4 minute read
GOING up

from EasyDIY Autumn 2023

Dog stairs provide a safe way to get up onto furniture. By
Gina Hartoog
Any vet will tell you that your dog shouldn’t be jumping up onto couches and beds. This is especially important for large breed puppies that risk developing early-onset joint problems. Some breeds, such as dachshunds and corgis, shouldn’t be allowed to jump on furniture throughout their lives. Dog stairs provide a safe and easy way for your furry friend to get onto a bed or couch. This unit incorporates a storage locker, accessible via a lid that forms the top step. You can use the space to store your dog’s toys and bedding.
Sizing
Our unit measures 650x425mm with a height of 330mm. We planned it around a small- to medium-sized breed and a couch 400–500mm high. If you have a much smaller dog, you will need to adjust the height of both steps and possibly consider adding a third step to the unit.
HERE’S HOW:
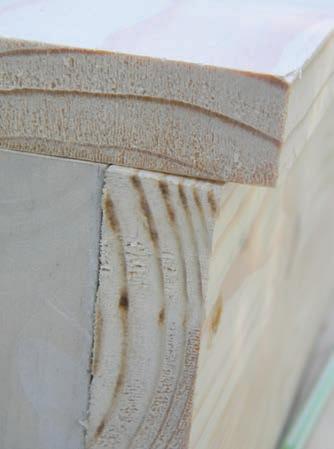
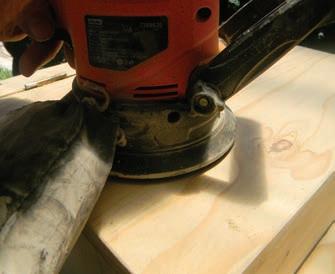
Cut the wood to size as indicated on the materials list. Sand down the planks and plane the edges to ensure they are square.
Assistant
YOU WILL NEED:
• SA pine shelving (21mm thick)
• 2 x 300x305mm (side braces –top step)
• 3 x 305x425mm (back, step platform, lid/top step)
• 2 x 305x150mm (side braces –bottom step)
• 1 x 150x425mm (front riser)
• 1 x 155x425mm (step riser)

• 1 x 425x50mm (hinge support plank on top step)
• Chipboard countersink screws (4x40mm)
• Wood glue
• 80- and 120-grit sandpaper
• 2 cabinet hinges
• 4 straight connectors
• Drill bits
• Countersink bits
• Wood filler (optional)
• Paint or varnish
• Piece of 5mm masonite board.
TOOLS:
• Tape measure
• Pencil
• Drill
• Jigsaw/hand saw
• Orbital sander
• Planer (optional)
• Painting or staining supplies.
Top Tip
Take your time with this project to ensure that it is properly made – sturdy and safe for your dog.
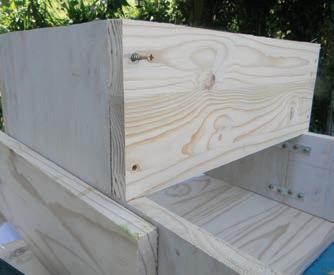
Make the braces. Join one top-step brace to one bottom-step brace using two straight connectors and screws on each side. Ensure that you make one right and one left brace, not two of the same.

Top Tip
Don’t need dog stairs? Use the same unit as a plant stand. You can store your gardening tools and gardening gloves in the storage locker on the top step.
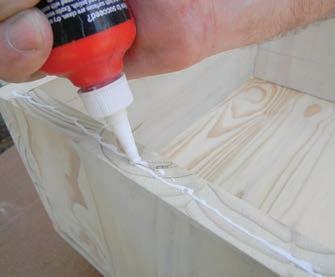
Attach the back to the braces. Drill two holes 30mm from the end of each side of the back plank and 10mm from the 300mm edge. Place a glue bead down the end of the step brace and attach to the back. Screw in place. Now drill an additional hole in the middle between the two screws and fasten with a screw.
The step riser is attached between the bottom and the top step. Attach the step riser to the unit. Drill two holes 30mm at each end and 10mm from the edge of the 155mm (step riser). Place a glue bead down the end of the step brace and attach the step riser to the brace.
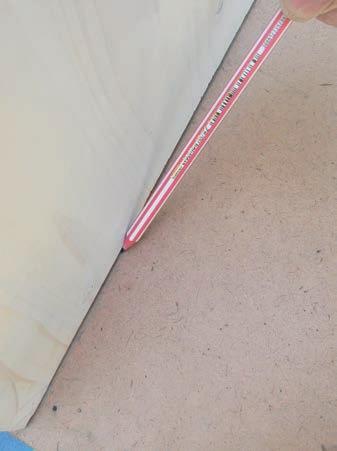
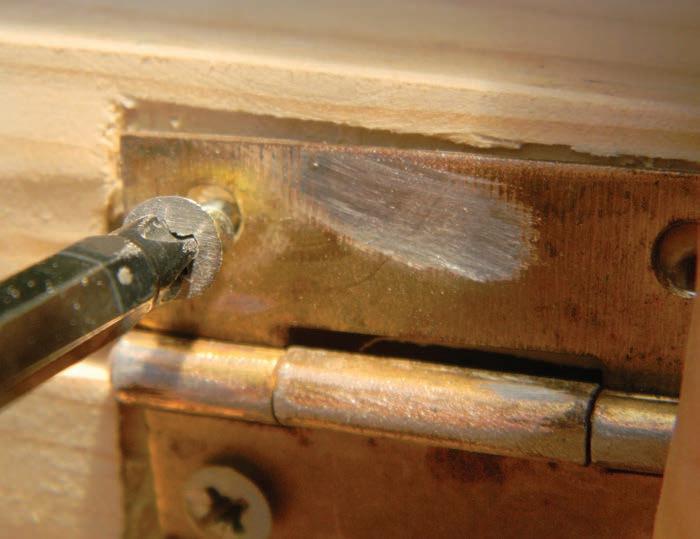
Now mark out the hinge position and holes on both ends of the plank, using the hinge as a template. Place the hinge 50mm from the outer edge of the hinge support plank. Place the edge of the hinge along the marked line with the hinge flipped back on top of the hinge support plank. Draw a line around the outside and mark the holes.
Attach the front riser to the front of the unit. Drill two holes 30mm at each end and 10mm from the edge of the 150mm (front riser). Place a glue bead down the end of the step brace and attach the front riser to the brace.
Fit the bottom step platform by drilling two holes along the 305mm width, 30mm from the end and 10mm from the edge on each side. Place a glue bead along the bottom step on three sides and fasten in place. Now drill an additional hole in the middle between the two screws and fasten with a screw.
Drill a small pilot hole in the middle of the marked hole position about 15mm deep. Chisel out the recess for the hinge to the thickness of the hinge plate. To make this easier, make a crease along the line that marks out the hinge plate area using a chisel at 90 ° , with the chisel-bevelled edge facing the marked-out hinge plate area to be removed.
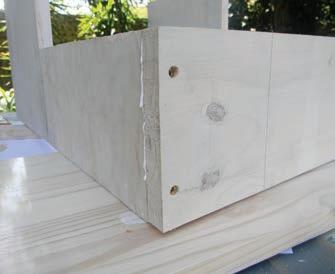
Attach the hinge support plank to the top step (back of the lid opening). On the hinge support plank, drill one hole from the front edge 10mm from the front and 10mm from the side. Drill another hole 30mm from the edge and 10mm from the back. Do the same on the opposite side. Place a bead of glue along the back and 50mm down either side and fasten in place.


Be patient! Remove small slithers of wood at a time.

Fasten the hinge with the barrel facing the lid. Place the lid against the hinges and draw a line along the top of the lid on one of the hinges. Transfer the 50mm measurement on each side of the hinges onto the lid on both sides. Remove the lid and the hinge and mark a 50mm line down the thickness of the plank (21mm) where the hinge will be fitted. Place the hinge edge on the 50mm mark, making sure that the line that you have drawn along the hinge is flush with the top of the lid. Draw a line around the outside and mark the holes. Drill two pilot holes 15mm deep for both hinges. Chisel out the hinge recess for the hinge plate as indicated above and attach the hinges.
You will note that the lid will hang about 3mm over the top of the step riser. This facilitates the opening of the lid.


14
17
18
16 15
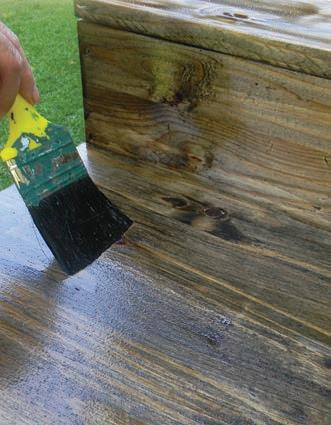
Paint or varnish the unit as per your choice. If you opt for varnish, follow the manufacturer’s instructions regarding drying times between coats.
If you find the stairs are slippery (depending on your finish), purchase rubber step mats and glue them in place on each platform.
Tip