8 minute read
Your lifetime BRAAI BUDDY

from EasyDIY Autumn 2023

By Rod Baker
There are many fire-starters on the market, ranging in price from less than R100 up to R550 or even more.
But I wanted to make one that would last for decades.
That meant going for stainless steel (living on the coast is great, but sea air plays havoc with mild steel) and having some way to replace the fire-grate –where the coals rest and the paper starter material sits – as this is often the first part to go as the metal ablates over time due to being repeatedly exposed to naked flame.
When you look at the main picture, note that the braai on which the fire-starter is resting is not large, so the fire-starter looks very big by comparison.
To be fair, it is not small, but it has a charcoal or briquette capacity of 8 800cm³ (8.8L). That capacity means it can be used to create a wide bed of coals in a large braai, or when only half full or less, a bed of coals for a small braai. It can also be used as a braai when a small 230mm grid is placed on top. However, it creates a lot of heat, so flip your sausages or steaks frequently unless you want burnt offerings.
I chose 1.6mm gauge (thick) 316-grade (marine) stainless steel and a square shape, so that its fire-grate can be easily renewed as and when required.
All the parts are stainless steel, resulting in a heavy unit (almost 4kg), which is extremely sturdy and durable.


TIME
3–7 days
Cost
R800-R1 000 (depending on the materials you use and the cost of the breaking and welding – unless you can do both yourself)
SKILL ASSISTANT No

YOU WILL NEED:
• Stainless steel* 316-grade (marine) sheet, 1.6mm gauge:

• 1 x 300x800mm length folded and welded down one corner to form a chimney box 300mm high and 200mm on each side
• 1 x 200x150mm plate to act as a heat shield


• Stainless steel bolts:
• 4 x 50x6mmØ
• 2 x100x8mmØ
• 2 x1m lengths of 5mmØ threaded rods, cut to make 9 lengths of 220mm for the fire-grate
• Stainless steel washers:
• 4 x 38x8mm fender washers (used on handle)
• 4 x 25x8mm fender washers (used on handle)
• 4 x 20x6mm fender washers (used on heat shield)
• 4 x 30x6mm fender washers (used on heat shield)
• 8 x 6mm flat washers (used on heat shield)
• Stainless steel hex nuts:
• 8 x 6mm hex nuts (used on heat shield)
• 4 x 8mm hex nuts (used on handle)
• Stainless steel dome nuts:
• 18 x 5mm (used to secure fire-grate bars)
• 4 x 6mm (used on heat shield)
• 2 x 8mm (used on handle)
• Stainless steel rope:
• 1 x 600mm length 3mmØ
• 2 x 5mm washers
• Aluminium:
• Wire rope ferrules – 2 x 4mm
• Meranti:
• 1 x 220mm length 32x32mm for main handle
• 1 x 100mm length of 25mmØ dowel, drilled down the centre for the cable-mounted tipping handle
• Mahogany exterior varnish to protect the handle and tipping handle from the elements
• Masking tape to mark drill hole positions and prevent the drill bit tip from skittering across the steel’s surface.

*If you decide on different dimensions and/or materials or a different design, it will affect the cost of the final unit.
TOOLS:
• Mains power drill
• Hacksaw
• Router (to shape handle)
• Socket set and spanner/s or adjustable spanner
• Vice grips or crimping tool or a bench vice (to crimp the ferrules on the cable)
• 35mmØ hole cutter for metal

• 3mmØ HSS drill bit for drilling pilot holes and/or centre punch to indent steel before drilling
• 5mmØ; 6mmØ; 8mmØ HSS drill bits
• Deburring tool or 10mmØ drill bit to clean up reverse sides of drilled holes.
The one tipping handle 5mmØ hole, the one 6mmØ shield securing bolt hole, and the 8mmØ handle securing bolt hole.
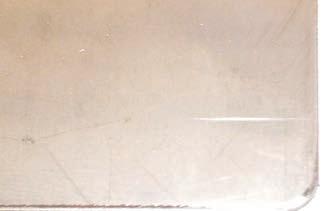
Use masking tape on the areas to be drilled so you can mark hole positions accurately. Note that the diameter of each hole was also indicated to avoid any mistakes.
I used a countersink bit to deburr the reverse edges of each hole to allow the washers to seat properly.
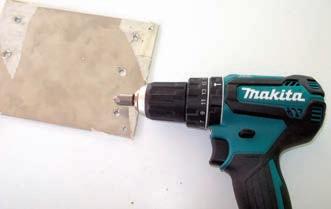
I used a centre punch to indent the surface of the heat shield at each drill point and then drilled each hole in turn. Shown here is the indent in the heat shield for the 8mmØ handle securing bolts. They were on the centre line of the heat shield and 30mm in from the upper and lower edges.
Now to position the heat shield on the side of the fire-starter and drill the holes for the heat shield securing bolts. Take care to line up everything in the centre and along the centre line.
There are two 5mmØ holes for the tipping handle cable and four 6mmØ for the bolts that secure the heat shield to the side of the fire-starter.
Then, using the predrilled holes in the heat shield, drill the hole for each one through the side of the fire-starter box. It is a good idea to drop a 6mm bolt into each hole as you complete it so that all four of the holes are exactly aligned. I marked a piece of tape on the top of the heat shield with the words ‘TOP OUTER’ so that the securing holes would be exactly aligned. (I positioned the holes as accurately as I could, and they were spot-on, but if one is just even half a millimetre out, the bolts will not seat properly; doing it like this ensures a perfect alignment).
Then, using the same techniques (tape, measuring, marking off and centre punching), I drilled the nine 5mmØ holes for the fire-grate bars. They are spaced at 20mm centres in a line 80mm from the base of the fire-starter. Thereafter I drilled three 6mmØ starter holes for the mandrel for the hole drills. This is because it is sometimes difficult to accurately see exactly where the tip of the centring drill bit is as the rim of the cutter itself shadows it. Drilling what is essentially a pilot hole solves this problem.


If you cannot get a drill bit or deburring tool into the body of the fire-starter, use a screwdriver to snap off the protruding skerf (shards) of drilled material that did not fall free during the drilling operation. These shards are extremely sharp and can cut. Hint: Use old pantyhose to check for any sharp bits still in place – this also works well when checking a wood surface for splinters before applying finish.
They are also nicely lined up.
Note that hole saws designed for use on metal have to be run at specific speeds, depending on their diameter. This 35mmØ has a maximum speed on steel of 250rpm. You can use oil as a cooling lubricant, but I used soapy water to keep the cutter cool … the bubbles help trap the debris.
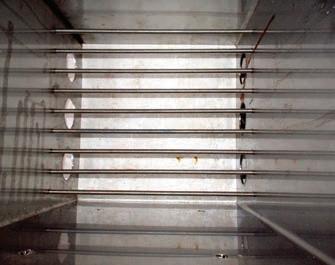
I then cut and fitted the nine 250mm fire-grate 5mmØ bars, using a dome nut at each end to secure each bar. It is important to make these bare a little longer than the width of the fire-starter, so they do not distort the box shape when cooling after use.


Now for the main handle … which will be 220mm long and cut from a length of 32x32mm meranti.
The three vent holes are 35mmØ, centre and 45mm in from each side, and 40mm up from the base of the fire-starter.


I used a ratchet drive and adjustable spanner to secure the dome nuts.
Without cutting off the 220mm length of the full length of meranti – which would have made securing it difficult – I routed each edge to a length of 100mm or so for a comfortable grip and left the ends squared off so that their securing bolts would bear on flat surfaces.
Then I cut the handle to a length of 220mm and sanded off all the surfaces.
The completed holes. There are just six vent holes in all – three per side – to allow air to get to the paper starter material and then to the coals so that an updraught can be created.The completed fire-grate top view.

I positioned it and clamped it firmly along the centre line of the heat shield.
Then I drilled 8mmØ holes about 5mm into the handle at each position.


I
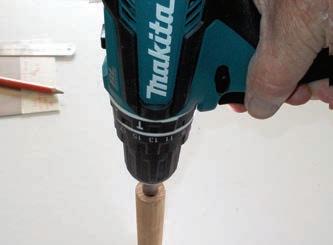
Now for the difficult part … drilling a hole down the dead centre of the tipping handle dowel. I began by countersinking a hole in the centre of each end to ensure that the 5mmØ drill bit tip would self-centre. I drilled the hole from one side.


I lightly crimped one ferrule on the end of the rope to lock it in position and then clamped it in my bench vice to lock it very solidly on the end of the rope.
Slip the washer onto the bolt and then the bolt through the heat shield, then the washer, nut, nut, third washer, handle washer, and finally dome nut. I suggest you tighten the dome nut first so that the handle ends up exactly parallel to the heat shield, but there is no need to overtighten it.
Then I turned it round, drilled a countersink hole in the other end, and completed the 5mmØ hole. Spot on!
This is a close-up of the result – and it will not be budging … ever.
Then tighten the other nuts. This will firmly secure the handle to the heat shield and to the fire-starter.

The completed hole. Even if the one you drill does not meet precisely, that junction is bang in the middle of the handle and invisible.
Then I threaded a washer onto the rope, passed its end through the heat shield, then through the handle, back through the heat shield, slipped on a washer, and then slotted the second ferrule onto the end. Now is a good time to fine-tune the length of the rope, but I found 600mm worked well.
Now to secure the heat shield to the fire-starter. Use the exact same method as you attached the handle – again, note the order of the washers and nuts …
I repeated the securing process, and this is the completed tipping handle assembly.
… washer, bolt through side of fire box, washer, nut, nut, washer, shield, washer and finally dome nut.
These materials are available at selected Mica stores. To find your closest Mica*, go to www.mica.co.za. If your local Mica does not stock exactly what you need, they will order it for you or suggest an alternative product or a reputable source.
The parts of the tipping handle; the 3mmØ wire rope can be cut short if you wish. Shown here are the heat shield (outer surface), cable, two 5mm washers, two 4mm ferrules, and the tipping handle, already dipped in mahogany finish three times.


Now to attach the handle to the heat shield using the 100x8mmØ bolts – note the order of the washers and nuts.
*You may find that your Mica store does not stock stainless steel sheet and in all likelihood would not offer a breaking (bending) or welding service. You would then need to find a company that does offer these services. All the other parts, such as the stainless steel nuts, bolt and washers should be available in Mica stores.


Because this pine table doesn’t weigh very much, it’s easy to move around and serve as a portable table.