solutions for better performing tools
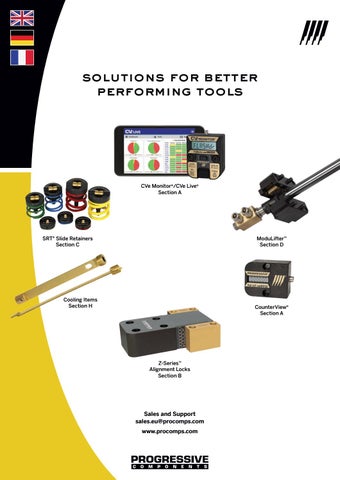
CVe Monitor®/CVe Live® Section A
SRT® Slide Retainers Section C
ModuLifter™ Section D
Cooling Items Section H
CounterView® Section A
Z-Series™ Alignment Locks Section B
Sales and Support sales.eu@procomps.com www.procomps.com
about progressive... Progressive Components offers advanced solutions for unmatched tooling performance, with product lines consisting of standard and proprietary mould components, mould monitoring devices and software. This collection delivers convenience for the mould builder and unmatched tooling performance for moulders and OEMs, with availability through direct distribution and authorized dealers throughout the world. Progressive Components bietet fortschrittliche Lösungen für eine herausragende Leistungsoptimierung Ihrer Werkzeuge mit Produktlinien, die Standardkomponenten, kundenspezifische Komponenten, Geräte und Software für das Monitoring von Werkzeugen beinhalten. Dieses umfangreiche Angebot erleichtet dem Werkzeugbauer Arbeitsvorgänge und bietet sowohl Werkzeugbauern alsauch OEMs eine unübertroffene Verbesserung der Werkzeugleistung. Komponenten sind weltweit über Direktvertrieb und bei autorisierten Händlern erhältlich. Progressive Components propose des solutions avancées pour des performances d’outillage inégalées, avec des gammes de produits comprenant composants de moules standard et propriétaires, dispositifs de surveillance des moules et logiciels. Cette collection offre une commodité pour le mouliste et des performances d’outillage inégalées pour les mouleurs et les équipementiers, avec une disponibilité via une distribution directe et des revendeurs agréés dans le monde entier.
our commitment: The team at Progressive continuously strives to be the leading supplier to the tooling industry. With a foundation in the mould business, we feel a responsibility to provide continued excellence. Therefore, every customer should always expect the following: • • • • •
Products that meet expectations for quality, value, and performance. Prompt resolution of any order issue. Prompt response to billing questions and account status. Orders that are traced at no additional charge. Knowledgeable and helpful Customer Service and Technical Support staff.
If there is any way in which we can serve your needs better, we want to hear about it. Feel free to contact anyone on the Progressive Team. We appreciate your support and will work to further earn your business. Das Team von Progressive ist ständig bestrebt, der führende Anbieter für die Werkzeugindustrie zu sein. Aufgrund unserer Erfahrung im Formenbau fühlen wir uns verpflichtet, kontinuierlich Spitzenleistungen zu erbringen. Daher kann jeder Kunde jederzeit Folgendes erwarten: • • • • •
Glenn Starkey Owner, President glenn.starkey@procomps.com
Don Starkey Owner, Chairman don.starkey@procomps.com
Produkte, die den Erwartungen an Qualität, Wertschöpfung und Leistung entsprechen. Schnelle Bearbeitung jeder Bestellanfrage. Schnelle Beantwortung von Fragen zu Abrechnungen und Kontoständen. Rückverfolgbarkeit von Bestellungen ohne Aufpreis. Kompetenter und hilfsbereiter Kundenservice sowie Unterstützung durch unser technisches Personal.
Wenn es eine Möglichkeit gibt, Ihre Bedürfnisse besser zu erfüllen, wollen wir davon hören. Nehmen Sie dazu mit jemandem vom Progressive Team Kontakt auf. Wir freuen uns über ihre Unterstützung und werden daran arbeiten, Ihr Vertrauen weiterhin zu rechtfertigen. L’équipe de Progressive s’efforce continuellement d’être le principal fournisseur du secteur de l’outillage. Avec une base dans le secteur des moules, nous nous sentons responsables de fournir une excellence continue. Par conséquence, chaque client doit toujours s’attendre à ce qui suit: • • • • •
Des produits qui répondent aux attentes de qualité, de valeur et de performance. Résolution rapide de tout problème de commande. Réponse rapide aux questions relatives à la facturation et à l’état du compte. Les commandes sont tracées sans frais supplémentaires. Personnel compétent et utile du Service Clientèle et du Soutien Technique.
S’il existe un moyen de mieux répondre à vos besoins, nous voulons en entendre parler. N’hésitez pas à contacter n’importe qui de l’équipe Progressive. Nous apprécions votre soutien et travaillerons pour gagner encore plus d’affaires.
program contents
MOULD MONITORING CVe Monitor Product Code
CVe
Catalogue Page
A-1
CVe OnDemand
CVe Live
A-4
A-7
ALIGNMENT LOCKS CounterView: 100/200
CounterView: R-Series
Side Locks
CVEX, CVIN, CVPL
CVR, CVRL
A-10
A-11
Bar Locks
Inserted Bar Locks
Top Locks
Guide Locks
BLB, BLG
BLG, BLN, BLS
TL, TLM
GL, GLM
B-4
B-6
B-7
B-8
X-Style Side Locks
Shuttle Mold Sets
Top Lock - 20MM Square
Synthetic Mould Grease
SLX
-SF, -SM
TLM
SYN
B-9
B-9
B-11
B-11
Product Code
SL, SLC, SLM
Catalogue Page
B-3
CAM ACTIONS SLIDE COMPONENTS Side Locks: Steel
Side Locks: Graphite
SLMS
SLPM
CamAction 100 Series
B-12
B-13
CamAction 200 Series
CamAction 300/350 Series
Slide Retainers
SRT Bases & Bushings
CAMM
CAMM
SRTM
SRTMBA, SRTMBU
C-2
C-4
C-7
C-8
Product Code
CAMM
Catalogue Page
C-1
1
LIFTERS UNDERCUT RELEASE Wear Plates WP
Product Code
C-9
Catalogue Page
UniLifter
ModuLifter
CBMM, UCMM, TGMM
MLB, MLC, MLR, MLH
D-1
D-4
PLATE SEQUENCE CONTROL FlexiCore
Lifter Blades & Cores
Roller Pullers
FCA, FCR, FCDA
LBA, LCA
D-10
D-14
Friction Pullers
Plate Locks
FP
PLCM
SK
E-2
E-3
E-9
Product Code
RPL
Catalogue Page
E-1
StacKit System
EJECTOR PINS, SLEEVES DIN 1530-A Ion Nitrided
DIN 1530-A Ion Nitrided
Inch Standard
Product Code
EPD
EPD
EP
Catalogue Page
F-2
F-3
F-4
Inch Standard
JIS Standard
JIS Standard
DIN 1530-F Through-Hardened
EP
EPJ
EPJ
BE
F-5
F-6
F-7
F-8
Inch Standard
Inch Standard
Thin Wall Sleeves
BE
ES
ESTW
F-9
F-10
F-11
Locking Series
Compact Locking Series
Tapered Series
DN, DNp
DTN, DTNP
DTPR, DTPRP
G-1
G-2
G-3
DATE STAMPS AIR VALVES Product Code Catalogue Page
2
RF Series
20 Series
CH Series
FD Series
DF, DFP
DL, DLP
DC, DCP
DFD
G-4
G-5
G-6
G-7
Multi-Daters
MicroDaters
LG Series
Recycle Inserts
DMD, DMDP
MD
DLB, DLS
RI
G-8
G-10
G-11
G-12
Baffles
Jumper Baffles
SB, TB
JBA
H-1
H-2
COOLING ITEMS
/ Air Valves & Poppets AV, APV G-13
Product Code Catalogue Page
Reverse Flow Baffles
Tubes: High Flow, Hex
Metric Tubes: High Flow, Hex
Bubbler Base
RFB
HFTM, HEXM, EHEXM
HFT, HEXT
BBL
H-3
H-4
H-5
H-6
Socket Connectors
Connector Plugs
Safety Clips
Pipe Plugs
SC
BSPT
SC
BR, ST, SS
H-7
H-8
H-8
H-9
Threadless Plugs
Status Tags
TWP
ST
H-9
H-10
3
mould monitoring section a
CVe Monitor
CVe OnDemand
CVe Live
Page: A-4
Page: A-7
Prefix: CVe Page: A-1
CounterView: 100/200
CounterView: R-Series
Prefix: CV
Prefix: CVR, CVRL
Page: F-6
Page: F-7
cve monitor
®
The CVe Monitor v3 tracks tool activity, allowing users to view data on the display or from comprehensive reports using OnDemand or CVe Live System. Features include: • 7-digit LCD display with a push button to move through the display modes. • 16GB flash drive for file storage. • Replaceable battery. • Water resistant with an ingress protection rating of IP58. • Maximum temperature: 90° C. • For higher tool temperatures contact Engineering. • Recommended mounting is on the stationary half of the mould. • Dimensional compatibility with Progressive’s mechanical CounterViews. • Mini USB connectivity for data retrieval. Progressive’s CVe Monitor v3 zeichnet den Produktionsverlauf Ihres Werkzeugs auf und ermöglicht es, Daten auf dem Display anzusehen oder umfassende Berichte mithilfe des OnDemand-Programms oder des neuen CVe Live Systems zu erstellen. Eigenschaften: • 7-Digit LCD Display mit einer Taste, um sich durch die Anzeigemodi zu bewegen. • 16GB Flash-Datenspeicher. • Austauschbare Batterie. • Wasserbeständig, Schutzart nach IP58 • Einsatzbereich bis 90° C. • Bei höheren Temperaturen sollte die Technikabteilung konsultiert werden. • Empfohlen wird die Montage auf der festen Seite des Werkzeugs. • Gleiche Abmessungen wie Progressive’s mechanische Zähler (CounterViews). • Mini-USB-Anschluss für den Datenabruf.
Le CVe Monitor v3 de Progressive suit l’activité des outils, permettant aux utilisateurs de visualiser les données à l’écran ou à partir des rapports complets utilisant OnDemand ou le système CVe Live. Les fonctionnalités incluent: • Écran LCD à 7 chiffres avec une touche pour parcourir les modes d’affichage. • Clé USB 16 Go pour le stockage de fichiers. • Batterie remplaçable. • Résistant à l’eau avec un indice de protection IP58. • Température maximale: 90° C • Pour des températures d’outil plus élevées, contactez Ingénierie. • Le montage recommandé est sur la moitié fixe du moule. • Compatibilité dimensionnelle avec les CounterViews mécaniques de Progressive. • Mini prise USB pour la récupération de données.
Mounting Options | Installationsmöglichkeiten | Options de Montage 1.125 (28mm)
Modify actuator to extend above parting line .170 (4mm)
Extension Rod
1.000 (26mm)
.938 1.875 (24mm) (48mm)
.394 Actuator Center (10mm)
+.015 -.000 +.3 -.0
.141ø (3.6mm
1.125 (28mm)
Mounting Block Screws (2)
PL )
PL Screws (2) 1.500 (38mm)
catalogue number CVE-M CVE-O
R 5/16 (R 8mm)
description CVe Monitor v3 Mould Maker/Moulder version including #8-32 x 1” SHCS (2) and M4 x 25mm SHCS (2) CVe Monitor v3 OEM version including #8-32 x 1” SHCS (2) and M4 x 25mm SHCS (2)
catalogue number
description
CVE-INT
Internal Extension Rod (8”/200mm) including a hex key for CVe Monitor set screw removal.
CVE-EXT
External Mounting Block including #8-32 x 1” SHCS (2) and M4 x 25mm SHCS (2)
OEM-specific CVe Monitors are available | OEM-spezifische CVe Monitore sind erhältlich | Les CVe Monitors spécifiques aux OEM sont disponibles.
Patent No. EP1567924 issues throughout Europe and South Africa. Chine Patent No. ZL200380109407.8 issued.
A-1
cve monitor
®
Data Cables | Datenkabel | Câbles de Données A Mini USB Cable is required for connecting to a computer for OnDemand and the CVe Live system.
catalogue number
description
CVEL-DATA9
USB 2.0 to Type B Mini 3M Long, Right-Angle Cable
The DATA9 cable has been specifically designed for use with the CVe. Zur Verbindung mit OnDemand und dem CVe live System ist ein Mini USB-Kabel erforderlich. Das DATA9 Kabel wurde speziell für die Anwendung mit dem CVe entwickelt. Un câble mini USB est requis pour la connexion à un ordinateur par OnDemand et le système CVe Live. Le câble DATA9 a été spécialement conçu pour être utilisé avec le CVe.
On-Mould Display
Display am Werkzeug
Affichage sur Moule
Each device is provided at -25 cycles to allow for mould set up and initialisation of the CVe Monitor. At zero (0), all timers and data will reset on the monitor.
Jeder Monitor wird mit einer Zykluszahl von -25 geliefert. Das ermöglicht das Installieren und die Inbetriebnahme. Bei Null (0) werden alle Daten auf dem Monitor zurückgesetzt.
During production, users can press the button on the front of the monitor and review the following information on the display:
Während der Produktion kann der Anwender die Taste vorn auf dem Monitor drücken und erhält die folgenden Informationen:
Chaque dispositif est fourni à -25 cycles pour permettre la configuration du moule et l’initialisation du moniteur CVe. À zéro (0), tous les temporisateurs et toutes les données seront réinitialisés sur le moniteur. Pendant la production, les utilisateurs peuvent appuyer sur la touche à la face du moniteur et consulter les informations suivantes sur l’écran:
Cycle Count: Total cycles for the life of the mould is presented on the main screen. Zykluszahl: Gesamtzahl der Zyklen wird für die Betriebsdauer des Werkzeugs auf dem Hauptbildschirm dargestellt. Nombre de Cycles: Total des cycles pour la vie du moule est présenté sur l’écran principal. Cycle Time: Cycle time for the life of the mould.y Zykluszeit: Zykluszeit für die Betriebsdauer des Werkzeugs. Temps de Cycle: Le temps de cycle pour la vie du moule. Cycle Time-Recent: Cycle time for the past 500 cycles is shown in seconds. Zykluszeit-Kurzzeitbetrachtung: Durchschnitt der letzten 500 Zyklen des Werkzeugs werden in Sekunden angezeigt. Temps de Cycle-Récent: Le temps de cycle des 500 derniers cycles est indiqué en secondes. Mould Temperature: Current temperature experienced by the monitor (°C) press button twice. Werkzeugtemperatur: Aktuelle Temperatur gemessen vom Monitor (in °C), Drücken Sie zweimal die Taste. Température du Moule: Voir la température actuelle du moniteur (° C) en appuyant deux fois sur la touche. Efficiency Percentage: The percentage of time that the mould has been actively cycling vs being idle. Effizienz in Prozentangaben: Prozentsatz der Produktonszeit gegen Stillstandszeit. Pourcentage d’Efficacité: Pourcentage de temps pendant lequel le moule a été en cours d’activité versus inactif. Efficiency Percentage-Recent: The percentage of time the mould has been active in the past 500 cycles. Effizienz in Prozentangaben-Kurzzeitbetrachtung: Prozentsatz der Produktionszeit während der letzten 500 Zyklen. Pourcentage d’Efficacité: Pourcentage de temps du moule en activité pendant des 500 derniers cycles. Cycle Count Reset: Separate counter can be reset to 0 for interim monitoring of cycles. Rückstellbarer Zykluszähler: Separater Zähler kann für periodisches Monitoring auf Null (0) zurückgesetzt werden. Nombre de Cycles Reset: Un compteur séparé permettant de remettre à 0 pour une surveillance intermédiaire des cycles. Flash Drive: Connect to a PC/Tablet with an industry-standard mini USB cable sold above. Flash-Datenspeicher: Verbindung mit einem PC/Tablet durch ein Industriestandard Mini USB Kabel, das oben erhältlich ist. Clé USB: Connectez-vous à un PC / une tablette à l’aide d’un câble mini-USB standard affiché en haut de la page.
A-2
cve monitor
®
OnDemand Alert Modes
OnDemand Warn-Modi
Modes d’Alerte OnDemand
Once the CVe data is initialized using the data via the complimentary OnDemand software (from www.CVeMonitor.com) users can choose to be alerted the following sets of conditions for:
Sobald die Daten für den CVe mithilfe der OnDemand-Software (siehe www.CVeMonitor.com) eingerichtet wurden, kann der Anwender Warn-Modi für folgende Bedingungen auswählen:
Une fois les données CVe initialisées via le logiciel OnDemand gratuit (disponible sur www.CVeMonitor.com), les utilisateurs peuvent choisir d’être alertés des conditions suivantes:
Preventive Maintenance: During initialisation, Preventive Maintenance (PM) checkpoints are entered and saved onto the monitor. If a PM checkpoint is exceeded, the monitor enters the PM alert mode and displays the “wrench” icon. After a PM is performed using OnDemand, the next checkpoint for the PM will be written. If no PM is performed, the monitor will remain in PM alert mode until the user performs all PMs whose thresholds have been exceeded. Vorbeugende Wartung: Bei der Initialisierung werden vorbeugende Wartungs-(PM) Checkpoints eingegeben und auf dem Monitor gespeichert. Wenn ein Wartungskontrollpunkt überschritten wird, gelangt der Monitor in den Wartungs-Alarm-Modus und zeigt das “Schlüssel”-Symbol an. Nachdem eine Wartung mit OnDemand durchgeführt wird, wird der nächste Kontrollpunkt für die Wartung geschrieben. Wenn keine Wartung durchgeführt wird, bleibt der Monitor im Wartungs-Alarm-Modus, bis der Benutzer alle Wartungen ausführt, deren Grenzwerte überschritten wurden. Maintenance Préventive: Lors de l’initialisation, des points de contrôle de maintenance préventive (PM) sont saisis et enregistrés sur le moniteur. Si un point de contrôle PM est dépassé, le moniteur passe en mode d’alerte PM et affiche l’icône «clé». Après l’exécution d’un PM à l’aide de OnDemand, le prochain point de contrôle PM sera écrit. Si aucune PM n’est effectuée, le moniteur reste en mode d’alerte PM jusqu’à ce que l’utilisateur exécute toutes les tâches dont les seuils ont été dépassés. Cycle Time: During initialisation, the target cycle time are written to the monitor using OnDemand. Any variation greater than 2% from the target will enter the alert mode and display the “clock” icon. When the cycle time returns to within 2% of the target, the alert is removed. Zykluszeit: Bei der Initialisierung wird die Ziel-Zykluszeit mithilfe von OnDemand auf den Monitor geschrieben. Jede Abweichung von mehr als 2% vom Ziel löst den Alarm-Modus aus und das Uhr-Symbol wird angezeigt. Sobald die Zykluszeit in den Bereich innerhalb von 2% des Ziels zurückkehrt, wird der Alarm gelöscht. Temps de Cycle: Pendant l’initialisation, le temps de cycle cible est écrit sur le moniteur à l’aide d’OnDemand. Toute variation supérieure à 2% par rapport à la cible entrera en mode alerte et affichera l’icône «horloge». Lorsque le temps de cycle revient à moins de 2% de la cible, l’alerte est supprimée. Efficiency: During initialisation, the target efficiency can be written to the monitor using OnDemand. Any variation greater than 2% from the target will enter the alert mode and display the (%) icon. When the efficiency returns to within 2% of the target, the alert is removed. Effizienz: Bei der Initialisierung kann das Effizienz-Ziel mit OnDemand auf den Monitor geschrieben werden. Jede Variation, die mehr als 2% vom Ziel abweicht, löst den Alarm-Modus aus und das (%)-Symbol wird angezeigt. Sobald die Effizienzangabe in den Bereich innerhalb von 2% des Ziels zurückkehrt, wird der Alarm gelöscht. Efficacité: Lors de l’initialisation, l’efficacité cible peut être écrite sur le moniteur à l’aide d’OnDemand. Toute variation supérieure à 2% de la cible entrera dans le mode d’alerte et affichera l’icône (%). Lorsque l’efficacité revient à moins de 2% de la cible, l’alerte est supprimée. Low Battery: The CVe Monitor has a typical battery life of approximately 4 years. When the battery reaches a specified level, the display will show a “battery icon”. This is the indication to replace the battery, A replacement Battery kit can be purchased. Schwache Batterie: Der CVe-Monitor hat üblicherweise eine Akkulaufzeit von etwa 4 Jahren. Wenn die Batterie ein bestimmtes Niveau erreicht, zeigt das Display ein “Akku-Icon” an. Dies ist der Hinweis, die Batterie zu ersetzen. Dafür kann ein Ersatz-Batterie-Set bestellt werden. Batterie Faible: Le moniteur CVe a une autonomie d’environ 4 ans. Lorsque la batterie atteint un niveau spécifié, l’écran affiche une “icône de batterie”. C’est l’indication pour remplacer la batterie. Un kit de batterie est disponible.
Retrofit CVe for CounterView Tools: During initialisation, the monitor can be started at the tool’s current cycle count. Once entered, users can see the tool’s total cycles from fitting the CVe. Umrüsten des Monitors: Bei einer Neu-Initialisierung kann der Monitor mit der aktuellen Zykluszahl des Werkzeugs gestartet werden. Nach der Eingabe können die Benutzer alle Zyklen des Werkzeugs auf dem Monitor sehen. Renouvellement du CVe pour les outils avec CounterView: Lors de l’initialisation, le moniteur peut être démarré au nombre de cycles actuel de l’outil. Une fois saisis, les utilisateurs peuvent voir les cycles totaux de l’outil à partir du CVe.
A-3
cve ondemand
®
Initialisation, Settings and Customisation
Initialisierung, Einstellungen und kundenspezifische Lösungen
Initialisation, Paramètres et Personnalisation
Provides comprehensive reporting using data collected by the CVe Monitor after the OnDemand software has been installed on a local PC or Laptop. Supports ten languages: English, German, Mandarin, Spanish, French, Italian, Japanese, Korean, Portuguese and Thai. Reports, generated in the chosen language, compare actual values to targets, providing a quick view of any variances. Enables the user to generate Adobe Acrobat (.pdf), Excel (.xls), and encrypted (.enc) reports to share with customers, colleagues with these metrics: Reports can be downloaded to a local folder/ server and/or emailed to a customer or colleague. A: When the CVe is initialized, users can identify their tool and align with the device serial number which is tracked on reports utilising different field options. B: The target cycle times and efficiency percentages can be entered. C: The New Maintenance Tab has 9 userdefinable PM points (Incremental or Absolute). It provides an overview of when each type of PM was performed to a tool and when it is next due. It also allows the user to customize PM forms and checklists for their maintenance program.
Bietet eine umfassende Berichterstattung über die vom CVe-Monitor gesammelten Daten, sobald die OnDemand-Software auf einem lokalen PC oder Laptop installiert wurde. Unterstützt zehn Sprachen: Englisch, Deutsch, Mandarin, Spanisch, Französisch, Italienisch, Japanisch, Koreanisch, Portugiesisch und Thai. Berichte, die in der gewählten Sprache generiert werden, vergleichen die tatsächlichen Werte mit den Zielen und bieten einen schnellen Überblick über die Abweichungen. Ermöglicht es dem Benutzer, Adobe Acrobat (. pdf), Excel (. xls) und verschlüsselte (. enc) Berichte zu generieren, die Sie mit Kunden, Kollegen mit diesen Metriken teilen können: Berichte können auf einen lokalen Ordner/ Server heruntergeladen und/oder an einen Kunden oder Kollegen per e-Mail geschickt werden. A: Wenn CVe eingerichtet ist, können Nutzer Ihr Werkzeug auswählen und mit der Seriennummer des Geräts verlinken. Dies ermöglicht eine Nachverfolgung, darstellbar in Berichten, die unterschiedliche Feld-Optionen nutzen. B: Soll-Zykluszeiten und Effizienzangabe in Prozent können eingegeben werden. C: Die neue Wartungs-Registerkarte hat 9 benutzerdefinierte Wartungs-Punkte (inkrementell oder absolut). Es gibt einen Überblick darüber, wann eine Wartung an einem Werkzeug durchgeführt wurde, welche Art Wartung durchgeführt wurde und wann eine Wartung wieder fällig ist. Es ermöglicht dem Anwender auch, Wartungs-Formulare und Checklisten für sein Wartungsprogramm anzupassen.
Fournit des rapports complets en utilisant les données collectées par le moniteur CVe après l’installation du logiciel OnDemand sur un PC ou un ordinateur portable local. Prend en charge dix langues: Anglais, Allemand, Mandarin, Espagnol, Français, Italien, Japonais, Coréen, Portugais et Thaï. Les rapports, générés dans la langue choisie, comparent les valeurs réelles aux cibles, offrant un aperçu rapide des écarts. Permet à l’utilisateur de générer des rapports Adobe Acrobat (.pdf), Excel (.xls) et criptés (.enc) pour les partager avec les clients et collègues disposant de ces statistiques: Les rapports peuvent être téléchargés dans un dossier / serveur local et / ou envoyés par courrier électronique à un client ou à un collègue. A: Lorsque le CVe est initialisé, les utilisateurs peuvent identifier leur outil et s’aligner sur le numéro de série du dispositif, lequel est suivi sur les rapports en utilisant différentes options de cases. B: Les temps de cycle et les pourcentages d’efficacité cibles peuvent être saisis. C: L’onglet New Maintenance contient 9 points PM définissables par l’utilisateur (Incremental ou Absolu). Il fournit une vue d’ensemble du moment où chaque type de PM a été effectué sur un outil et à quel moment il expire. Il permet également à l’utilisateur de personnaliser les formulaires PM et les listes de contrôle pour leur programme de maintenance.
A
B
C
A-4
cve ondemand
®
Report Structure
Berichtsstruktur
Structure du Rapport
D: Statistics are provided to show quantity of total cycles and inactivity for the life of the tool. E: Weekly sessions are presented graphi cally to show production efficiency levels. F: Weekly cycle time tracking identifies tools with variances over the past year. G: The productivity portion of the report takes the target preventive maintenance (PM) points set by the moulder and com pares them to actual maintenance pulls.
D: Statistiken werden zur Verfügung gestellt, um die Quantität der Gesamtzyklen und Inaktivität für die Betriebsdauer des Werkzeugs anzuzeigen. E: Wöchentliche Produktionen werden grafisch dargestellt, um die Produktionseffizienz anzuzeigen. F: Die wöchentliche Aufzeichnung der Zykluszeit zeigt die Abweichungen beim Werkzeug über das laufende Jahr an. G: Der Teil des Berichtes, der die Produktivität anzeigt, übernimmt die vom Anwender gesetzten Zielpunkte für die vorbeugende Wartung (PM) und vergleicht diese mit der tatsächlich erfolgten Wartung.
D: Des statistiques sont fournies pour indiquer la quantité totale de cycles et l’inactivité pendant la durée de vie de l’outil. E: Les sessions hebdomadaires sont présentées graphiquement pour montrer les niveaux d’efficacité de la production. F: Le suivi du temps de cycle hebdomadaire identifie les outils présentant des écarts au cours de l’année écoulée. G: La partie productivité du rapport prend en compte les points de maintenance préventive (PM) définis par le mouleur et les compare aux résultats de maintenance réels.
The CVe Monitor records the temperature each week and these temperatures are shown in the OnDemand reports.
Le moniteur CVe enregistre la température chaque semaine et ces températures sont indiquées dans les rapports OnDemand.
Der CVE-Monitor erfasst wöchentlich die Temperaturen und zeigt diese in den OnDemand-Berichten an.
Crimson Fan Performance Summary
Device ID: MKX1234 Tool ID: 8565B 94%
Program: Green
Target Efficiency (%)
7.5
OEM ID: ABT1 Legend
Target Cycle Time
100%
Since Last Report Efficiency %
7.2
Since Last Report Cycle Time
94%
Last Full Week Efficiency %
7.4
Last Full Week Cycle Time
92%
Life-To-Date Efficiency %
8.5
Life-To-Date Cycle Time
Between
507,288 1,000,000 Hours Idle 111
PM
Cycles Prior to CVe Installation*
2%-5% 5%
Outside Target
Part ID: Blower Housing ABT57 Cycles since last
Life-To-Date Cycles
2%
Within Target
04 Oct 2018
D
Asset ID: 354-1856
6,287
Part Revision
Hours in Ac ve Mode
1,197
General Query
764
Report
764
200
E
Never
Hours
150 100
Ac ve Time
4 days
16-Sep-18
30-Sep-18
23-Sep-18
2-Sep-18
9-Sep-18
19-Aug-18
26-Aug-18
19-Aug-18
19-Aug-18
5-Aug-18
0
70 60 50
Initial PM Point:
G
10,000 Cycles-Target 9,265 Cycles-Actual
Produc vity
4 days
30-Sep-18
16-Sep-18
50000
Temperature
Target PM Interval Cycles until PM
23-Sep-18
9-Sep-18
2-Sep-18
26-Aug-18
19-Aug-18
19-Aug-18
19-Aug-18
19-Aug-18
Out of Range > 25%
12-Aug-18
5-Aug-18
29-Jul-18
22-Jul-18
15-Jul-18
8-Jul-18
1-Jul-18
24-Jun-18
17-Jun-18
10-Jun-18
3-Jun-18
27-May-18
20-May-18
13-May-18
6-May-18
29-Apr-18
22-Apr-18
Weekly
15-Apr-18
8-Apr-18
1-Apr-18
10000
25-Mar-18
18-Mar-18
11-Mar-18
4-Mar-18
25-Feb-18
18-Feb-18
4-Feb-18
11-Feb-18
28-Jan-18
21-Jan-18
14-Jan-18
7-Jan-18
31-Dec-17
24-Dec-17
17-Dec-17
10-Dec-17
40
Life-To-Date
Active Time is the accumulation of all time the monitor is cycling. Idle time begins after 200 seconds of inactivity. Once Idle Time counts to 6 hours the time is transferred to Sleep Time and continues to accumulate until monitor is cycled
Sleep Time
Cycle Time
F
19-Aug-18
29-Jul-18
Idle Time
12-Aug-18
8-Jul-18
15-Jul-18
22-Jul-18
1-Jul-18
24-Jun-18
3-Jun-18
17-Jun-18
10-Jun-18
27-May-18
6-May-18
20-May-18
13-May-18
29-Apr-18
22-Apr-18
8-Apr-18
15-Apr-18
1-Apr-18
25-Mar-18
4-Mar-18
18-Mar-18
25-Feb-18
11-Mar-18
4-Feb-18
11-Feb-18
18-Feb-18
21-Jan-18
28-Jan-18
7-Jan-18
14-Jan-18
31-Dec-17
24-Dec-17
17-Dec-17
10-Dec-17
50
13 12 11 10 9 8 7 6 5
50,000 25,279
Seconds
Cycle Time= Active Time/ Total Cycles
Cycles
©Copyright 2018 AST Technology All rights reserved
CVe OnDemand 3.1.0 Template v2.6.1
4 days
30-Sep-18
23-Sep-18
9-Sep-18
16-Sep-18
2-Sep-18
Revision
26-Aug-18
19-Aug-18
19-Aug-18
19-Aug-18
19-Aug-18
12-Aug-18
Repair
5-Aug-18
29-Jul-18
22-Jul-18
8-Jul-18
1-Jul-18
15-Jul-18
PM Performed
24-Jun-18
17-Jun-18
10-Jun-18
3-Jun-18
27-May-18
20-May-18
13-May-18
6-May-18
29-Apr-18
Maintenance Required
22-Apr-18
15-Apr-18
8-Apr-18
1-Apr-18
25-Mar-18
18-Mar-18
11-Mar-18
25-Feb-18
18-Feb-18
11-Feb-18
PM Target Exceeded
4-Feb-18
28-Jan-18
21-Jan-18
14-Jan-18
7-Jan-18
31-Dec-17
17-Dec-17
10-Dec-17
24-Dec-17
Next PM Due: Intermediate Preventive Maintenance
4-Mar-18
Deg C
0
Hours in Sleep Mode
Efficiency
30
24,721
Repair
18,000 16,000 14,000 12,000 10,000 8,000 6,000 4,000 2,000 0
General Query
Total Cycles per Week
CVe Fimware v. 3.1.9
CVe OnDemand is developed and supported by AST Technology, A wholy owned susiduary of Progressive Components. CVe OnDemand wird von Ast Technology entwickelt und unterstützt, einer 100-prozentigen Schwestergesellschaft von Progressive Components. CVe OnDemand est développé et soutenu par AST Technology, société filiale de Progressive Components.
A-5
cve ondemand
ÂŽ
Reporting History Documentation
Bericht fortlaufender Aufzeichnungen
Documentation sur l’Historique des Rapports
OnDemand allows users to view data and keep a record of reports run.
OnDemand ermĂśglicht es Nutzern, Daten zu sehen und Berichte Ăźber Aufzeichnungen zu fĂźhren.
OnDemand permet aux utilisateurs de consulter les donnĂŠes et de conserver un enregistrement des rapports exĂŠcutĂŠs.
Dieser Bericht zeigt die Historie des Werkzeugs auf und skizziert den Grund fĂźr die Berichtsgenerierung einschlieĂ&#x;lich präventiver Wartung, allgemeine Abfragen, Revisionsänderungen und Reparaturen.
Ce rapport Êtablit un historique de l’outil et dÊcrit la raison de la gÊnÊration de rapports, y compris la gestion des PM, les requêtes gÊnÊrales, les modifications de rÊvision et les rÊparations.
Hinweise und Anmerkungen sollten in die dafĂźr vorgesehenen Felder eingetragen werden. Somit erzeugt der Anwender akkurate Berichte.
Les notes doivent être incluses dans la section fournie à des fins de clartÊ. Le compte qui gÊnère le document est notÊ pour un historique prÊcis.
This report builds up a history of the tool and outlines the reason for the report generation including PM, General Queries, Revision Changes, and Repairs. Notes should be included in the section provided for clarity also the Account generating the document is noted for accurate history.
OnDemand Ac vity Log [So ware Version 3.1.0/2.6.1/3.1.9] CVe Ini alize Date Device ID Tool ID
November 23, 2017 MKX1234 8565B Blower Housing ABT57 Mocha Crimson Fan N/A N/A 50000 100000 1000000 N/A N/A
Part ID Program Name Customer Target Efficiency % Target Cycle Time Ini al PM Point Target PM Interval Cycles Prior to CVe Installa on* OEM ID ASSET ID
December 17, 2017 MKX1234 8565B Blower Housing ABT57 Mocha Crimson Fan 94% 7.5 50000 100000 1000000 ABT1 0356-5686
CrimsonQ@crmn.com
N
N
Y
OK
INJECTI1
Blake Fitz
Injec on Tech
CrimsonQ@crmn.com
N
N
N
OK
491,274
INJECTI1
Blake Fitz
Injec on Tech
CrimsonQ@crmn.com
N
N
Y
September 15, 2018 June 28, 2018 May 31, 2018
OK OK
MOLDHOU1 MOLDHOU1
Chuck Louse Chuck Louse
Mold House Mold House
CrimsonQ@crmn.com CrimsonQ@crmn.com
N N
Y Y
N N
OK
482,567 364,001 314,856
N/A Data Pull Pulled from produc on for mold opera onal issues. It is being sent for evalua on and rework N N/A Full PM: Cavity #2 was shutoff N N/A Full PM
MOLDHOU1
Chuck Louse
Mold House
CrimsonQ@crmn.com
N
Y
N
N N/A Full PM
April 28, 2018
OK
260,002
MOLDHOU1
Chuck Louse
Mold House
CrimsonQ@crmn.com
N
Y
N
April 4, 2018 March 22, 2018
OK
211,563 193,268
MOLDHOU1
Chuck Louse
Mold House
CrimsonQ@crmn.com
N
Y
N
N N/A Full PM
OK
INJECTI1
Blake Fitz
Injec on Tech
CrimsonQ@crmn.com
N
N
Y
N N/A 3 cavi es are shutdown. Pulled for evalua on and repair
February 7, 2018
OK
106,235
MOLDHOU1
Chuck Louse
Mold House
CrimsonQ@crmn.com
N
Y
N
N N/A Full PM
January 10, 2018
OK
58,725
MOLDHOU1
Chuck Louse
Mold House
CrimsonQ@crmn.com
N
Y
N
N N/A Full PM
December 17, 2017
OK
9,265
MOLDHOU1
Chuck Louse
Mold House
CrimsonQ@crmn.com
N
Y
N
N N/A
November 23, 2017
OK
0
MOLDHOU1
Chuck Louse
Mold House
CrimsonQ@crmn.com
N
N
N
Y
Notes
N N/A Replaced damaged core pin in cavity 4 Y
N N/A
N N/A Full PM: Cavity #2 was shutoff
Ini al mold inspec on. There is no wear or damage to mold following ini al run. Targets are set. Mold is released for produc on
N/A Mold is completed and released for sampling
OnDemand User maunual and instalation instuctions can be found at no charge at CVeMonitor.com.
Â
OnDemand Version 3.0.3
   Â
 Installation Manual & User’s Guide
 AST Technology 235 Industrial DriveÂ
OnDemand Bedienungsanleitung und Installationsanweisungen finden Sie kostenlos unter CVeMonitor.com. On peut trouver gratuitement les instructions d’installation et de l’utilisateur OnDemand sur CVeMonitor.com.
Required • Windows XP (SP2 or greater) or Windows 7 Professional • .Net Framework 4 Client Profile* • Microsoft Excel 2003 or greater • Internet Explorer 8
Wauconda, IL  60084  Â
A-6
REV#
Des na on
Injec on Tech
GEN
Company
Blake Fitz
September 19, 2018
Â
Â
Conn. By
INJECTI1
Cycles 507,288 506,524
OK
Â
Â
OD User
REP
Ba ery
PM
Date/Time October 4, 2018 October 4, 2018
REV
Reason for connec ng CVe Monitor
Recommended • Microsoft Excel 2007 (SP2) or Excel 2010 Professional • Internet Access
cve live hardware ®
CVe Live provides For real-time monitoring of tools, AST provides hardware and website access for OEMs and Moulders utilizing the CVe Monitors. Features: • Utilizes FCC and CE certified internal components. • Press Modules act as a node on a network, reducing the distance required in the plant for data submission to the Gateway. • Radio Frequency (RF) antennas are interference-free in typical moulding environments. • Designated website for data collection, reporting, and file storage. CVe Live sorgt für die Echtzeitüberwachung von Werkzeugen, AST bietet CVe Live is developed and supported by AST Technology, Hardware und Website-Zugang für OEMs und Spritzgießer, die mit den sister company of Progressive Components. CVe-Monitoren arbeiten. CVe Live wird von AST Technology, Schwestergesellschaft von Eigenschaften: Progressive Components, entwickelt und unterstützt. • Verwendet FCC und CE zertifizierte interne Komponenten. CVe Live est développé et soutenu par AST Technology, • Funkmodule fungieren als Knoten in einem Netzwerk, wodurch der in der société filiale de Progressive Components. Anlage erforderliche Abstand für die Datenübertragung zum Gateway reduziert wird. • Radio Frequency (RF) Antennen sind in den üblichen Spritzgussumgebungen störungsfrei. • Ausgewiesene Website für die Datenerhebung, Berichterstattung und Dateispeicherung. CVe Live fournit la surveillance en temps réel des outils, AST fournit un accès au matériel et au site Web aux OEM et aux Mouleurs utilisant les moniteurs CVe. Caractéristiques: • Utilise des composants internes certifiés FCC et CE. • Les modules de presse agissent comme un noeud sur un réseau, réduisant la distance requis dans l’usine pour la soumission de données au routeur. • Les antennes de radiofréquence (RF) ne sont pas affectés par les interférences habituelles des environnements de moulage. • Designated website for data collection, reporting, and file storage.
Press Module • 1 per press connects to the CVe Monitor via cables • Power supply (US/International) included • Sends data to the Gateway continuously • Serves as a node on the network for tools running with a CVe Monitor • Includes CVEL-DATA9 Cable, fitting ties and instalation instructions
Gateway • 1 per facility collects data from all press modules installed via RF transmissions • Power supply (US/International) • Accesses the internet via cellular technology • Sends data to the customer’s web portal every 15 minutes • Includes CAT5 Ethernet cable
Funkmodul • 1 pro Maschine wird über Kabel mit dem CVe-Monitor verbunden • Netzteil (US/International) inklusive • Sendet kontinuierlich Daten an das Gateway • Dient als Knotenpunkt im Netzwerk für Werkzeuge, die mit einem CVe-Monitor ausgestattet sind • Inklusive CVEL-DATA9-Kabel, passende Verbindungen und Installierungsanweisungen
Funk-Gateway • 1 pro Anlage/Halle, sammelt Daten von allen Funkmodulen, die über RF-Übertragung installiert sind • Netzteil (US/International) • Zugriff auf das Internet über Mobilfunktechnologie • Sendet alle 15 Minuten Daten an das Webportal des Kunden • Enthält CAT5 Ethernet-Kabel
Module de Presse • 1 par presse se connecte au moniteur CVe par câble • Alimentation (US / International) incluse • Envoie des données au routeur en continu • Fonctionne comme un noeud sur le réseau pour les outils en cours d’activité avec un moniteur CVe • Comprend un câble CVEL-DATA9, des attaches et des intructions d’installation
Routeur • 1 par établissement recueille des données de tous les modules de presse installé via des transmissions RF • Alimentation électrique (US / International) • Accède à Internet via le réseau cellulaire • Envoie des données au site Web du client toutes les 15 minutes • Comprend un câble Ethernet CAT5
A-7
cve live web portal ®
CVe Live Website Features: • • • • • • • • • • • •
Secure access for OEMs and moulders, set up at the time of installation of the CVe Live hardware. Dashboard gives users information at either the enterprise or plant level and allows users to drill down into specifics on each tool. Users can mark favorites and also save searches for monitoring specific programs or suppliers. Graphs for cycle times, efficiencies, cavitation and production loss and also preventive maintenance, can be seen and saved. PM Function allows for user-defined PM stops (Incremental or Absolute). The user can also create or customize PM forms and checklists for a specific maintenance program. This includes PM for moulds and machines or other assets. Work Order function allows users to create work orders for moulds, machines, or other assets. Asset Tracking shows where and when the CVe Monitor was last tethered to a CVe Live network. Plant exceptions screen shows any out-of-tolerance conditions. Downtime and reject tracking can be entered into the system and monitored through various reports. Moulding data and tool information can be exported to Excel, allowing for easy import into existing systems. Administration and security levels are controlled by the user, and access can be given to subcontractors to upload information or to initialize the CVe Monitors to begin submitting data. The file cabinet system is designed to store reports, tool and part drawings, and set-up sheets and can be utilized by customers with the CVe Live system installed, or by those using OnDemand who are looking to have or give global access to tool information.
For a CVe Live installation or for CVe Live website access, contact Customer Service or email AST directly at orderdesk@ASTtech.com. CVe Live Website Leistungsmerkmale: • Abgesicherter Zugang für OEMs und Spritzgießer, der zum Zeitpunkt der Installation der CVe Live-Hardware eingerichtet wird. • Das Dashboard gibt den Nutzern Informationen auf Unternehmensebene oder Werksebene und ermöglicht es den Anwendern, bei jedem Werkzeug ins Detail zu gehen. • Anwender können Favoriten markieren und auch das Monitoring bestimmter Programme oder Lieferanten speichern. • Graphiken für Zykluszeiten, Effizienz, Kavitation und Produktionsausfälle sowie vorbeugende Wartung können angesehen und gespeichert werden. • Die Funktion für präventive Wartung ermöglicht benutzerdefinierte Wartungs-Stopps (inkrementell oder absolut). • Der Anwender kann auch Wartungs-Formulare und Checklisten für ein bestimmtes Wartungsprogramm erstellen oder anpassen. • Dazu gehören Werkzeugwartung und Maschinenwartung oder andere Vermögenswerte. • Die Funktion “Arbeitsaufträge” ermöglicht es den Anwendern, Arbeitsaufträge für Werkzeuge, Maschinen oder andere Vermögenswerte zu erstellen. • “Asset Tracking” zeigt, wo und wann der CVe-Monitor zuletzt an ein CVe-Live-Netzwerk angeschlossen war. • Werksweite Übersichten zeigen Abweichungen im Werk sowie alle Vorgänge außerhalb der Toleranz an. • Ausfallzeiten und unterbrochene Nachverfolgung können in das System eingegeben und durch verschiedene Berichte überwacht werden. • Spritzgießdaten und Werkzeuginformationen können nach Excel exportiert werden, so dass ein einfacher Import in bestehende Systeme möglich ist. • Administrations- und Sicherheitsebenen werden vom Anwender kontrolliert. Subunternehmern kann der Zugang gewährt werden, um Informationen hochzuladen oder die CVe-Monitore zu initialisieren, um die Datenübertragung zu starten. • Es wurde ein “Aktenschrank” entwickelt, um Berichte, Werkzeug- und Teilezeichnungen sowie Einrichtungsblätter zu speichern. Dies kann von Kunden, die ein CVe Live-System oder OnDemand installiert haben und die einen globalen Zugriff auf Werkzeuginformationen haben oder zur Verfügung stellen wollen, genutzt werden. Für eine CVe-Live-Installation oder für einen CVe Live-Website-Zugang kontaktieren Sie den Kundenservice oder senden Sie direkt eine e-Mail an AST: Orderdesk@ASTtech.com. CVe Live Caractéristiques du Site: • Accès sécurisé pour les OEM et les mouleurs, mis en place au moment de l’installation de l’hardware CVe Live. • Le tableau de bord fournit des informations aux utilisateurs au niveau de l’entreprise ou de l’usine, et permet d’accéder à des informations détaillées sur chaque outil. • Les utilisateurs peuvent marquer des favoris et enregistrer des recherches pour surveiller des programmes ou des fournisseurs spécifiques. • Les graphiques pour les temps de cycle, les efficacités, la cavitation et la perte de production, ainsi que la maintenance préventive, peuvent être affichés et sauvegardés. • La fonction PM permet les arrêts PM définis par l’utilisateur (incrémental ou absolu). L’utilisateur peut également créer ou personnaliser des formulaires PM et des listes de contrôle pour un programme de maintenance spécifique. Cela inclut les matières particulaires pour les moules et les machines ou d’autres actifs. • La fonction Work Order permet aux utilisateurs de créer des bons de travail pour des moules, des machines ou d’autres actifs. • Asset Tracking indique où et quand le moniteur CVe a été connecté pour la dernière fois à un réseau CVe Live. • L’écran Plant Exceptions affiche toutes les conditions hors tolérances. • Le suivi des Downtime and Reject peut être saisi dans le système et surveillé par différents rapports. • Les données de moulage et les informations sur les outils peuvent être exportées vers Excel, permettant une importation facile dans les systèmes existants. • Les niveaux d’administration et de sécurité sont contrôlés par l’utilisateur, et l’accès peut être donné aux sous-traitants pour télécharger des informations ou initialiser les CVe Monitor pour commencer à soumettre des données. • Le système de stockage de fichiers est conçu pour stocker les rapports, les dessins d’outils et de pièces, et les feuilles de mise en place et peut même être utilisé par les clients avec le système CVe Live installé ou par ceux utilisant OnDemand qui souhaitent avoir un accès global à l’info sur l’outil. Pour une installation CVe Live ou pour un accès au site CVe Live, contactez le service clientèle ou envoyez un email à AST directement à orderdesk@ASTtech.com.
A-8
cve live web portal ÂŽ
A-9
counterview : 100/200 series ®
Progressive’s CounterView positively monitors mould activity, validates process monitoring data, and assists mould maintenance procedures. The 7-digit, non-resettable, mechanical counter has a maximum operating temperature of 120° C. Der Zähler (Counter View) von Progressive überwacht sicher die Werkzeugaktivität, validiert die Prozessdaten und unterstützt die Werkzeugwartung. Der 7-stellige, nicht rücksetzbare mechanische Zähler läuft bei einer maximalen Betriebstemperatur von 120° C. CounterView de Progressive surveille positivement l’activité des moules, valide les données de surveillance des processus et assiste les procédures de maintenance des moules. Le compteur mécanique à 7 chiffres, non réinitialisable, a une température de fonctionnement maximale de 120° C.
m Glass-filled Nylon housing
1.125 (28mm)
.375ø +.005 -.000 (10mm)
.938 (24mm)
*1.875/48mm for .004" (.1mm) PL gap parting line mount
Modify actuator to extend above parting line .170" (4mm)
PL
PL
.465 (12mm) 1.000 (26mm)
#8-32 x 1" or M4-.7 x 25mm SHCS (2) Included
1.500 (38mm)
0 0 0 0 0 00
1.875* (48mm)
0 0 0 0 0 00
1.000 (26mm)
.750 (19mm)
R 5/16 (R 8mm)
internal extension mount
Parting line mount makes unit easily visible to operator.
#8-32 x 1" or M4-.7 x 25mm SHCS (2) Included
Machinable 8” (200mm) extension allows installation in sup. plate or rail.
CVPL-100
Inch Standard
CVIN-100
Inch Standard
CVPL-200
Metric Standard
CVIN-200
Metric Standard
.250 (6mm)
1.125 (28mm)
.93 (24mm) 0 0 0 0 0 00
PL
#8-32 x 1" or M4-.7 x 25mm SHCS (2) Included
A-10
external mount
No pocket machining necessary. Designed specifically for retrofit applications.
CVEX-100
Inch Standard
CVEX-200
Metric Standard
counterview r-series ®
Progressive’s R-Series CounterView provides a compact and easy to instal alternative to the CVPL Series. The 7-digit, non-resettable, mechanical counter has a maximum operating temperature of 120° C. Die R-Serie Counter View von Progressive bietet eine kompakte und leicht zu installierende Alternative zur CVPL-Serie. Der 7-stellige, nicht rücksetzbare mechanische Zähler läuft bei einer maximalen Betriebstemperatur von 120° C. Le CounterView R-Series de Progressive fournit une alternative compacte et facile à installer face au CVPL standard. Le compteur mécanique à 7 chiffres, non réinitialisable, a une température de fonctionnement maximale de 120° C. m Glass-filled Nylon housing +.005
1.840 -.000 [46.75mm +.12 -.00 [
A Plate
PL B Plate
R .03 [.75mm] max, typical
1.625 +.010 -.000
Left hand CounterView mounted on the Fixed Side (A)
[41.25mm +.25 -.00 [
.750*
[
+.000 -.001
[
19.05*
Linke CounterView auf der festen Seite montiert (A) CounterView gauche monté sur le côté fixe (A) .875Ø
[
+.005 -.000
22.25Ømm +.12 -.00
[
Standard Plate Thickness
+.00 -.02
.28Ø [7Ø mm] THRU TO P/L
.50 ± .005
[ 12.5mm [ ± .12
*Light press fit
CAD insertion point | CAD Einfügemarke | CAD point d'insertion
Installation: Die R-Serie CounterView kann auf der beweglichen (B) Seite und der festen (A) Seite, die eine minimale Dicke von 56 mm aufweisen muss, installiert werden. Dickere Platten können durch eine schraubbare Stange ausgeglichen werden.
parting line at left
Left hand CounterView mounted in A Plate (CVRL-23 shown)
catalogue number
Nominal Plate Thickness
CVRL-56 CVRL-66 CVRL-76 CVRL-96 CVRL-116 CVRL-196
56 66 76 96 116 196
Each R-Series CounterView includes the actuator and require rod to the threaded CounterView unit.
Patent No. EP1567924 issued throughout Europe and South Africa. Chinese Patent No. ZL200380109407.8 issued.
Installation Le CounterView série R peut être installé sur les côtés mobiles (B) des côtés fixes (A) avec une épaisseur minimale de 56 mm, en utilisant une tige filetée, fournie avec chacun.
parting line at right
*Light press fit 7Ø
.75 R max.
+.25
41.25 -.00
THRU TO P/L
catalogue number
Nominal Plate Thickness
CVR-56 .75 R max.
56 66 76 96 116 196
CVR-66 CVR-76 CVR-96 Standard CVR-116 Plate Thickness CVR-196
Jede R-Serie Counter View enthält den Aktuator und benötigt eine Stange für das Gewinde der CounterView Einheit.
9999950
Installation: The R-Series CounterView can be installed on the Moving (B) of Fixed (A) sides with a minimum thickness of 56mm, utilising a threaded rod, included with each.
Chaque CounterView de série R comprend l’actionneur et nécessite une tige pour l’unité
A-11
alignment locks section b
Side Locks
Bar Locks
Inserted Bar Locks
Top Locks
SL, SLC, SLM
BLB, BLG
BLG, BLN, BLS
TL, TLM
B-3
B-4
B-6
B-7
Guide Locks
X-Style Side Locks
Shuttle Mold Sets
Top Lock - 20MM Square
GL, GLM
SLX
-SF, -SM
TLM
B-8
B-9
B-9
B-11
Synthetic Mould Grease
Side Locks: Steel
Side Locks: Graphite
SYN
SLMS
SLPM
B-11
B-12
B-13
performance testing Progressive Components continuously tests products with independent Laboratories.
Progressive Components prüft kontinuierlich Produkte durch unabhängige Prüfstellen.
Before launching of the Z-Series™ Alignment Locks, Progressive contracted Element Materials Technology to provide a mould lock Performance Evaluation.
Vor der Markteinführung der Z-Series™ Feinzentrierungen hat Progressive die Firma Element Materials Technology beauftragt, ein Verfahren zur Leistungsbewertung von Feinzentrierungen zu entwickeln.
The processes with fixtures and cycling was established to simulate use in the moulding environment, but more severe loads to accelerate any failures at 2000 KG of pressure. It was found that the Progressive Components’ Z-Series Alignment Locks, exceeded the 2-million cycle mark, and still displayed no measurable signs of wear of any type. With the industry’s widest selection of sizes in stock and competitively priced, specifying alignment locks from Progressive Components means your moulds will have unmatched protection from damage and downtime.
US Patent No. 8,821,144 and others pending.
Progressive Components teste régulièrement leurs produits par le biais de plusieurs laboratoires indépendants. Avant le lancement des centreurs Z-Series ™, Progressive a embauché Element Materials Technology pour une évaluation de la performance de cette gamme de centreurs.
Der Prozess mit Vorrichtungen und Zyklen wurde eingerichtet, um Produktionsbedingungen in einem Spritgussumfeld zu simulieren. Jedoch wurden stärkere Lasten bei 2000kg /4400 lbs verwendet, um Ausfälle zu beschleunigen.
Les procédés avec fixations et cycles ont été mis en place pour des simulations d‘utilisation en milieu de moulage. Des charges lourdes ont été utilisées pour accélérer les défaillances à 2000 KG de pression.
Es wurde festgestellt, dass die Feinzentrierungen der Z-Serie von Progressive Components die 2 MillionenZyklus Marke überschritten und dennoch keine messbaren Verschleißerscheinungen jeglicher Art zeigten.
Nous constatons que les centreurs Progressive Z-Series ™ dépassent les 2 millions de cycles, sans évidence d‘aucun signe d‘usure mesurable.
Mit der breitesten Auswahl an Größen und wettbewerbsfähigen Preisen stellen die Feinzentrierungen von Progressive Components einen unübertroffenen Schutz für Ihre Werkzeuge vor Beschädigungen und Ausfallzeiten dar.
Avec le plus grand choix de tailles en stock et de prix concurrentiels de l’industrie, spécifier les centreurs d’alignement Progressive Components signifie que vos moules bénéficieront d’une protection inégalée contre les dommages et les temps d‘arrêt.
B-1
z-series™
Progressive’s Alignment Locks have been designed to outperform competitive products. This is achieved through a combination of engagement geometry, particulate capturing rings, materials and treatments, and lubrication. Benefits include: • Working life that surpasses others, confirmed by independent lab results and monitoring in, ‘real world’ conditions. • Exclusive features maintain clean and consistent lubrication. • Bar Lock, Guide Lock, Side Lock, Top Lock and custom styles available.
C C
Die Feinzentrierungen von Progressive wurden entwickelt, um Produkte von Wettbewerbern zu übertreffen. Erreicht wird dies durch eine Kombination aus Eingriffsgeometrie, Partikel auffangenden Ringen, Materialien und deren Behandlungen sowie Schmierung. Vorteile: • Lebensdauer, die andere übertrifft, bestätigt durch unabhängige Prüfergebnisse und die Überwachung unter “realen” Bedingungen. • Durch einzigartige Eigenschaften bleibt eine saubere und gleichbleibende Schmierung erhalten. • Rechteckführungen, Flachführungseinheiten, Flachzentrierungen, Eckige Zentriereinheiten und individuelle Varianten erhältlich.
Les centreurs Progressive ont été conçus pour surpasser les produits concurrents. Cela est possible grâce à une combinaison de géométrie d’engagement, d’anneaux de capture de particules, de matériaux et de traitements, et de lubrification. Les avantages : • Une durée de vie qui surpasse celle des produits concurrents, validée par les résultats des laboratoires, testé et surveillé dans de réelles conditions. • Les caractéristiques exclusives permettent de maintenir une lubrification propre et constante. • Barres de verrouillage, Guides de verrouillage, et différents types disponibles.
F
B
DD
E
A
A
Engagement Ramp: lead-in for smooth lifting upon engagement of the mould halves.
A
Einlauframpe: Einführung für weiches Anheben der Werkzeughälften (sanftes Anheben beim Eingriff der Formhälften)
A
Rampe d’Engagement: angles d’entrée pour le levage en douceur lors de l’engagement des moitiés de moule.
B
Particle Rings: particle rings trap material and debris to avoid “picking up” or galling.
B
Partikelringe: Partikelringe fangen Material und Schmutz ein, um das “Fressen” oder Scheuern zu vermeiden.
B
Anneaux de particules: ces anneaux de particules piègent la matière et les débris afin d’éviter le grippage.
C
Engagement: utilises the maximum allowable engagement area.
C
Eintauchtiefe: Nutzt den maximal zulässigen Einsatzbereich.
C
Engagement : utilisation de la zone d’engagement maximale autorisée
D
Arced Relief: reduces the possibility of parts sticking to the lock at the bottom of the mould.
D
Gewölbte Form: Reduziert die Wahrscheinlichkeit, dass Teile an der Zentrierung unten am Werkszeug liegen bleiben.
D
Relief Arquée: réduit la possibilité de que les pièces restent sur les centreurs au fond du moule.
E
Rounded Edges: larger radius to avoid operator “reach in” injury.
E
Abgerundete Kanten: Größerer RADIUS, um Verletzungen beim „Hineingreifen“ zu vermeiden.
E
Bords Arrondis: Un rayon plus grand pour éviter que l’opérateur se blesse.
F
Pry Slot Lead-In: expanded entry of pry slots to ease removal.
F
Eingriffskante für Montagehebel: Erweiterte Aussparung für erleichtertes Aufhebeln.
F
Rainure Outil Levier: entrée élargie pour outil levier afin de faciliter l’enlèvement.
G
Premium Materials: and coatings.
G
Premium Materialien: Und Beschichtungen.
G
Matériaux et traitements de qualité supérieure.
B-2
z-series™ side locks
W
T
R
D
Z
S3 B
H C
Female: m 1.2379 h Core: 58-62 HRC, Surface: 80 HRC s Titanium Nitride Coated
A S2
Male:
SHCS
S1
m 1.2344 h Core: 42-48 HRC, Surface: 70 HRC s Salt Bath Nitride
Metric Standard | Metrische Norm | Métrique Standard +.00 -.05
+.00 -.01
+.00 -.05
+.00 -.05
b
c
SLM16X50
16
50
21.5
21.5
13
catalogue number
t
w
a
.002/.008 Clearance Per Side
d
+ 0.0 - 0.1
h
Pocket Radius
r
s1
s2/s3 ±.25
Chamfer
shcs
17
43
5
8
11
.8
M6-1.0 x 18
±.25
z
SLM19X75
19
75
36
36
22.5
25
72
5
12.5
18
.8
M10-1.5 x 20
SLM19X100
19
100
45
45
30
35
90
5
15
22
.8
M10-1.5 x 20
SLM25X125
25
125
45
45
28.7
35
90
5
20.5
22
.8
M10-1.5 x 25
Inch Standard-Compatible | Kompatible Zoll-Norm | Standard Compatible en Pouce catalogue number
t
+.000 -.002
w
+.0000 -.0004
a
+.000 -.002
b
+.000 -.002
c
d
h
r
.0001/.0003 Clearance Per Side
+.000 -.004
Pocket Radius
s1 ±.01
s2 s3
z
±.01
±.01
Chamfer
shcs
SLC62X150
.620
1.500
.870
.870
.41
.500
1.74
.187
.281
.281
.437
.03
1/4-20 x 3/4"
SLC62X200
.620
2.000
.870
.870
.41
.680
1.74
.187
.375
.375
.437
.03
1/4-20 x 3/4"
SLC75X300
.745
3.000
1.370
1.360
.68
1.000
2.73
.187
.375
.688
.688
.03
3/8-16 x 1"
Inch Standard | Zoll-Norm | Standard en pouce catalogue number SL37X100
+.000 -.002
t
+.0000 -.0004
w
+.000 -.002
a
+.000 -.002
b
c
.375
1.000
1.125
.875
d
h
.0001/.0003 Clearance Per Side
+.000 -.004
Pocket Radius
r
s1/s2/s3 ±.01
Chamfer
z
shcs
.62
.500
2.000
.187
.250
.015
#10-32 x 1/2” #8-32 x 5/8”
SL50X125
.490
1.250
1.125
.875
.68
.500
2.000
.187
.250
.03
SL50X150
.500
1.500
.875
.875
.56
.563
1.750
.187
.250
.03
#8-32 x 5/8”
SL50X200
.500
2.000
1.375
.875
.86
.750
2.250
.187
.312
.03
#10-32 x 5/8” 1/4-20 x 3/4”
SL75X300
.750
3.000
1.875
.875
1.18
1.250
2.750
.250
.375
.03
SL100X400
1.000
4.000
2.375
1.375
1.43
1.500
3.750
.500
.500
.03
3/8-16 x 1”
SL125X500
1.250
5.000
2.875
1.375
1.75
2.000
4.250
.500
.625
.03
1/2-13 x 1-1/4”
SL150X600
1.500
6.000
2.875
1.375
1.87
2.500
4.250
.500
.625
.03
1/2-13 x 1-1/2”
CAD insertion point | CAD Einfügemarke | CAD point d'insertion
Screws included | Schrauben inklusive | Vis incluses
Note: 260° C max operating temperature. Hinweis: Maximale Betriebstemperatur bei 260° C Remarque: Température de fonctionnement de 260° C max.
US Patent No. 8,821,144 and others pending.
B-3
z-series™ bar lock
Bar Locks enable designers to use off-the-shelf components for the alignment of large or multiple moving plate moulds.
Flachführungseinheiten ermöglichen es Konstrukteuren, diese für die Ausrichtung von großen oder mehreren beweglichen Platten zu verwenden.
Les centreurs Bar Locks permettent aux bureaux d’études d’utiliser des composants standard pour l’alignement des grands moules ou moules à plusieurs plaques mobiles.
Bar | Führungsschwert | Barre X
m 1.2344 h Core: 42-48 HRC, Surface: 70 HRC s Salt Bath Nitride X
t
catalogue number
+.000
X
BLB100L6
1.000
±.005
+.0000 - .0005
REF
MIN
±.005
±.005
s2
s3
6.00
1.000
.22
1.38
.50
.38
.69
5/16-18 x 1.25
l
- .005
w
e
p
s1
shcs
+.00 - .01
BLB125L9
1.250
8.88
1.500
.28
1.88
.75
.50
1.00
3/8 - 16 x 1.50
X BLB137L11
1.375
10.88
2.000
.31
2.38
1.00
.50
1.38
3/8 - 16 x 1.50
BLB150L16
1.500
15.88
3.000
.31
3.38
1.5
.63
2.00
1/2 - 13 x 1.75
Note: Sold individually. Each catalogue number includes (1) Bar Lock and (2) Screws. Hinweis: Einzeln erhältlich. Jede Katalognummer beinhaltet (1) Stabverriegelung und (2) Schrauben. Remarque: Vendu individuellement. Chaque numéro de catalogue comprend (1) serrure à barres et (2) vis.
X
CAD insertion point | CAD Einfügemarke | CAD point d'insertion For custom Bar Locks, refer to the templates in section X. Kundenspezifische Flachführungseinheiten finden Sie in den Vorlagen unter Abschnitt X
X
Pour les centreurs personnalisés, référez-vous aux modèles de la section X.
Bar L
X
X
Guides E
P
S1 W
PW
S3 S2 T
Guides | Führungen | Guides m 1.2379 h Core: 58-62 HRC, Surface: 80 HRC
catalogue number BLG100L1.3 BLG100L1.8 BLG125L1.3 BLG125L2.3 BLG137L1.8 BLG137L3.3 BLG150L2.3 BLG150L3.8
t
+.000 - .005
1.000 1.250 1.375 1.500
l
+.000 - .005
1.310 1.810 1.310 2.310 1.810 3.310 2.310 3.810
c
s Titanium Nitride Coated
pw
e
s1
+.0000 - .0003
+.0003 +.0006
REF
±.005
.500
2.000
.22
.250
.625
2.750
.28
.310
.750
3.500
.31
.375
1.000
5.000
.31
.500
s2
.750 1.125 .750 1.25 1.125 2.250 1.500 2.500
L
shcs
use with
#10-32 x 1.25
BLB100L6
1/4-20 x 1.50
BLB125L9
±.005
S2
C
S1 E
5/16-18 x 1.50
BLB137L11
3/8-16 x 1.75
BLB150L16
T
CAD insertion point | CAD Einfügemarke | CAD point d'insertion Note: Guides are sold in pairs. Each catalogue number includes (2) guides and (4) screws. Note: 260° C max operating temperature. Hinweis: Führungen werden paarweise verkauft. Jede Katalognummer beinhaltet (2) Führungen und (4) Schrauben. Hinweis: Maximale Betriebstemperatur bei 260° C Remarque: Les guides sont vendus par paires. Chaque numéro de catalogue comprend (2) guides et (4) vis. Remarque: Température maximale de fonctionnement de 260° C.
B-4
US Patent No. 8,821,144 and others pending.
bar lock applications
Stripper Plate | Abstreifplatten | Plaque Dévêtisseuse
Three Plate | Dreiplattenwerkzeuge | Trois Plaques
P
P
MINIMUM POCKET LENGTH = P
Stack Mould | Etagenwerkzeuge | Moule À Étage
US Patent No. 8,821,144 and others pending.
Large Mould | Großwerkzeuge | Moule Grande Taille
B-5
z-series™ inserted bar locks Inserted Bar Locks are engineered for long term alignment of very large moulds: • Designed to align large injection moulds up to 3400 Kg (75,000 pounds ) moving half + platen. • Inserts are also sold individually to retro-fit into existing mould designs. Führungsschwerter mit eingesetzter Gleitfläche wurden für die langfristige Ausrichtung von sehr großen Formen entwickelt: • Entwickelt, um große Spritzgießformen bis zu 3400 kg (75.000 Pfund) (Bewegliche Seite und Platte) auszurichten. • Um in bestehende Werkzeug-Konstruktionen zu passen, sind Führungsschwerter auch einzeln erhältlich. Les barres Inserted Bar Locks sont conçues pour l’alignement durable de trés grands moules: • Conçu pour l’alignement des grands moules d’injection jusqu’à 3400 Kg, coté éjection et plaques. • Les inserts sont également vendus individuellement pour rétro-ajustement sur les moules existants. Bar: m 1.7225 h Core: 36-40 HRC s Black Oxide Inserts: m 1.2344 h Core: 42-48 HRC, Surface 70 HRC s Salt Bath Nitride
Assemblies | Baugruppen | Assemblées
t
w1
catalogue number
+.000
- .005
+.0000 - .0005
BLN150L8
1.500
4.000
BLN250L10
2.500
5.000
BLN350L13
3.500
6.000
REF
cL
REF
s1C
s2
s3
4.000
7.75
3.75
1.00
2.00
2.25
5.000 W1
10.38
5.00
1.25
3.25 W23.25
12.88 S2
6.00
1.50 N
4.00
lP
w2 +.000/-.002 S3 +.000/-.002
6.000
+.000/-.003 R
S1
±.01
±.01
±.01
3.50
r
p
shcs
total max lbs. supported
4.00
1/2-13 x 1.75
25,000
1.00
5.38
5/8-11 x 2.75
50,000
1.00
6.88
3/4-10 x 3.75
75,000
Pocket Radius
Minimum Pocket Length
.75PW
Note: Each catalogue number includes (1) Bar and (2) Inserts with screws. Guides are sold separately. Hinweis: Jede Katalognummer beinhaltet (1) Führungsschwert und (2) Gleiteinsätze mit Schrauben. Führungen sind separat erhältlich. T Remarque: Chaque numéro de catalogue comprend (1) Barre et (2) inserts avec vis. Les guides sont vendus séparément.
Guides
Bar
CAD insertion point | CAD Einfügemarke | CAD point d'insertion
L P
W2
C
W1 S3
PW
W2
PW
.315 Insert Pocket
R
S2
S1
serts
Inserts
T
L S5
Guides | Führer | Guides
NL
m 1.2379 h Core: 58-62 HRC, Surface: 80 HRC
catalogue number BLG150L2.3 BLG150L3.8 BLG250L4.3 BLG350L4.8
t
+.000 - .005
1.500 1.500 2.500 3.500
l
+.0000 -.0003
REF
e
s4
s5 ±.01
shcs
2.310 6.000 1.000 3.810 6.000 1.000 4.310 7.500 1.250 4.810 9.500 1.750
.31 .31 .31 .31
.50 .50 .625 .875
1.50 2.50 3.00 3.25
3/8-16 x 1.75 3/8-16 x 1.75 1/2-13 x 2.75 5/8-11 x 3.75
+.000 - .005
pw
+.0010 +.0015
c
±.01
.375
S6
s Titanium Nitride Coated
S7
use
+.0000 -.0005
C
S4
E
NH with
BLN150L8 BLN150L8 1/4-20 SHCS BLN250L10 BLS150 (2) On Center BLN350L13 BLS250/350 (4)
T .315 Insert Pocket
Note: Guides are sold in pairs. Each catalogue number includes (2) guides and (4) screws. 260° C max operating temperature. Hinweis: Führungen werden paarweise verkauft. Jede Katalognummer beinhaltet (2) Führungen und (4) Schrauben. Remarque: Les guides sont vendus par paires. Chaque numéro de catalogue comprend (2) guides et (4) vis. Température maximale de fonctionnement de 260° C.
Inserts | Führungsschwerter | Inserts
NL S6
m H-13 h Core: 42-48 HRC, Surface 70 HRC s Salt Bath Nitride
catalogue number BLS150 BLS250 BLS350
B-6
nh +.000 - .005
+.000 - .002
nl
s6
s7
1.440 2.440 3.375
2.999 3.999 4.999
1.750 2.250 3.000
--1.500 2.500
±.01
±.01
Note: Inserts sold individually and include screws. Hinweis: Führungsschwerter sind einzeln inklusive Schrauben erhältlich. Remarque: Les inserts sont vendus individuellement avec les vis.
.375
+.0000 -.0005
S7 NH
1/4-20 SHCS BLS150 (2) On Center BLS250/350 (4)
US Patent No. 8,821,144 and others pending.
z-series™ top locks R
C
Z
D
S2
W Female: m 1.2379 h Core: 58-62 HRC, Surface: 80 HRC s Titanium Nitride Coated
S1
w
a
m 1.2344 h Core: 42-48 HRC, Surface: 70 HRC s Salt Bath Nitride
Metric Standard | Metrische Norm | Standard en métrique
CAD insertion point | CAD Einfügemarke | CAD point d'insertion
t
Male:
catalogue number
+.00 -.05
+.00 -.01
+.00 -.05
+.00 -.05
b
c
d
s1
s2 ±.25
Pocket Radius
Chamfer
TLM26X35
26
35
25
15
17
11
13
23
8
1
TLM30X45
30
45
25
15
17
15
15
30
8
1
M: M6 x 18
F: M6 x 25
TLM36X55
36
55
30
20
21.5
20
18
37.5
8
1
M: M8 x 22
F: M8 x 35
TLM36X75
36
75
35
20
26
30
18
52
8
1.5
M: M10 x 25
F: M10 x 35
TLM45X100
45
100
60
20
42
40
22.5
70
8
1.5
M: M10 x 25
F: M10 x 65
.002/.008 Clearance Per Side
±.25
r
z
shcs M: M5 x 16
F: M5 x 25
Screws included | Schrauben inklusive | Vis inclus
Inch Standard | Zoll-Norm | Standard en pouce
t
w
a
b
c
.500
.375
.30
.625
.500
.41
catalogue number
+.000 -.002
+.0000 -.0004
+.000 -.002
TL50X100
.500
1.000
TL62X125
.625
1.250
+.000 -.002
d
s1
s2
.375
.25
.688
.188
.03
M: #6-32 x 1/2”
F: #6-32 x 5/8”
.438
.312
.875
.250
.03
M: #6-32 x 5/8”
F: #6-32 x 3/4”
.0001/.0003 Clearance Per Side
±.01
±.01
r
Pocket Radius
z
Chamfer
shcs
TL75X125
.750
1.250
.625
.500
.38
.438
.375
.875
.250
.04
M: #8-32 x 5/8”
F: #8-32 x 3/4”
TL87X150
.875
1.500
.875
.750
.57
.500
.437
1.000
.250
.04
M: #8-32 x 7/8”
F: #8-32 x 1”
TL100X150
1.000
1.500
.875
.375
.57
.500
.500
1.000
.250
.04
M: #10-32 x 1/2” F: #10-32 x 1”
TL100X200
1.000
2.000
1.125
.750
.75
.750
.500
1.375
.375
.04
M: #10-32 x 7/8” F: #10-32 x 1-1/8”
TL112X200
1.125
2.000
.875
.625
.50
.750
.563
1.375
.375
.04
M: 1/4-20 x 3/4” F: 1/4-20 x 1”
TL112X300
1.125
3.000
1.500
.750
.87
1.125
.563
2.250
.500
.04
M: 1/4-20 x 7/8”
TL150X250
1.500
2.500
1.375
.625
.85
1.000
.750
1.750
.375
.04
M: 1/4-20 x 3/4” F: 1/4-20 x 1-1/2”
TL175X300
1.750
3.000
1.250
.875
.75
1.125
.875
2.250
.500
.06
M: 5/16-18 x 1”
F: 5/16-18 x 1-1/4”
TL200X350 2.000
3.500
1.750
.750
1.07
1.500
1.000 2.500
.500
.06
M: 3/8-16 x 7/8”
F: 3/8-16 x 2”
F: 1/4-20 x 1-5/8”
Screws included | Schrauben inklusive | Vis inclus
Note: 260° C max operating temperature. Hinweis: Maximale Betriebstemperatur bei 260° C Remarque: température maximale de fonctionnement de 260° C.
Additional Option: Top Locks are also available with dual radii for mounting internally. To order, specify the catalogue number followed by ”-R”. Ex. TL112X200-R.
Zusätzliche Option: Eckige Zentriereinheiten sind auch mit Doppelradien für die interne Montage erhältlich. Für eine Bestellung geben Sie bitte die Katalognummer an, gefolgt von “-R”. Ex. TL112X200-R.
Option supplémentaire: Les centreurs Top Locks sont également disponibles avec des rayons doubles pour le montage en interne. Pour commander, indiquez la référence de catalogue suivie par ”-R”. Ex. TL112X200-R.
R (4)
B-7
z-series™ guide locks
L
L S S
M
S
F
S
T
W
R
H
C
1
/2 C
Z
R
Females (2): m 1.2379 m 1.2344 Male:
h Core: 58-62 HRC, Surface: 80 HRC h Core: 42-48 HRC, Surface: 70 HRC
s Titanium Nitride Coated s Salt Bath Nitride
Metric Standard | Metrische Norm | Standard en métrique catalogue number
l
+.00 -.25
w
+.008 +.015
c
+.00 -.01
f
+.00 -.12
t
m
+.00 -.01
h +.0 -.2
s
r
±.2
Pocket Radius
z
shcs
Chamfer
GLM25X45
25
45
15
15
15
10
24
7
4
1
M: M4 x 25
F: M4 x 14
GLM40X65
40
65
20
20
25
15
34
10
9
1.5
M: M5 x 35
F: M5 x 22
GLM50X90
50
90
25
25
40
20
44
10
9
1.5
M: M6 x 45
F: M6 x 30
Screws included | Schrauben inklusive | Vis incluses
Inch Standard | Zoll-Norm | Standard en pouce catalogue number
l
+.000 -.010
w
c
f
+.0003 +.0006
+.0000 -.0003
+.000 -.005
t
+.0000 -.0003
m
h
s
+.00 -.01
±.01
r
Pocket Radius
z
shcs
Chamfer
GL100X150
1.000
1.500
.500
.500
.500
.375
.85
.25
.187
.03
M: #10-32 x 1”
GL150X250
1.500
2.500
.750
.750
1.000
.625
1.35
.31
.250
.06
M: 1/4-20 x 1-1/2” F: 1/4-20 x 7/8”
GL200X350
2.000
3.500
1.000
1.000
1.500
.750
1.73
.44
.375
.06
M: 3/8-16 x 2”
GL250X450
2.500
4.500
1.250
1.250
2.000
.875
2.11
.56
.500
.09
M: 1/2-13 x 2-1/4” F: 1/2-13 x 1-1/2”
Note: 260° C max operating temperature.
F: #10-32 x 5/8” F: 3/8-16 x 1-1/4”
CAD insertion point | CAD Einfügemarke | CAD point d'insertion
Hinweis: Maximale Betriebstemperatur bei 260° C Remarque: la température de fonctionnement de 260° C max.
Additional Option: Guide Locks are also available with dual radii for mounting internally as shown at left.
Zusätzliche Option: Flachzentrierungen sind auch mit Doppelradien für die interne Montage erhältlich, wie links dargestellt.
Option supplémentaire: Les verrous de guidage sont également disponibles avec des rayons doubles pour le montage en interne.
To order, specify the catalogue number followed by ”-R”. Ex. GL200X350-R.
Für eine Bestellung geben Sie die Katalognummer an, gefolgt von “-R”. Ex.
Pour la commande, veuillez indiquer la référence Progressive suivi de ”-R”.
B-8
R (4)
R (2) Each
z-series™ x-style side locks
A
A
X P
.03 x 45°
R
C
W
D
S SHCS
S Females (2): m 1.2379 m 1.2344 Male:
h Core: 58-62 HRC, Surface: 80 HRC h Core: 42-48 HRC, Surface: 70 HRC
t
w
x
T
s Titanium Nitride Coated s Salt Bath Nitride
a
c
CAD insertion point | CAD Einfügemarke | CAD point d'insertion
d
r
s
p
catalogue number
+.000 -.002
+.0000 -.0004
+.000 -.002
+.000 -.002
±.01
.0001/.0003 Clearance Per Side
Pocket Radius
±.01
+.001 -.000
shcs
SLX50X87 SLX75X137 SLX75X187 SLX100X137
.500 .750 .750 1.000
2.000 3.000 3.000 4.000
.875 1.375 1.875 1.375
1.375 1.875 1.875 2.375
.87 1.18 1.18 1.43
.750 1.250 1.250 1.500
.187 .250 .250 .500
.312 .375 .375 .500
.250 .313 .313 .375
#10-32 x 5/8” 1/4-20 x 3/4” 1/4-20 x 3/4” 3/8-16 x 1”
Screws included | Schrauben inklusive | Vis incluses
Note: 260° C max operating temperature. Hinweis: Maximale Betriebstemperatur bei 260° C Remarque: la température de fonctionnement de 260° C max.
Shuttle Mould Sets Examples of Shuttle Mould configurations: 2 Female Inserts : 1 Male Insert To order, specify “-SF” after the catalogue number of the lock. Example: SL50X200-SF X GL100X150-SF TL75X125-SF 2 Male Inserts : 1 Female Insert To order, specify “-SM” after the catalogue X number of the lock. Example: SL75X300-SM GL250X450-SM TL112X200-SM Contact Customer Service for Pricing at X CustomerService@procomps.com X
X
Beispiele für Werkzeuge mit zwei Auswerferseiten:
Exemples de configuration de centreurs avecdeux côtés d’éjection
2 weibliche Einsätze: 1 männlicher Einsatz Für eine Bestellung, fügen Sie “-SF” nach der Katalognummer für die Zentriereinheit ein. Beispiel: SL50X200-SF GL100X150-SF TL75X125-SF
2 Inserts femelle : 1 Insert male Bien spécifier “-SF” à la fin de la référence. Exemple: SL50X200-SF GL100X150-SF TL75X125-SF
2 männliche Einsätze : 1 weiblicher Einsatz Für eine Bestellung, geben Sie “-SM” nach der Katalognummer der Zentriereinheit an. Beispiel: SL75X300-SM GL250X450-SM TL112X200-SM Für Preisauskünfte kontaktieren Sie den Kundenservice unter CustomerService@procomps.com
2 Inserts male: 1 insert femelle Bien spécifier “-SM” à la fin de la référence. Exemple: SL75X300-SM GL250X450-SM TL112X200-SM Contactez notre service commercial pour vosdemandes de prix: CustomerService@procomps.com
For custom Locks, refer to the templates in section X. X
Benutzerdefinierte Vorlagen für Mold-Ready-Komponenten finden Sie in Abschnitt X. Pour les centreurs personnalisés, référez-vous aux modèles de la section X.
X
B-9 X
side/top/guide lock selection guide Refer to the chart below to match the correct alignment lock for the corresponding mould size and weight of B-Side and press platen, using four locks per mould. Clean and lubricate lock every 100,000 cycles, and prevent corrosion during mould storage.
RECOMMENDED MAX MOULD SIZE (LXWXH)
Beziehen Sie sich auf die nachfolgende Tabelle, um die passende Feinzentrierung für die entsprechende Werkzeuggröße und das Gewicht der beweglichen-Seite sowie der Maschinenaufspannplatte auszuwählen, wobei vier Zentrierungen pro Werkzeug verwendet werden. Reinigen und Schmieren Sie alle 100.000 Zyklen und vermeiden Sie Korrosion bei der Wiedereinlagerung des Werkzeugs
Des plaques de pression sont utilisées avec quatre centreurs par moule. Nettoyer et lubrifier tous les 100 000 cycles et empêcher la corrosion lors du stockage du moule.
GUIDE LOCKS
TOP LOCKS
TOTAL MAX WEIGHT MOVING HALF + PRESS PLATEN (KG/LBS)
SLM16X50, SLPM16X20 SL37X100, SL50X125 RTI AND MOULDS SLPM16X40, SLPM20X25 SL50X150, SL50X200 196 X 196 X 200 SLPM20X50, SLMS13X38 SLS62X150, SLS62X200 AND SMALLER SLMS16X50 SLR50X125,SLR50X150
GL100X150 GLM25X45
TL50X100, TL62X125 TL75X125, TLM26X35 TLR87X150
900 /2,000
246 X 396 X 400
SLM16X50, SLMS19X75 SL50X125, SL50X150 SLPM25X32, SLPM25X63 SL50X200,SLS62X150 SLPM32X40, SLPM32X80 SLS62x200, SLS75X300 SLPM40X50 SLS75X400, SLR50X150 SLPM40X100 SLR50X200 SLMS19X100
GL100X150 GL150X250 GLM25X45
TL62X125, TL75X125 TLM26X35 TLR87X150 TLR112X200
2,300 / 5,000
396 X 596 X 400
SLM19X75, SLM19X100 SL50X150, SL50X200 SLMS25X125 SL75X300, SLS112X500 SLPM50X56 SLS75X300, SLS75X400 SLPM50X112 SLR75X300, SLR100X400
GL150X250 GLM40X65
TL75X125, TL87X150 TLM26X35, TLM30X45 TLR112X200 TLR150X250
3,200 / 7,000
696 X 796 X 600
SLM19X75, SLM19X100
SL75X300, SLS112X500
GL200X350 GL150X250 GLM40X65
TL100X150, TL100X200 TL112X200, TL112X300 TLM26X35, TLM30X45
4,500 / 10,000
796 X 996 X 700
SLM25X125
SL100X400
GL200X350 GLM40X65
TL112X200, TL112X300 TLM36X55, TLM36X75
6,800 / 15,000
1000 X 1200 X 850
SL125X500
GL250X450 GLM50X90
TL150X250, TL175X300 TLM36X55, TLM36X75
9,000 / 20,000
1200 X 1300 X 950
SL150X600
GL250X450
TL175X300, TL200X350 TLM45X100
11,800 / 26,000
METRIC SIDE LOCKS
SIDE LOCKS
bar lock selection guide BAR CATALOGUE NUMBER
GUIDE CATALOGUE NUMBER
BAR LOCK ENGAGEMENT
BLB100L6
BLG100L1.3, BLG100L1.8
4.50
15,000
BLB125L9
BLG125L1.3, BLG125L2.3
7.00
20,000
B-10
TOTAL MAX KG (LBS) SUPPORTED
BLB137L11
BLG137L1.8, BLG137L3.3
8.50
23,000
BLB150L16
BLG150L2.3, BLG150L3.8
12.50
26,000
BLN150L8
BLG150L2.3, BLG150L3.8
3.75
25,000
BLN250L10
BLG250L4.3
5.00
50,000
BLN350L13
BLG350L4.8
6.00
75,000
US Patent No. 8,821,144 and others pending.
z-series™ 20mm square top locks Z
R
C
D
W S1
M6 thread for lock removal
S2
A
B
T Female: m 1.2379 h Core: 58-62 HRC, Surface: 80 HRC Male:
m 1.2344 h Core: 42-48 HRC, Surface: 70 HRC
catalogue number TLM20X20
t
w
a
b
+.00 -.05
+.00 -.01
+.00 -.05
+.00 -.05
20
20
14
14
s Titanium Nitride Coated s Salt Bath Nitride
c
d
s2 ±.25
Pocket Radius
Chamfer
Center
Center
5
1
±.25
7 80 HRC 9
C
s1
.002/.008 Clearance Per Side
r
z
shcs M: M4 x 25
F: M4 x 10
R
59 ±1 HRC
65 HRC
Lubrication | Schmierung | Lubrification - for SL, TL, GL, BL
42 ±2 HRC
D Lubrication: M6 thread • Non-drying, non-hardening food grade fortolock grease is applied all areas, including the removal particle rings. B • For production, install the locks and wipe down the outside of the Lock only; maintain the grease on the mating surfaces and within the rings.
W
Schmierung: Lubrification: • Nicht trocknendes, nicht härtendes Fett • De la graisse de qualité alimentaire, non in Lebensmittelqualität wird auf alle desséchante et non durcissante, est apBereiche, einschließlich der Partikelringe, pliquée sur toutes les zones, y compris les T aufgetragen. A anneaux de particules. • Installieren Sie die Zentrierungen und • Pour la production, installez les centreurs wischen Sie nur die Außenseite ab; Belaset essuyez l’extérieur du centreur uniquesen Sie Fett auf der Zentrierfläche und ment; maintenir la graisse sur les surfaces innerhalb der Ringe. de contact et dans les anneaux.
Synthetic Mould Grease | Synthetisches Werkzeugfett | Graisse Moule Synthétique Premium synthetic mould grease provides superior lubrication to sliding or moving components within molds and tooling. • Engineered for food and medical moulding environments • Low migration • Should only be applied in a thin layer, by hand
Technical Information: • NSF H1 Registered • Thermally stable to 300 °C
Hochwertiges synthetisches Werkzeugfett sorgt für eine hervorragende Schmierung von gleitenden bzw. beweglichen Teilen innerhalb des Werkzeugs. • Entwickelt für Spritzgießumgebungen der Lebensmittel- und Pharmabranche • Niedrige Migration • Sollte nur von Hand in einer dünnen Schicht aufgetragen werden.
catalogue number
description
SYN-100
100g Tube
Technische Informationen: • NSE H1 Registriert • Wärmebeständig bis 300°C
La graisse synthétique de qualité supérieure procure une lubrification supérieure aux composants coulissants ou mobiles des moules et/ou outillages. • Conçu pour les moules alimentaire et médical • Faible migration • Ne doit être appliqué qu’en couche mince, à la main
Description technique: • Norme NSF H1 • Stable thermiquement jusqu’à 300 °C
B-11
side lock Metric Standard D
X B
50-55 HRC
S1
H C A S2 SHCS
S3
55-60 HRC
T W Z Female: m 1.2842 h 55-60 HRC m 1.2842 h 50-55 HRC Male:
catalogue number
t
w
CAD insertion point | CAD Einfügemarke | CAD point d'insertion
a
b
c
+.00 -.05
+.00 -.01
+.00 -.02
+.00 -.02
13
38
22
22
8.5
SLMS16X50
16
50
21.5
21.5
SLMS19X75
19
75
36
36
SLMS19X100
19
100
45
SLMS25X125
25
125
45
SLMS13X38
d
h
x
z
s1/s2 s3 ±.2
±.2
shcs
7
8
M5-.8 x 15
.002/.008 Clearance Per Side
+ .00 - .04
Corner Chamfer
Chamfer
12
44
5
.5
9.5
17
43
5
1
11
8
M6-1.0 x 18
15
25
72
8
1
18
12.5
M10-1.5 x 20
45
21
35
90
10
1
22
15
M10-1.5 x 20
45
21
45
90
10
1
22
20.5
M10-1.5 x 25
Screws included | Schrauben inklusive | Vis incluses
B-12
side lock Graphite Plugged
R
H -.5 -.7 S2
H -.5 -.7
L
S1
Dg5
S
Wg4
S2
S1
T +.0 -.1
T +.0 -.1 C Z
.5mm
m 1.2842 h 56-60 HRC
CAD insertion point | CAD Einfügemarke | CAD point d'insertion
catalogue number
l
SLPM16X20
20
SLPM16X40
40
SLPM20X25
25
SLPM20X50
50
SLPM25X32
32
SLPM25X63
63
SLPM32X40
40
SLPM32X80
80
SLPM40X50
50
SLPM40X100
100
SLPM50X56
56
SLPM50X112
112
d
t
w
c
h
s1
s2
s
r
z
Screw Size
16
20
40
11
22
7
15
26
6
1
M6-1.0 x 25
20
22
45
13
27
7
19
31
6
1
M6-1.0 x 25
25
25
50
14
36
9
27
35
8
1
M6-1.0 x 30
32
32
63
19
46
11
35
45
8
1
M8-1.25 x 35
40
36
85
22
56
15
40
60
10
1.5
M10-1.5 x 40
50
40
100
24
66
18
48
74
10
1.5
M12-1.75 x 45
Screws included | Schrauben inklusive | Vis incluses
Using grease will inhibit the function of the graphite plugs. Instead, use a light 20 weight oil at startup to begin lubrication.
Der Gebrauch von Fett beeinträchtigt die Funktion der Grafiteinlagen. Verwenden Sie stattdessen ein dünnflüssiges Öl für die Schmierung.
L’utilisation de graisse empêche le bon fonctionnement des bouchons en graphite. Au lieu de cela, utilisez une huile légère au démarrage pour commencer la lubrification.
B-13
cam actions slide components section c
CamAction 100 Series
CamAction 200 Series
CamAction 300/350 Series
CAMM
CAMM
CAMM
C-1
C-2
C-4
Slide Retainers
SRT Bases & Bushings
Wear Plates
SRTM
SRTMBA, SRTMBU
WP
C-7
C-8
C-9
32
cam action
+.05 -.00
®
16.00
6R
100 Series 26 +.05 -.00
20 ±.25 32
30.15*16.00
20
*Note: When the core pin is not shutting off on the inner core wall, the distance from the edge of the insert should be 29.00 for the slide carrier to shut off against the core insert.
+.05 -.00
6R
*Hinweis: Wenn der Kernstift nicht an der inneren Kernwand abtuschiert, sollte geprüft werden, dass der Abstand von der Kante des Einsatzes 29,00 beträgt, damit der Schieberkörper gegen den Kerneinsatz tuschiert.
26 +.05 -.00
±.25
30.15*
*Remarque: Lorsque la broche ne s’arrête pas sur le poinçon empreinte, respecter la cote de 29mm à partir du bord de l’insert, afin que la partie centrale du chariot s’arrête sur le porte empreinte.
21.03
Optional clearance for loading core pin
±.025
25.4 21.03 2.5
Optional clearance for loading core pin M5x.8
±.025
Allows for .675 clearance below slide
Note: 21.03 dimension must be maintained to avoid improper spring pre-load or damage to internal components. Hinweis: Das Maß 21.03 muss beibehalten werden, um eine falsche Federvorspannung oder Schäden an internen Komponenten zu vermeiden.
Remarque: la cote de 21.03mm doit être respectée afin de ne pas endommager le ressort ou d’autres composants.
25.4
Travel 2.5 | Weg | Course = 4mm
Allows for .675 catalogue clearance below slide
M5x.8 thd description
number
CAMM-100
Shoulder Bolt
Metric CamAction Unit
Note: Max operating temperature 148°C.
Driver
Hinweis: Maximale Betriebstemperatur 148° C. Remarque: température de fonctionnement maximale 148°C.
Spring Housing
Replacement parts are available. Ersatzteile sind erhältlich.
Slide Carrier
Les pièces de rechange sont disponibles.
European Patent No. 011495314 Germany Patent No. 69836420.1
C-1
32 +.05 -.00 20
16.00
± .25
29.21* 26 +.05 -.00
cam action
®
200 Series
29.21* .571 +.002 -.000
14.5 +.05 -.00
32 +.05 -.00 20
.2855 R .187 (2)
± .25
.7505 +.002 -.000
14.5 +.05 -.00
16.00
7.25 R 4 (2)
R6
26 +.05 -.00
19.01 +.05 -.00
7.25 R 4 (2) 29.21*
R .125 (2)
R3 (2)
1.1500*
R3 (2)
29.21*
Core Plan View
19.01 +.05 -.00
Cavity Plan View
Note: When the core pin is not shutting off on the inner core wall, the distance from the edge of the insert should be 29.02 for the slide carrier to shut off against the core insert. Hinweis: Wenn der Kernstift nicht an der inneren Kernwand abtuschiert, sollte geprüft werden, dass der Abstand von
.828 ±.001
29.21*der Kante des Einsatzes 29,02 beträgt, damit der Schieberkörper gegen 21.03 den Kerneinsatz tuschiert. ±.025 14.5 +.05 -.00 M6-1dethd 1/4-20 thd Remarque: Lorsque la broche ne s’arrête pas sur le poinçon empreinte, respecter la cote 29.02mm à partir bord 12.7du minus .500 minus de l’insert, afin que la partie centrale du chariot s’arrête sur le porte empreinte. 7.25 total insert total insert preload R 4 (2) preload 21.03
19.01 +.05 -.00
±.025
M6-1 thd
0
12.7 minus total R insert 3 preload (2)
1.000
#10-24 thd
Optional clearance for loading core pin
23.11
29.21*
23.11
25.4
Note: 21.03 dimension must be maintained to ensure proper shut-off. Hinweis: Das Maß 21.03 muss beibehalten werden, um eine ordnungsgemäße Optional clearance for loading core pin Tuschierung zu gewährleisten.
M5-.8 thd Remarque : la cote de 21.03mm doit être respectée afin d’assurer un arrêt correct.
25.4
Optional clearance 21.03 ±.025 for loading
minus nsert ad
ance e pin
R6
1.1500*
M5-.8 thd
core pin
M6-1 thd
12.7 minus total insert preload
Travel | Weg | Course = 5.8 mm
catalogue number CAMM-200 CAMM-200L
description 23.11 Metric CamAction Unit-Standard Driver 25.4 Metric CamAction Unit-Longer Driver
Note: Longer driver allows for extension below parting line up to 76mm. Note: Max operating temperature 148°C.
Optional clearance for loading core pin
Driver
M5-.8 thd
Hinweis: Ein längeres Aktivierungselement ermöglicht eine Verlängerung unterhalb der Trennlinie von bis zu 76 mm. Hinweis: Maximale Betriebstemperatur beträgt 148° C. Remarque : Une butée plus longue permet l’implantation en dessous du plan de joint jusqu’à 76mm. Remarque : température maximale d’utilisation 148°C.
Housing Slide Carrier
Replacement parts are available. Ersatzteile sind erhältlich. Les pièces de rechange sont disponibles.
C-2
European Patent No. 011495314 Germany Patent No. 69836420.1
cam action accessories ®
100/200 Series Core Pins m 1.3343 h 60-62 HRC
s Chrome Plated
catalogue number
d
h
y1
y2
CAPMM-5
4.984 mm 4.992 mm
9.5 mm
12.7 mm
19.05 mm
CAPMM-10
9.985 mm 9.992 mm
9.5 mm
12.7 mm
17.40 mm
76mm
H
9mm max
For use with 100 and 200 Series CamActions. When using with the 100 Series, 2° min draft per side is required in the moulding area.
Core Pin range shown. Pins are keyed to fit into slot on slide carrier.
Zur Verwendung mit Schiebern der Serien 100 und 200. Bei Verwendung mit der Serie 100 sind mindestens 2° Entformschräge pro Seite am Formteil erforderlich.
Ansicht Kernstiftbereich. Die Stifte sind so kodiert, dass sie in den Schlitz des Schieberkörpers passen.
Y1
Y2
Vue de côté du chariot avec emplacement des broches. Les broches sont indexées pour s’installer dans le coulisseau central.
Pour une utilisation avec les séries CamAction 100 et 200. Lors de l’utilisation avec la série 100, un angle de démoulage de 2° minimum par côté est nécessaire.
m 1.3343 h 60-62 HRC
200 Series Core Pins
s Chrome Plated
3.00" (76mm)
catalogue number
d
h
CAP2MM-13
13.002 mm 13.007 mm
9.5 mm
.343 (8.73 mm
76mm
D D
For use with 200 Series CamActions only.
8.73 mm
61 ±1 HRC
H
Nur für den Gebrauch mit Schiebern der 200er Serie.
61 ±1 HRC
Pour utilisation avec série 200 uniquement.
m 1.2311/1.2330 Pre-Hard
6mm diameter with flats
61 1 HRC
D
H
200 Series Inserts
s Salt Bath Nitride
catalogue number
t
w
h
CSE2MM-16X19
15.98 mm
19 mm
9.5 mm
W
+.05 mm -.00 mm
8.73 mm
76mm
W +.001 +.025 mm -.000 -.000 mm
T[
For use with 200 Series CamActions only.
[
.343 (8.73 mm)
3.00" (76mm)
+.05 mm -.00 mm
Nur für den Gebrauch mit Schiebern der 200er Serie.
T
+.025 mm Pour utilisation avec série 200 uniquement. +.001 -.000 [ -.000 mm [
H H
66 ±2 HRC
“A” Extensions
Thread for SHCS to suit
L D 30 2 HRC 9.5mm min
Cut to suit
C’Bore for SHCS
12.7 mm min
R
165 B
C
C’Bore for SHCS (2)
m 1.7225 h 28-32 HRC
catalogue number
d
l
shcs
CAEMM-100
19 mm
28 mm
M6-1
“B” Riser
Cut to suit
m 1.7225 h 28-32 HRC
A
catalogue number
B Thread for SHCS to suit
European Patent No. 011495314 Germany Patent No. 69836420.1
76mm
s Black Oxide
a
s Black Oxide
b
c
r
CBRMM-100 44 mm 38 mm 10 mm 12.7 mm
shcs M6-1
C-3
cam action
®
300 Series
Core Plan View | Sicht auf den Kern | Vue côté Poinçon +.050 -.000
60 30
Cavity Plan View | Sicht auf die Kavität | Vue côté Empreinte
M6-1 x 12mm Deep
M10-1.5 x 20mm Deep
38 +.05 -.00 19
+.050
40 -.000
40 +.05 -.00
R 6.35 R 6.35 12
X
±.127
X + 14.12
52
12
± .12
±.127
Machine this surface to suit
R .7 16*
+.025 -.000
16* +.025 -.000 Overall Length (124mm max.) 11.11 Distance to SHCS center
X + 14.12
X + 14.12
22 Insert
7.3 Ref 41.6 +.025 -.000
Lock Depth
30.5 Ref Pocket can be cleared in back of plate to allow for easy screw installation
.6 Clearance
X
*Minus pre-load | *Negative Vorspannung | * Moins la Pré-charge
Pocket shown cleared
X
CAD insertion point | CAD Einfügemarke | CAD point d'insertion
Lock Slide (with Slide Retainer)
Travel | Weg | Course = 6.35 mm
catalogue number
description
CAMM-300
Metric CamAction Unit-Standard Lock
CAMM-300L
Metric CamAction Unit-Longer Lock
Insert (Sold on page C-6)
Guide
Each assembly includes SRTM-04 Slide Retainer and (3) mounting screws. Individual replacement parts are available.
C-4
Jede Baugruppe beinhaltet SRTM-04 Schiebeverriegelungen und (3) Befestigungsschrauben. Einzelne Ersatzteile sind erhältlich.
Chaque ensemble comprend un verrou SRTM-04 et les vis de montages (3). Des pièces de rechange individuelles sont disponibles.
European Patent No. 011495314 Germany Patent No. 69836420.1
1.500
+.002 -.000
1.500
+.002 -.000
cam action
®
.25 R
350 Series
X
.437 ±.005
.25 R
2.312
X + .250
±.005
Core Plan View | Sicht auf den Kern | Vue côté Poinçon 64
+.05 -.00
.500 ±.005
Cavity Plan View | Sicht auf die Kavität | Vue côté Empreinte 40 +.05 -.00
M10-1.5 x 20 Deep
M6-1 x 12 Deep
20
40 +.05 -.00
40 +.05 -.00
7R ±.1
54
7R
X
12
X+6
±.1
14 ±.1
R .5 20*
+.02 -.00
11.4 Distance to SHCS center
46.5
Lock
Slide (with Slide Retainer)
X+6
22 Insert
Insert (Sold on page C-6)
+.02 -.00
Pocket can be cleared in back of plate to allow for easy screw installation
1mm Clearance
X Guide
*Minus pre-load | *Negative Vorspannung | * Moins la Pré-charge
Travel | Reise | Course = 6.35 mm
catalogue number
description
CAMM-350
CamAction Unit: 350 Series (Metric)
CAD insertion point | CAD Einfügemarke | CAD point d'insertion
Each assembly includes SRTM-04 Slide Retainer and (3) mounting screws. Individual replacement parts are available.
European Patent No. 011495314 Germany Patent No. 69836420.1
Jede Baugruppe beinhaltet SRTM-04 Schiebeverriegelungen und (3) Befestigungsschrauben. Einzelne Ersatzteile sind erhältlich.
Chaque ensemble comprend un verrou SRTM-04 et les vis de montages (3). Des pièces de rechange individuelles sont disponibles.
C-5
cam action accessories ®
300 Series Core Pins m 1.3343 h 58-62 HRC s Chrome Plated
catalogue number
d
thd
c
CAP3MM-19
19.009 mm 19.019 mm
M6-1
20 mm
6.00" (152mm)
THD
L
C
+.010 -.000
D
Socket head cap screw included.
Notched for orientation
Innensechskantschraube enthalten. Vis CHC incluses.
300/350 Series Inserts +.002 -.000
s Salt Bath Nitride
m 1.2311/1.2330 Pre-Hard
catalogue number
h
w
l
thd
w
CSE3MM-12
22 mm
38 mm
12 mm
M6 - 1mm
15 mm
CSE3MM-50
22 mm
38 mm
50 mm
M6 - 1mm
15 mm
W
[
+.05 mm -.00 mm
L [
+.010 -.000
mm [ +.25 -.00 mm [
C
+.002 -.000
H+.05 mm [
-.00 mm
[
THD
Socket head cap screw included. Innensechskantschraube enthalten. Vis CHC incluses.
300 Series UL Adapters
A UL Adapter
THD
W
H
+.000 -.005 +.00 -.12
+.000 -.002 +.00 -.05
[
T
[
+.000 +.00 -.005 -.12
[
[
B
[ C
[
D m 1.7225
+.000 +.00 -.002 -.05
Add .0015 (.04mm) to Core Blade diameter or T & W dimensions for clearance
U-Coupling
Core Blade
.30 (8mm)
s Salt Bath Nitride
catalogue number
t
w
h
d
thd
a
b
c
compatible u-coupling
CTGMM-300
23 mm
23 mm
6 mm
2.5 mm
M6-1
12 mm
10 mm
30.15 mm
UCMM22
Socket head cap screw included. Core Blades and U-Couplings are sold on page D-2 and D-3.
C-6
Innensechskantschraube enthalten. Schrägschieberkerne und U-Kupplungen sind auf den Seien D-2 und D-3 erhältlich.
Vis CHC incluses. Les lames Core Blades et les pièces d’accouplement U-Couplings sont vendues séparément en page D-2 et D-3.
European Patent No. 011495314 Germany Patent No. 69836420.1
slide retainers SRT® Series Slide Retainers hold from 1 to 36 kgs each. The SRT features colour-coded springs that indicate force rating and a compact design that allows for installation in a mould base or wear plates. SRT® Schiebeverriegelungen halten zuverlässig 1 bis 36 kg. Die SRT Schiebeverriegelung verfügt über farbkodierte Federn zur Anzeige der Kraftwerte und über ein kompaktes Design, das den Einbau in einen Formenaubau oder in eine Verschleißplatte ermöglicht. Les verrous de la série SRT® de Progressive retiennent de 1 à 36 kg chacun. Le SRT dispose de ressorts à code couleur pour indiquer la force nominale et un design compact qui permet une installation dans une carcasse ou des plaques d’usure.
Roller: m 1.3343
h 60-62 HRC s Titanium Nitride Coated 80 HRC
slide retainer catalogue number
Max Weight Per Unit (kgs)
SRTM-01 SRTM-02 SRTM-04 SRTM-09 SRTM-13 SRTM-22 SRTM-36
1 2 4 9 13 22 36
slide retainer l s t Ød ±.025
±.05
Screws (2)
Minimum Thread Depth
15.9
4.06
3.95
M3 x .5
1.9
19.1
12.70
3.80
M4 x .7
4.8
22.3
19.05
3.80
M4 x .7
6.2
CAD insertion point | CAD Einfügemarke | CAD point d'insertion
ØD OPTIONAL CLEAT
e
+.1 -.0
H
J
Color
cleat g c
h
j
cleat catalogue number
±.025
±.05
Screws (2)
Minimum Thread Depth
SRTMC-04
6.35
4.85
M3 x .5
6.35
SRTMC-13
6.35
6.35
M3 x .5
6.35
SRTMC-36
6.35
7.60
M3 x .5
6.35
GRN BLU RED GRN BLU RED YEL
Cleats sold separately | Gegenstücke sind einzeln erhältlich. | Cales vendues séparément
SLIDE 9 KGS
SLIDE 26 KGS
.01 x 45˚ (2) SRTM-9
SRTM-13
SRTM-13
G L SLIDE RETAINER
E
Do not chamfer screw threads
S
T
C Cleat
Technical Information: • Maximum operating temperature is 218° C. • Match total Slide Retainer Spring force to slide weight; excess spring force will induce wear. • Do not chamfer screw threads. • Machine 10° lead-in on all slides to aid in assembly once the SRT is installed. • Optional Bases and Bushings (shown on C-8) allow for installation in plates made from soft materials such as aluminum.
US Patent Nos. 7,229,269 & 7,431,581, with other patents issued and pending.
Select the SRT to match the slide weight.
Or add the force of multiple SRTs to match the slide weight.
Wählen Sie SRT Schiebeverriegelung für das passende Schiebergewicht.
Oder fügen Sie mehrere Schiebeverriegelungen zusammen, um das passende Gewicht zu erhalten.
Sélectionnez le SRT pour correspondre au poids du chariot.
Ou ajoutez la force de plusieurs SRT pour correspondre au poids du chariot.
Technische Informationen: • Maximale Betriebstemperatur beträgt 218° C. • Nutzen Sie für die Schiebeverriegelungen die passende Federkraft. Übermäßige Federkraft kann zu Verschleiß führen. • Gewinde nicht fasen. • Fertigen Sie an allen Schiebern 10° Einführschrägen zur Unterstützung bei der Montage. • Auf der folgenden Seite (C-8) erhältliche optionale Sockel und Buchsen ermöglichen den Einbau in Platten aus weichen Materialien wie Aluminium.
Informations Techniques: • La température maximale de fonctionnement est de 218° C. • Faire correspondre la force de ressort du nombre total de verrous au poids du chariot; une force de ressort excessive pourrait induire une usure. • Ne pas chanfreiner les filetages. • Usiner une entrée à 10° sur toutes les chariots pour faciliter l’assemblage une fois la SRT installée. • Les bases et les bagues facultatives illustrées sur la page suivante(C-8), permettent l’installation dans des plaques fabriquées à partir des matériaux souples tels que l’aluminium.
C-7
srt design guidelines retainer catalogue number SRTM-01 SRTM-02 SRTM-04 SRTM-09 SRTM-13 SRTM-22 SRTM-36 NO CHAMFER NO CHAMFER PAS DE CHANFREIN
t
k
a
Thread (2)
Tap Class Required
V-Groove
10° Angle Lead - In
M3x.5
6H D3
1 mm
.50 mm
M4x.7
6H D4
2 mm
1.00 mm
M4x.7
6H D4
2 mm
1.27 mm
A
K
90°
A
10°
10°
T
SRT Bases
SRT Bushings
Base: m 1.2379 h 58-60 HRC
Bushing: m 1.2379 h 58-60 HRC
+.1 -.0
±.03
l
s1
t
SRTMBA-04
15.9
9.56
8.0
5.50
5.30 M2.5-.45 x 8
SRTMBA-13
19.1
19.05
11.0
6.35
4.95
M3-.5 x 8
SRTMBA-36
22.3 25.40
13.0
6.35
4.95
M3-.5 x 8
catalogue number
Ød
±.1
e
Screws (2)
REF
L
T
+.05 -.00
l
s1
t
SRTM-01 SRTM-02 SRTM-04 SRTM-09 SRTM-13 SRTM-22 SRTM-36
SRTMBU-04
22.3
9.50
8.0
SRTMBU-13
25.4
19.10
SRTMBU-36
28.5 25.40
E
e
Screws (2)
5.44
5.35
M2.5-.45 x 8
11.0
6.35
4.95
M3-.5 x 8
13.0
6.35
4.95
M3-.5 x 8
±.1
REF
E Screws
S1 CENTERED
Ød
L T
Screws
ØD
+.03 -.00
use with catalogue number
ØD
S1 CENTERED
CAD insertion point | CAD Einfügemarke | CAD point d'insertion
SRT Bases enable the Slide Retainer to be installed on a hardened plate when mould base steel is aluminum, for example. (SRTMBA04 shown in graphics.)
SRT Bushings accept the standard Slide Retainer to allow for installation in soft materials (aluminum.) Also, the SRT Bushing can provide hardened guidance against wear rather than bearing on a bronze wear plate. (SRTMBU-13 shown in graphics.)
SRT Sockel ermöglichen die Installation der Schiebeverriegelung in eine gehärtete Platte, wenn das Werkzeug beispielsweise aus Aluminium besteht. (SRTMBA04 in Grafiken abgebildet.)
SRT Buchsen ermöglichen es, eine Standard-Schiebeverriegelung auch bei weichem Material wie Aluminium zu verwenden. Zusätzlich kann die SRT Buchse eine gehärtete Führung gegen Verschleiß bieten, im Vergleich zu einer Verschleißplatte aus Bronze. (SRTMBU-13 in Grafiken gezeigt.)
Les Bases SRT permettent, par exemple, l’installation d’un verrou dans une plaque durcie lorsque l’acier de la carcasse est en aluminium. (SRTMBA04 montré dans les images.)
Les Bagues SRT acceptent le verrou standard pour permettre leur installation dans des matériaux souples(aluminium). La Bague SRT peut aussi fournir un guidage durci contre l’usure, plutôt que de s’appuyer sur une plaque d’usure en bronze. (SRTMBU-13 montré dans les images.)
C-8
US Patent Nos. 7,229,269 & 7,431,581, with other patents issued and pending.
wear plates
Wear Plates use Z-Series technology to reduce wear and increase life expectancy. • Standardised “plug and play” design ready to install. • Place multiple sizes in a series as needed. • Low Head Cap Screws included.
R
L
Verschleißplatten verwenden die Z-SerienTechnologie, um den Verschleiß zu reduzieren und die Betriebsdauer zu verlängern. • Standardisiertes Plug-and-Play-Design für die Installation. • Platzieren Sie nach Bedarf mehrere Größen in einer Reihe. • Flachkopfschrauben enthalten.
Les plaques d’usure utilisent la technologie Z-Séries pour réduire l’usure et augmenter la durée de vie. • Conception «plug and play» standardisée prête à installer. • Placez plusieurs tailles dans une série si nécessaire. • Vis d’assemblage à tête basse incluses.
L
R
.04 x 45°
W
.04 x 45°
W S1
.250±.0005
.250±.0005
m 1.2344 h Core: 42-48 HRC, Surface: 70 HRC s Salt Bath Nitride
catalogue number WP050X050
w
l
r
+.000 - .005
+.000 - .005
Pocket Radius
.500
.500
.125
m 1.2344 h Core : 42-48 HRC, Surface: 70 HRC s Salt Bath Nitride
lhcs (1)
catalogue number
#8-32 X .38
WP050X250 WP050X350 WP075X400 WP075X600
w
l
R
±.005
Pocket Radius
.500 .500 .750 .750
2.500 3.500 4.000 6.000
.875 1.375 1.500 2.500
.094 .094 .125 .125
L
S2
S1
S1 .250±.0005
.250±.0005
m 1.2344 h Core: 42-48 HRC, Surface: 70 HRC s Salt Bath Nitride
WP050X150 WP075X200
l
#8-32 X .38 #8-32 X .38 #10-32 X .38 #10-32 X .38
.04 x 45°
W
w
lhcs (3)
.04 x 45°
W
catalogue number
r
+.000 - .005
R
L
s1
+.000 - .005
s1
r
+.000 - .005
+.000 - .005
±.005
Pocket Radius
.500 .750
1.500 2.000
.375 .500
.094 .125
lhcs (2) #8-32 X .38 #10-32 X .38
m 1.2344 h Core: 42-48 HRC, Surface: 70 HRC s Salt Bath Nitride catalogue number
WP125X300 WP125X500 WP125X800 WP200X600 WP200X800 WP250X600 WP300X600
w
l
s1
s2
r
+.000 - .005
+.000 - .005
±.005
±.005
Pocket Radius
1.250 1.250 1.250 2.000 2.000 2.500 3.000
3.000 5.000 8.000 6.000 8.000 6.000 6.000
1.00 2.00 3.50 2.50 3.50 2.50 2.50
.375 .375 .375 .625 .625 .750 .750
.187 .187 .187 .187 .187 .187 .187
lhcs (6) #10-32 X .38 #10-32 X .38 #10-32 X .38 #10-32 X .38 #10-32 X .38 #10-32 X .38 #10-32 X .38
CAD insertion point | CAD Einfügemarke | CAD point d'insertion
Wear Plates can be cut as long as the edges have radii. Verschleißplatten können bearbeitet werden, solange die Kanten dabei Radien behalten. Les plaques d’usure peuvent être coupées à condition que les bords aient des rayons.
US Patent No. 8,821,144 and others pending.
C-9
lifters undercut release section d
UniLifter System
ModuLifter System
FlexiCore System
CBMM, UCMM, TGMM
MLB, MLC, MLR, MLH
FCA, FCR, FCDA
D-1
D-4
D-10
Lifter Blades & Cores LBA, LCA D-14
unilifter
®
undercut release system
U-Coupling
Core Blade
T-Gibs The UniLifter undercut release system incorporates a three piece set: Core Blade, U-Coupling, and T-Gib.
Das UniLifter Hinterschnitt-Entformungssystem enthält ein dreiteiliges Set: Schrägschieberkern, U-Kupplung und T-Führungsleiste.
La cale montante UniLifter est composèe de trois èlèments: le corps de cale, la pièce d’accouplement et l’embase en T.
UniLifter Travel = Ejector Plate Travel x tan ( ANGLE)
ANGLE
CLEARANCE
ANGLE is established
through support plate
in core insert by the mold builder
U-Coupling seats the core blade to the correct angle while traveling along the T-Gib
Ejector Plate Travel
Mould Closed Werkzeug geschlossen | Moule Fermé Application Guidelines: • Typical angle is 5-10˚, though users report success at greater angles with guides installed. Contact Engineering for application review. • Guided Ejection is recommended, and if there is less than half of the Core Blade bearing in the insert, lifter guide plates should be added. • Recommended clearance is .001”-.0015” (.025-.038 mm) where permissible. • Core insert material should be at least 10 HRC higher in hardness than the Core Blade, and for maximum longevity consider coatings or treatments for increased lubricity or hardness. • Locking angles can be designed to accept moulding pressure, and non-standard sizes or pre-roughed Core Blades can be provided by accessing www.procomps.com.
Mould Open Werkzeug offen | Moule Ouvert
Anwendungsrichtlinien: • Üblicher Winkel ist 5-10°. Dennoch berichten Anwender von erfolgreichen Einsätzen bei größeren Winkeln. Kontaktieren Sie Engineering für die Anwendungssprüfung. • Eine geführte Bewegung wird empfohlen. Zusätzliche Führungseinsätze sind einzubauen, wenn weniger als die halbe Länge des Schrägschieberkerns geführt ist. • Ein Führungsspiel von 0,025 bis 0,038 mm wird empfohlen. • Der Kavitäteneinsatz sollte mindestens 10 HRC härter sein als der Schrägschieberkern. Für maximale Langlebigkeit kommen Beschichtungen oder Behandlungen für erhöhte Gleiteigenschaften oder Härte in Betracht. • Schließwinkel können so ausgelegt werden, dass sie den Spritzdruck aufnehmen können. Vom Standard abweichende Schrägschieberkerne können Sie unter www.procomps.com anfragen.
Guide d’application: • Habituellement inclinée à 5-10°, et même au-delà dans certains cas. Contacter notre service développement pour une étude de votre application. • La plaque d’éjection doit être guidée idéalement et si moins de la moitié de la cale est guidée, utiliser les plaques de guidage pour cale montante. • Jeu nécessaire .025-.038mm. • La dureté de l’empreinte doit être supérieure de 10 HRC environ que cede la cale montante, des traitements de surface permettront également d’améliorer le glissement et augmenteront la durée de vie de l’ensemble. • Des coins de verrouillage peuvent être mis en place pour absorber la pression d’injection, les cales sont disponibles également en hors standard ou en ébauche.
D-1 Patented System
unilifter
®
Flat Core Blades: Metric Standard
mw
UniLifter 10mm
r
10
ht
catalogue number
5
CBMM10X10L250 CBMM10X20L250 CBMM15X15L250 CBMM15X30L400 CBMM20X10L250 CBMM20X20L400 CBMM30X15L400
m 1.2344 h 38-42 HRC +.000 -.025
t
+.000 -.025
w
+2 -0
l
mt
10.25 10.25 15.25 15.25 20.25 20.25 30.25
10.25 20.25 15.25 30.25 10.25 20.25 15.25
250 250 250 400 250 400 400
10.0 10.0 15.0 15.0 15.0 15.0 15.0
Flat Core Blades - Inch Standard
mw
r
ht
MiniLifter® .250
.250
.156
UniLifter .500
.406
.187
XL 1.000
.875
.375
catalogue number CBS37X25L8 CBS50X25L8 CBS75X37L8 CBS50X50L8 CBS50X50L14 CBS50X100L8 CBS50X100L14 CBS50X150L14 CBS75X50L14 CBS75X150L8 CBS75X150L14 CBS100X50L8 CBS100X50L14 CBS150X50L8 CBS150X50L14 CBS150X75L8 CBS150X75L14 CBS100X100L10 CBS100X100L18 CBS100X150L10 CBS100X150L18 CBS150X100L10 CBS150X100L18
+.000 -.001
t
+.000 -.001
r
ht
catalogue number
UniLifter
10
5
CBMM10DL250 CBMM15DL250
w
+.06 -.00
l
mt
.385 .510 .760 .510 .510 .510 .510 .510 .760 .760 .760 1.010 1.010 1.510 1.510 1.510 1.510 1.010 1.010 1.010 1.010 1.510 1.510
.260 .260 .385 .510 .510 1.010 1.010 1.510 .510 1.510 1.510 .510 .510 .510 .510 .760 .760 1.010 1.010 1.510 1.510 1.010 1.010
8 8 8 8 14 8 14 14 14 8 14 8 14 8 14 8 14 10 18 10 18 10 18
.25 .31 .31 .49 .49 .49 .49 .49 .62 .62 .62 .62 .62 .62 .62 .62 .62 1.00 1.00 1.00 1.00 1.00 1.00
+2 -0
l
mt
10.00 15.00
250 250
10.0 10.0
Round Core Blades - Inch Standard
l
mt
CBS43DL8
.437
8
.31
CBS75DL8 CBS75DL14 CBS75DL18 CBS125DL10 CBS125DL18
.750 .750 .750 1.250 1.250
8 14 18 10 18
.62 .62 .62 1.00 1.00
ht
catalogue number
MiniLifter .250
.250
.156
UniLifter .500
.406
.187
XL 1.000
.875
.375
MT
MW
R
T
d
MIN. THK.
L
40 ±2 HRC
HT
MT D-2
HT
m 1.2344 h 38-42 HRC +.06 -.00
r
40 ±2 HRC
MIN. THK.
+.000 -.001
mw
L
D
m 1.2344 h 38-42 HRC
d
T
MIN. THK.
W +.000 -.025
D
W
m 1.2344 h 38-42 HRC
Round Core Blades - Metric Standard
mw
MIN. THK.
R
MW
40 ±2 HRC
40 ± HR
unilifter
®
m 1.2344
U-Couplings - Metric Standard
s Salt Bath Nitride
series
r
rc
catalogue number
cw
cl
ch
UniLifter
10
6
UCMM22
22
18
25
CH m 1.2344
RC
r
rc
catalogue number
cw
cl
ch
MiniLifter
.250
.125
UCM50
.50
.44
.62
UniLifter
.406
.187
UCU87
.87
.75
.87
XL
.875
.125
UCX175
1.75
1.50
1.65
series
(CENTER OF R)
CW
CL
U-Couplings - Inch Standard
s Salt Bath Nitride
TD* TH TL
TW
m 1.7225
T-Gibs - Metric Standard
h 28-32 HRC s Salt Bath Nitride
series
tw
th
MiniLifter
22
13
+.000 -.025
+.25 -.00
td* tr +.25 -.00
6
5
shcs
(included)
M-5x20
ts
tl
TGMM10
10
33
10
TGMM30
15
52
30
catalogue number
+.00 -.25
travel allowed
SHCS(1)
TGM31 TS
TR
SHCS(2)
m 1.7225
TGM100
SHCS(1)
series MiniLifter
TGU25
SHCS(2)
TS
TGU50, TGU100, TGU150 TGX50, TGX100, TGX250 TGMM10, TGMM30
TGMM30-17
UniLifter
XL
T-Gibs - Inch Standard
h 28-32 HRC s Salt Bath Nitride
tw +.000 -.001
.500
.875
1.750
th +.010 -.000
.500
.468
.615
td* tr +.010 -.000
.344
.219
.250
shcs
(included)
.093
.187
.312
#10-32x1
1/4-20x3/4
3/8-16x11/4
catalogue number
ts
tl
+.000 -.010
travel allowed
TGM31
-
.750
.312
TGM100
.500
1.50
1.000
TGU25
-
1.00
.250
TGU50
.375
1.25
.500
TGU100
.625
1.75
1.000 1.500
TGU150
.750
2.25
TGX50
.625
2.00
.500
TGX100
.875
2.50
1.000
TGX250
1.375
4.00
2.500
*TD Includes fitting stock for final adjustments. **TD beinhaltet. | *TD: inclue une sur-épaisseur pour l’ajustage final de la hauteur.
D-3
modulifter™ A standardized modular lifter assembly simplifies undercut release: • Specialized design for accelerated and decelerated applications. • Additional lifter cooling options and components available.
Eine standardisierte modulare Schrägschieber-Baugruppe vereinfacht die Hinterschnitt-Freigabe: • Spezielles Design für beschleunigte und verzögerte Anwendungen. • Zusätzliche Optionen und Komponenten für Schrägschieberkühlung erhältlich.
Un ensemble cale montante + coulisseau standard: • Conception spéciale pour des applications avec accélération ou décélération. • Option de régulation intégrée ainsi que des composants de régulation.
Straight Travel | Synchrone Bewegung zum Auswerfer | Coulisseau course standard horizontale
Accelerated/Decelerated Options | Beschleunigte / verlangsamte Bewegung zum Auswerfer | Coulisseau avec plan incliné pour accélération et décélération
Cooled: Single Rod In/Out | Gekühlt: Einzelkern Ein/Aus | Régulée: Entrée/sortie sur une seule cale
Cooled: Dual Rod In/Out | Gekühlt: Doppelkern Ein/Aus | Régulée: Entrée sur une cale/sortie sur l’autre cale
D-4
modulifter™ D F L
A
H
B C
Aº SL
W
D F
B C
Cale (vendue séparément) Embase assemblée incluant:
B
• • • •
C
SHCS
.125 +.001 -.000
A
A
D F
Rod (sold separately) Base Assembly includes: • Rod Coupling Assembly • Gibs (2) • Mounting Screws (4) • Dowels installed
Kern (separat erhältlich) Basisbaugruppe erhält: • Kernkupplungseinheit • Führung (2x) • Befestigungsschrauben (4x) • Zylinderstift installiert
A
Pièce d’accouplement Glissières (2) Vis de montage (4) Goupilles installées
.125 +.001 -.000
2 H
C
G B
SL Aº SL
Base Assembly Gibs/Coupling: m 1045 h 28-32 HRC s Nitride
L nominal rod diameter Ø 1/2 5/8 3/4 W 1 1-1/4 1-1/2
Slides: m C86300 (Graphite Plugs if specified)
l
catalogue number
a=0°
a=5°
MLBA050 MLBA063 MLBA075 MLBA100 MLBA125 MLBA150
MLBA050-5 MLBA063-5 MLBA075-5 MLBA100-5 MLBA125-5 MLBA150-5
Note: Includes (4) SHCS and (4) Dowels. For ModuLifter BaseSHCS Assemblies with different Gib angles, contact tech@procomps.com. To order with Graphite Plugged Base, add GP to the part number as shown, Ex: MLBAGPxxx.
a=10°
+ .000 - .015
MLBA050-10 2.250 MLBA063-10 2.625 MLBA075-10 2.750 G MLBA100-10 3.125 MLBA125-10 3.875 MLBA150-10 4.750
w
h
L
+ .000 - .002
+ .000 - .001
2.250 2.500 3.000 3.250 4.000 4.250
1.375 1.375 1.750 1.750 2.250 THD 2.500
F
d
+ .0003 - .0000
.5003 .6253 .7503 1.0003 1.2503 1.5003
Hinweis: Beinhaltet (4x) SHCS und (4x) Zylinderstifte. Für ModuLifter-Basisbaugruppen mit unterschiedlichen Führungswinkeln kontaktieren Sie tech@procomps.com. Für die Bestellung der Basis mit Graphit fügen Sie bei der Bestellnummer GP hinzu, zB: MLBAGPxxx.
f
+ .0015 - .0000
shcs
.4505 .5905 .6905 .8755 1.1605 1.4005
1/4-20 x 1-1/2 1/4-20 x 1-1/2 5/16-18 x 2 5/16-18 x 2 3/8-16 x 2-1/2 3/8-16 x 2-3/4
sl 1.38 1.57 1.57 1.77 2.76 3.15
travel (l-sl) .87 1.06 1.18 1.35 1.12 1.60
Note: inclue 4 Vis CHC et 4 goupilles. Pour des applications avec des angles d’inclinaison différents contacter le service développement (tech@procomps. com). Pour avoir des glissières avec plaques en bronze graphité ajouter GP à la référence par exemple : MLBAGPxxx
Lifter Rod G D
F Thread for SHCS
L m 1045 h Core: 28-32 HRC, Surface: 56-58 HRC
d
Note: Includes (1) screw for installation.For additional Lifter Rod lengths, contact tech@procomps.com. Hinweis: Enthält (1x) Schraube für die Installation. Für weitere Schrägschieberkernlängen kontaktieren Sie tech@ procomps.com. Note: Inclue 1 vis CHC pour fixation, pour des longueurs de cales hors standard contactez tech@procomps.com
+ .0000 - .0003
.500 .625 .750 1.000 1.250 1.500
l
f
g
catalogue number
+ .13 - .00
+ .000 - .0 0 1
+ .03 - .00
shcs
MLR050L14 MLR063L14 MLR075L16 MLR100L16 MLR125L18 MLR150L18
14 14 16 16 18 18
.450 .590 .690 .875 1.160 1.400
.50 .56 .68 .75 .94 1.00
1/4-20 x 5/8 5/16-18 x 3/4 3/8-16 x 7/8 1/2-13 x 1 5/8-11 x 1-1/2 5/8-11 x 1-1/2
CAD insertion point | CAD Einfügemarke | CAD point d'insertion
D-5
The ModuLifter Cooling Base Assemblies have Die ModuLifter Kühlungsbaugruppe bietet (3) Les assemblages de base de refroidissement three (3) options for varying water connections. Möglichkeiten das Wasser anzuschließen. ModuLifter ont trois (3) options pour faire varier les connexions d’eau.
modulifter™ The ModuLifter Cooling Base Assemblies have three (3) options for varying water connections.
L
Die ModuLifter Kühlungsbaugruppe bietet (3) Möglichkeiten das Wasser anzuschließen.Spezielles Design für beschleunigte und verzögerte Anwendungen. Rod (sold separately) Base Assembly includes: B • Rod Coupling Assembly C • Gibs (2) • Mounting Screws (4) • Dowels installed D Cascade (sold separately)
Kern (separat erhältlich) Basisgruppe beinhaltet: B • Kernkupplungseinheit C • Führung (2x) • Befestigungsschrauben (4x) • Zylinderstifte installiert D Kaskade (separat erhältlich)
A
W
L’embase de cale montante ModuLifter régulée possède 3 options d’alimentation différentes.
A
A
Cale (vendue séparément) L’embase assemblée comprend: B • Pièce d’accouplement C • Glissières (2) • Vis de montage (4) • Goupilles installées D Fontaine (vendue séparément)
A
SHCS
D F
.125 +.001 -.000
H
C
B
Aº
OD
D
SL
Cooled Base Assembly Slides: m C86300 (Graphite Plugs if specified)
Gibs/Coupling: m 1045 h 28-32 HRC s Nitride
nominal rod diameter 5/8 3/4 1 1-1/4 1-1/2
l
catalogue number
a=0°
a=5°
a=10°
+ .000 - .015
w
+ .000 - .002
h
d
+ .000 - .001
MLCBA063 MLCBA063-5 MLCBA063-10 2.625 2.500 1.375 MLCBA075 MLCBA075-5 MLCBA075-10 2.750 3.000 1.750 MLCBA100 MLCBA100-5 MLCBA100-10 3.125 3.250 1.750 MLCBA125 MLCBA125-5 MLCBA125-10 3.875 4.000 2.250 MLCBA150 MLCBA150-5 MLCBA150-10 4.750 4.250 2.500
Note: Includes (4) SHCS and (4) Dowels. For ModuLifter Base Assemblies with different Gib angles, contact tech@procomps.com. To order with Graphite Plugged Base, add GP to the part number as shown, Ex: MLBAGPxxx.
f
sl
+ .0003 - .0000
+ .0015 - .0000
shcs
.6253 .7503 1.0003 1.2503 1.5003
.5905 .6905 .8755 1.1605 1.4005
1/4-20 x 1-1/2 5/16-18 x 2 5/16-18 x 2 3/8-16 x 2-1/2 3/8-16 x 2-3/4
Hinweis: Beinhaltet (4x) SHCS und (4x) Zylinderstifte. Für ModuLifter-Basisbaugruppen mit unterschiedlichen Führungswinkeln kontaktieren Sie tech@procomps.com. Für die Bestellung der Basis mit Graphit fügen Sie bei der Bestellnummer GP hinzu, zB: MLBAGPxxx.
1.57 1.57 1.77 2.76 3.15
ROD
travel (l-sl) 1.06 1.18 1.35 1.12 1.60
Note: inclue 4 Vis CHC et 4 goupilles. Pour des applications avec des angles d’inclinaison différents contacter le service développement (tech@procomps. T2 com). Pour avoir des glissières avec plaques en bronze graphité ajouter GP à la référence par exemple : NUT MLBAGPxxx
Cooled Lifter Rod T2
OAL
NUT
ROD
G
OD F
T1
L
ID
m 1045 h Core: 28-32 HRC, Surface: 56-58 HRC
od
+ .0000 - .0003
catalogue number
.625 .750 1.000 1.250 1.500
MLCR063L14 MLCR075L16 MLCR100L16 MLCR125L18 MLCR150L18
id
oal
.250 .250 .375 .375 .375
14.75 16.88 17.00 19.25 19.38
l
+. 1 3 - .00
14 16 16 18 18
f
t1
t2
+ .03 - .00
+ .000 - .001
5/16-24 5/16-24 1/2-20 1/2-20 1/2-20
1/2-20 1/2-20 3/4-20 7/8-20 7/8-20
.56 .68 .75 .94 1.00
.590 .690 .875 1.160 1.400
CAD insertion point | CAD Einfügemarke | CAD point d'insertion
D-6
g
Internal External Thread Thread
Note: Includes (1) Installation Nut. Replacement nuts are available; refer to the price list. For additional Cooled Lifter Rod lengths, contact tech@procomps.com. Hinweis: Beinhaltet (1x) Installationsmutter. Ersatzmuttern sind verfügbar; Entnehmen Sie dies der Preisliste. Für zusätzliche gekühlte Schrägschieberkernlängen kontaktieren Sie tech@procomps.com. Note: inclue écrou de montage, écrou de montage de rechange disponible sur stock. Pour des demandes en longueurs spéciales contactez tech@procomps.com.
G
modulifter™ Cooling Cascades
OD ID
OD ODOD OD ID ID ID ID
OD ID
OD ID
OD ODOD OD ID ID ID ID
OD ID OD ID
25
THD
25 25 25 25
25 27.38 27.38 27.38 27.38
25
THD THD THD 27.38 THD
27.38
THD
THD
For Ø1/4” Hose Out
Parallel (In & Out)
od
id
Series (In & Out)
od
catalogue number
id
25 25 25 25
25
27.38 27.38 27.38 27.38
THD THD THD 27.38 THD
27.38
THD
For For For ForØ1/4” Ø1/4” Ø1/4” For Ø1/4” Hose Hose Hose For Ø1/4” Ø1/4” Hose OutOut Out Hose Hose THD Out In In In Out Out In Swivel Type In For In In Drehgelenk | Type Pivotant Ø1/4” 1.0 1.0 1.0 Hose 1.0 1.0 1.25 1.0 Out m C86300 and Stainless Steel. Fittings: Nickel Plated Brass. In For Ø1/4” Hose
OD ID
ID For For For 25 THD THD ForØ1/4” ForØ1/4” Ø1/4” Ø1/4” Ø1/4” Ø1/4” For For Ø1/4” Ø1/4” Hose Hose Hose Hose Hose Hose Ø1/4” 27.38Ø1/4” Hose Hose 27.38 Out OutOut Hose Hose THD Out In In In Out 1.75 1.75 In For In Ø1/4” 1.25 1.251.25 1.25 Hose 1.0 1.25 Out 1.0
id 1.0 catalogue
thd
max torque
number
1.75 1.751.75 1.75
THD
For Ø1/4” 1.0 1.0 1.0 1.0 Hose
In
Single (In Only)
catalogue number
ID ID ID ID
THD THD THD ID For For 25For THD
1.25
nominal rod diameter Ø
.157
.12
MLCP16L25
.157
.12
MLCS16L25
.12
MLC12
5/16-24
75 in-lbs
5/8, 3/4
.236
.20
MLCP23L25
.236
.20
MLCS23L25
.20
MLC20
1/2-20
20 ft-lbs
1, 1-1/4, 1-1/2
Note: Straight Fittings included with Cooling Cascades. | Hinweis: Gerade Anschlüsse im Lieferumfang. | Note: Tube inox inclue dans l’ensemble.
Push-to-Connect: Hose Fittings | Schlauchanschlüsse | Raccords de Tuyaux HEX2 HEX1 OAL
OAL HEX2
HEX1 HEX1 HEX1 HEX1 HEX2 HEX2 HEX2 HEX2 A HEX1
HEX1 OAL OAL OAL OALHEX2 A
A A A A OAL A HEX1
HEX2 HEX2 HEX2 HEX2
HEX2
OAL OAL OAL A A HEX1 HEX1 HEX1 OAL A OALHEX1 A A HEX1 HEX1
HEX2 HEX1 HEX1 HEX1 HEX1
HEX1 fitting type
catalogue number
hose od
thd (npt)
Straight Elbow Banjo
MLFS25 MLFE25 MLFB25
1/4 1/4 1/4
1/8 1/8 1/8
aHEX2 oal A
hex1 OAL hex2 1/2 1/2 9/16
B
5/32 — 1/8
— .83 .81
B B B B L B
B L
m Polyurethane
catalogue number
hose od
hose id
MLH25-5 MLH25-10 MLH25-25
1/4 1/4 1/4
5/32 5/32 5/32
turns
oal
l
b
5 10 Straight
10.5 in 13.0 in 25.0 ft
2.5 5.0 —
OAL
d OAL
4 4 —
1.5 1.5 —
.87 — 1.22
OAL m Nickel Plated HEX1 Brass with Sealant
A
Note: Maximum Operating Temperature 70° C. Hinweis: Maximale Betriebstemperatur 70° C. Note: Température d’utilisation max. 70°C.
LL L L B
B B B B
Push-to-Connect: Spiral and Straight Hoses D B OAL OAL OAL OAL
D D D D
D L
B D
OAL
Note: Maximum Operating Temperature 70° C. Hinweis: Maximale Betriebstemperatur 70° C. Note: Température d’utilisation max. 70°C.
D-7
1
modulifter™
ve Dia.
e Dia.
Lifter Rod Bushing
GD BD
GD BD L
GW
shing Bushings: m C95400 Bushing Dia.
GW
B D
Retaining Retaining Ring: m Steel s Black Oxide Ring (Included) Bushing
d
b
catalogue number
+ .001 - .000
+ .0005 - .0000
MLBSH50L1.37 MLBSH63L1.37 MLBSH75L3.37 MLBSH100L4.37 MLBSH125L4.87 MLBSH150L5.87
.5005 .6255 .7505 1.0005 1.2505 1.5005
.750 .875 1.125 1.375 1.625 2.000
l
gd
+ .00 - .01
+ .005 - .000
D
1.375 .862 1.375 1.000 Groove Dia. 3.375 1.262 Bore Dia. 4.375 1.528 4.875 1.792 5.875 2.186
Retaining Ring
bd
gw + .005 -.000
Bushing
±.002
B
.046 .046 .056 .056 .068 .086
.813 .934 1.188 1.438 1.688 2.063
Note: Includes (1) Retaining Ring. Replacement rings are available with pricing listed in the price list. Hinweis: Beinhaltet (1) Sicherungsring. Ersatzringe sind erhältlich. Beachten Sie dafür die Preisliste. Note: Inclue une bague de retenue, bague de rechange disponible en stock.
Groove Width
Rod Coupling Assembly Plate Machining Option Retaining Ring
Coupling: Slides:
W
Bushing ( ) A2 Bushing Dia.
m 1045 h 28-32 HRC s Nitride m C86300 (Graphite Plugs if specified)
nominal catalogue number rod dia. Ø Non-Cooled Cooled
L H A
1/2 5/8 3/4 1 1-1/4 1-1/2
RC050 RC063 RC075 RC100 RC125 RC150
— RCC063 RCC075 RCC100 RCC125 RCC150
w
h ±.001
+ .010 - .000
1.187 1.310 1.500 1.781 2.375 2.656
.788 .788 .946 1.024 1.340 1.498
.66 .78 .97 1.21 1.64 1.84
Note: To order slides with Graphite Plugs, add GP to the part number as shown, Ex: RCGP050 or RCCGP125. Hinweis: Für Führungen mit Graphit GP zur Teilenummer hinzufügen, Bsp.: RCGP050 oder RCCGP125.
F glissement avec inserts graphités ajouter GP à la référence, Ex: RCGP050 or RCCGP125. Note: Pour commander des plaques de
Lifter Rod Spacer H m D-2
.125 +.001 -.000 h 58-60 HRC
catalogue number MLRS050 MLRS063 MLRS075 MLRS100 MLRS125 MLRS150
od + .00 - .01
.500 .625 .750 1.000 1.250 1.500
D1
id
+ .000 - .005
.30 .53 .53 .80 .93 W .93
t
OD
+ .000 - .001
T
W A(2)
L H
.063
D
ID A
Spacer
D-8
a
+ .002 - .000
S2 P2 S2 Dowel
R P1
Dowel
P2
G2
R
Dowel
S1 modulifter ™
Installation Guidelines for Base Assemblies | Installationsrichtlinien für Basisbaugruppen | Conseils d’installation des glissières G1
P1
DowelS2
P1
G2
S1 D1
P2
Dowel
G2
R
Dowel
S1
D2 Z1
Z2 P1
G2
Dowel
S1
G1
G1 D1
G1
D2 D1
D1
nominal rod diameter Ø
Z2
Z2 1/2 5/8 3/4
Z2
1
s1 ±.005
D2 D2 Installation Dimensions s2
±.005
p1
p2
Dowel
Dowel
±.0005
±.0005
1.750
1.750
1.750
.750
2.000
2.000
2.000
1.000
2.250
2.250
2.250
1.250
2.500
2.500
2.500
1.500
1-1/4
3.250
3.250
3.250
1.750
1-1/2
3.500
4.000
3.500
2.500
Z1
Accel./Decel. Keying Dowel
r
Z1Pocket Max
d1
+.0005 -.0000
z1
+.03 -.00
g1 ±.005
Z1
.75 .19
.25
.2500
.3750
.28
.41
g2
±.005
d2
Drill Ø
z2
Drill Depth +.03/-.00
1.00
.75
1.25
.75
1.50
1.00
1.75
1.25
2.25
1.50
2.50
.125 .19 .188
Installation Methods | Installationsmethoden | Méthode d’installation
L
Bottom Mount | Montage unter der Platte | Montage par l’arrère
Top Mount | Montage auf der Platte | Montage par le dessus
L
D-9
flexicore
™
B D A
C
A
Flats prevent twisting.
Ebenen verhindern das Verdrehen.
Plats pour empêcher la rotation de l’éjecteur de forme.
B
Heel Plate retains FlexiCore.
Fußplatte, um FlexiCore zu halten.
Rondelle de retenue de l’éjecteur de forme.
C
Bronze Guide used for positional align- Bronzeführung zur Positionsausrichment and guidance during ejection. tung und Führung beim Ausstoßen.
Douille de guidage en bronze.
D
Advanced materials used to extend life during production.
Acier special pour prolonger la durée de vie de l’éjecteur de forme.
Verbesserte Materialien für erhöhte Lebensdauer während der Laufzeit.
Mould Closed | Werkzeug geschlossen | Moule Fermé
Mould Open | Werkzeug offen | Moule Ouvert
Application Guidelines: • Diameter (D) must be within the Guide prior to ejection. • Any surface treatments must be low temperature (Electroless Nickel-based or Chromium Deposition). • Maximum Tool Temperature is 125° C. • Please contact Engineering to review any designs.
1/2 T Max
.07mm to .12mm
9.5mm Min.
Anwendungsrichtlinien: • Der FlexiCore-Durchmesser (D) muss sich in der hinteren Stellung innerhalb der Führung befinden. • Jegliche Oberflächenbehandlung ist nur bei niedrigen Temperaturen zulässig, wie z. B. chemische Nickel- oder Chrombeschichtungen. • Maximale Werkzeugtemperatur beträgt 125 ° C. • Zur Überprüfung von Konstruktionen kontakten Sie bitte Engineering. Guide d’applications: • L’extremité de l’éjecteur doit être dans son logement et guidé avant l’éjection • Tout traitement de surface réalisé doit être fait à basse température (nitrure de chrome, base nickel)pour éviter un recuit de la matière et une perte des caractéristiques mécaniques. • Température maximale admissible 125°C • Merci de contacter le service développement pour étude ou validation de conception.
D-10
flexicore
™
Bottom Guide Assembly OAL L G
C
E
FLATS (2)
T
SHCS
D
4mm
25mm
16mm
J
12mm
E
6˚
16mm
??? 65 HRC Bottom Guide
19mm
35 ±3 HRC
S
Heel Plate
170 B
16mm
W “E”= maximum travel E” = maximaler Weg “E” = course maximum
Nitrided .25mm Deep
m FlexiCore: AISI 4340 with thin, dense Chromium treatment, Guide: CA954 Solid Bronze, Heel Plate: 1.0453 +.05 -.00
+.05 -.00
+.25 -.00
l
oal REF
+.000 -.025
± .35
c
e
9 9 11.5 11.5 12.5 12.5
6.2 8.2 10.2 12.2 14.2 16.2
162.5 162.5 200.0 200.0 200.0 200.0
166.5 166.5 204.0 204.0 204.0 204.0
5.94 6.35 7.92 7.92 7.92 7.92
22 22 26 26 30 30
3.5 3.5 4.5 4.5 4.5 4.5
t
catalogue number FCA9X6L160 FCA9X8L160 FCA11X10L200 FCA11X12L200 FCA12X14L200 FCA12X16L200
w
Assemblies include: Core, Guide, Heel, and Screws. Assembly components also sold as spare parts D-13.
d
g
j
s
shcs
88.6 88.4 111.2 111.2 107.2 107.2
24.3 24.3 26.0 26.0 28.5 28.5
M4-.7 x 20 M4-.7 x 20 M5-.8 x 20 M5-.8 x 20 M5-.8 x 20 M5-.8 x 20
M6-1 M6-1 M6-1 M6-1 M6-1 M6-1
+.25 -.00
Baugruppe besteht aus: Kern, Vierkantführung, Fußplatte und Senkkopfschrauben. Montagekomponenten werden auch einzeln verkauft, D-13.
Le set comprend: Éjecteur, douille de guidage, rondelle, vis. Les composants sont aussi vendues séparement en pièces de rechange au chapitre D-13.
Round Guide Assembly OAL L G
C
E
FLATS (2)
T 4mm
D
Round Guide
B
16mm
J
A
6˚
W
25mm
19mm
35 ±3 HRC
S
170 B
.5mm
Heel Plate
Nitrided .25mm Deep
m FlexiCore: AISI 4340 with thin, dense Chromium treatment, Guide: CA954 Solid Bronze, Heel Plate: 1.0453
catalogue number FCR9X6L160 FCR9X8L160 FCR11X10L200 FCR11X12L200 FCR12X14L200 FCR12X16L200
+.05 -.00
t
+.05 -.00
w
+.25 -.00
l
oal REF
+.000 -.025
± .35
c
e
9 9 11.5 11.5 12.5 12.5
6.2 8.2 10.2 12.2 14.2 16.2
162.5 162.5 200.0 200.0 200.0 200.0
166.5 166.5 204.0 204.0 204.0 204.0
5.94 6.35 7.92 7.92 7.92 7.92
22 22 26 26 30 30
3.5 3.5 4.5 4.5 4.5 4.5
Assemblies include: Core, Round Guide, Heel, and Screw. Assembly components also sold as spare parts D-13.
d
Baugruppe enthält: Kern, Rundführung, Fußplatte und Schrauben. Baugruppenkomponenten sind auch als Ersatzteile erhältlich, D-13.
g
j
s
a
b5
88.6 88.4 111.2 111.2 107.2 107.2
24.3 24.3 26.0 26.0 28.5 28.5
M4-.7 x 20 M4-.7 x 20 M5-.8 x 20 M5-.8 x 20 M5-.8 x 20 M5-.8 x 20
16 16 20 20 20 20
12 12 16 16 16 16
+.25 -.00
Le set comprend: Éjecteur, douille de guidage, rondelle, vis. Les composants sont aussi vendues séparement en pièces de rechange au chapitre D-13.
D-11
flexicore
™
Double Actuation
The double action bottom guide allows for the FlexiCore System to be used to release boss details with undercuts. FlexiCore Double Assembly (FCDA) includes: two Cores, Guide, Heel, and Screws.
Das doppelwirkende Flexi Core System mit Vierkantführung ermöglicht das Lösen von beidseitigen Hinterschnitten. FlexiCore Double Assembly (FCDA) beinhaltet: zwei FlexiCores, eine Vierkantführung, eine Fußplatte und zwei Senkkopfschrauben.
Le système double éjecteurs FlexiCore (FCDA) permet le démoulage de formes avec contre dépouille partielle ou sur toute la périphérie.
OAL L G
C
FLATS (2)
E
E 6˚
T Bottom Guide
“E”= maximum travel “E”= maximaler Weg E = course maximum
J
19mm
35 ±3 HRC
S
Nitrided .25mm Deep
170 B
Heel Plate
W
m FlexiCore: AISI 4340 with thin, dense Chromium treatment, Guide: CA954 Solid Bronze, Heel Plate: 1.0453
catalogue number
t
+.05 -.00
w
+.05 -.00
l
+.25 -.00
oal
d
REF
+.000 -.025
c
±.035
e
.015
g
+.25 -.00
j
+.01 -.00
s
+.000 -.025
FCDA9X6L160
9
6.2
162.5
166.5
5.94
22
3.5
88.6
24.3
M4-.7 x 20
FCDA11X12L200
11.5
12.2
200.0
204.0
7.92
26
4.5
111.2
26.0
M5-.8 x 20
FCDA12X14L200
12.5
14.2
200.0
204.0
7.92
30
4.5
107.2
28.5
M5-.8 x 20
FCDA12X16L200
12.5
16.2
200.0
204.0
7.92
30
4.5
107.2
28.5
M5-.8 x 20
CAD insertion point | CAD Einfügemarke | CAD point d'insertion
D-12
flexicore accessories ™
Wear Blocks
D
m 1.2311/1.2330 Pre-Hard h Nitrided .005” Deep
w
catalogue number FCWBM-6 FCWBM-8 FCWBM-10 FCWBM-12 FCWBM-14 FCWBM-16
d
b
c
h
k
25.4 25.4 25.4 25.4 33.2 33.2
2.9 2.9 2.9 2.9 3.5 3.5
+.05 -.00
±.25
+.025 -.000
+.025 -.000
6.2 8.2 10.2 12.2 14.2 16.2
7.2 7.2 7.2 7.2 8.0 8.0
15.9 15.9 14.4 14.4 15.2 15.2
13.55 13.55 12.05 12.05 12.11 12.11
Wear Blocks install from parting line, utilise the same screw hole position as guide.
W
t
30 ±2 HRC
Thread
Verschleißeinsätze können von der Trennlinie aus installiert werden, wobei die gleiche Schraubenposition wie bei der Montage von unten verwendet wird.
C
M5-.8 M6-1 M6-1 M6-1 M6-1 M6-1
6˚
68 ±2 HRC
H
K
B
CAD insertion point | CAD Einfügemarke | CAD point d'insertion
Les pavés d’usure s’installe coté empreinte, et sont maintenu par la même vis que la douille de guidage.
T 12 mm
Extensions m 1.7225 Pre-Hard
d
b
a
l
+.00 - .12
6 8
L
+.25 -.00
M4-.7 M5-.8
4.8 6.3
1/2
L
30 2 HRC
50mm
100mm
FCXM4L50 FCXM5L50
FCXM4L100 FCXM5L100
D 9mm wide Wrench Flats
B
A
x 19mm Deep
Includes threaded stud | Inklusive Gewindelöcher | Inclus une vis sans tête.
CAD insertion point | CAD Einfügemarke | CAD point d'insertion
Replacement Guides m CA954 Solid Bronze
catalogue number FCBG-6 FCBG-8 FCBG-10
a b h f g t 25 25 25
16 16 16
16 4.8 16 5.0 16 7.3
6 6 6
M6-1 A G M6-1 M6-1
m CA954 Solid Bronze
5mm Pocket Radius
F G
catalogue number FCRG-6 FCRG-8 FCRG-10
T H
B
b c h f x g
B
12 12 16
F
16 25 4.8 16 25 5.0 20 25 7.3
5 5 5
6 6 8
3mm
G C
H
X
Replacement Heel Plates m 1.7225 Pre-Hard s Black Oxided
catalogue number
k
p
s
FCHP-4
16
4
M4 -.7
FCHP-5
16
4
M5 -.8
K S
P
F
Screws included | Schrauben inklusive | Vis inclues.
m CA954 Solid Bronze
G
catalogue number
a
b
h
f
g
r
s
t
FCDBG-6
45
16
20
4.8
3.5
5
15.5
M6-1
FCDBG-12
48
16
20
7.3
4.5
5
16.5
M6-1
R G
A S B
T
H
Replacement Heel Plates: Double Actuation m 1.7225 Pre-Hard s Black Oxided
catalogue number
c
k
p
s
FCDHP-4 FCDHP-5
7 9
20 22
6 6
M4-.7 M5-.8
K
C
P
S
Screws included | Schrauben inklusive | Vis inclues.
D-13
lifter blades
&
cores
Lifter CoresTM for details 6mm-12mm wide. Lifter Blades and Cores offer unique advantages for undercut release: • The “up, then over” motion assists part ejection, for addressing small parts prone to sticking to lifters. • With the lifter traveling radially away from the undercut, the top of the blade can be flush with the core, requiring no standing pad on moulded part that may interfere with snap function. • Compact, no angled machining, with blades beginning as thin as 1.8mm.
Lifter BladesTM for details 1.8mm-4.2mm wide. Lifter Blades und- Cores einzigartige Vorteile für die Hinterschnitt-Entformung: • Die “Aufwärts”-, dann “Seitlich” -Bewegung unterstützt das Auswerfen von kleinen Teilen, welche dazu neigen, am Schrägschieber zu kleben. • Weil sich der Schrägschieber radial von der Hinterschneidung wegbewegt, kann die Oberseite der Klinge bündig mit dem Kern sein, damit kein Grad entsteht, der Schnappfunktionen stören kann. • Kompakt, keine Winkelbearbeitung mit Klingen ab 1,8 mm.
Lifter Blades et Cores offre un avantage unique pour le démoulage des contres dépouilles: • Le mouvement de montée verticale puis de libération permet l’assistance à l’éjection en maintenant les petites contres dépouilles en place durant le début de l’éjection. • La cale ou la lame libérant la contre dépouille radialement, le dessus de la lame ou de la cale peut être affleurant avec la douille empreinte évitant toute marque ou sur-épaisseur sur la pièce moulée. • Les lames sont compactes, l’usinage est très simple (non incliné).
PT
PT
PT
Preliminary Travel
Preliminary Travel
Preliminary Travel
Ejection Retracted Lifter seated within bushing to prevent moulding pressure movement.
Initial Ejection Ejector plates move forward 7mm with part remaining on lifter.
Release Point The Lifter is mechanically forced away from the undercut.
Zurückgefahrener Auswerfer Schrägschieber sitzt in der Buchse und verhindert eine Bewegung durch Spritzdruck.
Auswerferstart Auswerfer bewegen sich 7mm vorwärts, wobei das Teil auf dem Schrägschieber verbleibt.
Freigabepunkt Der Schrägschieber fährt automatisch vom Hinterschnitt weg.
Éjecteur position moulage (rentré) La cale est en place dans la douille empreinte pour éviter tout mouvement lié à la pression d’injection.
Éjection initiale La cale ou lame accompagne la pièce durant l’éjection sur 7 mm.
Point de libération de la forme La cale ou lame libère la contre dépouille mécaniquement
D-14
EJT
EJT
Maximum Travel
Maximum Travel
US Patent No 8,657,599 US Patent No 8,241,031 ES Patent Nos. 232054 and 2345697 Other patents pending.
lifter blades
&
cores
Installation Options: Parting Line Bushing: Reduces machining in the core half.
Guide Bushing: Best for applications when space is limited.
Guide Plate: Used when the design does not require a support plate.
Trennebenenzentrierung: Reduziert die Bearbeitung in der Kavität.
Führungsbuchse: Am besten geeignet für Anwendungen bei begrenztem Platz.
Führungsplatte: Zur Verwendung, wenn die Konstruktion keine Stützplatte erfordert.
Douille empreinte: Réduit l’usinage dans le bloc empreinte.
Douille de guidage: Préconisé pour les espaces restreints.
Plaque de guidage: Préconisé lorsqu’une plaque support n’est pas nécessaire.
Preload Pin Use:
Federstiftanwendung:
Broche de pré charge:
Use the provided preload pin to prevent the lifter from falling back on the part.
Verwenden Sie den mitgelieferten Federstift, um zu verhindern, dass der Schrägschieber auf das Teil zurückfällt.
Empêche la cale de tomber coté empreinte.
Preload Pin
A +.008 -.000
T D-15
P +.00 -.01
Top of Core
lifter blades
&
cores AF MT
Y*
T
W
AP
X
TP
.15 R
EJT C
B
K+2
PT A
C
Top of Core
A
K
L1
L
Xg
A
B
C
Preliminary Travel Y* of For mechanical activation, removal the pin will achieve the travel shown below, using Xany Bushing or Guide Plate installation.
Mindestweg Für eine mechanische Aktivierung wird der Federstift entfernt, so dass der unten gezeigte Verlauf ausgeführt wird, egal, welche Buchse oder Führungsplatte genutzt wird.
Course initiale Pour l’activation mécanique, l’enlèvement de la broche de précharge va permettre d’atteindre la course montrée ci-dessous.
K+2 Maximum Travel With the preload pin installed, the lifter arcs away from the undercut.
Maximaler Weg Wenn der Federstift installiert ist, bewegt sich der Schrägschieber vom Hinterschnitt weg.
Course maximum Avec la broche de précharge OAL installée, la cale s’éloigne de la forme en contre dépouille. THD* Lifter
Machining guidelines shown above for all Lifter Assemblies when using the Parting Line Bushing or machining the detail in the core insert. Refer to the Undercut Limits in the chart below. *Note: On all Lifter Blades (LBA), the undercut must go through the Lifter; “Y” is not applicable.
Bearbeitungsrichtlinien für alle SchrägschieberBaugruppen bei Verwendung der Trennlinienbuchse oder Bearbeitung der Details im Kerneinsatz sind oben angezeigt. Beachten Sie die Hinterschnittgrenzen in nachfolgender Tabelle. *Hinweis: Bei allen LBA Schrägschieberblättern muss die Hinterschneidung durch den Schrägschieber gehen; “Y” ist nicht anwendbar.
catalogue number
t
- .004 - .009
w
c
- .004 ±.005 - .009OAL
Lifter
b l a d e s c o r e s
LBA08X018
K
oal tp Ref
THD*
pt
ap
Horiz. Prelim Travel
Prelim Ejection Length
Prelim Travel Angle
3
17
4.0˚
mt ejt afPreloadsPin thd Max. Full Travel
Ejection Length
Full Ejection Angle
Maximum Stroke for Removal
Thread Size
Undercut LimitsReceiver
x
y
k
8
1.8
20
162
6
38
8˚
50
M4
3.0
N/A
15
LBA08X024 Preload Pin8
2.4
20
162on the Receiver/Post 3 17Combo.4.0˚
6
38
8˚
50
M4
3.0
N/A
15
162
6
38
8˚
50
M4
3.0
N/A
15
Combo 20 LBA08X032Receiver/Post 8 3.2
*Thread is provided 15mm deep
3
17
4.0˚
LBA08X042
8
4.2
20
162
3
17
4.0˚
6
38
8˚
50
M4
3.0
N/A
15
LCA09X06
9
6
26
246
6
26
6.0˚
9
56
9˚
65
M4
3.5
4
21
LCA10X08
10
8
26
246
6
26
6.0˚
9
56
9˚
65
M4
21
75
M5
4.0 ID6 5.0 8
25
75
M5
5.0
25
OAL
LCA12X10
12
10
30
256
LCA12X12
12
12
30
256
Lifter
Preload Pin
8 THD* 8 Receiver
32
6.5˚
10
66
8˚ Q
32
6.5˚
10
66
8˚
Post
*Moldmaker to cut the Lifter Core Post to suit the application and then drill and tap 15mm deep.
D-16
Instructions d’usinage indiquées ci-dessus pour tous les ensembles de cales et lames *Thread is provided 15m montantes Preload Pinutilisant les douilles emprein-on the Receiver/Post Co D Receiver/Post Combo tes ou des empreintes taillé dans la plaque empreinte. Se référer aux valeurs limites de contre dépouilles indiquées dans le tableau ci-dessous. *Note : Sur toutes les lames montantes (LBA), la forme doit traverserLla largeur de la OAL lame ; Y n’est pas applicable dans ce cas. THD* Lifter
10
*Moldmaker to cu Core Post to suit t and then drill and
K
lifter blades Lifter Blade Assemblies: Widths 1.8mm to 4.2mm
Lifter Blade Baugruppen: Breite 1,8mm bis 4,2mm
&
cores
Lames Lifter Blade: Épaisseur de 1.8 à 4.2mm
OAL THD*
Lifter
OAL Lifter Preload Pin Receiver/Post Combo
on the Receiver/Post Combo.
*Thread is provided 15mm deep on the Receiver/Post Combo.
Preload Pin Receiver/Post Combo
Lifter Core Assemblies:
THD* *Thread is provided 15mm deep
Lifter Core Baugruppen: OAL Breite 6mm bis 12mm
Widths 6mm to 12mm
Lifter
Cales Lifter Core: Épaisseur de 6 à 12mm
THD*
OAL Lifter
Preload Pin
Preload Pin
CAD insertion point | CAD Einfügemarke | CAD point d'insertion
Q
Q
THD*
Receiver
Post
*Moldmaker to cut the Lifter Core Post to suit the application and then drill and tap 15mm deep.
Receiver
Post
*Moldmaker to cut the Lifter Core Post to suit the application and then drill and tap 15mm deep.
Assembly Part Information | Information zu den Montageteilen | Informations sur les composants: part name
material/treatment
Lifter
H-13, 50-52 HRC Nitride .25 Deep
Receiver
H-13, 50-52 HRC, Titanium Nitride
Post
P-20 Pre-Hard, Black Oxided
Preload Pin
M-2, 62-64 HRC
Note: On the Lifter Blade Assemblies (LBA), the Post and Receiver are a single piece, made from prehardened P-20 and TiN coated. Replacement items are available. Contact Customer Service for pricing and delivery. Hinweis: Bei der Lifter Blade Baugruppe (LBA) ist die Aufnahme und die Stange aus einem Teil aus vorgehärtetem P-20 und TiN beschichtet. Ersatzteile sind vorhanden. Kontaktieren Sie für Angebote den Kundendienst. Pour les lames Lifter Blade (LBA), la rallonge et le reçu de la cale sont d’une seule pièce, en acier pré traité revêtue TiN. Les pièces de rechange sont disponibles.Contactez le service commercial pour une offre de prix et délai.
Removability from Parting Line | Entfernung über die Trennebene | Démontage coté empreinte:
S
Maximum stroke/ejection for removal from parting line
With ejector stops removed, the ejector plates can be moved forward to expose the Lifter Blade Assembly, and then the Lifter and the Preload Pin can slide sideways out of the Receiver/Post Combo. On the Lifter Cores, the Receiver can be unscrewed from the Post and then removed from parting line.
Wenn die Auswerferbegrenzungen entfernt werden, können die Auswerferplatten vorwärts bewegt werden, um die Schrägschieberblatt-Gruppe freizulegen. Dann können der Schrägschieber und der Ferderstift seitlich aus der Führung heraus geschoben werden. Beim Schrägschieberkern kann die Führung von der Stange abgeschraubt und dann von der Trennebene entfernt werden.
En enlevant les butées d’éjection, la plaque d’éjection va jusqu’en butée découvrant ainsi l’ensemble cale montante complet. La lame / cale montante ainsi que la broche de précharge peuvent être enlevée par glissement latérale. Le reçu peut à ce moment être dévissé de la rallonge depuis l’empreinte.
D-17
lifter blades
&
cores
AFInstallation | Installation der Trennlinienbuchse | Installation de la Douille empreinte Parting Line Bushing MT
A +.008 -.000 T
EJT
P +.00 -.01 View from bottom of ÒBÓ plate
Top of Core
K
C+.02 -.00
A Xg
b
c
d
e
f
g
Diam. Diam. Diam. Diam.
j
L
a
Diam. Diam.
k
Dowel Size
t
p
D -.0 +.2
B
L1
assembly ref
+.3 +.4
LBA08X018
12
16
5
9.6
6
4.5
8
4.5
5
7
56
LBA08X024
12
16
5
9.6
6
4.5
8
4.5
5
7
56 56
LBA08X032
12
16
5
9.6
6
4.5
8
4.5
5
7
LBA08X042
12
16
5
9.6
6
4.5
8
4.5
5
7
56
LCA09X06
14
20
5
11
6
4.5
8
4.5
5
8.5
66
LCA10X08
16
22
5
13
6
4.5
8
4.5
5
9.5
66
LCA12X10
20
26
6
15
8
5.5
10
5.5
6
11
76
LCA12X12
20
26
6
15
8
5.5
10
5.5
6
11
76
E -.00
+.01
F
J G
G
K Parting Line Bushings | Trennebenenzentrierung | Douille empreinte m A-2
s 58-60 HRC
catalogue number
For Lifter Widths
LBB018 LBB024 LBB032 LBB042 LCB06 LCB08 LCB10 LCB12
1.8 2.4 3.2 4.2 6 8 10 12
d
± .010
12 12 12 12 14 16 20 20
56 56 56 56 66 66 76 76
Features: • Use of the Parting Line Bushing simplifies THD*
machining in the mould base. • Each bushing assembly incorporates a wedge that creates a stop for the Lifter to *Thread is provided 15mm deep avoid push back due to moulding pressure. on the Receiver/Post Combo. • The Guide Bushing should be utilized with the Parting Line Bushings to locate and guide the Lifter Blade/Core Assembly in the support plate. The bushings, along with Guide Plates, are sold separately on page D-19.
THD*
Receiver
Post
D-18*Moldmaker to cut the Lifter Core Post to suit the application and then drill and tap 15mm deep.
l
-.003 -.008
D
L
Eigenschaften: • Die Verwendung der Trennlinienbuchse vereinfacht die Bearbeitung im Einsatz. • Jede Baugruppe für Führungsbuchsen enthält einen Keil, der einen Anschlag für den Schrägschieber erzeugt, um ein Zurückschieben aufgrund des Spritzdrucks zu vermeiden. • Die Führungsbuchse sollte zusammen mit den Trennlinienbuchsen verwendet werden, um die Schrägschieberbaugruppe in der Stützplatte zu positionieren und ID zu führen. Die Buchsen, zusammen mit Q Führungsplatten, sind separat auf Seite D-19 erhältlich.
Caractéristiques: • L’utilisation de la douille empreinte simplifie l’usinage dans le bloc empreinte • Chaque douille possède une butée interne empêchant ainsi le recul de la cale dû à la pression. • La douille de guidage doit être utilisée avec la douille empreinte pour positionner et guider la cale/lame montante dans la plaque support. Les éléments sont vendus séparément en page D-19.
lifter blades
AF MT T
C
X
1/2 T M
W +.008 -.000 EJT
T +.008 -.000
(Central)
C -.000 Y +.00 -.01 +.006
TSC
PT A
.15 Rad. Max
Top of Core P -.01
3 ±.01
+.00
S
A
D
Xg
A
E +.02 -.00
+.02
9 -.00
.15 Rad. Max
+.02 -.00
K
+.02 -.00
D
+.015 +.025
1/2 T M
H +.01 -.00
A
J
F
K+2
R (2) G
Details for Lifter Cores
K
D sind Für die Montage der Führungsplatte alle Abmessungen und Toleranzen ähnlich der Führungsbuchse links, außer wie oben gezeigt.
For installation of the Guide Plate, all dimensions and tolerances are similar to the Guide Bushing installation at left, except as shown above.
tL w
assembly ref
Bottom view of Guide Plate
G
D
x
c
y
m z
a
d
Diam.
b
Diam.
e
f
Diam.
Pour l’installation de la plaque de guidage, toutes les dimensions et tolérances sont identiques à l’installation de la douille de guidage à gauche, sauf comme ci-dessus.
gL h
Diam.
j
k
n
q
s r
p
LBA08X018
8
1.8
7.3
20
28
3.1
5˚
13.5˚
9.6
12.8
3
4.5
8
6
4.5
12
18
24
12
6
56
LBA08X024
8
2.4
7.3
20
28
3.1
5˚
13.5˚
9.6
12.8
3
4.5
8
6
4.5
12
18
24
12
6
56
LBA08X032
8
3.2
7.3
20
28
3.1
5˚
13.5˚
9.6
12.8
3
4.5
8
6
4.5
12
18
24
12
6
56
LBA08X042
8
4.2
7.3
20
28
3.1
5˚
13.5˚
9.6
12.8
3
4.5
8
6
4.5
12
18
24
12
6
56
OAL LCA09X06
9
6
7.7
26
46
3.3
6˚
2˚
11
14
3
4.5
8
6
4.5
14
18.5
26
12
7
66
LCA10X08
10THD* 8
8.5
26
46
3.6
8˚
2˚
13
16
4
4.5
8
6
4.5
16
19.5
28
12
8
66
LCA12X10
12
10
10.1
30
55
4.2
8˚
2˚
15
20
4
5.5
10
8
5.5
18
20.5
30
13
9
76
LCA12X12
12
12
10.1
30
55
4.2
8˚
2˚
15
20
4
5.5
10
8
5.5
18
20.5
30
13
9
76
Preload Pin Receiver/Post Combo
*Thread is provided 15mm deep on the Receiver/Post Combo.
Guide Bushings
Guide Plates
Alternative Heel Plates
ID Q
Q
TSC
Y*
Lifter
N
L
B
+.025 -.000
L1
L1
X
M5
Xg
L
+.01 -.00
Details for Lifter Blades
X
cores
Z
AP TP
&
ID
OAL
Q
THD*
ifter
Preload Pin
Receiver
LBGB0696 LCGB0611 LCGB0613 LCGB0817
Core Post to suit the application then drill and tap 15mm deep. Forand Lifter Widths
1.8-4.2 6 8 10 & 12
S
P
Post
*Moldmaker m CA954 Bronze h 170 Brinell to cut the Lifter
catalogue number
K
m CA954 Bronze h 170 Brinell
m 4140 Pre-Hard s Black Oxided
id
catalogue number
For Lifter Widths
q
catalogue number
k
p
s
6 6 6 8
LBGP1212 LCGP1426 LCGP1628 LCGP1830
1.8-4.2 6 8 10 & 12
24 26 28 30
FCHP-4 FCHP-5
16 16
4 4
M4 -.7 M5 -.8
D-19
plate sequence control section e
Roller Pullers
Friction Pullers
Plate Locks
RPL
FP
PLCM
E-1
E-2
E-3
StacKit System SK E-9
W2 S2
SHCS (4)
B
roller pullers™ T2
Dowel (4)
Parting Line Sequence Control
8mm
G
S3 A SHCS (4)
B
G
W2 S2
T2
Dowel (4)
T1
D1 S1 W1
PR
Pull Rod 8mm
S4
D2
S3
S4
D2
A T1
D1 S1 W1
Screw and dowel orientation for RPL-140 and RPL-140-40 S1 D1
Housing: m 1.7225
h 27-32 HRC s Black Oxide
Roller: m 1.3343
catalogue number
w1
t1 w2 t2 a
b
g
h 62-64 HRC, Nitrided
Pull Rod: m 1.3343
s1 s2 3 s4 Screw s and
d1
h 62-64 HRC, Nitrided
d2
Dowel Size
shcs
pr
See Below
RPL-135
135
25
38
25
28
19
1
60.0
dowel orientation for RPL-140 and RPL-140-40 25.0 7.0
15.6
30.0
22.1
ø5
M6-1.0 x 25
RPL-135- 40
135
25
38
25
28
19
40
60.0
25.0
7.0
54.6
30.0
S1 D1 61.1
ø5
M6-1.0 x 25
65
RPL-140
140
32
64
25
32
22
2
70.0
35.0
10.0
23.1
100.0
28.1
ø6
M10-1.5 x 35
30
RPL-140-40
140
32
64
25
32
22
38
70.0
35.0
10.0
59.3
100.0
64.3
ø6
M10-1.5 x 35
66
26
CAD insertion point | CAD Einfügemarke | CAD point d'insertion
Custom Pull Rods are available. Benutzerdefinierte Zugstangen erhältlich. Des tirants personnalisés sont disponibles.
Mould Closed | Werkzeug Geschlossen | Moule Fermé
Mould Open | Werkzeug Offen | Moule Ouvert
Housing
Pull Rod Compression Screw Lock Screw
PR
Spring Roller Housing Roller
Technical Information: • Compression screw provides adjustable pull force. • Roller design allows for smooth action. • Mounting screws and dowels included. Technische Informationen: • Kompressionsschraube bietet einstellbare Zugkraft. • Roller-Design ermöglicht eine reibungsarme Aktion. • Befestigungsschrauben und Zylinderstifte inklusive. Informations techniques: • La vis de compression fournit une force de traction réglable. • La conception des rouleaux permet une action en douceur. • Vis de montage et goupilles incluses.
catalogue number RPL-135
45 Kg (100 lbs)
75 Kg (160 lbs)
100 Kg (220 lbs)
RPL-135-40 45 Kg (100 lbs)
75 Kg (160 lbs)
100 Kg (220 lbs)
RPL-140
45 Kg (100 lbs) 100 Kg (220 lbs) 150 Kg (330 lbs)
RPL-140-40 45 Kg (100 lbs) 100 Kg (220 lbs) 150 Kg (330 lbs)
E-1
friction pullers Parting Line Sequence Control Used to uniformly draw floating plates and inserts. Designed to replace shoulder bolts. Initiate movement utilising friction will release the plate when stop reached.
Wird verwendet, um schwimmende Platten und Einsätze gleichmäßig zu ziehen. Entwickelt, um Schulterschrauben zu ersetzen. Bei Verwendung unter Ausnutzung der Reibung wird die Platte freigegeben, wenn der Anschlag erreicht ist.
m Custom PPA Resin with 8620 Fastener
L
catalogue number
H D
FP-10 FP-13 FP-16 FP-20
T
d 10 13 16 20
l 17 20 25 28
t M5-.8 M6-1 M8-1.25 M10-1.5
h
hd
Hex
Hole Depth
Maximum Force
3 4 5 6
20 23 30 32
32.5 kg 62.5 kg 150.0 kg 212.5 kg
(Each)
Technical Information: • Before removing mould from press, rotate screw counter-clockwise 3/4 turn. • Maximum operating temperature is 150° C. • Fastener includes Nylok® patch for secure installation. • Hemisphere is plated for added lubricity during adjustments. • Friction Pullers are self-venting.
D
ceiving Hole ameter
Fastener Floating
Plate or Insert
D
Hemisphere L
2mm R
H
HD L
H Resin D
D
PL
D
D D
Technische Informationen: • Vor dem Entfernen der Form von der Spritzgießmaschiene drehen Sie die Schraube gegen den Uhrzeigersinn eine 3/4 Drehung. • Die maximale Betriebstemperatur beträgt 150° C. • Befestigung enthält Nylok® Patch für sichere Installation. • Die beschichtete Hemisphäre bietet eine bessere Gleitfähigkeit während der Einstellungen. • Reibungs-Puller sind selbstentlüftend. Informations techniques: • Avant de retirer le moule de la presse, faites tourner la vis de 3/4 de tour dans le sens anti-horaire. • La température maximale de fonctionnement est de 150°C. • La T fixation T comprend le patch Nylok® pour une installation sécurisée. • L’hémisphère est plaqué pour plus de lubrification pendant les ajustements. • Les Friction Pullers sont auto-ventilés.
D
Mould Closed
Receiving Receiving Hole Hole finish Hole finishHole Diameter Diameter = µ Ra .4-1.6 = µ Ra .4-1.6
D
D
D
+.10mm +.10mm +.15mm +.15mm Interference Interference Adjusted Adjusted on Friction on Friction Puller Puller
2mm R 3mm
PL
Utilisé pour traîner uniformément des plaques flottantes et des inserts. Conçu pour remplacer les vis épaulée. Initier le mouvement en utilisant le frottement va libérer la plaque lorsque l’arrêt est atteint.
Floating Floating Plate Plate or Insert D or Insert
HD
2mm R
HD
3mm
PL
PL
10mm 10mm Minimum Minimum
D
D
D
PL
D
• Recommended interference + 0.1 to +0.15
• Empfohlene Überlappung zum Loch sollte
larger than hole. • To adjust, rotate the screw clockwise and measure bulge. • Use the reference arrows for further adjustment.
+ 0,1 bis + 0,15 betragen. • Zum Einstellen drehen Sie die Schraube im Uhrzeigersinn und messen Sie die Wölbung. • Verwenden Sie die Referenzpfeile zur weiteren Anpassung
E-2
Mould Open
• Interférence recommandée + 0,1 à +0,15
plus grande que le trou. • Pour régler, tournez la vis dans le sens ho-
raire et mesurez le gonflement. • Utilisez les flèches de référence pour ef-
fectuer d’autres réglages.
U.S. Patent Nos. 8,038,425 and 8,038,426 European Patent No. 2,282,883 Chinese Patent No. ZL200980121427.4
plate locks External Cam-Driven System
The Cam-Driven External Plate Lock allows for parting line sequencing, including: • 3-Plate Sequencing • Dual Ejection • Stripper Plate Sequencing Die externen Klinkenzüge ermöglichen die Sequenzierung von Trennlinien, einschließlich: • 3-Platten-Sequenzierung • Zwei-Stufen Auswerfer • Abstreiferplatten-Sequenzierung Le verrouillage de plaque externe piloté par came permet le séquençage de la ligne de partition, y compris: • Séquençage de 3 plaques • Double éjection • Séquençage de la plaque devêtisseuse
1
2
Mould Closed: Lock Engaged (3-Plate Application) Three parting lines are utilised for ejecting the part and runner.
First Parting Line Opens The runner and breaks the gate, parting line 2 is held.
Werkzeug geschlossen: Verriegelung geschlossen (3-PlattenAnwendung) Drei Trennlinien werden zum Auswerfen von Teil und Kaltkanal verwendet.
Öffnung der ersten Trennlinie Der Kaltkanal bricht am Anschnitt. Die zweite Trennlinie wird zugehalten.
Moule Fermé: Verrouillé Engagé (Application à 3 plaques) Trois lignes de partition sont utilisées pour éjecter la pièce et le canal.
La première ligne de partition s’ouvre Le canal brise le point d’injection, la ligne de partition 2 est tenue.
US Patent No. 7,963,758 European Patent No. 2442955
E-3
plate locks External Cam-Driven System
3
4
Stroke Continues The release point is reached and the 2nd parting line begins to open.
Second Parting Line Opens Parting line 1 and 2 fully open, mould continues to open, and the part is then ejected.
Öffnungsbewegung geht weiter. Der Freigabepunkt ist erreicht und die 2. Trennlinie öffnet sich.
Zweite Trennlinie öffnet sich. Sobald die Trennlinien 1 und 2 vollständig geöffnet sind, öffnet sich das Werkzeug weiter und das Teil wird ausgeworfen.
La course porsuit Le point de libération est atteint et la 2ème ligne de partition commence à s’ouvrir.
La deuxième ligne de partition s’ouvre Les lignes de partition 1 et 2 sont complètement ouvertes, le moule continue à s’ouvrir et la pièce est ensuite éjectée.
• On moulds that are over 250mm wide, four assemblies, two sets per side on the opposite ends of the mould is recommended. • See www.procomps.com/platelockguide for further information.
E-4
• Bei Werkzeugen mit einer Breite von mehr als 250 mm werden zwei Baugruppen pro Seite an den gegenüberliegenden Enden der Form empfohlen.
• Sur les moules de plus de 250 mm de large, quatre ensembles, deux jeux de chaque côté aux extrémités opposées du moule sont recommandés.
• Weitere Informationen finden Sie unter www.procomps.com/platelockguide.
• Voir www.procomps.com/platelockguide pour plus d’informations.
European Patent No. 011495314 Germany Patent No. 69836420.1
plate locks 3-Plate Application
D
L
Two sets of dowels recommended.
Gauge Pin: 14mm Dia.
Machine for (2) SHCS and (2) dowels as shown
Provided Length = 180mm
See timing diagram for installation guidelines
H
PL2
T
E M
Provided Length = 180mm
PL1
Machine for (2) SHCS and (2) dowels as shown
K
Machine bars to clear wedge for length of plate.
Two sets of dowels recommended.
Stripper Bolt Travel = Stripper Plate Travel + 1.5mm minimum for clearance
PL3 (Main) F
J
G
R D
C A B
E THD
catalogue number PLCM20
a
b
c
d
e
f
g
h
+.03 -.00
± .1
± .1
+.03 -.00
+.03 -.00
± .1
REF
REF
80.02
64
12
24
27
35
49
31.55
Design & Installation Guidelines: • Determine mould stroke. • Determine stripper bolt travel (1.5mm minimum clearance past release point). • Determine the cam bar length using gauge pin. • Machine the latch bar 0.025mm clearance between the wedge block and latch bar when closed. • Machine (2) fasteners and (2) dowels for latch and cam bar as shown. (see graphic #1) .
j
k
l
m
+.00 -.03
20
7
Gestaltungs- & Installationsrichtlinien: • Bestimmung des Werkzeugwegs. • Bestimmen Sie den Weg des Abstreiferbolzens (1,5 mm Mindestabstand vom Freigabepunkt). • Bestimmen Sie die Länge der Nockenstange mit dem Messstift. • Bearbeiten Sie die Verriegelungsstange mit 0,025 mm Spiel zwischen dem Keilblock und der Verriegelungsstange im geschlossenen Zustand. • Bearbeiten Sie (2) Befestigungen und (2) Zylinderstifte für Riegel und Nockenstange wie gezeigt.(siehe Grafik 1)
r
thd
20
14
7
M6-1.0 x 10mm Deep
Guide de conception et d’installation: • Déterminer la course du moule. • Déterminez la course du vis épaulée (jeu minimum de 1,5 mm au-delà du point de libération). • Déterminez la longueur de la barre de came à l’aide de la goupille de jauge. • Usiner la barre de verrouillage avec un jeu de 0,025 mm entre le bloc de coin et la barre de verrouillage une fois fermée. • Usiner (2) vis et (2) goupilles pour les barres de verrouillage et de came comme indiqué. (voir image n° 1).
E-5
plate locks 3-Plate Application Timing Diagram for Cam Bar Release Point | Zeitdiagramm für Freigabepunkt der Nockenstange| Diagramme de synchronisation pour le point de libération de la barre à cames Parting At Line initialClosed. release point. Cam Bar
1
2
Full Release of Latch. At initial release point.
3
Latch Bar
n tangent Bar and Block
Ø14mm gauge pin tangent to Cam Bar and Wedge Block
Block
Wedge Block
mould ge Block
At initial release point.
0.0254mm gap when the mould 6.42mm is closed between the Wedge Block and Latch Bar
1. Cam Bar location is shown when the Ø 14mm gauge pin is tangent in three places. 2. From tangency of pin, the Cam Bar must travel 6.42mm to initial release. 3. The Cam has engaged the Wedge and traveled 8mm, fully releasing the Latch. Example: To calculate the initial release point for a 27mm plate travel: T=27mm 6.42mm
6.42mm
1. Die Position des Nockenstabs wird angezeigt, wenn der Messstift mit dem Ø 14 mm an drei Stellen tangential anliegt. 2. Vom Berührungspunkt des Stiftes muss die Nockenstange 6,42 mm laufen, um die Freigabe einzuleiten. 3. Die Nockenleiste hat den Keil zurückgedrückt und ist 8 mm gefahren, um den Riegel vollständig zu lösen. Beispiel: Zur Berechnung des ersten Freigabepunktes für einen 27mm Lauf der Platte: T = 27mm-6,42 mm
6.42mm 8.00mm
1. L’emplacement de la barre à cames est indiqué lorsque la goupille de calibre Ø 14mm est tangente à trois endroits. 2. À partir de la tangence de la goupille, la barre à cames doit se déplacer de 6,42mm à la libération initiale. 3. La came a engagé la cale et a parcouru 8mm, libérant complètement le verrou. Exemple: calculer le point de libération initial pour une course de plaque de 27 mm: T = 27 mm - 6,42 mm
Dual Ejection Application
• Plate Locks keep both ejector sets together until preset release point. • Machine all pockets as shown, mounting the Guide Assembly/Wedge Block in the bottom Ejector Plate.
E-6
• Verriegelungen halten beide Auswerferpakete bis zum voreingestellten Freigabepunkt zusammen. • Bearbeiten Sie alle Taschen wie gezeigt und montieren Sie die Führungsbaugruppe / den Keilblock in die untere Auswerferplatte.
• Les centreurs de plaque maintiennent les deux ensembles d’éjection ensemble jusqu’au point de libération prédéfini. • Usiner toutes les poches comme indiqué, en assemblant l’ensemble guide/bloc coin dans la plaque d’éjection inférieure.
Full
Stripper
Gauge Pin: .500” or Gauge Pin: 14mm Dia. .500” or 14mm Dia.
Stripper
T T
.001 (.03mm) Gap between .001 (.03mm) Driver Cap & Gap between Wedge Block Driver Cap & Required Wedge Block Required
Release Point “T”= Release Stripper Plate Point “T”= Travel Stripper Plate + .212 Travel (6.66mm) + .212 (6.66mm)
plate locks Stripper Plate Application
Provided Provided Length =Length 180mm = 7.5”
Mould Closed: Stripper Plate in Back Position Werkzeug geschlossen: Zurückgefahrene Abstreiferplatte Moule Fermé: Plaque Devêtisseuse Rétractée
Mould Open: Stripper Plate Released Drivers push stripper plate forward. Lock releases, ejector pins eject part. Werkzeug offen: Abstreiferplatte freigegeben Maschinenauswerfer drückt Abstreiferplatte nach vorne. Die Verriegelung gibt frei, Auswerferstifte werfen die Teile aus. Moule Ouvert: Plaque Devêtisseuse Libérée La plaque devêtisseuse est poussée vers l’avant par les Pilotes. Le verrou libére, les éjecteurs poussent la pièce.
Stripper
Gauge Pin: 14mm Dia.
T
T = Initial Plate release - 6.66 mm
.03mm Gap between Driver Cap & Wedge Block Required
Design & Installation Guidelines: • For stripper plate applications use stripper plate kit PLCM20-S on E-8. Disregard latch bar. • All machining as per 3-plate application except for “T” dimension. For timing the release point see graphic above. • Use the Spacer as a template for machining the screws/dowels to the Driver/Cap assembly. • Fit the spacer to the driver providing 0.75mm gap to mould to avoid interference. • Install all components as shown.
Gestaltungs- & Installationsrichtlinien: • Für die Anwendung von Abstreiferplatten verwenden Sie den Abstreiferplattensatz PLCM20-S auf E-8. Ignorieren Sie die Verschlussstange. • Alle Bearbeitungen gemäß der 3-Platten-Anwendung, außer für „T“ -Abmessungen. Zur zeitlichen Bestimmung des Freigabepunktes siehe Grafik oben. • Verwenden Sie die Abstandsplatte als Schablone für die Schrauben/Zylinderstifte für die Bearbeitung an den Klinkenzugelementen. • Setzen Sie die Abstandsplatte so auf den Treiber, dass ein Abstand von 0,75 mm entsteht. • Installieren Sie alle Komponenten wie abgebildet.
Guide de conception et d’installation: • Pour les applications de plaque devêtisseuse, utiliser le kit PLCM20-S sur E-8. Ne pas considérer la barre de verrouillage. • Tout usinage selon l’application à 3 plaques sauf pour la dimension «T». Pour synchronisation du point de libération, voir image ci-dessus. • Utilisez l’espaceur comme gabarit pour l’usinage des vis / goupilles sur l’assemblage du Pilote. • Installez l’espaceur sur le pilote en prévoyant un espace de 0,75 mm avec le moule pour éviter les interférences. • Installez tous les composants comme indiqué.
E-7
plate locks External Cam-Driven System catalogue number
description
PLCM20
External Plate Lock Assembly: Metric
Assembly includes: • Components listed below. • Compression Springs (2) • M6-1.0 LHCS (2-Within Housing) • Ø3mm Dowel Pin (Within Housing)
Latch Bar
Guide
Baugruppe beinhaltet: • Unten aufgeführte Komponenten. • Druckfedern (2) • M6-1.0 LHCS (2-innerhalb des Gehäuses) • Ø3mm Zylinderstift (innerhalb des Gehäuses)
Wedge Block
L’assemblage comprend: • Les composants listés ci-dessous. • Ressorts de compression (2) • M6-1.0 LHCS (2 dans le logement) • Goupille Ø3mm (dans le logement)
Guide Plate
part name
material/treatment
Latch Bar
4340, 35-40 HRC, Nitrided/Black Oxide
Cam Bar (2)
4340, 35-40 HRC, Nitrided/Black Oxide
Wedge Block
A-2, 58-60 HRC Titanium Nitrided
Guide
H-13, 52-54 HRC Nitrided/Black Oxide
Guide Plate
H-13, 52-54 HRC, Nitrided/Black Oxide
Cam Bars (2)
Stripper Plate Kit Cam Bars, Guide Plate, Guide, and Wedge Block are shown for reference only, sold in the assembly above.
Purchase the PLCM20-S assembly. Discard the Latch Bar, replacing it with the Cap/Driver/Spacer shown at left. Bestellen Sie die PLCM20-S-Baugruppe. Entsorgen Sie die Verschlussstange und ersetzen Sie sie durch den links abgebildeten Kopf / den Treiber/ Abstandhalter. Achetez l’assemblage PLCM20-S. Jeter la barre de verrouillage en la remplaçant par le couverture / pilote / espaceur illustré à gauche. catalogue number
description
PLCM20-S
Stripper Plate Kit: Metric
Cap
Assembly includes: • Cap (34-38 HRC, Nitrided) • Driver (35 HRC, Black Oxide) • Spacer (Stainless, 35-40 HRC) • (1) M5-.8 x 30mm SHCS for the Cap/Driver assembly. Baugruppe beinhaltet: • Kopf(34-38 HRC, nitriert) • Treiber (35 HRC, Schwarzoxid) • Abstandsplatte (rostfrei; 35-40 HRC) • (1) M5-.8 x 30mm SHCS für die Kopf/Treiber-Baugruppe. L’assemblage comprend: • Couverture (34-38 HRC, Nitruré) • Pilote (35 HRC, oxyde noir) • Espaceur (Inox, 35-40 HRC) • (1) M5-.8 x 30mm SHCS pour l’ensemble Couverture/Pilote.
E-8
Driver Spacer
stackit
®
Stack Mould System Efficiently design, build, and maintain stack moulds. Available as standard components with center support systems made to order.
Effizientes Gestalten, Bauen und Pflegen von Etagenformen. Als Standardkomponenten mit Trägereinheit für den Mittelblock erhältlich.
Concevez, construisez et entretenez efficacement des moules à étages. Disponibles en tant que composants standard avec des systèmes de support centraux fabriqués sur commande.
catalogue number
description
SK-GHA-250
Gear Housing Assembly
D
C
E
B
A
Center Positioning: Gear Housing Assembly maintains position of center section.
Zentrische Positionierung: Das Getriebegehäuse hält die Position des mittleren Blocks aufrecht.
Positionnement central: L’assemblage du carter d’engrenage Gear Housing maintient la position de la section centrale.
B
Rack Spacers: For securing gear racks to the movable halves.
Abstandshalter: Zur Befestigung von Zahnstangen an den beweglichen Hälften.
Espaceurs de crémaillère: Pour fixer les crémaillères aux moitiés mobiles.
C
Center Support: Support layouts allow for many applications.
Mittenabstützung: Abstützungsvarianten ermöglichen viele Anwendungen.
Support Central: les dispositions de support permettent des nombreuses applications.
A
D
E
Tie Bar Pads: Tie Bar Pads are also avail- Holmauflagen: Holmauflagen sind ebenable, visit procomps.com for templates. falls erhältlich, besuchen Sie procomps. com für Varianten.
Coussinets de Colonnes: Des coussinets de colonnes sont également disponibles, visitez procomps.com pour les modèles.
Ejection Actuation: Standard cylinders Auswerferbetätigung: Standardzylinder and couplings for actuating ejector plates. und Kupplungen zum Betätigen von Auswerferplatten.
Actionnement de l’éjection: vérins et raccords standard pour actionner les plaques d’éjection.
E-9
stackit
®
Stack Mould System
140mm 128mm
125.00mm* Cover Plates (4)
100mm
Gear Housing Top Cam Followers (4) M12-1.75 mounting screws (4)
Steel Spur Gear, 5 Diametral Pitch, 20 teeth, 20˚ Pressure Angle
275mm
84mm Precision Heavy Duty Ball Bearings (2) Steel Bushings 150.00mm*
Thrust Washers Wear Pads (4) to ride against racks secured by M8-1.25 FHCS
13mm x 95˚
Gear Housing Bottom
M10-1.5mm SHCS (8) *Mounting Pocket Dimensions +.05 / -.00
Design Installation Guidelines: • Max center section effective weight per StacKit pair is 4500KG. • Ensure mould is within maximum projected weight of moulding machine. • When mounting racks to a mould ensure both sides are timed equally. • Install two gear housings in center, as shown above. For large moulds, four housings should be installed—two per side.
E-10
Corner Block
Gestaltungs- & Installationsrichtlinien: • Das maximale Gewicht des Mittelblocks pro StacKit-Paar beträgt 4500kg. • Stellen Sie sicher, dass sich das Werkzeug innerhalb des maximal zulässigen Gewichts der Spritzgießmaschine befindet. • Wenn Sie Etagenantriebe an ein Werkzeug montieren, stellen Sie sicher, dass beide Seiten gleichmäßig aufeinander abgestimmt sind. • Montieren Sie zwei Getriebegehäuse in der Mitte, wie oben gezeigt. Bei großen Formen sollten vier Gehäuse installiert werden - zwei pro Seite.
Locating Pad 6mm
Guide de Conception d’Installation: • Le poids effectif maximal de la section centrale par paire StacKit est de 4.500kg. • Assurer que le moule ne surpasse le poids maximal projeté prévu par la presse à injecter. • Lors du montage des crémaillères sur un moule, veillez à ce que les deux côtés soient synchronisés de manière égale. • Installez deux carters d’engrenage au centre, comme indiqué ci-dessus. Pour les gros moules, quatre boîtiers doivent être installés, deux par côté.
stackit
®
Rack Spacer
1124mm Max distance from Gear Housing Centerline
50mm
57mm
18 ±2 HRC
65.15mm to center of Gear Housing
100mm
35mm
M12-1.75mm x 120mm SHCS (2)
38mm 100mm
m A-36 h Pre-Hard s Black Oxide
M10 x 120mm Dowel Pin keeps rack securely in position
13mm For locating in mouldbase
CAD insertion point | CAD Einfügemarke | CAD point d'insertion
catalogue number
description
SK-RSA-250
Rack Spacer Assembly
Screws and locating dowel included. Schrauben und Passstifte sind enthalten. Vis et goupille de positionnement inclus.
59 ±1 HRC
Rack
1240mm 5mm 63.5mm
M10 Dowel Pin Hole
19mm Centerline of Dowel Pin
38.1mm
CL Gear Housing 70mm
Rack Spacer
1124mm Distance between centers. Actual dowel location to be determined by toolmaker.
90 B
CL 50mm
CRS
catalogue number
description
SK-RC-250
Rack (Sold Individually)
E-11
stackit
®
Tie Bar Pads
100mm M16-2 x 18mm Deep Mounting screw locations
32mm
35mm
19mm 75mm
SK-TBP-35 Tie Bar Pad Blanks Holmauflagenrohlinge Coussinets de Colonne Sans Radius
SK-TBP-R Tie Bar Pad with finished radius. Please specify “-R” when ordering.
38mm
Holmauflagen mit fertigem Radius. Bitte geben Sie bei der Bestellung “-R” an.
R Tie Bar Radius
Coussinet de Colonne avec radius fini. Veuillez spécifier “-R” lors de la commande.
25mm Tangent Point
SK-TBP-RG Tie Bar Pad with finished radius, grease grooves, and zerk fitting. Please specify “-RG” when ordering.
Grease Grooves 1.5mm x 1mm deep
Holmauflagen mit fertigem Radius, Fettrillen und Schmiernippeln. Bitte geben Sie bei der Bestellung “-RG” an.
38mm
R Tie Bar Radius
Coussinet de Colonne avec radius fini, rainures de graisse et raccord zerk. Veuillez spécifier “-RG” lors de la commande. 6mm Zerk fitting installed
Grease Groove 1mm Deep
25mm Tangent Point
m CA954 Solid Bronze
CAD insertion point | CAD Einfügemarke | CAD point d'insertion
catalogue number
description
SK-TBP-35
Tie Bar Pad Blanks (No Radius)
SK-TBP-R
Tie Bar Pads with machined radius
SK-TBP-RG
Tie Bar Pads with machined radius, grease grooves and zerk fitting Sold individually | Einzeln erhältlich | Vendus séparément.
E-12
D Tie Bar ø
Supports (2)
Support
Y
Y
stackit
®
V Mold
D Center Support Systems
Mol
Tie Bar ø
H Entwickelt, um den Stift- und Buchseneingriff zu unterstützen. Die Mittelteile bestehen aus 1.7225, und verwenden Standardlayouts, Vorlagen und Komponenten.
Designed to help pin and bushing engagement. Manufactured from 1.7225, center sections utilise standard layouts, templates, and components.
Style 1
Style 2
Top Reach Support X
ort
X
D Tie Bar ø
D Supports (2) Tie Bar ø Support Y
Y
X
Y
Y
Y
H
Supports (2)
D Tie Bar ø
V Style 4
D Tie Bar ø D Tie Bar ø
D Mold Tie Bar ø D X Tie Bar ø H
D D TieTie BarBar ø ø
X X
X
X
H D X Tie Bar ø
Y V V
V D Tie Bar ø
Mold Supports (2)
Support
Mold Mold
V
Support
Y Mold
X B
V V
Y
Tie Bar p on mach
V
A Supports (2)
Support MoldSupports (2)
Mold
Support
H H
Mold
C
Y
V
H
A Way Support
Y Y
D Mold Tie Ba
H
Style 5 Y
Side Support (Bottom)
Supports (2) Mold
X
H
H
Y
V H
D D Mold TieTie BarBar ø ø
Support
H
V
V Mold
Mold Mold
X H
X
Supports (2)
V
D Mold Tie Bar ø
D Tie Bar ø
Y V
V
X
Supports (2)
Y
V
Side Support (Top)
X
Support
H
Style 3
Bottom Reach Support X
D Tie Bar ø
Conçu pour faciliter l’engagement des colonnees et des bagues. Fabriquées à partir 1.7225, les sections centrales utilisent des dispositions, des modèles et des composants standard.
H
C
H
B
TieHBar pads rest on machine ways
Y V To obtain a quote: 1. Select the style based on press layout and preference. Supports (2) 2. Determine the variables Mold based on the Graphics. 3. Send the information via email to tech@procomps.com andHwe will provide pricing and delivery.
Um ein Angebot zu erhalten: 1. Wählen Sie die Ausführung basierend auf Layout und Präferenz der Spritzgießmaschine aus. 2. Bestimmen Sie die Größen mithilfe der Grafiken. 3. Senden Sie die Informationen per E-Mail an tech@procomps.com, um Informationen über Preise und Lieferungsbedingungen zu erhalten.
Pour obtenir un devis: 1. Sélectionnez le style en fonction de la disposition en presse et des préférences. 2. Déterminez les variables en fonction des images. 3. Envoyez les informations par e-mail à tech@procomps.com pour avoir des prix et délais.
E-13
stackit
®
Ejection Actuation
15mm
+.25 - .00
Locating Slot for Key (included)
Full Radius
Key
15mm
Pin Plate
Ejector Plate
56mm Min.
40mm
5mm
+.25 - .00
Locating Slot for Key (included)
+.25 - .00
Pin Plate Coupling
Cylinders
M12-1.75 x 100mm Mounting SHCS (4 included)
50mm Stroke
125mm
75mm Male 1/4 NPT couplings (2 incl.)
8mm
80mm
9mm
M20-1.5mm Thread 76mm
100mm
28mm
20mm
Specifications: • 50mm Stroke • Rated up to 3200 psi • Temperature: 100˚ C max • Includes (2) NPT couplings and Locating Key
Spezifikationen: • 50mm Hub • Ausgelegt bis zu 3200 psi • Temperatur: 100° C maximal • Beinhaltet (2) NPT Kupplungen und Nutensteine
catalogue number
description
SK-CYL-50
50 mm Block Cylinder
35mm
Caractéristiques:: • Course de 50mm • Évalué jusqu’à 3.200 psi • Température: 100°C max • Comprend (2) raccords NPT et méplat de positionnement
CAD insertion point | CAD Einfügemarke | CAD point d'insertion
Pin Plate Couplings
38mm 12.5mm 6.5mm
40mm
+.00 -.25
28mm
+.00 -.13
+.00 -.13 +.00 -.05
M20-1.5mm Thread
24mm
.25
m AISI 4140 s Black Oxide
catalogue number
description
SK-PPC-20
M20-1.55 mm Pin Plate Coupling
CAD insertion point | CAD Einfügemarke | CAD point d'insertion
E-14
E-15
ejector pins, sleeves section f
DIN 1530-A Ion Nitrided
Inch Standard
Inch Standard
EPD
EPD
EP
EP
F-2
F-3
F-4
F-5
JIS Standard
JIS Standard
DIN 1530-F Through-Hardened
Inch Standard
EPJ
EPJ
BE
BE
F-6
F-7
F-8
F-9
Inch Standard
Thin Wall Sleeves
ES
ESTW
F-10
F-11
pin comparison
Metric mm 0.8 0.9 1.0 1.1 (1.2) 1.2 1.3 1.4
Pin Diameter D Inch DIN Metric Fraction Decimal PRO Cat # H 1/32
3/64
1.5 (1.6) 1/16 1.6 1.7 1.8 (1.9) 5/64 2.0 2.2 (2.4) 3/32 2.5 2.7 (2.8) 7/64 3.0 3.2 1/8 3.5 (3.6) 9/64 3.7 4.0 5/32 4.1 4.2 (4.4) 11/64 4.5 4.7 3/16 (4.8) Pin Diameter D 5.0 Inch 5.2 13/64 Fraction Decimal 5.5 1/32 .0312 (5.6) 7/32 (.0354) 6.0 15/64 (.0394) 6.1 (.0433) 6.2 3/64 (6.4) .04691/4 (.0472) 6.5 (6.7) (.0511) 17/64 7.0 (.0551) (7.1) (.0590) 9/32 19/64 1/16 7.5 .0625 (7.9) 5/16 (.0630) 8.0 (.0669) 8.2 (8.3) (.0675) 21/64 (.0708) 8.5 5/64 (8.7) .0781 11/32 (.0787) 9.0 (9.1) (.0866) 23/64 3/32 9.5 .09373/8 (9.9) (.0984) 25/64 7/64 10.0 .1094 10.2 (.1181) (10.3) 13/32 .1250 1/8 10.5 (.1378) (10.7) 27/64 9/64 11.0 .1406 5/32 (11.1) .15627/16 (11.5) (.1575) 29/64 (11.9) (.1653) 15/32 11/64 12.0 .1719 12.2 (.1771) 31/64 3/16 (12.3) .1875 12.5 (.1968) 13/64(12.7) .20311/2 (13.1) 33/64 (.2047) (13.5) 17/32 (.2165) 14.0 7/32 (14.3) .2187 9/16 .2344 15/64 15.0 (15.9) (.2362) 5/8 16.0 (.2440) 1/4 16.2 .250 (17.5) (.2559) 11/16 18.0 17/64 .2656 (19.1) (.2756) 3/4 .2812 9/32 20.0 (22.2) 7/8 19/64 .2969 25.0 5/16 (25.4) .3125 1 32.0 (.3150)
21/64 11/32 23/64 3/8 25/64
(.3228) .3281 (.3346) .3437 (.3543) .3594 .3750 .3900 (.3950) (.3937)
.0312 EPD008 4 (.0354) EPD009 4 (.0394) EPD01 4 (.0433) EPD011 4 .0469 — — (.0472) EPD012 3/4 (.0511) EPD013 4 (.0551) EPD014 4 (.059) EPD015 3/6 .0625 — — (.063) EPD016 3/6 (.0669) EPD017 3/6 (.0708) EPD018 3/6 .0781 — — (.0787) EPD02 4/6 (.0855) EPD022 4/6 .0937 — — (.0984) EPD025 5/6 (.1063) EPD027 5 .1094 — — (.1181) EPD03 6 .125 EPD032 6 (.1378) EPD035 7 .1406 — — (.1457) EPD037 7 .1562 EPD04 8 (.1614) EPD041 8 (.1653) EPD042 8 .1719 — — (.1771) EPD045 8 (.185) EPD047 8 .1875 — — (.1968) EPD05 Metric US10 Inch EPD052 10 # .005 O.S. mm .2031PRO Cat (.2165) EPD055 10 EP036 0.8 EP031 .2187 — — 0.9 .2344 EPD06 12 1.0(.2402) EPD061 12 1.1 (.244) EPD062 12 (1.2) .25 EP047 — EP052 — 1.2(.2559) EPD065 12 — — 1.3 .2656 EPD07 12 1.4(.2756) — — 1.5 .2812 EPD075 12 (1.6).2969 EP062 — — 1.6 .3125 (.315) EPD08 14 1.7 (.3228) EPD082 14 (1.7) .3281 EP062 — — 1.8(.3346) EPD085 14 (1.9).3437 EP078 — EP083 — 2.0(.3543) EPD09 14 2.2 .3594 — — EPD095EP099 14 (2.4) .375 EP094 — — 2.5 .39 (2.8)(.3937) EP109EPD10 EP114 16 EPD102 16 3.0(.4015) .4062 EP125 — EP130 — (3.2) (.4133) EPD105 16 3.5 .4219 — — (3.6)(.433) EP141EPD11 16 (4.0) .4375 EP156 — EP161— 4.0 .4531 — — 4.2 .4687 — — 18 (4.4)(.4724) EP172EPD12 (.4803) EPD122 18 4.5 (4.8).4844 EP187 — EP192 — EPD125 18 5.0 (.4921) — (5.2) .5 EP203 — .5156 — — 5.2 .5312 — — 5.5 (.5512) EPD14 22 (5.6).5625 EP219 — EP224 — (6.0)(.5906) EP234 — — 6.0 .625 — — 6.2(.6299) EPD16 22 EPD162EP25522 (6.4)(.6378) EP250 — — 6.5 .6875 24 (6.7)(.7087) EP266EPD18 .75 — — 7.0 EPD20 (7.1)(.7874) EP281 EP28626 .875 — — (7.5) EP297 (.9842) EPD25 32 (7.9)1.0000 EP312 — EP317 — 8.0(1.2598) EPD32 40
8.2 (8.3) 8.5 (8.7) 9.0 (9.1) (9.5) (9.9) (10.0) 10.0
EP328 EP344 EP359 EP375 EP390 EP395
EP349
EP380
T
Standard Head Dimensions JIS Metric US Inch PRO Cat # H T PRO Cat # .005 O.S. H
2 — — — EP031 — 0.25 2 — — — — — — 2 EPJ01 4/5/6 4 — — — 2 — — — — — — — — — — EP047 — 0.25 1.5/2 EPJ012 5/6 4 — — — 2 — — — — — — 2 — — — — — — 1.5/3 EPJ015 4/5/6/8 4/6 — — — — — — — EP062 — 0.25 1.5/3 — — — — — — 1.5/3 — — — — — — 1.5/3 — — — — — — — — — — EP078 — 0.25 2/3 EPJ02 5/6/8 4/6 — — — 2/3 — — — — — — — — — — EP094 — 0.25 2/3 EPJ025 6/8 4/6 — — — 2 — — — — — — — — — — EP109 — 0.25 3 EPJ03 6/8/9 4/6 — — — 3 — — — EP125 EP130 0.25 3 EPJ035 7 4 — — — — — — — EP141 EP146 0.25 3 — — — — — — 3 EPJ04 8 6 EP156 EP161 0.28 3 — — — — — — 3 — — — — — — — — — — EP172 EP177 0.34 3 EPJ045 8 6 — — — 3 — — — — — — — — — Dimensions — EP187 EP192 0.37 Standard Head 3 EPJ05 9 DIN Metric 6 — — JIS Metric — Cat # H 3 T — PRO Cat—# H — TEP203PRO EP208 H0.37 3 EPJ055 10 6 — — — .25 .125 EPD008 4 2 — — — — EP219 EP224 0.40 4 6 2EP234 5 EPJ06EPD00910 EP239 0.4 EPJ01 4/5/6 4 2 EPD01 5 — — — — — — EPD011 4 2 5 — — — — — — .125 — .25 — — — EP250 EP255 0.43 4 — 2 — 5/6— EPJ012 5 — EPD012— — — — EPD013— EP271 0.43 4 — 2EP266 5 EPJ07 EPD01411 — — 4 6 2 — — — EPD015— EP286 4/5/6/8 0.43 3 — 1.5EP281 EPJ015 — — EP297 EP302 0.5 .125 — .25 5 — — EP317 0.50 EPD016— 6 — 3EP312 5 EPJ08 13 8 — — — EPD017 6 3 5 — — — — — — .125 — .25 — — — EP328 EP333 0.56 3 EPD018 6 5 — — — — — — .125 — .25 — — — EP344 EP349 0.56 5/6/8 EPD02 4 2 EPJ02 5 — — — — — — 2/3 4/6 — — — EPD022— EP359 EP364 0.62 — — EP375 EP380 0.62 .25 5 .125 — — — EPD025— EP395 0.62 6/8 5 — 2EP390 EPJ025 15 8 — — — .25 5 .125EPJ10 5 — EPD03— — — 6 — 3 — EPJ03 6/8/9 EP411 0.68 .125 — EPD032— .25 — 6 — 3EP406 5 — — — 7 EPJ035 EPD035 6 3 — — — — EP422 EP427 0.68 .25 5 .125 — — — — — — .28 — .156 — — — EP437 EP442 0.68 3EP453 EPJ04 8 — 80.68 — — EPD04— EP458 8 — 3EP469 — — EPD042— EP474 0.75 17 8 — — — .187EPJ12 .34 7 7 — EPD045— — — — EPJ045 8— 8 3 — — — — EP484 EP489 0.75 .37 .187 7 — EPD05— 9— 10 — 3 — EPJ05— — — — EP500 EP505 0.75 .37 .187 — — — — — EP515 — 0.75 3 EPD052 10 — — — — EP531 EP536 0.75 EPJ055 10— EPD05519 10 8 3 — 7 EPJ14 — .40 — .187 — — — EP562 — 0.81 .40 — .187EPJ15 20 8 — — — 12 — 5EP625 EPJ06— 10 — — EPD06— 0.87 12 8 5 — 7 EPJ16 EPD06221 — — — — — — — .43 7 .187 — — — EPD065— — 0.93 12 — 5EP687 23 8 — — — .250EPJ18 .43 7 — — EPD07— — EP750 — 1.00 11 EPJ07 14 5 25 8 — — — .43 8 .250EPJ20 — — — — EP875 — 1.12 .250 .50 10 — — — — — — .250 — .50 — — — EP1000 — 1.25 14 — 5 — EPJ08 13— 10 — EPD08— —
.56
.250
.56
.250
.62 .62 .62 .62
.250 .250 .250 .250
EPD082
14
5
EPD085
14
5
EPD09
14
5
T 0.125 — — — 0.125 — — — — 0.125 — — — 0.125 — — 0.125 — — 0.125 — 0.125 — 0.125 — 0.156 — — 0.187 — — 0.187 — 0.187 T — 0.187 0.187 4— — 0.187 4— 0.250 — 0.250 4/6 0.25 0.250 — — 0.25 — 0.25 4/6— 0.25 0.250 0.25 4/6 — — 4/6 0.250
Chart shows standard nominal Pin Ø. Reference each specific page for shoulder and overall lengths. Tabelle zeigt die Ø der Standardauswerfer. Referenzieren Sie jede spezifische Seite für Schulterund Gesamtlängen. Le graphique indique le diamètre nominal de la broche. Rapportez à chaque page spécifique pour les longueurs d’épaule et générales.
D
4
0.250 — 0.250 6 0.25 0.250 — 6— 0.25 6— 0.25 0.250 0.25 6— 0.25 — 0.25 — — 0.250 — 0.250 6 — 0.250 — 0.250 8—
T H
F-1 EPD10
16
5
EPJ10
15
8
din1530-a ion nitrided T
L+2.0 -0.0
+0.00 -0.05
R0.3 max
4R a
H +0.0 -0.2
D g6 32 ± 2 HRC
m 1.2344 h Core: 48-50 HRC, Surface: 66-70 HRC
d
h
t
1.2 1.5 1.6 1.7 1.8 2 2.2 2.5 2.7 3 3.2 3.5 3.7 4 4.1 4.2 4.5 4.7 5 5.2 5.5 6 6.1 6.2 6.5 7 7.5 8 8.2 8.5 9 9.5 10 10.2 10.5 11 12 12.2 12.5 14 16 16.2 18 20 25 32
3 3 3 3 3 4 4 5 5 6 6 7 7 8 8 8 8 8 10 10 10 12 12 12 12 12 12 14 14 14 14 14 16 16 16 16 18 18 18 22 22 22 24 26 32 40
1.5 1.5 1.5 1.5 1.5 2 2 2 2 3 3 3 3 3 3 3 3 3 3 3 3 5 5 5 5 5 5 5 5 5 5 5 5 5 5 5 7 7 7 7 7 7 7 8 10 10
Pin Diameter
49 ± 1 HRC
68 ± 2 HRC
CAD insertion point | CAD Einfügemarke | CAD point d'insertion
l=125mm
l=160mm
EPD012L125 EPD015L125 EPD016L125 EPD017L125 EPD018L125 EPD02L125 EPD022L125 EPD025L125 — EPD03L125 EPD032L125 EPD035L125 — EPD04L125 — EPD042L125 EPD045L125 EPD047L125 EPD05L125 EPD052L125 EPD055L125 EPD06L125 — EPD062L125 EPD065L125 EPD07L125 — EPD08L125 EPD082L125 EPD085L125 EPD09L125 — EPD10L125 EPD102L125 EPD105L125 EPD11L125 EPD12L125 EPD122L125 EPD125L125 EPD14L125 EPD16L125 — — — — —
EPD012L160 EPD015L160 — — — EPD02L160 EPD022L160 EPD025L160 EPD027L160 EPD03L160 H +0.0 -0.2 EPD032L160 EPD035L160 EPD037L160 EPD04L160 EPD041L160 EPD042L160 EPD045L160 EPD047L160 EPD05L160 EPD052L160 EPD055L160 EPD06L160 EPD061L160 EPD062L160 EPD065L160 EPD07L160 EPD075L160 EPD08L160 EPD082L160 EPD085L160 EPD09L160 EPD095L160 EPD10L160 EPD102L160 EPD105L160 EPD11L160 EPD12L160 EPD122L160 EPD125L160 EPD14L160 EPD16L160 — EPD18L160 EPD20L160 EPD25L160 EPD32L160
l=200mm
l=250mm
l=400mm
l=630mm
— — — — EPD015L200 EPD015L250 — — EPD016L200 EPD016L250 — — EPD017L200 EPD017L250 — — EPD018L200 EPD018L250 +2.0 — — EPD02L200 EPD02L250L -0.0EPD02L400 — +0.00 EPD022L200 — T -0.05 EPD022L250 EPD022L400 EPD025L200 EPD025L250 EPD025L400 — R0.3 max Rz 4 — EPD027L250 EPD027L400 — EPD03L200 EPD03L250 EPD03L400 — EPD032L200 EPD032L250 EPD032L400 — 70 ± 2 HRC 32 ± 2 HRC ± 2 HRC EPD035L200 EPD035L25042 EPD035L400 — — EPD037L250 EPD037L400 — EPD04L200 EPD04L250 EPD04L400 EPD04L630 — EPD041L250 EPD041L400 — EPD042L200 EPD042L250 EPD042L400 — EPD045L200 EPD045L250 EPD045L400 — EPD047L200 EPD047L250 EPD047L400 — EPD05L200 EPD05L250 EPD05L400 EPD05L630 EPD052L200 EPD052L250 EPD052L400 — EPD055L200 EPD055L250 EPD055L400 — EPD06L200 EPD06L250 EPD06L400 EPD06L630 — EPD061L250 EPD061L400 — EPD062L200 EPD062L250 EPD062L400 EPD062L630 EPD065L200 EPD065L250 EPD065L400 — EPD07L200 EPD07L250 EPD07L400 EPD07L630 — EPD075L250 EPD075L400 — EPD08L200 EPD08L250 EPD08L400 EPD08L630 EPD082L200 EPD082L250 EPD082L400 — EPD085L200 EPD085L250 EPD085L400 — EPD09L200 EPD09L250 EPD09L400 — — EPD095L250 EPD095L400 — EPD10L200 EPD10L250 EPD10L400 EPD10L630 EPD102L200 EPD102L250 EPD102L400 — EPD105L200 EPD105L250 EPD105L400 — EPD11L200 EPD11L250 EPD11L400 — EPD12L200 EPD12L250 EPD12L400 EPD12L630 EPD122L200 EPD122L250 EPD122L400 — EPD125L200 EPD125L250 EPD125L400 — EPD14L200 EPD14L250 EPD14L400 EPD14L630 EPD16L200 EPD16L250 EPD16L400 EPD16L630 — EPD162L250 EPD162L400 EPD162L630 EPD18L200 EPD18L250 EPD18L400 EPD18L630 EPD20L200 EPD20L250 EPD20L400 EPD20L630 EPD25L200 EPD25L250 EPD25L400 EPD25L630 EPD32L200 EPD32L250 EPD32L400 EPD32L630
l=1000mm — — — — — — — — — D g6 — — — — — — — Stiack version — — EPD05L1000 — — EPD06L1000 — — — EPD07L1000 — EPD08L1000 — — — — EPD10L1000 — — — EPD12L1000 — — — — — — EPD20L1000 EPD25L1000 EPD32L1000
Custom Templates for Mould-Ready Components can be found in section X. Kundenspezifische Vorlagen für vorgefertigte Komponenten finden Sie in Abschnitt X.
X
Trouvez des modèles personnalisés pour les composants Mould-Ready dans la section X.
F-2
X
X
din1530-c ion nitrided
S 32 ± 2 HRC R 0.3 max
H
B
R 10
+0.0 -0.1
4R a
+0.0 -0.2
Dg6
68 ± 2 HRC 49 ± 1 HRC
T
+0.00 -0.05
L +2.0 -0.0
m 1.2344 h Core: 48-50 HRC, Surface: 66-70 HRC
d
b
h
t
Nominal Diameter
CAD insertion point | CAD Einfügemarke | CAD point d'insertion
l=125mm s
l=160mm s
=50mm
=75mm
l=200mm s=75mm
0.8
2
4
2
EPD008X2L125-50
EPD008X2L160-75
—
0.9
2
4
2
EPD009X2L125-50
EPD009X2L160-75
—
1
2
4
2
EPD01X2L125-50
EPD01X2L160-75
EPD01X2L200-75
1.1
2
4
2
EPD011X2L125-50
EPD011X2L160-75
—
1.2
2
4
2
EPD012X2L125-50
EPD012X2L160-75
—
1.3
2
4
2
EPD013X2L125-50
EPD013X2L160-75
EPD013X2L200-75
1.4
2
4
2
EPD014X2L125-50
EPD014X2L160-75
—
1.5
3
6
3
EPD015X3L125-50
EPD015X3L160-75
EPD015X3L200-75
1.6
3
6
3
EPD016X3L125-50
EPD016X3L160-75
EPD016X3L200-75
1.7
3
6
3
—
EPD017X3L160-75
EPD017X3L200-75
1.8
3
6
3
EPD018X3L125-50
EPD018X3L160-75
EPD018X3L200-75
2
3
6
3
EPD02X3L125-50
EPD02X3L160-75
EPD02X3L200-75
2.2
3
6
3
—
EPD022X3L160-75
EPD022X3L200-75
2.5
3
6
3
EPD025X3L125-50
EPD025X3L160-75
EPD025X3L200-75
Custom Templates for Mould-Ready Components can be found in section X. X
Kundenspezifische Vorlagen für vorgefertigte Komponenten finden Sie in Abschnitt X. Trouvez des modèles personnalisés pour les composants Mould-Ready dans la section X.
X
X
X
X
X
X
X
F-3
inch standard
L+.06 -.00 +.000
T -.002 R .03
D Tolerances Ø3/64 - Ø7/16
Ø15/32 and Up
m H-13
d
4R a
H +.00 -.01
-.0004 -.0007
D 32 ± 2 HRC
-.0004
h Core: 48-50 HRC, Surface: 66-70 HRC
h
t
Nominal Pin Diameter
68 ± 2 HRC
49 ± 1 HRC
-.0009
l=6”
CAD insertion point | CAD Einfügemarke | CAD point d'insertion
l=10”
D D Standard Standard
l=14”
l=18”
l=25”
l=39” l=50”
D D D D D D D D D .005 Standard .005 Standard .005 Standard .005 Standard Standard Oversize Oversize Oversize Oversize
1/32
.25
.125
EP031L6
—
—
—
—
—
—
—
—
—
—
3/64
.25
.125
EP047L6
—
—
—
—
—
—
—
—
—
—
1/16
.25
.125
EP062L6
EP062L10
—
—
—
—
—
—
—
—
—
5/64
.25
.125
EP078L6
EP078L10
—
—
—
—
—
—
—
—
—
3/32
.25
.125
EP094L6
EP094L10
—
—
—
—
—
—
—
—
—
7/64
.25
.125
EP109L6
EP109L10
—
—
—
—
—
—
—
—
—
1/8
.25
.125
EP125L6
EP125L10
EP130L10
EP125L14
EP130L14
EP125L18
—
EP125L25
—
—
—
9/64
.25
.125
—
EP141L10
—
EP141L14
EP146L14
—
—
—
—
—
— —
5/32
.28
.156
EP156L6
EP156L10
EP161L10
EP156L14
EP161L14
EP156L18
—
EP156L25
—
—
11/64
.34
.187
—
EP172L10
—
EP172L14
EP177L14
—
—
—
—
—
—
3/16
.37
.187
EP187L6
EP187L10
EP192L10
EP187L14
EP192L14
EP187L18
—
EP187L25
—
EP187L39
EP187L50
13/64
.37
.187
—
EP203L10
—
EP203L14
EP208L14
—
—
—
—
—
—
7/32
.40
.187
EP219L6
EP219L10
EP224L10
EP219L14
EP224L14
—
—
EP219L25
—
—
—
15/64
.40
.187
—
EP234L10
—
EP234L14
EP239L14
—
—
—
—
—
—
1/4
.43
.187
EP250L6
EP250L10 EP255L10
EP250L14
EP255L14
EP250L18
17/64
.43
.250
—
EP266L10
—
EP266L14
EP271L14
—
—
EP266L25
—
—
—
9/32
.43
.250
EP281L6
EP281L10
EP286L10
EP281L14
EP286L14
EP281L18
EP286L18
EP281L25
—
—
—
19/64
.50
.250
—
EP297L10
—
EP297L14
EP302L14
—
—
—
—
—
—
5/16
.50
.250
EP312L6
EP312L10
EP317L10
EP312L14
EP317L14
EP312L18
EP317L18
EP312L25
EP317L25
EP312L39
EP312L50
21/64
.56
.250
—
EP328L10
—
—
11/32
.56
.250
EP344L6
23/64
.62
.250
3/8
.62
.250
25/64
.62
.250
—
EP255L18 EP250L25
—
EP250L39 EP250L50
EP328L14
EP333L14
—
—
EP328L25
—
—
EP344L10 EP349L10
EP344L14
EP349L14
—
—
EP344L25
—
—
—
EP359L10
—
EP359L14
EP364L14
—
—
—
—
—
EP375L6
EP375L10
EP380L10
EP375L14
EP380L14
EP375L18
—
—
EP390L14
EP395L14
EP390L18
—
—
EP395L25
—
—
EP406L25
—
—
—
—
EP380L18 EP375L25 EP380L25 EP375L39 EP375L50
13/32
.68
.250
EP406L6
EP406L10
EP411L10
EP406 L14
EP411L14
EP406L18
—
27/64
.68
.250
—
—
—
EP422L14
EP427L14
—
—
—
—
—
—
7/16
.68
.250
EP437L6
EP437L14
EP442L14
EP437L18
—
EP437L25
—
EP437L39
—
29/64
.68
.250
—
—
—
EP453L14
EP458L14
—
—
—
—
—
—
15/32
.75
.250
—
EP469L10
EP474L10
—
EP474L14
EP469L18
—
EP469L25
—
—
—
31/64
.75
.250
—
—
—
EP484L14
EP489L14
—
—
—
—
—
—
1/2
.75
.250
EP500L6
17/32
.75
.250
—
—
—
EP531L14
EP536L14
—
—
EP531L25
—
—
—
9/16
.81
.250
EP562L6
EP562L10
—
EP562L14
—
EP562L18
—
EP562L25
—
—
—
5/8
.87
.250
EP625L6
EP625L10
—
EP625L14
—
EP625L18
—
EP625L25
—
EP625L39
—
11/16
.93
.250
—
EP687L10
—
—
—
EP687L18
—
EP687L25
—
—
—
3/4
1.00
.250
EP750L6
EP750L10
—
EP750L14
—
EP750L18
—
EP750L25
—
7/8
1.12
.250
—
EP875L10
—
EP875L14
—
EP875L18
—
EP875L25
—
EP875L39
—
1
1.25
.250
—
EP1000L14
—
EP1000L18
—
EP1000L25
—
EP1000L39
—
EP437L10 EP442L10
EP500L10 EP505L10 EP500L14 EP505L14 EP500 L18
EP1000L6 EP1000L10
—
EP500L25 EP505L25 EP500L39 EP500L50
EP750L39 EP750L50
Custom Templates for Mould-Ready Components can be found in section X. Kundenspezifische Vorlagen für vorgefertigte Komponenten finden Sie in Abschnitt X.
X
Trouvez des modèles personnalisés pour les composants Mould-Ready dans la section X.
F-4
X
X
inch standard
S R .25
32 ± 2 HRC .25
s
Nominal Pin Diameter
Shoulder Length
3/64
1/16
5/64
3/32
7/64
L +.06 -.00
h Core: 48-50 HRC, Surface: 66-70 HRC
d
68 ± 2 HRC
.125 +.000 -.001 49 ± 1 HRC R .03
+.000 -.002
1/32
4R a
+.00 -.01
.125
m H-13
D -.0004 -.0007
CAD insertion point | CAD Einfügemarke | CAD point d'insertion
l=6”
l=10”
D Standard
D .005 Oversize
D Standard
1/2
EP031L6-05
EP036L6-05
2
EP031L6-20
—
3
EP031L6-30
—
—
4
EP031L6-40
—
1/2
EP047L6-05
—
l=14”
D .005 Oversize
D Standard
D .005 Oversize
—
—
—
—
EP031L10-20
EP036L10-20
—
—
—
—
—
—
—
—
—
EP047L10-05
EP052L10-05
—
—
2
EP047L6-20
—
EP047L10-20
EP052L10-20
EP047L14-20
—
3
—
—
EP047L10-30
—
—
—
4
—
—
EP047L10-40 EP052L10-40
EP047L14-40
EP052L14-40
1/2
EP062L6-05
—
EP062L10-05 EP067L10-05
—
—
2
EP062L6-20
—
EP062L10-20 EP067L10-20
EP062L14-20
—
3
—
—
EP062L10-30
4
—
—
EP062L10-40 EP067L10-40 EP062L14-40
—
1/2
EP078L6-05
—
EP078L10-05 EP083L10-05
—
—
2
EP078L6-20
—
EP078L10-20 EP083L10-20
EP078L14-20
—
3
—
—
EP078L10-30
—
—
—
—
— EP067L14-40
4
—
—
EP078L10-40 EP083L10-40
EP078L14-40
EP083L14-40
1/2
EP094L6-05
—
EP094L10-05 EP099L10-05
—
—
2
EP094L6-20
—
EP094L10-20 EP099L10-20
EP094L14-20
—
3
—
—
EP094L10-30
—
—
—
4
—
—
EP094L10-40 EP099L10-40 EP094L14-40
1/2
EP109L6-05
—
EP109L10-05
EP114L10-05
—
EP099L14-40 —
2
EP109L6-20
—
EP109L10-20
EP114L10-20
EP109L14-20
—
3
—
—
EP109L10-30
—
—
—
4
—
—
EP109L10-40
EP114L10-40
EP109L14-40
EP114L14-40
Custom Templates for Mould-Ready Components can be found in section X. X
Kundenspezifische Vorlagen für vorgefertigte Komponenten finden Sie in Abschnitt X. Trouvez des modèles personnalisés pour les composants Mould-Ready dans la section X.
X
X
X
F-5 X
jis standard
L+2.0 -0.0 T
+0.00 -0.05
R0.3 max
H
D 32 ± 2 HRC
m SKD61
d
Pin Diam.
4R a
+0.0 -0.1
49 ± 1 HRC
68 ± 2 HRC
h Core: 48-50 HRC, Surface: 66-70 HRC
h
t
l=100mm
l=150mm
-0.01 -0.02
CAD insertion point | CAD Einfügemarke | CAD point d'insertion
l=200mm
l=250mm
l=300mm l=400mm l=500mm l=600mm l=650mm
1
4
4
EPJ01L100
EPJ01L150
EPJ01L200
—
—
—
—
—
—
1.5
4
4
EPJ015L100
EPJ015L150
EPJ015L200
EPJ015L250
—
—
—
—
—
2
5
4
EPJ02L100
EPJ02L150
EPJ02L200
EPJ02L250
—
—
—
—
—
2.5
6
4
EPJ025L100
EPJ025L150
EPJ025L200
EPJ025L250
—
—
—
—
—
3
6
4
EPJ03L100
EPJ03L150
EPJ03L200
EPJ03L250
—
—
—
—
—
3.5
7
4
EPJ035L100
EPJ035L150
EPJ035L200
EPJ035L250
—
—
—
—
—
4
8
6
—
—
EPJ04L200
EPJ04L250
EPJ04L300 EPJ04L400
—
—
—
4.5
8
6
—
—
EPJ045L200
EPJ045L250 EPJ045L300 EPJ045L400
—
—
—
5
9
6
—
—
EPJ05L200
EPJ05L250
EPJ05L300 EPJ05L400
—
—
—
5.5
10
6
—
—
EPJ055L200
EPJ055L250 EPJ055L300 EPJ055L400
—
—
—
6
10
6
—
—
EPJ06L200
EPJ06L250
EPJ06L300 EPJ06L400 EPJ06L500
—
—
7
11
6
—
—
—
EPJ07L250
EPJ07L300
—
—
8
13
8
—
—
—
—
—
EPJ08L400 EPJ08L500 EPJ08L600
10
15
8
—
—
—
—
—
EPJ10L400
EPJ10L500
EPJ10L600
—
12
17
8
—
—
—
—
—
—
EPJ12L500
EPJ12L600
EPJ12L650
14
19
8
—
—
—
—
—
—
EPJ14L500
—
—
15
19
8
—
—
—
—
—
—
EPJ15L500
—
—
16
21
8
—
—
—
—
—
—
EPJ16L500
—
—
18
23
8
—
—
—
—
—
—
EPJ18L500
—
—
20
25
8
—
—
—
—
—
—
EPJ20L500
—
—
EPJ07L400
EPJ07L500
—
Custom Templates for Mould-Ready Components can be found in section X. Kundenspezifische Vorlagen für vorgefertigte Komponenten finden Sie in Abschnitt X.
X
Trouvez des modèles personnalisés pour les composants Mould-Ready dans la section X. X
X
X
F-6
X
X
jis standard
S
32 ± 2 HRC
R 0.3 max
B
-0.01
+0.00 - 0.02
H +0.0 -0.1
68 ± 2 HRC
R 10 49 ± 1 HRC
T
+0.00 -0.05
L +2.0 -0.0
m SKD61 h Core: 48-50 HRC, Surface: 66-70 HRC
d
b
h
CAD insertion point | CAD Einfügemarke | CAD point d'insertion
1.2
1.5
2 2.5 3
l=150mm
t
Nominal Diameter 1
D -0.02
4R a
s=50mm
l=200mm
s=70mm
s=70mm
s=100mm
2.5
5
4
EPJ01X25L150-50
—
—
EPJ01X25L200-100
3
6
4
EPJ01X3L150-50
—
EPJ01X3L200-70
EPJ01X3L200-100
2.5
5
4
EPJ012X25L150-50
—
—
EPJ012X25L200-100
3
6
4
EPJ012X3L150-50
—
EPJ012X3L200-70
EPJ012X3L200-100
2.5
5
4
EPJ015X25L150-50
—
—
EPJ015X25L200-100
3
6
4
EPJ015X3L150-50
—
EPJ015X3L200-70
EPJ015X3L200-100
4
8
6
EPJ015X4L150-50
—
—
EPJ015X4L200-100
3
6
4
EPJ02X3L150-50
—
EPJ02X3L200-70
EPJ02X3L200-100
4
8
6
—
EPJ02X4L150-70
—
EPJ02X4L200-100
3
6
4
EPJ025X3L150-50
—
EPJ025X3L200-70
EPJ025X3L200-100
4
8
6
—
EPJ025X4L150-70
—
EPJ025X4L200-100
4
8
6
—
EPJ03X4L150-70
—
EPJ03X4L200-100
5
9
6
—
—
—
EPJ03X5L200-100
Custom Templates for Mould-Ready Components can be found in section X. X
Kundenspezifische Vorlagen für vorgefertigte Komponenten finden Sie in Abschnitt X. Trouvez des modèles personnalisés pour les composants Mould-Ready dans la section X.
X
X
X
X
X
X
X
F-7
din1530-f through-hardened
L
+1.0 -0.0
43 ±2 HRC
M
R H
Y +.000 -.015
4R a
+.0 -.2
T +.00 -.05
59 ±1 HRC
D
+.000
X -.015
R 10
+.00 -.02
m 1.2510
+1.0 +2.0
h 58-60 HRC
CAD insertion point | CAD Einfügemarke | CAD point d'insertion
x y d h t r
l=
60 mm
l=
80 mm
l=
l=
100 mm
l=
125 mm
l=
160 mm
200 mm
l=
250 mm
l=
315 mm
l=
400 mm
1.0 3.5
4
8
3
0.3 BE4-1.0L60 BE4-1.0L80 BE4-1.0L100 BE4-1.0L125 BE4-1.0L160
—
—
—
—
1.2 3.5
4
8
3
0.3
BE4-1.2L80 BE4-1.2L100 BE4-1.2L125 BE4-1.2L160
—
—
—
—
—
—
1.5 4.5
5
10
3
0.3
—
BE5-1.5L80 BE5-1.5L100 BE5-1.5L125 BE5-1.5L160
—
—
—
1.2 5.5
6
12
5
0.5
—
BE6-1.2L80 BE6-1.2L100 BE6-1.2L125 BE6-1.2L160 BE6-1.2L200
—
—
—
1.5
5.5
6
12
5
0.5
—
BE6-1.5L80 BE6-1.5L100 BE6-1.5L125 BE6-1.5L160 BE6-1.5L200
—
—
—
2.0 5.5
6
12
5
0.5
—
BE6-2.0L80 BE6-2.0L100 BE6-2.0L125 BE6-2.0L160 BE6-2.0L200
—
—
—
1.2
7.5
8
14
5
0.5
—
—
BE8-1.2L100 BE8-1.2L125 BE8-1.2L160 BE8-1.2L200 BE8-1.2L250
—
—
1.5
7.5
8
14
5
0.5
—
—
BE8-1.5L100 BE8-1.5L125 BE8-1.5L160 BE8-1.5L200 BE8-1.5L250
—
—
BE8-2.0L100 BE8-2.0L125 BE8-2.0L160 BE8-2.0L200 BE8-2.0L250 BE8-2.0L315 Length
2.0 7.5
8
14
5
0.5
—
—
1.5 9.5
10
16
5
0.5
—
—
—
2.0 9.5
10
16
5
0.5
—
—
—
2.0 11.5 12
20
7
2.5 11.5 12
20
7
—
—
Head 0.8 Ø —
0.8
—
2.0 15.5 16
22
7
0.8
—
—
2.5 15.5 16
22
7
H— 0.8 -0.2 Head
—
+0.0
ThicknessM Blade Length M 30 mm
—
R
L
M +0.00 T -0.05 40 mm
+1.0 -0.0
—
—
M
+1.0 +2.0
Rz 4—
Blade Ø—
M
D50 mm
+0.00 -0.02
— —
Width BE10-2.0L160 BE10-2.0L200 BE10-2.0L250 BE10-2.0L315 BE10-2.0L400
—
— —
Flat Length
—
—
43 ±2 HRC
BE10-1.5L160 BE10-1.5L200 BE10-1.5L250 BE10-1.5L315 Flat
M R 10mm 60
—
BE12-2.0L200 BE12-2.0L250 BE12-2.0L315 BE12-2.0L400
—
BE12-2.5L200 BE12-2.5L250 BE12-2.5L315 BE12-2.5L400 Y +0.000 -0.015
—
BE16-2.0L200 BE16-2.0L250 BE16-2.0L315 BE16-2.0L400
—
BE16-2.5L200 BE16-2.5L250 BE16-2.5L315 BE16-2.5L400
M HRC 59 ±1 80 mm
Flat Thickness
M 100 mm
M+0.000 -0.015 125Xmm
M 160 mm
M 200 mm
Custom Templates for Mould-Ready Components can be found in section X. X
Kundenspezifische Vorlagen für vorgefertigte Komponenten finden Sie in Abschnitt X. Trouvez des modèles personnalisés pour les composants Mould-Ready dans la section X.
X
JIS Specification
Spécification JIS
JIS Spezifikation
Material: SKS-21 X JIS Blade Ejectors can be ordered by specifying the information shown below. X
Material: SKS-21
Matériel: SKS-21
JIS Flachauswerfer können unter Angabe der folgenden Informationen bestellt werden.
Les éjecteurs de lame JIS peuvent être commandés en spécifiant les informations ci-dessous.
X
Length Flat Length
X
X
X
F-8
Flat Width
Head Ø Head Thickness
Blade Ø
Flat Thickness
inch standard
+.06
L -.00 43 ±2 HRC
+.02
M +.06
R .03
Y +.0000 -.0003
4R a
H +.00 -.01 T +.000 -.002
59 ±1 HRC
D +.000 -.001
m 1.2510
+.0000
X -.0003
R 3.5
h 58-60 HRC
CAD insertion point | CAD Einfügemarke | CAD point d'insertion
x
y
d
h
t
l =6.5”
l =7.5”
l =10.5”
.0150
.0460
.062
.250
.125
BE062-015L6.5
BE062-015L7.5
—
.0150
.1000
.125
.250
.125
BE125-015L6.5
BE125-015L7.5
—
.0200
.0460
.062
.250
.125
BE062-020L6.5
BE062-020L7.5
—
.0200
.1000
.125
.250
.125
BE125-020L6.5
BE125-020L7.5
—
.0240
.1000
.125
.250
.125
BE125-024L6.5
BE125-024L7.5
—
.0240
.1400
.156
.281
.156
BE156-024L6.5
BE156-024L7.5
—
.0240
.1720
.187
.375
.187
BE187-024L6.5
BE187-024L7.5
—
.0320
.1000
.125
.250
.125
BE125-032L6.5
BE125-032L7.5
—
.0320
.1400
.156
.281
.156
BE156-032L6.5
BE156-032L7.5
Flat BE187-032L7.5 Width
— BE187-032L10.5
BE250-032L7.5
BE250-032L10.5
Length
.0320
.1720
.187
.375
.187
Flat Length BE187-032L6.5
.0320
.2340
.250
.437
.187
BE250-032L6.5
.0320
.2960 Head
Ø .312
.500
.250
—
BE312-032L7.5
BE312-032L10.5
.0320
.3590
.375
.625
.250
—
BE375-032L7.5
BE375-032L10.5
.0460
.1000
.125
.250
.125 Blade
.0460
Head .1400 Thickness.156
.281
.0460
.1720
.187
.375
.0460
.2340
.250
.437
.0460
.2960
.312
.0460
.3590
.375
Ø BE125-046L6.5
BE125-046L7.5
Flat — Thickness —
.156
BE156-046L6.5
BE156-046L7.5
.187
BE187-046L6.5
BE187-046L7.5
BE187-046L10.5
.187
BE250-046L6.5
BE250-046L7.5
BE250-046L10.5
.500
.250
—
BE312-046L7.5
BE312-046L10.5
.625
.250
—
BE375-046L7.5
BE375-046L10.5
.0620
.1720
.187
.375
.187
BE187-062L6.5
BE187-062L7.5
BE187-062L10.5
.0620
.2340
.250
.437
.187
BE250-062L6.5
BE250-062L7.5
BE250-062L10.5
.0620
.2960
.312
.500
.250
—
BE312-062L7.5
BE312-062L10.5
.0620
.3590
.375
.625
.250
—
BE375-062L7.5
BE375-062L10.5
.0780
.2960
.312
.500
.250
—
BE312-078L7.5
BE312-078L10.5
.0780
.3590
.375
.625
.250
—
BE375-078L7.5
BE375-078L10.5
.0780
.4840
.500
.750
.250
—
BE500-078L7.5
BE500-078L10.5
.0780
.5470
.562
.812
.250
—
BE562-078L7.5
BE562-078L10.5 BE625-078L10.5
.0780
.6090
.625
.875
.250
—
BE625-078L7.5
.0940
.4220
.437
.687
.250
—
BE437-094L7.5
BE437-094L10.5
.0940
.4840
.500
.750
.250
—
BE500-094L7.5
BE500-094L10.5
.0940
.5470
.562
.812
.250
—
BE562-094L7.5
BE562-094L10.5
.0940
.6090
.625
.875
.250
—
BE625-094L7.5
BE625-094L10.5
M = 5”
M = 5”
M = 6”
Blade Length M
Custom Templates for Mould-Ready Components can be found in section X. X
Kundenspezifische Vorlagen für vorgefertigte Komponenten finden Sie in Abschnitt X. Trouvez des modèles personnalisés pour les composants Mould-Ready dans la section X.
X
F-9 X
inch standard
L +.125 -.000 T
+.000 -.002
General Dimensions
m 1.2344
d
B -.0004 -.0007 D +.0003 -.0000
32 ±2 HRC
42 ±2 HRC
R .03
h Core: 40-44 HRC, Surface: 65-75 HRC
b
4R a
H +.00 -.01
N=1-3/4” for ES094 & ES125 N=2-1/4” for ES156 and larger T=.187” for ES094 thru ES156 T=.250” for ES187 and larger
N
D+ 1/64
70 ±5 HRC (ID & OD)
CAD insertion point | CAD Einfügemarke | CAD point d'insertion
h l 3” l 4” l 5” l 6” l 7” l 8” l 9” l 10” l 11” l 12” l 13” l 14” = = = = = = = = = = = =
Nom. I.D.
O.D.
3/32
.1875
.37 ES094L3 ES094L4 ES094L5 ES094L6 ES094L7 ES094L8 ES094L9 ES094L10 ES094L11
—
—
—
1/8
—
—
—
Head Dia.
.2187
.40
5/32 .2500
.43
ES125L3 ES125L4 ES125L5 ES125L6 ES125L7 ES125L8 ES125L9 ES125L10 ES125L11 —
ES156L4 ES156L5 ES156L6 ES156L7 ES156L8 ES156L9 ES156L10 ES156L11 ES156L12 ES156L13 ES156L14
3/16
.3125
.50
—
ES187L4 ES187L5 ES187L6 ES187L7 ES187L8 ES187L9 ES187L10 ES187L11 ES187L12 ES187L13 ES187L14
7/32
.3437
.56
—
1/4
.3750
.62
—
5/16
.4375
.68
—
ES219L4 ES219L5 ES219L6 ES219L7 ES219L8 ES219L9 ES219L10 ES219L11 ES219L12 ES219L13 ES219L14 Length
ES250L4 ES250L5 ES250L6 ES250L8 ES250L9 ES250L10 ES250L11 ES250L12 ES250L13 ES250L14 HeadES250L7 Thickness
OD
ES312L4 ES312L5 ES312L6 ES312L7 ES312L8 ES312L9 ES312L10 ES312L11 ES312L12 ES312L13 ES312L14
3/8
.5000
.75
—
ES375L4 ES375L5 ES375L6 ES375L7 ES375L8 ES375L9 ES375L10 ES375L11 ES375L12 ES375L13 ES375L14
7/16
.6250
.87
—
ES437L4 ES437L5 ES437L6 ES437L7 ES437L8 ES437L9 ES437L10 ES437L11 ES437L12 ES437L13 ES437L14
1/2
.6875
ES500L4 ES500L5 ES500L6 ES500L7 ES500L8 ES500L9 ES500L10 ES500L11 ES500L12 ES500L13 ES500L14
Head Ø
ID
.93
—
9/16 .7500 1.00
—
-.000 ES562L4 ES562L5 ES562L6 ES562L7 LES562L8 ES562L9 ES562L10 ES562L11 ES562L12 ES562L13 ES562L14
5/8
1.12
—
ES625L4 ES625L5+.000ES625L6 ES625L7 ES625L8 ES625L9 ES625L10 ES625L11 ES625L12 ES625L13 ES625L14
3/4X 1.0000 1.25
—
.8750
+.125
T
N
D+ /64 ES750L8 ES750L94 ES750L10 ES750L11 ES750L12 ES750L13 ES750L14 ES750L4 ES750L5 ES750L6 ES750L7 R -.002
1
a
H -.01 Custom Templates for Mould-Ready Components can be found in section X. +.00
X
B -.0004 -.0007 D +.0003 -.0000
Kundenspezifische Vorlagen für vorgefertigte Komponenten finden Sie in Abschnitt X. 42 ±2 HRC Trouvez des modèles pour les composants Mould-Ready dans la section X. 32 personnalisés ±2 HRC R .03
70 ±5 HRC (ID & OD)
X
X
Metric Specification Metric sleeves (JIS or DIN standard) can X be ordered by specifying the information shown below.
Metrische Spezifikation Metrische Hülsenauswerfer (JIS oder DINStandard) können unter Angabe der folgenden Informationen bestellt werden.
Spécification Métrique Les tubulaires métriques (standard JIS ou DIN) peuvent être commandés en spécifiant les informations ci-dessous.
X
Length
X
X
Head Thickness Head Ø
OD ID
F-10 US Patent No. 6,872,069
thin wall sleeves
L +.05 -.00 N
S ±.01 G +.000 -.001 H
+.00 -.01
B
4R a
-.0003 -.0007
D
D +.01
+.0003 -.0000
59 ±1 HRC
T
m 1.2363
d
60° Transition Angle
+.000 -.002
h 58-60 HRC s Electroless Nickel Coated .00003”-.00007” Thick
d
b
g
s
ESTW250L4
ESTW250L6
ESTW312L4
ESTW312L6
ESTW375L4 D +.0003 -.0000
ESTW375L6
.250
.312
7/32
.2187
.2813
.344
.625S ±.01
X
ESTW219L6
.62
.250
.2500
X
ESTW219L4
.250
.2187
.1875
.500
ESTW187L6
.56
.1562
3/16
.4375 D +.01
ESTW156L6
ESTW187L4
.187 L +.05 -.00 .250
5/32
+.00 -.01
ESTW156L4
2.50
.50
.219
.3750 H
2.50
.43
.625
.188
.1875
3/8 X
ESTW125L6
.500
.1563
.1250
.375
ESTW094L6
ESTW125L4
.187
.0937
1/8
.438
ESTW094L4
1.75
.187
.40
3/32
.3125
1.75
.37
.500
Shoulder Length
.3750
l=6”
.500
Shoulder Diameter
.3125
l=4”
Bearing Length
O.D.
.2500
n
Head Thickness
Decimal I.D.
1/4
CAD insertion point | CAD Einfügemarke | CAD point d'insertion
t
Head Diameter
Nominal I.D.
5/16
h
.625
Length
G -.001 Shoulder Length .625 .68 Shoulder Ø .625
+.000
4R .250 a
.75
.250
N 2.50 2.50 B -.0003 -.0007 2.50
OD
2.50
Custom Templates for Mould-Ready Components can be found in section X. Head Ø
Kundenspezifische Vorlagen für vorgefertigte Komponenten finden Sie in Abschnitt X. 60° Transition Angle T +.000 Trouvez des modèles personnalisés pour les-.002 composants Mould-Ready dans la section X.
ID 59 ±1 HRC
Head Thickness
X
Metric Specification Material: 1.3343 X Thin Wall Sleeves can be ordered by specifying the information shown below: X
Metrische Spezifikation Material: 1.3343 Dünnwandige Hülsenauswerfer können unter Angabe der folgenden Informationen bestellt werden:
Spécification Métrique Material: 1.3343 Les tubulaires à épaisseur mince peuvent être commandés en spécifiant les informations ci-dessous:
Length X
Shoulder Length Shoulder Ø
OD
X
Head Ø
ID
Head Thickness
F-11
49 ±1 HRC
32 ±2 HRC
68 ±2 HRC
mould-ready components
K Tangent
Flat Distance +.000 -.002
+.000 -.002
+.00mm -.05mm
+.00mm -.05mm
Keyed Pins
Verdrehgesicherte Auswerfer
Broches Orientées
Specify the catalogue number and the “K” dimension.
Geben Sie die Katalognummer und die “K”-Maße an.
Spécifiez le numéro de catalogue et la dimension «K».
Example:
Beispiel:
Exemple:
• EPD10L200-K6 for a 10mm Ø DIN pin with a flat 6mm from centre Flat will be ground tangent if -K is specified without a dimension.
• EPD10L200-K6 für einen 10mm Ø DINAuswerfer mit einer 6mm Fläche von der Mitte Flat Distance Die Fläche bis zum Innendurchmesser +.002wird +.05mm -.000 wenn -.00mmK ohne Dimension geschliffen, angegeben wird.
• EPD10L200-K6 pour une broche DIN de 10 mm avec un méplat de 6 mm du centre
Cut-to-Length Pins
Auf Länge geschnittene Auswerfer
Broches coupés à longueur
Available with or with-out keyed heads.
Mit oder ohne verdrehgesichertem Kopf erhältlich.
Disponible avec ou sans méplat d’orientation.
Beispiel:
Exemple:
• EPD10l 225.5 für einen 10mm Ø x 225,5 mm langen DIN-Auswerfer
• EPD10L225.5 pour une broche DIN de Ø10mm x 225,5mm
• EPD10l 225.5 K6 für einen 10X 225,5 langen Auswerfer mit einer 6mm Fläche von der Mitte
• EPD10L225.5 K6 pour une broche de 10x225,5 avec un méplat de 6 mm du centre
Example: • EPD10L225.5 for a 10mm Ø x 225.5mm long DIN pin • EPD10L225.5 K6 for a 10x225.5 long pin with a flat 6mm from centre
EP Pin Type
-
125
-
Pin Diameter
L6.752
L
K080
Length
Custom templates for Mould-Ready Components can be found in section X, online at www.procomps.com, or email drawings to tech@procomps.com for pricing and delivery.
F-12
-
Méplat sera rectifié tangente si -K n’est pas spécifié.
Key K= Tangent K=080 ( .080˝ from center)
Kundenspezifische Vorlagen für vorgefertigte Komponenten finden Sie in Abschnitt X, online unter www. procomps.com oder senden Sie per e-MailZeichnungen an Tech@procomps.com für Preis- und Lieferanfragen.
+.001 -.000
+. 025mm -.00mm
Trouvez des modèles personnalisés pour les composants Mould-Ready dans la section X, en ligne à l’adresse www.procomps.com, ou par e-mail à l’adresse tech@procomps.com pour demander un devis.
mould-ready components Finished Ejector Pins
Fertige Auswerferstifte
Éjecteurs finis
Custom templates for Mould-Ready Components can be found in section X, online at www.procomps.com, or email drawings to tech@procomps.com for pricing and delivery.
Kundenspezifische Vorlagen für vorgefertigte Komponenten finden Sie in Abschnitt X, online unter www.procomps.com oder senden Sie per e-Mail-Zeichnungen an Tech@ procomps.com für Preis- und Lieferanfragen.
Trouvez des modèles personnalisés pour les composants Mould-Ready dans la section X, en ligne à l’adresse www.procomps.com, ou par e-mail à l’adresse tech@procomps.com pour demander un devis.
L S
T
D
H R
B
R .03 max.
K
L S M
T
R1
R2
H R.03 max.
D
B
A
K
L D
M
H
Y X
Radius to suit
R .03
T
L
D
H
T
R .03
X
Y
M
B
Z
Y Z
F-13
date stamps air valves section g
Locking Series
Compact Locking Series
Tapered Series
RF Series
DN, DNp
DTN, DTNP
DTPR, DTPRP
DF, DFP
G-1
G-2
G-3
G-4
20 Series
CH Series
FD Series
Multi-Daters
DL, DLP
DC, DCP
DFD
DMD, DMDP
G-5
G-6
G-7
G-8
/
MicroDaters
LG Series
Recycle Inserts
Air Valves & Poppets
MD G-10
DLB, DLS
RI
AV, APV
G-11
G-12
G-13
date stamps Locking Detent Series
L +.05 -.00 LP
PROCOMPS.COM
Etched for replacement source
A
M
1 2111
43 2
C
56 ± 2 HRC
P
9 01 8
91
T
D h6
5 7 9
T
Hex is present for tightening the set screw thread from parting line when plug is not installed.
Plugs | Einsätze | Inserts
Rings | Ringe | Anneaux
m 1.4034 h 54-58 HRC
DNP04-19 DNP05-19 DNP06-19 DNP08-19 DNP10-19 DNP12-19 DNP16-19
c
a
lp
2.5 3.1 3.1 4.6 4.6 6.4 8.4
2.3 2.8 2.8 4.0 4.0 4.0 5.0
10.5 13.0 13.0 14.0 14.0 17.0 23.0
p
Engraving Depth (Arrow)
M1.4 x 0.2 .30 M1.6 x 0.2 .40 M1.6 x 0.2 .40 M2.5 x 0.35 .40 M2.5 x 0.35 .40 Date Plug M3Compression x 0.5 .60 M3.5 x 0.6 Unit .60
CAD insertion point | CAD Einfügemarke | CAD point d'insertion Date Ring LP
catalogue number DN04 DN05 DN06 DN08 DN10 DN12 L DN16
D H7
4 5 6 8 10 12 16
t
14 M2 x 0.4 17 M3 x 0.5 No height variation 17 rotationM3 x 0.5 during 20 M4 x 0.7 20 M5 x 0.8 25 M6 x 1.0 33 M8 x 1.25
P
3 3 3 4 4 6 8
Engraving Depth
L +.05 -.00
.10 .20 .20 .20 .20 .25 .25
9 01 8
*Où les années sont spécifiées, n’importe quelle année peut être commandée en changeant le suffixe. Exemple DNP05-20 ou DNY05-21. Pour créer des Dateurs pour les jours, achetez les deux anneaux 0-30 (DNT), la bague 0-9 (DNN) et les inserts désirés.
E DC
O QP
2 42
87
03
RST
3
91 0
22
2 12
*Wenn Jahre angegeben sind, kann das Jahr jeweils durch Änderung des Suffix bestellt werden. Beispiel DNP05-20 oder DNY05-21. Um Datumsstempel für Tage zu erstellen, kaufen Sie sowohl den 0-30 Ring (DNT) als auch den 0-9 Ring (DNN) und die gewünschten Einsätze.
Blank Cat #: DN-Diam-B Ex.: DN05-B
NM X
WVU
*Where years are specified, any year can be ordered by changing the suffix. Example DNP05-20 or DNY05-21. To create Date Stamps for days, purchase both the 0-30 ring (DNT) and the 0-9 ring (DNN) and the desired plugs.
20
0 - 30 Cat #: DNT-Diam Ex.: DNT05
T
KJ I
Maximum mould temperature: 230 ° C Maximale Werkzeugtemperatur: 230° C Température Maximale du Moule: 230° C
0
01
C Cat #: DNP-Diam-C Ex.: DNP05-C
T
1 2111
T Ring Options | Ringoptionen | Options d’anneau: M D h6 | Lettrage en Retrait (Max) Recessed Lettering | Vertiefte Beschriftung (Optional 5 7 SHCS) Etched for 9 0-9 A-L replacement 5 BAL 6 4 source Cat #: DNN-Diam #: DNA-Diam Hex is present for tightening set screw thread 901 FG Hthe Cat parting line when plug installed. Ex.: from DNN05 Ex.:is notDNA05 32
A
m
56 ± 2 HRC
Plug Options | Einsatz-Optionen | Options d’insert: M PROCOMPS.COM C | Lettrage Recessed Lettering | Vertiefte9Beschriftung Retrait 1 (SetenScrew) Arrow Only Cat #: DNP-Diam - AO Ex.: DNP05-AO
l
d
43 2
catalogue number
M-X Cat #: DNZ-Diam Ex.: DNZ05 Years Cat #: DNY-Diam-Starting Year* Ex.: DNY05-19
Installation Guidelines | Installationsrichtlinien | Guide d’Installation No height variation during rotation
D H7
Date Plug Compression Unit
L
Date Ring
M
(Set Screw)
M (Optional SHCS)
T (Max)
G-1 Patent No. DE 4415583
date stamps Compact Locking Detent Series
L +.05 -.00
LP
A
43 2
9 01 8
1 2111
////PRO
C
9 1
P
Dm6
5 7 9
Etched for replacement source
56 ± 2 HRC
Plugs | Einsätze | Inserts
Rings | Ringe | Anneaux
m 1.4034 h 54-58 HRC
catalogue number DTNP03-19 DTNP04-19 DTNP05-19 DTNP06-19 DTNP08-19 DTNP10-19 DTNP12-19 DTNP16-19 DTNP20-19
D
c
a
lp
1.6 2.5 3.1 3.1 4.4 5.2 6.2 8.2 11.0
1.0 1.2 2.0 2.0 2.5 3.0 3.0 3.5 4.5
3.8 4.8 7.8 7.8 9.8 11.8 13.8 13.8 15.8
No height variation during rotation
H7
p
Engraving Depth (Arrow)
Date Plug M1 x 0.25 .20 M1.4 x 0.2 Date .30 Ring M1.6 x 0.2 .40 M1.6 x 0.2 .40 M2.3 x 0.25 .40 M2.5 x 0.35 .40 M3 x 0.35 .60 M4 x 0.35 .60 M4 x 0.35 .60
l
d
catalogue number
b
Max From Graphic Below
L DTN03 3 4 DTN04 4 5 DTN05 5 8 Clearance to DTN06 drive out6assembly 8 B DTN08 if required. 8 10 DTN10 10 12 DTN12 12 14 DTN16 16 14 DTN20 20 16 ±.02
1.6 2.2 3.2 3.2 4.2 5.2 6.2 8.2 10.2
Engraving Depth
.10 .15 .20 .20 .20 .20 .25 .25 .30
CAD insertion point | CAD Einfügemarke | CAD point d'insertion
LP
*Wenn Jahre angegeben sind, kann das Jahr jeweils durch Änderung des Suffix bestellt werden. Beispiel DTNP05-20 oder DTNY05-21. Um Datumsstempel für Tage zu erstellen, kaufen Sie sowohl den 0-30-Ring (DTNT) als auch den 0-9-Ring (DTNN) und die gewünschten Einsätze. *Où les années sont spécifiées, n’importe quelle année peut être commandée en changeant le suffixe. Exemple DTNP05-20 ou DTNY05-21. Pour créer des Dateurs pour les jours, achetez les deux anneaux 0-30 (DTNT), la bague 0-9 (DTNN) et les inserts désirés.
A
Etched for Blank replacement Cat #: DTN-Diam-B source Ex.: DTN05-B
L +.05 -.00
1NM2X111M - X RST
Cat #: DTNZ-Diam Dm6 Ex.: DTNZ05
5 7 9 Years 91 0
3
22
2 12
*Where years are specified, any year can be ordered by changing the suffix. Example DTNP05-20 or DTNY05-21. To create Date Stamps for days, purchase both the 0-30 ring (DTNT) and the 0-9 ring (DTNN) and the desired plugs.
20
////PRO
P
0 - 30 Cat #: DTNT-Diam Ex.: DTNT05
A-L Cat #: DTNA-Diam Ex.: DTNA05
9 01 8
C
FG H
WVU
8 1
01
03
0
BAL
E DC
901
0-9 Cat #: DTNN-Diam Ex.: DTNN05
PO 4 3Q2
87
32
C Cat #: DTNP-Diam-C Ex.: DTNP05-C
654
KJ I
Arrow Only Cat #: DTNP-Diam - AO Ex.: DTNP05-AO
Ring Options | Ringoptionen | Options d’anneau: Recessed Lettering | Vertiefte Beschriftung | Lettrage en Retrait
2 42
Plug Options | Einsatz-Optionen | Options d’insert: Recessed Lettering | Vertiefte Beschriftung | Lettrage en Retrait
Cat #: DTNY-Diam-Starting56 Year* ± 2 HRC Ex.: DTNY05-19
Installation Guidelines | Installationsrichtlinien | Guide d’Installation
D
No height variation during rotation
H7
Date Plug
L ±.02
Date Ring
B
Clearance to drive out assembly if required.
Maximum mould temperature | Maximale Werkzeugtemperatur| Température Maximale du Moule: 300˚ C Maximum moulding pressure | Maximaler Druck | Pression Maximale de l’Injection: 2.000 bar
G-2 Patent No. DE 4415583
date stamps Tapered Series
Tapered Seal for Nylon, LSR, etc.
P
C
M
PROCOMPS.COM
9 01 8
91
D h6
5 7 9
A
T
1 2111
43 2
LP
L +.05 -.00
56 ± 2 HRC
Etched for replacement source Hex is present for tightening the set screw thread from parting line when plug is not installed.
Plugs | Einsätze | Inserts
T Rings | Ringe | Anneaux
m 1.4034 h 54-58 HRC
catalogue number
c
a
lp
p
Engraving Depth (Arrow)
catalogue number
d
l
m
t
14
DTPRP04-19
2.5
2.3
10.5
M1.4 x 0.2
.30
DTPR04
4
DTPRP05-19
3.1
2.8
13.0
M1.6 x 0.2
.40
DTPR05
5
M2 x 0.4
3
.15
3
.20
3
.20
4
.30
.40 D
DTPR06
H7
DTPR08
17 M3 x 0.5 6 No height 17 variation M3 x 0.5 during rotation 8 20 M4 x 0.7
.60
DTPR10
10
20
M5 x 0.8
4
.30
.60
DTPR12
12
25
M6 x 1.0
6
.30
.60
L DTPR16
16
33
M8 x 1.25
8
.30
.60
DTPR20
20
33
M8 x 1.25
8
DTPRP06-19
3.1
2.8
13.0
M1.6 x 0.2
DTPRP08-19
4.6
4.0
14.0
M2.5 x 0.35
.60
DTPRP10-19
4.6
4.0
14.0
DTPRP12-19
6.4
4.0
17.0
DTPRP16-19
8.4
5.0
23.0
DTPRP20-19
11
6.5
23.0
M2.5 x 0.35 M3Date x 0.5Plug Compression M3.5 x 0.6 Unit M3.5 x 0.6 Date Ring
CAD insertion point | CAD Einfügemarke | CAD point d'insertionTapered Seal for Nylon, LSR, etc.
E DC
O QP
2 42
3
91 0
22
2 12
Blank Cat #: DTPR-Diam-B Ex.: DTPR05-B
T
WVU
Température Maximale du Moule: 230° C
JI
*Où les années sont spécifiées, n’importe quelle année peut être commandée en changeant le suffixe. Exemple DTPRP05-20 ou DTPRY05-21. Pour créer des Dateurs pour les jours, achetez les deux anneaux 0-30 (DTPRT), la bague 0-9 (DTPRN) et les inserts désirés.
01
*Wenn Jahre angegeben sind, kann das Jahr jeweils durch Änderung des Suffix bestellt werden. Beispiel DTPRP05-20 oder DTPRY05-21. Um Datumsstempel für Tage zu erstellen, kaufen Sie sowohl den 0-30-Ring (DTPRT) als auch den 0-9-Ring (DTPRN) und die gewünschten Einsätze.
A
D
0-9 5 7B A L A - L h6 for Cat #: DTPR-Diam 9 0Etched 1 9 FGH Cat #: DTPRA-Diam replacement Ex.: DTPR05 Ex.: DTPRA05 source Hex is present for tightening the set screw 0 - 30 M-X 0 thread from parting NM X line when plug is not installed. Cat #: DTPRT-Diam Cat #: DTPRZ-Diam RST 20 Ex.: DTPRT05 Ex.: DTPRZ05 654
32
*Where years are specified, any year can be ordered by changing the suffix. Example DTPRP05-20 or DTPRY05-21. To create Date Stamps for days, purchase both the 0-30 ring (DTPRT) and the 0-9 ring (DTPRN) and the desired plugs.
Maximale Werkzeugtemperatur: 230° C
43 2
PROCOMPS.COM
C Cat #: DTPRP-Diam-C Ex.: DTPRP05-C
Maximum mould temperature: 230° C
(Max) 11 (Optional 1 21Beschriftung Recessed Lettering | Vertiefte | Lettrage en Retrait SHCS) 87
C
+.05 -.00
56 ± 2 HRC
LPM T P| Ringoptionen Ring Options | Options d’anneau:
03
91
.30
L
9 K 01 8
M Plug Options | Einsatz-Optionen | Options d’insert: (Set Screw) Recessed Lettering | Vertiefte Beschriftung | Lettrage en Retrait Arrow Only Cat #: DTPRP-Diam - AO Ex.: DTPRP05-AO
Engraving Depth
Years Cat #: DTPRY-Diam-Starting Year* Ex.: DTPRY05-19
Installation Guidelines | Installationsrichtlinien | Guide d’Installation
D
No height variation during rotation
H7
Date Plug Compression Unit
L
Date Ring
M
(Set Screw)
M (Optional SHCS)
T (Max)
G-3 Patent No. DE 4415583
T2
M
M
(Max)
(Optional SHCS)
(Set Screw)
date stamps RF-Series: Remains Flush Raised Lettering Height
LP
0.1 L1 +-.0.0
P
M
1 2111
43 2
C
PROCOMPS.COM
Dh6
5 7 9
Etched for replacement source
A
RF ONLY
9 01 8
9 1
L2 ±.05
T1 Min
56 ± 2 HRC
Hex is present for tightening the set screw thread from parting line when plug is not installed.
Plugs | Einsätze | Inserts
Rings | Ringe | Anneaux
CAD insertion point | CAD Einfügemarke | CAD point d'insertion No height variation D L2 during P rotation Engraving H7 Raised recessed Slot catalogue Depth number Depth (Arrow) Date Plug 1.6 2.0 9.0 M1 x 0.25Clamp .30 N/A† DFP03-19 PROCOMPS.COM C
8 1
DFP04-19 DFP05-19 DFP06-19 DFP08-19 DFP10-19 DFP12-19 DFP16-19
†
c
a
2.5 3.1 3.1 4.6 4.6 6.4 8.4
2.3 2.8 2.8 4.0 4.0 4.0 5.0
lp
m 1.4034 h 54-58 HRC
D H7 recessed catalogue number
p
10.5 M1.4 x 0.2 .30 Etched for Date Ring 13.0 replacement M1.6 x 0.2 .40 M1.6 x 0.2 .40 A13.0 source 14.0 M2.5 x 0.35 M.40 (Set Screw) 14.0 M2.5 x 0.35 .40 17.0 M3 x 0.5 .60 23.0 M3.5 x 0.6 .60
DF03 L2 DF04 DF05 DF06 DF08T2
L1 .25 .30 .30 .35 M (Optional .35 SHCS) .40 .40
(Max)
DF10 DF12 DF16
d
l1
Recessed
Raised
l2
m
t1
t2
14 14 17 17 20 20 25 33
N/A† 13.80 16.75 16.75 19.70 19.70 24.70 32.70
M2 x 0.4 M2 x 0.4 M3 x 0.5 M3 x 0.5 M4 x 0.7 M5 x 0.8 M6 x 1.0 M8 x 1.25
4 4 4 4 4 4 6 8
N/A† 3 3 3 4 4 6 8
3 4 5 6 8 10 12 16
3mm size not available with raised lettering | 3mm Größe nicht verfügbar mit erhabener Schrift | Taille 3mm non disponible avec lettrage en relief. + 0.1
T1 Min
3
91 0
22
Years Cat #: DFY-Diam-Starting Year* Ex.: DFY05-19
L2 RQP
Days Cat #: DFRL-Diam Ex.: DFRL05
A-M Cat #: DFRA-Diam Ex.: DFRA05
Months Cat #: DFR-Diam Ex.: DFR05
N-Z Cat #: DFRZ-Diam Ex.: DFRZ05
3
91 0
22
2 12
YXW
ON Z
ST V U
0-9 Cat #: DFRN-Diam Ex.: DFRN05
2 42
EDC
L1
Years Cat #: DFRY-Diam-Starting Year* Ex.: DFRY05-19
T2
M
(Max)
(Optional SHCS)
*Where years are specified, any year can be ordered by changing the suffix. Example DFP05-20 or DFY05-21. *Wenn Jahre angegeben sind, kann das Jahr jeweils durch Änderung des Suffix bestellt werden. Beispiel DFP05-20 oder DFY05-21.
Maximum mould temperature: 230° C Maximale Werkzeugtemperatur: 230° C
*Où les années sont spécifiées, n’importe quelle année peut être commandée en changeant le suffixe. Exemple DFP05-20 ou DFY05-21.
Température Maximale du Moule: 230° C
G-4
LKJ I
FGH
Date Ring
M
RQP
901
BAM
Date Plug Clamp
2 42
EDC
H7
H7
654 87
D
N-Z Cat #: DFZ-Diam Ex.: DFZ05
Raised Lettering | Erhöhte Beschriftung | Lettrage En Relief 32
D
ST V U
2 12
Installation Guidelines | Installationsrichtlinien | Guide d’Installation
ON Z
YXW
C Cat #: DFRP-Diam-C Ex.: DFRP05-C
(Set Screw)
Days Cat #: DFL-Diam Ex.: DFL05
87
Arrow Only Year 0-9 PROCOMPS.COM Dh6 654 C 8 #: 1 DFP-Diam-AO Cat Raised Lettering9 HeightCat #: DFN-Diam 9 1 Cat #: DFRP-Diam-Year* 5 7 01 EtchedEx.: for Ex.: DFP05-AO DFRP05-19 Ex.: DFN05 9 L2 ±.05 replacement M C Only A -screw M 56 ± 2sourceArrowHex A is present for tighteningBAthe set thread HRC Cat #: DFP-Diam-C Cat #:from DFRP-Diam-AO Cat #: DFA-Diam parting line when plug Fis GHnot installed. Ex.: DFP05-C Ex.: DFRP05-AO Ex.: DFA05
No height variation during rotation
Blank Cat #: DF-Diam-B Ex.: DF05-B
LKJ I
43 2
Ring M Options | Ringoptionen | Options d’anneau: Recessed Lettering | Vertiefte Beschriftung | Lettrage en Retrait 32
9 01 8
L1 -.0.0 L2 P Plug Options | Einsatz-Optionen | Options d’insert: 11Retrait Raised | Erhöht | En Relief Recessed | Vertieft 1 2|1En
Raised Lettering Height
L2
Patent No. DE 4415583 ±.05
date stamps 20 Series: 20mm Length
L
L2
9 1L
P Engraving Depth: Numbers: .2mm (.007”) Arrows: .4mm (.015”)
C A
D
D
m6
Etched for replacement source
52 ±2 HRC
CAD insertion point | CAD Einfügemarke | CAD point d'insertion
Plugs | Einsätze | Inserts ////PRO
52 ±2 HRC
m 420 Stainless Steel h 50-54 HRC
Maximum mould temperature: 140° C Maximale Werkzeugtemperatur: 140° C Température Maximale du Moule: 140° C
Installation Guidelines | Installationsrichtlinien | Guide d’Installation
D
Height variation during rotation .2-.3mm
H7
L
Clearance to drive out assembly if required.
c
a
l2
DLP06-19 DLP08-19 DLP10-19 DLP16-19
3.1 4.6 4.6 8.2
13 14 14 14
catalogue number
d
3.0 4.0 4.0 3.5 Date Plug
DL06 DL08 DL10 DL16
Date Plug Spring Date Ring
catalogue number
±.02
D
H7 or +.0004" - .0000"
p
arrow only
M1.6x0.20 M2.5x0.35 M2.5x0.35 M4x0.35
DLP06-AO DLP08-AO DLP10-AO DLP16-AO
Rings L | Ringe | Anneaux
l Spring Date Ring
6 8 Clearance to 20 10 drive out assembly 16 if required.
D - 2mm (max) For a different year change item number. Example: DLP06-20. Um ein anderes Jahr auszuwählen, ändern Sie die Artikelnummer. Beispiel: DLP06-20.
D - 2mm (max)
Pour une année différente, changez la référence d’article. Exemple: DLP06-20.
D Series: Deep Engraving D
L
Height variation
H7
L2 during rotationP .2-.3mm
Date 9 Plug 1
C
L ±.02
Engraving Depth: Numbers: .5mm (.020”) Arrows: .4mm (.015”)
Dm6
Spring
A B
Date Ring
Plugs | Einsätze | Inserts
Etched for replacement source
Clearance to drive out assembly if required.
Rings | Ringe | Anneaux m 420 Stainless Steel h 50-54 HRC
c
DCP10D-19 DCP12D-19 DCP16D-19 DCP20D-19
5.2 6.2 8.2 11.0
////PRO
CAD insertion point | CAD Einfügemarke | CAD point d'insertion
catalogue number
a
l2
52 ±2 HRC
p
arrow only
M2.5x0.35 DCP10-AO L ±.001 M3x0.35 DCP12-AO M4x0.35 DCP16-AO A Socket Head M4x0.35 DCP20-AO Cap Screw may be installed to secure For a different year change item number. Example: DCP16D-20. the date stamp.D +.0004 - .0000 Um ein anderes Jahr auszuwählen, ändern Sie die Artikelnummer. Beispiel: DCP16D-20. (Optional) 3.0 3.0 3.5 4.5
12 14 14 16
catalogue number DC10-D DC12-D DC16-D DC20-D
d
Ring Diameter 10 12 16 20
A Socket lHead Cap Screw may be installed12to secure the date14 stamp. (Optional) 14 16
Pour une année différente, changez la référence d’article. Exemple: DCP16D-20.
G-5
CH Series: Compact Height L L2 ////PRO
P C
9 1
Engraving Depth: Numbers: .2mm (.007”) Arrows: .4mm (.015”)
Dm6
Etched for replacement source
A
52 ±2 HRC
Plugs | Einsätze | Inserts
Rings | Ringe | Anneaux
L L
m 1.4034 h 54-58 HRC
catalogue number DCP04-19 DCP05-19 DCP06-19 DCP08-19 DCP10-19 DCP12-19 DCP16-19 DCP20-19
c
a
l2
2.2 52 ±2 3.1HRC
2.0 2.0 2.0 2.5 3.0 3.0 3.5 4.5
8 8 8 10 12 14 14 16
3.1 4.4 5.2 6.2 8.2 11.0
p
±.001
catalogue number
M1x0.25 +.0004 M1.6x0.20 D - .0000 M1.6x0.20 M2.3x0.25 M2.5x0.35 M3x0.35 M4x0.35 M4x0.35
DC04 DC05 DC06 DC08 DC10 DC12 DC16 DC20
d
l
4 5 6 8 10 12 16 20
8 8 8 10 12 14 14 16
b
From Graphic Below 1.4 2 2 3 3 4 5 5
CAD insertion point | CAD Einfügemarke | CAD point d'insertion
D
Height variation during rotation Plug Options | Einsatz-Optionen | Options .2-.3mmd’insert: Recessed Lettering | Vertiefte Beschriftung | Lettrage en Retrait H7
Height variation during rotation .2-.3mm
H7
Date Plug
EDC
D
Days Cat #: DCL-Diam Ex.: DCL05
ON Z
ST V U
3
91 0
22
2 12
Installation Guidelines | Installationsrichtlinien | Guide d’Installation
Blank Cat #: DC-Diam-B Ex.: DC05-B
BAM
FGH
YXW
D - 2mm (max)
0-9 Cat #: DCN-Diam Ex.: DCN05
RQP
901
2 42
654
±.02
LKJ I
Clearance to drive C out assembly if Cat #: DCP-Diam-C required. Ex.: DCP05-C
L
32
Date Plug Arrow Only Spring Cat #: DCP-Diam - AO Date Ring Ex.: DCP05-AO
Ring Options | Ringoptionen | Options d’anneau: Recessed Lettering | Vertiefte Beschriftung | Lettrage en Retrait
87
D
date stamps
A-M Cat #: DCA-Diam Ex.: DCA05 N-Z Cat #: DCZ-Diam Ex.: DCZ05 Years Cat #: DCY-Diam-Starting Year* Ex.: DCY05-19
Note: The DCL04 and DCL05 does not have tick marks. Hinweis:. Die DCL04 und DCL05 haben keine Teilstriche. Remarque: les DCL04 et DCL05 ne comportent pas de graduations.
L ±.02
Spring Date Ring
B
Clearance to drive out assembly if required.
*Um ein anderes Jahr auszuwählen, ändern Sie die Artikelnummer. Beispiel: DCP05-20 oder DCY05-21.
Maximum mould temperature: 140° C Maximale Werkzeugtemperatur: 140° C
*Où les années sont spécifiées, n’importe quelle année peut être commandée en changeant le suffixe. Exemple DCP05-20 ou DCY05-21.
Température Maximale du Moule: 140° C
G-6
*Where years are specified, any year can be ordered by changing the suffix. Example DCP05-20 or DCY05-21.
A Socket Head Cap Screw may be installed to secure the date stamp. (Optional)
date stamps FD-Series: Full Diameter Plug
K
L
Etched for replacement source
B
M 9 1
Dg6
PROCOMPS.COM
A L2
P
D m6 T
56 ±2 HRC
Plugs | Einsätze | Inserts
Shell | Hülse | Capsule
m 1.4034 h 54-58 HRC
Etched for replacement source
a
catalogue number
b
L
k
l2
p
M
DFDPY03-19
.3
.3
2.0
9.0
DFDPY04-19
D.3
.3
2.3
10.5D m6 M1.4x0.2
g6
M1x0.25
T
56 ±2 HRC
To Order Plugs: Specify catalogue number as shown below.
L
Etched for replacement source
P D m6 T
eight tion g rotation
t
l
m
DFD03-S
3
3
14
M2 x 0.4
DFD04-S
4
3
14
M2 x 0.4
D
H7
Für eine Bestellung der Einsätze: L Geben Sie die unten aufgeführte Katalognummer an.
M
DMonth g6 & Year* 9 1
A L2
d
No height variation during rotation Plug Pour Commander les Inserts: Shell Spécifiez la référence du catalogue comme indiqué ci-dessous.
M
9 1
M
COMPS.COM
9 1
EDM Arrow Detail
CAD insertion point | CAD Einfügemarke | CAD point d'insertion
P
catalogue number
Cat #: Ex.: 56 ±2 HRC
D m6
DFDPY-Diam – Starting Year* DFDPY03-19
T
Months Cat #: DFDP-Diam DFDP03 Ex.:
Installation Guidelines | Installationsrichtlinien | Guide d’Installation
D
EDM Arrow Detail
No height variation during rotation
H7
Plug
L
*Um ein anderes Jahr auszuwählen, ändern Sie die Artikelnummer. Beispiel: DFDPY03-20 oder DFDPY03-21.
Shell
*Où les années sont spécifiées, n’importe quelle année peut être commandée en changeant le suffixe. Exemple DFDPY03-20 ou DFDPY03-21.
M
D
EDM Arrow Detail
H7
L
*Where years are specified, any year can be ordered by changing the suffix. Example DFDPY03-20 or DFDPY03-21.
No height variation during rotation Plug Shell
G-7
date stamps
L ±.05
M
Multi-Daters M
L ±.05
C
02
02
2 32 2
21
CPROCOMPS.COM
1
21
2 32 2
Plugs | 9Einsätze | Inserts
C
M
D h6
P
L ±.05
Etched for replacement source
T 02
D h6 P
L ±.05 M
PROCOMPS.COM
T
56 ±2 HRC
56 ±2 HRC
T M
Rings | Ringe | Anneaux
D h6
PROCOMPS.COM
T
P 56 ±2 HRC
m 1.4034 h 54-58 HRC
catalogue number
c
p
Slot Depth
Engraving Depth (Arrow)
catalogue number
d
T
l
m
t
Engraving Depth
DMDP06-19
4.2
0.4
M1.6x0.2
0.10
DMD06
6
17
M3 x 0.5
3
0.10
DMDP08-19
5.8
0.4
M2.5x0.35
0.10
DMD08
8
20
M4 x 0.7
4
0.12
DMDP10-19
7.0
0.4
M2.5x0.35
0.10
DMD10
10
20
M5 x 0.8
4
0.13
DMDP12-19
8.5
0.6
M3.0x0.5
0.20
DMD12
12
25
M6 x 1.0
6
0.20
DMDP16-19
11.5
0.6
M3.0x0.6
0.25
DMD16
16
33
M8 x 1.25
8
0.25
CAD insertion point | CAD Einfügemarke | CAD point d'insertion
91
Years & Months plug style is featured in the table above.
Months ring style is featured in the table above.
Jahres- & Monats- Einsätze sind in der Tabelle oben aufgeführt.
Monatsringe sind in der Tabelle oben enthalten.
L’Insert d’Années et Mois est présenté dans le tableau ci-dessus.
91 91
91
32
91
91
Ring Options | Ringoptionen | Options d’anneau: Recessed Lettering | Vertiefte Beschriftung | Lettrage en Retrait
Date Plug
L
No height variation during rotation
M L
Clamp Date Ring
M
12
23
*Where years are specified, any year can be ordered by changing 7 71 2 the suffix. Example DMDP10-20 or DMDP06-21. 91
L
19
12
3
52
M
D H7
91
23
72
52
12
71
71
02
72
19
12
71
Installation Guidelines | Installationsrichtlinien | Date Plug Date Plug Guide d’Installation Clamp Clamp Date Ring Date Ring
81
91
81
02
122 0
19
02
Weeks Cat #: DMDW-Diam Ex.: DMDW06
No height Cat #: DMDP-Diam-Starting - 11 D DNo height Year* H7 H7variation variation Ex.: DMDP06-1911 during rotation during rotation
71
52
25
72
23
Arrow & 11 Years
71
12
72
213 952 9 2
Days Cat #: DMDL-Diam Ex.: DMDL06
02
92
91
Arrow & 5 Years Cat #: DMDP-Diam-Starting Year* - 5 Ex.: DMDP06-195
12
22 32 2272
91 219 91 2 21 23 5 2
81
02
22
Plug Options | Einsatz-Optionen | Options d’insert: 21 Recessed Lettering | Vertiefte Beschriftung | Lettrage en Retrait
12
L’anneau de Mois est présenté dans le tableau ci-dessus.
32
91
12
±2 RC ±2 RC
91
T
21
M 2 32 2
91
±2 C
L ±.05
Etched for Etched for replacement replacement source source
91
L
±.05
*Um ein anderes Jahr auszuwählen, ändern Sie 2die Artikelnummer. Beispiel: DMDP10-20 oder DMDP06-21. *Où les années sont spécifiées, n’importe quelle année peut être commandée en changeant le suffixe. Exemple DMDP10-20 ou DMDP06-21.
Maximum mould temperature: 230° C Maximale Werkzeugtemperatur: 230° C Température Maximale du Moule: 230° C
G-8 Patent No. DE 4415583
date stamps Replacement Plugs C
C
C
C
Locking Series Verriegelungsserie Série de Verrouillage
Tapered Series Konische Serie Série Conique
Compact Locking Kompakte Verriegelung Verrouillage Compact
RF-Series RF-Serie Série RF
Replace Progressive’s Locking Series plugs
To replace Progressive’s Tapered Series plugs
To replace Progressive’s Compact Locking Series plugs
To replace Progressive’s RF- or H-Series plugs.
C
C
C
C
CC
C
C
C C
CC
CC
CC
////PRO
CC
////PRO
CC
CC
////PRO
CC
C
Date Ring
2.2 3.1 3.1 4.4 5.2 6.2 8.2 11.0
DLP06-19 DLP08-19 DLP10-19 DLP16-19
DL06 DL08 DL10 DL16
Catalogue Number
1.6 2.5 3.1 3.1 4.4 5.2 6.2 8.2 11.0
DFP03-19 DFP04-19 DFP05-19 DFP06-19 DFP08-19 DFP10-19 DFP12-19 DFP16-19
DF03 DF04 DF05 DF06 DF08 DF10 DF12 DF16
CC
C
C
C
C
CC catalogue number
Date Ring
3.1 4.6 4.6 8.2
DMDP06-19 DMDP08-19 DMDP10-19 DMDP12-19 DMDP16-19
DMD06 DMD08 DMD10 DMD12 DMD16
Catalogue Number
c 4.2 5.8 7.0 8.5 11.5
1.6 2.5 3.1 3.1 4.6 4.6 6.4 8.4
////PRO
.67 (17mm)
c
C C
c
To replace plugs previously purch-ased for PCS/Cumsa style rings.
////PRO
.67 (17mm)
Catalogue Number
Retro Retro Rétro C
PROCOMPS.COM
C catalogue number
C
.67 (17mm)
Date Ring
PROCOMPS.COM
PROCOMPS.COM
.67 (17mm)
c
CC ////PRO ////PRO
PROCOMPS.COM
////PRO
DC04 DC05 DC06 DC08 DC10 DC12 DC16 DC20
PROCOMPS.COM
DCP04-19 DCP05-19 DCP06-19 DCP08-19 DCP10-19 DCP12-19 DCP16-19 DCP20-19
Catalogue Number
CC ////PRO PRO ////
PROCOMPS.COM
Date Ring
PROCOMPS.COM
catalogue number
////PRO
PROCOMPS.COM
PROCOMPS.COM
PROCOMPS.COM
////PRO
PROCOMPS.COM PROCOMPS.COM
PROCOMPS.COM
////PRO
C
CC
PROCOMPS.COM
C C
.67 (17mm)
catalogue number
To replace Progressive’s MultiDater Plugs.
C
PROCOMPS.COM
C C
C
To replace Progressive’s 20 Series plugs. Springs included.
CC //// PRO //// PRO
c
Multi-Daters Multi-Datum Multi-Dateurs CC
C C
PROCOMPS.COM
20 Series 20er Serie C Série 20
Catalogue Number
PROCOMPS.COM
CC
DTN03 DTN04 DTN05 DTN06 DTN08 DTN10 DTN12 DTN16 DTN20
PROCOMPS.COM
C
DTNP03-19 DTNP04-19 DTNP05-19 DTNP06-19 DTNP08-19 DTNP10-19 DTNP12-19 DTNP16-19 DTNP20-19
PROCOMPS.COM
C
2.5 3.1 3.1 4.6 4.6 6.4 8.4 11.0
C
CH & D-Series CH & D-Serien Série CH & D To replace Progressive’s CHor D-Series plugs or DME front style plugs. Springs included.
Date Ring
C
PROCOMPS.COM
C
catalogue number
////PRO
DTPR04 DTPR05 DTPR06 DTPR08 DTPR10 DTPR12 DTPR16 DTPR20
c
CC
//// ////PRO PRO
PROCOMPS.COM PROCOMPS.COM
DTPRP04-19 DTPRP05-19 DTPRP06-19 DTPRP08-19 DTPRP10-19 DTPRP12-19 DTPRP16-19 DTPRP20-19
PROCOMPS.COM
2.5 3.1 3.1 4.6 4.6 6.4 8.4
Catalogue Number
////PRO
Date Ring
C
CC
////PRO PROCOMPS.COM PROCOMPS.COM
catalogue number
PROCOMPS.COM
C
c
////PRO
C
PROCOMPS.COM PROCOMPS.COM
DN04 DN05 DN06 DN08 DN10 DN12 DN16
PROCOMPS.COM
DNP04-19 DNP05-19 DNP06-19 DNP08-19 DNP10-19 DNP12-19 DNP16-19
Catalogue Number
////PRO
Date Ring
PROCOMPS.COM
PROCOMPS.COM
PROCOMPS.COM
catalogue number
C C
.67 (17mm)
C C catalogue
C Date Ring
number
Catalogue Number
DP32-19 DP47-19 DP57-19 DP67-19 DP87-19
DS06 DS08 DS10 DS12 DS16
c 3.2 4.7 5.7 6.7 8.7
For Retro Plugs outside of North America, call for availability from local distributors. *Retro Date Rings are not available.
For D-Series replacements, add “D” to the catalogue number. Ex. DCP16D-19.
PROCOMPS.COM
Auf den Katalogseiten finden Sie die speziCC C fischen Serien, die für Einsätze mit alternativer Gravur wie “C”, “Nur Pfeil” oder erhöhte Versionen benötigt werden. Kontaktieren Sie den Kundenservice bei Nachfragen zu speziellen Einsätzen oder für die Bestimmung der benötigten Einsätze. PROCOMPS.COM
PROCOMPS.COM
PROCOMPS.COM
Refer to the catalogue pages for the speCC required for plugs with C cific series alternate engraving such as “C”, “Arrow Only”, or raised versions. Contact Customer Service for availability of special plugs or for verification of the plugs required.
Reportez-vous aux pages du catalogue pour connaître les séries spécifiques requises pour les inserts avec une gravure alternative, telles que “C”, “Arrow Only” ou les versions en relief. Contactez le service clientèle pour la disponibilité des inserts spéciaux ou pour la vérification des inserts requises.
G-9
D
91
S
52 HR
date stamps MicroDaters®
A
L 45˚
C
.07mm - .12mm Deep
50 91
M D
S
52 ±2 HRC
A m 420 Stainless Steel h 50-54 HRC
CAD insertion point | CAD Einfügemarke | CAD point d'insertion
catalogue number
d
l
a
m
c
f
t
Width x Depth
s
blank cat. no.
MD02
2
5
.45
M1.4x0.3
.50
1.14
1.4
.38 x .25
MD02-B
MD03
3
5
.76
M1.8x0.35
.75
1.52
1.8
.38 x .38
MD03-B
MD04
4
6
.89
M2.5x0.45
1.0
1.65
2.7
.38 x .38
MD04-B
Blank (-B) MicroDaters do not have numbers or the removal slot, ready for custom engraving by the mould maker.
Blanke (-B) Mikro-Datumsstempel haben keine Zahlen oder einen Entnahmeschlitz, bereit für die benutzerdefinierte Gravur durch den Formenbauer.
Les Microdaters vierges (-B) n’ont pas de numéro ou de fente d’enlèvement, sont prêts pour une gravure personnalisée par le mouliste.
D
Design Options | Designoptionen | Options de Conception
Installation Guidelines | Installationsrichtlinien | Guide d’Installation +.25 - .00
Microdaters can be installed directly into the plates, inserts, core or ejector+.25 pins.
D
+.25 - .00
F +.25 - .00
T
30 91
To Order: • MicroDaters can be ordered individually or in 12-month sets. • For individual months, specify the 2-digit month and year: Ex. MD04-03-19 for a 4mm screw for March 2019. • To order a 12-month set, specify a “Y” at the end of the catalogue number, followed by the 2-digit month and year that begins the series: Ex. MD03-Y-03-19 would yield (12) 3mm screws starting with March 2019, ending with February 2020. Shown below at 2:1 scale.
30 91
G-10
40 91
50 91
60 91
40 91
50 91
60 91
70 91
Les Microdaters peuvent être installés directement dans les plaques, les inserts, les poinçons ou les éjecteurs. 80 91
90 91
01 91
11 91
Bestellung: • Mikro-Datumsstempel können einzeln oder in 12-Monats Sets bestellt werden. • Geben Sie für einzelne Monate die zweistellige Monatsangabe und das Jahr an: Ex MD04-03-19 für eine 4mmSchraube für März 2019. • Um einen 12-Monats Satz zu bestellen, fügen Sie ein “Y” am Ende der Katalognummer an, gefolgt von dem zweistelligen Monat und Jahr, das die Serie beginnt: Ex. MD03-Y-03-19 würde ab März 2019 (Februar 2020) (12) 3 mm Schrauben liefern. Dargestellt im Maßstab 2: 1
70 91
80 91
F - .00
T
Mikro-Datumsstempel können einzeln oder in 12-Monats Sets bestellt werden.
90 91
01 91
21 91
10 02
20 02
Pour Commander: • Les MicroDaters peuvent être commandés individuellement ou en séries de 12 mois. • Pour les mois individuels, spécifiez le mois et l’année à deux chiffres: Ex. MD04-03-19 pour une vis de 4mm pour Mars 2019. • Pour commander un ensemble de 12 mois, spécifiez un «Y» à la fin de la référence du catalogue, suivi du mois et de l’année à deux chiffres qui commencent la série: Ex. MD03-Y-03-19 comprenant (12) vis de 3 mm à partir de Mars 2019 et se terminerait en Février 2020. Ci-dessous à l’échelle 2:1.
11 91
21 91
10 02
20 02
61
19
0 12 2
0 12 2
date stamps LG-Series: Large Mould D
D
D
+0.0 -0.1
+0.0 -0.1
.5mm Deep
C
C
H
5 ±0.1
5 ±0.1
M
C
5 ±0.1 10
Thread for removal (M+1mm)
Recessed Lettering | Vertiefte Beschriftung |Lettrage en Retrait
+0.0 -0.1
.5mm Deep
10
10
Thread for removal (M+1mm)
M
M
Raised Lettering | Erhöhte Beschriftung | Lettrage En Relief
Brass m Ms 58 Steel m 1.2510 h 52-56 HRC
d
c
Nominal Ring Diameter
m
h
Raised Height
15
10
M3 x 0.5
0.5
20
13
M3 x 0.5
1.0
30
19
M4 x 0.7
1.0
40
25
M5 x 0.8
1.0
CAD insertion point | CAD Einfügemarke | CAD point d'insertion
To Order: Specify catalogue number as shown.
Für eine Bestellung geben: Sie die Katalognummer, wie dargestellt, an.
Ring Options | Ringoptionen | Options de sonnerie: Recessed Lettering | Vertiefte Beschriftung | Lettrage en retrait Months Cat #: DLB-Diam (Brass) DLS-Diam (Steel) DLB40, DLS40 Ex.:
Months Cat #: DLBR-Diam (Brass) DLSR-Diam (Steel) DLBR40, DLSR40 Ex.:
Days Cat #: Ex.:
DLBL-Diam (Brass) DLSL-Diam (Steel) DLBL40, DLSL40
Days Cat #: Ex.:
DLBRL-Diam (Brass) DLSRL-Diam (Steel) DLBRL40, DLSRL40
Year Cat #: Ex.:
DLBY-Diam – Starting Year* (Brass) DLSY-Diam – Starting Year* (Steel) DLBY40-19, DLSY40-19
Year Cat #: Ex.:
DLBRY-Diam – Starting Year* (Brass) DLSRY-Diam – Starting Year* (Steel) DLBRY40-19, DLSRY40-19
Plug Options | Einsatz-Optionen | Options de prise: Recessed Lettering | Vertiefte Beschriftung | Lettrage en Retrait
9 1
91 22
3 42 2
22
3 42 2
0 12 2
91
Pour Commander: Spécifiez la référence du catalogue comme indiqué ci-dessous.
Ring Options | Ringoptionen | Options de sonnerie: Raised Lettering | Erhöhte Beschriftung | Lettrage En Relief
0 12 2
19
7 81 1
61
Plug Options | Einsatz-Optionen | Options de prise: Raised Lettering | Erhöhte Beschriftung | Lettrage En Relief
Arrow Only Cat #: DLBP-Diam – AO (Brass) DLSP-Diam – AO (Steel) Ex.: DLBP40-AO, DLSP40-AO
Arrow Only Cat #: DLBRP-Diam – AO (Brass) DLSRP-Diam – AO (Steel) Ex.: DLBRP40-AO, DLSRP40-AO
Year Cat #: Ex.:
Year Cat #: Ex.:
DLBP-Diam – Year* (Brass) DLSP-Diam – Year* (Steel) DLBP40-19, DLSP40-19
*Where years are specified, any year can be ordered by changing the suffix. Example DLBP15-20 or DLSP15-21.
9 1
*Um ein anderes Jahr auszuwählen, ändern Sie die Artikelnummer. Beispiel: DLBP15-20 oder DLSP15-21
DLBRP-Diam – Year* (Brass) DLSRP-Diam – Year* (Steel) DLBRP40-19, DLSRP40-19
*Où les années sont spécifiées, n’importe quelle année peut être commandée en changeant le suffixe. Exemple DLBP15-20 ou DLSP15-21.
G-11
recycle inserts - spi standard Installation Guidelines: To avoid damage to face, press insert into hole using a brass or plastic mallet.
Installationsrichtlinien: Um Beschädigungen der Gravur zu vermeiden, schlagen Sie den Einsatz mit einem Messing-oder Kunststoffhammer in die Bohrung.
L
Etching .3mm (.012") Deep
DH7 L ±0.02mm
1/2 L
C
1
2
3
4
5
Material Code
Material
N/A
BLANK
RI-10-1
1
POLYETHYLENE TEREPHTHALATE
RI-10-2
2
HIGH DENSITY POLYETHYLENE
RI-10-3
3
POLYVINYL CHLORIDE
4
LOW DENSITY POLYETHYLENE
10 mm
RI-10-5
5
POLYPROPYLENE
RI-10-6
6
POLYSTYRENE
RI-10-7
7
OTHER
RI-16-0
N/A
BLANK
RI-16-1
1
POLYETHYLENE TEREPHTHALATE
RI-16-2
2
HIGH DENSITY POLYETHYLENE
RI-16-3
3
POLYVINYL CHLORIDE
4
LOW DENSITY POLYETHYLENE
RI-16-4
16 mm
RI-16-5
5
POLYPROPYLENE
RI-16-6
6
POLYSTYRENE
RI-16-7
7
OTHER
RI-20-0
N/A
BLANK
RI-20-1
1
POLYETHYLENE TEREPHTHALATE
RI-20-2
2
HIGH DENSITY POLYETHYLENE
RI-20-3
3
POLYVINYL CHLORIDE
4
LOW DENSITY POLYETHYLENE
RI-20-4
20 mm
6
7
CAD insertion point | CAD Einfügemarke | CAD point d'insertion
RI-10-0
RI-10-4
G-12
d
D 50 ± 2 HRC
m 420 Stainless Steel h 48-52 HRC
catalogue number
M
Dm6
Clearance for SHCS or to drive out insert
0
Guide d’Installation: Pour éviter d’endommager le visage, appuyez sur insert dans un trou en utilisant un maillet en laiton ou en plastique.
RI-20-5
5
POLYPROPYLENE
RI-20-6
6
POLYSTYRENE
RI-20-7
7
OTHER
l
c
m
12 mm
6 mm
M5 x .08
14 mm
10 mm
M6 x 1.0
16 mm
12 mm
M6 x 1.0
air valves L L
B
B
D D
.04
.04
C1
A
C1
A 49 ±1 HRC
53 ±1 HRC
49 ±1 HRC 53 ±1 HRC D Plunger: Tool Steel, coated for lubricity h Body: 52-54 HRC, Plunger: 48-50 HRC m Body: 420 Stainless Steel,
B
catalogue number
T AV-08
d
a
b
c1
l
mm
mm
mm
mm
mm
Ø8 G6
6.5
11
6
24
AV-12
Ø12 G6
AV-18
Ø18 G6
9.7
18
8
34
14.8
22
12
46
L
Pocket +.002 -.000
CAD insertion point | CAD Einfügemarke | CAD point d'insertion
Suggested Machining Diameters | Empfohlene Bearbeitungsdurchmesser | Diamètres d’Usinage Suggérés:
C +0.12 -0.00
C
catalogue number
c
AV-08
6.8
AV-12
12
Do not machine AV-18
14
+0.12 -0.00
C
+0.00 or polish the parting BDo -.025 not machineline surface of the valve
or polish the parting line surface of the valve
B +0.00 -.025 Specifications: • Pressure Required: 29-140 psi • Maximum Mould Temperature: 130˚ C
Spezifikationen: • Erforderlicher Druck: 29-140 PSI • Maximale Werkzeugtemperatur: 130° C
Caractéristiques: • Pression Requise: 29-140 psi • Température Maximale du Moule: 130° C
air poppets L Pocket +.002 -.000
C1
+.03 +.08
D Pocket C1 +.03 +.08
Clearance
B
C to drive out insert if needed.
B
+.000 TB -.001
+.000 -.001
m 420 Stainless Steel h 40-44 HRC
d
air poppet catalogue number
± .0002
APV-25
.250
APV-37
.375
APV-50
.500
b
c
t
l
repair kit catalogue number
.215
3/16
.06
.375
APVR-25
.325
9/32
.07
.375
APVR-37
.437
3/8
.10
.500
APVR-50
APV-75
.750
.656
9/16
.15
.750
APVR-75
APV-100
1.000
.875
3/4
.20
1.000
APVR-100
APV-150
1.500
1.312
1
.30
1.500
APVR-150
Specifications: • Pressure Required: 80-100 psi • Maximum Mould Temperature: 140˚ C • Repair kit includes spring and pin.
Spezifikationen: • Erforderlicher Druck: 80-100 psi • Maximale Werkzeugtempertur: 140° C • Reparatursatz enthält Feder und Stift.
Caractéristiques: • Pression Requise: 80-100 psi • Température Maximale du Moule: 140° C • Le kit de réparation comprend le ressort et la goupille.
G-13
cooling items section h
Baffles
Jumper Baffles
Reverse Flow Baffles
Tubes: High Flow, Hex
SB, TB
JBA
RFB
HFTM, HEXM, EHEXM
H-1
H-2
H-3
H-4
Metric Tubes: High Flow, Hex
Bubbler Base
Socket Connectors
Connector Plugs
HFT, HEXT
BBL
SC
BSPT
H-5
H-6
H-7
H-8
Safety Clips
Pipe Plugs
Threadless Plugs
Status Tags
SC
BR, ST, SS
TWP
ST
H-8
H-9
H-9
H-10
P
B
baffles: bspt series
L
P
B
L
P
B
S
L
Baffles feature patented XT technology. A deeper socket and keyed design provide 3 times the torque over conventional brazed baffles.
Leitbleche verfügen über eine patentierte XT-Technologie.
P de la technologie Les barrettes sont dotés B XT Extra Torque. brevetée
Eine tiefere Verbindungsstelle und ein spezielles Design sorgen für das Dreifache des Drehmoments im Vergleich zu herkömmlichen gelöteten Leitblechen.
Une douille plus profonde et le verrouillage de position permettent 3 fois le couple par rapport aux barrettes soudeés conventionnelles.
Straight | Gerade/Direkt | Plat
Turbo
m Brass
m Brass
catalogue number
p
l
b
Blade Width
Plug Size (BSPT)
Overall Length
Blade Thickness
SB12L4-BSP
1/8-28
4
.057
.312
SB12L8-BSP
1/8-28
8
.057
.312
SB12L12-BSP
1/8-28
12
.057
SB25L5-BSP
1/4-19
5
.085
SB25L10-BSP
1/4-19
10
.085
SB25L15-BSP
1/4-19
15
SB37L6-BSP
3/8-19
6
SB37L12-BSP
3/8-19
12
SB37L18-BSP
3/8-19
SB50L8-BSP
1/2-14
SB50L16-BSP SB75L12-BSP SB75L20-BSP
3/4-14
SB100L16-BSP SB100L24-BSP
S
CAD insertion point | CAD Einfügemarke | CAD point d'insertion
catalogue number
p
l
s
Blade Thickness
Blade Width
Overall Length
TB12L4-BSP
1/8-28
4
2
.057
.312
TB12L8-BSP
1/8-28
8
4
.057
.312
.312
TB12L12-BSP
1/8-28
12
6
.057
.312
.421
TB25L5-BSP
1/4-19
5
2
.085
.421
.421
TB25L10-BSP
1/4-19
10
4
.085
.421
.085
.421
TB25L15-BSP
1/4-19
15
6
.085
.421
.093
.562
TB37L6-BSP
3/8-19
6
2
.093
.562
.093
.562
TB37L12-BSP
3/8-19
12
4
.093
.562
18
.093
.562
TB37L18-BSP
3/8-19
18
6
.093
.562
8
.093
.687
TB50L8-BSP
1/2-14
8
3
.093
.687
1/2-14
16
.093
.687
TB50L16-BSP
1/2-14
16
5
.093
.687
3/4-14
12
.093
.906
TB75L12-BSP
3/4-14
12
4
.093
.906
20
.093
.906
TB75L20-BSP
3/4-14
20
6
.093
.906
1-11
16
.093
1.125
TB100L16-BSP
1-11
16
5
.093
1.125
1-11
24
.093
1.125
TB100L24-BSP
1-11
24
8
.093
1.125
-.005 -.010
Straight Length
b
Plug Size (BSPT)
-.005 -.010
Alternative configurations and materials available:
Alternative Konfigurationen und Materialien verfügbar:
Configurations alternatives et matériaux disponibles:
• For Baffles with stainless steel pipe plugs, add “-SS” to the end of the catalogue number. Ex. SB25L5-BSP-SS or TB75L12BSP-SS • Baffles can be ordered cut to any length. For Turbo Baffles, the closest straight length (S) is used. Ex. SB25L6.25-BSP or TB37L5.75BSP-SS (with a 2” “S” dimension)
• Für Leitbleche mit Edelstahl-Rohr Stecker, fügen Sie “-SS “ am Ende der Katalognummer hinzu. Bsp.: SB25L5BSP-SS oder TB75L12-BSP-SS • Leitbleche können auf jede beliebige Länge geschnitten werden. Für TurboLeitbleche wird die nächstgelegene gerade Länge (n) verwendet. Bsp.: SB25L6.25-BSP oder TB37L5.75-BSP-SS (mit 2” “S”Dimension)
• Pour les barrettes avec bouchons en acier inoxydable, ajoutez «-SS» à la fin de la référence de catalogue. Ex. SB25L5-BSPSS ou TB75L12-BSP-SS • Les barrettes peuvent être commandés coupés à n’importe quelle longueur. Pour les barrettes Turbo, la longueur droite la plus proche (S) est utilisée. Ex. SB25L6.25BSP ou TB37L5.75-BSP-SS (avec une dimension “S” de 2 ”)
H-1 US Pat. #7,159,837, CN Pat. #ZL200480020696.9
jumper baffles Jumper Baffles enable water routing via interconnected baffles. • Allows flow to turn corners and reach angles within a single circuit. • Simplifies design and machining of a complex circuit. Jumper-Leitbleche ermöglichen die Wasserführung über vernetzte Leitbleche. • Ermöglicht es, um Ecken zu fließen und Winkel innerhalb einer einzigen Kühlung zu erreichen. • Vereinfacht das Design und die Bearbeitung eines komplexen Kreislaufs.
Standard Straight Baffle
Les barrettes d’embrochement permettent l’eau de passer entre les déviations interconnectées. • Permet à l’écoulement de tourner les coins et d’atteindre les angles dans un seul circuit. • Simplifie la conception et l’usinage d’un circuit complexe.
Jumper Baffle
OUT IN
P
W C OUT
IN m Brass
catalogue number JBA12 JBA25
p
b
1/8 1/4
.06 .06
Pipe Plug Size (NPT)
w
-.005 -.010
l oal s
.312 .66 .437 .90
12.25 12.31
c
f
OAL
L
CAD insertion point | CAD Einfügemarke | CAD point d'insertion
S
Set Screw Size
.50 .242 .25 #4-40 x 3/32” .65 .352 .30 #6-32 x 1/8”
Installation Guidelines: 1. Install the Jumper Blade so its shoulder rests against the Straight Baffle. Mark this location. 2. Calculate the distance from marked location by adding the S dimension from the Jumper Plug to this length. 3. Attach the Jumper Blade to the Jumper Plug. 4. Install the assembly until it rests against the Straight Baffle. 5. Insert the Pipe Plug until it is secured against the Jumper Plug.
NPT Thread for Pipe Plug
Mark Location
S+
Plug Recess
Installationsrichtlinien: 1. Installieren Sie die Jumper-Klinge so, dass der Seitenstreifen am geraden Leitblech anliegt. Markieren Sie diese Stelle.. 2. Berechnen Sie den Abstand von der markierten Stelle, indem Sie die Länge S des Jumper Stopfen zu dieser Länge hinzufügen.. 3. Befestigen Sie die Jumper-Klinge am Jumper-Stopfen 4. Installieren Sie die Baugruppe, bis sie an der geraden Blende anliegt. 5. Fügen Sie den Gewindestopfen ein, so dass er am Jumper-Stopfen anliegt.
Marked Location Plug Recess
Cut Location
S
Guide d’Installation: 1. Installez la barrette d’embrochement pour que son épaule repose contre la Pipe Plug barrette plate. Marquez cet endroit. 2. Calculez la distance depuis l’emplacement marqué en ajoutant la dimension S du bouchon de la barrette d’embrochement à cette longueur. 3. Fixez la barrette d’embrochement à son bouchon. 4. Installez l’assemblage jusqu’à ce qu’il repose contre la barrette plate. 5. Insérez le bouchon fileté jusqu’à ce qu’il soit fixé contre le bouchon de la barrette d’embrochement.
H-2
F
B
Jumper Plug
Jumper Blade
Intersecting Straight Baffle
reverse flow baffles Reverse Flow Baffles enables the feed line to a baffle to be located internally, avoiding interfering with bushings, return pin holes, etc., simplifying design, machining, and waterline cleaning. OAL
Gegenstrom-Leitbleche ermöglichen es, die Einspeiseleitung zu einem Leitblech intern zu montieren, um zu vermeiden, dass Buchsen, Bolzenlöcher usw. beeinträchtigt werden, was die Konstruktion, Bearbeitung und das Reinigen der Wasserleitung vereinfacht.
SL
S P
Les barrettes d’écoulement inversé permettent de positionner la conduite d’alimentation vers un déflecteur à l’intérieur, évitant les interférences avec les bagues, les trous des poinçons de retour, etc., simplifiant la conception, l’usinage et le nettoyage de la conduite d’eau.
RFB06L8 RFB12L8 RFB25L10 RFB37L12 RFB50L16 RFB75L20 RFB100L24 RFB125L24
Set Screw
C
B
m Brass
catalogue number
W
SW
E
CAD insertion point | CAD Einfügemarke | CAD point d'insertion
p
oal
b
1/16 1/8 1/4 3/8 1/2 3/4 1 1-1/4
8.16 8.23 10.25 12.28 16.28 20.38 24.38 24.50
.057 .057 .085 .093 .093 .093 .093 .093
Pipe Plug Size (NPT)
(REF)
Installation Guidelines: 1. Install into the waterline and measure the distance “M” as shown below. 2. Cut the measured length from the end, including any recess required. 3. Re-attach the Reverse Flow Plug. 4. Install the assembly into the water line, ensuring a tight seal and proper orientation.
w
s
sl
sw
c
e
.250 .312 .437 .562 .687 .937 1.125 1.484
.44 .44 .62 .62 .75 .75 .87 1.35
.18 .22 .35 .41 .50 .77 1.00 1.22
.13 .16 .19 .28 .31 .44 .50 .50
.38 .50 .62 .75 .75 .87 .87 1.00
.16 .23 .25 .28 .28 .38 .38 .50
-.005 -.010
Installationsrichtlinien: 1. In die Kühlbohrung einbauen und den Abstand “M “ messen, wie unten gezeigt. 2. Schneiden Sie die gemessene Länge, einschließlich der erforderlichen Aussparung, am Ende ab. 3. Befestigen Sie den Gegenstrom-Stopfen neu. 4. Bauen Sie die Baugruppe in die Kühlbohrung ein, um eine enge Dichtung und eine richtige Orientierung zu gewährleisten.
Set Screw Size (2) #4-40 x 3/32" #4-40 x 3/32" #8-32 x 1/8" #10-32 x 3/16" 1/4-20 x 3/16" 1/4-20 x 3/8" 1/4-20 x 3/8" 1/4-20 x 1/2"
Guide d’Installation: 1. Installez dans la conduite d’eau et mesurez la distance “M” comme indiqué ci-dessous. 2. Coupez la longueur mesurée à partir de l’extrémité, y compris la profondeur de rainure requise. 3. Rattachez le bouchon de l’inverseur d’écoulement. 4. Installez l’assemblage dans la conduite d’eau, en assurant une étanchéité parfaite et l’orientation correcte.
M
OUT
IN
Thru Slot Baffle
Reverse Flow Plug
M+
Baffle Recess Cut Location
H-3
high flow tubes - metric m Stainless Steel
450mm
S T
H
CAD insertion point | CAD Einfügemarke | CAD point d'insertion
t
s
h
catalogue number
Tube O.D.
Tube I.D.
Thread
Shoulder Length
Thread Length
HFTM18L450 HFTM23L450 HFTM32L450 HFTM48L450 HFTM64L450 HFTM79L450
1.8 2.3 3.2 4.8 6.4 7.9
1.5 1.9 2.8 4.2 5.8 7.3
M4 x .7 M5 x .8 M6 x 1.0 M8 x 1.25 M10 x 1.5 M12 x 1.75
5 6 7 10 12 14
4 5 6 8 10 12
hex series tubes: metric m Stainless Steel catalogue number
450mm
S D Wrench Size
T
H
Metric Hex Series Tubes can be utilized in applications where installation is required from the back.
CAD insertion point | CAD Einfügemarke | CAD point d'insertion
Tube Tube O.D. I.D.
HEXM18L450 HEXM23L450 HEXM32L450 HEXM48L450 HEXM64L450 HEXM79L450
1.8 2.3 3.2 4.8 6.4 7.9
1.5 1.9 2.8 4.2 5.8 7.3
Die Rohre der metrischen Hex-Serie können in Anwendungen eingesetzt werden, bei denen eine rückseitige Installation erforderlich ist.
t
Thread
s
d
8 10 12 16 16 16
5 6 8 10 12 14
Shoulder Diameter Length
M4 x .7 M5 x .8 M6 x 1.0 M8 x 1.25 M10 x 1.5 M12 x 1.75
h
Head Height
Wrench Size
4 5 6 8 8 8
3 4 5 6 6 8
Les tubes métriques Hex Series peuvent être utilisés dans des applications nécessitant une installation par l’arrière.
external hex series tubes: metric m Stainless Steel
T Hex Size
S
450mm
H
Tubes can be ordered cut to a specific length or provided in longer lengths. To order, replace the length on any given catalogue number with the desired length. Ex: HFTM79L200, HEXM79L200, EHEXM79L200
H-4
t
s
h
catalogue number
Tube O.D.
Tube I.D.
Thread
Shoulder Length
Thread Length
Hex Size
EHEXM18L450 EHEXM23L450 EHEXM32L450 EHEXM48L450 EHEXM64L450 EHEXM79L450
1.8 2.3 3.2 4.8 6.4 7.9
1.5 1.9 2.8 4.2 5.8 7.3
M4 x .7 M5 x .8 M6 x 1.0 M8 x 1.25 M10 x 1.5 M12 x 1.75
7 9 10 12 15 18
4 5 6 8 10 12
6 7 8 10 13 15
CAD insertion point | CAD Einfügemarke | CAD point d'insertion
Rohre können auf eine bestimmte Länge geschnitten oder in größeren Längen zur Verfügung gestellt werden. Für eine Bestellung ersetzen Sie die Länge einer beliebigen Katalognummer durch die gewünschte Länge. Bsp.: HFTM79L200, HEXM79L200, EHEXM79L200
Les tubes peuvent être commandés coupés à une longueur spécifique ou fournis plus longues. Pour commander, remplacez la longueur sur la référence de catalogue. Ex: HFTM79L200, HEXM79L200, EHEXM79L200
high flow tubes: inch Length
S H
m Stainless Steel Tube O.D.
Tube I.D.
.072
.060
.090
.076
.125
.109
.187
.167
.250
.230
.312
.288
.365
.340
.427
.397
.500
.444
CAD insertion point | CAD Einfügemarke | CAD point d'insertion
h
s
Thread Size
Thread Length
Shoulder Length
12” Length
18” Length
24” Length
36” Length
#5-44 #10-32 #5-44 #10-32 #10-32 1/4-28 1/4-28 5/16-24 5/16-24 3/8-24 3/8-24 7/16-20 7/16-20 1/2-20 1/2-20 9/16-18 9/16-18 5/8-18
.125 .156 .125 .156 .156 .203 .203 .235 .235 .296 .296 .359 .359 .421 .421 .421 .421 .421
.140 .203 .140 .203 .203 .255 .255 .290 .290 .359 .359 .437 .437 .500 .500 .500 .531 .531
HFT078L12 HFTJ078L12 HFT094L12 HFTJ094L12 HFT125L12 HFTJ125L12 HFT187L12 HFTJ187L12 HFT250L12 HFTJ250L12 HFT312L12 HFTJ312L12 HFT375L12 HFTJ375L12 HFT437L12 HFTJ437L12 HFT500L12 HFTJ500L12
HFT078L18 HFTJ078L18 HFT094L18 HFTJ094L18 HFT125L18 HFTJ125L18 HFT187L18 HFTJ187L18 HFT250L18 HFTJ250L18 HFT312L18 HFTJ312L18 HFT375L18 HFTJ375L18 HFT437L18 HFTJ437L18 HFT500L18 HFTJ500L18
HFT078L24 HFTJ078L24 HFT094L24 HFTJ094L24 HFT125L24 HFTJ125L24 HFT187L24 HFTJ187L24 HFT250L24 HFTJ250L24 HFT312L24 HFTJ312L24 HFT375L24 HFTJ375L24 HFT437L24 HFTJ437L24 HFT500L24 HFTJ500L24
HFT078L36 HFTJ078L36 HFT094L36 HFTJ094L36 HFT125L36 HFTJ125L36 HFT187L36 HFTJ187L36 HFT250L36 HFTJ250L36 HFT312L36 HFTJ312L36 HFT375L36 HFTJ375L36 HFT437L36 HFTJ437L36 HFT500L36 HFTJ500L36
hex series tubes: inch
Length
S D Wrench Size
T
H
m Stainless Steel
Tube O.D.
Tube I.D.
.072
.060
.090
.076
.125
.109
.187
.167
.250
.230
.312
.288
CAD insertion point | CAD Einfügemarke | CAD point d'insertion
t
Thread
Wrench Size
#5-44 #10-32 #5-44 #10-32 #10-32 1/4-28 1/4-28 5/16-24 5/16-24 3/8-24 3/8-24 1/2-20
1/8 1/8 1/8 1/8 5/32 5/32 3/16 1/4 1/4 5/16 5/16 3/8
HEX Tubes can be used with the Bubbler Tubes or in applications where installation in cores is required from the back. Tubes on this page can be ordered longer or cut to a specific length. Ex. HFT125L14.5, HEXT125L14.5
s .312 .406 .312 .406 .406 .406 .500 .562 .562 .625 .625 .750
d
h
Diameter
Head Height
12” Length
18” Length
24” Length
36” Length
.182 .245 .182 .245 .245 .307 .307 .370 .370 .495 .495 .620
.156 .187 .156 .187 .187 .250 .250 .281 .281 .312 .312 .375
HEXT078L12 HEXTJ078L12 HEXT094L12 HEXTJ094L12 HEXT125L12 HEXTJ125L12 HEXT187L12 HEXTJ187L12 HEXT250L12 HEXTJ250L12 HEXT312L12 HEXTJ312L12
HEXT078L18 HEXTJ078L18 HEXT094L18 HEXTJ094L18 HEXT125L18 HEXTJ125L18 HEXT187L18 HEXTJ187L18 HEXT250L18 HEXTJ250L18 HEXT312L18 HEXTJ312L18
HEXT078L24 HEXTJ078L24 HEXT094L24 HEXTJ094L24 HEXT125L24 HEXTJ125L24 HEXT187L24 HEXTJ187L24 HEXT250L24 HEXTJ250L24 HEXT312L24 HEXTJ312L24
HEXT078L36 HEXTJ078L36 HEXT094L36 HEXTJ094L36 HEXT125L36 HEXTJ125L36 HEXT187L36 HEXTJ187L36 HEXT250L36 HEXTJ250L36 HEXT312L36 HEXTJ312L36
Hex-Rohre können zusammen mit den Bubbler-Rohren verwendet oder in Anwendungen eingesetzt werden, bei denen eine rückseitige Installation in die Kerne erforderlich ist. Die Rohre auf dieser Seite können länger bestellt oder auf eine bestimmte Länge geschnitten werden. Bsp.: HFT125L14.5, HEXT125L14.5
Les HEX Tubes peuvent être utilisés avec les Bubbler Tubes ou dans applications nécessitant une installation par l’arrière. Les tubes sur cette page peuvent être commandés plus longues ou coupés à une longueur spécifique. Ex. HFT125L14.5, HEXT125L14.5
H-5
bubbler base™ L H
P
S
Standard High Flow or Hex Series High Flow Tube
Break all lead-in corners for O-Ring
.03 Chamfer
.03 Chamfer
D P
Drainage Slots (3)
T
C L
K
+.001 -.000
L
+.001 -.000
Drain Channel
Drain Channel
D
+.002 -.000
D
Feed (In)
+.002 -.000
IN
IN
Drain (Out)
Application m Brass with Viton O-Ring
catalogue number
d
Maintenance/Removal
CAD insertion point | CAD Einfügemarke | CAD point d'insertion
l
c
k
s
h
Stop for High Flow Tube
t
p
Tube Thread
Pipe Thread for Removal
Compatible High Flow Tube
Compatible Hex Series Tube
BBL05
.374
.750
.35
.19
.160
.45
#5-44
#10-32
HFT078 / HFT094
HEXT078 / HEXT094
BBL10
.436
1.000
.55
.23
.190
.61
#10-32
1/4-28
HFTJ078 / HFT125
HEXTJ094 / HEXT125
BBL25
.560
1.250
.72
.27
.255
.72
1/4-28
1/16-27 NPT
HFTJ125 / HFT187
HEXTJ125 / HEXT187
BBL31
.748
1.500
.98
.27
.285
.92
5/16-24
1/8-27 NPT
HFTJ187 / HFT250
HEXTJ187 / HEXT250
High Flow Tubes and Hex Series Tubes are sold separately on the following page.
Rohre mit großen Durchflussmengen (High Flow Tubes) und Hex-Serien-Rohre sind auf der folgenden Seite separat erhältlich.
Les tubes à haut débit et les tubes hex sont vendus séparément à la page suivante.
Features:
Eigenschaften:
Caractéristiques:
• The Bubbler Base allows for positive positioning of cooling tubes. • Minimal center-to-center pin locations. • Includes the O-Ring. • Compatible with High Flow Tubes and Hex Series Tubes. • Maximum temperature: 200˚ C
• Der Sprudlerfuß ermöglicht eine einfache Positionierung von Kühlrohren. • Minimale Stichmaße möglich. • Enthält den O-Ring. • Kompatibel mit Rohren mit großen Durchflussmengen und Hex-Serien-Rohren. • Maximale Temperatur: 200° C
• La base Bubbler permet un positionnement positif des tubes de refroidissement. • Emplacement minimal des broches centre à centre. • Comprend le joint torique. • Compatible avec les tubes à haut débit et les tubes de la série Hex. • Température maximale: 200° C
Application Guidelines:
Anwendungsrichtlinien::
Guide d’application::
• Utilise the largest diameter tube possible. • Core pin should contain an O-ring to seal around the tube. • Water line location can be anywhere within the relief channel. • Easy removal by hand, or by wrench on pipe nipple (P). • For assistance in determining the optimal waterline circuit, please contact Engineering at tech@procomps.com.
• Verwenden Sie ein Rohr mit größtmöglichem Durchmesser. • Der Kern sollte einen O-Ring enthalten, der um das Rohr herum abdichtet. • Die Kühlbohrung kann überall im Breich des Rückstromkanals liegen. • Einfaches Entfernen von Hand oder durch Schraubenschlüssel am Rohrnippel (P). • Für die Unterstützung bei der Bestimmung des optimalen Kühlungsquerschnitts wenden Sie sich bitte an Engineering unter Tech@procomps.com.
• Utiliser le tube de plus grand diamètre possible. • La broche centrale doit contenir un joint torique pour sceller le tube. • L’emplacement de la conduite d’eau peut être n’importe où dans le canal de sortie. • Enlèvement facile à la main ou à l’aide d’une clé sur le bouchon (P). • Pour soutien afin de déterminer le circuit optimal de la conduite, veuillez contacter Engineering à l’adresse tech@procomps.com.
H-6
US Patent No. 9,248,597
socket connectors: standard series • Pressure to 13.7 Bar • Max temp = 204º C • Druck bis 13,7 bar • Maximale Temperatur 200° C
Thread Largest Diameter
Hole
• Pression à 13.7 Bar • Temp max = 204º C
m Brass with Stainless Steel Bearings and Silicone Seals
200 SERIES
300 SERIES
(1/4” Hole)
S T R A I G H T
90˚
S T E M
45˚
S T E M
Socket Body Only
500 SERIES
(3/8” Hole)
(1/2” Hole)
catalogue number
Hose ID
Largest Diam.
catalogue number
Hose ID
Largest catalogue number Diameter
SC204
1/4
.71
SC306
3/8
.97
SC205
5/16
.71
SC308
1/2
SC206
3/8
.71
-
SC214
1/4
.71
SC215
5/16
SC216
Hose ID
Largest Diameter
SC504
1/2
1.21
.97
SC506
3/4
1.21
-
-
-
-
-
SC316
3/8
.97
SC514
1/2
1.21
.71
SC318
1/2
.97
SC516
3/4
1.21
3/8
.71
-
-
-
-
-
-
SC224
1/4
.71
SC326
3/8
.97
SC524
1/2
1.21
SC225
5/16
.71
SC328
1/2
.97
SC526
3/4
1.21
SC226
3/8
.71
-
-
-
-
-
-
catalogue number
Thread
catalogue number
Thread
catalogue number
Thread
SC200B
1/8
SC300B
1/4
SC500B
1/2
SC200B-4
1/4
SC300B-4
3/8
-
-
Replacement Seals: Silicone (Red)
SC200S
SC300S
SC500S
Replacement Seals: Viton (Black)
SC200S-V
SC300S-V
SC500S-V
Note: 200 and 300 Series Straight Socket Connectors are manufactured from a single piece, not assembled as shown.
Hinweis: Die Steckverbinder der Serie 200 und 300 sind aus einem Stück gefertigt und nicht wie abgebildet montiert.
Remarque: Les Raccords de Tuyaux Droit série 200 et 300 sont fabriqués en une seule pièce, ne sont pas montés comme illustré.
Alternative configurations and materials available: • To order valved style Socket Connectors or Bodies, add a “-V”. Ex. SC316-V • To order Socket Connectors or Bodies with barbs for Push-Lok® hose, specify “-PL”. Ex. SC326-PL or SC306-V-PL • Note: Valved versions (-V or -V-PL) are not available in the 500 series.
Alternative Konfigurationen und Materialien verfügbar: • Um Anschlussstecker mit Verschlussventil oder -körper zu bestellen, fügen Sie “-V”. Bsp.: SC316-V hinzu. • Um Anschlusstecker oder -körper für Push-Lok® Schlauch zu bestellen, wählen Sie “-PL”. Bsp.: SC326-PL oder SC306-V-PL. • Hinweis: Verschlussversionen (-V oder -V-PL) sind in der 500er Serie nicht erhältlich.
Configurations alternatives et matériaux disponibles: • Pour commander des Raccords ou des Corps à soupape, ajoutez un «-V». Ex. SC316-V • Pour commander des Raccords ou des Corps avec des barbes pour tuyau PushLok®, spécifiez «-PL» .Ex. SC326-PL ou SC306-V-PL • Remarque: les versions avec soupape (-V ou -V-PL) ne sont pas disponibles dans la série 500.
H-7
connector plugs: international standard L
L D M
B
Pipe Nipple
m Brass
m Brass
MALE TYPE: BSPT
catalogue number
m
d
l
n
s
t
200 SERIES
251-BSPT
1/8
9
24
15
6
9
(6.35MM Hole)
252-BSPT
1/4
9
29
17
6
351-BSPT
1/8
13
30
20
9
352-BSPT
1/4
13
34
21
9
13
300 SERIES (9.525MM Hole)
FEMALE TYPE: BSPT
f
catalogue number
m
11
251F-BSPT
12
14
10
14
Inner Diameter
l
1/8
6
25
252F-BSPT
1/4
6
33
351F-BSPT
1/8
8
25
14
352F-BSPT
1/4
8
34 34
353-BSPT
3/8
13
35
21
9
14
17
353F-BSPT
3/8
8
500 SERIES
553-BSPT
3/8
20
41
27
14
14
21
553F-BSPT
3/8
14
35
(12.7MM Hole)
554-BSPT
1/2
20
43
24
16
19
22
554F-BSPT
1/2
15
45
m Brass
L
MALE TYPE: METRIC
200 SERIES
T
catalogue number
m
d
l
n
s
t
f
252-M10
M10
9
24
15
6
9
11
N
D S
M
F
Alternative configurations and materials available:
Alternative Konfigurationen und Materialien verfügbar:
Configurations alternatives et matériaux disponibles:
• For Connector Plugs manufactured from stainless steel, add an “-SS”. Ex. 250-SS or 351-SS or 251-FSS
• Für Anschlusstecker aus Edelstahl, fügen Sie “-SS” hinzu. Bsp.: 250-SS oder 351-SS oder 251-FSS
• Pour les Raccords en acier inoxydable, ajoutez un «-SS». Ex. 250-SS ou 351-SS ou 251-FSS
• Note: The 250F, 351F and all 500 Series Female Plugs are available in brass only.
• Hinweis: Die weiblichen Stecker der 250F, 351F und der 500er Serie sind nur in Messing erhältlich.
• Remarque: les raccords femelles 250F, 351F et toutes les séries 500 sont disponibles en laiton uniquement.
safety clips catalogue number
color
SC200-BL SC300-BL
200 Blue | Blau | Bleu
SC500-BL
SC500-R
H-8
300 500
SC200-R SC300-R
series
200 Red | Rot | Rouge
300 500
pipe plugs: bspt standard m Brass and Alloy Steel Pipe Thread
Brass Catalogue Number
Steel Catalogue Number
Stainless Catalogue Number
Height (in mm)
1/16-28 BSPT 1/8-28 BSPT 1/4-19 BSPT 3/8-19 BSPT 1/2-14 BSPT 3/4-14 BSPT 1-11 BSPT 1 1/4-11 BSPT
BR06-BSP BR12-BSP BR25-BSP BR37-BSP BR50-BSP BR75-BSP BR100-BSP BR125-BSP
ST06-BSP ST12-BSP ST25-BSP ST37-BSP ST50-BSP ST75-BSP -
SS06-BSP SS12-BSP SS25-BSP SS37-BSP SS50-BSP SS75-BSP -
6 8 10 10 10 13 14 14
• Fits BSPT and BSPP threads. • BSP Identification ring.
Height
• Passt für BSPT und BSPP Gewinde. • BSP Identifikationsring.
• S’adapte aux filetages BSPT et BSPP. • Anneau d’identification BSP.
threadless plugs: push-in o-ring type m Brass with Buna O-Rings catalogue number
a
b
TWP281 TWP375 TWP500 TWP625 TWP750 TWP1000 TWP1187
.273 .366 .494 .618 .743 .990 1.177
.250 .312 .312 .437 .500 .625 .625
O-Ring
Ream Size
d
e
1/16 1/16 1/16 3/32 3/32 1/8 1/8
.281 .375 .500 .625 .750 1.000 1.187
#6-32 #10-32 #10-32 1/4-20 1/4-20 3/8-16 3/8-16
c
B
+.000 -.005
A Maximum Temp: 120° C
E
Maximale Temperatur: 120° C
C
Température maximale: 120° C
CAD insertion point | CAD Einfügemarke | CAD point d'insertion
B
+.005 -.000
Threadless O-Ring Plugs are designed for inserts backed up by mould steel. Gewindelose O-Ring Stopfen sind für abgestützte Bohrungen konstruiert.
D +.005 -.000
Bouchons non-filetés au joints toriques sont conçus pour des inserts soutenus par l’acier du moule. .03 x 20° Break
Alternative configurations and materials available:
Alternative Konfigurationen und Materialien verfügbar:
Configurations alternatives et matériaux disponibles:
• For Viton O-rings specify “-V”. Ex. TWP500-V
• Für Viton O-Ringe wählen Sie “-V”. Bsp.: TWP500-V • Für gewindelose Stopfen aus Edelstahl, wählen Sie “-SS”. Bsp.: TWP500-SS oder TWP281-SS-V für Edelstahl-Stopfen mit Viton O-Ring.
• Pour les joints toriques Viton, spécifiez «-V». Ex. TWP500-V • Pour les bouchons non-filetés en acier inoxydable, spécifiez «-SS». Ex. TWP500SS ou TWP281-SS-V pour bouchons inox avec joints toriques en Viton.
• For stainless steel threadless plugs, specify “-SS”. Ex. TWP500-SS or TWP281SS-V for stainless plugs with Viton O-rings.
H-9
status tags Status Tags magnetically attach to moulds and are color-coded for easy identification of mould status at a glance.
Magnetische Hinweisschilder werden am Werkzeug befestigt und zeigen den Werkzeugstatus durch Farbkodierung leicht erkennbar an.
Les étiquettes d’état se fixent magnétiquement sur les moules et portent un code couleur pour identifier l’état du moule en un coup d’oeil.
catalogue number
color
description
quantity
ST-GRE
Green
Ready to Run
12
ST-YEL
Yellow
Qualify Mold / Sample
12
ST-RED
Red
Do Not Run Mold / Repair
12
ST-ORN
Orange
Maintenance Required
12
ST-WHT
White
Operator Required
12
ST-BLK
Black
Obsolete Mold
12
Specifications: • Ø 95mm Diameter • Magnetic back • Laminated Vinyl Surface
H-10
Spezifikationen: • Durchmesser: Ø 95mm • Magnetische Rückseite • Laminierte Vinyl-Oberfläche
Caractéristiques: • Ø 95mm de diamètre • Dos magnétique • Surface en vinyle laminé
H-11
literature, other section i
Literature
Mold Finish Guides
Mold Base Components (Inch Standard)
Prefix: LIT
Prefix: LIT
Info
Page: I-1
Page: I-2
I-3 Materials Low Carbon Steels (up to .35% Carbon)
Medium Carbon Steel (.35-.50% Carbon)
High Carbon and Tool Steels (Up to 1.50% Carbon)
UA SAE/AISI
Germany W.nbr
1018
1.0453
081A15
4130
---
708A30
USA
Japan
SCM2
8630
1.6523
805A20
SNCM220H
P20
1.2311/1.2330
4659
---
4140
1.7225
708A42
SCM440
A-2
1.2363
BA2
SKD12
S15C
D-2
1.2379
BD2
SKD11
H-13
1.2344
BH13
SKD61
M-2
1.3343
BM2
SKH51
O-1
1.2510
BO1
SKS21
O-2
1.2842
---
SKS93
S-7
---
BT4
SKH3
Collapsible Cores, Expandable Cavities
Online Resources
Global Steel Cross Reference Chart
Info
Info
Info
I-4
I-5
I-6
english language literature
What is a Mould? A thorough introduction to Plastic Injection Moulding and Injection Mould Construction. Topics covered include: description of common plastics and their uses, the injection moulding machine and moulding process, and detailed functional characteristics of components within the mould.
catalogue number LIT-WM
Written by Len Graham, 121 pages.
Mouldmaking and Die Cast Dies for Metalworking Trainees Presents mouldmaker trainees with basic fundamentals of mould construction with an emphasis on plastics moulds. Die cast dies and rubber moulds are also described. Defines and describes the types and parts of common moulds. Properties of common moulding materials and processes are also described.
catalogue number LIT-MDC
Written by John Kluz, 306 pages.
I-1
mould finish guides Steel Insert
catalogue number LIT-BMG
Front | Vorderseite | De face
Back | Rückseite | Arrière
SPI Mould Finish Guide shows diamond comparisons for measurement of tooling surfaces. Easy to read and includes data to cross-reference the Roughness Average (RA) and SPI scales. The 72 HRC surface hardness prevents damage. Guide measures 90mm x 150mm, and is comes in a plastic sleeve for safe storage. SPI Mould Finish Guide zeigt Oberflächenqualitäten bezogen auf die Rauhigkeit von Werkzeugoberflächen. Einfach zu lesen und enthält Daten zum Querverweis auf die Mittenrauheit(RA) und SPI-Skalen. Die Oberflächenhärte von 72 HRC verhindert Schäden. Die Führung misst 90 mm x 150 mm und wird in einer Kunststoffhülse für eine sichere Lagerung geliefert. SPI Mould Finish Guide présente des comparaisons de diamants pour la mesure des surfaces d’outillage. Facile à lire et comprend des données permettant la référence-croisée des échelles de rugosité moyenne (RA) et SPI. La dureté de surface de 72 HRC empêche les dommages. Le guide mesure 90 mm x 150 mm et est livré enveloppé en plastique pour un stockage sûr.
Provided by Bales Mold Service.
Moulded Plastic
Moulded, ABS plastic plaque, 215mm x 280mm, showing typical finishes to aid in communication with customers. Includes A-1, A-2, A-3, B-1, B-2, B-3, C-1, C-2, C-3, D-1, and D-3 finishes. Gespritzte ABS-Kunststoffplatte, 215 mm x 280 mm, mit charakteristischen Ausführungen für die Präsentation beim Kunden. Umfasst A-1, A-2, A-3, B-1, B-2, B-3, C-1, C-2, C-3, D-1 und D-3. Plaque en plastique moulé en ABS, 215 x 280 mm, présentant des finitions typiques pour faciliter la communication avec les clients. Comprend les finitions A-1, A-2, A-3, B-1, B-2, B-3, C-1, C-2, C-3, D-1 et D-3.
Provided by the Society of Plastics Industry.
I-2
catalogue number LIT-MFC
mould base components Inch Standard
PH, PKP
LR
SPR
v ESB, RX
PP, PPB
LP
SLP
SAB, SHB, SGP, STL
STB, STGP
SQC
GEB, GGP, GQC
GEP, LP
FLPB
GBK
SP, SPH
GESP
US
MS, HS
SBLT
SBB
TD
SD, STP
MSTRP
Full range of Inch Standard Components available at www.procomps.com/Catalog. Vollsortiment an Inch-Standardkomponenten, erhältlich unter www.procomps.com/Catalog. Gamme complète de composants standard en pouces disponibles sur www.procomps.com/Catalog.
I-3
collapsible cores, expandable cavities Roehr Tool Solutions
DT
DTG
S10
v
CC, CCM
RTGR
EXCAV
Full range of Roehr Tool Solutions products are available at www.procomps.com/Catalog or visit Roehr Tool Solutions directly at www.roehrtool.com. Eine vollständige Auswahl von Roehr Tool Solutions Produkten finden Sie unter www.roehrtool.com. La gamme complète des produits Roehr Tool Solutions est disponible sur www.procomps.com/Catalog ou visiter Roehr Tool Solutions directement sur www.roehrtool.com.
I-4
online resources
Progressive Components offers verified CAD geometry in 2D and 3D files in eight different formats online. Designers can download the geometry specific for their application and review product catalogue pages, technical data, and more. Additionally, at procomps.com, new product announcements and animations are available so designers and mould makers can see the items in a production tool environment. For automatic notification of new products and software upgrades, subscribe to our “Progress Report” at procomps.com/subscribe. Progressive Components bietet online verifizierte 2D- und 3D- CAD-Daten in acht verschiedenen Formaten an. Konstrukteure können die für ihre Anwendung spezifischen Daten herunterladen und Produktkatalogseiten, technische Daten und mehr anzeigen lassen. Zusätzlich stehen auf Procomps.com neue Produktankündigungen und Animationen zur Verfügung, damit Konstrukteure und Formenbauer die Artikel in einem Werkzeug sehen können. Für eine automatische Benachrichtigung über neue Produkte und Software-Upgrades abonnieren Sie unseren “Progress Report” unter procomps.com/subscribe. Progressive Components propose une géométrie de CAO vérifiée dans des fichiers 2D et 3D en huit formats différents en ligne. Les concepteurs peuvent télécharger la géométrie spécifique à leur application et consulter les pages du catalogue de produits, les données techniques, etc. En plus, sur procomps.com, des nouvelles annonces et animations de produits sont disponibles pour que les concepteurs et les moulistes puissent voir les éléments dans un environnement d’outils de production. Pour une notification automatique des nouveaux produits et les mises à jour des logiciels, abonnez-vous à notre «Progress Report» sur procomps.com/subscribe.
www.procomps.com
I-5
global steel cross reference chart
The following reference chart references common tooling materials and their designations in various regions. Contact Progressive at tech@procomps.com for materials not listed here. Die folgende Referenztabelle verweist auf gängige Werkzeugmaterialien und ihre Bezeichnungen in verschiedenen Regionen. Kontaktieren Sie Progressive unter tech@procomps.com für Materialien, die hier nicht aufgeführt sind. Le tableau de référence suivant fait référence aux matériaux d’outillage courants et à leurs désignations dans différentes régions. Contactez Progressive à tech@procomps.com pour les matériaux non listés ici.
Materials
UA SAE/AISI
Germany W.nbr
USA
Japan
Low Carbon Steels (up to .35% Carbon)
1018
1.0453
081A15
S15C
4130
---
708A30
SCM2
8630
1.6523
805A20
SNCM220H
P20
1.2311/1.2330
4659
---
4140
1.7225
708A42
SCM440
A-2
1.2363
BA2
SKD12
D-2
1.2379
BD2
SKD11
H-13
1.2344
BH13
SKD61
M-2
1.3343
BM2
SKH51
O-1
1.2510
BO1
SKS21
O-2
1.2842
---
SKS93
S-7
---
BT4
SKH3
303
1.4305
303S21
SUS303
420
1.4021
X20Cr13
SUS420J1
440C
1.4125
--
SUS440C
Medium Carbon Steel (.35-.50% Carbon)
High Carbon and Tool Steels (Up to 1.50% Carbon)
Stainless Steel
I-6
I-7
mould-ready components section x
Pins: Keyed & Special
Finished Core Pins
Pins: Straight
Pins: Single Step
Page: X-1
Page: X-2
Page: X-3
Page: X-4
Pins: Two Step
Pins: Water Cooled
Blade Ejectors
Ejector Sleeves: Straight
Page: X-5
Page: X-6
Page: X-7
Page: X-8
Ejector Sleeves: Stepped
Ejector Sleeves: Thin Wall
Puller Pins
Top Locks
Page: X-9
Page: X-10
Page: X-11
Page: X-12
Side Locks
Guide Locks
X-Style Side Locks
Bar Locks
Page: X-13
Page: X-14
Page: X-15
Page: X-16
UniLifter Core Blades
UniLifter Core Blades: L-Shaped
UniLifter Core Blades: T-Shaped
UniLifter Core Blades: Round
Page: X-17
Page: X-18
Page: X-19
Page: X-20
Extension Plugs: Finished Length
Special Tubes
Page: X-21
Page: X-22
Extension Plugs: Finished Length
Special Tubes
Page: X-21
Page: X-22
pins: keyed & special lengths
Standard Inch, DIN, or JIS Ejector Pins (Straight or Shoulder style) can be provided cut to your specific length and/or keyed for maintaining positioning during production. L+.06 -.00 Standard-Inch-,+.000 DIN- oder JIS-Auswerferstifte (Gerade oder Abgesetzt) können auf T -.002 H Ihre spezifische Länge zugeschnitten und / oder mit einer Verdrehsicherung versehen +.00 -.01 werden, um die Positionierung während der Produktion aufrechtzuerhalten.
R .03
Rz 4
1/2 D (Pin tangent)
Les éjecteurs standard en pouces, DIN ou JIS (style droit ou épaulée) peuvent être fournies coupées à votre longueur spécifique et / ou avec méplat de positionnement. D
42 ±2 HRC
32 ±2 HRC
+.000 -.002
68 ±2 HRC
Keyed Pins For pins with a flat machined on the head, specify the catalogue number and the distance after the “K”. Für Stifte mit einer an den Kopf angearbeiteten Fläche geben Sie die Katalognummer und den Abstand nach dem “K” an. Pour les éjecteurs avec méplat de positionnement dans la tête, indiquez la référence de catalogue et la distance après le «K».
Flat Distance +.000 -.002
+.00mm -.05mm
Examples: EP437L10-K250 = 7/16 Ø EP with a flat 1/4˝ from center EPD10L200-K6 = 10mm Ø EP with a flat 6mm from center EPJ055L250-K4 = 5.5mm Ø EP with a flat 4mm from center
Flat will be ground tangent if -K is specified without a dimension. Fläche wird tangential zum Auswerferdurchmesser sein, wenn die Dimension K ohne Maß angegeben wird. Le méplat sera rectifié tangente si -K est spécifié sans cote.
K Tangent +.000 -.002
+.00mm -.05mm
Example: CP125L6-K = 1/8˝ Ø Core Pin with a flat tangent to Ø
Cut-to-Length Pins +.001/-.000 (+.025/-.000mm), with or without keyed heads +.001 / -. 000 (+.025 / -. 000mm), mit oder ohne Verdrehsicherung +.001/-.000 (+.025/-.000mm), avec ou sans méplat dans les têtes
+.001 -.000
L
+. 025mm -.00mm
Examples: EP437L6.25-K250 = 7/16˝ Ø pin x 6.25˝ long with a flat 1/4˝ from center EPD10L225.5 = 10mm Ø x 225.5mm long DIN pin EP
Pin Type
-
125
-
Pin Diameter
L6.752
-
K080
Length
Key K= Tangent K=080 ( .080˝ from center)
X-1
finished core pins
Material: 1.2344 (H-13) Core Pins are Hard (H=50-55 HRC) or Soft+.0005 (S=30-35 HRC). L1 number -.0000 +.0005 +.0005 Specify “H” or “S” as “X” in the catalogue below. -.0000 L1L1 -.0000
All unspecified inside corners = R.010 Angles ± .25° Radii ± .004
-.000 Note: Pin Diameter (D1), head diameter and head L2 thickness are per standard Core Pins as shown on page A-12 of the US catalogue. +.002 +.002 +.002
-.000 +.0005 L2L2 -.000 PIN D1 L1 -.0000 PIN D1 PIN D1 +.002 L2 -.000 L1 +.0005 -.0000 PIN D1L2 +.002 -.000
Tapered
+.001 ØD2 +.001 -.000 ØD2-.000+.001 -.000 ØD2
ØD2 +.001 -.000
PIN D1
ØD2 +.001 -.000
L1 +.0005
-.0000 +.0005 +.0005 To order: CPTX-D1-D2-L1-L2 Ex: CPTH-.1875-.090-2.250-1.875 L1L1 -.0000 -.0000
+.002 L2 +.002 -.000 +.002 L2-.000 +.0005 L2L1 -.000 -.0000 PIN D1 PIN PIN D1D1 +.002 L2 L1 +.0005 -.000 -.0000 PIN D1L2 +.002 -.000
Step Taper
+.001
ØD2 +.001 -.000 +.001 ØD2-.000-.000 ØD2 ØD2
PIN D1
ØD2
A° A°A°
+.001 -.000 +.001 -.000
A°
To order: CPSTX-D1-D2-L1-L2-A Ex: CPSTH-.1875-.090-2.250-1.875 -3°
Taper Chamfer
A°
+.0005 L1 +.0005 -.0000 +.0005 L1L1 -.0000 -.0000 +.002 L2 +.002 -.000 +.002 L2 -.000 L2 -.000 L1 +.0005 -.0000 PIN D1 +.002 PIN L2 PIN D1D1 -.000 L1 +.0005 -.0000
PIN D1L2
+.001 ØD2 +.001 -.000 +.001 ØD2 -.000 ØD2 -.000
+.002 -.000
ØD2 +.001 -.000
PIN D1
ØD2 +.001 -.000 A° A° A° +.003 C +.003 -.000 +.003 -.000 CC -.000 A° To order: CPTCX-D1-D2-L1-L2-A-C Ex: CPTCH-.1875-.090-2.250-1.875-3°-.03 C +.003 -.000 A°
Step Chamfer
+.0005 C +.003 -.000 L1 +.0005 -.0000 +.0005 -.0000 L1L1 -.0000 +.002 L2 +.002 -.000 +.002 -.000 L2L2-.000 +.0005 PIN D1 L1 -.0000 PIN D1 PIN D1 +.002 L2 -.000 AC° L1 +.0005 -.0000 AC° AC° PIN D1 L2 +.002 -.000 AC° PIN D1
+.001 ØD2 +.001 -.000 +.001 ØD2-.000 ØD2 -.000
ØD2 +.001 -.000
AC° A° A°A°
+.003 C +.003 -.000 +.003 -.000 CC -.000
ØD2 +.001 -.000
To order: CPSCX-D1-D2-L1-L2-A-C-AC Ex: CPSCH-.1875-.090-2.250-1.875-3°-.03-45°
Step with Radius
+.0005 L1+.0005 -.0000 +.0005 L1L1 -.0000 -.0000 +.002 L2 +.002 -.000 +.002 L2 -.000 +.0005 PIN D1 L2L1-.000 -.0000 PIN PIN D1D1 +.002 L2 L1 +.0005 -.000 -.0000 PIN D1 L2 +.002 -.000 PIN D1
A°
C +.003 -.000
A°
C +.003 -.000
+.001 ØD2+.001 -.000 +.001 ØD2 -.000 ØD2 -.000
ØD2 +.001 -.000
A° A°A°
R RR
ØD2 +.001 -.000
To order: CPSRX-D1-D2-L1-L2-A-R Ex. CPSRX-.1875-.090-2.250-1.875-3°-.03
X-2
A°
R
A°
R
ejector pins Straight
D
R .03
H STANDARD TOLERANCES
D D D T H L K
EJECTOR PIN -0.0004 -0.01 -0.0007 -0.02 CORE PINS +0.0010 +0.02 +0.0005 +0.01 TI PINS +0.0003 +0.008 -0.0000 -0.000 +0.000 +0.00 -0.002 -0.05 +0.000 +0.0 -0.010 -0.2 +0.060 +1.5 -0.000 -0.0 +0.000 +0.00 -0.002 -0.05 INCH
T
K L
Material: Ejector Pin Material = 1.2344 (H-13) Core = 48-50 HRC Surface = 65-70 HRC
Ultra Pin Material = 1.2344 (H-13) Core = 48-50 HRC Surface = 65-70 HRC Treatment = Chrome
Core Pin Material = 1.2344 (H-13) Hard = 50-55 HRC Soft = 30-35 HRC
TI Pin Material = 1.3342 (M-2) Core = 60-64 HRC
Final pin tolerances: -.0003/-.0006
Other: Material
Core Hardness
Surface Hardness
Treatment
METRIC
PIN #1 Dimension
PIN #2 Tolerance
Standard Ejector Pin Standard Core Pin Standard TI Pin
D
Dimension
+ -
Tolerance
Standard Ejector Pin Standard Core Pin Standard TI Pin
D
+
H
Standard
-
Standard
-
H
Standard
Standard
-
T
Standard
Standard
-
Quantity:
+
L
Standard
+
K
+
+
L
-
+
+
T
+
+
K
Standard
-
Quantity:
E-MAIL TECH@PROCOMPS.COM CONTACT:
COMPANY NAME:
PHONE #:
REFERENCE #:
ACCOUNT #:
E-MAIL ADDRESS:
X-3
ejector pins Single Step L S
T
STANDARD TOLERANCES
D
EJECTOR PINS
H
Material: Ejector Pin Material = 1.2344 (H-13) Core = 48-50 HRC Surface = 65-70 HRC
Other: Material
Ultra Pin Material = 1.2344 (H-13) Core = 48-50 HRC Surface = 65-70 HRC Treatment = Chrome
R
B
R .03 max.
Surface Hardness
B
Standard Ejector Pin Standard Core Pin
+ + +
L
Standard
+
S
Standard
+
H
Standard
+
T
Standard
+
K
Standard
+
R
To Suit
-
Quantity:
D
K
+0.0005 +0.0000 +0.0005 +0.0010 +0.06 -0.00 +0.000 -0.010 +0.000 -0.002 +0.000 -0.002
S
±0.03
±1.0
INCH
METRIC
L H
Treatment
Dimension
Tolerance
D
Standard Ejector Pin Standard Core Pin
B
Standard Ejector Pin Standard Core Pin
+ + +
L
Standard
+
S
Standard
+
H
Standard
+
T
Standard
+
K
Standard
+
R
To Suit Quantity:
E-MAIL TECH@PROCOMPS.COM CONTACT:
COMPANY NAME:
PHONE #:
REFERENCE #:
ACCOUNT #:
E-MAIL ADDRESS:
X-4
+0.00 -0.02
B
PIN #2 Tolerance
Standard Ejector Pin Standard Core Pin
+0.000 -0.001
T
PIN #1 D
B
CORE PINS
Final pin tolerances: -.0003/-.0006
Dimension
-0.01 -0.02
K
Core Pin Material = 1.2344 (H-13) Hard = 50-55 HRC Soft = 30-35 HRC
Core Hardness
D
-0.0004 -0.0007
-
+0.02 +0.00 +0.01 +0.02 +1.5 -0.0 +0.00 -0.2 +0.00 -0.05 +0.00 -0.05
ejector pins Two Step
L S M
T STANDARD TOLERANCES
D B D B A L H T
EJECTOR PINS -0.0004 -0.01 -0.0007 -0.02 CORE PINS +0.0005 +0.02 -0.000 -0.00 +0.000 +0.00 -0.001 -0.02 +0.060 +1.5 -0.000 -0.0 +0.000 +0.00 -0.010 -0.2 +0.000 +0.00 -0.002 -0.05
S
±0.03
±1.0
M
±0.03
±1.0
K
+0.000 -0.002
+0.00 -0.05
INCH
METRIC
R1
R2
H R.03 max.
Material: Ejector Pin Material = 1.2344 (H-13) Core = 48-50 HRC Surface = 65-70 HRC
D
B
A
K
Ultra Pin Material = 1.2344 (H-13) Core = 48-50 HRC Surface = 65-70 HRC Treatment = Chrome
Core Pin Material = 1.2344 (H-13) Hard = 50-55 HRC Soft = 30-35 HRC
Final pin tolerances: -.0003/-.0006
Other: Material
Core Hardness
Surface Hardness
PIN #1 Dimension
PIN #2 Tolerance
A
Standard Ejector Pin Standard Core Pin Standard Ejector Pin Standard Core Pin Standard Ejector Pin Standard Core Pin
L
Standard
S
Standard
H
Standard
T
Standard
M
Standard
K
Standard
R1 R2
To Suit To Suit
D B
Treatment
+ + + + + + + + + -
Quantity:
Dimension
Tolerance
A
Standard Ejector Pin Standard Core Pin Standard Ejector Pin Standard Core Pin Standard Ejector Pin Standard Core Pin
L
Standard
S
Standard
H
Standard
T
Standard
M
Standard
K
Standard
R1 R2
To Suit To Suit
D B
+ + + + + + + + + -
Quantity:
E-MAIL TECH@PROCOMPS.COM CONTACT:
COMPANY NAME:
PHONE #:
REFERENCE #:
ACCOUNT #:
E-MAIL ADDRESS:
X-5
ejector pins Water Cooled
D
D
H
Material: Ejector Pin Material = 1.2344 (H-13) Core = 48-50 HRC Surface = 65-70 HRC Other: Material
R .03
T
X
Y
M
STANDARD TOLERANCES
L
B
Z
D L
Y
H
Core Pin Material = 1.2344 (H-13) Hard = 50-55 HRC Soft = 30-35 HRC
T
Z
B M X
Core Hardness
Surface Hardness
Y
Treatment
Z
EJECTOR PIN -.0004 -0.01 -.0007 -0.02 CORE PINS +0.0010 +0.02 +0.0005 -0.01 +0.030 +0.8 -0.000 -0.0 +0.000 +0.0 -0.010 -0.2 +0.000 +0.0 -0.002 -0.05 +0.015 +0.4 -0.000 -0.0 +0.000 +0.0 -0.060 -1.5 +0.002 +0.05 -0.002 -0.05 +0.002 +0.05 -0.002 -0.05 +0.002 +0.05 -0.002 -0.05 INCH
PIN #1 Dimension
PIN #2 Tolerance
D
Standard Ejector Pin Standard Core Pin
L
Standard
H
Standard
T
Standard
B
Standard
+ + + + + +
M
Standard
X
Standard
Y
Standard
+ + +
Z
Standard
-
Quantity:
Dimension
Tolerance
D
Standard Ejector Pin Standard Core Pin
L
Standard
H
Standard
T
Standard
B
Standard
+ + + + +
M
Standard
X
Standard
Y
Standard
+ + +
Z
Standard Quantity:
E-MAIL TECH@PROCOMPS.COM CONTACT:
COMPANY NAME:
PHONE #:
REFERENCE #:
ACCOUNT #:
E-MAIL ADDRESS:
X-6
+
-
METRIC
blade ejectors
L D
STANDARD TOLERANCES
X Y D L M H T
+0.0000 -0.0005 +0.0000 -0.0005 +0.000 -0.001 +0.04 -0.00 +0.04 +0.08 +0.000 -0.010 +0.000 -0.002
+0.000 -0.015 +0.000 -0.015 +0.00 -0.02 +1.0 -0.0 +1.0 +2.0 +0.0 -0.2 +0.00 -0.05
INCH
METRIC
M
H
Y X
Radius to suit
R .03
T
Material 1.2510 (O-1) 58-62 HRC Thru Hardened
BLADE #2
BLADE #1 Dimension
Dimension
Tolerance
Tolerance
+
+
X
Standard
-
X
Standard
+
+
Y
Standard
-
Y
Standard
Standard
-
D
Standard
Standard
-
L
Standard
Standard
-
M
Standard
Standard
-
H
Standard
Standard
-
+
+
T
+
+
H
+
+
M
+
+
L
+
+
D
-
T
Standard
-
Quantity:
Quantity:
E-MAIL TECH@PROCOMPS.COM CONTACT:
COMPANY NAME:
PHONE #:
REFERENCE #:
ACCOUNT #:
E-MAIL ADDRESS:
X-7
ejector sleeves Straight
R .03
L G
N D B
H T Material: 1.2344 (H-13) Core = 40-45 HRC Treatment = Nitrided ID/OD
Other: Material
STANDARD TOLERANCES
Tapered Lead-ins
D B
1.2363 (A-2) Core = 58-60 HRC Treatment = Nicklon®
Core Hardness
1.3342 (M-2) Core = 58-62 HRC
SLEEVE #1 Dimension
Standard
Dimension
Tolerance
+
D
-
Standard
+
B
Standard
B
Standard
+
G
Standard Standard
G
-
Standard
Standard
L
-
Standard
Standard
N
-
Standard
Standard
H
-
Standard
+
T
-
Quantity:
Standard Quantity:
E-MAIL TECH@PROCOMPS.COM CONTACT:
COMPANY NAME:
PHONE #:
REFERENCE #:
ACCOUNT #:
E-MAIL ADDRESS:
X-8
+
+
T
+
+
H
+
+
N
+
+
L
+
-
±0.3
L
+1.0 -0.0 +5.0 -0.0 +0.0 -0.2 +0.00 -0.05
INCH
METRIC
T
SLEEVE #2 Tolerance
+
D
±0.015
+0.030 -0.000 +0.20 -0.00 +0.000 -0.010 +0.000 -0.002
H
Treatment
-
+0.007 -0.000 -0.01 -0.02
G N
Surface Hardness
+0.0003 -0.0000 -0.0004 -0.0007
ejector sleeves Tapered Lead-In
R .03
L
Stepped
N
STANDARD TOLERANCES
E
+0.0003 -0.0000 -0.0004 -0.0007 +0.000 -0.001
+0.007 -0.000 -0.01 -0.02 +0.00 -0.02
G
±0.015
±0.4
L
+0.030 -0.000 +0.20 -0.00
+1.0 -0.0 +5.0 -0.0
D B
N S
±0.01
±0.2
H
+0.000 -0.010 +0.000 -0.002
+0.00 -0.20 +0.00 -0.05
INCH
METRIC
T
D B
H G
T Material: 1.2344 (H-13) Core = 40-45 HRC Treatment = Nitrided ID/OD
Other: Material
S
E
R
1.2363 (A-2) Core = 58-60 HRC Treatment = Nicklon®
Core Hardness
1.3342 (M-2) Core = 58-62 HRC
Surface Hardness
SLEEVE #1 Dimension
SLEEVE #2 Tolerance
D
Standard
B
Standard
E
Standard
G
Standard
L
Standard
N
Standard
S
Standard
H
Standard
T
Standard
R
To Suit
Treatment
+ + + + + + + + + -
Quantity:
Dimension
Tolerance
D
Standard
B
Standard
E
Standard
G
Standard
L
Standard
N
Standard
S
Standard
H
Standard
T
Standard
R
To Suit
+ + + + + + + + + -
Quantity:
E-MAIL TECH@PROCOMPS.COM CONTACT:
COMPANY NAME:
PHONE #:
REFERENCE #:
ACCOUNT #:
E-MAIL ADDRESS:
X-9
ejector sleeves Thin Wall L
R .03
S
N
G
B STANDARD TOLERANCES
D
H
D
T Material: 1.3343 (M-2) Core = 58-60 HRC Treatment = Nicklon®
Other: Material
.25 R
B
Tapered Lead-In from end of sleeve
L
1.3342 (M-2) Core = 58-62 HRC (Thru Hard)
Core Hardness
N
Surface Hardness
SLEEVE #1 Dimension
Tolerance
+
D
Standard Standard Standard
N
Standard
S
Standard
G
Standard
+ + + +
H
Standard Standard
Standard Standard
Quantity:
L
Standard
N
Standard
S
Standard
G
Standard
+ + + +
Standard
+
Standard Quantity:
E-MAIL TECH@PROCOMPS.COM CONTACT:
COMPANY NAME:
PHONE #:
REFERENCE #:
ACCOUNT #:
E-MAIL ADDRESS:
X-10
+
T
-
+
H
+
T
+
B
+
L
Tolerance
D
+
B
Dimension
S
±0.01
±0.2
+0.000 -0.001 +0.000 -0.010 +0.000 -0.002
+0.00 -0.02 +0.0 -0.2 +0.0 -0.05
INCH
METRIC
T
SLEEVE #2
-
+0.007 -0.000 -0.01 -0.02 +1.0 -0.0 +5.0 -0.0
G H
Treatment
+0.0003 -0.0000 -0.0004 -0.0007 +0.030 -0.000 +0.20 -0.00
puller pins
PL
L H T
Material: 1.2344 (H-13) Core = 40-45 HRC Surface = 60-70 HRC
Other: Material
Core Hardness
PD (TSC)
A
D PL
Surface Hardness
R1
STANDARD TOLERANCES
Treatment
PULLER PIN #1 Dimension
R2
Tolerance
Standard
Dimension
Standard Standard
D
-
Standard
Standard
L
-
Standard
Standard
PL
-
Standard
Standard
PD
±0.003
±0.07
PL
±0.003
±0.07
INCH
METRIC
-
-
+
PD
-
Standard
+
H
-
Standard
+
T
±0.07
+
+
H
±0.003
+
+
PD
L
+
+
PL
-0.01 -0.02
Tolerance
+
L
-0.0004 -0.0007
PULLER PIN #2
+
D
D
+
T
-
Quantity:
Standard
-
Quantity:
E-MAIL TECH@PROCOMPS.COM CONTACT:
COMPANY NAME:
PHONE #:
REFERENCE #:
ACCOUNT #:
E-MAIL ADDRESS:
X-11
top locks Z-Series™
R1
W S1
T STANDARD TOLERANCES
B
+0.000 -0.002 +0.000 -0.002
+0.00 -0.05 +0.00 -0.05
C
±0.01
±0.2
T
+0.000 -0.002 +0.0000 -0.0004
+0.00 -0.05 +0.00 -0.01
A
W S1-2
±0.01
±0.2
INCH
METRIC
Male Insert Material = 1.2344 (H-13) Core = 42-48 HRC Surface = 70 HRC Treatment = Salt Bath Nitride
S2
R (4)
A
Dual Radii Option Top Locks are also available with dual radiifor mounting internally.
Dimension
C D
E
C -.03
Female Insert Material = 1.2379 (D-2) Core = 58-62 HRC Surface = 80 HRC Treatment = Titanium Nitride Coated
TOP LOCK
B
+ Tolerance
W
Standard
R1
To Suit
Pocket Radius (Lock machined to suit)
E
To Suit
Engagement Radius
+
A
Standard
S
-
-
+
B
Standard
+
C
Standard
D
Standard
S
-
SHCS SIZE
.0001 - .0002 (.002 - .005 mm) Clearance per side
+
T
Standard
-
Quantity:
E-MAIL TECH@PROCOMPS.COM CONTACT:
COMPANY NAME:
PHONE #:
REFERENCE #:
ACCOUNT #:
E-MAIL ADDRESS:
X-12
side locks Z-Series™
W S2
S
S1 B
E
C-.03
T
D C A
R1
SIDE LOCK Dimension
Tolerance
+
A
Standard
B
Standard
C
Standard
D
Standard
+
+
Standard
.0001 - .0002 (.002 - .005 mm) Clearance per side
Standard
C
±0.01
±0.2
T
+0.000 -0.002 +0.0000 -0.0004
+0.00 -0.05 +0.00 -0.01
W S1-4
±0.01
±0.25
INCH
METRIC
To Suit
Pocket Radius (Lock machined to suit)
E
To Suit
Engagement Radius
SHCS SIZE
S2 S3
+
W
+0.00 -0.05 +0.00 -0.05
S1
-
+
T
B
+0.000 -0.002 +0.000 -0.002
R1
S
-
A
Female Insert Material = 1.2379 (D-2) Core = 58-62 HRC Surface = 80 HRC Treatment = Titanium Nitride Coated
S3 S4
STANDARD TOLERANCES
Male Insert Material = 1.2344 (H-13) Core = 42-48 HRC Surface = 70 HRC Treatment = Salt Bath Nitride
S4
-
Quantity: E-MAIL TECH@PROCOMPS.COM CONTACT:
COMPANY NAME:
PHONE #:
REFERENCE #:
ACCOUNT #:
E-MAIL ADDRESS:
X-13
guide locks Z-Series™ L
L S3 S1
S4
F
S2 E
T C
S
1
H
Z
R1 (4)
Tolerance
E
Standard
-
R1
Pocket Radius To Suit (Lock machined to suit)
+
H
Standard
-
Standard
-
S1
Standard
Standard
-
S2
Standard
Standard
-
-
+
S3
Standard
+
F
C F S1-4
+0.00 -0.25 +0.0 - 0.2 +0.00 - 0.01 +0.00 -0.01 +0.00 -0.12
±0.01
±0.2
INCH
METRIC
SHCS +
Z
Standard
DUAL RADII
+
S4
Standard
MALE QTY
-
FEMALE QTY
E-MAIL TECH@PROCOMPS.COM CONTACT:
COMPANY NAME:
PHONE #:
REFERENCE #:
ACCOUNT #:
E-MAIL ADDRESS:
X-14
T
S
+
+
C
H
+0.000 - 0.010 +0.00 - 0.01 +0.0000 - 0.0003 +0.0000 - 0.0003 +0.000 - 0.005
-
+
+
T
Engagement Radius
To Suit
+
L
L
Female Insert Material = 1.2379 (D-2) Core = 58-62 HRC Surface = 80 HRC Treatment = Titanium Nitride Coated
Dual Radii Option Guide Locks are also available with dual radii for mounting internally as shown at left.
GUIDE LOCK
STANDARD TOLERANCES
Male Insert Material = 1.2344 (H-13) Core = 42-48 HRC Surface = 70 HRC Treatment = Salt Bath Nitride
R1 (4) Each
Dimension
/2 C
Yes
No
x-style side locks Z-Series™
A
X
R1
A
C
-.03
S STANDARD TOLERANCES
A X
+0.000 -0.002 +0.000 -0.002
+0.00 -0.05 +0.00 -0.05
C
±0.01
±0.2
T
+0.000 -0.002 +0.0000 -0.0004
+0.00 -0.05 +0.00 -0.01
S1-6
±0.01
±0.2
P
+0.001 -0.000
+0.03 -0.00
INCH
METRIC
W
E S4
S5 S3
C
S6
Tolerance
+
W
Standard
R1
To Suit
Pocket Radius (Lock machined to suit)
S4
E
To Suit
Engagement Radius
S5
SHCS SIZE
S6
+
Standard
+
X
S1
Female Insert Material = 1.2379 (D-2) Core = 58-62 HRC Surface = 80 HRC Treatment = Titanium Nitride Coated
X-STYLE LOCK
A
S2
P
T
Male Insert Material = 1.2344 (H-13) Core = 42-48 HRC Surface = 70 HRC Treatment = Salt Bath Nitride
Dimension
W
D (2)
Standard
-
S3
-
+
C
Standard
D
Standard
.0001 - .0002 (.002 - .005 mm) Clearance per side
S S1
P
+
T
Standard
-
S2
Quantity:
E-MAIL TECH@PROCOMPS.COM CONTACT:
COMPANY NAME:
PHONE #:
REFERENCE #:
ACCOUNT #:
E-MAIL ADDRESS:
X-15
bar locks Z-Series™
L Male Insert Material = 1.2344 (H-13) Core = 42-48 HRC Surface = 70 HRC Treatment = Salt Bath Nitride
E
L3
L2
L1
S3
S2
S1
W2
S4
Female Insert Material = 1.2379 (D-2) Core = 58-62 HRC Surface = 80 HRC Treatment = Titanium Nitride Coated
E
W
S6
GUIDE
GUIDE
(PLATE 3) (PLATE 2)
Quantity
T
S5
GUIDE
(PLATE 1)
P
BAR L
T
STANDARD TOLERANCES
W
S5
S6
GUIDE 1 L1
T
W2
S1
S4
E
REF
P
W-W2
+0.000 -0.005 +0.000 -0.005 +0.0000 -0.0003
+0.00 -0.15 +0.00 -0.15 +0.000 -0.007
S1-S6
±0.005
±0.1
INCH
METRIC
L-L3 T
Note: The “T” dimension will be equal for male and all guides. Progressive will determine the lead-in radius, SHCS size, and center spacing.
GUIDE 2 L2
T
Bars sold individually. Guides sold in pairs.
W2
S2
S4
W2
S3
S4
SHCS not included for non-standard T Dimensions.
GUIDE3 L3
T
E-MAIL TECH@PROCOMPS.COM CONTACT:
COMPANY NAME:
PHONE #:
REFERENCE #:
ACCOUNT #:
E-MAIL ADDRESS:
X-16
unilifter™ core blades L+R (Ref) T
R MT*
L
MW
Series
R
MT*
MW
MiniLifter
.250
.31
.24
UniLifter
.406
.49
.49
XL Series
.875
1.00
1.00
Metric
10mm
15mm
10mm
Series:
MiniLifter U-Coupling = UCM50
UniLifter U-Coupling = UCU87
1.2344 (H-13) Hardness = 38-42 HRC
XL Series U-Coupling = UCX175
Metric U-Coupling = UCMM22
no DIN (Aluminum Bronze) Hardness = 30 HRC
CORE BLADE #1 +
Standard
+
Standard
+
Standard
-
Dimension
+
Standard
+
W
Standard
+
L
Standard
CORE BLADE #3
-
CORE BLADE #4
Tolerance
+
Standard
+
Standard
+
L
METRIC
Quantity:
Dimension
W
INCH
Tolerance
T
Quantity:
T
L
+0.0 -0.025 +0.0 -0.025 +2.0 -0.0
CORE BLADE #2
Tolerance
L
W
+0.000 -0.001 +0.000 -0.001 +0.06 -0.00
Material:
Dimension
W
T
*Note: MT may increase for strength. Note: Altering the MT & MW dimensions (Minimum Thickness and Width of heel area) is not recommended.
W
T
STANDARD TOLERANCES
Standard
-
Quantity:
Dimension
Tolerance
+
T
Standard
+
W
Standard
+
L
Standard
-
Quantity:
E-MAIL TECH@PROCOMPS.COM CONTACT:
COMPANY NAME:
PHONE #:
REFERENCE #:
ACCOUNT #:
E-MAIL ADDRESS:
X-17
unilifter core blades: l-shaped
L+R STANDARD TOLERANCES
T1 T2 W A L
R
+0.000 -0.001 +0.020 -0.000 +0.000 -0.001 +0.020 -0.000 +0.020 -0.000
+0.0 -0.025 +0.5 -0.0 +0.0 -0.025 +0.5 -0.0 +0.5 -0.0
INCH
METRIC
T2 T1
MT*
A L
W
MW
Series
R
MT*
MW
MiniLifter
.250
.31
.24
UniLifter
.406
.49
.49
XL Series
.875
1.00
1.00
Metric
10mm
15mm
10mm
Series:
*Note: MT may increase for strength. Note: Altering the MT & MW dimensions (Minimum Thickness and Width of heel area) is not recommended.
Material:
MiniLifter U-Coupling = UCM50
UniLifter U-Coupling = UCU87
1.2344 (H-13) Hardness = 38-42 HRC
XL Series U-Coupling = UCX175
Metric U-Coupling = UCMM22
no DIN (Aluminum Bronze) Hardness = 30 HRC
CORE BLADE #1 Dimension
CORE BLADE #2
Tolerance
Dimension
Tolerance
+
T1
Standard
+
T1
-
Standard
+
T2
Standard
+
T2
-
Standard
+
W
Standard Standard
W
-
Standard
Standard
A
-
Standard
+
L
-
Quantity:
Standard Quantity:
E-MAIL TECH@PROCOMPS.COM CONTACT:
COMPANY NAME:
PHONE #:
REFERENCE #:
ACCOUNT #:
E-MAIL ADDRESS:
X-18
+
+
L
+
+
A
-
-
unilifter core blades: t-shaped A
C1
W1
MW
W2 Ref. STANDARD TOLERANCES
C2
T1
T1
D1
T2 Ref.
W1
MT*
A
R
D2
L
L
Series:
Material:
MiniLifter U-Coupling = UCM50
UniLifter U-Coupling = UCU87
1.2344 (H-13) Hardness = 38-42 HRC
XL Series U-Coupling = UCX175
Metric U-Coupling = UCMM22
No DIN, Aluminum Bronze Hardness = 30 HRC
+0.000 -0.001 +0.000 -0.001 +0.020 -0.000 +0.020 -0.000
+0.0 -0.025 +0.0 -0.025 +0.5 -0.0 +0.5 -0.0
INCH
METRIC
Series
R
MT*
MW
MiniLifter
.250
.31
.24
UniLifter
.406
.49
.49
XL Series
.875
1.00
1.00
Metric
10mm
15mm
10mm
*Note: MT may increase for strength. Note: Altering the MT & MW dimensions (Minimum Thickness and Width of heel area) is not recommended.
CORE BLADES Dimension
Tolerance
W2
+
T1
Standard
T2
REF
REF
-
+
C1
-
+
D1
+
C2
-
-
+
D2
+
A
-
Standard
+
W1
Standard
+
L
-
Standard
-
Quantity:
E-MAIL TECH@PROCOMPS.COM CONTACT:
COMPANY NAME:
PHONE #:
REFERENCE #:
ACCOUNT #:
E-MAIL ADDRESS:
X-19
unilifter core blade: round L+R (Ref) D
R MT*
STANDARD TOLERANCES
D L
+0.000 -0.001 +0.06 -0.00
+0.000 -0.025 +2.0 -0.0
INCH
METRIC
L
MW
Series
R
MT*
MW
MiniLifter
.250
.31
.24
UniLifter
.406
.49
.49
XL Series
.875
1.00
1.00
Metric
10mm
15mm
10mm
D
Series:
*Note: MT may increase for strength. Note: Altering the MT & MW dimensions (Minimum Thickness and Width of heel area) is not recommended.
Material:
MiniLifter U-Coupling = UCM50
UniLifter U-Coupling = UCU87
1.2344 (H-13) Hardness = 38-42 HRC
XL Series U-Coupling = UCX175
Metric U-Coupling = UCMM22
No DIN, Aluminum Bronze Hardness = 30 HRC
CORE BLADE #1 Dimension
CORE BLADE #2
Tolerance
Dimension
Tolerance
+
D
Standard
+
D
-
Standard
+
L
Standard
+
L
-
Quantity:
Standard
Dimension
CORE BLADE #4
Tolerance
Dimension
Tolerance
+
Standard
+
D
-
Standard
+
L
Standard
+
L
-
Quantity:
Standard Quantity:
E-MAIL TECH@PROCOMPS.COM CONTACT:
COMPANY NAME:
PHONE #:
REFERENCE #:
ACCOUNT #:
E-MAIL ADDRESS:
X-20
-
Quantity:
CORE BLADE #3 D
-
-
extension plugs: finished length L
EXT. PLUG #1 Variable
Series (S)
Thread (M)
EXT. PLUG #2
Dimensions
Variable
200 (1/4” Flow) 300 (3/8” Flow) 500 (1/2” Flow) Keyed Connect 1/16-27 NPT (50) 1/8-27 NPT (51) 1/4-18 NPT (52) 3/8-18 NPT (53) 1/2-14 NPT (54) BSPT
Series (S)
Thread (M)
Thd: ______________
Length (L)
±.015
Quantity:
Series (S)
Thread (M)
Variable
200 (1/4” Flow) 300 (3/8” Flow) 500 (1/2” Flow) Keyed Connect 1/16-27 NPT (50) 1/8-27 NPT (51) 1/4-18 NPT (52) 3/8-18 NPT (53) 1/2-14 NPT (54) BSPT
Series (S)
Thread (M)
Thd: ______________ ±.015
Quantity:
Variable
200 (1/4” Flow) 300 (3/8” Flow) 500 (1/2” Flow) Keyed Connect 1/16-27 NPT (50) 1/8-27 NPT (51) 1/4-18 NPT (52) 3/8-18 NPT (53) 1/2-14 NPT (54) BSPT
Series (S)
Thread (M)
±.015
Quantity:
Quantity:
200 (1/4” Flow) 300 (3/8” Flow) 500 (1/2” Flow) Keyed Connect 1/16-27 NPT (50) 1/8-27 NPT (51) 1/4-18 NPT (52) 3/8-18 NPT (53) 1/2-14 NPT (54) BSPT
Thd: ______________ ±.015
Quantity:
EXT. PLUG #6 Variable
Dimensions
200 (1/4” Flow) 300 (3/8” Flow) 500 (1/2” Flow) Keyed Connect 1/16-27 NPT (50) 1/8-27 NPT (51) 1/4-18 NPT (52) 3/8-18 NPT (53) 1/2-14 NPT (54) BSPT
Thd: ______________
Length (L)
Dimensions
Length (L)
EXT. PLUG #5
Dimensions
Thd: ______________
Length (L)
EXT. PLUG #3
Dimensions
Length (L)
EXT. PLUG #4 Variable
Standard 3/4" per foot taper with ND-ST3 thread sealant applied
M
S
±.015
Series (S)
Thread (M)
Dimensions
200 (1/4” Flow) 300 (3/8” Flow) 500 (1/2” Flow) Keyed Connect 1/16-27 NPT (50) 1/8-27 NPT (51) 1/4-18 NPT (52) 3/8-18 NPT (53) 1/2-14 NPT (54) BSPT
Thd: ______________
Length (L)
±.015
Quantity:
E-MAIL TECH@PROCOMPS.COM CONTACT:
COMPANY NAME:
PHONE #:
REFERENCE #:
ACCOUNT #:
E-MAIL ADDRESS:
X-21
special tubes Tube 2
Tube 3
ZËš
Connection Style
Tube 1
Thread
L1 L2 L3
Special High Flow (Stainless Steel) Specification Template Quantity Required:
Z=
Tube 1
Tube Gage Size=
L1=
Tube 2
Tube Gage Size=
L2=
Tube 3
Tube Gage Size=
L3=
Connection Style: For the specific style of connection, document the thread size needed or select the box with a straight tube. High Flow Tube Style
Thread Size=
Hex Series Tube Style
Thread Size=
Pipe Plug Style
Set Screw
Thread Size=
None
Thread Size=
Progressive Components'standard tube sizes shown in red. All others are standard gage sizes. Gage Size
OD
ID
Gage Size
OD
ID
Gage Size
OD
ID
Gage Size
OD
ID
Gage Size
OD
ID
HF437T
.421
.500
7TW
.180
.160
13RW
.095
.071
18XT
.050
.042
24XX
.022
.016
HF375T
.365
.340
7X
.180
.166
13TW
.095
.077
19RW
.042
.027
25RW
.020
.010
HF312T
.312
.288
8RW
.165
.135
13X
.095
.085
19TW
.042
.032
25TW
.020
.012
3RW
.259
.219
8TW
.165
.145
HF093T
.090
.076
19XT
.042
.035
25XX
.020
.016 .010
3TW
.259
.229
8XX
.165
.150
14RW
.083
.063
20RW
.0355
.0235
26RW
.018
3XT
.259
.239
9RW
.148
.118
14TW
.083
.067
20TW
.0355
.0255
26TW
.018
.012
HF250T
.250
.230
9TW
.148
.128
14XT
.083
.072
20XT
.0355
.0275
26XV
.018
.0135
4RW
.238
.198
9XX
.148
.135
15RW
.072
.054
21RW
.032
.020
27RW
.016
.008
4TW
.238
.208
10RW
.134
.106
15TW
.072
.060
21TW
.032
.023
27TW
.016
.010
4XT
.238
.218
10TW
.134
.114
15XTS
.072
.063
21XT
.032
.025
27XV
.016
.0115
5RW
.219
.189
10XT
.134
.118
16RW
.065
.047
22RW
.028
.016
28RW
.014
.007
5TW
.219
.199
HF125T
.125
.109
16TW
.065
.053
22TW
.028
.020
28TW
.014
.009 0105
5XT
.219
.205
11RW
.120
.094
16TXT
.065
.055
22XTS
.028
.021
28XV
.014
6RW
.203
.173
11TW
.120
.100
17RW
.058
.042
23RW
.025
.013
29RW
.013
.007
6TW
.203
.183
11X
.120
.106
17TW
.058
.048
23TW
.025
.017
30RW
.012
.006
6X
.203
.189
12RW
.109
.085
17XT
.058
.050
23XX
.025
.020
31RW
.010
.005
HF187T
.187
.167
12TW
.109
.091
18RW
.050
.033
24RW
.022
.012
32RW
.009
.004
7RW
.180
.150
12XT
.109
.095
18TW
.050
.038
24TW
.022
.014
33RW
.008
.004
E-MAIL TECH@PROCOMPS.COM CONTACT:
COMPANY NAME:
PHONE #:
REFERENCE #:
ACCOUNT #:
E-MAIL ADDRESS:
X-22
X-23