


Dear Readers,

We are thrilled to bring you an exciting new issue of TAMRON Magazine! This fall, we’re delighted to introduce our latest lenses, including the highly anticipated 90mm 1:1 Macro lens for Sony E and Nikon Z mirrorless cameras. This lens is designed to elevate your photography experience, offering exceptional sharpness and beautiful bokeh that will undoubtedly inspire your creativity.
Our field tests span from the breathtaking landscapes of Alaska to the lush jungles of Costa Rica, showcasing our newest lenses in action. You'll find in-depth reviews and stunning imagery featuring the 90mm lens, as well as the versatile 50-400mm for Nikon Z mount and the all-encompassing 28-300mm.
In this issue, we also shine a spotlight on street photography with over a dozen professional tips to help you capture the essence of urban life. Monica Olvera’s inspiring newborn story beautifully captures the magic of those early moments. Dino Sokocevic takes us on a journey through the stunning fall landscapes of Colorado and Utah, sharing his tips for photographing the changing seasons.
For our filmmakers, Charley Voorhis is back with another informative tutorial. If you missed his first two installments, be sure to check out our magazine archives on the website for valuable insights that can help elevate your filmmaking.
Speaking of our website, have you explored the new features at www.tamron-americas. com? We’ve made some exciting changes, particularly in our new Inspire & Learn and Tools & Resources sections. We hope you find the new site user-friendly, and with our new Lens Finder tool, discovering your next favorite TAMRON lens is easier than ever! We hope you enjoy this issue, filled with inspiration and knowledge. We look forward to bringing you more photography and videography tips in the spring.
5 TAMRON WEBSITE
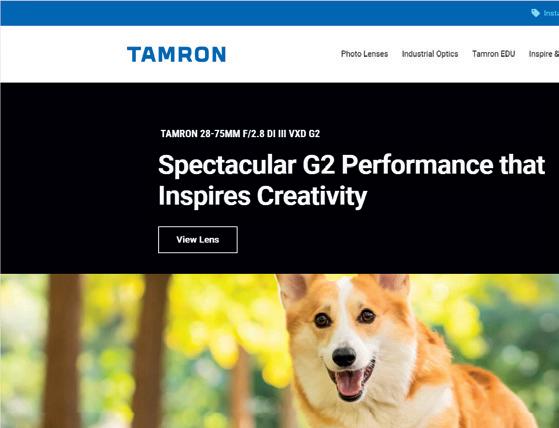
TAMRON launches new website with easy navigation and great tools
6 TOP FEATURES
NEW! 90mm F2.8 Macro
8 TOP FEATURES
NEW! 50-400mm for Z mount
10 TOP FEATURES
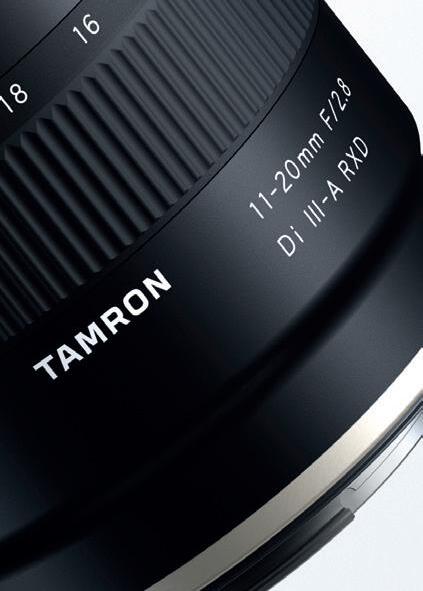
NEW! 11-20mm for RF mount
12 FIELD REPORT
Ken Hubbard puts the new 50400mm for Nikon Z to the test in Alaska
16 FIELD REPORT
Alyce Bender travels to Costa Rica with the new 90mm macro for mirrorless
20 SPECIAL TAMRON pros share their top tips for capturing street photos
28 EXCURSION
Dino Sokocevic captures fall foliage with two of his favorite lenses
32 FIELD REPORT
Junichi Shimizu's First-Hand Experience with the new 90mm macro
36 PRACTICE
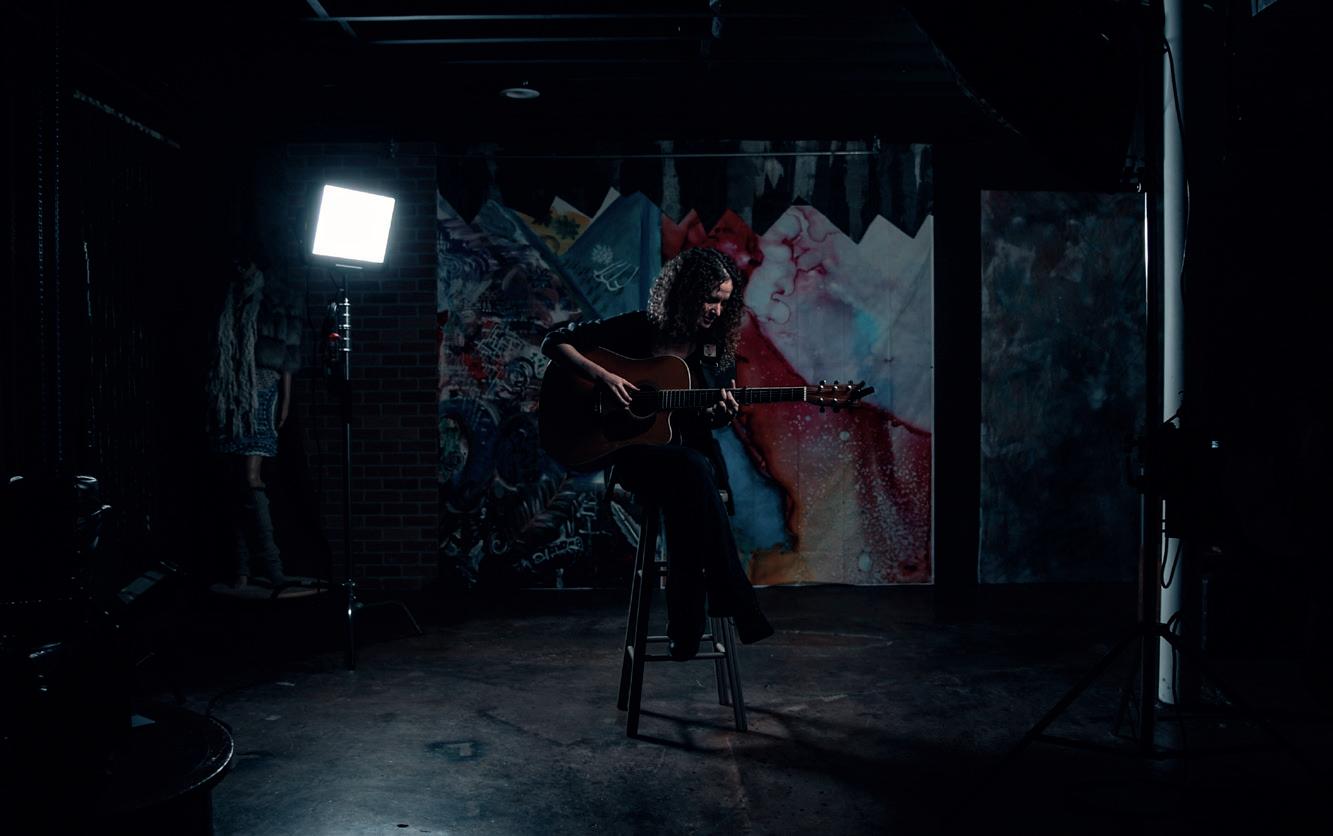
Charley Voorhis shares his steps for shooting a music video in Nashville
40 PRACTICE
Monica Olvera provides tips for photographing swaddled newborns
44 MY PROJECT
Kristine Bosworth showcases her macro-style floral photos
Warm regards,


Stacie Errera Vice President, Marketing & Communications
Register your TAMRON lenses towards 2025 VIP status and reap the rewards
TAMRON Americas' VIP Club rewards users in the USA and Canada who have registered their eligible TAMRON lenses through our online warranty registration system since May 2011. There are three VIP Club levels: Silver for those having registered three to four purchased lenses; Gold for those having registered five purchased lenses; and Platinum for those having registered six or more purchased lenses. Club membership will be evaluated each year to include new members who qualify and to increase the status level of current members if applicable. Get complete rules and program details at tamron-americas.com/tamron-vip-club.
DEADLINE TO REGISTER: JANUARY 15, 2025
Membership (3-4 lenses)
TAMRON owners who have purchased and registered three (3) to four (4) lenses during the time-frame of May 2011 and January 15, 2025 are eligible for these 2025 membership perks:
HURRY! DEADLINE TO REGISTER JAN 15 2025
Membership (5 lenses)
TAMRON owners who have purchased and registered five (5) lenses during the time-frame of May 2011 and January 15, 2025 are eligible for these 2025 membership perks:
Membership (6+ lenses)
TAMRON owners who have purchased and registered six or more (6+) lenses during the time-frame of May 2011 and January 15, 2025 are eligible for these 2025 membership perks


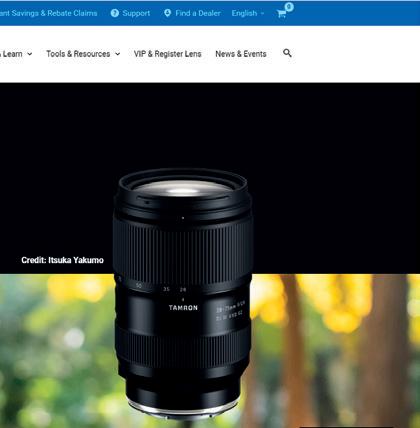
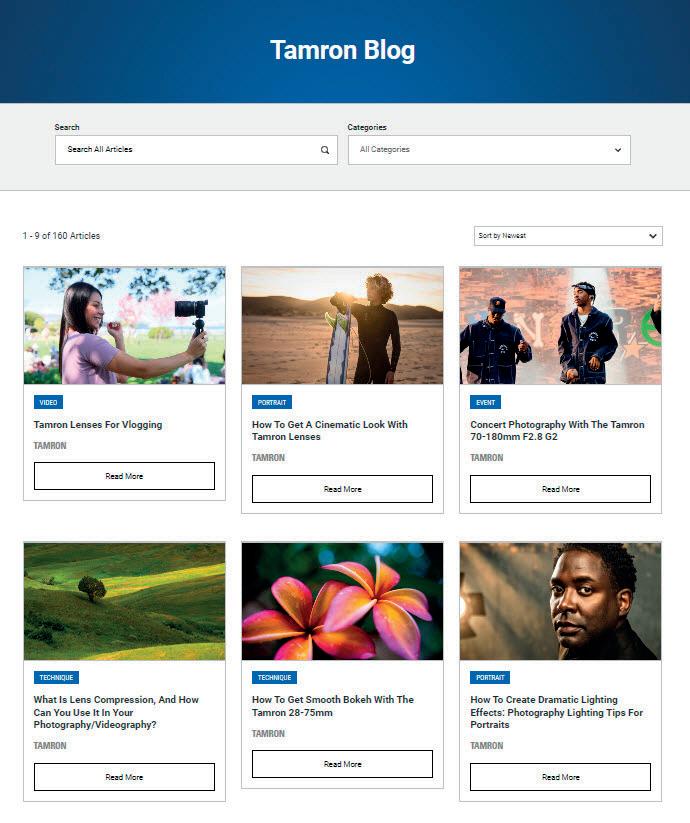
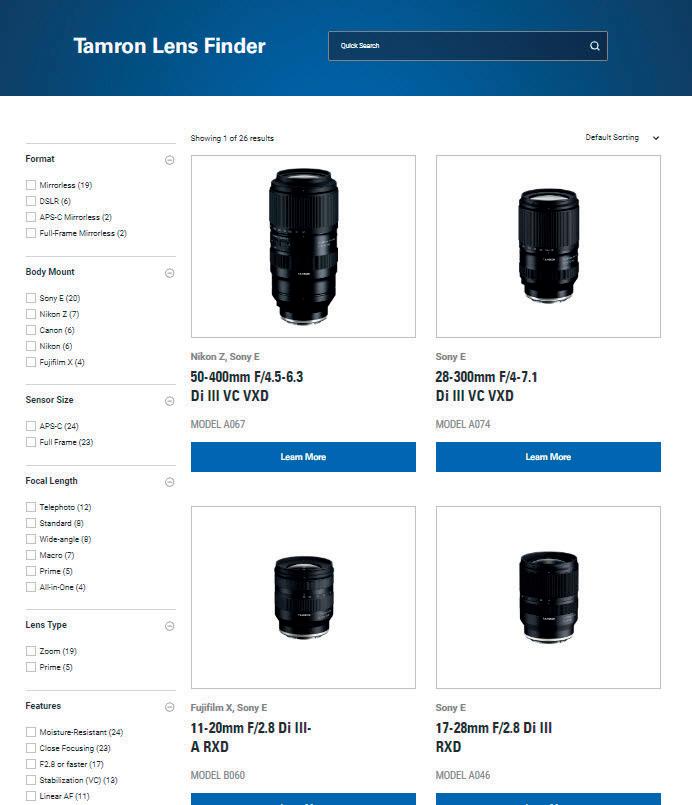
TAMRON Americas is excited to introduce its freshly redesigned, multi-language website, built to give you a better experience with cool new tools, helpful resources, and an easy way to shop locally or directly online from TAMRON.
The site has been completely revamped, starting from scratch, to include inspiring learning sections, dynamic product pages, and a handy lens finder that lets you easily narrow down the best lens for your needs. Plus, the new design makes it a breeze to explore upcoming events, savings, support, and more.
"Our new website is more than just a facelift—it’s a commitment to enhancing the way we connect with our customers,” said Stacie Errera, Vice President of Marketing & Communications at TAMRON Americas. "We've listened to our users and built a website that goes beyond their needs, offering inspiring content, easy shopping, and strong support to make every visit worthwhile."
Tools and Resources to Level Up Your Photography and Videography
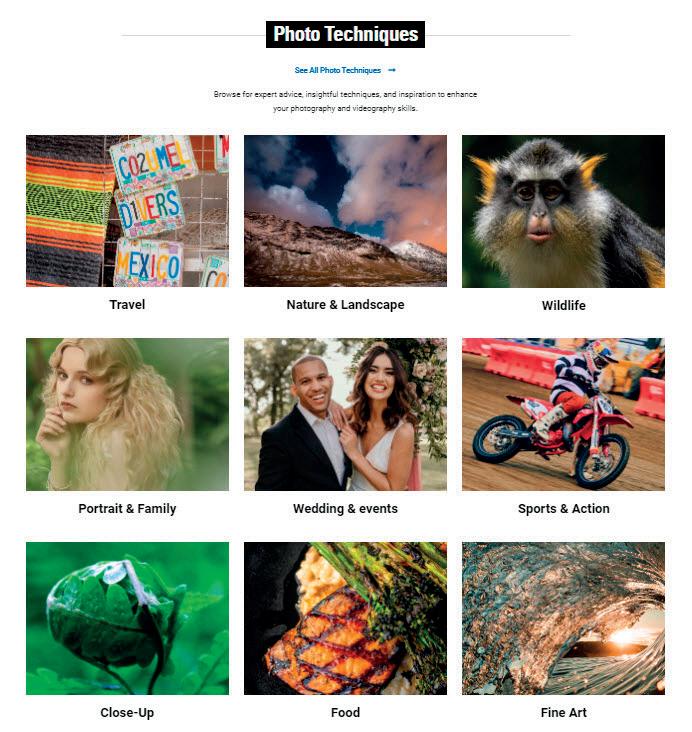
The new website is packed with resources to empower photographers and creators, whether you're a beginner or a seasoned pro. It’s easy to navigate and gives you quick access to the tools you need—whether you’re shopping for gear, learning new techniques, or finding support. Check out the "Inspire & Learn" and "Tools & Resources" sections for tutorials, expert tips, and more, all designed to help you dive deeper into photography and boost your skills.
Shop at Your Local Retailer or Directly from TAMRON
The new website now features e-commerce integration, so if you want to buy directly from TAMRON, it’s easier than ever. The new product pages are packed with specs, images, videos, and reviews to help you make informed decisions. The checkout process is fast, secure, and offers plenty of payment options, so you can go from browsing to buying without a hitch.


“WE'VE LISTENED TO OUR USERS AND BUILT A WEBSITE THAT GOES BEYOND THEIR NEEDS.”


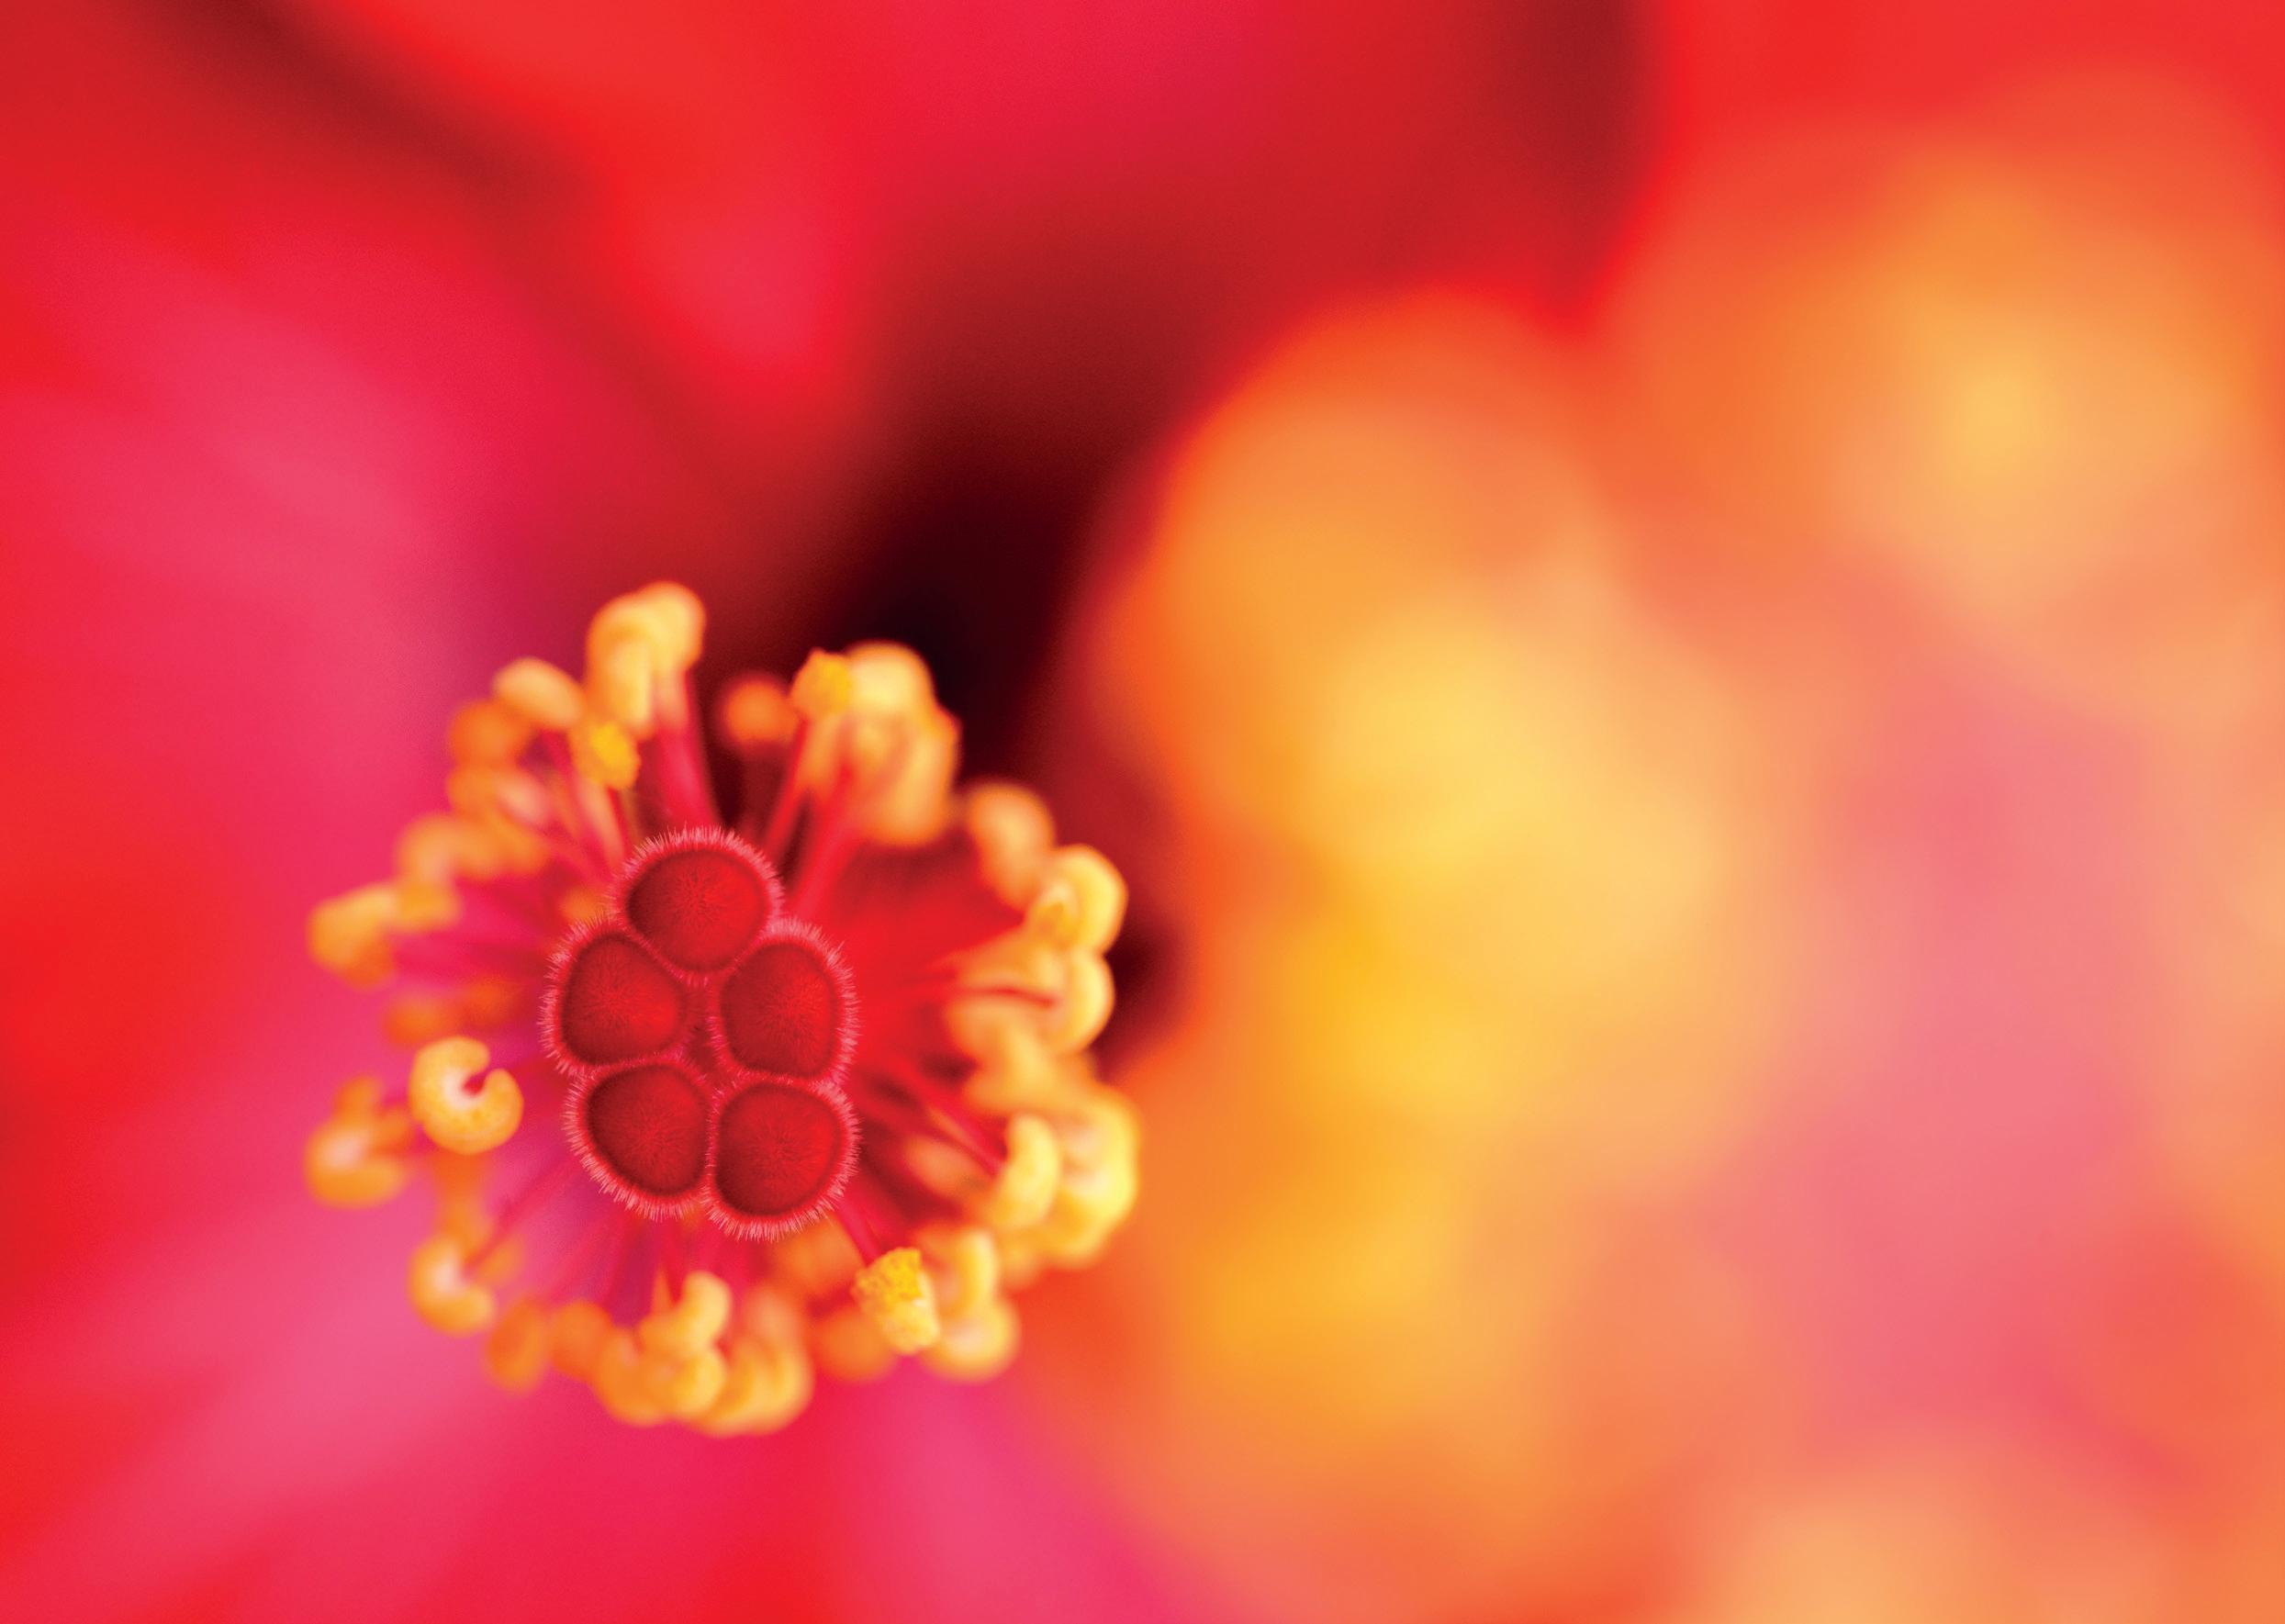
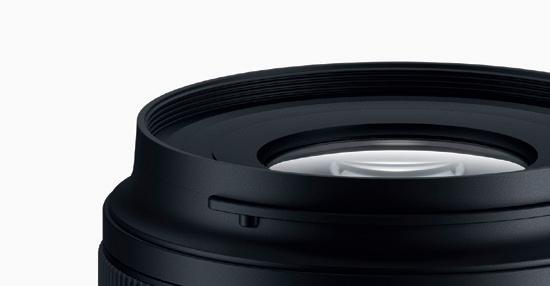
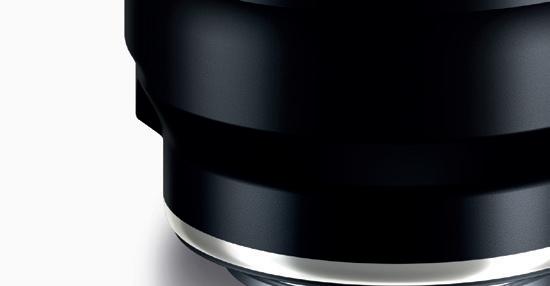
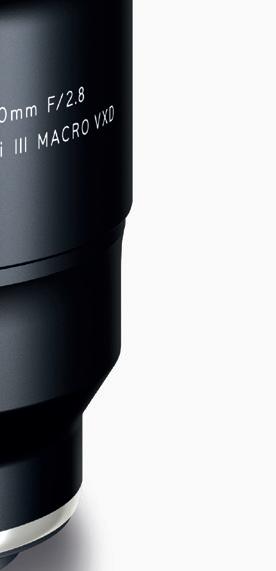
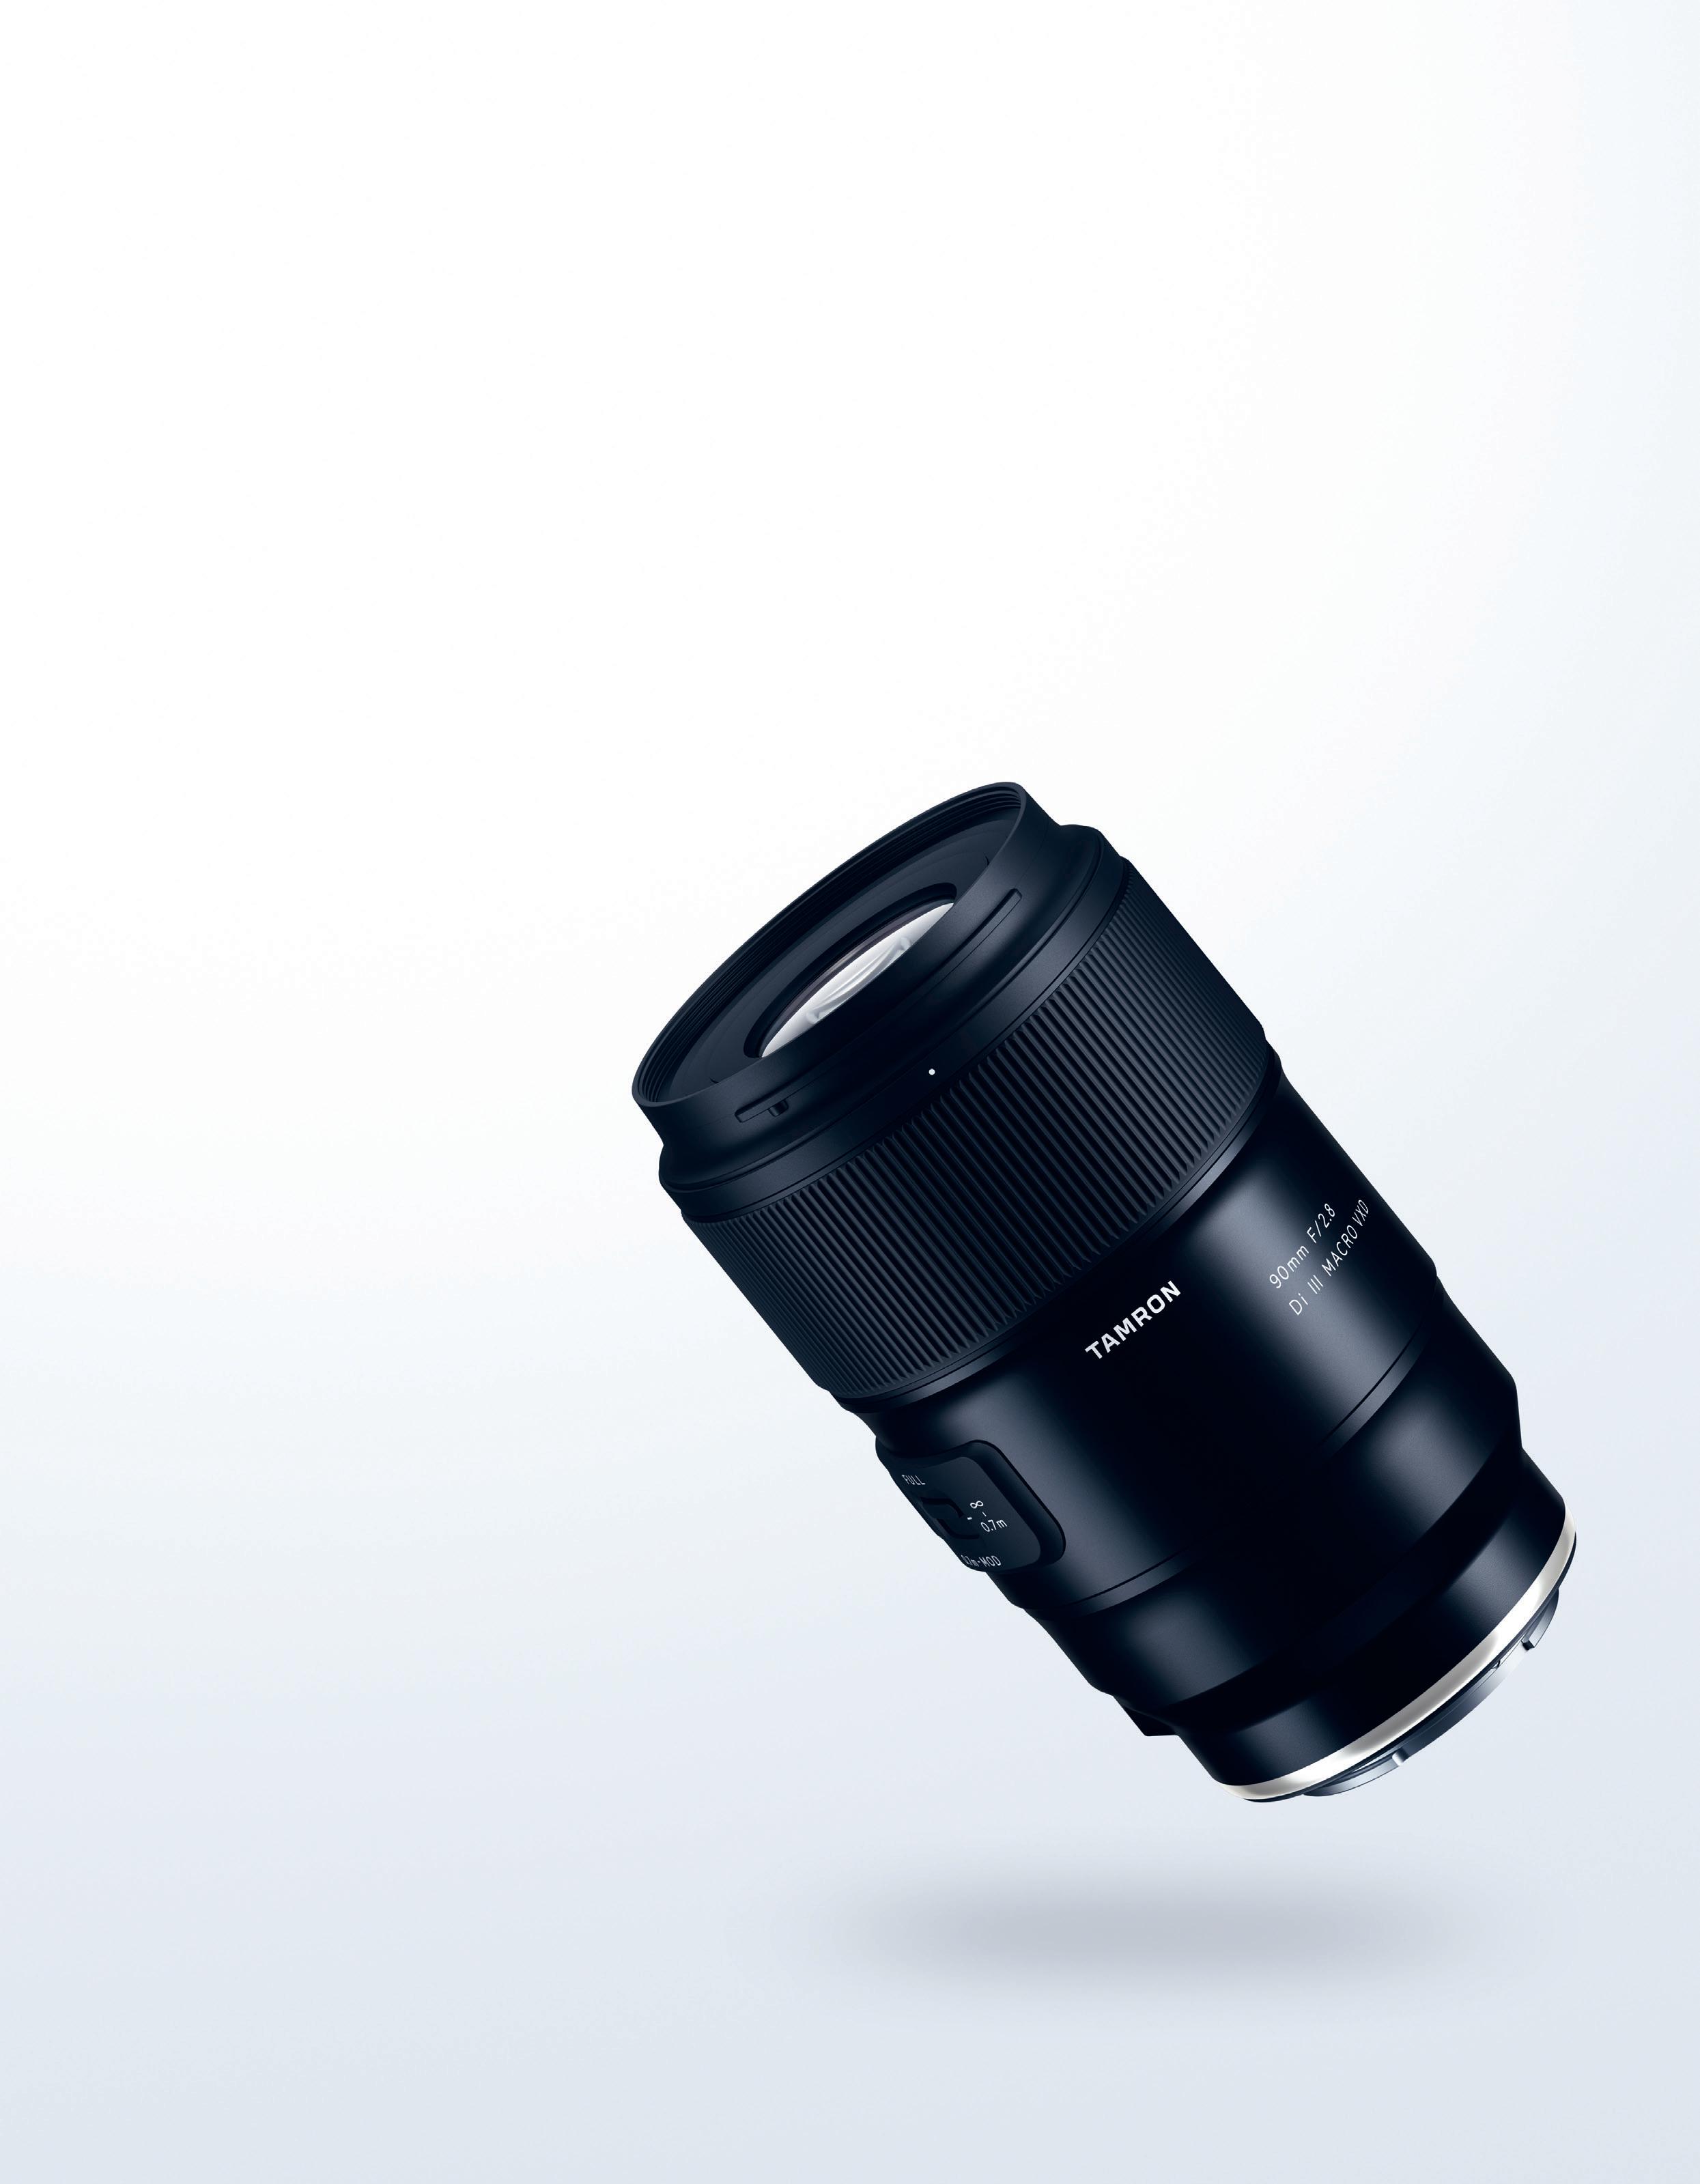
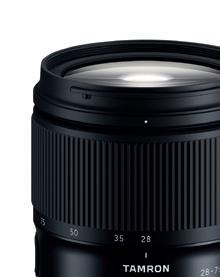
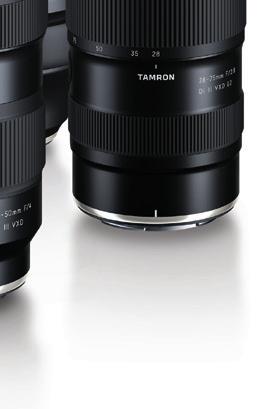
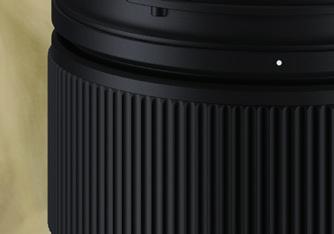
Superior resolution and creamy bokeh. This compact mid-telephoto 1:1 macro lens features an advanced high-speed, highprecision AF system and TAMRON’s first-ever 12-blade circular aperture.
I
n 1979, TAMRON unveiled its groundbreaking 90mm macro lens, SP 90mm F/2.5 (Model 52B). Photographers were clamoring for a mid-telephoto lens with a short MOD and TAMRON delivered a truly revolutionary product. The lens combined macro functionality with stunning bokeh and exceptional image quality, making it a versatile choice for general photography, quickly gaining acclaim among nature and portrait photographers.
Fast forward to 2024, the 45th anniversary of the first generation 90mm. TAMRON proudly introduces a highly anticipated mirrorless version of this iconic 90mm macro lens, the 90mm F/2.8 Di III VXD MACRO (Model F072). This lens continues TAMRON's legacy of beloved brilliant performance with cutting-edge technology to forge a new chapter in the history of TAMRON’s 90mm macro lens.

Compact size, just 5” (126.5mm) and 22.2oz (630g) for easy carrying
This is a compact mid-telephoto macro lens with a maximum aperture of F2.8 and a length of 5”. With a maximum diameter of 79.2mm, it fits comfortably in the palm and is easy to hold. It’s also lightweight at 22.2oz, making it more pleasant to carry for long periods.
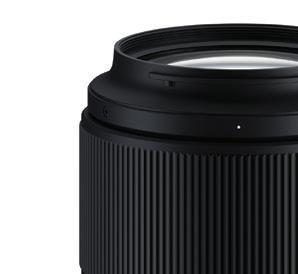
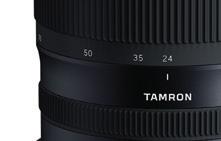
12-blade design for stunning circular bokeh and starburst effects
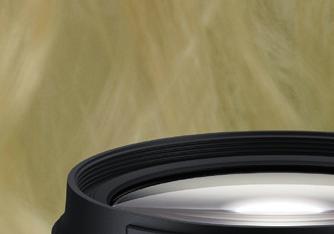
TAMRON introduces its first 12-blade circular aperture with this 90mm, ensuring perfectly circular bokeh and minimal vignetting especially in the macro range. It creates 12 rays for starburst effects when stopped down, making it ideal for dramatic images with point light sources.
A mid-telephoto prime lens, ideal for a wide range of genres
This lens excels in a variety of genres beyond macro. Utilize its F2.8 aperture for stunning portrait photography, leverage its closefocusing ability for captivating tabletop photos, and capture distant landscapes with remarkable image quality.
High-speed, high-precision AF
The lens features TAMRON’s VXD linear motor focus mechanism that allows
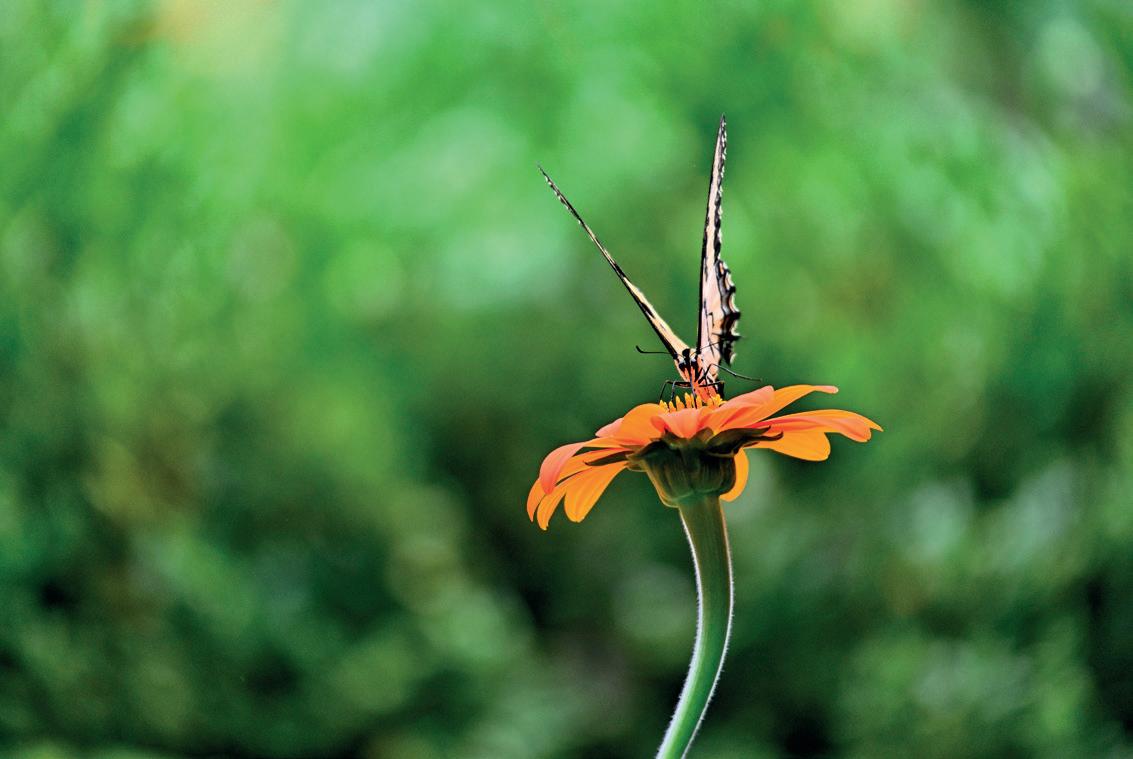
comfortable focusing from MOD through infinity with high-speed and high-precision performance that represents the highest level in TAMRON’s history. Tracking performance for moving objects is also outstanding, making it perfect for shooting subjects that move in unpredictable ways such as butterflies. This high-performance AF demonstrates its advantages and prowess in various types of macro photography situations.
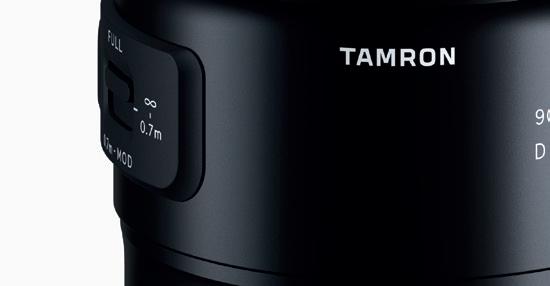
90mm F/2.8 Di III VXD Macro
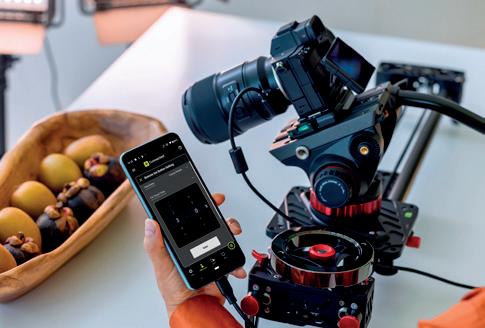
TAMRON Lens Utility™ and Focus Set Button
TLU lets you change lens settings, assign camera functions, and update firmware. The mobile version is especially useful for macro photography where a tripod is often used. You can customize functions for various still photography and videography shooting styles for a more personalized shooting experience.
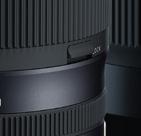
The lens is equipped with a focus limiter switch that can restrict the AF focus range, enabling faster focusing during AF shooting. This feature also helps prevent the lens from searching focus in full range when losing focus during closerange AF photography.
New hood design
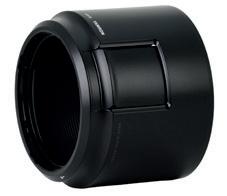
The hood has a sliding window for easy filter use, letting you rotate filters without removing the hood. This ensures precise control and smooth operation while maintaining shooting rhythm.


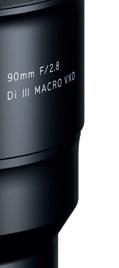

NEW 90mm
F/2.8 Di III VXD Macro
Model F072
Focal Length 90mm
Maximum Aperture F2.8
Blades 12 (circular diaphragm)
MOD 9.1“/0.23m
Max. Mag. Ratio 1:1
Length 5” (126.5mm) Sony 5.1” (128.5mm) Nikon
Weight 2.2 oz. (630g) Sony 22.6 oz. (640g) Nikon
Filter Size .Ø67mm
Max. Diameter Ø79.2mm
Mount Sony E & Nikon Z
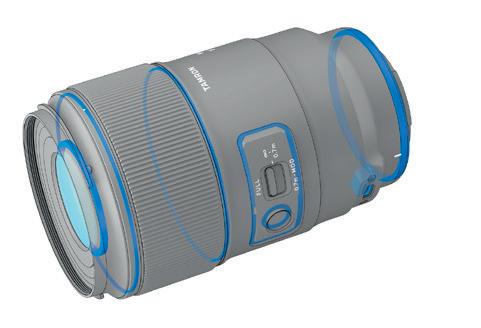
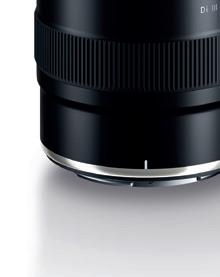
Moisture-Resistant Construction
Moisture-Resistant Construction
For greater protection when shooting outdoors, leak-resistant seals throughout the lens barrel help protect your equipment. Also, the Connector Port is the water-proofed USB Type-C variety.
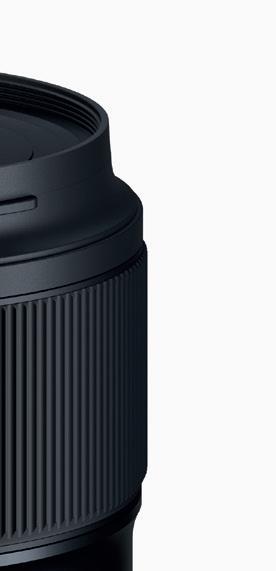
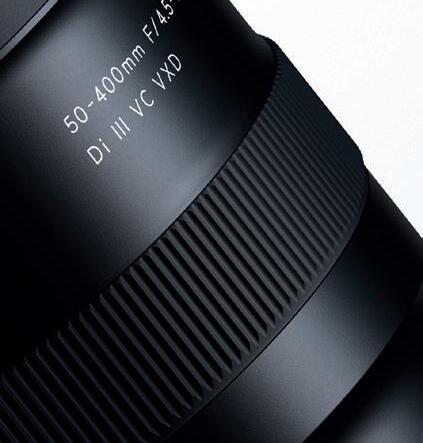
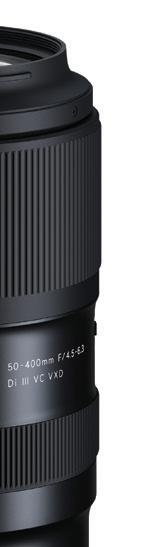
Ultra-telephoto zoom starting from 50mm expands its versatility with 1:2 macro capability. Now available for Nikon Z mount.

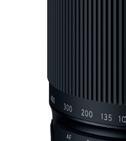
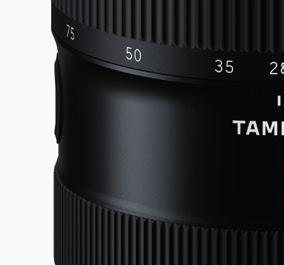
he 50-400mm VC is a compact ultra-telephoto zoom lens designed to pair perfectly with Nikon Z mount full-frame mirrorless cameras. Offering an impressive 8x zoom range, this lens spans from the standard 50mm, challenging the conventional 100-400mm telephoto lenses with a wider angle of view on the short end. Despite its expansive reach, the lens remains remarkably compact at just 7.3” (185.8mm) in length and weighs only 41.6 oz (1,180g), making it ideal for photographers seeking portability without sacrificing performance. The lens incorporates TAMRON’s advanced VXD linear motor for fast, quiet autofocus and its VC image stabilization system for steady shooting across all focal lengths.


TCovers 50mm standard focal length up to 400mm ultra-telephoto One of the greatest features of this lens is its dramatically broad focal length range that covers standard to ultratelephoto, delivering an 8x zoom ratio. With 50mm on the wide side, you can create images that capture both the subject and the background. The wide end is also extremely useful when


shooting subjects that may continuously move closer and further away, such as when whale watching, shooting sports at the sidelines, and photographing animals in habitats.
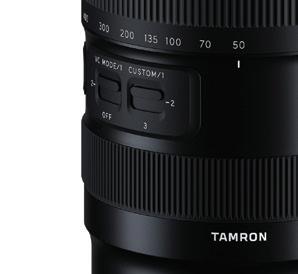
TAMRON’s proprietary VC takes the shakes out of handheld shooting
The lens is equipped with TAMRON’s VC mechanism, and effectively controls camera shake that can occur when shooting at telephoto. VC also helps reduce when shooting handheld in low-light conditions or at slower shutter speeds. Using AI technologies, the lens chooses the appropriate compensation characteristics for videography at focal lengths of 100mm or less.
Superb image quality across the entire zoom range
The optical construction features 24 elements in 18 groups with a generous and effective use of special lens elements, including two XLD (eXtra Low Dispersion), three LD (Low Dispersion), one GM (Glass Molded Aspherical) and one Hybrid Aspherical lens elements.

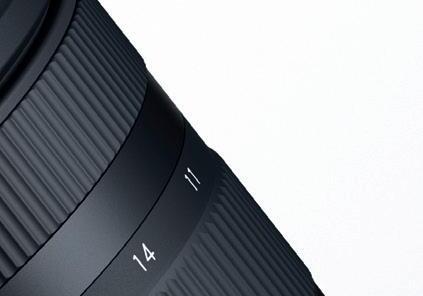
Half-macro photography with 1:2 magnification ratio at the 50mm to 70mm focal length
The 50-400mm F4.5-6.3 is capable of extremely high performance when shooting close-ups, particularly for an ultra-telephoto zoom lens. Users can enjoy maximum magnification ratio of 1:2 with an MOD of 9.8″ (0.25m) at 50mm and 10.6″ (0.27m) at 70mm. The unprecedented level of freedom in shooting reveals the charm of subjects more than ever and provides flexible shooting options previously unseen in ultra-telephoto zooms.


HIGHLIGHTS IN
50-400MM F/4.5-6.3 Di III VC VXD
Half-macro photography with 1:2 magnification ratio from 50mm to 70mm focal length
Enjoy shooting half macro with a maximum magnification ratio of 1:2 from 50mm to 70mm, and 1:4 at 400mm.

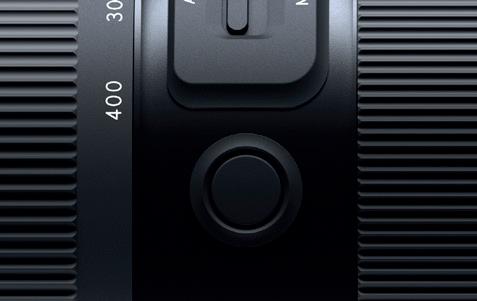
TAMRON Lens Utility™ and Focus Set Button
TLU lets you change lens settings, assign camera functions and update firmware. With the Mobile version, Focus Preset and A-B Focus can be operated remotely. You can also select the “Focus Limiter” function to limit the focus search range of the AF shortening the time to refocus when a subject slips out of focus. The function can be instantly toggled using the Focus Set Button.
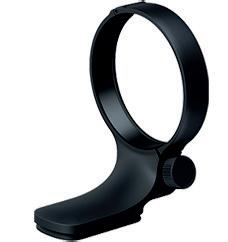
Optional Arca-Swiss Compatible Tripod Mount
Model A067
Focal Length 50-400mm
Maximum Aperture F4.5-6.3
Blades 9 (circular diaphragm)
MOD 9.8" (0.25m) at 50mm
Max. Mag. Ratio 1:2 at 50mm~70mm
Length 7.3” (185.8mm)
Weight 41.6 oz. (1,180g)
Filter Size Ø67mm
Max. Diameter Ø88.5mm
Mount Nikon Z*
*Also available for Sony E
An optional Arca-Swiss compatible accessory tripod mount is available for convenience when using a tripod.
Nothing escapes this high-performance ultra wide-angle zoom. Now for CANON RF mount!
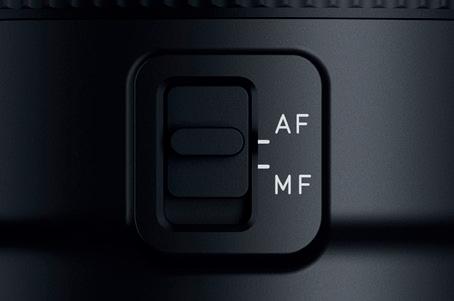
The 11-20mm F/2.8 Di III-A RXD is an ultra-wide-angle zoom lens that is now available for CANON RF APS-C mirrorless cameras and is a versatile, high-performance lens for wide-angle enthusiasts. Offering a constant F2.8 maximum aperture, this lens delivers excellent low-light performance and depth of field control, making it ideal for landscape, architectural, and astrophotography. With its 11-20mm focal length range, it provides an expansive field of view, allowing photographers to capture sweeping vistas and tight indoor spaces with ease. Compact and lightweight, the lens is easy to handle, making it a great travel companion. The RXD (Rapid eXtra-silent stepping Drive) autofocus motor ensures fast, accurate, and quiet focusing, perfect for both stills and video. The lens features moisture-resistant construction, ensuring durability in various shooting environments. The RF mount model is equipped with an AF/MF switch for easier operation. It also features compatibility with the TAMRON Lens Utility software.


Compact, lightweight F2.8 ultra wideangle zoom lens for APS-C mirrorless invites new experiences
TAMRON’s ultra wide-angle zoom for CANON RF mirrorless offers a bright constant F2.8 aperture and outstanding portability. The fast aperture lets you maintain a high shutter speed even in dark conditions, ensuring sharp handheld images with minimal shake. Special lens elements are arranged to suppress optical aberrations, producing clear images and high-resolution performance throughout the zoom range. The lens is so lightweight and compact that it’s ideal for everyday


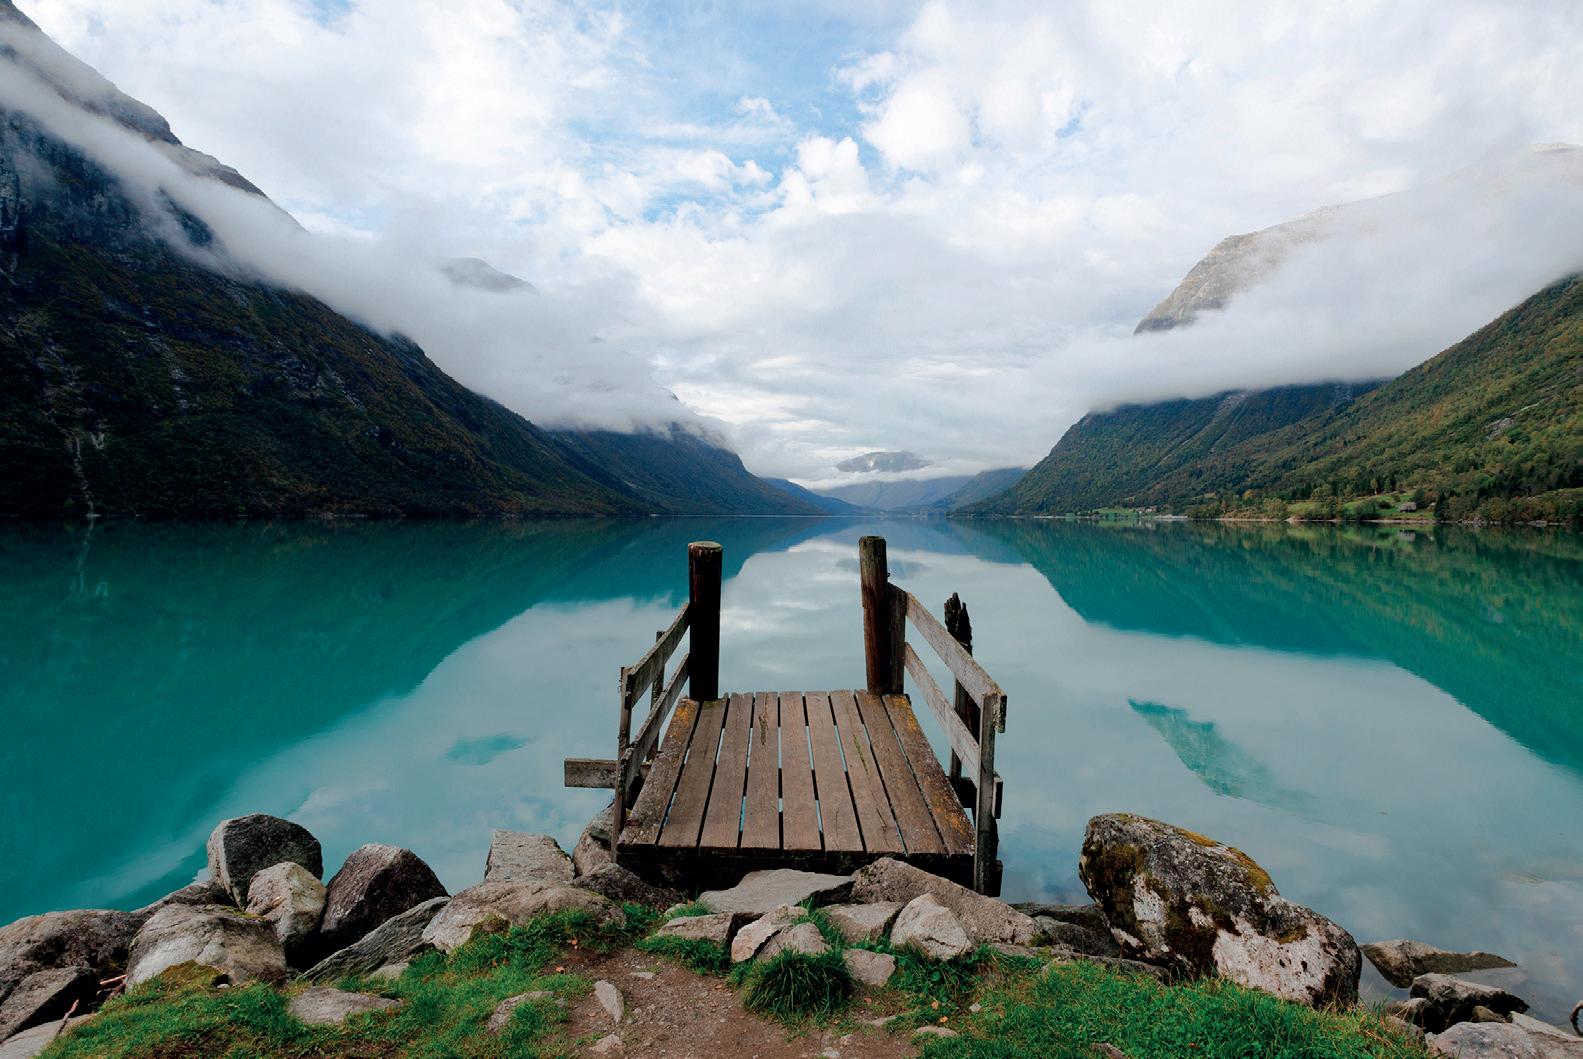
use and travel and is perfect for video, especially when using a gimbal. It provides a remarkable MOD allowing you to close in on subjects easily. This lens combines excellent portability with the ability to capture unique images, expanding your enjoyment of photography.
Outstanding ultra wide-angle optical performance
The 11-20mm F2.8 is a high-resolution lens that focuses on superb image quality as a full-fledged fast-aperture ultra wide-angle zoom. The optical construction includes 12 elements in 10 groups. High resolution performance is maintained across the entire frame with the well-balanced arrangement of two GM (Glass Molded Aspherical) lens elements. Two LD (Low Dispersion) and one XLD (eXtra Low Dispersion) lens elements are used to suppress the chromatic aberrations that tend to occur when shooting at the wideopen aperture of fast-aperture lenses.
Explore the Captivating World of WideAngle Macro Photography
The MOD is just 5.9” (0.15m) at the wide end. This extreme close-range shooting performance allows you to get as close to a subject as you like. The maximum magnification ratio is 1:4 — an astonishing feat for an ultra wide-angle lens — and it unlocks powerful wide-angle macro shooting utilizing the unique perspective that makes near objects look larger, and distant objects smaller.
High performance autofocus system
The AF drive on the lens includes an RXD motor unit to help you stay focused on the action. RXD uses an actuator to precisely control the rotational angle of the motor, allowing it to directly drive the focusing lens without passing through a reduction gear. A sensor that precisely detects the position of the lens enables high-speed and accurate AF, which is ideal when shooting continually moving subjects or recording video. And with a focusing system that is both smooth and quiet, the 11-20mm F2.8 lets you shoot without worrying about the drive sound in a quiet environment.
Model B060
Focal Length 11-20mm


HIGHLIGHTS IN FOCUS: 11-20mm F/2.8 Di III-A RXD
CANON RF mount equipped with AF/MF switch and TAMRON Lens Utility™ compatibility
The 11-20mm F2.8 for CANON RF mount features an AF/MF switch for easier operation. Users can use the TLU app that lets users easily update the lens to the latest firmware without going through the camera.
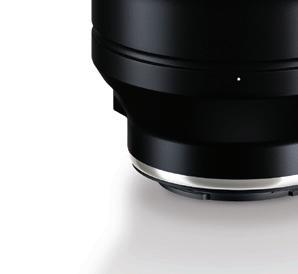
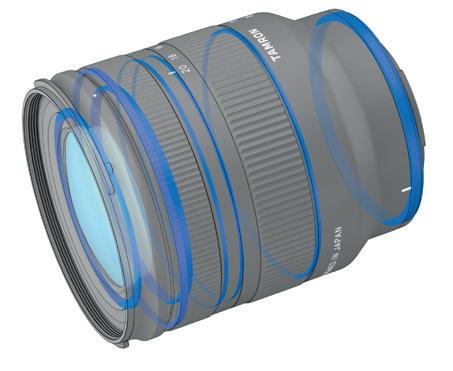
Moisture-Resistant Construction
TAMRON's moisture-resistant construction is a valuable feature because it helps protect the lens from damage caused by rain, humidity, or accidental splashes, making it more reliable for outdoor and challenging shooting conditions. This enhances durability and performance, especially for photographers working in unpredictable environments.
High performance autofocus system for both still and video use


Maximum Aperture F2.8
Blades 7 (circular diaphragm)
MOD 5.9” / 0.15m (WIDE) 9.4” / 0.24m (TELE)
Max. Mag. Ratio 1:4 (WIDE) 1:7.6 (TELE)
Length 3.3” (84.2mm)
Weight 12 oz. (340g)
Filter Size Ø67mm
Max. Diameter Ø73mm
Mount CANON RF*
*Also available for Sony E and Fujifilm X
Equipped with TAMRON’s proprietary RXD motor unit, the autofocus system delivers high-speed and high precision focusing. It accurately captures moving subjects and is suitable for both still photography and video. Its quiet RXD stepping motor is ideal for capturing moments where noise may be a concern, or silence is required.

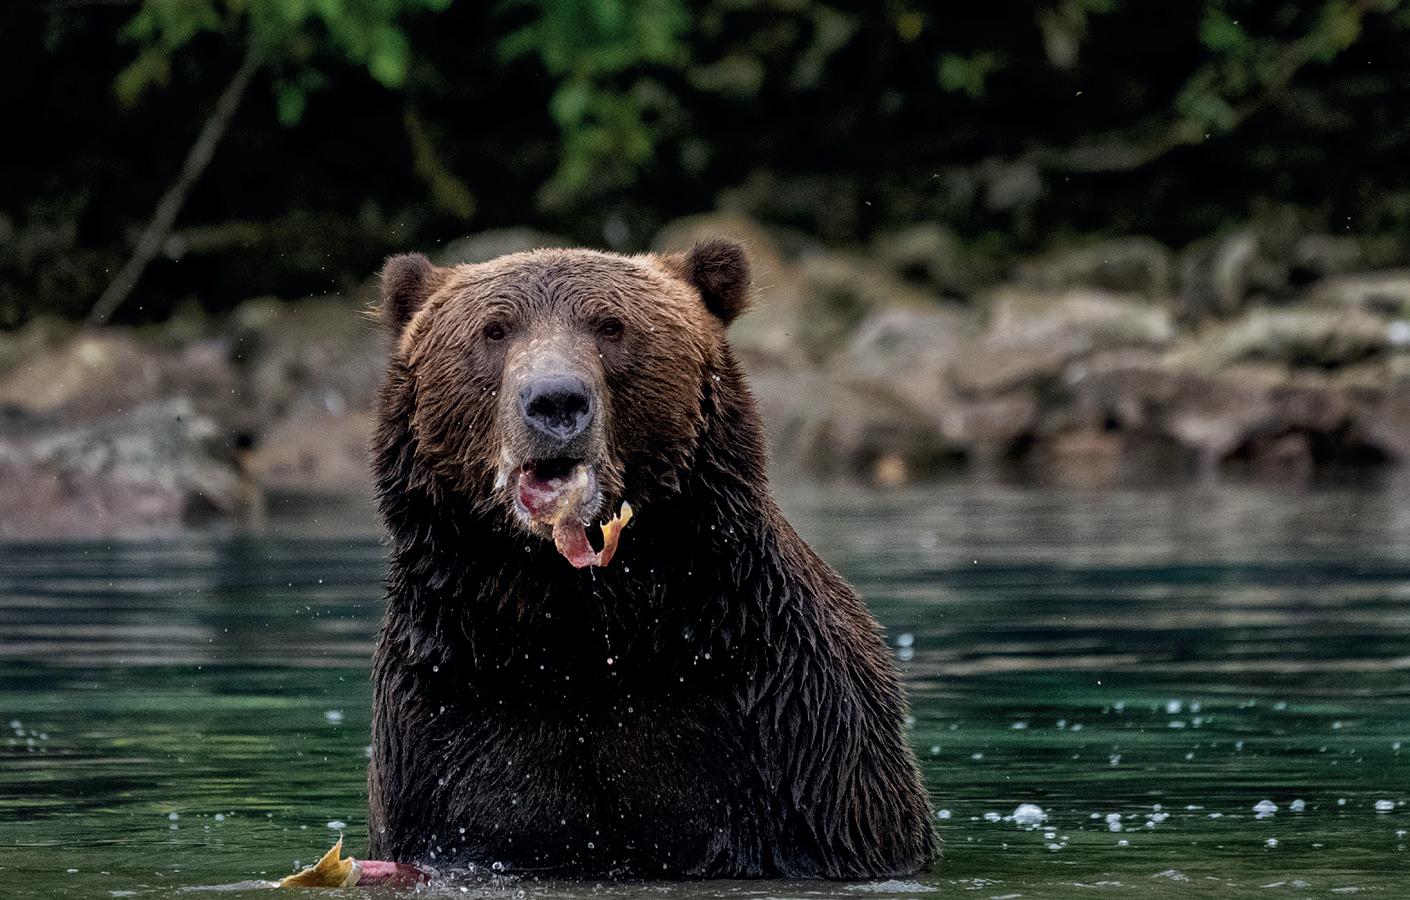
With his TAMRON 50-400mm VC ultra-telephoto lens, Ken Hubbard captures the Kenai Peninsula’s resident wildlife and other local flavor.

Every year, Lisa Langell heads up to Alaska’s Kenai Peninsula to conduct her photo workshops, experiences filled with stunning nature scenes, captivating wildlife, and a sense of adventure. Ken Hubbard joined Lisa this past August, during the late-summer period when the region’s resident brown bears are bulking up on salmon to prepare for their long winter hibernation.
“The bears are all getting fat and happy at this time of year,” Ken says. “Our guides took us out in 18-foot metal outboards, where we were able to head to the spots where all the bears congregate. These guides don’t take you super-close to the bears, which wouldn’t be fair to either the bears or us, but in some cases we came within about 20 feet, which was perfect for picture-taking, especially with my TAMRON ultra-telephoto zoom lens.”
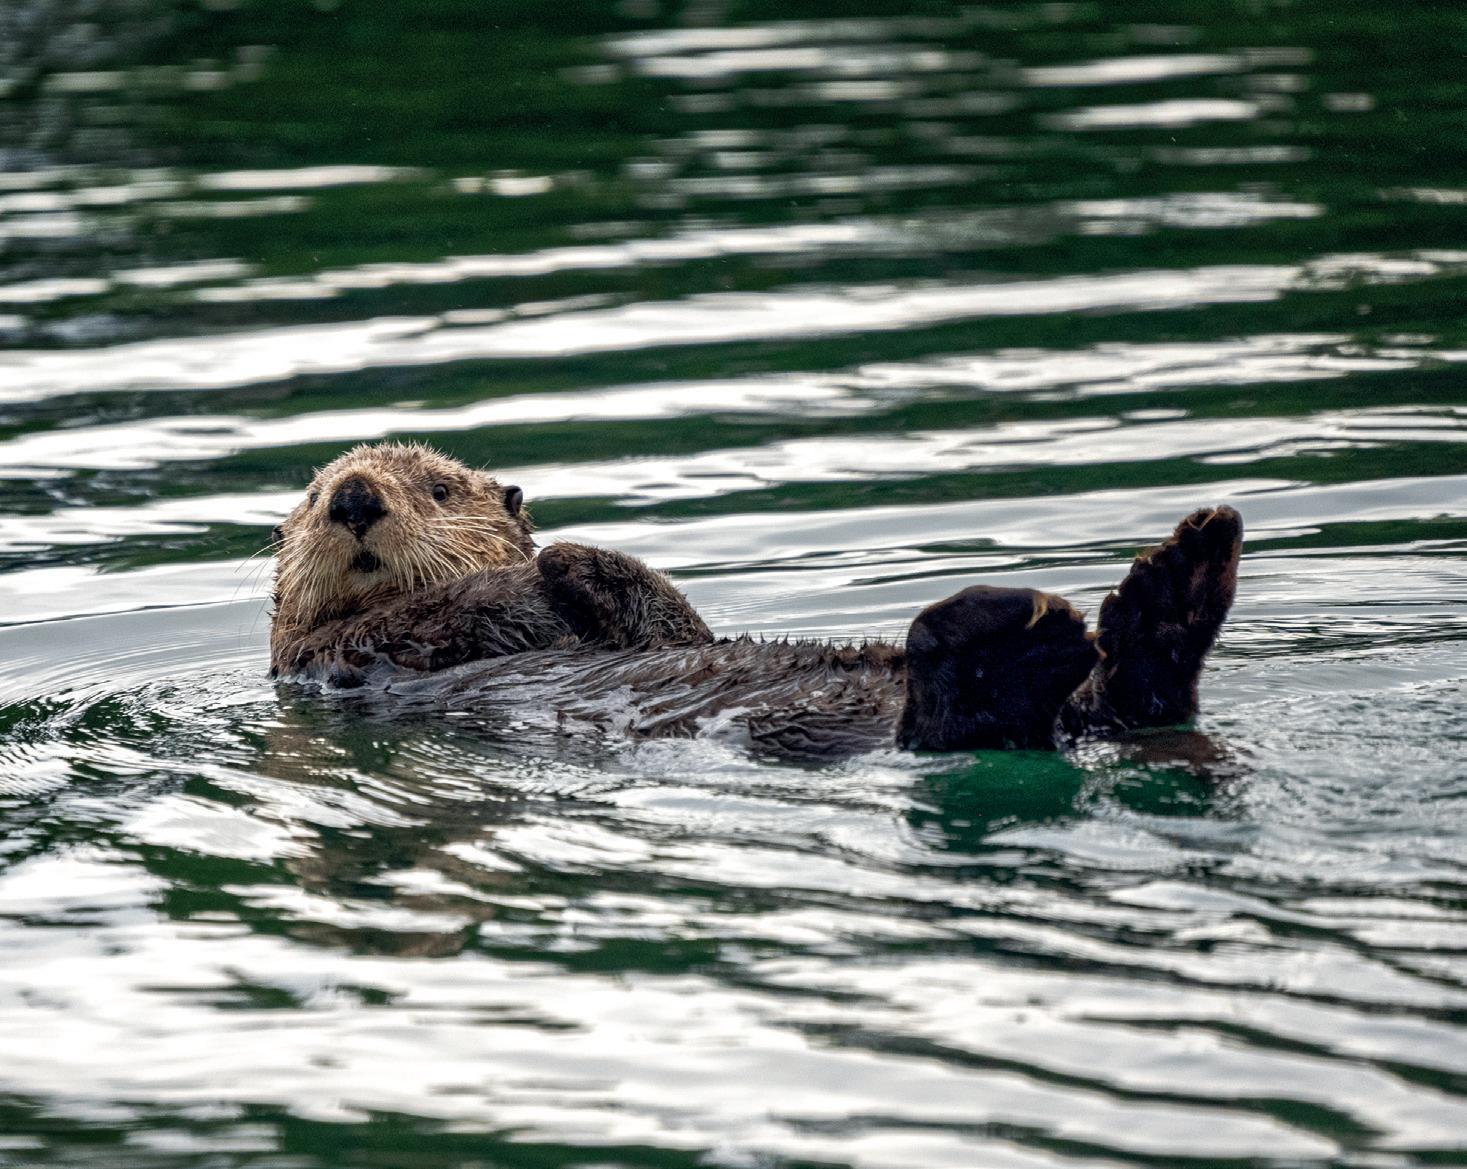
That lens, the TAMRON 50-400mm Di III VC VXD, allowed Ken to go wide for some of Alaska’s stunning landscape scenes, then zoom in from a safe distance to capture images of the wildlife. “That 400mm reach was especially useful to take photos of the smaller creatures, like the otters we saw in Otter Cove,” he says. “This one lens let me be flexible in what I was shooting—you don’t really want to be switching lenses while you’re crammed into an outboard. The sharpness of the 50-400mm is amazing throughout the entire zoom range, with no light falloff in the corners.
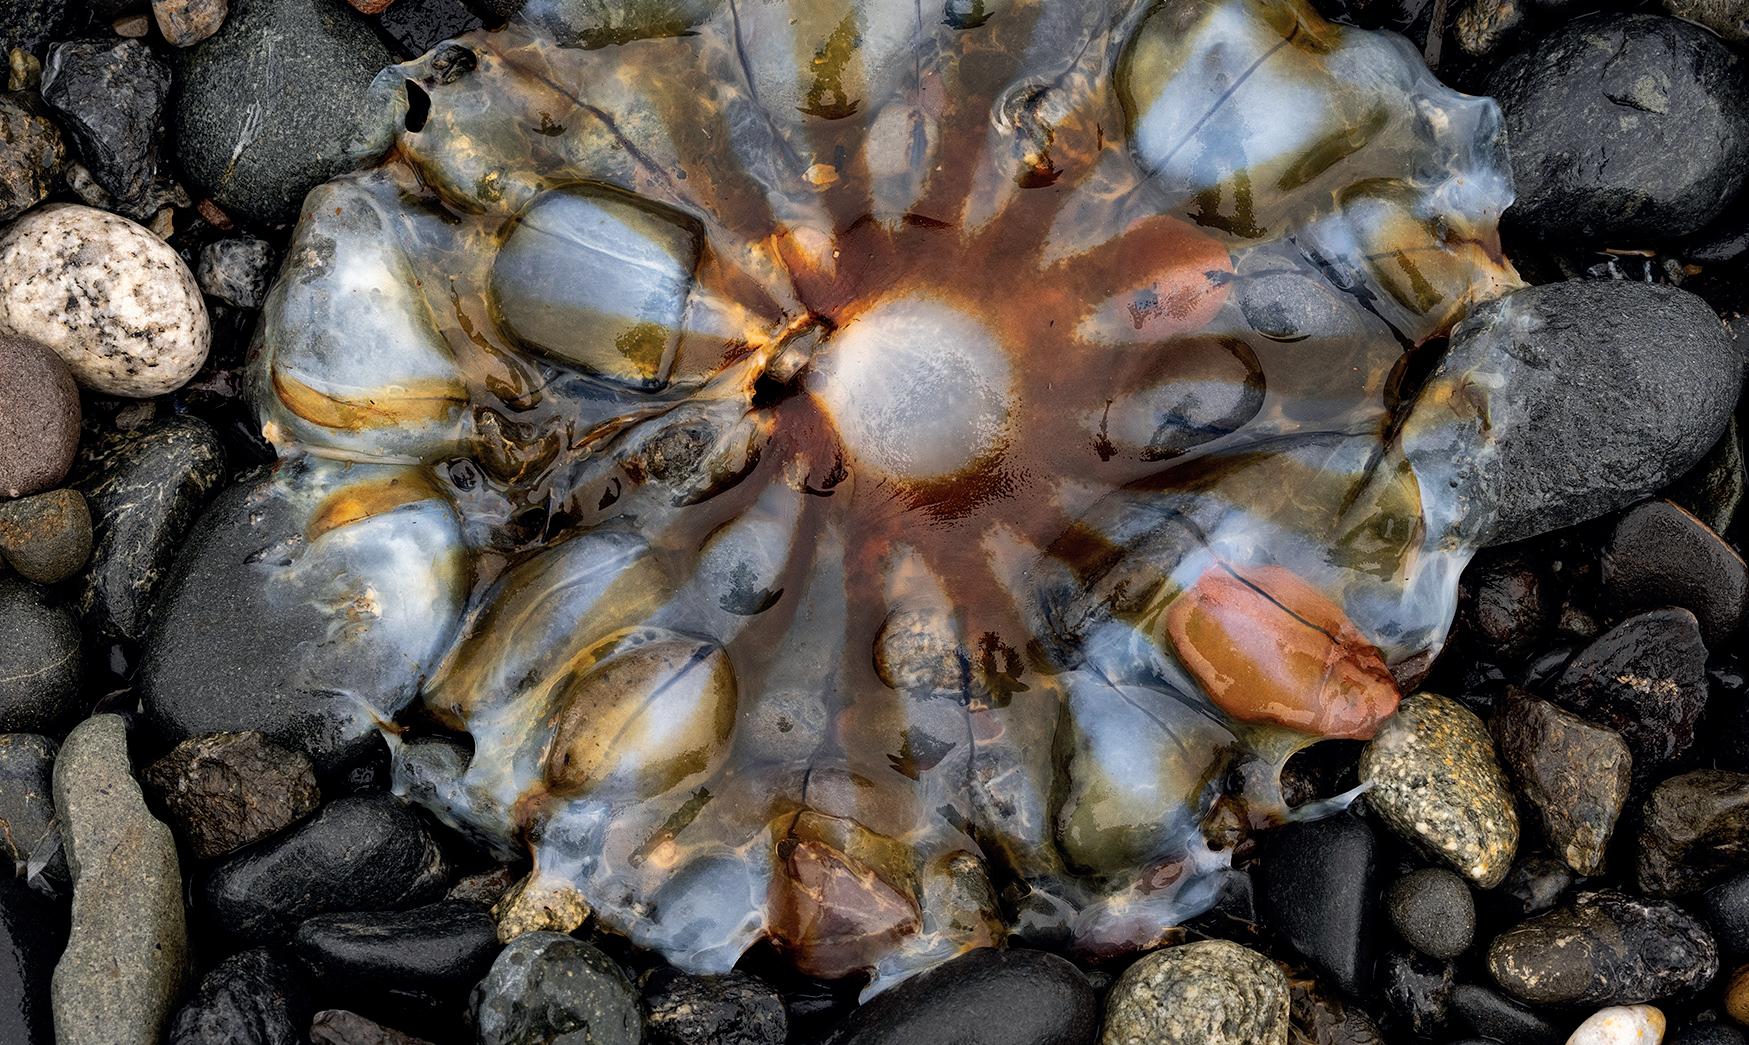
The Vibration Compensation helped in this regard, too, eliminating camera shake. And the fast focusing of the 50400mm VC was a big help when the bears would suddenly move from sitting position to splashing around in the water. “The lens was able to lock right in,” Ken says. “Meanwhile, the 50-400mm also offers a maximum magnification ratio of 1:2, with a Minimum Object Distance (MOD) of 9.8” at the wide end and 59.1” at the telephoto end. I didn’t shoot much macro on this particular trip, but I did shoot some detail shots that required me to get closer, like when taking pictures of some jellyfish in the water.”
1 Set up for success. When photographing bears at Crescent Lake, make sure your camera is set to capture sharp, detailed images, always ready for sudden movements. Start by prioritizing a fast shutter speed to freeze the action, especially since
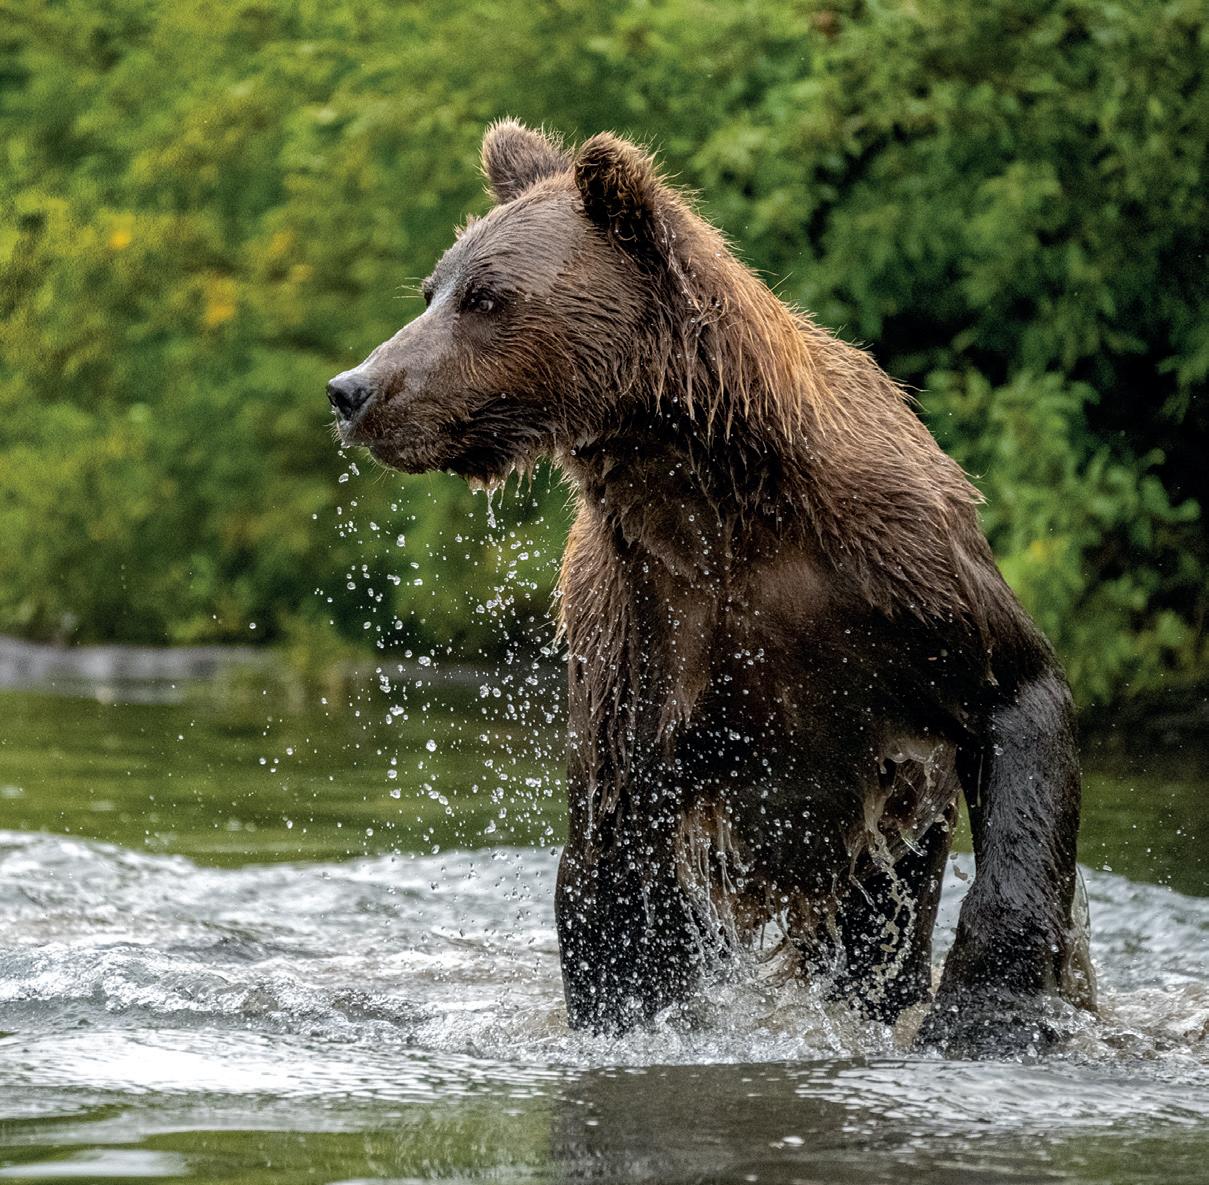


“WHEN PHOTOGRAPHING WILDLIFE IN ALASKA, THE WATER ITSELF CAN SERVE AS AN EVERCHANGING BACKGROUND, BECAUSE AS THE LIGHT SHIFTS, THE WATER REFLECTS DIFFERENT COLORS AND PATTERNS.”
bears can switch from slow movements to sudden bursts of activity. Next, adjust your aperture to create a shallow depth of field that will make the bears stand out from their backgrounds. Alaskan landscapes are gorgeous, but when photographing wildlife, I don’t want there to be distractions like rocks and leaves that take away from my main subjects. Finally, be mindful of your ISO settings. Since you’ll often encounter varying lighting conditions, like overcast and misty days, you may need to raise the ISO to maintain your desired shutter speed and aperture, even if that means a slightly higher noise level.


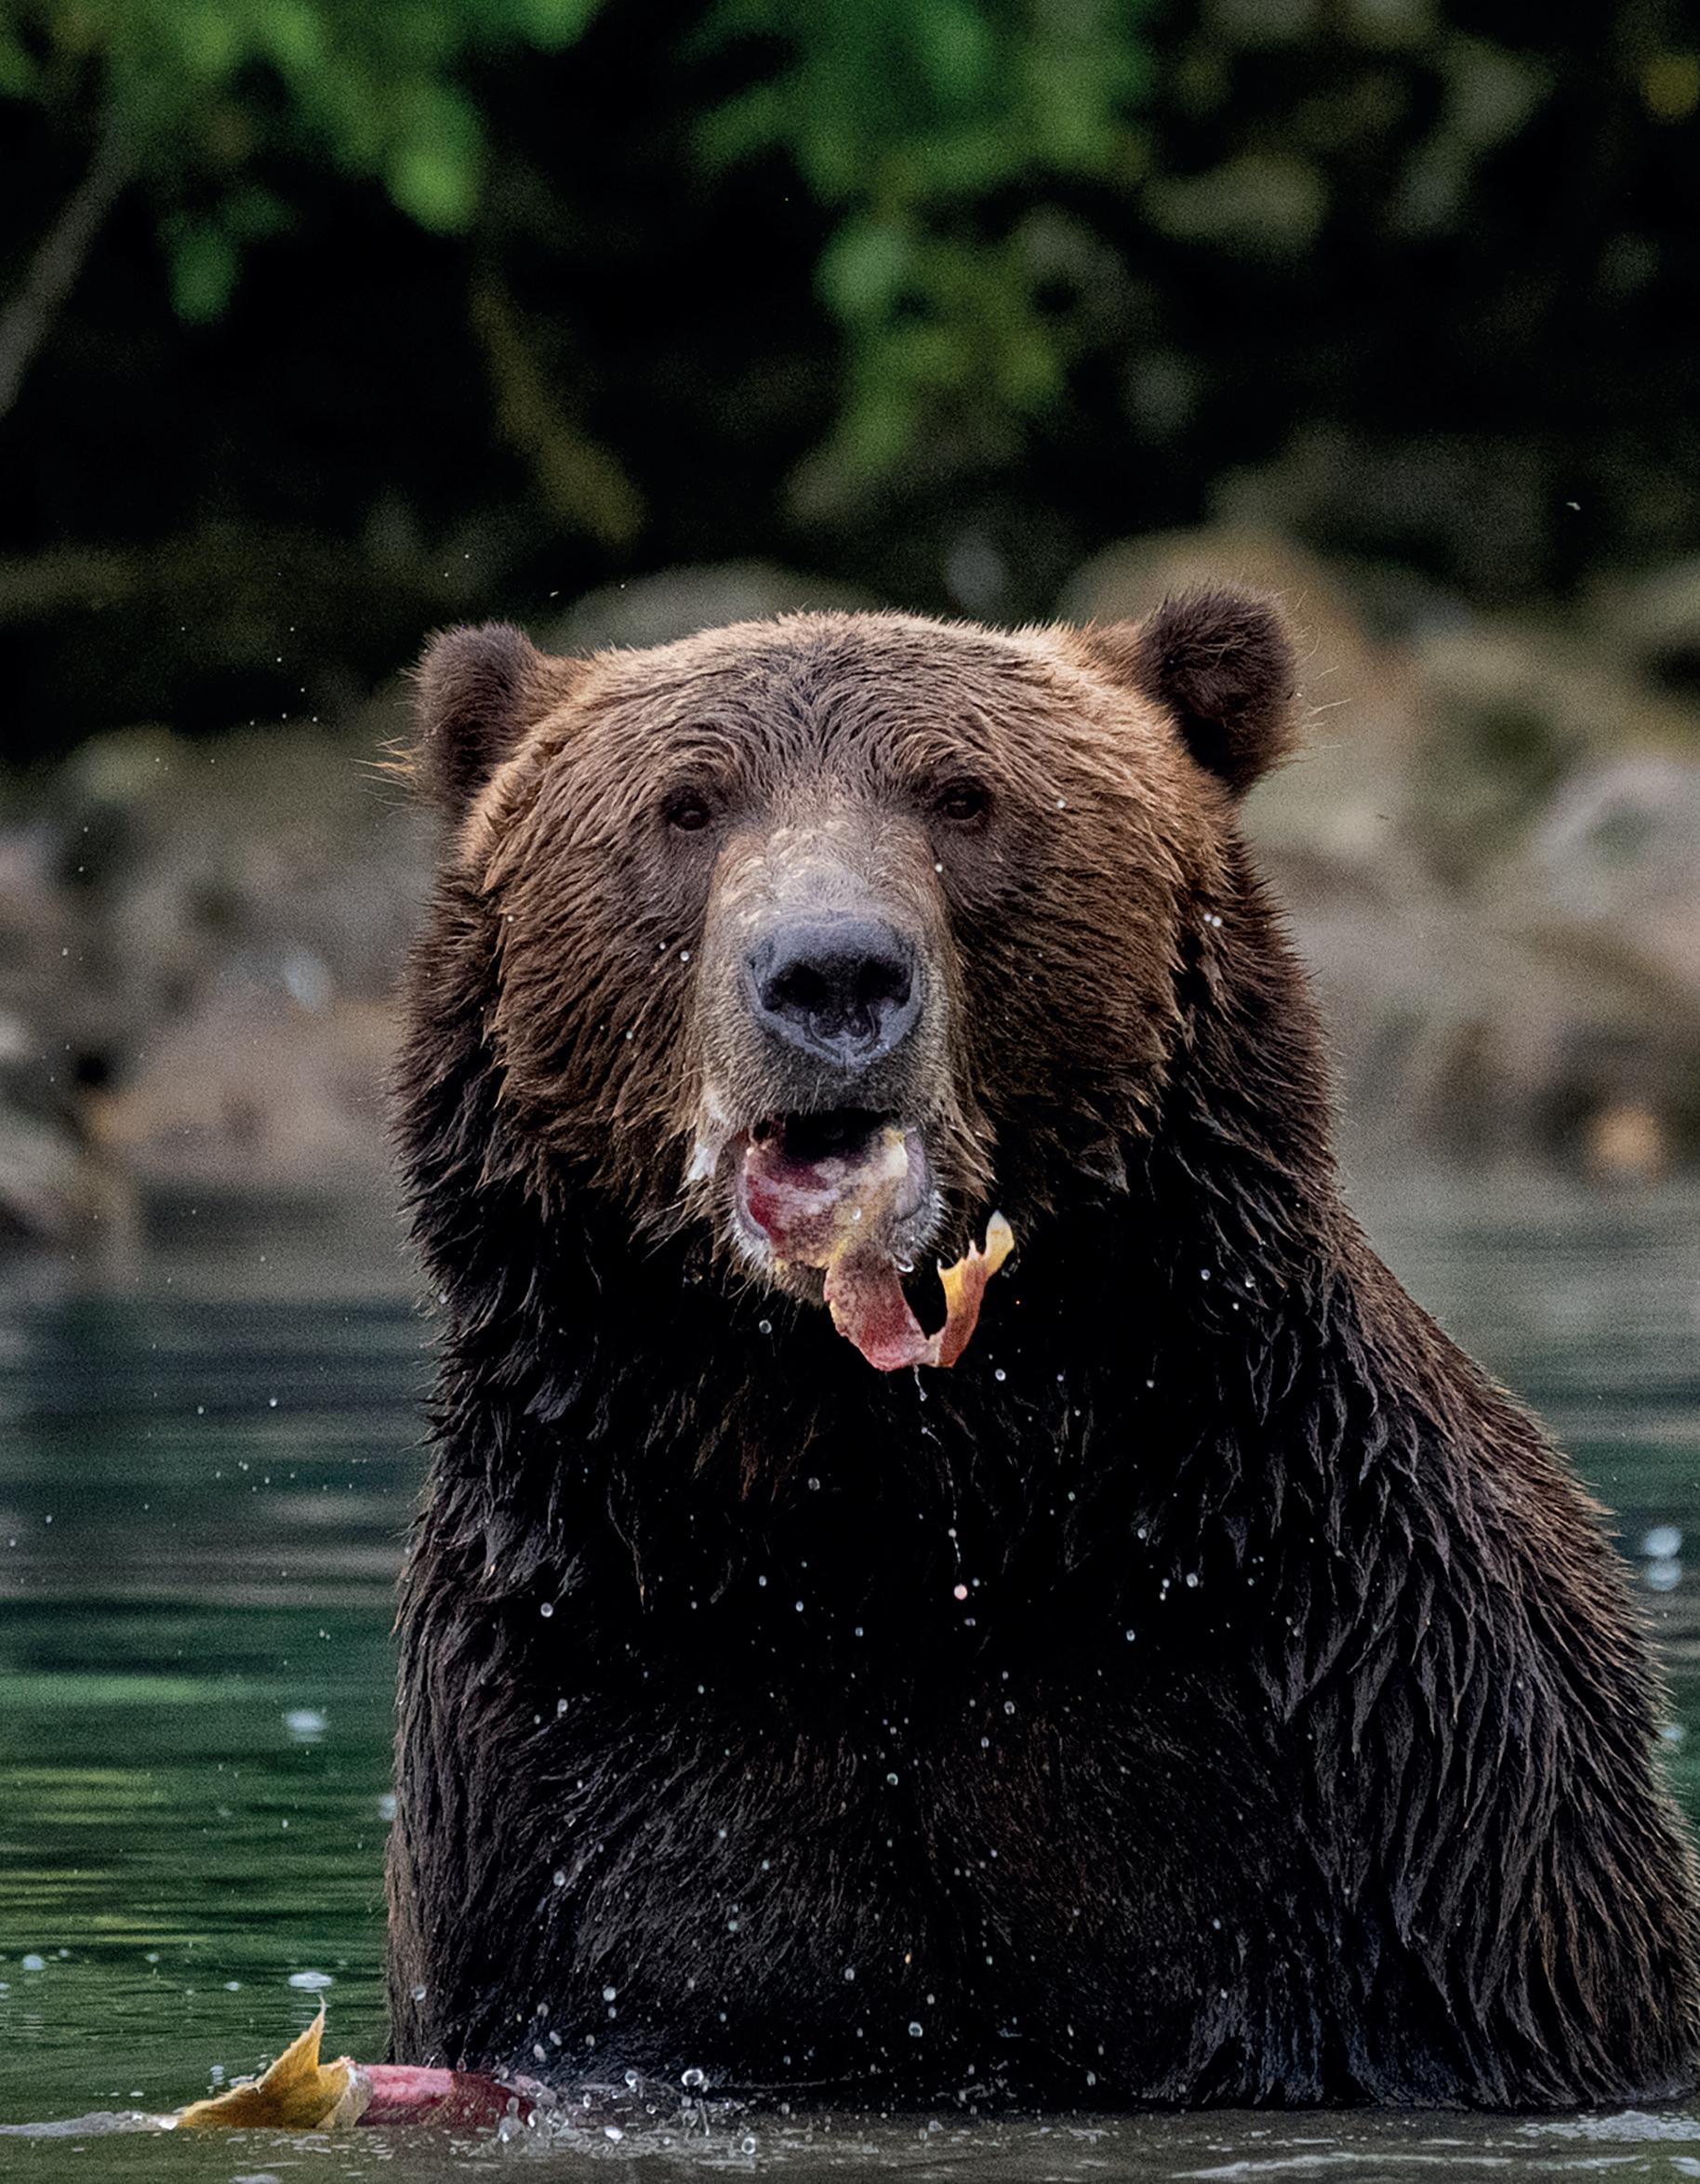
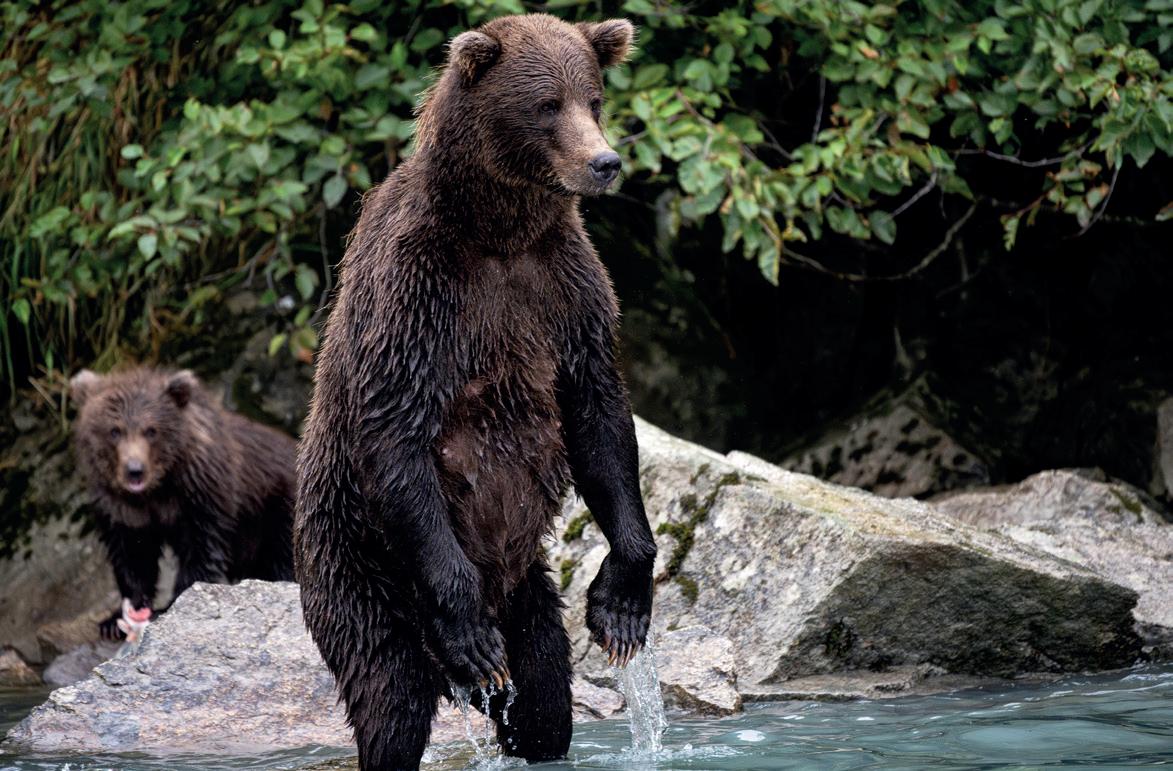
2 Get to the bears’ eye level.
This can greatly enhance the impact of your shots. It creates a sense of connection with the subject that’s staring you down, like the bear you see here chowing down on a piece of salmon. If you’re in a boat like we were in, you’re practically at eye level already, which makes your photos feel as if you’re standing in the water with them. If you’re shooting from shore, try to crouch or otherwise get lower to the ground to achieve the same effect.
3 Keep an eye out for action, and unpredictability. You’ll want to capture moments that show the essence of the bears’ behavior and the rugged beauty of their environment, like bears catching or eating salmon, especially when they manage to grab one midair or emerge from the water with a fish in their jaws. And then you have shots like the one I took of the bear standing straight up on its hind legs. I was not expecting that to happen! By keeping your camera up and on the hunt for such moments, you may be able to show wildlife in a way that your viewers have never seen.
4 Use the water as a fluid backdrop.
I love otters, and there are plenty to be found in Otter Cove, like this guy you see here, who was just hanging out here like a California surfer. When photographing wildlife in Alaska, the water itself can serve as an ever-changing background, because as the light shifts, the water reflects different colors and patterns—even if you’re shooting from the same spot. We circled this otter for about 20 minutes, and I captured a halfdozen shots with completely different backgrounds, ranging from metallic whites to deep greens.
5 Use the water as a reflective surface.
Otter Cove is an idyllic spot, offering me plenty of landscape and shoreline opportunities as well. The water was super calm on the day I captured this photo of the Danny J fishing boat along the dock, so I was able to capture a nice reflection of the
boat and these vividly colored buildings along the shore. It was an overcast day, but that actually saturated those colors even more, which I love. The tiny drops of water you see on the water from the sprinkle of rain coming down adds a little texture to the scene without disturbing the reflection.
6 Take detail shots to tell the story of a place. There’s more to a destination than its landscapes and wildlife. The photo you see here of the ropes and nets was taken in the fishing town of Homer. The Time Bandit fishing vessel from Deadliest Catch anchors in this harbor. There’s commercial fishing here, private fishing, recreational fishing—this town is all about fishing. So it made sense to zoom in a little to showcase some of the elements that suggest what kind of town Homer is.


50-400mm

F/4.5-6.3


Di III VC VXD [model A067] (available for Sony E & Nikon Z)


Ken Hubbard is the Field Services Manager for TAMRON. He’s responsible for the company’s events, including TAMRON’s popular consumer workshop series. Ken has had nationwide gallery showings of his portrait and landscape photography and teaches enthusiasts how to take better photos at numerous events. Ken’s extensive background in the field of photography is unique and diverse. He has traveled extensively throughout the US, and the result is a consistent output of breathtaking photographs that continually challenge the boundaries of the genre.
Instagram: @kenhubbardphotography


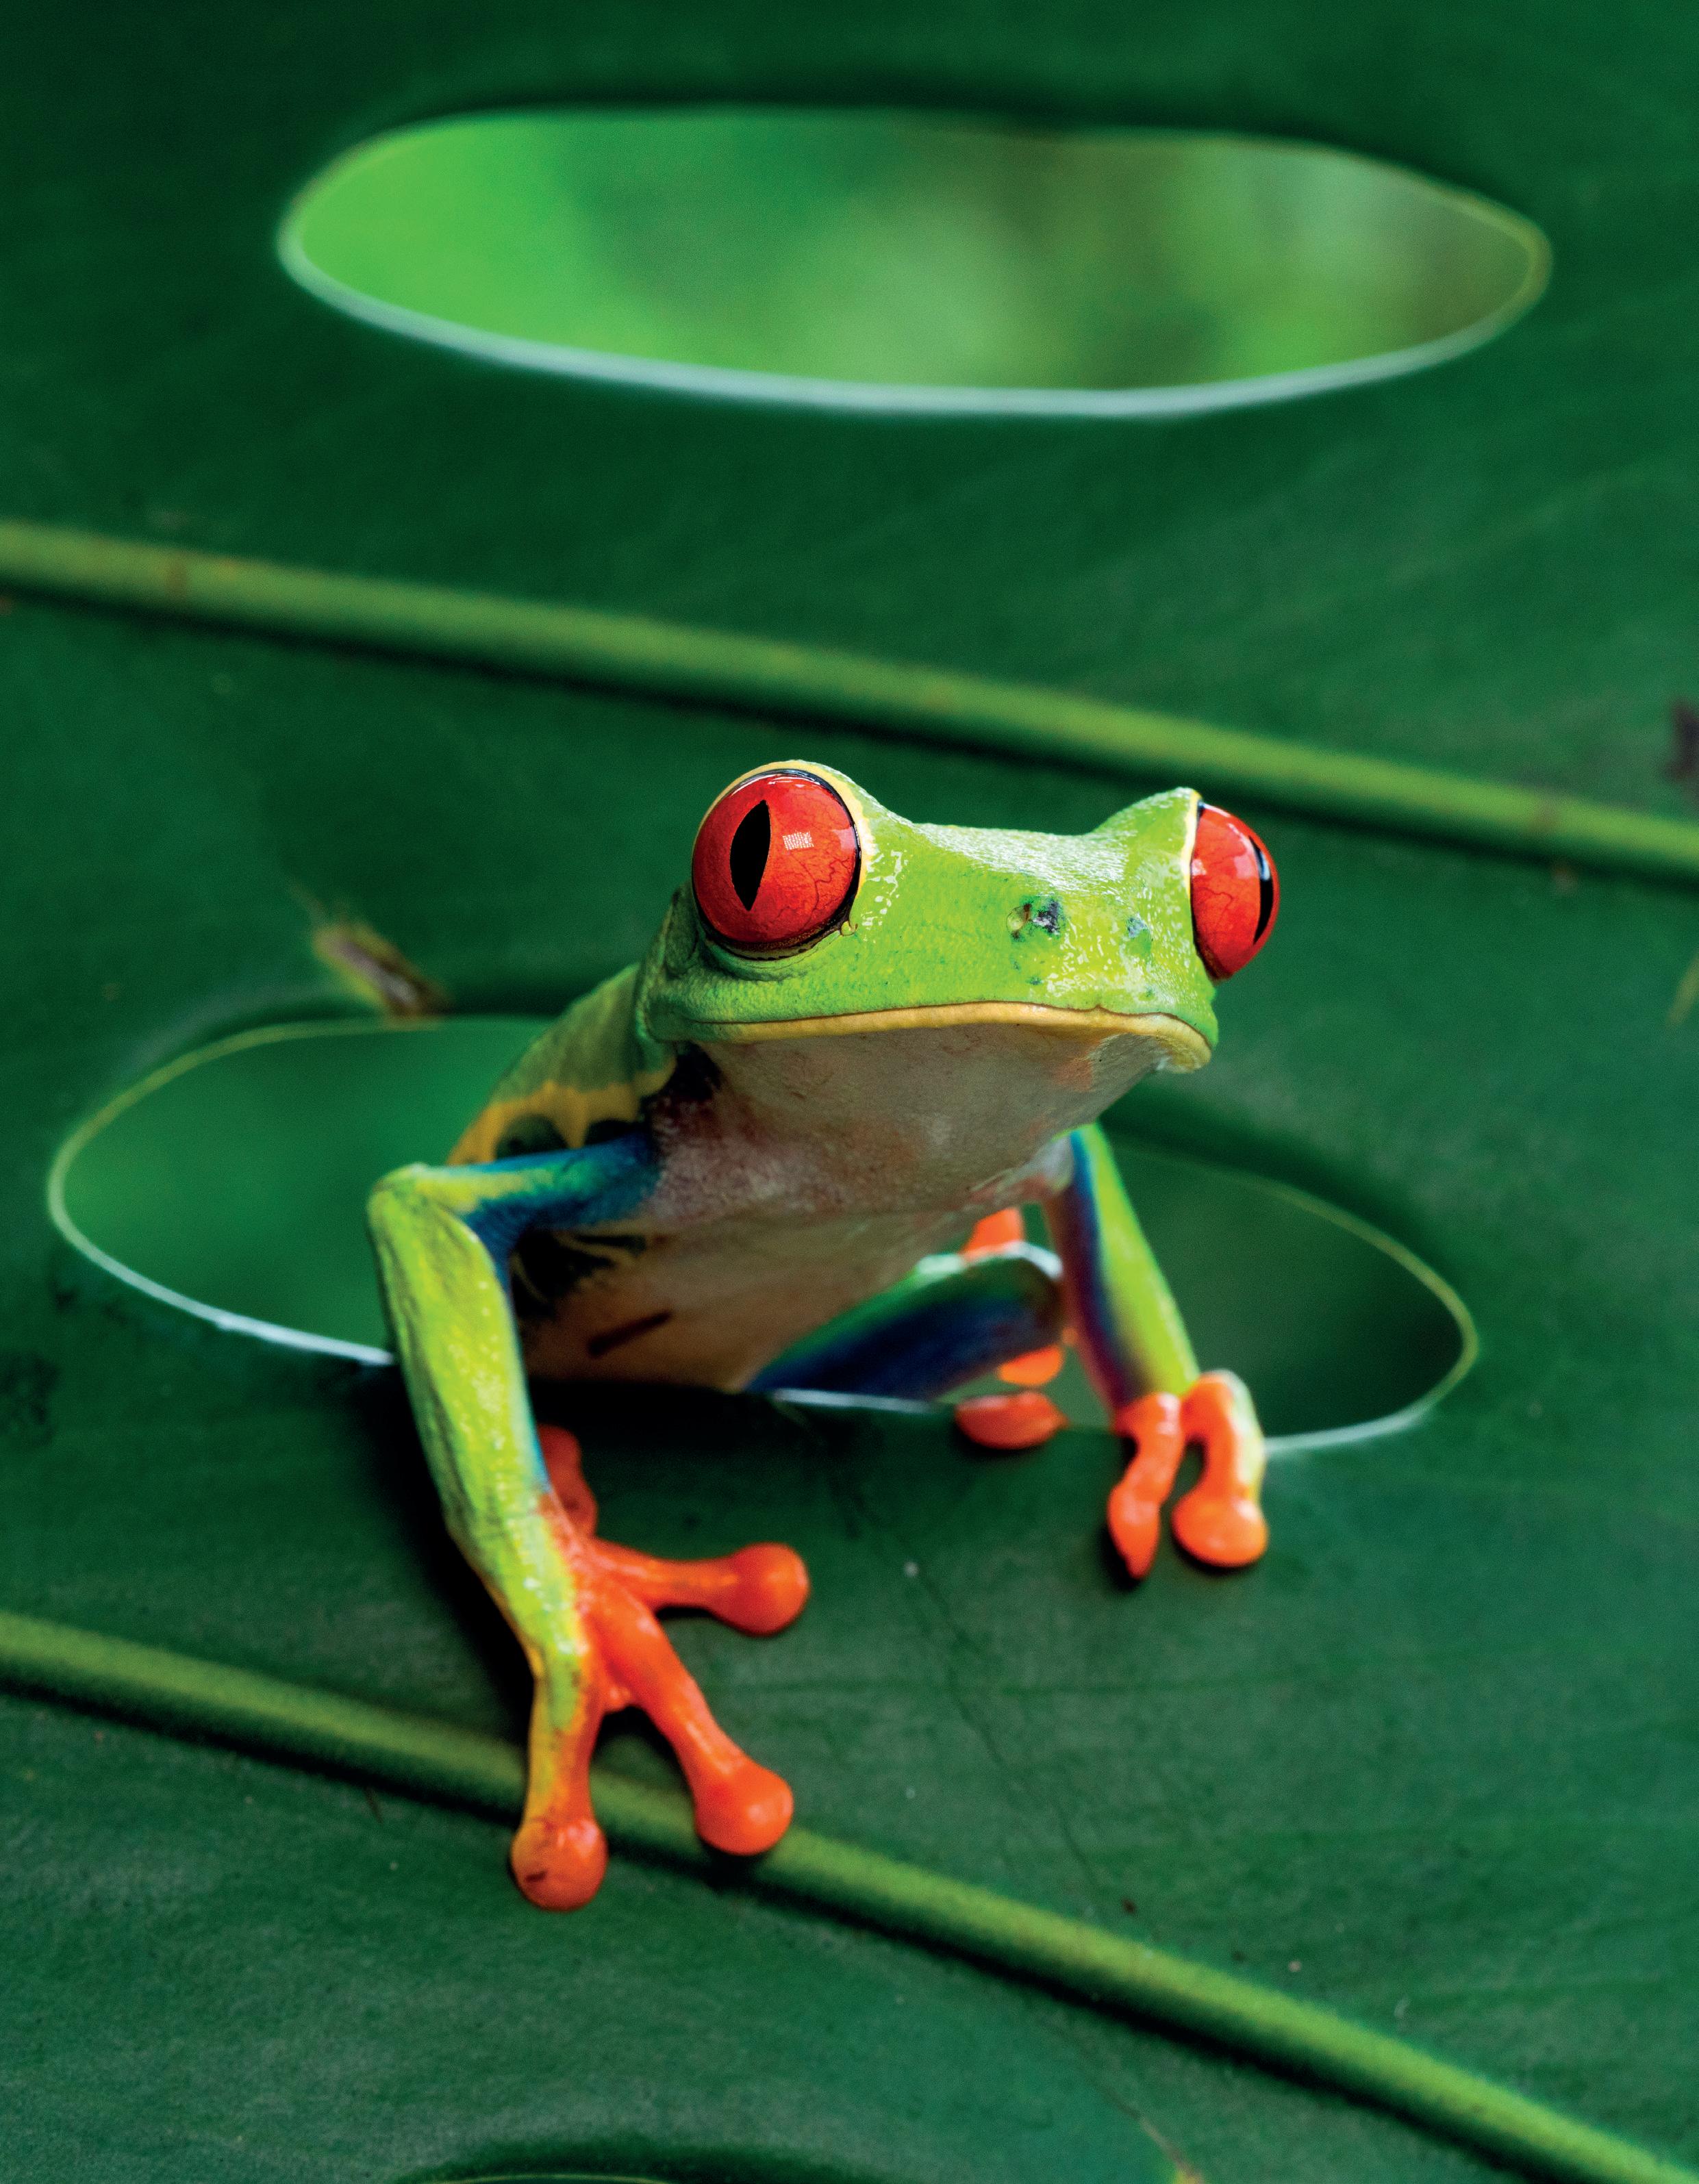


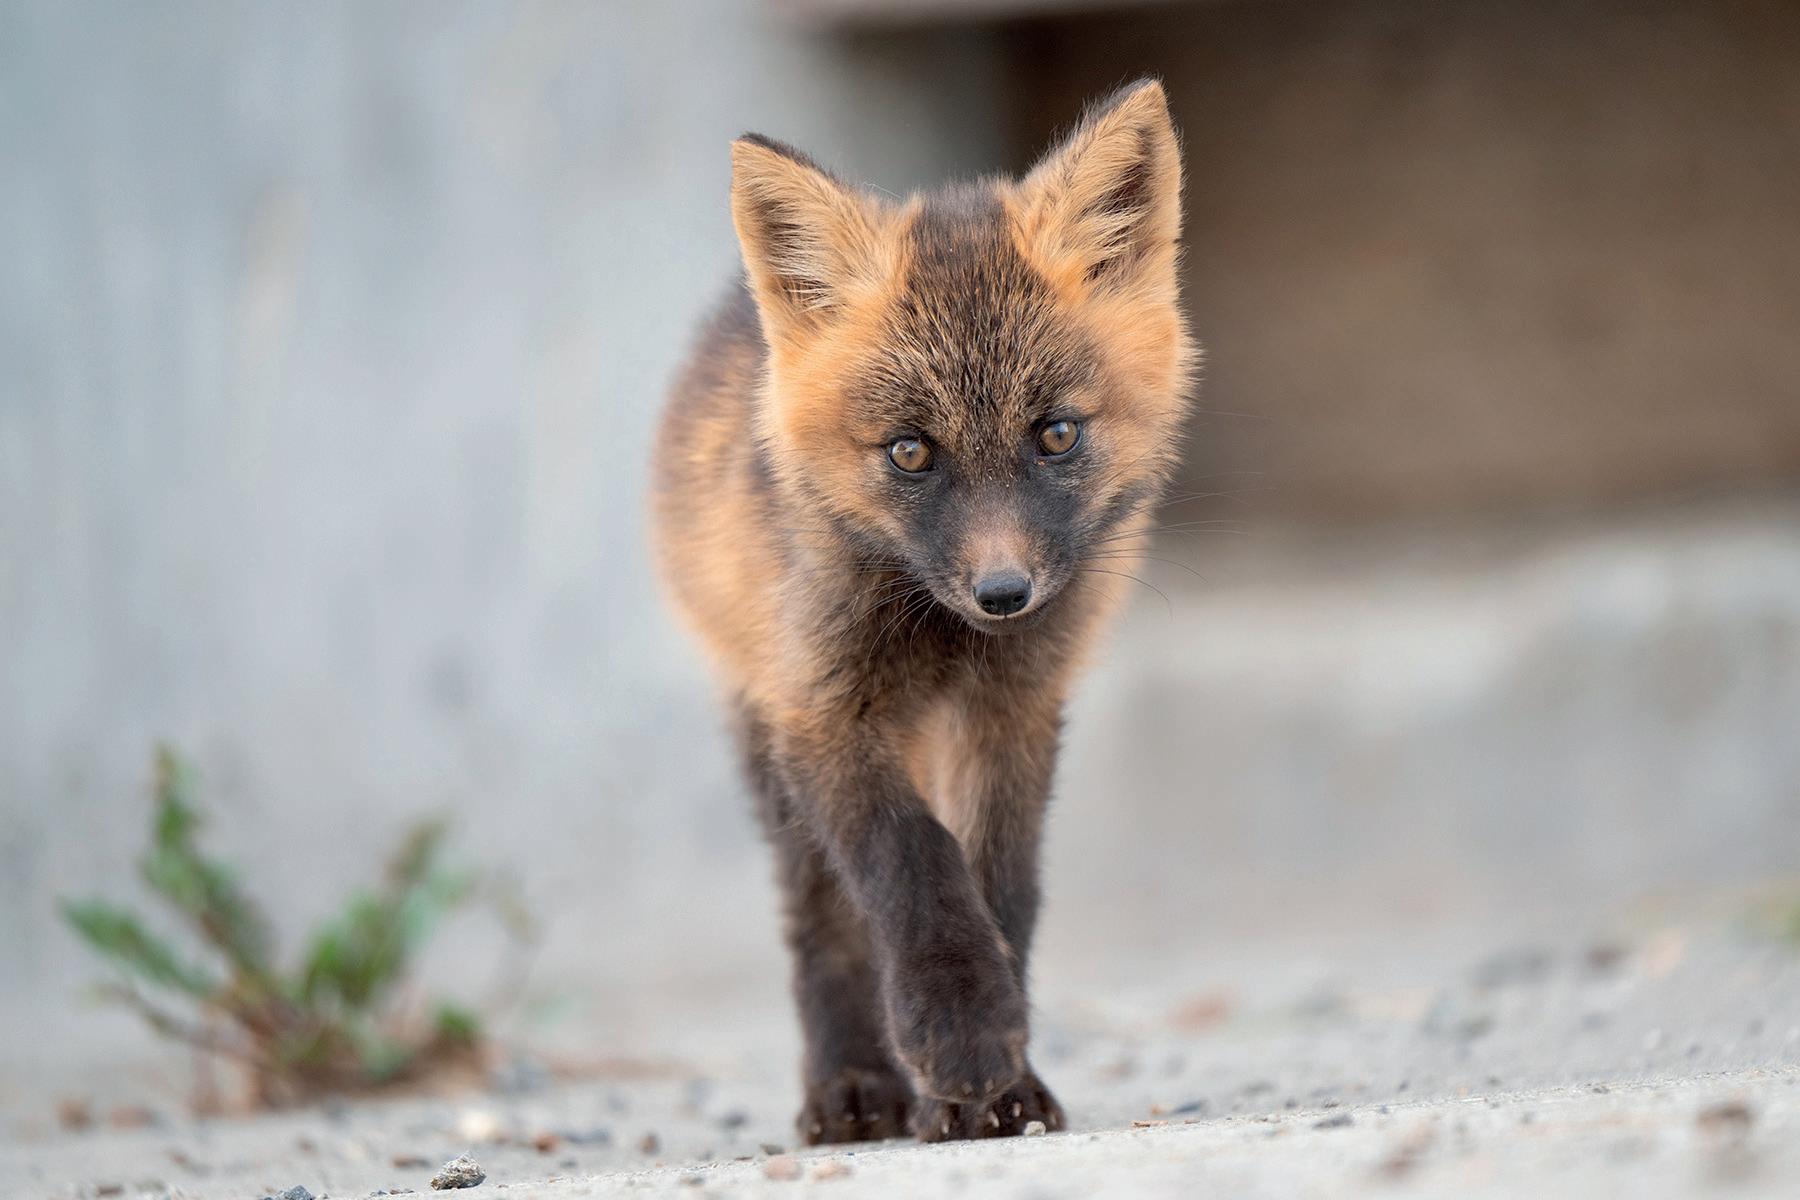
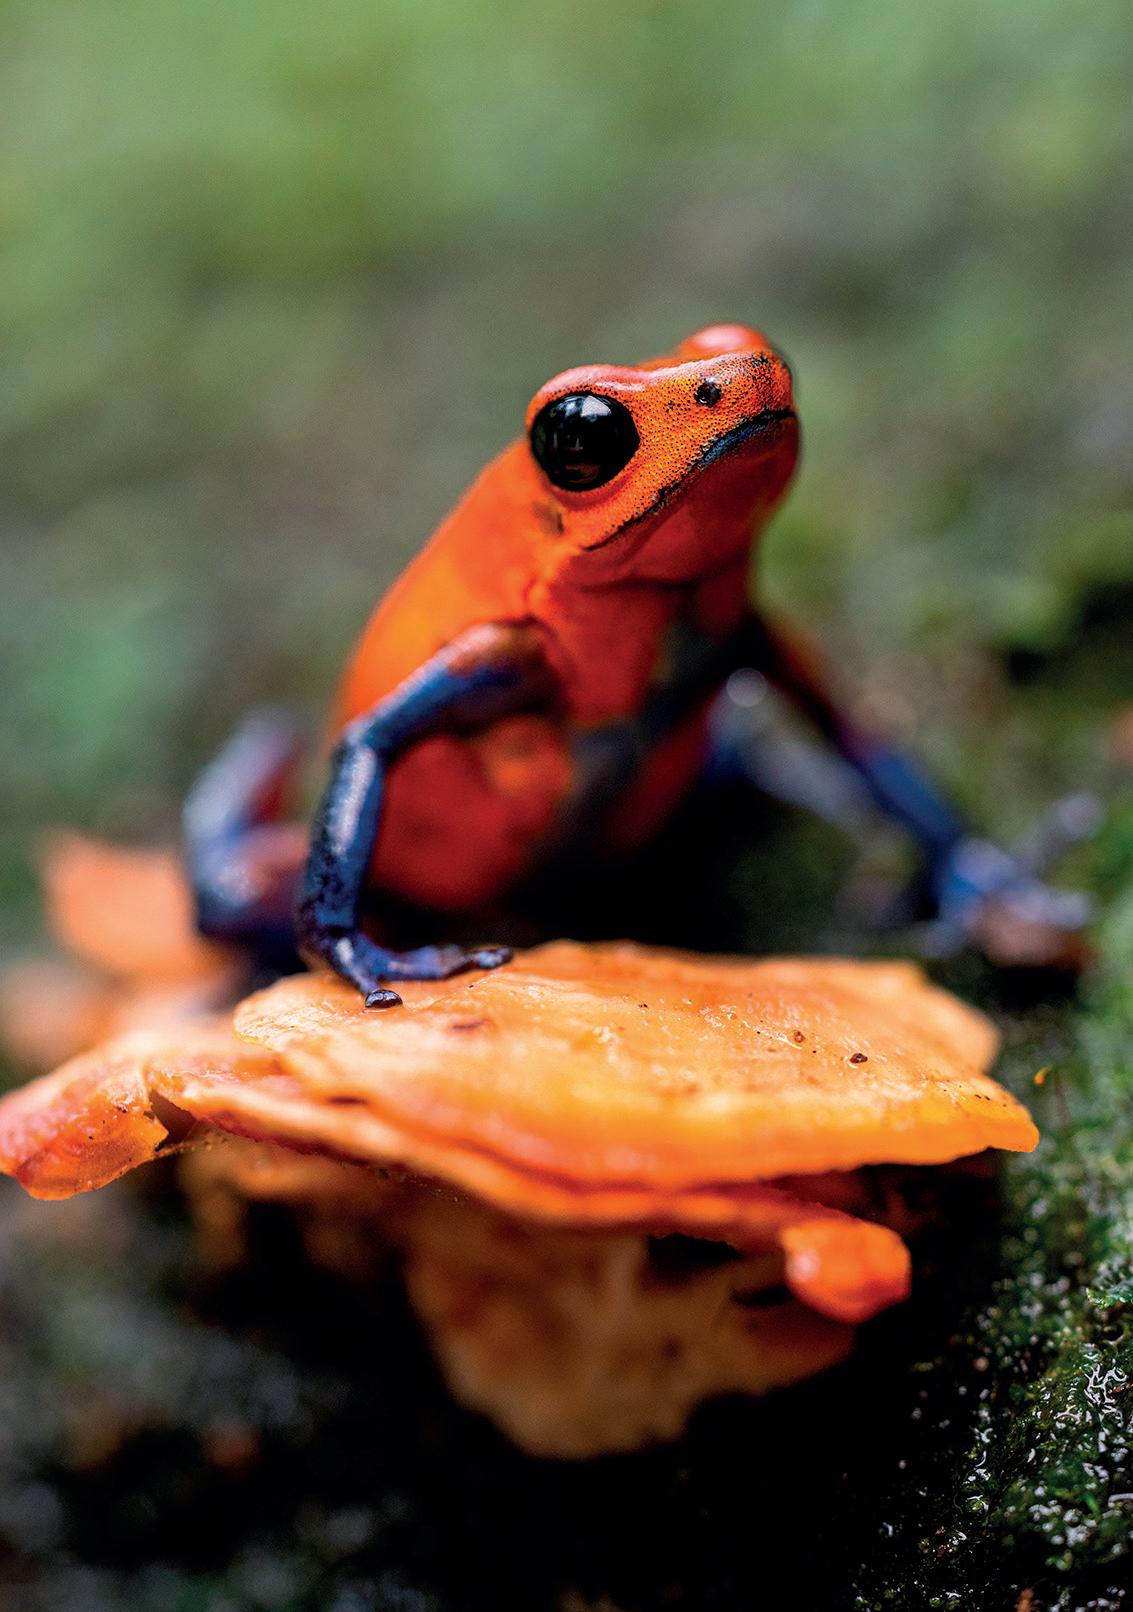
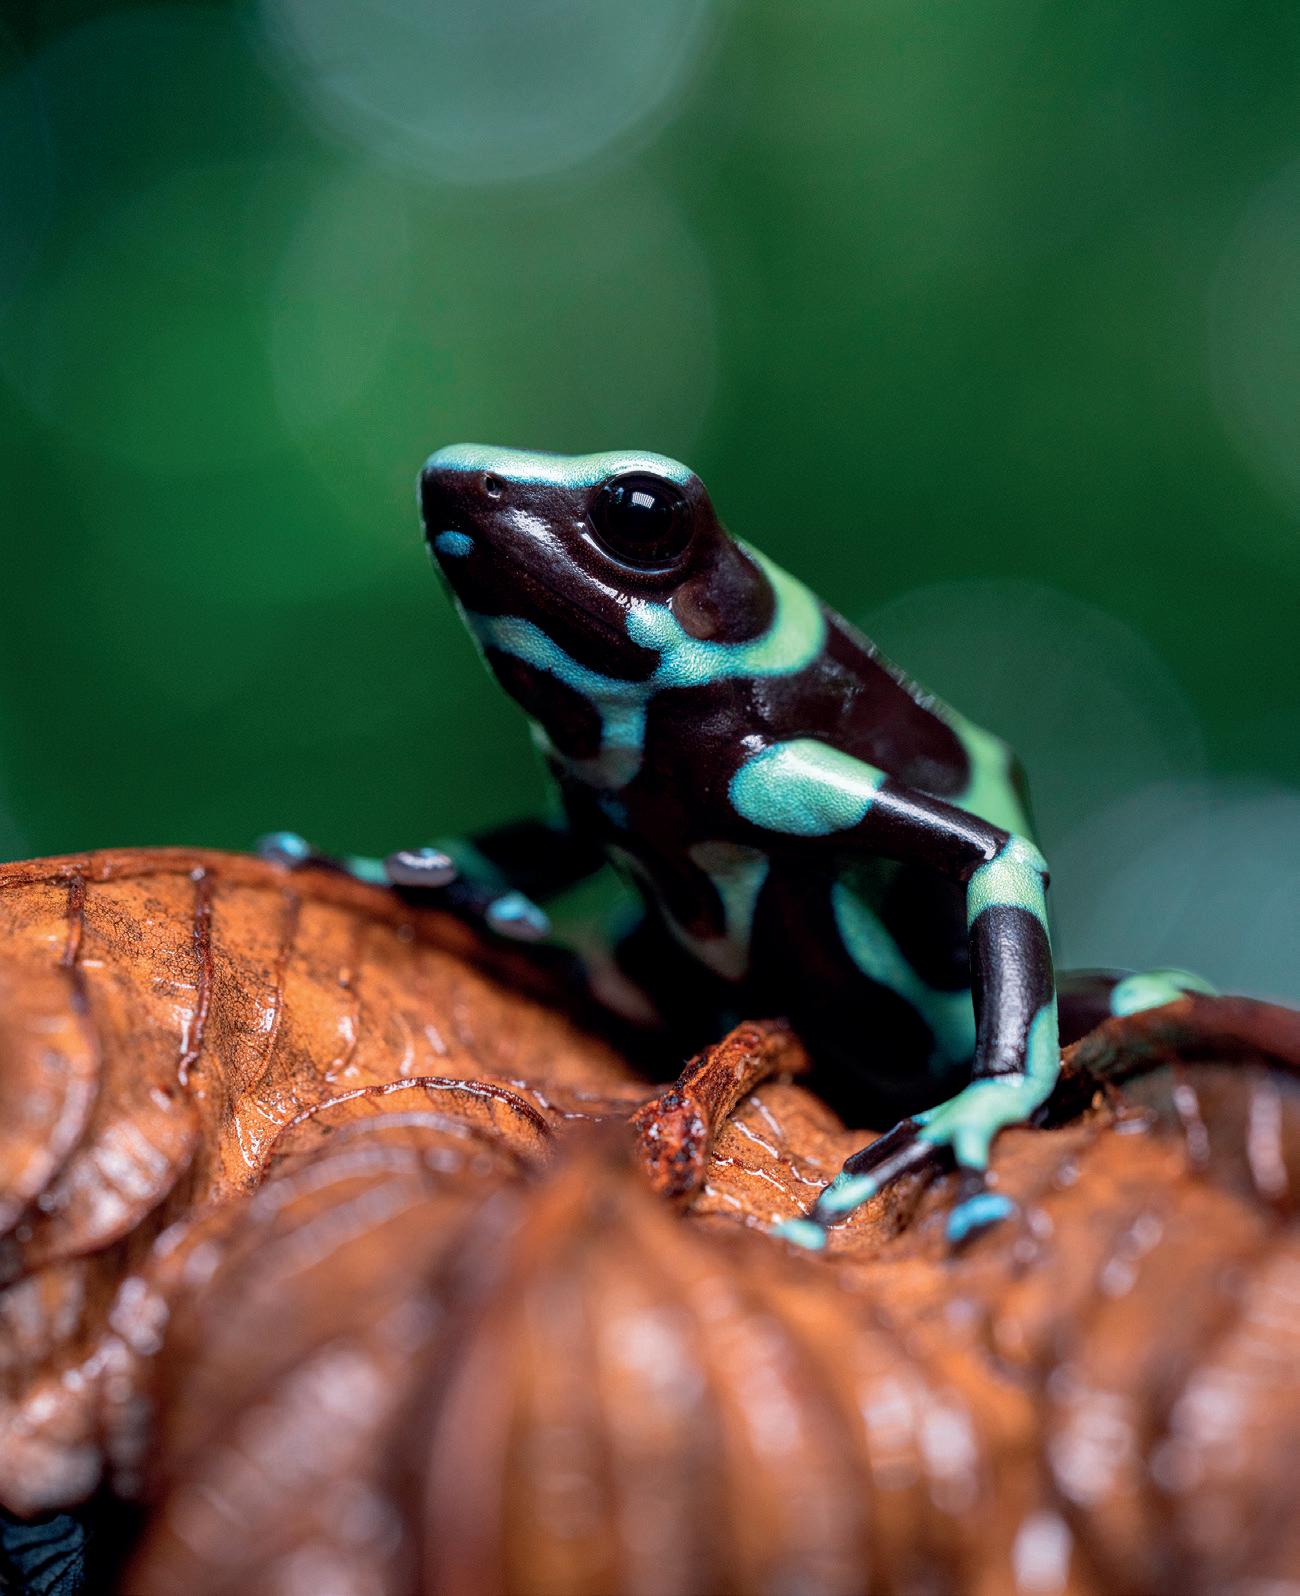
Alyce Bender taps into the new TAMRON 90mm F2.8 Macro lens for mirrorless to photograph tiny creatures in Costa Rica.


t was a summer of hectic travel for Alyce Bender, including a 72-hour getaway to lush Costa Rica, where she photographed some of the resident insects, reptiles, and amphibians. “I first had the chance to shoot in the true wild—I went trekking through the nighttime jungle, where trails were scarce, with a fixer and a herpetologist who knew the mountain ecosystem,” she says. “The next day, I photographed creatures in captivity at area zoos with other herpetologists, who handled the sometimes-venomous species and ethically positioned them for me so I could take their picture.”
IOn this whirlwind trip, Bender test-drove the new Tamron 90mm F/2.8 Di III VXD Macro lens for her Sony mirrorless camera system, a versatile mid-telephoto 1:1 macro lens that offers close-focusing ability, with an MOD (Minimum Object Distance) of 9.1” (0.23m) and stellar image quality in a compact, lightweight, extremely portable package. “I call this my Goldilocks lens,” Bender says. “It fills a sweet spot for macro photography, allowing me to get close for the details, but not too close. I can work with very small species like ladybugs or tiny frogs, but also with larger subjects like lizards and pit vipers.”
What stands out especially for Bender is the lens’s 1:1 magnification, delivering TAMRON’s signature sharpness. “TAMRON has always been at the forefront in this regard,” she says. “I took all of the images you see here handheld, essential when working with wildlife that doesn’t allow for much setup time. The 90mm F2.8 Macro is very quick, able to focus in even on the quickest-moving tiny subjects, and the


“I CALL THIS MY GOLDILOCKS LENS. THE TAMRON 90MM F2.8 MACRO FOR MIRRORLESS FILLS A SWEET SPOT FOR MACRO PHOTOGRAPHY.”
maximum F2.8 aperture allowed me to take gorgeous pictures in even the deepest shade of the Costa Rican rainforest.”
The 90mm F2.8 Macro’s compact size (5”/126.5mm Sony; 5.1”/128.5mm Nikon) and light weight (22.2 oz./630g Sony; 22.6 oz./640g Nikon) easily allow Bender to shoot for long stretches, and the lens features TAMRON’s first 12-blade circular aperture, which allows for stunning bokeh. “The 90mm F2.8 Macro takes those little points of light in your background and turns them into these beautiful round bokeh balls,” she says. “I especially love using the lens in a tropical environment like Costa Rica, where I can place my small subjects in front of those light halos, enhancing my compositions.”
1 Include the environment.


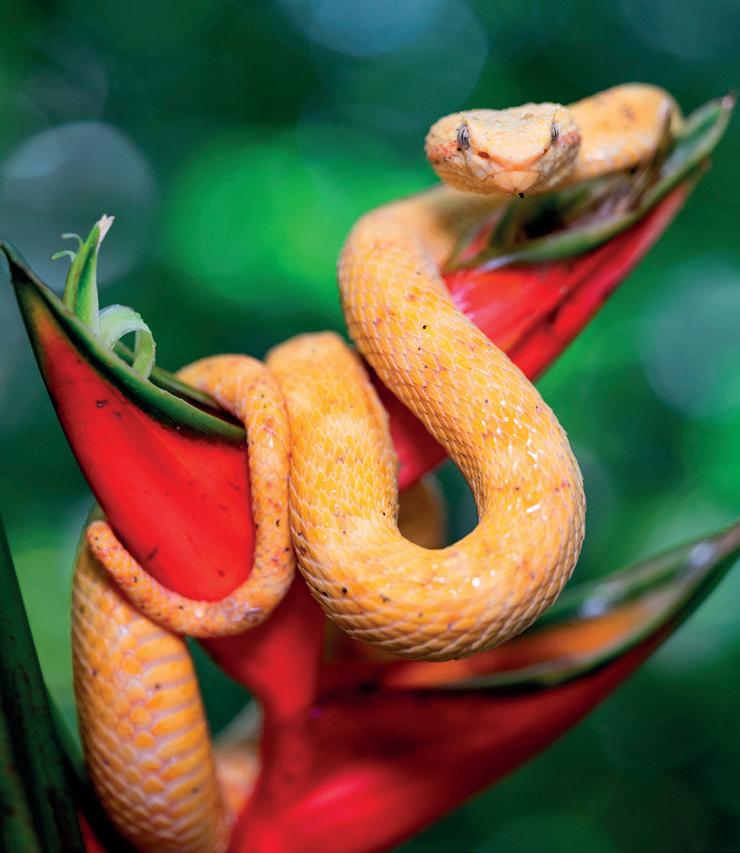
Highlight where your subjects are from—these creatures don’t exist in a vacuum. For instance, some of the snakes I encountered mainly hang out on leaf litter. That may not seem like the most glamorous backdrop, but it accurately reflects the snake’s true habitat and adds context to its story.
2 Know your lighting limitations.


In Costa Rica, the rainforest is so dense and dim that I know I’ll almost always need supplemental lighting. That’s why I usually carry a small LED panel with me, or at least a flashlight in my backpack, for those low-light environments. Sometimes my guides come through for me as well. For the shot here of the harvestmen arachnid—not actually a spider!—my guide had a handheld UV black light on him that we shone on the arachnid to fluoresce it and show it from a different perspective.
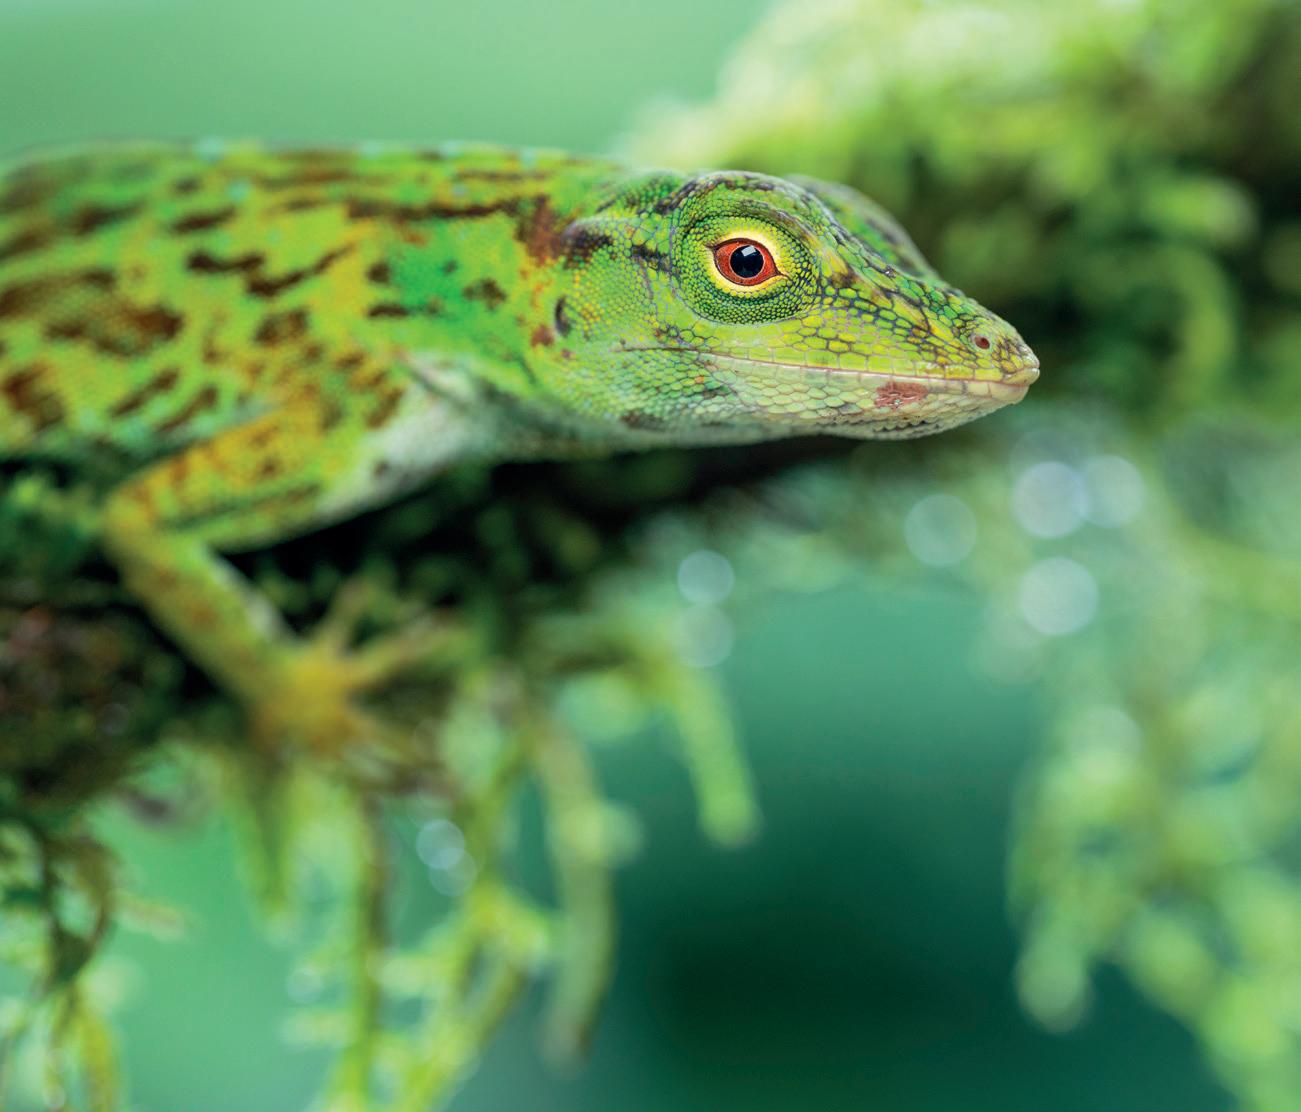
3 Selectively focus.
Choose a captivating focal point, like the animal’s eye, especially on larger creatures like lizards. I loved the intricate scale pattern around the eye of the neotropical anole you see here, as well as how the color of its eye contrasts with its green body. With the sharp TAMRON 90mm F2.8 Macro lens, I’m able to capture crisp photos that show off these details while still allowing for creamy bokeh in the background, which helps subjects like this pop.
4 Showcase uniqueness.
I was able to zero in on this Costa Rican earth snake’s head, which has that distinctive iridescent hue because it was preparing to shed its skin. The way it poked its head out and positioned it perfectly along the leaf’s vein gave me some leading lines to work with to best draw the viewer’s eye to the snake’s head.
5 Keep things ethical.
When working with animals, especially potentially dangerous ones like the poison dart frogs and eyelash vipers of Costa Rica, safety should always take precedence. If you’re able, bring along an expert knowledgeable on the species you’re photographing so they can handle and position the animals—typically more docile in captivity—so that it’s safer for both you and your subjects.
The animal’s well-being is paramount. Take the poison dart frog, for example. If you use supplemental lighting for too long or place it too close to the frog, it can actually dry the frog out—especially if you use traditional lighting over LED lighting, which produces more heat. Knowing the species you’re photographing also helps. Animals can become stressed if you work with them for too long, and they don’t have facial expressions that necessarily reveal that stress. Red-eyed tree frogs are nocturnal, so I usually photograph them in deep shade. I’ve used supplemental lighting in cases like this, but only for a few minutes before the frog returned to its habitat. I also know that this particular frog’s eyes will turn into black slits if too much bright light is used, or their color will fade to a pastier green. Do your homework so you know how each species reacts and when to pull the plug.

Alyce Bender is a professional nature photographer, writer, educator, US Air Force veteran, and TAMRON Americas ambassador. Her passion for the natural environment compels her to connect others with nature through education and experiences that promote conservation, creativity, and ethical photography. Her work has been featured in group and solo shows across the US, as well as in domestic and international publications from the UK to Japan. When leading tours, Bender’s goal is to help photographers expand their personal vision and naturalist skills. When not in the field, she offers a variety of educational and mentorship programs.
Instagram: @abenderphoto


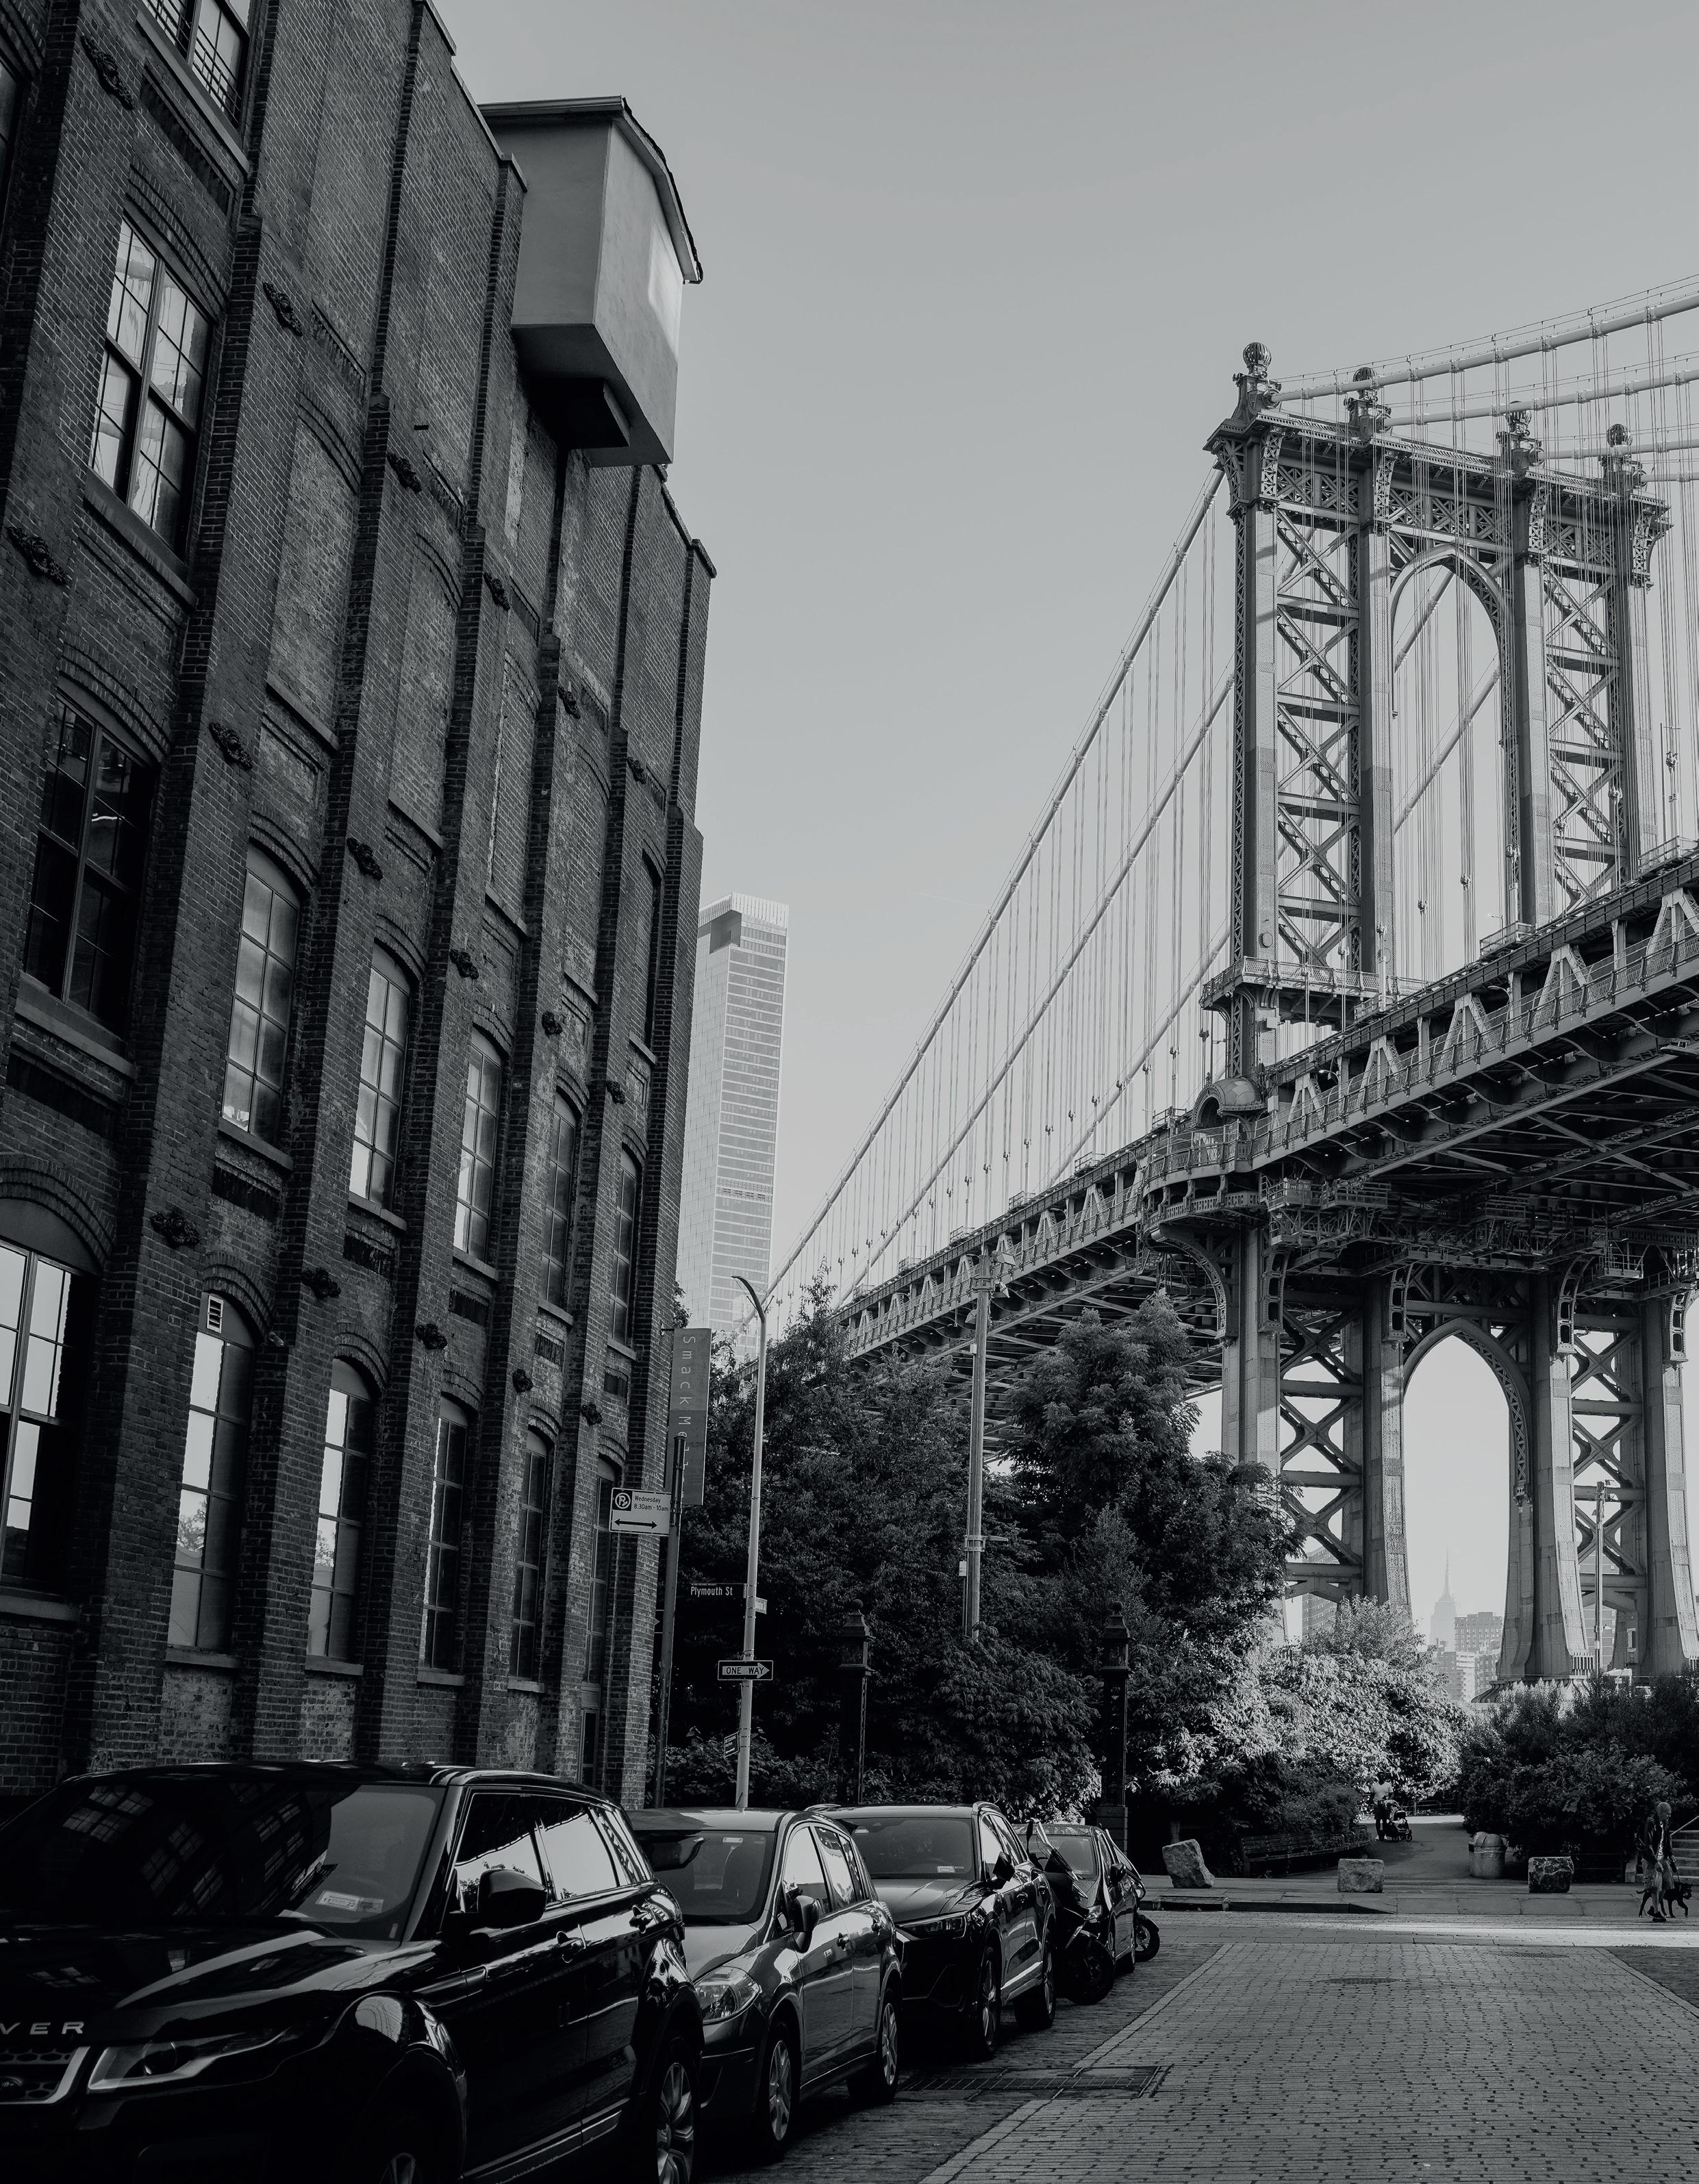
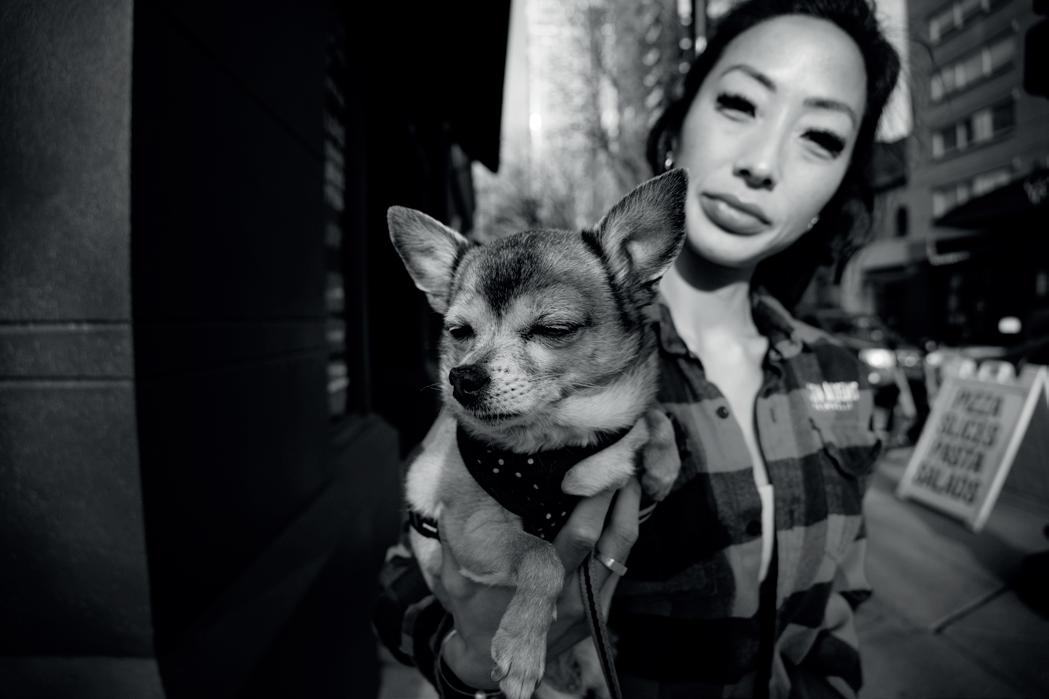
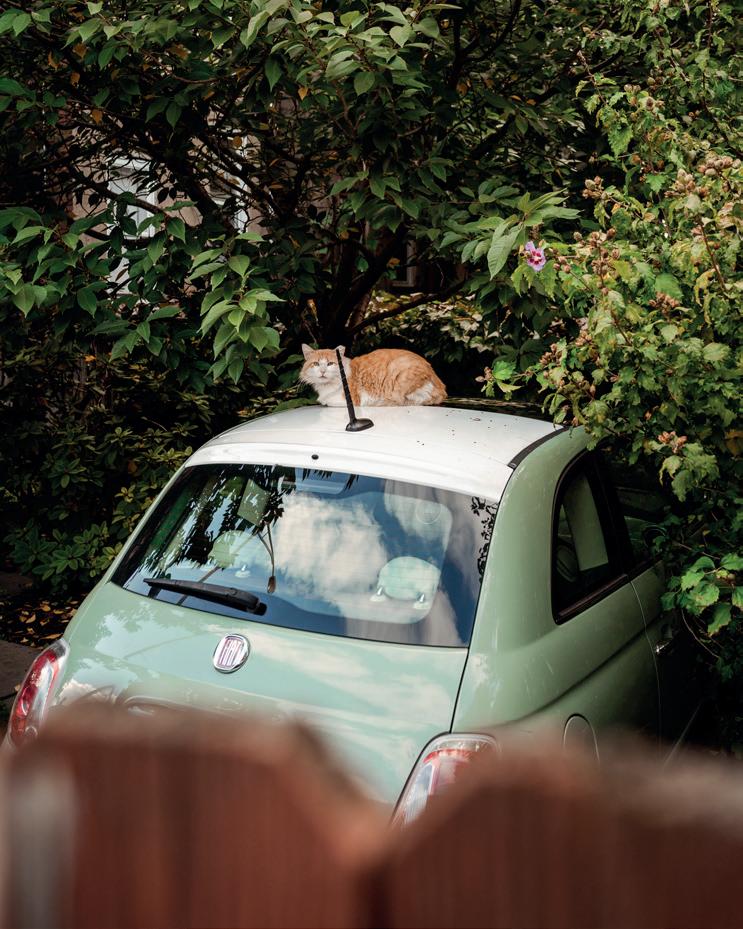
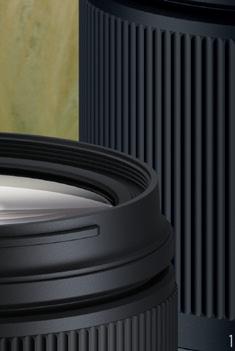
Our in-house pros share how TAMRON’s versatile lenses can help you capture the heart of a city, one candid shot at a time.

Street photography captures the energy, spirit, and subtle details of urban life. With the right lenses, you can reveal the unique beauty hidden in everyday scenes—whether it’s the grand architecture of a city’s buildings and bridges, the texture of a local’s cowboy boots, or a fleeting moment of connection between strangers. From ultra-wide options like the 20-40mm F2.8, to versatile zooms like the 28-75mm F2.8 G2 and the 35-150mm F2-2.8, to ultra-telephoto zooms like the 50-400mm VC, TAMRON empowers photographers to creatively frame their shots, adapting to the varied lighting and environments within each magnificent metropolis. Our TAMRON pros offer new ways to document the world around you, transforming the ordinary into the extraordinary.
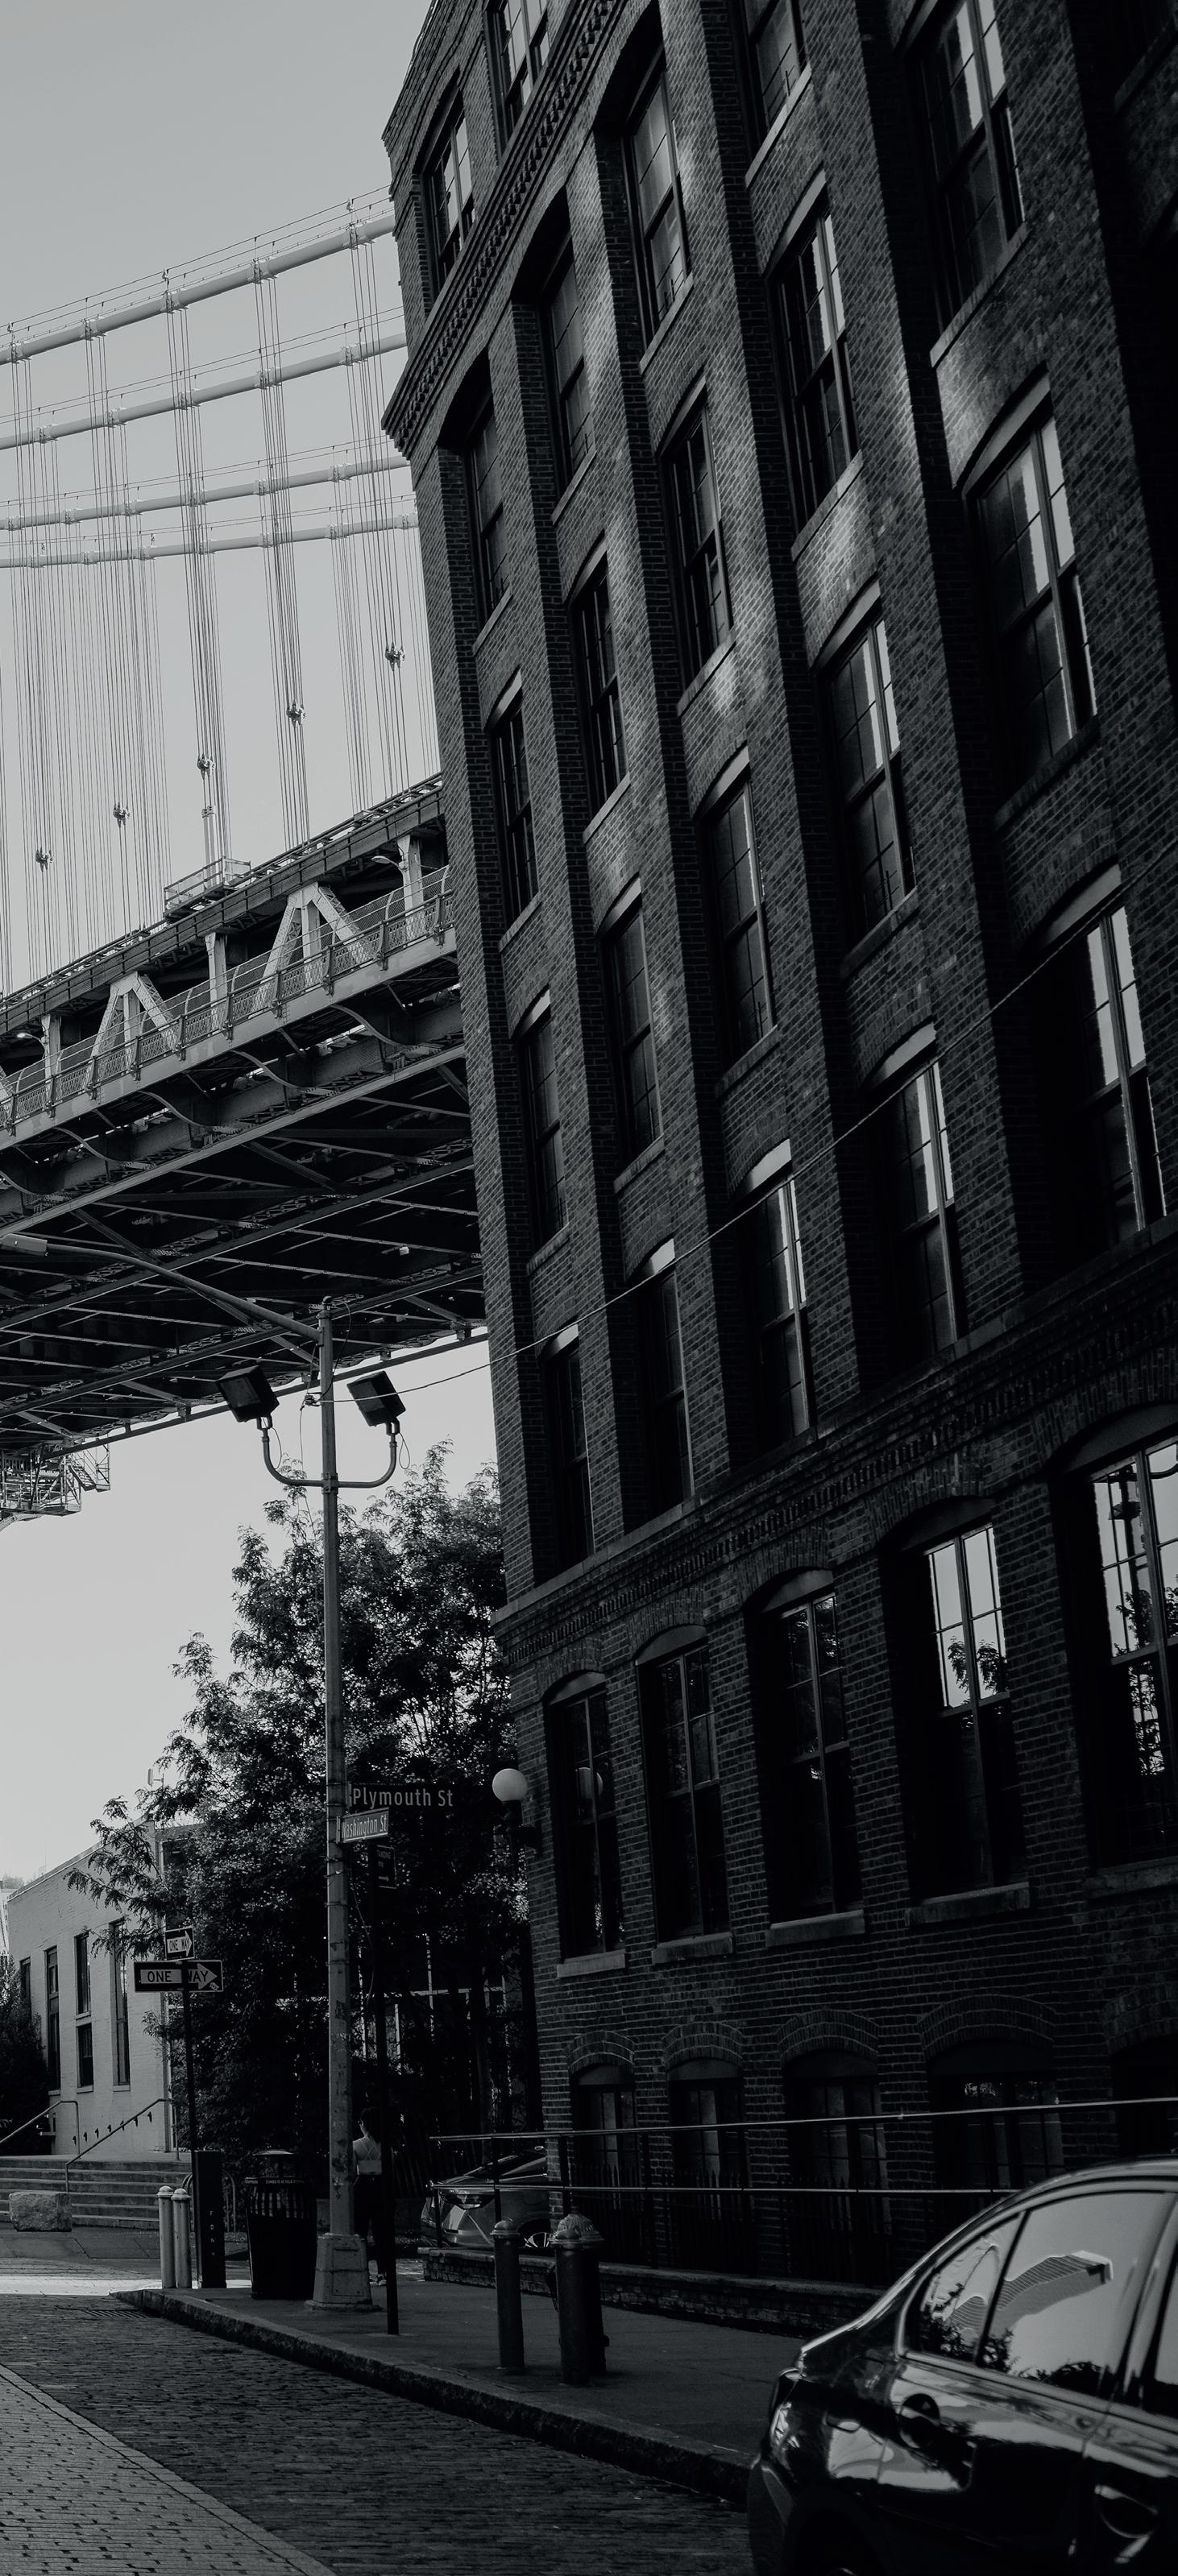
By turning your electronic viewfinder and LCD to black-and-white mode, you’ll see the basics of your compositions without being distracted by color. Shooting in black and white also helps you see light in new and different ways. Most cameras should still record color RAW photos, but your JPEGS will be in black and white.
Concentrate on the ordinary objects around us—in other words, the objects that most

“IF YOU’VE GOT A BUSY STREET SCENE IN FRONT OF YOUR CAMERA, USE A SHALLOW DEPTH OF FIELD TO ISOLATE THE FOREGROUND, MAKING THE IMAGE MORE DYNAMIC.”
people pass by without a second thought, such as an old weathered door, a cracked sidewalk, or even an abandoned newspaper. Rather than photographing people, try to find meaning in the objects they leave behind or the marks they make on the world. In these quiet, unassuming details, you can discover the true beauty of the city in front of you.


An easy way to ensure you get popular photography locations, like New York City’s Manhattan Bridge (page20), almost all to yourself is to wake up early. It’s not always the easy thing to do, but the results are often worth it if you want to minimize crowds in your shots, especially if you’re trying to photograph local architecture. Using a lens with a maximum aperture of F2.8 like the TAMRON 28-75mm F2.8 G2 zoom will help you best take advantage of the low light during those early hours.
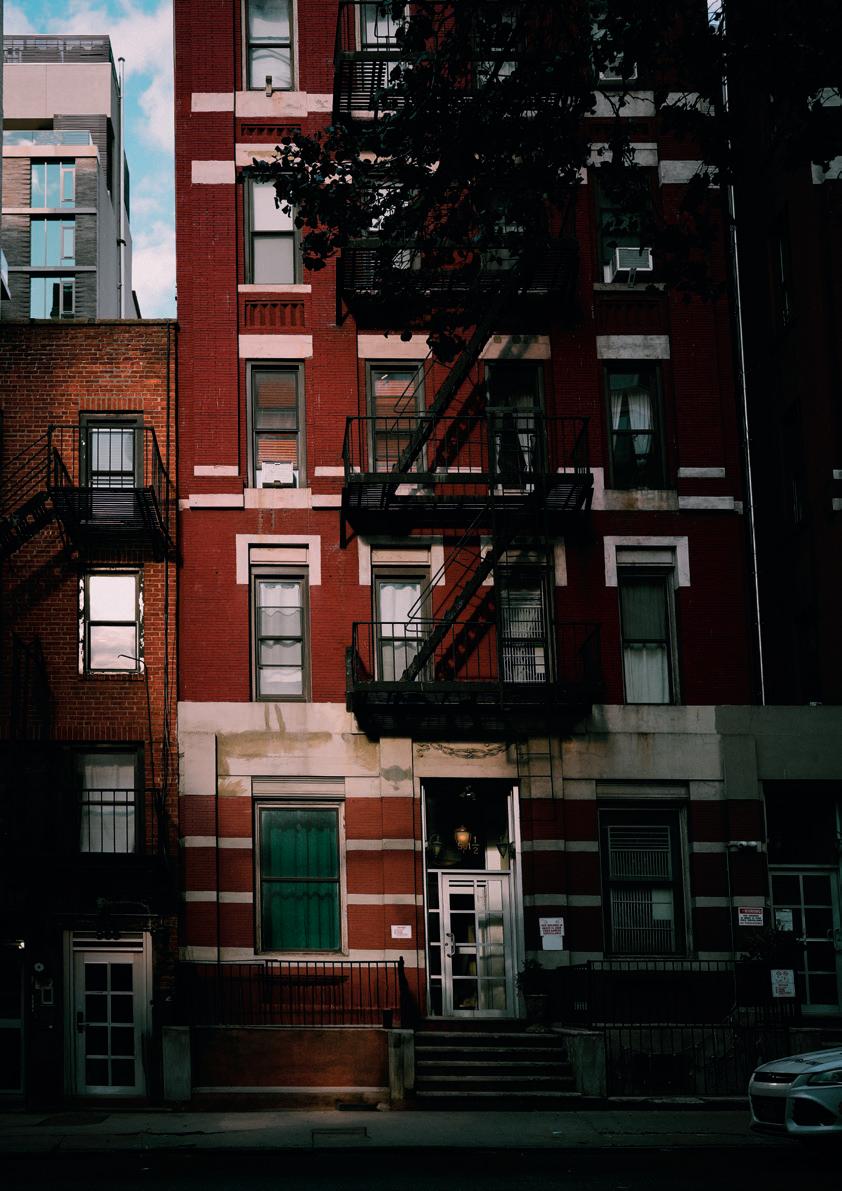
often your shots, light


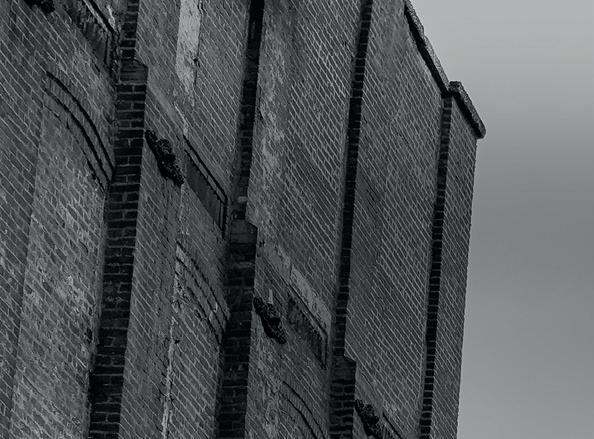
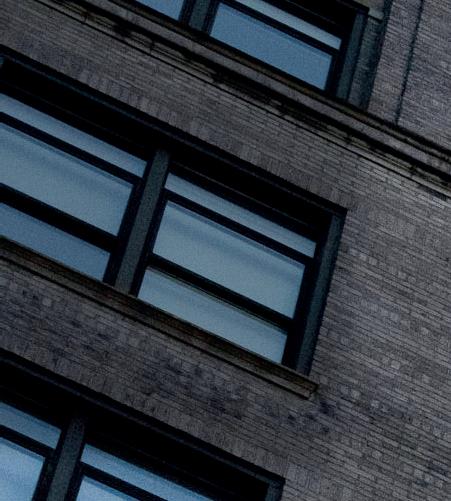
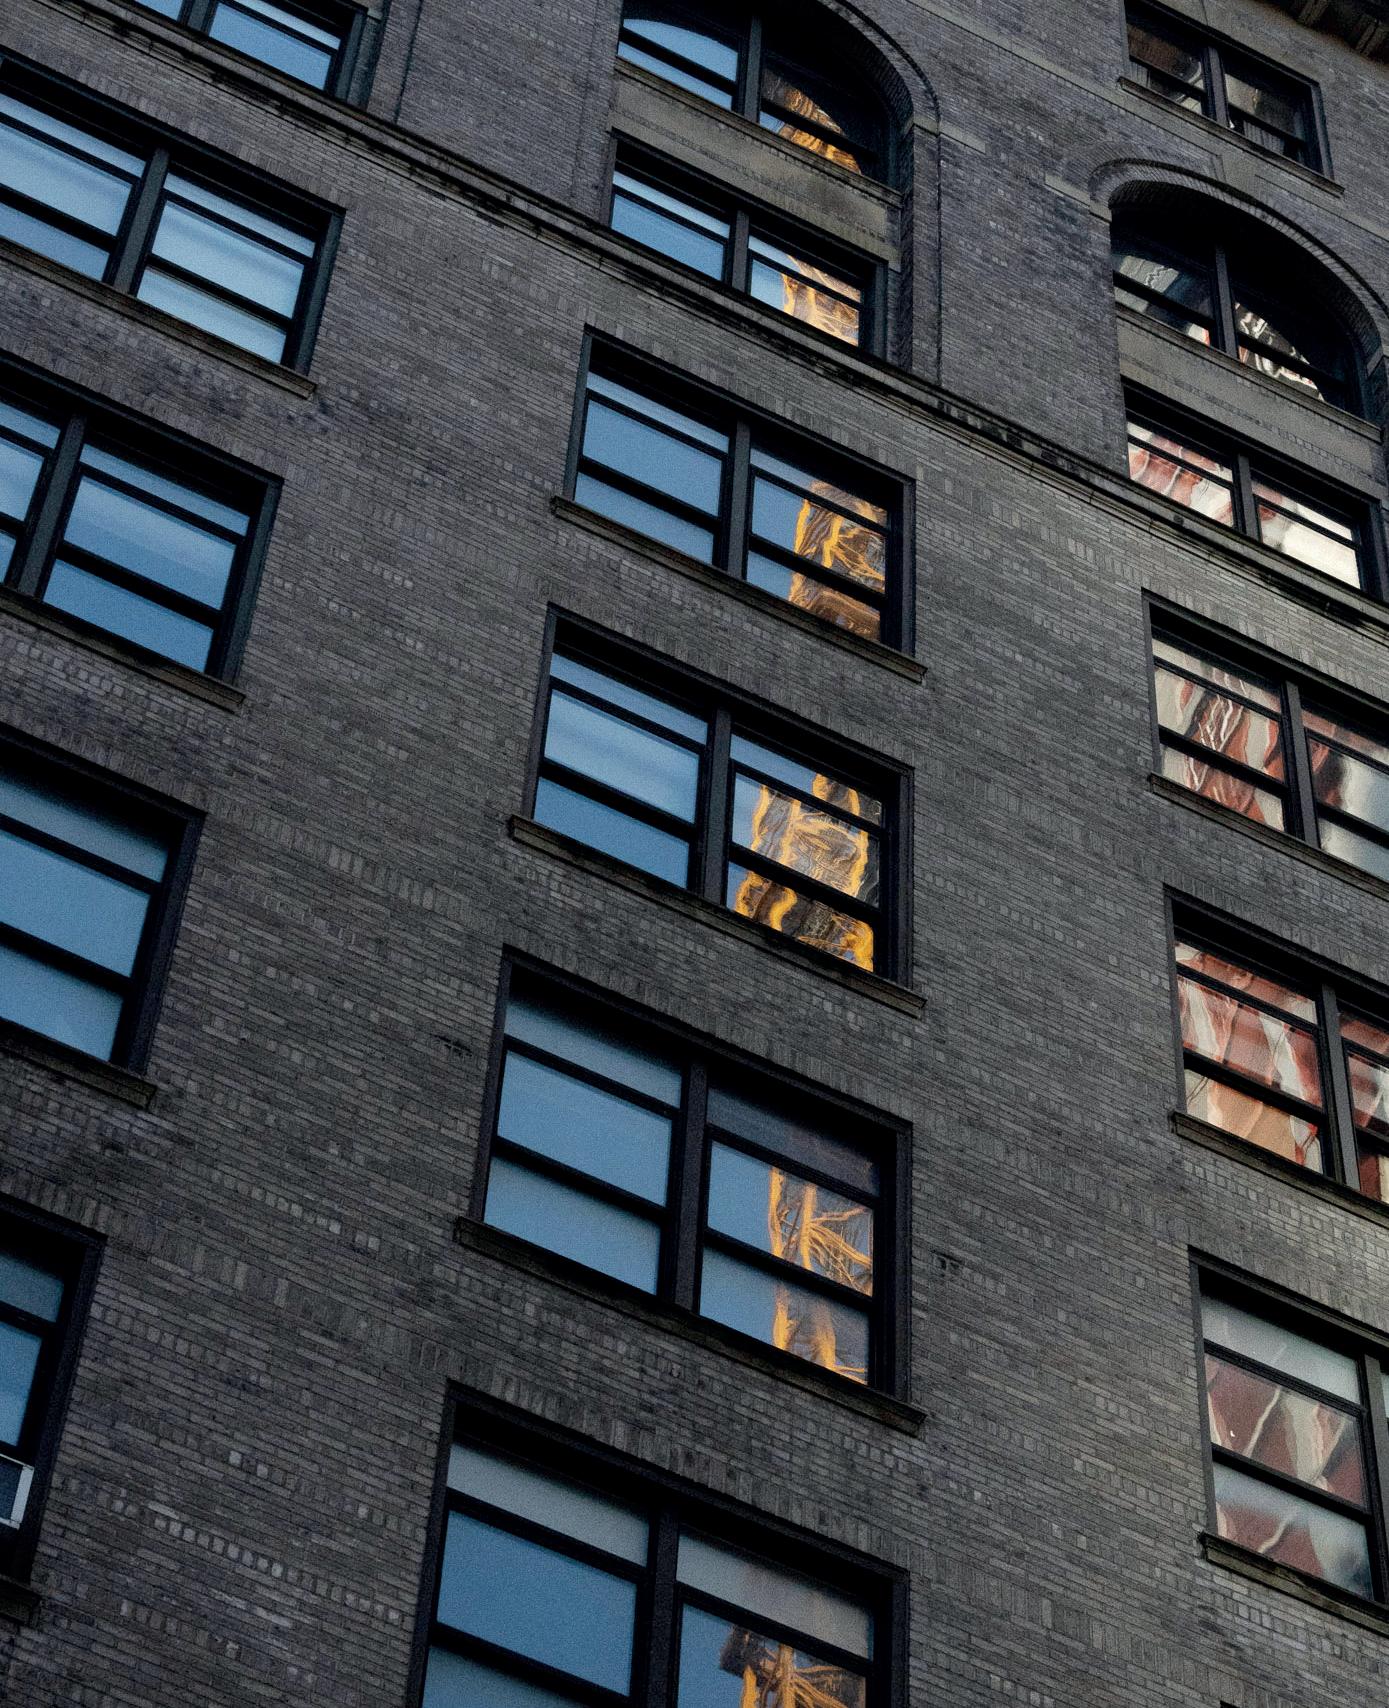
It may not even be about the subject or the location, but more about how the light hits. In the photo here of the building with the stairwells, the photographer appreciated how the sunlight created a sliver of light that illuminated the red brick, splitting the two buildings into shadow on the outer edges. The fire escape is a nice bonus, adding a classic “Welcome to New York” vibe.
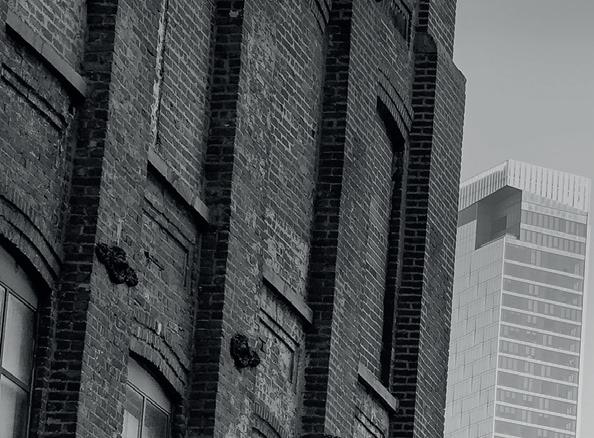
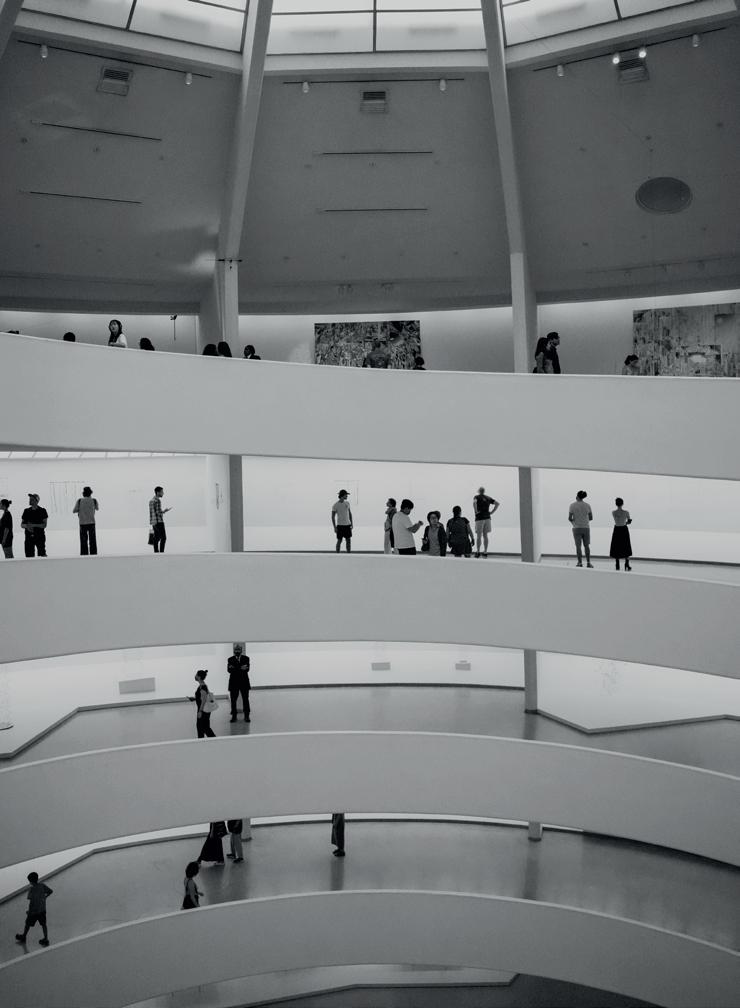
Scouting for local architecture is an ideal way to highlight eye-catching geometry and patterns. Look for an object that you can position in the middle of your scene so it can be distributed equally in the frame. In the photo here of the orange building, the windows and flags align perfectly, even though they’re not the same size. If you use focal lengths that fall between 35mm and 50mm for shots like this, it captures the closest view possible to the human eye, without creating huge amounts of distortion.
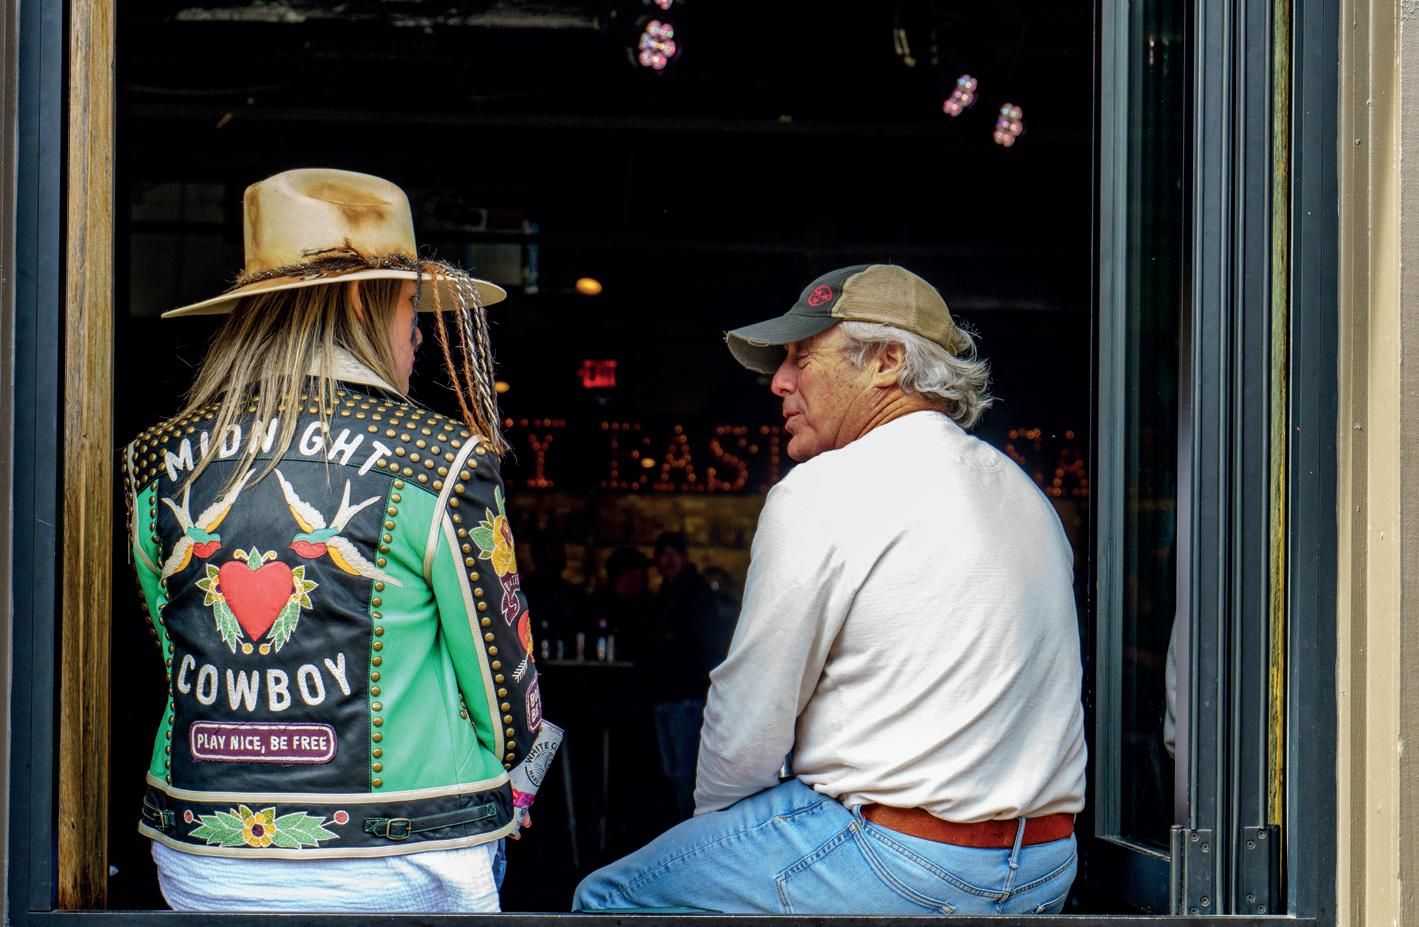
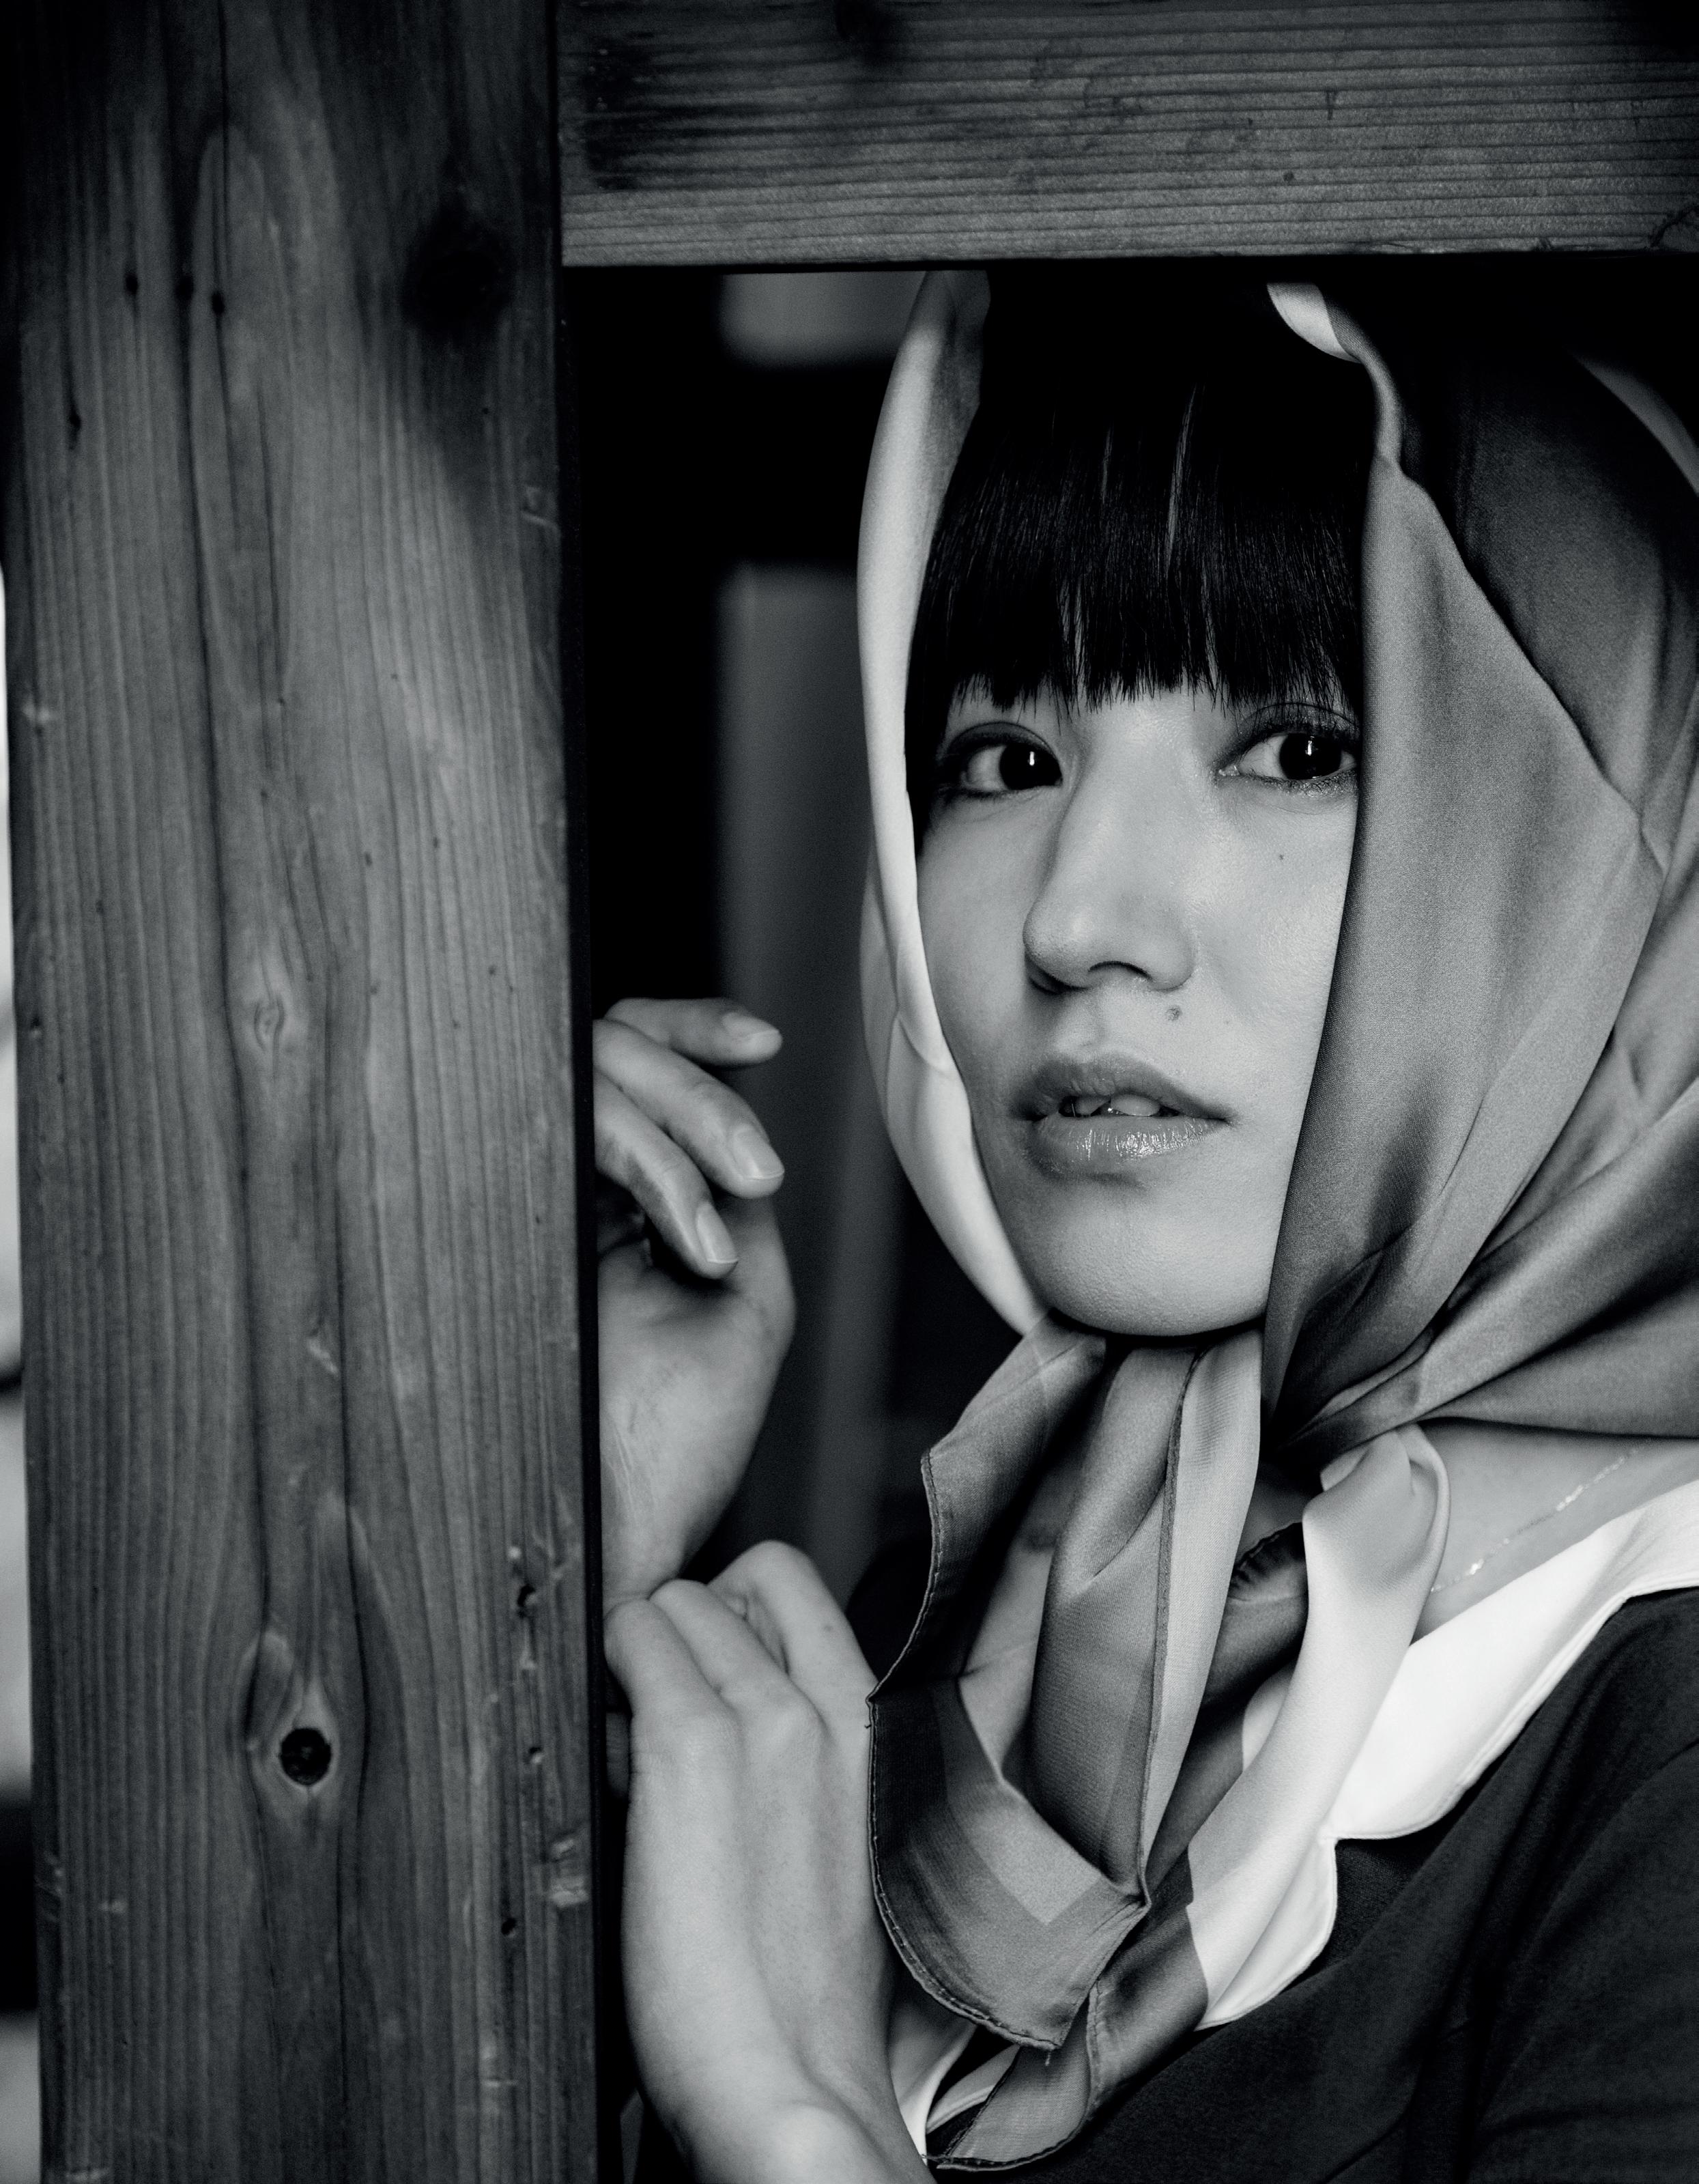
This lends depth to the photo and enhances the story it’s trying to tell, as seen here in the picture of the woman wearing the “Midnight Cowboy” jacket and her companion, both sitting in an open window with their backs to the world.
If you’ve got a busy street scene in front of your camera, use a shallow depth of field to isolate the foreground, making the image more dynamic. Use a wide aperture to create a separation between your subjects and the background while still capturing the atmosphere of the location.
Zooming in tight to frame one particular object in your photo can show details that might otherwise go unnoticed, like the cowboy boots shown here with their intricate patterns. Sometimes those tiny details tell their own stories.
© Tony Shepherd 50-400mm (368mm), F6.3, 1/640 sec., ISO 6400


Doing so can create beautiful contrasts. Always be mindful of where the light falls, positioning your subject so that the light adds depth through soft shadows and highlights the most interesting aspects of your shot.


© Tony Shepherd 50-400mm(400mm), F6.3, 1/5000 sec., ISO 10000


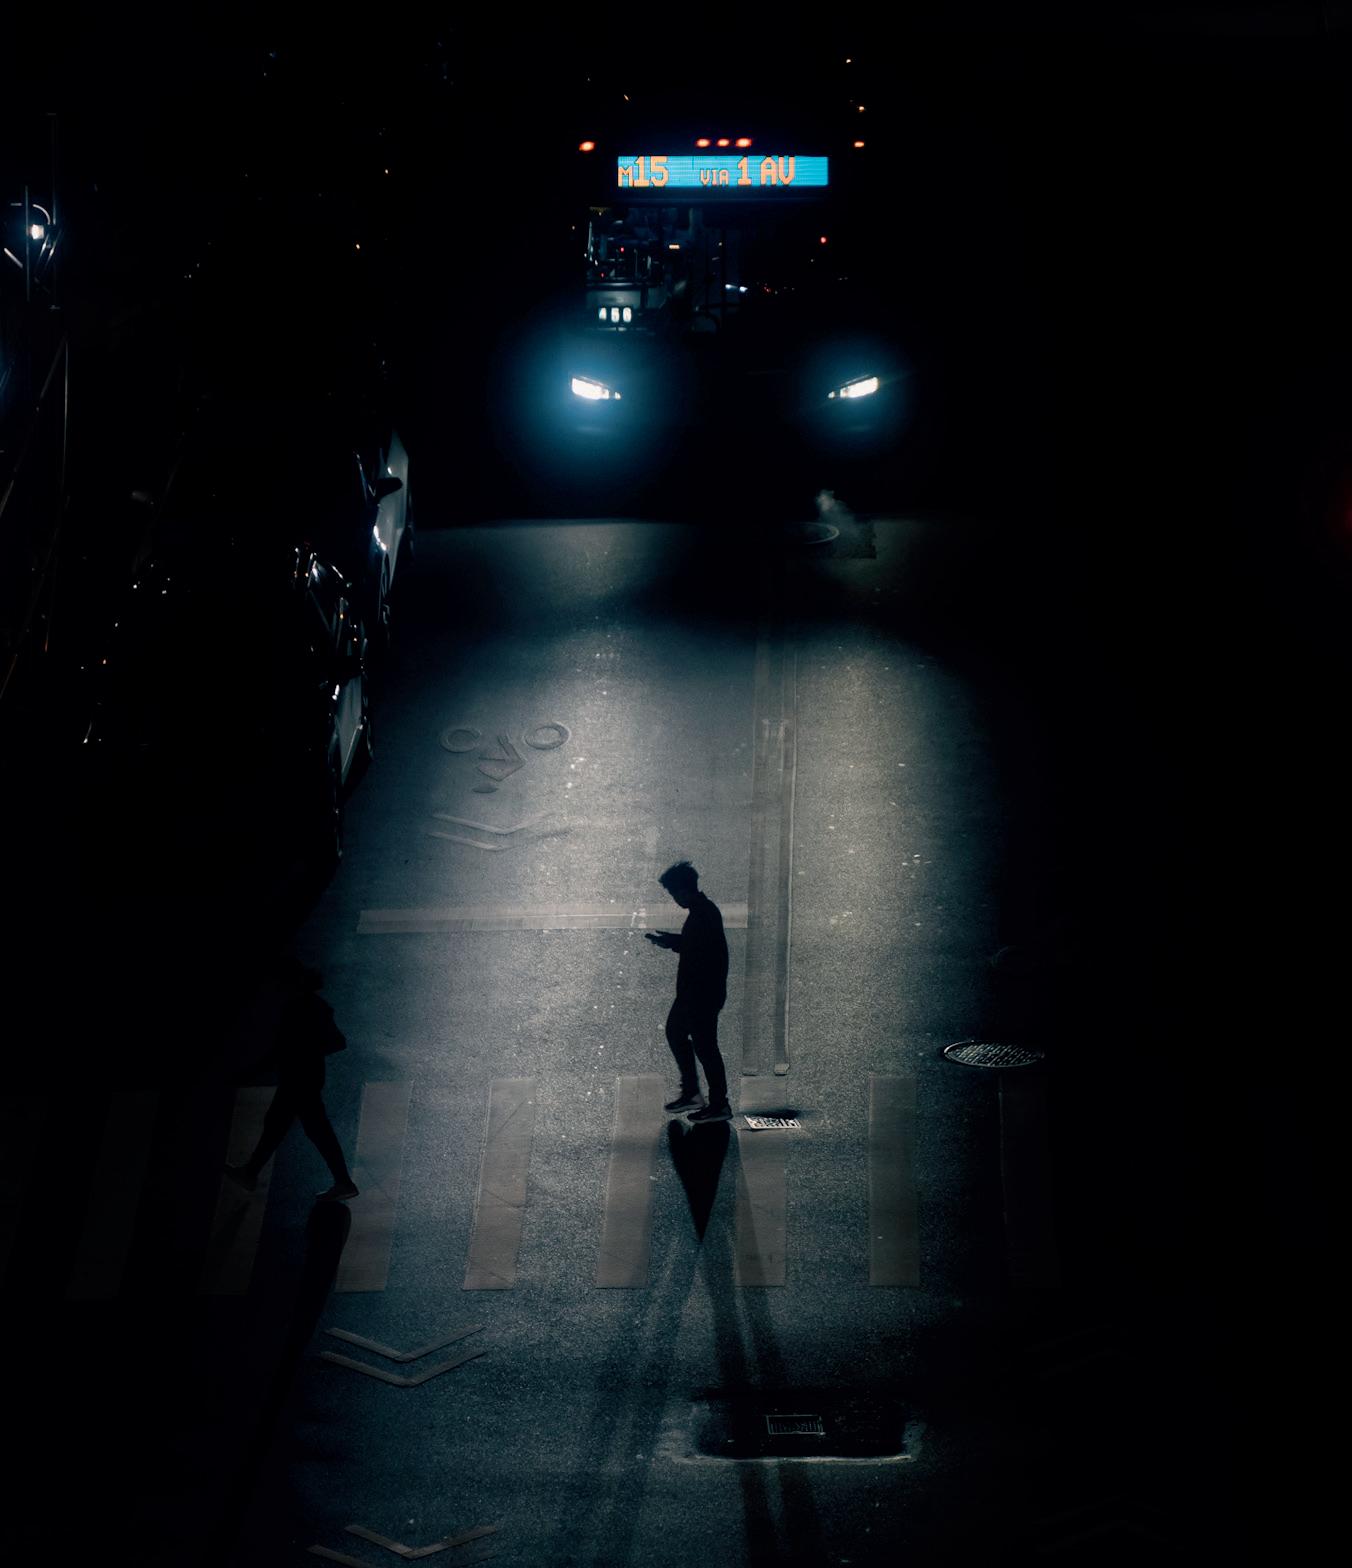
To increase the chances of catching that perfect photographic moment, remain in one place and wait for a subject to come into frame, instead of constantly moving around. For the photo here of the person in the middle of the street at night, taken from the nearby Manhattan Bridge to get a bird’s-eye view, the photographer noticed the people crossing the street were making interesting silhouettes—but the photo needed a stronger light source. That light source emerged when a bus stopped at the crosswalk. Taking photos from above can also offer you long shadows to serve as leading lines.
©Tony 17-50mmShepherd (17mm), F4, 1/2000 sec., ISO 320

© Paul Park 35-150mm (150mm)
F2.8, 1/160 sec., ISO 2500

By keeping the main subject (in this case, a pedestrian in the crosswalk) in sharp center focus and blurring certain elements in the background (the car), the photographer here lent a more dynamic feel to the photo.
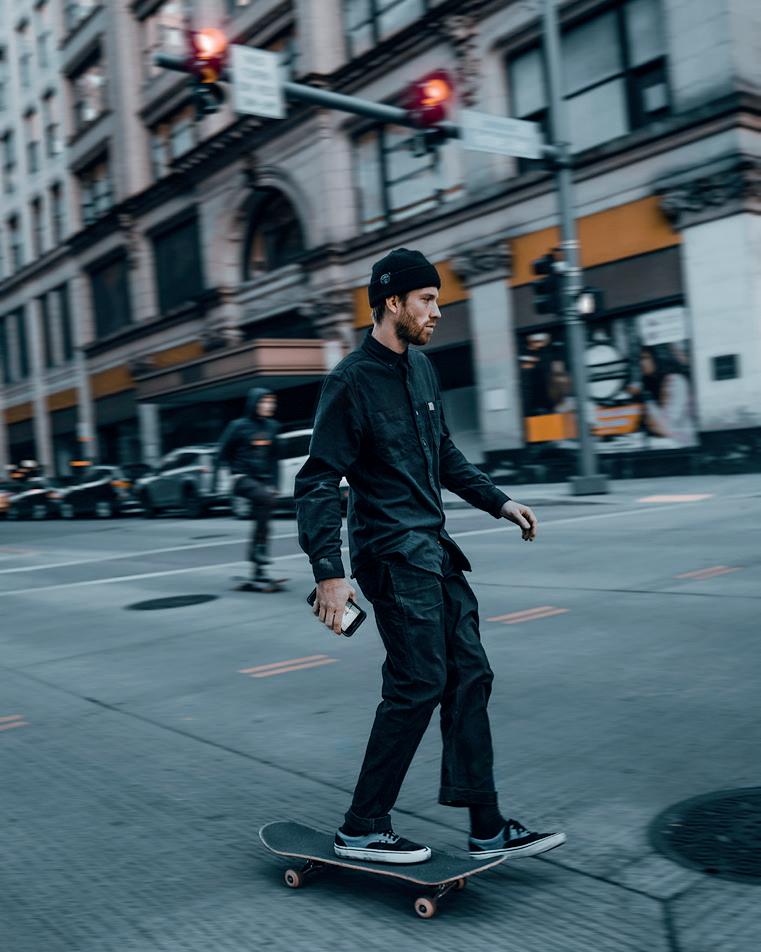
You never know what scenes will unfold in front of your camera. For the skateboarder photo here, the photographer noticed a group of skateboarders approaching and had to quickly choose which one to focus on. The skater closest to the photographer was slowing down, while his friends in the background were speeding by. Using a low shutter speed, the photographer was able to keep him in focus while blurring the background. Shooting at F3.2 allowed the photographer to create a beautiful bokeh effect, which, combined with the shutter speed, captured a sense of motion in the image.


“ZOOMING IN TIGHT TO FRAME ONE PARTICULAR OBJECT IN YOUR PHOTO CAN SHOW DETAILS THAT MIGHT OTHERWISE GO UNNOTICED.”
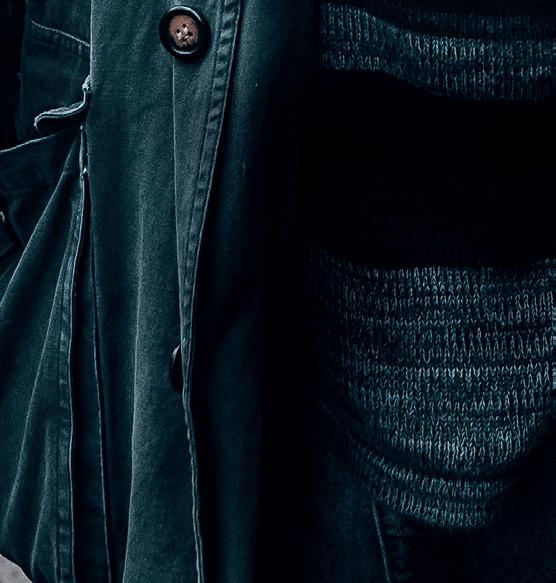
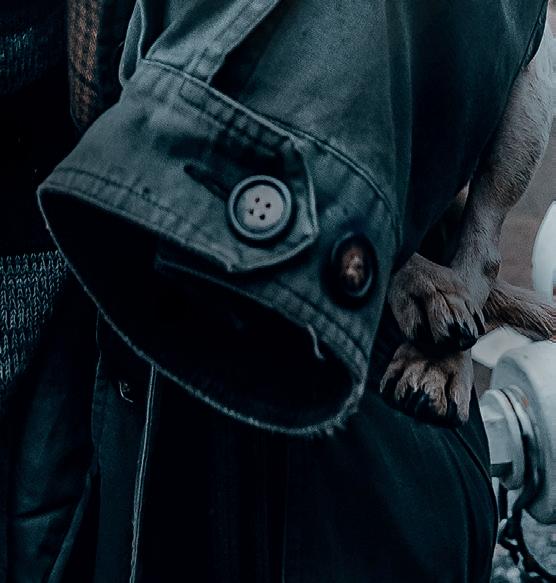
Street photography often involves slyly taking candids without subjects realizing it, but if you see an interesting potential subject you’d like to get closer to, politely ask for their OK to take their portrait. The photographer who spotted this man and his dog (cover) realized immediately they’d serve as perfect subjects. The man agreed to let their picture be taken, which produced what became one of the photographer’s favorite pictures.


If you plan on getting up close and personal to your subjects, continue to show that respect and appreciation by having a genuine conversation with them and using a small, lightweight lens like the TAMRON 20-40mm F2.8 wide angle. No one loves a camera being shoved in their face during their day-to-day routine, so using a more subtle lens helps. It’s less cumbersome to pull out and use in the moment, and it’s also less offputting for your subject.
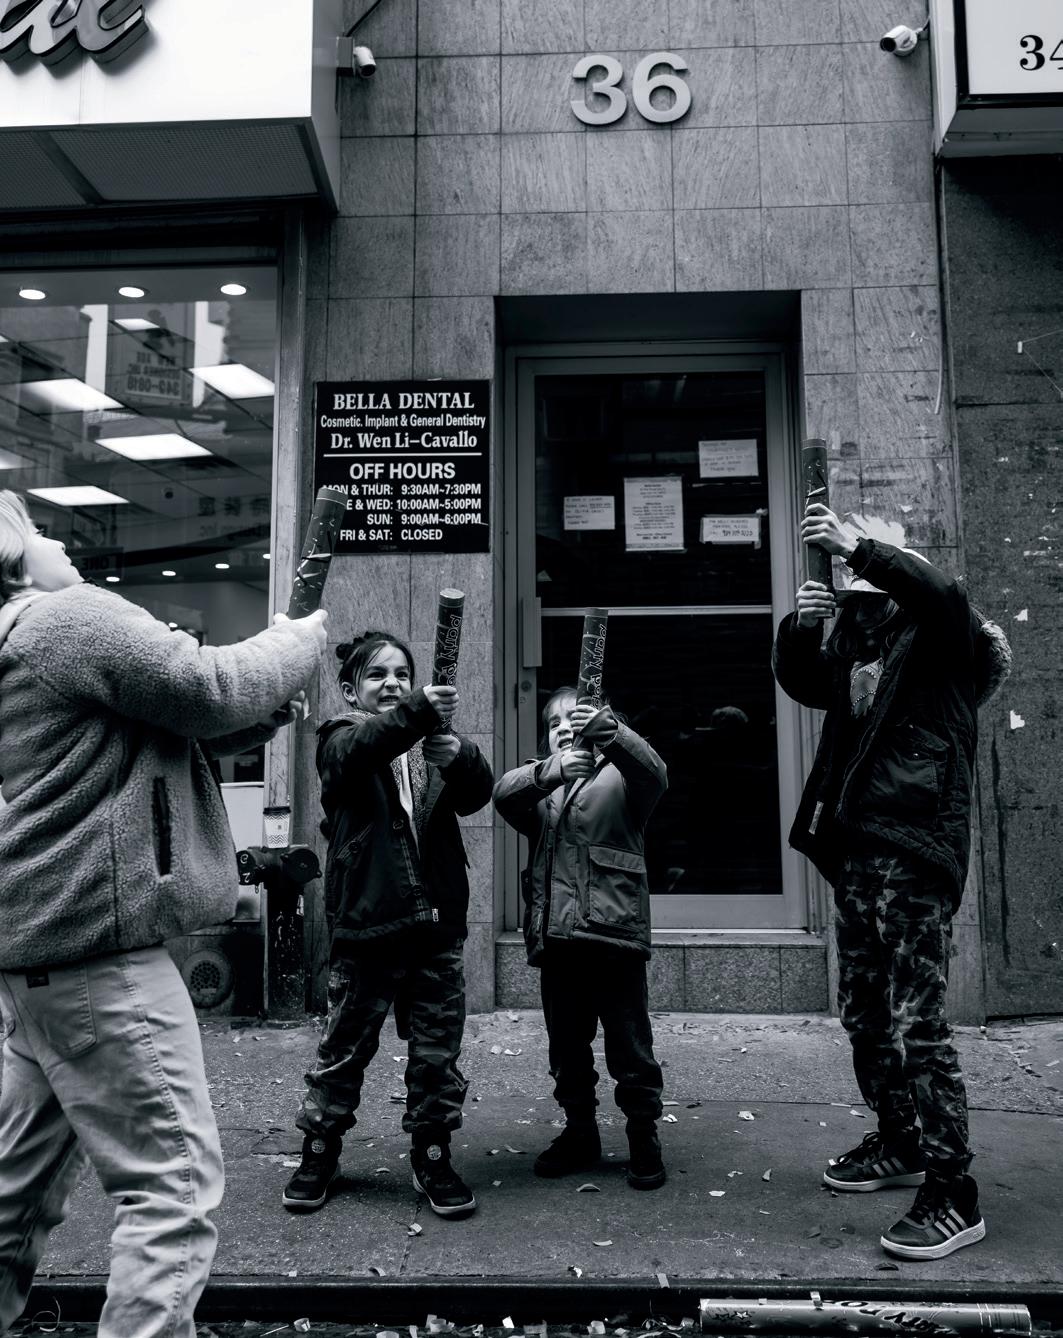
Seeking out moments of togetherness, joy, and celebration are some of the best to show local flavor, such as these kids outside of a dental office. Use a 35mm or wider focal length in these situations. It allows you to connect more easily to the energy you’re witnessing.
That’s what especially stood out to the photographer who photographed this cat hanging out on a car. The photo could have zoomed in completely on the cat, but then the natural framing and cat’s domain, as well as the vibrancy and contrast of colors, may have been lost. It’s also important to respect any living subjects in front of your camera. Animals especially can be easily spooked, and also very territorial, so capturing the cat without disrupting its space or energy was one of the photographer’s goals.

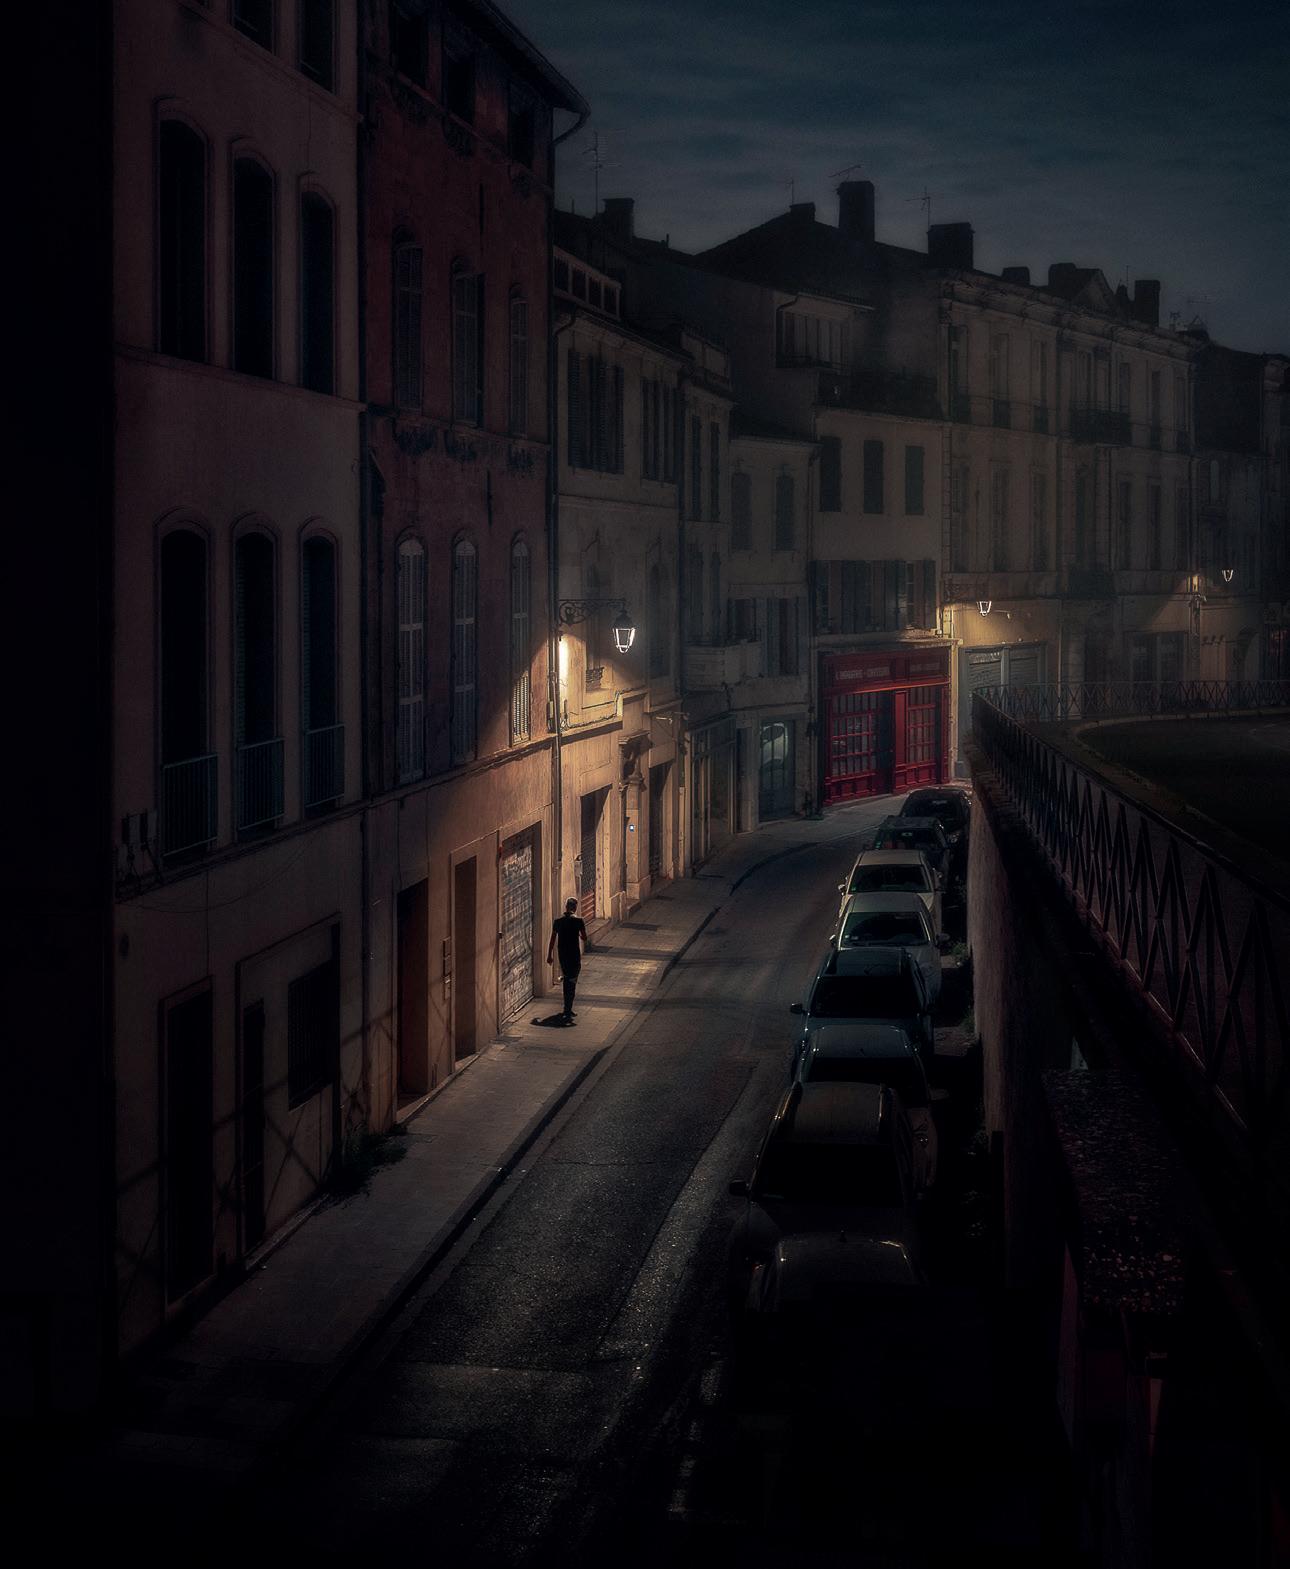
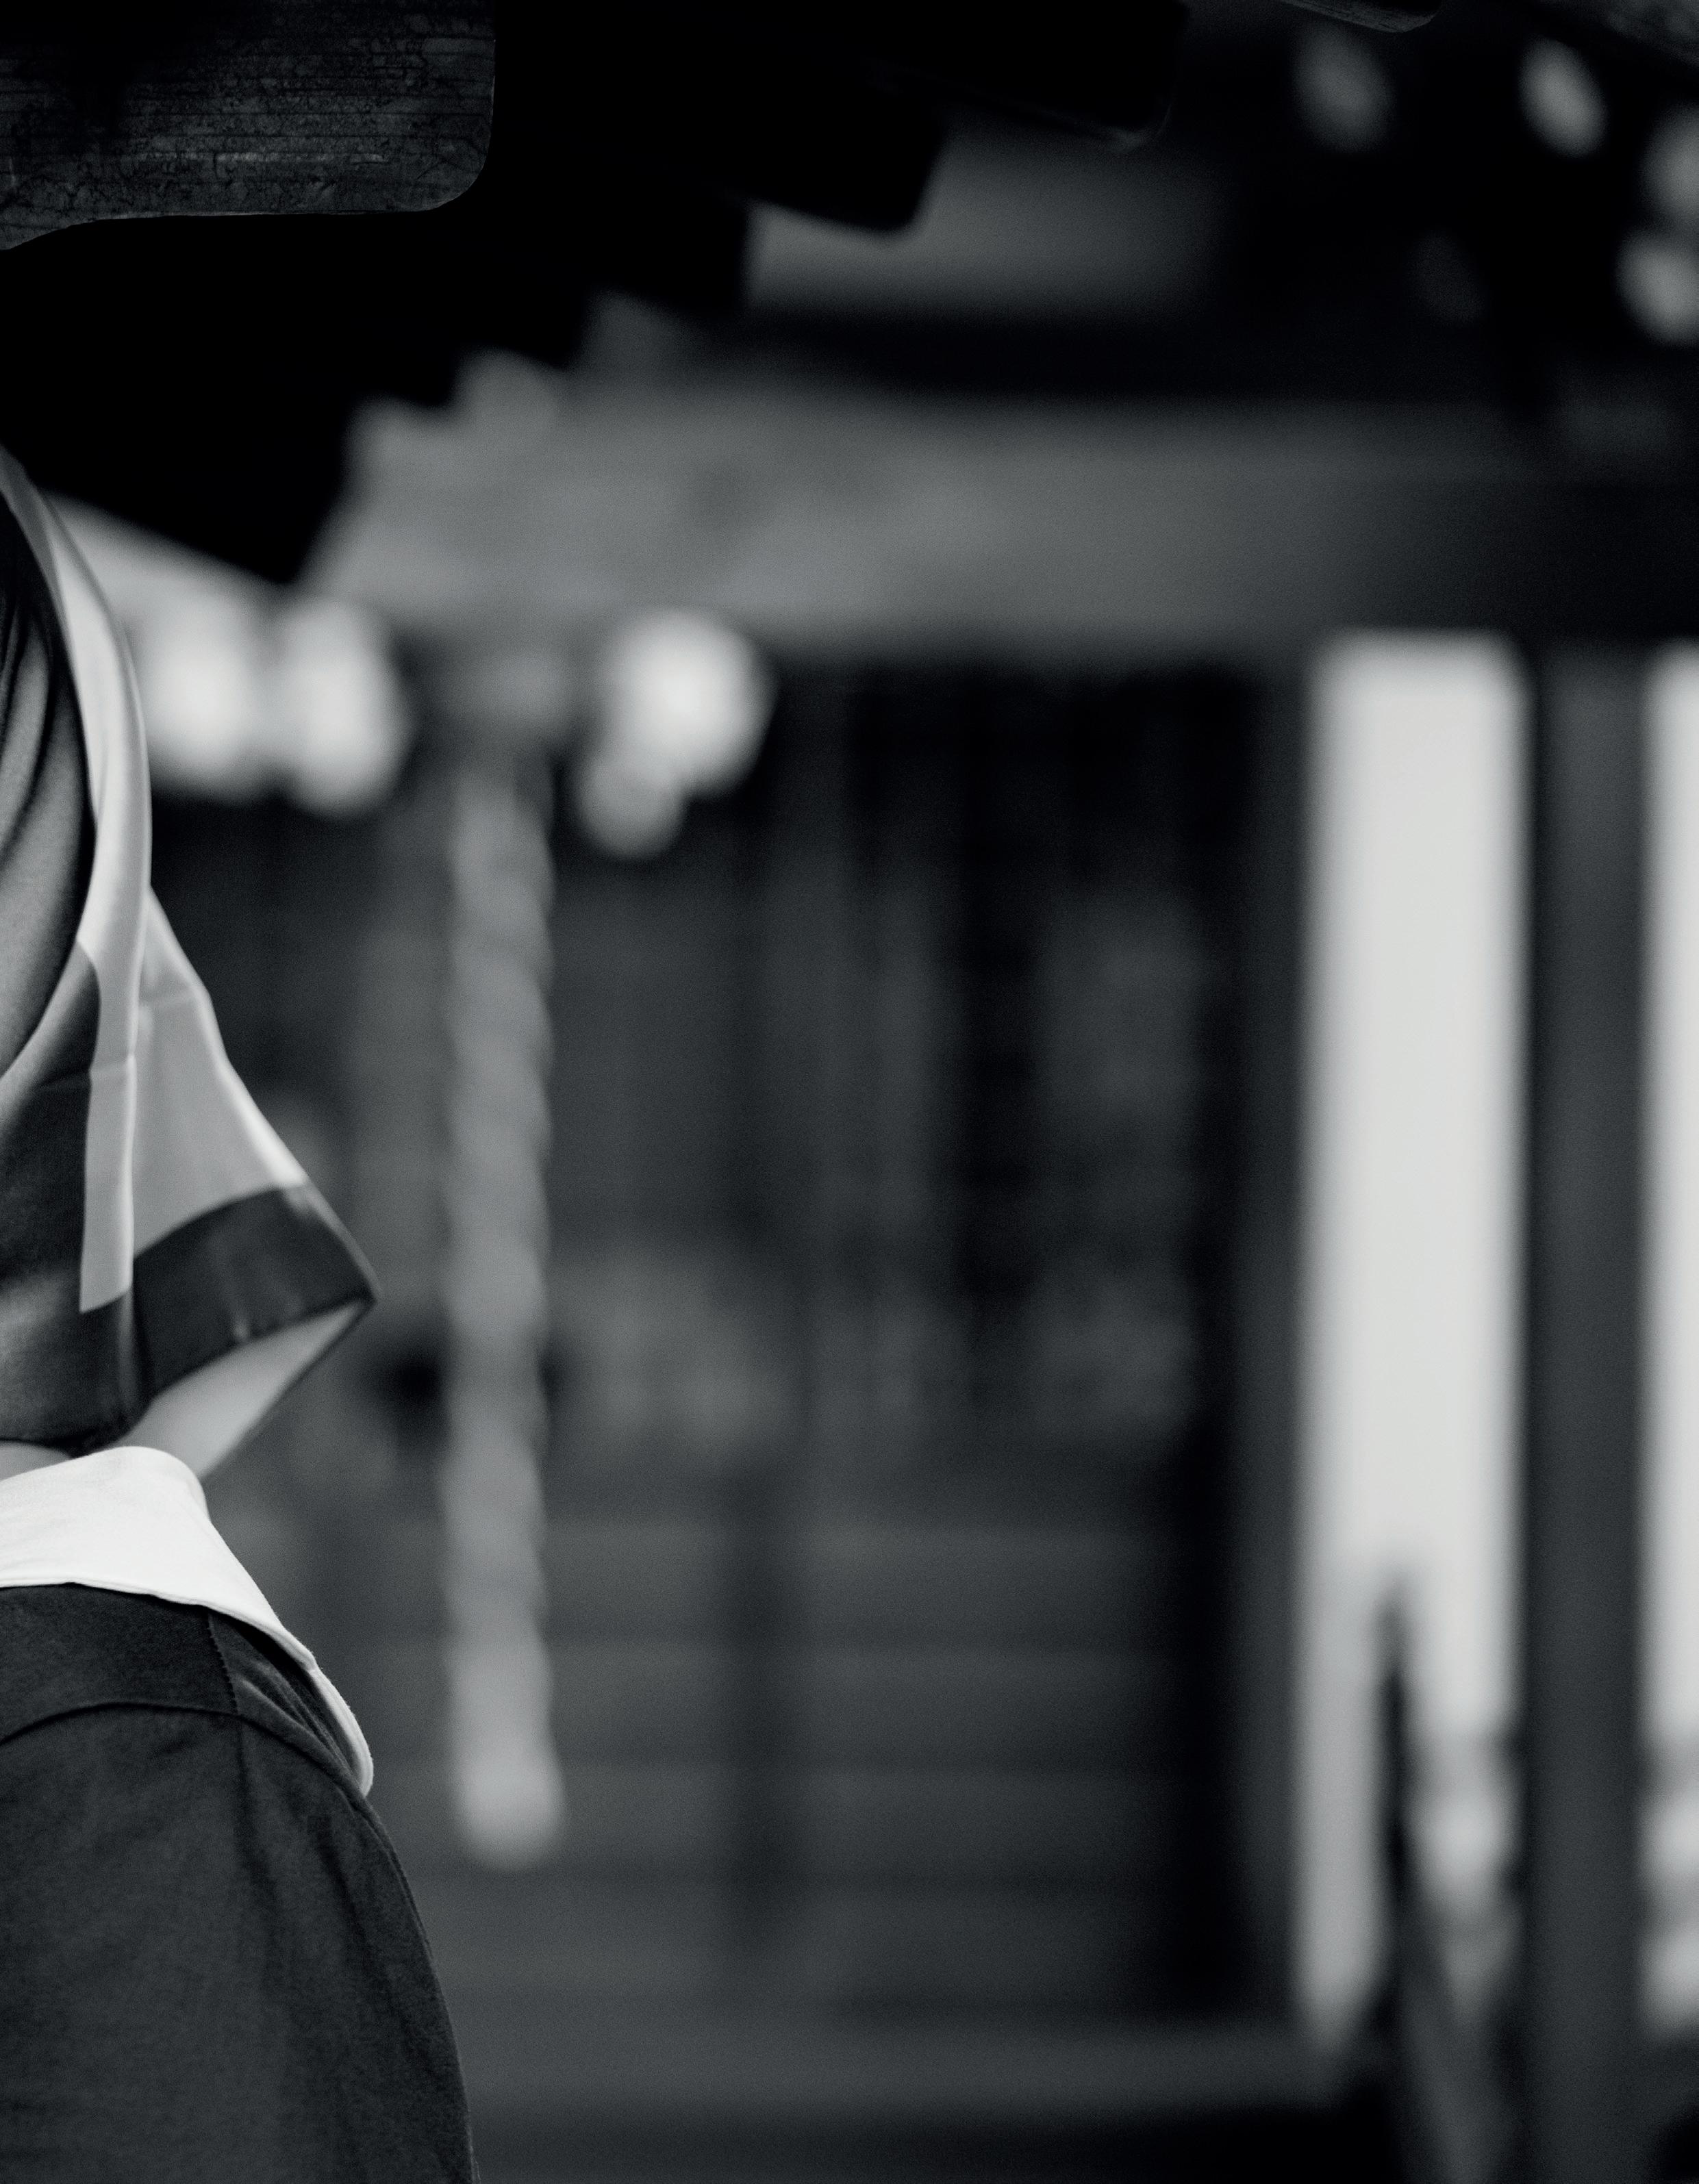
This street scene shot in Arles, France, caught the photographer’s eye due to the quietude and atmosphere it conveyed. The way the streetlights softly illuminated the empty alley, casting long shadows, created a sense of mystery and stillness. The lone figure walking through the empty street added a sense of narrative, inviting questions about who they were and where they were going. The muted colors and timeless architecture made the moment feel like a pause in time, blending history and introspection. To capture this shot, the photographer rested their camera on the barrier of a bridge that stretched over the street below. It was shot using three bracketed images that were cleaned up for noise reduction, then blended together to increase dynamic range.
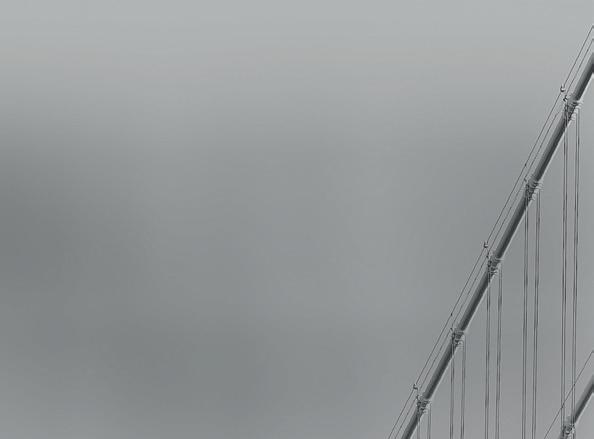
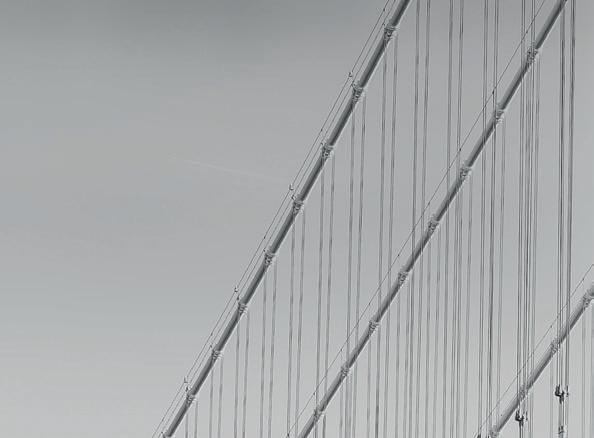
There are so many interesting things above street level in the city. Always be on the lookout for light and reflections, especially as the light starts to fade and the shadows get longer. Color contrasts can also prove super interesting. At the right angle, an otherwise dull building might be cast with colors and reflections from another building, piquing viewers’ curiosity.

The pros' favorite lenses for street photography:
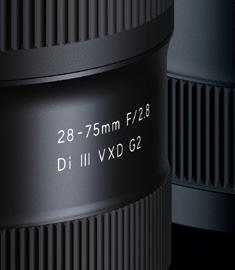
28-75mm F/2.8 Di III VXD G2 [model A063] 35-150mm
F/2-2.8 Di III VXD [model A058]


20-40mm


F/2.8 Di III VXD [model A062] 50-400mm F/4.5-6.3 Di III VC VXD [model A067]


Born in Tokyo. After graduating from Tokyo Polytechnic University Junior College of Photography, he joined the photography department of the evening newspaper Nikkan Gendai. Later became an independent freelance photographer. He has been photographing moments, spaces, and objects created by "people" for magazines and advertisements, including documentaries, portraits, food, and stage performances. His works are snapshots of Tokyo today with a variety of themes and approaches. He also judges photography contests and teaches photography at various venues, and is especially interested in training future photographers, such as high school and university students. Chairman of the Japan Professional Photographers Society.
Instagram: @k2kuma
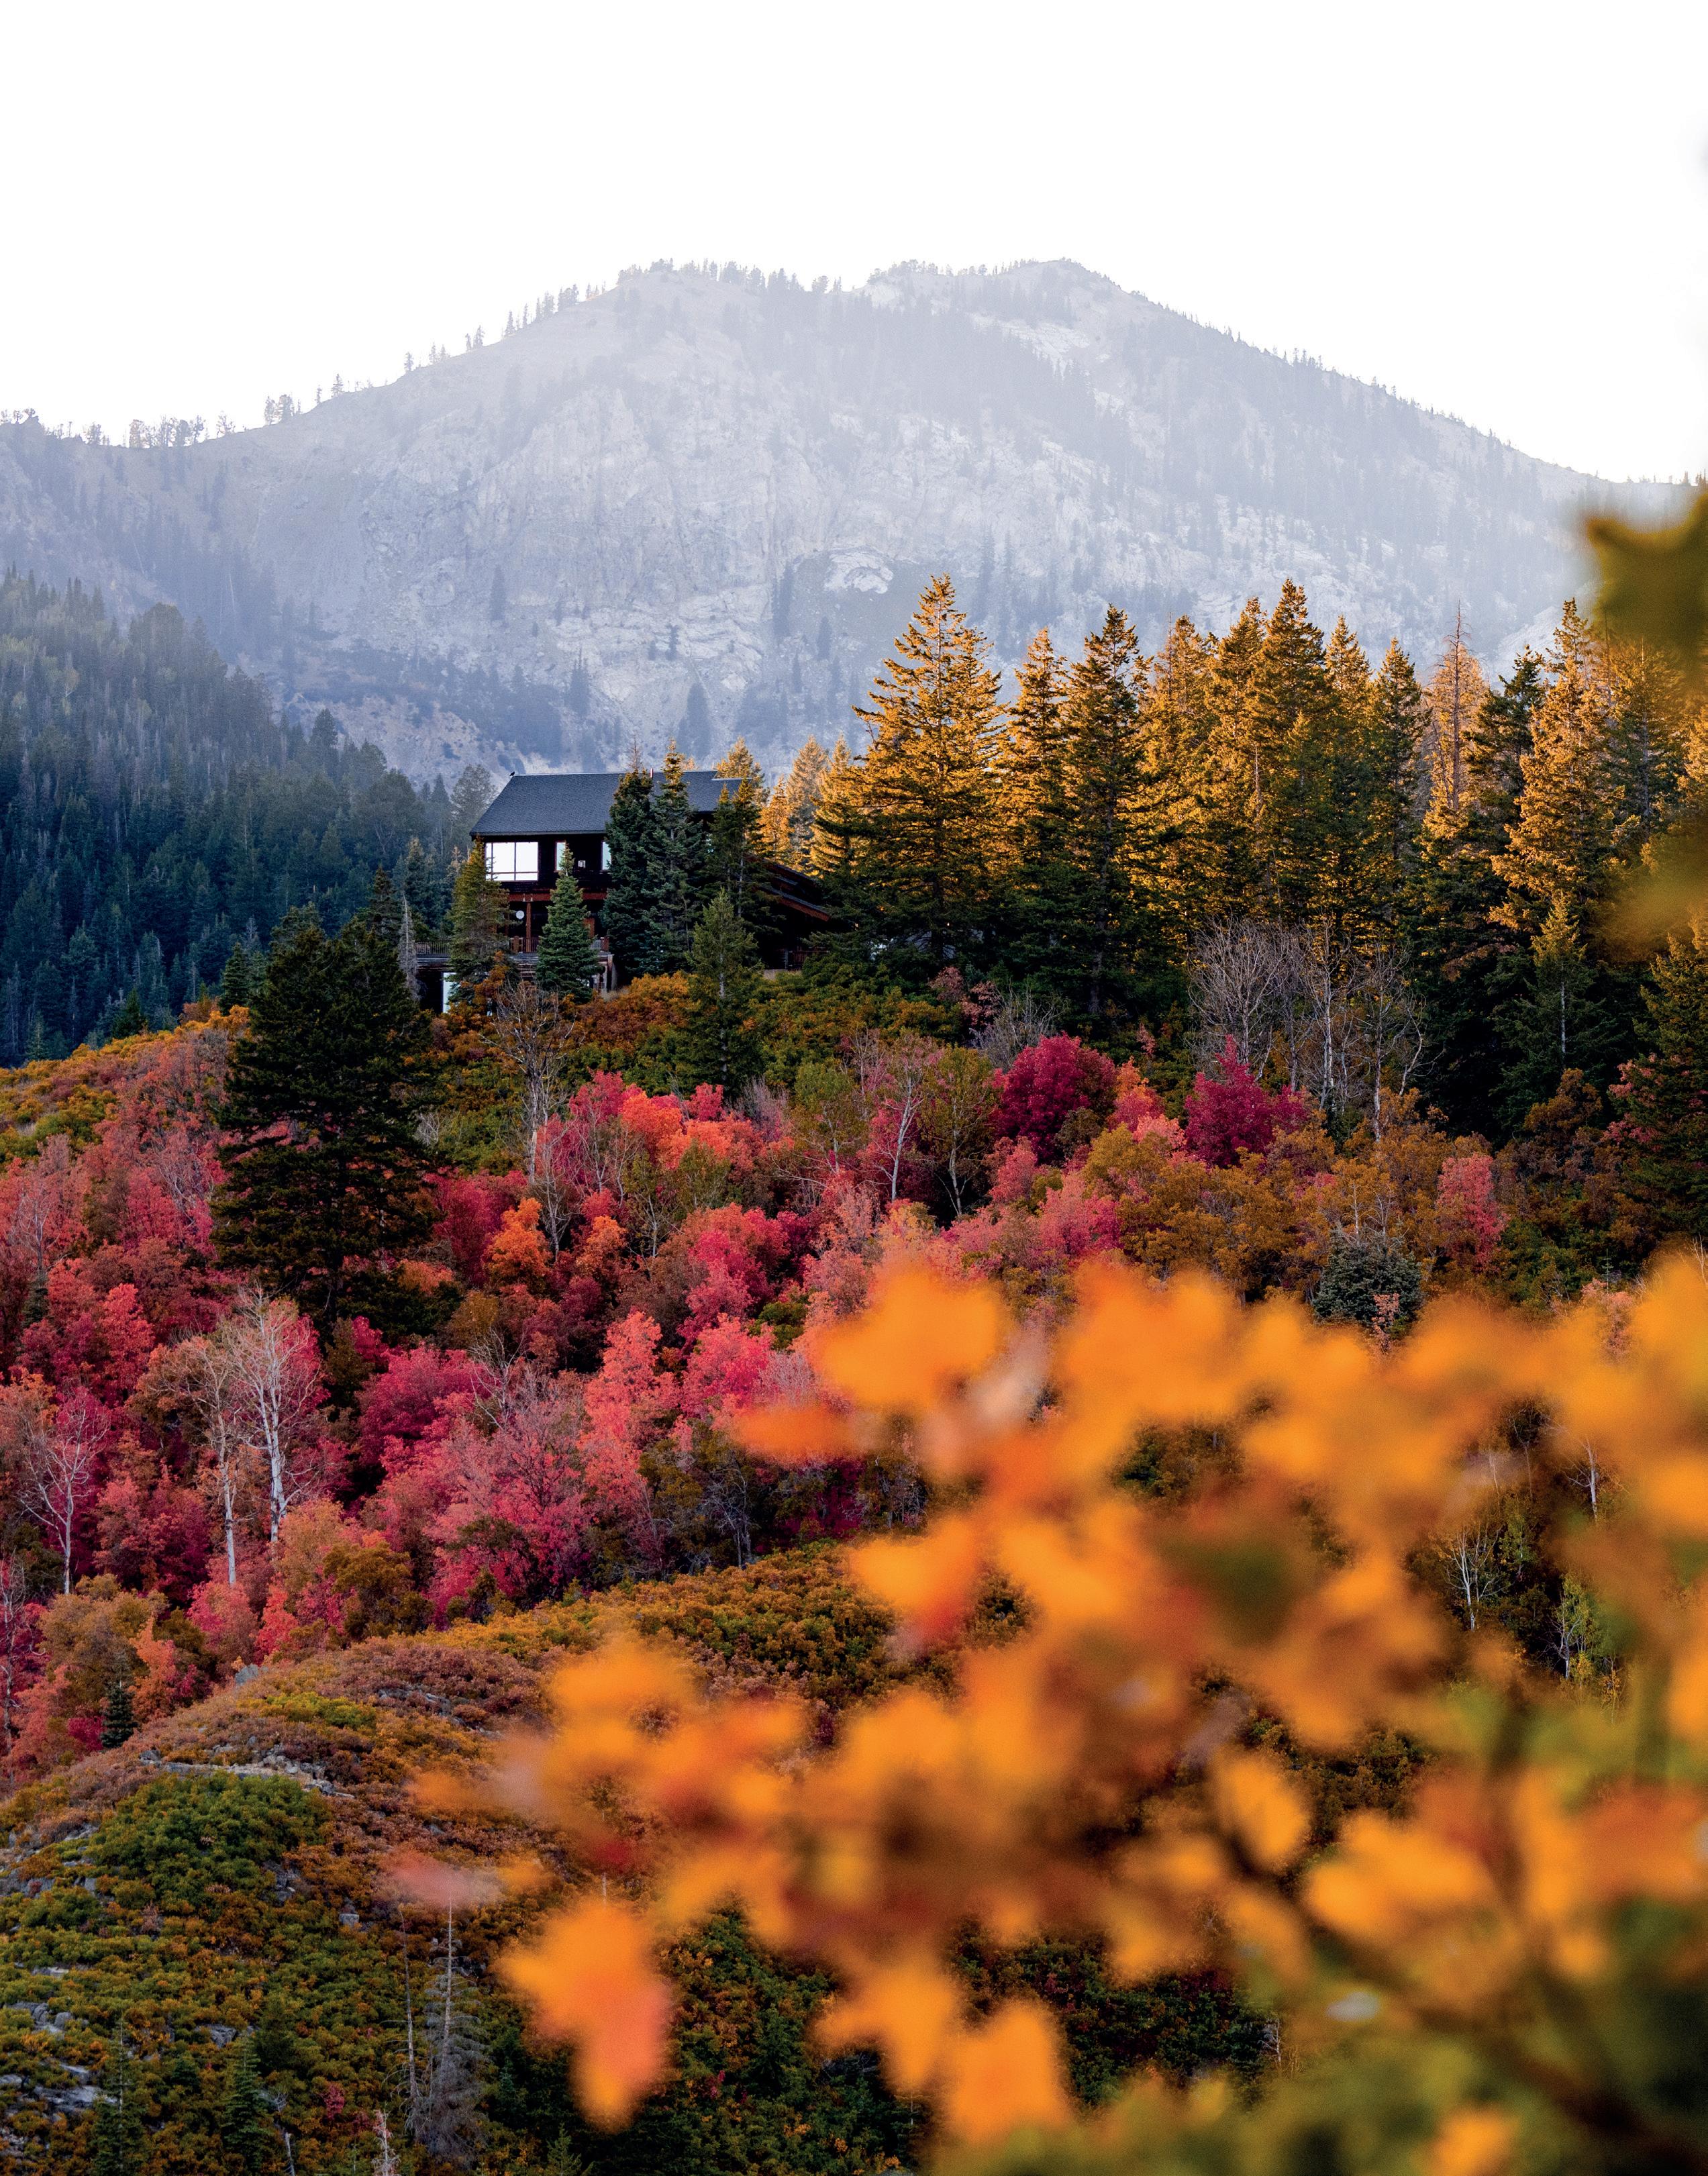
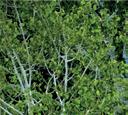
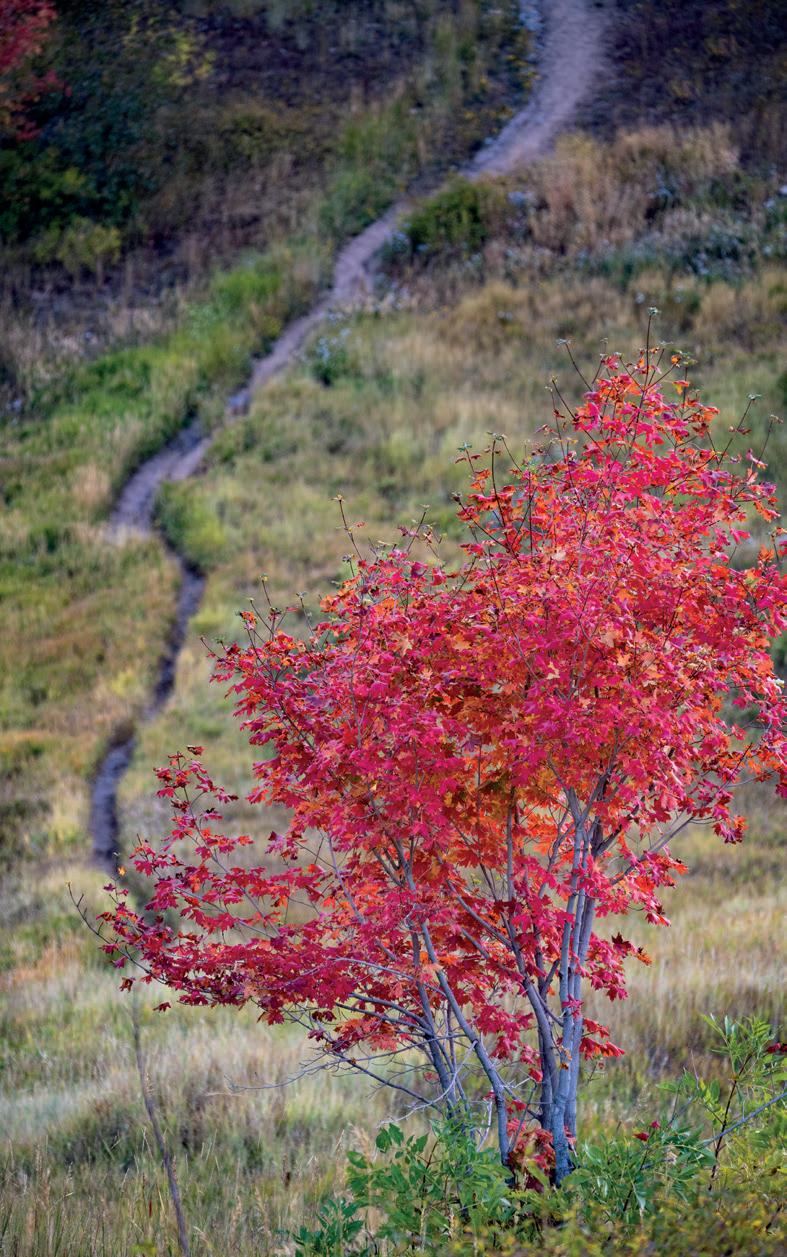
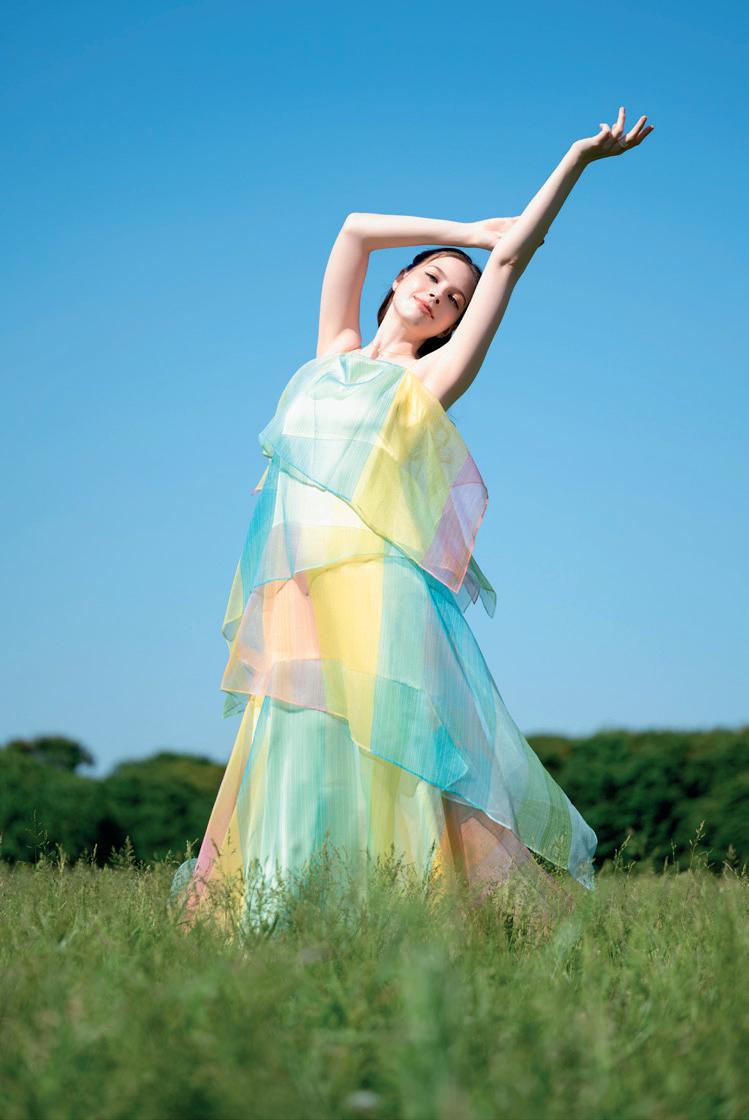
With his TAMRON 50-400mm VC ultra-telephoto and 28-75mm F2.8 G2 zoom lenses, Dino Sokocevic captures fall foliage before its inevitable vanishing act.
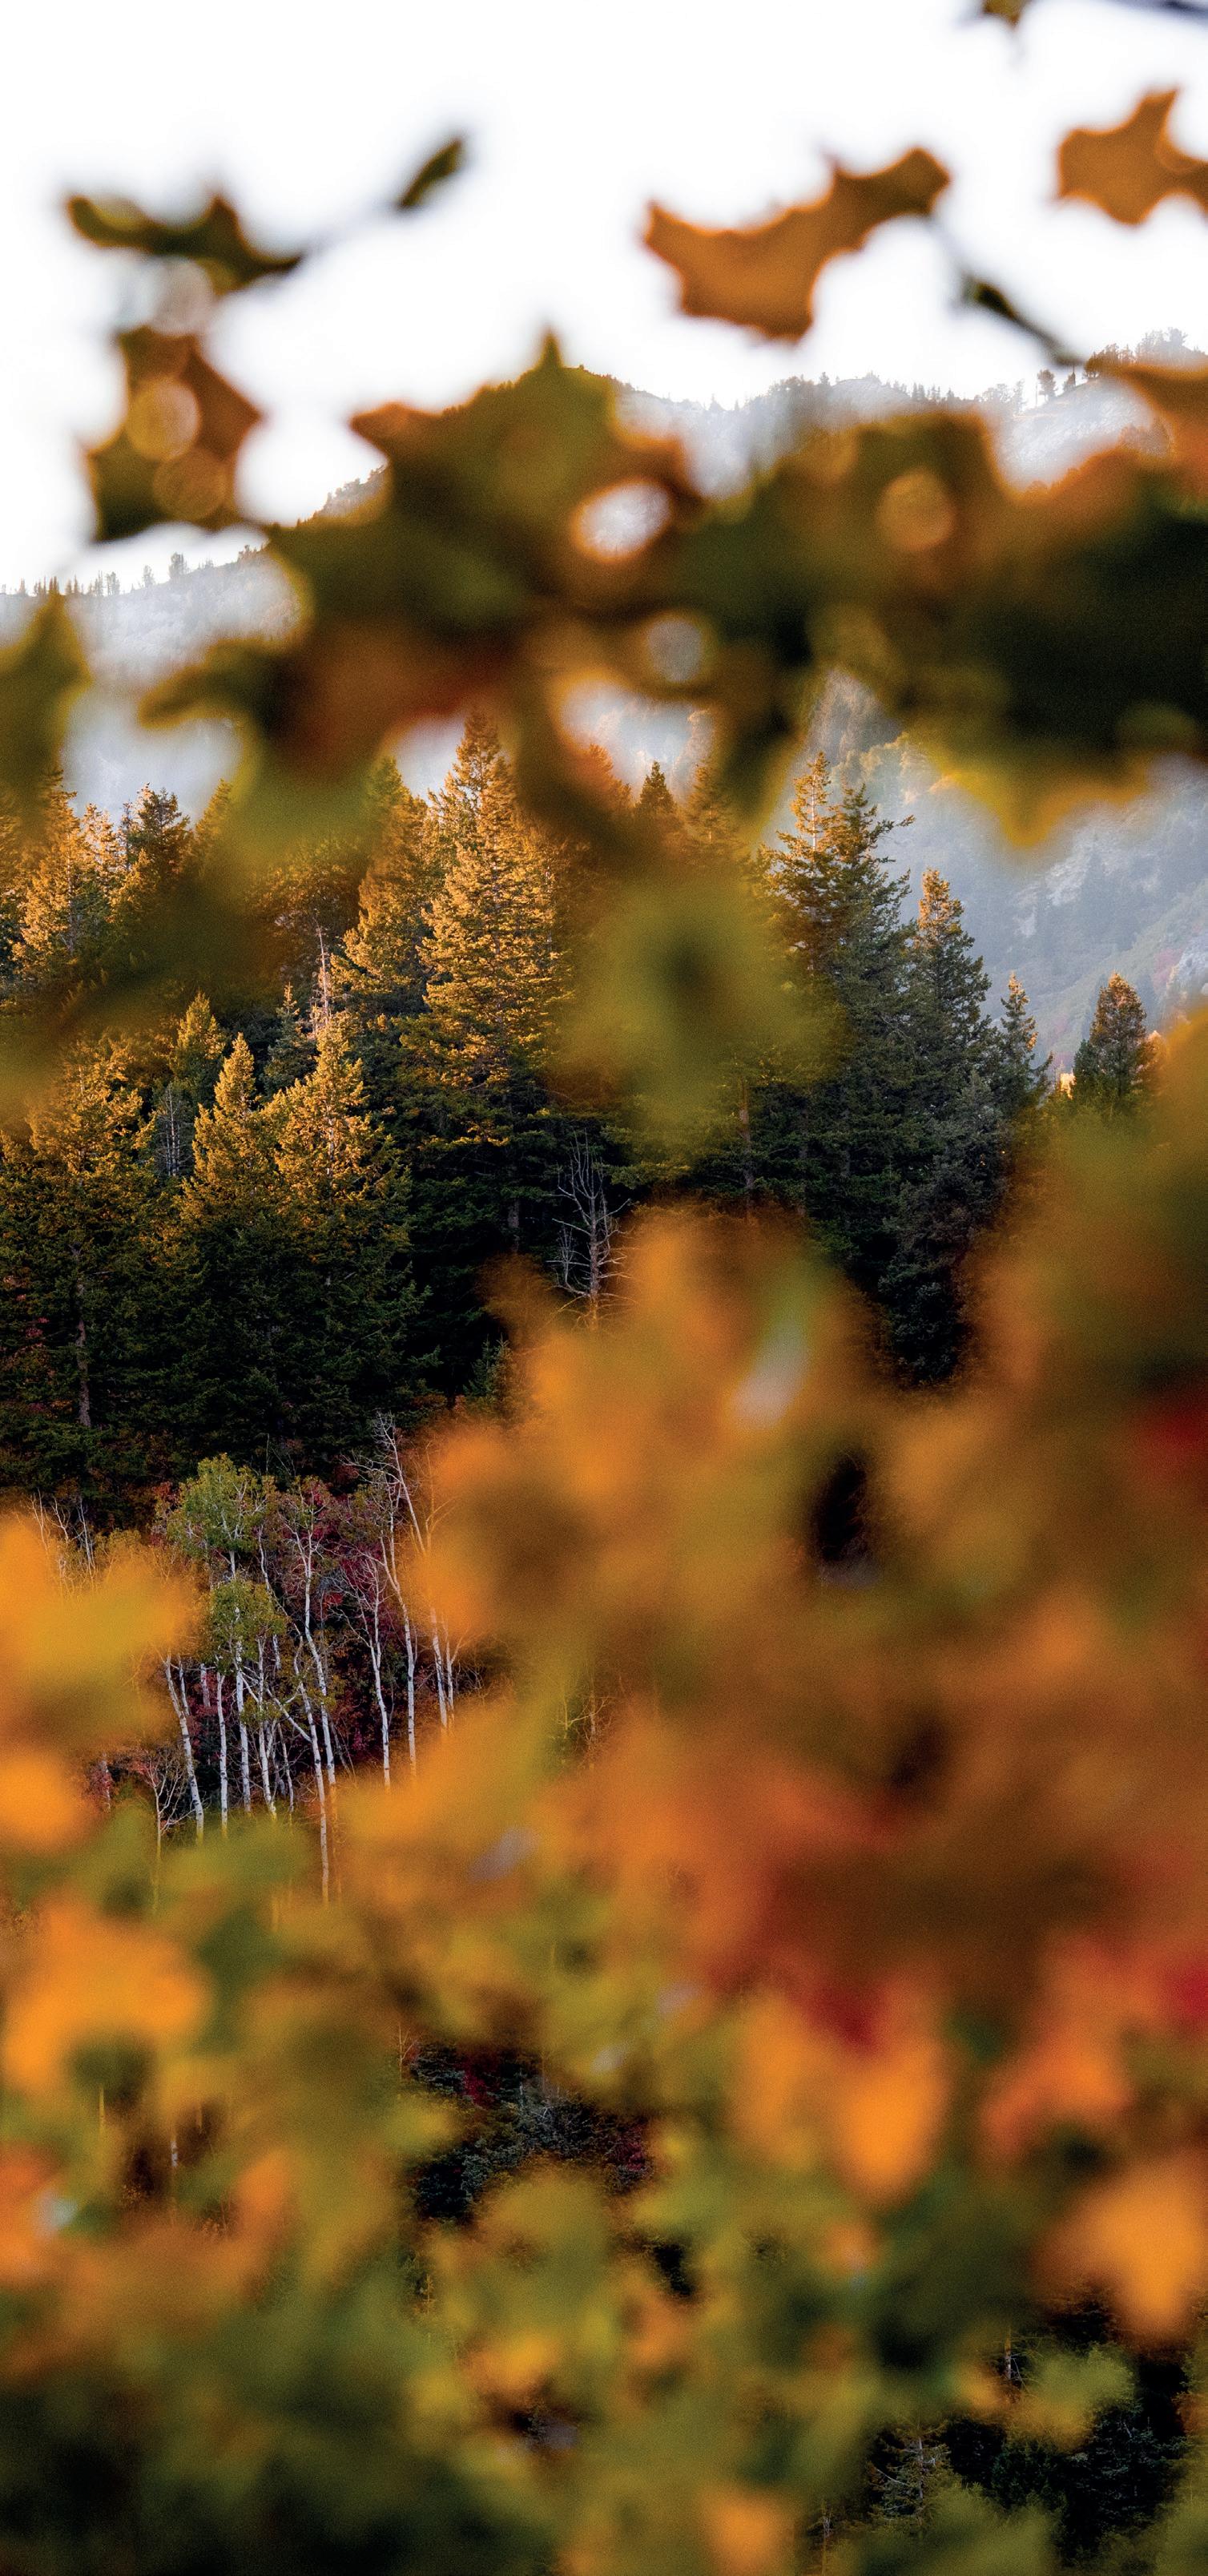

Autumn this year in Utah and Colorado came and went in a flash, thanks to a recent heat wave that prematurely stripped the trees of their brilliant fall foliage. Luckily, Dino Sokocevic was there to capture the vibrant show before his window closed.
“I grew up in Vermont, so I’ve long been drawn to the colors and contrasts of the season,” he says. “To people who don’t take pictures, I tell them that this time of year, when the foliage is at its peak, is like the Super Bowl of photography.”
For his brief dalliance with this year’s colors, Dino used the TAMRON 28-75mm F/2.8 Di III VXD G2 zoom and 50-400mm Di III VC VXD ultra-telephoto zoom for his mirrorless camera system with Nikon Z mount. “The 28-75mm F2.8 G2 has long been a reliable staple for me for this kind of photography,” he says. “The 50-400mm VC, however, is next level. It’s got an awesome focal range and 8x zoom ratio, allowing me to zoom out for a wider view if I don’t require a lot of framing, then zoom in if I want to isolate a section of trees or even take a portrait of one particular tree. The image quality is spectacular, and that quality extends throughout that entire zoom range.”
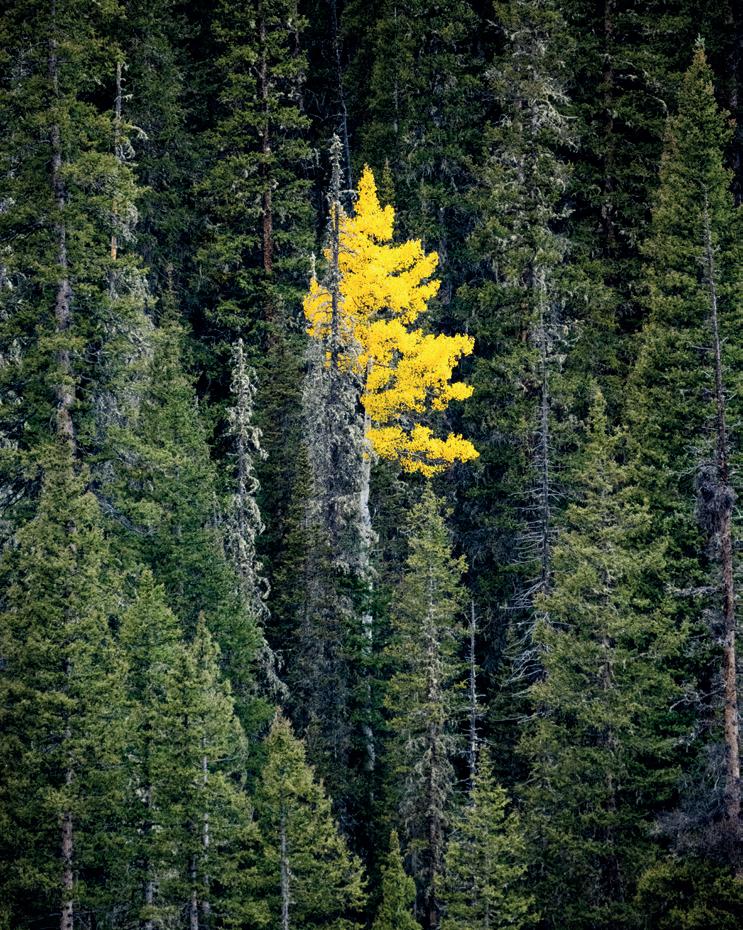
1 Pinpoint a focal anchor. One way to do this is to look for standout colors that pop against the surrounding landscape, like a bright yellow or red that

“WHEN USING A LENS LIKE THE TAMRON 50-400MM VC, ZOOM IN ON SMALLER SECTIONS OF THE FALL FOLIAGE SCENE, ESPECIALLY IF THE OVERALL VIEW FEELS OVERWHELMING OR CHAOTIC.”

contrasts with a more monotone or earthtoned background. For example, during a drive along Colorado’s Million Dollar Highway, I was captivated by this single yellow tree immersed in a sea of green and had to stop to capture the moment.
2 Make sense of chaos.
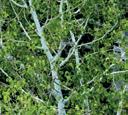
On the other side of that coin, sometimes there’s no focal point to find, especially when the landscape is filled with a hodgepodge of vibrant colors and dense textures. You should embrace the chaos in those cases. That’s what I did here with this grove of aspens, simply taking in the entire scene and all of its repetitive patterns.
3 Use nature’s lines.
I don’t like calling the rule of thirds an actual rule, because that implies it always has to be followed (and rules are sometimes meant to be broken). But I do find it to be a great way to organize your fall foliage photos, and I tend to rely on it often, both consciously and subconsciously.
You can see my use of Mother Nature’s lines in the photo of the S-curve road leading the viewer’s eye to the yellow aspens in the middle of the picture. The vertical lines of those trees, in turn, lead the viewer’s eye to the mountain and sky. In the photo of the baby red maple near Provo, I spotted that path coming down off the mountain, which led to a camping area that’s often visited by college students from nearby Brigham Young University. This is the reverse of how I usually shoot, in which the leading line works its way up from the bottom of the frame to the middle or top, but I liked how this came together.
4 Layer your scene.
Adding different lines of visual interest adds depth and dimension. In my photo of the mountain at sunrise, the lines of the various layers I included guided my composition.
Working your way from the bottom up, you’ve got a line of dried grass to kick things off, followed by that bright row of yellow aspens. Next come the patches of green trees, then a line of sun-adorned mountain, and, finally, the sky. It’s like a photographic fi ve-layer cake!
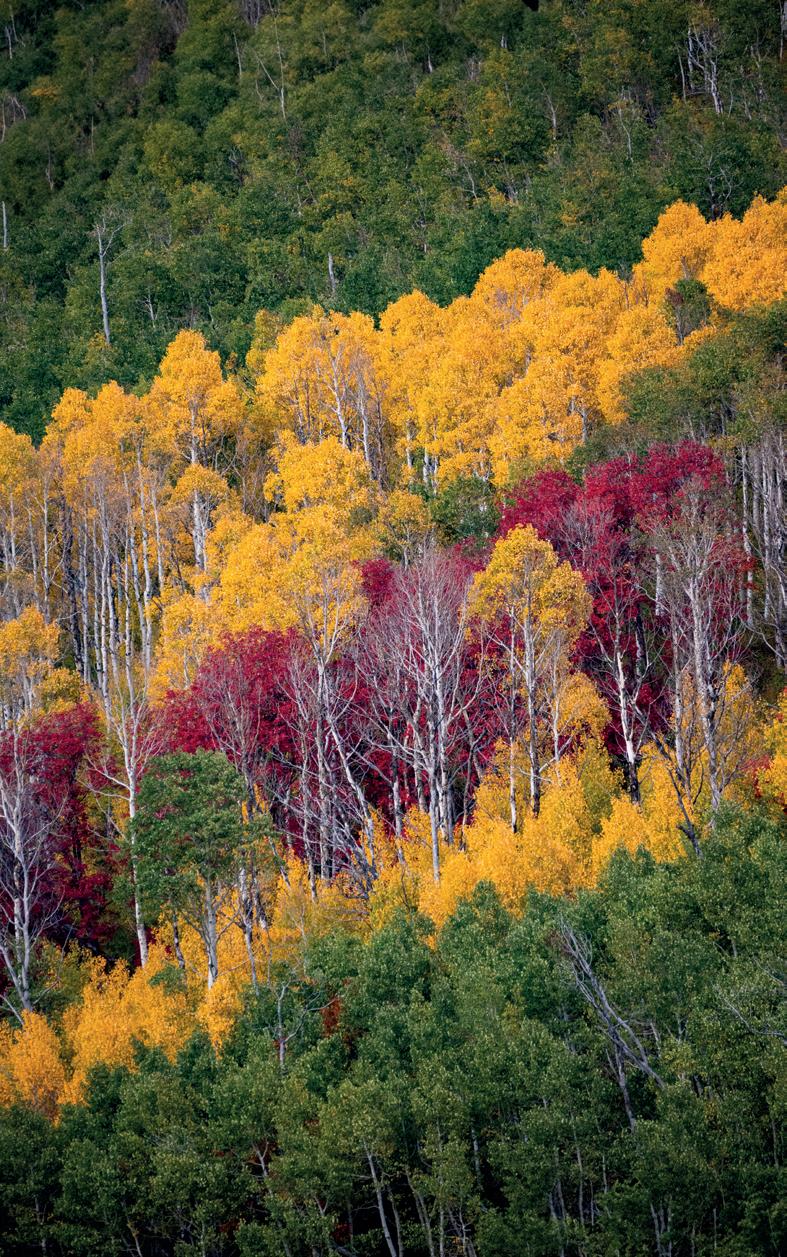
5 Create a “sandwich.”
This is another version of layering. Near Utah’s Wasatch Mountain State Park, not far from Midway, I was taking photos of something else entirely when I turned around and had the happy accident of spotting a perfect delineation of colors, with a line of deep red trees in the middle, sandwiched in between two lines of yellow trees, which were themselves sandwiched in between that expanse of green. I took a wider landscape photo of this scene, as well as this vertical image. I liked the vertical version better, since you could see the side of the mountain a bit in the other photo.
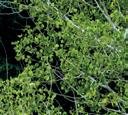
6 Zoom in to isolate smaller sections. When using a zoom lens like the TAMRON 50-400mm VC, it can be helpful to use your zoom to focus on smaller sections of the scene, especially if the overall view feels overwhelming. If I’d zoomed out, you would see a pretty nondescript bunch of trees jumbled together. Using the longer end of that lens, however, allowed me to quarantine this one area that I found interesting, with the top half filled with greenery and the bottom half populated with eye-catching reds, yellows, and hints of orange. The white vertical lines of the trees also add visual interest.
7 Be judicious but creative during editing.
I want to enhance the natural beauty of my photos without going overboard. At the same time, many people who aren’t photographers think photography is meant to be strictly documental in nature. I think that’s a false dichotomy. I do want to capture the scene as is, but I also usually want to add my own flair. Toward that end, I keep the colors natural in post-processing, balancing adjustments I make in terms of contrast, saturation, and white balance. Working with a high-quality monitor helps. I’m also a big believer in stepping away from your photo for 24 to 48 hours after making initial minor adjustments, so you can revisit the photo with fresh eyes later.


28-75mm F/2.8 Di III VXD G2 [model A063] (available for Sony E & Nikon Z)

Dino Sokocevic is a semi-professional landscape photographer from Utah who loves exploring the great outdoors. Born in Bosnia, Dino came to the US as a first-generation immigrant. Now, as a proud American citizen, he gives back to his community through medicine as a physician assistant. He spends his free time exploring Utah’s many diverse landscapes and is regularly making progress on his mission to photograph every US national park. He hopes his work inspires you to seek out your next adventure.
Instagram: @dinosaur802


50-400mm F/4.5-6.3


Di III VC VXD [model A067] (available for Sony E & Nikon Z)


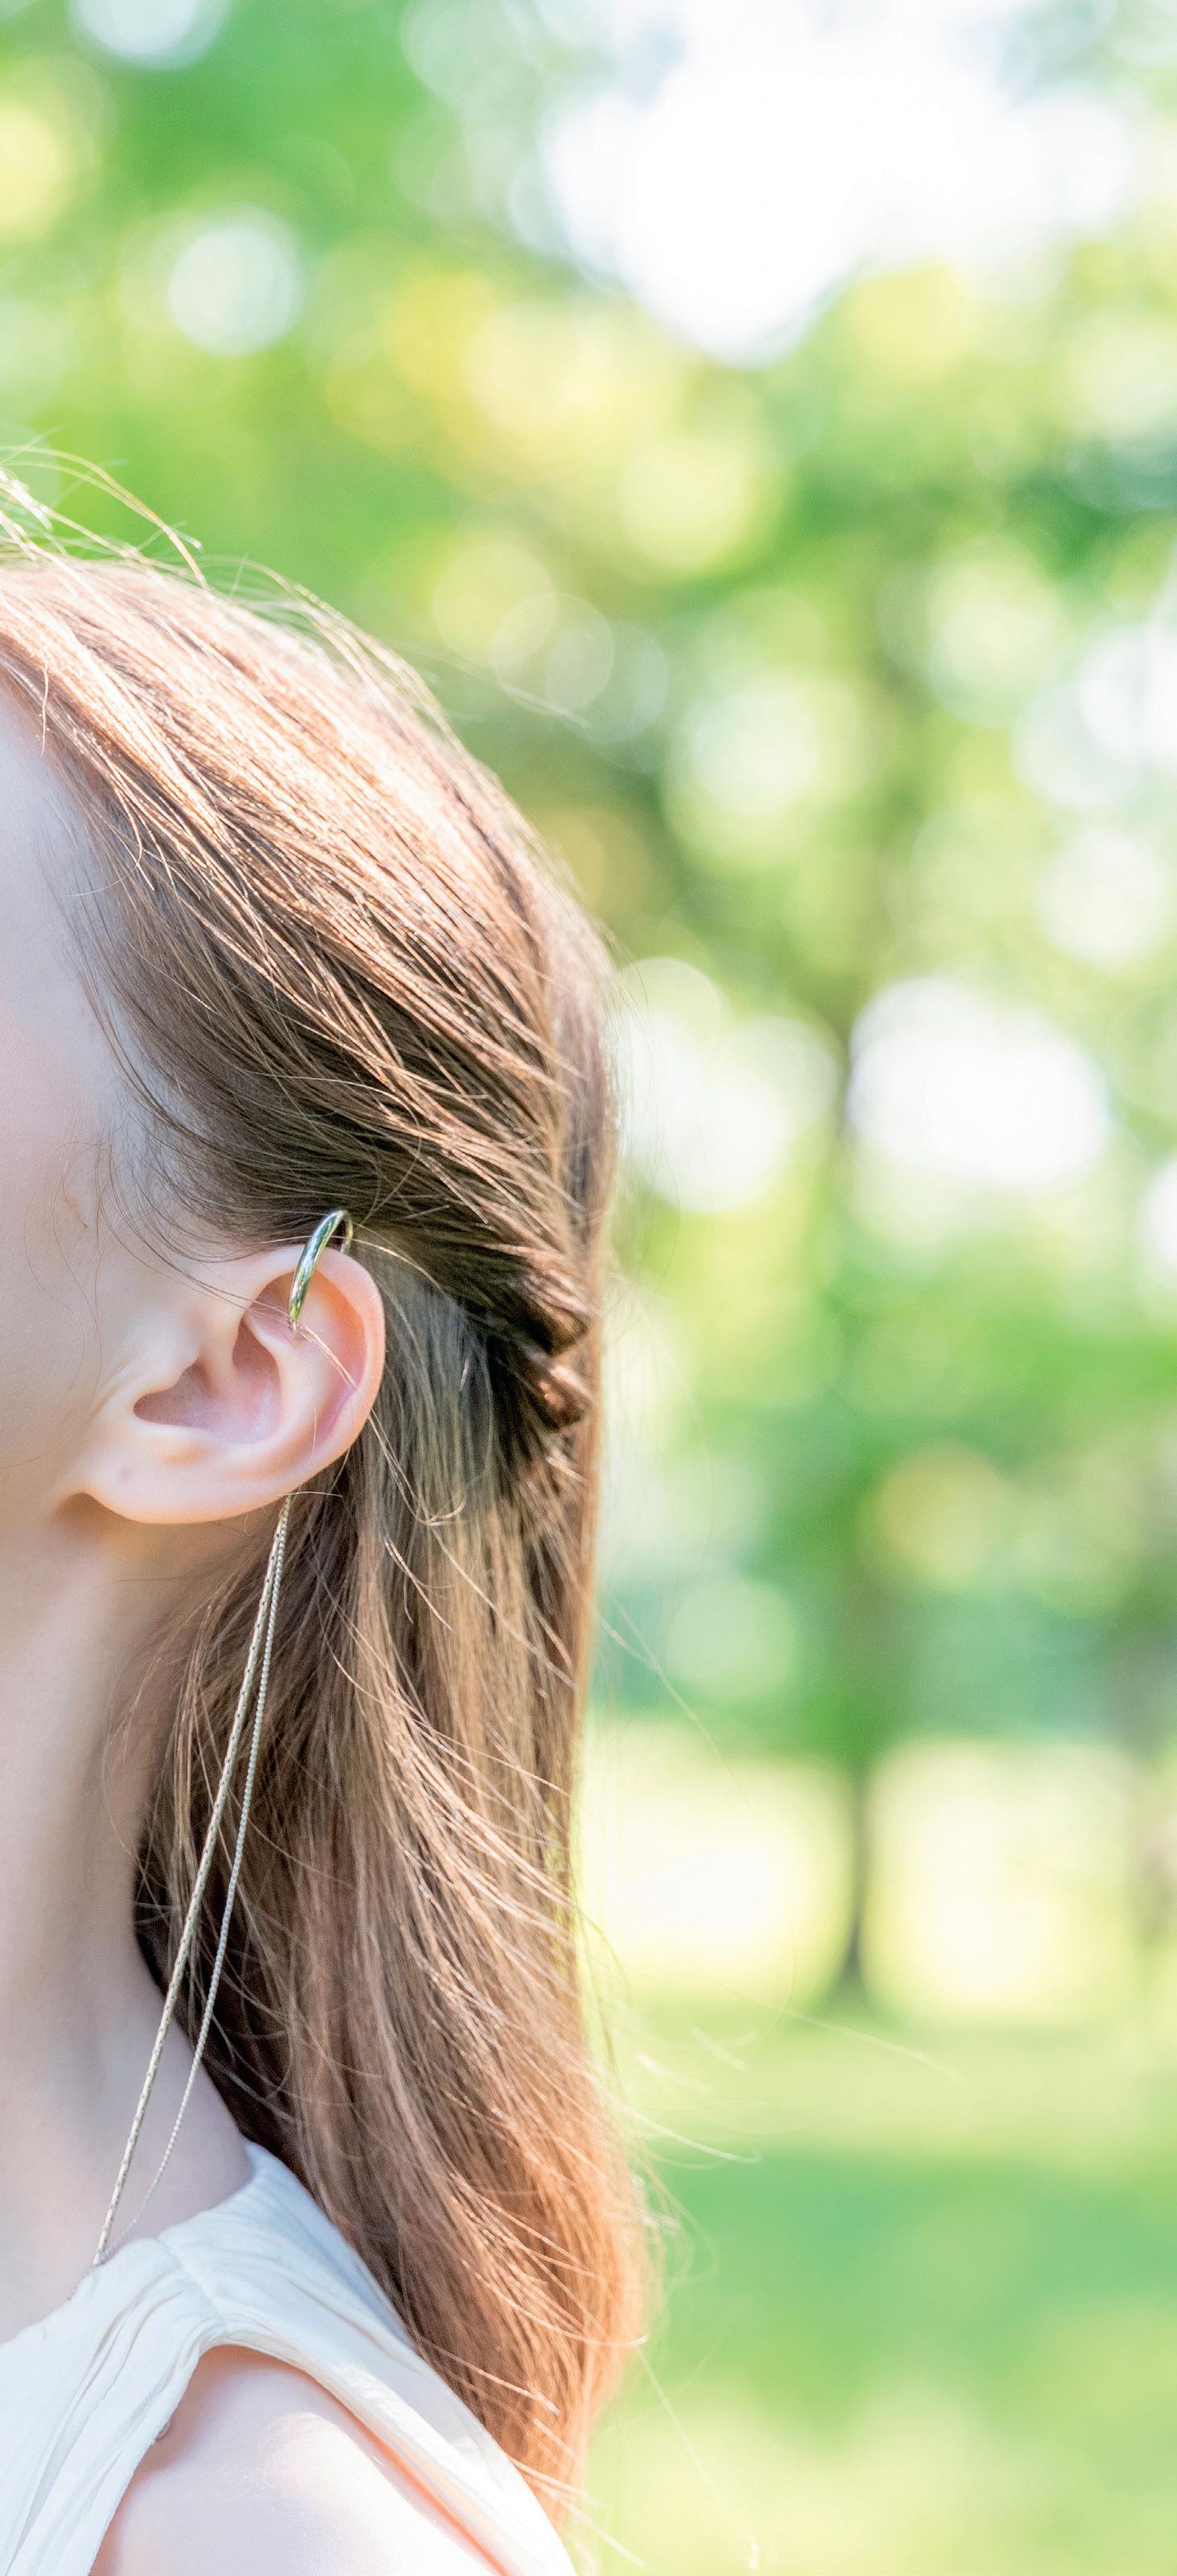
Junichi Shimizu's First-Hand Experience with the TAMRON 90mm F2.8 MACRO
F2.8, 1/800 sec., ISO 31
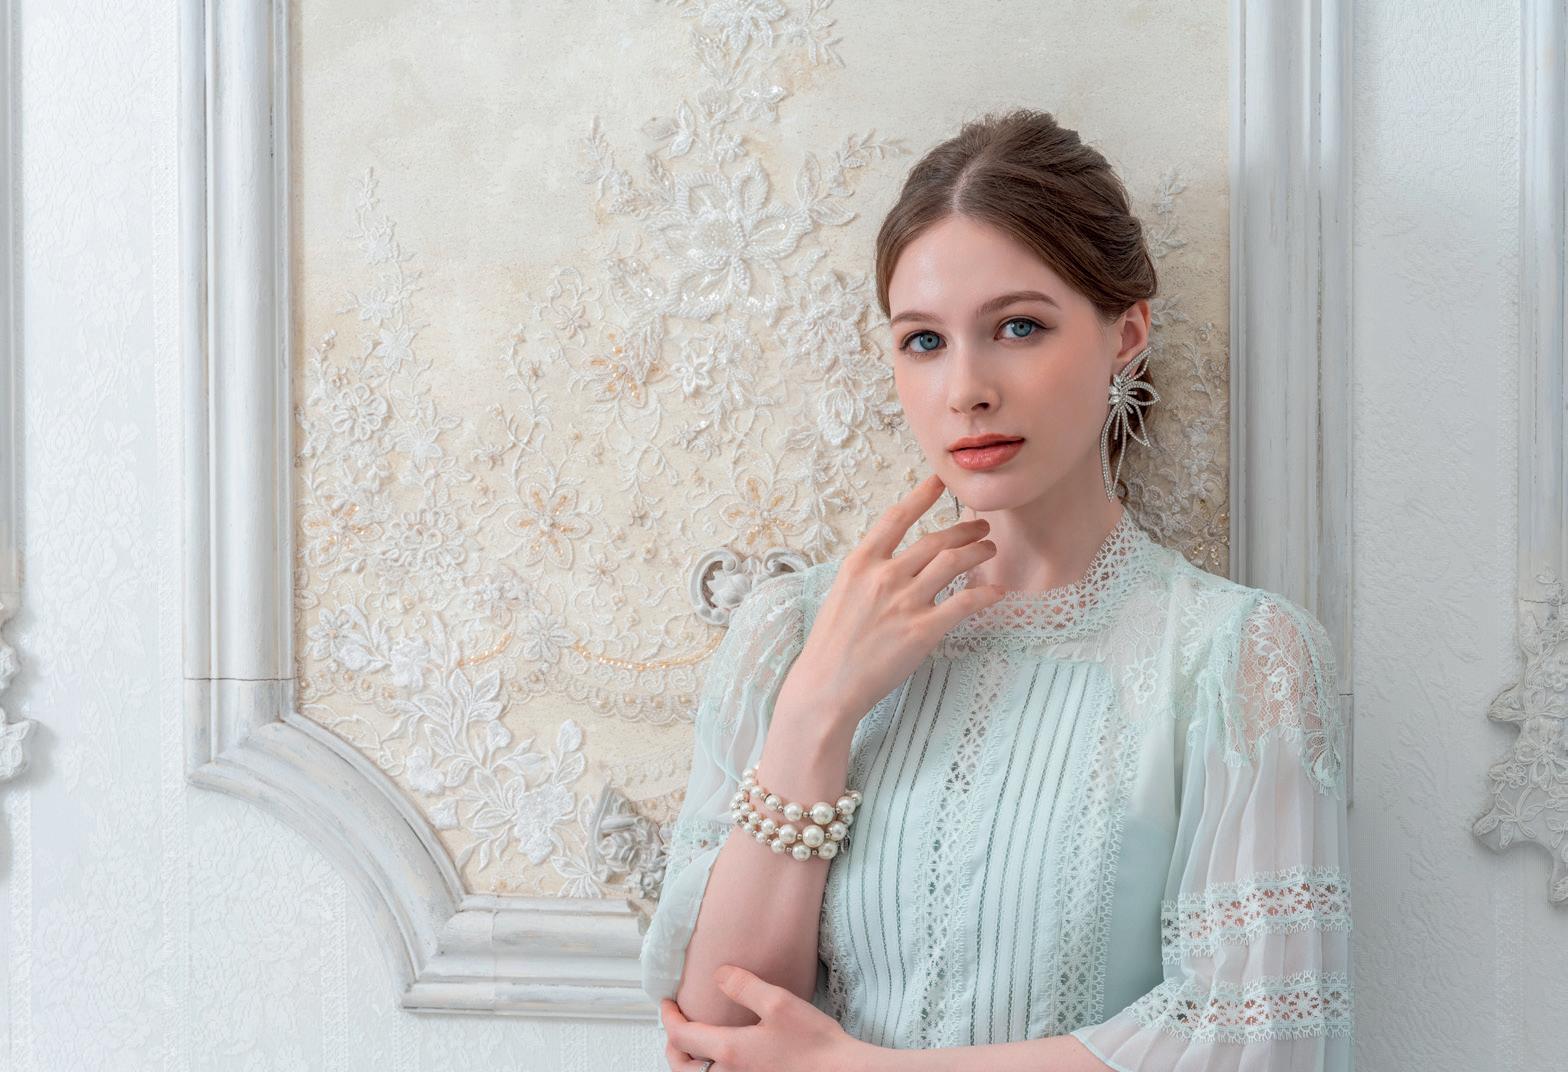
I
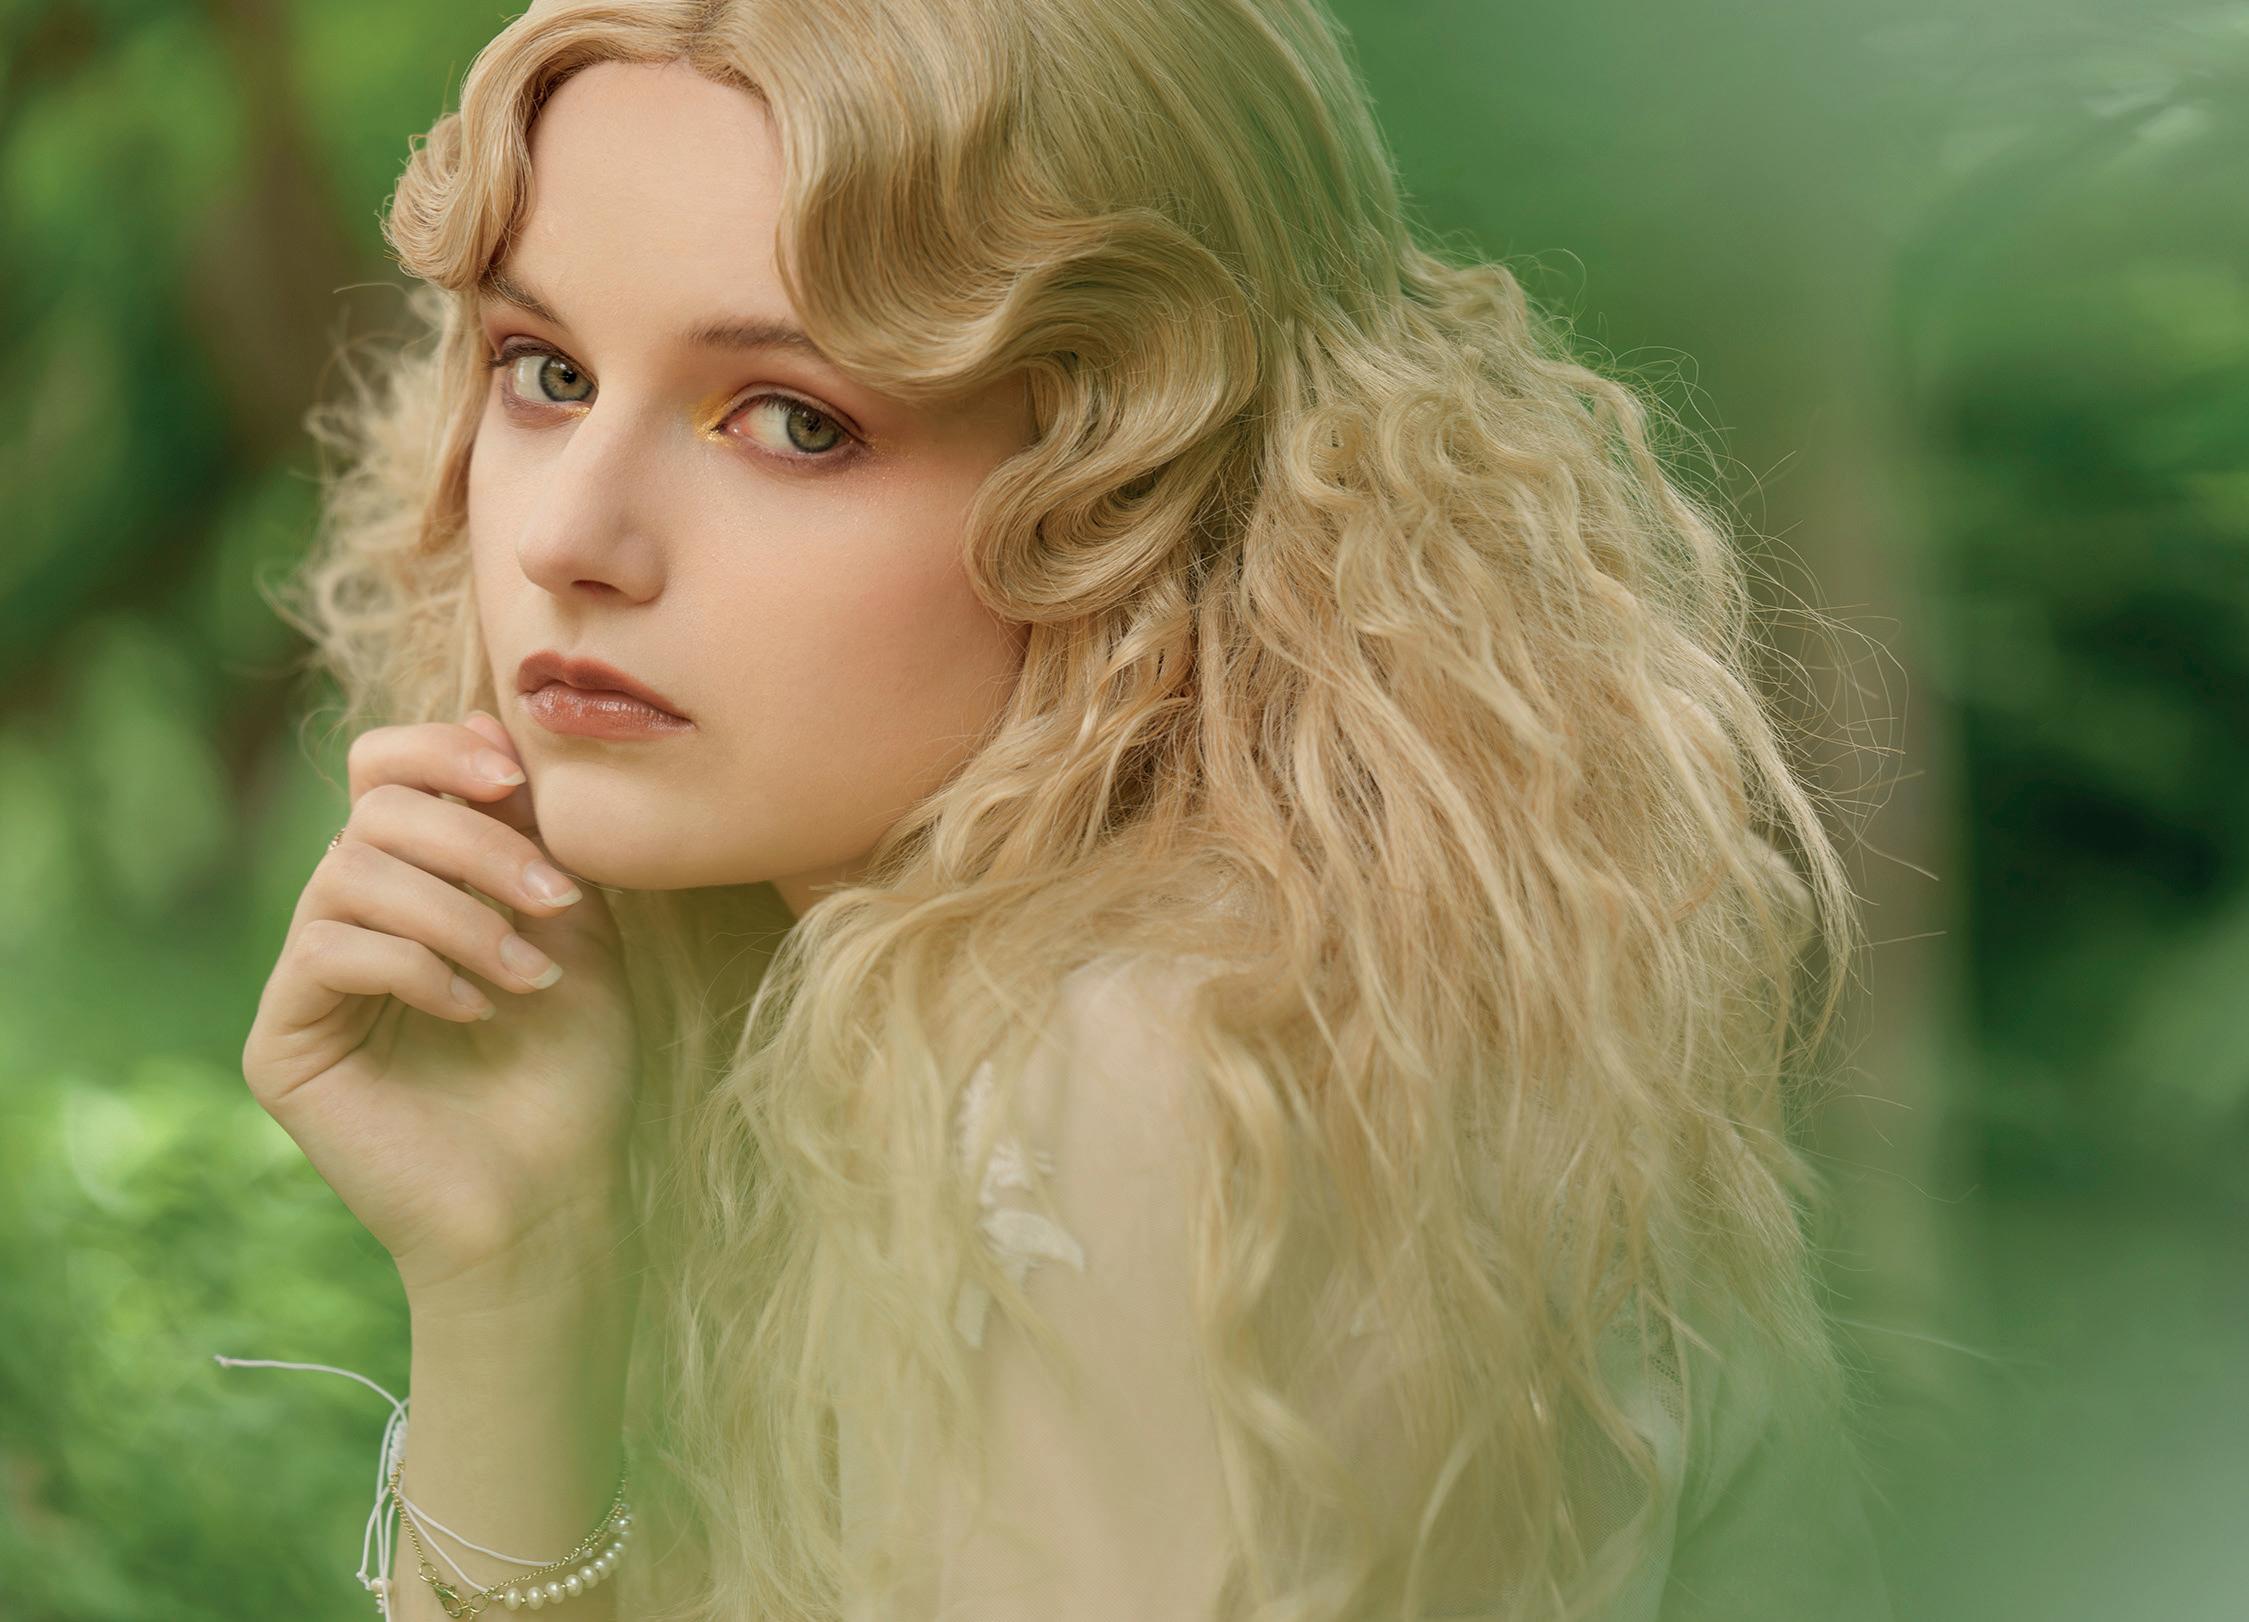
’m Junichi Shimizu, a portrait photographer with a passion for capturing the unique charm of every individual I photograph in my private work.
Recently, I had the chance to try the TAMRON 90mm F/2.8 Di III VXD MACRO (Model F072) for Nikon Z mount, and it instantly made an impression. Normally, I stick to zoom lenses like the 24-70mm or 70-200mm, especially for fast-paced portrait shoots where quick adjustments are crucial. But there’s something special about prime lenses—they capture light and bokeh in a way that really stands out for me. So, I was eager to see how this 90mm would perform.
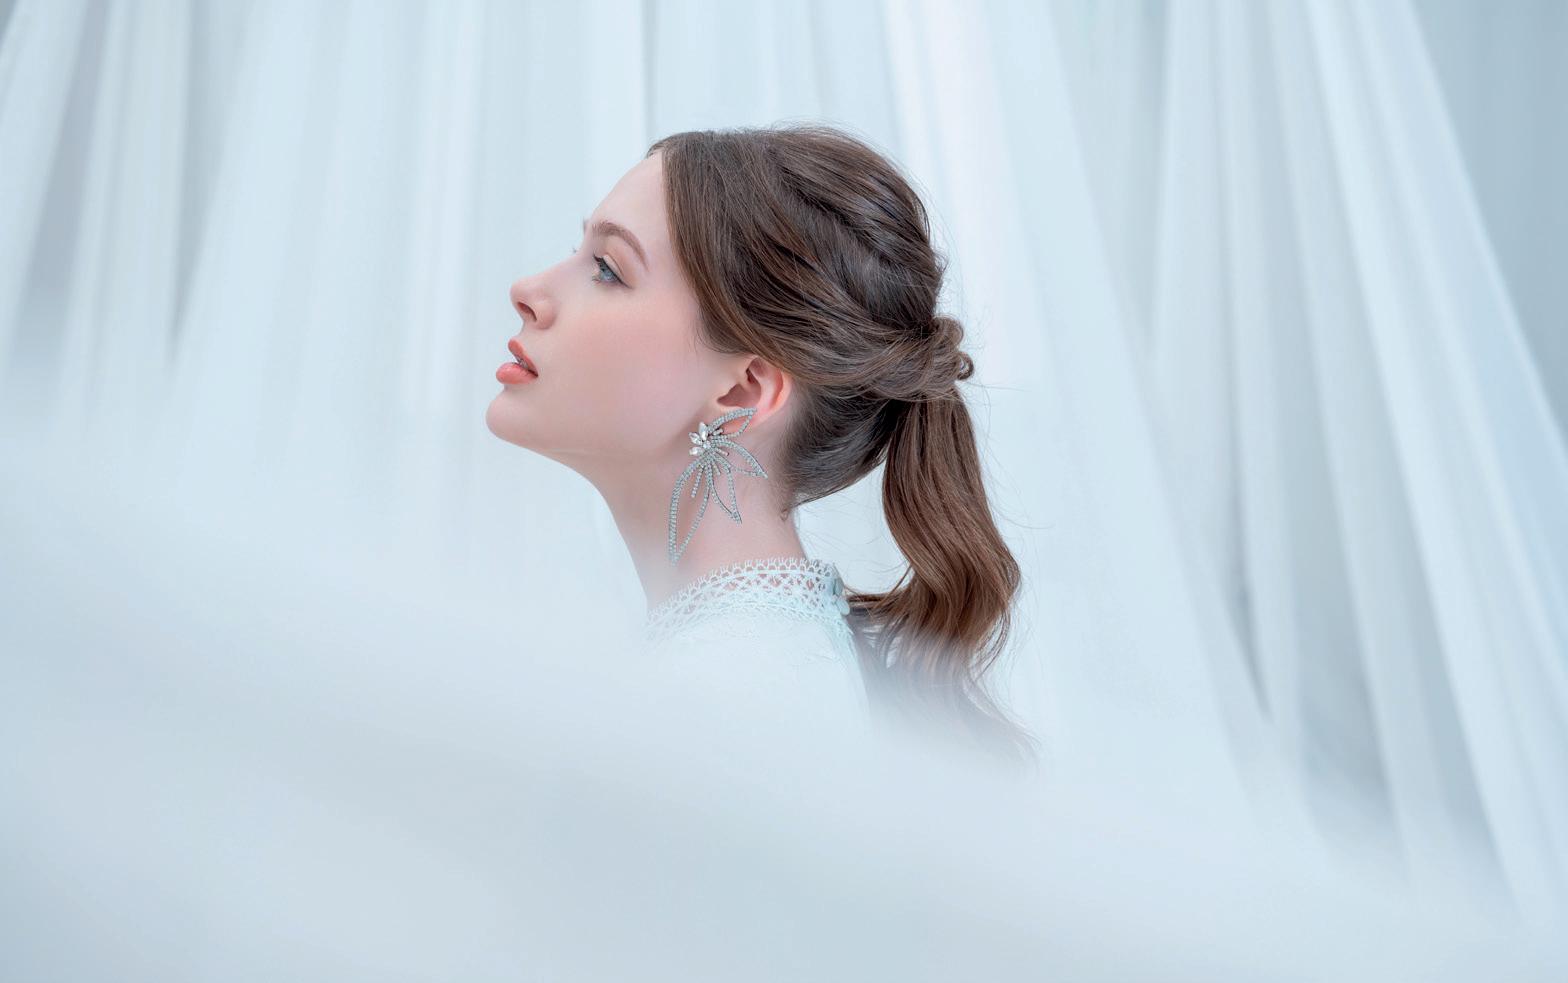
Right from the first click, I was struck by the dreamy softness of the background bokeh. It was remarkably soft and gentle, making the model stand out beautifully, while still keeping her sharp. As someone obsessed with smooth, creamy bokeh, this was a big win for me and made me realize how incredible this lens is. Even the foreground melted away in a way that felt both artistic and satisfying. I felt this was the perfect lens for me, and I immediately wanted to purchase it.
Being a macro lens, I couldn’t resist getting up close for some detail shots—specifically the model’s ring. I had heard the lens could focus as close as 9.1” (0.23m) but

"THE DREAMY SOFTNESS OF THE BACKGROUND BOKEH AND THE LENS'S SHARPNESS MADE THE MODEL STAND OUT BEAUTIFULLY, PUSHING ME TO RETHINK MY APPROACH TO PORTRAIT PHOTOGRAPHY.”
experiencing it firsthand was a different story. The ring stayed sharp, while the surrounding area blurred softly, creating a stunning effect. One of my biggest concerns when shooting accessories, especially with skin in the frame, is that fine textures can be highlighted too much, but this lens handled it with grace, resolving every detail while keeping it flattering.
Outdoors, the lens truly shined. Since I prefer shooting handheld to stay nimble, the lightweight build was a huge plus. It was so comfortable that I almost forgot I had a lens attached at all, allowing me to fully focus on framing the shot. As the sunlight filtered through the trees, I aimed to capture those elusive bokeh highlights, and the results were just as magical as I hoped—soft, round, and incredibly pleasing. The color accuracy was spot-on too, which made postprocessing a breeze.
The 90mm focal length hit that perfect sweet spot for portrait work. While I often lean toward zooms for their flexibility, this prime lens reminded me of the joy in moving around, physically adjusting my position to find the best angle. It made me rethink my reliance on zooms in the 70mm to 100mm range. The 90mm lens was just perfect. I found it to be a lens that could stand on its own without needing anything else.

In the end, the TAMRON 90mm F2.8 was more than just a great portrait lens—it was a creative tool that pushed me to explore new perspectives. With its sharpness, soft bokeh, and macro capabilities all wrapped in such a lightweight package, I knew this lens would quickly become a go-to for my future shoots.

Born in Tokyo in 1978, Junichi Shimizu graduated from the Japan Institute of the Moving Image. After gaining experience as a photographer’s assistant, he joined the photography department of a major theme park, where he focused on capturing images for websites and advertisements for theme parks and commercial facilities. Now working as a freelance photographer, Shimizu specializes in portrait photography and continues to work on various projects, including advertising and web media.
Instagram: @junichi_shimizu1978


90mm F/2.8 Di III VXD Macro [model F072] (available for Sony E & Nikon Z)


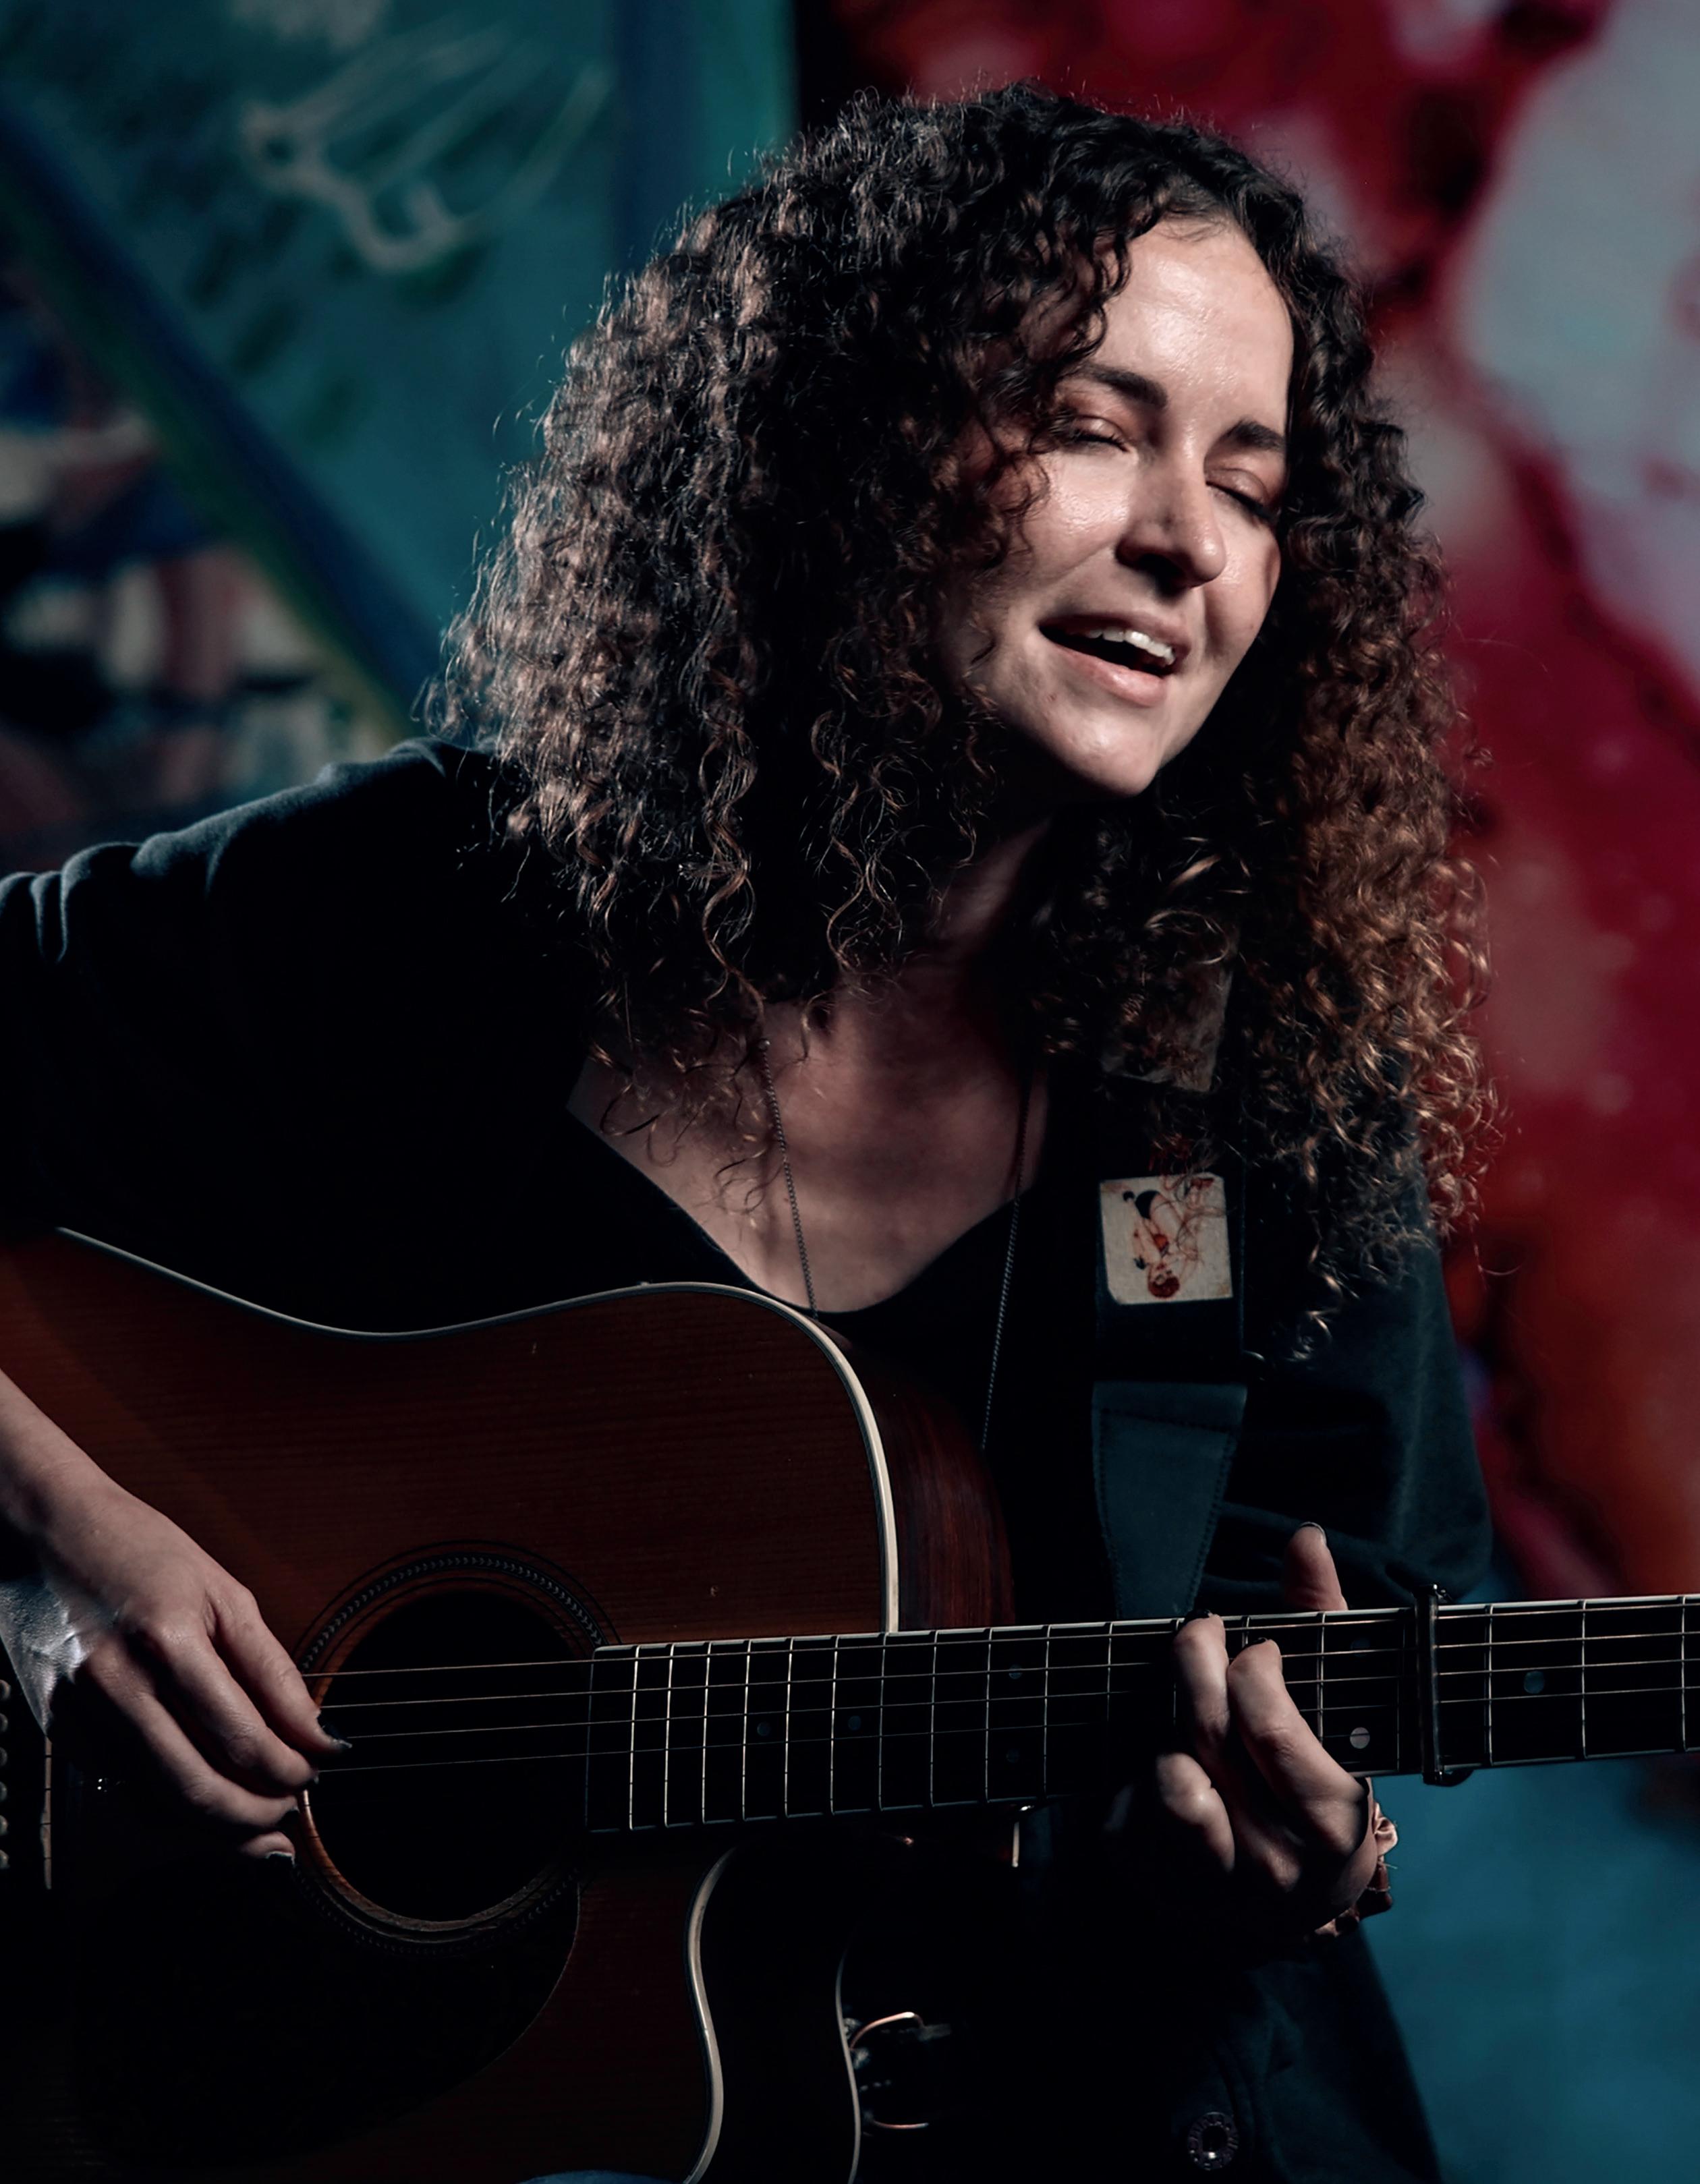
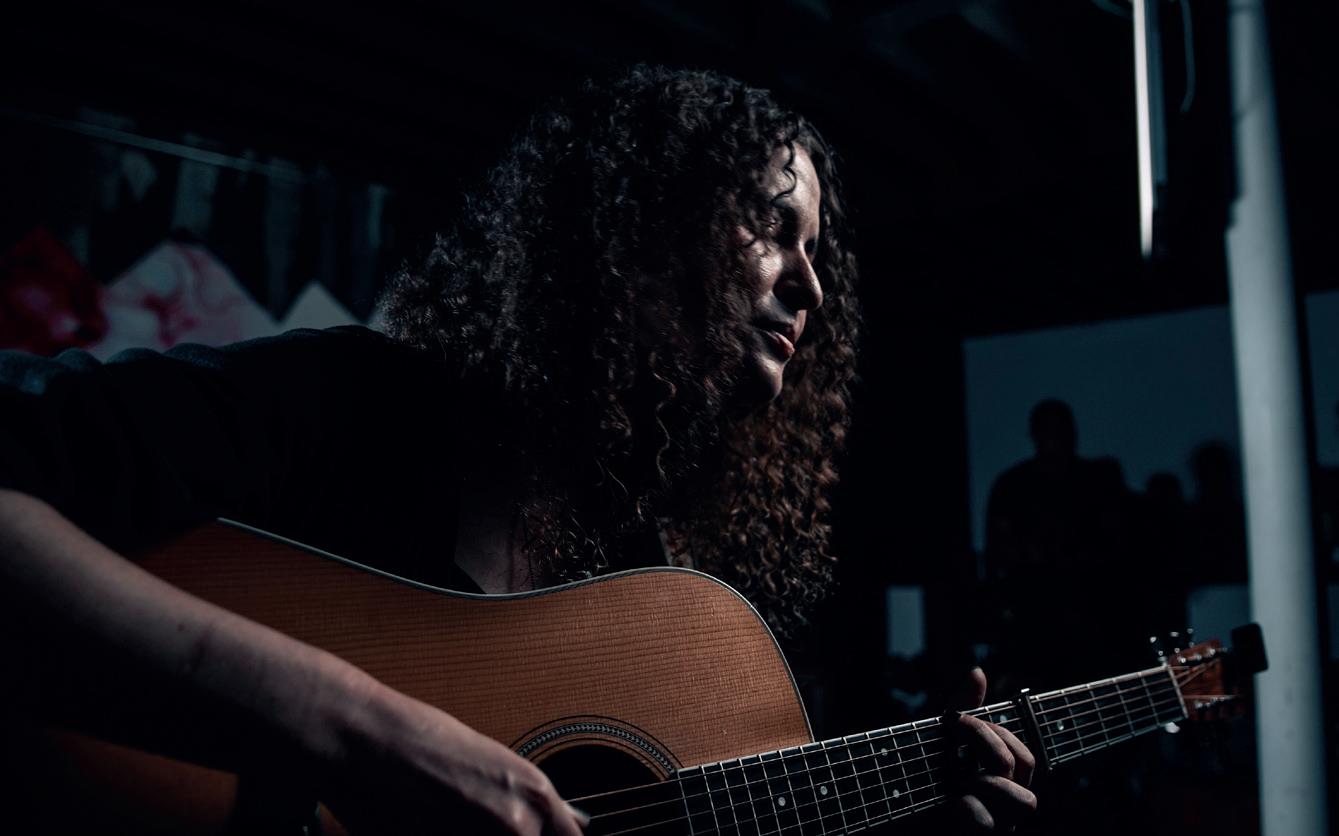
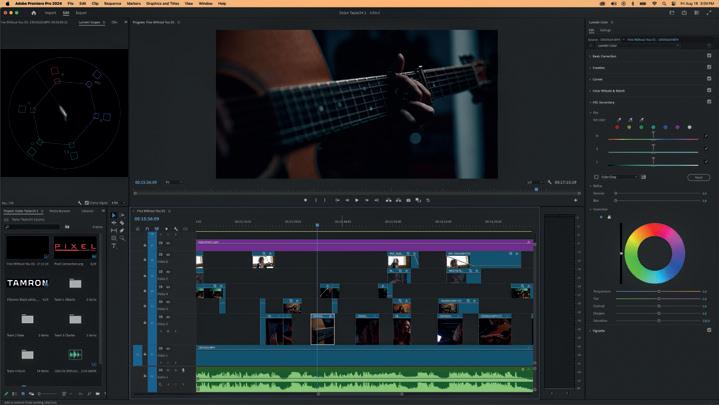
With his TAMRON 35-150mm F2-2.8 and 24-70mm F2.8 VC G2 lenses, Charley Voorhis shoots a music video for Nashville artist Dylan Taylor


Creating music videos may seem a daunting process, but with careful planning and execution, and the best camera lenses for the job, photographer and filmmaker Charley Voorhis embraces the challenge. “It seems like many of the projects I work on have some kind of element of: Can we actually do this?” he laughs. “Somehow, we always get it done.”
For a recent assignment, Charley collaborated with Nashville-based indie rock artist Dylan Taylor, shooting a video for her song “Without You.” This project wasn’t just about creating marketing content for Dylan—it was also an opportunity for Charley to put his TAMRON lenses to work for music video creation, including the SP 24-70mm F/2.8 Di VC USD G2 and the 35-150mm F/2-2.8 Di III VXD all-in-one zoom for his mirrorless camera system. Charley and a team of students completed the production in a single day, shooting from morning until late afternoon, figuring out how to sync up Dylan’s vocals with Charley’s footage.
“For this particular video, I wanted to be very comfortable shooting handheld and still achieve stable, sharp shots,” he says. “Most of my shots were achieved with the 35-150mm F2-2.8, which offers me great versatility in focal length and a maximum F2 aperture that allows me to shoot even in challenging lighting situations. The 35-150mm’s linear motor also tamps down
TAMRON
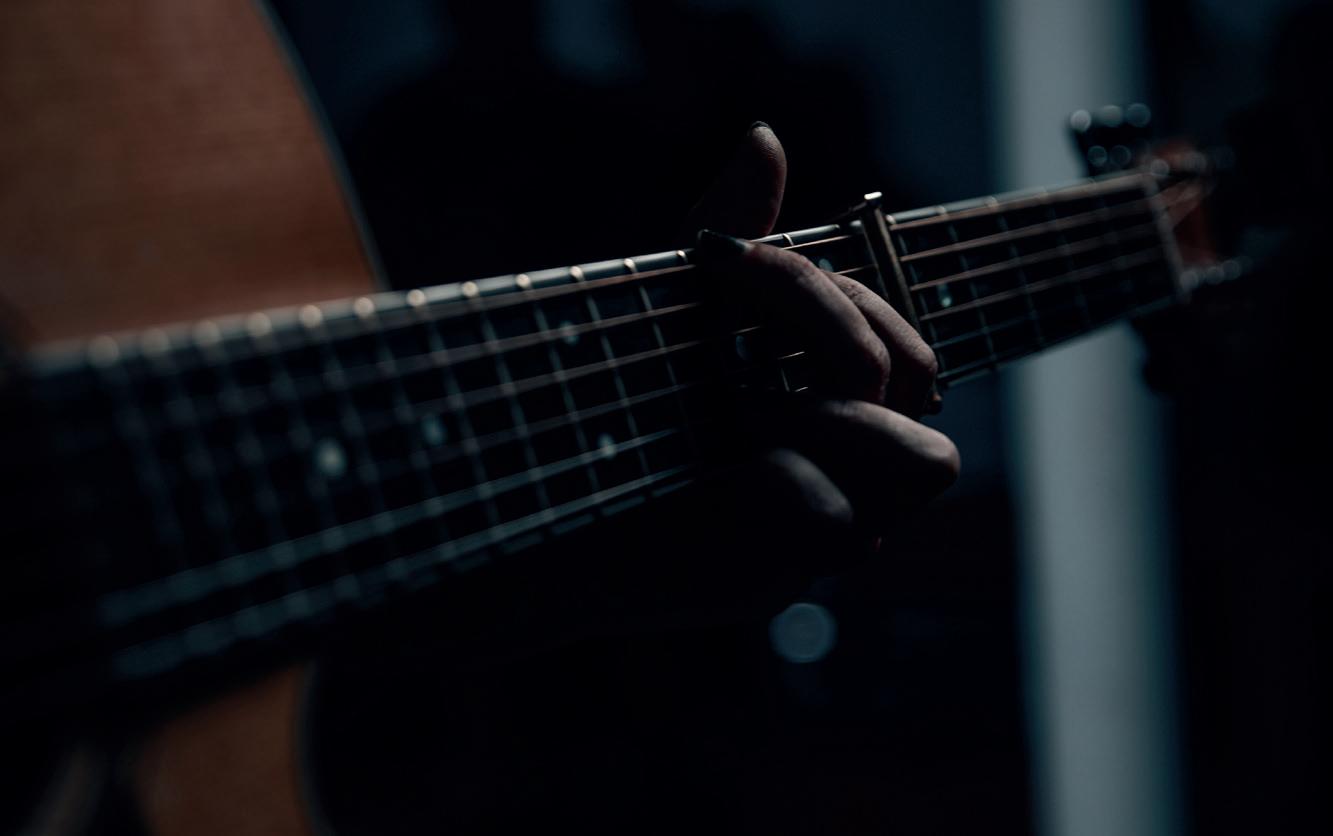
on drive noises and vibrations when I’m focusing, and I love that I can calibrate my focus ring directly through the TAMRON Lens Utility (TLU) mobile app so I can easily and smoothly shoot handheld.”
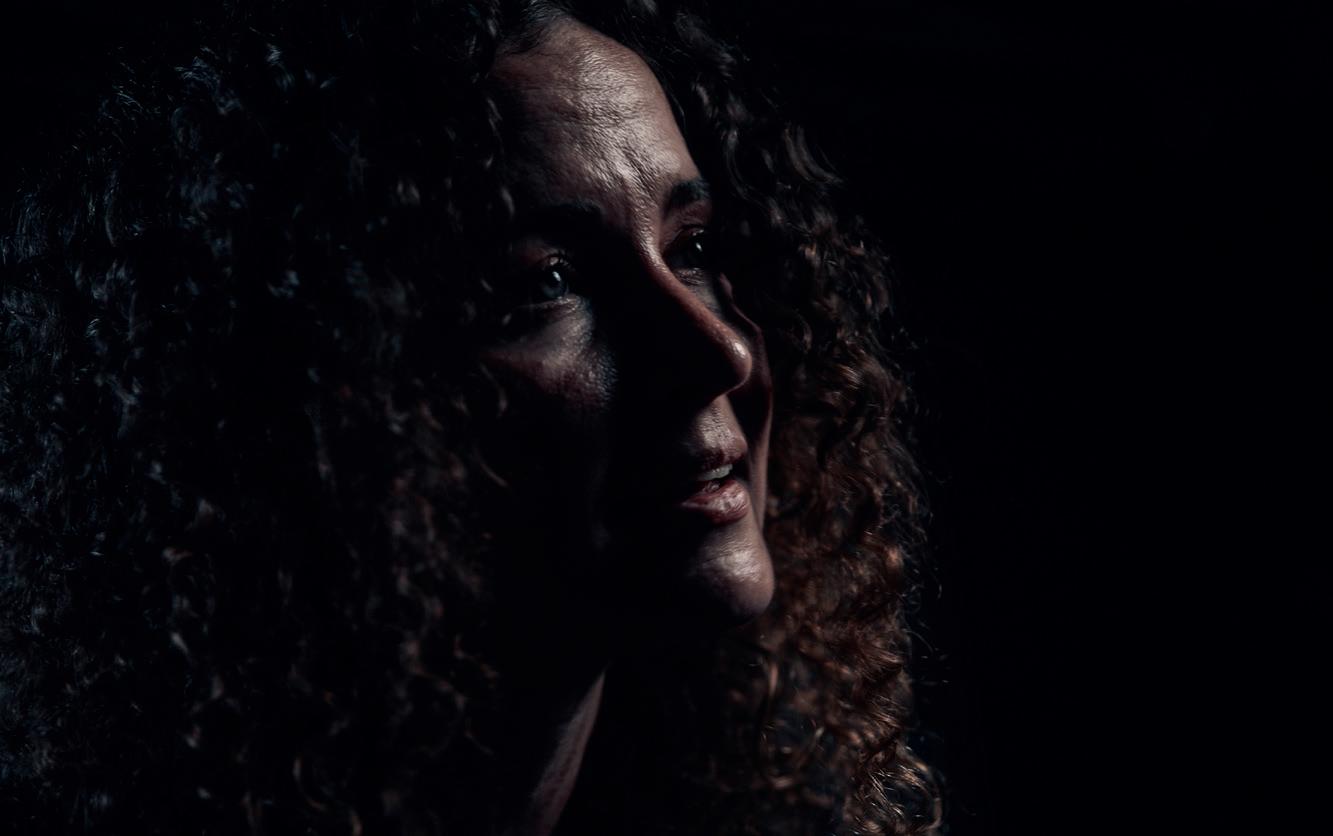
For Charley, the real driving force behind his production approach is the music itself. “I’ve always spoken about music being a driving force for me, and an inspiration,” he says. “When I’m shooting music videos, I use the song itself as an emotional recipe for the rest of the project.”
1 Make sure your audio setup is on point.
This is most easily accomplished using a prerecorded version of the song and having the artist perform along with it. If the audio is being recorded live during the takes, I suggest that each take be performed along with a click track—a digital audio track that serves as a metronome of sorts—to ensure all the takes will sync up in the edit.
In this case, Dylan was playing along with the song live, but we didn’t use any of the audio that we captured while shooting. She wasn’t lip-syncing—she was actually projecting her voice and playing guitar. If we didn’t do it that way, there’s no way we would’ve been able to sync everybody’s shots together later.
2 Shoot a master shot.
This establishing shot should be aesthetically pleasing and reliable. I think of it as the foundation of the music video; I can rely on cutting to it at any given time throughout the video. I take little to no risks in this shot and really let the performance of the musician carry it. I most often lock this shot off static or occasionally incorporate slow, stable pans or dollies.
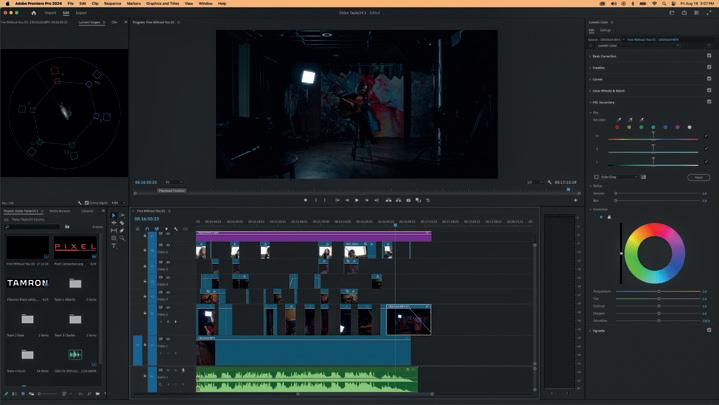
3 Shoot a variable shot.
The main purpose of this shot is to take risks and explore angles, compositions, and movements. I often shoot this handheld or on a gimbal. The primary goal of this shot is to capture variety. The more variety of angles and compositions that I get out of this take, the more dynamic my video will be. I often encourage the musician to replicate the same performance they gave during the master shot; however, that’s a subjective, artistic choice. (Note: The process detailed here maps out a two-shot project, but it can be scaled to include as many takes as you’d like.)
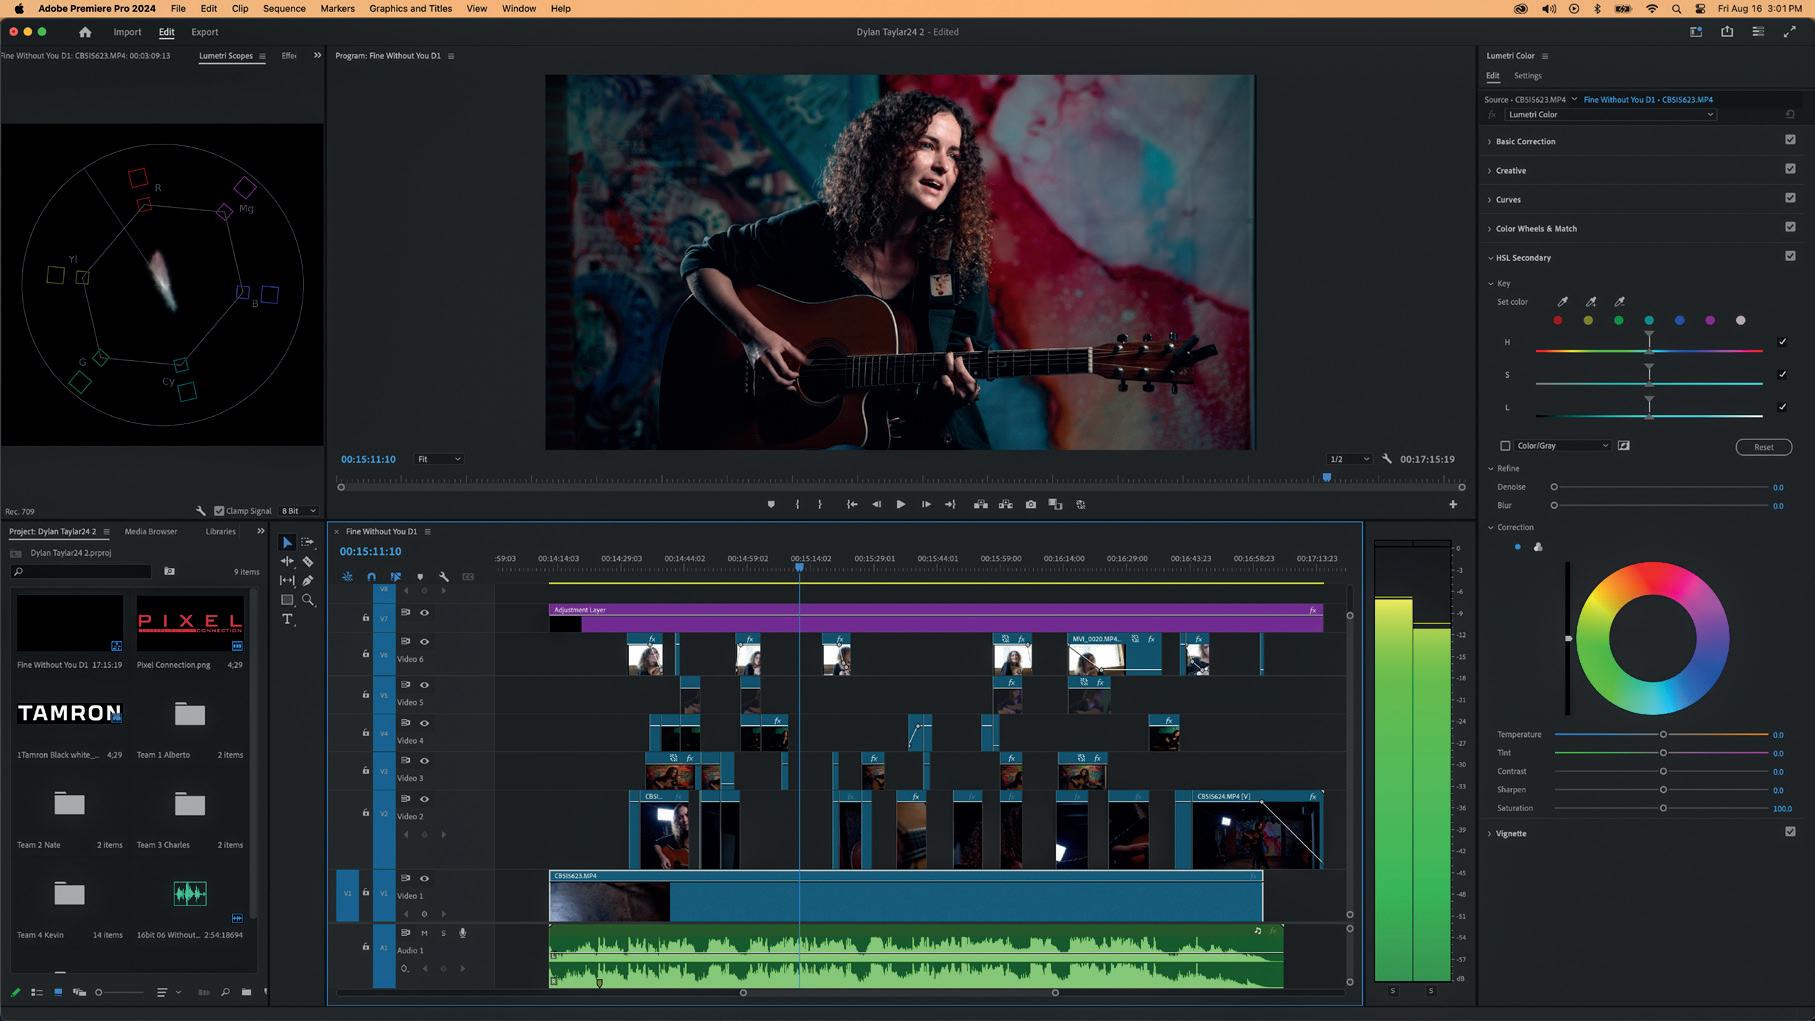
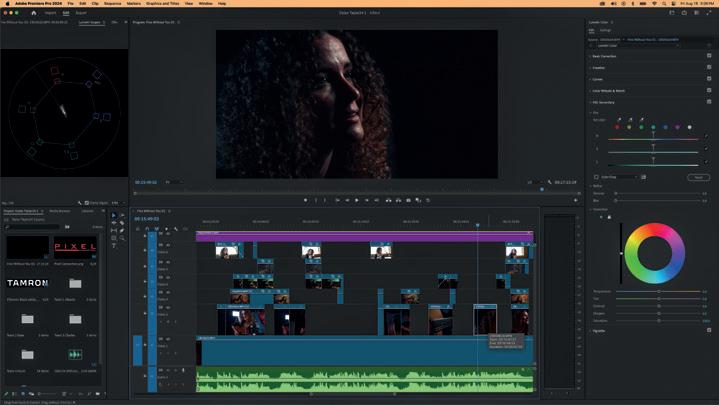
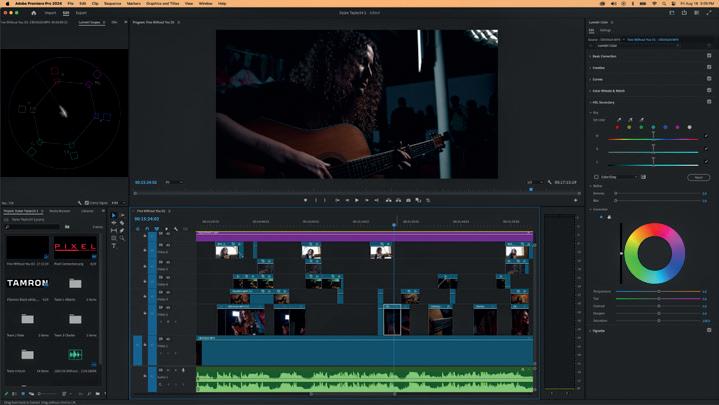
4 Do your initial edit.
The master shot should be assigned the first track on the video timeline. If all went as planned during your shoot, there shouldn’t be a need to make any cuts to this shot on the timeline. Next, I’ll sync the variable take on top of the master shot on track two.
Once the two shots are synced with the audio track, I’ll filter out all of the unusable moments of the variable take, which will leave a chopped-up sequence of video on track two. It’s important that once all the tracks are synced to the audio that the clips don’t get moved forward or backward on the timeline. This will keep all the edited video in sync.
“YOUR ESTABLISHING SHOT SHOULD BE AESTHETICALLY PLEASING AND RELIABLE. I THINK OF IT AS THE FOUNDATION OF THE MUSIC VIDEO.”
5 Polish the edit.
This stage of the process is all about making creative decisions. It’s important to pay close attention to how each shot cuts to the next one. This is also the stage in the editing process where I begin to make creative choices, like the look of the video regarding color, styles, and transitions.
Syncing the audio with the visual can be tricky, but the program I use for video editing has a feature that allows you to lasso two clips together. If they have the same noise print or audio—which is why I mentioned the importance of using a recorded studio song for consistency—you can just press “Auto Sync” and the program will snap the clips together.

SP 24-70mm F/2.8 Di VC USD G2 [model A032]


35-150mm F/2-2.8 Di III VXD [model A058]


Charley Voorhis started Voortex Productions in July 2004. He has since produced hundreds of videos for clients and has followed stories all over the world. Based in Washington state, he specializes in adventure filmmaking and community branding.
Instagram: @charleyvoorhis


Monica Olvera safely captures every swaddled newborn smile with her TAMRON 35-150mm F2-2.8 zoom lens.


Think newborns are cute and deserve more time in front of your camera? If you’re mulling giving newborn images more attention in your portfolio, don’t think you can just go in cold. “The biggest challenge for this type of photography, more so than in any other, is training about our subjects,” says Mexico City photographer Monica Olvera. “It’s essential to undergo this training to understand newborn behavior, including how to safely handle them and pose them. This is one of the few photography genres where you need to learn not only how to create impeccable portraits, but also to ensure that the baby is safe on your watch. That has nothing to do with photography and everything to do with neonatal care.”
To get up close to her tiny subjects, Monica uses the TAMRON 35-150mm F22.8 Di III VXD all-in-one zoom for Nikon Z mount. “This lens is so versatile for newborn photography,” she says. “Since it’s a 35mm, I can use it for overhead shots, like when the baby is in a bucket or on the bed, and still include much of the background. And when I want to do a tighter shot or close-up of the face, or focus on details like the hands, I don’t have to move or risk changing my lens, which could fall onto the scene, which goes back to what I was saying about keeping the baby safe. You can see that in practice in the photo here of the baby with the turquoise background. Being able to shoot at 35mm allowed me to widen the frame without having to shoot from the ceiling.”
52mm, F2.5, 1/200 sec., ISO 200


“WHEN I WANT TO DO A CLOSE-UP OF THE FACE OR FOCUS ON DETAILS LIKE THE HANDS, I DON’T HAVE TO MOVE OR RISK CHANGING MY LENS, WHICH COULD FALL ONTO THE SCENE, WHICH GOES BACK TO WHAT I WAS SAYING ABOUT KEEPING THE BABY SAFE.”


Thanks to the 35-150mm’s fast maximum F2 aperture, Monica can achieve beautiful bokeh in her backgrounds, keeping the focus on her babies. “In the photo of the baby snoozing in the lilac carrier, I loved the 35-150mm’s fast and accurate shooting, which helped me capture that split second when the baby seemed to smile,” she says.
1 Light it right.
The most flattering light for this type of portrait is a white-interior umbrella, at least 5 feet in diameter, as the light should be soft and diffused. However, one tip that has helped me soften the lighting even
more is to place a double white cover on the umbrella. Just buy an extra one and add it to your diffuser to create what I call a velvet light.
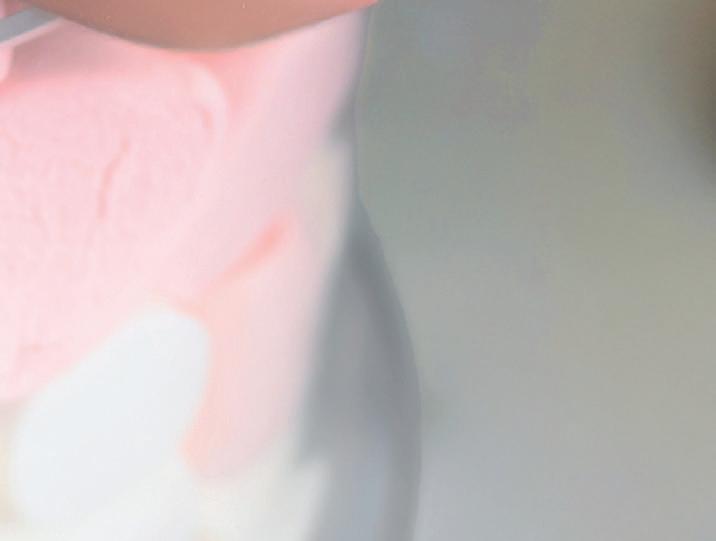
In the peach-colored shot here, it’s an overhead photo with the light positioned at 45 degrees laterally over the special puff prop I used for this pose. The puff had a hole in the center where the baby could be securely placed for the shot.
2 Make intentional choices on backgrounds and props.
I choose backgrounds according to the tones I’ll be using for the entire session. I try to be creative by combining different elements so it’s not just the same photo over and over again with different colors. I make an effort to use various combinations of elements in the scene.
3 Swaddle up!
It’s crucial for the baby to be asleep during this type of photo shoot. We usually use several techniques to prolong their sleep as much as possible while we work. One tip: When it seems like the babies are having a hard time falling asleep, we wrap them in such a way so that their arms are contained at their sides. This prevents them from startling themselves awake when they move, as at this stage they have many involuntary movements.
4 Disturb the baby as little as possible. It’s like dancing a waltz. Switch from one pose to another—for example, from face down to lying on its side to face up—so that the transitions are as nondisruptive as possible to the baby’s sleep. In the photo here of the baby in the container of giant stuffed marshmallows, the biggest


challenge was positioning the baby comfortably without waking her up. I’d done this shot with blankets before, but this time I decided to change the contents to make the baby more comfortable so she hopefully stays asleep longer.
5 Let your framing evolve with the session.
I usually start with a wide shot and change the framing as I go. Then I move on to close-ups. If I have front lighting, I try


to create a backlight with a diagonal angle so that the eyes are positioned transversally in the photo. I also try to make my shots symmetrical if the elements in the photo allow it. The most flattering angle will always be when you’re high enough above the baby’s face so that their nostrils aren’t visible. In the photo here of the baby swaddled in green, that was the trickiest part.


Monica Olvera is a prominent Mexican photographer specializing in newborn, maternity, boudoir, and family portrait photography. With a background in graphic design from the National Autonomous University of Mexico (UNAM), Monica began her photography career at 22 and has built a nearly threedecade-long career in the visual world. Her ability to capture intimate, meaningful moments has earned her recognition in Mexico and internationally. In addition to her photographic practice, Monica has mentored and been a panelist on forums in the United States, Brazil, Colombia, Spain, and Mexico. Residing in Mexico, Monica continues to contribute to the development of contemporary photography.
Instagram: @monicaolveraphotography
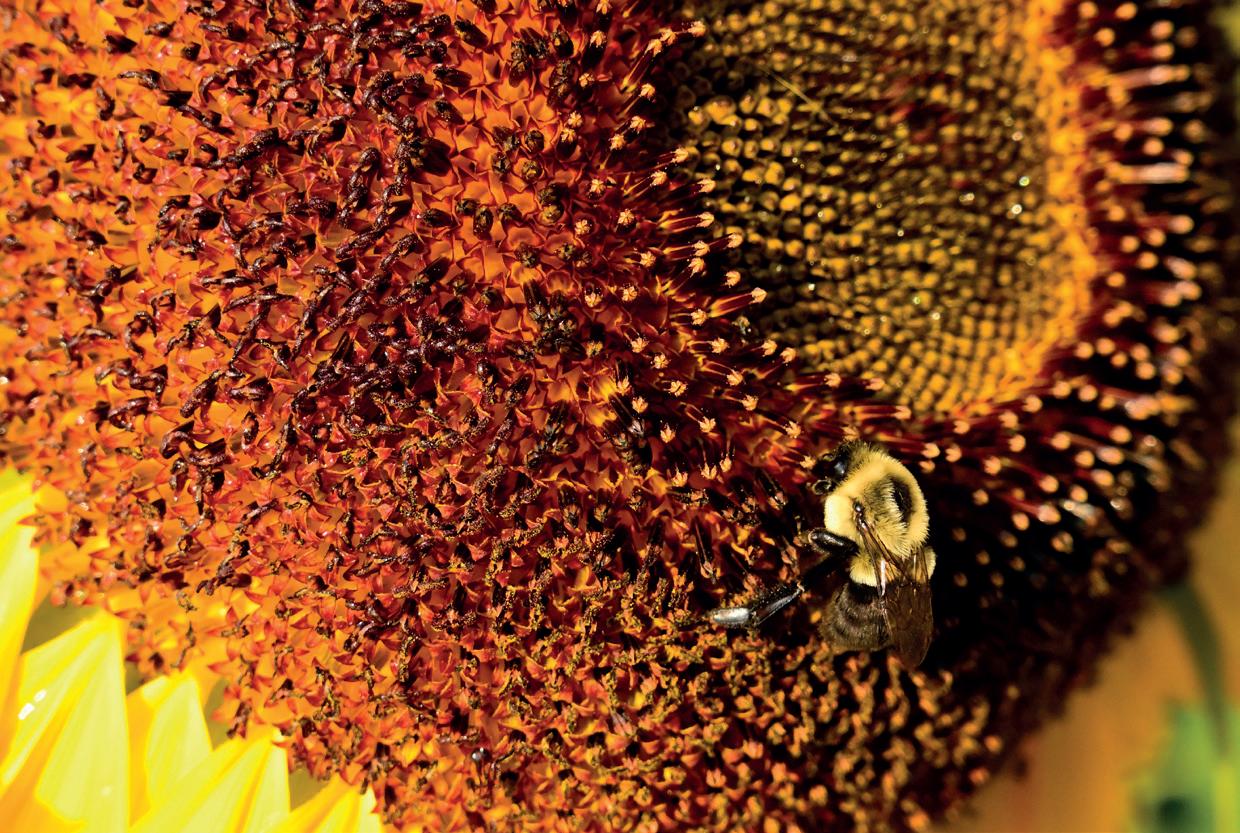
Kristine Bosworth uses a trio of fast TAMRON lenses to achieve her macro-style floral images.


Ilove the intricacy of flowers and often find myself hanging out in my garden whenever I’m home. Even when traveling, I’m happiest when I stumble upon a local garden, where I can surround myself with these beauties of nature.
Like the phrase “stop and smell the roses,” I believe you should slow down and really take in the entirety of each flower in front of your camera. One image alone typically can’t do a flower justice. I love the details of every one of my floral subjects and want others to see them the way I do.
Some of the ones shown here are from my own garden. My mother insists that I have my grandmother’s green thumb,
and I’ve always found digging in the garden to be my happy place. The blooms I photograph become an extension of that. I hadn’t intended for this as I was taking pictures, but these images evolved into a “color” series of sorts.
I’m lucky to have so many TAMRON lenses at my disposal. Because most of my personal photography is close up, I choose what lenses I use based on how close they focus, though sometimes the focal length I want will dictate which one I reach for.
My usual everyday lens is the TAMRON 28-75mm F/2.8 Di III VXD G2 zoom for Nikon Z mount, a lightweight lens with a great walk-around range. The 28-300mm Di III VC VXD for my Sony
mirrorless camera is perfect as a onelens solution that can cover me for virtually anything I want to shoot (and takes away the pressure of having too many lens choices). Finally, the 150500mm Di III VC VXD ultra-telephoto lens for mirrorless cameras is what I select for butterflies and wildlife, when I don’t want to be so close that I disturb nature. The close-up capabilities of all three lenses is excellent, offering a softness to the out-of-focus parts of my images that’s stunning.
To keep things sharp, I almost always shoot with one-point focus, moving the point around the viewfinder. So many new photographers leave their focus point in the center, focus on their subject, and recompose their image.
That was fine to do years ago, but with the amount of detail that’s achievable with today’s sensors, that slight shift in recomposing will sometimes pull the focus off of what elements you’d like to remain sharp.
I always stress taking more than one image of the subject: Focus, shoot, refocus, shoot again, move, focus, shoot again. Change apertures and repeat, over and over. The more you do it, the more it becomes intuitive. Since my subjects are right outside my door, I can spend time to review my images, then go back out until I get it right. Sometimes the flower dictates what I want to keep sharp and what I want to fade off. Isolation is the key to controlling the viewer’s eye; taking your time with the subject will help you get there.
Knowing what to look for when I’m with my camera can vary with each outing. Sometimes I’ll just sit in the middle of the garden and wait for something to strike me. Other days I’ll focus on how the morning rain or early drops from the sprinkler look on the blossoms. Still other times I’ll zoom in on how transfixed the bees and butterflies are with gathering nectar, or how their shapes and colors contrast with the flowers.
Mostly, however, it’s all about how close I can get to my subjects, to show viewers more than what the average person sees when they walk by a flower on the ground. And every morning, the garden is different from the day before.

150-500mm F/5-6.7 Di III VC VXD [model A057]


28-75mm (28mm), F13, 1/10 sec., ISO 4000


Location: The Villages, FL
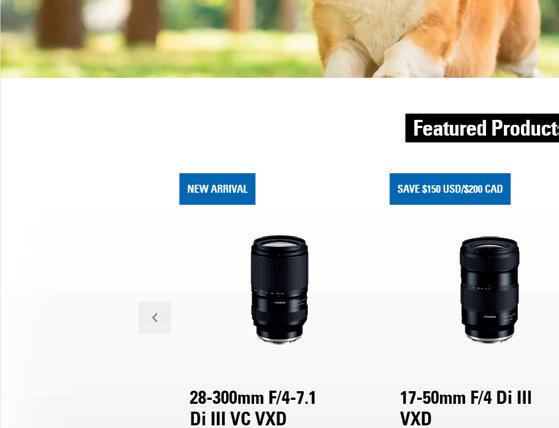
28-300mm
F/4-7.1
Di III VC VXD [model A074]
17-50mm
F/4 Di III VXD [model A068]
Occupation: Technical Representative & EDU Market Liaison
28-75mm
F/2.8 Di III VXD G2 [model A063]

Photographic Specialty: Travel and Nature photography, primarily capturing the natural beauty of flowers through a variety of styles, including wide-angle landscapes, close-up portraits, and abstract macro photos.
Passions: Family-time, gardening & Christmas-time!
Favorite Lenses: All the new Z glass; TAMRON 28-75mm F/2.8 Di III VXD G2 (A063), 90mm F/2.8 Di III VXD M1:1 (F072), 35-150mm F/2-2.8 Di III VXD (A058), 50-400mm F/4.5-6.3 Di III VC VXD (A067) & 150-500mm F/5-6.7 Di III VC VXD (A057).
Instagram: @tamrontechkristineb


17-50mm (50mm), F8, 1/1250 sec., ISO 2000


150-500mm (500mm), F6.7, 1/400 sec., ISO 1600
28-300mm (300mm), F7.1, 1/800 sec., ISO 1250

TAMRON 17-28mm F/2.8 Di III RXD 17mm,1/60 sec, F10, ISO 100
During a polar vortex which dropped the temperature to a freezing -18°. I decided to drive up to Minnesota's North-shore on Lake Superior. During the sunrise, a thick layer of sea smoke covered up the horizon. There is a big rock with a massive hole in the middle that is just off the shore. If timed just right, you can get these large icicles hanging down on the inside. Some of them grow up to 6-7 feet. There is a small window during sunrise when the icicles will shine with a golden glow.
Instagram: @martinjrmn
tamroneditor@tamron.com #tamronamericasmagazine
If you have any questions about our products or services, get in contact with us:
Telephone: 1-800-827-8880 / prompt 1
Email: custserv@tamron.com Mon-Fri 8:45am – 5:00pm EST
TAMRON products are manufactured with the greatest care and precision. However, should there be any damage to your lens, TAMRON Customer Service will be happy to assist you. All TAMRON lenses purchased through an authorized TAMRON Americas retailer in the USA and Canada are supported with our 6-Year Warranty. You can find contact addresses and more detailed information on the warranty and the procedure for sending in the product and having it repaired in the Support section of our website: www.tamron-americas.com/ support
Publisher: TAMRON Americas, 10 Austin Blvd, Commack, NY 11725
Editor: Stacie Errera
Writer: Jennifer Gidman
Staff: Jessica Kelly, Lisa Keller, Damion Fearron
Contributors: Ken Hubbard, André Costantini
Production and layout: Stephen Reisig / Real Imagination
Printed by: Spectragraphic, New England
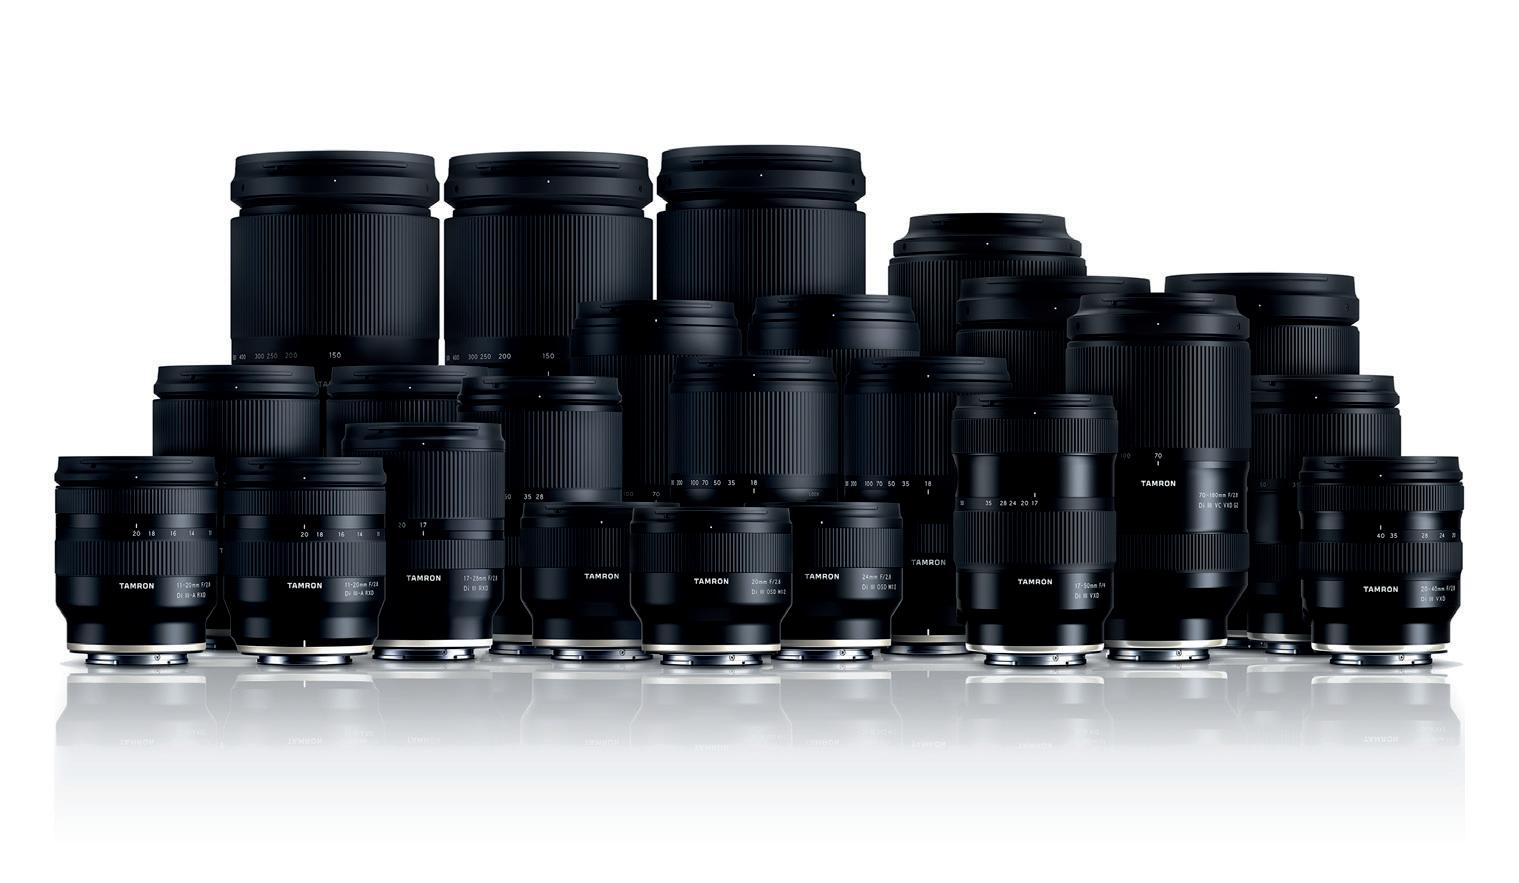
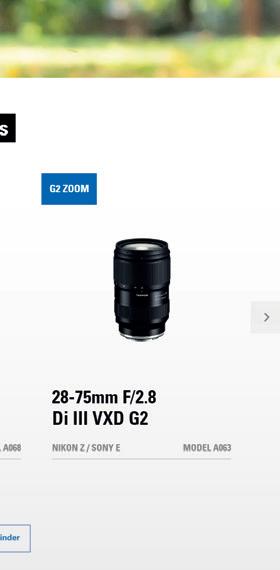
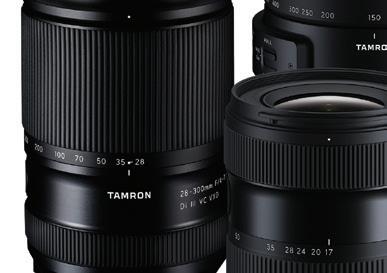
TAMRON’s G2 Zooms: Incomparable Coverage for Every Moment!
TAMRON lenses deliver a superb fusion of performance and value, enabling today’s cameras to perform at their peak, and are designed for remarkable optical performance.
28-75mm F/2.8 Di III VXD G2


www.tamron-americas.com


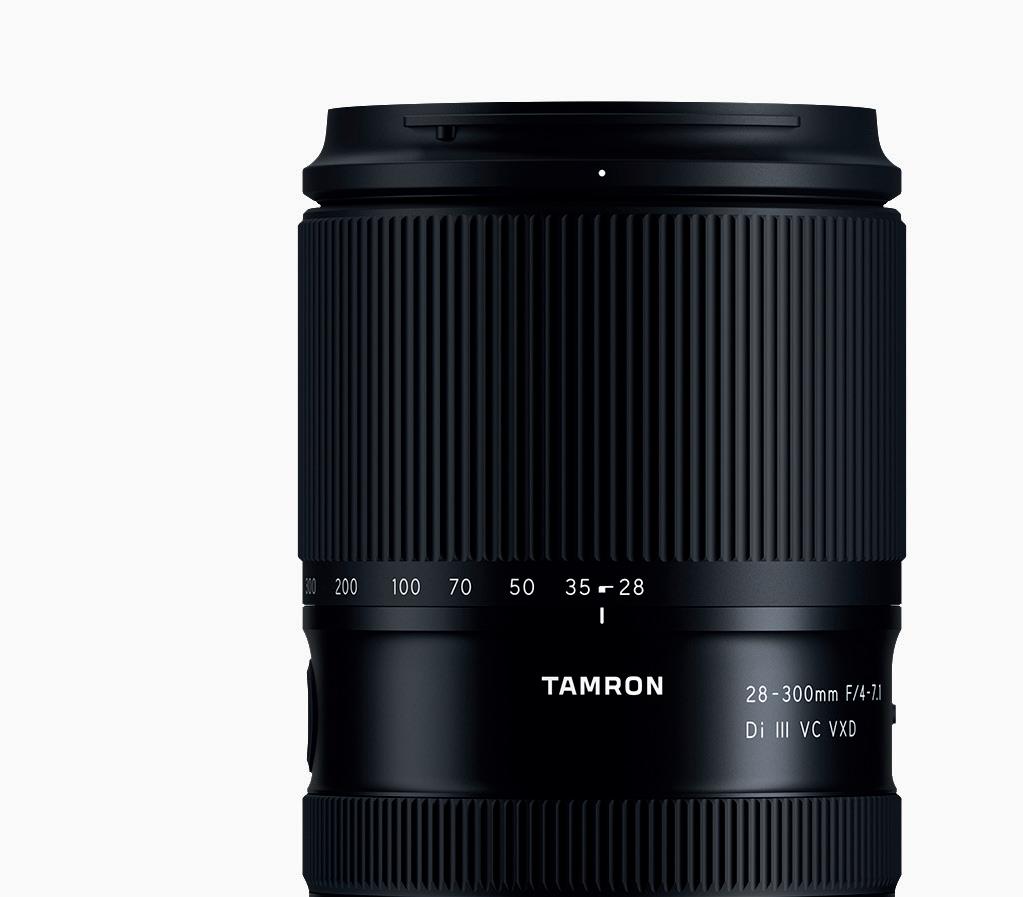
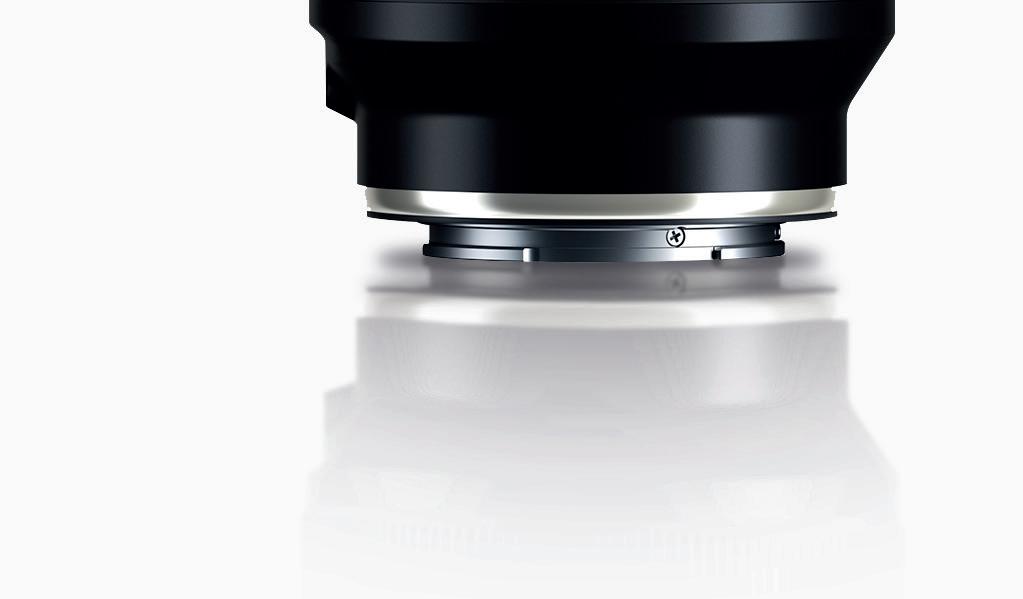
28-300mm F/4-7.1 Di III VC VXD
Introducing the ultimate All-in-One Zoom Lens. Exceptional imaging performance throughout its 10.7x wide to tele zoom range. ALL-IN-ONE ZOOM LENS for Sony E-mount [ Model A074]