PRO










TIPS FOR FOOD AND WINE
© Ian Jones 35-150mm (123mm), F4, 1/1250 sec., ISO 1000 MAGAZINE I ssue 18 · Spring 2024
Our Tamron pros dish out tips and techniques for food photos that tantalize.
HORNER Captures motorcycle motion with his 70-180mm F2.8 VC G2 zoom. NEW 28-75mm F2.8 G2 TAMRON’s high speed G2 zoom lens for Nikon Z mount cameras.
CASEY


























www.tamron-americas.com Capture the decisive moment with Tamron's fast zooms. ONLY AVAILABLE AT YOUR AUTHORIZED TAMRON AMERICAS RETAILER © André Costantini 35-150mm, 55mm, F/2.8, 1/320 sec., ISO 125 ALL NEW G2 ALL NEW G2 STANDARD ZOOM LENS for Sony E-mount and Nikon Z mount [ model A063] 28-75mm F/2.8 Di III VXD G2 FAST F/2 FAST ALL-IN-ONE ZOOM LENS for Sony E-mount and Nikon Z mount [ model A058] 35-150mm F/2-2.8 Di III VXD TELEPHOTO ZOOM LENS for Sony E-mount [ model A065] 70-180mm F/2.8 Di III VC VXD G2 ULTRA WIDEANGLE17-28mm F/2.8 Di III RXD [ model A046] WIDE-ANGLE ZOOM LENS for Sony E-mount

Dear Readers,

As we welcome the vibrant colors of Spring, it is with pleasure that we bring you Issue 18 of the TAMRON Magazine. This edition is a celebration of culinary delights and an exciting new product for Nikon Z shooters.
Our special focus on "Food and Wine" will take you on a delectable journey, exploring the diverse world of food photography. From downhome cooking to the plates served at 5-star restaurants, our pro team presents a collection of images and photo tips that will not only inspire your food photography adventures, but might just tantalize your taste buds, too! BONUS: Watch our how-to companion videos that delve in for a closer look at the ins and outs of food photography.
In addition to our culinary showcase, we are thrilled to bring you insider tips for capturing stunning photos across several genres. Learn from the pros as they share their secrets to creating visually captivating images from portraits and maternity to landscapes, sports, aerial, and birds. From composition techniques to lighting tricks, their tips will elevate your photography skills to new heights.
As part of our commitment to fostering creativity, we are delighted to announce the winners of the 2023 Tamron Magazine Photo/Video Contest. The talent displayed by Tamron lens users was truly extraordinary, and we can't wait for you to see the winning entries showcased in the pages of this issue. Congratulations to all the winners and thank you to everyone who participated!
But that's not all – the Spring 2024 issue also marks the unveiling of the new TAMRON 28-75mm F2.8 G2 for Nikon Z mount. We believe this high-performance fast standard zoom lens will revolutionize the way Nikon Z users capture and cherish moments. We hope you enjoy the diverse content packed into Issue 18. Thank you for your continued support, and here's to a season filled with capturing food, family, travel, and adventures.
Sincerely,
Stacie Errera Vice President, Marketing & Communications
CONTENTS
4 NEWS
Check us out on YouTube and subscribe to our eNewsletter
5 TAMRON VIP CLUB
Register your Tamron lenses towards 2025 VIP status and reap the rewards
6 TOP FEATURES
NEW! 28-75mm G2 for Nikon Z mount
10 PRACTICE
Rachael Rodgers helps adoptable dogs with the Tamron 17-28mm
14 SPECIAL
Our Tamron pros dish out tips and techniques for food photos that tantalize
20 PHOTO CONTEST
Winners Circle for Tamron User Photo/ Video Contest 2023
24 INTERVIEW
David Akoubian’s bird portraits with the Tamron 150-500mm VC
28 FIELD REPORT
Ken Hubbard heads into the ominoussounding parks with his Tamron 17-70mm VC
32 EXCURSION
Stunning aerial photography shot by Henry Do’s Tamron 28-75mm G2 & 35-150mm
36 PRACTICE
Elmer Escobar captures Maternity Glow with his Tamron 35-150mm F2-2.8
40 PRACTICE
Christina Roberts’ portraits with the Tamron 28-75mm G2
44 MY PROJECT
Jessi Carrieri captures youth football with her Tamron 35-150mm
46 PARTING SHOT
Casey Horner uses a panning technique with the 70-180mm G2 lens
FOLLOW US:


Tamron Magazine 3
TAMRON NEWS Get news, interviews, photo tips and more each month. Visit Tamron at www.tamron-americas.com to sign up.
FACEBOOK tamronamericas INSTAGRAM @tamronamericas TIKTOK @tamronamericas LINKEDIN @tamronamericas WATCH TAMRON IN ACTION www.youtube.com/user/tamronvids WELCOME
© Rachael Rodgers









NEWS SUBSCRIBE TODAY AT www.youtube.com/TamronVids SUBSCRIBE TO ALL FOUR TODAY AT bit.ly/TamronNewsSignUp 4 Tamron Magazine 60-SECOND LESSONS NEW PRODUCT HIGHLIGHTS BEHIND THE SCENES VIDEOS Aspirational and how-to videos from the pros. Tips from the pros, new product info and specials delivered to your inbox. CHECK US OUT ON... SUBSCRIBE TO OUR... eNewsletter FOUR SUBSCRIPTIONS TO CHOOSE FROM! ■✓ Portrait and Events ■✓ Everything Nature and Travel ■✓ World of Close-up and Art ■✓ General news, events and promotions Available in English, French and Spanish
TAMRON AMERICAS VIP CLUB
Tamron Americas' VIP Club rewards users in the USA and Canada who have registered their eligible Tamron lenses through our online warranty registration system since May 2011. There are three VIP Club levels: Silver for those having registered three to four purchased lenses; Gold for those having registered five purchased lenses; and Platinum for those having registered six or more purchased lenses. Club membership will be evaluated each year to include new members who qualify and to increase the status level of current members if applicable. Get complete rules and program details at bit.ly/RegisterLenses.
SILVER Membership (3-4 lenses)
Tamron owners who have purchased and registered three (3) to four (4) lenses during the time-frame of May 2011 and January 15, 2025 are eligible for these 2025 membership perks:
GOLD Membership (5 lenses)
Tamron owners who have purchased and registered five (5) lenses during the time-frame of May 2011 and January 15, 2025 are eligible for these 2025 membership perks:
PLATINUM Membership (6+ lenses)
Tamron owners who have purchased and registered six or more (6+) lenses during the time-frame of May 2011 and January 15, 2025 are eligible for these 2025 membership perks















PRACTICE Tamron Magazine 5
VIP Liaison Program Magazine Lens Cloth Sportspack Pin Contest Rebate Repair Cap Water Bottle Vest Excusion Workshop Discount Excusion Advanced Registration Notice SILVER MEMBERSHIP ✔ ✔ ✔ ✔ ✔ ✔ $50 10% ✔ $500 3-days GOLD MEMBERSHIP ✔ ✔ ✔ ✔ ✔ ✔ $75 15% ✔ ✔ $750 4-days PLATINUM MEMBERSHIP ✔ ✔ ✔ ✔ ✔ ✔ $100 20% ✔ ✔ ✔ $1,000 5-days
Register your Tamron lenses towards 2025 VIP status and reap the rewards
REGISTER YOUR TAMRON LENSES AT bit.ly/RegisterLenses NEWS

TOP FEATURES OF THE 28-75MM F/2.8 DI III VXD G2
FOR NIKON Z MOUNT
TAMRON’s high speed G2 zoom lens optimized for the latest full-frame mirrorless cameras is now available for Nikon Z mount cameras.
The 28-75mm F/2.8 Di III VXD G2 (Model A063) is a fast-aperture standard zoom lens that delivers outstanding resolution and superb overall performance in a lightweight and compact design. And it’s now available for Nikon Z full-frame mirrorless cameras in addition to Sony E-mount.
Outstanding high-resolution performance delivers an unprecedented photo experience With the goal of producing outstanding high image quality befitting a new fast-aperture zoom lens, TAMRON redesigned the optical design in the 28-75mm F2.8 G2 from scratch. The optical construction of the 28-75mm F2.8 G2 deploys 17 elements in 15 groups. To minimize optical aberrations to an extreme degree, two LD (Low Dispersion) and two GM (Glass Molded Aspherical) lens elements are used in an optimal arrangement. The lens demonstrates high resolving power to the edges of the frame at all focal lengths, while also offering the soft and beautiful bokeh that is distinctive to fast-aperture lenses. The new fast standard zoom lens for Nikon Z as well as Sony E mount shooters is ideal for a wide range of photographic genres from street photography and portraiture to landscapes and general family events like vacations and holidays.
TOP FEATURES
Light & Compact 4.7” long, 19.4oz.
Tamron Lens Utility™ compatible
Ø67mm filter size
Fluorine Coating
wide / 15” tele
Moisture resistant lens construction MOD 7.1”
6 Tamron Magazine
VXD autofocus (Voice-coil eXtreme-torque Drive)
TOP FEATURES
Capture all the action with high-speed, high precision VXD
The AF drive system is equipped with VXD linear motor focus mechanism. VXD is exceptionally responsive and operates at high speed with great precision. With reliable, speedy focusing from the MOD to infinity and extremely good focus tracking, you are ready for those important moments even when photographing fast-moving subjects. Moreover, the AF drive motor is very quiet, making it ideal for still photography and videography when shooting in conditions where near silence is required.
Lightweight and compact lens body
The 28-75mm F2.8 G2 features a remarkably compact and lightweight design, just 4.7in (119.8mm) long, with the Nikon Z mount version weighing only 19.4oz (550g). With a size that is easy to carry and a weight that’s well-suited for handheld shooting for extended periods, the 28-75mm F2.8 G2 will likely become your best choice for travel, street shooting, everyday carry, and spontaneous photo opportunities.
Close-up shooting with 7.1" (0.18m) MOD and a 1:2.7 maximum magnification ratio Close focusing has also been improved. The MOD of the 28-75mm F2.8 G2 is 7.1" (0.18m) at the wide 28mm end, an improvement over the 1st-generation 28-75mm F2.8 (Model A036). This allows photographers to
capture powerful shots that emphasize the perspective effects unique to wide-angle photography when shooting close-ups. The working distance becomes about 1.7" (4.4cm) at the MOD. The maximum magnification ratio is 1:2.7. Get closer to any subject and enjoy the world of wide macro photography. In addition, at the telephoto end the MOD is 15" (0.38m). The magnification ratio when using the longer 75mm focal length is 1:4.1, enabling close-up shooting with greater working distance.
HIGHLIGHTS IN FOCUS: 28-75mm F/2.8 Di III VXD G2
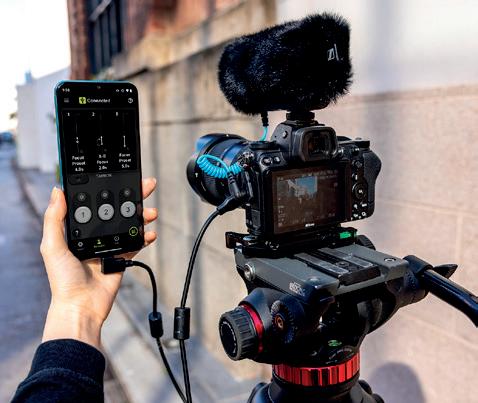
TAMRON Len Utility and Focus Set Button expands the possibilities of still photography and video shooting. Easily update the lens to the latest firmware without going through the camera and use functions to support focusing operations and other actions when shooting still images or video like A-B Focus. *The ring function (Focus/Aperture) is not supported for Nikon Z mount.

Circular aperture
A 9-blade diaphragm is configured to retain a smooth, circular-shaped aperture opening even when stopped down by two stops from the wideopen aperture. This produces a smooth-edged bokeh in background highlights.



NEW 28-75mm F/2.8 Di III VXD G2
Model A063
Focal Length 28-75mm
Maximum Aperture F2.8
Blades 9 (circular diaphragm)
MOD 7.1“/0.18m (WIDE) 15“/0.38m (TELE)
Max. Mag. Ratio 1:2.7 (WIDE) 1:4.1 (TELE)
Length 4.7“ (119.8mm)
Weight 19.4 oz. (550g)
Filter Size Ø67mm
Max. Diameter Ø75.8mm
Mount* Nikon Z mount
*See website for Sony E-mount specs
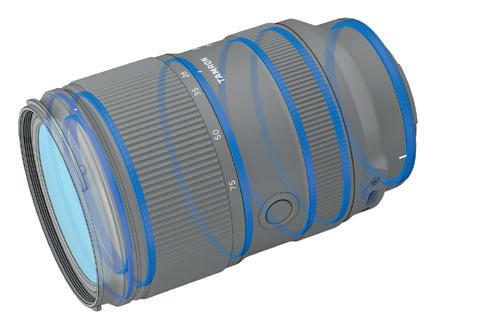
Moisture-Resistant Construction
For greater protection when shooting outdoors, leak-resistant seals throughout the lens barrel help protect your equipment. Also, the Connector Port is the water-proofed USB Type-C variety.
28mm, F2.8, 1/200 sec, ISO 640
Tamron Magazine 7
Noriko Kukimoto

JUN MATSUO



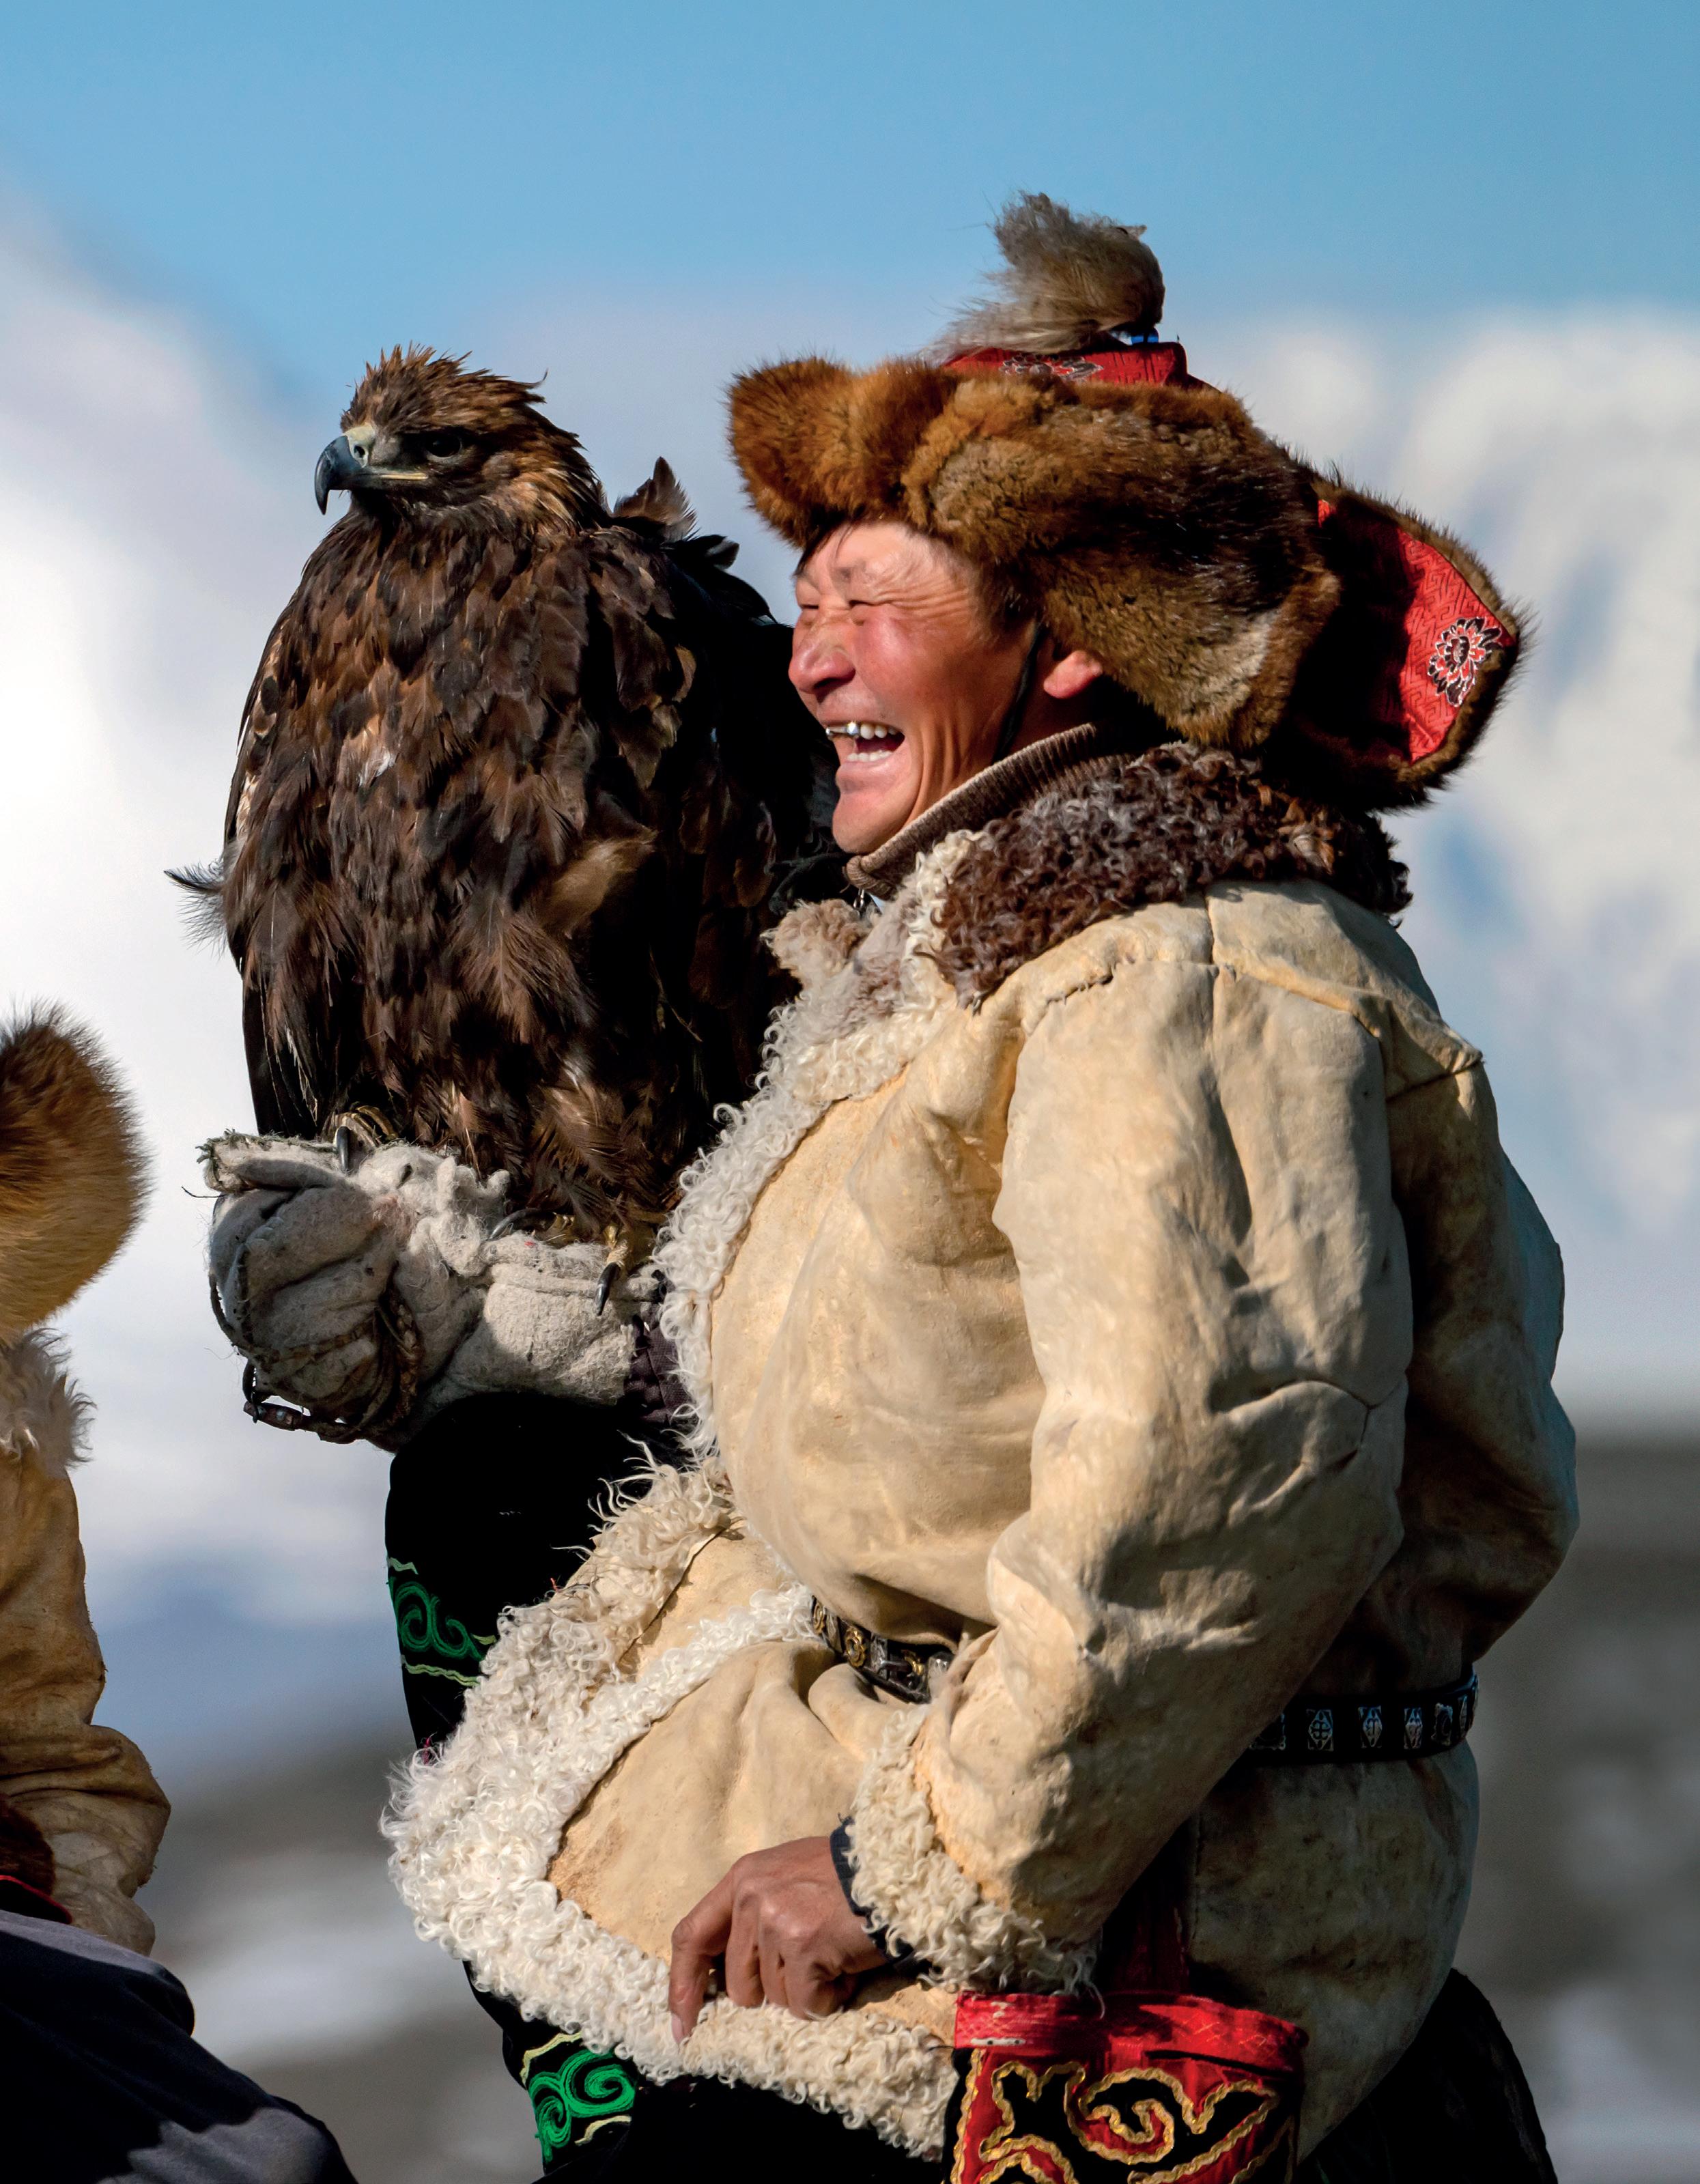
Jun Matsuo is a talented photographer who has traveled to more than 50 countries since the age of 19. Jun was born in 1976 in Hiroshima and graduated from Joshibi University of Art and Design. She dedicates herself to documenting the lives of people living in remote areas of the world, and in recent years has been working on the Tibetan cultural area and the western region of Mongolia. She is a member of the Japan Professional Photographers Society and teaches photography at Nikon school.
Instagram: @junmatsuo_photo
HIGHLIGHT
Tamron Magazine 9 HIGHLIGHT 150-500mm (462mm), F6.7, 1/5000 sec., ISO 400

TAILS FROM THE TRAILS
Rachael Rodgers helps adoptable dogs find homes via her photos with the Tamron 17-28mm F2.8 wide-angle lens.
PRACTICE 10
Magazine
Tamron
PHOTOS: RACHAEL RODGERS


When Rachael Rodgers was growing up in New Brunswick, her mother always had a camera in hand—and soon, so did Rachael. “I’ve been taking photos since I was old enough to hold a camera,” she says. “I used to get film developed at the local grocery store.”
Now, from her home base in Exshaw, Alberta, the Canadian outdoor enthusiast harbors two obsessions: photography and helping dogs in the care of animal rescues find homes, including through her Trails and Bears project, which features pictures of curious canines embarking on unique adventures suited to their character, whether that’s kayaking on a lake, hiking to the top of a mountain, or simply frolicking in the snow.
“My immediate goal with each photo is to let the dog’s true character show,” Rachael explains. “For every weirdo dog, there’s a weirdo person out there who would love that dog. My job as their advocate and representative is to make the dog comfortable and capture his or her spirit accurately. My bigger goal, however, is to change the way society sees adoptable dogs. I often hear comments like, ‘What is such a sweet/smart/wonderful dog doing in a shelter?’ What people don’t realize is that shelters everywhere are full of wonderful dogs.”
To capture her photos, Rachael uses the Tamron 17-28mm F/2.8 Di III RXD wide-
PRACTICE
17mm, F5.0, 1/1250 sec., ISO 500
Tamron Magazine 11
17mm, F5.6, 1/1000 sec., ISO 250

“MY IMMEDIATE GOAL: LET THE DOG’S TRUE CHARACTER SHOW. MY BIGGER GOAL: CHANGE THE WAY SOCIETY SEES SHELTER DOGS.”
angle lens for her Sony mirrorless camera system. “Due to the nature of volunteering with often rowdy dogs, I go through a lot of lenses,” she explains. “I’ve had lenses end up on the bottom of lakes and others smashed against mountainsides as we climbed. Tamron sent me this lens specifically to help with this. The wide-angle perspective the 17-28mm offers is most suited for the type of picture I like to take, which captures a dog’s character up close while still showcasing the scenery and situation they’re in to tell a more complete story.”





Rachael’s Trails and Bears journey began when she started posting her daily mountain-biking photos to Instagram, sometimes including a photo of her own dogs. Those photos are the ones that ended up going viral and attracting a slew of new followers who wanted to see more dog-themed content. “I wasn’t interested in showing everyone a new photo of my own dogs every day,


soon it clicked that the most useful pictures I could show were of other dogs needing homes,” she says. “I signed up at a local shelter as a volunteer and have photographed hundreds of adoptable dogs from various rescues since.”


Each expedition with Rachael’s tailwagging friends typically takes five to seven hours—a couple of hours to drive to a different remote location for each dog, then a few hours of the actual adventuring and picture-taking. “My mission for each photo shoot is to show how the dog acts in all sorts of circumstances,” she says. “I also film how they ride in the car, how they behave on a leash, how they are at picnic time, and how they handle the whole strange experience overall. These videos let the dog’s true character speak for itself so that they reach the perfect potential adopter. The photo is an integral part of the puzzle; it’s what can stop people’s scroll and get them to look more closely at a particular dog.”
Rachael tries to plan her outings around the weather, but it’s not an exact science. “Here in the Canadian Rockies, we have short days with the sun low
PRACTICE
12 Tamron Magazine
17mm, F5, 1/1250 sec., ISO 640
17mm, F4.5, 1/1600 sec.,
ISO 1600 but
17mm, F5, 1/1600 sec., ISO 100
“THE 17-28MM’S WIDE-ANGLE PERSPECTIVE HELPS ME CAPTURE A DOG’S CHARACTER UP CLOSE WHILE STILL SHOWCASING THE SCENERY.”
in the sky much of the year,” she says. “Sometimes even at noon, the sun might be behind a mountain peak. Due to the complicated logistics involved—e.g., dog pickup, driving for hours to get somewhere, potentially having to go to Plan B or Plan C if the trailhead looks too busy for a reactive dog, then hiking or paddling as long as it takes to get to the photo target spot—there’s no way to plan the time of day when I’ll get the best photos. It’s all extremely tentative, flexible, and opportunistic.”
Some of Rachael’s best recommendations for taking photos like this is to get down to the dogs’ height and encourage them to have fun; clear away any eye goobers (“the No. 1 preventable dog photo ruiner I see”); and keep a line of communication open with your furry subject before the shoot starts to ensure a confident and comfortable model. “You won’t get a great shot of a scared or frustrated dog, no matter how great a photographer you are,” she notes.
ABOUT: RACHAEL RODGERS

Rachael is a Canadian animal rescue advocate and dog photographer. For years, she has helped "unadoptable" dogs find their perfect families by showcasing them in natural settings. Rachael's dog photography skills were honed inadvertently, along with an understanding of dog behaviour, as a result of volunteering with all sorts of dogs. Still an active volunteer and foster, Rachael hosts volunteer training days to share key tips on communicating with strange dogs and getting successful adoption portraits. Instagram: @trailsandbears
Working with non-human subjects doesn’t faze Rachael. Nor does the time she invests in her labor of love, which can include more than 40 volunteer hours per week, which she does on top of her fostering and day job. “I’ve photographed more than 500 dogs now, spending hours with some and weeks with others,” she notes. “Each one has taught me something and made me a stronger photographer (and dog friend) for the next one. It’s all about communication and trust, and that’s probably easier, for me, with dogs than with humans.”

17-28mm



PHOTOS: RACHAEL RODGERS
PRACTICE
18mm, F5, 1/800 sec., ISO 640
Tamron Magazine 13
17mm, F5.6, 1/1250 sec., ISO 800
F/2.8 Di III
RXD [model A046]
RECIPE FOR SUCCESS
Our Tamron pros dish out tips and techniques for food photos that tantalize.
14 Tamron Magazine
SPECIAL PHOTO: ANDY AGUIRRE


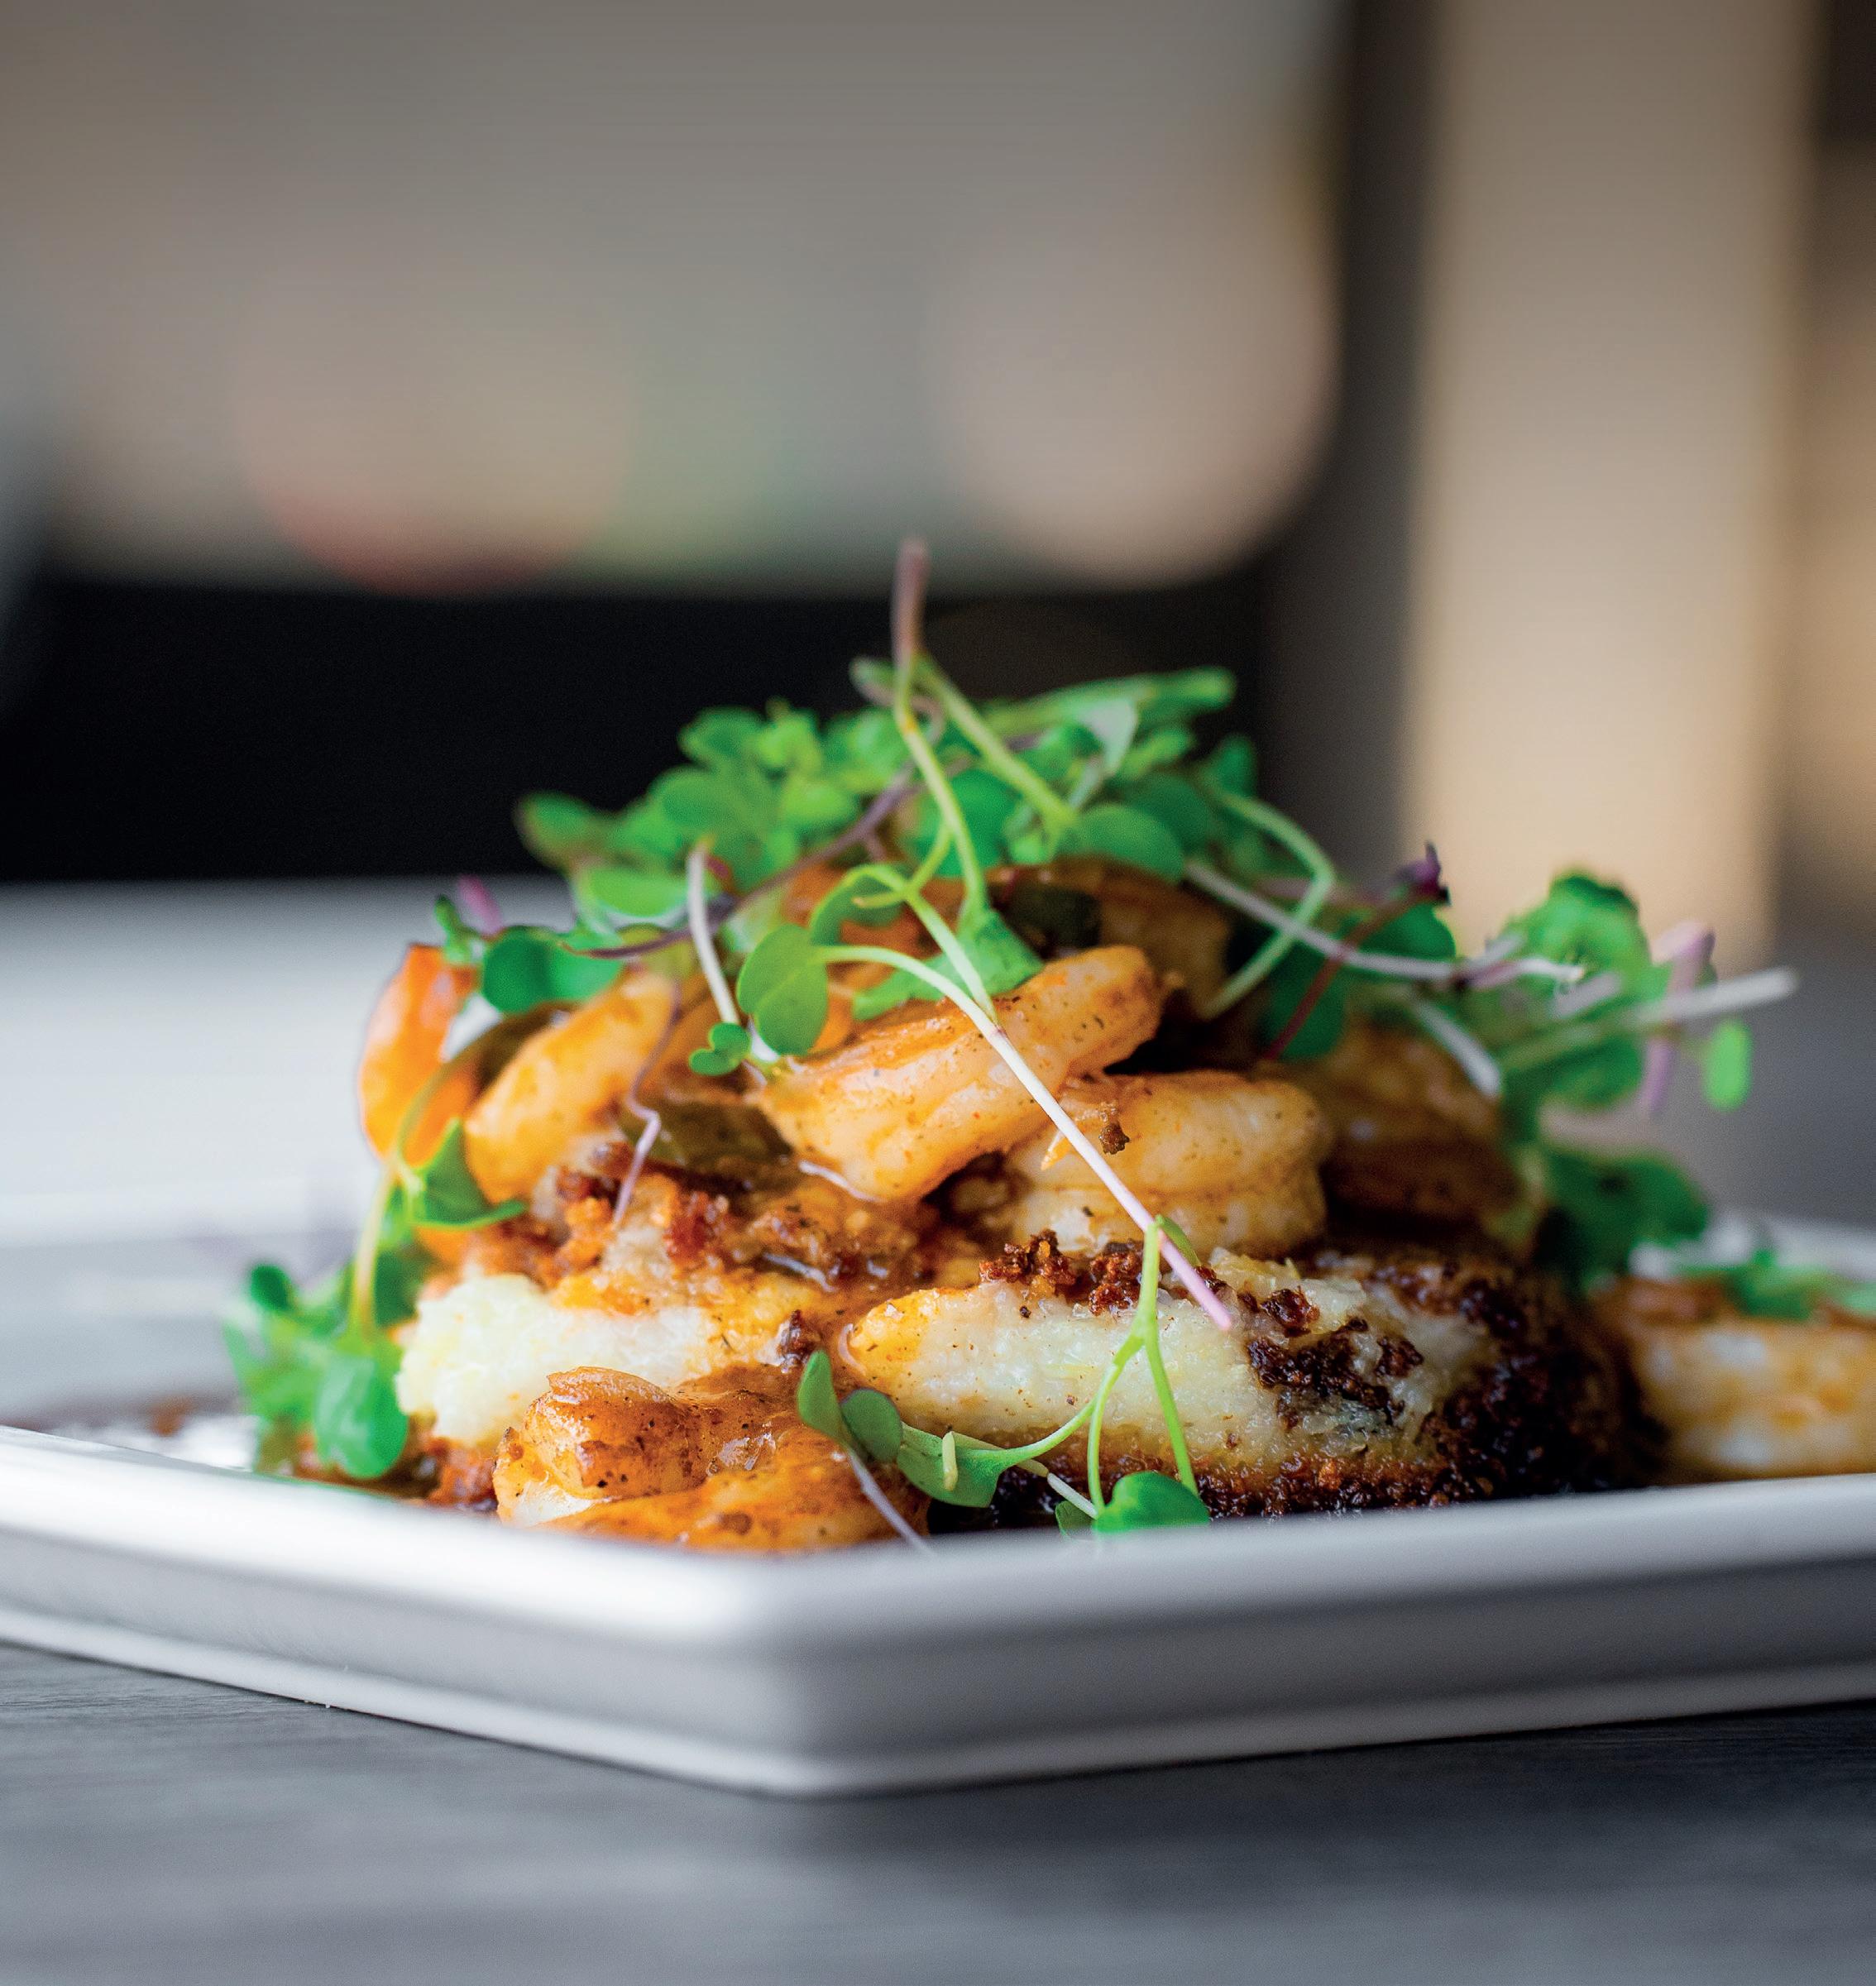
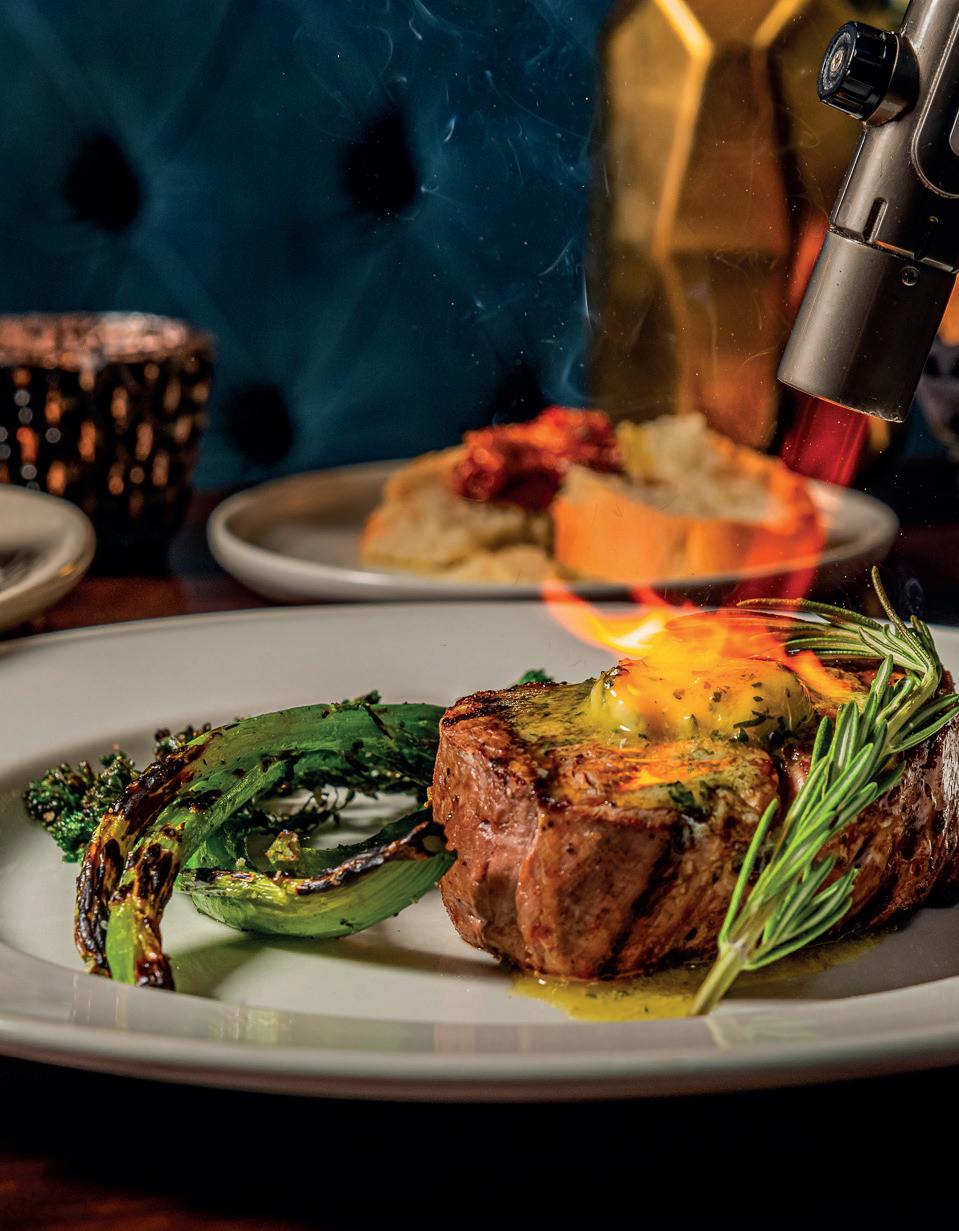
Food and beverage photography should tell a compelling story by setting the right mood, making the viewer feel like they’re immersed in the culinary moment in a single lip-smacking frame. After each item is plated, the next task at hand is knowing which Tamron lens will best showcase each delectable dish— whether it’s an ultra-wide-angle lens like the 17-50mm Di III VXD, standard zooms like the 28-75mm F/2.8 Di III VXD G2 and 35-150mm F/2-2.8, or an all-in-one lens with close-focusing capabilities like the 18-300mm Di III-A VC VXD. By zooming in on each menu item’s unique details, weaving in movement, and paying meticulous attention to styling, lighting, and composition, each photo can become a flavorful narrative, inviting viewers to savor every image.
INCORPORATE ACTION.
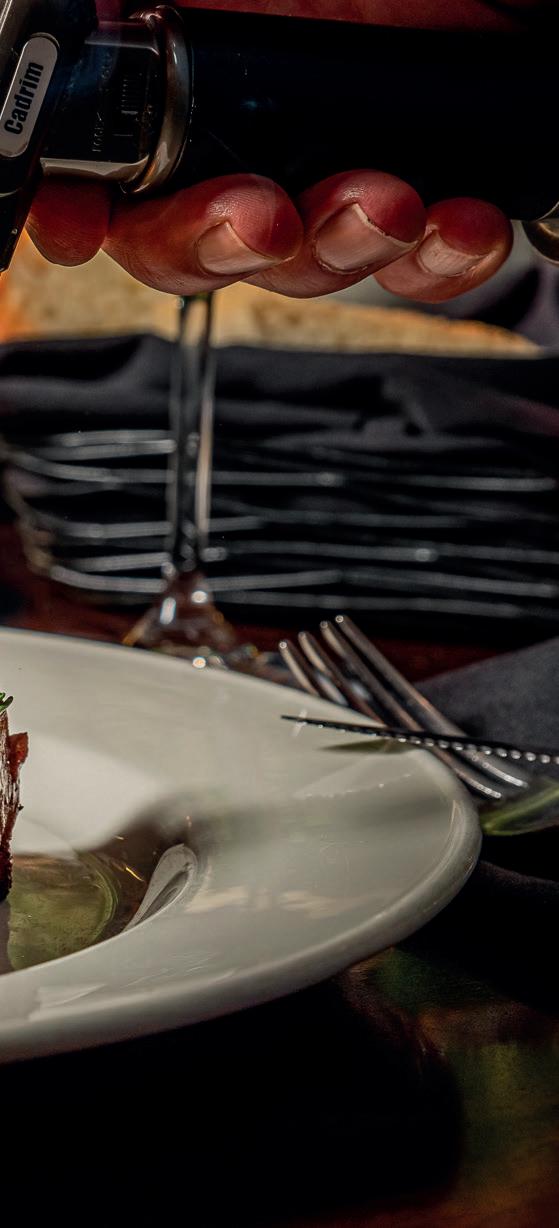
Whether it’s applying a torch to a buttertopped filet or squeezing a lemon onto a freshly opened oyster, working movement into your food photos adds visual interest, engages viewers, and makes them feel like they’re part of the culinary experience. Focus on anticipating that motion and make sure you have your composition and framing set, so that when the action takes place, you can just focus on timing. Switch your camera to burst mode to ensure you capture the exact moment you’d like to freeze.
Tamron Magazine 15
SPECIAL
24-70mm (70mm), F8, 1/125 sec., ISO 800
© Andrea Grieco 24-75mm (75mm), F10, 1/250 sec., ISO 100


“WORKING MOVEMENT INTO A PHOTO ADDS VISUAL INTEREST, ENGAGES VIEWERS, AND MAKES THEM FEEL LIKE THEY’RE PART OF THE CULINARY EXPERIENCE.”
TAP INTO PROPS.
Using props in food and beverage photography can create a compelling story around your subject and give a shoutout to the establishment you’re shooting in. Thoughtfully selected items, such as menus, utensils, tableware, fresh ingredients, or even branded matchboxes, can add context and depth to your compositions.
PAY ATTENTION TO STYLING.
Pull out a color wheel, look for complementary (or opposing) colors to sync or contrast with your subject, and use them in your backdrop. Depending on the dish in front of your camera, use a dish’s ingredients while styling.
PLAY UP A DISH’S VIBRANCY IN POST.


If the items plated before you feature bright colors, give them an intentional edit that ensures those colors remain saturated and vivid and show the dish’s full essence.


Whether it’s a hand drizzling chocolate sauce on a scrumptious dessert, a chef’s fingers delicately adding garnish to a dish, or a group of friends enjoying a meal, the presence of people adds life to a scene and invites viewers to connect on a personal level.
 © Andrea Grieco 28-75mm (56mm)
F9, 1/250 sec., ISO 100
16 Tamron Magazine SPECIAL
© Andrea Grieco 28-75mm (49mm) F5.0, 1/200 sec., ISO 100
© Marcie Reif 20-40mm (37mm), F3.2, 1/1600 sec., ISO 800

ZOOM IN FROM THE FRONT.
This angle offers a direct, intimate perspective to the dish you’re photographing. By positioning the camera parallel to the food, you’ll capture the full essence of the dish head-on, allowing viewers to appreciate its colors, textures, and overall makeup.
SUBTLY SHOW YOUR SURROUNDINGS.
Incorporate the environment where you’re photographing, whether it’s inside an upscale restaurant or at a barbecue picnic table. Position yourself at a lower angle, use a wide aperture to achieve a shallow depth of field, and shoot the food straight on to reveal a soft background. That background will offer your viewer an understated glimpse of where you are without distracting from your subject.
ADD COST-EFFECTIVE AMBIENCE.


Clients appreciate when photographers employ creative problem-solving without exceeding budgetary constraints. For instance, you might not be able to set up a food photography session overlooking a scenic lake, but for this photo starring a bottle of pinot grigio, the photographer simply called up a digital image on a TV screen behind the table. Not only did this backdrop minimize costs—it also introduced a layer of sophistication and showcased the wine in a context that resonates with the brand’s story and the product’s color scheme.


SPECIAL Tamron Magazine 17
© Andy Aguirre 24-70mm (70mm), F5.6, 1/200 sec., ISO 100
© Eduardo Montepeque 35-150mm (35mm), F11, 1/125 sec., ISO 500
© Andy Aguirre 24-70mm (70mm), F4, 1/125 sec., ISO400


TAKE AN OVERHEAD VIEW.
A traditional flat lay featuring an assortment of dishes is always fun. The dishes look great from above, but you can also get down low and hit some other angles with a shallow depth of field so that you can focus on one particular dish in the foreground. These types of images are ideal for restaurant website banners or wallpapers.
If you have a dish that has more intricate details you’d like to call attention to, such as grill marks on a piece of meat, you can still shoot from above. Simply give that image a tighter crop to bring the viewer closer to the parts you’d like them to see.
LAYER UP.
If certain food items are stacked high, capture them from the side, showing each individual section of the dish. This allows the viewer to appreciate the dish as a whole.
OPT FOR LIGHTING SIMPLICITY.
Start out with soft, natural light. On an overcast day, position yourself next to a window with no shades or even outside on a covered patio, which is where the dumplings shown here were photographed. Beautiful soft light filtered in from multiple directions, which allowed for some striking highlights and shadows. If you’re shooting indoors on a bright sunny day, use curtains to diffuse and soften the light. If you’re on an open patio, use a small soft diffuser panel.
That doesn’t mean you can’t use a more elaborate lighting setup if you need to. For the photo of the ribs, slaw, and fries, the photographer used a basic setup of two strobes: one with a soft box for the main light, and another as a rim light over the barbecue sauce to lend some shine. You can also use a polarizing filter to control brightness and shadows.
SPECIAL 18 Tamron Magazine
© Ian Jones
35-150mm (92mm), F4.5, 1/1250 sec., ISO 500
© Ian Jones
35-150mm (35mm), F4.5, 1/500 sec., ISO 500
© Ian Jones
WANT TO SEE THESE PHOTO TIPS IN ACTION? Food and Drinks at the Brix https://tamronamericas.co/foodphotography1 5-Courses at Bistro Don Giovanni’s https://tamronamericas.co/foodphotography-2
35-150mm (49mm), F4.0, 1/800 sec., ISO 500


USE BACKLIGHTING FOR A MOODIER LOOK.


This can dramatically enhance the visual appeal of your dishes. To utilize this technique, position your light source behind the subject, allowing the light to pass through the food. This creates a beautiful glow around the edges, highlighting textures and creating depth.
MAKE FLAT OBJECTS FLATTERING.


If you’re shooting something flat, like a pizza, consider photographing it at a 45- or 90-degree angle to showcase your subject’s surface. In the pizza photo featured here, the pizza boasted many different colors and textures, so the photographer positioned himself at a higher angle to enable the viewer to see everything—from the crust and pepperoni to the broccoli rabe. Keep your background in mind for these kinds of shots, too. Since there was so much happening on the pizza’s surface, the photographer kept the background simple, with a light, neutral color so that the pizza would appear more dynamic.


Tamron Magazine 19
SPECIAL
© Ken Hubbard 17-50mm (46mm), F6.3, 1/125 sec., ISO 1000
© Ken Hubbard 28-75mm (35mm), F11, 1/125 sec., ISO 400
© Andrea Grieco 28-75mm (39mm), F5.6, 1/250 sec., ISO 100
Peak Performance
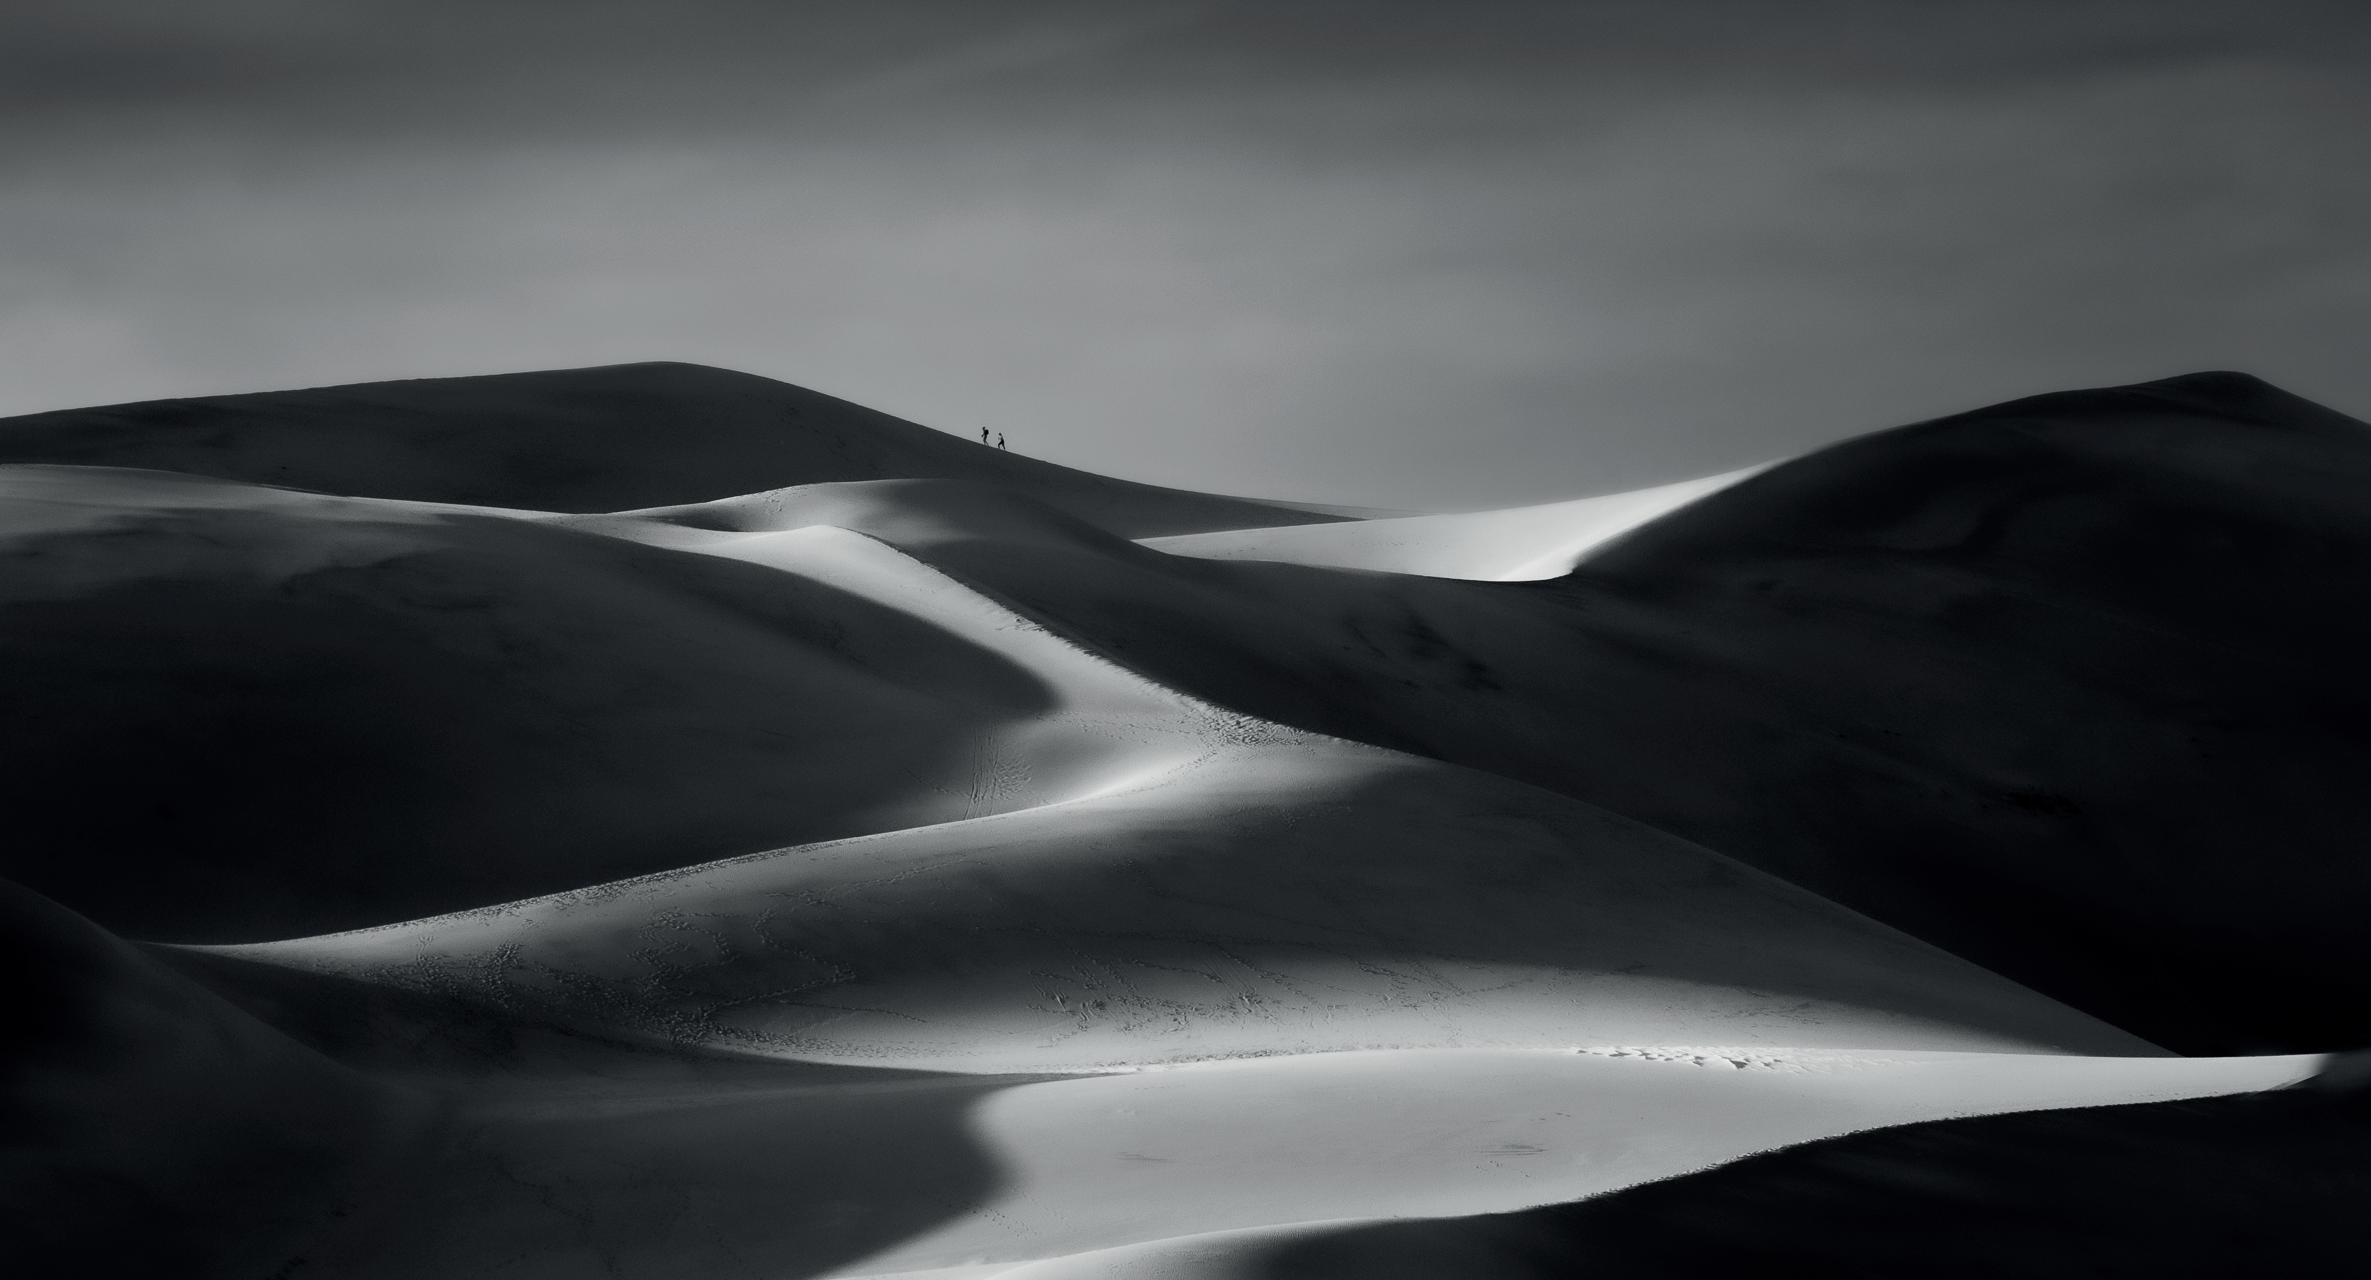
John Calvin’s photo of hikers at Great Sand Dunes National Park wins the “Still Image” grand prize in Tamron’s 2023 photo/video user competition.
“WHEN I’M OUT LOOKING FOR IMAGE POSSIBILITIES, I’M SEARCHING FOR NATURAL LEADING LINES, VARIED TONES, AND CONTRASTING TEXTURES.”
— John Calvin
I was absolutely blown away when I heard I’d won the grand prize. Landscape photography has become my passion, whether it’s near my home in the American Southwest or in the many places I’ve visited.
When I’m looking for image possibilities, I’m searching for natural leading lines, varied tones, and contrasting colors and textures. The image shown here was captured a few minutes after 6:00. I spent four-and-a-half hours waiting for the light and shadows to be just right.
And that changed dramatically over time. There was an abundance of cloud shadows throughout the day, and they all became an integral part of my composition. As the sun got lower and the shadows started lengthening, that’s when it started getting interesting.
I used the Tamron 18-300mm Di III-A VC VXD all-in-one zoom with a FUJIFILM X-mount for my mirrorless camera. Historically, I’ve loved using prime lenses like the 35mm or 45mm—in landscape situations with primes, what I’ve usually done is just “zoom with my feet.”
However, if you travel to a destination and find yourself in a place where you might not be able to move around as much as you’d like— sometimes you’re on ice, sometimes at the edge of a cliff—then you see the importance of having a versatile lens like the 18-300mm, the first 16.6x all-in-one zoom for APS-C cameras. Being able to capture everything from wide angle to ultratelephoto has been key for me. The Vibration Compensation (VC) feature on this lens is also crucial when I don’t feel like lugging a tripod around.
On this day, I watched how the light was creating that path through the sand, which in turn created a leading line toward the back of the photo, where the hikers were. I kept my eye on them as they made their way to the top of that one dune, hoping the light was going to be in the right place when I was ready to take the picture. I knew what title I was going to give this image as soon as I captured it: “Taking the Long Way Home.”
20 Tamron Magazine PHOTO CONTEST




A-Plus Lenses for A-State Bands
Chandler Weber’s short film featuring the Arkansas State marching band wins the “Video” grand prize in Tamron’s 2023 photo/video user competition.
“MY FAMILIARITY WITH THE ‘BAND’ WORLD ALLOWED ME TO CAPTURE UNIQUE MOMENTS THAT ARE SO OFTEN OVERLOOKED IN SPORTS ENVIRONMENTS.”
— Chandler Weber
I didn’t pick up photography until after I’d graduated from college. I was working as a music teacher at the time, so I’d spend my days teaching band, then evenings taking pictures or researching photography.
While I was an undergrad, I’d also started the social media channels for the band program at Arkansas State. At one point, we decided to bring the pregame “hype” video in-house. If you’ve been to an NCAA football game, you’ve seen such a “pump up the crowd” video before, played when the team runs out onto the field.
That’s exactly what this video is—an introduction for the band as a way to build excitement during pregame festivities. I used several different cameras and Tamron lenses for the video. The majority was shot on the Tamron SP 24-70mm F/2.8 VC G2 zoom, on either a Blackmagic camera rig I built or handheld on my Nikon DSLR. I also used the SP 35mm F/1.4 prime lens with the Blackmagic camera and the SP 70200mm F/2.8 VC G2 on my Nikon. There’s even a shot that was recorded using the SP 150-600mm VC G2 ultra-telephoto lens.
These Tamron lenses gave me a variety of focal lengths to work with, allowing me to switch from, say, a wide-angle to a telephoto lens and capture the story from different perspectives. I’ve also been impressed by the sharpness of my lenses, as well as the weather sealing and coatings on the internal elements that cut down on lens flare. There was one bowl game I still vividly remember due to the downpour that kept up for practically the entire game. The fluorine coating on the front of my Tamron lenses made a world of difference in keeping as much rain as possible off the glass.
My familiarity with the “band” world allowed me to capture unique moments that are so often overlooked in sports environments. When I’m behind the camera, I have a decent idea for when a certain section is about to be featured, or where there might be a hold coming up in the drill. I’m able to move around by instinct and capture the best shots.
Tamron Magazine 21 PHOTO CONTEST
Winners Circle for Tamron User Photo/Video Contest 2023
There’s an abundance of creative talent in the Tamron user universe, as made clear by the winners of the 2023 Tamron User Photo/Video Contest. Skilled photographers and videographers sent in entries from across the United States, Canada, and Mexico, showing us how they see the world through their Tamron lenses. John Calvin nabbed the grand prize in the “Still Images” category, while Chandler Weber brought home top honors in the “Video” category.
Here, check out the winning photos in seven other distinct categories, along with a brief description on how Tamron lenses helped these photographers bring their incredible images to life.

Bruce Herwig II (Redlands, CA)
FINE ART

Josh Murphy (Milan, PA)
A wildland firefighter was conducting initial attack operations as air support flew overhead Quinault Nation tribal land for this photo I took last summer with the Tamron 35-150mm F2-2.8 lens for my Sony mirrorless camera. My goal was to show the gravity of the situation and tell the story of how all elements of a wildland fire operation come together to suppress a fire. The versatility of the 35-150mm lens was key here. When you’re working a fire line, you don’t have room for another camera, and you definitely don’t have time to change lenses.


I was intrigued to capture a captivating close-up image of my son’s plasma sphere, with the electrical currents animated beneath my fingertips. The way the plasma moves makes the ball come to life. Having a fast F2.8 lens like the Tamron SP 24-70mm F2.8 VC G2 was critical, as it was dark and the plasma was moving. Also tricky: As I moved my fingers across the glass, the plasma spikes moved with me. No two shots were the same. I took several photos for each hand position so I’d have options.
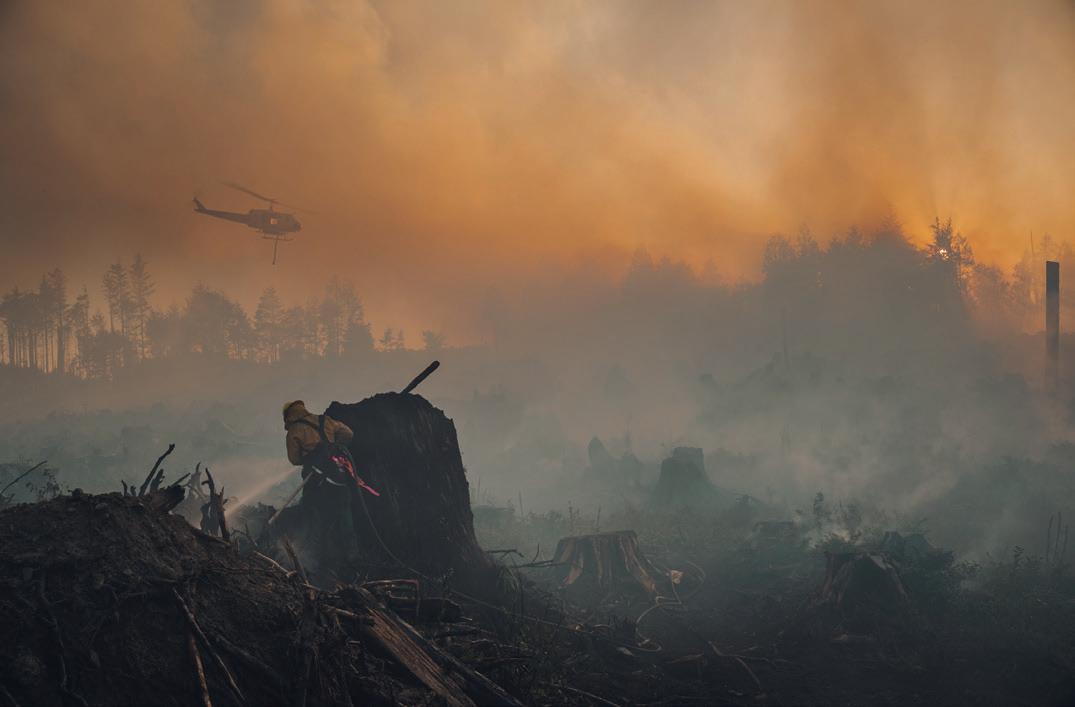
PHOTOJOURNALISM

Dylan Dufault (Port Coquitlam, British Columbia)
My goal here was to embrace human emotion. A candy shop often suggests sweetness, but I wanted my model, Clara, to look like she wished she wasn’t feeling lonely in such a public place. I've always been a fan of wide-angle lenses for cinematic-style photos ever since I started watching films by Terrence Malick and Wong Kar-Wai. That’s why I gravitated toward the Tamron 17-28mm F2.8 lens for this shoot.
22 Tamron Magazine PHOTO CONTEST
PORTRAIT


Marcin Zajac (Santa Rosa, CA)
I was on a road trip through Arizona and Utah when I captured this photo of first light on the sandstone pillars of Monument Valley. As the sun started rising, some of the clouds in the sky dissipated, which lit up the scene beautifully. I love how the Tamron 100-400mm VC ultratelephoto lens compresses faraway objects. The towers here, located miles away, are very sharp, thanks to the high quality of this lens.
SPORTS TRAVEL AND LANDSCAPE
Bruce Bennett (Old Bethpage, NY)
This popular angle for hockey images depends on arena rules, rafter access, and an appropriately centered catwalk. It’s a great supplement to the more “factual” coverage I do with my handheld camera at ice level. I love using the Tamron 70-200mm F/2.8 G2 telephoto for rafter remotes like this. The lens is incredibly sharp, and the range also affords me the opportunity to reframe depending on my intended subjects and the rafter height in the arena.

VIDEO

Forest Qiao (Richmond Hill, Ontario)
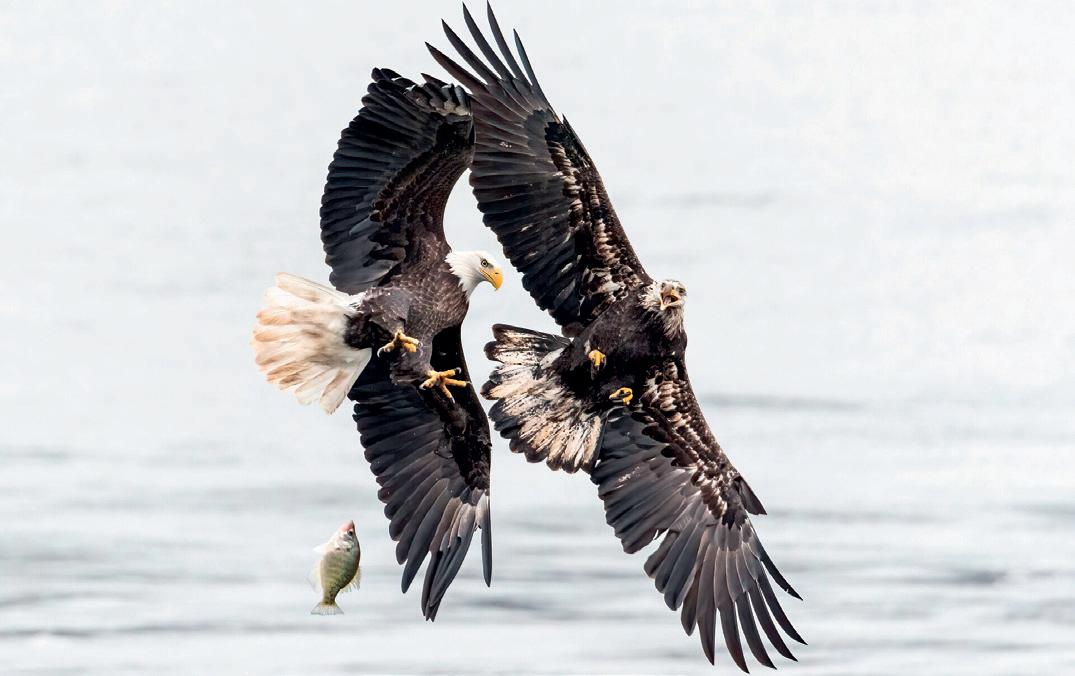
For this photo of two bald eagles fighting over a fish in Maryland’s Susquehanna River, I used the Tamron SP 150-600mm VC G2 ultra-telephoto lens for Nikon F mount. One eagle was chasing another, trying to snatch his pal’s prey in midair. The birds flew right in front of me for a split second. I aimed and shot so fast that I didn't even know if I got the photo. I was so happy that the 150-600mm helped me capture this fleeting moment.
Nate Leese (Seattle, WA)
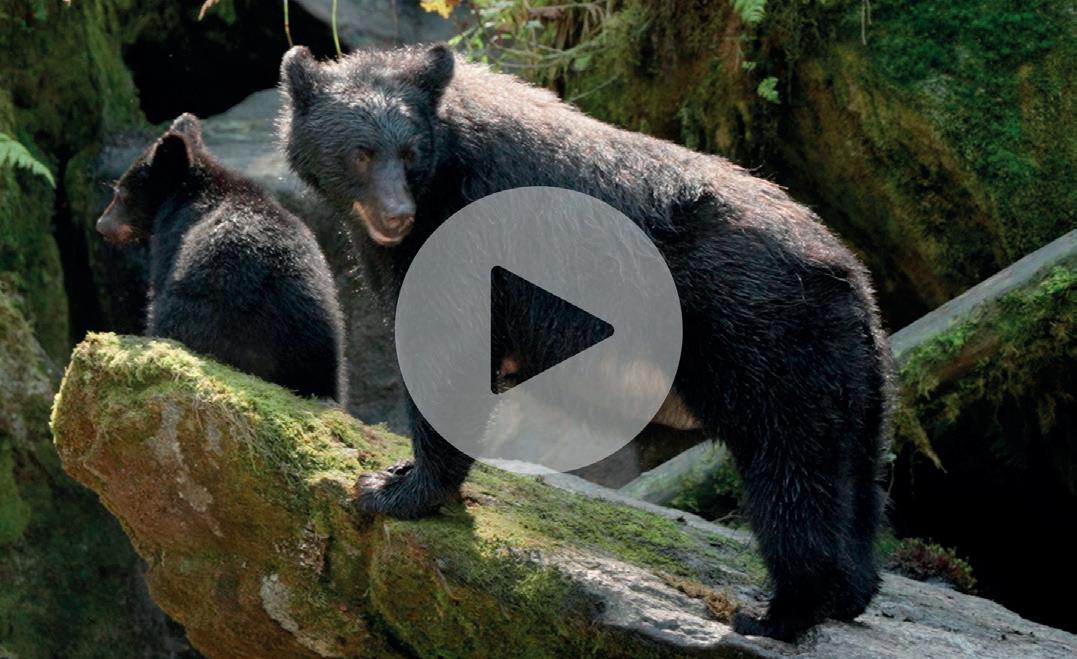
The Anan Creek area in Tongass National Forest has a thriving wild-pink salmon run, as well as two open-air viewing platforms overlooking the river segment where I recorded some of the bears. I filmed this video with the versatile Tamron 50-400mm VC ultra-telephoto lens on my Sony mirrorless camera. In this scene specifically, I was able to film establishing landscape and creek shots while quickly adjusting to a telephoto scene of a black bear catching a salmon, all without having to change lenses.
WILDLIFE

Tamron Magazine 23 PHOTO CONTEST


BIRD’S-EYE VIEW
Patience, perseverance, and photographic know-how are all key to David Akoubian’s bird portraits with the Tamron 150-500mm VC ultra-telephoto zoom.

PHOTOS: DAVID
24 Tamron Magazine INTERVIEW
AKOUBIAN
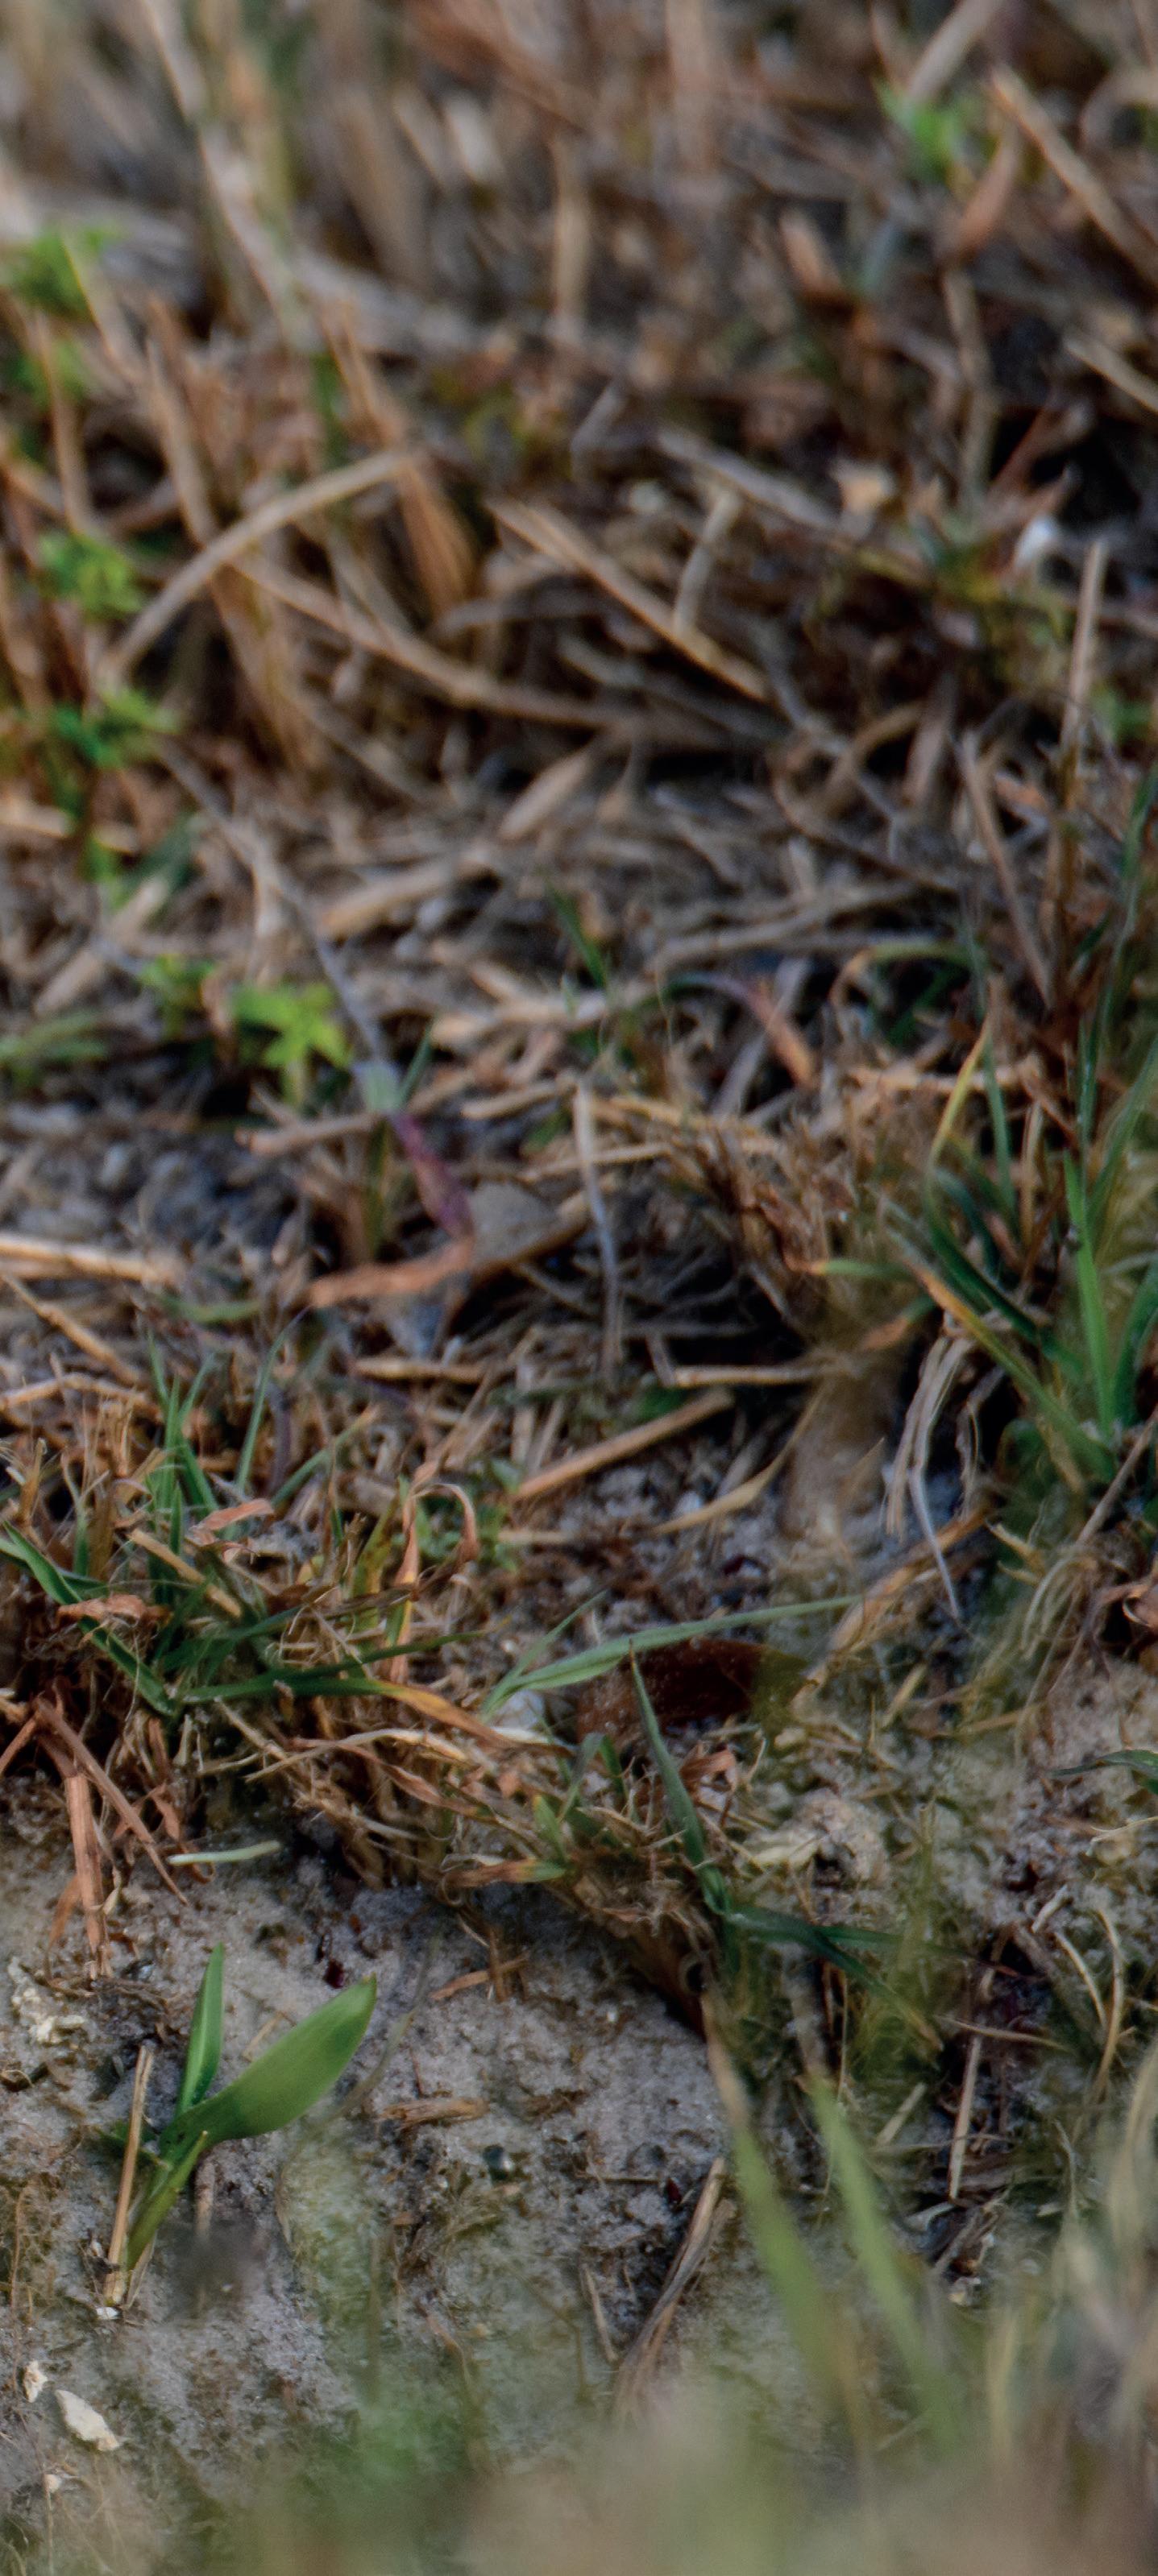

David Akoubian’s 30-year-long career in nature photography has taken him from the Alaskan wild, where he’s captured photos of local landscapes and salmon-devouring bears, to the aweinspiring waterfalls, glaciers, and black sand beaches of Iceland. Ask anyone who knows him, though, and they’ll tell you David is just as likely to be found relaxing at home in the mountains of northern Georgia, taking pictures of the winged creatures who fly in to visit the bird sanctuary he’s built in his own backyard.
One of the newest tools in his gear bag for his bird portraits is the Tamron 150500mm Di III VC VXD ultra-telephoto zoom, designed for the mirrorless Nikon Z mount. “Nikon users, including myself, previously had to have an adapter to use the Tamron SP 150-600mm Di VC USD G2 telephoto lens,” he says. “Now, I prefer using the native 150-500mm lens without the adapter, due to its more compact size and other benefits. Menu features in the new 150500mm VC lens appear seamlessly, and the lens is capable of tracking even fast-moving subjects. Tamron’s proprietary Vibration Compensation (VC) image stabilization feature also consistently blows me away. It’s incredible at minimizing vibrations and camera shake.”
Read on for a Q&A with David on his bird photography, the seeds of which were planted when he was a kid growing up in rural
Tamron Magazine 25 INTERVIEW
600mm, F8, 1/500 sec., ISO 900
500mm, F8, 1/250 sec., ISO 500


Georgia. “I spent so much time at the lake down the road, and I would always find myself drawn to watching the birds,” he says. “Today, bird photography for me is not only about watching my subjects and capturing them with my camera, but also learning about their behaviors.”
Did you have any mentors who informed your approach to bird photography?
Akoubian: John Shaw, one of the most well-known nature photographers out there, has been a big influence. I traveled with him for a few years, and he definitely knows his birds. I was shooting with him in Cape May once, and I said, “I think that sea gull over there is about to do something.” He said to me, “There’s no such thing as a generic ‘sea gull.’ Let me know when you figure out what specific kind of a gull it is.” John taught me how to be more precise in identifying species, and learning their habits.
My wife, Evelyn, also encouraged me during my early days of bird photography, signing me up for a continuing-education course at the Cornell Lab of Ornithology. I’d never been the greatest student, but this course fascinated me and taught me so much.
What are you trying to show in your portraits?
Akoubian: I want people to be inquisitive as to what the bird is doing, or why it’s doing what it’s doing. The photo you see here of great egrets at the St. Augustine Alligator Farm in Florida might initially appear to be a mother or father bird approaching the nest of babies. But in actuality, it’s another adult bird that got too close to the nest, and the babies are trying to scare it away. Here’s the tell: If it was their mother coming in to feed them, they’d have their mouths wide open, ready for dinner.
How does depth-of-field play into your images?
Akoubian: Using a shallower depthof-field that blurs out the background allows you to isolate your subject and enhance the photo. When I photographed those great egrets, there were all of these different layers of trees surrounding them. You had the palm trees behind them, and then mangroves and other shrubbery in the foreground. By shooting at F8, I was able to blur out the background enough so that the birds
26 Tamron Magazine INTERVIEW
500mm, F8, 1/250 sec., ISO 1600
397mm, F8, 1/1000 sec., ISO 3200
500mm, F9, 1/250 sec., ISO 2500
“I DON’T LIKE TO TOTALLY FREEZE THE MOVEMENT OF HUMMINGBIRD WINGS—IF THE WINGS ARE STILL IN THE IMAGE, IT LOOKS TOO STATIC TO ME.”


remained the prime focus, but I was still able to show a bit of the environment behind them. It may have been a flat background otherwise.
What are some challenges inherent in this type of photography?
Akoubian: You need a fast-enough shutter speed to stop the action and should shoot in continuous high drive mode (or burst mode), which will take the maximum pictures per second that your camera is capable of as long as you hold the shutter down. That’s because birds make tiny movements, like blinking. I can’t tell you how many times I took 50 photos, and in a good number of them the bird’s eyes were closed. The 150-500mm VC, in combination with my mirrorless camera with focus control, has been a game-changer for me in this regard.
Do you employ any special techniques for particular birds?
Akoubian: Hummingbirds can be particularly challenging to photograph, with wings capable of beating up to 70 times per second. I don’t like to totally freeze that movement—if the wings are still in my image, it looks too static to me and doesn’t tell a compelling story.
I’ll typically sit for an hour or so in the early morning or late evening, when the hummingbirds most active, before I even take my first frame. I want the birds to become acclimated to me so they feel comfortable. During this “getting to know you” period, I’ll also pay attention to
which flowers they repeatedly return to, because they tend to do that.
In the photo you see here, I noticed the hummingbird kept returning to this bright-red cardinal flower. I tried to position myself so I had enough space between the flower and the foreground, and then the background as well to offer some separation. Then I simply prefocused on the flower. When the hummingbird flew into my frame again, I just held the shutter down. Usually for a photo like this, I’ll shoot at between 1/500 sec. and 1/1000 sec. so that I’m able to capture some detail on the wings, but not too much detail.

hummingbird kept


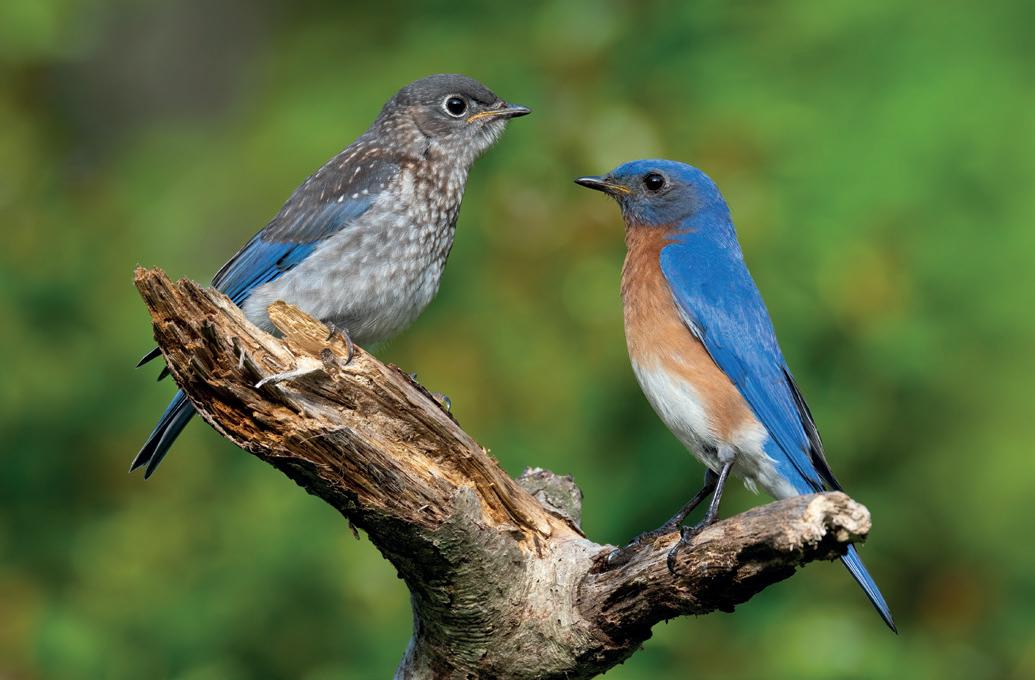



Also always remember that, like airplanes, most birds take off and land against the wind. In Alaska, when the charter fishing boats are done for the day, all the fish remains have to be dumped in the water where they were caught. The bald eagles know this and come to scavenge. For this photo, I spotted a fish carcass, then got upwind of it because I knew eventually an eagle would come flying in facing me. I was able to capture a bunch of frames of this one slowing down to land.
David is a professional nature photographer based in Georgia. David has been a working professional since 1992 and leads workshops across the country and in Iceland. David's style is a "classic" nature photographer utilizing the best light and simple compositions for his images.
Instagram: @bearwoodsdavid
Tamron Magazine 27
PHOTOS: DAVID AKOUBIAN
INTERVIEW
DAVID AKOUBIAN
416mm, F8, 1/6400 sec., ISO 4000
361mm, F8, 1/500 sec., ISO 800


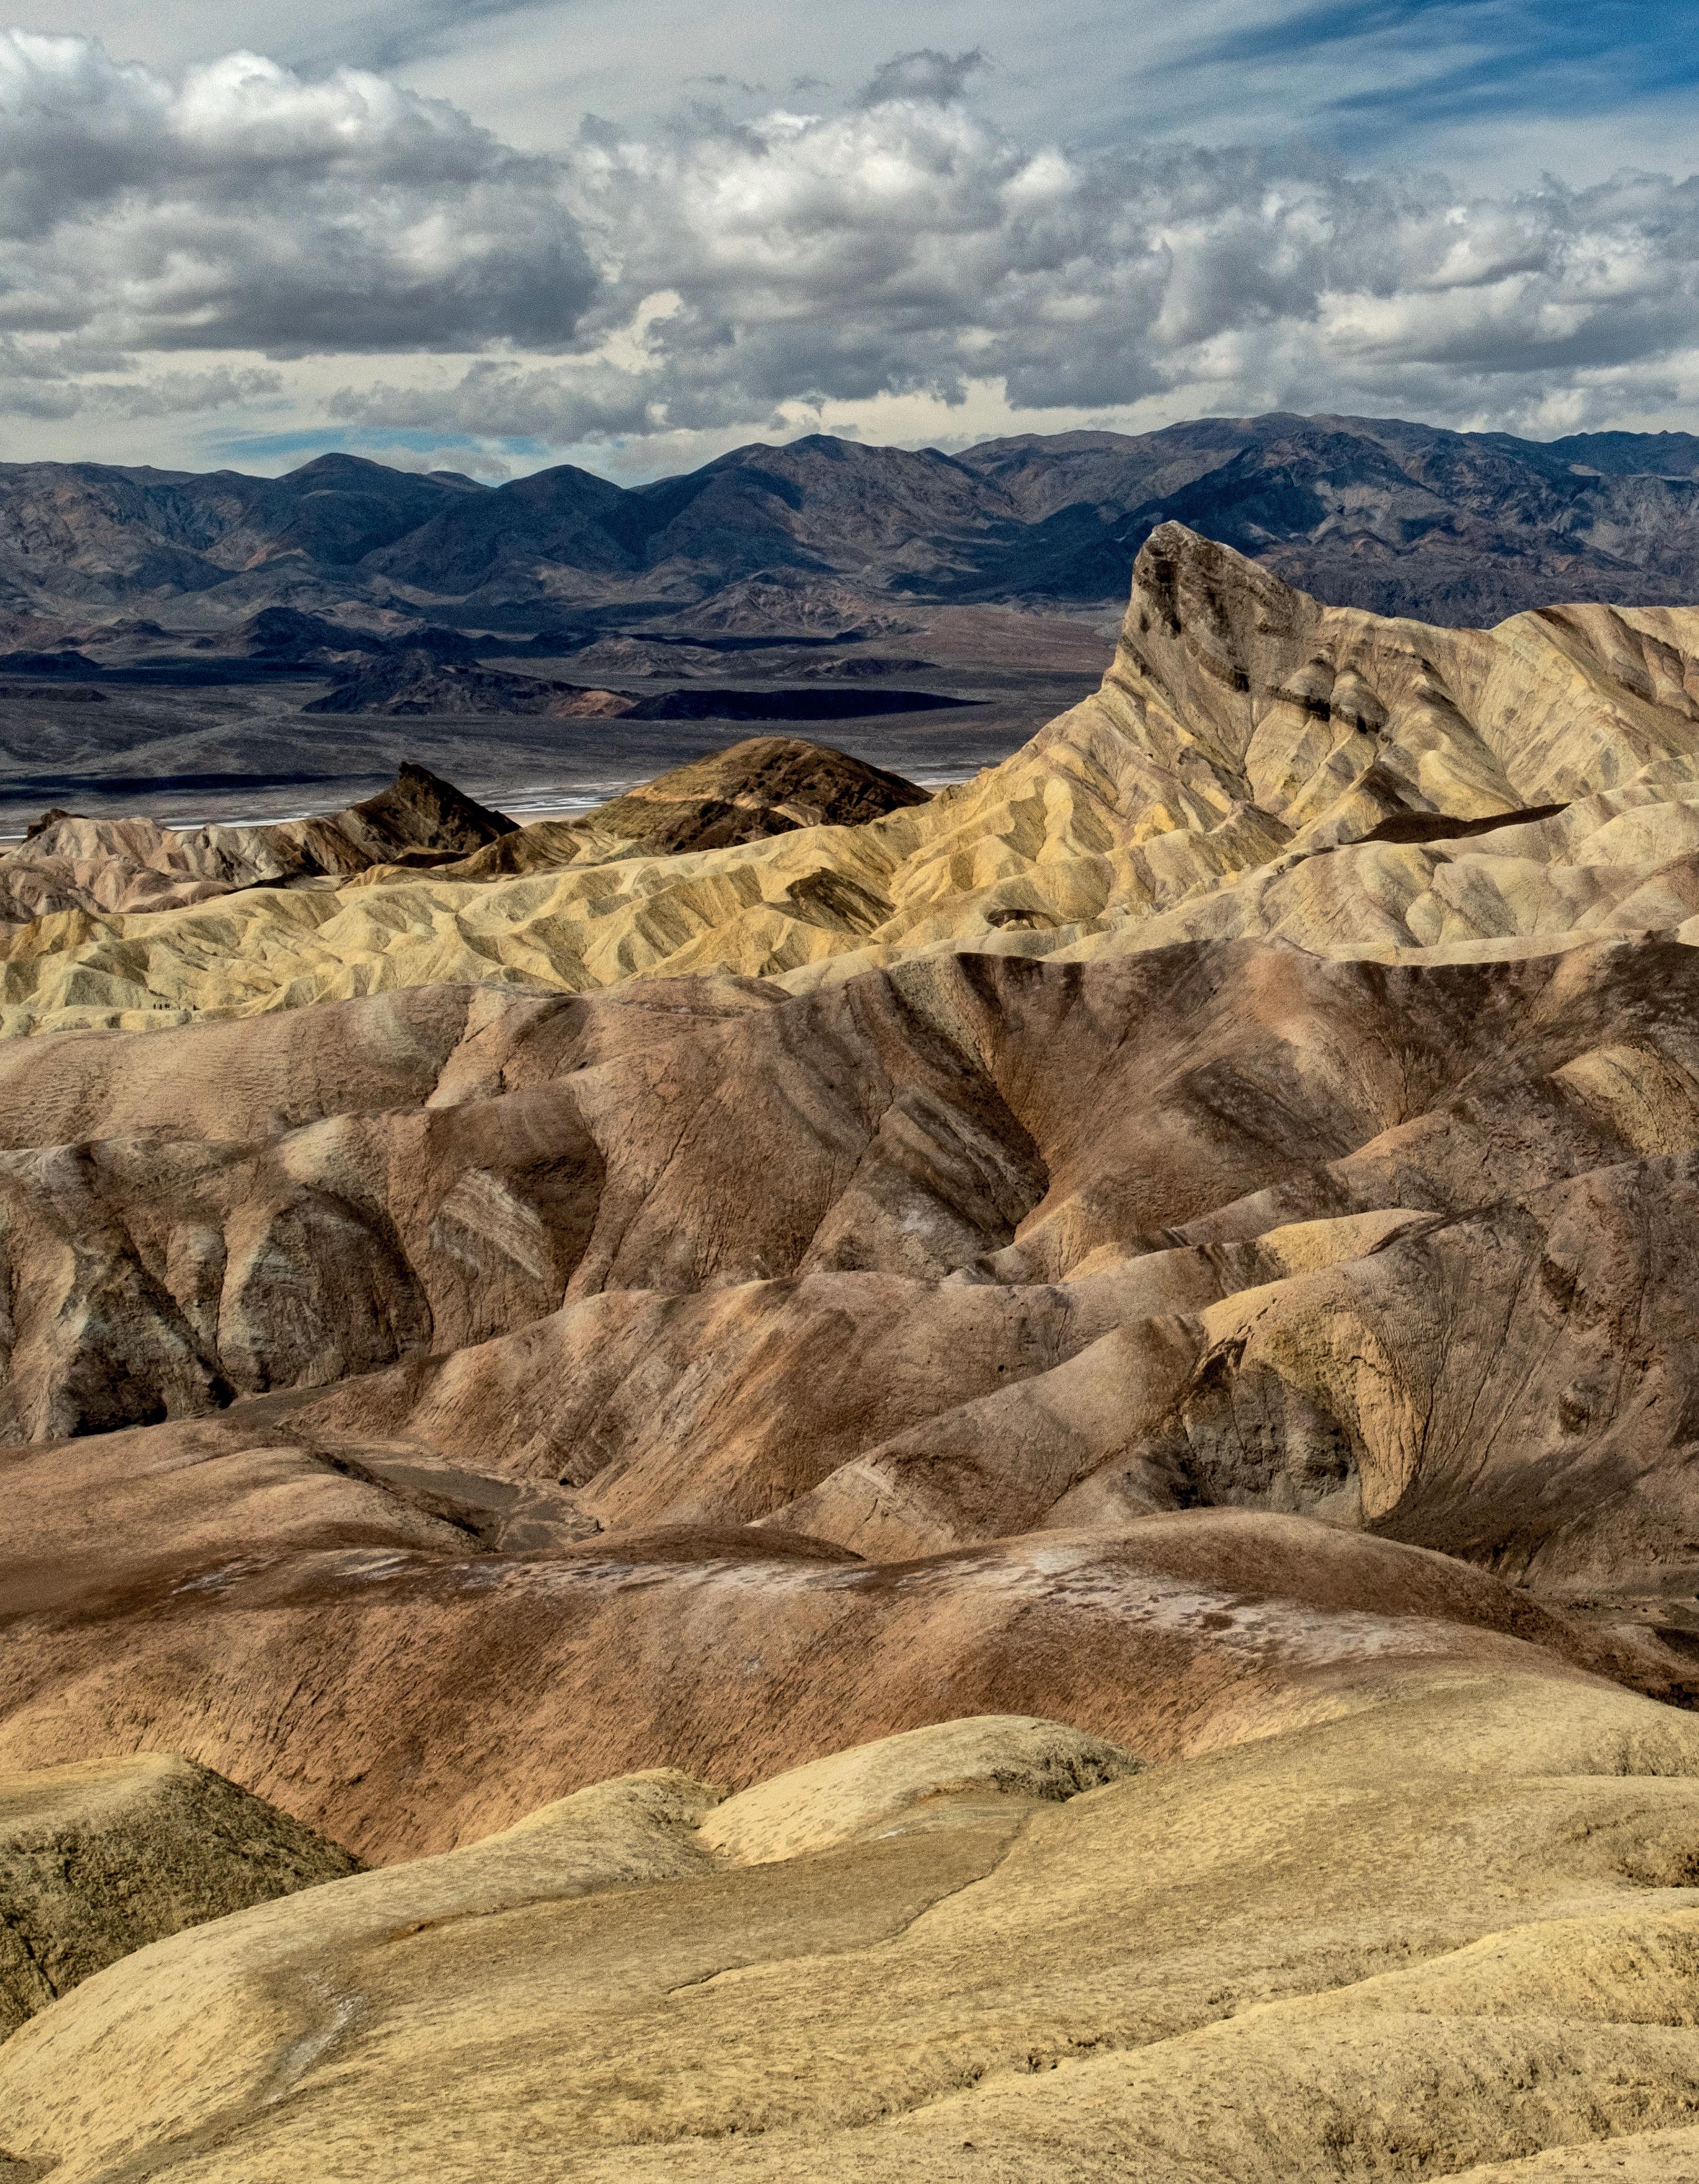
DESOLATE SPLENDOR
Ken Hubbard heads into the ominous-sounding Death Valley and Badlands national parks with his Tamron 17-70mm F2.8 VC zoom.


KEN
FIELD REPORT
PHOTOS:
HUBBARD

Ken Hubbard has already traveled to all 50 states, but now he’s got a new goal on his to-do list: visiting all of America’s national parks. “County and state parks can be phenomenal, but when it comes to sheer expanse and grandeur, there’s nothing like a national park,” he says. “Ken Burns called them America’s greatest idea, and I agree. Each park is so different from the next. I also love that even within the same park, you can often stand in one spot, do a 360, and keep stumbling upon completely different scenes to photograph—look ahead of you and you might see an arid desert; look behind you and you might spy a lush, green valley.”
National parks with ominous names like the Badlands and Death Valley especially pique Ken’s interest. “People have asked me why a photographer would want to visit a place like Death Valley,” he says. “There’s something so intriguing about those landscapes, and they’re not always as barren as you might think. For instance, when there’s a lot of rain over the spring, they’ll sometimes end up having superblooms later in the season, where wildflowers pop up for a few days before vanishing again.”
To help Ken capture the parks’ beauty, often more majestic than menacing, he uses the Tamron 17-70mm F2.8 Di III-A VC RXD zoom designed for FUJIFILM X-mount for his APS-C mirrorless camera system. “The 17-70mm F2.8 VC’s full-frame-equivalent of 25mm to 105mm allows you to cover everything you’d want to photograph in a





Tamron Magazine 29 FIELD REPORT
24mm, F16, 1/160 sec., ISO 200
70mm, F8, 1/400 sec., ISO
400


“AT LESS THAN 5 INCHES LONG AND WEIGHING JUST 18.5 OUNCES ON MY FUJI X-T CAMERA, I CAN WALK AROUND FOR DAYS WITH THE 17-70MM F2.8 VC AROUND MY NECK AND NOT EVEN NOTICE IT.”
national park from a landscape point of view, whether it’s tapping into the wide-angle end to capture vast panoramas or taking close-up photos of the details all around you, thanks to a minimum object distance (MOD) of 7.5 inches on the wide end and 15.4 inches on the telephoto end,” he says.
The 17-70mm’s Vibration Compensation (VC) technology and maximum F2.8 aperture allows Ken to shoot handheld in even the most challenging of conditions as he treks through foreboding-sounding sections like Death Valley’s Badwater Basin or the Devils Golf Course, a jagged, desolate landscape of rock-salt spires. One of the 17-70mm’s greatest assets, however, is its portability. “At less than 5 inches long and weighing just 18.5 ounces on my Fuji X-T camera, I can walk around for days with it around my neck and not even notice,” he says.
PHOTO TIPS: NATIONAL PARKS
1 Pick your favorite time of year.
I don’t recommend hanging out in the sand dunes of Death Valley in the middle of July— which I did about 20 years ago, when I was in the area for a trade show and decided to take a day to hike the Mesquite Flat Sand Dunes, where it was about 120 degrees. The shoulder seasons in spring and fall can be very nice, though crowded. There’s been a spike in tourism over the past decade or so due to the superblooms. These superblooms also take place in the Badlands, but late spring is also an ideal time to head there from a photography standpoint because that’s storm season. Those threateninglooking clouds blanketing the sky can make for dramatic photos. Whatever park you decide to hit, go onto its website to research seasonal patterns and recommendations for capturing the best photos possible.
30 Tamron Magazine FIELD REPORT
24mm, F16, 1/200 sec., ISO 200
17mm, F14, 1/125 sec., ISO 320
41.80mm, F16, 1.3 sec., ISO 160
2 Create layers.
Use foreground elements that add depth to your image, such as rock formations or vegetation. In the case of the Badlands, I used the pinkish-yellow mounds I was standing on as that foreground element, pulling the viewer from those mounds into the green valley behind them, then to the rock formations in the background. The sky that day was somewhat boring, so I tilted my camera down a bit so it didn’t figure as prominently in the photo. I also used the natural zigzaggy lines coming in from the bottom left of the frame to help guide viewers toward the back of the image.
3 Take an artistic view.
Incorporate close-up perspectives of the landscapes around you to mimic larger scenes. For instance, I was walking on some cracked earth in the Badlands when I stopped and zoomed in all the way with my 17-70mm on a section of dried mud between my feet. That section was only about a foot wide, but by pulling in and carefully framing the shot to emphasize the ground’s texture and patterns, it makes the viewer feel as if they’re seeing a larger landscape from a bird’s-eye view. It almost looks like a dried-up river as seen from a cliff or drone high above.
4 Get strategic with flat landscapes. In landscapes where features are relatively sparse or repetitive, like on the sweeping Mesquite sand dunes of Death Valley, you can use the light to your advantage. Seek out highlights and shadows that form lines in the sand to show depth. One piece of advice for that, however: You may want to head out first thing in the morning, giving the wind a chance overnight to erase all of the footprints from the previous day’s visitors.
There’s also the occasional unexpected element that sticks out on those types of landscapes. When I was in the Badlands, sometimes all I’d see all around me was the flat, smooth sand—but then, suddenly, I’d spot a small area where branches were growing out of the sand, sticking up like strands of hair and breaking up the monotony of the scene. Those are the serendipitous situations you want to look out for.
5 Know the park’s rules.
To ensure the preservation of these natural wonders and keep everyone (people and any resident wildlife) safe, be aware of park-specific regulations before you head in. Both the Badlands and Death Valley prohibit drones, for instance, but you can still use a tripod in most places, and the restrictions for night photography are

minimal. Other parks, like Zion and the Tetons, have started to become a little stricter. It’s also recommended you stick to designated trails as much as possible and respect signs that indicate sensitive or offlimits areas.
ABOUT: KEN HUBBARD


Ken Hubbard is the Field Services Manager for Tamron. He is responsible for the company’s events, including Tamron’s popular consumer workshop series. Ken has had nationwide gallery showings of his portrait and landscape photography and teaches enthusiasts how to take better photos at numerous events. Ken’s extensive background in the field of photography is unique and diverse. He has traveled extensively throughout the US and the result is a consistent output of breathtaking photographs that continually challenge the boundaries of the genre.
Instagram: @kenhubbardphotography


















Tamron Magazine 31
HUBBARD FIELD REPORT
PHOTOS: KEN
17-70mm F/2.8 Di III-A VC RXD [model B070]
28.40mm, F16, 1/160 sec., ISO 200
17mm, F16, 1/160 sec., ISO 200

AERIAL ARTISTRY
Whether from a helicopter or drone, Henry Do’s Tamron 28-75mm F2.8 and 35-150mm F2-2.8 lenses deliver stunning landscape images from up high.
PHOTOS: HENRY DO EXCURSION 32


Henry Do’s photographic journey began in the most unexpected of places: an airplane flying over Southeast Asia and the Pacific Ocean, as he emigrated as a child from Vietnam to America with his aunt. “I was mesmerized at the view from so high up,” he recalls.
After settling into a career in IT and trying his hand at automotive photography on the side, Henry began to travel around the US and overseas, posting his photos online. The positive response surprised him. “The dopamine hit I got from people appreciating my work definitely inspired me to take my photography to the next level,” he says.
Today, the creative director and travel photographer, whose work has appeared everywhere from Lonely Planet and the Telegraph to National Geographic, has circled back to his origin story, specializing in aerial imagery taken from planes, helicopters, and drones. “When people view my pictures, I want them to feel as if they were up there with me,” Henry explains. “There needs to be some kind of emotion I’m drawing out of them when they see my work, or a new perspective I’m offering on a scene that they’ve never experienced.”
Riding shotgun in Henry’s airborne vehicle of choice are his Tamron 28-75mm F2.8 zoom (the newer G2 model is now available) and the 35-150mm F2-2.8 Di III VXD zoom for his Sony mirrorless camera system. “One of the most important things
Tamron Magazine 33 EXCURSION
28-75mm (28mm), F5.6, 1/1000 sec., ISO 500
35-150mm (35mm), F2.8, 1/500 sec., ISO 100

"WHEN PEOPLE VIEW MY PICTURES, I WANT THEM TO FEEL AS IF THEY WERE UP IN THE SKY WITH ME."
to keep in mind when I’m preparing to fly is to keep my gear bag light,” he says. “The 28-75mm F2.8 is so light and compact, while the versatile 35150mm F2-2.8 lens offers the extended range needed for certain photos, allowing me to zoom out for a wider view and zoom in for telephoto shots. You don’t want to be up in the air and fumbling with changing lenses if you don’t have to. I appreciate that I can work with just one or two lenses for the entire flight, able to achieve everything
from wide-angle to telephoto shots.”
Henry is also pleased with the crisp images he’s able to capture with his Tamron lenses. “It’s definitely a challenge to achieve the sharpness I want when I’m in a helicopter,” he says. “I almost always shoot at a shutter speed of 1/1000 sec. or higher, to keep things from getting blurry, and I try to fly when there’s plenty of light,” he says. “I also have to be in constant communication with the helicopter pilot on what my photographic intentions

are, so they’ll know whether you want them to hover over a particular spot or make a turn so you can capture a scene from a certain angle. Editing software also offers me an additional tool to enhance my images.”
Before he ascends into the clouds, Henry checks out reviews of his target destinations online, including on Google Maps, where he can examine 3D maps of the bustling cityscapes and sweeping landscapes below. “Doing this research prior to the shoot allows me to map out exactly what I want to photograph and gives me a sense of, say, what angle we approach the coastline from, or what perspective I should show to give the viewer something distinctive. For instance, everyone’s seen various parts of the Las Vegas Strip from street level—viewing it from the sky is an entirely different, enthralling experience.”
Mother Nature plays a substantial role in Henry’s aerial photography, and can pose unique challenges, depending on location. “In Hawaii, for example, you can have one side of the island drenched in sun and the other side getting drenched by a rainstorm,” he says. “And when there’s too much cloud cover, it makes it tough to shoot. But if the weather is cooperating, I’ll check
EXCURSION
28-75mm (30mm), F4.0, 1/1000 sec., ISO 500
35-150mm (35mm), F2.8, 1/800 sec., ISO 500
"I APPRECIATE HOW LIGHTWEIGHT AND COMPACT MY TAMRON 28-75MM F2.8 AND 35-150MM F2.8 LENSES ARE WHEN I HAVE TO LIMIT THE GEAR I BRING IN THE HELICOPTER."
out Google Earth Pro, which allows you to punch in a certain time of day to find out where the shadows and light will be. Although most landscape photographers prefer sunrise and sunset, that’s actually not the ideal time to shoot from a helicopter. You want the angle of the light to offer some shadows so you gain depth to your images.”
One of Henry’s favorite photo ops is a frame that’s able to feature both ocean and coastline, which he encounters in abundance when he’s working in California and Hawaii. “There's so much variation you can include in such a scene,” he says. “Whether it’s emphasizing the vastness of the ocean, the serenity of the beach, or the mountains in the background, such spots give you a lot of leeway to capture the scenery in so many ways.”












ABOUT: HENRY DO






Henry Do is a professional travel photographer who specializes in aerial photography. His passion for capturing stunning aerial perspectives originated from the breathtaking views he encountered on his first airplane journey as a young boy immigrating from Vietnam to the U.S. Currently based in Las Vegas, Nevada, Henry is available for projects worldwide.
Instagram: @henry_do
Tamron Magazine 35
EXCURSION
PHOTOS: HENRY DO
35-150mm F2-2.8 Di III VXD [model A058]
28-75mm F/2.8 Di III VXD G2 [model A063]
35-150mm (35mm), F2.8, 1/1000 sec., ISO 800
35-150mm (35mm), F2.8, 1/1000 sec., ISO 800
MATERNITY GLOW-UP
Elmer Escobar captures one of the most beautiful transformations of a woman’s life with his Tamron 35-150mm F2-2.8 all-in-one zoom.
PRACTICE 36
PHOTOS: ELMER ESCOBAR


Elmer Escobar first picked up a camera to ease his broken heart after a girlfriend broke up with him. “I didn’t want to sit home wallowing, and my brother recommended I get out to do something I enjoyed, so I started taking pictures all over New York City,” he says. Today, Elmer runs TNK Photo, a thriving engagement, wedding, and family portrait business, in Orange County, California, with a niche for maternity portraits to expand on the love he initially captures during couples’ nuptials.
“My maternity portraits aren’t as dramatic aesthetically as some of my other work,” Elmer explains. “I tend to go a lot softer, in both my lighting and the editing process, or by creating a softer background using lower apertures.”
The technical end of that process is easily achievable thanks to one Tamron lens that has become an invaluable element in Elmer’s workflow: the Tamron 35-150mm F/2-2.8 Di III VXD for his Sony mirrorless camera system, an all-in-one zoom lens that allows him to capture everything from wide-angle environmental shots to telephoto images that focus on the details. “The versatility of this lens is perfect for a maternity session, or even a family session,” he says. “I can offer my clients more variation, with plenty of horizontal and vertical crops to choose from, than if I were simply shooting with a single wideangle or telephoto lens.”
Tamron Magazine 37
PRACTICE
123mm, F2.8, 1/320 sec., ISO 500
64mm, F2.8, 1/1250 sec., ISO 640


your prices reflect that experience), your clientele will likely be a more sophisticated demographic that knows exactly what they like—and that includes their wardrobe. I find that my moms-to-be typically know what to wear, and what looks good on them personally, to bring about the look they desire in their photos. If they’re unsure what might work best, I’ll often recommend long, flowy dresses or garments that we can play with during the session for more dramatic images.

PHOTO TIPS: MATERNITY PORTRAITS
1 Select an aesthetically appealing location.
Whether it’s a serene beach, verdant field, or even a well-manicured backyard, collaborate with your clients in a way that taps into your expertise but still prioritizes their preferences. I’m all about customer service first. That said, the client often isn’t sure where they want to do the shoot— they simply know the look or feel they’re hoping for. In those cases, I’ll send them a few suggestions of venues I think would work and let them choose from that.
Pregnancy already has enough stressors involved; I want to make the process as easy as possible for my customers.


Dot your i’s and cross your t’s. This could mean everything from checking to see when low tide is at the beach where you plan on shooting to ensuring you have all required permits. Although many outdoor locations don’t require a permit, you don’t want to show up for your session with your clients, and all of your gear, only to find out you don’t have the necessary paperwork in place. The shot of the couple in front of the bamboo was taken at the Los Angeles County Arboretum and Botanic Garden, and they simply needed to pay a small permit fee. It’s well worth the access to some wonderful locations you wouldn’t otherwise have at your disposal.
3 Let your clients’ style shine.
When you’ve been in the business for a while and established yourself (meaning
4 Be judicious with props. The focus of the maternity session should always be the mom-to-be and her partner. You don’t want the majority of your photos to be of baby shoes and sonogram pictures. That said, if clients suggest props that would be meaningful to them, I always react with enthusiasm. I’ll often shoot wide open if that’s the case to isolate and separate those items from the background. You don’t have to make them the central element of the photo, either. If I do use props, I try to work some angle of the couple’s relationship into the image as well, or do a series of shots that incorporate that prop. For instance, for the couple here that wanted to include their baby’s sonogram, I first did some wider shots that showed the two of them together holding the sonogram, then zoomed in for a close-up of the sonogram. For the baby shoes photo, I made sure to include their hands holding the shoes together, instead of simply a stand-alone of the shoes.
5 Timing is everything.
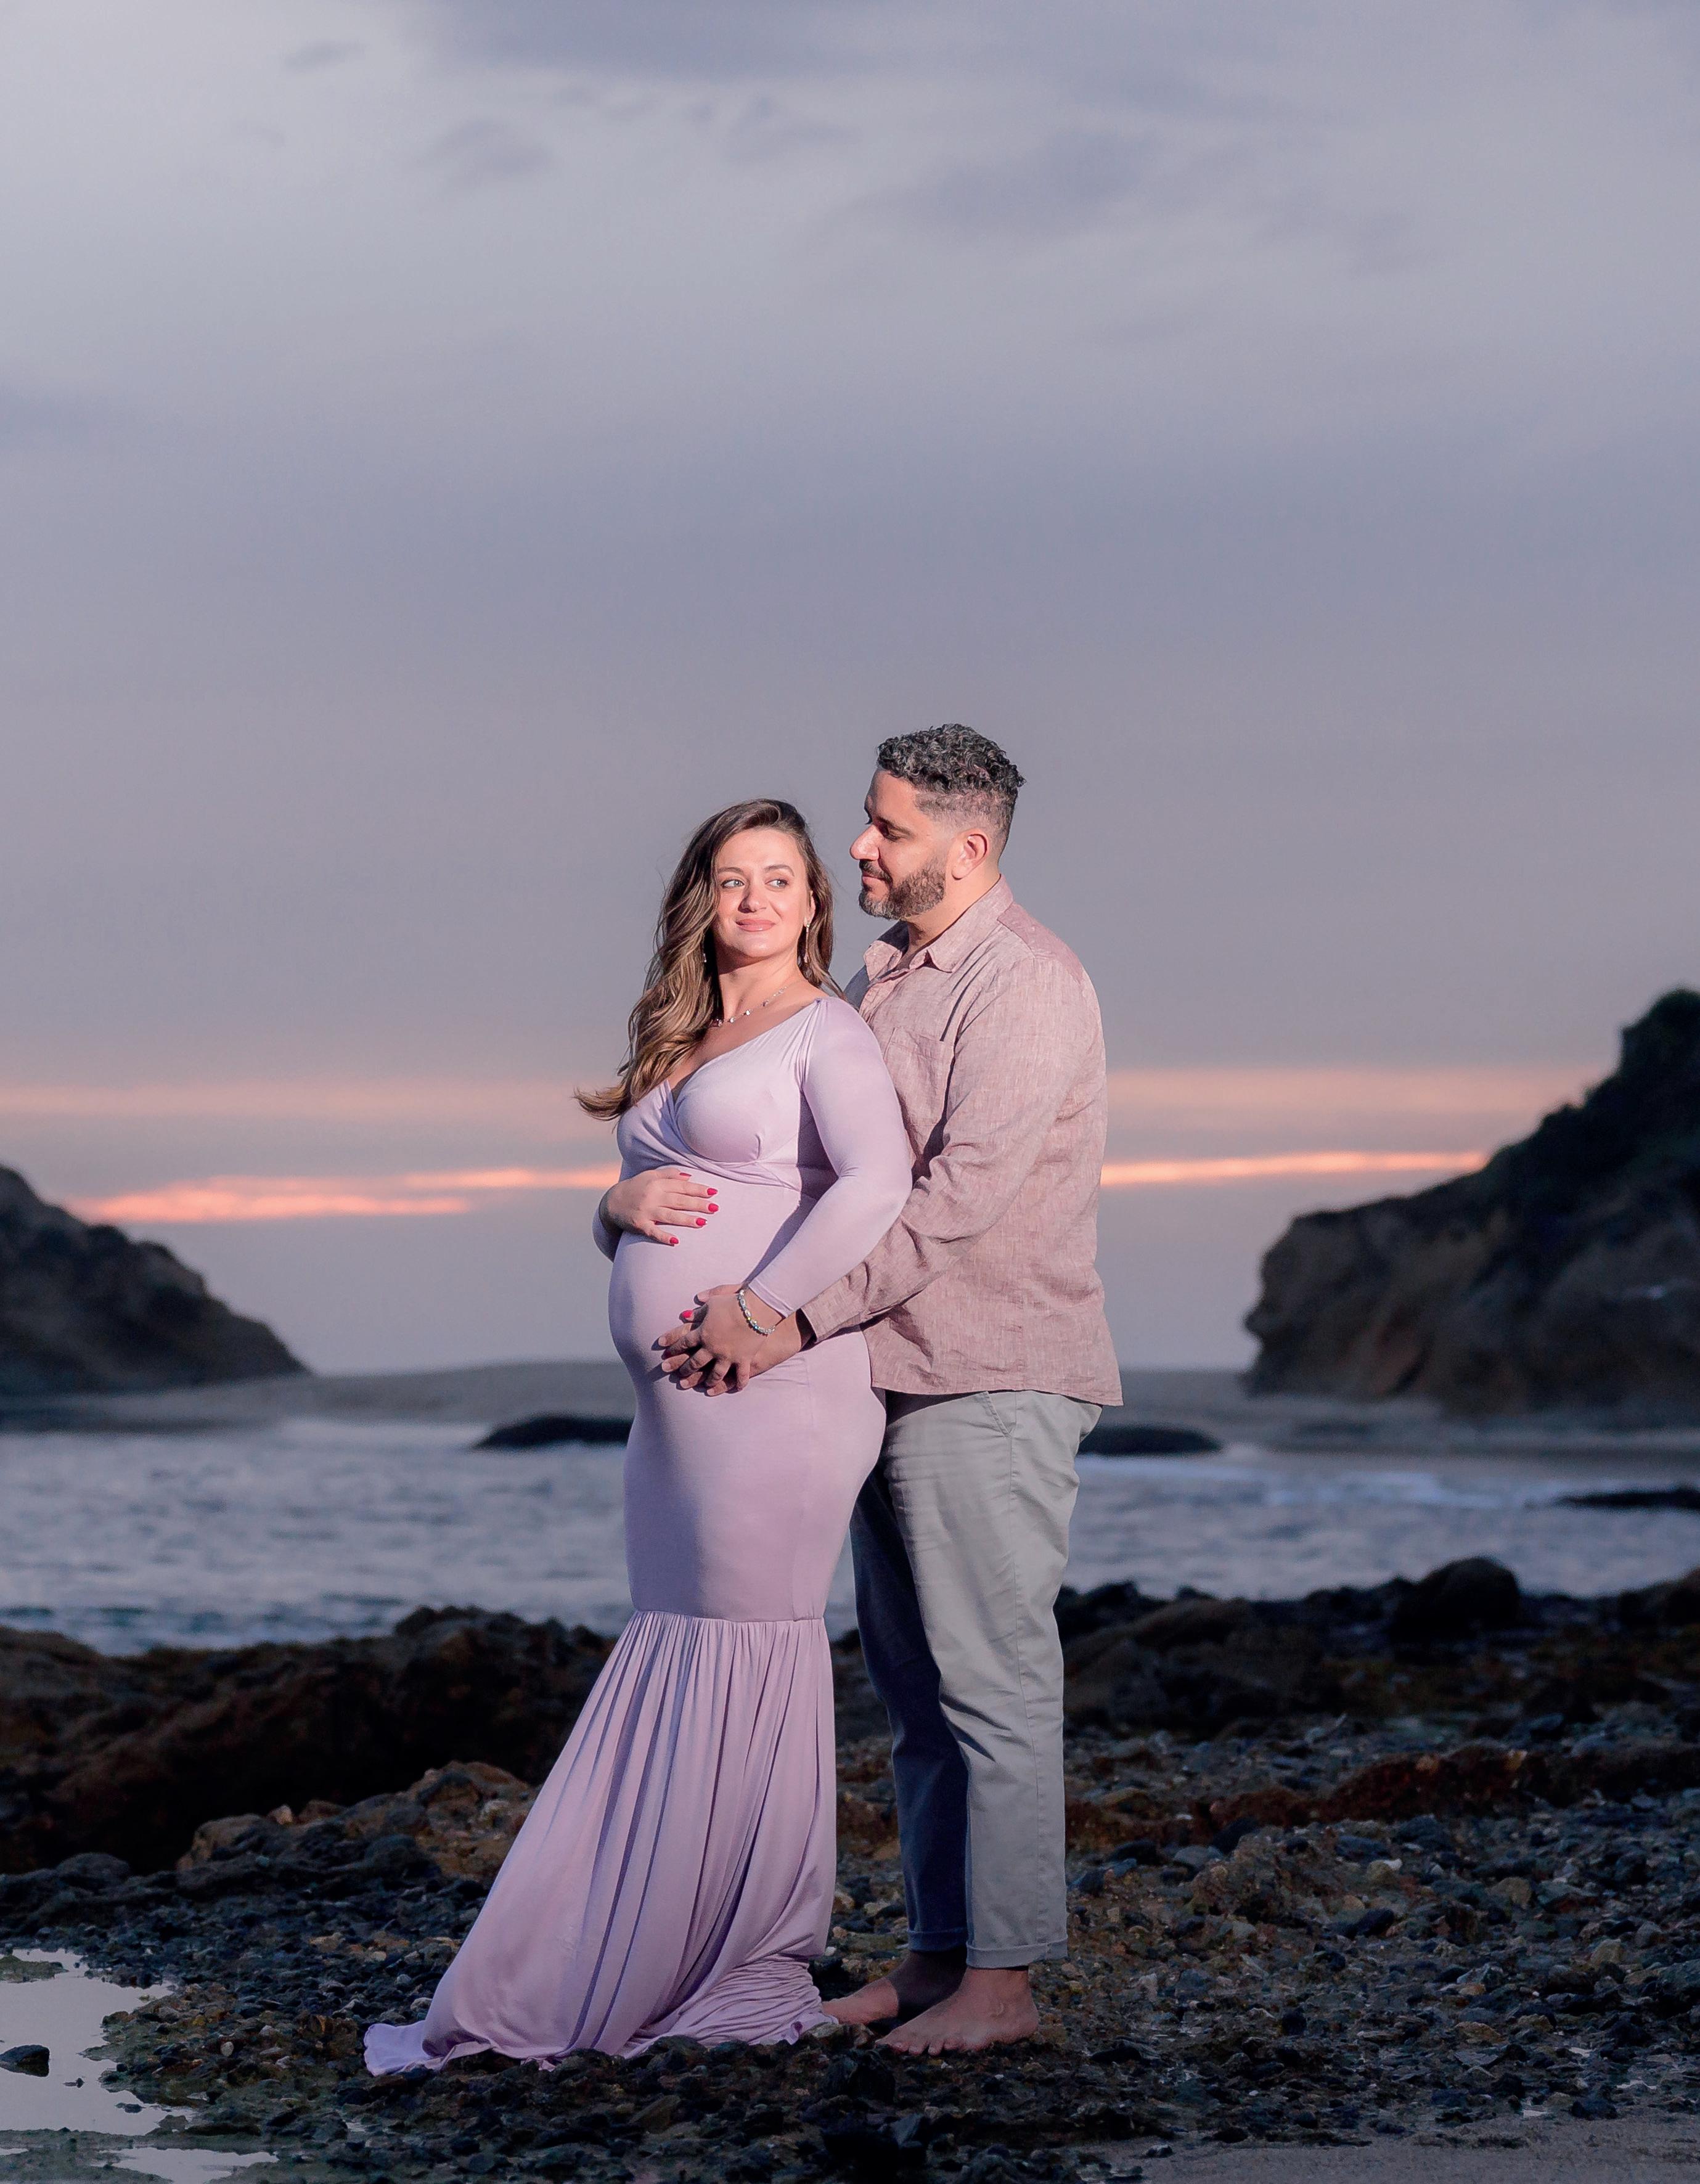
We always schedule our shoots about an hour before sunset—maybe slightly earlier if there’s an outfit or location change involved, but not much earlier. Some couples want to show up extra early, to ensure we have enough time, but I tell them that the light will be too harsh then. That’s especially the case when we’re doing a session at the beach. You don’t want the sun too high and creating an annoying glare that reflects off the water. For the couple on the beach here, the evening light was perfect for the mood I was trying to create. I simply added some supplemental light coming at them from the right side so they wouldn’t be as dark as the rocks around them.
38 Tamron Magazine
PRACTICE
2
40mm, F2.2, 1/800 sec., ISO 500
150mm, F5.0, 1/500 sec., ISO 320
“WITH THE TAMRON
35-150MM F2-2.8, I CAN OFFER MY MATERNITY CLIENTS MORE VARIATION, WITH PLENTY OF HORIZONTAL AND VERTICAL CROPS TO CHOOSE FROM.”


ABOUT: ELMER ESCOBAR

Elmer Escobar, a photographer in Southern California, owns TNK Photo named after his dog Tank. The business grew organically from teaching photographers he saw potential in. With a team of over 12 photographers using Tamron lenses for versatility and image quality, they handle multiple assignments confidently. Passionate about their work, they continue to grow and refine their craft.
Instagram: @tnkphotodotcom








Tamron Magazine 39
PRACTICE
PHOTOS: ELMER ESCOBAR
35-150mm F/2-2.8 Di III VXD [model A058]
82mm, F2.8, 1/200 sec., ISO 1250
126mm, F2.8, 1/1600 sec., ISO 100

THE POWER OF THE PROMPT
Christina Roberts subtly draws the emotion out of every portrait with her Tamron 28-75mm F2.8 G2 lens.
PRACTICE 40
PHOTOS: CHRISTINA ROBERTS
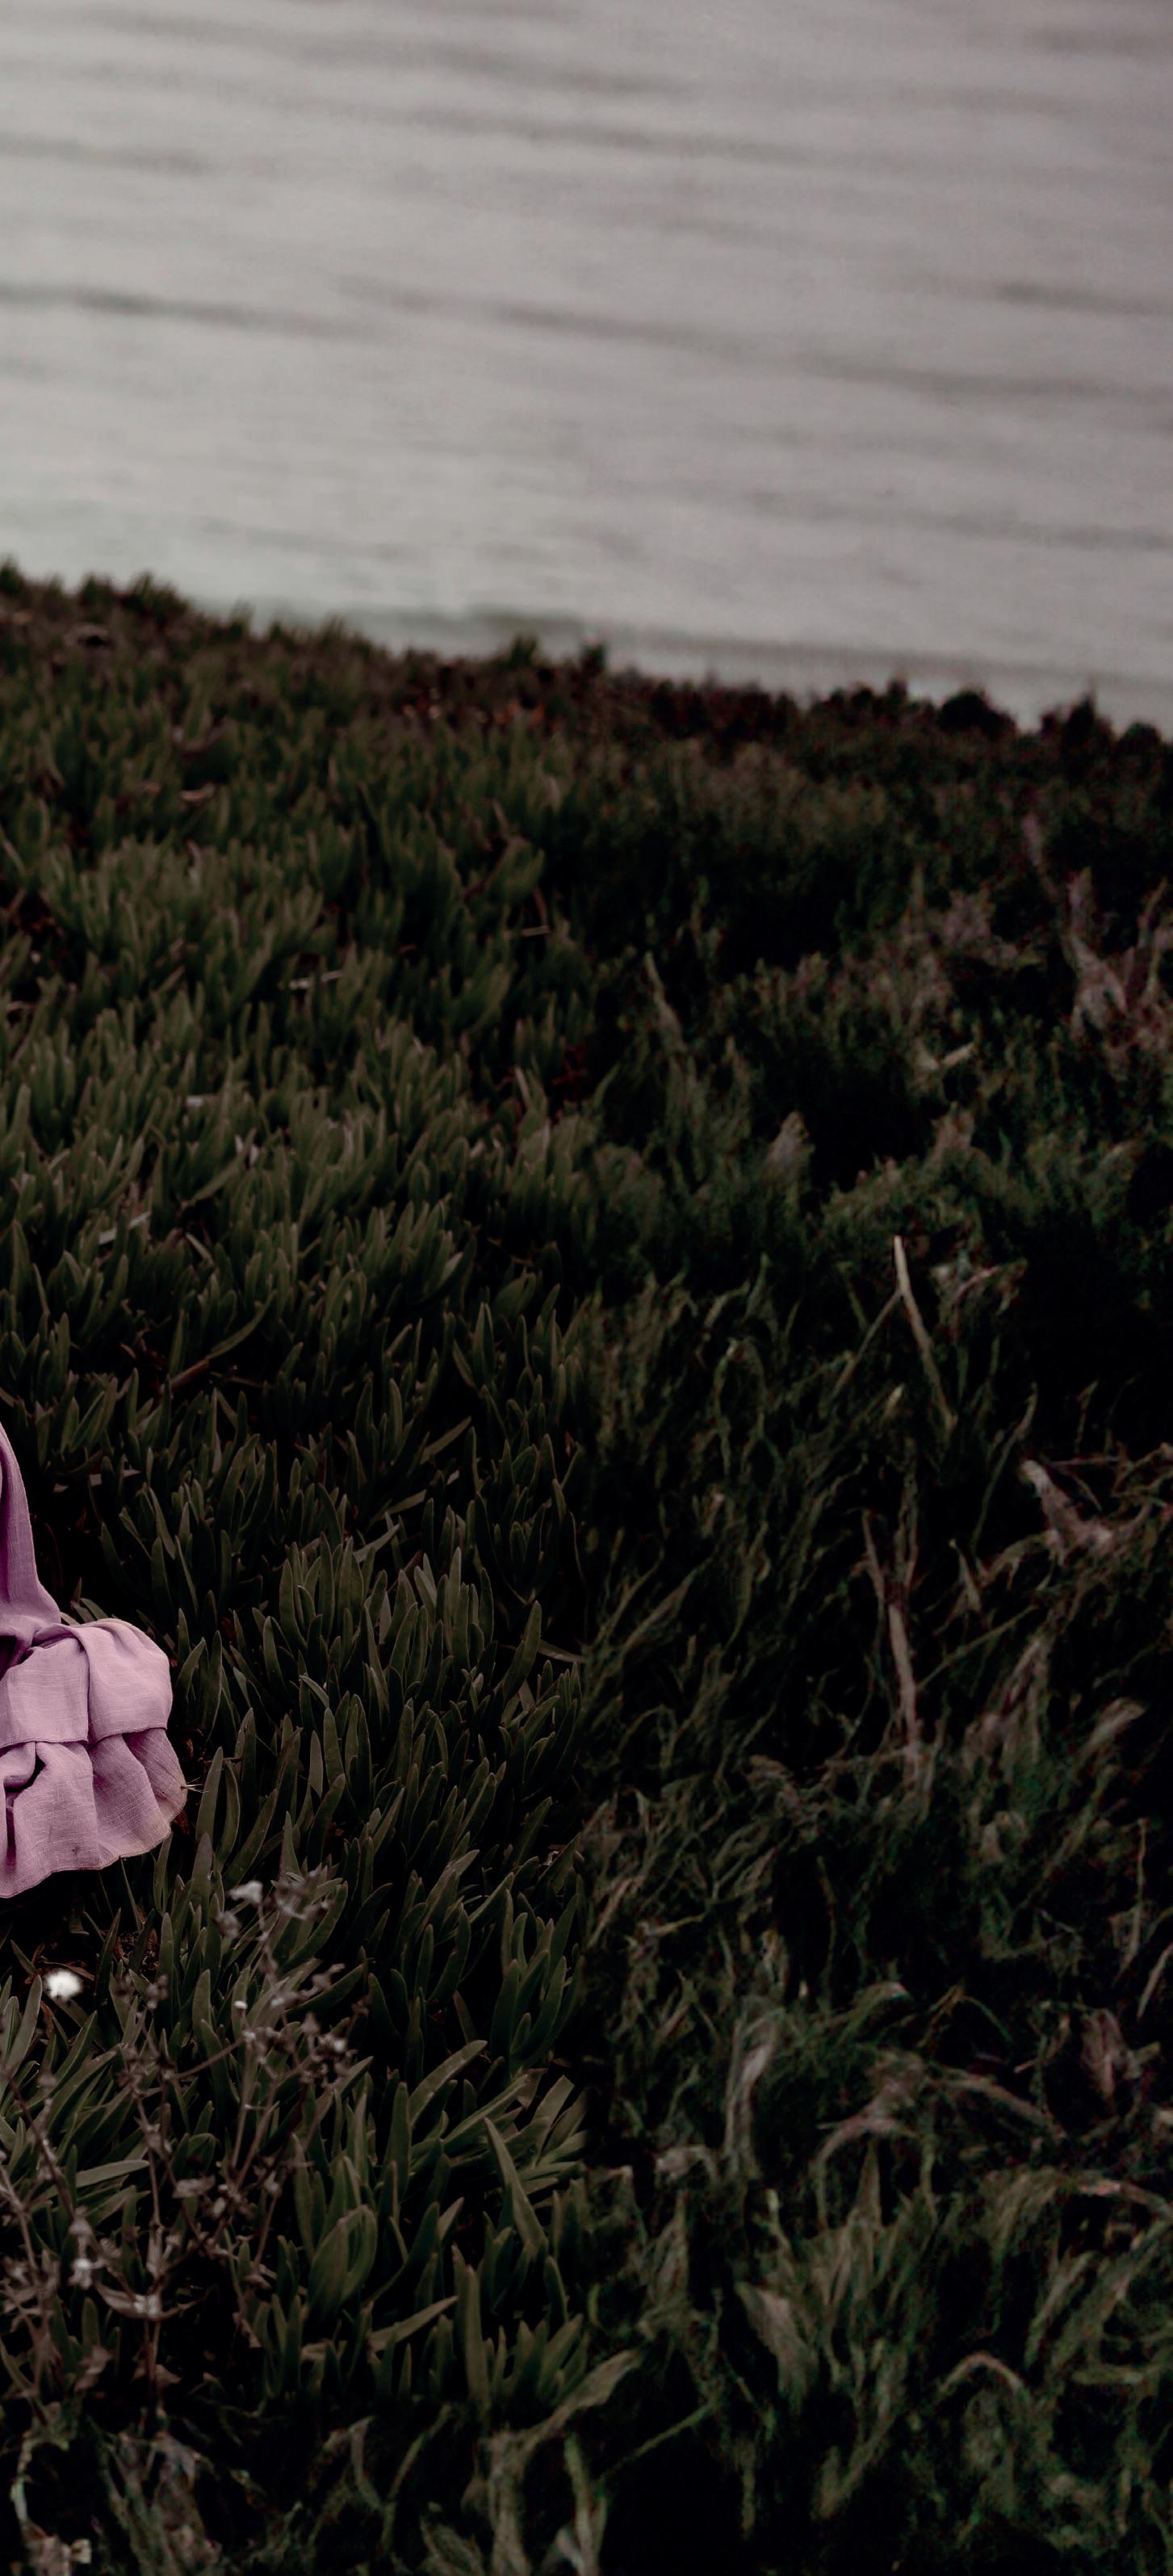

Today, the Sacramento photographer has long since figured her gear out, specializing in individual and family portraits with a Sony mirrorless camera system and her Tamron 28-75mm F/2.8 Di III VXD G2 zoom lens. “I love this lens for its versatility,” Christina says. “I can zoom in to capture detail shots, then pull back to portraits that include the landscape. It’s ideal that I can use that one lens for my entire session—the second I stop to switch lenses, I’ll miss a precious moment. I prefer to shoot in the golden hour and blue hour, so the 28-75mm’s maximum F2.8 aperture allows me to take control of those situations when the light starts to fade.”
The story behind each person in front of her lens is what Christina tries to draw out with every image. “I always seek out a dramatic landscape for my backdrop, then let my subjects’ narrative unfold in front of that backdrop,” she says. “My work as a school psychologist has also helped inform my photography. Knowing how to work with kids when they’re having a tough time is key. I think that background is what drew me to work with families in the first place.”
PHOTO TIPS: FAMILY PORTRAITS
1 Shift your subjects into the right mindset. For me, that starts before the photo session. I make sure to connect with my clients beforehand and explain that I’m there to
Tamron Magazine 41 PRACTICE
75mm, F2.8, 1/1000 sec., ISO 250
46mm, F2.8, 1/800 sec., ISO 250


capture their authentic story, and not stiff, rigid poses. I let them know we’ll be playing games, joking around—whatever it takes to ensure everyone is relaxed on the day of the shoot and ready to have fun.
I also encourage parents to let kids bring whatever comfort items they want to our session, whether it’s a favorite stuffed animal, blanket, or toy. I know some photographers don’t want unplanned props, but I think they’re adorable, and I want the kids to feel comfortable in front of my camera.
2 Elicit organic poses.
Offer a prompt to encourage natural movement and expressions. For instance, one of my favorite prompts for younger children is to ask them to tell their parent or sibling a secret, or to listen to their mom’s heartbeat. They’ll lean in closely, and I’ll then subtly direct the mom to place a hand on their child’s cheek, arm, or wherever it looks most natural to me in the moment.
Another favorite prompt of mine is “No lonely hands”—there’s nothing more unnatural than a picture with one floppy, out-of-place hand. If I spot that in my viewfinder, I’ll ask the person to find someone else’s hand to hold, or to put their hand on someone’s arm or back.
For the mom seen here with her three daughters, this session was styled and led by Clare Cassidy at the “Finding My Niche” event. They were all super snuggly and affectionate. I had the opportunity to prompt the family and work with her sweet children. So my prompt in their case was to simply hug each other tight. They were more than happy to oblige, and I ended up with a carefree, playful image. I used a similar prompt for the mom on the hillside, holding her daughter close. This photo, though, sends out more of a fiercely protective, maternal vibe. A similar prompt can result in very different photos, because every family is different.
3 Collaborate on wardrobe.
I like to make sure what my subjects are wearing complements our chosen setting. Lately, I’ve been gravitating toward more natural tones. I have a client closet and a styling program that allows my clients to input their preferences, then comes up with which outfits from my styling closet would sync with those preferences.
I’m also partial to long, flowing dresses. This session was styled and led by Twyla Jones at the “Finding My Niche” event organized by Clare Cassidy. In this image, the two sisters wore an ethereal flowing wardrobe, against the backdrop of a river in Santa Cruz. This type of outfit adds elegance, but it’s also versatile. Sometimes I’ll have my subject drape her dress over some nearby rocks; other times, I’ll ask younger children to hide underneath the bottom of their mother’s dress. In most cases I’ll just have my subjects playfully swish their dresses around.
42 Tamron Magazine PRACTICE
26mm, F2.8, 1/1000 sec., ISO 250
75mm, F2.8, 1/800 sec., ISO 250
CREDITS:
Session with twins
Led by: Twyla Jones @somethingrad
Event: Finding My Niche
Models: Clare Cassidy & Cat Cassidy
Session with mother and daughter
Led by: Twyla Jones @somethingrad
Event: Finding My Niche
Model: @_.caspur_creates._
Session with mother and daughters
Led by: Clare Cassidy @ifyouwereachild
Event: Finding My Niche
Models: Lupe Arango Crespin and children
Session with Zephyr (horse)
Led by: Jeremy Miyagi @miyagiphotography
Event: Finding My Niche
Model: Sophia Morales


4 Focus on authenticity.


If your subjects have a compelling backstory, tell it through your images. The young woman you see here with the horse is a Native American, and so the session incorporated elements of her heritage and culture into the image, through her wardrobe, jewelry, and headwear. Doing so helped me to convey a deeper connection to her identity. This session was styled and led by Jeremy Miyagi at the “Finding My Niche” event organized by Clare Cassidy.


With the 28-75mm G2, I was able to zoom in to show off those details, then pull back to show more of the shoreline behind her. I love that those birds in the sky flew into frame as I was shooting. As for the horse, a handler led it down a big flight of stairs to the beach. It was a little hectic, but worth it—the resulting session was incredible and all made possible by this versatile lens.


“HIGHLIGHT AUTHENTICITY. IF YOUR SUBJECTS HAVE A COMPELLING BACKSTORY, TELL IT THROUGH YOUR IMAGES.”
ABOUT: CHRISTINA ROBERTS

Christina Roberts, a genuine portrait photographer, is based in Loomis, CA, a quaint town close to Auburn, Folsom, and Granite Bay. Besides her photography work, Christina is a passionate educator, drawing inspiration from her two children. With a focus on storytelling, she delights in preserving the enchanting connections found in those special moments.
Instagram: @christina_roberts_photography
Tamron Magazine 43
PRACTICE
PHOTOS: CHRISTINA ROBERTS
F/2.8 Di III VXD G2 [model A063]
28-75mm
1/800
ISO 250
52mm, F2.8,
sec.,
56mm, F2.8, 1/800 sec.,
ISO 320
MY PROJECT BEYOND THE BLEACHERS
Jessi Carrieri captures the excitement of youth football with her Tamron 35-150mm F2-2.8 zoom.
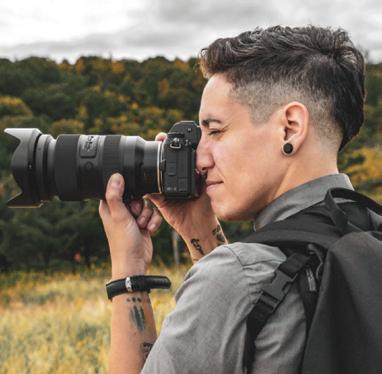


My first camera was an old-school 35mm Canon AE-1 passed down from my dad, though I eventually upgraded to a DSLR by the age of 16. I ended up going to college and spent nearly a decade working at a camera store before transitioning into the role of Customer Service Technical Specialist at Tamron. Photography still remains a fundamental part of my life.
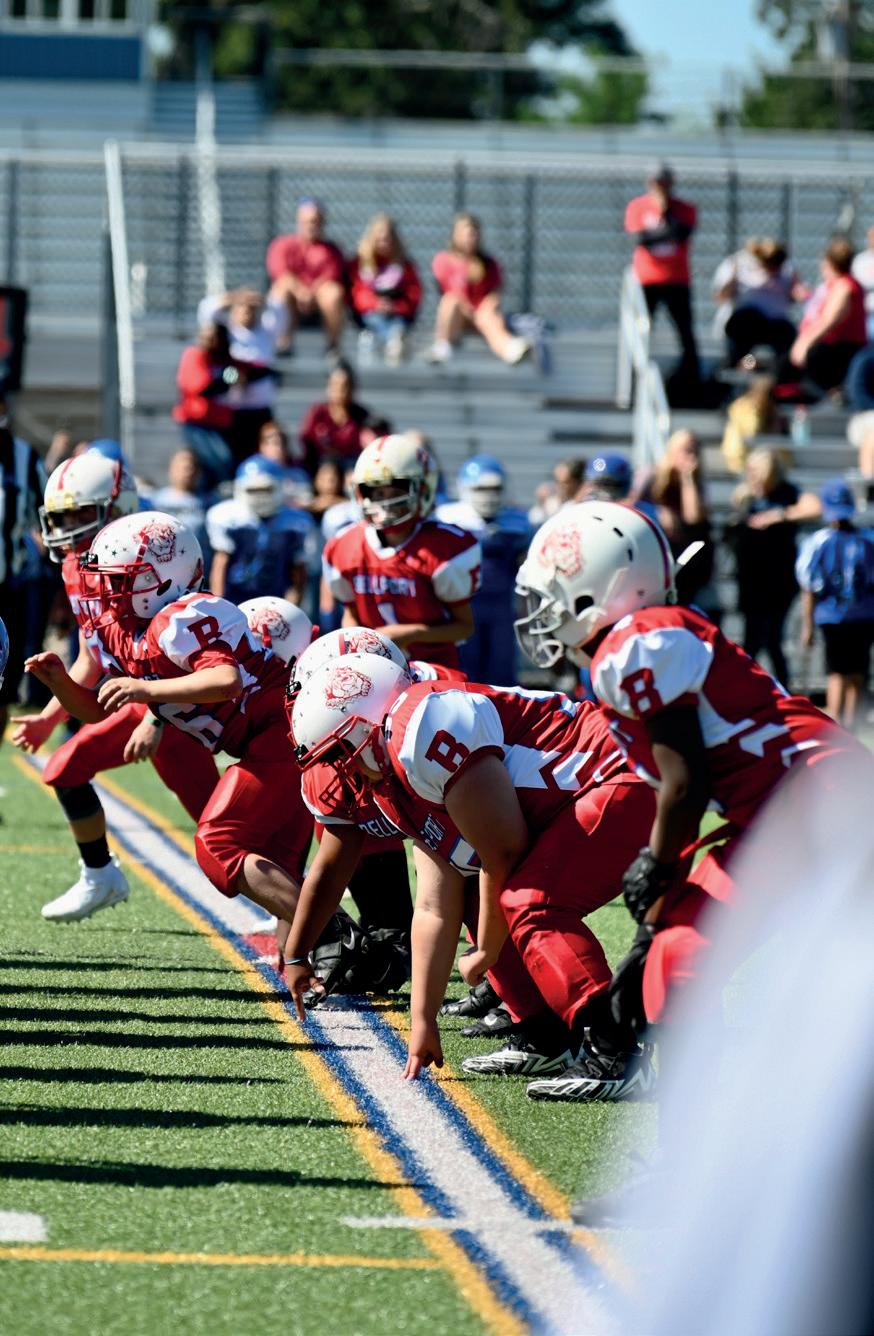
I especially love capturing sports moments, a hobby I began in high school. The images shown here were taken during a session photographing my 10-year-old nephew’s football team. With the coach’s approval, I positioned myself close to the action to thoroughly document the game. I aimed to test the limits of the Tamron 35-150mm F/2-2.8 Di III VXD on a Nikon Z 7II, employing it as my versatile “all-in-one” lens for the day’s events.
Usually, I go for the Tamron SP 70-200mm F/2.8 Di VC USD G2 for football games on my Nikon D750 when I’m among the other spectators further back. Being right on the field this time presented the perfect chance to test out the 35-150mm. I was genuinely impressed with this versatile lens, which enabled me to capture action shots from a distance while also getting up close to the players and capturing the details in their uniforms. I truly appreciated the lowaperture capability of this lens, as it allowed me to blur distracting backgrounds and focus solely on the subject.
Having basic understanding and knowledge of the sport that you’re photographing
44 Tamron Magazine MY PROJECT
35mm, F4.5, 1/2000 sec., ISO 100
150mm, F2.8, 1/1600 sec., ISO 100

is beneficial, as it helps you anticipate player movements and crucial moments in the game. Action shots pose a challenge, but I try to maintain a minimum shutter speed of 1/500 of a second. For faster activities such as biking, motorcross, hockey, etc., I increase the shutter speed to at least 1/1000 of a second to effectively freeze the action. To ensure sharp images, I rely on back button focus, which shifts autofocus control from the shutter button to a button on the back of the camera.
Apart from capturing punts, tackles, and touchdowns, I enjoy capturing unique perspectives—like zooming in on the referee’s jersey or focusing on players from behind to capture details like their helmets. These shots offer a different narrative of the game. Despite not showing faces, photos can convey a lot, such as the intensity and passion of the players. These boys were fully immersed and ended up winning the entire season! #proudaunt


PROFILE:
JESSI CARRIERI
Location: Long Island, NY
Occupation: Customer Service Technical Specialist
Photographic Specialty: Capturing the essence and emotion of various moments within portraits, macro, sports, concerts, weddings.
Passions: Creative expression, storytelling and connecting with people.
Favorite Lenses: Tamron 15-30mm G2 (model A041), 70-200mm G2 (A025N) for Nikon DSLR, and 35-150 (A058Z) for Nikon Z.










Tamron Magazine 45 MY PROJECT
150mm, F6.3, 1/500 sec., ISO 100
150mm, F6.3, 1/500 sec., ISO 100
128mm, F2.8, 1/2000 sec., ISO 100
35mm, F2.5, 1/2000 sec., ISO 100
35-150mm F/2-2.8 Di III VXD [model A058Z]
PARTING SHOT:

CONTACT
MAGAZINE FEEDBACK
tamroneditor@tamron.com
#tamronamericasmagazine
CUSTOMER SERVICE
If you have any questions about our products or services, get in contact with us:
Telephone: 1-800-827-8880 / prompt 1
Email: custserv@tamron.com
Mon-Fri 8:45am – 5:00pm EST
REPAIRS
Tamron products are manufactured with the greatest care and precision. However, should there be any damage to your lens, Tamron Customer Service will be happy to assist you. All Tamron lenses purchased through an authorized Tamron Americas retailer in the USA and Canada are supported with our 6-Year Warranty. You can find contact addresses and more detailed information on the warranty and the procedure for sending in the product and having it repaired in the Support section of our website:
www.tamron-americas.com
LEGAL NOTICE
Publisher: Tamron Americas, 10 Austin Blvd, Commack, NY 11725
Editor: Stacie Errera
Writer: Jennifer Gidman
Staff: Sabrina Retas, Lisa Keller, Damion Fearron
Contributors: Ken Hubbard
Production and layout: Stephen Reisig / Real Imagination
Printed by: Spectragraphic, New England
Reprinting,
Instagram: @mischievous_penguins
46 Tamron Magazine
reproduction in online services and on the internet, duplication onto storage media such as thumbdrive, CD-ROM, DVD-ROM etc. are only permitted with the advance written permission of the editorial staff. All information, prices, dimensions and colors are subject to correction Copyright © 2024, Tamron Americas
Photographer Casey Horner reveals a panning technique along with a slow shutter speed method to depict lively images that convey movement and vitality. According to Casey, "Practice is crucial for achieving the perfect balance." A recommended starting point for automotive or motorcycle photography is usually 1/200 of a second. Lowering the shutter speed gradually enhances the perception of motion. Utilizing a lens such as the Tamron 70-180 F2.8 G2 with optical stabilization allows for slower shutter speeds while preserving image sharpness.
Tamron 70-180mm F/2.8 Di III VC VXD G2 83mm, F13, 1/50 sec., ISO 50


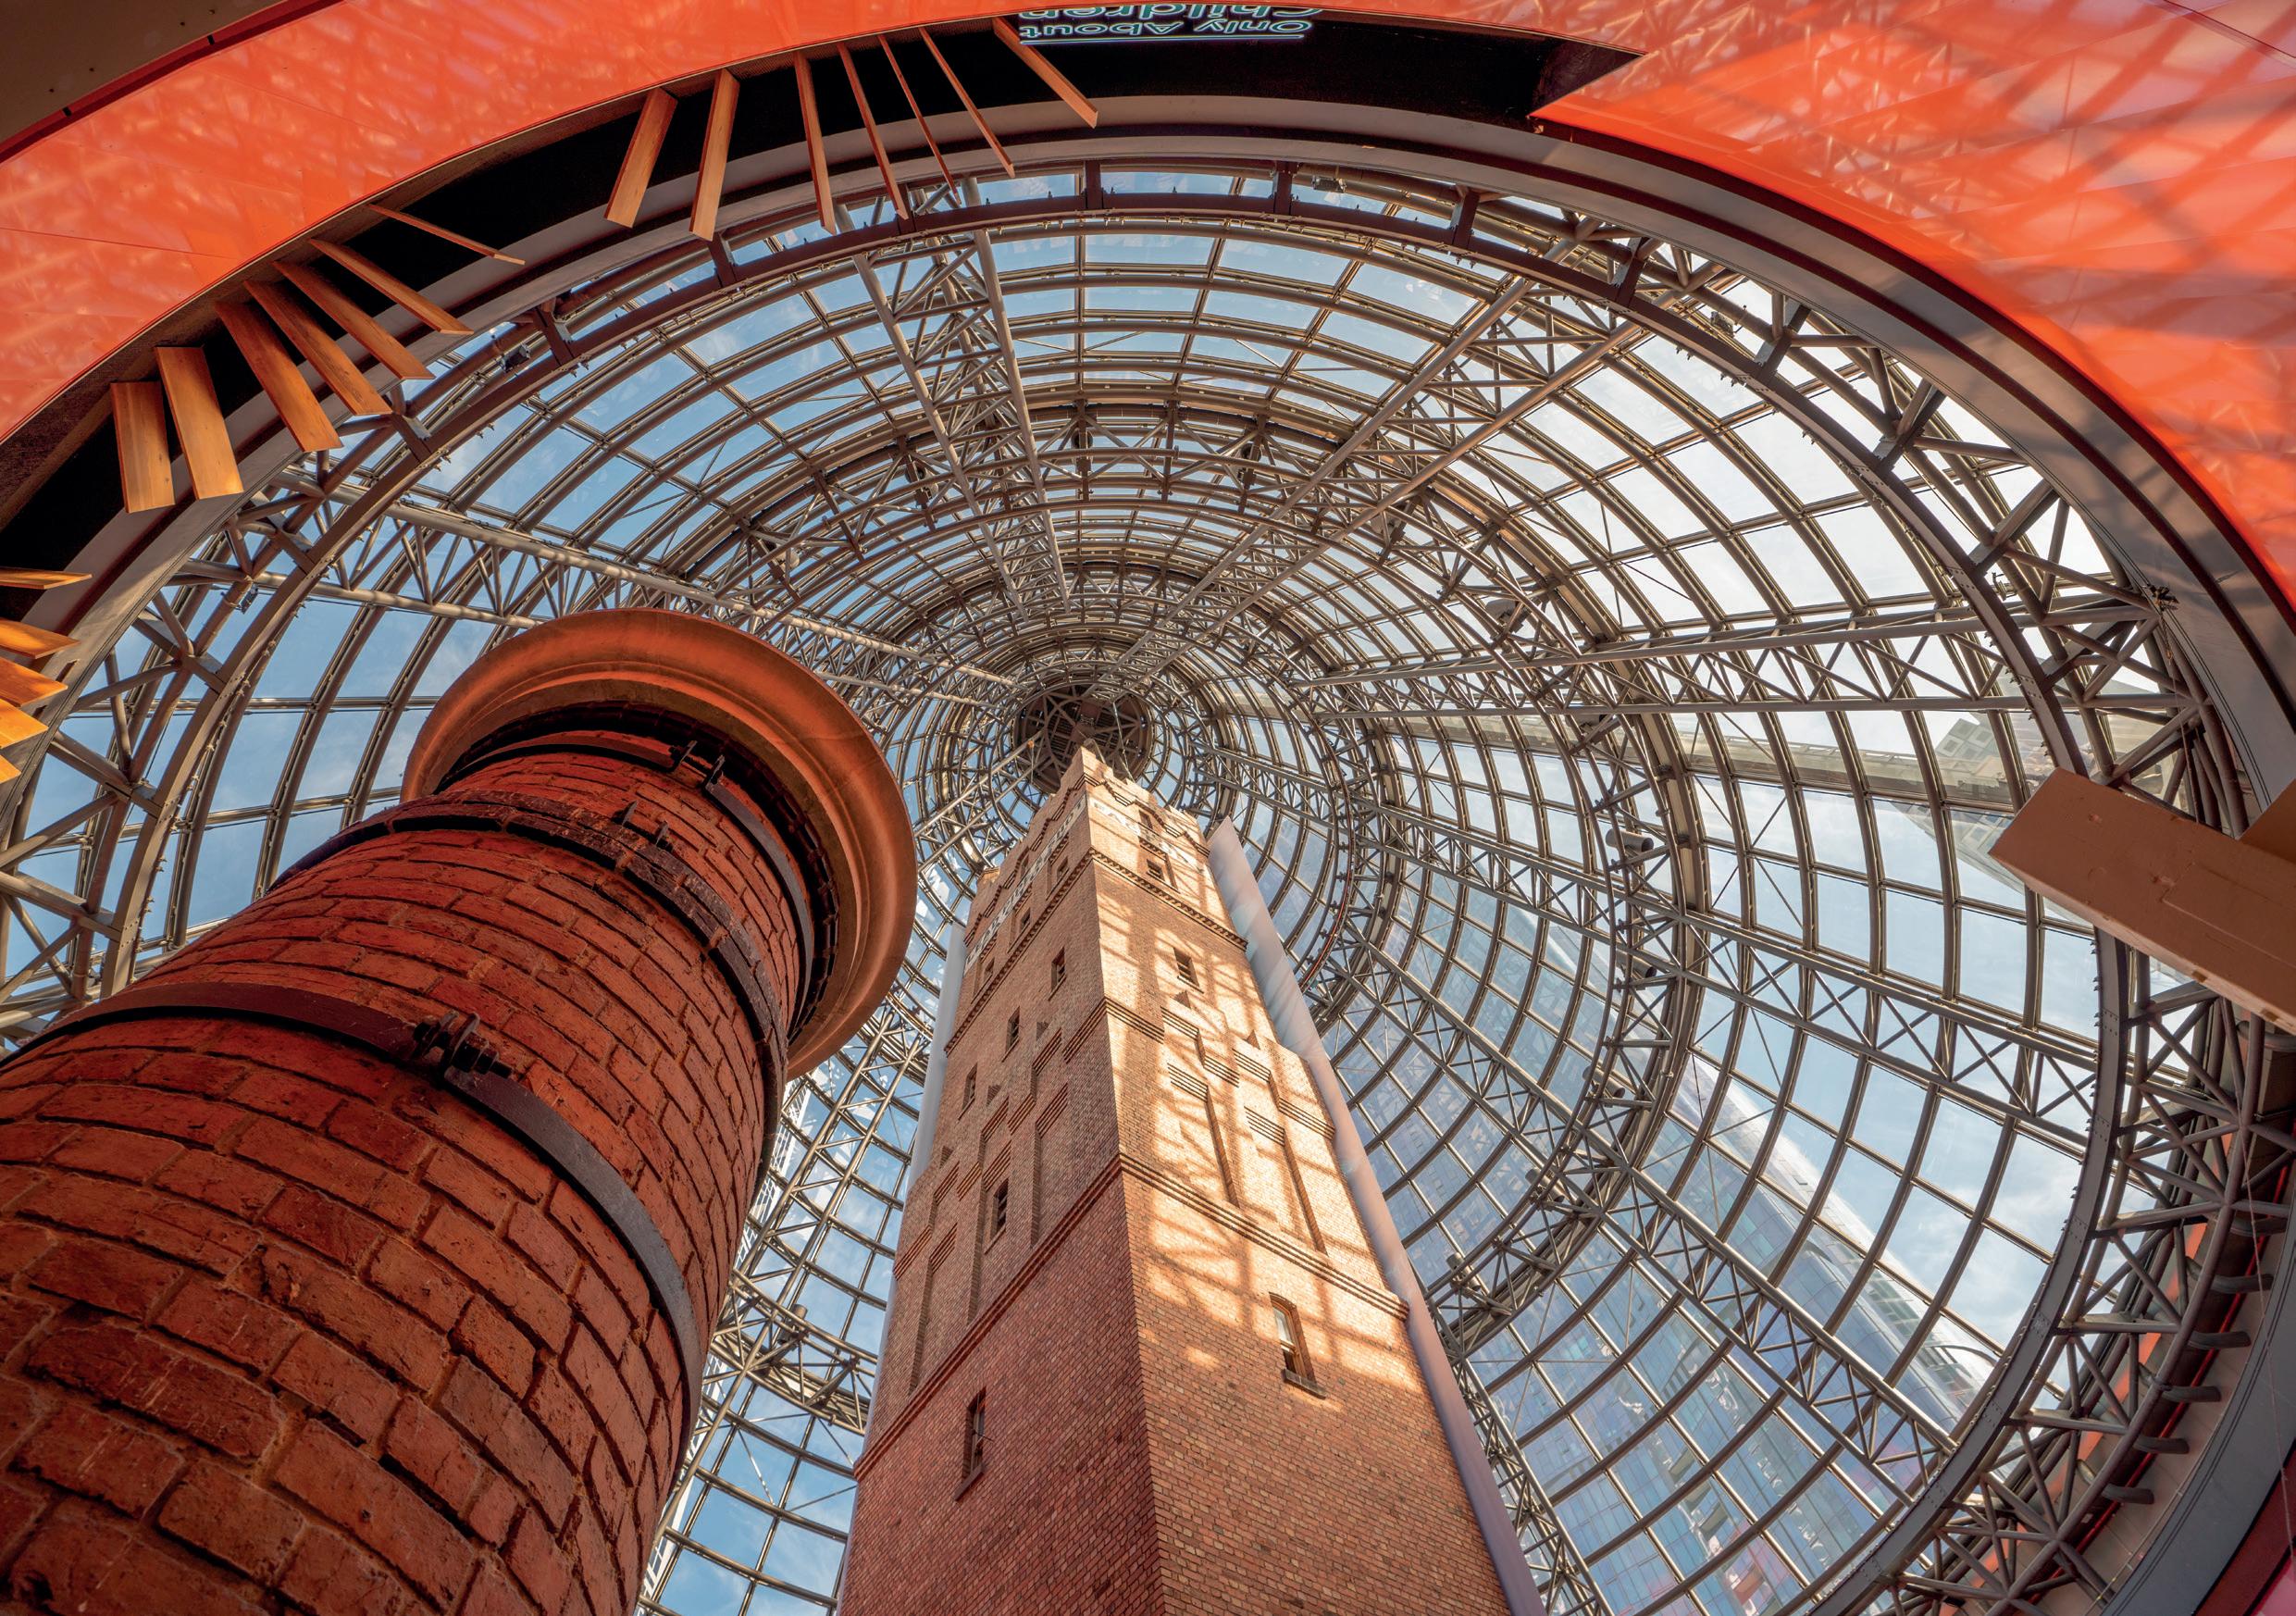












 © Glynn Lavender
www.tamron-americas.com ONLY AVAILABLE AT YOUR AUTHORIZED TAMRON AMERICAS RETAILER ULTRA TELE ULTRA WIDE WIDE ANGLE ZOOM LENS for Sony E-mount [ model A068]
F/4 Di III VXD TELEPHOTO ZOOM LENS for Sony E-mount [ model A067]
F/4.5-6.3 Di III VC VXD
ultra-wide to ultra-tele, Tamron’s got you covered with two compact zooms.
17-50mm, 17mm, F/6.3, 1/25 sec., ISO 100
17-50mm
50-400mm
From


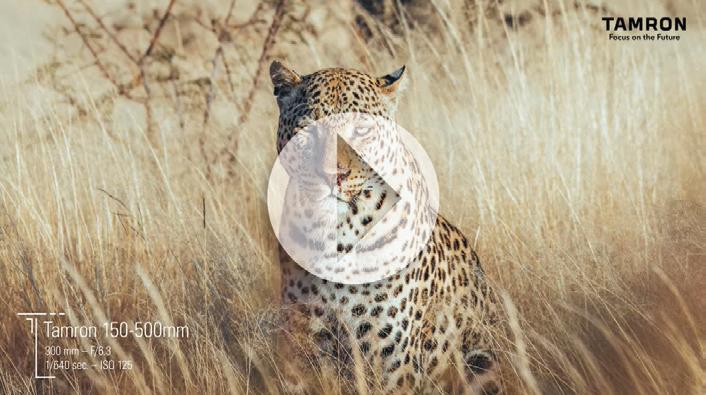
www.tamron-americas.com © JeanMarie Seveno The compact and lightweight ultra-telephoto zoom with VC and fast AF for Mirrorless Cameras ULTRA-TELEPHOTO ZOOM LENS for Sony E-mount, FUJIFILM X-mount and Nikon Z mount [ model A057] STABLE VC150-500mm F/5-6.7 Di III VC VXD ONLY AVAILABLE AT YOUR AUTHORIZED TAMRON AMERICAS RETAILER 500mm, F/6.7, 1/1000 sec., ISO 800


 © Andrea Grieco 28-75mm (56mm)
F9, 1/250 sec., ISO 100


 © Glynn Lavender


