A Quick Furniture Guide to Your New Space
Say hello to your new workplace
It’s a new beginning and work environments have come a long way. Here’s the scoop on your new digs! Your space is designed to support a more dynamic work environment, enhance communication, provide better accessibility to each other and your resources, and most of all... be a really great place to work.
Place matters because people matter. The places where we come together need to provide choice and control over where and how we work.

How We Approach Workplace Design
Today’s workspaces need an ecosystem of spaces designed to adapt and evolve over time, optimizing real estate while fostering higher levels of employee engagement. When we design spaces with the needs of people in mind and with a holistic perspective of technology and space, we can help people achieve more while having a much better experience at work.


“The design challenge is to meet business needs while we’re serving the needs of human beings by creating thoughtfully-curated
destinations,”
Our Workplace Design Approach
Ecosystem of Spaces
An effective and evolving ecosystem of spaces is accomplished through the intentional combination of five spatial zones, designed to accommodate and anticipate changing organizational and employee needs.
The size, ratio and adjacency of each zone should be tailored to match both your business objectives and cultural expectations.
“The result is a flexible workplace design that can adapt and evolve over time.”

Resident Zone
Assigned spaces for workers to complete everyday tasks. A space to support both individual focused and collaborative work. Owned amenities like personal storage and uniquely chosen worktools allow workers to personalize their space.
Meeting Zone
A variety of settings to support different forms of collaboration. This zone offers a wide range of connective technologies to support communication and collaboration of teams both physical and distributed.
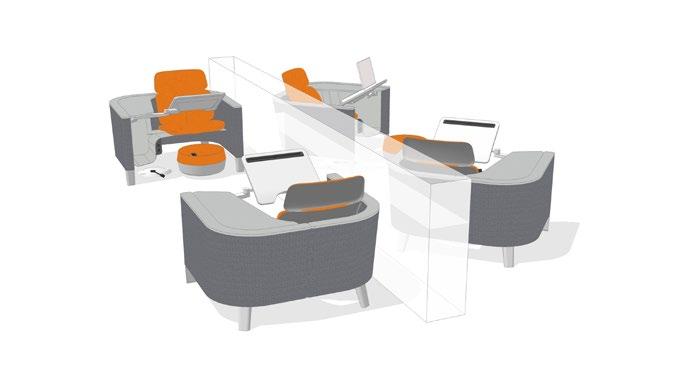
Nomadic Zone
A welcoming destination for mobile workers to connect with others or find an appropriate space for focus. The Nomadic Zone fosters a range of interactions from short-term to long term with quick and easy access to data and power.

Social Zone
A comfortable area to socialize, rejuvenate, informally collaborate, focus and seek nourishment. Design considerations can be tailored to a specific team or department’s culture.
Resource Zone
A convenient central location that offers worktools and shared materials, as well as an option for personalized assistance and facilitated services.

“The design challenge is to meet business needs while we’re serving the needs of human beings by creating thoughtfullycurated destinations,”
JAMES
LUDWIG, STEELCASE GLOBAL DESIGN DIRECTOR


1. Ergonomic Seating - The Torsa task chair provides innovative cable-driven synchro mechanism with Comfort Drive® which allows easy fingertip adjustment from a seated position. Excellent ergonomics come standard with adjustable lumbar support and seat depth adjustment.
2. Fabric Screens - Define individual boundary in shared space without impeding sight lines for collaboration. Screens are tackable to allow for personalization
3. Return Worksurface - Provides an additional surface to organize current work document.

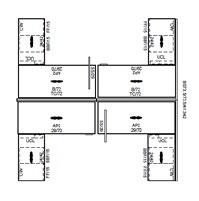
4. Universal Storage - Each station has a unit for your files and personal items.
5. Activ-Pro Height Adjustable DeskAllows the flexibility to sit/stand, and change postures throughout the day.
6. Surface Power (next to monitor)Allows easy access to plug in small tech items on top of your worksurface.
7. Dual Monitor Arm - Adjustable monitor arms give users the ability to control the angle, distance and height of the monitor for optimum viewing.
1. Ergonomic Seating - The Torsa task chair provides innovative cable-driven synchro mechanism with Comfort Drive® which allows easy fingertip adjustment from a seated position. Excellent ergonomics come standard with adjustable lumbar support and seat depth adjustment.
2. Fabric Screens - Define individual boundary in shared space without impeding sight lines for collaboration. Screens are tackable to allow for personalization.
3. Removable Fabric Screen - Defines individual boundary and provides the flexibility to remove the screen to collaborate if desired.
4. Return Worksurface - Provides an additional surface to organize current work document.
5. Universal Storage - Each station has a unit for your files and personal items.
6. Activ-Pro Height Adjustable DeskAllows the flexibility to sit/stand, and change postures throughout the day.
7. Surface Power (next to monitor)Allows easy access to plug in small tech items on top of your worksurface.
8. Dual Monitor Arm - Adjustable monitor arms give users the ability to control the angle, distance and height of the monitor for optimum viewing.


1. Ergonomic Seating - The Torsa task chair provides innovative cable-driven synchro mechanism with Comfort Drive® which allows easy fingertip adjustment from a seated position. Excellent ergonomics come standard with adjustable lumbar support and seat depth adjustment.
2. Fabric Screens - Define individual boundary in shared space without impeding sight lines for collaboration. Screens are tackable to allow for personalization
3. Universal Storage - Each station has a unit for your files and personal items.
4. Activ-Pro Height Adjustable DeskAllows the flexibility to sit/stand, and change postures throughout the day.
5. Surface Power (next to monitor)Allows easy access to plug in small tech items on top of your worksurface.
6. Dual Monitor Arm - Adjustable monitor arms give users the ability to control the angle, distance and height of the monitor for optimum viewing.


1. Ergonomic Seating - The Torsa task chair provides innovative cable-driven synchro mechanism with Comfort Drive® which allows easy fingertip adjustment from a seated position. Excellent ergonomics come standard with adjustable lumbar support and seat depth adjustment.
2. Mackinac Height Adjustable Desk w/ Simple Touch Controller - Allows the flexibility to sit/stand, and change postures throughout the day.
3. Universal Storage - Each private office has a unit for files and personal items.
4. Universal Overhead Storage - Each private office has overhead units for larger storage - ex. binders
5. Surface Power (next to monitor)Allows easy access to plug in small tech items on top of your worksurface.
6. Dual Monitor Arm - Adjustable monitor arms give users the ability to control the angle, distance and height of the monitor for optimum viewing.
7. Tackboard - Fabric are tackable to allow for personalization
8. Guest Chairs - Seating for any visitors, casual meetings, etc.


Informal Meeting Spaces
To love how you work, you must understand how they work.
Torsa Adjustment Instructions
Torsa features a new enhanced synchro mechanism with Comfort Drive and seat depth adjustment. Comfort Drive is an innovative cable-driven synchro mechanism that allows easy fingertip adjustment from a seated position.
Operating the adjustments of the Y/E3 enhanced synchro mechanism with Comfort Drive and seat depth adjustment is simple and easy. These instructions will show you how to adjust the seat height, seat depth, tilt lock and tilt tension using the levers and knobs conveniently located underneath your new SitOnIt Seating Torsa chair.
References to the chair’s right or left side are from a seated position.
The seat has one lever and one knob on the right side and two levers on the left side. Let’s start with the levers on the left side
SEAT HEIGHT ADJUSTMENT
The seat height is adjusted using the rear lever. To raise the seat, lift the paddle as you lift your weight slightly off the chair. Release the paddle when the seat reaches the desired height.
To lower the seat, remain seated and lift the paddle, similarly releasing it when the seat reaches the desired height.
SEAT DEPTH ADJUSTMENT
The lever closest to the front of the seat is used to adjust the seat depth. To increase the seat depth, lift the paddle and push your hips forward. Release the paddle and the seat will lock in the nearest available position.
To decrease the seat depth, lift the paddle and push your hips back. Release the paddle and again, the seat will lock in the nearest available position.


Torsa Adjustment Instructions
TILT LOCK
The tilt or recline feature is adjusted with a lever located on the right side of the seat. To unlock, move the lever backward toward the rear of the seat. To lock the tilt, move the lever forward, toward the front edge of the seat. You can lock the seat in either the reclined or upright position.
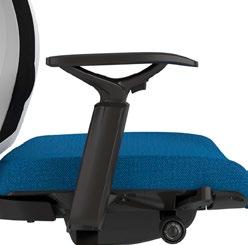

TILT TENSION
The knob located on the right side of the seat adjusts the tilt tension. Arrows printed on the knob indicate the direction of rotation. Rotating the knob clockwise increases tension while rotating counter-clockwise decreases tension. View a video demonstration of the Y/E3 enhanced synchro mechanism with Comfort Drive and seat depth adjustment at www.SitOnIt.net.


Monitor Arm Consideration
What to consider when selecting a monitor arm
Number of monitors
ESI offers solutions for as few as one to as many as six monitors. Should the needs of the user change, the Evolve series can easily be modified in the field to accommodate additional monitors and changing work environments.
Height adjustment
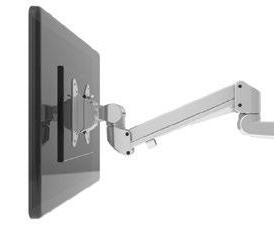
Monitor arms offer various types of height adjustability. The most user-friendly option is dynamic height adjustment which allows the user to adjust the monitor height quickly and easily with just the touch of a finger.
Weight of monitor(s)
ESI's standard monitor arm configurations support the average monitor which weighs between 8-16 lbs. For heavier monitors and all-in-one PC’s, ESI recommends the Edge - Max series.
Size of monitor(s)
Most users prefer to have their monitors side-by-side as close as possible with no gaps between them. The versatility of the ESI Evolve series allows up to 32" monitors to fit sideby-side. Configurations that include a slider will provide additional horizontal adjustability, allowing monitors of varying sizes to fit together seamlessly.
Size and shape of the worksurface
Shallow worksurface depths 24.0" or less, are best suited for monitor arm configurations with fewer limbs or the Evolve slider. For applications that require extended reach, ESI recommends an Evolve configuration with multiple limbs. When positioning two or more monitors side-by-side in a 90º corner, the maximum monitor size will be reduced. Please contact our Customer Service Departement to discuss your specific applications and requirements.


Monitor Arm Consideration
What to consider when selecting a monitor arm
Grow. Adapt. Evolve.
As technology advances and monitors are becoming lighter and wider, challenges are created in workstation design. The Evolve allows the merger of form and function with one product that will easily adapt to the fluidly changing needs of today’s workplace.
Whether you have a shallow or deep work surface, 1, 2, 3 or more monitors, the Evolve can adapt to fit your needs.

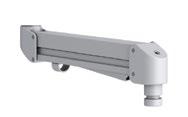


Motion arms provide 13.0" of dynamic height adjustment.
Fixed arms provide extra reach.


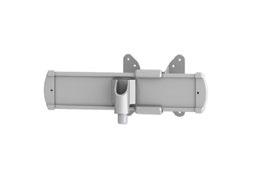
A Vesa mount attaches your monitor to the arm. Arm stems are included in every configuration.
Sliders provide extended lateral adjustment - ideal for positioning monitors of varying sizes side-by-side.

ACTIV-Pro


A. Height Adjustment Buttons
B. Memory Position Buttons
C. Memory Setting Button
D. Digital Display
Programming Memory Presets
1. Press the up or down arrow to set the worksurface to the desired height.
2. Press “M” button followed by one of the preset number buttons (1, 2 or 3) on the LED screen.
3. The table will automatically reset to this height whenever the preset number is pressed and held until the preset height is reached.
Power Saving Mode - Waking up the Hand Set
1. Press any button to wake up handset.
Resetting the Base
Note: Make sure there is nothing under the base before setting to its lowest level (24.5”).
If the cable is obstructed it will not reset properly.
1. Press and hold the Down arrow; the desk will begin to go down.
2. Once the desk reaches its lowest height, continue to press the Down arrow for 5 seconds, until the digital display shows “RST”.
3. Release and then press the Down arrow again; the recalibration process will now begin.
4. When reset is complete, the digital display will show “24.5”.
Most issues will resolve by re-setting the base
See re-set instructions on previous page.
Note: Please make sure there is nothing under the base before setting to its lowest level (24.5”). If the cable is obstructed it will not reset properly.
Please ensure that all connections are tight and in tact before further troubleshooting.
Issue
Solution
ASR/RST Error Code Reset the base.
No power/LED on control box is off The control box may be damaged – contact us for replacement.
E07/E08 Error Code (legs not moving uniformly) 1. Reset the base.
2. If the issue persists, swap the connecting cables.
3. If the issue persists, contact us for a replacement.
H01 Error Code (Controller Overheat) Disconnect the power for 1 minute and then reconnect the handset.
Handset Display Error (eg, “88.8”) The handset may be damaged – contact us for replacement.
We create curated destinations that empower people to work, learn + heal. Simply put, we make killer workspaces.
http://www.tangraminteriors.com
