Let’s make cool string art.


Nails
with pre-drilled holes
Scissors
What’s
Board
String
Hammer
Inside
Let’s make cool sh*t.
Fun Fact:
String art started as a way to demonstrate math and engineering principles. It was created by Englishwoman and teacher, Mary Everest Boole. She used curve stitching to make math fun for her young students.
3
Inside
Jason has worked for Studio Other for 11 years. In his free time, he makes intricate string art using hand-stained reclaimed wood.


Jason has worked for Studio Other for 11 years. In his free time, he does luthiery and hand-builds guitar bodies and amps.
Scan to learn more about their passion projects and how it transpired this years Studio Other holiday gift.
Studio Other: String Art Instructions

4
Jason Betty Engineering Supervisor
Jason Doerr Senior Engineer - CAD Leader
Let’s make cool sh*t.
Choose which pattern design you would like to do from the following pages, or feel free to experiment on your own and make your own patterns.

Pattern 1 Pattern 2

5
Preparing the boards INSTRUCTIONS
NAILING
1. Place your nails into the predrilled holes 1 at a time by holding the nail straight up and lightly tapping it in with 1-2 hits.

2. After it is somewhat secure, hit it a little harder to fully secure it into the wood. You should be left with about 7/16” of nail exposed
— use the height card to help gauge that your nails are in far enough and all even.
Note: If your nails are slightly angled, you can lightly tap them with a hammer to straighten them out or use a pair of needle nose pliers.
Studio Other: String Art Instructions
6
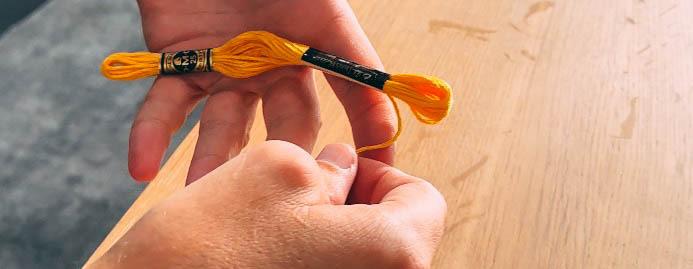
UNBUNDLING THE STRING
Note: The string tangles very easily so it’s best to follow our method.

1. Choose which color you want to use as the background pattern.
2. Pick up the bundle with your non-dominant hand, making sure to have a grip on both of the small plastic parts. Make sure to not take the plastic parts off.
3. Find the loose thread sticking out of either end of the bundle and grab it.
4. Slowly start to pull that loose thread out — be careful not to pull too quickly and pull excess thread loops out.
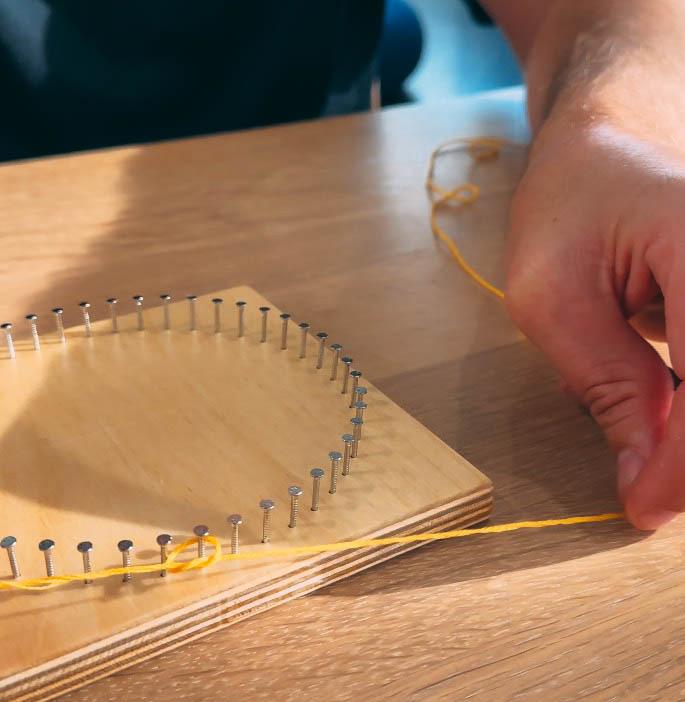
5. As you pull, make sure to lay out the thread in a loose line and not in a pile (Note: You can pull out about 2-3 feet at a time leaving the bundle bound in the plastic).
Pattern 1 INSTRUCTIONS
BASIC NOTES
This is a basic circle design where you will pick a number of nails to count for every time you want to loop the string and repeat that to make a pattern. The larger the number of nails (up to 23), the more filled the circle will be. For the best layering, start with the largest number and work your way down.

8
Studio Other: String Art Instructions
PATTERN 1 TUTORIAL
Let’s make cool sh*t.
1. For this tutorial, I will lay out an 18, 16, 14 pattern but you can choose to do any combination of the steps for different results.
2. Once you have your string pulled out, tie a standard knot to the top center nail.

9
3. Start off by tying 2-3 standard knots — you can put a small dab of superglue on the knot to help hold it.
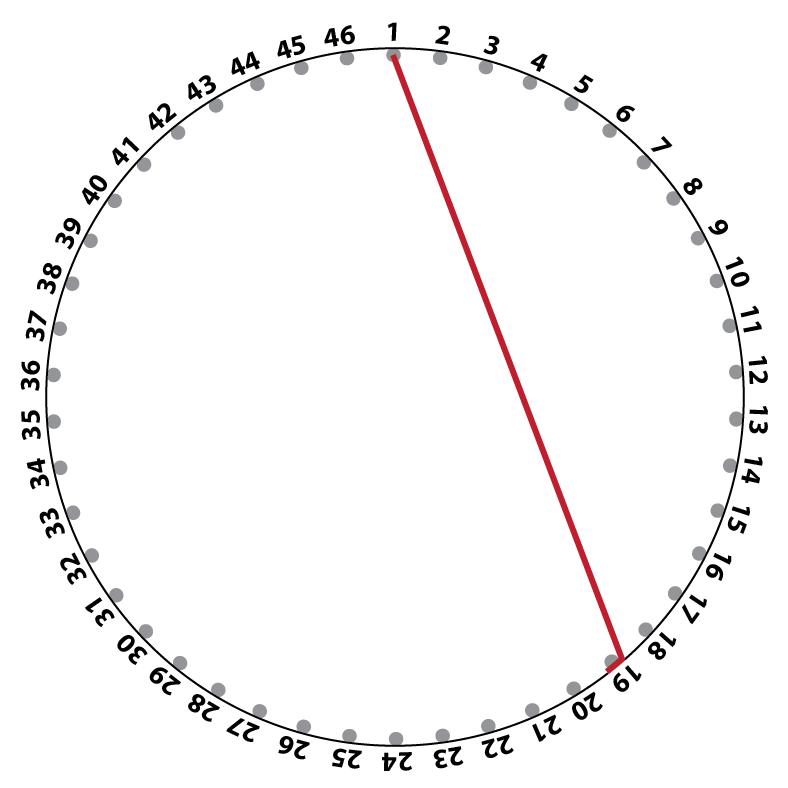
4. Count 18 nails over from your first nail you tied to (Note: Your #1 nail does not count). Go from nail 1 to nail 19 and so on.
Studio Other: String Art Instructions

10
PATTERN 1 TUTORIAL
Let’s make cool sh*t.
5. After the first round is done, you will see that you land 2 before the first nail. This is where it gets easier because you no longer need to count, you can simply continue to wrap around the nail that is 2 before the strung nail that is across.

6. Continue going every 18 nails until you land back on the #1 nail.

11
7. If you’re using the same color for the next circle, every 16, continue from #1 to #17. If you’re choosing a new color, tie off the first color and tie on the new color.

8. This pattern results in the thread landing 2 after your #1 nail so you can quickly string the next nail by continuing to go 2 after the last strung nail that is next. Continue until you get back to #1 and tie off.

12
PATTERN 1 TUTORIAL
Studio Other: String Art Instructions
Let’s make cool sh*t.
9. Start at nail 46 — from there, you do every 14 nails following the same process as the previous 2 steps.


13
Pattern 2 INSTRUCTIONS
The same pattern just in opposite direction.


14
Studio Other: String Art Instructions
PATTERN 2 TUTORIAL

Let’s make cool sh*t.
1. Once you have your string pulled out, tie a standard knot to the top center nail (Note: if you start in a different location, it will rotate the pattern). Tie off by tying 2-3 standard knots — you can put a small dab of superglue on the knot also to help hold it.
2. Take the string over to the opposite nail, looping around the nail counterclockwise (from nail #1 to #24).

15
PATTERN 2 TUTORIAL


3. From there, go back over to the #2 nail (1 nail to the right of where you started) again wrapping around the nail counterclockwise.
4. Go back across to nail #25, then over to nail #3 and back again to the next nail, #26.
16
Studio Other: String Art Instructions
Let’s make cool sh*t.
5. To form the spiral, you will be skipping every 3rd nail so when you go back over, you will wrap around nail #5. Note: The starting nail that you first tied to does not count.
6. Continue to repeat the above steps until you come all the way back to nail #24. Note: Toward the end of the spiral, it gets very tight to continue the pattern — you can just loop the string around the nails.


17
7. Once you get to the end, cut the leftover string to a length that will easily allow you to tie off.

8. To start the second spiral, you will start on the opposite side you began, beginning with tying to nail #24 and going across to #1. Repeat steps 3-7.

18
2
Studio Other: String Art Instructions PATTERN
TUTORIAL
Let’s make cool sh*t.
9. Note: You can play with the start point for the second spiral or do the pattern in the opposite direction if you want to change the relationship.

19
@studioother studioother.com


