Academic Authors: Jatinder Kaur, Harsimran Kaur
Creative Directors: Bhavna Tripathi, Mangal Singh Rana, Satish
Book Production: Rakesh Kumar Singh, Sanjay Kumar Goel
Project Lead: Sneha Sharma
VP, Learning: Abhishek Bhatnagar
All products and brand names used in this book are trademarks, registered trademarks or trade names of their respective owners.
© Uolo EdTech Private Limited
First impression 2025
This book is sold subject to the condition that it shall not by way of trade or otherwise, be lent, resold, hired out, or otherwise circulated without the publisher’s prior written consent in any form of binding or cover other than that in which it is published and without a similar condition including this condition being imposed on the subsequent purchaser and without limiting the rights under copyright reserved above, no part of this publication may be reproduced, stored in or introduced into a retrieval system, or transmitted in any form or by any means, electronic, mechanical, photocopying, recording or otherwise, without the prior written permission of both the copyright owner and the above-mentioned publisher of this book.
Book Title: Reflection Teacher Manual Science 3
ISBN: 978-81-985579-3-3
Published by Uolo EdTech Private Limited
Corporate Office Address:
85, Sector 44, Gurugram, Haryana 122003
CIN: U74999DL2017PTC322986
Illustrations and images: www.shutterstock.com, www.stock.adobe.com and www.freepik.com
All suggested use of the internet should be under adult supervision.
Teaching science is more than just explaining concepts—it is about sparking curiosity, encouraging inquiry, and making learning an exciting journey. With this goal in mind, the Teacher Manual for the Reflection series has been carefully designed to support educators in delivering engaging, hands-on, and student-centred lessons for grades 3–5.
At UOLO, we recognise the vital role educators play in shaping young minds. This manual is designed to empower teachers with engaging strategies and well-structured lesson plans that make science teaching more interactive and effective. It encourages educators to go beyond textbooks and create dynamic, engaging, and collaborative learning experiences that help students develop critical thinking and problem-solving skills.
Aligned with the National Education Policy (NEP) 2020 and the National Curriculum Framework (NCF) 2023, this manual follows a competency-based approach, ensuring that students not only understand scientific concepts but also apply them in meaningful ways. It serves as a comprehensive teaching resource, equipping educators with structured lesson plans that transform classrooms into hubs of exploration and discovery.
Each chapter in this manual includes:
Learning Outcomes – Clearly stated objectives that outline what students will achieve by the end of the lesson.
Teaching Aids – A list of materials and resources required to enhance classroom instruction.
Hands-on Activities – A variety of interactive experiments, role-plays, games, and creative exercises to reinforce scientific concepts.
Extension Ideas – Thought-provoking discussion questions and real-world connections that encourage deeper learning.
Additionally, this teacher manual is part of the Reflection product bundle, which includes not only the textbook but also technology-powered features, such as engaging videos, interactive exercises, digital lesson plans, and an assessment generator to support educators in delivering impactful lessons.
By integrating relatable examples and guided activities, this resource aims to make science an exciting and practical part of students’ everyday lives. We hope this manual serves as a valuable guide for teachers, helping them ignite curiosity, inspire young learners, and foster a lifelong love for science.
Together, let us nurture the next generation of thinkers, innovators, and problem-solvers. Happy teaching!


1. Our Body
2. The Food We Eat Story in This Unit
One day, while Dr Vikram was working in his lab, he received a video call on his computer. To his surprise, the call was from Elder Wizard and Elder Robot, who warned him about Lord Ero, a threat to their planet Avora, who was now targeting Earth. Elder Wizard assured Dr Vikram of their support and promised to send help. The next day, a spaceship arrived on Earth carrying Mel, a robot, and two wizards, Eva and Conji, from Avora. They met three children—Pihu, Ishaan and Manu—who were playing nearby. After introductions, Manu, excited to meet the wizards, asked Conji to show a magic trick. Conji performed a spell, making a plate of samosas appear. Seeing this, Dr Vikram advised Manu to not have too much junk food. Dr Vikram then welcomed his guests and took them to his home.
Students will be able to: understand the structure and functions of the human body, including the organisation of cells, tissues, organs and organ systems. differentiate between external and internal organs, and identify examples of each. describe the roles of the five sense organs and understand their unique functions. identify the main organ systems (skeletal, muscular, respiratory, digestive, circulatory, nervous, reproductive and excretory) and explain their key functions in our body.
Let’s Recall
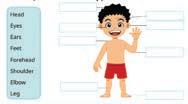
Recap to check if students know the names of the different body parts. Ask students to solve the question given in the Get Set section.
Vocabulary
blocks: small parts
skeleton: a structure made of bones
inhale: breathing in air exhale: breathing out air cells: the building blocks of our body tissues: groups of cells that perform the same function
organs: groups of tissues performing the same function
organ systems: groups of organs that work together
sense organs: organs that help us sense things breathing: taking in and giving out air digestion: breaking down food into a simpler form
Posters or charts showing the human body structure, organ systems and sense organs with blank labels; Flash cards with images and names of organs (e.g., brain, heart, lungs, stomach, liver, kidneys); Flash cards with the names of organ systems (e.g., nervous system, circulatory system, respiratory system, digestive system, excretory system); Blank sheets of paper; Pre-cut labels or sticky notes with the labels: Cell, Tissue, Organ, Organ System and Organism; A piece each of silk cloth and sandpaper; Lemon juice; Sugar candy; A bell or whistle
Learning Outcomes
Reflection Page 7
Students will be able to understand the structure and functions of the human body, including the organisation of cells, tissues, organs and organ systems.
Teaching Aids
Blank sheets of paper; Pre-cut labels or sticky notes with the labels: Cell, Tissue, Organ, Organ System and Organism
Activity
Instruct students to work in small groups. Distribute the teaching aids among the groups.
Ask students to draw a flow chart composed of 5 blank boxes with arrows. Let students paste the pre-cut labels of the different parts in the empty boxes to complete the order, starting from ‘cell’ to ‘organism’.
Discuss the different building blocks of our body in class. Also, explain how our body works like a machine and how the brain controls all the other organs in our body. Ask students to say the names of the building blocks aloud.
Extension Idea
Ask: What is the relationship between organs and organ systems in the human body?
Say: Organs are made of tissues, and work together to form organ systems. Each organ system performs a specific function to keep the body working properly.
Organs
Learning Outcomes
Reflection Page 8
Students will be able to differentiate between external and internal organs, and identify examples of each. They will also be able to describe the roles of the five sense organs and understand their unique functions.
Teaching Aids
A human body diagram on a chart paper with blank labels; A piece each of silk cloth and sandpaper; Lemon juice; Sugar candy; A bell or a whistle
Activity
Instruct students to work in small groups. Distribute the teaching aids among the groups.
Ask students to label the internal and external organs of the human body on the chart paper. After that, have them touch the silk cloth and sandpaper to understand the sense of touch. Then, ask them to smell the lemon juice to explore the sense of smell. Next, let them taste the lemon juice and sugar candy to understand the sense of taste. Ask students to observe various objects in the class and write their names to learn about the sense of sight. Finally, ask one student to clap, blow a whistle or ring the bell to understand the sense of hearing.
Extension Idea
Ask: What role do our sense organs play in helping us understand our surroundings?
Say: Sense organs help us understand our surroundings by detecting signals like touch, sound, light, taste and smell, allowing us to respond to the environment around us.
Students will be able to identify the main organ systems (skeletal, muscular, respiratory, digestive, circulatory, nervous, reproductive and excretory) and explain their key functions in our body.
Flash cards with images and names of organs (e.g., brain, heart, lungs, stomach, liver, kidneys); Flash cards with the names of organ systems (e.g., nervous system, circulatory system, respiratory system, digestive system, excretory system)
Instruct students to work in small groups. Distribute the teaching aids among the groups.
Ask students to match the organs with their corresponding organ systems using the flash cards. First, they will receive two sets of flashcards: one with pictures and the names of organs (e.g., brain, heart, lungs, etc.) and the other with the names of organ systems (e.g., nervous, circulatory, respiratory, etc.). Ask students to match each organ with the correct system.
Ask each group to share their reasoning with the class, discussing how each organ contributes to the function of its respective system.
Ask: How do different organ systems work together to maintain the body’s overall health?
Say: Different organ systems work together to keep the body healthy by sharing important jobs, like carrying oxygen and food to different parts of the body, digesting food and removing waste from the body. They all help each other to keep the body running smoothly.

Get Set
Use the help box and label the body parts.
Pause and Answer
Complete the given flowchart.
1. Tick the correct options.
A. cell B. tissue C. Ribs
2. Fill in the blanks.
A. organ B. organ C. 206 D. Blood
3. Write ‘T’ for true and ‘F’ for false.
A. F B. T C. F
4. Picture-based question.
A.

Page no. 6
Page no. 7
C. Our brain is called the controller of our body because it controls all the organs in our body and makes them work properly.
6. Long-answer questions.
A. Differences between external and internal organs:
Internal Organs External Organs
Internal organs are inside our body and cannot be seen from the outside. External organs can be seen from the outside.
For example, brain, heart, lungs, stomach, and liver. For example, arms, legs, abdomen and sense organs.
B. The skeletal system gives shape and support to our body. It also protects our internal organs.
The four main parts of the skeletal system are the skull, ribs, backbone and limbs. The function of each part is as follows:
The ribs protect the heart and the lungs.
The skull protects the brain.
The backbone supports the head and the upper body.
The limbs include the arms and the legs, and help in movement.
C. Differences between the circulatory and excretory systems:
Circulatory System Excretory System
Our circulatory system consists of the heart, the blood vessels and blood. Our excretory system consists of the lungs, skin and the kidneys.

B. Respiratory System
5. Short-answer questions.
A. Reproduction is a process in which organisms produce young ones of their own kind.
B. Organs of our digestive system: i. Mouth ii. Liver iii. Food pipe
iv. Stomach v. Intestines vi. Anus
The circulatory system helps transport blood throughout our body. The excretory system helps remove wastes from our body.
Our sense organs help us cross the road safely by letting us see vehicles and signals, hear the sound of vehicles and feel if the ground is safe to walk on.
Students will be able to:
understand importance of food we eat every day. learn about the sources of food we eat. differentiate between raw and cooked food. know about energy-giving, body-building, and protective foods. know about the importance of the balanced diet and healthy food habits that one should follow.
Recap to check if students know the names of various fruits and vegetables. Ask students to solve the question given in the Get Set section.
Vocabulary
survival: staying alive grind: break down into powder repair: to fix something that is damaged or not working well
nutrients: important substances present in our food energy-giving food: food which gives us energy to do our daily activities
body-building food: food which helps our body to grow and repair the wear and tear protective food: food which helps protect our body from diseases and keeps us healthy diet: food eaten regularly in a meal balanced diet: a diet that has food from all food groups and in the right amount
A chart paper with pictures of different food items of different meals we eat everyday with blank labels; Pictures or sample of different types of food, chart paper, white board, and marker; Worksheets with the names of different food items (raw and cooked); Picture cards of different food items (e.g., rice, potatoes, nuts, milk, eggs, spinach, carrots, oranges, etc.), three large baskets or containers labelled ‘Energy-Giving Food,’ ‘Body-Building Food,’ and ‘Protective Food.’; Paper plates (one per student), crayons, markers, or coloured pencils, cut-out pictures of different foods (or stickers), glue
of Food Reflection Page 16
Learning Outcomes
The students will be able to understand importance of food we eat every day.
Teaching Aids
A chart paper with pictures of different food items of different meals we eat everyday with blank labels
Activity
Instruct the students to work in small groups. Distribute the teaching aids among the groups. Ask the students to label all the food items on the chart paper according to the meal names. Then ask students to talk about the breakfast they have in morning and discuss if it is healthy or not.
Extension Idea
Ask: Can you think of two food items that your mother give you when you are sick and why?
Say: Vegetable soup and khichdi because these give us instant energy and are easy to digest. Sources of Food
Learning Outcomes
Students will be able to learn about the sources of food we eat.
Teaching Aids
Pictures or sample of different types of food, chart paper, white board, and marker Activity
Instruct the students to work in small groups. Distribute the teaching aids among the groups.
Page 16
Ask the students to list the different food items and write them on their notebooks. Then, draw two columns on the board/whiteboard—one labelled “Plant as Source” and the other “Animal as Source.” Name one food item and ask the students to categorise it into the appropriate column.
Extension Idea
Ask: How do sources of food help us understand human food habits?
Say: Humans who eat plant-based food are called vegetarians, while those whose primary source of food comes from animals are called non-vegetarians.
and Raw Food Reflection Page 18
Learning Outcomes
Students will be able to differentiate between raw and cooked food.
Teaching Aids
Worksheets with the names of different food items (raw and cooked)
Activity
Ask students to work in pairs with a sheet that has a list of food items. Students will sort the food items into two categories: those that can be eaten raw and those that need to be cooked.
Encourage students to explain the methods used to cook the food and discuss how cooked food differs from raw food in terms of taste, texture, and aroma.
Extension Idea
Ask: Why we cook food in different ways on special occasions or festivals?
Say: We cook food in different ways during festivals or special occasions because it enhances the aroma and flavour, making the meal more enjoyable and unique.
Students will be able to know about energy-giving, body-building, and protective foods.
Reflection Page 18
Picture cards of different food items (e.g., rice, potatoes, nuts, milk, eggs, spinach, carrots, oranges, etc.), three large baskets or containers labelled ‘Energy-Giving Food,’ ‘Body-Building Food,’ and ‘Protective Food’
Activity
Divide the students into small groups, with 3–4 students per group. Distribute the teaching aids to each group.
Place the labelled baskets or containers at the front of the class, each representing a different food group. For the sorting activity, each group will take turns selecting a card from their pile and determining which food group the item belongs to. They will then place the card in the corresponding basket.
For example, if a group picks a card with a picture of a carrot, they will place it in the “Protective Food” basket. After all the cards are sorted, discuss, and explain why each food item belongs to its respective group. Encourage students to share examples of foods they eat at home from each food group.
Extension Idea
Ask: Why is it important to eat foods from all three groups?
Say: Our body needs energy, strength to grow, and protection from diseases. Eating a mix of these foods keeps us healthy and strong.
Learning Outcomes
Reflection Page 19
Students will be able to know about the importance of the balanced diet and healthy food habits that one should follow.
Paper plates (one per student), crayons, markers, or coloured pencils, cut-out pictures of different foods (or stickers), glue
Divide the students into small groups, with 3–4 students per group. Distribute the teaching aids to each group.
Ask the students to choose one food item from each of the three food groups: energy-giving, body-building, and protective. Provide cut-out pictures or stickers of various foods, and have the students draw or paste the selected foods onto their plate, ensuring they include at least one item from each group to create a balanced diet.
After the students have completed their plates, hold a discussion where each student shares with the class which foods they chose and why.
Ask: Why is it important to include foods from all three food groups (energy-giving, body-building, and protective foods) in our daily meals?
Say: We need foods from all three groups (energy-giving, body-building, and protective) because they work together to keep us healthy. Energy-giving foods give us the power to move, body-building foods help us grow, and protective foods keep us strong and safe from getting sick.
Get Set
Page no. 15
Look at the pictures and name the fruits and vegetables.
1. Grapes 2. Onion 3. Peas
4. Banana 5. Cherries 6. Pineapple
7. Carrot 8. Lemon 9. Radish
Pause and Answer
Circle the incorrect option.
Page no. 17
Grains Rice Chickpea Wheat
Pulses Grams Lentils Corns
Nuts Peas Almonds Cashews
Pause and Answer
Write two examples of each.
1. Energy-giving food: rice, sugar
2. Body-building food: milk, meat
3. Protective food: apple, carrot
Chapter Checkup
1. Tick () the correct option.
A. Lettuce
B. Milk
C. Protects us from diseases
D. Almond, cashew and walnut
E. Fruits and vegetables
2. Fill in the blanks.
A. energy
B. Body-building
C. balanced diet
Page no. 19
3. Write ‘T’ for true and ‘F’ for false.
A. T B. F C. F
4. Short-answer questions.
A. Food is important for us because it gives us energy, helps us grow, and keeps us healthy.
B. The two main sources of food are plants and animals.
C. Some foods we get from animals are milk, eggs, meat, and honey.
5. Long-answer questions.
A. The food that gives us energy to do our daily work is called energy-giving food. Examples: rice, chapatti, sugar, and potatoes
Food that helps our body grow and repair itself from daily wear-and tear is called body-building food. Examples: Milk, eggs, meat, fish, beans, and pulses
Protective foods help to keep us healthy and protect us from diseases. Examples: Fruits and vegetables
B. Three healthy eating habits are:
Always wash your hands before and after you eat. Chew your food properly.
Do not eat your meals very late.
C. A balanced diet is a diet that has food from all these food groups in the right amount. Eating a balanced diet helps us stay healthy, active, and strong.
Sample Answer: I will have a balanced diet which includes chapatti or rice, pulses, meat, vegetable, and salad.
Chapters in This Unit
3. Living and Non-living Things
4. Plants and Their Parts
5. Animals and Their Eating Habits
6. Birds
Story in This Unit
The story unfolds in a living room where Dr Vikram shares a secret with his children, Ishaan, Pihu, and Manu, about a mission to protect Earth from a serious threat. He explains that Conji, Eva, and Mel, a trio of a robot and wizards, have come to stop Lord Ero, an evil wizard from Avora who disrupts peace between wizards and robots. This time, Lord Ero plans to use a magical drink to control all living beings on Earth, including humans, animals, plants, and birds, to build a powerful army. His ultimate goal is to destroy Avora and ensure that peace never exists there. Though worried, the children decide to help the trio stop Lord Ero. Dr Vikram tells them they are brave and can work together to save Earth and stop Lord Ero’s dark plans.
Students will be able to:
identify and differentiate between natural things (like soil, water, and animals) and human-made things (like cars, books, and buildings). categorise living things (like plants and animals) and non-living things (like a car, pencil, and table). describe the unique characteristics of living things, such as their need for food, their ability to reproduce, grow, move, and feel changes around them.
Recap to check if students can name natural things, human-made things, living things and non-living things.
Ask students to solve the question given in the Get Set section.
Vocabulary
characteristics: (here) qualities that are present in one type of thing and not the other germinate: to start growing fins: body part of a fish which is used for swimming lungs: organs used for breathing by humans and some other animals gills: organs used for breathing by fish
spiracles: pores on the body of insects for breathing
stomata: small pores on the underside of leaves that help plants to breathe reproduction: a process by which living things produce young ones of their own kind
antennae: structures in insects that sense the surroundings
Flashcards with pictures of various objects (e.g., tree, car, bird, pencil, mountain, house, river, sun, book, etc.), two large chart papers labelled “Natural Things” and “Human-Made Things”, glue sticks or tape: Pictures of various items (e.g., tiger, sunflower, car, pencil, fish, tree, chair, dog, stone, bird), two large charts or whiteboards labelled “Living Things” and “Non-living Things”, glue, markers, and crayons; A potted plant, a small stuffed toy or rock, a picture of a goldfish or any other animal
Learning Outcomes
Students will be able to identify and differentiate between natural things (like soil, water, and animals) and human-made things (like cars, books, and buildings).
Teaching Aids
Flashcards with pictures of various objects (e.g., tree, car, bird, pencil, mountain, house, river, sun, book, etc.), two large chart papers labelled “Natural Things” and “Human-Made Things”, glue sticks or tape
Activity
Instruct students to work in small groups. Distribute the teaching aids among the groups. Provide each group with a set of flashcards containing pictures of various objects. Ask the groups to sort the flashcards into two categories: Natural Things and Human-Made Things and stick their sorted cards onto the respective chart papers.
Discuss as a class if all of the items are correctly placed. Correct any mistakes if needed.
Extension Idea
Ask: What do all natural things have in common?
Say: All natural things are found in nature and not made by humans.
Learning Outcomes
Reflection Page 28
Students will be able to categorise living things (like plants and animals) and non-living things (like a car, pencil, and table).
Teaching Aids
Pictures of various items (e.g., tiger, sunflower, car, pencil, fish, tree, chair, dog, stone, bird), two large charts or whiteboards labelled “Living Things” and “Non-living Things”, glue, markers, and crayons
Activity
Distribute the flashcards to the students
Instruct students to examine each flashcard and determine if it represents a living or non-living thing.
Have students take turns coming to the front of the class and matching each flashcard to the correct category (Living Things or Non-living Things) by placing it under the appropriate label.
Extension Idea
Ask: How is a tiger different from a car in terms of being living or non-living?
Say: A tiger is a living thing because it has life and a car is a non-living thing because it does not have life.
Students will be able to describe the unique characteristics of living things, such as their need for food, their ability to reproduce, grow, move, and feel changes around them.
A potted plant, a small stuffed toy or rock, a picture of a goldfish or any other animal Activity
Instruct students to work in small groups. Distribute the teaching aids among the groups. Show the students a potted plant and ask:
Does it eat? (Explain that plants make their own food using sunlight, water, and air.)
Does it breathe? (Point out stomata on the underside of leaves.)
Does it grow? (Show new leaves or buds if visible.)
Does it move? (Explain sunflower movement or touch-me-not reaction.)
Does it feel? (Mention the lotus flower opens at sunrise and closes at night.)
Show the picture of a goldfish or any other animal. Discuss its characteristics (eats, breathes, reproduces, grows, moves, feels). Finally, show a stuffed toy or rock and discuss how it does not show these characteristics.
Extension Idea
Ask: Can you find one living thing at home that eats and one non-living thing that does not eat?
Say: The pet dog eats food every day and the chair in the dining room does not eat anything.
Get Set
Page no. 27
Sheena and her friends went for a picnic. While looking around, she saw many different things. Help her circle the things that can move on their own.
Pause and Answer
Page no. 28
Tick () the natural things and cross out () the humanmade things.


1. Tick () the correct option.
A. Dog B. Cockroach
C. Stomata D. Turtle
E. Fins
2. Fill in the blanks.
A. natural B. reproduction
C. sun D. plants
E. spiracles
3. Write ‘T’ for true and ‘F’ for false.
A. T B. F C. F
D. T E. F
4. Picture-based questions.
A. Living things can move.
B. touch-me-not
5. Short-answer questions.
A. Things found in nature are called natural things. Soil, water, sun, clouds, mountains and forests are examples of natural things. Things like cars, books and buildings are made by humans, so they are called human-made things.
B. Stomata help plants to breathe.
C. A toy horse does not eat food. A toy horse is a nonliving thing and non-living things do not need food.
D. Birds have wings to fly and fish have fins to swim.
E. The lotus flower opens at sunrise and closes at night.
6. Long-answer questions.
A. Things like plants and animals have life and are called living things. Things like car, pencil, table, chair and water have no life. These things are called nonliving things.
B. All living things give birth to young ones of their own kind. The process by which living things produce young ones of their own kind is called reproduction.
C. Living things feel changes around them. Animals like ants and bees have antennae that help them feel changes around them. The lotus flower opens at sunrise and closes at night.
D. The touch-me-not plant closes its leaves when touched.
No, a river cannot be called living even though it moves. Living things move on their own to find food, shelter, or because they sense something. A river does not move because it is alive, but rather because of the force of the water.
Students will be able to:
understand the process of germination and the conditions required for it. identify the types and functions of roots. learn about the functions and types of stems in plants. understand the structure of a leaf and the process of photosynthesis. learn the functions and uses of flowers, fruits, and seeds.
Recap to check if students know the names of different body parts. Ask students to solve the question given in the Get Set section.
Vocabulary
sufficient: enough weeds: unwanted plants absorb: to take in upright: standing straight nectar: sweet liquid made by a flower garland: flowers tied in a loop with the help of thread
germination: the process by which a seed grows into a plant
seedling: the new plant that grows out of a seed trunk: the stem of a tree
photosynthesis: the process by which plants make their own food using sunlight, carbon dioxide and water
Large chart paper or A3 sheets, cut-outs of plant parts (roots, stems, leaves, flowers), glue sticks, coloured markers, storytelling cue cards; Carrots, wheat plants (if possible, otherwise arrange the pictures), pictures of taproots and fibrous roots; Samples of stems (thick, thin, soft), pictures of trees, shrubs, herbs, climbers, and creepers; Real leaves, magnifying glass (if available), chart paper, markers, glue sticks; A variety of flowers, fruits, and seeds or their pictures
Reflection Page 37
Students will be able to understand the process of germination and the conditions required for it.
Teaching Aids
Large chart paper or A3 sheets, cut-outs of plant parts (roots, stems, leaves, flowers), glue sticks, coloured markers, storytelling cue cards
Activity
Divide the students into small groups and provide each group with cut-outs of different plant parts, such as roots, stems, leaves, and flowers. Ask them to assemble the cut-outs on a chart paper to form a complete plant and label the root and shoot systems. To make the task more engaging, include a few extra cut-outs that are unrelated to plants, such as rocks or clouds, and instruct students to identify and set them aside.
Once the plant puzzle is complete, hand out storytelling cue cards with prompts describing the germination process, such as “A seed was planted in the soil” or “The seed needed air, water, and warmth to grow”. Guide students to arrange the cards in the correct sequence and narrate the plant’s growth journey to the class.
Extension Idea
Ask: What will happen if the seeds do not get water?
Say: The seeds will not germinate and grow into plants.
Root System Reflection Page 38
Learning Outcomes
Students will be able to identify the types and functions of roots.
Teaching Aids
Carrots, wheat plants (if possible, otherwise arrange the pictures), pictures of taproots and fibrous roots
Activity
Show students a carrot (example of a taproot) and a clump of wheat (example of fibrous roots).
Ask them to observe the structure of the roots.
Have students draw and label both types in their notebooks.
Discuss the functions of roots, such as fixing the plant in soil, absorbing water, and storing food.
Extension Idea
Ask: Which root type do you think is better for holding soil in place?
Say: Fibrous roots, because they spread out and hold the soil tightly.
Learning Outcomes
Students will be able to learn about the functions and types of stems in plants.
Teaching Aids
Samples of stems (thick, thin, soft), pictures of trees, shrubs, herbs, climbers, and creepers
Activity
Bring samples or pictures of different plant stems (e.g., mango for thick stems, rose for thin stems). Ask students to categorise them as trees, shrubs, herbs, climbers, or creepers. Discuss the functions of stems, such as carrying water and food and providing support.
Extension Idea
Ask: What would happen if a plant did not have a strong stem?
Say: The plant would not be able to stand upright and may fall over.
Leaves and Their Functions
Learning Outcomes
Students will be able to understand the structure of a leaf and the process of photosynthesis.
Teaching Aids
Real leaves, magnifying glass (if available), chart paper, markers, glue sticks
Activity
Ask students to bring a variety of leaves from home or the school garden. Guide them to examine the structure of the leaves closely. Instruct them to identify and label the main parts: the leaf blade, mid vein, side veins, and stomata (if visible with a magnifying glass).
Next, divide the students into small groups and provide each group with chart paper and markers. Ask them to create a “Leaf Collage” by pasting different leaves and labelling their key parts.
To reinforce the functions of a leaf, engage students in a discussion. Ask each group to write or draw the process of photosynthesis on their chart, including essential elements like sunlight, water, and carbon dioxide. Additionally, encourage students to list examples of leaves eaten by humans and create a small section in their collage showcasing these edible leaves. Display their completed collages in the classroom to foster peer learning and reinforce the concept that leaves are essential for both plants and humans.
Extension Idea
Ask: What would happen if there were no leaves on plants?
Say: If there were no leaves on plants, they would not be able to make food through photosynthesis. This would affect the plant’s growth and survival. Without plants producing oxygen, it would also impact all living beings that depend on oxygen for breathing.
Learning Outcomes
Students will be able to learn the functions and uses of flowers, fruits, and seeds.
Teaching Aids
A variety of flowers, fruits, and seeds or their pictures
Ask students to set up an interactive “Flower, Fruit, and Seed Showcase” in the classroom. Provide students with the task of bringing a variety of flowers, fruits, and seeds from home.
Flower Section: Students will display flowers and write labels describing their uses, such as food (cauliflower), decoration (marigold), fragrance (jasmine), or spices (clove). Encourage them to explain to their peers how flowers are also used for dyes and perfumes.
Fruit Section: Instruct students to classify fruits based on the number of seeds — fruits with one seed (mango), few seeds (apple), and many seeds (watermelon). They will label each fruit category and explain it to their classmates.
Seed Section: Students will create a seed showcase, including cereals, pulses, and spices such as corn, mustard, and cumin. Ask them to write how these seeds are used in food and discuss the importance of seeds in our daily diet.
Ask: Which part of the plant do we eat when we eat rice?
Say: The seed.
Get Set Page no. 36
Solve the riddles.
1. I have a long stem with yellow petals — Sunflower
2. I have thorns on my stem with a good smell — Rose
3. I grow in bunches, juicy and sweet — Grapes
Chapter Checkup
1. Tick () the correct option.
A. Root system and shoot system
B. Wheat and rice
C. Stems, leaves, flowers, and fruits
D. To transport water and food
2. Fill in the blanks.
A. Shrubs B. Taproots
C. Leaf blade D. Leaves
3. Write ‘T’ for true and ‘F’ for false.
A. F B. F
C. T D. F
4. Picture-based question.
A. Leaf: Leaf makes food for the plant and releases oxygen into the air.
B. Seed: Seeds are eaten and can be also used to grow more plants.
5. Short-answer questions.
A. The root system grows under the ground, while the shoot system grows above the ground.
B. Seeds need air, water, and warmth to grow into a new plant.
C. Sunlight, water, and carbon dioxide are used for photosynthesis.
D. Flowers can be used to make dyes.
6. Long-answer questions.
A. a. Functions of Roots: Fix the plant and absorb water
b. Functions of Stem: Carry water and food, hold the plant upright
c. Functions of Leaf: Make food, release oxygen
B. Taproots have one thick main root (example carrot), while fibrous roots have many thin roots (example wheat).
C. Diagram of a leaf: Structure of a Leaf: The main parts of a leaf are:
Leaf blade: Flat part of the leaf
Mid vein: Thick line that divides the leaf into half

Side veins: Thin lines that grow from the mid vein
Stomata: Tiny pores mostly found on the lower side of the leaf
Functions of a leaf:
Makes food
Stores food
Releases oxygen
D. Photosynthesis is the process of making food using sunlight, water, and carbon dioxide. During photosynthesis, plants also produce oxygen, which they release into the air.
E. Trees have thick stems (mango), shrubs have woody stems (rose), and herbs have soft stems (mint).
F. Three uses of plants:
A. Plants give us fruits, vegetables, cereals, and spices to eat.
B. Plants release oxygen, which we need to breathe.
C. Wood from trees is used to make houses and furniture.
(HOTS)
If the roots of a plant were damaged, the plant would not get enough water and food from the soil. The leaves would dry up, the stem would become weak, and flowers might not grow at all. The plant could die without healthy roots.
Students will be able to: identify wild and domestic animals and understand their characteristics. understand the basic characteristics of animals, such as movement, breathing, and reproduction. learn about herbivores, carnivores, and omnivores and understand their eating habits. understand the concept of a food chain and how living things depend on each other for food.
Let’s Recall
Recap to check if students know the names of some animals. Ask students to solve the question given in the Get Set section.
Vocabulary
shelter: a place to live escape: to move away for safety partially: (here) not fully reproduction: the process by which living beings produce young ones of their own kind herbivores: animals that eat plants and plant parts like fruits, leaves and stems
cud: the partially digested food
gnawing: a way of eating in which animals use their sharp front teeth to take small bites of hard things like nuts, seeds or wood carnivores: animals that eat the flesh of other animals
omnivores: animals that eat both plants and the flesh of other animals
Picture cards of wild, domestic, farm, and pet animals, two labelled baskets, sticky notes, glue sticks; Pictures of animals (fish, birds, caterpillars, and mammals), videos showing animal movement and reproduction (if available), balloons, animal cards; Pictures of different animals and their teeth structures, chart papers, markers, labels, sticky notes, glue sticks; Picture cards of plants, herbivores, and carnivores
Reflection Page 47
Students will be able to identify wild and domestic animals and understand their characteristics.
Teaching Aids
Picture cards of wild, domestic, farm, and pet animals, two labelled baskets, sticky notes, glue sticks
Activity
Show the pictures of wild and domestic animals to the students and explain the difference between them. Also, discuss the difference between farm and pet animals.
Now, divide the classroom into small groups and distribute the teaching aids and picture cards of animals to the students. They will take turns picking a card and placing it in the correct basket.
After sorting, give each student a sticky note to write one use of an animal (e.g., “Cows give us milk”) and attach it to the corresponding picture.
Extension Idea
Ask: Why cannot wild animals live with humans at home?
Say: Wild animals are used to living in nature and can be dangerous to keep at home.
Reflection Page 47
Students will be able to understand the basic characteristics of animals, such as movement, breathing, and reproduction.
Pictures of animals (fish, birds, caterpillars, and mammals), videos showing animal movement and reproduction (if available), balloons, animal cards
Activity
In the classroom, set up four learning stations, one each to represent the characteristic of the animals: Movement, Breathing, Reproduction, and Growth.
At the Movement station, let the students pick an animal card from a bowl and act out how that animal moves— running, swimming, flying, or crawling—while their classmates guess the animal and discuss which body parts help it move.
At the Breathing station, students blow air into balloons to feel how lungs expand and then match pictures of animals with their breathing organs, such as lungs, gills, spiracles, or nares.
At the Reproduction station, keep two labelled boxes—one for “Egg-layers” and another for “Give birth”—where students sort animal pictures based on how they reproduce, followed by a discussion on which animals lay eggs and which give birth to their young ones.
Lastly, at the Growth station, students match images of baby animals with their adult forms and discuss how animals change as they grow. After completing all the stations, bring the class together for a discussion where students share their observations and reinforce their learning through a short quiz or drawing activity.
Extension Idea
Ask: How do different environments affect the characteristics of animals?
Say: Different environments change how animals live. Fish have gills to breathe in water, while land animals have lungs. Birds have wings to fly, and moles have strong claws to dig. Some animals, like polar bears, have thick fur to stay warm, while camels have long legs to walk on sand.
Page 49
Students will be able to learn about herbivores, carnivores, and omnivores and understand their eating habits.
Pictures of different animals and their teeth structures, chart papers, markers, labels, sticky notes, glue sticks
Activity
Instruct students to work in small groups. Distribute the teaching aids among the groups. Provide each group with a chart paper. Ask them to divide the paper into three sections and label them: “Herbivores”, “Carnivores”, and “Omnivores”. Have students draw or paste pictures of animals in the correct section based on their eating habits. For example, cows and elephants go under “Herbivores,” lions and sharks under “Carnivores”, and monkeys and bears under “Omnivores”. Encourage them to add details like the animal’s habitat or food (e.g., grass for herbivores, meat for carnivores).
In each section, ask students to draw or write about the type of teeth the animals have. For herbivores, they can draw flat teeth for grinding plants; for carnivores, sharp teeth for tearing meat; and for omnivores, both sharp and flat teeth for eating plants and meat.
Students can write one fun fact about each category, such as “Cows chew cud to digest their food better” or “Snakes swallow prey whole”.
Have students present their posters to the class. Encourage them to explain why they placed each animal in a specific category and what they learned about their eating habits.
Extension Idea
Ask: Why do omnivores have both sharp and flat teeth?
Say: Omnivores have both sharp and flat teeth because they eat both plants and meat. Sharp teeth help them tear meat, and flat teeth help them grind plants. This helps them eat many types of food and survive in different places.
Students will be able to understand the concept of a food chain and how living things depend on each other for food.
Picture cards of plants, herbivores, and carnivores
Activity
To help students understand food chains, begin with a class discussion by asking them what they eat and where their food comes from. Explain that all animals depend on plants or other animals for food and introduce simple food chain examples like Grass → Deer → Tiger or Plant → Caterpillar → Bird.
Next, divide students into small groups and provide picture cards of plants, herbivores, and carnivores. Each group will choose a plant as the starting point and then find a herbivore that eats the plant and a carnivore that
eats the herbivore. They will arrange the pictures in order and use arrows (→) to show the flow of energy, such as Leaf → Grasshopper → Frog → Snake → Eagle.
After creating their food chains, each group will present their work and explain who eats whom.
Extension Idea
Ask: What would happen if all the plants in a food chain disappeared?
Say: If one part of the food chain disappears, it can cause big problems for the other animals and plants. For example, if all the plants (like grass) disappear, herbivores (like cows) would not have food to eat. Then, carnivores (like lions) that eat herbivores would not have food either. Everything is connected, so when one part is missing, it can affect the whole food chain!
Get Set
Page no. 46
Have you ever been to a zoo? List some animals you saw there.
Lion, giraffe, monkey, elephant
Pause and Answer
Name the following.
Body Part for Movement: Fish – Fins; Bird – Wings
Page no. 49
Body Part for Breathing: Fish – Gills; Insect – Spiracles
Way They Reproduce: Snake – Lays eggs; Cat – Gives birth
1. Tick () the correct option.
A. Omnivore
B. Lion
C. Horse
D. Herbivore
E. Pet animals are kept by humans for companionship.
2. Fill in the blanks.
A. Humans
B. Food chain
C. Tear
D. Swallow
3. Write ‘T’ for true and ‘F’ for false.
A. T B. T C. T D. T
4. Picture-based question.
A. Caterpillar: Spiracles
Bird: Nare on beak
B. Plant → Caterpillar → Bird
5. Short-answer questions.
A. Wild Animals: Lion, fox, crocodile
Pet Animals: Dog, cat, rabbit
Farm Animals: Buffalo, horse, hen
B. Fish use fins and birds use wings to move.
C. Animals reproduce by laying eggs or giving birth to young ones.
D. Omnivores have sharp teeth for tearing and flat teeth for grinding.
6. Long-answer questions.
A. Animals that eat plants and plant parts like fruits, leaves and stems are called herbivores, for example, cow, zebra, and horse.
Animals that eat the flesh of other animals are called carnivores, for example, lion, tiger, and wolf.
B. Animals that eat both plants and the flesh of other animals are called omnivores. Animals like dogs, pigs, monkeys, and crows are omnivores.
C. A food chain shows how living things depend on each other for food. It tells us who eats whom in a specific place. A food chain always begins with a plant.
Example: Grass → Zebra → Lion
Grass → Rabbit → Eagle
D. a. Herbivores have broad flat teeth because these types of teeth help them to chew plants.
b. Carnivores have sharp teeth because they are used to tear meat.
If lions and tigers decrease, herbivores like zebras and deer will increase because no one is hunting them. More herbivores will eat a lot of grass, which may reduce plant life. This can upset the balance of the food chain in the grassland.
Students will be able to: identify different birds and appreciate their diversity. learn about the body parts of birds and their functions. understand the features that help birds fly. explore the nesting habits and migration patterns of birds.
Let’s
Recap to check if students know the names of some common birds. Ask students to do the activity of joining the dots and completing the picture of a bird given in the Get Set section.
Vocabulary
chisel: a tool with a sharp end that is used for cutting
slender: small or narrow
perch: to sit on a branch
talons: long, sharp, and curved nail on the feet of some birds
streamlined: a shape that is thick in the middle and narrow at the ends
pectoral muscles: strong muscles located in the chest area
migration: movement of birds from colder places to warmer places
Bird picture cards, A4 sheets, markers, colours; Pictures of bird parts (wings, beaks, feathers, claws), chart papers, glue sticks, markers, and pencils; Clay or playdough, feathers or paper cutouts, straws or rolled paper tubes, toothpicks or craft sticks, scissors, and glue; Pictures of nests, twigs and grass, a large leaf, needle (teacher supervision required), thread, arrows to show migration routes
Learning
Students will identify different birds and appreciate their diversity.
Teaching Aids
Bird picture cards, A4 sheets, markers, colours
Activity
Reflection Page 57
Show pictures of sparrows, parrots, and peacocks, and discuss their colours, beaks, and feathers. Ask students to imagine they are visiting a village and think about the birds they might see. Then, provide drawing sheets and colours, and have students draw and colour a bird they would love to see in a village.
After finishing their artwork, encourage them to share their drawings and share one amazing fact about birds. Finally, display the students’ drawings on the classroom display board.
Extension Idea
Ask: Why do birds have different colours and shapes?
Say: Different colours and shapes help birds blend in with their surroundings and find food.
Learning Outcomes
Students will learn about the body parts of birds and their functions.
Teaching Aids
Reflection Page 58
Pictures of bird parts (wings, beaks, feathers, claws), chart papers, glue sticks, markers, and pencils
Activity
Divide the class into three groups: Group 1: Wings, Group 2: Beaks, Group 3: Feet
Instruct each group to focus on their assigned topic and complete specific tasks.
Group 1: Wings will explore how different wing shapes help birds fly, selecting 2–3 bird examples to illustrate and explain their function.
Group 2: Beaks will examine how beak shapes help birds eat, drawing or pasting examples and describing their role in food gathering.
Group 3: Feet will study how various foot types aid survival, illustrating and explaining their function in movement or catching food.
Let each group present their findings on chart paper with drawings or pasted images and brief explanations.
Extension Idea
Ask: What would happen if a bird did not have the right type of beak or feet for its habitat?
Say: If a bird did not have the right beak or feet, it might not be able to find enough food or survive in its environment. For example, a duck with grasping feet instead of webbed feet would not be able to swim well, and a woodpecker with a short beak could not make holes in trees to find insects.
Learning Outcomes
Students will be able to understand the features that help birds fly.
Teaching Aids
Clay or playdough, feathers or paper cutouts, straws or rolled paper tubes, toothpicks or craft sticks, scissors, and glue
Activity
Explain the features that help a bird fly, including the upward and downward movement of its wings, hollow bones, strong muscles, and streamlined body.
Divide the class into small groups and instruct students to create a model of a bird using craft materials to understand how these features assist in flight. Provide each group with clay or playdough to shape a streamlined body, ensuring it has a pointed head and smooth shape. Instruct them to attach feathers or paper cutouts as wings, positioning them slightly lifted to represent movement.
To demonstrate hollow bones, ask students to insert straws or rolled paper tubes inside the clay model, making the bird lightweight. Have them use toothpicks or craft sticks inside the wings to represent strong muscles that help birds flap powerfully.
Once their models are complete, guide them to label each part with sticky notes or index cards and write a short explanation of how each feature aids in flight.
Finally, set up a “Bird Exhibition”, where students take turns presenting their models and explaining how their bird’s body helps it fly.
Extension Idea
Ask: What would happen if birds had heavy, solid bones instead of hollow bones?
Say: If birds had heavy, solid bones, they would be too heavy to fly. Their bodies would require more energy to lift off the ground, making it difficult for them to stay in the air for long periods. Hollow bones help birds stay light and fly easily.
Students will be able to explore the nesting habits and migration patterns of birds.
Teaching Aids
Reflection Page 61
Pictures of nests, twigs and grass, a large leaf, needle (teacher supervision required), thread, arrows to show migration routes
Activity
Instruct students to work in small groups. Provide each group with a chart paper and ask them to divide it into sections for different birds: sparrow, pigeon, woodpecker, tailorbird, weaver bird, and Siberian crane. Ask them to use natural materials like twigs and grass to create sparrow and pigeon nests, draw or paste a tree trunk with a hole to represent the woodpecker’s nest, and cut out a large leaf, stitching it with thread to depict the tailorbird’s nest. For the weaver bird, they can weave small strips of grass or paper to create a hanging nest.
To illustrate migration, instruct the students to draw or paste an image of the Siberian crane, adding arrows to show its movement from Russia to India.
Once their collage is complete, encourage students to present their work, explaining each part to the class.
Ask: Do all birds migrate? Why or why not?
Say: No, not all birds migrate. Only birds that live in places with harsh winters and food shortages migrate to warmer regions to survive. Birds that can find food all year round stay in the same place.
Get Set
Connect the dots and colour the picture.
Pause and Answer
1. Sparrow
2. Duck
3. Woodpecker
4. Eagle Chapter Checkup
1. Tick () the correct option.
A. Flight feathers
B. Down feathers
C. Weaver birds
2. Fill in the blanks.
A. Feet
B. Feathers
C. Streamlined
D. Nests
3. Write ‘T’ for true and ‘F’ for false.
A. F B. T
C. T D. T
4. Picture-based question.
A. It lives near water (Duck).
B. It eats fish.
Page no. 56
Page no. 60
5. Short-answer questions.
A. Grasping feet help birds catch and hold prey tightly.
B. Woodpeckers make their nests by drilling holes in tree trunks.
C. Wings help birds fly by flapping upwards and downwards.
D. Nests protect bird eggs and young ones from predators and bad weather.
6. Long-answer questions.
A. Birds have different types of beaks and feet based on their food and living environment. For example, ducks have webbed feet for swimming, and woodpeckers have climbing feet.
B. Weaver birds weave nests with grass, while tailorbirds stitch leaves to make nests.
C. Migration is the movement of birds from colder places to warmer places in search of food and better living conditions.
D. (Answers may vary.) Students draw a creative bird combining features from three different birds and describe one special thing about it.
A bird with webbed feet would face many challenges in a desert. Webbed feet are suited for swimming, but in the desert, there is little water, making them less useful. Walking on hot, dry sand would be difficult, and finding food like fish or aquatic plants would be hard. The bird might struggle to survive in the dry and hot environment.
Chapters in This Unit
7. Staying Safe
8. Housing and Clothing
Story in This Unit
The story revolves around a group of friends—Ishaan, Mel, Manu, Pihu, Conji, and Eva—who are discussing ways to protect the Earth. As they brainstorm, Manu excitedly suggests that people should stay inside their homes, as it is the safest place. Pihu agrees and adds that people should also be cautious and avoid talking to strangers.
However, when Pihu suggests using a photo of Lord Ero to warn others, Conji explains that it may not be helpful because Lord Ero can use magic to disguise himself as someone familiar. Manu finds this surprising, and Eva confirms that wizards have the ability to transform into different people. To demonstrate, Conji casts a spell and changes his appearance to look exactly like Manu. Everyone is shocked and amazed at how realistic the transformation is.
Seeing this, Eva expresses concern about the dangers of such magic. Pihu agrees, emphasising that they must stay cautious for their own safety. Mel then reminds everyone that their main goal is to understand how the magical potion can impact life on Earth.
Students will be able to: identify and explain basic safety rules for different places (home, school, playground, and road). identify items in a first-aid box and demonstrate basic first-aid procedures. differentiate between safe and unsafe situations with strangers and understand good touch vs bad touch.
Recap to check if students know some basic safety rules that they follow in their daily lives. Ask students to solve the question given in the Get Set section.
Vocabulary
dangerous: harmful adult: a grown-up person littered: kept things untidily utensils: pots and pans queue: line handrail: a long bar at the side of a staircase stray: homeless
foot-over bridge: a narrow bridge over road that is used for crossing to the other side antiseptic: something that kill germs comfortable: (here) safe and pleasant first aid: the first help given to an injured person before reaching a hospital or a doctor
Pictures showing safe and unsafe situations, safety signs and symbols flashcards, real objects like scissors (with covered tips), electrical switches (dummy), traffic light model or circular cut-outs to represent red, yellow, and green lights; Chart paper or drawing sheets, colour pencils, markers, or crayons, cut-outs or printed images of first-aid items (band-aids, cotton, antiseptic cream, etc.), glue and scissors (use under an adult’s supervision); Flashcards with different safety scenarios, two large charts labelled “Safe” and “Unsafe”, a whistle hand-drawn smiley and sad face cutouts, a stuffed toy
Learning Outcomes
Reflection Page 72
Students will be able to identify and explain basic safety rules for different places (home, school, playground, and road).
Teaching Aids
Pictures showing safe and unsafe situations, safety signs and symbols flashcards, real objects like scissors (with covered tips), electrical switches (dummy), traffic light model or circular cut-outs to represent red, yellow, and green lights
Activity
Divide the class into four groups, assigning each group a safety theme: home, school, playground, or road. Give each group a flashcard with a specific safety rule, such as “Do not play with sharp objects” or “Always use a zebra crossing”. The groups will prepare a short skit demonstrating both the wrong way and the correct way to follow the rule.
After each performance, encourage a class discussion by asking questions like “What mistake did they make?” and “How can we stay safe in this situation?”. To reinforce road safety, conduct a Traffic Light Game, where one student acts as the traffic light, holding red, yellow, and green circles, while others play pedestrians and vehicles, practicing stopping at red and walking at green.
Extension Idea
Ask: Your younger sister is playing with matches. What would you do and why?
Say: Taking the matches away, explaining the danger, informing parents, suggesting safe play alternatives.
First Aid
Learning Outcomes
Reflection Page 74
Students will be able to identify items in a first-aid box and demonstrate basic first-aid procedures.
Teaching Aids
Chart paper or drawing sheets, colour pencils, markers, or crayons, cut-outs or printed images of first-aid items (band-aids, cotton, antiseptic cream, etc.), glue and scissors (use under an adult’s supervision)
Activity
Discuss with the class what first aid is and why it is important. Assign each student or pair a specific injury (e.g., small cut, minor burn, scraped knee). Ask them to draw or paste pictures related to their assigned injury and write simple step-by-step instructions on how to give first aid.
For example, for a small cut, they can write:
1. Wash the cut with clean water.
2. Apply antiseptic cream.
3. Put on a band-aid.
After completing their charts, students will present their work to the class. Encourage discussion by asking questions like “Why do we need to clean a wound before applying a band-aid?”. Display their charts on the classroom display board as a helpful reminder of basic first-aid rules.
Extension Idea
Ask: Why is it important to keep a first-aid box at home and school?
Say: Keeping a first-aid box at home and school ensures a quick response to injuries, helps prevent infections, and provides immediate care before a doctor arrives.
Students will be able to differentiate between safe and unsafe situations with strangers and understand good touch vs bad touch.
Flashcards with different safety scenarios, two large charts labelled “Safe” and “Unsafe”, a whistle hand-drawn smiley and sad face cutouts, a stuffed toy
Activity
Discuss various safety scenarios with the students, such as “A stranger offers you candy” or “You hold your parent’s hand while crossing the road”.
Divide the class into two groups. Provide the students two charts labelled “Safe” and “Unsafe”.
Have students pick a flashcard/picture card from the basket, read the situation aloud, and place it in the correct category, explaining their choice.
Next, divide students into small groups and assign each group a safety scenario for role-play, such as a stranger asking for personal information. Guide them to respond using “Say No and Go” and seeking help from a trusted adult.
Then, use a stuffed toy to explain good touch and bad touch. Show smiley and sad face cutouts and ask students to decide whether different types of touch feel safe or unsafe. Finally, play an Emergency Signal Game where you blow a whistle and students quickly act out a safe response to a dangerous situation.
After the activity, hold a short discussion reinforcing the key safety rules: Don’t talk to strangers, Stay close to trusted adults, Say No and Go, Never share personal information, Trust your feelings, and Tell a trusted adult.
Extension Idea
Ask: What would you do if a stranger offers you candy near your school?
Say: If a stranger offers me candy near my school, I will say no firmly, walk away, tell my teacher or parent immediately, and stay with my friends.
Get Set
Page no. 71
Label the traffic light, the zebra crossing and the footpath in the boxes. Traffic light
Footpath
Zebra crossing
Pause and Answer Page no. 75
Write ‘T’ for true and ‘F’ for false.
1. T 2. F 3. F 4. F
1. Tick () the correct option.
A. We should not touch hot utensils in the kitchen.
B. We should not slide on the handrails.
C. We should wait for our turn on the swings.
D. We should use the zebra crossing while crossing the road.
E. It is the medical help given to someone before the doctor arrives.
2. Fill in the blanks.
A. electrical B. strangers
C. good D. bad
3. Write ‘T’ for True and ‘F’ for False.
A. F B. T
C. F D. F
4. Picture-based question.
5. Short-answer questions.
A. Three things with which we should not play at home are sharp objects, electrical switches, hot utensils.
B. We should not touch electric devices because they can give an electric shock and hurt us.
C. First aid is the medical help given to someone before a doctor arrives.
D. [Traffic light drawing with: Red - Stop, Yellow - Wait, Green - Go]
6. Long-answer questions.
A. Three safety rules to be followed at home: Never play with sharp objects like scissors or knives. Always ask an adult for help when using them. Do not touch electrical switches or wires, especially with wet hands, as you may get a shock.
Keep your toys and other things in their proper place to avoid tripping and falling.
B. Two ways to stay safe:
a. At school: Always walk in a queue and do not push others. Do not run in the corridors or classrooms.
b. In the playground: Wait for your turn on swings and slides. Do not tease or go near stray animals.
c. On the road: Use zebra crossing to cross the road. Look left-right-left before crossing the road.
C. We need an adult’s help while using sharp objects because they are dangerous and can hurt us. Sharp objects like scissors, knives, or paper cutters can cause cuts and injuries if not handled properly. Adults know how to use these objects safely and can prevent accidents.
D. If an injured person does not get first aid: The injury might become worse. There could be more pain and bleeding. The wound might get infected. It may take longer to heal. The person might need more medical treatment later.
E. A bad touch is any touch that makes you feel uncomfortable, confused, or scared. For example, if someone pinches you hard or touches private parts of your body, it is a bad touch. If anyone gives you a bad touch, you should immediately tell your parents or a trusted adult about it.
No, it would not be safe to pick up the toy because it might be dirty, broken, or left there by someone else. It could also be a trick by a stranger to get a child’s attention. It is always better to leave unknown objects and inform a trusted adult.
Students will be able to: understand why houses are important and how they protect us from weather, animals, and other dangers. differentiate between kutcha and pucca houses based on materials used. identify different types of houses based on location and purpose. understand how clothes protect us and why we wear different clothes in different seasons. learn about natural and synthetic fibres and their sources. learn how to take care of clothes to keep them clean and last longer.
Let’s Recall
Recap to check if students know about the different parts of a house. Ask students to solve the riddles given in the Get Set section.
Vocabulary
disinfectant: a liquid used to kill germs
concrete: a mix of cement, sand, water and small stones
canvas: a thick, strong cloth, mostly waterproof nomads: people who do not stay long at a place and keep moving from place to place floods: overflowing of water on the land prevent: to stop something from happening polar regions: the cold regions near the poles of the Earth
waterproof: that does not let water pass through woven: threads joined in a pattern
fabric: cloth or material made using fibres occasion: a special event
fibres: thin thread-like structures woven together to make fabric
natural fibres: fibres we get from plants and animals
synthetic fibres: fibres made from chemicals in factories
Picture cards with clean and unclean house habits, two baskets, flashcards with different house-related scenarios; Drawing sheets and colouring materials; Flashcards with pictures of different houses, flashcards with descriptions of each house type, drawing sheets and colouring materials; Magazines, newspapers, or printed pictures of different clothes, scissors and glue sticks, large sheets of paper with four sections labelled Summer Clothes, Winter Clothes, Monsoon Clothes, and Snowy Places Clothes, markers or crayons for labelling and decorating; Fabric samples, picture cards of fibre sources, two labelled baskets: Natural Fibres and Human-Made Fibres; Picture cards showing steps of clothes care
Need of a House Reflection Page 82
Learning Outcomes
Students will be able to understand the importance of a house and how to keep it clean.
Teaching Aids
Picture cards with clean and unclean house habits, two baskets, flashcards with different house-related scenarios
Activity
Discuss with the students why we need a house and discuss how it protects us from weather, animals, and thieves. Explain that a clean house keeps us healthy by preventing germs from spreading.
Next, conduct a Sorting Game by preparing picture cards showing clean and unclean house habits, such as “throwing garbage in the bin” or “leaving dirty dishes in the sink”. Mix the cards and let students take turns sorting them into two baskets labelled “Good Habits” and “Bad Habits”.
After sorting, discuss why each habit is good or bad. Then, move to an Act It Out! activity.
Divide students into small groups and assign each group a scenario, such as “Your room is very messy” or “You see an open dustbin with flies around it”. Instruct the students to act out the correct way to handle the situation while the rest of the class guesses what they are demonstrating.
Extension Idea
Ask: What would happen if we never cleaned our house and kept the windows closed all the time?
Say: If we never cleaned our house, germs and dirt would build up, making us sick. Keeping windows closed all the time would prevent fresh air from coming in, making the house stuffy and unhealthy.
Kutcha and Pucca Houses Reflection Page 82
Learning Outcomes
Students will be able to differentiate between kutcha and pucca houses based on materials used.
Teaching Aids
Drawing sheets and colouring materials
Activity
Discuss with the students whether a house is a kutcha house or a pucca house and what materials are used to build it.
Provide the teaching aids to the students and ask them to draw a kutcha house and a pucca house, adding details like doors, windows, and surroundings. Encourage them to colour and decorate their drawings. After drawing, have them label their house type and write two materials used to build each type of house. Let students present their drawings and explain their house type to the class.
At the end, explain the differences between kutcha and pucca houses.
Extension Idea
Ask: What happens to a kutcha house in heavy rain?
Say: It can break or wash away because mud is not strong like bricks.
Students will be able to identify different types of houses based on location and purpose.
Teaching Aids
Reflection Page 83
Flashcards with pictures of different houses, flashcards with descriptions of each house type, drawing sheets and colouring materials
Activity
Discuss different types of houses and their features. Ask students if they have seen or heard about these houses before.
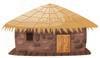
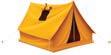
Give them flashcards with pictures and descriptions of houses like tents, houseboats, caravans, stilt houses, and igloos. Ask them to match the pictures with the correct descriptions. Next, let students choose one house type and draw it, adding details like water for a houseboat or ice for an igloo. Encourage them to colour and decorate their drawings. Then, write “Permanent Houses” and “Temporary Houses” on the board. Ask students to place their chosen house in the correct category and explain why. Discuss the differences between permanent and temporary houses and ask which house they would like to live in and why.
Extension Idea
Ask: Why do people in Assam build houses on stilts?
Say: People in Assam build houses on stilts because the region receives heavy rainfall and often experiences floods. The stilt houses are raised on wooden or metal poles, preventing floodwater from entering and keeping the house safe and dry.
Students will be able to understand how clothes protect us and why we wear different clothes in different seasons.
Magazines, newspapers, or printed pictures of different clothes, scissors and glue sticks, large sheets of paper with four sections labelled Summer Clothes, Winter Clothes, Monsoon Clothes, and Snowy Places Clothes, markers or crayons for labelling and decorating
Activity
Discuss different types of clothes worn in summer, winter, monsoon, and snowy places. Show real clothes or pictures of cotton, woollen, waterproof, and fur materials.
Give each student a large sheet of paper divided into four sections: Summer Clothes, Winter Clothes, Monsoon Clothes, and Snowy Places Clothes. Provide magazines, newspapers, or printed pictures of clothes. Ask students to cut out and paste pictures in the correct sections. Let students present their collages and explain their choices. After the activity, discuss why we wear different clothes in each season and special clothes for special jobs.
Extension Idea
Ask: Why do we wear woollen clothes in winter instead of cotton clothes?
Say: Woolen clothes trap body heat and keep us warm, while cotton clothes allow air to pass through and do not keep us warm in winter.
Learning
Students will be able to learn about natural and synthetic fibres and their sources.
Teaching Aids
Reflection Page 85
Fabric samples, picture cards of fibre sources, two labelled baskets: Natural Fibres and Human-Made Fibres
Activity
Discuss with the students how clothes were made in the past and how we now use fibres to make fabric. Show samples of cotton, wool, silk, jute, nylon, polyester, and rayon. Let students touch and describe each fabric, then guess if it comes from a plant, an animal, or a factory.
Next, give students picture cards of fibres like cotton plants, silkworms, sheep, and nylon fabric. Ask them to sort the cards into two baskets labelled “Natural Fibres” and “Human-Made Fibres”.
After the activity, discuss why some fabrics are more expensive and where we use different fibres.
Extension Idea
Ask: Why do we use jute to make bags and ropes instead of cotton?
Say: Jute is a strong and rough fibre, making it more durable for bags and ropes, while cotton is soft and used for making clothes.
Learning
Students will be able to learn how to take care of clothes to keep them clean and last longer.
Teaching Aids
Picture cards showing steps of clothes care
Activity
Reflection Page 87
Discuss with the students why it is important to take care of clothes. Explain the steps: washing, drying, ironing, and storing.
Give each student a set of four picture cards showing different steps of clothes care (washing, drying, ironing, storing). Ask them to arrange the cards in the correct order.
Once done, have them explain the steps in their own words.
After the activity, discuss why we follow this order and when clothes need dry cleaning. Ask students if they help in taking care of clothes at home.
Extension Idea
Ask: Why should we dry clothes in the sun instead of keeping them wet for a long time?
Say: Sunlight helps kill germs and keeps clothes fresh, while wet clothes can develop a bad smell and germs.
Get Set
Solve the riddles:
1. Kitchen 2. Door
3. Bedroom
Pause and Answer
Name the type of houses.
Page no. 81
5. Short-answer questions.
A. We need houses to protect us from the weather, wild animals, and thieves.
B. Kutcha houses are made of mud, straw, and bamboo.
Page no. 84
1. Houses that move on wheels → Caravan
2. Houses built on boats → Houseboat
3. Houses made of canvas cloth → Tent
4. Houses made of ice blocks → Igloo
Pause and Answer
Write two examples of each.
1. Natural Fibres: Cotton, Wool
2. Synthetic Fibres: Nylon, Polyester
1. Tick () the correct option.
A. Weather, animals, and thieves
B. Bricks C. Stilt houses
D. Waterproof materials E. Cotton
F. Rayon
2. Fill in the blanks.
A. Straw B. Dry cleaning
C. Silk D. Chemicals
3. Write ‘T’ for true and ‘F’ for false.
A. T B. T
C. F D. F
4. Picture-based question.
Page no. 87
C. Tents are useful because they are easy to carry and set up.
D. Reasons:
a. Raincoats are made of waterproof materials because they do not allow water to pass through, keeping us dry during rain.
b. Stilt houses are built in areas that get floods because they are raised on poles, preventing floodwater from entering the house.
6. Long-answer questions.
A. Kutcha houses are made of weak materials like mud and straw, while pucca houses are made of strong materials like bricks and cement.
B. Bungalows are permanent houses because they cannot be moved.
C. Similarity: Both are temporary houses. Difference: A caravan moves on wheels, while a houseboat floats on water.
D. Summer clothes are made of cotton, while winter clothes are made of wool.
E. Natural fibres: Cotton (from plants), Wool (from sheep). Synthetic fibres: Nylon, Polyester (made from chemicals)
F. Ways to take care of clothes: Wash them properly, dry them in the sun, and iron them.
Challenge (HOTS) (Sample Answer)
Name the types of houses and write the materials used to make them.
I would choose a pucca house because it is made of strong materials like bricks and concrete, which can withstand heavy rains and floods better than a kutcha house.
Chapters in This Unit
9. Air and Water
10. Weather and Seasons
11. Soil Story in This Unit
Dr Vikram is deep in thought when he suddenly realises that the environment affects all living beings on Earth. He shares this idea with the children, Ishaan, Manu, and Pihu, along with their friends Conji, Mel, and Eva. They discuss how the environment provides essential resources like air, water, and soil, which support life.
As they talk, Pihu wonders if Lord Ero will use his magical potion by spraying it in the air, since all living beings need air to breathe. Manu adds that the potion could also be mixed with soil, affecting plants and food sources. However, Conji points out that this method would take too long.
Ishaan suggests that water might be the quickest way to spread the potion, as rivers and lakes carry water to many places. Manu agrees, explaining that if the potion is mixed in water, it will reach people quickly since water is used for drinking, cooking, and daily activities. Pihu realises that this would allow Lord Ero to control all life on Earth.
Dr Vikram concludes that Lord Ero will likely target either air or water to spread his potion quickly. Understanding the danger, he warns the group that they must act fast to stop Lord Ero before it is too late.
Students will be able to:
understand what air is, its composition, and how it moves. learn how air is important for breathing, burning, drying, and movement. identify different sources of water and understand the importance of water conservation. understand that water exists in three forms—solid, liquid, and gas. understand how water moves through evaporation, condensation, and precipitation.
Recap to check if students know the basic properties of air and water. Ask students to solve the question given in the Get Set section.
photosynthesis: a process by which plants make their food consumption: the using up of a resource irrigation: watering land to grow crops
glaciers: large sheets of ice formed in nature
icebergs: pieces of ice that have broken off from glaciers and float in the sea atmosphere: the layer of air surrounding the Earth
A balloon, a fan, a candle, a chart showing the composition of air; A burning candle, a deflated bicycle tire or balloon, a wet cloth; Chart paper or whiteboard, printed or drawn pictures of surface water (ponds, rivers, lakes, oceans), groundwater (wells, tubewells, handpumps), and water usage activities (drinking, cooking, bathing, irrigation), sticky notes or flashcards, markers; Ice cubes, a transparent glass of water, a kettle or bowl of warm water, a small mirror or steel plate, spoons, or tongs; A transparent bowl of water, a lid or plate to cover the bowl, a picture or diagram of the water cycle, a sunny spot for the experiment, sheets, and colouring material
Air
Learning Outcomes
Students will be able to understand what air is, its composition, and how it moves.
Teaching Aids
A balloon, a fan, a candle, a chart showing the composition of air
Activity
Reflection Page 95
Ask students to blow up a balloon and observe what happens. Discuss what fills the balloon, leading them to understand that it is air.
Next, turn on a fan and let students feel the moving air. Ask them whether they can see air and how they know it is present.
To demonstrate how warm air rises, hold a paper bag upside down near a candle (teacher supervision required). As the warm air lifts the bag, students will see how wind is created. Explain that the sun heats the air, causing it to rise, while cooler air moves in to take its place, forming wind.
After that, ask the students to create a chart to demonstrate the composition of the atmosphere. Explain that air in our surroundings is a mixture of gases, consisting of 78% nitrogen, 21% oxygen, and the remaining 1% made up of argon, carbon dioxide, water vapour, other gases, and dust.
Extension Idea
Ask: Why do hot air balloons rise in the sky?
Say: Hot air balloons rise because the air inside them is heated, making it lighter than the cooler air outside. Since warm air rises, the balloon lifts into the sky.
Uses of Air
Learning Outcomes
Reflection Page 96
Students will be able to learn how air is important for breathing, burning, drying, and movement.
Teaching Aids
A burning candle, a deflated bicycle tire or balloon, a wet cloth
Activity
Ask students to take a deep breath and then exhale. Discuss how air is essential for breathing and that all living beings need air to survive.
Next, demonstrate the importance of air for burning by lighting a small candle and then covering it with a glass jar. Have students observe how the flame goes out when there is no air.
To show how air helps in drying, wet a small cloth and hang it in the classroom. Ask students what they think will happen after some time, guiding them to understand that air helps remove moisture, causing the cloth to dry.
Finally, demonstrate how air enables movement by showing a deflated bicycle tire or balloon. Blow air into it and explain that air provides shape and allows objects like tires and balloons to function properly.
Extension Idea
Ask: Why does a candle go out when covered with a glass jar?
Say: A candle needs oxygen from the air to keep burning. When we cover it with a glass jar, the oxygen inside gets used up, and no more air can enter. Without oxygen, the flame goes out.
Learning
Reflection Page 97
Students will be able to identify different sources of water and understand the importance of water conservation.
Teaching
Chart paper or whiteboard, printed or drawn pictures of surface water (ponds, rivers, lakes, oceans), groundwater (wells, tubewells, handpumps), and water usage activities (drinking, cooking, bathing, irrigation), sticky notes or flashcards, markers
Activity
Draw two sections on the white/black board: Sources of Water and Uses of Water.
Divide the “Sources of Water” section into Surface Water and Groundwater. Display pictures of water sources such as ponds, rivers, oceans, wells, and handpumps, along with images of activities that use water, like drinking, bathing, and irrigation. Give each student a sticky note or flashcard and ask them to pick an image and place it in the correct category while explaining their choice. Encourage class participation if a student is unsure. After all images are sorted, discuss why rain is important, whether all water on Earth is usable, and how we can save water.
Conclude by asking students to share one way they will save water at home.
Extension Idea
Ask: What would happen if there was no groundwater or surface water available?
Say: If there was no groundwater or surface water, we would not have enough water for drinking, cooking, and farming. Plants, animals, and humans would struggle to survive. That is why it is important to save water and use it wisely.
Learning Outcomes
Students will be able to understand that water exists in three forms—solid, liquid, and gas.
Teaching
Reflection Page 98
Ice cubes, a transparent glass of water, a kettle or bowl of warm water, a small mirror or steel plate, spoons, or tongs
Activity
Give each student an ice cube and ask them to hold it or place it in a cup. Let them observe how the ice melts into water, explaining that heat turns solid ice into liquid water. Explain to them that water is also frozen as ice in glaciers and icebergs, in nature.
Next, pour warm water into a bowl or use a kettle to create steam. Hold a small mirror or steel plate above the steam and let students observe how tiny water droplets form on the surface.
Explain that when water is heated, it turns into water vapour (gas), and when cooled, it changes back into liquid. Discuss with students by asking what happened to their ice cube, where water from wet clothes goes, and if they can see water vapour in the air. Encourage them to observe water changes at home, such as steam while cooking or ice melting in a drink.
Note for teachers: This activity can be performed in a science lab.
Extension Idea
Ask: Why do wet clothes dry faster on a sunny day than on a cloudy day?
Say: The heat from the sun makes the water in the clothes evaporate faster, turning it into water vapour. On a cloudy day, there is less heat, so the water takes longer to evaporate.
Cycle Reflection Page 99
Students will be able to understand how water moves through evaporation, condensation, and precipitation.
A transparent bowl of water, a lid or plate to cover the bowl, a picture or diagram of the water cycle, a sunny spot for the experiment, sheets, and colouring material
Activity
Discuss the water cycle with the students in the class. Then, let the students place a bowl of water in the sun and ask them to check it after some time. Explain that the water level decreases because some of the water turns into water vapour and rises into the air. This process is called evaporation.
Next, cover the bowl with a lid or plate and wait for a few minutes. Small water droplets will form on the surface of the lid, demonstrating condensation, just like how clouds form in the sky.
Then, lift the lid and gently shake it, allowing the water droplets to fall back into the bowl, simulating precipitation (rain).
Finally, let the students draw a picture of the water cycle and explain how the sun heats water, turning it into vapour (evaporation), how the vapour cools and forms clouds (condensation), and how water falls back to the Earth as rain (precipitation).
Extension Idea
Ask: Why do we see fog or mist on a cold morning?
Say: Fog or mist forms when warm air with water vapour cools down quickly near the ground, causing the vapour to turn into tiny water droplets, just like condensation in the water cycle.
Get Set
Page no. 94
A. Air B. Shape and size C. Water and gas
Pause and Answer
Page no. 96
Number the steps in the correct order to explain the formation of winds.
1. The sun’s heat warms the air.
2. The warm air moves up.
3. An empty space is created.
4. Cool air moves in.
5. Wind is formed.
Pause and Answer
Page no. 98
Classify the following sources of water as surface water sources and ground water sources.
Surface Water Sources: Pond, lake, river, sea, ocean Ground Water Sources: Well, handpump, tubewell
Chapter Checkup
1. Tick ( ) the correct option.
A. A mixture of gases
B. We can feel it
C. Wells
D. Glaciers and icebergs
E. By melting it
2. Fill in the blanks.
A. Warm B. Rain
C. Water vapour D. Freezing
E. Water
3. Write ‘T’ for true and ‘F’ for false.
A. F B. F C. F D. F
4. Picture-based question.
A. Solid: Ice | Gas: Water Vapour | Liquid: Water
B. Water changes states by freezing, melting, and evaporating.
5. Short-answer questions.
A. Air is important for breathing and burning.
B. Four uses of water in our daily life are drinking, cooking, bathing, and washing.
C. The water in the wells come from rainwater that seeps into the ground.
D. Water is important for farmers as it is needed to grow crops.
E. Three processes that take place in the water cycle are evaporation, condensation, precipitation.
6. Long-answer questions.
A. Air is made of nitrogen (78%), oxygen (21%), and other gases (1%).
B. Three uses of air: It is used for breathing. It is used for burning. It is used for drying clothes.
C. Various sources of water are: Surface water (rivers, lakes) and groundwater (wells, tubewells).
D. There are three forms of water: solid (ice), liquid (water), gas (vapour).
E. Water cycle:
When the sun heats water, it turns into vapour and rises—this is evaporation. As it cools, it forms clouds, known as condensation. When clouds become heavy, they release water as precipitation (rain, snow, or hail). Some water collects in water bodies, while some seeps into the ground as groundwater. The sun heats the collected water again, restarting the water cycle.
1. If you live in a village with no river nearby, you can get water from wells, tubewells, handpumps, or rainwater collected in ponds and tanks.
2. Two ways to save water are:
Turn off taps while brushing or washing hands to avoid wasting water.
Reuse water from washing fruits and vegetables for watering plants.
Students will be able to: understand what weather is and the factors affecting it. identify different types of weather—sunny, rainy, cloudy, and snowy. understand the different seasons and how they follow a cycle. learn how clothing changes with seasons to keep us comfortable.
Let’s Recall
Recap to check if students know the names of different types of weathers and seasons. Ask students to solve the question given in the Get Set section.
Vocabulary
slanting: at an angle pleasant: nice and likable freeze: turning into ice duration: time during which something continues weather: it is the day-to-day conditions of our atmosphere at a given place and time atmosphere: it is the layer of air around the Earth breeze: the gentle blowing wind is called breeze
Flashcards of different weather types (sunny, rainy, cloudy, snowy), markers, chart papers with columns for the date, weather condition, temperature feel, sky appearance, wind strength, and rainfall; Pictures of different weather conditions (sunny, rainy, cloudy, snowy), scenario cards for real-life activities (e.g., wearing a raincoat, playing in the snow, using a fan), chart paper and crayons; Flashcards with pictures and names of the five seasons, props like sunglasses, woollen fabric, paper fans, cotton balls, spray bottle, artificial leaves, flowers, and fruits (or pictures of seasonal fruits), coloured paper, glue, crayons, and markers for drawing and making crafts, real-life objects like Ice cubes, a mini fan, and a raincoat or umbrella; Three labelled baskets for summer, monsoon, and winter, picture cards of different clothing items
Students will be able to understand what weather is and the factors affecting it.
Teaching Aids
Reflection Page 104
Flashcards of different weather types (sunny, rainy, cloudy, snowy), markers, chart papers with columns for the date, weather condition, temperature feel, sky appearance, wind strength, and rainfall
Activity
Discuss the concept of weather and show students flashcards of different weather types. Explain the key factors that influence weather: the sun, wind, clouds, and rain. Engage students by asking questions like, “Have you noticed how mornings are cooler than afternoons?” or “What happens when dark clouds appear in the sky?”
Provide each student with a chart containing columns for the date, weather condition (sunny, cloudy, windy, rainy), temperature feel (hot, warm, cool, cold), sky appearance (clear, few clouds, dark clouds), wind strength (calm, breeze, strong wind), and rainfall (none, light, heavy).
Instruct students to observe the weather at the same time each day (e.g., morning or afternoon) and record their findings in the chart. Encourage them to look outside, feel the air, and note any significant changes. After a week, gather students to compare their observations. Ask guiding questions such as, “Did you notice any patterns in the weather?” or “What happened before it rained?” Discuss how their findings relate to the role of the sun, wind, clouds, and rain.
Ask: What do you think would happen if the sun never shone for a whole week?
Say: If the sun never shone for a week, the Earth would become colder, plants would struggle to grow, and the days would be dark. People and animals might feel tired, and the weather could change drastically.
Reflection Page 105
Students will be able to identify different types of weather—sunny, rainy, cloudy, and snowy.
Pictures of different weather conditions (sunny, rainy, cloudy, snowy), scenario cards for real-life activities (e.g., wearing a raincoat, playing in the snow, using a fan), chart paper and crayons
Activity
Discuss the four types of weather: sunny, rainy, cloudy, and snowy with the students. Encourage them to share what they have seen or felt during these weather conditions.
Divide the class into small groups and give each group weather flashcards and scenario cards with activities like “playing at the beach” or “carrying an umbrella”. Ask students to match the scenarios to the correct weather type. Example: “Playing at the beach” matches with “Sunny”, and “Carrying an umbrella” matches with “Rainy”.
After the matching activity, let each student draw and colour their favourite type of weather and write a few sentences about what they enjoy doing during that weather.
Finally, encourage all groups to share their matches with the class and discuss how different weather affects daily life.
Extension Idea
Ask: How does weather affect what we eat and drink?
Say: On hot days, we drink cool drinks and eat ice cream. On cold days, we drink hot tea or soup to keep warm.
Seasons Reflection Page 106
Learning Outcomes
Students will be able to understand the different seasons and how they follow a cycle.
Teaching Aids
Flashcards with pictures and names of the five seasons, props like sunglasses, woollen fabric, paper fans, cotton balls, spray bottle, artificial leaves, flowers, and fruits (or pictures of seasonal fruits), coloured paper, glue, crayons, and markers for drawing and making crafts, real-life objects like Ice cubes, a mini fan, and a raincoat or umbrella
Activity
Set up five stations, each representing a season. Divide students into small groups and have them rotate through the stations.
At the Summer Station, students try on sunglasses, use a handheld fan, and observe pictures of summer fruits.
At the Monsoon Station, they create clouds using cotton balls and spray water to mimic rain.
At the Autumn Station, students touch dry leaves and draw a tree with falling leaves.
At the Winter Station, they feel wool, touch ice cubes or artificial snow, and discuss warm clothing. At the Spring Station, they make a simple flower craft using paper and glue.
After visiting all stations, gather students for a discussion. Ask them which season they like the most and why, then have them draw their favourite season and share with the class.
Extension Idea
Ask: Why do trees shed their leaves in autumn? How does this help them?
Say: Trees shed their leaves in autumn to save water and energy. This helps them survive the cold winter and grow new leaves in spring.
Learning Outcomes
Students will be able to learn how clothing changes with seasons to keep us comfortable.
Teaching Aids
Reflection Page 108
Three labelled baskets for summer, monsoon, and winter, picture cards of different clothing items
Prepare three labelled baskets: Summer, Monsoon, and Winter. Provide students with picture cards of different clothing items (e.g., T-shirts, shorts, raincoats, sweaters, umbrellas, woollen caps, and sunglasses). One by one, students will pick a card, name the item, and place it in the correct basket. After all cards are sorted, review the baskets together and discuss why each item belongs to its respective season.
Extension Idea
Ask: How does a raincoat protect us in the monsoon?
Say: It is made of waterproof material that keeps us dry.
Get Set
Solve the riddles.
1. Air
2. Water
Page no. 103
Pause and Answer Page no. 106
B. Noon is the hottest part of the day because the sun’s rays are straight.
C. Getting wet in the rain can make us sick.
D. Woollen clothes keep us warm in winter.
6. Long-answer questions.
A. Weather types: Sunny, rainy, cloudy, snowy. Today’s weather is [Answer may vary] sunny.
B. Weather is the day-to-day condition of our atmosphere at a given place and time. The weather of a place does not remain the same. It may change any time. For example, weather can be sunny, rainy, or cloudy.
1. Tick ( ) the correct option.
A. Sun B. The heat of the sun
C. Monsoon season D. Woollen clothes
2. Fill in the blanks.
A. Summer B. Monsoon
C. Shorter, longer D. Spring
3. Write ‘T’ for true and ‘F’ for false.
A. T B. F C. F D. T
4. Picture-based question.
A. The weather shown in the picture is the summer season.
B. We like to swim and have cool drinks during summer season.
5. Short-answer questions.
A. Different types of weather are: Sunny, rainy, cloudy, snowy
On the other hand, Seasons are the conditions of our atmosphere for longer durations. Unlike the weather, seasons remain the same for several months and they follow a cycle. For example, summer, winter, and monsoon.
C. [Answer may vary] My favourite season is spring because the weather is pleasant, and many beautiful flowers bloom. I enjoy playing outside and seeing butterflies and birds. It is neither too hot nor too cold, which makes it a perfect season to have fun outdoors.
We can collect rainwater by placing large containers or barrels under rooftops and open areas. Using a rainwater harvesting system, we can direct the rainwater from rooftops through pipes into storage tanks. This collected water can be used for watering plants, cleaning, and other household activities.
Students will be able to:
understand how soil is formed through the weathering of rocks. identify the components of soil, including air, water, and humus. learn about sandy, clayey, and loamy soil and their characteristics. learn how soil is important for plants, animals, and human activities.
Let’s Recall
Recap to check if students know the necessary things that a plant would require to grow. Ask students to solve the question given in the Get Set section.
Vocabulary
minerals: substances naturally formed in the Earth decaying: breaking down of substances
burrow: a tunnel or a hole in the ground
humus: the part of soil made from dead plants and animals
fertile: rich in minerals required for plant growth
gravel: collection of small, loose pieces of rock and stone particles: very small pieces of anything
manure: a natural substance which helps in the growth of the plants
fertilisers: chemical-based minerals added to the soil
weathering: breaking down of huge rocks due to the action of sun, rain and wind soil erosion: washing away of topsoil due to wind and rain
soil conservation: taking care of the soil and preventing its erosion
Small pieces of chalk or dry biscuits, a zip-lock bag or a mortar and pestle, water spray bottle, small tray or paper plate, choco chips or colourful sprinklers; Brown, yellow, orange, and black construction paper, glue stick, scissors, white paper for the base, labels or markers; Three soil samples (sandy, clayey, loamy), a bowl of water, a sieve; Picture cards of soil uses (plants, animals, rainwater absorption, clay objects), flashcards with key terms (soil, erosion, conservation), a small pot of soil for demonstration
Learning
Students will be able to understand how soil is formed through the weathering of rocks.
Teaching Aids
Reflection Page 114
Small pieces of chalk or dry biscuits, a zip-lock bag or a mortar and pestle, water spray bottle, small tray or paper plate, choco chips or colourful sprinklers
Activity
Give each student a small piece of chalk or a dry biscuit and ask them to crush it inside a zip-lock bag or using a mortar and pestle.
Explain that just like the chalk or biscuit breaks into small pieces, rocks break down over time due to heat, wind, and rain. Spray a little water on the crushed pieces and ask students to rub them together, making them even finer. Mix choco chips or colourful sprinklers into the paste to depict humus.
After the activity, discuss how water and wind help in breaking rocks into tiny particles, forming soil over millions of years. Explain that in nature, dead plants and animals mix with these tiny rock particles to form humus, which makes the soil fertile.
Extension Idea
Ask: What would happen if there was no soil on Earth?
Say: Plants would not grow, animals would lose their homes, and life would not survive as we depend on soil for food and shelter.
Learning
Students will be able to identify the components of soil, including air, water, and humus.
Teaching Aids
Reflection Page 115
Brown, yellow, orange, and black construction paper, glue stick, scissors, white paper for the base, labels or markers
Activity
Give each student four strips of coloured paper: black (topsoil), brown (subsoil), orange (parent rock), and yellow (bedrock). Ask them to arrange and glue the strips onto a white sheet in the correct order from top to bottom. Once done, instruct the students to label each layer and draw plant roots in the topsoil layer. Encourage them to discuss why plants grow in topsoil and not in the deeper layers.
Extension Idea
Ask: How do farmers know if the soil is good for growing plants?
Say: Good soil is soft, holds water, and has humus for plant growth.
Learning Outcomes
Students will be able to learn about sandy, clayey, and loamy soil and their characteristics.
Teaching Aids
Three soil samples (sandy, clayey, loamy), a bowl of water, a sieve
Activity
Divide students into small groups and provide each group with three different soil samples: sandy soil, clayey soil, and loamy soil. Ask them to touch and feel each type of soil and describe its texture—whether it is rough, smooth, dry, or sticky.
Next, have them pour water over each soil sample and observe how the water behaves.
Explain that sandy soil lets water pass through quickly, clayey soil holds water and becomes sticky, and loamy soil holds some water but remains soft.
After the observations, hold a discussion on which type of soil is best for plant growth and why. Help students conclude that loamy soil is the best for plants because it retains moisture while also allowing air to reach the roots.
Extension Idea
Ask: Why do desert plants grow well in sandy soil?
Say: Desert plants grow well in sandy soil because it does not hold much water. Their roots can grow deep to find water, and their stems store water to survive in dry weather.
Learning Outcomes
Students will be able to learn how soil is important for plants, animals, and human activities.
Teaching Aids
Picture cards of soil uses (plants, animals, rainwater absorption, clay objects), flashcards with key terms (soil, erosion, conservation), a small pot of soil for demonstration
Activity
Divide the students into small groups and give each group a set of picture cards showing different uses of soil, such as plants growing in soil, animals living in soil, rainwater seeping into soil, and clay objects like pots and bricks. Ask them to sort the pictures into categories based on how soil is used.
Once sorted, each group will explain their choices to the class.
Next, discuss why soil conservation is important and how planting trees can prevent soil erosion.
Encourage students to think of ways they can help protect soil in their surroundings.
Extension Idea
Ask: What would happen if all the topsoil got washed away?
Say: Plants would not grow properly, animals would lose their homes, and we would not have food or clay objects like bricks and pots.
Get Set
A. 1. Air 2. Sunlight 3. Water 4. Soil
Page no. 113
B. She should water the plant regularly and keep it in sunlight.
Pause and Answer
Name the layers of soil.
Page no. 116
1. Bedrock 2. Topsoil 3. Subsoil Chapter Checkup
1. Tick ( ) the correct option.
A. Topsoil B. Humus C. Bedrock
2. Fill in the blanks.
A. Topsoil B. Air, water C. Wind
3. Write ‘T’ for true and ‘F’ for false.
A. T B. F C. T
4. Picture-based question.
Label the layers of soil and answer the question.
Most fertile layer is the topsoil, because it has humus.
5. Short-answer questions.
A. Weathering of rocks is caused by the actions of sun, wind, and rain.
B. Humus is useful to plants because it provides nutrients for them.
C. Soil conservation means keeping the soil safe from being washed or blown away. It is important because soil takes a long time to form, so we must protect it.
6. Long-answer questions.
A. The sun heats rocks, and wind and rain cool them, causing cracks. Over time, the rocks break into small pieces. These pieces become smaller and form soil, where small plants start growing. Dead plants and animals mix with water and soil particles to form humus.
B. Diagram of soil layers:
Topsoil is the outermost layer (2 to 8 inches thick) and contains humus, making it fertile. Plant roots grow in this layer.
Subsoil lies below topsoil and is a mix of sand, clay, and broken rocks.
Parent Rock is beneath subsoil and contains large solid rocks that can break into smaller pieces. Bedrock is a layer of solid rock. Water cannot pass through it and collects above to form the water table.
C. Difference between clayey and sandy soil:
Sandy Soil: Sandy soil is dry and light and contains large sand particles. It does not hold much water due to the large air spaces between the particles. Plants like cacti and coconuts grow well in sandy soil.
Clayey Soil: Clayey soil contains very fine particles and holds water well. It becomes sticky when mixed with water. However, it is not ideal for most plants because it lacks air due to the small spaces between the particles.
D. Soil is useful in many ways:
a. Soil provides water and minerals for the crops and plants.
b. It is the home of animals such as earthworms, ants, rats, rabbits and snakes.
c. Soil allows rainwater to seep in and prevent floods.
d. Soil (clayey soil) is used to make pots, diyas, bricks and kutcha houses.
1. I would choose loamy soil for my garden because it has a good balance of sand, silt, and clay. It holds enough water for plants while also allowing air to reach the roots. Loamy soil is rich in nutrients, making it the best for plant growth.
2. If there were no soil on Earth, plants would not be able to grow, and animals and humans would have no food. There would be no trees to give us oxygen, and the land would be barren. Soil is important for life on Earth.
Chapters in This Unit
12. Solids, Liquids and Gases
13. Measuring Things
14. Light, Sound and Force
Story in This Unit
Mel, Conji, Eva, and their friends gather in the living room, looking serious. Mel reminds everyone about the magical device given to them by Elder Robot, which is made of solid, liquid, and gaseous materials from Avora. Conji explains that the device can detect evil powers and will light up when it touches a magical potion. Ishaan is excited that this will make their mission easier. Manu wonders if the device is large, but Conji laughs and reminds him that they are wizards. Eva casts a spell, making the device appear instantly. Manu wishes he had magical powers to make delicious food, making everyone laugh.
To test the device, Mel holds it in the air, but nothing happens. Dr Vikram then drives them to a nearby lake. When Mel brings the device in contact with the water, it lights up, revealing that the lake is polluted. Dr Vikram warns that this is dangerous, as pollution could allow Lord Ero to control the people. Pihu insists they must act quickly. Just then, they hear distant chanting, hinting at more trouble ahead.
Students will be able to:
understand that matter is anything that takes up space and has weight. learn that solids have a fixed shape and size unless acted upon by an external force. understand that liquids do not have a fixed shape but take the shape of their container. learn that gases do not have a fixed shape or size and can spread out. understand how solids, liquids, and gases can change from one state to another.
Let’s Recall
Recap to check if students can identify some objects that occupy space and have weight. Ask students to solve the question given in the Get Set section.
Vocabulary
matter: anything that takes up space and has weight freezing: the process in which a liquid changes into a solid melting: the process in which a solid changes into a liquid evaporation: the process in which a liquid changes into vapour condensation: the process in which a gas changes into a liquid
Picture cards of different objects, three labelled baskets, flashcards with definitions of solid, liquid, and gas; A variety of solid objects, scissors; A jug full of water, different shaped containers (glass, bowl, bottle), measuring cups; A balloon, a perfume bottle or air freshener, a plastic bag with a tie; Ice cubes, a glass of water, a small pan or kettle (for teacher demonstration)
to Matter Reflection Page 127
Learning Outcomes
Students will be able to understand that matter is anything that takes up space and has weight.
Teaching Aids
Picture cards of different objects, three labelled baskets, flashcards with definitions of solid, liquid, and gas
Activity
Give each student a set of picture cards showing different objects, such as a balloon, a glass of juice, a rock, a cloud, a candle, and steam from a kettle. Place three labelled baskets in the classroom, each representing one state of matter: Solids, Liquids, and Gases.
Ask the students to pick a card one by one, observe the object, and decide which state of matter it belongs to.
Let them place the card in the correct basket and explain their choice to the class.
After all the cards are sorted, discuss why each object belongs to its category.
Extension Idea
Ask: Can you think of an object that can change from one state to another?
Say: Yes! Ice is a solid, but when it melts, it turns into water (liquid). When heated, water turns into steam (gas).
Learning Outcomes
Reflection Page 127
Students will be able to learn that solids have a fixed shape and size unless acted upon by an external force.
Teaching Aids
A variety of solid objects, scissors
Activity
Divide the students into small groups and give each group a set of solid objects (e.g., a ball, a brick, a pencil, a cup, a piece of paper, and some flour). Ask them to observe and discuss the shape and size of each object.
Let them try to change the shape of some objects by squeezing, cutting, or tearing (e.g., crumpling paper or cutting a sponge).
Let each group present their observations about which solids keep their shape and which can be changed by force.
Extension Idea
Ask: Why do some solids change shape while others do not?
Say: Some solids, like paper or clay, are soft and can be reshaped, while others, like a brick or a metal spoon, are hard and do not change shape easily.
Learning Outcomes
Students will be able to understand that liquids do not have a fixed shape but take the shape of their container.
Teaching Aids
A jug full of water, different shaped containers (glass, bowl, bottle), measuring cups
Activity
Pour water into different containers and ask students to observe what happens to its shape. Have them pour water from one container to another and notice whether the quantity of water changes. Discuss with students why liquids flow and take the shape of their container while keeping the same volume.
Extension Idea
Ask: What will happen if you pour juice from a bottle into a bowl?
Say: The juice will take the shape of the bowl. Gases Reflection Page 128
Learning Outcomes
Students will be able to learn that gases do not have a fixed shape or size and can spread out.
Teaching Aids
A balloon, a perfume bottle or air freshener, a plastic bag with a tie
Activity
Distribute the teaching aids among the students in the class. Blow up a balloon and ask students to observe its shape. Explain that air inside gives it shape, showing that gases take up space. Spray perfume or air freshener in one corner of the classroom and ask students if they can smell it. Discuss how gases spread out freely in the air.
Capture air in a plastic bag, tie it, and let students feel it. Explain that gases, though invisible, still occupy space.
Extension Idea
Ask: Why do we feel the wind even though we cannot see air?
Say: We feel the movement of air when it pushes against our skin, just like when we blow air on our hands.
Learning Outcomes
Reflection Page 129
Students will be able to understand how solids, liquids, and gases can change from one state to another.
Teaching Aids
Ice cubes, a glass of water, a small pan or kettle (for teacher demonstration)
Give each student an ice cube and ask them to hold it in their hands. Let them observe how the ice slowly melts into water due to body heat.
Pour water into an ice tray and place it in the freezer (or show pre-frozen ice cubes). Discuss how cooling turns water into ice.
Heat a small amount of water in a pan or kettle and show students how steam rises, explaining that heat turns water into vapour.
Ask: Why do we see water droplets on a cold glass of juice on a hot day?
Say: The water vapour in the air cools down and changes into water droplets when it touches the cold glass.
Get Set
Page no. 126
Unscramble the words to name the things numbered in the picture. Also, write if they occupy space and have weight.
1. Window Yes
2. Soap Yes
3. Table Yes
4. Books Yes
Pause and Answer
1. A solid that is red in colour: Brick
2. A solid that is hard to break: Rock
3. A solid we can break easily: Chalk
Chapter Checkup
1. Tick ( ) the correct option.
A. Ice B. Juice C. Gas
2. Fill in the blanks.
Page no. 127
D. We can change the state of matter by heating or cooling it.
Heating: Ice melts into water, and water evaporates into vapour.
Cooling: Water freezes into ice, and water vapour condenses back into water.
6. Long-answer questions.
A. Condensation happens when water vapour cools down and turns into water droplets.
Ice cools down the water vapour. Water vapour cools to change into water.
Water
A. Liquid B. Shape C. Gases
3. Write ‘T’ for true and ‘F’ for false.
A. T B. F C. T
D. F
4. Picture-based question.
A. Heating
B. Cooling
5. Short-answer questions.
A. Yes, water will change its shape when poured from a bottle into a glass. It will take the shape of the glass.
B. Solid: Chalk, Liquid: Water, Gas: Air
C. When ice gains heat from the surroundings, it changes into liquid water. This process is called melting. On cooling, water can turn into ice. This process is called freezing.
Vapour changes to water on condensation.
B. a. Water turns into vapour because of heat.
b. Water freezes into ice because of cooling.
1. Ice melts faster on a hot day because heat energy increases melting.
2. Yes, by breaking or cutting, e.g., cutting paper.
Students will be able to: understand why measurement is important in daily life. learn about standard units of measurement and the tools used for measuring. learn about old methods of measurement and why they were not reliable.
Recap to check if students know about the variations in size and weight of objects. Ask students to solve the question given in the Get Set section.
Vocabulary
duration: for how long something lasts chariot: a vehicle used in olden times that was pulled by horses and had two wheels spokes: rods that connect the centre of the wheel to its edges
handspan: the unit measured by the length of the palm
cubit: the unit measured by the length of arm up to elbow
foot: the unit measured by the length of the sole of a foot
stride: it was measured by the distance covered by a single step of a person
unit: a fixed quantity that is used as a standard of measurement
Rulers and measuring tapes, weighing scales, various objects to measure, chart or board to record guesses and actual measurements; Measuring tape or ruler, notebooks for recording measurements, objects to measure; Rulers, measuring tapes, objects of different sizes (pencils, books, doors), weighing scales (digital or balance), objects of varying weights (books, erasers, water bottles), measuring cups, beakers, bottles, water, and various containers, thermometers, bowls of warm and cold water, stopwatches or digital timers, activity cards (jumping, clapping, running), worksheets
Learning
Students will be able to understand why measurement is important in daily life.
Teaching Aids
Reflection Page 134
Rulers and measuring tapes, weighing scales, various objects to measure, chart or board to record guesses and actual measurements
Activity
Ask students to guess the length of a book, their own height, or the weight of an eraser. Write their guesses on the board to compare later.
Next, use a ruler, measuring tape, or weighing scale to measure the actual length or weight of the objects. Allow students to observe and note the differences between their guesses and the real measurements.
Discuss with the class why accurate measurement is important in daily life, such as in tailoring, construction, and cooking. Encourage students to think about other situations where precise measurement is necessary. Discuss why it is important to measure things accurately.
Extension Idea
Ask: Can you think of a situation where incorrect measurement could cause a problem?
Say: Yes! If a tailor measures cloth incorrectly, the clothes may not fit properly. If a chef adds the wrong amount of ingredients, the food may not taste good. In construction, incorrect measurements can make buildings unsafe.
Learning
Reflection Page 135
Students will be able to learn about old methods of measurement and why they were not reliable.
Teaching Aids
Measuring tape or ruler, notebooks for recording measurements, objects to measure
Activity
Ask students to measure the length of their desks using three non-standard units: handspan, cubit, and foot. Let each student record their measurements and then compare their results with their classmates.
Conduct a discussion on why the measurements vary for different students, emphasising that everyone’s handspan, cubit, and foot size are different.
Then, explain why we need standard units of measurement to ensure accuracy and consistency in daily life. Connect this idea to real-world examples, such as why tailors, engineers, and shopkeepers use measuring tapes, weighing scale, and rulers instead of handspans or cubits.
Extension Idea
Ask: Why do you think people in the past used their hands and feet for measuring things?
Say: People in the past used their hands and feet for measuring because they were easy to use and always available. However, these measurements were not accurate since everyone has different hand and foot sizes. That is why standard units of measurement were introduced.
Students will be able to learn about standard units of measurement and the tools used for measuring.
Rulers, measuring tapes, objects of different sizes (pencils, books, doors), weighing scales (digital or balance), objects of varying weights (books, erasers, water bottles), measuring cups, beakers, bottles, water, and various containers, thermometers, bowls of warm and cold water, stopwatches or digital timers, activity cards (jumping, clapping, running), worksheets
Activity
Set up five stations in the classroom, each focusing on a different type of measurement: length, weight, capacity, temperature, and time. Divide the class into small groups and provide the necessary materials for each activity.
At the length station, instruct students to use rulers and measuring tapes to measure objects like pencils and doors. Have them record their measurements in centimetres (cm) and metres (m).
At the weight station, ask students to use a weighing scale to measure the weight of various objects, such as books and erasers, in grams (g) and kilograms (kg).
At the capacity station, let students pour water into different containers and measure the amount in millilitres (mL) and litters (L).
At the temperature station, have students use thermometers to measure the classroom temperature and compare it with the temperatures of warm and cold water.
At the time station, ask students to use a stopwatch to time simple activities, such as jumping ten times or clapping twenty times. Then, have them compare their predictions with the actual time taken.
Extension Idea
Ask: Why is measurement important in daily life?
Say: Measurement is important in daily life. We use it for buying food, cooking, building, checking temperature, and tracking time. Accurate measurement ensures things work correctly and safely.
Get Set
Page no. 134
Look at the pictures and write the correct options in the box.

Pause and Answer
Match the following.
Page no. 136
A. Handspan → iii. Length of palm
B. Cubit → i. Length of arm up to elbow
C. Foot → ii. Length of foot
D. Stride → iv. Length covered by one step
1. Tick () the correct option.
A. Ruler
B. Handspan
C. Metre
2. Fill in the blanks.
A. Foot
B. Centimetres
C. Litres
D. Thermometer
3. Write ‘T’ for true and ‘F’ for false.
A. T
B. F
C. T
4. Picture-based question.
A. Name the tools shown in each image.
Picture 1: Weighing scale
Picture 2: Clock
Picture 3: Thermometer
B. Use of Picture 3: It is used to measure the temperature.
5. Short-answer questions.
A. We need standard units to ensure accurate and consistent measurements.
B. Three tools used to measure length ruler, measuring tape, and metre rod.
C. A measuring cylinder measures liquid volume.
D. A device used to check body temperature is thermometer.
E. Two tools that were used to measure length in olden days are handspan and cubit.
6. Long-answer questions.
A. In olden times, measurements like handspan and cubit varied from person to person, causing inaccuracy and confusion in trade. Standard units ensure accuracy and fairness.
B. We use different units to measure objects of varying lengths. For example, we measure the length of a pencil in centimetres (cm), a cloth in metres (m), and the distance between two cities in kilometres (km). Using the right unit ensures accurate measurement.
Measuring time is important because it helps us stay organised and complete tasks on time.
Example 1: Students follow a timetable to attend classes and complete homework on time.
Example 2: Doctors use time to schedule appointments and give medicine at the right intervals.
Students will be able to:
understand that light helps us see things and comes from different sources and classify objects as luminous or non-luminous and explore how shadows are formed. learn about different types of sound and the difference between pleasant and unpleasant sounds. understand that force is a push or pull that makes objects move or stop.
Let’s Recall
Recap to check if students know the names of the objects that give light. Ask students to solve the riddles given in the Get Set section.
Vocabulary
harsh: unpleasant sirens: devices that make a loud sound as a warning honking: to make a short and loud noise from vehicle horns luminous objects: the objects that give out light of their own
non-luminous objects: the objects that do not give out light of their own
shadow: a dark patch formed on the opposite side of the light source when the path of light is blocked by an object noise: the unpleasant sound that disturbs others force: a push or a pull friction: a force that stops moving objects
Picture cards or real objects, flashlight/torch, white sheet or wall, student response cards; Audio Clips or Objects like bell, wind chimes, siren, horn, soft music, student response cards—smiley card, sad face card, white/black board, and markers; Toy car, ball, book, clay, sponge, floor, or rough carpet/mat
Light
Learning Outcomes
Reflection Page 143
Students will be able to understand that light helps us see things and comes from different sources and classify objects as luminous or non-luminous and explore how shadows are formed.
Teaching Aids
Picture cards or real objects, flashlight/torch, white sheet or wall, student response cards
Activity
Show different objects (or pictures) such as the Sun, a candle, a firefly, a book, or the Moon. Allow students to decide whether the object gives off its own light and raise an “L” for Luminous or “N” for Non-luminous card. Next, explain how light forms shadows using a flashlight and various objects like toys, books, and hands. Let students hold an object in front of the light and observe the shadow formed on a wall or sheet. Describe how moving the object closer to or farther from the light changes the size of the shadow. After the activity, discuss why shadows form and whether all objects create shadows.
Extension Idea
Ask: What do you think happens to shadows at different times of the day? Why do they change in size and direction?
Say: Shadows change in size and direction because of the Sun’s position in the sky. In the morning and evening, when the Sun is low, shadows are long. At noon, when the Sun is overhead, shadows are shortest. This happens because the angle of light affects the shadow’s size.
Sound
Learning Outcomes
Reflection Page 145
Students will be able to learn about different types of sound and the difference between pleasant and unpleasant sounds.
Teaching Aids
Audio Clips or Objects like bell, wind chimes, siren, horn, soft music, student response cards—smiley card, sad face card, white/black board, and markers
Activity
Gather recordings or create sounds using objects such as a bell, wind chimes, a siren, a horn, or music. Explain that students will listen to different sounds and classify them as pleasant or unpleasant. Play each sound one by one.
Ask students to raise a smiley card for pleasant sounds and a sad face card for unpleasant sounds. Discuss why each sound feels good or unpleasant. Ask students if they have ever been disturbed by loud sounds. Write their responses on the board.
Encourage them to suggest ways to reduce noise, such as speaking softly and keeping the TV volume low.
Extension Idea
Ask: Why do some people cover their ears when they hear loud noises?
Say: People cover their ears when they hear loud noises because loud sounds can hurt their ears and make them uncomfortable.
Force Reflection Page 147
Learning Outcomes
Students will be able to understand that force is a push or pull that makes objects move or stop.
Teaching Aids
Toy car, ball, book, clay, sponge, floor, or rough carpet/mat
Activity
Gather some objects like a book, ball, and toy car and distribute them to the students. Ask students to move each object and say whether they are pushing or pulling. Discuss how they use force in daily life (e.g., opening a door, kicking a ball).
Roll a ball across the floor. Ask students what made it move (push force). Place an obstacle in the ball’s path and observe how it stops.
Let a student roll a ball toward another student, who taps it sideways to change its direction. Give students clay or a sponge and ask them to press, pull, or squeeze to see how force changes an object’s shape.
Push a toy car on a smooth surface (tile) and then on a rough surface (carpet). Ask: Which one moves farther? Why?
Then, explain that friction slows down and stops objects, helping us walk without slipping.
Extension Idea
Ask: Why do athletes wear special shoes while running?
Say: Special shoes provide better grip and reduce slipping by increasing friction between the shoes and the ground.
Get Set Page no. 143
Solve the riddles.
1. Sun
2. Moon Chapter Checkup
1. Tick () the correct option.
A. Light
B. Sun
C. Moon
2. Fill in the blanks.
A. Sound
B. Pleasant
C. Force
D. Friction
3. Match the following.
A. Non-luminous objects → ii. pencil
B. Pleasant sound → iii. tinkling windchime
C. Unpleasant sound → i. honking
4. Picture-based question. Moon – N Star – L Door – N Bed – N Sun – L
5. Short-answer questions.
A. We cannot see in a dark room because there is no light.
B. Three sources of light that are found in nature are Sun, stars, fireflies.
C. Shadows is formed when an object blocks the path of light.
D. A force is a push or pull.
E. Friction helps us walk without slipping.
6. Long-answer questions.
A. The objects that give out light of their own are called luminous objects. The Sun and the stars are examples of luminous objects found in nature. On the other hand, the objects that do not have light of their own are called non-luminous objects. Some examples of non-luminous objects are chairs, tables, walls, and the Moon.
B. There are two types of sounds:
Pleasant sounds: These sounds are soft and nice (music, birds chirping).
Unpleasant sounds: These sounds are loud and disturbing (horns, firecrackers).
C. Three uses of force in daily life:
a. Force can move objects.
b. Force can stop moving objects.
c. Force can change the direction of moving objects.
D. A shadow is formed when an object blocks the path of light.
Take a pencil and stand it upright on a piece of cardboard using clay. Place it in the sun. You can observe the shadow of the pencil on the opposite side of the sun light.
Two sources of light in a dark room:
A candle (gives a soft glow).
A torch (gives a strong beam of light).
Chapters in This Unit
15. Earth and Its Neighbours
Ishaan and his friends are frightened when they hear people chanting from afar. Ishaan worries that some people may have drunk the magical water. Suddenly, strong winds blow, and a spaceship lands near them. The Elders—Elder Wizard and Elder Robot—step out of the spaceship.
Dr Vikram welcomes the Elders, and Conji and Eva explain that Lord Ero has started controlling living beings. Elder Wizard reassures them that they have come to protect everyone. Elder Robot suggests that they must work together to remove the magical potion from the lake.
Mel asks how they can do this, and Elder Wizard explains that they will use power from the sun and the moon. Elder Robot calls upon Conji, Mel, and Eva to assist. Together, the Elders and the Trio take out their wands and chant a spell:
“With the sun’s warm rays and the moon’s gentle light,
Cleanse this water and make everything right.”
As they complete the spell, a blue-black gas rises from the lake, and the water becomes pure again. Elder Robot confirms to Dr Vikram that the water is now safe. The children cheer happily, relieved that the danger is over.
However, their celebration is short-lived. Suddenly, the sky darkens, and Lord Ero appears. He is furious that the Elders have ruined his plan and warns them that they will face consequences.
Lord Ero traps Dr Vikram and the children in a Dark Magic bubble, declaring that they will help him build his army. Elder Wizard blocks his spell, and a fierce battle begins. Inside the bubble, the children cry for help. Mel suggests that Conji transform into Cyborg, Lord Ero’s ally, to trick him and free their friends. Elder Robot agrees. As Elder Wizard and Lord Ero fight, Conji, disguised as Cyborg, approaches Lord Ero and pretends to be on his side. Lord Ero orders Cyborg to take the captives away. Conji obeys but secretly leads them to safety. Meanwhile, Elder Wizard lands a spell on Lord Ero. The villain boasts that no one will find the prisoners—until Conji returns with them. Furious, Lord Ero realises the trick, but it is too late.
The Trio and the Elders cast a final spell: “Evil wizard, disappear, Let the light shine bright and clear.”
A bright light engulfs the battlefield, and Lord Ero is defeated. The children cheer, and Dr Vikram thanks them for saving the planet. With their mission complete, the Elders and the Trio return to Avora.
Students will be able to:
understand that the solar system consists of the Sun, planets, and other celestial objects. learn why the Sun is important for life on Earth. understand why Earth is special and supports life. learn about the Moon and its phases. learn that stars are huge balls of fire and form patterns called constellations.
Let’s Recall
Recap to check what the students know about the Sun and the moon. Ask students to solve the question given in the Get Set section.
spherical: ball-like shape traps: to hold something satellite: an object moving around a larger object in space celestial objects: the objects that we see in the sky atmosphere: the protective layer of air around the Earth orbit: the path along which the Earth moves around the Sun constellations: groups of stars forming particular shapes craters (Moon): big holes on the surface of the Moon, made when rocks from space hit it
Chart paper or drawing sheets, colouring material, fact cards/strips, a yellow ball or cut-out of sun, name tags/ labels; Picture cards, flashlight, small potted plant; Globe or ball, large Earth drawing, flashlight, charts or visuals for discussion; A ball, a flashlight, Moon phase chart, drawing sheets and pencils; Pictures of constellations, glowin-the-dark stickers, dark-coloured chart paper
The Solar System Reflection Page 156
Learning Outcomes
Students will be able to understand that the solar system consists of the Sun, planets, and other celestial objects.
Teaching Aids
Chart paper or drawing sheets, colouring material, fact cards/strips, a yellow ball or cut-out of sun, name tags/labels
Activity
Divide the class into eight groups and assign each group a planet.
Ask each group to create a small drawing of their assigned planet and write one fact about it.
Arrange the students in a circle with one student in the centre holding a yellow ball (Sun). Ask students to walk in circles around the Sun, demonstrating how planets revolve.
Extension Idea
Ask: Which planet is closest to the Sun, and how does its position affect its temperature?
Say: Mercury is the closest planet to the Sun. Because of its position, it experiences very high temperatures during the day and extremely cold temperatures at night.
The Sun Reflection Page 157
Learning Outcomes
Students will be able to learn why the Sun is important for life on Earth.
Teaching Aids
Picture cards, flashlight, small potted plant
Activity
Discuss the Sun’s importance, using picture cards of the Sun, plants, and outdoor scenes. Divide the class into three groups, each representing one of the Sun’s benefits: providing heat, giving light, and helping plants grow. Then, have each group silently act out their assigned benefit. For example, the first group can rub their hands and pretend to feel warm, the second can pretend to look around using “sunlight”, and the third can stretch like a growing plant. The rest of the class guesses what each group is demonstrating.
Use a flashlight to show how light helps us see and a small potted plant to explain how sunlight helps plants grow. Conclude the activity with a discussion on why the Sun is essential and ask why do we need to protect ourselves from too much sunlight.
Extension Idea
Ask: What would happen if there was no Sun?
Say: If the Sun disappeared, Earth would become very cold and dark. Plants would not be able to make food, and without heat and light, all living things would struggle to survive. The Sun is essential for life on Earth.
Students will be able to understand why Earth is special and supports life.
Teaching Aids
Globe or ball, large Earth drawing, flashlight, charts or visuals for discussion
Activity
Discuss key facts about Earth, including its shape, water and land distribution, and atmosphere. Show a globe or a ball to help students understand that Earth is spherical. Ask students why the Earth appears flat when we stand on it. Explain that since Earth is huge, we can only see a small part of it. Divide the class into three groups.
Group 1: “The Blue Planet” – Let students colour a large Earth drawing, shading 70% blue (water) and 30% green/brown (land).
Group 2: “The Atmosphere Protects Us” – Let them write and present three reasons why the atmosphere is important, using simple drawings (e.g., a sun with arrows blocked by the atmosphere).
Group 3: “Earth in Motion” – Let them demonstrate Earth’s rotation and revolution. One student stands in the centre with a yellow ball (Sun), while other walks around the first one (revolution) and spins slowly (rotation). Let them enact how day and night are formed with the help of a flashlight as sun.
After the activity, conduct a group discussion on why Earth is special and how we should protect it.
Extension Idea
Ask: How does the atmosphere help living things on Earth?
Say: The atmosphere protects us by trapping heat to keep Earth warm, blocking harmful rays from the Sun, and providing oxygen for living beings to breathe.
The Moon
Students will be able to learn about the Moon and its phases.
Teaching Aids
A ball, a flashlight, Moon phase chart, drawing sheets and pencils
Activity
Turn off the lights and shine a flashlight on a ball. Rotate the ball slowly to show how moving the ball in different positions changes the lit portion, creating different phases of the Moon.
Explain that different parts of the Moon receive light depending on its position relative to the Sun and Earth.
Discuss the New Moon, Crescent Moon, Half Moon, and Full Moon. Have students draw and label the phases as they see them.
Extension Idea
Ask: Why does the Moon change its shape every night?
Say: The Moon does not actually change shape; we see different phases because the Moon orbits the Earth, and the amount of sunlight reflecting off its surface changes as it moves.
Learning Outcomes
Students will be able to learn that stars are huge balls of fire and form patterns called constellations.
Teaching Aids
Pictures of constellations, glow-in-the-dark stickers, dark-coloured chart paper
Activity
Describe that stars are huge balls of fire that give out light. Give students glow-in-the-dark stickers and dark chart paper. Ask them to stick stars to form their own constellation. Let them name their constellation and explain what it looks like.
Extension Idea
Ask: Why do stars appear small even though they are huge balls of fire?
Say: Stars appear small because they are very far away from Earth. In reality, they are much bigger than our Sun and give out their own light.


When do you mostly see it? (Day Sky/Night Sky) Day sky Night sky
Does it change its shape? Yes No Pause and Answer Page no. 156 Read the hints and write the names.
Pause and Answer Page no. 159
Fill in the table.
Rotation Revolution
Movement of the Earth on its Movement of the Earth around the 1
Look at the pictures. Name the shapes of the Moon.
1. Tick () the correct option.
A. the Sun
B. the Moon
C. Phases
D. Full Moon
E. Atmosphere
2. Fill in the blanks.
A. 365
B. Constellation
C. Mercury
D. Sun
E. Seasons
3. Write ‘T’ for true and ‘F’ for false.
A. F
B. F
C. F
D. F
E. T
4. Short-answer questions.
A. Celestial objects are things we see in the sky, like sun and stars.
B. The Sun is very important to us because:
The heat of the Sun helps maintain the temperature on the Earth.
The light from the Sun helps us see things around us.
Sunlight is also used by plants to make their food.
C. The planets in the solar system are: Mercury, Venus, Earth, Mars, Jupiter, Saturn, Uranus, Neptune.
5. Long-answer questions.
A. Students draw the solar system.
B. The protective layer of gases around the Earth is called the atmosphere. Gases such as oxygen and carbon dioxide are found in the atmosphere. The atmosphere is important because:
It traps the heat of the Sun and keeps the Earth warm.
It stops the harmful rays of the Sun from reaching the Earth.
It supports life on Earth. Living beings use oxygen for breathing.
C. The rotation of the Earth causes day and night. The side of the Earth that faces the Sun has day while the side away from the Sun has night. Earth takes 24 hours (1 day) to complete a rotation.
D. The revolution of Earth causes seasons. The side of the Earth that is tilted towards the Sun experiences the summer season and the side away from the Sun experiences the winter season.
E. Constellations are groups of stars forming particular patterns. Some examples of constellations are Orion, Big Dipper, Small Dipper, etc.
6. Picture-based question.
A. There are 8 planets in the solar system.
B. Smallest planet is Mars and the biggest planet is Jupiter.
C. Saturn is the sixth planet from the Sun.

D. The big dipper
Challenge (HOTS)
1. Without the Sun, Earth would be dark and freezing, and there would be no life.
2. If Earth stops rotating, one side will always have day and the other will always have night.
Read the story. Answer the questions below.
1. Answer: A. Pumping blood
2. Answer: C. Our body will not get oxygen.
3. Answer: When Ravi runs, his muscles need more oxygen and energy. The lungs take in more oxygen, and the heart pumps blood faster to deliver it to the muscles.
4. Answer: Ravi should eat a balanced diet with carbohydrates (rice, bread) for energy, proteins (eggs, fish) for muscles, fats (nuts, oil) for energy storage, vitamins and minerals (fruits, vegetables, milk) for immunity, and water for hydration.
Read the story. Answer the questions below.
1. Answer: B. When the top layer of soil is washed or blown away
2. Answer: C. To balance the environment
3. Answer: As a farmer, I could plant trees to hold the soil together and use terracing on slopes to slow down water flow and prevent soil from washing away.
4. Answer: If soil erosion is not stopped, the land will become less fertile, making it hard for crops to grow. It can also lead to more landslides and loss of plant and animal life, harming the environment.
Read the story. Answer the questions below.
1. Answer: C. Turns it into steam
2. Answer: C. Because it rises and is not visible
3. Answer: She would need to apply heat to melt the ice. This would increase the temperature of the ice, changing it from a solid to a liquid.
4. Answer: The liquid juice will freeze due to the cold temperature, turning into solid popsicles.
Chapter 1
Think and Tell
Page no. 7
The brain gives the command, the eyes see the notebook, the hands move to open it, and the muscles help in writing.
Discuss! Page no. 7
Plants and animals are made up of tiny building blocks called cells.
Chapter 2
Do and Learn
Food from plants: Fruits, vegetables, rice, wheat
Page no. 17
Chapter 8
Think and Tell
Page no. 82
A kutcha house may get damaged or blown away in a heavy storm.
Discuss!
Page no. 85
We wear different uniforms because summer is hot, so we wear light clothes, and winter is cold, so we wear warm clothes.
Chapter 9
Discuss!
Food from animals: Milk, eggs, meat, honey
Discuss! Page no. 18
Food items that can be eaten raw and cooked: Carrots, tomatoes, spinach, onions, apples
Chapter 3
Discuss!
Page no. 95
When there is a strong wind outside, we should stay indoors, close windows, and avoid going near trees or weak buildings.
Think and Tell
Page no. 31
No, vehicles are not living because they do not grow, eat, or breathe. They move using fuel, not on their own.
Think and Tell
Page no. 98
Activities affected by water shortage: Cooking, drinking, bathing, washing clothes
Chapter 10
Think and Tell
Page no. 32
No, water is non-living because it does not grow, eat, or reproduce.
Chapter 5
Discuss!
Page no. 47
Animals protect themselves by running fast, camouflaging, having sharp claws, or living in groups.
Think and Tell
Page no. 105
If it would never rain, plants and animals would not get water, and we would not be able to survive.
Discuss!
Page no. 108 No, different parts of India have different weather, like hot summers in Rajasthan and heavy rains in Kerala.
Chapter 11
Think and Tell
Page no. 51
Humans are omnivores because they eat both plants and animals.
Chapter 6
Discuss!
Common birds: Pigeons, crows, sparrows
Page no. 59
Common features: Feathers, beaks, wings, laying eggs
Think and Tell Page no. 62
Yes, birds migrate back when the weather changes, usually in summer or spring. They fly long distances.
Chapter 7
Discuss! Page no. 73
By following safety rules, we can prevent accidents and keep everyone safe.
Page no. 117
Sand does not dissolve in water; it settles down, showing it is heavier and insoluble.
Chapter 12
Think and Tell
Clay and wax change their shape when pressed. Ice changes its size when it melts.
Do and Learn
Page no. 127
Page no. 129
Different items in my house and their state are as follows:
Solids: Chair, book, spoon
Liquids: Water, juice, milk
Gases: Air, steam, oxygen
Chapter 13
Discuss!
Page no. 135
Yes, measurements help us know the exact amount or quantity of things like food, cloth, and water.
Think and Tell Page no. 136
Standard units help everyone measure things correctly and avoid confusion.
Think and Tell
Page no. 145
Pleasant sounds: A baby’s laughter, sound of raindrops falling, flowing water
Think and Tell
Talking loudly can disturb others and hurt their ears. Discuss!
Page no. 146
Page no. 148
Without friction, we would slip while walking, and cars would not stop.
Think and Tell
Page no. 157
Without the Sun, Earth would be dark and cold, and no plants, animals, or humans could survive.
Teaching science is more than just imparting knowledge—it’s about igniting curiosity, fostering inquiry, and making learning an engaging journey. The Teacher Manual for the Reflection Series (Grades 3–5) is designed to empower educators with structured lesson plans, hands-on activities, and interactive teaching strategies that bring science to life in the classroom. Each chapter includes learning outcomes, teaching aids, hands-on activities, and extension ideas, making science lessons dynamic and student-centered.
This Teacher Manual is designed to empower educators with:
• Well-structured lesson plans that provide a step-by-step guide for effective teaching, ensuring smooth lesson delivery, clear learning objectives, and engaging instructional methods.
• Hands-on activities and experiments that encourage active participation, allowing students to explore concepts through role-plays, creative exercises, and real-world applications.
• Innovative teaching techniques that promote deeper understanding, encourage student collaboration, and make science lessons more immersive and impactful.
Uolo partners with K-12 schools to provide technology-based learning programs. We believe pedagogy and technology must come together to deliver scalable learning experiences that generate measurable outcomes. Uolo is trusted by over 15,000+ schools across India, South East Asia and the Middle East.
ISBN 978-81-985579-3-3