Academic Authors: Jatinder Kaur, Harsimran Kaur
Creative Directors: Bhavna Tripathi, Mangal Singh Rana, Satish
Book Production: Rakesh Kumar Singh, Sanjay Kumar Goel
Project Lead: Sneha Sharma
VP, Learning: Abhishek Bhatnagar
All products and brand names used in this book are trademarks, registered trademarks or trade names of their respective owners.
© Uolo EdTech Private Limited
First impression 2025
This book is sold subject to the condition that it shall not by way of trade or otherwise, be lent, resold, hired out, or otherwise circulated without the publisher’s prior written consent in any form of binding or cover other than that in which it is published and without a similar condition including this condition being imposed on the subsequent purchaser and without limiting the rights under copyright reserved above, no part of this publication may be reproduced, stored in or introduced into a retrieval system, or transmitted in any form or by any means, electronic, mechanical, photocopying, recording or otherwise, without the prior written permission of both the copyright owner and the above-mentioned publisher of this book.
Book Title: Reflection Teacher Manual Science 4
ISBN: 978-81-985579-2-6
Published by Uolo EdTech Private Limited
Corporate Office Address:
85, Sector 44, Gurugram, Haryana 122003
CIN: U74999DL2017PTC322986
Illustrations and images: www.shutterstock.com, www.stock.adobe.com and www.freepik.com
All suggested use of the internet should be under adult supervision.
Teaching science is more than just explaining concepts—it is about sparking curiosity, encouraging inquiry, and making learning an exciting journey. With this goal in mind, the Teacher Manual for the Reflection series has been carefully designed to support educators in delivering engaging, hands-on, and student-centred lessons for grades 3–5.
At UOLO, we recognise the vital role educators play in shaping young minds. This manual is designed to empower teachers with engaging strategies and well-structured lesson plans that make science teaching more interactive and effective. It encourages educators to go beyond textbooks and create dynamic, engaging, and collaborative learning experiences that help students develop critical thinking and problem-solving skills.
Aligned with the National Education Policy (NEP) 2020 and the National Curriculum Framework (NCF) 2023, this manual follows a competency-based approach, ensuring that students not only understand scientific concepts but also apply them in meaningful ways. It serves as a comprehensive teaching resource, equipping educators with structured lesson plans that transform classrooms into hubs of exploration and discovery.
Each chapter in this manual includes:
Learning Outcomes – Clearly stated objectives that outline what students will achieve by the end of the lesson.
Teaching Aids – A list of materials and resources required to enhance classroom instruction.
Hands-on Activities – A variety of interactive experiments, role-plays, games, and creative exercises to reinforce scientific concepts.
Extension Ideas – Thought-provoking discussion questions and real-world connections that encourage deeper learning.
Additionally, this teacher manual is part of the Reflection product bundle, which includes not only the textbook but also technology-powered features, such as engaging videos, interactive exercises, digital lesson plans, and an assessment generator to support educators in delivering impactful lessons.
By integrating relatable examples and guided activities, this resource aims to make science an exciting and practical part of students’ everyday lives. We hope this manual serves as a valuable guide for teachers, helping them ignite curiosity, inspire young learners, and foster a lifelong love for science.
Together, let us nurture the next generation of thinkers, innovators, and problem-solvers. Happy teaching!


Chapters in This Unit
1. Food and Digestion
2. Teeth and Microbes
Story in This Unit
Ishaan, Pihu, and Manu were playing at Ishaan’s house when they stumbled upon his father’s study room. Ishaan’s father, Dr Vikram, is a scientist with many fascinating things in his room. Manu was curious and touched some buttons, which sent a signal to a faraway planet called Avora.
On Avora, some wise leaders called the Elders were studying space when they received the signal. They were worried and asked the Trio - Conji, Mel, and Eva - to visit Earth and find out who sent the signal. The Elders warned them to be quick and make friends with the people on the Earth before Lord Ero and Draken could cause trouble.
Meanwhile, Lord Ero and Draken found out about the signal and were worried that if the Elders become friends with the people on the Earth, they will become more powerful. Lord Ero told Draken to go to the Earth and stop anyone from becoming friends.
The Trio - Conji, Mel, and Eva, followed directions on Mel’s special tablet to find the source of the signal and they landed in Madhavgarh, right outside Ishaan’s house!
Ishaan and his father, Dr Vikram, were surprised to see the three aliens at their door. But the aliens assured them they came in peace and wanted to be friends. Dr Vikram apologised for the mistaken signal and welcomed the Trio to the Earth.
Students will be able to:
explain functions and sources of nutrients and identify them in different food items. understand what a balanced diet is, why it is important, and how it can vary based on individual needs such as age, work, and health.
understand the importance of cooking food, and explain various methods of cooking food. understand the importance of food preservation, identify and explain different methods of food preservation.
identify the parts of the human digestive system, understand their functions, and describe the process of digestion from mouth to anus.
Let’s Recall
Recap with the students the knowledge on the different nutrients. Ask the students to write examples for the different types given in the Get Set section.
Vocabulary
regulate: to control dumplings: a small piece of dough filled with spiced vegetables or meat prevent: to stop spoilage: getting wasted nutrients: components in food that help our bodies to grow and stay healthy constipation: a condition where undigested food (stool) becomes hard and painful to pass
balanced diet: a diet that has all the essential nutrients in the right amount as required by the body food preservation: the process in which food is treated and stored to prevent spoilage digestion: the process of breaking down food into simpler forms digestive system: group of organs that help in the digestion of food in our body
Flash cards of different food items; A4 sheets, sketch pens; Flashcards of food items and cooking methods; Chart papers, pencil colours, sketch pens, pictures related to food items for using different preservation methods; A4 sheets, pencil colours, sketch pens
Nutrients from Food Reflection Page 6
Learning Outcomes
The students will be able to explain functions and sources of nutrients and identify them in different food items.
Teaching Aids
Flash cards of different food items
Activity
Divide the class into teams.
Show flashcards of different food items to each team, one at a time.
Instruct the students to guess the main nutrient present in the food item on the flashcard.
Award one point for each correct answer.
The team with the highest points wins.
Encourage and appreciate the students throughout the activity.
Extension Idea
Ask: Which nutrients will help a person who is sick and why?
Say: A person who is sick should eat more of the proteins, vitamins, minerals, carbohydrates and water as they may help the sick person to recover by repairing tissues, boosting immunity, providing energy, and staying hydrated.
Learning Outcomes
Reflection Page 9
The students should be able to understand what a balanced diet is, why it is important, and how it can vary based on individual needs such as age, work, and health.
Teaching Aids
A4 sheets, sketch pens
Activity
Divide the class into groups.
Ask each group to create a meal plan for one day, including breakfast, lunch, and dinner, ensuring it is a balanced diet.
Once the meal plans are ready, have each group present their plan to the class.
Encourage other groups to listen carefully and review the plans shared.
Provide feedback and guide the students to correct any mistakes or improve their plans.
Conclude by appreciating all groups for their efforts and creativity.
Extension Idea
Ask: Do you know how many glasses of water we should drink everyday?
Say: It is generally recommended to drink 8–10 glasses of water every day (approximately 2–2.5 litres) to stay hydrated and help the body perform its functions smoothly.
Reflection Page 10
The students will be able to understand the importance of cooking food, and explain various methods of cooking food.
Flashcards of food items and cooking methods
Activity
Divide the class in groups. Provide them with a set of cards containing food items and cooking methods. Instruct them to match each food item with the correct cooking method, like Idlis – Steaming, Puris – Frying, Cakes – Baking, Roasted Brinjal – Roasting.
After completing the match, invite the groups to share their answers.
Post the activity, discuss why certain foods are cooked using particular methods (e.g., steaming for softness, frying for crispness).
Extension Idea
Ask: Which cooking methods help preserve nutrients and make food healthier?
Say: Steaming, roasting are considered as some healthy cooking methods unlike frying. They also help preserve the nutrients.
Reflection Page 10
The students will be able to understand the importance of food preservation, identify and explain different methods of food preservation.
Teaching
Chart papers, pencil colours, sketch pens, pictures related to food items for using different preservation methods
Activity
Divide the students into groups and give each group a half sheet of chart paper. Ask them to choose two preservation methods and write down how each method is used. Then, they should paste pictures or draw food items that are preserved using these methods.
Once the groups are finished, invite them to present their charts and explain the preservation methods they selected, along with the food items associated with each method.
Post the activity, have the students display their charts on the class wall/display board.
Extension Idea
Ask: In olden times when people did not have refrigerators, how did they preserve the food?

Say: In the olden days, people did not have refrigerators, so they used methods like drying, salting, and canning to preserve food.
Reflection Page 12
The students will be able to identify the parts of the human digestive system, understand their functions, and describe the process of digestion from mouth to anus.
Teaching Aids
A4 sheets, pencil colours, sketch pens
Activity
Give each student an A4 sheet.
Instruct them to create a flowchart illustrating the process of digestion, including the name of each organ and its role in digestion.
Once the students have completed their flowcharts, invite them to present their work to the class.
Walk around the room to assist students as needed.
Extension Idea
Ask: What would happen if one part of the digestive system stopped working?
Say: The digestive system is like a team of workers, each doing a special job to make sure our body gets the nutrients it needs. For example, if the stomach or small intestine stopped working, food would not be broken down properly, and nutrients would not be absorbed, leading to malnutrition or digestive issues.
Get Set
1. Energy-giving food - Rice, Butter, Sugar, Potato
Page no. 6
Pause and Answer
2. Body-building food - Eggs, Milk, Fish, Pulses
3. Protective food - Spinach, Carrots, Oranges, Apples
Pause and Answer
Page no. 9
Carbohydrates Proteins Fats Vitamins Minerals
Chapati Meat Ghee Fresh Fruits Spinach
Bread Fish Oil Vegetables Milk
Honey Eggs Dry Fruits
Potato Pulses
Beans
Pause and Answer
1.
3.
5.
Page no. 9
Page no. 12
1. Preservation Method: Drying, Example: Dry fruits
2. Preservation Method: Boiling, Example: Milk
3. Preservation Method: Salting, Example: Fish
4. Preservation Method: Freezing, Example: Peas
5. Preservation Method: Sweetening, Example: Jams
Chapter Checkup
1. Tick () the correct option. A. Carbohydrates B. Idlis
C. Sweetening D. Mouth
E. Boiling
2. Fill in the blanks. A. Minerals
B. Vitamins help us fight infections and heal wounds.
C. Proteins
D. carbohydrates and fats
E. protective foods
3. Write True or False.
A. False B. True C. True
D. False E. False
4. Short-answer questions.
A. Vitamins - Orange, Carrots
Minerals - Spinach, Milk (Answer may vary.)
B. Cooking kills the germs and it makes the food tasty.
C. Cakes, Bread
D. Jams, Jellies
E. Digestion is the process of breaking down food into simpler forms so the body can absorb nutrients.
F. Liver: It produces a juice that breaks down fat into tiny droplets.
Pancreas: It produces a juice that also helps in digestion.
5. Long-answer questions.
A. Nutrients are components in food that help our bodies to grow and stay healthy. There are five main nutrients in addition to water and roughage.
Carbohydrates: Rice
Proteins: Pulses
Fats: Butter
Vitamins: Orange (Vitamin C)
Minerals: Spinach (Iron)
Roughage: Whole grains
Water: Drinking water
B. The following are 3 methods of cooking:
Steaming: Food is cooked using steam or water vapour. Example: Idlis
Frying: Food is cooked in hot oil or ghee. Example: Puris
Baking: Food is cooked in dry heat in a closed space like an oven. Example: Cakes
C. The process in which food is treated and stored to prevent spoilage is called food preservation. The different methods of food preservation are:
Drying: It removes the moisture from the food and stops germs from growing. Example: Dry fruits
Salting: In this method, salt is used to preserve the food. Salting removes moisture from the food. Example: Fish
Sweetening: When excess sugar is added to food, it kills germs and protects the food from getting spoiled. Example: Jams
Freezing: In this method, food items are stored at low temperatures to preserve their taste and nutrients. Example: Meat
Boiling: It preserves food items only for a short time. The food item is boiled to kill germs. Example: Milk
Canning: It is the method in which food is stored in airtight jars called cans. Example: Fruits
D. The food we eat needs to be broken down into simpler forms so that it can be easily absorbed by our bodies. This process of breaking down food into simpler forms is called digestion. The group of organs that help in the digestion of food in our body makes up our digestive system.
Mouth: The process of digestion begins in the mouth. The food is first broken down by biting and chewing. This food is then mixed with saliva, a watery substance present in the mouth. Saliva helps in food digestion.
Oesophagus: This is also called the food pipe, and it is a thin, long tube. After the mouth, the food goes through the food pipe and reaches the stomach.
Stomach: This is a sac-like or J-shaped organ. This organ acts like a mixer and mixes all the food particles to form a fine paste.
Small intestine: After passing through the stomach, the food reaches the small intestine. In this organ, all the nutrients from the food is absorbed, and then supplied by the blood to other body parts.
Liver: It produces a juice that breaks down fats into tiny droplets.
Pancreas: It produces a juice that also helps in digestion.
Large intestine: The large intestine absorbs water from the undigested food, and the remaining food is formed into a waste called faeces.
Anus: The faeces produced in the large intestine get removed from the body through the anus.
6. Picture-based questions.
A. 1. Mouth 2. Liver 3. Oesophagus
4. Stomach 5. Large intestine 6. Small intestine
7. Anus
B. After passing through the stomach, the food reaches the small intestine. In this organ, all the nutrients from the food is absorbed, and then supplied by the blood to other body parts.
Heena should eat a balanced diet rich in fruits, vegetables, and whole grains to provide vitamins, minerals, and fiber to relieve constipation and boost immunity. She should also drink plenty of water.
Students will be able to:
identify the number of teeth in humans and understand their role, difference between temporary and permanent teeth.
identify the four main types of teeth (incisors, canines, premolars, molars), and understand their shapes and functions.
identify three main parts of a tooth, and explain their roles in the structure and function of teeth. explain what a cavity is, identify the causes of cavities, and describe ways to prevent cavities by practicing good oral hygiene habits.
define and identify different types of microbes, and understand where they are found and list their uses and harmful effects.
Let’s Recall
Recap with the students the knowledge on the digestive system and role of teeth.
● Ask the students to read about Rani in the Get Set section.
Vocabulary
edges: sharp or flat sides of an object
anchored: to be held firmly in one place
acids: liquids that can wear away or break down materials
plaque: a harmful substance that forms on your teeth
gumline: where your teeth and gums meet
jawbone: the hard, bony part of the mouth that holds teeth
cavity: a small hole or opening that forms on the surface of a tooth
antibiotics: medicines that fight infections
microbes: tiny living things that are too small to see with our naked eyes
Timeline worksheet, reference chart with average ages for teeth development; Modelling clay, small toothpicks, glue, and small chits of paper, reference charts showing teeth arrangement, and an example model for demonstration; A4 sheets, pencil, coloured pencils, reference chart showing structure of tooth; Chart paper, pictures related to care tips for teeth, markers
Page 17
Learning
The students will be able to identify the number of teeth in humans and understand their role, difference between temporary and permanent teeth.
Teaching Aids
Timeline worksheet, reference chart with average ages for teeth development
Activity
Provide a timeline worksheet with blank spaces for ages and events (e.g., first tooth at 6 months, losing first tooth at 6 years).
Guide students to fill in the timeline based on discussion and personal experiences. Have them work in pairs.
Once complete, encourage the students to share stories about losing milk teeth.
Extension Idea
Ask: Do you know about wisdom teeth? At what age does it appear?
Say: These are special teeth that usually come much later. They are the last set of molars that typically appear between the ages of 17 and 25.
Learning
Reflection Page 17
The students should be able to identify the four main types of teeth (incisors, canines, premolars, molars), and understand their shapes and functions.
Teaching Aids
Modelling clay, small toothpicks, glue, and small chits of paper, reference charts showing teeth arrangement, and an example model for demonstration
Activity
Divide the class into groups. Provide each group with modelling clay (for the jaw and teeth), small toothpicks, glue, and small chits of paper for labelling.
Ask each group to mold a lower jaw using the clay.
Guide students to sculpt the different types of teeth (incisors, canines, premolars, and molars) using the clay. Encourage them to make the shapes distinct based on function.
Instruct the groups to place their clay teeth in the correct positions in the jaw model. They should use toothpicks and paper chits to label each type of tooth.
Walk around the room to observe and guide the students as they work. Once the models are complete, ask each group to explain the structure and function of the teeth in their model.
Extension Idea
Ask: Which teeth would you use to eat an apple?
Say: Our incisors are like scissors, helping us cut through food.
The students will be able to identify three main parts of a tooth, and explain their roles in the structure and function of teeth.
Teaching Aids
A4 sheets, pencil, coloured pencils, reference chart
Activity
Divide the class into small groups. Provide each group with the materials. Ask them to draw a large tooth and colour its layers (enamel, dentine, pulp). Have them write a short description for each layer next to the drawing. Once complete, ask them to paste them on the class wall or the display board.
Extension Idea
Ask: Can you name some foods or habits that protect and harm the enamel? Say: Food items that protect the enamel - Dairy products like milk, cheese, and yogurt. Food items that can harm the enamel - Sugary foods and drinks like candies, sodas, and sweetened juices.
Reflection Page 19
The students will be able to explain what a cavity is, identify the causes of cavities, and describe ways to prevent cavities by practicing good oral hygiene habits.
Teaching Aids
Chart paper, pictures related to care tips for teeth, markers, glue sticks
Activity
Split the class into small groups. Provide each group with chart paper, magazines (or printed pictures), markers, and glue sticks.
Instruct each group to create a chart that includes tips for healthy teeth (e.g., brushing twice a day, eating healthy foods, visiting the dentist). Encourage them to paste pictures that illustrate each tip (such as a toothbrush, healthy foods, or a dentist).
Once the charts are completed, invite each group to present their chart to the class, explaining the tips they’ve included and the importance of each.
After all groups have presented, discuss the charts as a class, reinforcing the key messages of good oral hygiene.
Extension Idea
Ask: What might happen if you eat too many sugary snacks?
Say: Eating too many sugary snacks can lead to cavities because the sugar feeds harmful bacteria in your mouth, which create acids that wear down the enamel and cause holes in your teeth.
What Are Microbes?
Learning Outcomes
Reflection Page 21
The students will be able to define and identify different types of microbes, and understand where they are found and list their uses and harmful effects.
Teaching Aids
Flash cards showing harmful and useful microbes
Activity
Invite a pair of students to select a flashcard. Have them read the card and determine whether it describes the effect of harmful bacteria or useful bacteria.
Divide the blackboard into two sections—one labelled “Harmful Microbes” and the other “Useful Microbes”.
Ask the students to write the information from the flashcard in the appropriate section on the board.
Post the activity discuss the effects of harmful and useful microbes.
Extension Idea
Ask: Microbes play a crucial role in maintaining the health and balance of our world. Do you know how?
Say: Microbes break down dead plants and animals into nutrients, which helps plants grow. They also clean up the environment by decomposing waste materials. They are also called decomposers.
Pause and Answer Page no. 18
1. The teeth used for tearing and crushing food: Canines and Premolars
2. The teeth with a large flat biting surface: Molars
Pause and Answer Page no. 19
Pause and Answer Page no. 20
Calcium
Twice
Sugary
Chapter Checkup 1. Tick () the correct option.
Teeth get damaged by chewing food
Six
Plaque
2. Fill in the blanks.
A. crown, root B. sweets
C. Microbes D. antibiotics
E. Milk/Temporary
3. Write True or False.
A. True B. True
C. True D. False
4. Match the following.
A. Incisors → iii. Cutting
B. Canines → iv. Tearing
C. Premolars → ii. Crushing
D. Molars → i. Grinding
5. Short-answer questions.
A. We have four types of teeth: incisors, canines, premolars, and molars.
B. We can avoid cavities by brushing our teeth twice a day, flossing, eating a healthy diet, avoiding sugary foods, and visiting the dentist regularly.
C. Temporary teeth, also known as milk teeth, are the first set of teeth that children get, and they are replaced by permanent teeth as they grow older.
D.
E. a. Microbes are used to make food such as curd, yoghurt, cheese and bread.
b. Microbes also help break down dead plants and animals into nutrients that growing plants can be used.
6. Long-answer questions.
A. Flossing helps clean between your teeth where your toothbrush cannot reach. It should be done once a day to keep your gums healthy.
B. If you don’t take care of your teeth, plaque and bacteria can build up, leading to cavities, gum disease, bad breath, and possibly tooth loss.
C. Fizzy drinks can harm your teeth by eroding the enamel due to their acidic content. They also contain sugar, which feeds bacteria that cause cavities.
D. Regular visits to the dentist help detect and treat dental problems early, such as cavities, gum disease, or tooth decay. The dentist also cleans your teeth and gives advice on how to maintain good oral hygiene.
E. Molars are most important for chewing food because they have large, flat surfaces that help grind and crush food into smaller pieces for easier digestion.
F. Eating too much sugar can cause the bacteria in your mouth to produce acids, which erode the enamel on your teeth, leading to cavities and tooth decay.
7. Picture-based questions.
A. 9 - Incisor; 11 - Canine; 24 - Incisor; 32 - Molar
B. Upper Dental Arch: 7, 8, 9, 10
Lower Dental Arch: 22, 24, 25, 26
If you don’t brush your teeth for two weeks, plaque and tartar will build up, leading to bad breath, yellow teeth, gum inflammation, and an increased risk of cavities. Your teeth may feel sticky, and gums might bleed or become swollen.
Chapters in This Unit
3. Clothes We Wear
4. Safety First Story in This Unit
Draken, following Lord Ero’s orders, had followed the Trio- Conji, Mel, and Eva to Earth. While the three were talking with Dr Vikram and his son, Draken peeked through the window, learning that the people here are called humans.
As he watched them, he accidentally stepped on a stone, making a noise. Dr Vikram looked towards the window and chased after the shadow he saw. Draken escaped, but Dr Vikram tripped and fell. Ishaan and the Trio rushed to help him. Dr Vikram explained he had seen someone strange at the window. When he described the figure, the Trio realised it was Draken, who must have followed them. Ishaan, seeing his father was hurt, offered to get the first aid kit.
Dr Vikram then mentioned he needed to change his pants because they had ripped in the fall. The Trio was surprised to learn that humans change their clothes. Ishaan explained that people on Earth wear different clothes depending on the season, which the Trio found fascinating. They suggested Dr Vikram take some rest while they talked with Ishaan.
Students will be able to:
understand the importance of clothes. list and compare the properties of natural and synthetic fibres in order to identify and understand their uses.
understand the importance of wearing different types of clothes based on seasons, occasions, and work. understand how proper clothing care—washing, drying, ironing, and storing—helps maintain quality and prolong lifespan.
Recap with the students the knowledge on different types of clothes and their needs.
Ask the students to complete the crossword puzzle given in the Get Set section.
Vocabulary
materials: substances that are used to make something artificially: made by humans
durable: that can exist for a long time without loss in quality
stretchable: that can be pulled or stretched and will go back to its original shape after you let go
wrinkle-free: smooth
fancy: special
equality: when all persons are treated in the same manner
tough: strong
fabrics: clothing materials that are obtained from fibres
fibres: long thread-like materials that are used to make clothes
cocoon: a covering of silky threads to protect insects like silkworms
uniform: special clothes worn for specific work overalls: clothes that cover the body completely
A4 sheets, wax/pencil colours; Fabric samples or swatches made from different fibres such as cotton, linen, wool, silk, nylon, rayon, and polyester; Pictures of different professionals in their uniforms like policemen, soldiers, a pilot, doctors with a white coat, nurses and so on
The students will be able to understand the importance of clothes.
Teaching Aids
A4 sheets, wax/pencil colours
Activity
Distribute A4 sheets to all students.
Ask them to divide the sheet into four sections, each representing a different weather condition: hot, cold, rainy, and windy. In each section, students should draw and colour one type of clothing they would wear for that specific weather.
Once completed, invite students to share their work with the class and explain how the clothes they drew provide protection in those weather conditions.
After the discussion, display the completed sheets on the class wall or a display board.
Extension Idea
Ask: How does a raincoat protect us from getting wet?
Say: A raincoat protects us from getting wet by acting as a waterproof barrier. It is made of materials like plastic or rubber that do not allow water to pass through, keeping our clothes and body dry even during heavy rain.
Reflection Page 29
The students should be able to list and compare the properties of natural and synthetic fibres in order to identify and understand their uses.
Teaching Aids
Fabric samples or swatches made from different fibres such as cotton, linen, wool, silk, nylon, rayon, and polyester
Activity
Divide the class into five groups.
Distribute fabric samples or swatches made from different fibres such as cotton, linen, wool, silk, nylon, rayon, and polyester to each group.
Ask the students to feel the texture of each fabric, and note the differences. Then, have them crush the fabric in their hands to observe if it gets wrinkled easily or not.
After completing the task, invite a representative from each group to come forward and present their findings. Encourage other groups to listen, ask questions, and engage in the discussion. Finally, appreciate the students for their efforts and participation.
Extension Idea
Ask: Do you know a synthetic fibre that resembles wool?
Say: Acrylic
Learning
The students will be able to understand the importance of wearing different types of clothes based on seasons, occasions, and work.
Teaching Aids
Pictures of different professionals in their uniforms like policemen, soldiers, a pilot, doctors with a white coat, nurses and so on
Activity
Divide the class into two teams and explain the rules of the game.
Show pictures of different professional attire one at a time. Ask each team to guess the profession based on the clothing shown.
Award points for each correct answer and keep track of the scores on the board.
The team with the highest score at the end wins the game.
After the quiz, have a class discussion on the different types of clothing worn for different seasons, occasions, and professions.
Extension Idea
Ask: Every state in India has its unique traditional attire, which reflects its culture and heritage. Do you know what the traditional dress is for your state?
Say: (Answer may vary.) Gunyo Cholo is the traditional attire worn by the women of Sikkim.
Learning
Reflection Page 32
The students will be able to understand how proper clothing care—washing, drying, ironing, and storing—helps maintain quality and prolong lifespan.
Teaching Aids
A4 sheets, colours, sketch pens, pictures related clothing care
Activity
Provide materials to the students.
Instruct the students to create a poster illustrating how they take care of clothes. Have them include 4–5 points they follow at home to maintain their clothes and add relevant pictures.
Post the activity, ask the students to share their posters with the class.
Ask: Why should we wash white clothes separately?
Say: White clothes should be washed separately to prevent them from getting stained by the colours of other clothes. Coloured clothes can also lose their dye if washed with whites.
Get Set
Across
Page no. 28
1. We wear this to protect ourselves from getting wet in the rain—RAINCOAT
2. We wear these boots in the rainy season—GUMBOOTS Down
3. We wear these types of clothes in summer—COTTON
4. We wear these types of clothes in winter—WOOLLEN
Pause and Answer
1.
2.
3.
4.
Pause and Answer
1. Cotton
2. Linen
3. Wool
4. Silk
5. Jute
Pause and Answer
1. Raincoats
2. Raincoat
3. Fancy clothes
4. Raincoats
Pause and Answer
1. T 2. F
3. T
4. F
5. T
Page no. 29
1. Tick () the correct option.
A. Jute
B. Nylon
C. To protect themselves from heat and fire.
2. Fill in the blanks.
A. Natural
B. Nylon (Answer may vary.)
C. cotton
D. Uniforms
E. naphthalene
3. Match the following.
A. Soldier → ii.
B. Doctor → iii.
C. Police officer → iv.
Page no. 30
D. Firefighter → v.
E. Student → i.
4. Short-answer questions.
A. We wear cotton clothes in summers as they absorb sweat and keep us cool.
B. Woollen clothes
Page no. 32
Page no. 33
C. We wear raincoats in the rainy season because they are made up of waterproof materials that keep us dry and comfortable.
D. Firefighters wear safety suits that are made up of heat- and fire-resistant materials which protect them from heat and fire. It also protects their skin from getting burnt.
E. We like to wear fancy and stylish clothes during festivals.
F. Silk and woollen clothes need extra care because they are expensive and can be easily damaged while washing or storing. Some insects like moths and silverfish, can eat silk and woollen clothes. So, extra care should be taken while storing them.
5. Long-answer questions.
A. The difference between synthetic and natural fibres is as follows:
They are obtained from plants or animals. They are made by humans in factories.
They can absorb sweat. They do not absorb sweat. They did extra care while washing and storing. They are easy to maintain.
They do not catch fire and are safe to wear. They can catch fire easily.
Examples—Cotton, Linen, Wool, Silk
Examples—Nylon, Polyester, Rayon
B. Some people wear special clothes for specific work. These clothes are called uniforms. Uniforms show a sense of equality among different members of the team. Students of a specific school, soldiers, doctors, police officers and firefighters wear uniforms.
C. We can take care of clothes by following some of the following steps:
a. We should wash our clothes regularly in clean water with detergent.
b. After washing, clothes should be dried in sunlight to kill germs and bacteria.
c. Once the clothes are completely dried, we should iron them properly.
Sportspersons mostly wear synthetic clothes because they are:
Durable and stretchable: They can withstand a lot of movement and stretching without tearing. Easy to wash and dry quickly: This is important for athletes who sweat a lot.
Don’t absorb sweat (as much): They help keep athletes dry and comfortable by wicking away sweat. These features help athletes perform better and feel more comfortable during sports.
Students will be able to: identify and explain safety rules relevant to different environments (home, school, road, playground, and interactions with strangers) and demonstrate safe practices in these situations. identify common injuries and ailments, understand basic first aid procedures for each, and demonstrate how to respond appropriately in these situations.
Let’s Recall
Recap with the students the knowledge on safety rules and first aid. Ask the students to identify the safe and unsafe images given in the Get Set section.
accidents: unplanned events that cause harm to people or damage to property prevent: to stop something from happening injuries: harm or damage to someone supervision: the act of watching over someone carefully pedestrians: persons walking on the roads or streets first aid: immediate help given to an injured person before a doctor arrives sprain: an injury caused by twisting a joint or pulling a muscle dehydration: a condition in which the body loses more water than it takes in antiseptic: a substance that stops or slows down the growth of harmful microbes
Slips of paper with safety rules, bowl for keeping slips (optional); Index cards with scenarios, basic first-aid supplies (bandages, cotton balls, etc. - for demonstration purposes only, not actual treatment)
Rules Reflection Page 37
The students will be able to identify and explain safety rules relevant to different environments (home, school, road, playground, and interactions with strangers) and demonstrate safe practices in these situations.
Teaching Aids
Slips of paper with safety rules, bowl for keeping slips (optional)
Activity
Write various safety rules on slips of paper, ensuring they cover all five topics: home, school, road, playground, and strangers. Place the slips in a box or hat. Have students take turns picking a slip and acting out the rule without speaking. Encourage creativity by allowing gestures, facial expressions, or miming actions. The rest of the class watches and tries to guess both the rule and the location it applies to. After each turn, discuss why the rule is important and what could happen if it is not followed. Continue until all slips have been used or time runs out.
Extension Idea
Ask: Can you give an example of a time you followed a safety rule?
Say: I always wear a helmet while riding my bicycle. (Answer may vary.)
First Aid
Learning Outcomes
Reflection Page 40
The students should be able to identify common injuries and ailments, understand basic first aid procedures for each, and demonstrate how to respond appropriately in these situations.
Teaching Aids
Index cards with scenarios, basic first-aid supplies (bandages, cotton balls, etc. - for demonstration purposes only, not actual treatment)
Activity
Write different first-aid scenarios on index cards and place them in a box. Gather basic first-aid supplies for demonstration. Divide students into small groups and have each group pick a card. Give them a few minutes to discuss and plan their role-play. One student acts as the injured person, while others provide first aid based on what they have learned. After each role-play, ask the class to identify the correct steps taken and discuss any improvements. Emphasise staying calm and seeking adult help when needed. Continue until all groups have participated.
Extension Idea
Ask: What is the first thing you should do in any first aid situation?
Say: Stay calm and assess the situation. Make sure it’s safe for you to help.
Get Set
1. 2. 3.
Page no. 37
Pause and Answer Page no. 40
1. 2. 3. 4. Chapter Checkup
1. Tick ( ) the correct option.
A. Touch them with dry hands
B. At the zebra crossing
C. People you know and trust
D. Drink water or ORS
E. Antiseptic ointment
2. Fill in the blanks.
A. dry
B. shoes
C. medicine D. antiseptic
E. medical
3. Write True or False.
A. False B. False
C. False D. True
E. True
4. Short-answer questions.
A. Look to your right, then left, and right again before crossing. Always use a zebra crossing and follow traffic signals.
B. Because water is a good conductor of electricity, touching electrical appliances with wet hands can cause electric shocks.
C. I will not open the door. I will inform my parents or a trusted adult immediately.
D. A first-aid box is used to provide quick help to an injured person before a doctor arrives. It contains bandages, antiseptic lotion, cotton, and other medical supplies.
E. Make the person sit with their head slightly forward, pinch the soft part of their nose gently and hold it for 10–15 minutes, and keep them calm. If bleeding does not stop, seek medical help.
5. Long-answer questions.
A. Safety rules at school prevent accidents and injuries. They help students move around safely, avoid fights, and protect them from dangerous situations like falling or getting hurt.
B. Always wear shoes while playing to protect your feet. Always wait for your turn on the swings and slides.
C. Cuts and wounds: Clean the wound with water, apply antiseptic, and cover with a bandage.
Burns: Wash with cold running water and apply antiseptic cream.
Sprain: Apply an ice pack, keep the injured part still, and wrap it with a bandage.
Dehydration: Give the person water or ORS to drink and allow them to rest in a cool place.
D. Put a cool cloth or ice pack on the bite to reduce pain and swelling.
Apply antiseptic ointment to the bite.
Visit a doctor for vaccination against tetanus and rabies.
E. Stay calm and do not enter the kitchen if there is smoke or fire.
Leave the house if necessary and go to a safe place. Call an adult or emergency services (112) for help. Do not try to put out the fire if it is too big; wait for help.
6. Picture-based questions.
A. The second image (ii) ensures safety at school because students are walking up the stairs in an orderly manner. They are holding onto the railing, which helps prevent falls. Following rules while using stairs is an important safety measure.
B. The first image (i) is not safe because the students are running out of the school gate. Running in such areas can lead to accidents, such as tripping, falling, or colliding with others. It is important to walk carefully, especially near gates and roads, to stay safe.
I would not go with the stranger and instead tell a trusted adult, like a parent or teacher. Strangers may trick children into unsafe situations, so it is important to stay cautious and never go anywhere alone with someone I don’t know.
Chapters in This Unit
5. Plants Around Us
6. Adaptation in Plants
7. Animals and Their Young Ones
8. Adaptation in Animals
Story in This Unit
Ishaan and the Trio—Eva, Conji, and Mel—are discussing a mysterious stranger seen outside Ishaan’s house. Ishaan feels scared, but his friends assure him that they will protect him and the Earth from any danger. Conji believes that the stranger might be an evil Dark Wizard, Lord Ero or Drakon, and Mel adds that they might be here to know about Earth and its beings. Ishaan expresses his desire to help, and the group agrees that to defeat the Evil Wizards, they need to learn more about Earth and its living creatures.
As the conversation continues, Ishaan explains that humans are not the only living beings on Earth. He introduces the importance of plants and animals, which help maintain the balance of nature. Conji is surprised to learn that plants play a vital role in providing food, oxygen, and other necessities for survival. Eva and the others realise that animals are equally important in keeping nature in balance. Ishaan decides to show them an example to help them understand better.
He takes them to his drawing room and introduces them to his pet fish, Goldy. Eva finds the fish small but very fast, and Ishaan explains that fish use their fins and tails to move in water. Conji wonders if all animals live underwater, but Ishaan clarifies that many animals live on land as well. The Trio is fascinated by the diversity of life on Earth and agrees that it is a truly unique planet.
Understanding the importance of protecting Earth, the friends decide to work together against the Evil Wizards. Ishaan is determined to save the planet, and he promises to introduce his best friends, who will also join their mission. They plan to meet again the next day to continue their adventure and prepare for the challenges ahead.
Students will be able to:
explain that plants make their own food through photosynthesis, identify the necessary ingredients (carbon dioxide, water, and sunlight), and describe the roles of different plant parts (roots, stem, and leaves) in this process.
identify the main parts of a leaf, explain the role of chlorophyll in photosynthesis, and describe the function of stomata and transpiration.
explain that plants store excess food as starch in different parts like roots, stems, leaves, fruits, and flowers, and identify examples of these food storage parts.
describe with examples non-green plants and insect-eating plants.
explain how plants and animals depend on each other for food, shelter, oxygen, carbon dioxide, and seed dispersal, and understand the importance of maintaining balance in nature.
Recap with the students the knowledge on plants and its parts.
Ask the students to complete the crossword puzzle given in the Get Set section.
Vocabulary
absorb: to take in combine: mix or join pigment: a substance that gives colour
starch: reserve food stored in plants nutrition: getting nutrients from food photosynthesis: the process by which plants make their food
chlorophyll: a pigment that gives green colour to the leaves and helps to absorb sunlight
stalk: the part that joins the leaf to the branch
mid vein (midrib): the central, thick line that runs through the leaf
side veins: thin, side lines that arise from the mid vein that carries water and food through the leaf leaf blade (lamina): the flat, green and broad part of the leaf that bears the mid vein and the side veins
stomata: special tiny pores present in leaves that help in exchange of gases
Blank sheets of paper, pencils, markers, and coloured pencils; Fallen leaves of different shapes and sizes, chart papers, markers, glue; Chart papers, markers, pictures and information of non-green plants, insect-eating plants; Pictures or drawings of plants (grass, leaves, fruits), herbivores (grasshopper, deer, rabbit), carnivores (snake, lion, eagle), omnivores (bear, human), arrows to connect the organisms in the food chain
Learning
Reflection Page 49
The students will be able to explain that plants make their own food through photosynthesis, identify the necessary ingredients (carbon dioxide, water, and sunlight), and describe the roles of different plant parts (roots, stem, and leaves) in this process.
Teaching Aids
Blank sheets of paper, pencils, markers, and coloured pencils
Activity
Tell students they will create a comic strip that shows how a plant makes food. Provide students with blank sheets of paper, pencils, markers, and coloured pencils.
Guide the students to the Comic Strip Creation. Give them the hints for dialogues as follows:
Draw the sun shining on a plant. A speech bubble from the sun can say, “Here’s some energy for you!”
Show roots absorbing water from the soil. The roots can say, “We are drinking water!”
Draw leaves taking in carbon dioxide from the air. The leaves can say, “We need this air to make food!”
Show the plant producing food (glucose) and releasing oxygen. The plant can say, “Yay! Now I have food, and I’m giving out oxygen for you to breathe!”
Allow students to add fun elements like happy roots, talking leaves, or a smiling sun to make their comic strip engaging.
Once students complete their comic strips, invite them to present their work to the class.
Create a classroom display of the comic strips to reinforce learning.
Extension Idea
Ask: What would happen if there was no sunlight?
Say: If there was no sunlight, plants would not be able to make food through photosynthesis. Without plants, there would be no oxygen for us to breathe and no food for animals and humans. Life on Earth would not survive.
Parts of a Leaf
Learning Outcomes
Reflection Page 50
The students should be able to identify the main parts of a leaf, explain the role of chlorophyll in photosynthesis, and describe the function of stomata and transpiration.
Teaching Aids
Fallen leaves of different shapes and sizes, chart papers, markers, glue
Activity
Divide the class into small groups and ask each student to collect two fallen leaves of different shapes or sizes from their surroundings.
Have students sit with their group and paste all their collected leaves onto a chart paper, showcasing the variety of shapes and sizes.
Each group selects one large leaf from their collection, traces its outline on the chart paper, and labels its different parts.
Next to the traced leaf, students write down the major functions of the leaf and its parts.
Once finished, groups present their work to the class, explaining the different leaf shapes and their functions. Display the charts in the classroom for everyone to see.
Extension Idea
Ask: Do you think veins in a leaf are compared to blood vessels in our body?
Say: Yes, leaf veins carry water and food to different parts of the plant, just like blood vessels transport oxygen and nutrients throughout our body.
Page 52
The students should be able to explain that plants store excess food as starch in different parts like roots, stems, leaves, fruits, and flowers, and identify examples of these food storage parts.
Bingo cards, teacher’s list of clues
Activity
Prepare 3 × 3 bingo cards for each student, replacing numbers with different plant parts where food is stored, such as roots, stems, leaves, seeds, and fruits. Ensure some words repeat across different cards to make the game engaging. Distribute one bingo card and a marker to each student. Explain that you will read out clues about how plants store food, and students must find and mark the correct answer on their bingo card. Begin reading clues one by one, such as “Potatoes store food in this part” (Answer: Stem) or “Carrots store food in this part” (Answer: Root). Allow students to look at their cards and mark the correct plant part if it appears. Encourage them to focus and listen carefully. Display a plant chart or draw simple examples on the board for reference.
The first student to mark a full row, column, or diagonal shouts “Bingo!” and wins. Continue playing until multiple students get bingo. Once the game ends, review each clue and discuss why plants store food in different parts. Reinforce learning by asking students to name more examples of plants storing food in each part.
Extension Idea
Ask: Why is it important for plants to store food?
Say: It is important for plants to store food because they need energy to grow, survive, and reproduce. Stored food helps plants during times when they cannot make their own food, such as in winter or during droughts. It also provides food for animals and humans who eat plant parts like roots, stems, fruits, and seeds.
Learning Outcomes
The students should be able to explain with examples non-green plants and insect-eating plants.
Teaching Aids
Chart papers, markers, pictures and information of non-green plants, insect-eating plants, glue
Activity
Divide students into small groups and assign each group a specific type of non-green or insect-eating plant to research, such as parasitic plants (e.g., mistletoe, dodder) or carnivorous plants (e.g., Venus flytrap, pitcher plant).
Ask each group to gather key information about their plant, including how it gets its food, where it grows, and interesting facts. Have them present their information and pictures creatively on chart papers.
Once ready, have each group present their findings to the class. Encourage other students to ask questions and discuss how these plants survive differently from green plants.
Extension Idea
Ask: What is the most interesting thing you learned about your plant?
Say: (Answer may vary.) The most interesting thing I learned about my plant is that the Venus flytrap snaps shut in less than a second when an insect touches its tiny hairs twice. It traps bugs to get nutrients because it grows in soil that lacks them.
Learning Outcomes
The students should be able to explain how plants and animals depend on each other for food, shelter, oxygen, carbon dioxide, and seed dispersal, and understand the importance of maintaining balance in nature.
Pictures or drawings of plants (grass, leaves, fruits), herbivores (grasshopper, deer, rabbit), carnivores (snake, lion, eagle), omnivores (bear, human), arrows to connect the organisms in the food chain
Activity
Divide students into small groups and provide each group with pictures or drawings of various plants and animals. Explain that they will create a food chain by arranging the images to show the flow of energy from plants (producers) to animals (consumers).
Ask each group to start with a plant at the bottom, then add herbivores that eat the plants, followed by carnivores or omnivores that eat the herbivores. Encourage them to connect the images with arrows to show the direction of energy flow.
Once the food chains are complete, have each group present their work and explain how energy moves through their chain. Discuss the importance of plants as the base of all food chains and how animals depend on them for survival. Display the completed food chains in the classroom for reinforcement.
Extension Idea
Ask: What is the role of the sun in a food chain?
Say: The sun provides the energy that plants need to make food. This energy then passes through the food chain to animals.
Get Set
Page no. 48
You know about different parts of a plant. Solve the crossword puzzle as quickly as you can.
1


Pause and Answer Page no. 50
1. Photosynthesis
2. Leaves
3. Roots
4. Stem
Pause and Answer Page no. 52
1. Thick line in the centre → iv. Mid vein
2. Thin side lines → v. Side veins
3. Flat part of the leaf → iii. Lamina
4. Part joined to the branch → i. Stalk
5. Tiny pores on the leaf → ii. Stomata
Pause and Answer Page no. 53
1. Potato, sugarcane → Stem
2. Cabbage, spinach → Leaves
3. Carrot, beetroot → Root
4. Cauliflower, broccoli → Flower
Pause and Answer Page no. 54
1.
2.
3.
4.
1. Tick () the correct option.
A. Leaves
B. Glucose, oxygen, and water
C. Spinach and cabbage
D. Plants depend for food on other animals.
E. Venus flytrap
2. Fill in the blanks.
A. Oxygen B. Photosynthesis
C. roots D. lamina
3. Write True or False.
A. True B. False
C. True D. True
4. Match the following.
A. Pitcher plant → v. An insect-eating plant
B. Dodder plant → iv. A non-green plant
C. Potato plant → i. Stores food in its stem
D. Cauliflower plant → iii. Stores food in its flower
E. Spinach → ii. Stores food in its leaves
5. Short-answer questions.
A. Sunlight, carbon dioxide, water, and chlorophyll.
B. Leaves are called the kitchen of the plant because they make food through photosynthesis.
C. Dodder is a parasitic plant. It attaches itself to a host plant and absorbs nutrients from it.
D. Stomata are tiny pores on leaves that help in gas exchange and release oxygen during photosynthesis.
E. Grass → Grasshopper → Frog → Snake → Eagle (Answer may vary.)
6. Long-answer questions.
A. Stomata
Side veins
They are thin, side lines that arise from the mid vein.
Mid vein (Midrib)
It is the central, thick line that runs through the leaf.
Leaf blade (Lamina) It is the flat, green and broad part of the leaf. It bears mid vein and side veins.
Stalk It is the part that joins the leaf to the branch.
B. Some ways in which animals depend on plants are:
a. For food: Plants are the main source of food for all living beings. Animals depend on plants for their food.
b. For shelter: Plants provide a safe space for animals to live. Birds build nests in the trees. Squirrels hide in the tree trunk and branches. (Answer may vary.)
C. a. Plants store food to use it later when they do not get enough sunlight or nutrients.
b. Stored food in plants provides us with vegetables and fruits, like potatoes (stored in stems) and carrots (stored in roots).
D. Photosynthesis is the process where plants make their food using sunlight, water, and carbon dioxide.
Equation:
Carbon dioxide + Water + Sunlight → Glucose + Oxygen
E. Venus flytrap traps insects by closing its leaves when an insect touches them.
The pitcher plant has a deep cavity filled with liquid where insects fall in and get trapped.
7. Picture-based questions.
A. Photosynthesis
B. a. Leaves (where photosynthesis occurs)
b. Sunlight (provides energy for photosynthesis)
c. Oxygen (released into the air)
d. Roots (absorb water and minerals from the soil)
C. Photosynthesis is essential for plants because it helps them make their own food using sunlight, water, and carbon dioxide. This food provides energy for the plant to grow, and the process also releases oxygen, which is necessary for humans and animals to breathe.
Clearing a forest to build a highway will create an imbalance in nature by destroying the habitat of many animals, leading to loss of biodiversity. It will also reduce the number of trees that produce oxygen and absorb carbon dioxide, contributing to climate change. Additionally, soil erosion and changes in rainfall patterns may occur, affecting the environment and nearby ecosystems.
Students will be able to: define habitat and adaptation, identify different types of habitats, and explain how plants and animals adapt to their specific environments identify different terrestrial habitats (mountains, plains, deserts, marshy lands, coastal areas) and describe how plants adapt to survive in each of these environments. identify different types of aquatic habitats (freshwater and saltwater) and describe how plants adapt to survive in these water-filled environments.
Let’s Recall
Recap with the students the knowledge on habitat and adaptations. Ask the students to attempt the question in the Get Set section.
Vocabulary
scanty: in small quantity spines: needle-like sharp points (for example, those found in cactus) abundance: excess trunk: the central part of the tree from where branches grow habitat: the natural environment where a living thing lives adaptations: the special features that help a living thing to survive in its habitat
coniferous trees: trees that produce cones instead of flowers
deciduous trees: trees that shed all their leaves once a year to reduce water loss
evergreen trees: trees that are green throughout the year
submerged plants: plants that grow completely under the water surface
Rough notebook, pen/pencil; Two sets of cards - One set has pictures or names of plants (cactus, mangrove, pine tree and so on) and another set has descriptions of plant adaptations (like thick, waxy leaves, needle-like leaves etc.); Chart paper, pictures of different aquatic plants with information on their adaptations, coloured pencils, marker pens, glue
Habitat and Adaptation Reflection Page 62
Learning Outcomes
The students will be able to define habitat and adaptation, identify different types of habitats, and explain how plants and animals adapt to their specific environments.
Teaching Aids
Rough notebook, pen/pencil
Activity
Take the students to the school playground or a nearby botanical garden and encourage them to observe the plants in the area carefully. Ask them to pay attention to details such as the shape, size, and colour of the leaves. They can also collect a few fallen leaves and identify the trees they belong to. To learn more, students can ask the local gardener about the names of certain trees and how they grow. Encourage them to note any special features they observe. Once back in the classroom, allow them to research these features further. Have them add their findings to an observation table and share their discoveries with the class.
Extension Idea
Ask: What are the different components that form a habitat?
Say: A habitat consists of both living and non-living components that support the survival of organisms. Living components include plants, animals and microorganisms, while non-living components are air, water, soil, sunlight, rocks, etc.
Terrestrial Plants
Learning Outcomes
Reflection Page 63
The students should be able to identify different terrestrial habitats (mountains, plains, deserts, marshy lands, coastal areas) and describe how plants adapt to survive in each of these environments.
Teaching Aids
Two sets of cards - One set has pictures or names of plants (cactus, mangrove, pine tree and so on) and another set has descriptions of plant adaptations (like thick, waxy leaves, needle-like leaves etc.)
Activity
Spread out all the cards face up. Take turns to invite the students to find matching pairs. Students try to match each plant card with the adaptation card that best describes how that plant survives in its specific habitat.
Discuss the correct matches as a class, explaining why each adaptation is important for survival in that particular environment.
Extension Idea
Ask: If you planted a cactus in a marsh, would it survive? Why or why not?
Say: A cactus would likely not survive in a marsh. Cacti are adapted to dry, desert conditions and cannot tolerate the consistently wet soil of a marsh. Their adaptations are designed to conserve water, while a marsh environment has abundant water. The cactus’s roots might rot in the constantly wet soil.
Reflection Page 65
The students should be able to identify different types of aquatic habitats (freshwater and saltwater) and describe how plants adapt to survive in these water-filled environments.
Chart paper, pictures of different aquatic plants with information on their adaptations, coloured pencils, marker pens, glue
Divide the class into three groups, each focusing on a type of aquatic plant: Floating Plants (Duckweed, Water Hyacinth), Underwater Plants (Elodea, Vallisneria), and Fixed Plants (Water Lily, Lotus, Cattail).
Each group collaborates to create a chart presentation, including visuals, written descriptions, habitat details, and the plant’s ecological role. Groups then present their findings to the class, followed by a discussion.
Ask: How are underwater plants adapted to get sunlight?
Say: Underwater plants often have thin, transparent leaves that allow sunlight to penetrate. They may also grow tall to reach shallower, sunlit areas.
Get Set
Page no. 62
Given below are some images of plants. Tick () the ones that you like.
(Answer may vary.) Sample Answer - All plants are good but I like flowering plants.


Pause and Answer
1. Mountains – Pine
2. Plains – Mango tree
3. Marshy areas – Mangrove
4. Deserts – Cactus
1. Tick () the correct option.
A. Lotus B. Coconut tree
C. Water hyacinth D. Water lily
E. Tape grass
2. Fill in the blanks.
A. land
Page no. 65
D. Spines help reduce water loss and protect the plant from herbivores.
E. Their flexible trunks bend with strong coastal winds to prevent breaking.
F. They absorb oxygen directly from water through their leaves and stems.
G. Floating plants have air-filled spaces in their leaves and stems, making them buoyant.
5. Long-answer questions.
A. Terrestrial plants grow on land and adapt to various climates (e.g., Mango, Pine, Cactus), while aquatic plants live in water and develop features like floating leaves or submerged stems (Lotus, Hydrilla, Water Hyacinth).
B. Deciduous trees shed all leaves once a year (Maple, Oak).
Evergreen trees retain leaves throughout the year (Pine, Mango).
C. Thick, waxy skin reduces water loss. Spines instead of leaves prevent evaporation. Stores water in its thick stem for dry periods. Deep roots absorb water from underground.
D. Floating plants: Float freely on water (Duckweed, Water Hyacinth)
Fixed plants: Have roots fixed in the soil while leaves float (Lotus, Water Lily)
B. deciduous trees
C. evergreen trees D. coastal
E. water
3. Write True or False.
A. False B. False
C. False D. True
4. Short-answer questions.
A. Plants adapt to survive in different environmental conditions by developing special features such as thick leaves, deep roots, or flexible stems.
B. Needle-like leaves help coniferous trees reduce water loss and withstand cold, snowy conditions.
C. The roots of the mangroves have adapted to extend above the soil and take in air directly, due to waterlogged, marshy area.
Submerged plants: Grow completely underwater (Hydrilla, Tape Grass).
6. Picture-based questions.
A. This is a Pine tree.
B. It has needle-like leaves and a cone-shaped structure, which are characteristic features of pine trees.
C. Pine trees grow in mountainous and cold regions, where they can withstand snowy conditions.
Tape grass should be kept inside an aquarium because it grows fully underwater and helps provide oxygen to fish. Water hyacinth and duckweed float on the surface, which can block light and reduce oxygen in the water.
Students will be able to:
define reproduction, differentiate between animals that give birth and those that lay eggs, identify characteristics of mammals, and classify mammals as terrestrial or aquatic. identify animals that lay eggs, describe the structure of an egg, and explain the function of each part (shell, albumin, yolk).
describe the life cycles of egg-laying animals (birds, reptiles) and insects (butterfly, cockroach), including the stages of development and any metamorphosis involved.
Let’s Recall
Recap with the students the knowledge on the animals and their babies. Ask the students to sort the animals given in the Get Set section based on where they live.
Vocabulary
pouch: pocket on the lower part of the body in which young ones are protected after they are born embryo: the unborn animal or human in very early stages of its development
reproduction: a process through which living beings can give birth to new beings of their own kind
life cycle: a series of stages that a young one goes through before developing into an adult
metamorphosis: when an animal or insect develops and changes into something completely different
larva: a small, worm-like creature that hatches from the egg
nymph: the young one of a cockroach that does not have wings at the initial stage
Flash cards for animals (terrestrial/aquatic mammals, non-mammals), babies of mammals; White and yellow chart paper, scissors, glue, and markers; Paper plates, pictures of different stages in the life cycle of chicken, frog, fish, cockroach, and butterflymarkers, child-friendly scissors, strings
The students will be able to define reproduction, differentiate between animals that give birth and those that lay eggs, identify characteristics of mammals, and classify mammals as terrestrial or aquatic.
Flash cards for animals (terrestrial/aquatic mammals, non-mammals), babies of mammals
Activity
Divide the class into small groups and provide each group with a set of animal pictures. Ask them to first classify the animals into mammals and non-mammals. Once sorted, have them further categorise the mammals as terrestrial or aquatic.
Distribute pictures of adult mammals and ask students to observe their features. Encourage them to guess what the baby of each animal might look like. Once they share their guesses, reveal the actual pictures of the baby animals for comparison.
Discuss the similarities and differences between adult and baby mammals, highlighting key features such as fur, size, and physical traits. Reinforce the idea that mammals give birth to live young and care for them.
Extension Idea
Ask: What are some ways that mammal parents care for their young?
Say: Mammal parents feed their babies milk, protect them from predators, and teach them important survival skills.
The students should be able to identify animals that lay eggs, describe the structure of an egg, and explain the function of each part (shell, albumin, yolk).
Teaching
White and yellow chart paper, scissors, glue, and markers
Activity
Provide students with materials such as white and yellow chart paper, scissors, glue, and markers. Begin by discussing the structure of an egg, emphasising the shell, albumin, yolk, and embryo. Give each student or group a white chart paper cutout representing the egg’s outer shape. Provide a smaller yellow chart paper cutout for the yolk. Ask students to paste the yolk in the centre of the egg shape and draw a thin outline around it to represent the albumin.
Once assembled, have students label each part: shell, albumin, yolk, and embryo. Encourage them to write a short description of each part next to their labels.
After completing the models, ask the students to paste them in their notebooks. Reinforce learning by asking questions about how the different parts help in the development of the young one inside the egg.
Extension Idea
Ask: Do all animals that lay eggs care for their eggs in the same way?
Say: No, different animals have different ways of caring for their eggs. Some, like birds, sit on their eggs to keep them warm. Others, like some reptiles, bury their eggs in the ground. Some insects lay their eggs and then leave them.
The students should be able to describe the life cycles of egg-laying animals (birds, reptiles) and insects (butterfly, cockroach), including the stages of development and any metamorphosis involved.
Paper plates, pictures of different stages in the life cycle of chicken, frog, fish, cockroach, and butterflymarkers, glue, child-friendly scissors, strings
Activity
Divide the class into five groups. Assign each of three groups an egg-laying animal—chicken, frog, or fish—and each of the other two groups an insect—cockroach or butterfly.
Provide paper plates along with markers, glue, and scissors. Show examples of life cycle mobiles to help students visualise the concept.
Instruct students to paste pictures of each stage of their assigned animal’s life cycle onto separate plates. Ensure they label each stage clearly.
Give them strings of different lengths and guide them in arranging the life cycle stages in the correct sequence, from egg to adult. Assist them in securing the strings to a central support, such as a hanger or a sturdy paper strip, to form a hanging mobile.
Once the mobiles are complete, have each group present their work to the class, explaining the life cycle of their assigned animal or insect. Display the mobiles in the classroom for continued learning and reinforcement.
Extension Idea
Ask: Why do some insects look so different in their larval stage compared to their adult stage?
Say: The larval stage (like a caterpillar) is often specialised for rapid growth and eating. The adult stage is usually specialised for reproduction and dispersal. The dramatic change in form allows them to fulfil these different roles effectively.
Get Set
Creatures Living on Land: Deer, Elephant, Dog Creatures Living in Water: Fish, Shark, Dolphin Creatures Flying in Air: Bat, Sparrow, Pigeon
Pause and Answer
Terrestrial mammals: Elephant, Tiger
Aquatic mammals: Dolphin, Whale
Marsupials: Kangaroo, Koala
Pause and Answer
1. 21 days
2. fingerling
3. metamorphosis
1. Tick () the correct option.
A. Cat
B. Butterfly
C. Albumin
D. Incubation
2. Fill in the blanks.
A. shell B. albumin
C. yolk D. fry
3. Write True or False.
A. True
B. False
C. False
Page no. 69
Page no. 70
C. The yolk provides essential nutrients such as fats, proteins, vitamins, and minerals to the developing embryo. It is the main source of nourishment for the growing young one.
D. A tadpole undergoes metamorphosis to become a frog. It starts as a tiny, fish-like creature with gills. Over time, it develops legs, loses its tail, and its gills are replaced by lungs, allowing it to live on land.
6. Long-answer questions.
Page no. 73
D. False (Some mammals like the platypus and echidna lay eggs.)
4. Match the following.
A. Young one of a hen → iv. Chick
B. Young one of a butterfly → iii. Caterpillar
C. Young one of a frog → i. Tadpole
D. Young one of a cockroach → ii. Nymph
5. Short-answer questions.
A. Birds reproduce by laying eggs.
B. Incubation is the process of keeping eggs warm to help the embryo develop until it is ready to hatch. Birds and some reptiles incubate their eggs by sitting on them.
A. Reproduction is the process by which living organisms produce offspring of their kind. Animals reproduce in two ways:
a. Egg-laying animals: These animals lay eggs, and the young ones hatch from them. Example: Hen, frog, butterfly.
b. Animals that give birth to live young: These animals give birth to babies instead of laying eggs. Example: Humans, dogs, cats.
B. Shell Yolk
Albumin
Internal Structure of an Egg
The egg is covered with a hard covering called a shell. This safeguards the egg and keeps it moist. Inside the shell, there is a soft, white jelly-like substance called albumin. It provides water and protein to the young one that will grow inside. It also protects it. At the centre of the egg, there is a round, yellow-coloured yolk. The young one develops inside the yolk. It contains important nutrients such as fats, vitamins and minerals. The yolk consists of the embryo, which later develops into the young one. The yolk provides the required food to the embryo for its healthy development.
C. a. Life cycle of a cockroach Eggs
Adult Nymph Life Cycle of a Cockroach
There are three stages in the life cycle of a cockroach. The mother cockroach lays eggs. After the eggs hatch, a small creature called a nymph emerges. At the initial stage, the nymph does not have wings but looks like a cockroach. As it grows, it sheds its old skin to become an adult. This process is called moulting.
b. Life cycle of a fish
egg embryo larva fry fingerling adult fish
Life Cycle of a Fish
The female fish lays many eggs in water. The fish embryos start developing their organs and tail while still inside the egg. After they hatch from the eggs, the young fish are called larva. The larva has an attached yolk sac, which provides all the nutrients needed for growth. Once the larvae develop further, they become fry. At this stage, they are small but will grow stronger and larger as they start eating. As the fry continue to grow, they become fingerlings. Eventually, as they mature, they develop into adult fish.
7. Picture-based questions.
A. Metamorphosis
B. 1- Eggs, 2- Caterpillar (larvae), 3- Chysalis (Pupa), 4- Butterfly
C. A small, worm-like creature, called a caterpillar (larva), hatches from the egg.
D. The caterpillar feeds on leaves and increases in size. It then builds a cocoon around itself to form a chrysalis (pupa).
Similarity: Both chickens and frogs start their life cycle as eggs.
Difference: A chicken hatches from the egg as a small chick that looks like an adult, while a frog hatches as a tadpole, which looks very different from an adult frog and undergoes metamorphosis.
Students will be able to:
identify and describe key adaptations that animals have developed to survive in different habitats, including forests, deserts, aquatic environments, and polar regions. classify animals as herbivores, carnivores, omnivores, or scavengers based on their diet and identify specific adaptations that help them obtain and consume their food. identify and explain physical adaptations (camouflage, beaks and claws, strong limbs) and behavioural adaptations (migration, hibernation) that help animals survive in their environments.
Let’s Recall
Recap with the students the knowledge on adaptations in animals. Ask the students to attempt the question given in the Get Set section.
Vocabulary
scarce: not easy to find
prey: animals that are hunted for food habitat: the natural place where an animal lives and grows
adaptations: features that help animals survive in their habitat
aquatic animals: animals that live in freshwater or seawater
predators: animals that hunt other animals for food
camouflage: the ability of animals to blend in with their surroundings
migration: mass movement of fish, bird and animals from one place to another hibernation: a long winter sleep
Cue cards related to animal adaptations, habitats, or specific animals; Flash cards animals and few plants; Chart paper/A3 sheets, coloured pencils, marker pens, pictures and information of animals showing different physical and behavioural adaptations, glue
Learning Outcomes
Reflection Page 77
The students will be able to identify and describe key adaptations that animals have developed to survive in different habitats, including forests, deserts, aquatic environments, and polar regions.
Teaching Aids
Cue cards related to animal adaptations, habitats, or specific animals
Activity
Divide the class into teams and prepare a set of cue cards related to animal adaptations, habitats, or specific animals. Each turn, a teacher or student reads a clue aloud, such as “I have a long neck to reach leaves on tall trees” (Answer: Giraffe) or “I have thick fur and hibernate in winter” (Answer: Bear, Polar Region), “I am ship of the desert, give one of my adaptations that help me survive in the desert” (I have long eyelashes and double eyelids protect my eyes from sand) and so on.
Teams take turns guessing the correct animal, adaptation, or habitat based on the clue. If a team answers correctly, they earn a point. Rotate turns so all students participate. Use pictures or a habitat chart for reference. At the end, discuss the adaptations and their importance for survival.
Extension Idea
Ask: How does camouflage help animals survive?
Say: Camouflage helps animals blend in with their surroundings, making it harder for predators to spot them and easier for them to sneak up on prey.
Adaptation for Food
Learning Outcomes
Reflection Page 80
The students should be able to classify animals as herbivores, carnivores, omnivores, or scavengers based on their diet and identify specific adaptations that help them obtain and consume their food.
Teaching Aids
Flash cards animals and few plants
Activity
Divide the class into small groups and provide each group with a set of animal flashcards. Ask students to sort the animals into four categories: herbivores, carnivores, omnivores, and scavengers. Once sorted, guide them to arrange the organisms into different food chains, starting with a producer (plant) and following the correct sequence of consumers.
Encourage groups to create 2–3 different food chains, showing different ecosystems. Once complete, have each group present their food chains, explaining the role of each organism. Discuss how energy flows through the food chain and the importance of each group in maintaining balance in nature.
Extension Idea
Ask: What kind of adaptations might a scavenger have?
Say: Scavengers might have a strong sense of smell to locate carcasses, powerful jaws and teeth for tearing flesh, and a digestive system that can handle decaying meat. Some might also have adaptations for soaring or gliding to spot carcasses from above.
The students should be able to identify and explain physical adaptations (camouflage, beaks and claws, strong limbs) and behavioural adaptations (migration, hibernation) that help animals survive in their environments.
Chart paper/A3 sheets, coloured pencils, marker pens, pictures and information of animals showing different physical and behavioural adaptations, glue
Activity
Divide the class into groups and assign each group a specific adaptation to research:
Group 1: Camouflage
Group 2: Beaks
Group 3: Claws
Group 4: Migration
Group 5: Hibernation
Group 6: Group Living
Ask each group to gather information and pictures of animals that demonstrate the physical and behavioural adaptations. In class, have students collaborate within their groups to creatively organise their findings on a chart paper or A3 sheet using images, labels, and key points. Once completed, invite each group to present their work, explaining the adaptation with examples and discussing its importance for survival.
Ask: How is hibernation different from just sleeping?
Say: Hibernation is a much deeper state than sleep. During hibernation, an animal’s body temperature drops significantly, its heart rate slows down, and its metabolism decreases. It’s a way for the animal to conserve energy and survive harsh conditions.
Get Set
1. Cow, Deer
2. Lion, Eagle
3. Bear, Crow
Pause and Answer
1. Herbivores
2. Omnivores
3. Carnivores
4. Scavengers
5. Parasites
Chapter Checkup
1. Tick () the correct option.
A. Adaptation
C. Brown
2. Fill in the blanks.
A. herbivores
C. hibernation
3. Write True or False.
A. False
C. False
4. Match the following.
Page no. 77
6. Long-answer questions.
A. Camels have hump(s) that store fat, providing energy when food is scarce.
Long eyelashes and nostrils that can close to protect from sand.
Wide, padded feet to walk easily on sand.
Page no. 81
B. Lungs
D. Bear
B. scavengers
D. parasite
B. True
D. True
A. Stick insect → iv. camouflage
B. Siberian cranes → iii. migration
C. Jackal → ii. scavenger
D. Bear → i. hibernation
5. Short-answer questions.
A. Birds have different types of beaks to help them eat different kinds of food, such as cracking seeds, catching insects, or tearing flesh.
B. Thick fur to keep warm.
A layer of fat (blubber) under the skin for insulation.
C. Omnivores eat both plants and animals (e.g., bear, crow), while scavengers eat dead animals (e.g., vulture, hyena).
D. Animals migrate to find food, escape harsh weather, or breed in suitable conditions.
Can drink large amounts of water and store it for long periods.
B. Camouflage is the ability of an animal to blend into its surroundings to avoid predators.
Chameleon changes its skin colour to match its environment.
A stick insect looks like a twig to stay hidden from predators.
C. Type of Animal Diet Example
Herbivores Eat only plants Cow, Deer Carnivores Eat only meat Lion, Tiger Omnivores Eat both plants and animals Bear, Crow
7. Picture-based questions.
A. The bird has a sharp, hooked beak, which is adapted for tearing flesh. This suggests that it eats dead animals (carrion) and is a scavenger.
B. The bird in the image is a vulture.
1. If polar bears were left in the desert, they would struggle to survive because they are adapted to cold climates. Their thick fur and fat layer would cause overheating, and they would not find their usual food sources like seals. The lack of ice and water would also make it difficult for them to hunt and stay hydrated.
2. Herbivores are the most important in the food chain because they are the primary consumers that transfer energy from plants to other animals. Without herbivores, carnivores and omnivores would not have food, and the entire food chain would collapse. They help in maintaining ecological balance by controlling plant growth and providing energy to higher-level consumers.
Chapters in This Unit
9. Clean and Green Earth
10. Weather Around Us
Story in This Unit
Pihu, Manu, and their friends meet kind aliens, Conji, Mel, and Eva, and enjoy their time together. However, they worry about the evil wizard, Drakon, who may be planning something terrible. Meanwhile, in his spaceship, Drakon decides to destroy their friendship by increasing pollution. Using dark magic, he casts a spell that pollutes the rivers, air, and forests of Madhavgarh, making it difficult for everyone to breathe. The once clean and green town turns dark and dirty, leaving the children shocked and helpless.
As the pollution spreads, Eva and Ishaan realise that Drakon must be behind it. Dr Vikram arrives with news that the sudden pollution has affected the environment badly, making water undrinkable and harming plants and animals. The children worry about what to do next, fearing the damage is too great to fix.
Luckily, their wizard friends, Conji and Eva, step in to help. Using their magic, they chant a powerful spell to cleanse the land, purify the rivers, and restore the forests. Soon, Madhavgarh returns to its clean and green state. The children are amazed and grateful for their friends’ help. However, Pihu warns that they must stay alert, as Drakon might try something evil again in the future.
Students will be able to:
define the environment, identify its components (living and non-living), explain our dependence on the environment, and describe ways in which human actions harm the environment. define air, water, and land pollution, identify common pollutants, describe the sources and effects of each type of pollution, and suggest ways to reduce pollution.
identify different types of waste, explain the importance of waste management, and describe and apply the 3Rs (Reduce, Reuse, Recycle) in their daily lives.
explain the importance of trees to the environment, define deforestation and afforestation, and describe ways to conserve trees and paper.
Let’s Recall
Recap with the students the knowledge on the importance of different components of the environment. Ask the students to recite the poem given in the Get Set section.
emission: the release of something as gas or particles in air or water
slaughtered: killed in a way that is cruel and unnecessary
discarding: throwing away
fertilisers: chemicals added to fields to help plants grow
pesticides: chemicals added to fields to kill animals and insects that eat away crops
scrap dealer: a person who buys and sells old things
erosion: (here) removal of the topmost, fertile layer of soil
habitat: natural home of a living organism
pollution: the addition of unwanted or harmful substances in the environment
pollutants: unwanted substances that affect the environment
acid rain: when harmful gases in the air mix with rain
compost pits: pits or holes in the soil where biodegradable wastes are collected to turn them into manure
deforestation: large scale cutting down of trees
afforestation: planting trees in large numbers
Drawing sheets, coloured pencils, markers, and other craft materials; Cardboard (base for the city layout, buildings, and structures), Coloured paper (to create roads, parks, and decorations), Markers and crayons (for labelling and designing), Glue and tape (to assemble different parts), Scissors (for cutting materials), Small craft items (popsicle sticks, cotton, bottle caps for trees, buildings, etc.), Toy vehicles and figures (optional, for public transport and bike lanes), Recyclable materials (small boxes, plastic bottles, paper rolls for eco-friendly structures), Cotton or sponge pieces (for clouds, greenery, or bushes), Printed or hand-drawn signs (labels for clean energy sources, recycling centres, etc.); Cardboard/old shoebox, plastic, fabric, bottle caps, old newspapers, poster colours, cello tape, glue; Pictures (if needed)
Our Environment
Learning Outcomes
Reflection Page 90
The students will be able to define the environment, identify its components (living and non-living), explain our dependence on the environment, and describe ways in which human actions harm the environment.
Teaching Aids
Drawing sheets, coloured pencils, markers, and other craft materials
Activity
Distribute drawing sheets, coloured pencils, markers, and other craft materials to the students. Explain that they will create a poster showcasing both living and non-living components of the environment, such as plants, animals, water, air, and sunlight, along with their importance to humans. Encourage them to include labels and brief descriptions. Allow students sufficient time to complete their posters creatively. Once done, invite each student to present their poster to the class, explaining the elements they included. Display the completed posters around the classroom for reinforcement and appreciation.
Extension Idea
Ask: Why is it important to protect our environment?
Say: We depend on the environment for everything we need to survive, including food, water, and air. Protecting the environment ensures our well-being and that of our future generations.
Learning Outcomes
Reflection Page 91
The students should be able to define air, water, and land pollution, identify common pollutants, describe the sources and effects of each type of pollution, and suggest ways to reduce pollution.
Teaching Aids
Cardboard (base for the city layout, buildings, and structures), Coloured paper (to create roads, parks, and decorations), Markers and crayons (for labelling and designing), Glue and tape (to assemble different parts), Scissors (for cutting materials), Small craft items (popsicle sticks, cotton, bottle caps for trees, buildings, etc.), Toy vehicles and figures (optional, for public transport and bike lanes), Recyclable materials (small boxes, plastic bottles, paper rolls for eco-friendly structures), Cotton or sponge pieces (for clouds, greenery, or bushes), Printed or hand-drawn signs (labels for clean energy sources, recycling centres, etc.)
Activity
Divide the class into four groups and provide them with materials such as cardboard, coloured paper, glue, markers, and small craft items. Explain that each group will design and build a model of a “Clean City” that reduces air, water, and land pollution. Encourage them to incorporate clean energy sources like solar panels and wind turbines, public transportation and bike lanes, recycling and composting systems, and green spaces. Allow students time to plan and construct their models. Once completed, have each group present their “Clean City,” explaining how their design promotes sustainability and reduces pollution. Display the models in the classroom to reinforce learning.
Extension Idea
Ask: How can we encourage others to help reduce pollution?
Say: We can educate others about the importance of environmental protection, set a good example by our own actions, and participate in community cleanups or environmental campaigns.
Learning Outcomes
Reflection Page 93
The students will be able to identify different types of waste, explain the importance of waste management, and describe and apply the 3Rs (Reduce, Reuse, Recycle) in their daily lives.
Teaching Aids
Cardboard/old shoebox, plastic, fabric, bottle caps, old newspapers, poster colours, cello tape, glue
Activity
Ask the students to bring recyclables like cardboard, plastic, fabric, and bottle caps. Plan a simple scene like a park or beach, sketching a rough design. Use cardboard or a box lid as the base, have them paint it for the sky or cover it for ground. Create trees from tubes or rolled paper, adding leaves and flowers from fabric or bottle caps and old buttons. Make hills from crumpled newspaper, covering them with painted paper. Use blue cellophane or painted cardboard for water. Add details like flowers from buttons or bottle caps, animals from cardboard or fabric, and buildings from small boxes. Glue everything to the base, layering for texture. Add finishing touches with markers or paint. Share your creation and explain the materials used.
Extension Idea
Ask: What happens to the trash that we throw away?
Say: Trash that isn’t recycled or composted usually ends up in landfills. Landfills can contribute to pollution and take up valuable space. Some trash is incinerated, which can also cause pollution. It’s important to reduce the amount of trash we produce in the first place.
Reflection Page 95
The students will be able to explain the importance of trees to the environment, define deforestation and afforestation, and describe ways to conserve trees and paper.
Drawing sheets, coloured pencils, marker pens, pictures (if needed) Activity
Distribute drawing sheets, coloured pencils, markers, and pictures (if needed). Explain to students the importance of trees and the harmful effects of deforestation. Encourage them to creatively illustrate these ideas in their posters using drawings, slogans, and short messages. Guide them to include aspects like oxygen production, wildlife habitats, and soil conservation while depicting the negative impacts of deforestation, such as loss of biodiversity and climate change. Once completed, ask students to present their posters to the class, explaining their key messages. Display the posters in the classroom to reinforce learning.
Ask: Why is it important to celebrate events like Van Mahotsav?
Say: Such events raise awareness about the importance of trees and encourage people to plant and protect them. They help spread the message about conservation.
Pause and Answer
1. Air pollution
2. Water pollution
3. Land pollution
Page no. 93
Pause and Answer Page no. 95
1. Newspaper → B (Biodegradable)
2. Glass jar → N (Non-biodegradable)
3. Plastic bag → N (Non-biodegradable)
4. Fruit peel → B (Biodegradable)
1. Tick () the correct option.
A. Pollutants
B. It turns into acid rain.
C. Paper
D. Throwing waste in open areas.
2. Fill in the blanks.
A. biodegradable
C. acid rain
3. Write True or False.
A. True
C. False
E. False
4. Short-answer questions.
B. Non-biodegradable
D. erosion
B. True
D. True
A. Cutting down trees (deforestation).
Throwing plastic waste into water bodies.
B. Acid rain damages buildings, harms plants and animals, and pollutes water bodies, making them unsafe for aquatic life.
C. Proper waste disposal and recycling. Avoiding the use of plastic and opting for biodegradable materials.
D. Soil erosion is the removal of the top fertile layer of soil by wind, water, or human activities, making the land unproductive.
E. Van Mahotsav is a tree-planting festival that spreads awareness about the importance of forests and encourages people to plant trees to protect the environment.
5. Long-answer questions.
A. Causes of air pollution:
Burning of fuels such as petrol, diesel and coal.
Emission of smoke and other harmful gases from factories and automobiles.
Burning waste in open areas.
Steps to control air pollution:
Use more public transport like buses and trains.
Use vehicles that run on green fuels like CNG.
Plant more trees.
B. Biodegradable waste Non-biodegradable waste
These are the wastes that easily decompose and mix with the soil.
For example, fruit and vegetable peels, leftover foods, paper, plant leaves and eggshells.
These are the wastes that do not decompose and mix with the soil.
For example, plastic, glass and metals.
C. Reduce: Minimise waste by using less plastic and disposable materials.
Reuse: Use items multiple times instead of throwing them away (e.g., glass bottles, cloth bags).
Recycle: Convert waste materials into new products (e.g., recycling paper and plastic).
D. Trees produce oxygen, which is essential for breathing.
They provide shelter and food for animals and humans.
Trees prevent soil erosion and maintain ecological balance.
E. Plant more trees and avoid cutting them. Use eco-friendly materials instead of plastic. Save water and electricity by using them wisely.
6. Picture-based questions.
A. The cows are eating plastic and other waste materials.
B. No, it is not safe for them to eat plastic because it is non-digestible and can cause serious health issues like choking, digestive problems, and even death.
C. If cows consume plastic and their milk or meat is consumed by humans, harmful chemicals may enter our bodies, leading to health problems such as food
poisoning, digestive issues, and long-term diseases. Additionally, environmental pollution increases when plastic waste is not disposed of properly.
1. The waste at the seashore can harm animals living in and near the sea in the following ways:
Marine animals may swallow plastic or get trapped in it, leading to injury or death.
Chemicals from batteries and other waste can pollute the water, making it unsafe for sea creatures to live in.
2. Plastic is the most important material to recycle because it does not decompose easily and stays in the environment for a very long time. Recycling plastic helps reduce pollution and protects animals and nature.
Students will be able to:
differentiate between weather and climate, describe how weather can change, and explain how climate affects the types of plants and animals that live in a region.
identify and explain the factors that influence weather, including distance from the sea, sunlight, humidity, clouds, and wind.
explain how the sun’s position affects temperature and describe how this relates to daily temperature changes.
explain how air circulation causes wind, differentiate between breeze, gale, and storm, and describe the processes of sea breeze and land breeze.
describe the water cycle, including the processes of evaporation, condensation, precipitation, and collection, and explain how water changes state during this cycle.
define precipitation and describe its different forms, including rain, snow, hail, dew, frost, fog, and mist.
Recap with the students the knowledge on the weather and climate.
Ask the students to attempt the question given in the Get Set section.
beforehand: in advance forecast: predict meteorologist: a scientist who studies the Earth’s atmosphere and the weather weather: the condition of the atmosphere at a particular place and time climate: the weather condition of a place for a longer duration of time breeze: gentle wind
gale: strong wind
storms: very strong winds
sea breeze: the movement of air from the sea to the land
land breeze: the movement of air from the land to the sea
water cycle: the continuous movement of water from the earth’s surface to the sky and back again
precipitation: when water falls on the ground in any form
A4 sheet, pencil, ruler, coursebook; Chart papers, markers; Flashlight, two pieces of paper, pencil; Cut-outs of land, sea, arrows, glue, notebook; Drawing paper, coloured pencils or markers, labels for the water cycle stages (evaporation, condensation, precipitation, collection); Pictures related to different forms of precipitation
Learning
The students will be able to differentiate between weather and climate, describe how weather can change, and explain how climate affects the types of plants and animals that live in a region.
Teaching Aids
A4 sheet, pencil, ruler, coursebook
Activity
Provide students with a reference image from page 100 of their coursebook, showing different weather symbols. Explain how these symbols represent various weather conditions like sunny, cloudy, rainy, and windy.
Give each student a sheet to record the daily weather for a week. Ask them to observe the sky, temperature, and any weather changes each day. They should use the correct symbols to represent the weather and note any significant observations.
Encourage students to discuss their findings at the end of the week, comparing their reports with classmates. Guide them in identifying patterns in the weather and discussing how it might affect daily activities. Display some of the reports in the classroom for everyone to see.
Extension Idea
Ask: If you have to travel to a desert, what kind of clothes would you pack and why?
Say: I would pack light-coloured, loose-fitting clothes to protect myself from the intense heat and sun. I would also need a hat and sunglasses.
Learning
The students should be able to identify and explain the factors that influence weather, including distance from the sea, sunlight, humidity, clouds, and wind.
Teaching Aids
Chart papers, pencils, markers, ruler
Activity
Divide the class into groups and assign each group a location like mountains, deserts, plains, or coastal areas. One group should compare two different places to see how their climates are different.
Ask students to use books, maps, and online resources to research their location’s weather, including temperature, rainfall, and seasons. Ask them to track the daily weather for a week.
Have them create a table with two columns to compare two locations. They should note temperature, humidity, and weather patterns. Help them understand how climate affects people, plants, and animals in each place. Each group will present their findings to the class, sharing the differences and similarities. Their tables can be displayed in the classroom for everyone to learn from.
Extension Idea
Ask: Why does it feel hotter on a humid day?
Say: High humidity means there is a lot of water vapour in the air. This makes it harder for our sweat to evaporate, which is our body’s natural cooling mechanism. This makes us feel hotter and stickier.
Reflection Page 101
The students will be able to explain how the sun’s position affects temperature and describe how this relates to daily temperature changes.
Flashlight, two pieces of paper, pencil Activity
Divide the class into groups and give each group a flashlight and two pieces of paper. Instruct them to shine the flashlight directly onto one flat piece of paper, observe the intensity of the light, and trace the circle it creates. Then, have them tilt the second piece of paper and shine the flashlight at an angle, tracing the new path of light. Explain that this is similar to the sun at noon (direct light) versus the morning or evening (angled light). The direct light is concentrated and makes it hotter, while the angled light spreads over a larger area, making it cooler. Walk around the room, check progress, and encourage discussion on how this helps explain daily temperature changes.
Extension Idea
Ask: If you were designing a house to stay cool in a hot climate, how would you use your knowledge about the sun’s path?
Say: I will design the house with large windows facing north or south (in the Northern Hemisphere) to avoid direct afternoon sun. I would also include awnings or overhangs to shade the windows during the hottest part of the day. Planting trees around the house would also provide shade.
Learning
Reflection Page 102
The students will be able to explain how air circulation causes wind, differentiate between breeze, gale, and storm, and describe the processes of sea breeze and land breeze.
Teaching Aids
Cut-outs of land, sea, arrows, glue, notebook Activity
Begin by preparing cutouts of land, sea, and arrows indicating air movement. Ensure that students have glue and notebooks ready.
Start by briefly explaining the concepts of land breeze and sea breeze, highlighting how temperature differences between land and water cause air movement. Distribute the cutouts to each student or group.
Instruct students to arrange the cutouts to depict both land breeze and sea breeze correctly. Encourage them to think about how warm air rises and cooler air moves in to replace it. Guide them to place the arrows accordingly, showing airflow direction for each phenomenon.
Once they have arranged the elements, ask them to paste them in their notebooks. Move around the classroom to observe their progress. Randomly call out the names of students to show their work to the class and explain the movement of air during land and sea breeze.
Extension Idea
Ask: How does wind help distribute heat around the Earth?
Say: Wind carries warm air from the equator towards the poles and cool air from the poles towards the equator, helping to regulate the Earth’s temperature.
Learning
Reflection Page 103
The students will be able to describe the water cycle, including the processes of evaporation, condensation, precipitation, and collection, and explain how water changes state during this cycle.
Teaching Aids
Drawing paper, coloured pencils or markers, labels for the water cycle stages (evaporation, condensation, precipitation, collection)
Activity
Instruct the students to draw a diagram of the water cycle, labelling each stage.
Ask them to use arrows to show the movement of water.
Once complete, encourage the students to share their work with the class. Post the activity, display the sheets on the class bulletin board.
Extension Idea
Ask: If all the water on Earth is part of the water cycle, why don’t we run out of water?
Say: The water cycle is a continuous process. Water is constantly being evaporated, condensed, and precipitated, so it is recycled and reused. While the form of the water changes, the amount of water remains relatively constant.
Reflection Page 104
The students will be able to define precipitation and describe its different forms, including rain, snow, hail, dew, frost, fog, and mist.
Teaching Aids
Chart paper, markers, pictures related to different forms of precipitation
Activity
Divide the class into groups and assign them the task of creating a comparative chart on the different forms of precipitation. Encourage them to present the information creatively, using pictures and information to clearly highlight the differences.
As they work, move around the room to observe their progress, offering guidance and suggestions as needed. Once the charts are complete, invite each group to present their work to the class and explain the different forms of precipitation. Facilitate a discussion to reinforce understanding and compare the presentations.
Extension Idea
Ask: How does fog affect visibility?
Say: Fog is made up of tiny water droplets that are suspended in the air. These droplets scatter light, reducing visibility. Mist is simply a less dense fog.
4. Circle the odd one out.
A. Storm Dew Breeze Gale
B. Wind Frost Rain Hail
C. Condensation Collection Water cycle Water purification
Rainy
and Answer
Meteorologists
Climate
Humidity Pause and Answer Page no. 103 Type of breeze Direction Time Land Breeze From Land to Sea Night Sea Breeze From Sea to Land Day Chapter Checkup
1. Tick () the correct option. A. Land to sea at night
B. Sun
C. Gale
2. Fill in the blanks. A. Rain
5. Short-answer questions.
A. Weather is the condition of the atmosphere at a particular place and time and climate is the weather pattern of a specific place for a longer period of time.
B. The weather of a place depends upon the following factors:
Distance from the sea
Sunlight
Humidity
Clouds
Wind
C. In the morning and evening, the sun’s rays are less direct and spread over a larger area, making it cooler than the afternoon when the sun is overhead.
D. Wind blows due to differences in air pressure. Air moves from high-pressure areas to low-pressure areas, creating wind.
E. The different types of precipitation are rain, snow, hail, dew, frost, fog, and mist.
6. Long-answer questions.
Mist C. Land
3. Write True or False. A. True
False
Sea
False
False
A. Sea breeze occurs during the day when the land heats up faster than the sea. Warm air rises over the land, and cooler air from the sea moves in to replace it. Land breeze occurs during the night when the land cools down faster than the sea. Warm air rises over the sea, and cooler air from the land moves in to replace it.
B. The sun is the primary source of energy that drives weather changes. It heats the Earth’s surface unevenly, causing differences in temperature and air pressure. This leads to wind formation, cloud formation, and precipitation, which influence weather conditions. The sun also powers the water cycle, causing evaporation, condensation, and precipitation.
C. The water cycle is the continuous movement of water from the earth’s surface to the sky and back again. There are four stages involved in the water cycle: evaporation, condensation, precipitation and collection.
Water Cycle
Water in different water bodies gets heated up by sunlight and changes into water vapour. This process is called evaporation. When water vapour moves up in the atmosphere, it cools down into water droplets, which combine to form clouds. This process is called condensation.
When clouds become heavy with water droplets, the water falls back to the earth in the form of rain or snow. This process is called precipitation. The water falling on the ground flows into different water bodies like rivers, oceans, lakes and ponds. This process is called collection.
The entire process of the water cycle is repeated again.
7. Picture-based questions.
A. This chart shows a 10-day weather forecast, including the daily maximum and minimum temperatures, weather conditions (hazy sun, sunshine, clear nights), and general atmospheric conditions.
B. The hottest days are Wednesday (10/16) and Thursday (10/17), with a maximum temperature of 38°C.
C. Since these days are very hot, it would be best to wear light, breathable clothes such as cotton shirts, shorts, or dresses. Wearing a hat, sunglasses, and sunscreen would also help protect against the sun.
D. The weather shows consistently high temperatures with clear skies and hazy sunshine. There is no rain mentioned, and the nights are relatively warm. This suggests a hot and dry climate, likely resembling a desert or semi-arid region.
To plan a picnic, I’d check the weather forecast for temperature (comfortable range preferred), precipitation (avoid rain!), wind speed (gentle breeze is nice, strong winds not so much), and cloud cover (sunny or partly cloudy is ideal). I’d avoid rainy, stormy, or excessively hot days.
Chapters in This Unit
11. Matter and Its States
12. Force and Energy
13. Machines for Us
14. Measurement
Story in This Unit
Ishaan finds a ring near his house and gives it to Conji, who recognises it as Drakon’s ring. Pihu and the others realise that Drakon is behind the mysterious events, and Conji believes the ring will help them learn more about Drakon’s plans. Using magic, Conji becomes invisible and travels to Drakon’s spaceship to overhear a conversation between Drakon and Lord Ero.
During the call, Lord Ero scolds Drakon for his failures, but Drakon insists that he has a new plan. He reveals that they will take control of all the machines on Earth, just like they once did on their home planet, Avora. They plan to blame the malfunctioning machines on the Trio, which will cause humans to turn against them. Without the Trio, Drakon and Lord Ero believe they will easily control Earth.
Drakon then opens a book about machines and wonders if he can control the forces that make machines work. If he can do that, he believes all machines will be under his control. Conji listens to everything and plans to return to his friends to share the information.
Conji is determined to stop Drakon’s evil plan and warns his friends about the dangers ahead.
Students will be able to: define matter, identify and describe its various physical properties (colour, size, shape, texture, volume, and state), and provide examples of matter in different forms. identify and describe the three states of matter (solid, liquid, and gas) and their properties. define and explain the processes of melting, freezing, evaporation, condensation, sublimation, and deposition, and provide real-world examples of each. differentiate between soluble and insoluble substances, define the terms solute, solvent, and solution, and provide examples of each.
Let’s Recall
Recap with the students the knowledge on matter and its forms. Ask the students to solve the word search puzzle given in the Get Set section.
Vocabulary
characteristics: qualities that help identify and describe something observe: look at carefully definite: fixed fluids: substances that can flow condensation: the change of state from gas to liquid on cooling
deposition: the change of state from solid directly to gas on cooling
evaporation: the change of state from liquid to gas on heating
freezing: the change of state from liquid to solid on cooling
liquid: the state of matter with no fixed shape but has a fixed volume and can flow
matter: anything that has mass and occupies space melting: the change of state from a solid to liquid on heating
solid: the state of matter with fixed shape and volume
solute: the substance that dissolves in another substance
solution: when two substances are mixed together and they get evenly distributed, it forms a solution
brackish water: water that is a mix of fresh water and salt water
sublimation: the change of state from gas directly to solid
Chart paper, styrofoam balls, markers, glue, pictures of examples for solid, liquid and gaseous states of matter; Bingo cards, teacher’s list of clues; Small clear containers or glasses, water, various substances to test (salt, sugar, sand, flour, chalk powder, coffee grounds, etc.), spoons for stirring
Reflection Page 114
The students will be able to define matter, identify and describe its various physical properties (colour, size, shape, texture, volume, and state), and provide examples of matter in different forms.
Teaching Aids
None required
Activity
Ask students to look around the classroom and identify different objects that are made of matter.
Discuss how each object occupies space and has mass.
Choose a few objects and describe their physical properties (colour, size, shape, texture).
Extension Idea
Ask: Is air matter? Why or why not?
Say: Yes, air is matter. Even though we can’t see it, it occupies space (we can feel it when the wind blows) and has mass (a balloon filled with air weighs more than an empty balloon).
Reflection Page 115
The students should be able to identify and describe the three states of matter (solid, liquid, and gas) and their properties.
Teaching Aids
Chart paper, styrofoam balls, markers, glue, pictures of examples for solid, liquid and gaseous states of matter
Activity
Divide the class into three groups, assigning each group one form of matter: solid, liquid, or gas. Provide each group with chart paper, styrofoam balls, glue, labels, and markers. Instruct the groups to use the styrofoam balls to represent molecules and arrange them according to the characteristics of their assigned form of matter. For solids, molecules should be close together and tightly packed; for liquids, they should be more spread out but still close; for gases, they should be far apart. Ask the groups to paste labels that highlight the general properties of their form of matter, such as shape, volume, and molecule movement. Have them also paste pictures of examples of their assigned form of matter. Once the groups are done, allow each group to present their chart, explaining the arrangement and properties of the molecules in their form of matter. After the presentations, display the completed charts on the bulletin board for the class to refer to.
Extension Idea
Ask: Can all substances exist in all three states of matter?
Say: Yes, theoretically, all substances can exist in all three states, but the temperatures at which they change states vary greatly. For example, water can be ice (solid), liquid water, or steam (gas), but iron only becomes liquid or gas at very high temperatures.
Learning
Reflection Page 117
The students will be able to define and explain the processes of melting, freezing, evaporation, condensation, sublimation, and deposition, and provide real-world examples of each.
Bingo cards, teacher’s list of clues
Activity
Distribute a Bingo Card to each student. Explain that you will read clues related to the processes of state changes (melting, freezing, evaporation, condensation, sublimation, and deposition), and the students will mark the process that matches the clue on their cards. Read the clues aloud and instruct the students to concentrate and mark the corresponding processes on their cards. For example, “This process occurs when water turns to steam” for evaporation or “This process happens when frost forms on a cold surface” for deposition.
The student/s who first complete a row, column, or diagonal on their Bingo card will be the winner.
Note for the teacher -
To prepare bingo cards, cut out cardboard or a sheet of paper and draw a 3 × 3 grid. Instead of numbers, fill the boxes with the names of processes (e.g. melting, freezing, evaporation, condensation, sublimation and deposition).
Extension Idea
Ask: If you leave a glass of water outside on a hot day, what will happen to the water and why?
Say: The water will evaporate, turning from a liquid into a gas (water vapour). This is because the heat provides energy for the water molecules to escape into the air.
Reflection Page 120
The students will be able to differentiate between soluble and insoluble substances, define the terms solute, solvent, and solution, and provide examples of each.
Small clear containers or glasses, water, various substances to test (salt, sugar, sand, flour, chalk powder, coffee grounds, etc.), spoons for stirring
Prepare containers and label each with the name of the substance to be tested, such as salt, sugar, sand, flour, etc. Fill each container with the same amount of water. Distribute the containers and substances to student groups. Instruct students to add a small amount of each substance to its labelled container, stir the mixture, and carefully observe what happens. Guide them to classify each substance as soluble if it dissolves completely in water or insoluble if it remains visible. Encourage discussion on why some substances dissolve while others do not. Conclude with a class discussion, asking students to share their observations and findings.
Ask: Can all liquids dissolve the same substances?
Say: No, different liquids have different dissolving abilities. For example, some substances might dissolve in water but not in oil.
Get Set
Find out the following words from the given word search.
1. Matter
2. Mass
3. Solid
4. Liquid
5. Gas
Pause and Answer
1. Solid
2. Gas
3. Liquid
4. Fluid
Pause and Answer
1. Melting → iv. Solid to liquid
2. Freezing → v. Liquid to solid
3. Evaporation → iii. Liquid to gas
4. Condensation → ii. Gas to liquid
5. Sublimation → i. Solid to gas
6. Deposition → vi. Gas to solid
Page no. 114
1. Tick () the correct option.
A. They change to a gas.
B. It takes the shape of the container.
C. Salt
D. Sand
2. Fill in the blanks.
A. solids
C. gases
3. Write True or False.
Page no. 117
Page no. 120
A. True
C. True
4. Short-answer questions.
B. fluids
D. Liquids
B. False
D. True
A. The three states of matter are solid, liquid, and gas.
B. Sublimation is when a solid changes directly into a gas without becoming a liquid, while deposition is when a gas changes directly into a solid without passing through the liquid state.
C. A soluble substance dissolves in water (e.g., salt), while an insoluble substance does not dissolve in water (e.g., sand).
D. Condensation is the process of gas turning into a liquid (e.g., water droplets forming on a cold glass).
E. Evaporation is the process of a liquid turning into a gas (e.g., water drying from clothes).
5. Long-answer questions.
A. Difference between solids, liquids and gases:
Solid Liquid Gas
Molecular arrangement Tightly packed Loosely packed Very loosely packed


Volume Definite Definite Not definite
Shape Definite Takes the shape of the container Not definite
Examples Table, chair, door Juice, milk, water Air, water vapour
B. Solute – The substance that dissolves in a solvent (e.g., salt in water).
Solvent – The liquid in which the solute dissolves (e.g., water).
Solution – A uniform mixture of a solute dissolved in a solvent (e.g., saltwater).
6. Picture-based questions.
A. a. Melting (Ice changing to liquid water)
b. Evaporation (Liquid water changing to water vapour)
c. Condensation (Water vapour changing back to liquid water)
d. Freezing (Liquid water changing to ice)
B. Melting: Ice cubes melting in a glass of water on a warm day.
Evaporation: A puddle of water drying up after a rain shower.
Condensation: Dew forming on the grass in the early morning.
Freezing: Putting a tray of water in the freezer to make ice cubes.
1. Water changes into ice in the freezer because the temperature is below 0°C, causing it to freeze. In the fridge, the temperature is above 0°C, which is cold but not enough to turn water into ice.
2. To test which solvent dissolves more solute, follow these steps:
Take equal amounts of both solvents in separate containers.
Add a measured amount of the same solute (e.g., salt or sugar) to each solvent and stir.
Keep adding small amounts of the solute until no more dissolves and some remains undissolved.
Compare how much solute each solvent dissolved before reaching saturation.
The solvent that dissolves more solute before saturation is the better solvent.
Students will be able to: describe and demonstrate how force can move objects, stop moving objects, change the direction of moving objects, and change the shape of objects. identify and describe different types of forces, including muscular force, gravitational force, magnetic force, and frictional force, and provide real-world examples of each. identify and describe different forms of energy, including solar, hydro, electrical, wind, and heat (thermal), and provide examples of how each is used.
Let’s Recall
Recap with the students the knowledge on force and energy. Ask the students to attempt the question given in the Get Set section.
Vocabulary opposes: to act against gradually: slowly over a period of time turbines: a machine that has a wheel with blades force: a push or a pull on an object energy: the ability to do work
A4 sheet, markers, glue, colours; Slips of paper with different actions involving force written on it (kicking a ball, stopping of car, lifting a book, bullocks pulling a cart, leaf falling from a tree, magnet attracting iron nails, and so on); Cardboard box, aluminium foil, clear plastic wrap, black construction paper, glue, ruler, food to warm (marshmallows, chocolate)
Reflection Page 125
The students will be able to describe and demonstrate how force can move objects, stop moving objects, change the direction of moving objects, and change the shape of objects.
Teaching Aids
A4 sheet, markers, glue, colours
Activity
Ask students to prepare a poster demonstrating the effects of force, such as pushing, pulling, stretching, or changing the shape or motion of an object. Before the activity, instruct them to bring relevant pictures or drawings illustrating different effects of force. Provide them with chart paper, markers, glue, and other materials needed for the poster. Guide them to arrange their pictures neatly and label each effect clearly. Encourage creativity in designing their posters. Once completed, have students present their posters to the class, explaining each effect. After the presentations, ask them to paste their posters into their notebooks as a record of their learning.
Extension Idea
Ask: What happens to an object’s motion when you apply a force in the same direction it’s already moving? Say: The object will speed up (accelerate).
Reflection Page 125
The students should be able to identify and describe different types of forces, including muscular force, gravitational force, magnetic force, and frictional force, and provide real-world examples of each.
Teaching Aids
Slips of paper with different actions involving force written on it (kicking a ball, stopping of car, lifting a book, bullocks pulling a cart, leaf falling from a tree, magnet attracting iron nails, and so on)
Activity
Divide the class into small groups and prepare slips of paper with different actions involving force, such as pushing a door, pulling a rope, kicking a ball, or lifting a book. Each group takes turns picking a slip and enacting the action without speaking. The rest of the group members observe and discuss the type of force used, such as push, pull, friction, gravity, or magnetic force. Encourage students to explain their reasoning and relate the actions to real-life examples. Continue until all groups have had a turn. Conclude with a discussion reinforcing the different types of forces and their effects.
Extension Idea
Ask: What would happen if there was no friction?
Say: If there was no friction, it would be difficult to walk (we would slip), objects would not stay still, and many machines would not work. While too much friction can be a problem, some friction is essential for many everyday activities.
Learning Outcomes
Reflection Page 127
The students will be able to identify and describe different forms of energy, including solar, hydro, electrical, wind, and heat (thermal), and provide examples of how each is used.
Teaching Aids
Cardboard box, aluminium foil, clear plastic wrap, black construction paper, glue, ruler, food to warm (marshmallows, chocolate)
Activity
Provide each group with a cardboard box, aluminium foil, clear plastic wrap, black construction paper, glue, and a ruler. Guide students to cut a flap on the top of the box and line the inside with aluminium foil to reflect sunlight. Have them place black construction paper at the bottom to absorb heat and cover the opening with clear plastic wrap to trap warm air inside. Once assembled, place the solar ovens in a sunny spot with food like marshmallows or chocolate inside. Ask students to observe changes over time and discuss how sunlight is converted into heat energy. Encourage them to relate this to real-world uses of solar energy.
Extension Idea
Ask: Think about a time you used more than one form of energy at the same time. Describe what happened. Say: Playing music on a phone – The phone used electrical energy to function, which converted into sound energy when the music played and light energy for the screen.
Get Set
Look at the picture.
Page no. 124
Write PUSH or PULL according to the force applied.
Pause and Answer
1. Muscular Force
2. Gravitational Force
3. Magnetic Force
4. Frictional Force
Chapter Checkup
1. Tick () the correct option.
A. Riding a bicycle
B. Pulls objects towards itself
C. Iron nail
D. Frictional force
E. Sun
2. Fill in the blanks.
A. Friction B. Energy
C. hydroelectricity D. Sun
E. Chemical
3. Write True or False.
A. True B. False
C. True D. True
4. Short-answer questions.
Page no. 127
5. Long-answer questions.
A. Force is a push or a pull applied on an object. We use force to do many things. Here are some effects of force:
Force can move objects: When you kick a football, it moves.
Force can stop moving objects: A fielder uses force to catch and stop a moving ball.
Force can change the direction of moving objects: A batsman changes the ball’s direction by hitting it with his bat.
Force can change the shape of objects: Pressing dough changes its shape. Similarly, when we squeeze a toothpaste tube, its shape changes.
B. Force is a push or pull that can change the state of motion or shape of an object.
Muscular Force: Muscular force is the force applied by the muscles of our body.
Whenever we move our body parts, like our arms or legs, we use muscular force. For example, a rickshaw puller uses muscular force to pedal and move the rickshaw forward.
Magnetic Force: Magnetic force is the force exerted by a magnet on another magnet or on magnetic materials like iron. For example, when you bring a magnet close to iron nails, the nails stick to the magnet because of magnetic force. (Answer may vary.)
C. Energy can neither be created nor destroyed. It can only be changed from one form to another. For example, in electric bulbs, electric energy is converted into light energy. In electric irons, electric energy is converted into heat energy.
D. Mechanical Energy – Used in machines like a fan.
Electrical Energy – Used to power lights and appliances.
A. Gravity pulls objects towards the Earth, keeping them grounded.
B. The dough changes its shape, which is an example of applied force.
C. Friction slows down or stops the motion of moving objects.
D. Solar energy can be used to generate electricity.
E. Fuels are used to cook food. Fuels are used to power vehicles.
Thermal Energy – Used in cooking food.
Chemical Energy – Released in fuel combustion to power vehicles.
Solar Energy – Used to generate electricity through solar panels.
6. Picture-based questions.
A. The man is applying muscular force. This is the force generated by his muscles to push the box.
B. The force that opposes the movement of the box is frictional force (or simply friction). Friction occurs between the bottom of the box and the surface of the floor, resisting their movement against each other.
C. The muscular force applied by the man is in the direction of the box’s motion (to the right in this case). The frictional force is in the opposite direction to the box’s motion (to the left).
Key Concept: Friction always acts in the opposite direction to the intended or actual motion of an object.
1. Benefits: Friction helps us grip things, like when we walk, friction between our shoes and the ground prevents us from slipping.
Problems: Friction causes wear and tear on machines and surfaces, like how the brakes on a car wear down over time due to friction.
2. If you place a thick book between the magnet and the paper clips, the magnet will likely not pick up the paper clips. This is because the book will block the magnetic field, preventing it from reaching the metal paper clips and attracting them.
Students will be able to: define simple machines, explain their importance, and describe how they make work easier by reducing force, increasing speed, and improving efficiency. identify and describe the six simple machines (inclined plane, wedge, wheel and axle, screw, pulley, and lever) and provide real-world examples of each. explain why it is important to maintain machines and describe methods for keeping machines working efficiently.
Recap with the students the knowledge on the machines used in daily lives. Ask the students to attempt the question given in the Get Set section.
grooved: with narrow cuts on the surface split: to divide into parts wheelbarrow: a small vehicle with a single wheel in front, used to carry small loads effort: the force applied on the lever fulcrum: a fixed point around which a lever can be turned
inclined plane: a surface whose one end is raised at an angle while the other end stays on the ground
lever: a straight rod that rests on a fixed point and can be turned around that point
load: the object that is moved by a lever machine: a device that makes our work simple and faster
pulley: a grooved wheel with a rope around it wedge: it is made up of two inclined planes joined back-to-back, forming a sharp edge screw: an inclined plane wrapped around a cylinder wheel and axle: it consists of a circular part called the wheel which is attached to a rod called an axle
Chart paper, marker, pictures of simple machines used in our daily lives; Pictures or drawings of various tools and objects that use simple machines (e.g., ramp, axe, doorknob, screw, crane, seesaw), labels with the names of the six simple machines; Variety of tools (hammer, screwdriver, scissors, wrench, etc.) and various tasks written on cards (cut paper, tighten a bolt, hammer a nail)
The students will be able to define simple machines, explain their importance, and describe how they make work easier by reducing force, increasing speed, and improving efficiency.
Chart paper, marker, pictures of simple machines used in our daily lives
Activity
Form small groups and instruct students to bring at least two pictures of simple machines commonly used at home. Provide each group with chart paper, glue, and markers. Ask them to paste the collected pictures on the chart, ensuring they label each machine and describe its purpose. Encourage students to discuss the function of each simple machine within their group. Once the collages are complete, have each group present their work to the class, explaining the machines and their uses. Display the finished charts on the class bulletin board for everyone to observe and learn from.
Extension Idea
Ask: How do machines make work easier?
Say: Machines make work easier by reducing the amount of force needed, increasing the speed of work, or changing the direction of the force.
The students should be able to identify and describe the six simple machines (inclined plane, wedge, wheel and axle, screw, pulley, and lever) and provide real-world examples of each.
Pictures or drawings of various tools and objects that use simple machines (e.g., ramp, axe, doorknob, screw, crane, seesaw), labels with the names of the six simple machines
Activity
Divide the class into small groups and provide each group with a set of pictures showing examples of simple machines along with labels such as pulley, wheel and axle, lever, inclined plane, and others. Ask students to work together to discuss and match each picture with the correct simple machine label. Once all groups have completed the matching, spread out the pictures and labels for a class-wide review. Have students take turns explaining their matches and how each tool or object works based on the principles of its corresponding simple machine. Encourage discussion, allowing groups to adjust their answers if needed, and reinforce how these machines help make work easier in daily life.
Extension Idea
Ask: Why is the screw considered a simple machine?
Say: A screw is essentially an inclined plane wrapped around a cylinder. It allows a rotational force to be converted into a linear force, useful for fastening things together.
The students will be able to explain why it is important to maintain machines and describe methods for keeping machines working efficiently.
Teaching Aids
Variety of tools (hammer, screwdriver, scissors, wrench, etc.) and various tasks written on cards (cut paper, tighten a bolt, hammer a nail)
Activity
Gather a variety of tools and simple machines such as a hammer, screwdriver, scissors, wrench, pulley, inclined plane, and lever, along with task cards describing actions like cutting paper, tightening a bolt, hammering a nail, lifting a load, or moving an object up a ramp. Divide students into small groups and have each group take turns picking a task card. Ask them to choose the appropriate tool or simple machine for the given task and demonstrate how it would be used. Encourage discussion on why the selected tool or machine is the best choice and what would happen if the wrong one were used. Allow groups to share their reasoning with the class to reinforce the importance of using the correct tool or machine for each job.
Extension Idea
Ask: What is the purpose of lubricating machines?
Say: Lubrication reduces friction between moving parts, allowing them to move smoothly and preventing them from wearing out quickly.
Get Set
Page no. 132
Look at the images given below. In the space provided, write the names of different things that are being used.
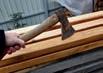

5. Short-answer questions.
A. Machines help us do work more easily and efficiently by reducing the effort required.
B. A ramp is an example of an inclined plane.
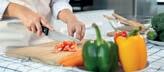
Do these things make our work easier?
Yes, definitely
Pause and Answer
1. Lever – Seesaw, Scissors
2. Inclined Plane – Ramp, slides
Page no. 132
3. Wheel and Axle – Bicycle, steering wheel of a car
4. Pulley – Flagpole, Well with a Bucket
5. Wedge – Knife, Axe
6. Screw – Jar Lid, bottle caps
1. Tick () the correct option.
A. Ramp
C. Lift objects
2. Fill in the blanks.
A. machine
C. cylinder
3. Write True or False.
A. True
C. True
4. Name the following.
A. Machine
C. Load
B. Fulcrum
D. Cut objects
B. wedge
D. pulley
B. True
D. False
B. Fulcrum
D. Effort
C. A pulley helps lift heavy objects by changing the direction of force.
D. A wedge is formed by joining two inclined planes back-to-back to create a sharp edge.
E. Regular maintenance helps machines work efficiently, prevents damage, and increases their lifespan.
6. Long-answer questions.
A. Lever – Seesaw
Inclined Plane – Ramp
Pulley – Flagpole pulley system
Wheel and Axle – Bicycle wheel
Wedge – Knife
Screw – Jar lid
B. Inclined planes reduce the amount of force needed to move an object by increasing the distance over which the force is applied. This makes it easier to lift or slide objects.
C. Cleaning: Remove dust and dirt from machines to keep them running smoothly.
Lubricating: Apply oil or grease to moving parts to reduce friction and wear-and-tear. Tightening: Check and tighten any loose bolts or screws to keep the parts of a machine in place.
7. Picture-based questions.
A. Device - Scissors, Machine - lever
B. Device - Roller skates, Machine - Wheel and Axle
C. Device - See-saw, Machine - lever
I would use an inclined plane because it reduces the effort needed to lift the heavy box by spreading the work over a longer distance. This makes it easier to push or roll the box up instead of lifting it straight up, requiring less force.
Students will be able to: identify and use standard units (metre, kilogram, and litre) for measuring length, weight, and volume respectively, and understand the need for standardisation in measurement. differentiate between measurement and estimation, understand the situations where each is appropriate, and appreciate the importance of accurate measurement in certain contexts. understand the concept of time, identify different units of time (seconds, minutes, hours, days, etc.), read time on a clock, and differentiate between a.m. and p.m. define temperature, identify a thermometer as a tool for measuring temperature, and understand the units Celsius and Fahrenheit.
Let’s Recall
Recap with the students the knowledge on measurement. Ask the students to read the story of Aisha given in the Get Set section.
reliably: doing something in a way that can be trusted to work well every time thoughtful guess: a guess made on a topic after having studied it very well standard units: units that give the same results for all measurements estimation: a thoughtful guess about the value of something time: the measure of the duration of an event temperature: the measurement of the hotness and coldness of a particular thing
Ruler, balance scale, standard weights, measuring cup, water, various-sized bowls and cups, common classroom objects; Containers filled with small items (e.g., buttons, beads, marbles), recording sheets (with columns for item name, estimated quantity, and actual quantity; Flashcards with different activities (e.g., brushing teeth, watching a movie, running a race), label strips with time units; Drawing sheet/notebook, pencil, eraser, ruler
The students will be able to identify and use standard units (metre, kilogram, and litre) for measuring length, weight, and volume respectively, and understand the need for standardisation in measurement.
Ruler, balance scale, standard weights, measuring cup, water, various-sized bowls and cups, common classroom objects
Activity
Divide the class into three groups and assign each group a different measurement task.
Group 1: Measure the length of their desks using their handspan first and then a ruler. Record their observations, compare the measurements, and discuss why using a standard unit like a ruler provides more reliable results.
Group 2: Measure a given quantity of sugar using different bowls brought from their homes. Then, use a balance scale to compare the actual weight of sugar in each bowl and note the differences in measurements. Discuss why a standard weighing scale ensures accuracy.
Group 3: Measure water using cups brought from home. Pour water into each cup and record the amount each one holds. Compare the measurements and discuss how standard units, such as litres, help in achieving consistent results.
Each group will present their findings to the class and explain why standard units are necessary for accurate measurement. Conclude with a class discussion on the importance of standard measurements in everyday life.
Extension Idea
Ask: What would happen if we didn’t have standard units for things like medicine dosages or building materials? Say: It would be very dangerous! Incorrect dosages of medicine could make people sick, and using the wrong amount of building material could cause a building to collapse. Standard units are very important for safety and accuracy.
The students should be able to differentiate between measurement and estimation, understand the situations where each is appropriate, and appreciate the importance of accurate measurement in certain contexts.
Containers filled with small items (e.g., buttons, beads, marbles), recording sheets (with columns for item name, estimated quantity, and actual quantity)
Activity
Divide students into small groups. Give each group a container of items and a recording sheet.
Ask them to estimate the number of items in the container before counting them. They should record their estimations.
Then, have them carefully count the items and record the actual count. Compare the estimations with the actual counts. Discuss the challenges of estimation.
Extension Idea
Ask: Why is estimation sometimes useful, even if it’s not exact?
Say: Estimation can give us a quick idea about a quantity when we don’t need or have time for an exact measurement. It can also help us check if a measurement we’ve made seems reasonable.
The students will be able to understand the concept of time, identify different units of time (seconds, minutes, hours, days, etc.), read time on a clock, and differentiate between a.m. and p.m.
Flashcards with different activities (e.g., brushing teeth, watching a movie, running a race), label strips with time units
Divide the class into small groups and provide each group with a set of flashcards containing different daily activities. Also, give them label strips with different time units: seconds, minutes, hours, days, weeks, months, and years.
Explain that their task is to match each activity with the most appropriate time unit. For example, “Brushing teeth” should be matched with minutes, while “Going on vacation” might be matched with days or weeks. Ask each group to discuss among themselves before placing the correct time duration label next to each activity. Walk around the classroom, observe their choices, and provide guidance if needed. Once all groups have completed the task, go through each activity as a class, asking different groups to share their answers. Encourage students to explain their reasoning.
Extension Idea
Ask: What would happen if we measured baking a cake in seconds instead of minutes?
Say: If we measured it in seconds, it would seem like the cake bakes instantly, which is not true. Using the right unit—minutes or hours—helps us understand how long the process actually takes and ensures the cake is fully baked.
The students will be able to define temperature, identify a thermometer as a tool for measuring temperature, and understand the units Celsius and Fahrenheit.
Drawing sheet/notebook, pencil, eraser, ruler
Ask students to draw a simple thermometer on paper.
Instruct them to include the outer tube, inner tube, bulb at the bottom, and markings for temperature. Have them label the important parts.
To show temperature changes, they can draw two versions: one thermometer showing the temperature of a hot liquid and another showing the temperature of a cold liquid.
Discuss their drawings and ask them to explain how the thermometer works in their own words.
Ask: How does the temperature change throughout the day? Why does it change?
Say: Generally, the temperature tends to be cooler in the morning and evening and warmer in the afternoon. This is because the sun’s rays are strongest around midday.
Pause and Answer
1. C L O C K
2. D I G I T A L C L O C K
3. S T O P W A T C H
Chapter Checkup
1. Tick ( ) the correct option.
A. Clock
C. Stopwatch
2. Fill in the blanks.
A. Estimation
C. Analog
3. Write True or False.
A. True
C. False
4. Match the following.
B. Digital clock
D. Thermometer
B. Seconds
D. temperature
B. False
D. False
A. An analog clock ii. two major hands
B. A digital clock iii. shows only numbers
C. Evening time v. adding p.m. with time
D. A stopwatch i. very short time intervals
E. Morning time iv. adding a.m. with time
5. Short-answer questions.
A. We need standard units to ensure accurate and consistent measurements that do not vary from person to person.
B. (Answer may vary.) Estimating the time it will take to reach school.
Estimating the weight of a watermelon before buying it.
C. Weight: Kilograms (kg)
Volume: Litres (L)
D. Clock, Watch, Stopwatch
E. The period from midnight till noon is indicated by adding a.m. with the time. The period from noon till midnight is represented by adding p.m. with the time. For example, 11 a.m. (in the morning) and 11 p.m. (at night).
6. Long-answer questions.
A. Measurement gives an exact value using standard units, such as 1 metre or 2 kilograms.
Estimation is a thoughtful guess about a value, such as guessing the height of a table or the weight of a book.
B. We use a clock to measure time. The clock has two major hands—an hour hand and a minute hand. Some clocks have a second hand as well. The hour hand is shorter than the minute hand. It takes the second hand 1 minute to complete one round of the clock. Similarly, it takes a minute hand one hour to complete one round of the clock. Lastly, it takes the hour hand half a day to complete one round of the clock. A clock has the numbers 1 to 12 on it. These numbers tell us the hours of the day. When an hour is complete, the hour hand moves from one number to the next. The clock shows a total of 12 hours at a
time. The hour hand needs to go around the clock twice to show one day. A clock also has five little dashes (‘) between every two numbers. These dashes represent minutes or seconds, depending on which hand is on them. There are 60 dashes in total to show that there are 60 seconds in a minute, and 60 minutes in an hour.
Types of clocks:
Analog clocks have hour and minute hands to show time.
Digital clocks display numbers to show the exact time.
Stopwatches measure very short time intervals.
C. A thermometer measures temperature. It has three main parts: a glass outer tube, a thin inner tube, and a small bulb filled with a liquid. There are markings on the inside to measure how hot or cold something is. When we use a thermometer, the liquid in the bulb moves up the tube to a specific marking, which tells us the temperature of the particular thing.
7. Picture-based questions.
A. Label the minute, second and hour hands in the image shown below.
Hour hand

B. Wall clock
Second hand
Minute hand
C. There are many possible answers, including: Watch Stopwatch Sundial Hourglass Calendar
1. You need 30 ÷ 6 = 5 tables to seat all the guests.
2. It is important to measure and calculate correctly to ensure that there are enough tables and seats for all guests. Miscalculations could lead to overcrowding or not enough seating, making the party uncomfortable.
Chapters in This Unit
15. The Earth and the Solar System
Story in This Unit
Conji rushes in with urgent news—Drakon has discovered a way to control all machines on Earth. The friends realise the gravity of the situation, knowing that machines are essential for humans. Ishaan asks Conji for more details, and Conji explains that Drakon’s dark magic will take two days to work. However, Mel questions whether this means two days in Avora or Earth. Pihu is confused, and Eva explains that a day on Avora is 500 hours long, unlike Earth’s 24-hour day. Dr Vikram clarifies that a planet’s day length depends on how long it takes to complete one rotation.
Determined to stop Drakon, Manu suggests interrupting his spell, but Conji warns that dark magic is too dangerous to confront directly. The friends realise they need a different plan. Just then, Dr Vikram’s robot, Lucy, enters with snacks. Seeing Lucy sparks an idea in Eva, and she excitedly gathers everyone to share it.
After hearing Eva’s plan, Dr Vikram is impressed and calls her a genius. Ishaan agrees, saying that Drakon would never expect their strategy. Mel points out that they will need Dr Vikram’s help to succeed, and he assures them that he will do everything he can to assist. With a clever plan in place, the group prepares to take action before Drakon’s spell is complete.
Dr Vikram and the children stand outside Drakon’s spaceship with Lucy, the robot. Conji warns that Drakon’s Dark Magic must have started, so they send Lucy inside. When Lucy enters, Drakon, thinking she is under his control, orders her to connect a call to Lord Ero. Convinced that his spell is already working, Drakon decides to stop the magic, believing all machines are now under his command.
The moment Drakon stops his spell, Eva, Mel, and Conji appear in front of him. Eva quickly casts “RESTRICTO”, tying Drakon with magical ropes. Shocked, Drakon commands Lucy to attack, but she does nothing. The children laugh, revealing that Lucy was never under his control—Dr Vikram had programmed her to trick Drakon into stopping his spell too soon. Furious and defeated, Drakon realises he has been trapped by his own arrogance.
Before Drakon can find a way to escape, the children decide to take him back to Avora. Mel and Conji exchange farewells, thanking each other for their friendship. Conji even thanks Manu for his accidental mistake, which led them to Earth and helped them make new friends. Dr Vikram and the children express gratitude for saving the planet. As their spaceship takes off, they wave goodbye, carrying Drakon, still tied in magical ropes, back to Avora.
Students will be able to: identify the planets in our solar system, understand their relative positions, and describe some basic characteristics of each planet. identify the main layers of the Earth, describe the Earth’s rotation and revolution, and explain the effects of these movements. understand the difference between natural and artificial satellites, their functions, and the importance of satellites in daily life.
Let’s Recall
Recap with the students the knowledge on the Solar System. Ask the students to read the poem given in the Get Set section.
elliptical: a shape that is oval or an elongated circle mnemonic: a special trick or rhyme that helps you remember something more easily imaginary: unreal tilted: leaning to one side celestial bodies: the objects present in the space planets: the celestial bodies that revolve around the Sun revolution: the movement of the Earth around the Sun in an orbit rotation: the movement of the Earth around its own axis satellites: the objects that revolve around a planet
Bingo cards, Clue cards; Flash cards related to layers of the earth, rotation and revolution of the earth; Index cards with satellite types (weather, communication, GPS), props (cardboard satellites, umbrellas, maps), markers
The students will be able to identify the planets in our solar system, understand their relative positions, and describe some basic characteristics of each planet.
Bingo cards, Clue cards
Activity
Distribute the Bingo cards to each student. Ensure each student has a card with names of the planets. Explain that you will read clues related to the planets, and students must mark the correct planet on their Bingo cards. As you read each clue, give students time to find the answer on their cards. For example, if the clue is “The planet with the largest number of moons”, students should mark Jupiter.
The first student to complete a row, column, or diagonal on their card should shout “Bingo!” and you will check their answers.
You can repeat the activity for multiple rounds, changing the clues or adding more challenging ones related to space facts.
Note for Teacher: To prepare Bingo cards, draw a 3 × 3 grid on cardboard or paper. Fill in the boxes with names of planets, moons, or solar system features. Ensure no two cards are the same by mixing up the order of the names.
Ask: Why is Pluto no longer considered a planet?
Say: Pluto is now classified as a “dwarf planet” because it hasn’t cleared its orbital path of other debris, which is one of the criteria for being a planet.
The students should be able to identify the main layers of the Earth, describe the Earth’s rotation and revolution, and explain the effects of these movements.
Flash cards related to layers of the earth, rotation and revolution of the earth
Activity
Divide the class into small groups, providing each group with a set of flashcards. On the cards, include characteristics of Earth such as information about the layers of the Earth, rotation, and revolution. For example, flashcards about the layers might include facts about the crust, mantle, outer core, and inner core. For rotation, include details like the 24-hour cycle and day and night. For revolution, include cards explaining the 365 days it takes for the Earth to orbit the Sun and the resulting seasons.
Instruct the groups to work together to match the correct characteristics to the appropriate Earth concept (layers, rotation, or revolution). Walk around the classroom, observing and offering help when necessary, ensuring students understand the connections between the facts and the concepts. After they finish, have each group share one fact they matched correctly, and encourage a short discussion to reinforce the learning points.
Extension Idea
Ask: If you could travel to the centre of the Earth, what do you think it would be like?
Say: It would be extremely hot and under immense pressure. It’s made mostly of solid iron and nickel.
Reflection Page 157
The students will be able to understand the difference between natural and artificial satellites, their functions, and the importance of satellites in daily life.
Index cards with satellite types (weather, communication, GPS), props (cardboard satellites, umbrellas, maps), markers
Activity
Briefly introduce the concept of satellites and their importance. Explain the four categories: weather, communication, GPS, and observation.
Divide the class into four groups, each assigned a satellite type via index card.
Groups brainstorm and prepare a short role-play (3–5 mins) demonstrating their satellite’s function. Encourage use of props and assigned roles (engineer, announcer, actors, etc.).
Each group performs their role-play. Encourage creativity and clear explanation of the satellite’s purpose.
Facilitate a class discussion:
How did each satellite type help in the demonstration?
How do these satellites impact our daily lives?
How are the different satellite types interconnected?
After the discussion, encourage each student to share one new thing they learned about satellites.
Extension Idea
Ask: How are artificial satellites different from the Moon?
Say: The Moon is a natural object that orbits Earth. Artificial satellites are man-made objects that we launch into orbit.
Pause and Answer
1. The nearest planet to the Sun – iii. Mercury
2. Blue Planet – i. Earth
Page no. 154
3. A planet with the maximum number of moons – ii. Jupiter
4. The largest planet – iv. Saturn
Pause and Answer
1. Tick ( ) the correct option.
A. Stars
C. Orbit
2. Fill in the blanks.
A. Core
C. tilt
3. Write True or False.
A. False
C. False
Page no. 157
6. Long-answer questions.
A. The Earth is made up of three main layers—crust, mantle and core.
Crust/Surface: It is the outermost layer of the Earth. It forms the surface on which we live. It is hard and cool.
Mantle: It is present between the crust and the core. It is made up of rocks, minerals and metals. This is a solid layer of the Earth.
Core: It is the innermost layer of the Earth. It is very hot. It is made of metals, minerals and gases. The core is further divided into two parts—the outer core and the inner core.
The outer core is liquid. The inner core is solid.
B. 8
D. The change of seasons
B. Mantle
D. Rotation
B. True
D. False
4. Circle the correct option in each of the following.
A. Outer
C. Mars
5. Short-answer questions.
B. Neptune
D. Venus
A. Mercury, Venus, Earth, Mars, Jupiter, Saturn, Uranus, Neptune.
B. Inner planets are rocky and have fewer moons. Examples: Mercury, Venus, Earth, Mars. Outer planets are gas giants or ice giants and have more moons. Examples: Jupiter, Saturn, Uranus, Neptune.
C. Earth has water, an atmosphere with oxygen, a moderate temperature, and a suitable distance from the Sun, making it ideal for life.
D. Axis: An imaginary line through the centre of the Earth that the Earth rotates around.
Equator: An imaginary line around the middle of the Earth, equidistant from the North and South Poles, dividing the Earth into the Northern and Southern Hemispheres.
E. The Earth is made up of three main layers—crust, mantle and core.
B. The Earth’s revolution causes different seasons. The Earth’s axis is tilted. This makes one pole of the Earth closer to the Sun at a particular time of the year. Thus, that hemisphere receives more sunlight and experiences summer. At the same time, the other hemisphere that is tilted away from the Sun experiences the winter season. Revolution changes the position of the poles tilted towards the Sun. For about six months in a year, the North Pole is tilted towards the Sun while for the rest of the year, the South Pole is tilted towards the Sun. This cycle of tilt and revolution causes the seasons to change throughout the year.
C. The rotation of the Earth on its axis causes the formation of day and night. During rotation, the part of the Earth that faces the Sun experiences day. The other part of the Earth that does not receive sunlight experiences night.
7. Picture-based questions.
A. The layers of the Earth (or the internal structure of the Earth).
C. Crust: The crust is the outermost and thinnest layer of the Earth, made of solid rock.
Mantle: The mantle is a thick layer of mostly solid rock that makes up the largest part of the Earth.
Outer Core: The outer core is a liquid layer made mostly of iron and nickel.
Inner Core: The inner core is a solid sphere at the Earth’s centre, made primarily of iron.
1. The stars, including our Sun, are extremely far away from Earth. Although they produce light and heat, the vast distance between Earth and the stars reduces the amount of heat that reaches us. The Sun is the closest star, but even then, only the light and energy that reaches us during the day can warm the Earth. At night, we see the light of distant stars, but their heat does not reach us because of the vast distance.
2. If the planets did not revolve in their orbits around the Sun, they would not stay in a stable position. The Sun’s gravitational pull keeps the planets in their orbits. Without this constant movement, the planets could either drift into space or be pulled towards the Sun, potentially causing collisions or extreme changes in the solar system. The orbits maintain a balance that helps keep the planets at a safe distance from the Sun, ensuring the conditions on Earth are stable for life.
1. Answer: A. Sunlight, water, and carbon dioxide
2. Answer: B. The process of making food by plants.
3. Answer: The extra food made by plants is turned into starch and stored in different parts of the plant, such as fruits, leaves, stems, roots, and flowers.
4. Answer: Three plant parts that we eat for food and examples: Leaves – Coriander, Spinach Fruits – Tomato, Lemon Stems – Brinjal, Pumpkin
1. Answer: C. Egg, caterpillar, pupa, butterfly
2. Answer: B. The caterpillar starts changing into a butterfly.
3. Answer: Butterflies lay their eggs on leaves because when the eggs hatch into caterpillars, they need leaves to eat and grow. If the eggs were laid on the ground, the caterpillars might not find food easily and could be in danger from predators or harsh conditions.
4. Answer: Another animal that goes through metamorphosis is a frog. Its life cycle stages are:
Eggs – Frogs lay eggs in water.
Tadpole – The eggs hatch into tadpoles that live in water and have tails for swimming. Froglet – The tadpole starts growing legs and loses its tail.
Adult Frog – The froglet fully develops into an adult frog that can live on land and in water.
1. Answer: A. Solar energy
2. Answer: B. It helps reduce pollution and keeps the air clean.
3. Answer: Three other forms of energy are: Wind energy – Generated by wind turbines. Hydro energy – Produced using water from dams or rivers.
Geothermal energy – Comes from heat inside the Earth.
4. Answer: We should use renewable energy sources like solar, wind, and hydro energy to fight climate change. These energy sources do not produce pollution or greenhouse gases, which helps keep the air clean and protects the environment.
Chapter 1
Think and Tell
Page no. 9
I drink _____ glasses of water and _____ glasses of milk daily. (Students can write their own numbers.)
Chapter 2
Discuss!
Page no. 17
Neha got new teeth because children grow permanent teeth after losing milk teeth. Her grandfather lost all his teeth, and adults do not grow new ones.
Think and Tell
The right way to brush is:
Page no. 20
1. Brush twice a day—once in the morning and once before bed.
2. Move the brush in circular and up-and-down motions to clean properly.
Chapter 3
Discuss!
Chapter 10
Think and Tell
Page no. 102
When a matchstick is blown out, the smoke rises because warm air is lighter and moves upward.
Chapter 11
Think and Tell
Page no. 118
We use naphthalene balls to keep clothes safe from insects and to prevent bad smells.
Chapter 12
Discuss!
Two effects of force in daily life:
1. Pushing a door to open or close it.
2. Kicking a ball to make it move.
Discuss!
Page no. 32
No, people in different countries wear different clothes based on their climate and culture.
Think and Tell
Page no. 32
To take care of my school uniform, I: 1. Wash it regularly. 2. Keep it neat and ironed.
Chapter 5
Think and Tell
Foods eaten raw: Carrots, cucumbers, apples
Page no. 52
Foods that need cooking: Rice, potatoes, eggs
Chapter 6
Discuss!
Page no. 125
Page no. 126
Without gravity, we would float in the air, and things would not stay in place.
Chapter 13
Think and Tell
An inclined plane helps in:
1. Ramps for wheelchairs.
2. Slides in playgrounds.
Discuss!
Page no. 64
Around my home and school, I see trees like mango and neem, shrubs like rose, and small plants like grass. Some have flowers, and others have big leaves.
Chapter 8
Think and Tell
Page no. 78
The camel is called the “ship of the desert” because it can walk easily on sand and store water in its body for many days.
Chapter 9
Think and Tell
Page no. 94
I would throw the leftovers and paper napkins in a compost pit. The plastic bottle should be recycled.
Page no. 133
Page no. 136
Without simple machines, lifting heavy objects would be harder, and tasks like cutting, pulling, and digging would take more time.
Chapter 14
Think and Tell
I estimate measurement when:
1. Guessing the length of a table.
2. Pouring water into a glass.
Think and Tell
I measure time when:
1. Looking at a clock to know school time.
2. Setting an alarm to wake up in the morning.
Chapter 15
Think and Tell
Page no. 141
Page no. 142
Page no. 153
I would call Earth “The Green Planet” because it has many trees, plants, and life.
Teaching science is more than just imparting knowledge—it’s about igniting curiosity, fostering inquiry, and making learning an engaging journey. The Teacher Manual for the Reflection Series (Grades 3–5) is designed to empower educators with structured lesson plans, hands-on activities, and interactive teaching strategies that bring science to life in the classroom. Each chapter includes learning outcomes, teaching aids, hands-on activities, and extension ideas, making science lessons dynamic and student-centered.
This Teacher Manual is designed to empower educators with:
• Well-structured lesson plans that provide a step-by-step guide for effective teaching, ensuring smooth lesson delivery, clear learning objectives, and engaging instructional methods.
• Hands-on activities and experiments that encourage active participation, allowing students to explore concepts through role-plays, creative exercises, and real-world applications.
• Innovative teaching techniques that promote deeper understanding, encourage student collaboration, and make science lessons more immersive and impactful.
Uolo partners with K-12 schools to provide technology-based learning programs. We believe pedagogy and technology must come together to deliver scalable learning experiences that generate measurable outcomes. Uolo is trusted by over 15,000+ schools across India, South East Asia and the Middle East.
ISBN 978-81-985579-2-6