IMMERSIVE OPTICS


Immersive scopes can be supplied with a set of MOA adjustable mounts (Pic. 1 Pos. 8-13), or without. The body diameter of the scope is 30mm, 34mm or 42mm; therefore, only ring mounts of a suitable diameter can be used depending on the scope. In most cases, using a single ring mount is sufficient. But if there is sufficient space, two rings can be fitted for extra security. Do not use excessive force when tightening the screws as this can damage the scope.
The MOA adjustable mounts supplied with the scope allow the user to preset the incline on the scope. This feature enables the user to avoid a rather common problem - running out of adjustment space when dialing for elevation.
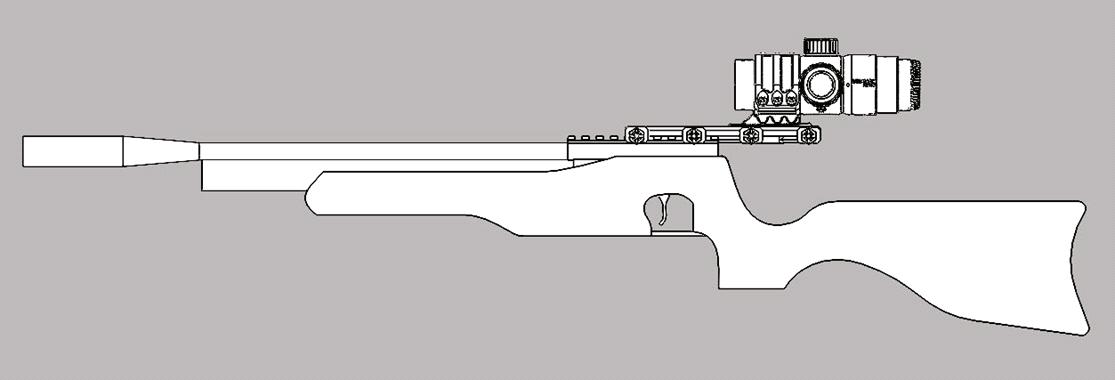
The set comes with three types of rails – see pic 1 (pos. 11, 12, 13) for reference. This allows the user to mount the scope on a variety of rifles, from a full-length sporter (Pic. 2)to a short bullpup (Pic. 3)


The scope comes with a pre-installed medium length rail, which is set at “0” MOA To install another rail:
Undo the three screws (Pic .4, pos 1), remove the rail and replace it with the desired rail.
Once completed, lock the screws back in to place.
To adjust the MOA:
• loosen the three screws (Pic. 4, pos 1) just enough to allow for the scope to be lifted and repositioned (pic 4, pos 2, 3).
• Once you have your desired MOA, tighten the three screws back in to place.


When tightening the ring mounting screws, please do so in the same order as in Pic 5. The screws will need to be tightened in sequential order, with the order being repeated until the scope is securely fastened. Do not use excessive force when tightening the screws as this can damage the scope.

Unscrew the battery container cover (Pic. 6, pos 1).
Insert a CR2032 battery into the container, remembering to observe the polarity of the battery (“-“ side facing out), and screw the battery container cover back on.
To activate the reticule illumination function, press the illumination button (Pic. 7, pos 1). The illumination level can be adjusted by repeatedly pressing the button. Please note, the illumination level cycles up until the highest level is reached, and then drops back down to the lowest level. To switch the illumination function off, press and hold the illumination button for 3 seconds.


Adjusting the eyepiece.
Aim the scope at a well-lit background and turn the eyepiece (Pic. 8, pos 1) left or right until the aiming mark is sharpest.
Focusing.
Turn the focusing knob (Pic. 8, pos 2) to focus on the target.
Calibrating the focusing knob.
Your scope comes with a set of distance stickers which, when attached to the focusing knob, allow the user to estimate the distance to the target. Focus the scope on a target of known distance to calibrate the focusing knob. Once this has been achieved, cut and place the corresponding distance number onto the side of the focusing knob (Pic. 8 pos 3).

Zeroing the scope.
This needs to be done in a safe environment. Unscrew the protective caps from both turrets (Pic.9 pos 1). Set the target at the distance you want your scope to be zeroed in on. Take a shot, and by operating the elevation and windage turrets, bring the crosshair precisely into the point of impact.
Setting turrets to zero.
After the scope is zeroed, both turrets need to be set to zero. Loosen the three grub screws (Pic 9, pos 2, 3, 4) until the turret is disengaged and can be freely rotated. Turn the turret until the “0“ mark aligns with the mark on the body (Pic. 9 pos 5) and then tighten the three grub screws (Pic 9, pos 6, 7, 8).

If the rubber eyepiece on the 5x magnification models is not in use, it’s long lead can be compactly folded and pinned (Pic.10 pos 2).

Your sight is equipped with rubber protective caps for an eyepiece and for a objective lens. When the scope is in use, the caps can be attached to turrets, as indicated in Pic.10 pos 1&2 (for 5x30 & 5x24 models) and Pic.11 pos 1&2 (for 10x24 model).

The rubber eyepiece can be repositioned for right or left eye use (Pic. 12 pos a).
For users with spectacles, we recommend you fold back the rubber eyepiece (Pic. 12 pos b).

Extended MD


Optical surfaces should only be cleaned using the optical soft cloth supplied with the scope or with a similar quality cloth. Do not apply force when cleaning. If you are not going to use the scope for a long time, please remove a battery.
The Manufacturer provides warranty for its products against material and workmanship defects for a period of 3 years, starting from the day of purchase.
The warranty does not cover the following cases:
- the device has been modified or tampered with;
- the device has been dropped or has marks suggesting mechanical damage;
- the device has been tampered with by an unauthorized repairer;
In the event that a warranty repair service is required, please contact the distributor. Any product returned under this warranty should be safely packaged to prevent damage in transit. In addition, it must be accompanied with the following items:
- Letter explaining the unit's problem.
- Copy of the original receipt showing when and where the product was purchased.
- Return shipping information, including return address and contact details.
For any questions please contact our technical support by email: support@immersive-scopes.co.uk