1 minute read
Quick Menu
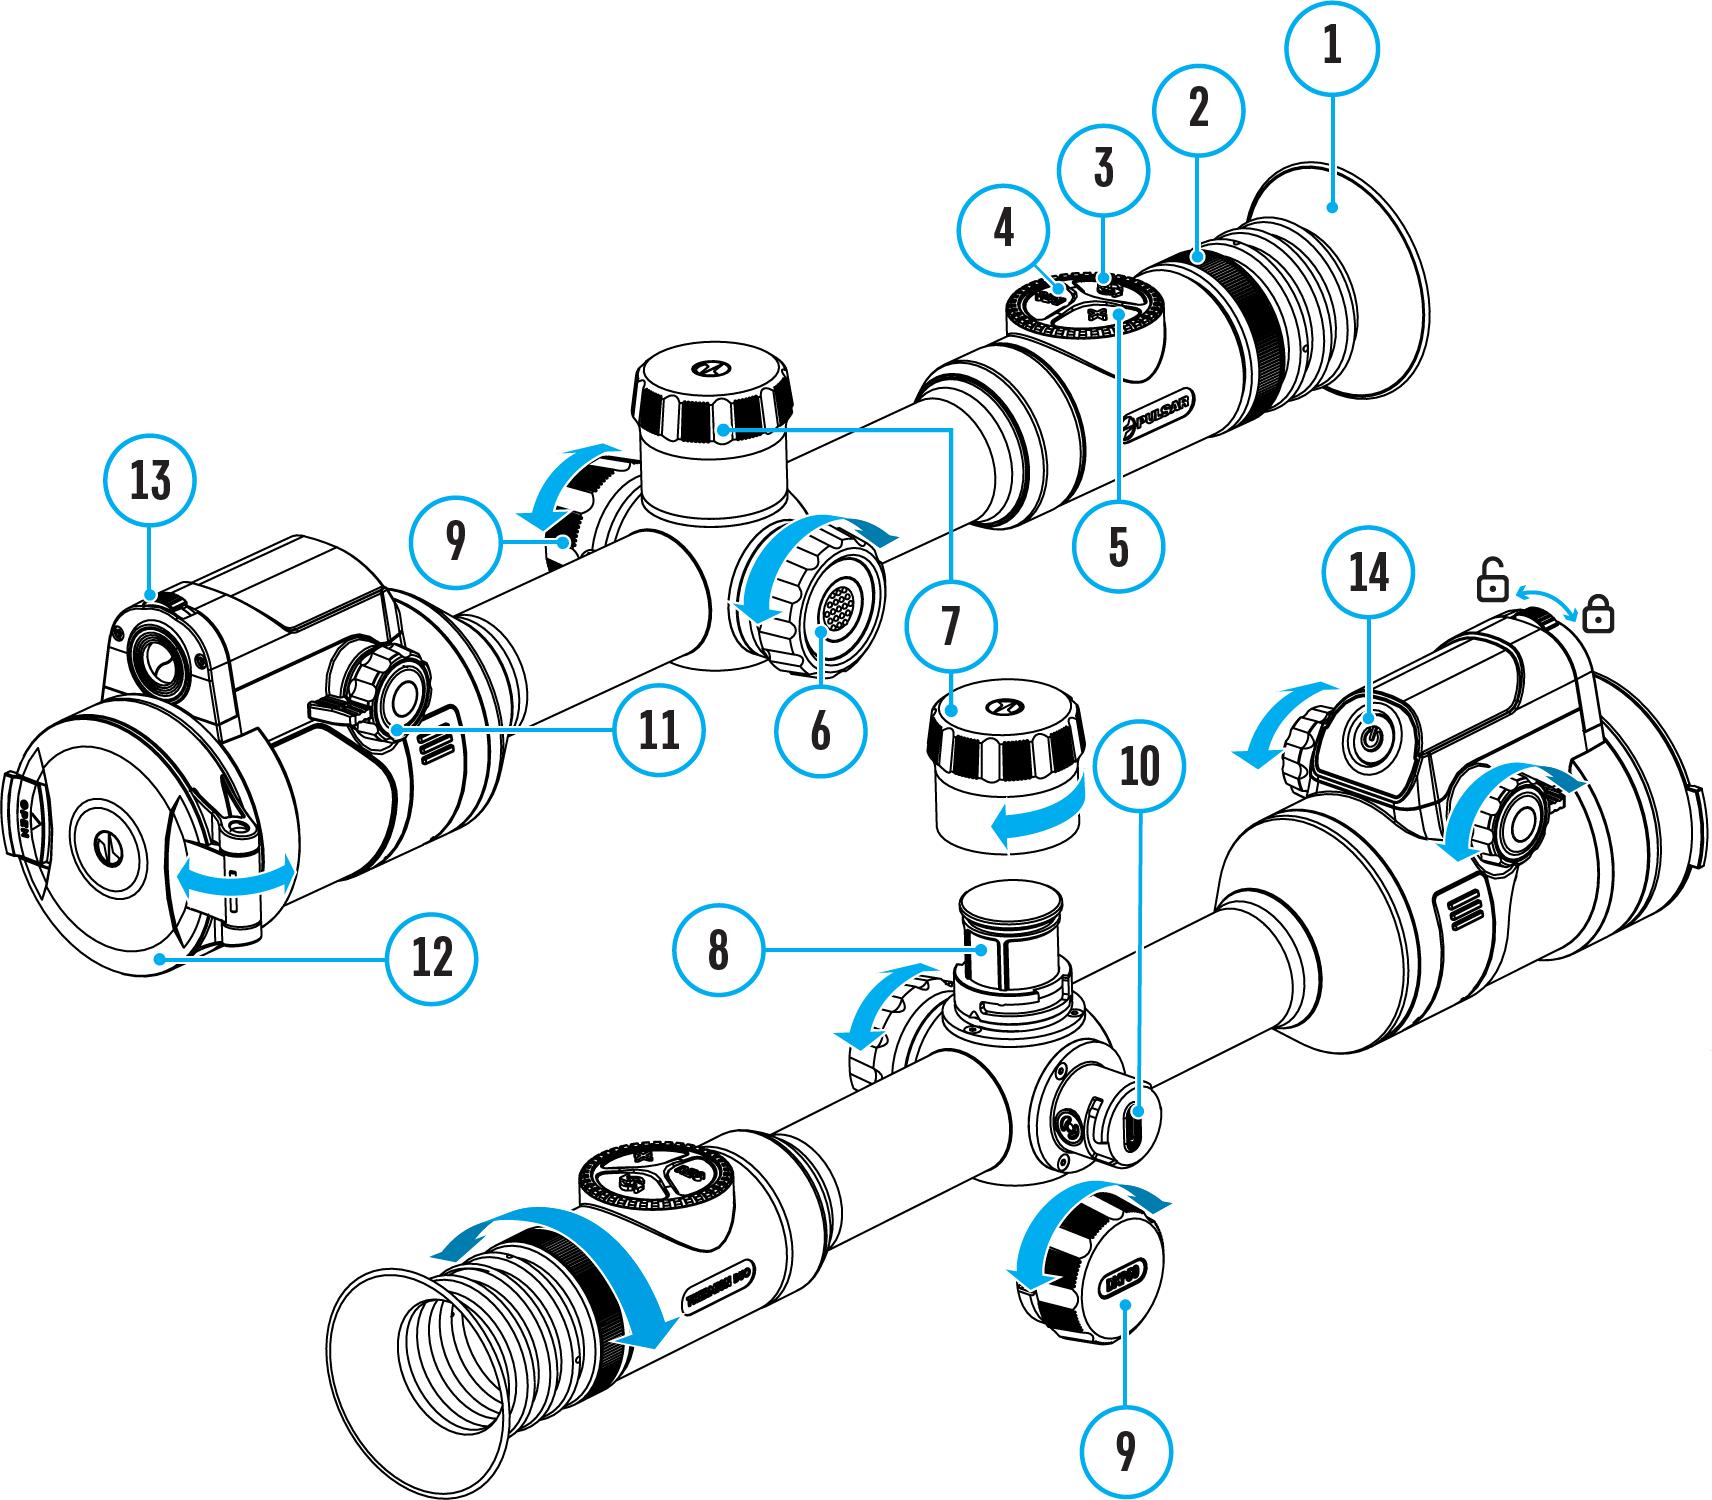
Show device diagram
The basic settings (adjusting brightness and contrast, information on the distance) can be changed using the quick access menu.
Press the controller button(6) briefly to enter the quick menu. A short press of the controller button (6) enables you to switch between functions, as described below.
Brightness Image not found or type unknown rotate the controller ring (6) to change the display brightness value from 00 to 20.

Contrast Image not found or type unknown rotate the controller ring (6) to change the image contrast value from 00 to 20.
Amplification Levels allows you to select one of three amplifying levels of sensitivity(Normal , High , Ultra ).
Note: To maintain brightness and contrast settings when changing amplifying levels, activate User Mode
Image not found or type unknown information on the current profile and zeroing distance in this profile (e.g., profile A, zeroing distance of 100 m). This information is always displayed in the status bar. Rotate the controller ring (6) to switch between the zeroing distances in the selected profile. This function is available if there are two or more distances in the profile.
Tip:To quickly switch between distances while hunting, leave the Zeroing Distance option selected before exiting the quick menu. The menu item will be saved, and the next time you enter the quick menu, you can quickly switch the zeroing distances by turning the controller (6) (for example, 100 m, 150 m, 200 m).
Image not found or type unknown rotating the controller ring (6), change the distance between the special mark points to determine the distance to the observed object (for more details on the rangefinder, see the Stadiametric Rangefinder section).
Stadiametric rangefinder
Press and hold the controller button (6) to exit the menu or wait 10 seconds to exit automatically.


