


Authors:RaeRobinson,SandraE.Johnston,ElanaV. Feldman,MaddieHoude,SamanthaR.Kurkowski, AmandaMast,JesV.Braun,andKarinM.Kettenring


Seeds are used in many aspects of plant research as well as in applications such as ecosystem restoration. However, not all seeds are living (i.e., viable). Non-viable seeds can result from a variety of factors such as failed pollination, fungal infection, insect damage, extreme weather events like historic drought, and inbreeding (Baskin and Baskin 2014; Rieger et al. 2014). Furthermore, seed viability can vary greatly across species and for individual species by patch, site, and year (Baskin and Baskin 2014; Rieger et al. 2014). In the wild and in storage (e.g., for restoration), seed viability declines with time, sometimes dramatically (De Vitis et al. 2020).
To successfully work with seeds, it is essential to know how many seeds are viable. Seed viability can be assessed through a few different avenues such as a basic cut test (i.e., is the embryo fully developed), germination assays, x-ray imaging, or the most common—a tetrazolium (TZ) test (Frischie et al 2020). The first three options are imperfect—with a cut test, embryos that appear fully developed can still be non-viable; germination assay results can be skewed by dormant seeds or improper germination conditions; and x-ray imaging requires specialized equipment and training (Frischie et al. 2020).
This document focuses on best practices for TZ testing for a wide array of common wetland species that have been the focus of research and restoration in our region (the Intermountain West). These recommendations build on formal rules and practices developed by the AOSA (Association of Official Seed Analysts) and SCST (Society of Commercial Seed Technologists; Miller and Peters 2010). In some cases, pre-existing protocols were followed or adapted, and the most straightforward option was often chosen when multiple protocol options were available For example, methods that were simple to follow and that led to more consistent results across observers were often chosen. In other cases, protocols were developed de novo, building on guidelines for similar species.
As information is developed for new species, the guide will be updated with new information (as indicated by the Edition number).
This guide was made possible by funding and resources from the Environmental Protection Agency; Utah Agricultural Experiment Station; Utah Department of Agriculture and Food; Utah Division of Forestry, Fire & State Lands; Utah Division of Wildlife Resources; and Utah State University Extension.
Recommended citation
Robinson, R., Johnston, S. E., Feldman, E. V., Houde, M., Kurkowski, S. R., Mast, A., Braun, J. V., & Kettenring, K M. (2024) Seed viability testing guide for common wetland plant species. Utah State University’s Wetland Ecology and Restoration Laboratory and Utah State University Extension.

What is tetrazolium (TZ)?
TZ stands for 2,3,5-triphenyl tetrazolium chloride. TZ testing is a relatively quick way to determine seed viability for a seed lot, i.e., the portion of a seed lot that is alive.
When TZ solution enters living tissue, it is reduced to formazan, a pink-red compound, via H+ ions that are released by dehydrogenase enzymes that are present in respiring cells. Therefore, seeds that turn red when exposed to TZ are known to be respiring and are viable. Seeds that do not take on a red coloration are no longer respiring and are effectively dead.
Suggested reading
Pages 1–22 in the AOSA/SCST Tetrazolium Testing Handbook, 2010 Edition, cover the nature of the TZ test, history, seed structure, etc.
Supplies
The following supplies will be helpful when conducting TZ testing:
● Microscope and microscope lights for preparing and evaluating seeds.
● Square or rectangular plexiglass pieces to prepare and evaluate seeds under the microscope.
● Double sided tape (thin tape is useful for small seeds and thick tape is useful for large seeds) to keep seeds in place during preparation and evaluation.
● Precision knife with exacto blade replacements for cutting seeds during preparation and evaluation.
● Forceps (various sizes) for handling seeds.
● Petri dishes to hold the seeds during the TZ solution soak.
● Paper towels or filter paper for seed imbibition prior to soaking in the TZ solution.
● TZ powder to create the TZ solution.
● Deionized water for mixing the TZ solution.
● Handheld clicker (counter tally) for keeping track of viable and non-viable seeds when assessing the seeds under a microscope.
Here is some general guidance on the TZ testing timeline:
If possible, complete a germination test prior to a TZ test. Germination tests can be completed in Petri dishes under ideal conditions in growth chambers or greenhouses. Germinated seeds can be counted and removed once a week for a short period of time (~1–2 weeks) prior to conducting TZ tests on the ungerminated seeds that remain. Total viability proportion is germinated seeds + viable seeds (as determined by TZ) divided by the number of seeds assessed. At least three replicates of 50–150 seeds should be used in testing depending on the level of accuracy needed. A germination test prior to

TZ evaluation can save time if many or some of the species are expected to germinate readily. Conducting a germination trial also imbibes the seeds, meaning the seeds are already properly imbibed at the start of TZ testing.
If a germination test is not pursued, soaking the seeds in water for 24–48 hours before beginning initial cuts may facilitate cutting precision and imbibition of the TZ solution. Imbibition improves efficiency and may lead to more straightforward evaluation.
TZ should be stored under dark and cold (refrigerator) conditions to prevent degradation. Aluminum foil can be used to cover containers holding the solid or liquid TZ to minimize light exposure. For the protocols described in this document, the soak in TZ solution occurred at room temperature in a drawer that shielded the solution from direct light.
● 1 gram of TZ powder dissolved into 100 ml of deionized water yields a 1% solution.
● Be sure to thoroughly shake the solution before using it.
● Information on many plant families and genera is in the AOSA/SCST Tetrazolium Testing Handbook, 2010 Edition. Read about the suggested preparation and TZ concentration (typically 2–3 pages for each family).
● For species that lack a TZ protocol, using a 1% TZ solution for 48 hours is a good starting place.
● Try a few different cutting techniques and periodically check the progression of the staining (e.g., 12, 24, and 48 hours). Typically, you want to avoid cutting the embryo but sometimes this is unavoidable.
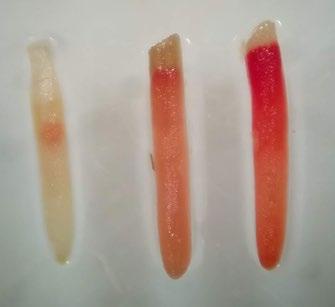
● Some species and seed lots will need more or less time in the TZ solution. However, if seeds are staining light pink or partially stained in a patterned way (darker closer toward the cut), this is evidence that they need more time in TZ or a higher TZ concentration.
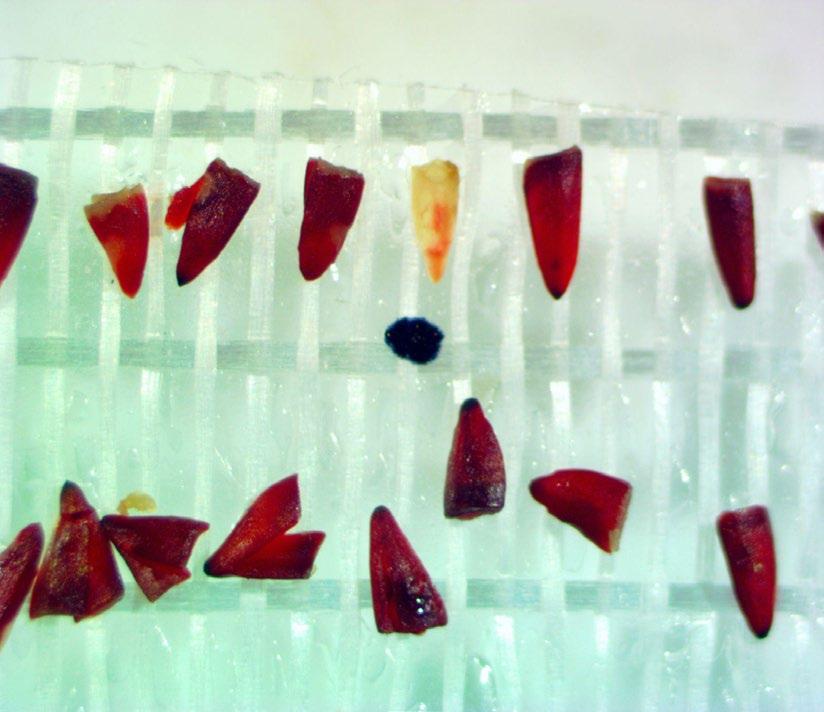
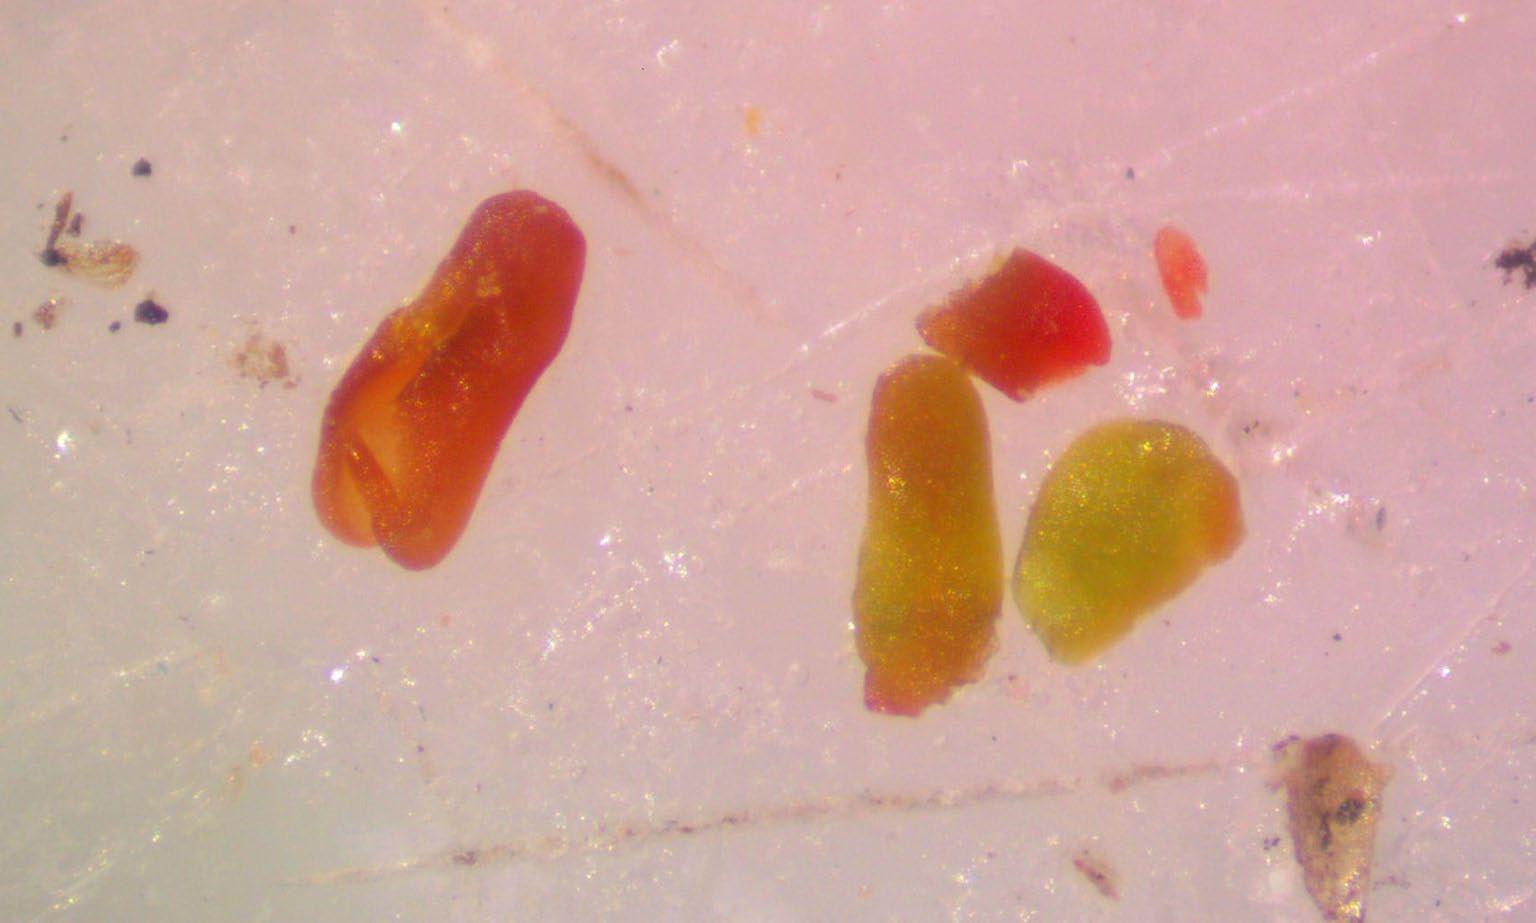
● At right is an example of a TZ diffusion issue as opposed to nonviable seeds. These


seeds were soaked in 0.1% TZ for 24 hours and were stained dark pink only near the cut location.
● If this staining pattern is present, it is an indication that a longer time or higher concentration TZ is needed to ensure a more straightforward evaluation. A higher concentration and soaking time (1% for 48 hours) resulted in fully dark pink embryos (see Senecio hydrophilus, p. 21).
In general, a fully stained embryo is viable. However, some plant families have specific evaluation criteria (see the AOSA/SCST Tetrazolium Testing Handbook, 2010 Edition, for information specific to plant families). Also, if other necessary tissues are damaged or absent, the seed can be deemed non-viable. From the AOSA/SCST Tetrazolium Testing Handbook, 2010 Edition (p. 1–18), “the following contribute to the classification of seeds as non-viable:
● Evidence of necrosis
● Half or more of the total cotyledon tissue in dicots non-functional
● Critical connective tissues damaged or decayed
● Flaccid tissues
● Pathogen invasion
● Mechanical breaks or bruises, especially in strategic locations that would impair growth and development”
A well-organized data sheet (see Appendix 1) can help with data collection and careful note taking. Many people find it useful to work in rows or groups of 10 seeds at a time when assessing viability. Counters can also be used to keep track of viable and nonviable seeds during the assessment. We suggest recording the characteristics observed that indicate a seed is non-viable. This helps people evaluate more purposefully and makes it easier to catch evaluation mistakes.
Here are some seed handling tips and tricks that are useful when conducting TZ testing:
● Embrace ambidextrousness. The dominant hand can cut or pierce seeds with a blade, while the nondominant hand can hold forceps to the seed to keep it in place.
● If seeds are flinging away and not staying in place when cutting, try a thick tape (i e., thicker than regular double-sided tape). If seeds are falling apart when you try to move them with forceps, a thin double-sided tape (i.e., regular double-sided tape; less sticky) will release the seeds more easily.
● To remove seeds from the TZ solution, pour the seeds and the TZ solution onto a small stack of paper towels. This is easier than removing seeds with forceps when they are floating in the solution.
● Use white backgrounds whenever possible to keep track of seeds more easily. The contrast of the seed on a white background under the microscope makes it much easier to see the seeds.

● During preparation of seeds, seeds may stick to forceps when moving them into an empty Petri dish. Use an eyedropper to put one small drop of water in an otherwise empty Petri dish. To place the seed in the dish, let the water pull the seed off the forceps. This drop will likely evaporate before you add the TZ solution, so no need to worry about further dilution of the TZ solution.
● If static interferes with the handling of small seeds, wipe down tools and the workstation with a wet paper towel.
● Sharp blades are very necessary. If you are chopping, smashing, or imprecisely slicing seeds, use a new blade it makes all the difference!
● After putting the seeds in TZ solution, lay a piece of paper towel the size of a Petri dish on top of the seeds/solution to force the seeds into solution and alleviate the issue of having seeds floating on top.
● Small seeds can be lined up on thin double-sided tape in preparation for the TZ solution. After cutting, remove the tape and stick it into a Petri dish before adding the TZ solution. This step saves time, as most of the seeds will stay on the tape even after 48 hours in solution.

Below is an example of the content and format you will find on the following pages for each species.
1.Plant family that the species belongs to
2. Latin name for the plant species
3. Common name for the plant species
4. Percent (%) tetrazolium (TZ) solution to use; Length of time to soak the seeds in solution
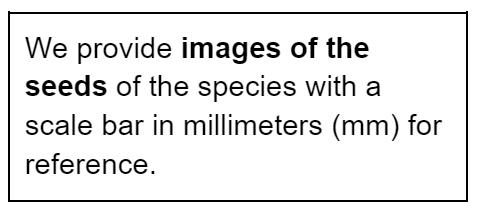
5. Preparation: we describe how to prepare the seed prior to soaking in the tetrazolium solution. This step will involve puncturing the seed coat, or sometimes cutting off a part of the seed (without disturbing the embryo). This step may also involve saturating the seed in water (imbibing) prior to cutting or staining.
6. Evaluation: we outline the steps to evaluate the embryo for viability after the seed has soaked in the tetrazolium solution.
7. Notes: we provide additional tips and tricks for the species for successful viability evaluation.
Throughout these pages, you will notice that we bold and blue botanical terms that we later define in the glossary.
8.Figures illustrating seed preparation and evaluation
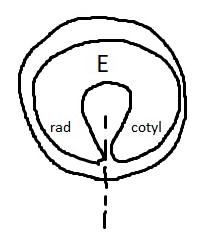
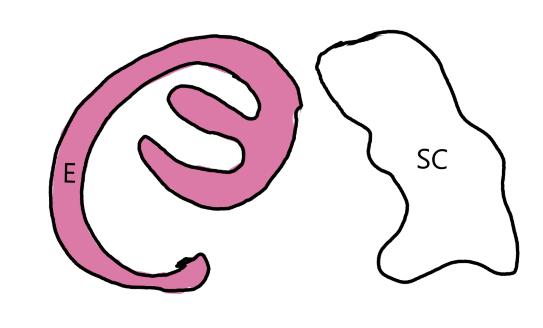
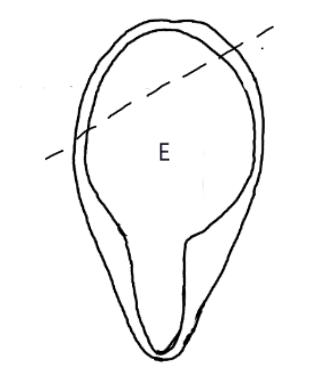
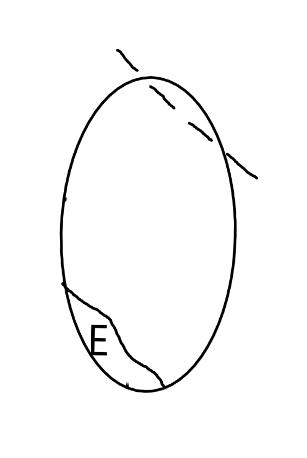
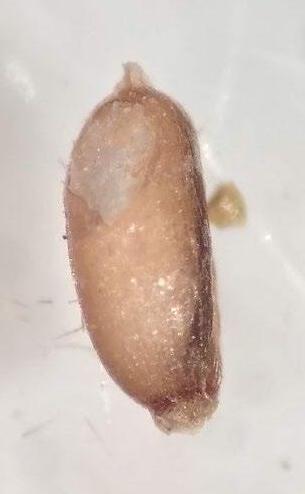
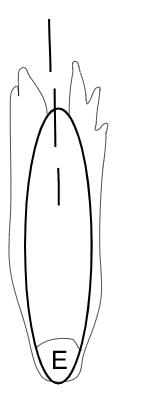
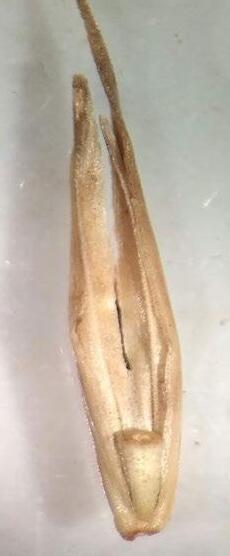
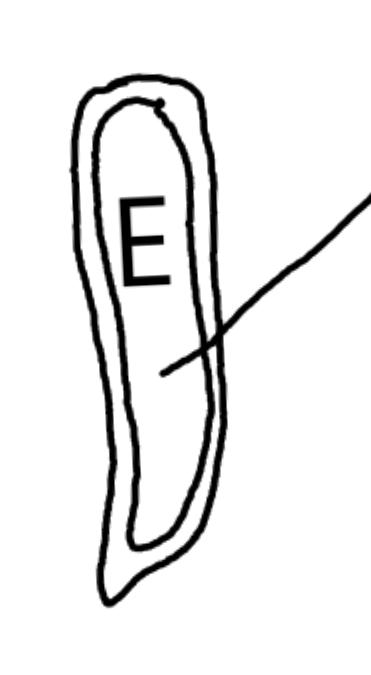
On the left side of Figure 1: We provide hand drawn diagrams to illustrate the preparation stage. We indicate where and how to make the preparation cuts and a photo of an actual seed with that cut. The cuts are indicated with a dashed line. The scratch of a window is indicated with a box with hatch marks. In the diagram, we indicate the embryo (E), radicle (rad), and cotyledon (cotyl) where needed to illustrate the steps.

On the right side of Figure 1:
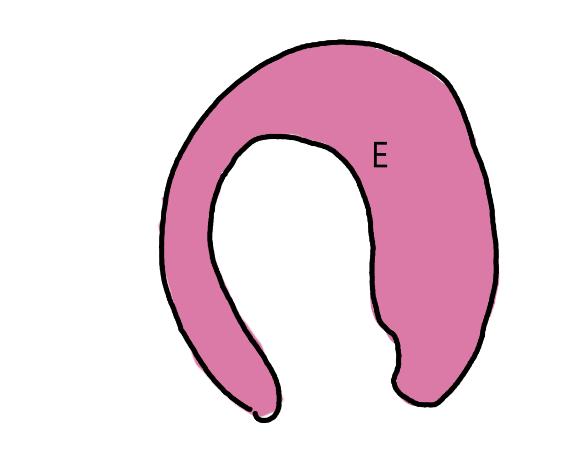
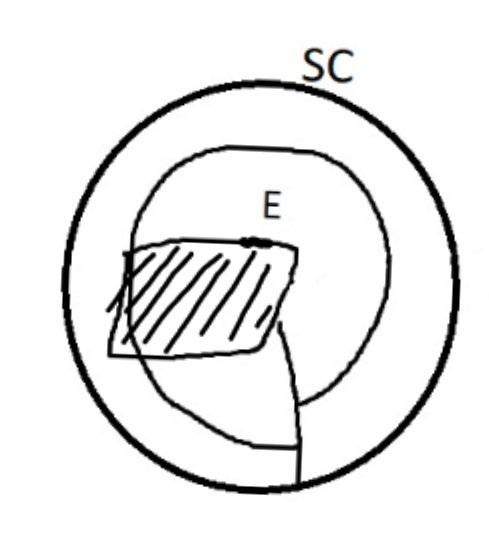
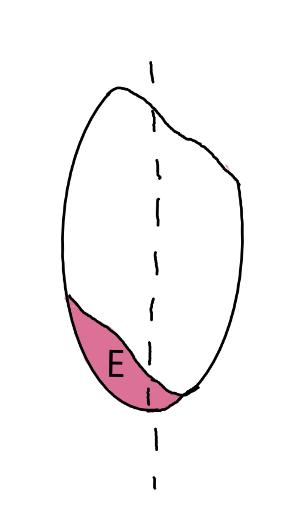
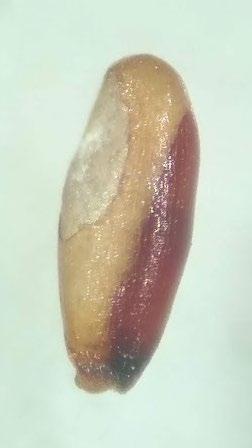
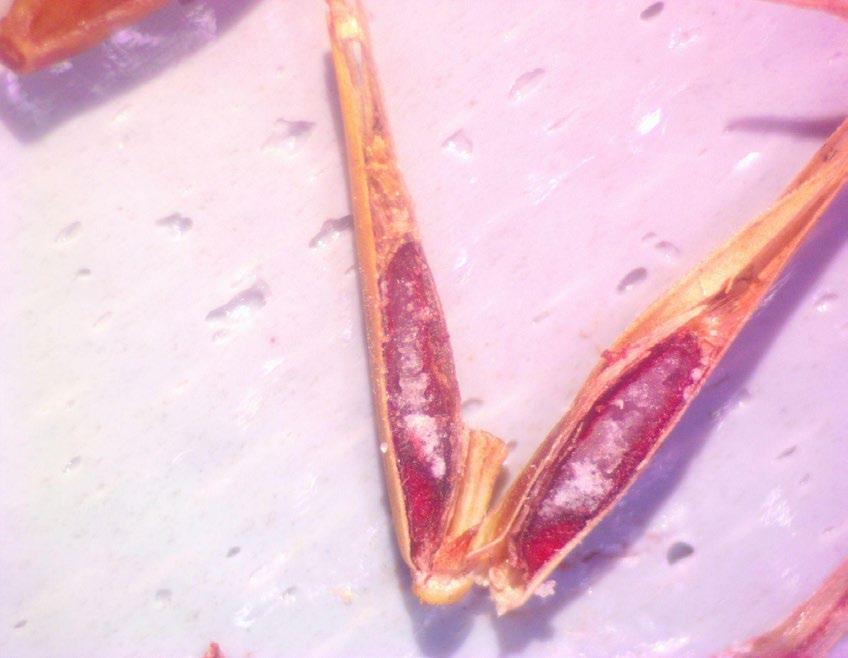
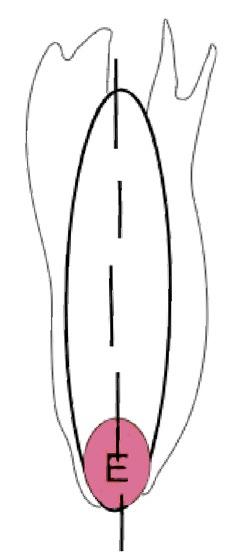
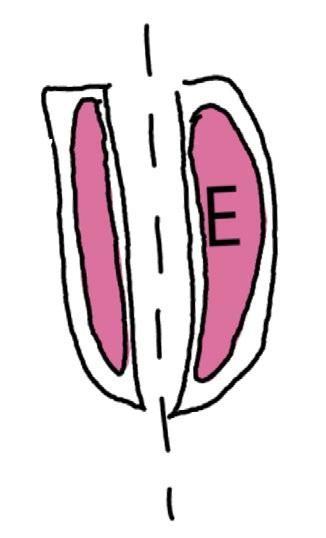
We have hand drawn diagrams and photos to illustrate the evaluation stage. We show the embryo (E) poststaining, and sometimes the seed coat (SC) where needed to illustrate the step.
9. Additional photographs
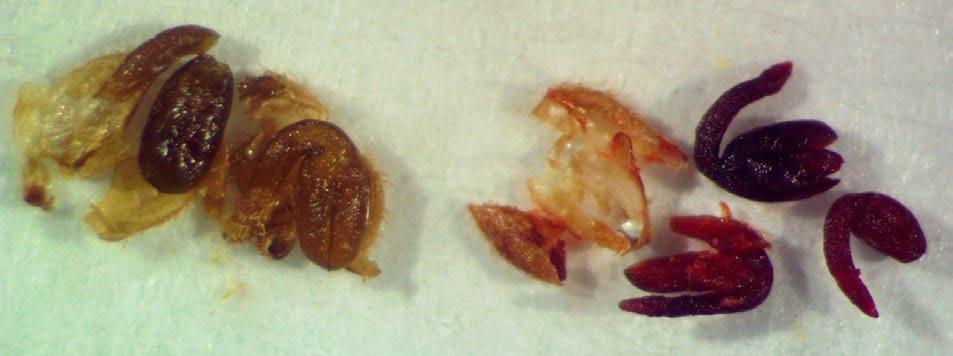
In some cases, we also provide additional photos of seeds in varying levels of viability (and associated staining) to assist with interpretation of test results.

Sesuvium verrucosum
Verrucose sea-purslane
1% TZ; 48 hours
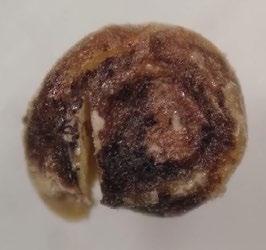
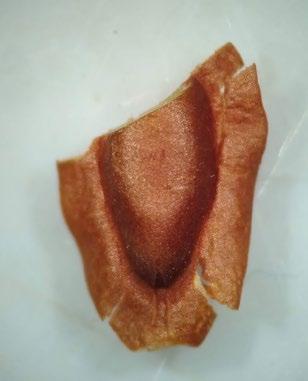
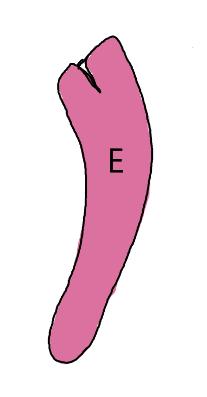
Preparation: Chip or scratch a “window” (W) into the center of the seed coat (SC) with an exacto blade (Figure 1). Try not to cut into the embryo (E) that curves around the edge of the seed.


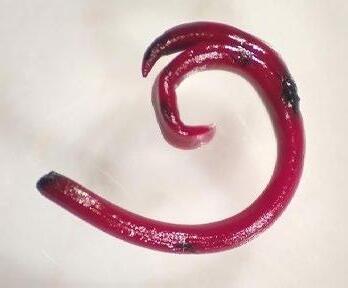
Evaluation: Remove the embryo from the seed coat by pulling the embryo out of or chipping away the seed coat. Be sure to get a good view of the whole embryo and disregard any artifact damage (Figures 2–3). The endosperm in the center of the seed does not need to be stained pink for the seed to be viable
Notes: Imbibition prior to creating the window cut does not seem to improve the technique since the seed coat is very hard.


Sagittaria cuneata
Arumleaf arrowhead
1% TZ; 48 hours
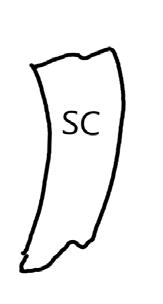
Preparation: Imbibe seeds for 12–24 hours before preparation to make the pericarp and embryo less brittle. Leave the embryo inside the pericarp and pierce the embryo (E) through the pericarp (P) and seed coat (SC; Figure 1). This approach will avoid damaging the embryo and it stains well if you are careful to pierce through the seed coat.
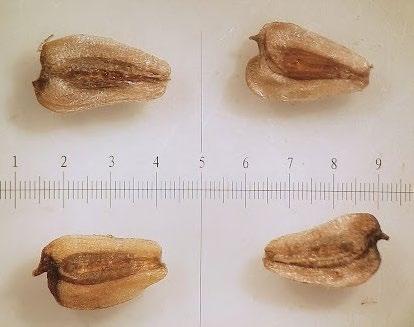
Evaluation: Remove the embryo from the pericarp AND the seed coat (first remove pericarp, then the seed coat, which is right around the embryo) by cutting right at the curve of the embryo and gently squishing the embryo out of the seed coat (Figure 1, middle image). A fully pink stain is viable (Figure 2). Be sure to get a good view of the whole embryo and disregard any artifact damage which is common (Figure 3).




Allenrolfea occidentalis
Iodine bush
1% TZ; 48 hours
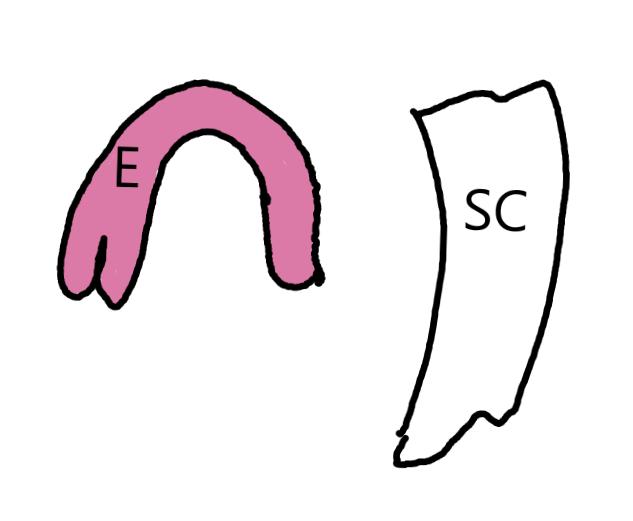
Preparation: Chip or scratch a “window” (W) into the center of the seed coat (SC) with an exacto blade (Figure 1). Try not to cut into the embryo (E) that curves around the edge of the seed. Removing seeds from utricles before making preparatory cuts and placing them in TZ is suggested
Evaluation: Remove the embryo from the seed coat by pulling the embryo out of or chipping away the seed coat. Be sure to get a good view of the whole embryo and disregard any artifact damage
mm


Notes: Imbibition prior to creating the window cut does not seem to improve the technique.




Salicornia rubra
Pickleweed
1% TZ; 48 hours
Preparation: Imbibe for 24 hours before slicing through the seed coat between the embryo’s (E) radicle (rad) and cotyledons (cotyl; Figure 1). Imbibition makes the seed softer, improving the precision of the cut. Removing seeds from utricles before making preparatory cuts and placing them in TZ is suggested.
Evaluation: Check to see if the full embryo is stained. Some green blotchiness is okay, but fully green embryos are non-viable (Figure 2; see the AOSA/SCST Tetrazolium Testing Handbook, 2010 Edition, protocol).

Notes: 24 hours in 0.1% solution is not strong enough for a full pink stain.





mm

Salicornia utahensis
Utah swampfire
1% TZ; 48 hours
Preparation: Imbibe for 24 hours before slicing through the seed coat between the embryo’s (E) radicle (rad) and cotyledons (cotyl; Figure 1). Imbibition is necessary to remove any remaining chaff from the seed and makes the seed softer, improving the precision of the cut. Removing seeds from utricles before making preparatory cuts and placing them in TZ is suggested.

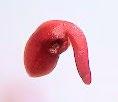
Evaluation: Check to see if the full embryo is fully stained (Figure 2). Some green blotchiness is okay, but fully green embryos are non-viable (Figure 3).




mm
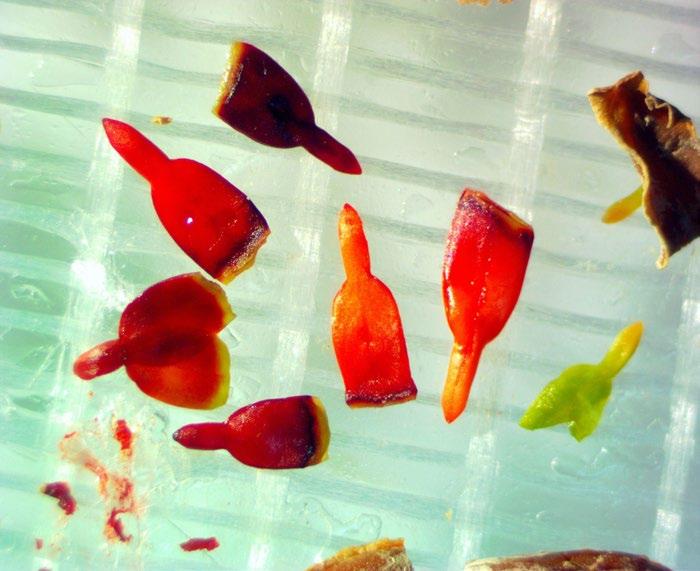
various conditions. One seed unstained and green (bottom right), another unstained and flaccid (top), and remaining two seeds contained no embryo (bottom left).
Suaeda calceoliformis
Pursh seepweed
1% TZ; 48 hours
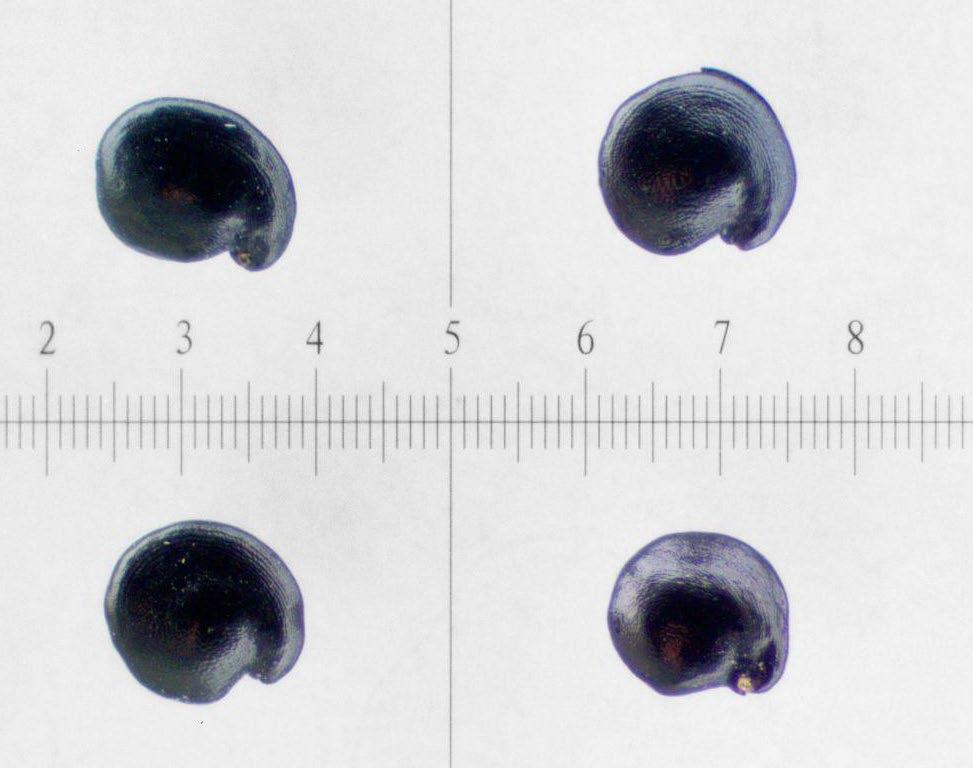
Preparation: Create a small slice in the seed coat (SC) where the radicle end of the embryo (E) meets the cotyledon end (Figure 1).
Evaluation: Use forceps and an exacto blade to chip away the seed coat or pull the embryo from the seed coat to get a good view of the embryo. The full embryo should be pink (Figure 2). Ignore any artifact damage





mm

Asclepias incarnata
Swamp milkweed
1% TZ; 48 hours
Preparation: Cut through the winged seed coat and a small part of the cotyledon side of the embryo (E). We find this diagonal cut to be easier than a longitudinal cut (Figure 1). Discard the small portion that was cut off and keep the large part of the embryo for staining.
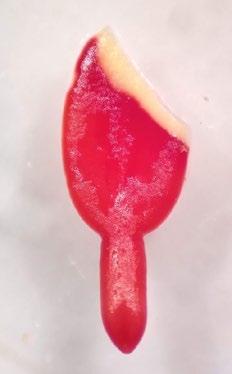
Evaluation: Remove the embryo from the seed coat to evaluate viability. The endosperm and embryo will both stain pink, but only the stained embryo is needed for evaluation (Figures 2–3). Ignore any artifact damage at the cut location.




Some viable seeds have acceptable artifact damage at the




Asclepias speciosa
Showy milkweed
1% TZ; 48 hours
Preparation: Cut through the winged seed coat and a small part of the cotyledon side of the embryo (E). We find this diagonal cut to be easier than a longitudinal cut (Figure 1). Discard the small portion that was cut off and keep the large part of the embryo for staining.

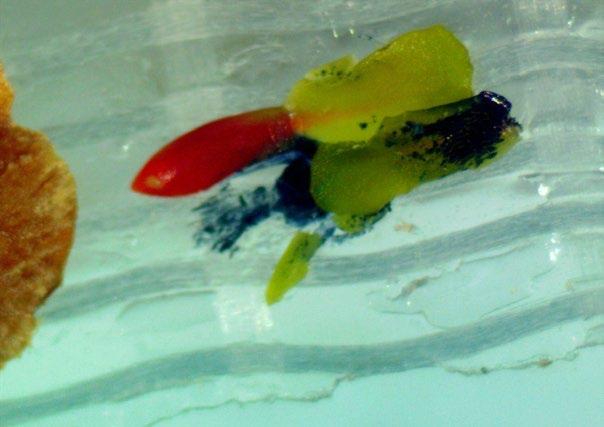
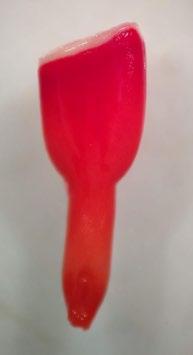
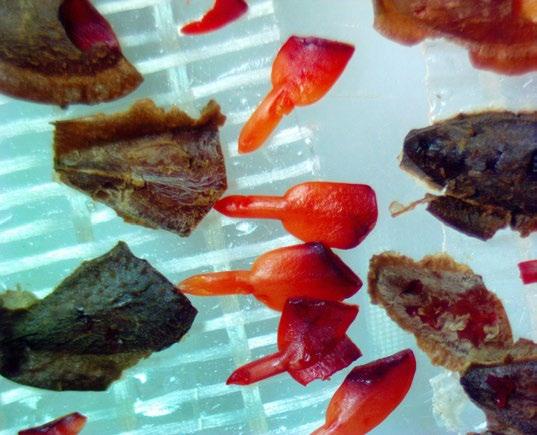
Evaluation: Remove the embryo from the seed coat to evaluate viability. The endosperm and embryo will both stain pink, but only the stained embryo is needed for evaluation (Figures 2–4). Ignore any artifact damage at the cut location. Stained embryos may vary from dark pink to light pink when using 1% TZ and a 48-hour staining time, but a light pink stain is still considered to be viable.
Notes: 1% TZ for 24 hours led to confusion about diffusion of the chemical and color.





Bidens spp.
Nodding beggartick
1% TZ; 48 hours
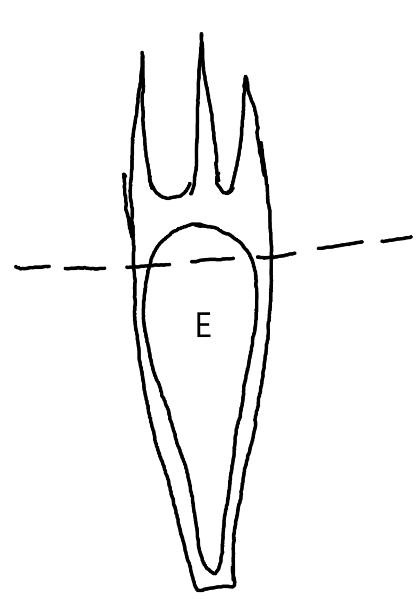
Preparation: Cut through the pericarp, membranous seed coat, and the very top of the cotyledons (Figure 1). Ignore small artifact damage which may be present as an unstained layer of cells at the site of cutting. Discard the small portion that was cut off and keep the large part of the embryo (E)for staining.
Evaluation: Bisect the seed and check both sides for a pink stain (Figures 2–4).
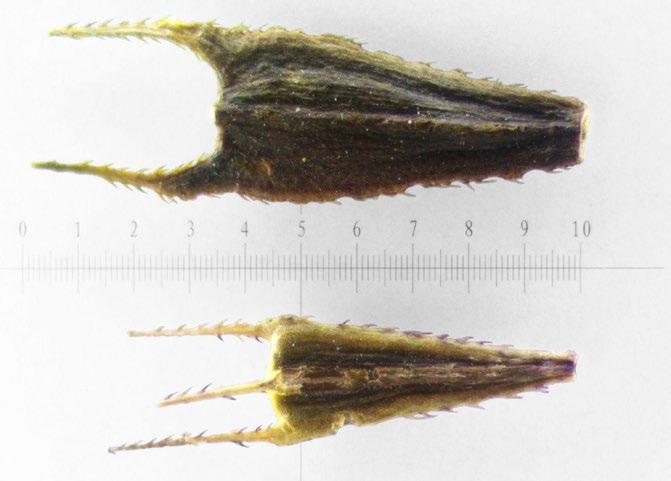
Notes: Preparing the seeds by scraping the pericarp to create a window led to a more subjective evaluation of the seeds due to a lighter pink stain. Using 0.1% TZ for 24 hours worked fine for some seed sources. However, different seed lots and sizes may need more time and a greater concentration, so we changed the protocol to 1% for 48 hours.



Euthamia occidentalis
Western goldentop
1% TZ; 48 hours
Preparation: Imbibe seeds overnight. With a sharp blade, pierce the center of the pericarp into the embryo (E; Figure 1).
Evaluation: The embryo slides easily out of the pericarp. View the embryo and evaluate it for a full pink stain. Disregard any artifact damage at the pierce location.


mm


Asteraceae
Eutrochium maculatum
Spotted Joe Pye weed
1% TZ; 48 hours
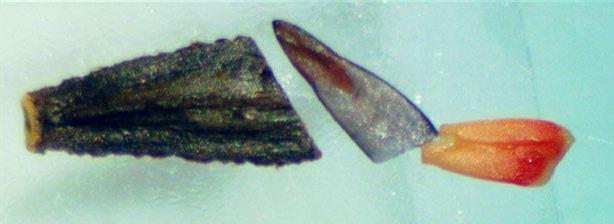
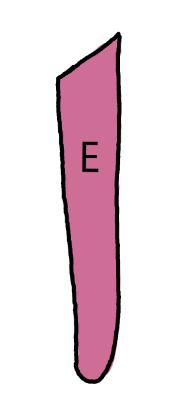
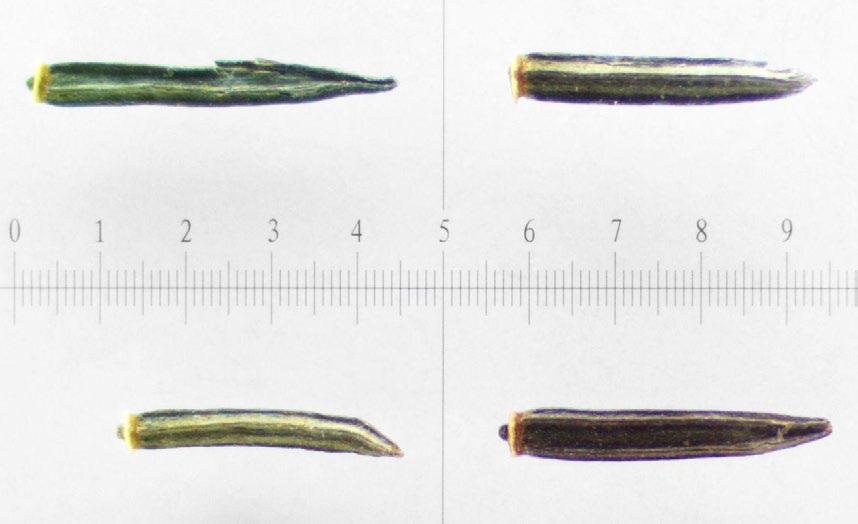
Preparation: Cut the seed diagonally at the blunt end of the seed (cotyledon end). Discard the small portion that was cut off and keep the large part of the embryo (E) for staining (Figure 1).
Evaluation: The embryo slides easily out of the pericarp after soaking. View the full embryo and evaluate for pink stain (Figures 2–3)
Notes: Using a 0.1% TZ solution led to incomplete staining.





mm

Asteraceae
Grindelia squarrosa
Curlycup gumweed
1% TZ; 48 hours
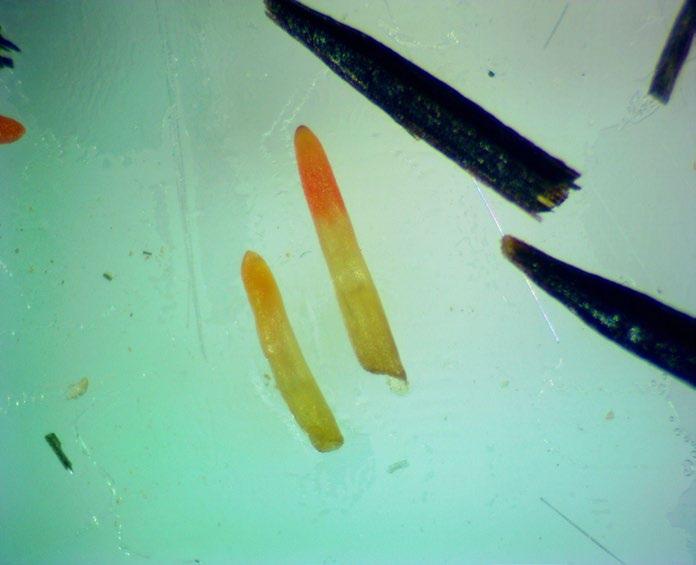
Preparation: Cut the seed diagonally at the blunt end of the seed (cotyledon end). Discard the small portion that was cut off and keep the larger part of the embryo (E) for staining (Figure 1).
Evaluation: The embryo slides easily out of the pericarp after soaking. View the full embryo and evaluate for pink stain (Figures 2–3).
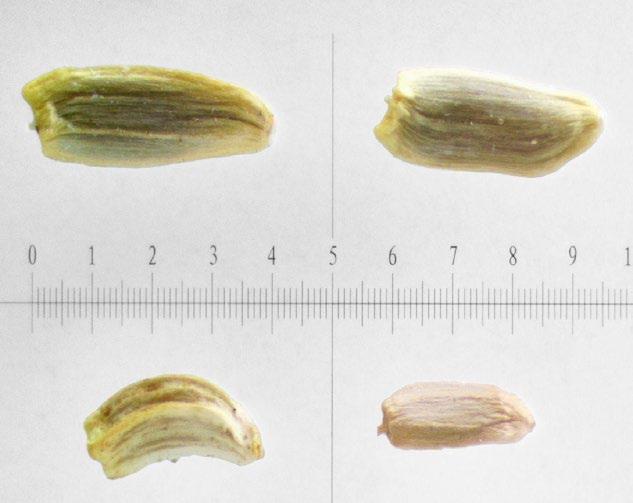
Notes: A straight, lateral cut (in contrast to the diagonal cut) led to embryos falling out of the pericarp during the TZ soak.


Asteraceae
Helianthus annuus
Common sunflower
1% TZ; 48 hours
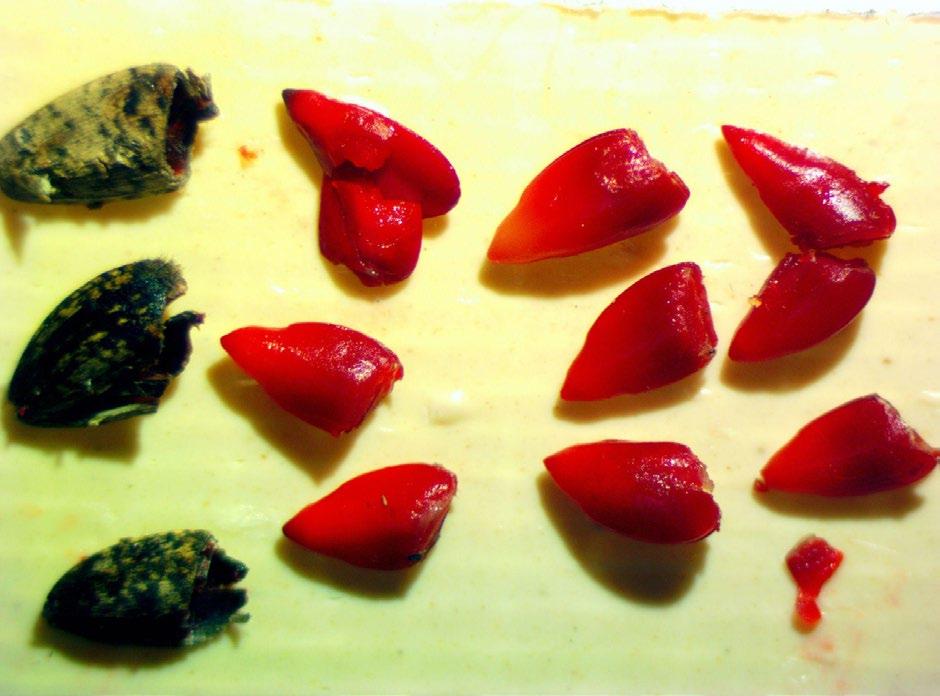
Preparation: Slice through the pericarp, seed coat, and embryo (E) laterally or diagonally at the wider, cotyledon end (Figure 1). Discard the small portion that was cut off and keep the large part of the embryo for staining.
Evaluation: Using forceps, push the embryo out of the pericarp. Viable embryos will stain pink (Figures 2–3).
Notes: Imbibition is not very helpful.
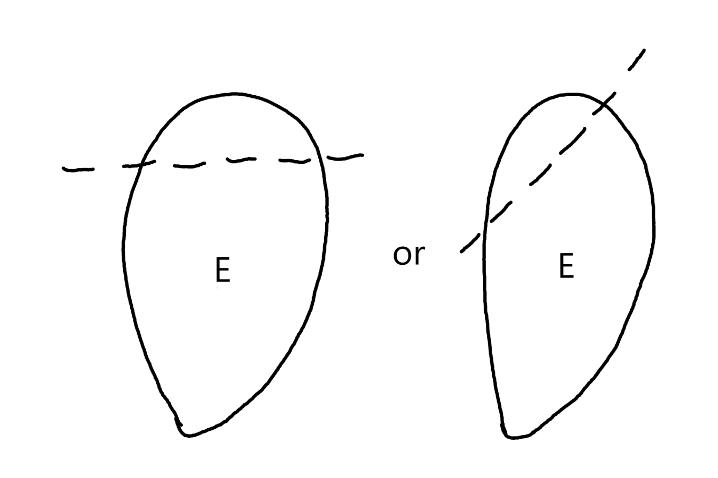
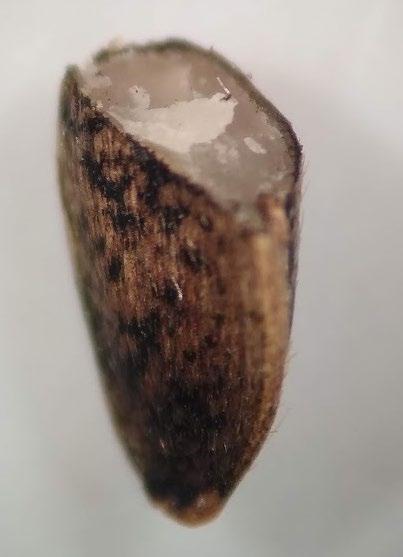


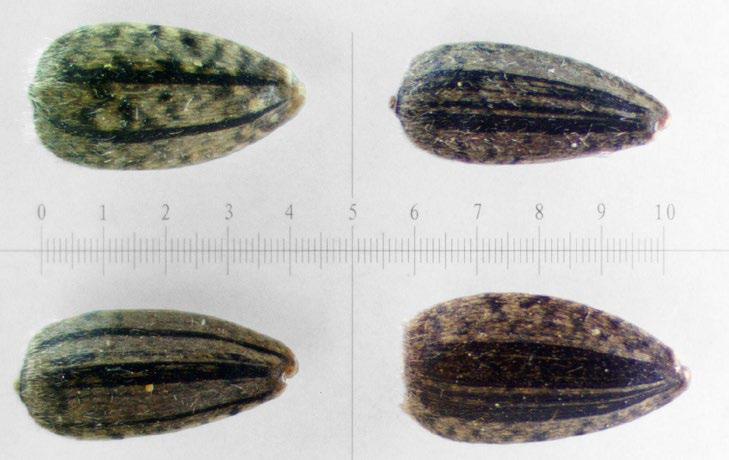

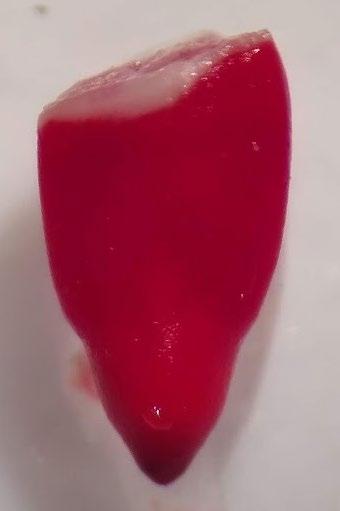
mm
Helianthus nuttallii
Nuttall’s sunflower
1% TZ; 48 hours
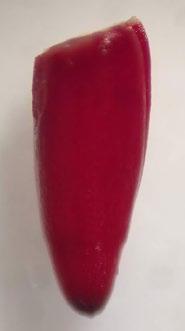
Preparation: Slice through the pericarp, seed coat, and embryo (E) laterally or diagonally at the wider, cotyledon end (Figure 1). Discard the small portion that was cut off and keep the larger part of the embryo for staining.
Evaluation: Using forceps, push the embryo out of the pericarp. Viable embryos will stain pink (Figure 2).




mm

Asteraceae
Senecio hydrophilus
Water groundsel
1% TZ; 48 hours
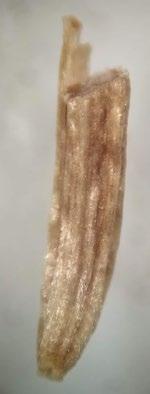
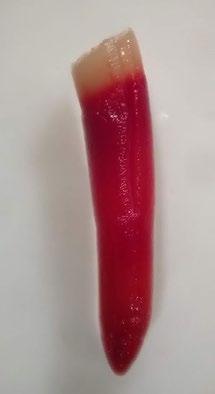
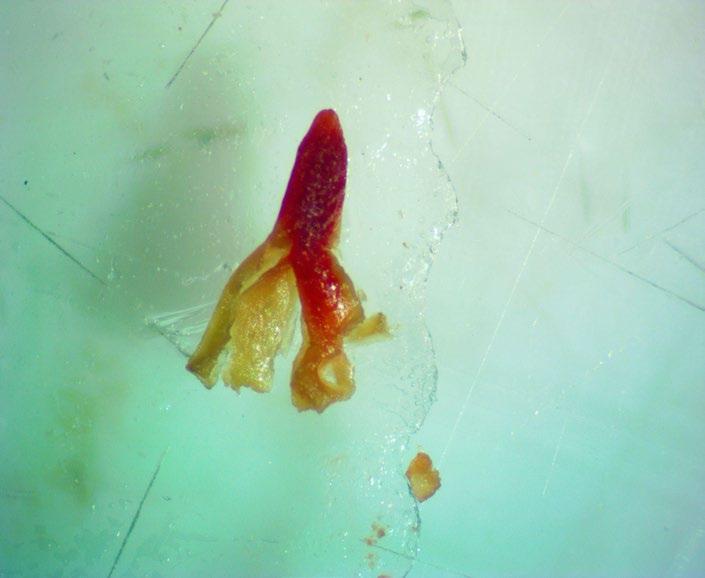
Preparation: Slice through the pericarp, seed coat, and embryo (E) diagonally at the blunt, cotyledon end (Figure 1) Discard the small portion that was cut off and keep the large part of the embryo for staining.

Evaluation: Using forceps, push the embryo out of the pericarp. Viable embryos will stain pink (Figures 2–3).
Notes: Using a lower TZ concentration or a shorter staining time leads to diffusion issues, where the cotyledons are pink but the stain fades into a white radicle







mm

Asteraceae
Solidago canadensis
Canada goldenrod
1% TZ; 48 hours
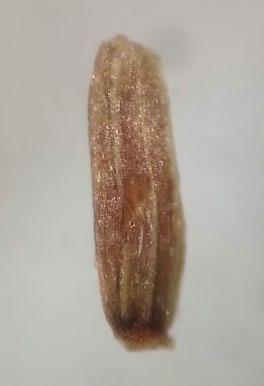
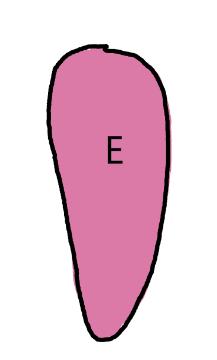
Preparation: Imbibe for 24 hours then pierce through the center of the pericarp and embryo (E) with a sharp blade (Figure 1). Use the impalement of the seed on the blade to transfer it to a Petri dish.
Evaluation: The embryo easily slides out of the pericarp after soaking. View the entire embryo to evaluate. Viable seeds are entirely pink (Figure 2). Disregard any artifact damage at the location where the embryo was pierced.
mm


Notes: For this species, because the seed is oval shaped, it is hard to cut laterally across the cotyledon end.




Asteraceae
Symphyotrichum ciliatum
Rayless alkali aster
1% TZ; 48 hours
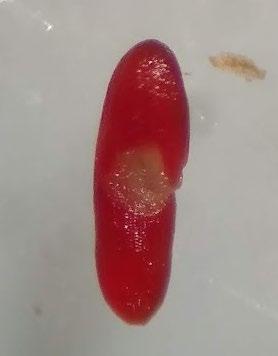
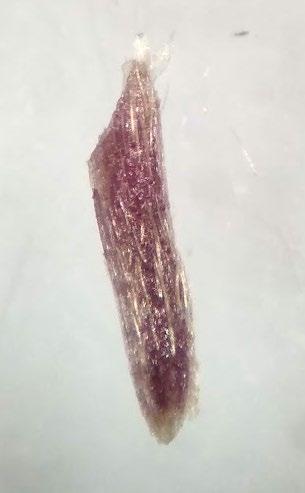
Preparation: Slice through the pericarp, seed coat, and embryo (E) diagonally at the wider, cotyledon end (Figure 1). Discard the small portion that was cut off and keep the large part of the embryo for staining.
Evaluation: The embryo will easily slide out of the pericarp after soaking. View the entire embryo and evaluate it for a full pink stain.



mm

Cleome serrulata
Rocky Mountain beeplant
1% TZ; 48 hours
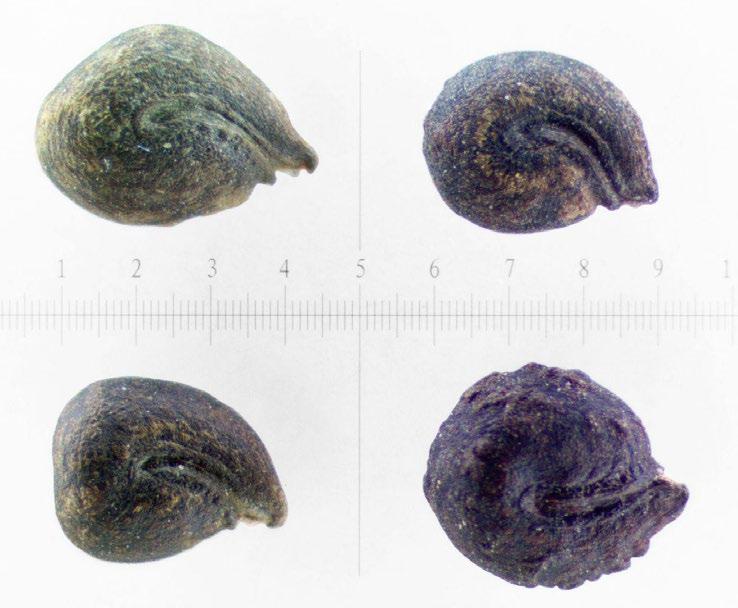
Preparation: Imbibition of seed on a moist media before cutting makes it slightly easier to cut the seed coat (SC) but is not necessary. Prepare the seeds by scraping the seed coat with an exacto blade to create a “window” (W; Figure 1). A larger window leads to greater imbibition of the TZ solution, so make the initial cuts large and uniform. However, if too much of the seed coat is removed, the embryo (E) will fall out of the seed coat.
mm

Evaluation: Cut in half upon scoring. White seed coats do not always mean nonviable embryos are inside. Non-viable seeds often have flaccid embryos that fail to totally fill the seed coat. Some viable embryos are pink in the middle and more orange on the ends (Figure 2). Non-viable embryos may appear white or yellow.
Notes: Using 0.1% TZ for 48 hours resulted in a lighter pink stain of viable seeds.


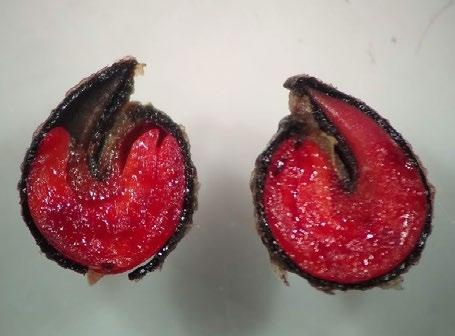
Bolboschoenus maritimus
Alkali bulrush
1% TZ; 48 hours
Preparation: Imbibe the achenes overnight. Slice diagonally through the thick seed coat and white, chalky endosperm near the widest part of the seed Discard the small portion that was cut off and keep the large part that contains the embryo (E) for staining (Figure 1). The embryo is basal, located at the narrow end of the seed.
Evaluation: Bisect the achene and view both sides of the embryo. A full pink stain (including light pink) is viable

Notes: Some seed lots may take longer to stain if they have deeper physiological dormancy. See Cyperaceae protocol in the AOSA/SCST Tetrazolium Testing Handbook, 2010 Edition, for more information.

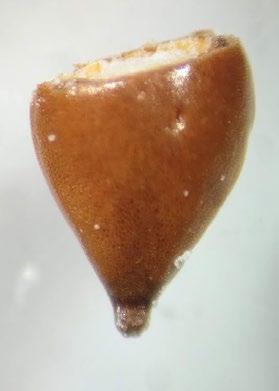


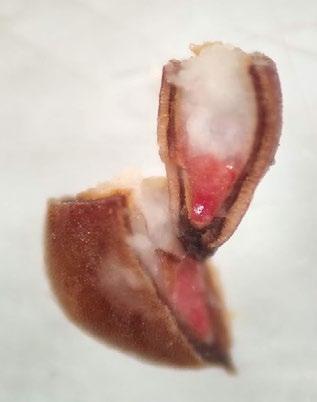


Carex nebrascensis
Nebraska sedge
1% TZ; 48 hours
Preparation: Imbibe the seed lot overnight to soften the seed coat. With the perigynium on (papery coating around the achene; unique to Carex) it’s hard to tell where the achene actually is, so remove the perigynium before slicing through the seed coat and endosperm on the side of the achene that is far from the embryo (E). Imbibition followed by rubbing the seeds on paper towels helps to remove the perigynium. Discard the small portion that was cut off and keep the large part that contains the embryo for staining (Figure 1).
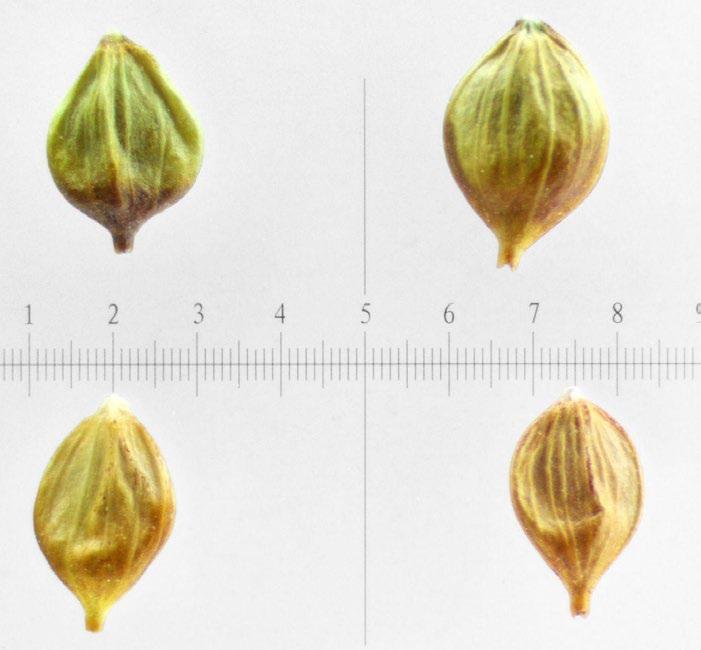

Evaluation: Bisect the achene and view both sides of the embryo. A full pink stain (including light pink) is viable (Figure 2).




Carex praegracilis
Clustered field sedge
1% TZ; 48 hours
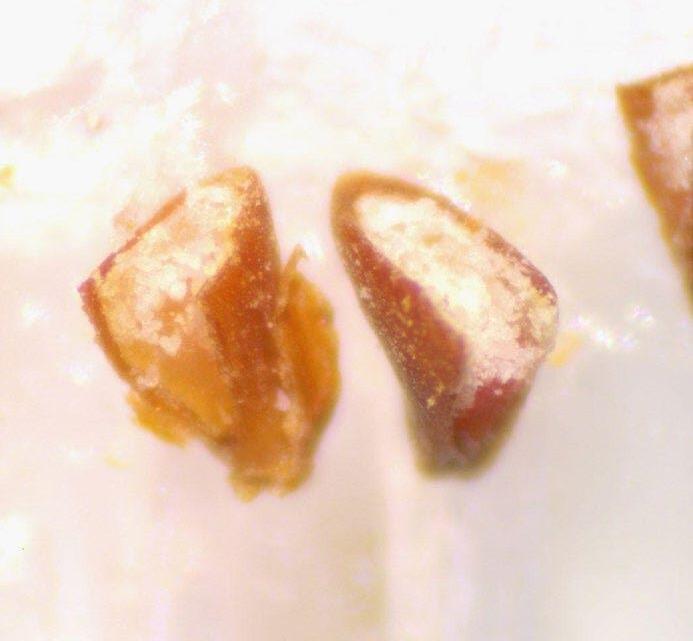
Preparation: Imbibe the seed lot overnight to soften the seed coat. With the perigynium on (papery coating around the achene; unique to Carex) it’s hard to tell where the achene actually is, so remove the perigynium before slicing through the seed coat and endosperm on the side of the achene that is far from the embryo (E). Imbibition followed by rubbing the seeds on paper towels helps to remove the perigynium. Discard the small portion that was cut off and keep the large part that contains the embryo for staining (Figure 1).
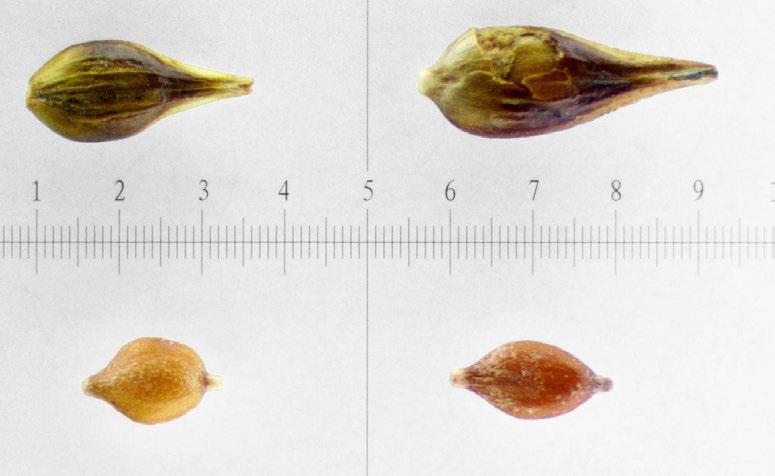

Evaluation: Bisect the seed and view both sides of the embryo. A full pink stain (including light pink) is viable
Notes: Using 0.1% TZ for 24 hours resulted in a very light pink embryo stain.



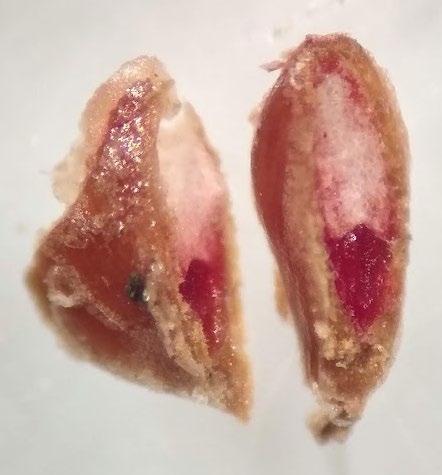

Carex simulata
Analogue sedge
1% TZ; 48 hours

mm

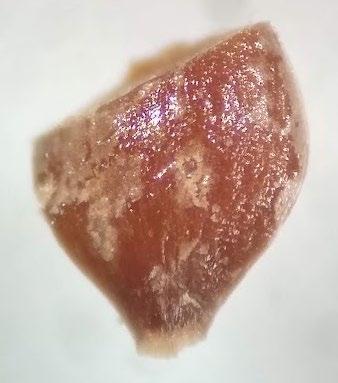
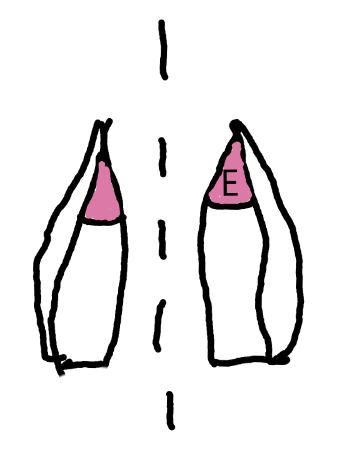
Preparation: Imbibe the seed lot overnight to soften the seed coat. With the perigynium on (papery coating around the achene; unique to Carex) it’s hard to tell where the achene actually is, so remove the perigynium before slicing through the seed coat and endosperm on the side of the achene that is far from the embryo (E). Imbibition followed by rubbing the seeds on paper towels helps to remove the perigynium. Discard the small portion that was cut off and keep the larger part that contains the embryo for staining (Figure 1).
Evaluation: Bisect the seed and view both sides of the embryo. A full pink stain (including light pink) is viable


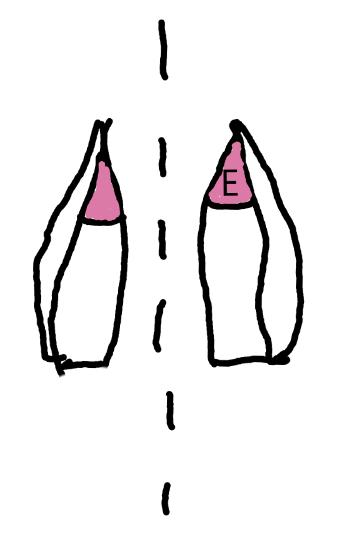


Eleocharis palustris
Common spikerush
1% TZ; 48 hours
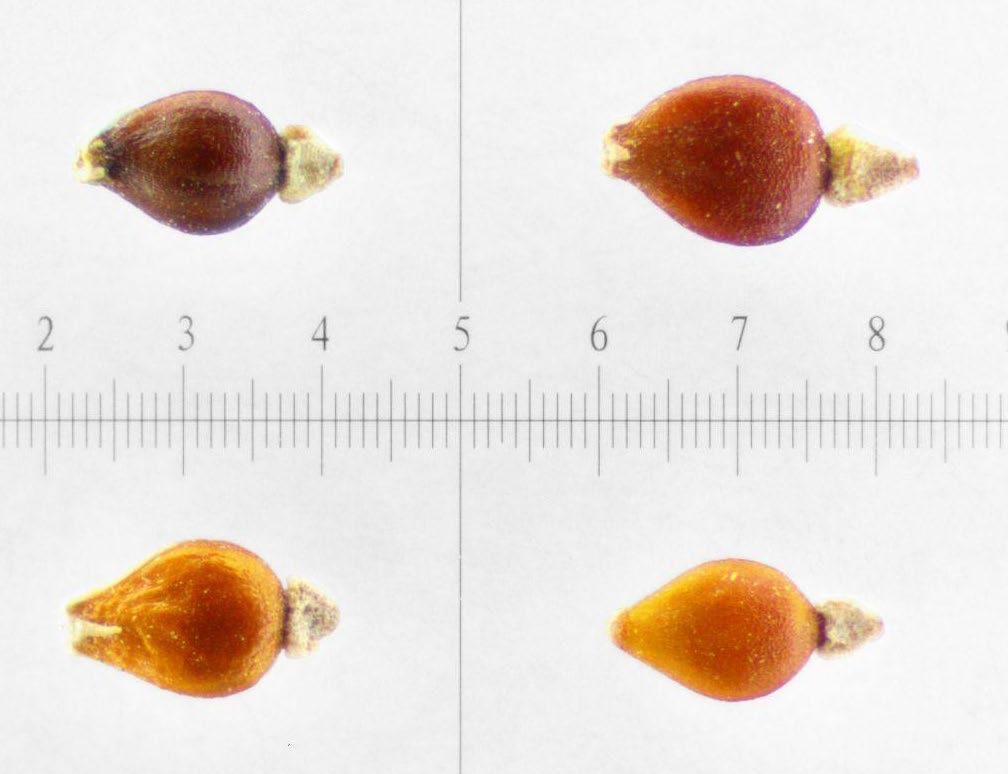
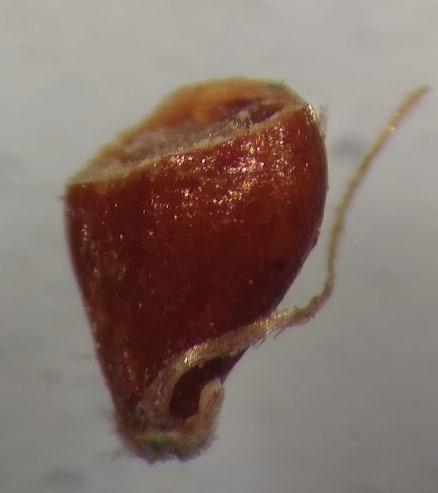
Preparation: Slice diagonally through the seed coat and white, chalky endosperm near the widest part of the achene. The embryo (E) is basal, located at the narrow end of the seed. The tubercle-side of the achene (the right side of the achenes in the photo to the right) will be discarded during preparation, keeping only the larger part that contains the embryo for staining (Figure 1).
Evaluation: Bisect the seed and view both sides of the embryo. A full pink stain (including light pink) is viable



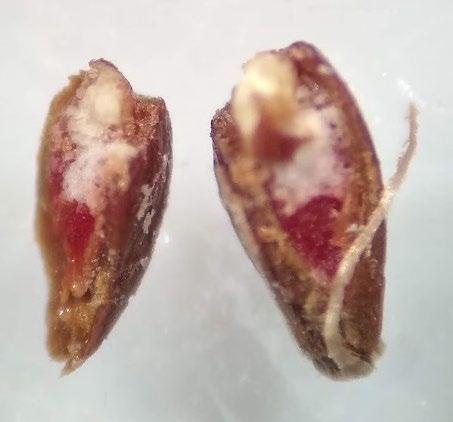

Schoenoplectus acutus
Hardstem bulrush
1% TZ; 48 hours
Preparation: Imbibe the achenes overnight. Place achenes flat side down on the tape and slice diagonally through the thick seed coat and white, chalky endosperm near the widest part of the seed. Discard the small portion that was cut off and keep the large part that contains the embryo (E) for staining (Figure 1). The embryo is basal, located at the narrow end of the seed.
Evaluation: Bisect the achene and view both sides of the embryo. A full pink stain (including light pink) is viable
Notes: Some seed lots may take longer to stain if they have deeper physiological dormancy. See Cyperaceae protocol in the AOSA/SCST Tetrazolium Testing Handbook, 2010 Edition, for more information.


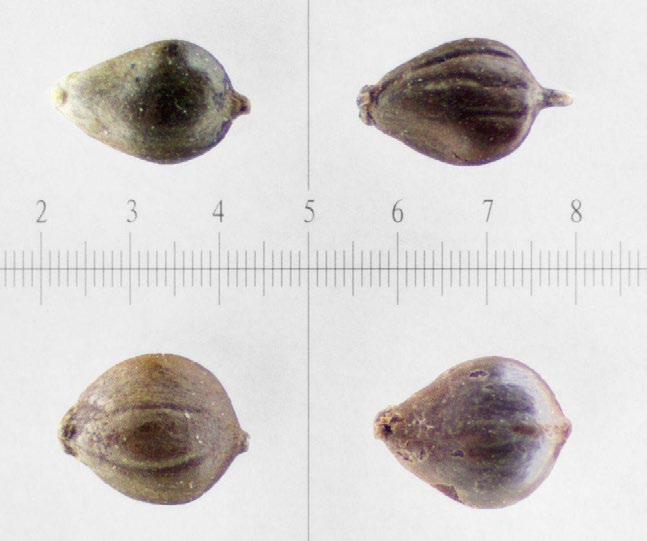

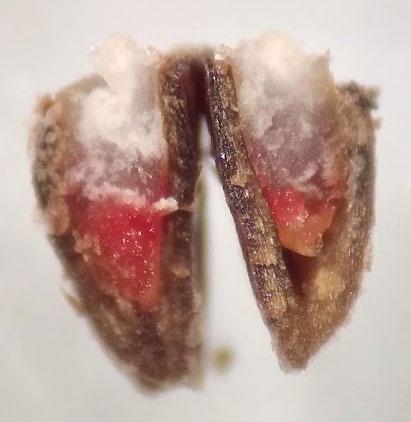
mm

Schoenoplectus americanus
Chairmaker’s bulrush
1% TZ; 48 hours
Preparation: Imbibe the achenes overnight. Slice diagonally through the thick seed coat and white, chalky endosperm near the widest part of the seed Discard the small portion that was cut off and keep the large part that contains the embryo (E) for staining (Figure 1). The embryo is basal, located at the narrow end of the seed.
Evaluation: Bisect the achene and view both sides of the embryo. A full pink stain (including light pink) is viable
Notes: Some seed lots may take longer to stain if they have deeper physiological dormancy. See Cyperaceae protocol in the AOSA/SCST Tetrazolium Testing Handbook, 2010 Edition, for more information.


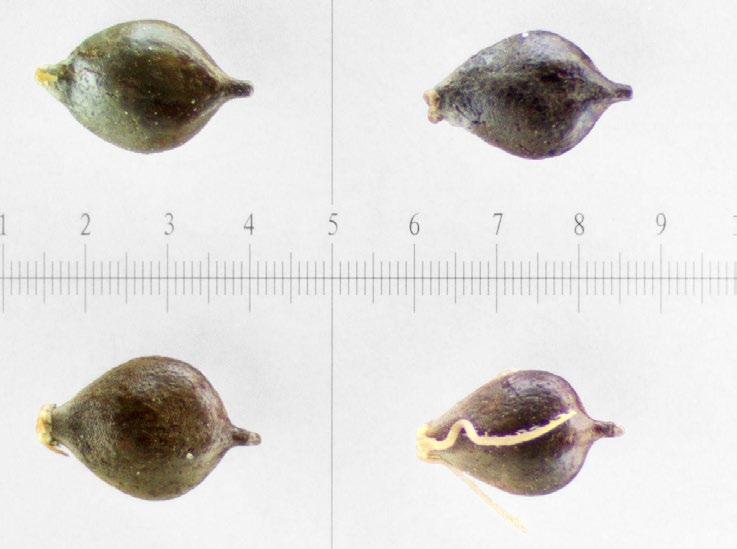

mm

Schoenoplectus pungens
Common threesquare bulrush
1% TZ; 48 hours
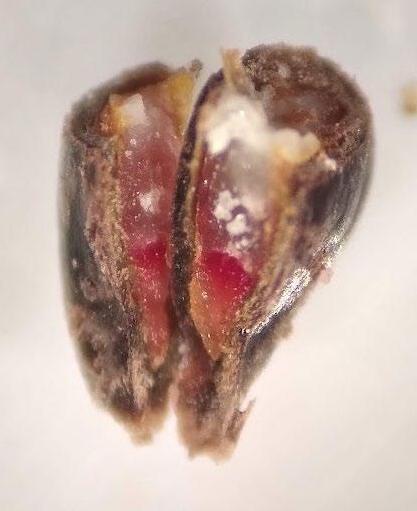
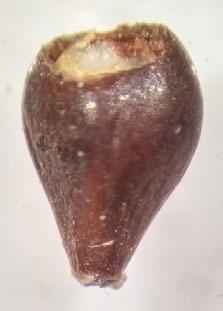
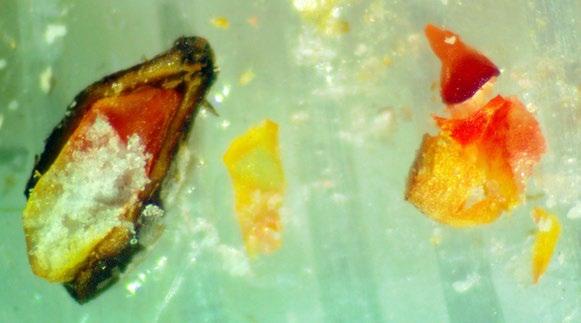
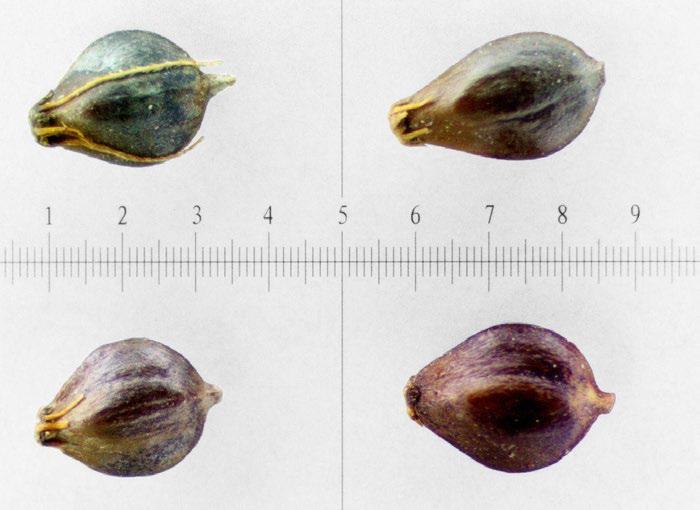
Preparation: Imbibe the achenes overnight. Slice diagonally through the thick seed coat and white, chalky endosperm near the widest part of the seed Discard the small portion that was cut off and keep the large part that contains the embryo (E) for staining (Figure 1). The embryo is basal, located at the narrow end of the seed.
Evaluation: Bisect the achene and view both sides of the embryo. A full pink stain (including light pink) is viable (Figures 2–4).
Notes: Some seed lots may take longer to stain if they have deeper physiological dormancy. See Cyperaceae protocol in the AOSA/SCST Tetrazolium Testing Handbook, 2010 Edition, for more information.






mm

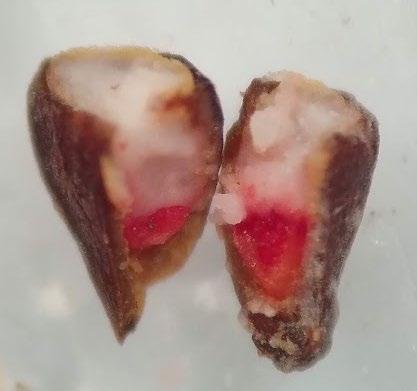


Glycyrrhiza lepidota
Wild licorice
1% TZ; 48 hours
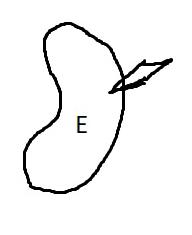
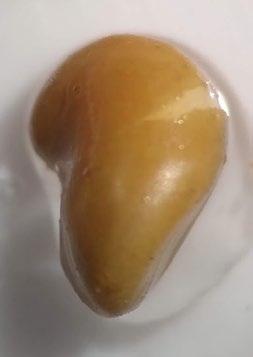
Preparation: Seed coat is hard enough to prevent imbibition of TZ solution or water, so scarification is needed before imbibing with water. With an exacto blade, saw through the tough seed coat on the round, curved end of the seed (away from the radicle) and be sure not to scratch the embryo (E) itself (Figure 1). Overnight, imbibe seeds on a moist paper towel and then soak the seeds in TZ for 48 hours.

mm

Evaluation: To evaluate, remove the seed coat and look at the whole embryo. Viable seeds may have a radicle that stains darker pink than the rest of the embryo.


Frankenia salina
Alkali seaheath
1% TZ; 48 hours
Preparation: Imbibe seeds overnight. Pierce the center of the seed with a sharp exacto blade (Figure 1).
Evaluation: Bisect the seed to evaluate a fully stained embryo (E, Figure 2). Viable seeds will be entirely stained pink.



mm


Juncus arcticus
Mountain rush
1% TZ; 48 hours
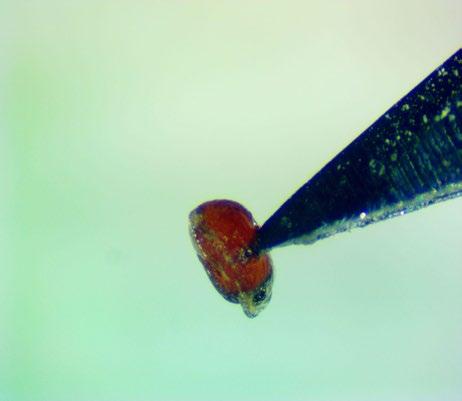
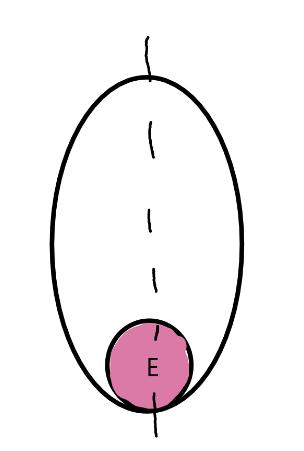
Preparation: Imbibe seeds on a moist medium for 24 hours. Stick seeds to a small piece of thin, clear, double-sided tape (Figure 5). Use a sharp exacto blade to pierce the center of the seed through the seed coat and endosperm (Figures 1–2). The tape that the seeds were prepared on can be transferred to the TZ solution.
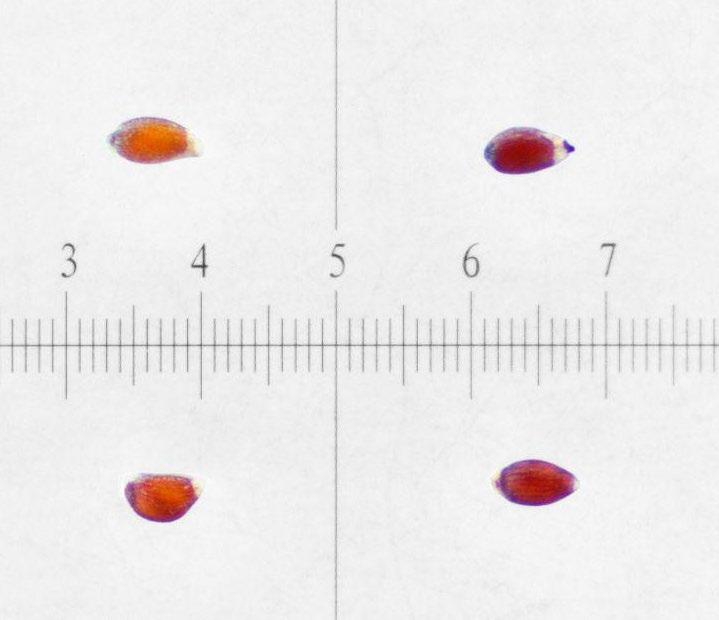

Evaluation: Remove tape from TZ solution and place it under a microscope. Be sure to find and evaluate any seeds that are unstuck from the tape and floating in the TZ solution. Bisect seeds and evaluate the basal embryo (E) for pink stain (Figures 3–4)
Notes: Some seeds may fall off the tape when soaking in the TZ solution, but most seeds stay stuck to the tape if agitation is minimal.






Juncus gerardii
Saltmeadow rush
1% TZ; 48 hours
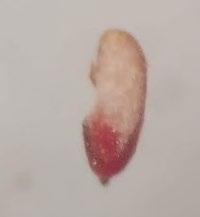
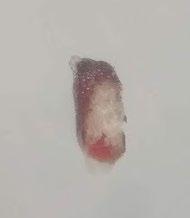
Preparation: Imbibe seeds on a moist medium for 24 hours. Stick seeds to a small piece of thin, clear, doublesided tape. Use a sharp exacto blade to pierce the center of the seed through the seed coat and endosperm (Figure 1). The tape that the seeds were prepared on can be transferred to the TZ solution.


Evaluation: Remove the tape from the TZ solution and place it under a microscope. Be sure to find and evaluate any seeds that are unstuck from the tape and floating in the TZ solution. Bisect seeds and evaluate the basal embryo (E) for pink stain (Figure 2)
Notes: Some seeds may fall off the tape when soaking in the TZ solution, but most seeds stay stuck to the tape if agitation is minimal.




Juncus torreyi
Torrey’s rush
1% TZ; 48 hours
mm


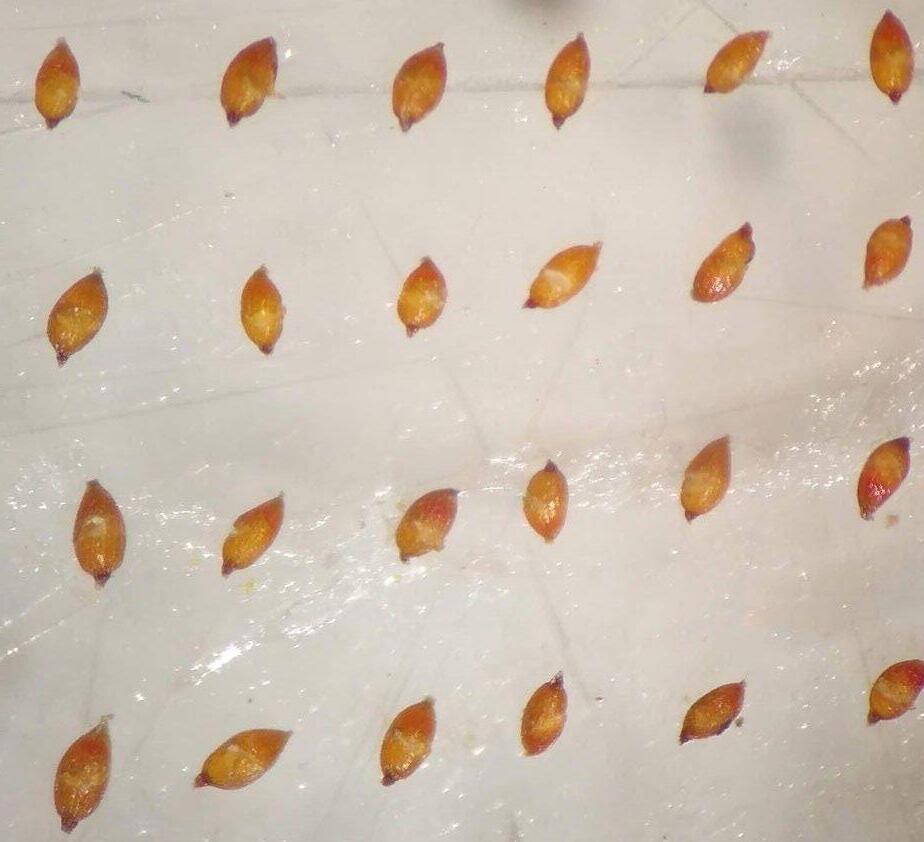
Preparation: Imbibe seeds on a moist medium for 24 hours. Stick seeds to a small piece of thin, clear, double-sided tape (Figure 2). Use a sharp exacto blade to pierce the center of the seed through the seed coat and endosperm (Figure 1). The tape that the seeds were prepared on can be transferred to the TZ solution.
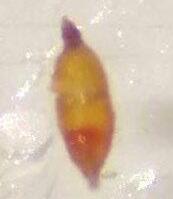
Evaluation: Remove the tape from the TZ solution and place it under a microscope. Be sure to find and evaluate any seeds that are unstuck from the tape and floating in the TZ solution. Bisect seeds and evaluate the basal embryo (E) for pink stain (Figure 3)
Notes: Some seeds may fall off the tape when soaking in the TZ solution, but most seeds stay stuck to the tape if agitation is minimal. Exposure at 0.1% for 24 hours yielded light pink seeds so a higher concentration is better. Post TZ soaking, embryos will glow pink through the seed coat, but should still be bisected and the embryo should be further evaluated to confirm.




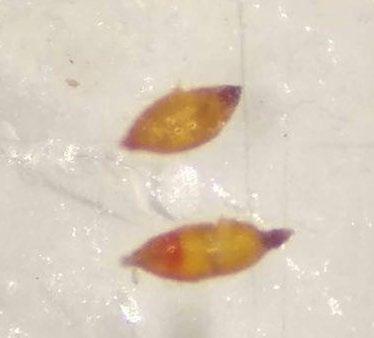

Triglochin maritima
Seaside arrowgrass
1% TZ; 48 hours
Preparation: Imbibe on a moist medium for 24 hours to make the seed easier to handle and minimize artifact damage. Remove seed from the mericarp (M) and pierce the center of the seed coat (SC) and embryo (E) with a sharp exacto blade (Figure 1).
Evaluation: View the full embryo. The viable stained embryo will glow through the membranous seed coat (Figure 2).
mm
Notes: Cutting the seed at the top of the cotyledons in preparation for the TZ solution did not work as well as piercing due to artifact damage.





Mentha arvensis
Wild mint
1% TZ; 48 hours
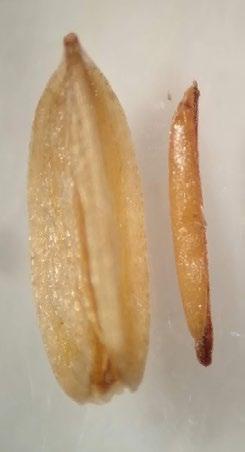
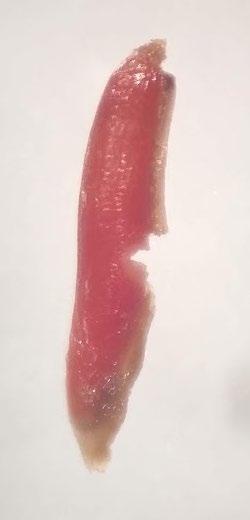
Preparation: Slice through the round, cotyledon end of the seed, through the pericarp and seed coat. Discard the small portion that was cut off and keep the large part of the embryo (E) for staining (Figure 1).
Evaluation: Remove the pericarp and seed coat to view the full embryo. A fully pink stain indicates a viable seed.
mm


Notes: Sometimes the seed coat will turn blue. A 24-hour imbibition prior to making preparatory cuts did not hurt the staining and evaluation process, but it is probably not necessary.


Epilobium ciliatum
Fringed willowherb
1% TZ; 48 hours
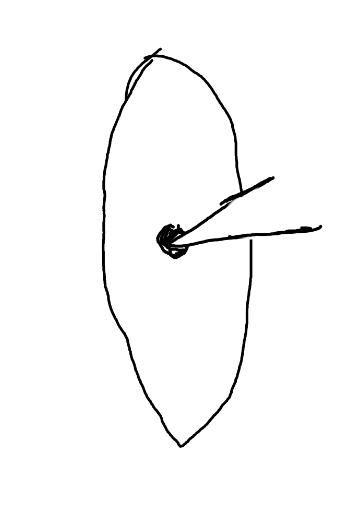
Preparation: Pierce the center of the seed coat and embryo (E; Figure 1).
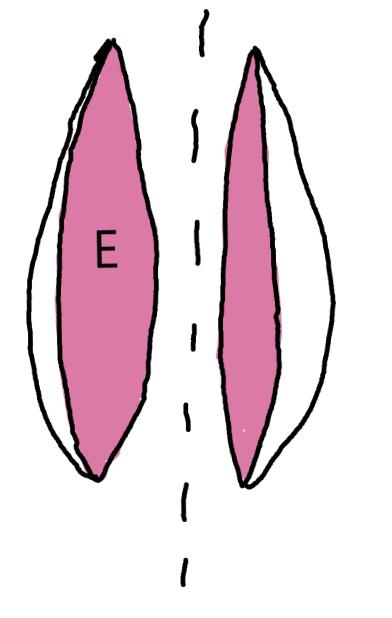
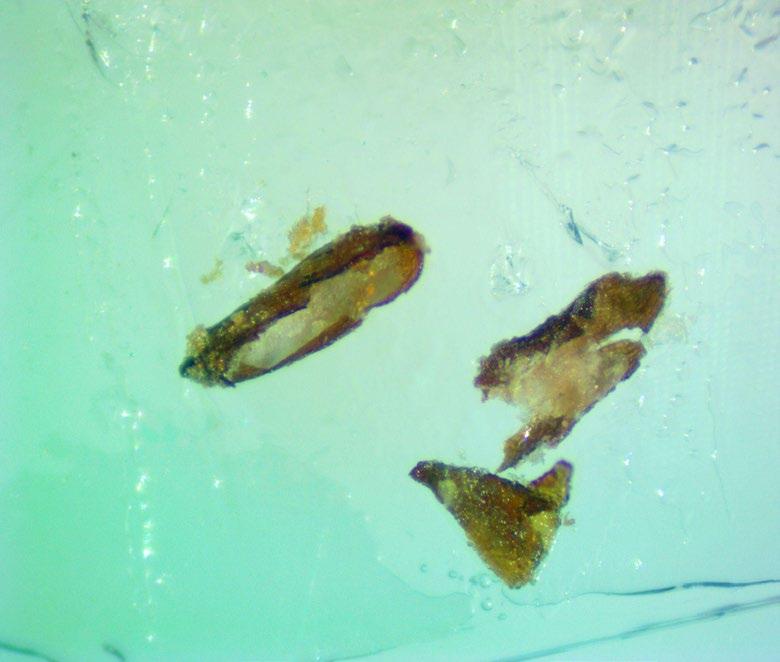
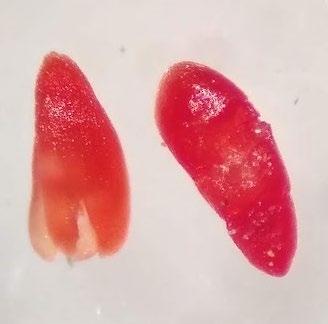
Evaluation: Cut longitudinally and evaluate. Some seeds are still light pink (viable) even using a 1% solution and a 48-hour soaking time (Figure 3). Non-viable seeds will have a clear embryo (Figure 2).




Notes: Using a 0.1% TZ solution and a 24-hour soaking time resulted in a very light pink stain.


Crypsis schoenoides
Swamp pricklegrass
1% TZ; 48 hours
Preparation: Slice off a piece of the seed coat and endosperm on the side of the seed that is farthest from the embryo (E; Figure 1). Discard the small portion that was cut off and keep the large part of the embryo for staining.
Evaluation: The embryo may glow through the seed coat. Bisect longitudinally to evaluate. The embryo will be fully pink.

mm



Distichlis spicata
Saltgrass
1% TZ; 48 hours
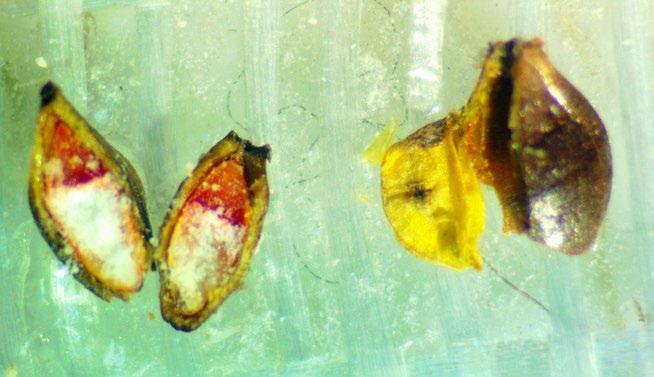
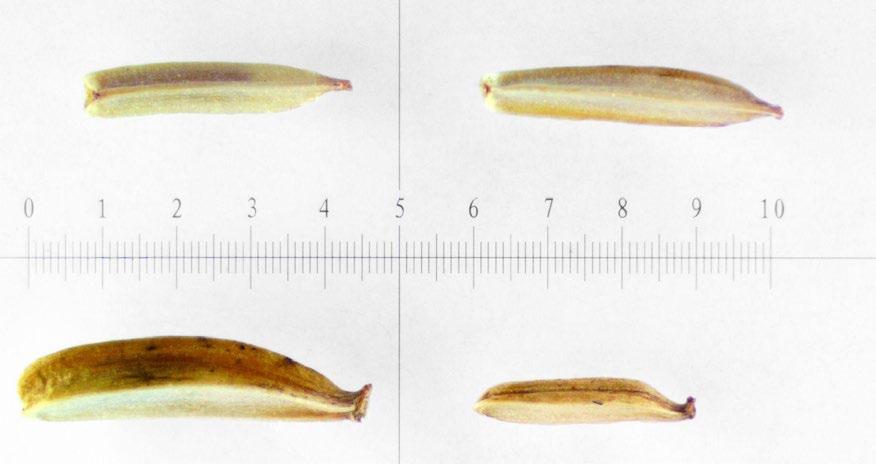
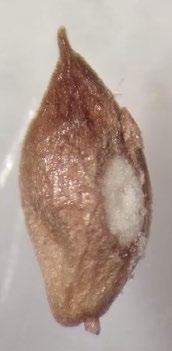
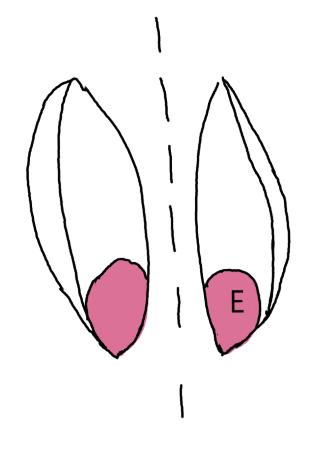
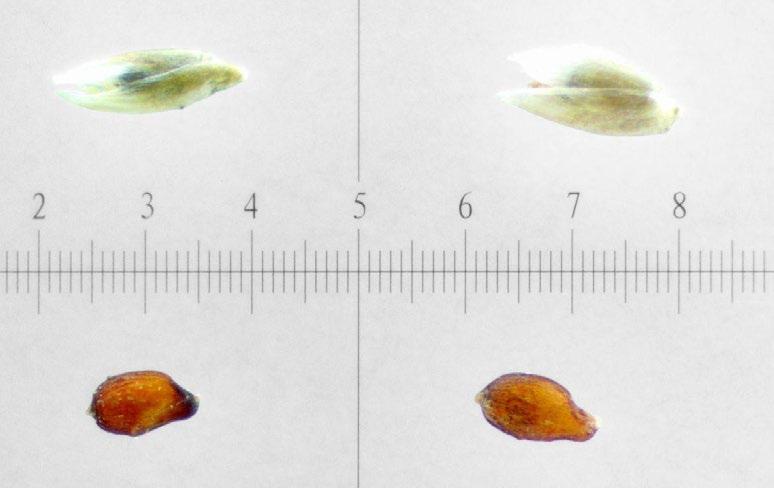
Preparation: Remove the seed from the palea and lemma (golden coverings, top right photo) if still attached, by agitating the seeds out using gloved hands or with forceps under the microscope. Typically, the embryo (E) is on the less sharply pointed side, but it can be hard to tell. Slice through the brown seed coat and white endosperm in the middle of the seed (the part that juts out). Discard the small portion that was cut off and keep the large part of the embryo for staining (Figure 1).
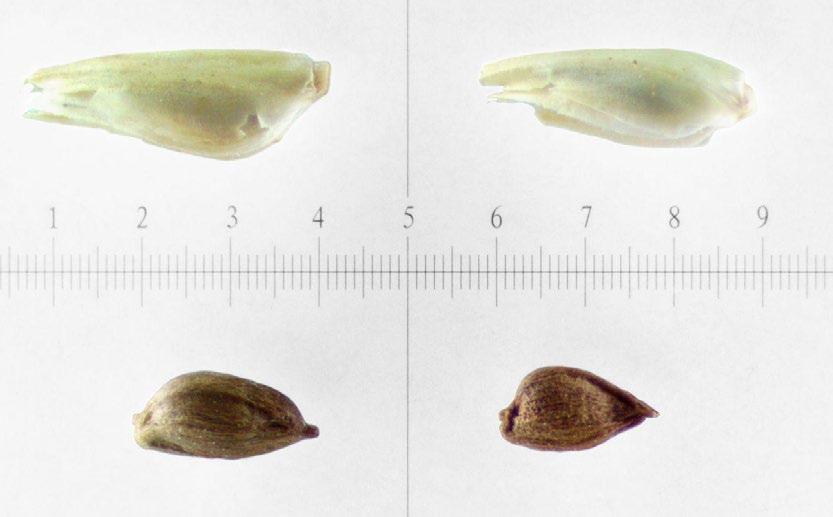

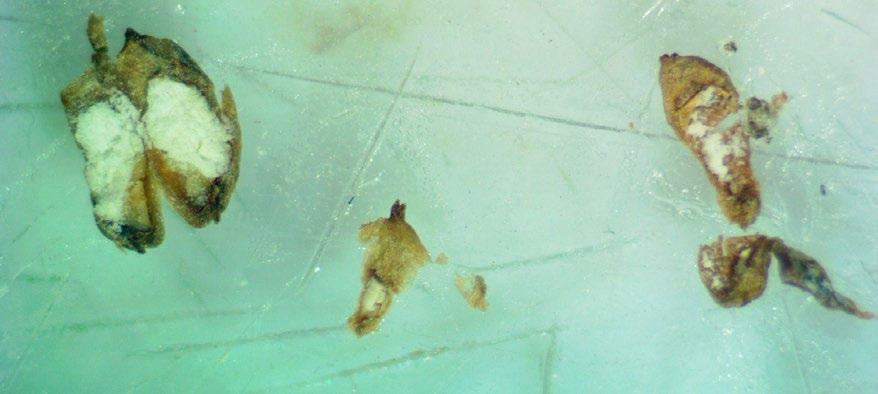
Evaluation: Turn the seeds so that the cut location is facing up, then bisect the seed longitudinally through the cut area and check both halves. A fully pink embryo (even a very pale pink) is viable (Figures 2–3)
Notes: Our lab used a 0.1% TZ for 24-hour soaking time for several years prior to 2022, but embryos stain a darker pink when a 1% TZ solution and 48-hour soaking time is used, leading to a more objective evaluation.






Leymus triticoides
Beardless wildrye
1% TZ; 48 hours
Preparation: Keeping the seed in the chaff, make a small longitudinal cut through the chaff and the endosperm on the side furthest from the embryo (E; Figure 1). Try to keep the seed intact.
Evaluation: Bisect longitudinally to evaluate. Viable embryos will be fully pink (Figure 2).




mm

Muhlenbergia asperifolia
Scratchgrass
1% TZ; 48 hours
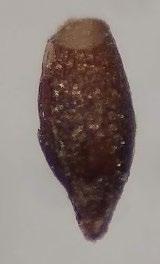
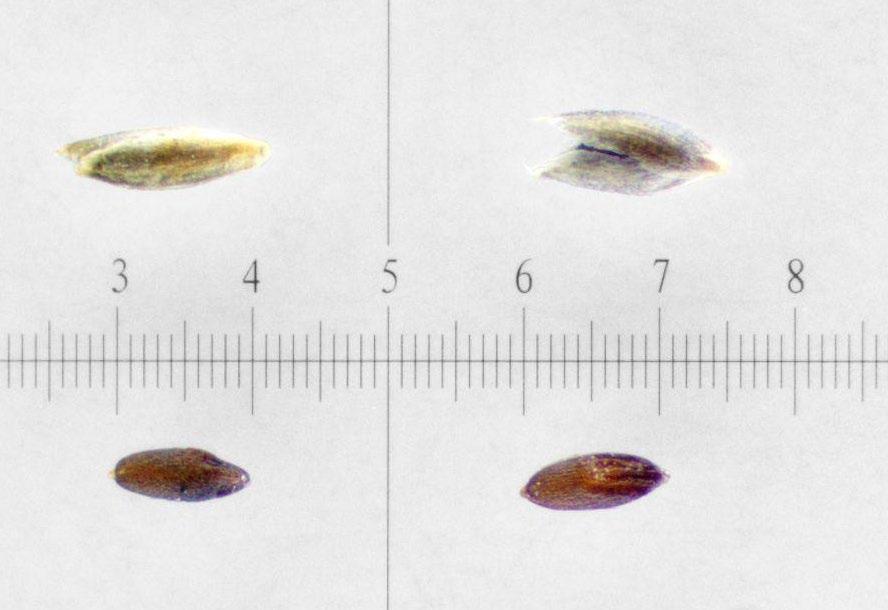
Preparation: With forceps under the microscope, remove the seed from the chaff. Cut off the top end of the seed, opposite the wrinkly embryo-end (E) of the seed (Figure 1). Discard the small portion that was cut off and keep the large part for staining.
Evaluation: Bisect longitudinally to evaluate. Viable embryos will be fully pink (Figures 2–3).
Notes: These small seeds hold up well in the solution and most viable seeds stain a dark red.





mm

Phragmites australis
Common reed
1% TZ; 48 hours
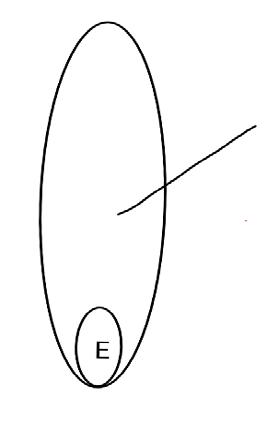
Preparation: Imbibe overnight. The embryo (E) is on one end of the seed. Pierce the center of the seed with a needle or exacto blade (Figure 1)
Evaluation: After 48 hours, bisect longitudinally and check for a pink embryo.
Notes: We found that 0.1% TZ for 24 hours leads to more light pink stained seeds.


mm


Puccinellia nuttalliana
Nuttall’s alkaligrass
1% TZ; 48 hours
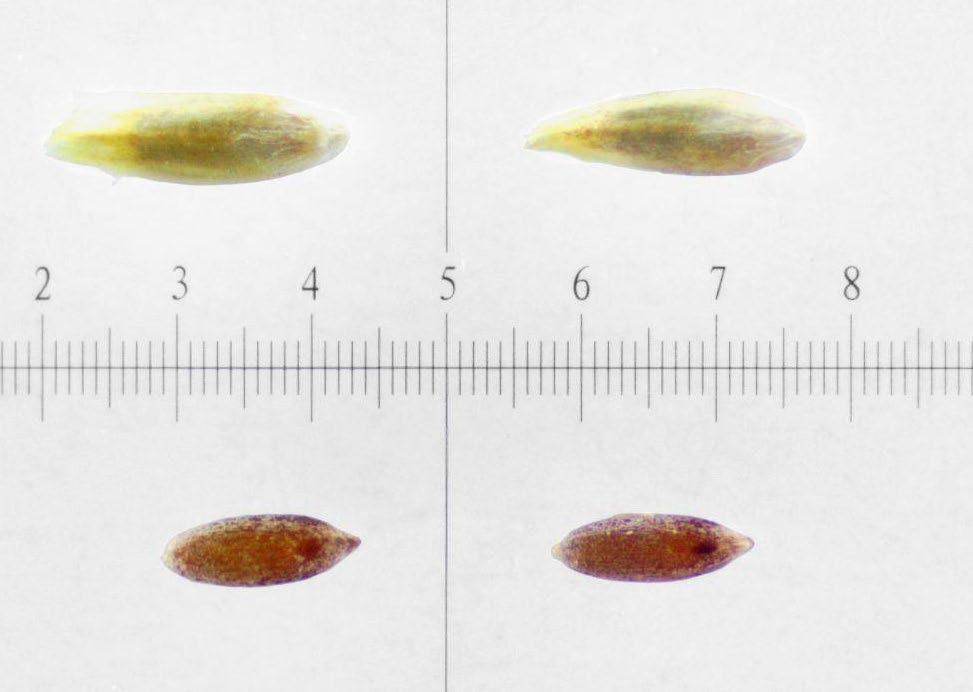
Preparation: Rub seeds out of their chaff. Gently scrape or saw into the seed (through the seed coat but leave seed intact) above the embryo (E; Figure 1). The embryo is located at the bottom (dark and pinched part of the seed). Tip: to keep seed intact, use a sharp blade to saw gently rather than pushing down into the seed.
Evaluation: Bisect to view the full embryo and evaluate (Figures 2–3). The embryo (E) will be fully pink if viable.



mm
Sporobolus airoides
Alkali sacaton
1% TZ; 48 hours
Preparation: Pierce the endosperm in the middle of the seed (Figure 1).
Evaluation: Bisect longitudinally to evaluate (Figure 1). The embryo (E) will be fully pink.


mm


Polygonum ramosissimum
Bushy knotweed
1% TZ; 24 hours
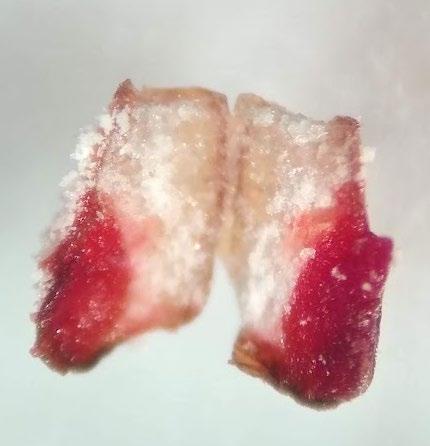
Preparation: Using an exacto blade at an angle, shave off parallel to the flat face (Figures 1–2). This species stains very quickly.
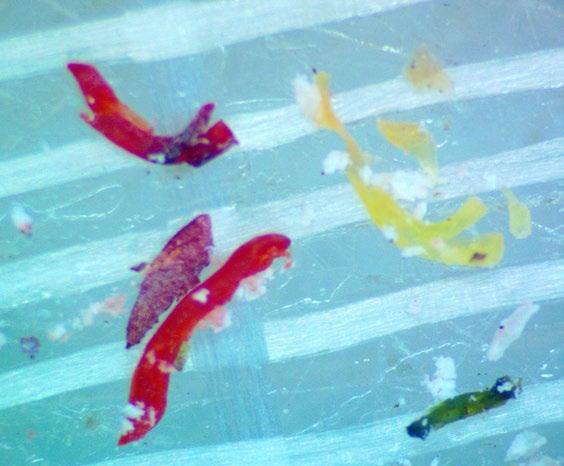
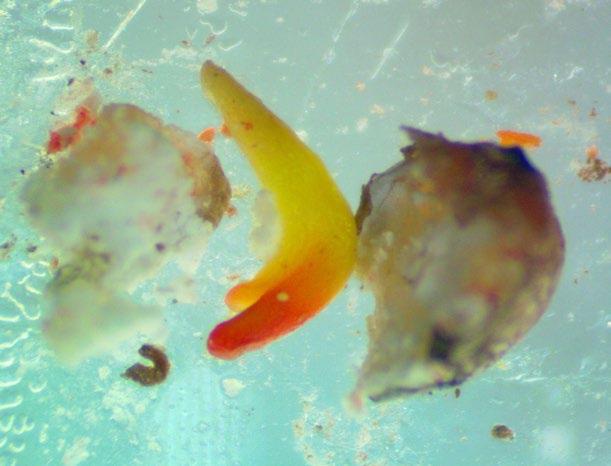
Evaluation: Bisect the seed longitudinally to evaluate. Viable seeds will have bright pink embryos (E; Figures 3–5).
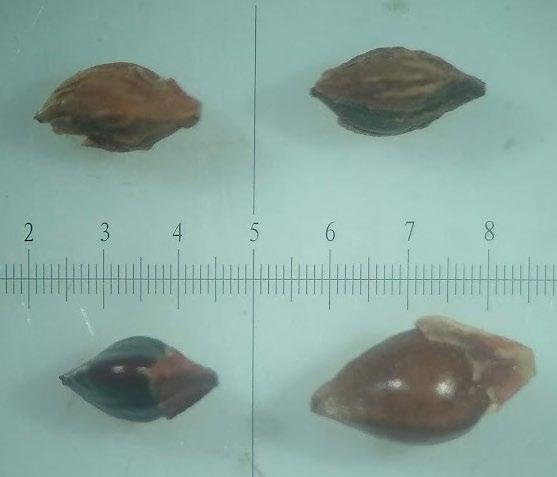

Notes: In the 2021 collection of this species, there were two seed morphologies in our seed lot a rounder light brown morph and a darker brown trigonal morph (below). We were unsure if this was two species or just two different morphs of the same species.
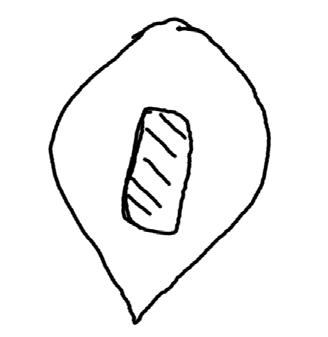


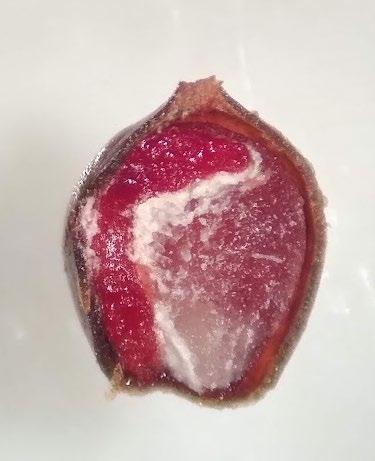
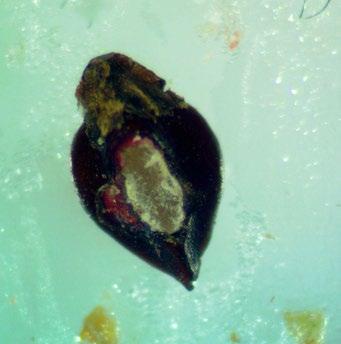
Shave off one face (parallel to the flattest face). Pictured: darker brown trigonal morph.




Rumex maritimus
Golden dock
1% TZ; 48 hours
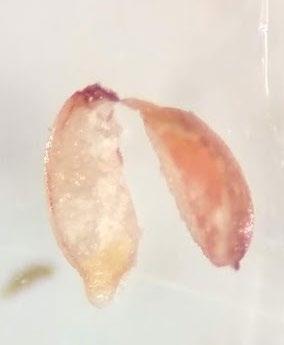
Preparation: Seeds are football shaped. Shave off one of the three angles with an exacto knife (Figure 1). A thicker double-sided tape helps to hold seeds in place. Discard the small portion that was cut off and keep the large part of the embryo (E) for staining.
Evaluation: Bisect the seed longitudinally to evaluate. Even after a 48-hour stain, some viable embryos are light pink (Figures 2–3).




mm


Glaux maritima
Sea milkwort
1% TZ; 48 hours
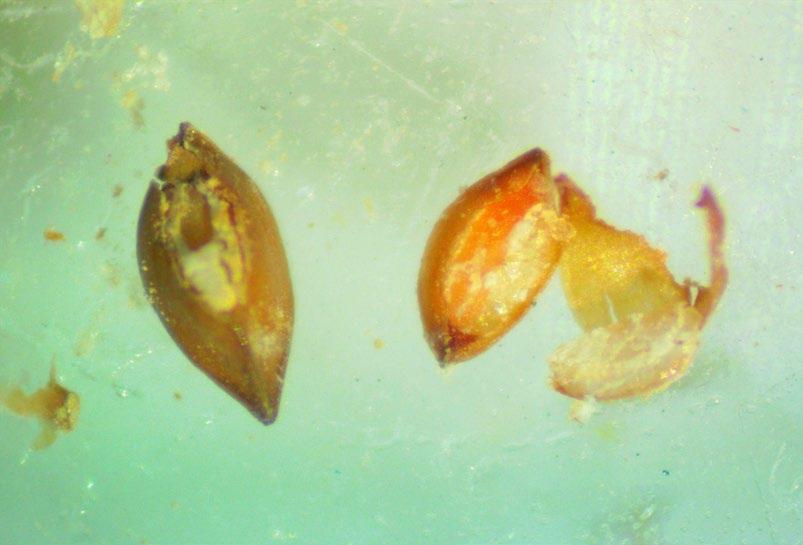
Preparation: Seeds are football shaped. Shave off one of the three angles with an exacto knife (Figure 1). A thick double-sided tape helps to hold seeds in place. Discard the small portion that was cut off and keep the large part of the embryo (E) for staining. Be careful to only shave off a bit of the edge; the seed will still stain just fine. But, if you cut too near the middle of the seed you will damage the embryo enough to make evaluation difficult.


Evaluation: Bisect the seed longitudinally to evaluate. Be sure to view the entirety of the embryo. It is sometime possible to gently squeeze the seed, so the embryo squishes out and view the embryo with this method (Figure 2, far right).



Ranunculaceae
Ranunculus sceleratus
Cursed buttercup
1% TZ; 48 hours
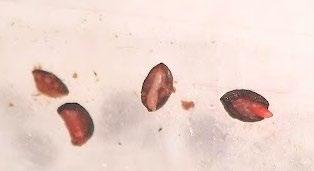
Preparation: The cut recommended in the AOSA/SCST Tetrazolium Testing Handbook, 2010 Edition, is hard to do without imbibition, as the seeds break. Implementing a 24-hour imbibition is helpful so that the seed stays intact. Make a small longitudinal slice opposite of the embryo side (Figure 1).
mm

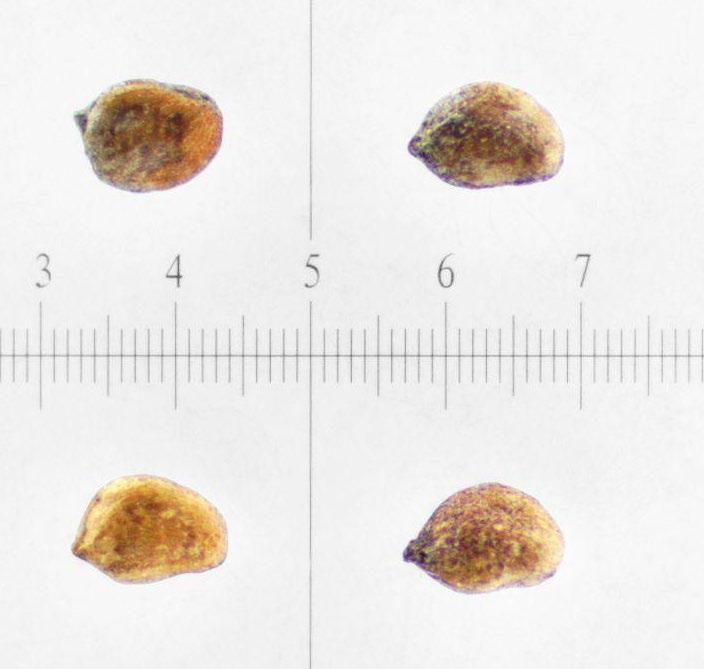
Evaluation: Pink embryo (E) and at least a lightly stained endosperm are necessary for counting as viable.
Notes: The embryo is not ready after 24 hours in 0.1% TZ.
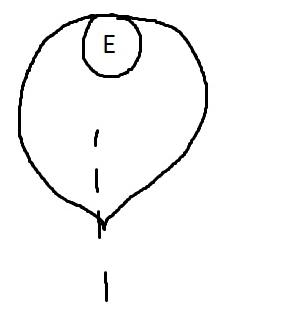


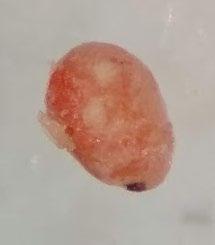


Sarcobatus vermiculatus
Greasewood
1% TZ; 48 hours
Preparation: Seeds are found within the pericarp (P). It is often hard to tell which pericarps have seeds and which do not, so it is recommend to remove the pericarp and pierce the seed (Figure 1). It is difficult to remove the pericarp without imbibition so seeds should be imbibed for 12–24 hours before preparation. The TZ process is equally effective if the seed is left in the pericarp, and both the pericarp and the seed are pierced.
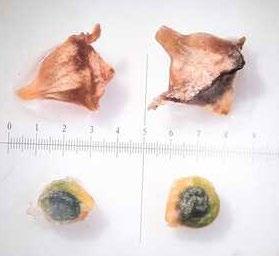
Evaluation: If applicable, remove the embryo (E) from the pericarp (P). If the pericarp was removed in preparation, view the embryo. A fully pink embryo is viable (Figure 2). Most non-viable seeds are not fully formed embryos and are unstained (Figure 3).

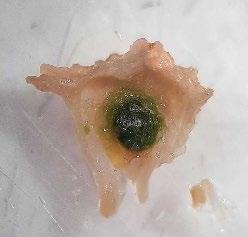



Castilleja minor
Lesser Indian paintbrush
1% TZ; 48 hours
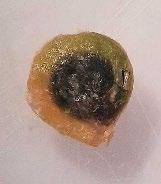
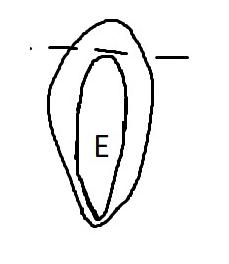
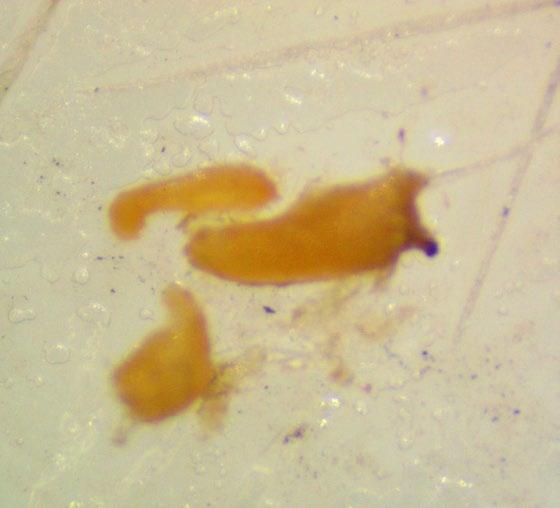
Preparation: Cut off the top, rounder (cotyledon) end of the seed (Figure 1). Discard the small portion that was cut off and keep the large part of the embryo (E) for staining. The seeds can remain in the airl (the fleshy coating around the embryo).
mm

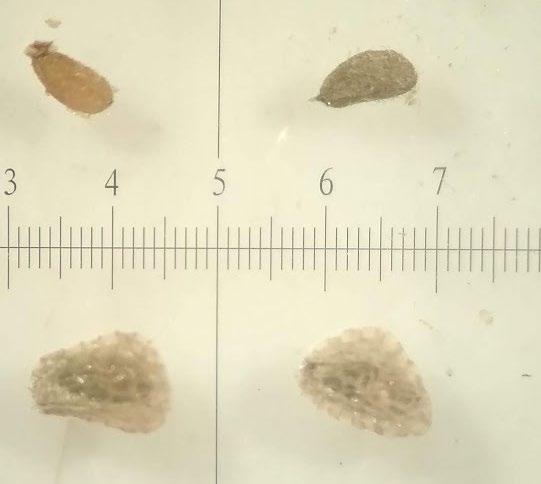
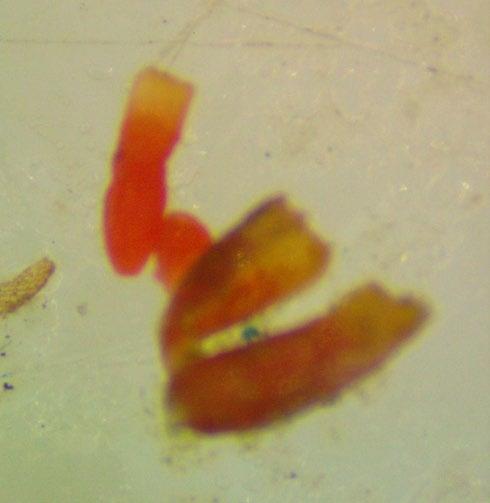
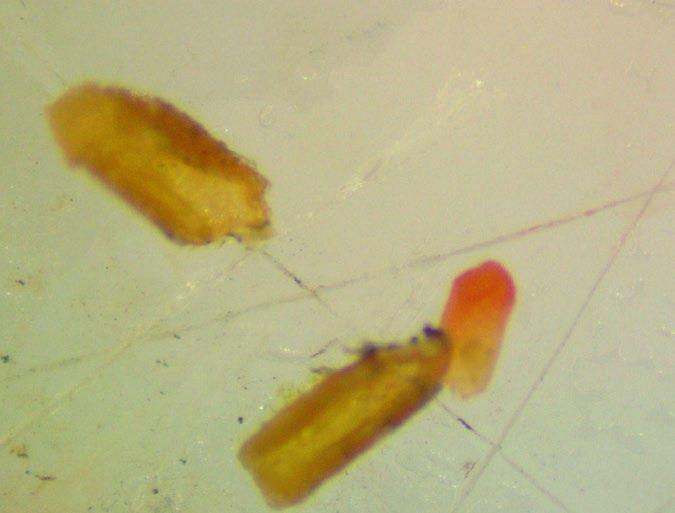
Evaluation: Bisect longitudinally to evaluate. A viable embryo is pink with a stained orange endosperm (Figure 2). A non-viable seed is white or clear with a yellow endosperm (Figures 3–4). Some endosperms look white outside but are orange inside. Disregard artifact damage at the cut location.






Veronica anagallis-aquatica
Water speedwell
1% TZ; 24 hours
Preparation: Imbibe for 1 hour in water and then soak in 1% TZ for 24 hours at 35℃ (e.g., in a temperature regulated growth chamber; wrap in aluminum foil to prevent light from degrading TZ or triggering germination).
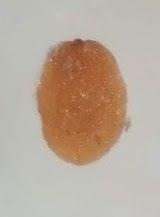
Evaluation: Observe if the seed (embryo (E) and endosperm) has turned pink through its transparent seed coat (Figures 1–2). Disregard any artifact damage.
mm

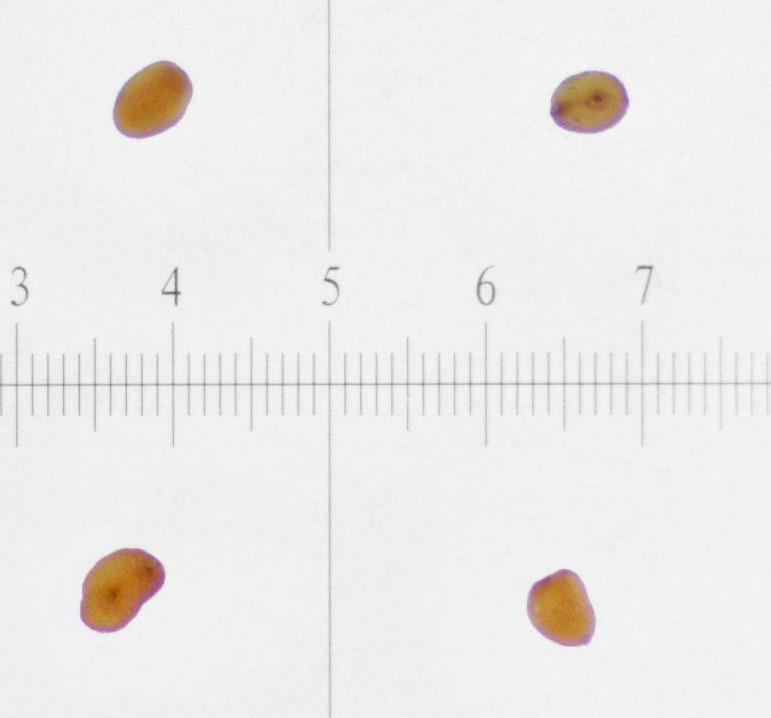
Notes: If seeds become too mucilaginous once wet, mucilage can close over the preparatory cut. If you suspect this may be a problem (e.g., many of the seeds don’t stain using the above protocol), you can use aluminum potassium sulfate to dissolve the mucilage. In the past, we’ve tried 60-minute soaks in a 10% AlK(SO4)2·12H2O solution (see the AOSA/SCST Tetrazolium Testing Handbook, 2010 Edition). Reducing the time seeds are wet helps reduce mucilage, which is why the imbibition and TZ soak time is shorter than others in this protocol.

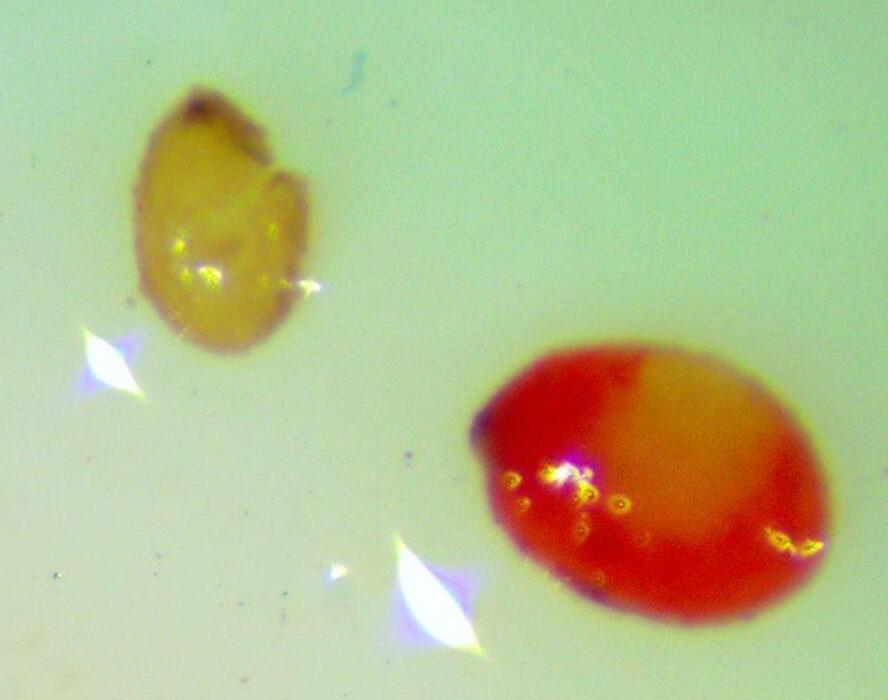


Verbenaceae
Verbena hastata
Swamp verbena
1% TZ; 48 hours
Preparation: A 24-hour imbibition makes the seed coat slightly softer and facilitates piercing the seed. Use a very sharp exacto knife to pierce the rounded part of the seed in the center (Figure 1).
Evaluation: Bisect and evaluate. When evaluating viability, there may be very slight discoloration of the embryo (E) at the pierce location (artifact damage), so disregard it if the rest of the seed is fully pink (viable; Figure 2).
mm

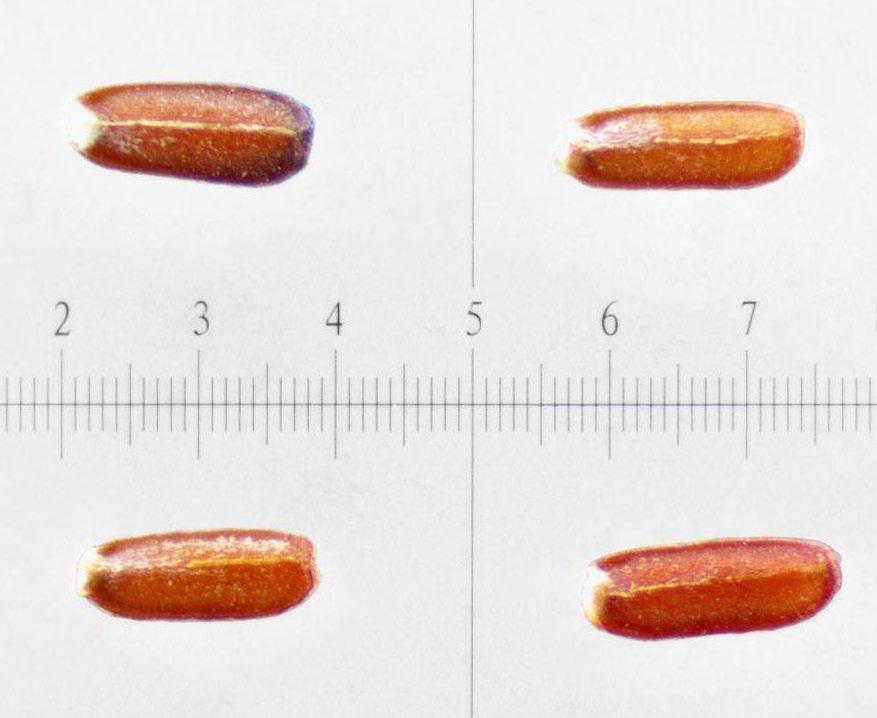
Notes: 24 hours at 1% seems to stain the seed slightly, but there is white artifact damage. 48 hours at 1% works better.


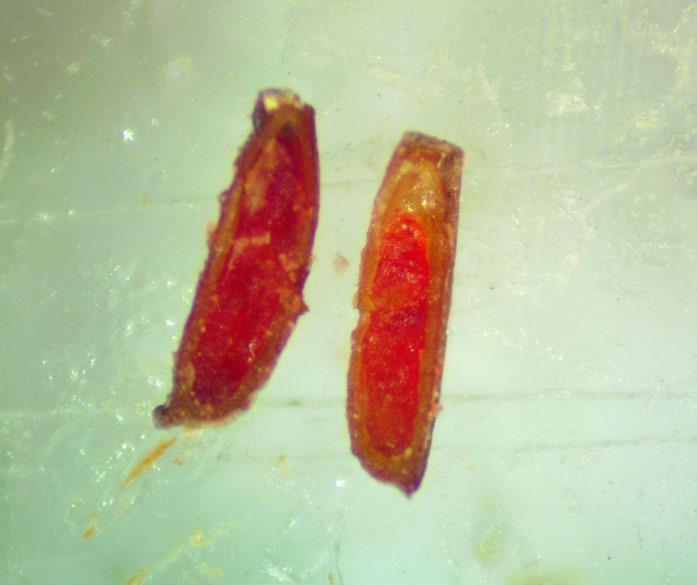


Note: the AOSA/SCST Tetrazolium Testing Handbook, 2010 Edition, has a great glossary. Some terms from that handbook are included below 1 Other definitions are taken from Harris and Harris (2001). 2
Achene: a dry, hard, one-seeded fruit.1
Aril: an appendage growing at or near the point of seed attachment; fleshy thickening of the seed coat. 2
Artifact damage: damage to the seed from the preparation technique.1
Chaff: seed coverings and other debris that is separated from the seed and discarded. Cotyledon: seed leaves of the embryo; embryonic leaves.1
Dicotyledon: plants with seeds that produce two cotyledons. Abbreviation: dicot.1
Embryo: a rudimentary plant contained within a seed or genetic individual.1
Endosperm: the part of a seed which acts as a food store for the developing plant embryo. 1
Germination: the development of a plant from a seed after a period of dormancy. 1
Imbibe/Imbibition: seed absorbing water into ultramicroscopic spaces or pores.1
Lateral: spanning the width, perpendicular to the longitudinal axis.
Lemma: the lower of the two bracts jutting out from a seed; surrounding the palea 2
Longitudinal: spanning the long axis.
Mericarp: a single unit of a schizocarp
Monocotyledon: plants that produce seeds with only one cotyledon. Abbreviation: monocot.1
Mucilaginous: having a viscous or gelatinous consistency.
Palea: the upper of the two bracts jutting out of the seed; surrounded by the lemma. 2
Pericarp: the fruit wall; derived from the ovary wall. It may be thin and fused with the seed coat as in corn, fleshy as in berries, or hard and dry as in pods of legumes.1
Perigynium: a fleshy cup or tube that surrounds the pistil (the female reproductive organ of a flower; i.e., the seed).2
Radicle: the rudimentary root of the embryo that forms the primary root of the young plant or embryonic root.1
Schizocarp: dry fruit that splits into one-seeded units when ripe.
Scoring: to break down the seed’s outer coating.
Seed: a mature ovule consisting of an embryonic plant together with a store of food, all surrounded by a protective seed coat 1
Seed coat: the protective covering of a seed usually composed of the inner and outer integuments. Also called the testa.1
Seed lot: in this context, the group of seeds that are being tested
Tuber: a thickened, solid, short underground stem with nodes bearing buds.
Tubercle: a small tuber-like prominence or nodule
Utricle: a thin-walled, one-seeded fruit where the seed is loosely attached to the pericarp
Viable: a seed that is alive with the potential to grow into a seedling. Conversely: nonviable with no potential for growing into a seedling.

Baskin, C C., & Basin, J M (2014). Seeds: Ecology, biogeography, and evolution of dormancy and germination (2nd ed.). Elsevier Inc.
De Vitis, M., Hay, F. R., Dickie, J. B., Trivedi, C., Choi, J., & Fiegener, R. (2020). Seed storage: Maintaining seed viability and vigor for restoration use. Restoration Ecology, 28(S3), S213–S303.
Frischie, S., Miller, A L., Pedrini, S., & Kildisheva, O A. (2020). Ensuring seed quality in ecological restoration: native seed cleaning and testing. Restoration Ecology, 28(S3), S213–S303.
Harris, J G., & Harris, M W (2001). Plant identification terminology: An illustrated glossary (2nd ed.). Spring Lake Publishing.
Miller, A. L., & Peters, J. (2010). AOSA/SCST tetrazolium testing handbook, 2010 edition. Tetrazolium Subcommittee of the Association of Official Seed Analysts and the Society of Commercial Seed Technologists.
Rieger, J. P., Stanley, J., & Traynor, R. (2014). Project planning and management for ecological restoration. Island Press.

Initials are for the personnel involved in that step. Conc = concentration, Hrs = hours, Prep = preparation, and Eval = evaluation.
Species/source: Eval initials: Eval date:
TZ conc: Hrs in TZ: Eval notes: Eval time:
Prep initials: Prep date:
Prep notes: Prep time:
