34 minute read
Paper pennants with statement lettering


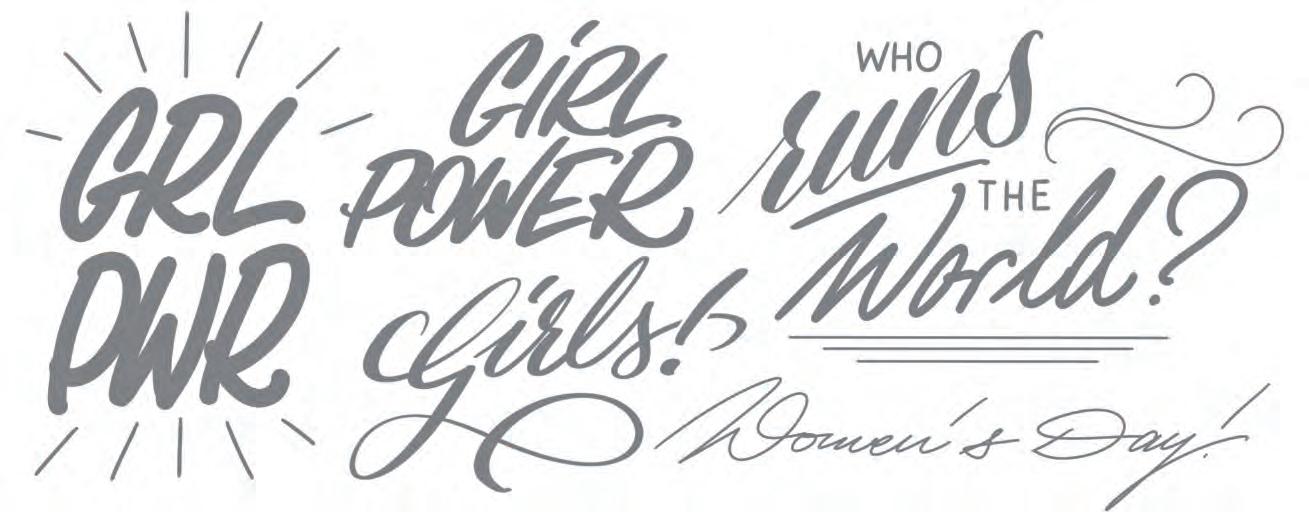
WOMEN'S DAY
Paper pennant
Advertisement
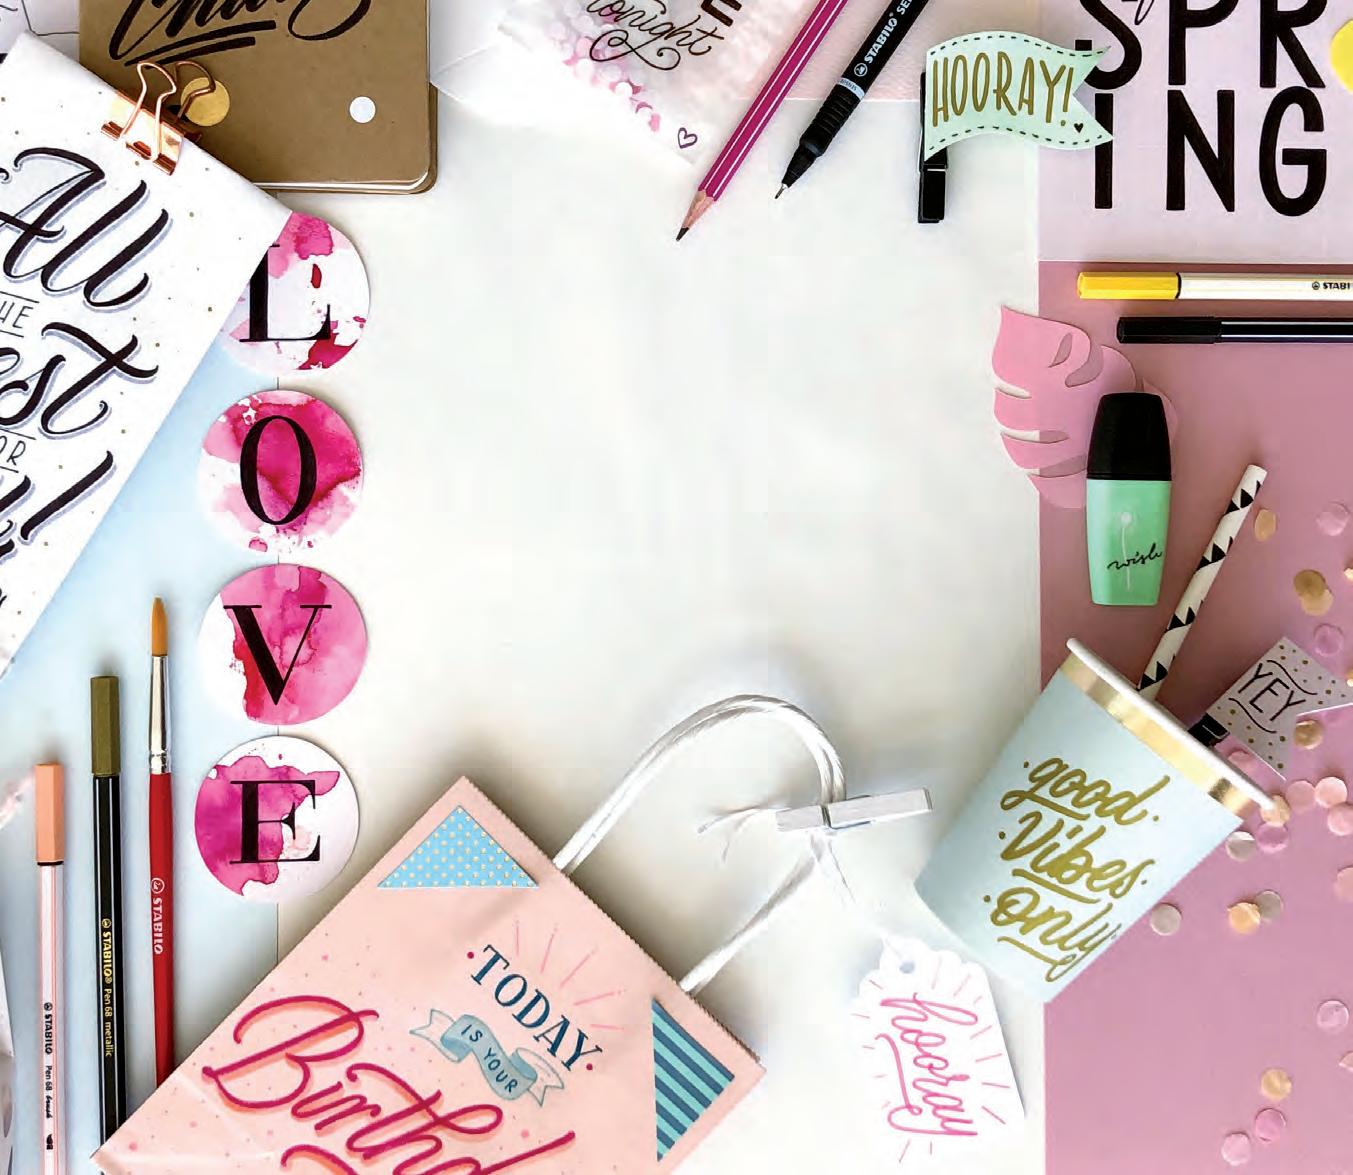
Who runs the world?
There’s only one answer: girls! Make a striking girl power statement on a handmade pennant – for your home, your bedroom door, for your office...
This pennant is super quick and easy to make and is also perfect for other motifs, statements and quotes! On the next few pages, I’ll take you through the instructions step by step.
MATERIALS

Construction paper
Glue or adhesive tape, scissors or scalpel, ruler, eraser, cutting mat or something to place underneath, drinking glass, kitchen roll
A straw or wooden skewer, cord/string
Writing instruments used: STABILO pencil 160 STABILO point 88 STABILO Pen 68 and Pen 68 brush STABILO paintbrush
Color scheme:
Skills:

Step by step 1
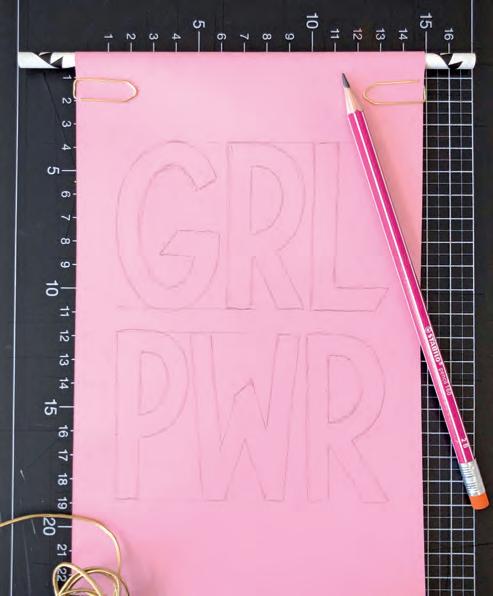
An overview of all you’ll need for the pennant: - a straw (or a wooden skewer) to mount it; - paper cut to the right size (slightly narrower than the length of the straw) using scissors or a scalpel; - adhesive tape (or a glue stick); - two paper clips to hold it in place (these will help you determine how much space you have for your design); - string or cord to hang it up.
2
Do a preliminary drawing of your lettering using the STABILO pencil 160.
Important: This time do not completely erase your preliminary drawing, because we’ll be going back over the outlines once we’ve finished the watercolor.


3
I chose the STABILO Pen 68 brush in four different shades of red in order to get the watercolor effect.
There are two ways to accomplish this technique: either “paint” the letters with water and then add the color, or vice versa!
Important: Ensure your work is “unperfect”! The fact that the letters are painted in a more messy style that runs over the outlines is what gives this project its charm!
Let everything dry well.
4
Now use your pencil drawing as a guide for re-drawing the outlines of the letters.
For the first, light outline I used the STABILO point 88; for the second, thicker outline I used the STABILO Pen 68.
Tip: The outlines should be striking! This makes the letters stand out against the watercolor background and catch the eye!
Now fold the top of the paper around the straw, as measured earlier, and stick it down with glue or adhesive tape.
Attach the cord to the left and right ends of the straw, then all that’s left to do is to hang the pennant where you want!
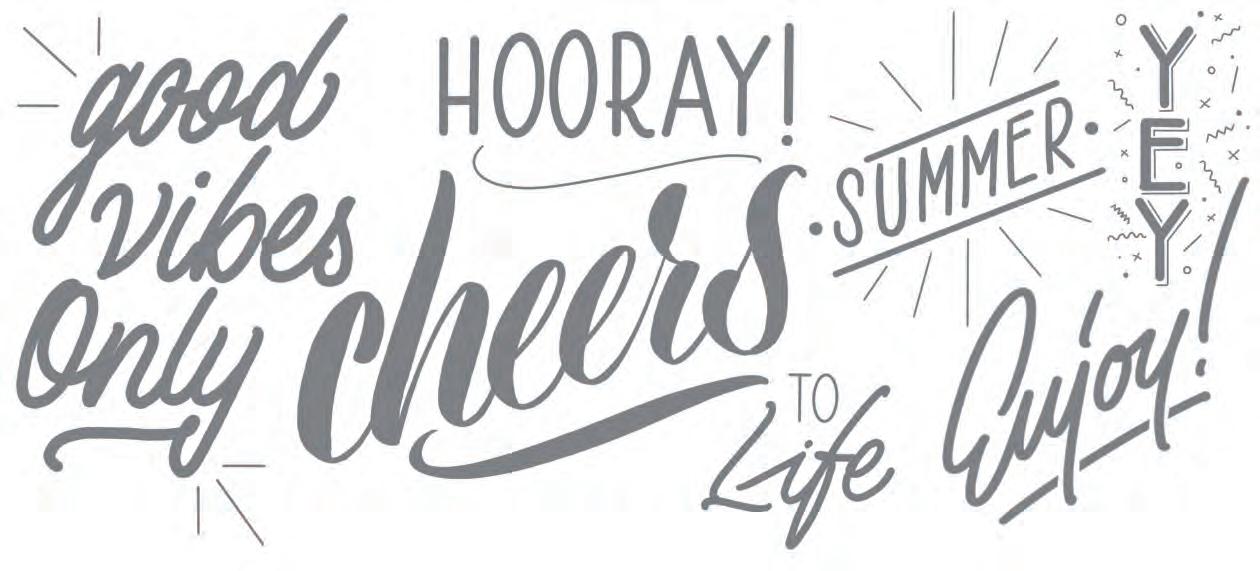
SUMMER
1 3

Let’s celebrate summer!
Ok, on page 33 I said I was a child of winter. But really, is there anything better than sultry summer nights? There really is nothing nicer than whiling them away with your sweetheart, friends or guests! And if you’ve got something to celebrate – even better! Or you can just celebrate the fact that it’s summer... On the next few pages I’ll show you three projects that are perfect for jazzing up a summer night to make it unforgettable. My favourite part of this is that all the lettering and objects are timeless. When autumn comes around, simply store them away and get them out again next summer! It would be a real pity to throw the paper cups away. Why not use them as pen pots? Or give them away as beautiful gifts!
No matter what you have planned, I hope you enjoy creating your designs – maybe even out on the balcony or in the garden. You’re sure to be inspired!
Paper cups Flags & pegs ♥ Paper candle bags
MATERIALS
Construction paper in bright or pastel summer colors
Glue or adhesive tape, scissors, scalpel, ruler, eraser, cutting mat
Paper cups, paper candle bags, (clothes) pegs, wooden skewers
Writing instruments used: STABILO pencil 160 STABILO Pen 68 and Pen 68 brush STABILO Pen 68 metallic
Color scheme:
Skills:

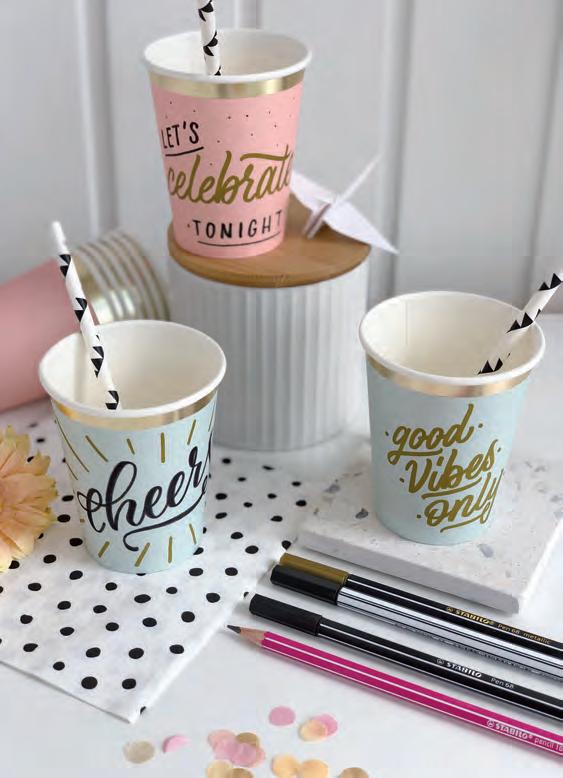
Paper cups
Whether for a birthday party, a summer bash or barbecue – saying “cheers” will be twice as fun with these hand-designed paper cups! While writing on a curved surface does require a bit of practice, the most important thing is the gesture and the delight your guests will feel when they pick up these cups! So don’t give up! Practice makes perfect and, once you and your hand are used to the shape and flow of the various pens, you’ll have so much fun – I promise!
Instructions
1. Select your color scheme: I’ve picked colors that both match and contrast with the cup colors. 2. Depending upon the amount of practise you’ve had, you can either do a preliminary pencil drawing of your text or start decorating the cups straight away. 3. When you’ve finished your lettering, finish it with matching illustrations, symbols, swirls, lines, etc.
My basic tip: When writing on cups, mugs and other round objects: get into a comfortable sitting position, making sure you aren’t cramped and you can move and rest your hand comfortably! If it starts getting tricky, like when it comes to drawing a longer swirl or a straight line, I like to have a thick book or something similar at hand, something that’s got a good bit of height that I can rest my hand on. This gives you a bit more purchase and makes your movements more sure when drawing certain elements!

Flags & pegs
You’ve set the table and now all you need are a few eye-catching elements. These flag and peg toppers will give any cup, glass or bunch of flowers that special little something! They’re quick and easy to make. And your guests are guaranteed to enjoy the words and little messages! So get to it: have fun celebrating!

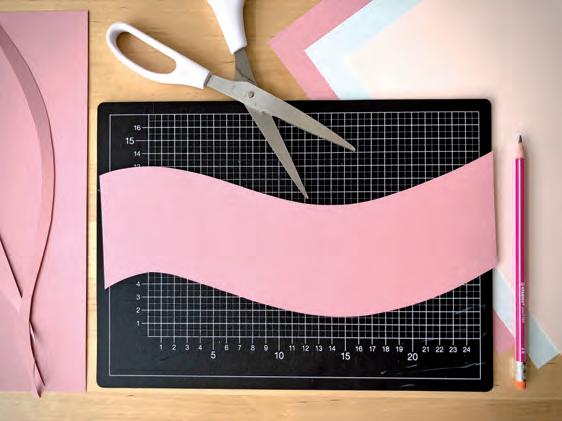
Instructions
1. Take a sheet of colored construction paper, fold it in half and then cut whatever shape you’d like (flag, rectangle, etc.) A preliminary drawing will help here! 2. Now add your design to the flag and decorate it with little elements and details. 3. Depending upon how you plan to use them, you can either stick them to clothes pegs or stick a wooden skewer between the pieces of paper.
My tip: Use a combination of both! A variety of heights, sizes and shapes will create a more exciting overall look.


Paper candle bags
I find these an absolute must-have for the pleasant, sultry summer nights we love! I’ve fallen in love with these simple yet effective, atmospheric little paper candle bags. With just a little bit of effort, you can create a wonderful atmosphere on your balcony, terrace or in your garden! Whether for a summer bash, a garden party or a romantic evening for two – design them however you wish, for whatever occasion. Then all you have to do is wait for sunset!


Instructions
1. A STABILO Pen 68 metallic is perfect for these candle bags as they provide a good contrast but also shimmer beautifully in the daylight. 2. Design the candle bags with quotes and words on the topic of summer (nights). 3. For the little shaped holes, place a thick piece of cardboard in the bag and use a scalpel to cut out the shapes you’d like. The candle light will look beautiful shining through them! 4. Put a big tealight in the bag, then place it out on your balcony or in your garden and enjoy the warm summer night!
WEDDINGS
1

2
3
The best day of your life.
For the best day of your life, I’ve laid out a few ideas over the following pages that you can easily create – to give your wedding or a friend’s wedding that personal touch. These examples are perfect for a range of uses: party favours, table or flower decorations and confetti. A quick tip before you get started: I made my own confetti by simply taking a hole punch (or you could use slightly larger circle punch) to the left-over watercolor-effect paper from the Valentine’s Day project on page 22. It’s really quick to do and this way absolutely everything is handmade – and you don’t have to throw anything away! You can also use different shapes or unusual materials such as petals, leaves, colored paper... The ideas and possibilities are endless!
Now enjoy getting creative and have an unforgettable day!


Flower topper
♥ Papier mâché hearts Confetti bags
MATERIALS
Construction paper
Ruler, eraser, scissors, adhesive tape
Wooden skewers, small bags, confetti and papier mâché hearts (e.g. from arts and crafts or home decoration shops)
Writing instruments used: STABILO pencil 160 STABILO SENSOR F & M STABILO Pen 68 metallic
Color scheme:
Skills:

Toppers
Either use one wooden skewer, like the flower toppers at the beginning of the guide, or two wooden skewers, which will make it more like a garland or banner. You can use these toppers in a range of different ways: as an extra element in the flowers decorating the tables of the church, or as signs displaying the table numbers or table names – whatever you choose, they’re a beautiful, eye-catching and personal option!


Instructions
1. Draw the shape of your banner with pencil on construction paper (not thin paper!). 2. Cut out the shapes using the scissors and do a preliminary drawing of the lettering. 3. Choose colors for the lettering that match the color scheme of the other decorations and how you intend to use the topper. I’ve picked shades from the bouquet. 4. Now stick two wooden skewer to the back of the banner using adhesive tape, one at the right end and the other at the left end. Done!
My tip: Ensure the banner isn’t too long, otherwise it will be unstable. The banner in my example is approx. 16cm long.

Papier mâché hearts
Hanging papier mâché hearts that you can buy from arts and crafts shops are another lovely idea. You can attach them to the chairs of the bride and groom or include them in other decorations. They’re easy to design but are such a lovely keepsake that everyone will want one!
Instructions
1. Papier mâché is a great material to work with: it has a matt surface and you can use almost any writing instrument on it. I’ve picked the STABILO Pen 68 metallic in light green. 2. Do a light preliminary pencil drawing of the word; it’ll help to ensure the word fits nicely within the heart shape! 3. Before doing the major work, erase as much of the pencil drawing as you can. 4. I’ve used faux calligraphy to write out “Mr & Mrs” and added swashes and flourishes to fill the shape as harmoniously as possible. 5. Let everything dry well and carefully erase any of the preliminary drawing that is still visible.


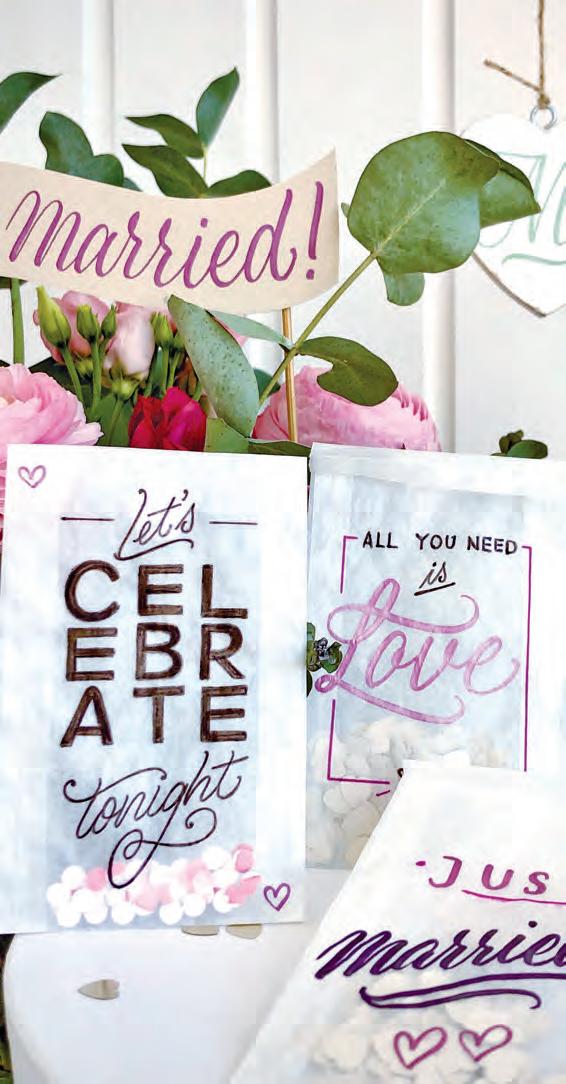
Confetti bags
It’s not a wedding without confetti! That much is certain. These handmade little confetti bags will put a big smile on the face of every wedding guest both during and after the party – because these bags are wonderful keepsakes for an unforgettable day! With words, quotes and short sayings that have a personal meaning to the bride and groom, you can turn these plain little bags into something really great. Fill them with your confetti and you can even give them as a gift to your guests. Have fun celebrating!
Instructions
1. The transparent paper bags you can get from arts and crafts shops are a great choice because they look so pretty with the confetti showing through. 2. Do a preliminary pencil drawing of the wording to ensure it fits harmoniously within the space. 3. Before doing the major work, erase as much of the pencil drawing as you can. 4. I’ve chosen bold, contrasting colors: metallic shades and black. Add little hearts or other fitting symbols to decorate the lettering. 5. Let everything dry well and carefully erase any of the preliminary drawing that is still visible. 6. When you’re finished, fill the bag with your confetti and get ready for the party!
STATIONERY
1

2
3
Creative chaos...
...or a meticulously tidy workspace? Opinions differ wildly. I’m definitely on team “Creative Chaos”, but sooner or later it gets to me and I have to tidy everything up. I must admit: looking at a clear, well-organised desk makes me feel great. Even if it doesn’t stay that way for long!
No matter which team you’re on: You’ll find a few practical yet pretty little helpers here, as well as some ideas for your desk, writing instruments and other stationery. Because one thing’s for sure: I don’t do anything without my beloved notebook. I’m Team Analogue all the way!
Color scheme:
Pen pot
Weekly planner Notebooks
MATERIALS
White construction paper
Ruler, eraser
Notebooks and pen pot, as well as stickers and masking/washi tape of your choice
Writing instruments used: STABILO Write-4-all STABILO Pen 68 and Pen 68 brush STABILO Pen 68 metallic STABILO BOSS ORIGINAL Pastel
Skills:

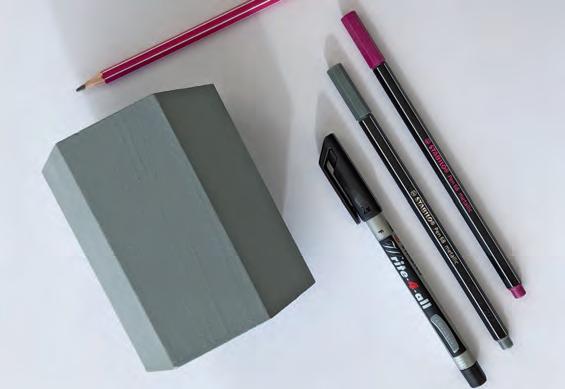
Pen pot
I like having my favourite pens close by, ready to grab. So it makes sense to make my pen pot look beautiful, too! For this, there are countless possibilities, shapes, sizes and materials. Whether you use paper cups, papier mâché, or even smooth or varnished wood – as long as the surface is nice and smooth, you can create some great results using the STABILO Write-4-all or the Pen 68 metallic, and in the end you’ll have a completely customized pen pot!
If the material you have is causing you problems, you can wrap a paper sleeve around it and use this to create your designs. The advantage of this is if you don’t like the design anymore, you can simply design a new one and replace it!
Instructions
1. For this pen pot made from smooth, painted wood, I have chosen high-contrast lettering in black with decoration in metallic shades. 2. Do a preliminary pencil drawing of the wording to ensure it fits harmoniously within the space. 3. Before doing the major work, erase as much of the pencil drawing as you can. 4. This can be quite awkward to do, depending on the shape of the cup or pot. For a better grip, it can help to stack up a few books to the height of the cup or pot. Then you can rest your hand on it and your movements will be more sure! 5. When the first part (here it’s the three words in black, “makers gonna make”) has dried well, you can add decorative elements around the outside. Important: Always ensure everything has dried well before starting the next step! 6. Now all that’s left is for you to fill it with your favourite pens and pencils and put it on your desk!

Weekly planner
When my mind is filled with chaos, I find it really helps to write down all the important things for the coming week. And the important part is the writing itself: that way, it’s out of my over-crowded mind and on paper – preferably written out beautifully – and I always have my weekly planner in sight! It doesn’t really matter whether you write out your tasks, projects and plans for a whole week, or prefer to work on a day-to-day basis, or split up your plans into specific categories. Lay out your list however feels good and right to you. The main thing is that you enjoy making it! I find that unpleasant or stressful topics seem only half as bad when they’re written out beautifully! This has the positive side effect of calming the mind! Here I’ll show you just one of many design ideas, and I’ve kept it very simple. The way I see it, legibility and clarity are particularly important here, which is why I’ve decided against adding any decoration or other elements and instead chosen a clean overall look that can be put together quickly!
Instructions

1. Depending upon the number of categories you want, a classic portrait A4 or A5 format should work. 2. First, use a pencil to measure out, assign and highlight each of the categories. 3. Any additions can added in the middle of the top and bottom. For example, you can write “to do”, “Weekly planner”, or something similar. Adding the calendar week or dates for that week will give you an even clearer overview. 4. Choose a different color of STABILO BOSS ORIGINAL Pastel for each of your categories; this way you’ll be able to easily distinguish between them. You can write out your tasks for the relevant category above the dotted lines. 5. Less is more: With the exception of a few pastelcolored accents, I’ve done my best to avoid flourishes and extra details. This way your plan will be clearly structured! 6. Use some masking or adhesive tape to stick it up somewhere you can easily see it.

Notebooks
I can’t live without my beloved notebooks. Whether a planner for my appointments, projects and free time or a blank book for ideas, sketches and my list of “words that I absolutely have to write out” – you can never have enough notebooks. At the minute, I especially like the notebooks made from brown kraft paper. I think a simple, graphic design in black, grey and white or gold accents looks very elegant and stylish. With statement lettering, which you can even scale-up to extend beyond the available space, you’ll turn a once dreary notebook into a real must-have. Have fun creating and filling your book!
Instructions
1. All arts and crafts shops stock a range of singlecolored notebooks in different shapes and sizes. 2. The color scheme is black with grey shading, and details in gold and white in the form of stickers or masking tape. 3. Do a preliminary pencil drawing of your (statement) lettering. For an exciting layout, combine a big, sweeping, page-filling word that extends over the edges of the space with a smaller word in serif or capital letters. This contrast always looks great! Guaranteed. 4. The best instrument for the major work is a STABILO Pen 68 brush; for the fine lines and details, I use the STABILO SENSOR F. 5. Once your lettering is finished, you can decorate the free space with color-coordinated stickers or masking tape, or with geometric lines and shapes. My tip: Less is more! This way, you’ll be able to create a clean, geometric look!

AT HOME
1

2
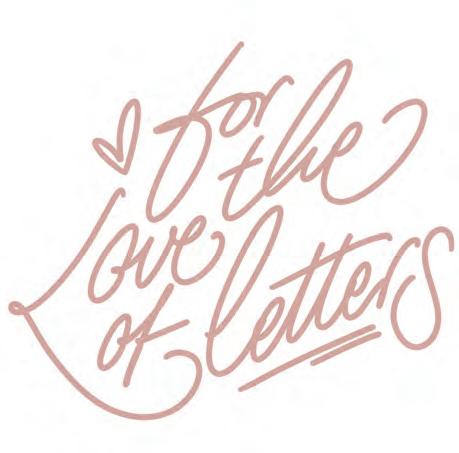
Decorative letters for your home
A life without letters is possible, but pointless. Or at least it is for me! They aren’t just the focus of my work and career; they’re also the focus of my private life. Anyone who comes round my house notices very quickly that I love letters! The evidence is everywhere: old illuminated letters from the flea market, signs, posters and cards, adhesive letters on windows or – and here’s where we get to the point – hand-drawn lettering: framed, pinned up and on shelves. The next few projects cover two ideas for displaying your lettering beautifully in your home! It requires some effort and a materials, but the result is all the more wonderful! I bet your next visitor will be super impressed and you’re sure to get your first few commissions!
Color scheme:
Skills:
Lettering in a poster hanger Floral wreath
MATERIALS
Construction paper or cardstock Ruler, eraser, scissors, jotting paper, kitchen roll, drinking glass Poster hanger from an arts and crafts store, wreath of dried flowers from a florist – or one you’ve made yourself! Writing instruments used: STABILO Pen 68 and Pen 68 brush STABILO point 88 STABILO BOSS ORIGINAL Pastel STABILO paintbrush


Lettering in a poster hanger
A beautiful idea that’s perfect for people who love change: the poster hanger. The poster hangers in my examples are magnetic and can be found in a variety of designs, colors and lengths (for different formats) in arts and crafts shops. And do you know what’s great about them? Once you’re sick of seeing them, it only takes a few seconds to put something new in the hanger and have a brand new decoration for your wall! For this example I asked myself: what makes my house a home? As a self-confessed plant lover, I soon had an answer. What makes your home special to you? Simply replace “Plants” with your own personal word!
Instructions
1. Choose a sheet of paper to fit the size of your poster hanger. You’ll need watercolor paper for this project! 2. Do a faint preliminary pencil drawing of the petals, leaves and lettering and erase the drawing until it is almost invisible, especially in the areas that are to have the watercolor effect! 3. For the watercolor work, I used the STABILO BOSS ORIGINAL Pastel and some matching shades of the STABILO Pen 68 brush; these two pens are great for painting with a brush! Color the petals and leaves and leave everything to dry well! 4. Fill in the lettering in faux calligraphy using a STABILO point 88; as a contrast, write “Plants” in narrow monoline capital letters. 5. Draw in the two thick lines below and above the watercolor elements. They mirror the frames of the poster hanger. 6. Clamp the finished picture between the bars.


Floral wreath
I am a great admirer of the artistry of florists and all those who can create such beautiful wreaths. I suspect that my patience only extends to letters... So of course I’ve added these to this cute dried floral wreath, too. Cut a banner from construction paper, add a nice saying, welcome, or something that fits in with your home, and you’ve made a beautiful, timeless decoration! The wreath will last forever and the paper banner is easy to replace when you’re ready for a change!
Instructions
1. Take a sheet of construction paper that fits your wreath (approx. 2–3cm longer), draw out the shape of your banner and cut it out with scissors. 2. Hold the paper banner to the wreath to check that it is big enough and work out where the lettering can go (so it won’t be covered by the flowers). 3. Do a preliminary pencil drawing of your lettering. The combination of brush lettering and serif font creates a lovely contrast and matches the text. 4. Do the major work on your lettering. For the word “home”, I used the STABILO Pen 68 brush and blended the shades light grey and salmon; for the word “sweet”, I used the STABILO point 88 and Pen 68. 5. I chose muted, unobtrusive colors that match the dried flowers. The lettering and flowers harmonise; neither of them steal the show and the overall look is natural and attractive. 6. Now stick the paper banner to the wreath; the left end under the flowers and the right end over the metal ring.

CHRISTMAS
1 2

3
Merry Christmas!
It’s the most wonderful time of the year. Even if we moan about how stressful the run-up to Christmas is – as soon as it’s time to wrap the little (or big!) gifts you’ve bought for your loved ones, you start to feel that sense of calm and contemplation. You don’t have to be a gift-wrapping wizard: with just a little effort and a few materials, you can conjure up the most amazing gift ideas. And as always, it’s the thought that counts. Whether it’s a few lovely little gift tags, some striking wrapping paper or small wooden discs: everything is made with love! That’s something everyone can see and appreciate. However you choose to wrap your gift, enjoy the feeling of calm and joy as you work! Take your time over it and look forward to the days ahead. I wish you a cosy, stress-free and merry run-up to Christmas!
Gift tags
♥ Wooden discs Wrapping paper
MATERIALS
Ready-made gift tags from arts and crafts shops or colored construction paper, kraft paper, or single-colored wrapping paper Ruler, eraser, holepunch (if needed), scissors, stickers Ribbons, string, wooden discs from an arts and crafts shop or garden centre Writing instruments used: STABILO pencil 160 STABILO Pen 68 brush and Pen 68 metallic STABILO point 88 STABILO Write-4-all
Color scheme:
Skills:

Gift tags
When it comes to wrapping gifts, these are a classic option. But I still love them for their versatility and design possibilities! You can find them in arts and crafts shops in a range of colors, shapes and sizes, and often with pre-punched holes. Which means that all that’s left to do is grab your favourite pens in your favourite colors and start designing these lovely little gift tags. They don’t always offer a lot of space, but that doesn’t matter. It’s nice, meditative work and good practice. You can play with shapes, for example by positioning the lettering in a circle. Attach it to your wrapping, bottle or Christmas bag with matching string and in less than no time you have a great gift to give!
Instructions

1. I picked traditional Christmas colors for this project: gold, green and red. Metallic shades will provide beautiful, shimmering accents. 2. Do a preliminary pencil drawing of your lettering and erase as much of it as you can before doing the major work. 3. You can even attach more than one tag to a gift: write one word on each tag then thread them onto the string in line, forming a sentence. This gives you more options to play with different tags, words and messages! 4. Decorate the remaining space with symbols, elements or pictures to suit the occasion. Try little dots, swirls, lines or illustrations such as stars, hearts, snowflakes, etc. 5. When you’re finished, attach them to your gifts using matching string or cord.

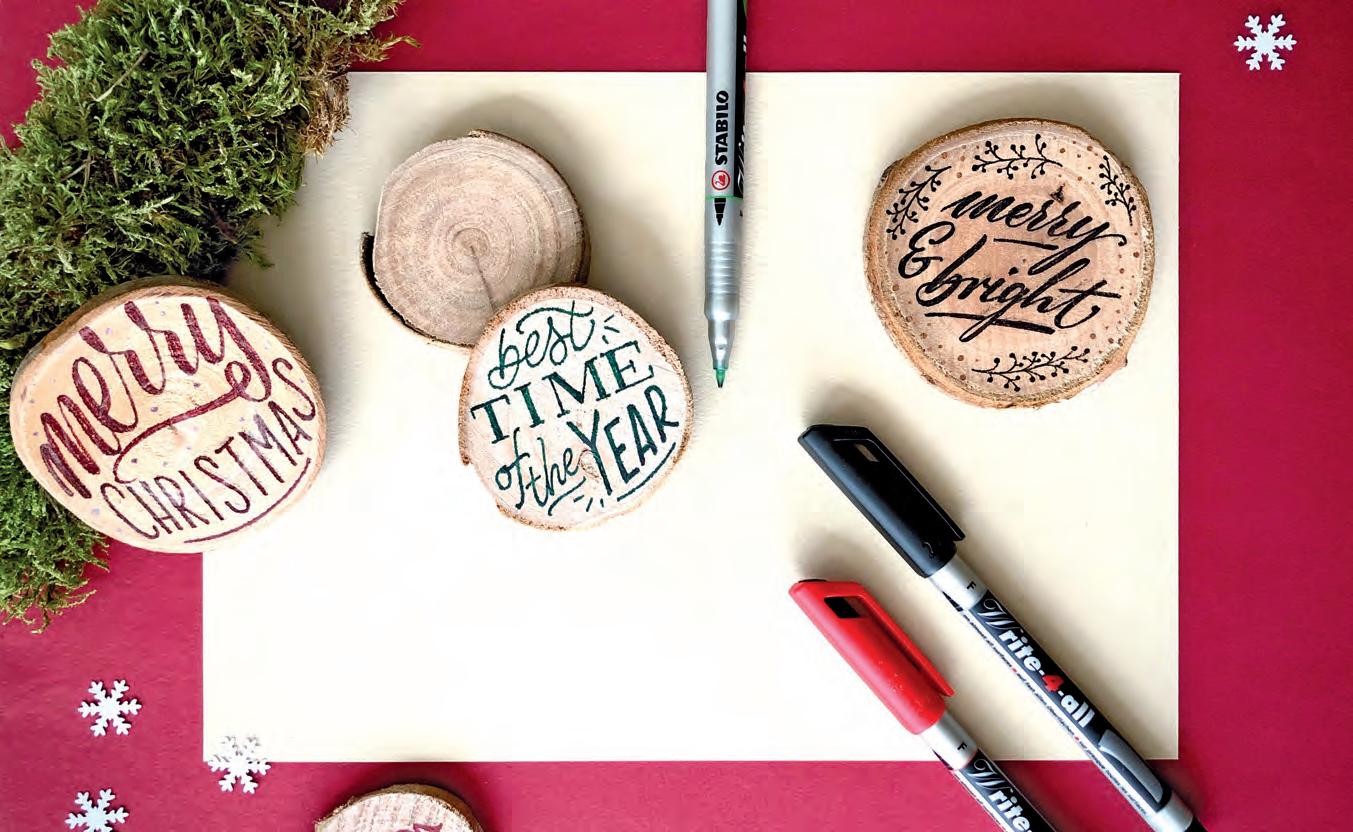
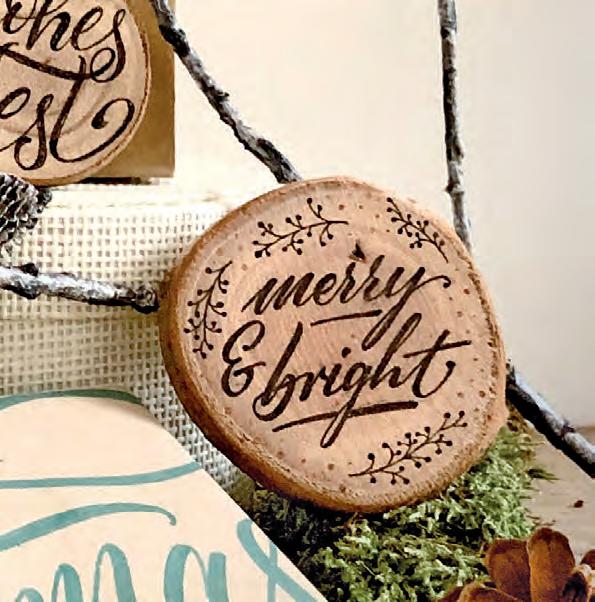
Wooden discs
The STABILO Write-4-all in black, red and dark green is wonderful for designing these little wooden discs! Ensure the surface is as smooth as possible. You can either integrate the wooden discs into your Christmas decorations or table setting, or attach them to a gift. They are available in a range of sizes and are perfect for that natural look!
Instructions
1. Do a preliminary pencil drawing of your lettering and select a STABILO Write-4-all in black, red and green. You can erase the pencil once the ink is dry. 2. The faux calligraphy technique is great for the major work on the letters, or you can use a combination of different fonts. As always, I recommend using no more than three! 3. You could even use a simple hatching technique to draw little illustrations such as Christmas trees and stars. It makes the pictures look lively and forms a contrast to the other wooden discs. 4. Important: Be careful not to apply too much pressure! Otherwise too much color will bleed into the wood and your pen could fray more quickly. 5. Once the discs are fully dry, you can erase any remaining pencil and then position them or hang them up wherever you want.

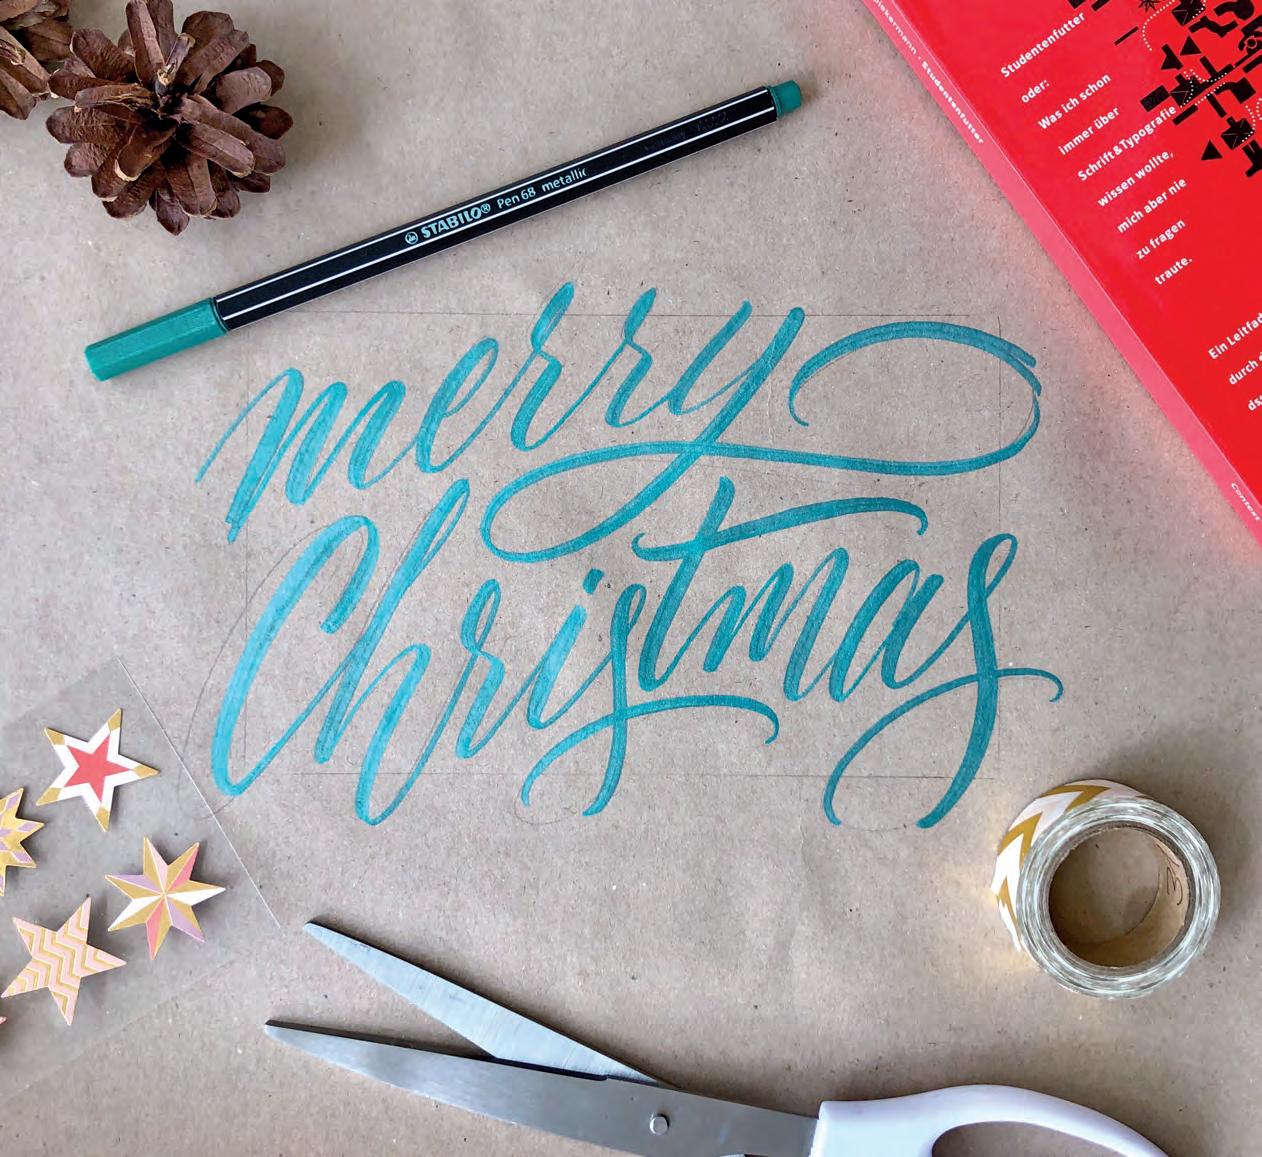
Wrapping paper
This is a very quick and easy idea that nevertheless turns your wrapping paper into a real work of art! And here’s a great little upcycling idea on the side: Once the gift has been unwrapped, the motif can be cut out and either hung up, framed or even used again during the festive period! For example, you could stick it on a Christmas card – there are so many possibilities!
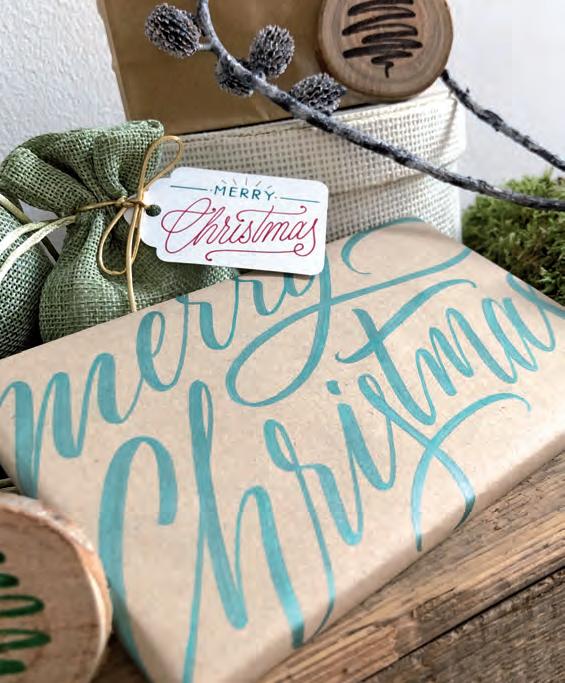

Instructions
1. Choose single-colored wrapping or kraft paper. 2. Draw out the dimensions of your gift – here it’s a book. This frame shows you the space you have for your design. 3. Do a preliminary drawing of the lettering if you’d like. 4. Important: Draw and work across and over the frame! It rounds off the idea and makes the final wrapping particularly exciting. The green STABILO Pen 68 metallic forms a great contrast to the brown kraft paper. 5. Once everything is fully dry, you can wrap your gift. I decided against using ribbons and other additions in order to maximise the impact of this statement paper! Tip: The metallic colors look different on kraft paper than they do on white or black paper!
NEW YEAR'S EVE
1
2

3
Happy New Year!
A quick case for the turn of the year: New Year’s Eve is in no way a day like any other! I’ve always loved New Year’s Eve and I always look forward to the next one. It seems like you only blink and “boxing week” is over and it’s already time to ring in the New Year. Whether with a huge blowout with tons of friends, or snuggled up on the sofa with your favourite person – everyone has their own way to celebrate! And if after Christmas you decide you haven’t had enough creativity, I have just the thing for you on the next few pages: I’ll show you a few easy but creative ideas to really make your New Year’s Eve party shine! With this in mind: ten, nine, eight... pop a cork and have an unforgettable start to the New Year!
Bottle bags Sparkler cards Place cards ♥
MATERIALS
Black construction paper, paper bottle bag
Ruler, eraser, scalpel and cutting mat, jotting paper, small saw or sharp, serrated knife
Champagne or sparkling wine cork, sparklers, stickers and extras of your choice
Writing instruments used: STABILO pencil 160 STABILO Pen 68 metallic
Color scheme:
Skills:
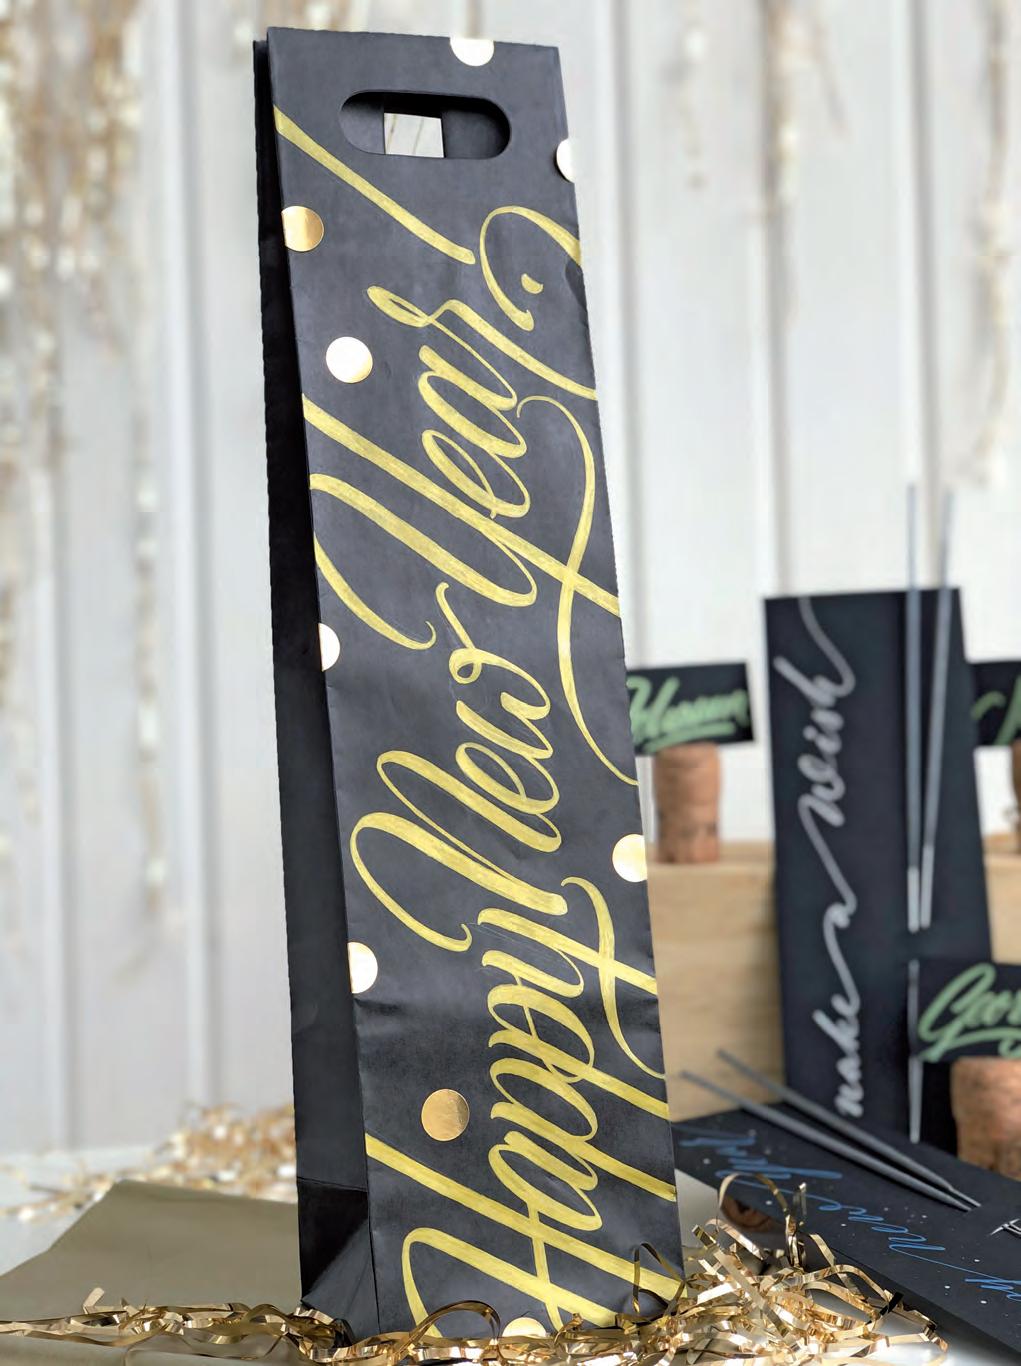
Bottle bags
No matter how you prefer to ring in the New Year: this handmade bottle bag is the perfect gift for the host of the party and will get you twice as excited about celebrating! These specialised paper bags are also available in a variety of sizes, colors and designs. To achieve the elegant New Year’s look that I wanted, I chose a black bag and then decorated it with oversized gold lettering and matching stickers.
Instructions
1. Do a preliminary pencil drawing of your lettering. And go for it: spread the oversized statement lettering with its long, sweeping flourishes across the entire length and width of the bag. This looks particularly dramatic and dynamic! 2. Now do the major work, using the gold STABILO Pen 68 metallic, for example. The other colors in this series also cover well and really come into their own on black paper! 3. Let your lettering dry well and carefully erase any remaining pencil. 4. You can then decorate the bag with matching stickers or even masking tape to give the perfect party look. The golden circles look like confetti and turn a once boring bag into a shimmering eye-catcher! Or use the other metallic colors, which will harmonise wonderfully with the gold. Then put your bottle in and get ready to party!


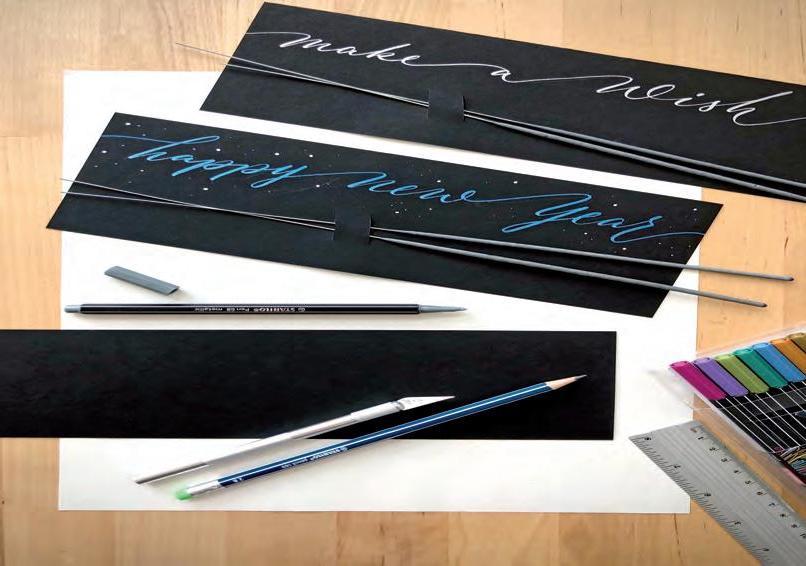
Sparkler cards
These cards may look simple at first, but with their small flap for holding sparklers they make a wonderful gift (perhaps for the host of a party)! These cards are a wonderful gesture when combined with heartfelt wishes for the New Year. They’re easy to make and quick to decorate. Minimum effort, maximum joy. They’ll guarantee a happy and – most importantly – sparkly start to the New Year!
Instructions
1. Cut out a piece of construction paper that is as big as you need (slightly shorter than the sparklers) and fold it in half once for stability, so that you have a long, narrow shape (like a standard DL envelope). 2. Now make two cuts approx. 1.5–2cm long using a scalpel (as you did for the Mother’s Day card project on page 38). This is the flap that will hold the sparklers. 3. Now stick the edges of the card together using adhesive tape or glue. 4. I’ve chosen long, extensive lettering that is all joined together and that matches the size and shape of the card. It runs along the length of the sparklers the entire card. 5. Do a preliminary pencil drawing of your lettering; a short phrase with approx. 3–4 words will suffice for the length this of card! This look is brought alive by the joins between words: the sweeping flourishes joining the words, which are written with the letters relatively close together, make the overall image exciting yet still harmonious and balanced. 6. Let everything dry well and carefully erase any remaining pencil. Slide two sparklers through the flap and you’re done!
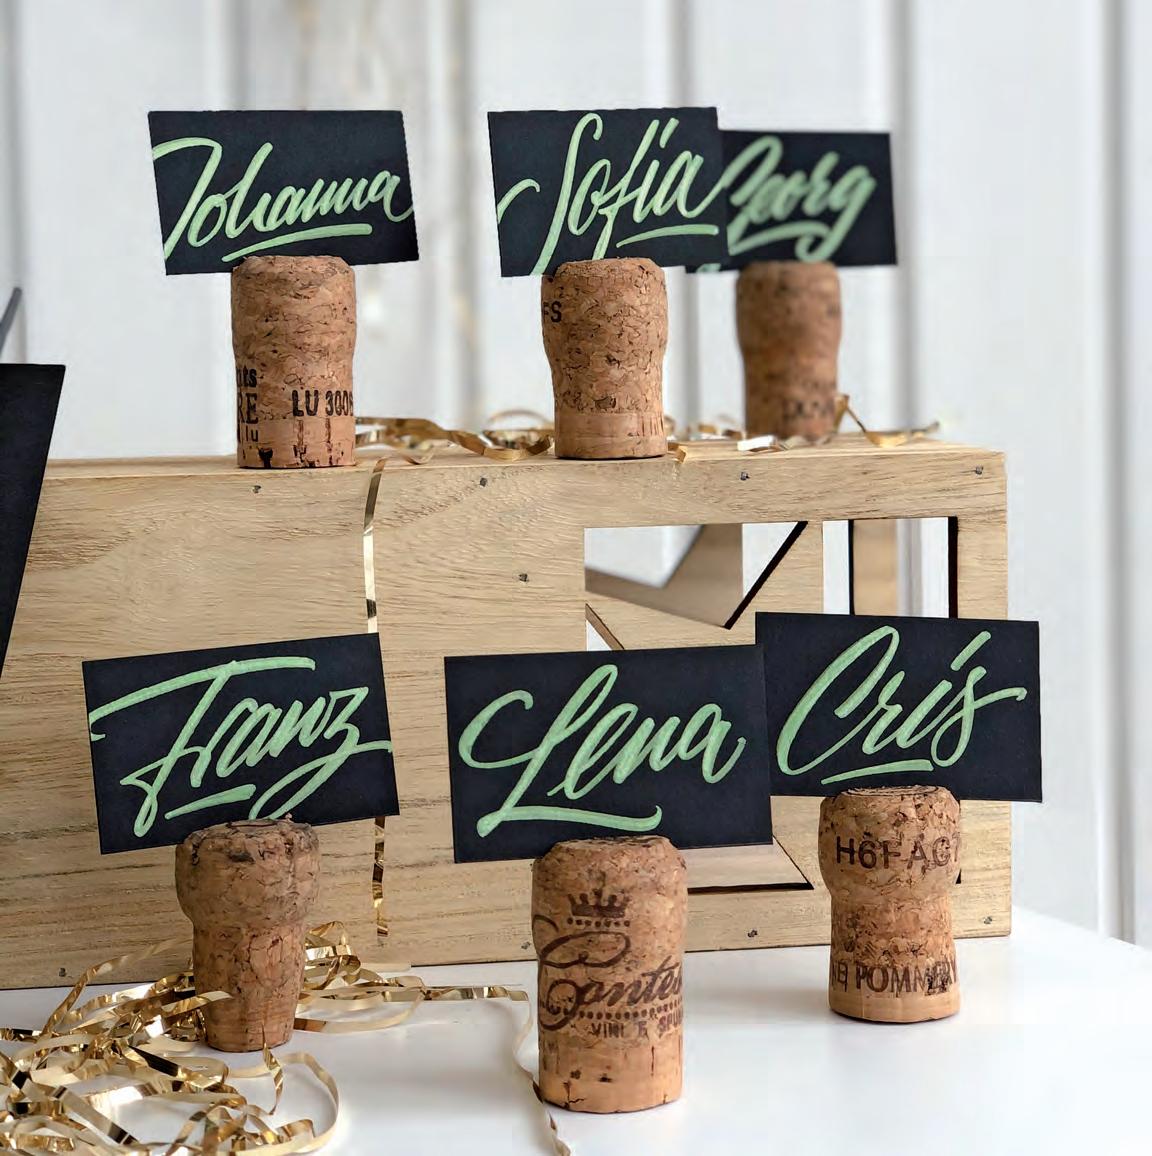
Place cards
You can get these champagne or sparkling wine corks in arts and crafts stores or home decoration shops. Or you could collect them yourself, of course... Add a piece of construction paper with the names of your friends and family written out in beautiful lettering and your striking place cards are finished! I really like this idea and you can definitely use it for other celebrations and parties! Anywhere where corks are being popped!
Instructions

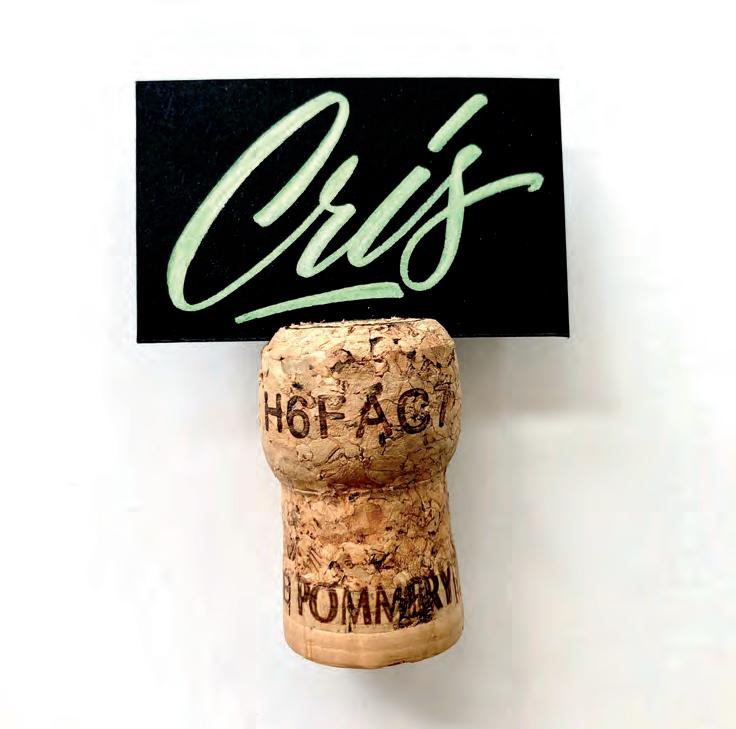
1. Either use ready-made place cards from the shop or cut them out of black construction paper. 6.5 x 4cm is about the right size for the corks. 2. For the names, I chose a font with a sweeping, dynamic look that sometimes extends over and across the edges of the format. 3. Do a preliminary pencil drawing of the names and erase it almost completely before you do the major work. 4. For the major work I selected a STABILO Pen 68 metallic in light green, because it looks really nice when combined with the black paper and beige cork. 5. Let everything dry well and then erase any remaining pencil. 6. Now cut a slit in the cork. For this you can use a bread knife or a small hand saw, if you have one. As long as you use something that cuts well and has teeth! No need to cut any deeper than approx. 5mm. Now stick the card in and you’re done!
Templates
In this part of the book, you’ll find a few of the examples from the projects as templates for you to copy. You can also go to the STABILO website to watch the making-of videos for several projects!
BIRTHDAYS

VALENTINE'S DAY
EASTER


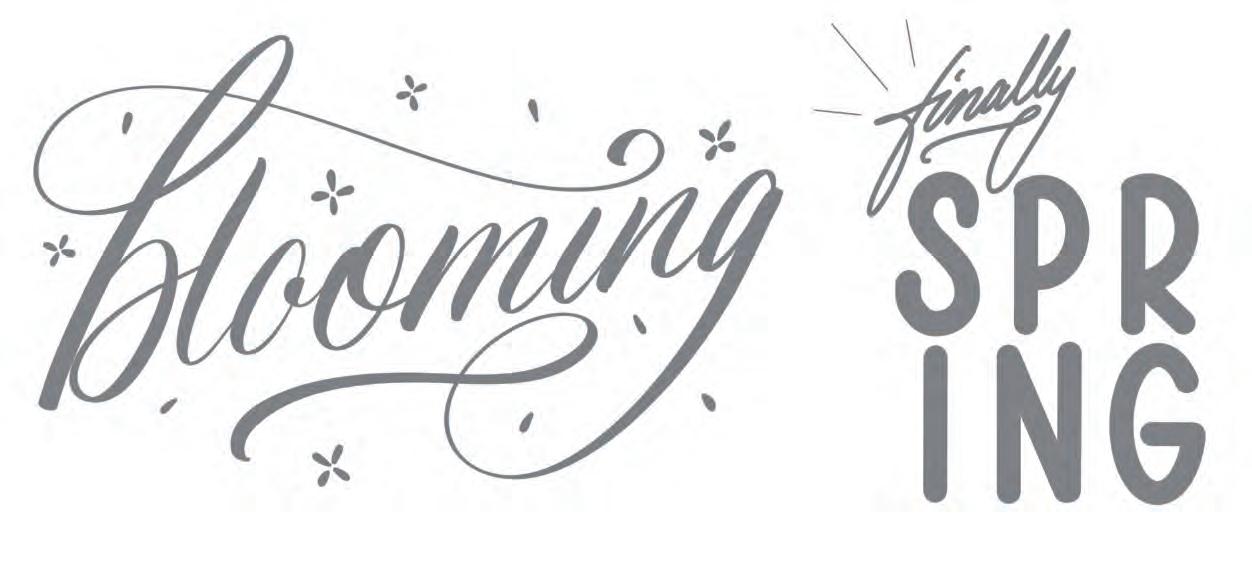
SPRING

MOTHER'S DAY
FATHERS' DAY
WOMEN'S DAY

SUMMER

WEDDINGS

STATIONERY

AT HOME

CHRISTMAS

NEW YEAR'S EVE


The artist
My fascination with letters began just before my design studies in Nuremberg and is still going strong more than 11 years later. In this time I’ve come to recognise the beauty of our 26 letters and our numbers with their many details and characteristics, and they’ve quickly become the focus of my work. My studies, in which I specialised in typography, allowed me to take this fascination further and expand my knowledge, and I became a true lettering aficionado. For more than seven years now I have worked as a freelancer doing lettering, calligraphy, graffiti and graphic design, and I can definitively say: I can’t imagine anything better! The multifaceted nature of working with letters makes every project exciting: Whether it’s designing logos, doing classic work on paper, designing large-scale shop windows, walls, tables or even properties, combining digital and analogue, working with a variety of techniques and tools – every project has its own challenges. The world of (hand) writing is virtually boundless and omnipresent. That’s what my life is like, too: Letters are not only the focus of my work, but also of my free time. They have and will always have my unabashed enthusiasm and love.


STABILO International GmbH Schwanweg 1 90562 Heroldsberg Germany www.stabilo.com Registered trademark of Schwan-STABILO, Schwanweg 1, 90562 Heroldsberg, Germany Printed in Germany