


Get inspired to make the most out of your supplies! Unique & creative techniques and hacks you should try today! Out of the Box Ideas! 7 Must-Try Card Making Ideas


CONTENTS 03 05 07 09 04 06 08 Quick and Easy Elegant Cards Vellum Florals String Art Background the Easy Way! CAS Monochromatic Thank You Card Using Just Dies Easy Splatter Watercolor Technique Hot Foiling on Acetate Ombré Die-Cut Greeting
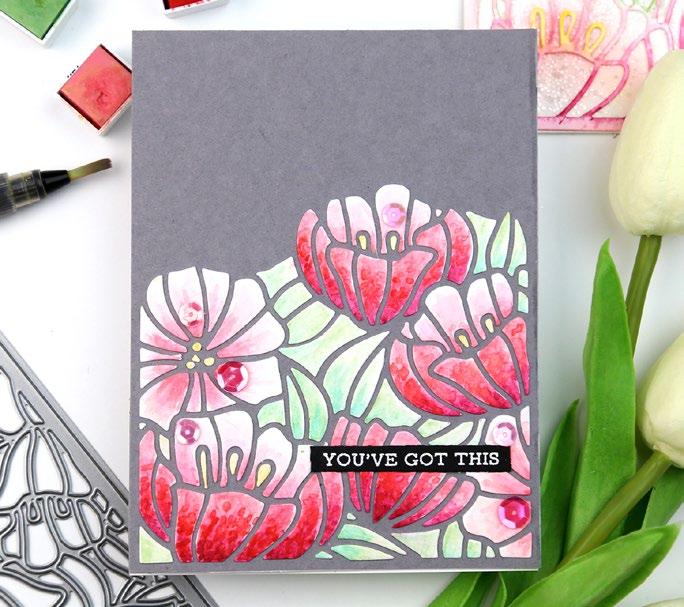
WATERCOLOR TECHNIQUE
BY ERUM TASNEEM
INSTRUCTIONS
1. Create a 4 ¼” x 5 ½” card base from Classic Crest Solar White Cardstock.
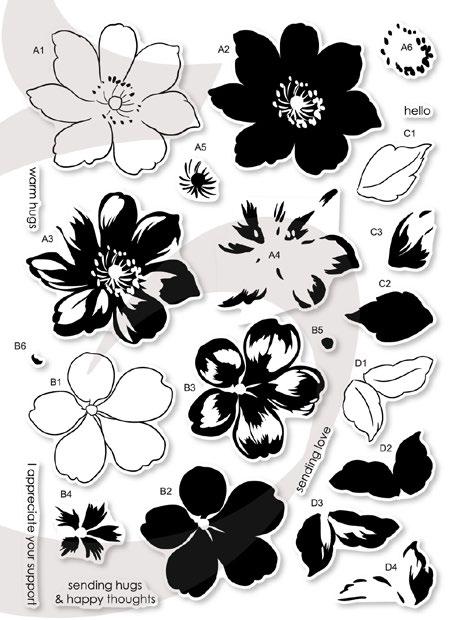
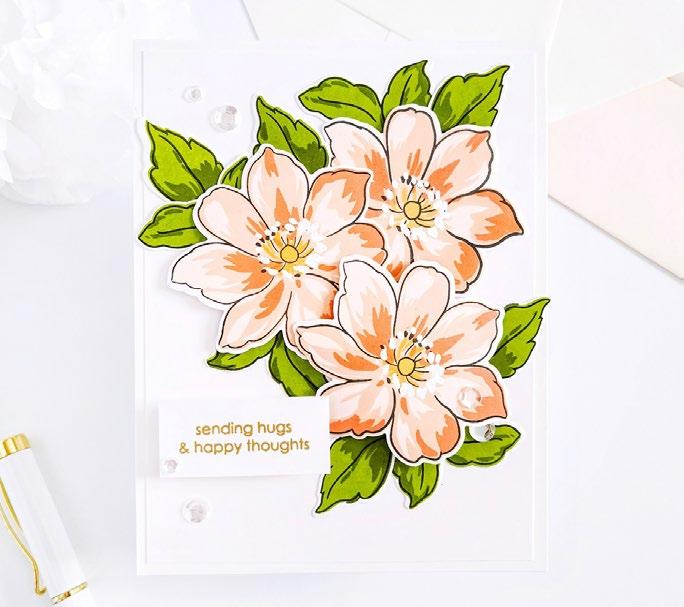
2. Stamp images from the Garden Delights Stamp Set on a piece of A2 Watercolor Cardstock in Embossing Ink and heat set with Pure White Embossing Powder.
3. Spritz water over the panel or apply it with a paintbrush.
4. Add Sea Shore and Lapis Lazuli pigment splatters to the petals from Artists’ Watercolor 24 Pan Set. Use Cool Summer Nights splatters for the flower centers.
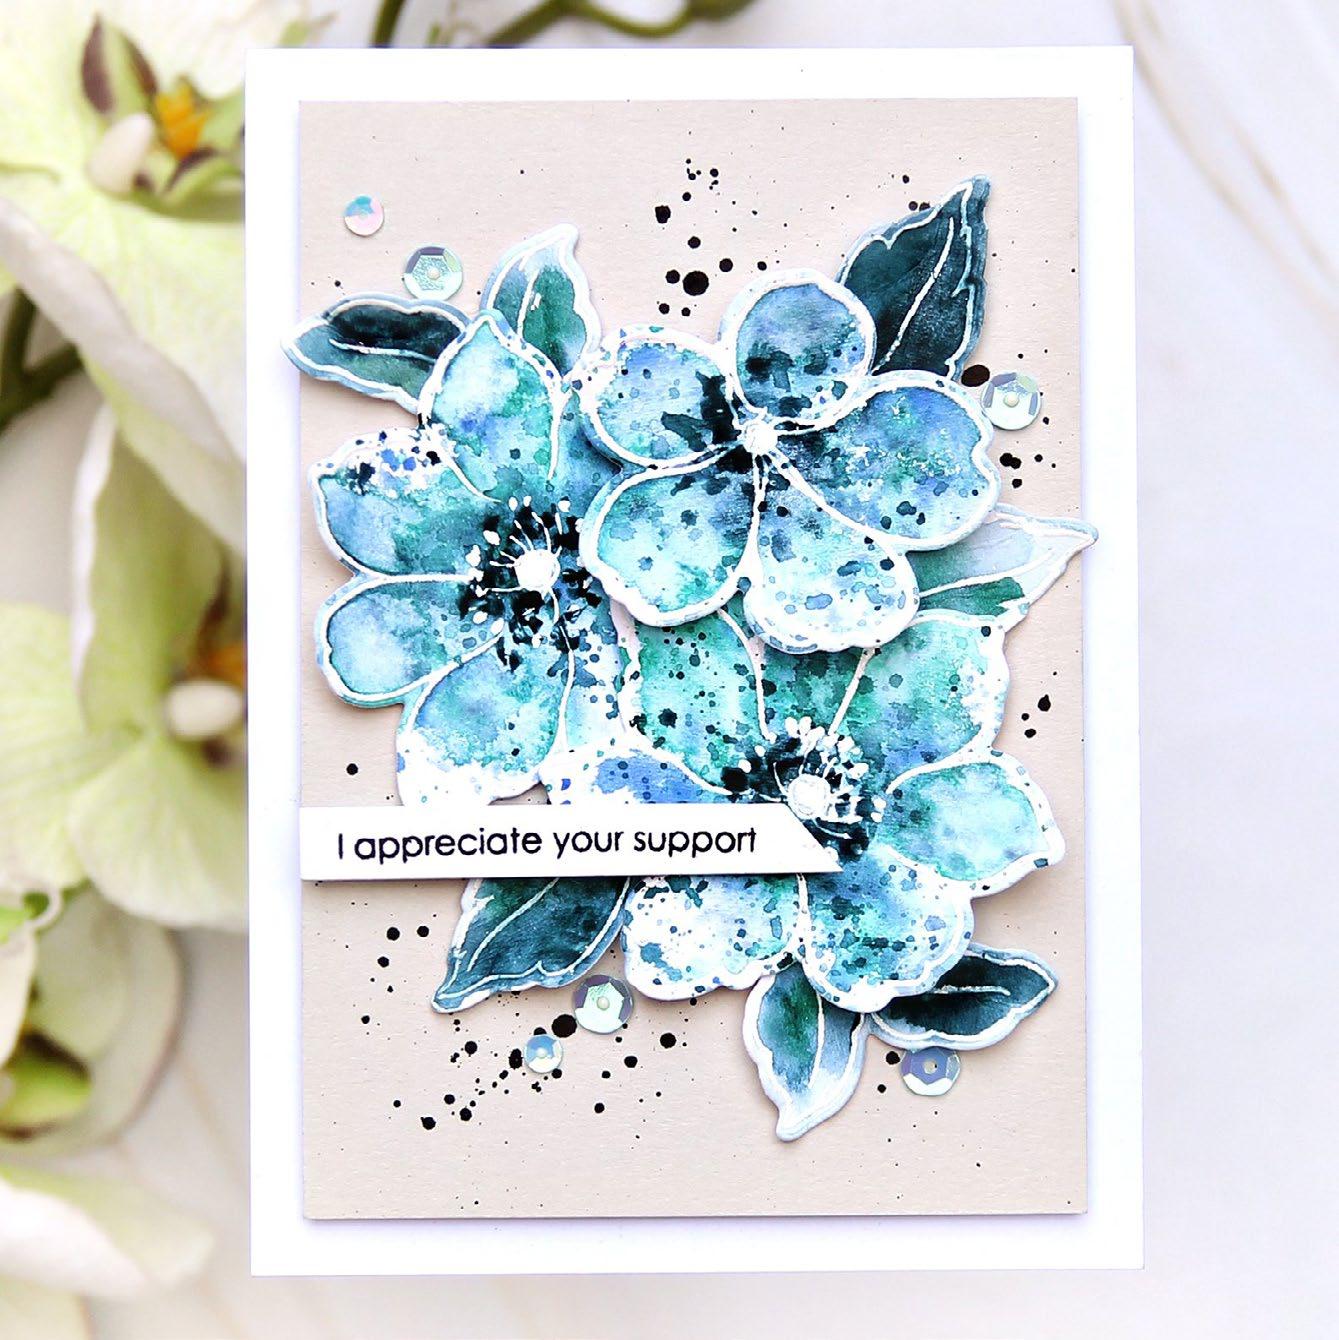
5. Repeat the same process with the leaves using Cool Summer Nights and Sea Shore pigment and leave them to dry. TIP! Make the leaves darker than the flowers.
SUPPLIES
Stamp & Dies
Garden Delights Stamp and Die Bundle
Inks
Obsidian Ink
Embossing Ink
Cardstock and Paper
Classic Crest Solar White Cardstock
Moonrock Cardstock (25 sheets/set)
Watercolor Paper Set (A2 loose sheets)
Coloring Medium
Artists’ Watercolor 24 Pan Set
Other
Instant Dimension Foam Tape
Pure White Crisp Embossing Powder
Make a Statement Sequins Bundle
2-in-1 Precision Glue Pen
Paintbrush
6. Die cut with coordinating dies.
7. Trim a panel of Moonrock Cardstock an inch smaller than the card front.
8. Add fine black paint splatters to the Moonrock panel and adhere the panel to the card front using foam tape.
9. Adhere the die-cut flowers to the panel using foam tape.
10. Pinch the tips of the leaves and then adhere them with liquid glue.
11. Stamp the sentiment on a white cardstock strip using Obsidian Ink and adhere it to the panel with foam tape.
12. To finish, add a few sequins.

SEE MORE ON OUR BLOG EASY
SPLATTER
03
QUICK AND EASY ELEGANT CARDS
BY LYDIA EVANS
INSTRUCTIONS
1. Create a 4 ¼” x 5 ½” card base from Classic Crest Solar White Cardstock.
2. Pour Yellow Ochre and Sicilian Amber Alcohol Inks all over a 4 ½” x 5 ½” panel of Gold Mirror Cardstock.
3. Die cut the panel using the detail die from Pattern Motif Die Set.
4. Add some Double-Sided Adhesive Sheets to a piece of Vellum and cut this using both dies in the Pattern Motif Die Set.
5. Then, cut a piece of Navy Cardstock with the shadow die from the same set.
6. Adhere the vellum die-cut to the navy die-cut and the gold mirror die-cut to the vellum shadow die-cut using liquid glue.

SUPPLIES
Stamp & Die
Pattern Motif Die Set
Sentiment Strips 3 Stamp Set
7. Add each die-cut into place onto contrasting panels using glue tape.
8. Adhere the panels to the card bases using glue tape.
Ink
Embossing Ink
Alcohol Inks: Yellow Ochre and Sicilian Amber
Cardstock
Classic Crest Solar White Cardstock
Gold Mirror Cardstock (5 sheets/set)
Navy Cardstock (25 sheets/set)
Vellum Translucent Paper (25 sheets/set)
Other
Antique Gold Crisp Embossing Powder
Double-Sided Adhesive Sheets (10 sheets/set)
Instant Dimension Foam Tape
Glue Tape
2-in-1 Precision Glue Pen
9. Stamp a couple of sentiments from Sentiment Strips 3 Stamp Set onto Navy Cardstock strips using Embossing Ink and heat set with Antique Gold Embossing Powder.
10. Adhere the sentiment strips onto the panels using foam tape.
SEE MORE ON OUR BLOG
04
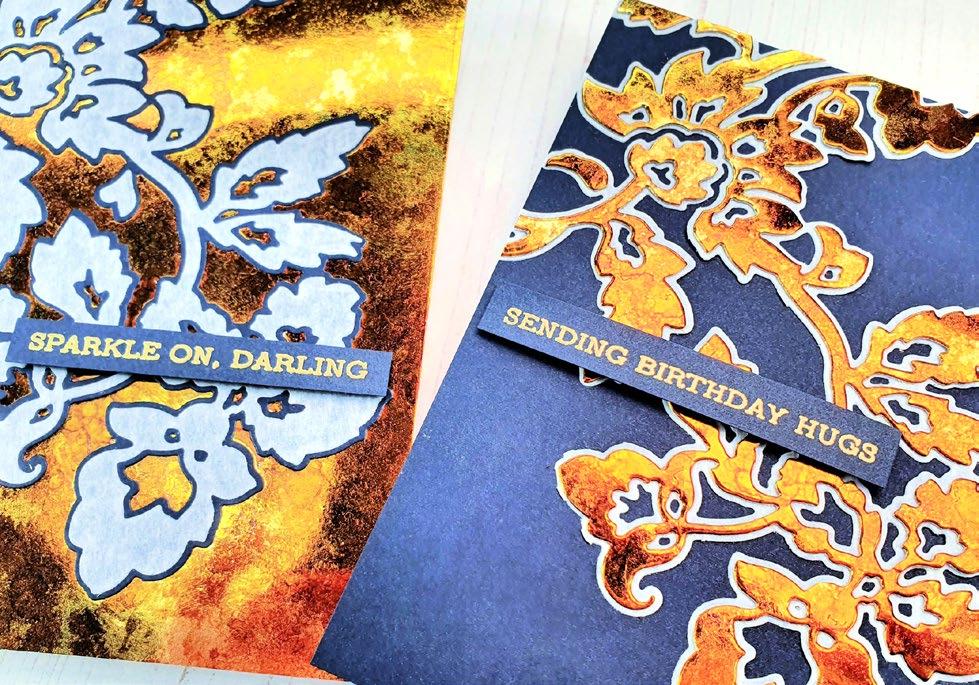
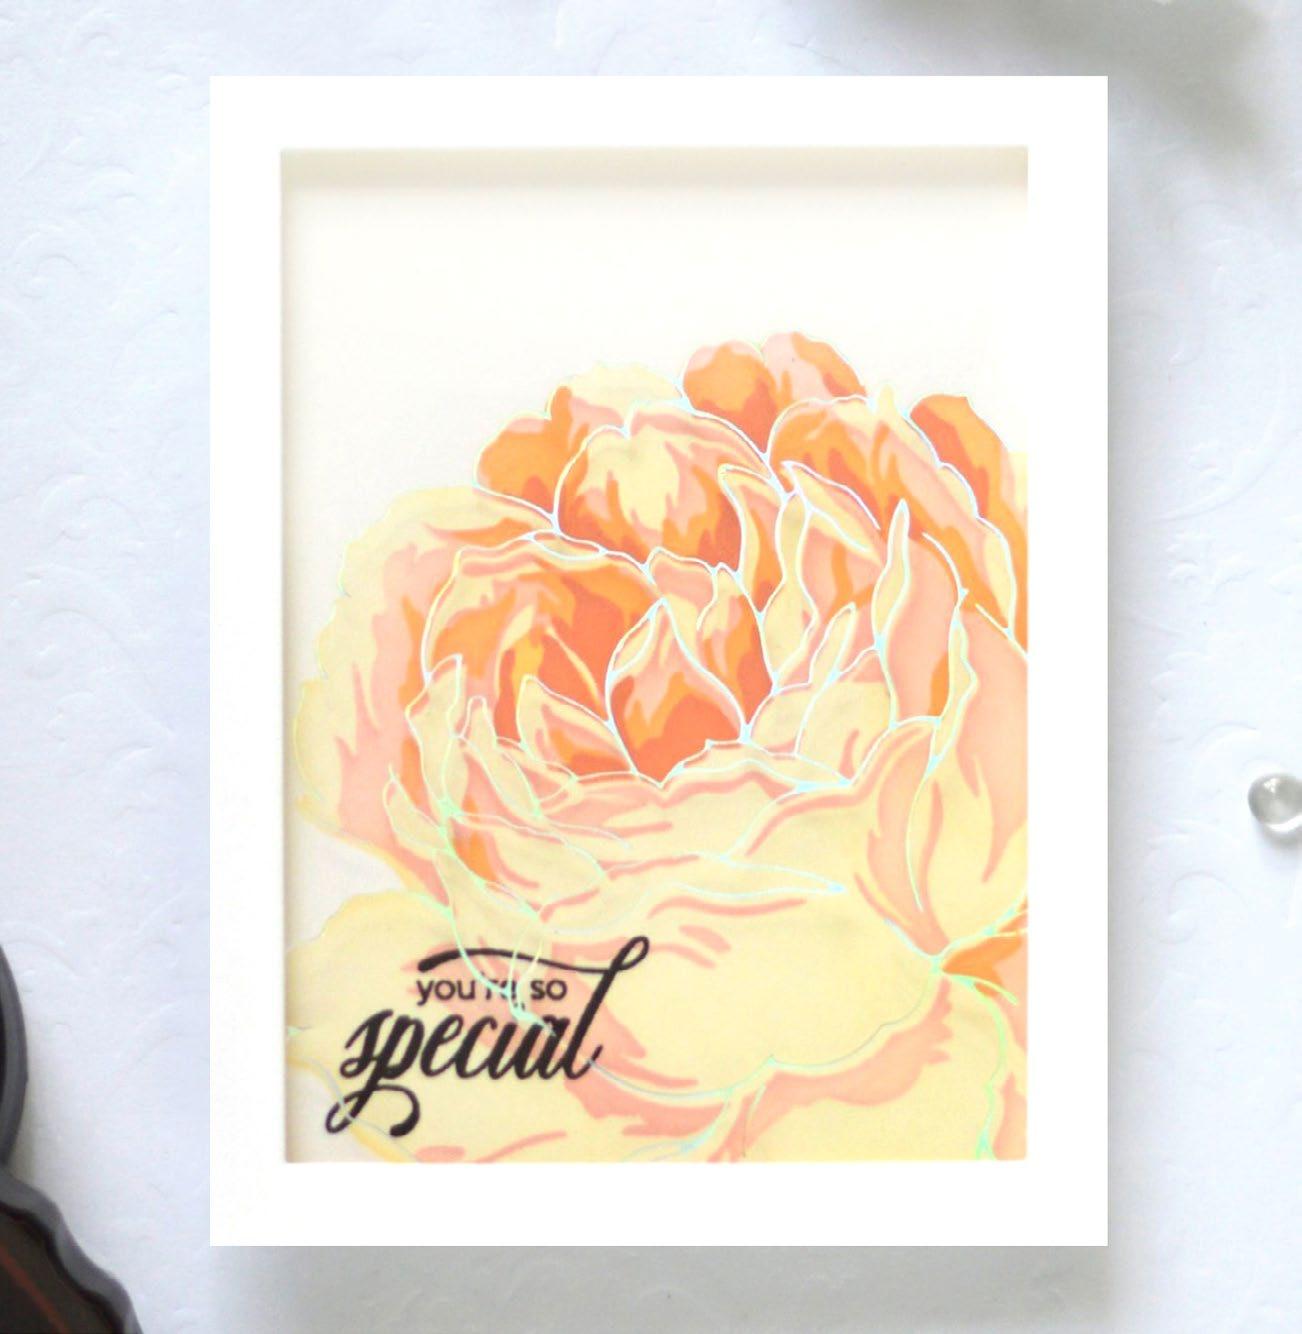
HOT FOILING ON ACETATE
BY THERESE CALVIRD
INSTRUCTIONS
1. Create a 4 ¼” x 5 ½” card base from Classic Crest Solar White Cardstock. Set aside.
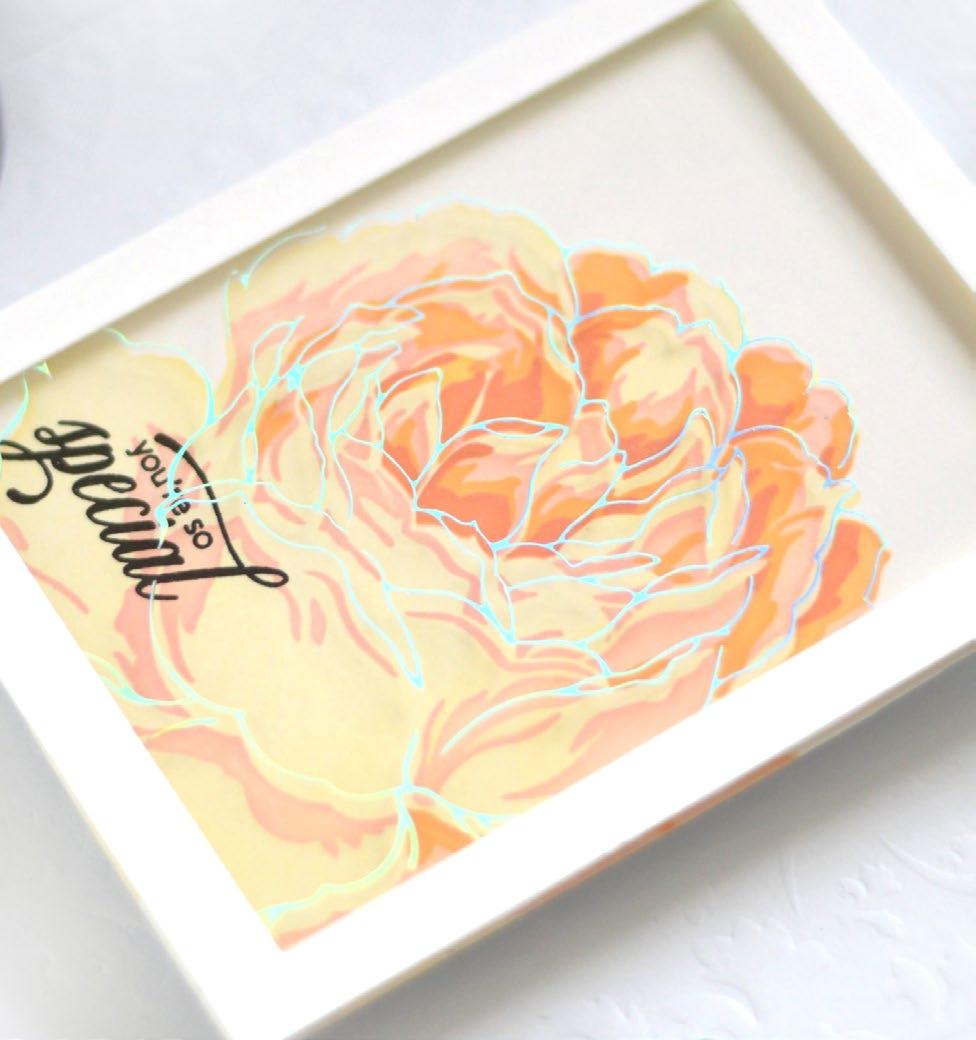
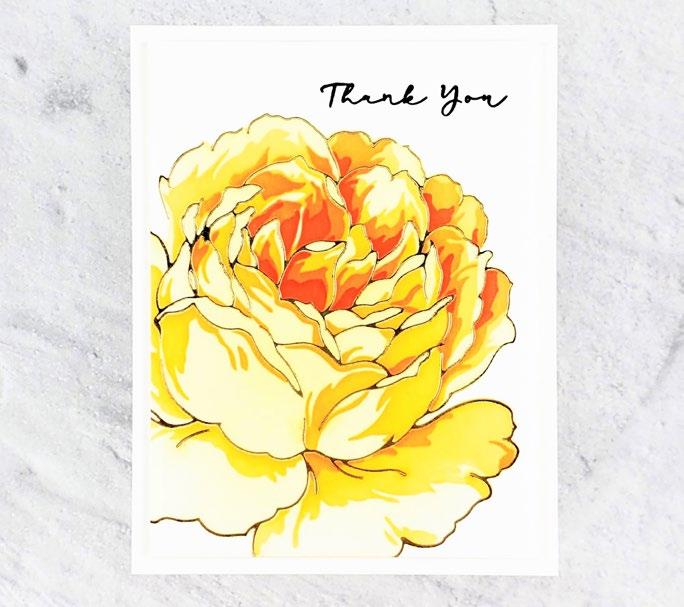
2. Hot foil the Gilded Rose Hot Foil Plate onto a heat-resistant acetate using iridescent hot foil sheet.
3. On another white cardstock panel, stencil the image from Gilded Rose Layering Stencil Set using Buttercream, Sunkissed, Blush, and Rouge Dye Inks.
4. Trim the hot foiled acetate to fit the stenciled image.
5. Cut a rectangle border for an A2-sized card using white cardstock.
6. Adhere the hot foiled acetate to the rectangle border using glue tape.
7. Stamp a sentiment from Bergenia Builder Stamp Set onto the stenciled panel using Permanent Black Crisp Dye Ink.
SUPPLIES
Stamp, Stencil, and Hot Foil Plate
Gilded Rose Layering Stencil Set
Gilded Rose Hot Foil Plate
Bergenia Builder Stamp Set
Inks
Crisp Dye Ink: Buttercream, Sunkissed, Blush, Rouge, Permanent Black
Cardstock and Paper
Classic Crest Solar White Cardstock
Other
Instant Dimension Foam Tape
Glue Tape
Iridescent Hot Foil Sheet
Heat-resistant Acetate
Ink Blending Brushes - Large
8. Adhere the hot foiled acetate onto the stenciled panel using foam tape.
9. Adhere the panel onto the card base using glue tape.
SEE MORE ON OUR BLOG
05
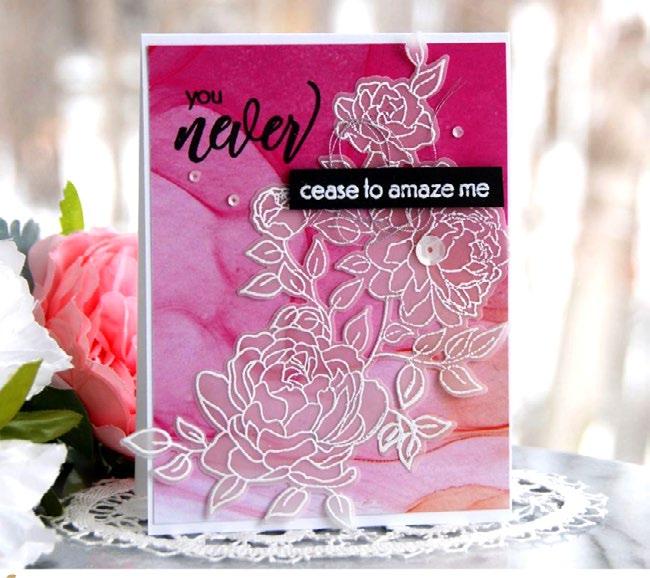
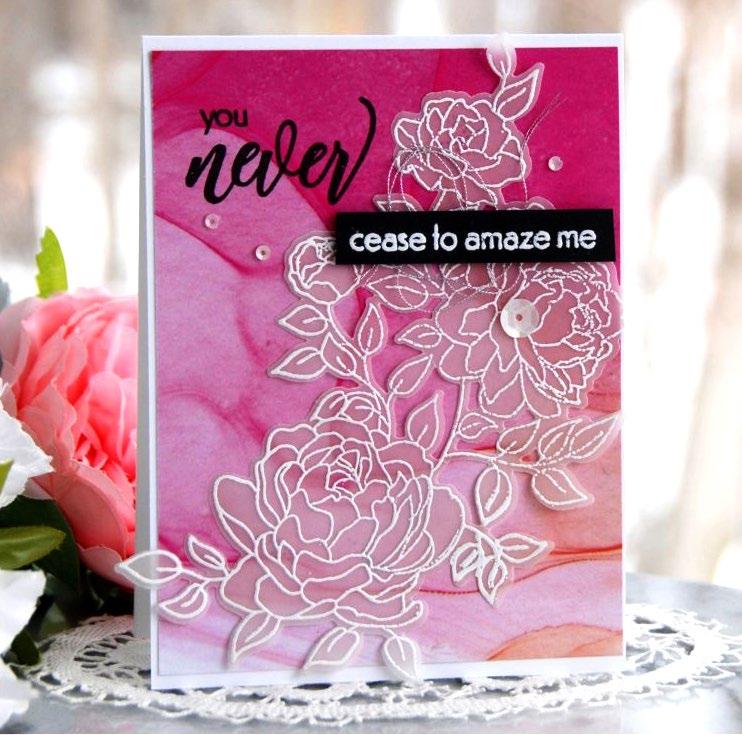
VELLUM FLORALS
BY VIRGINIA LU
INSTRUCTIONS
1. Create a 4 ¼” x 5 ½” card base from Classic Crest Solar White Cardstock.
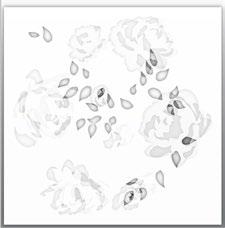
2. Pick a patterned paper from Alcohol Ink Backgrounds 6x6 Paper Pack and trim it slightly smaller than the A2 card base.
3. Heat emboss the large floral image from Craft Your Life Project Kit: Never Stop Dreaming onto a piece of Vellum using Embossing Ink and Pure White Embossing Powder.
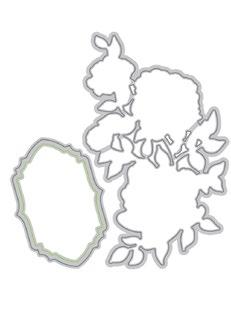
4. Die cut the image with the coordinating die.
5. Stamp a sub-sentiment from Craft Your Life Project Kit: Never Stop Dreaming onto a black cardstock strip using Embossing Ink and heat set with Pure White Embossing Powder.
SUPPLIES
Stamp & Die
Craft Your Life Project Kit: Never Stop Dreaming
Inks
Embossing Ink
Obsidian Pigment Ink
Cardstock and Paper
Classic Crest Solar White Cardstock
Vellum Translucent Paper (25 sheets/set)
Alcohol Ink Backgrounds 6x6 Paper Pack
Jet Black Cardstock
Other
Instant Dimension Foam Tape
Metallic Thread Set
Sequins - Satin White
Glue Tape
Pure White Crisp Embossing Powder
2-in-1 Precision Glue Pen
6. Adhere the vellum die-cut onto the patterned paper panel using glue tape.
7. Adhere the sentiment strip into place using foam tape.
8. Tuck in some Silver Metallic Thread behind the sentiment strip using liquid glue.
9. Stamp “you” and “never” from the same stamp set into place on the patterned paper panel using Obsidian Ink.
10. Adhere the panel onto the card base using glue tape.
11. Add a few Satin White Sequins.
SEE MORE ON OUR BLOG
06
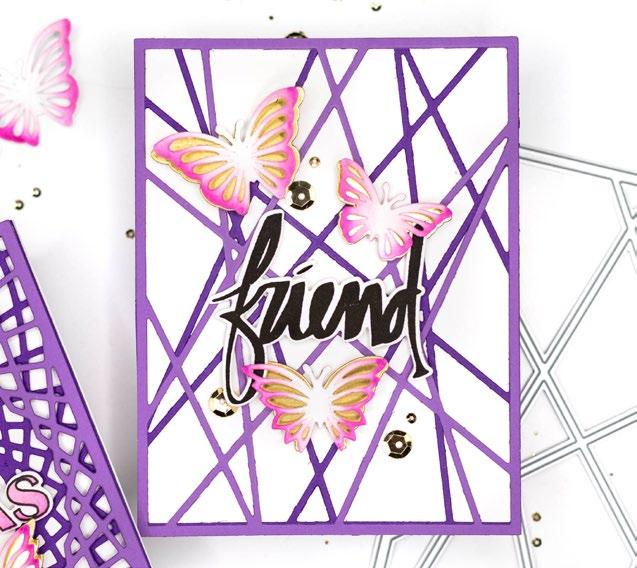
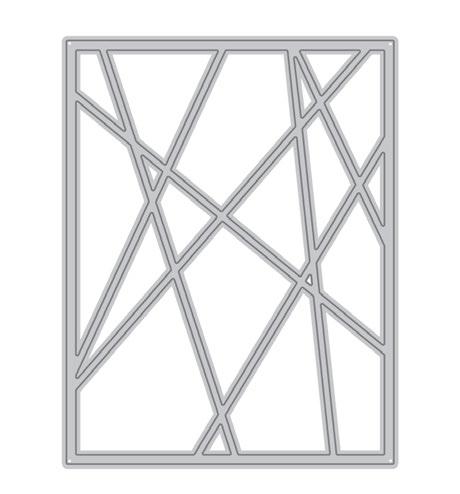
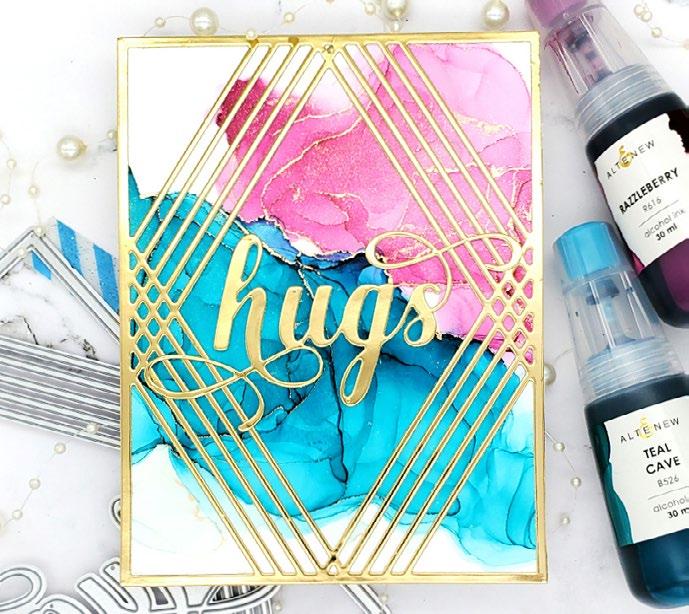
THE EASY WAY!
BY JENNY COLACICCO
SUPPLIES
Stamp and Dies
String Panel Cover Die
Mix & Match Mariposa Die Set
Super Script Stamp Set (retired)
Inks
Crisp Dye Ink: Fuchsia and Baby Pink
Obsidian Pigment Ink
Cardstock and Paper
Classic Crest Solar White Cardstock
Gold Mirror Cardstock (5 sheets/set)
Other
Instant Dimension Foam Tape
2 in 1 Precision Glue Pen
Glue Tape
Sequins - Antique Gold
Mini Blending Brush Set
Crafter’s Essential Micro-Tip Tweezers
INSTRUCTIONS
1. Create a 4 ¼” x 5 ½” card base from Classic Crest Solar White Cardstock.
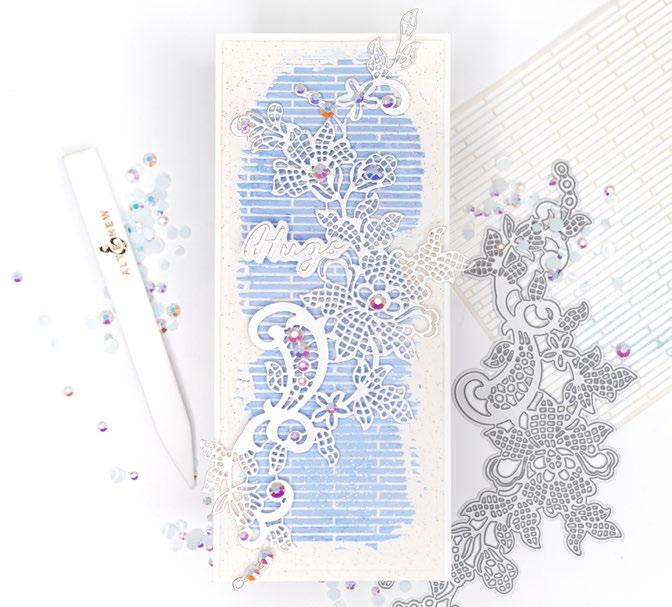
2. Die cut the String Panel Cover Die twice from two shades of purple cardstock.
3. Adhere one String Panel die-cut to a white cardstock panel using liquid glue.
4. Flip the other die-cut 180 degrees before adhering it to the panel using liquid glue.
5. Die cut all of the solid butterflies from Mix & Match Mariposa Die Set out of Gold Mirror Cardstock.

6. Die cut all of the detailed layers out of white cardstock.
7. Add pops of pink to the die-cuts by blending Fuchsia and Baby Pink Crisp Dye Inks using a Mini Blending Brush.
8. Use tweezers to fold the inkblended layer in half, then adhere it to the gold mirror layer using liquid glue, letting the wings pop up.
9. Adhere the die-cuts around the string art background panel with foam squares.
10. Adhere the panel to the card base using glue tape.
11. Stamp a sentiment from Super Script Stamp Set onto white cardstock using Obsidian Ink and die cut with the coordinating die.
12. Adhere the sentiment die-cut onto the panel using foam tape.
13. To finish, add a few Antique Gold Sequins.
SEE MORE ON OUR BLOG
ART
STRING
BACKGROUND
07
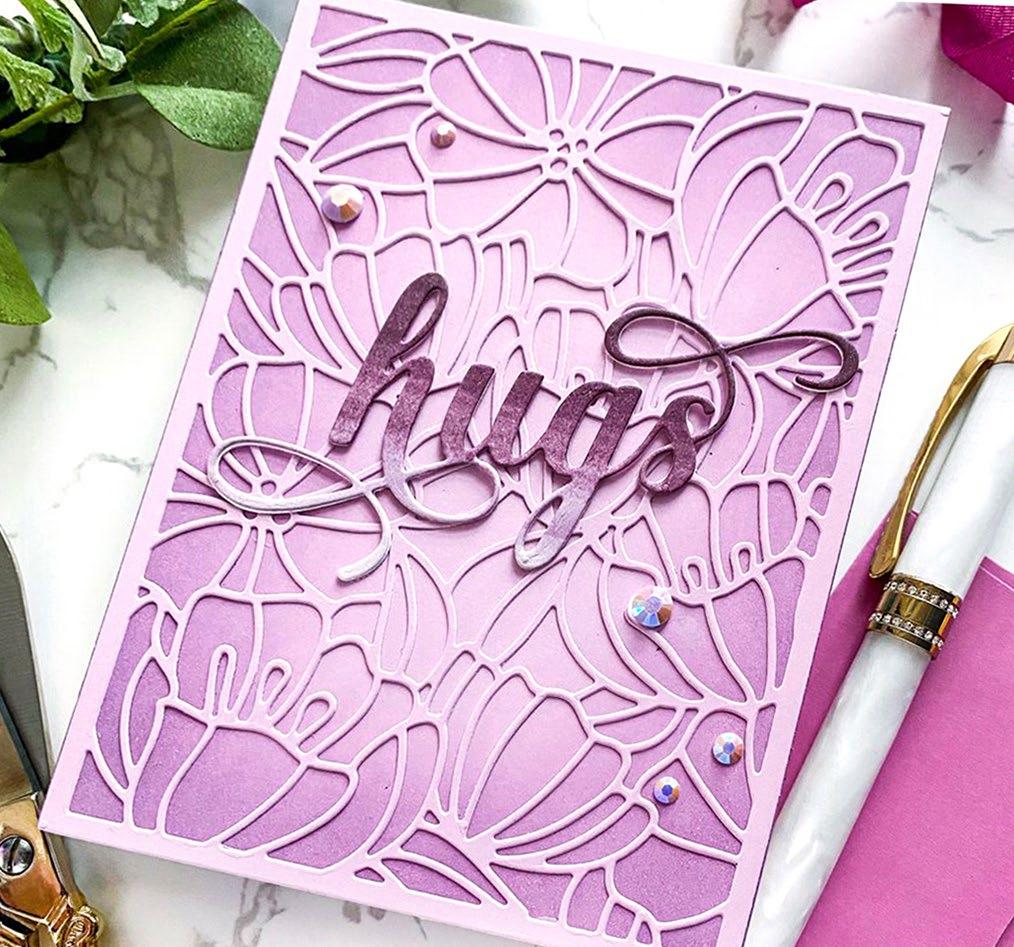
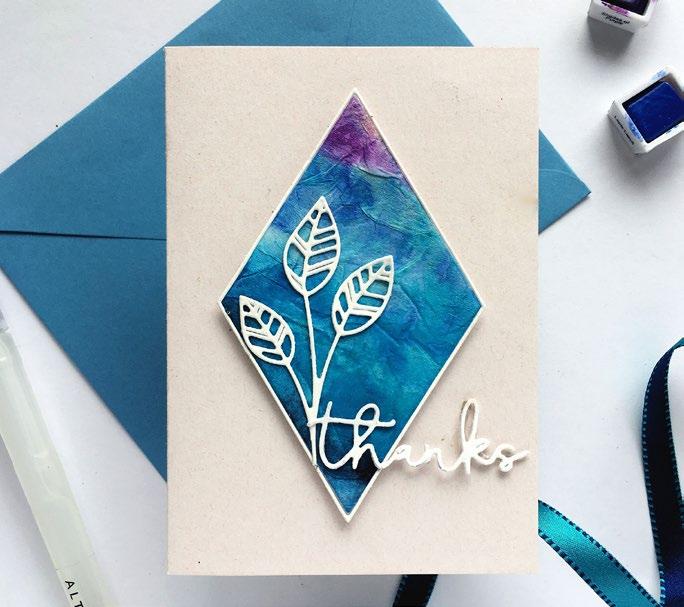
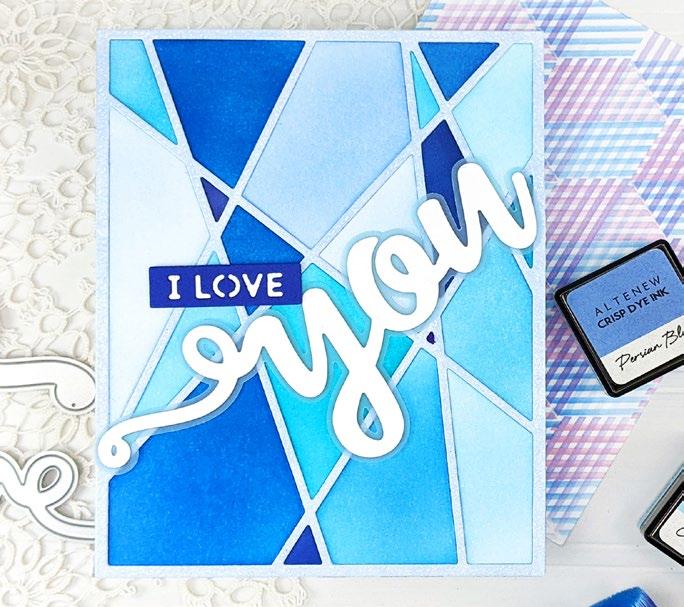
OMBRÉ DIE-CUT GREETING
BY EMILY MIDGETT
INSTRUCTIONS
1. Create a 4 ¼” x 5 ½” card base from Classic Crest Solar White Cardstock.
2. Ink blend Pale Mauve, Amethyst, Grape Agate, and Plum Alcohol Markers from the Space Garden Artist Alcohol Markers Set I on a white cardstock panel to create a plum ombré panel.
3. Cut Fancy Hugs Die from the plum ombré cardstock and white cardstock. Adhere the die-cuts together with liquid glue.

4. Ink blend Amethyst Crisp Dye Ink around the edges of an A2-sized lilac cardstock.
5. Cut the Dainty Blooms Cover Die out of another A2-sized lilac cardstock.
SUPPLIES
Dies
Fancy Hugs Die
Dainty Blooms Cover Die Ink
Amethyst Crisp Dye Ink
Coloring Medium
Space Garden Artist Alcohol Markers Set I
Cardstock and Paper
Classic Crest Solar White Cardstock
Lilac Cardstock
Other
Instant Dimension Foam Tape
2-in-1 Precision Glue Pen
Iridescent Gems
6. Adhere the Dainty Blooms die-cut to the ink-blended card front using liquid glue.
7. Adhere the ombré Fancy Hugs diecut to the center of the card with liquid glue.
8. Adhere the panel to the card base with liquid glue.
9. Add a few iridescent gems for some sparkle.
SEE MORE ON OUR BLOG
08
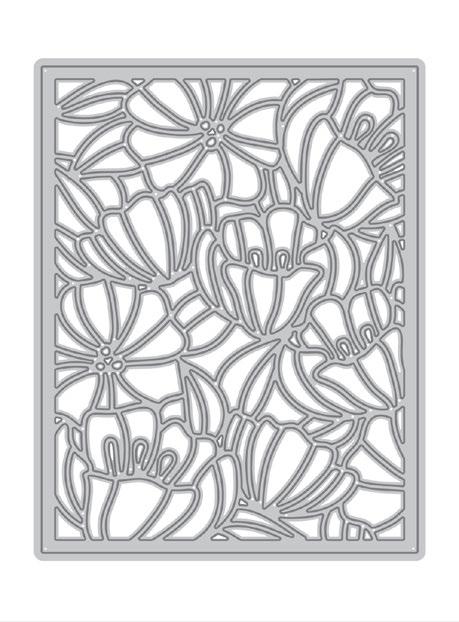
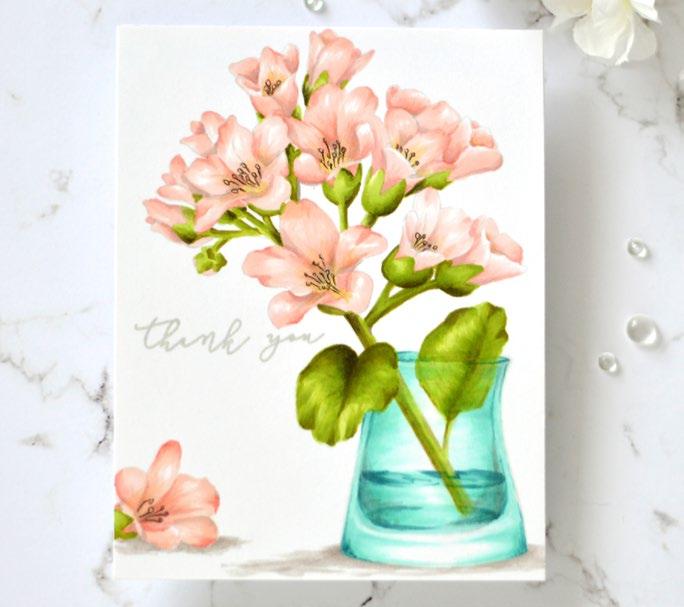
CAS MONOCHROMATIC THANK YOU CARD USING JUST DIES
BY AGA MALYSZEK
SUPPLIES
Dies
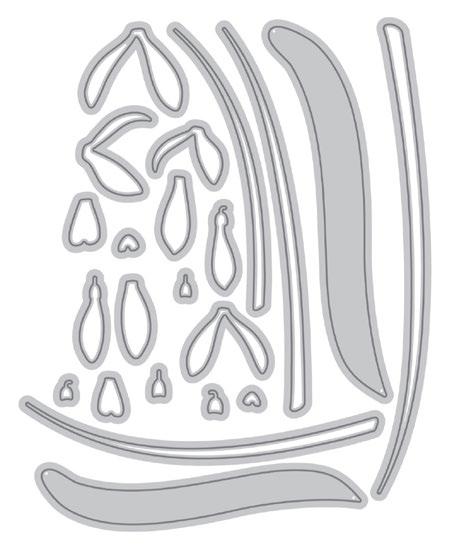
Craft-A-Flower: Snowdrops Layering Die Set
Floral Lace Die
Signature Words Die Set
Coloring Medium
Artist Alcohol Markers Tropical Forest Set
Cardstock and Paper
Classic Crest Solar White Cardstock
Jet Black Cardstock
Other
2 in 1 Precision Glue Pen
Crafter’s Essential Bone Folder
INSTRUCTIONS
1. Create a 4 ¼” x 5 ½” card base from Classic Crest Solar White Cardstock.

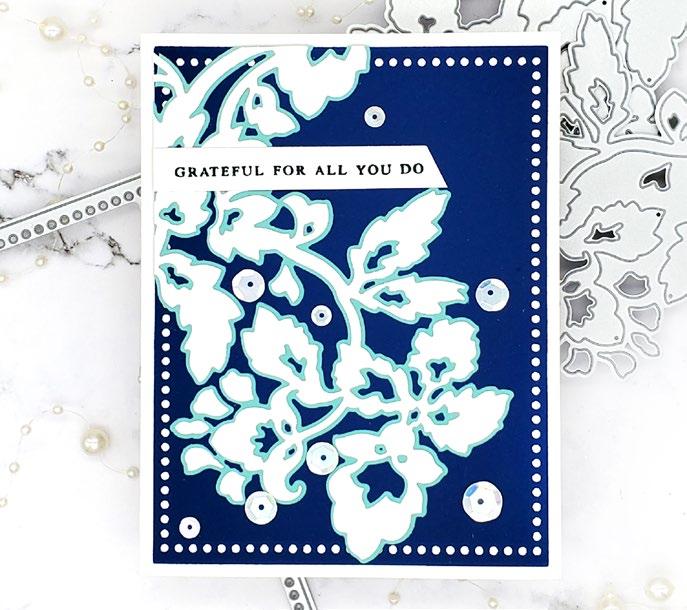
2. Cut Floral Lace Die out of white cardstock.
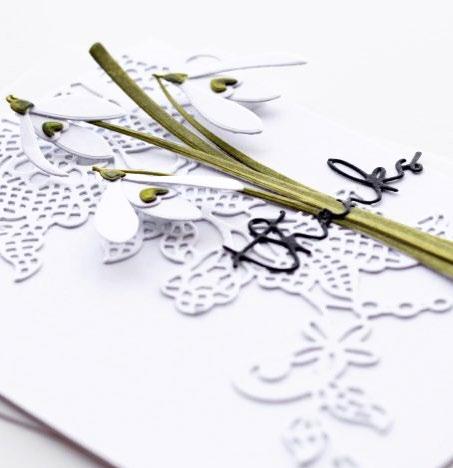
3. Adhere the die-cut to the card base using liquid glue.
4. Die cut a few snowdrops from Craft-A-Flower: Snowdrops Layering Die Set out of white cardstock.
5. Color in the stems using Artist Alcohol Markers Tropical Forest Set.
6. Arrange the die-cuts on the panel, adhering only the middle part of the stems with liquid glue. TIP! Use a bone folder to curve the top and bottom parts of the die-cuts and make them pop out a bit.
7. Die cut a sentiment from Signature Words Die Set out of Jet Black Cardstock.
8. Adhere the die-cut sentiment to the panel using liquid glue.
SEE MORE ON OUR BLOG
09
FEATURED PRODUCTS


Note: Gray SKU represents coordinating die set.


BUILDER ALT4200 RETAIL $23.99 ALT4201 RETAIL $26.99 CRAFT YOUR LIFE
KIT:
DREAMING ALT6861BN RETAIL $59.99 GARDEN DELIGHTS ALT6870 RETAIL $23.99 ALT6871 RETAIL $9.99 SENTIMENT STRIPS 3 ALT6618 RETAIL $15.99 CRAFT-A-FLOWER: SNOWDROPS LAYERING ALT4661 RETAIL $35.99 DAINTY BLOOMS COVER ALT3359 RETAIL $21.00 FANCY HUGS ALT6326 RETAIL $8.99 FLORAL LACE ALT4884 RETAIL $26.99 MIX & MATCH MARIPOSA ALT3444 RETAIL $19.99 STRING PANEL COVER ALT6379 RETAIL $21.00 GILDED ROSE ALT6642 RETAIL $33.99 GILDED ROSE LAYERING ALT6643 RETAIL $17.99
BERGENIA
PROJECT
NEVER STOP
MORE DESIGN INSPIRATION


STAY CONNECTED Download our FREE mobile app! altenew.com blog.altenew.com facebook.com/altenew instagram.com/altenewllc pinterest.com/altenew youtube.com/altenew tiktok.com/@altenew support@altenew.com (800) 593-1089
