


Explore the fun world of stamping, die cutting, embossing, and more! Get your creative juices flowing with these tips & tricks! Easy Techniques, Stunning Results! 7 Must-Try Card Making Ideas


CONTENTS 03 05 07 09 04 06 08 Easy Floral Card Using Gradient Cardstock Gorgeous and Unique Card Backgrounds With Sentiments Beautifully Unique CAS Card A Monochromatic Card With a Pop of Color Vintage Hanky Card Inspiration with Altenew Florals A Bold and Beautiful Birthday Card Alternative Way of Using Embossing Paste
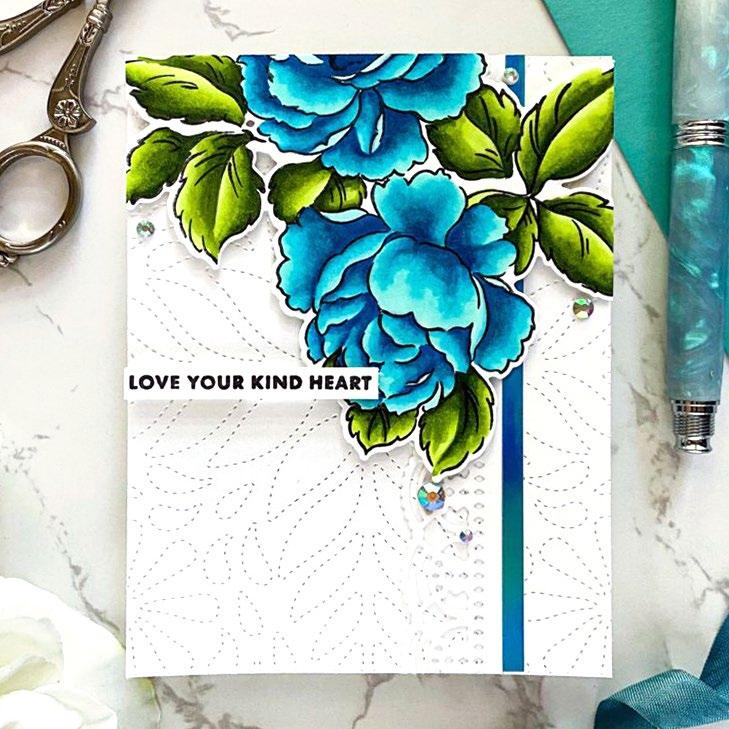
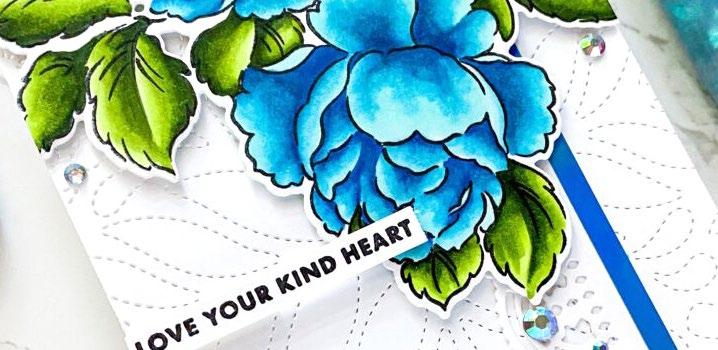
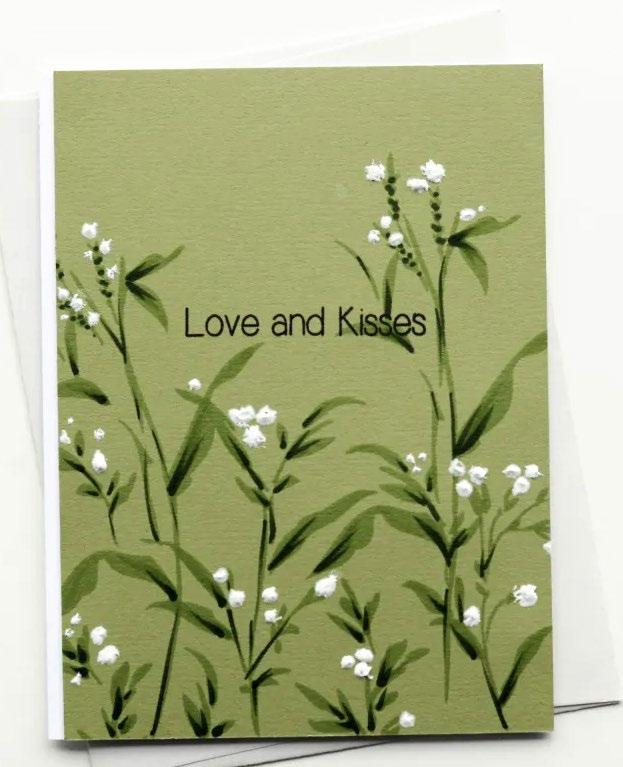
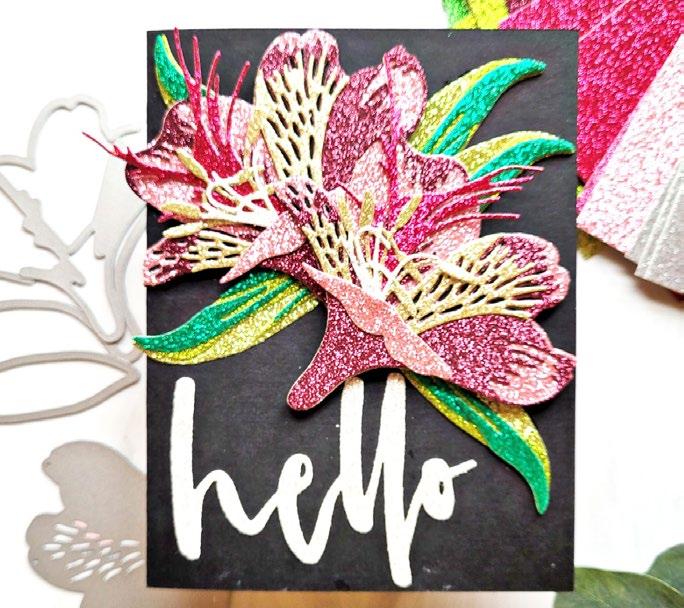
HANKY CARD INSPIRATION WITH ALTENEW FLORALS
BY EMILY MIDGETT
INSTRUCTIONS
1. Create a 4 ¼” x 5 ½” card base from Classic Crest Solar White Cardstock.
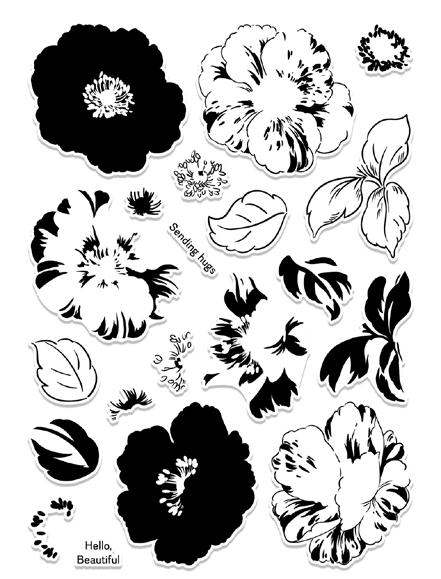
2. Stamp the outline floral arrangement from Bountiful Bouquet onto white cardstock using alcohol marker-friendly ink, offsetting it in the corner of an A2 panel.
3. Use Artists Markers Set A to color the image in vivid turquoise and bottle green.
4. Die cut the finished colored image using the coordinating die.
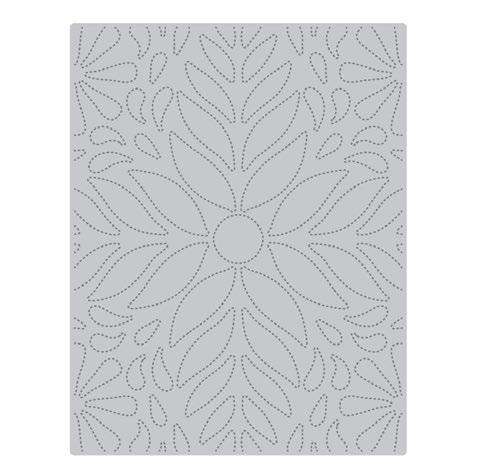
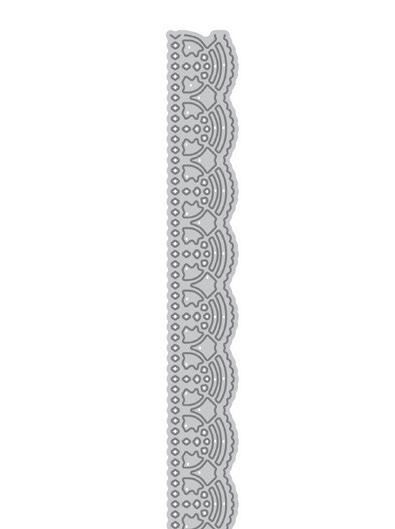
5. Die cut a strip of “lace” from white cardstock using the Creative Edges: Lace Die and a background from white cardstock using the Dotted Tile Debossed Background Die.
SUPPLIES
Stamp & Dies
Bountiful Bouquet Stamp and Die Bundle
Creative Edges: Lace Die
Dotted Tile Debossing Cover Die
6. Layer the lacy strip on the “embroidered” background with liquid adhesive and add a thin strip of holographic cardstock in a coordinating shade of blue.
7. Adhere the turquoise florals using Instant Dimension Foam Tape.
Ink
Obsidian Pigment Ink
Coloring Medium
Cosmic Garden Artist Alcohol
Markers Set A
Cardstock
Classic Crest Solar White Cardstock

Other
Instant Dimension Foam Tape
Iridescent Gems
8. Stamp a greeting from Bountiful Bouquet on a strip of white cardstock using black ink and adhere to the card front using a double layer of foam adhesive.
9. Add iridescent gems to coordinate with the holographic blue cardstock and complete the card design.
SEE MORE ON OUR BLOG VINTAGE
03
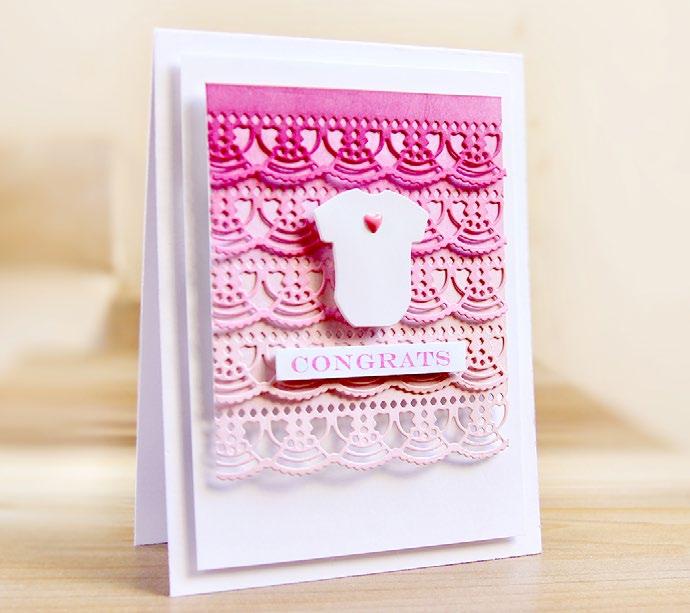
FLORAL CARD USING
GRADIENT CARDSTOCK
BY SVITLANA SHAYEVICH
INSTRUCTIONS
1. Cut 1 1/4” x 3 3/4” strips of each color from the Rose Petal Gradient Cardstock.
2. Adhere the strips onto a 3 1/2” x 4 3/4” cardstock panel.
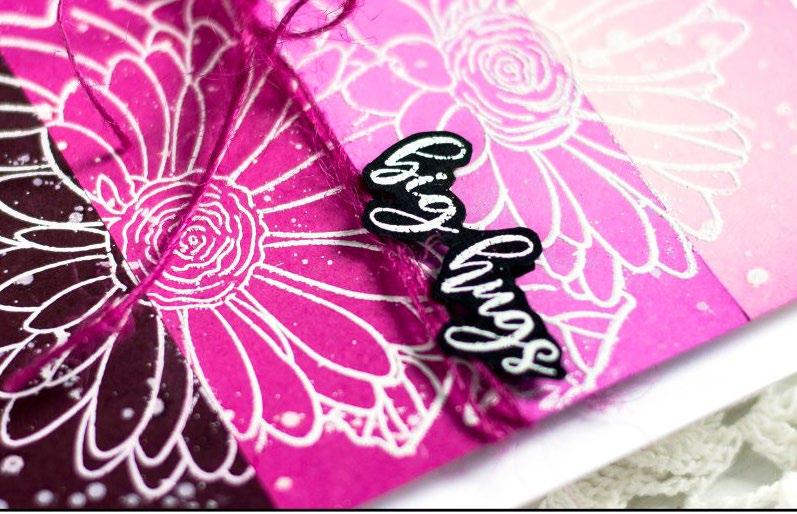
3. White emboss a flower from the Paint-A-Flower: Gerbera Revolution Stamp Set onto the gradient background, with two layers of heat embossing using Pure White Embossing Powder.
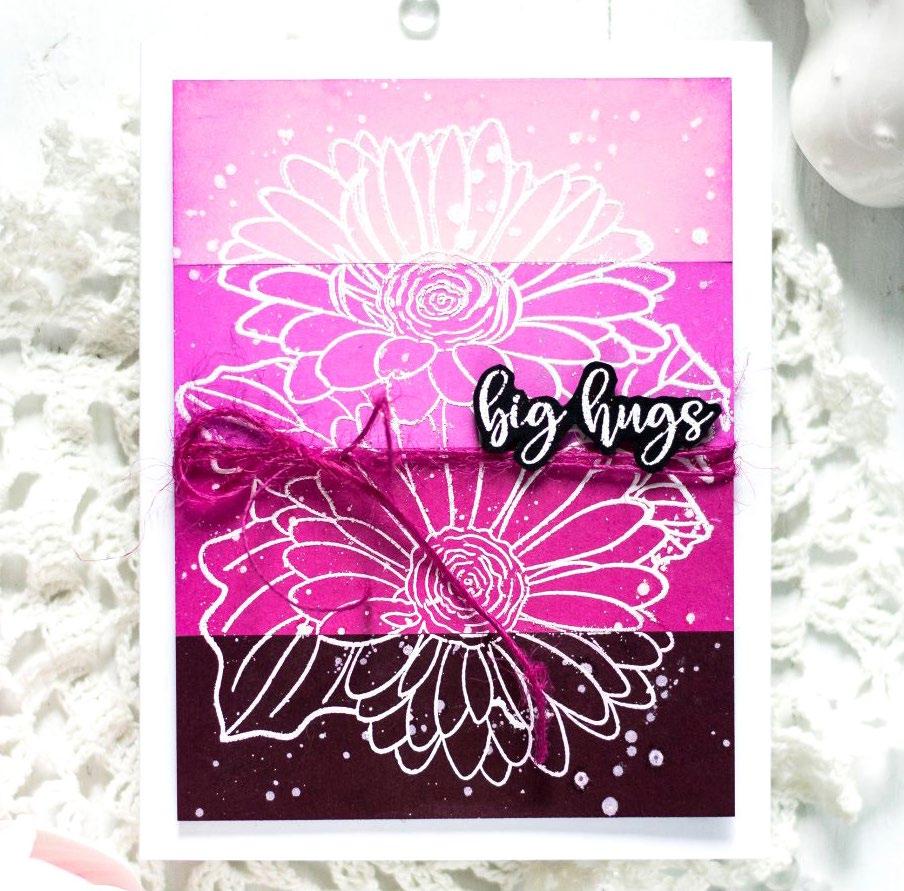
4. Blend Cosmic Berry Dye Ink around the panel edges, then sprinkle it with water for texture.
5. Add splatters of Pure White Ink Spray for additional interest.
6. Wrap purple jute twine around the panel, then foam mount it onto a white card base with Instant Dimension Foam Tape.
SUPPLIES
Stamp
Paint-A-Flower: Gerbera Revolution
Outline Stamp Set
Inks
Embossing Ink
Cosmic Berry Crisp Dye Ink
Cardstock
Gradient Cardstock Set - Rose Petal
Classic Crest Solar White Cardstock
Jet Black Cardstock
Other
Pure White Ink Spray
Instant Dimension Foam Tape
Pure White Crisp Embossing Powder
Ink Blending Brushes - Small (Set of 4)
Purple Jute Twine
7. White-emboss a sentiment from the Paint-A-Flower: Gerbera Revolution Stamp Set onto Jet Black Cardstock, and cut it out using scissors.
8. Pop the sentiment onto the card.
9. This floral card design is quick and easy, and the gradient cardstock adds an interesting touch to the embossed image. Adding splatters is also a good tip to level up a simpler card design.
SEE MORE ON OUR BLOG
EASY
04
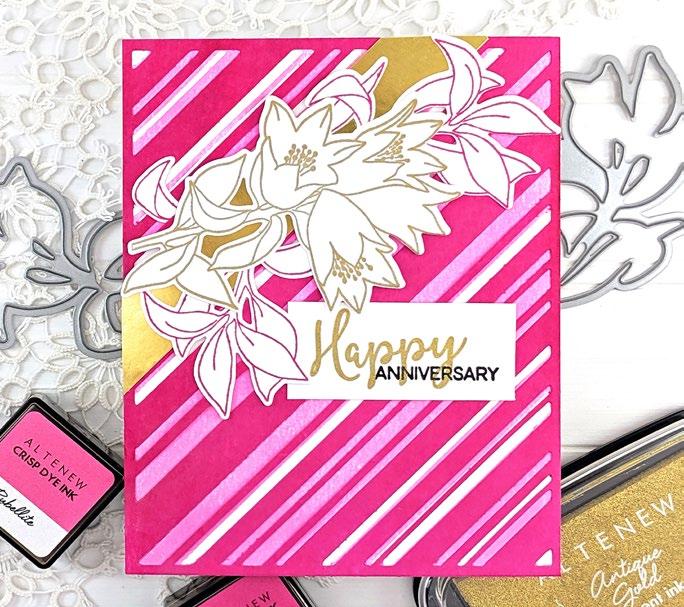
A BOLD AND BEAUTIFUL BIRTHDAY CARD
BY TERRI KOSZLER
INSTRUCTIONS
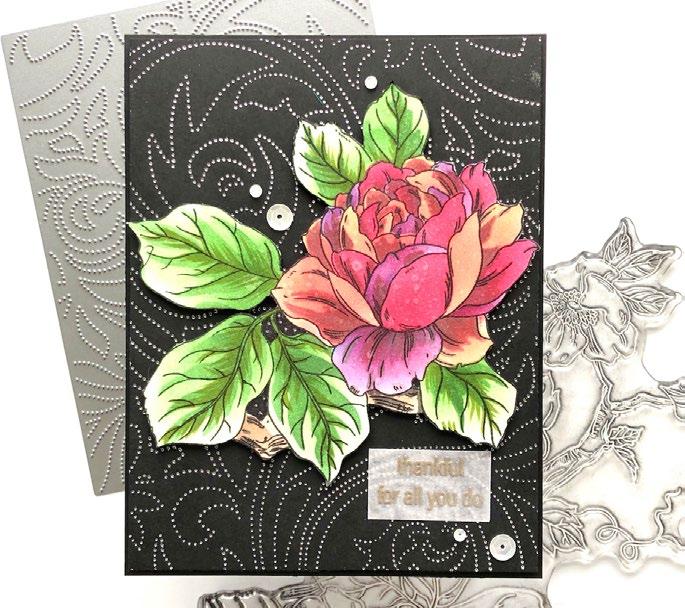
1. Stamp the Queen Anemone floral arrangement onto Classic Crest Solar Cardstock using the Tea Party Ink set, Green Fields Ink set, and Citrus Burst Crisp Dye Ink.
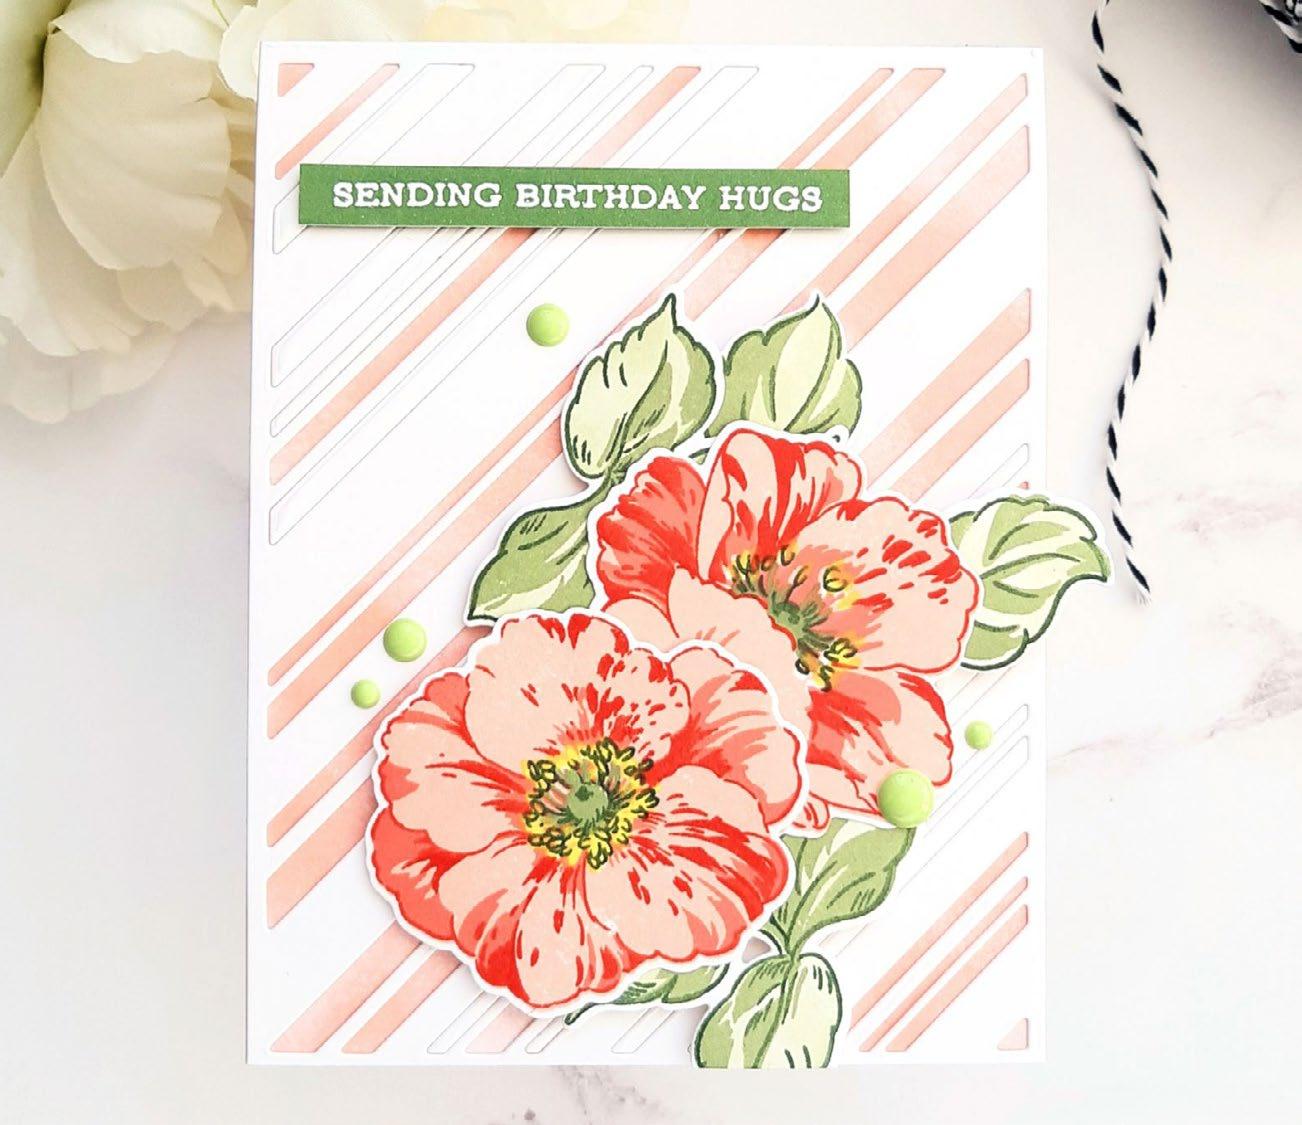
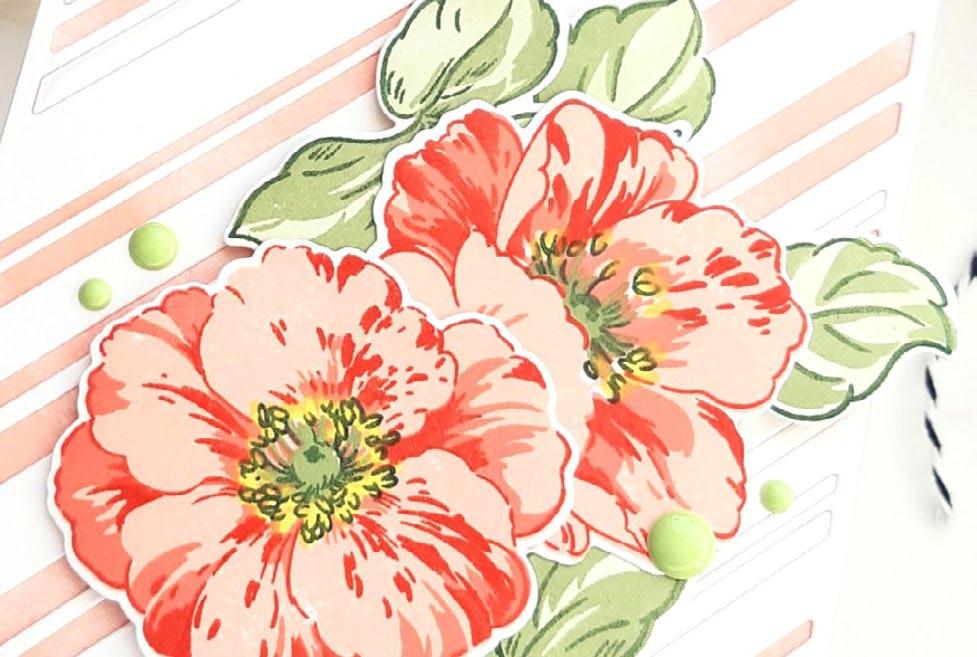
2. Cut out the stamped images using the coordinating die set.
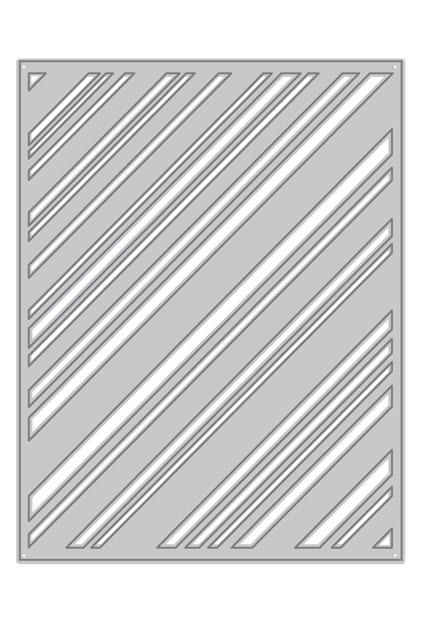
3. Create the card background by adding double-sided adhesive sheets to a piece of white cardstock and running it through a die-cut machine with the Candy Cane Stripe Cover Die.
4. Adhere the die-cut Candy Cane stripe background to an A2 notecard and ink blend with Pink Pearl Crisp Dye Ink.
5. Add some of the negative die-cut pieces to the striped background to create a custom look.
SUPPLIES
Stamps & Dies
Queen Anemone Stamp and Die Bundle
Candy Cane Stripe Cover Die
Sentiment Strips 3 Stamp Set
Inks
Embossing Ink
Crisp Dye Inks - Green Fields, Tea Party, Citrus Burst
Coloring Medium
Woodless Coloring Pencils
Cardstock and Paper
Classic Crest Solar White Cardstock
Forest Glades Cardstock
Other
Instant Dimension Foam Tape
Double-sided Adhesive Sheets
Pure White Crisp Embossing Powder
Green Meadows Enamel Dots
Die Cutting Machine
Heat Gun
6. Place the flowers and leaves onto the card using Instant Dimension Foam Tape.
7. Heat emboss a sentiment from the Sentiment Strips 3 Stamp Set onto Forest Glades Cardstock using Pure White Crisp Embossing Powder.
8. Cut out the sentiment and place it onto the card using Instant Dimension Foam Tape.
9. Finish off the card design by adding a few enamel dots from the Green Meadows Enamel Dots.
SEE MORE ON OUR BLOG
05
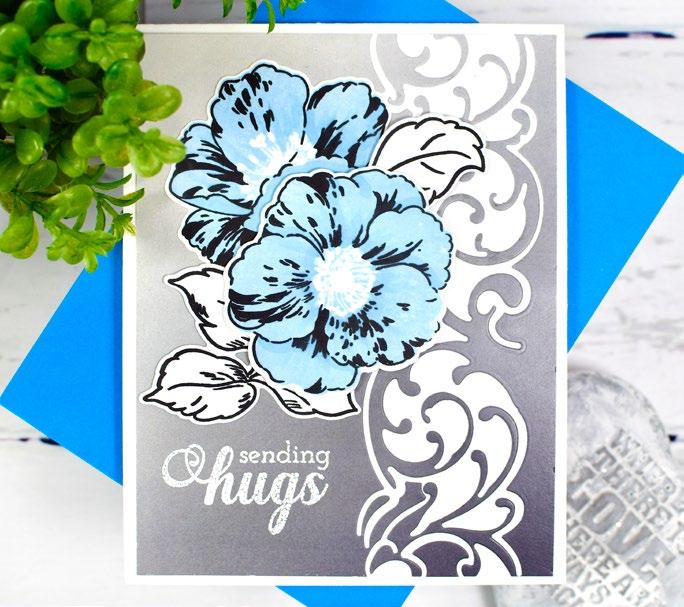
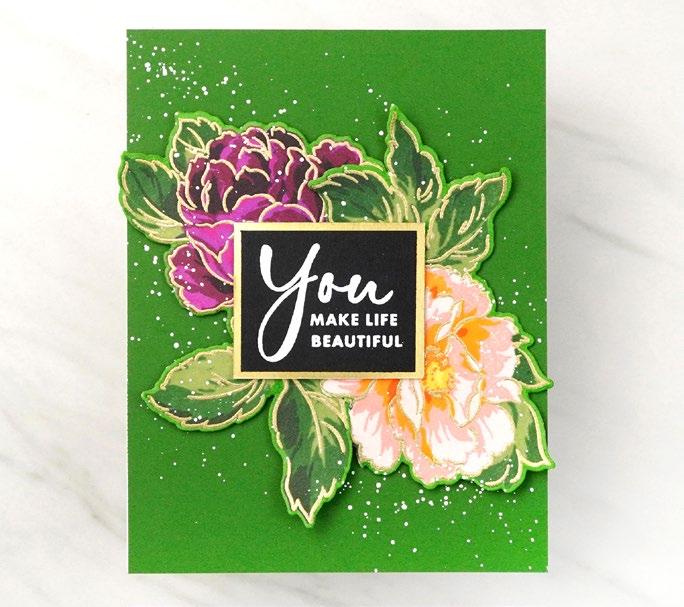
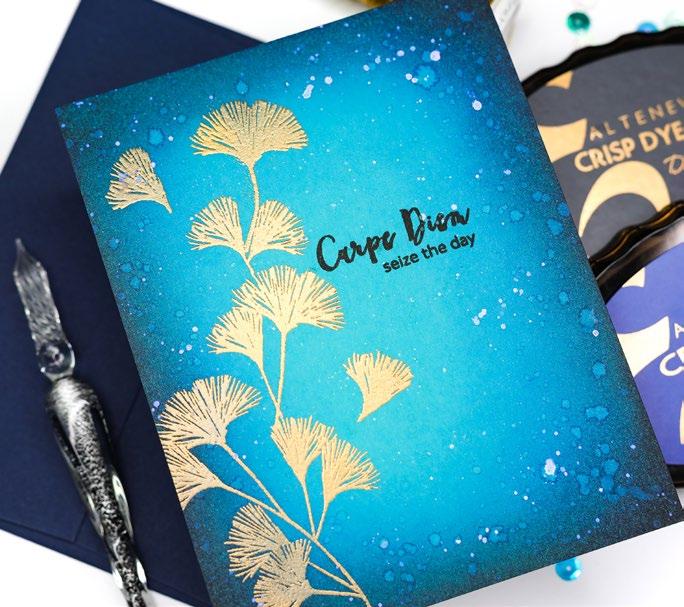
GORGEOUS AND UNIQUE CARD BACKGROUNDS WITH SENTIMENTS
BY JENNY COLACICCO
INSTRUCTIONS
1. Create a 4 ¼” x 5 ½” card base from Classic Crest Solar White Cardstock.
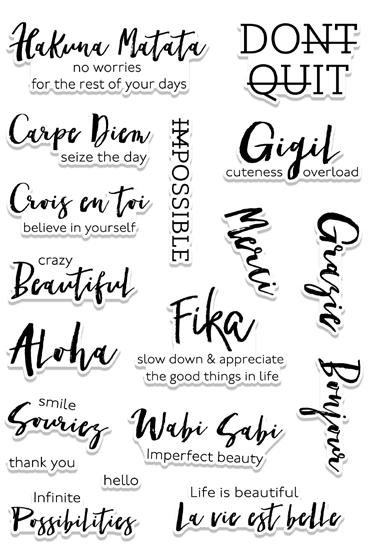
2. Choose a stamp set with interesting and different fonts for the background. Avoid using sets with paired sentiments such as “thank you”, “happy birthday”, and “with sympathy”.
3. Create the black and white text background by repeat stamping the sentiment stamps on a white panel of cardstock using Obsidian Pigment Ink for a newspaper text look.
SUPPLIES
Stamp & Die
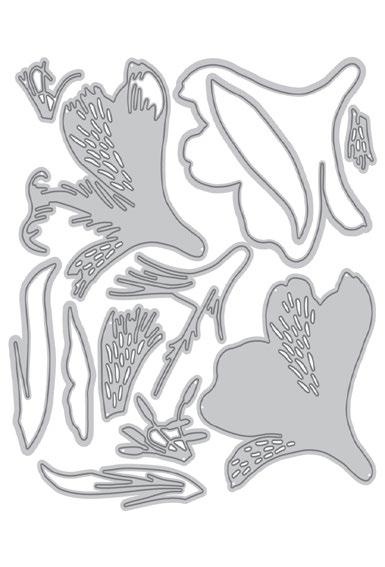
Craft-A-Flower: Peruvian Lily Layering Die Set
Carpe Diem Stamp Set

Inks
Obsidian Pigment Ink
Crisp Dye Inks - Rhodolite, Plum, Ultraviolet, Wisteria, Magenta, Honey Drizzle, Minty Mint, Sweet Leaf, Just Green
Cardstock
Classic Crest Solar White Cardstock
Glitter Cardstock Set - Gilded
Other
Lavender Fields Metallic Shimmer Ink Spray
Instant Dimension Foam Tape
Sequins - Satin Gold
Ink Blending Brushes - Small (Set of 4)
Crafter’s Essential Micro-Tip Tweezers
Cutting Mat & Stamping Mat
Crafter’s Essential Cutting and Alignment Mat
4. Arrange the stamps like a jigsaw puzzle, making sure to use small next to large stamps and different fonts close together. Cover as much of the cardstock as possible, and then stamp them down. Repeat until the background is complete.
5. Add splatters of Lavender Fields Metallic Shimmer Ink Spray to add a little glitz.
6. Die cut the Craft-A-Flower: Peruvian Lily twice for the flowers and three times for the leaves using white cardstock.
7. Color each piece of cardstock by taking a Crisp Dye ink pad directly to the cardstock. For the leaves, use Minty Mint, Sweet Leaf and Just Green inks. For the florals, use Rhodolite, Wisteria, Ultraviolet, and Plum. Use Magenta and Gilded Glitter cardstock for the stamens.
8. Use liquid glue to adhere each layer of the flower.
9. Arrange the flowers over the background using Instant Dimension Foam Tape in differing layers.
10. Finish off the card by adding Satin Gold Sequins.
SEE MORE ON OUR BLOG
06
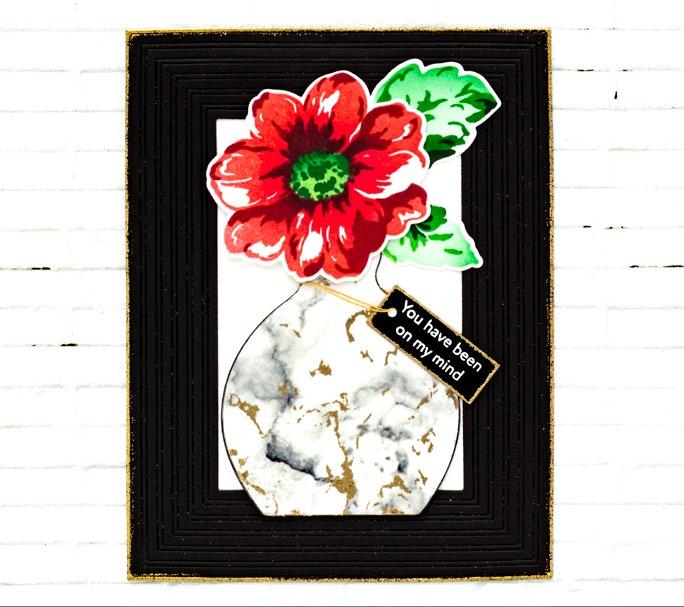
BEAUTIFULLY UNIQUE CAS CARD
BY TENIA NELSON
INSTRUCTIONS
1. Create a 4 ¼” x 5 ½” card base from Classic Crest Solar White Cardstock.
2. After, create a card panel from Classic Crest White Cardstock. On the panel, affix Gold Foil Polka Dot Washi Tape.
3. Stamp and heat emboss the image from the Mini Flan Cake Stamp and Die Bundle using Obsidian Pigment Ink and Crystal Clear Crisp Embossing Powder onto a piece of watercolor paper from the Altenew Watercolor Paper Set.
4. Die cut and color image with Watercolor Brush Markers- Winter Wonderland Set.
SUPPLIES
Stamp & Dies
Mini Flan Cake Stamp & Die Bundle
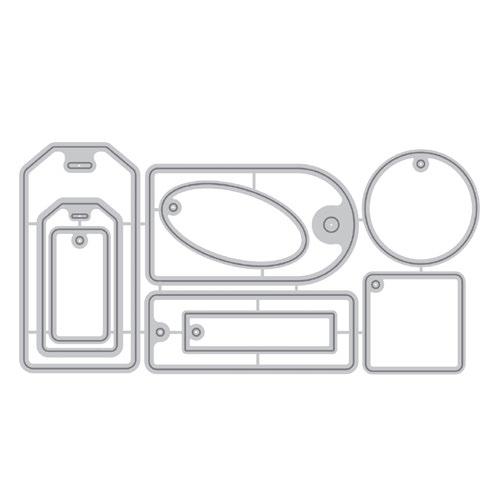
Handmade Tags Die Set Ink
Obsidian Pigment Ink
Coloring Medium
Watercolor Brush Markers - Winter
Wonderland Set
Cardstock
Classic Crest Solar White Cardstock
Watercolor Paper Set (A2 loose sheets)
Other
Instant Dimension Foam Tape
Crystal Clear Crisp Embossing Powder
Gold Foil Polka Dot Washi Tape
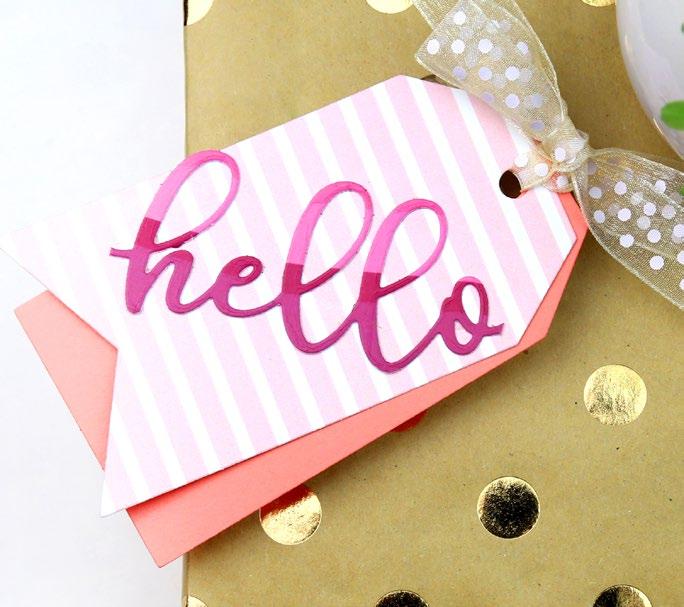
5. Stamp the “Beautifully Unique” sentiment from the Mini Flan Cake Stamp and Die Bundle onto a piece of Classic Crest Solar White Cardstock and trim.
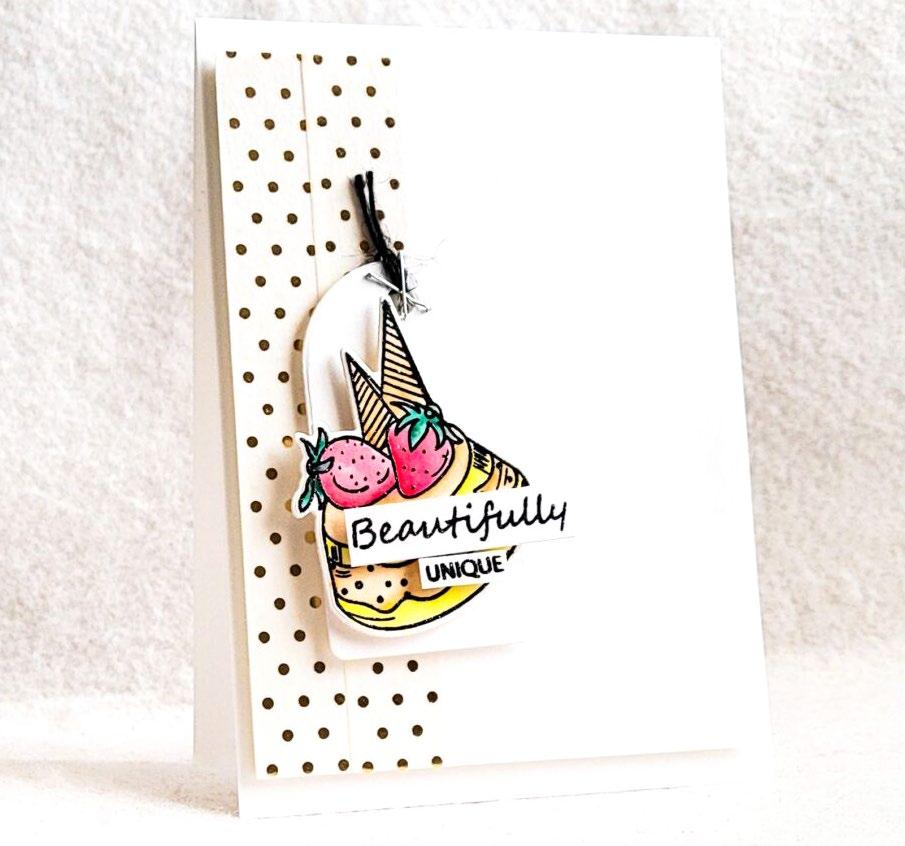

6. Die cut tag (with Classic Crest Solar White Cardstock) out of Handmade Tags Die Set and add twine and staples.
7. Adhere the image and sentiment onto the tag and adhere to the image panel.
8. Adhere the whole image panel onto the card front.
SEE MORE ON OUR BLOG
07
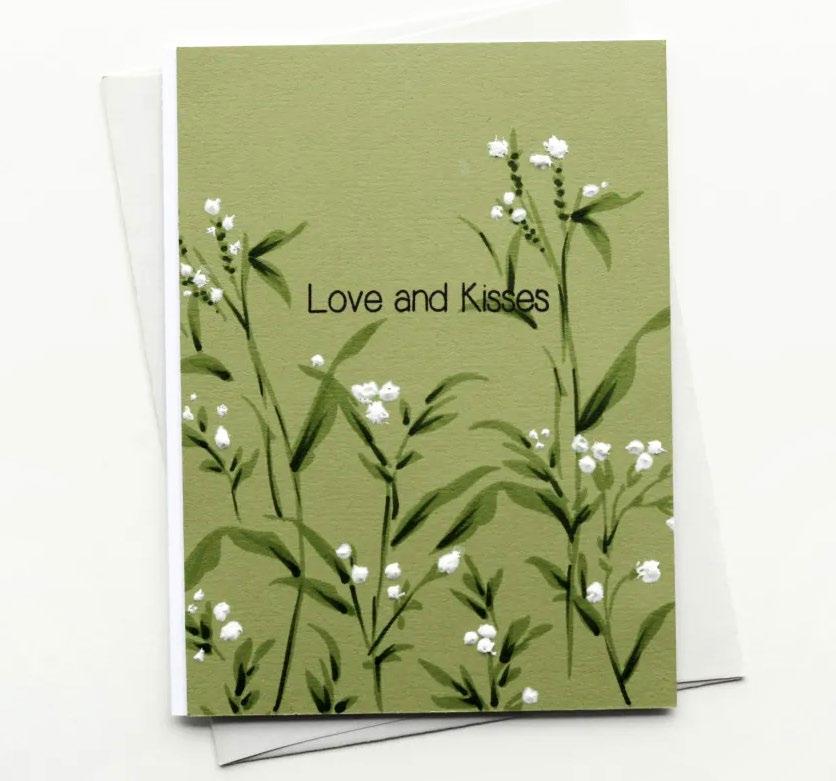
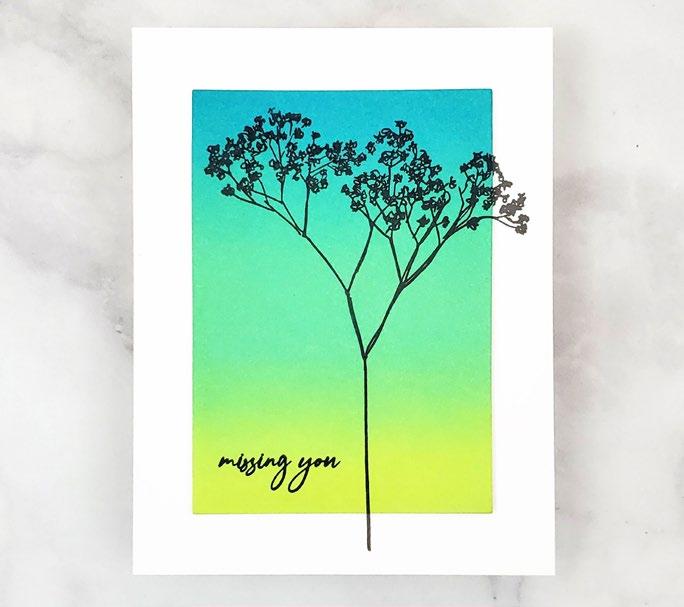
ALTERNATIVE WAY OF USING EMBOSSING PASTE
BY AGA MALYSZEK
INSTRUCTIONS
1. Create a 4 ¼” x 5 ½” card base from Classic Crest Solar White Cardstock.
2. Stamp leafy images from Wildflower Garden Stamp Set with Forest Glades Crisp Dye Ink onto Forest Glades Cardstock.
3. Cut it to the desired size and attach it to the card base.
4. Use an Evergreen marker from Cosmic Garden Artist Alcohol Markers Set A to add some details to the stamped images.
5. Stamp a sentiment from the Heartfelt Sentiments Stamp Set.
6. Apply the embossing paste using a thin tool, such as a toothpick, to add tiny dots of paste and create little white flowers.
SUPPLIES
Stamps
Wildflower Garden Stamp Set
Heartfelt Sentiments Stamp Set
Inks
Crisp Dye Inks - Permanent Black, Forest Glades
Coloring Medium
Cosmic Garden Artist Alcohol Markers Set A
Cardstock
Classic Crest Solar White Cardstock
Forest Glades Cardstock (10 sheets/set)
Other
Embossing Paste
Toothpick
7. Allow the embossing paste to dry completely before handling the card.
SEE MORE ON OUR BLOG
08
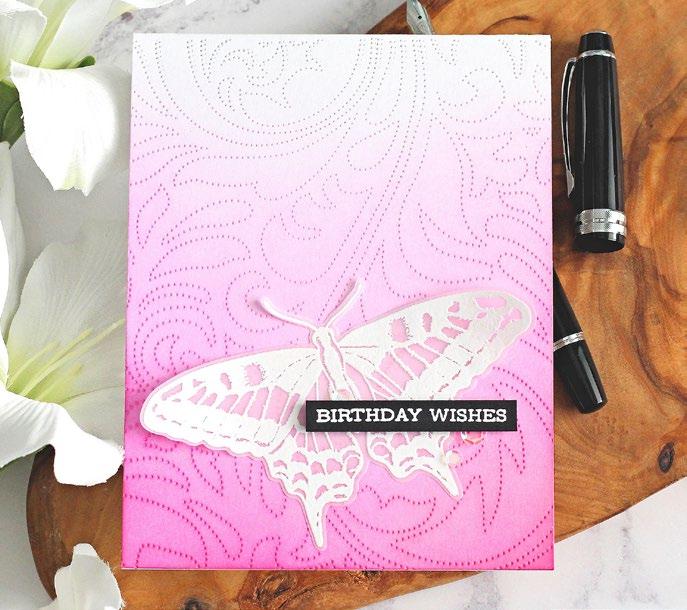
BY MICHELLE SHORT
INSTRUCTIONS
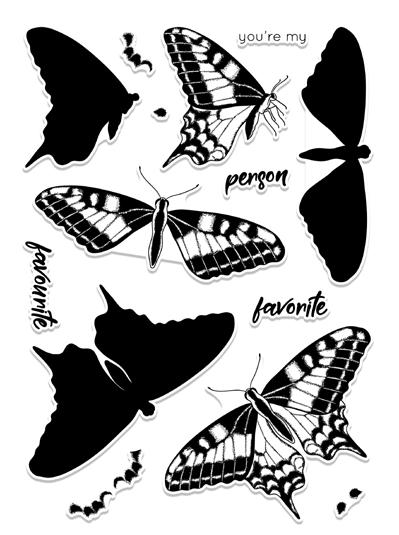
1. Stamp butterfly from the Dovetail Butterflies Stamp Set on Classic Crest Solar White Cardstock using Cherry Blossom Crisp Dye Inks (Pink Diamond, Pinkalicious, Rubellite) and Obsidian Pigment Ink for the outline layer. Let it dry and die cut it using Dovetail Butterflies Dies.
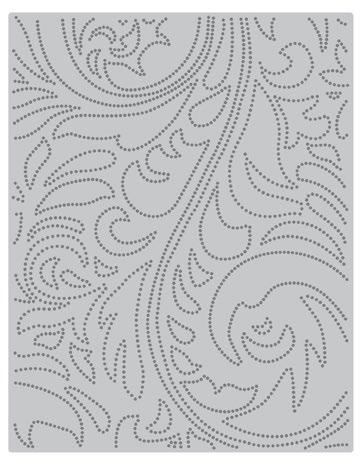
2. Take a panel of white cardstock and run it through a die-cutting machine with the Dotted Swirls Debossing Cover Die to create a background with a beautiful pattern.
3. Using the tag die from Terrific Tags, die cut it into the middle of the panel.
SUPPLIES
Stamps & Die
Dovetail Butterflies Stamp and Die Set

Sentiment Strips 2 Stamp Set
Dotted Swirls Debossing Cover Die
Terrific Tags Die Set
Inks
Obsidian Pigment Ink
Cherry Blossom Mini Cube Set
Cardstock
Classic Crest Solar White Cardstock
Masking Paper (10 sheets/set)
Other Glue Tape
Instant Dimension Foam Tape
Crafter’s Essential Micro-Tip Tweezers
Ink Blending Tool – Small (Set of 4)
4. Adhere the butterfly to the tag with Instant Dimension Foam Tape and add a sentiment from the Sentiment Strips 2 Stamp Set on the tag with more foam tape.
5. Thread twine through the top of the tag and add Cherry Blossom Enamel Dots for embellishment.
6. Adhere the panel with the tag cutout to an A2 white card base with Glue Tape and die cut two more tags from white cardstock and adhere them together.
7. Place the two tags inside of the opening on the card’s front panel and then adhere to the completed tag on top, making sure the dots on the background line up with the ones on the tag to create a seamless design.
CARD WITH
SEE MORE ON OUR BLOG
A MONOCHROMATIC
A POP OF COLOR
09
Note:

FEATURED PRODUCTS


SKU represents coordinating die set.
Gray
BOUNTIFUL BOUQUET ALT7151 RETAIL $36.99 ALT7152 RETAIL $19.99 CARPE DIEM ALT6093 RETAIL $15.99 DOVETAIL BUTTERFLIES ALT6094 RETAIL $23.99 ALT6095 RETAIL $17.99 FRAGILE FOLIAGE ALT4266 RETAIL $15.99 ALT4267 RETAIL $15.99 MINI FLAN CAKE ALT4811 RETAIL $6.99 ALT4812 RETAIL $6.99 QUEEN ANEMONE ALT4839 RETAIL $23.99 ALT4840 RETAIL $12.99 CANDY CANE STRIPE ALT3497 RETAIL $21.00 CRAFT-A-FLOWER: PERUVIAN LILY LAYERING DIE SET ALT6158 RETAIL $35.99
LACE DIE ALT2026 RETAIL $5.99 DOTTED SWIRLS DEBOSSING COVER DIE ALT3270 RETAIL $21.00 DOTTED TILE DEBOSSING COVER DIE ALT6792 RETAIL $18.99 HANDMADE TAGS DIE SET ALT1617 RETAIL $21.00
CREATIVE EDGES:
MORE DESIGN INSPIRATION


STAY CONNECTED Download our FREE mobile app! altenew.com blog.altenew.com facebook.com/altenew instagram.com/altenewllc pinterest.com/altenew youtube.com/altenew tiktok.com/@altenew support@altenew.com (800) 593-1089
