


MUST-TRY stamping, foiling, die cutting, and watercoloring techniques! Explore tips and tricks to fuel your creative fire! Step up Your Crafting Game! 7 Stunning Ideas for Your Cards


CONTENTS 03 05 07 09 04 06 08 Lovely DIY Floral Background for Cards Create Soft Looks With No-Line Coloring Stunning Watercolor Background With Silhouettes Rainbow Ink Smooshing for Floral Cards Add Shine to Cards With Foiling and Metallic Cardstock 2 Beautiful Floral Cards With Just 1 Stamp Easy Christmas Card Idea With Red Florals
FOILING AND METALLIC CARDSTOCK
BY LAURIE WILLISON
CARDS
INSTRUCTIONS
1. Create a 4 ¼” x 5 ½” card base from Classic Crest Solar White Cardstock.
2. Then, make a card front using the Golden Days Hot Foil Plate and Rose Gold Foil on pale pink cardstock.
3. Cut the pink card front down to 3 1/2” x 4 3/4” and adhere it to the white card base using foam tape for added dimension.
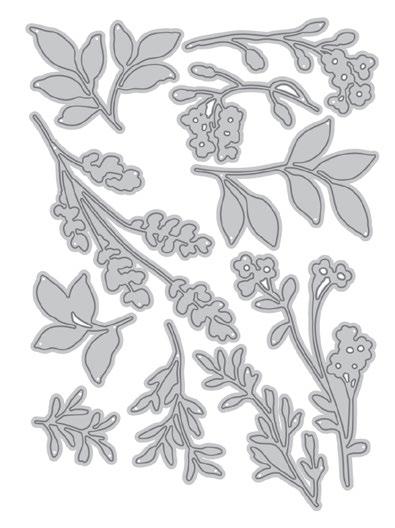
4. Use Altenew’s Brushed Rose Metallic Cardstock to die cut the word “hello” from the Simple Greetings Die Set.
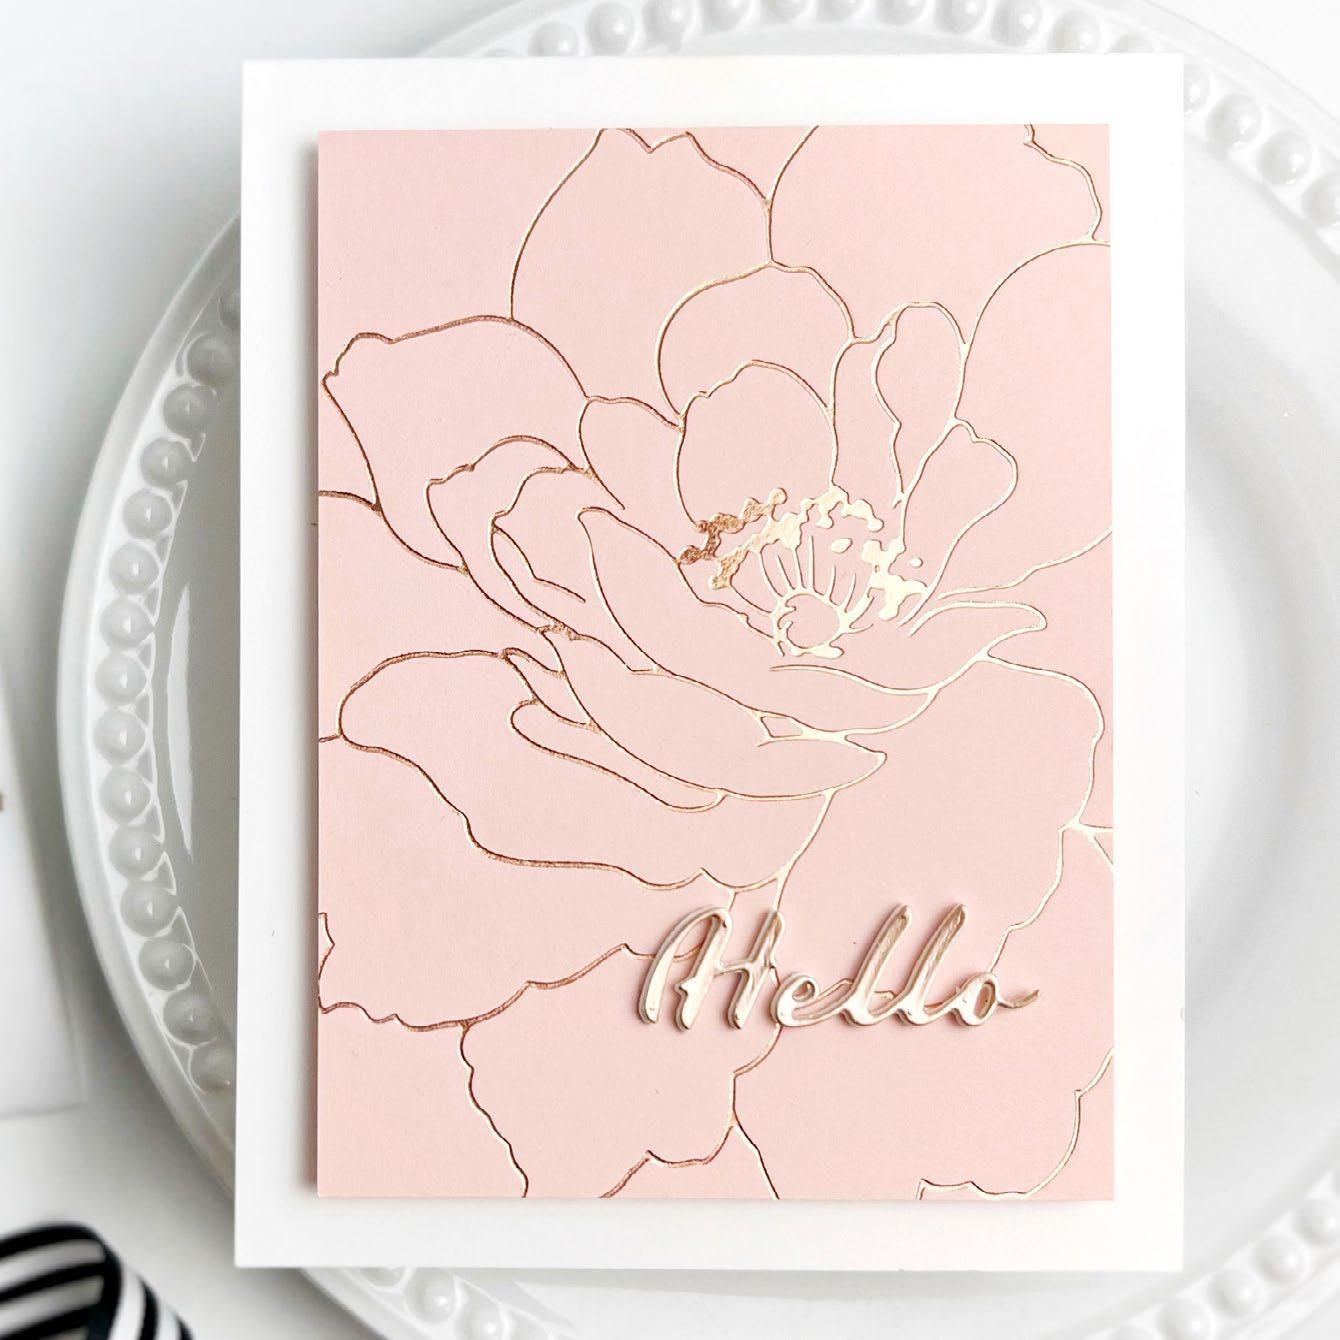
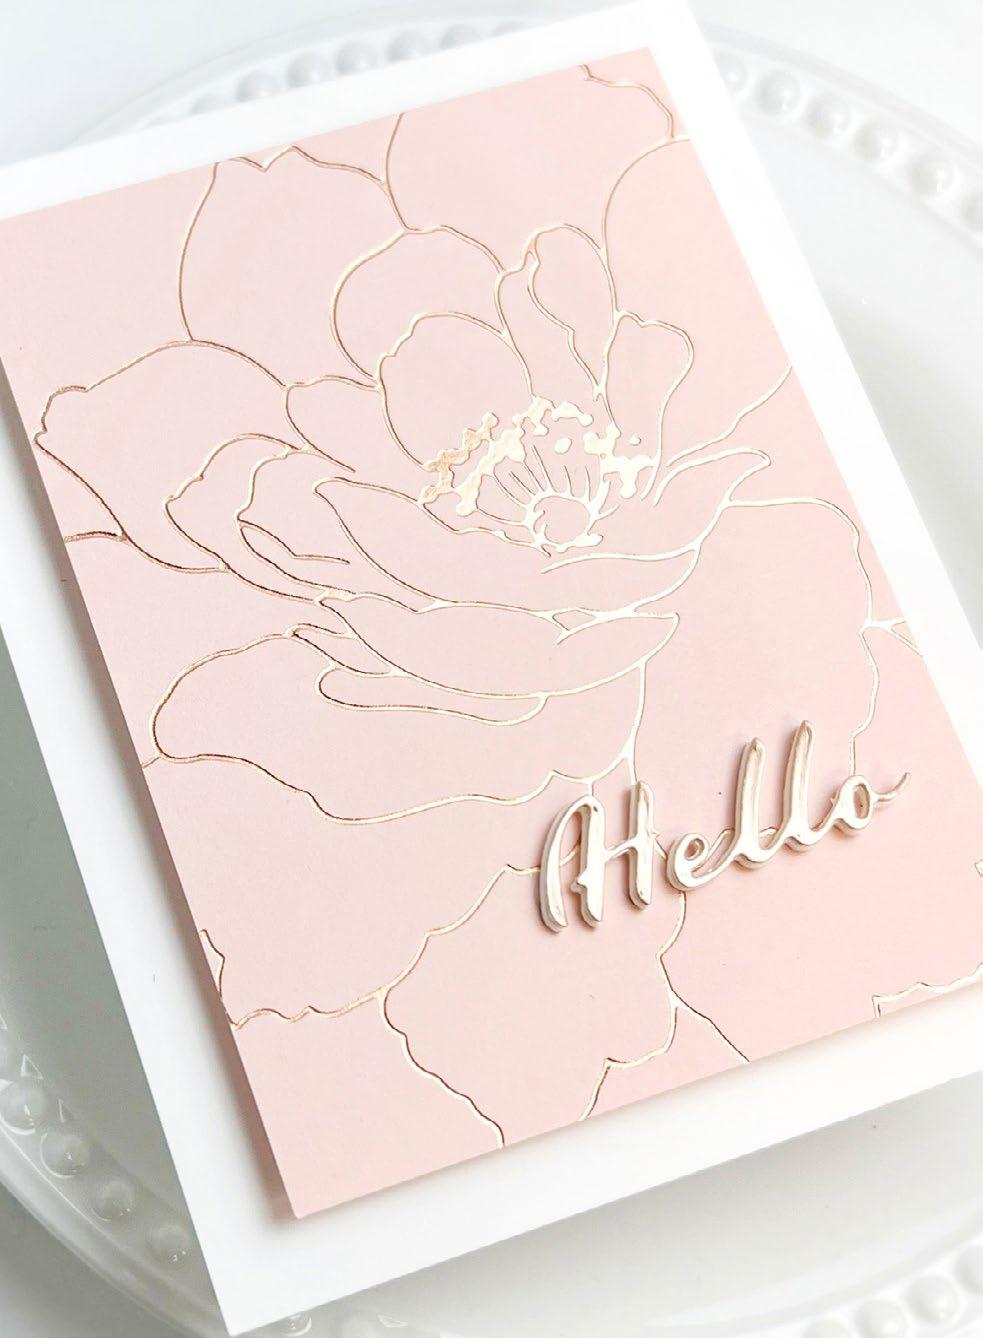
5. Enhance the sentiment by cutting a second “hello” layer and attaching it to the first layer with foam tape, providing dimension to the greeting.
SUPPLIES
Dies & Hot Foil Plate
Simple Greetings Die Set
Golden Days Hot Foil Plate
Cardstock
Classic Crest Solar White Cardstock

Brushed Rose Metallic Cardstock
Other
Instant Dimension Foam Tape
Hot Foil Roll - Rose Gold
SEE MORE ON OUR BLOG ADD
SHINE TO
WITH
03
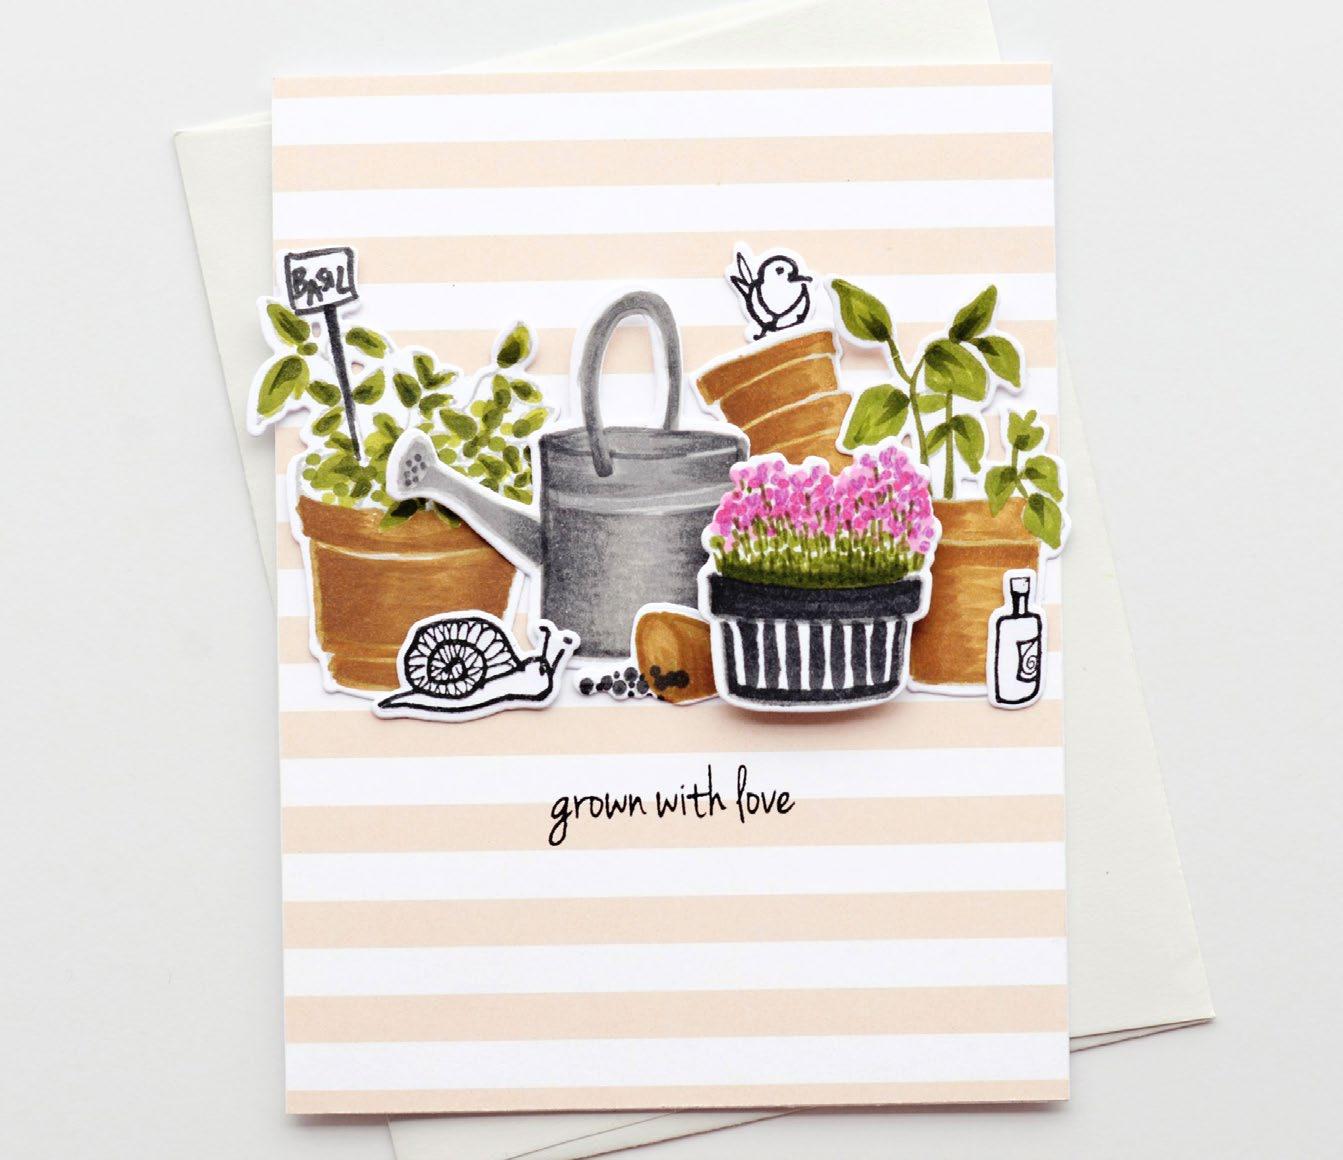
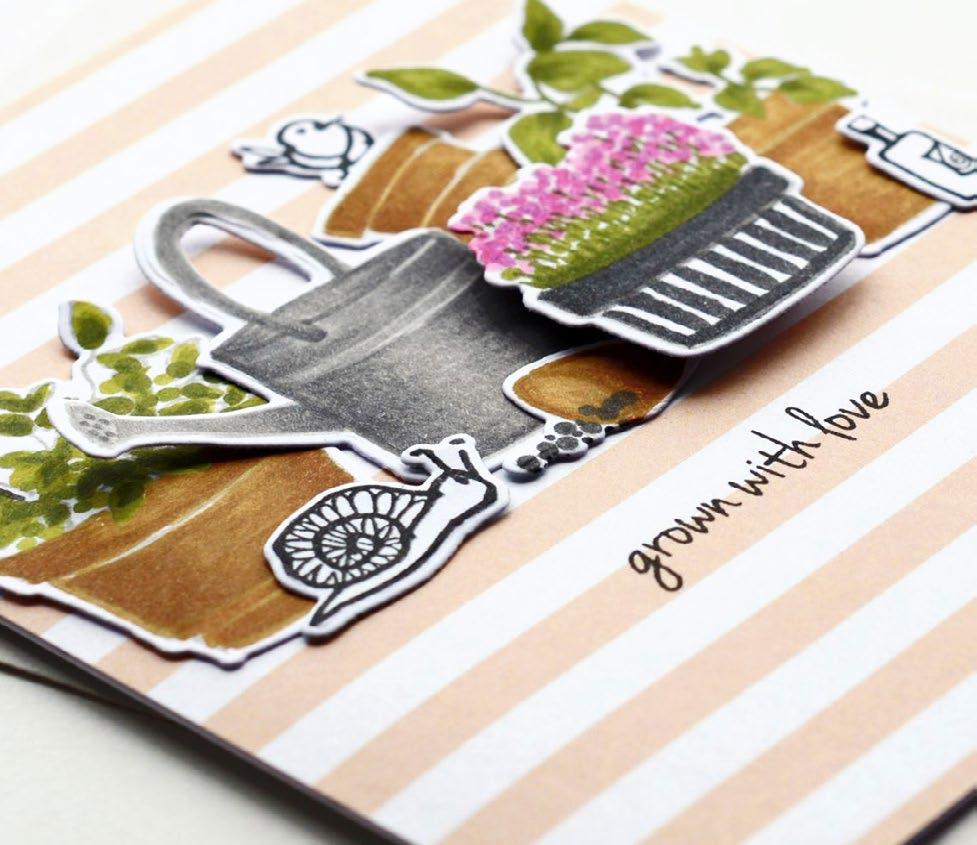
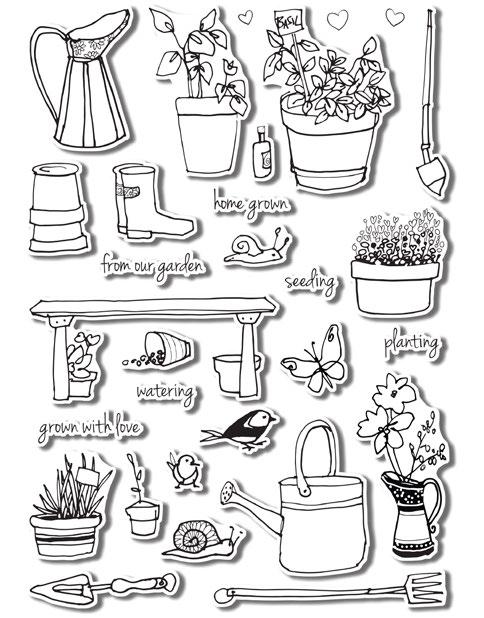
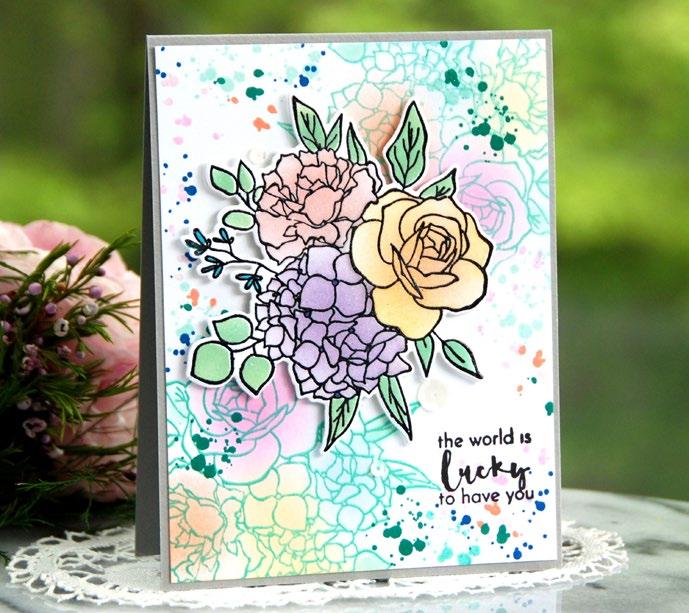
DIY FLORAL BACKGROUND FOR CARDS
 BY SVITLANA SHAYEVICH
INSTRUCTIONS
1. Create a 4 ¼” x 5 ½” card base from Classic Crest Solar White Cardstock.
2. Start building the floral background by white-embossing the outline stamp from the Build-A-Garden: Tulips & Friends Stamp Set onto a Watercolor Paper panel.
3. Emboss it once, covering almost the whole panel from the right, and then fill empty areas around the panel edges.
4. Make a colorful floral background by coloring areas between the florals with Lagoon Watercolor Brush Marker from the Winter Wonderland Watercolor Brush Markers Set.
5. Next, add watercolor pigment around the flowers to create shadows and wash them out with a wet brush.
SUPPLIES
Stamp & Die Set
Build-A-Garden: Tulips and Friends
Inks
Embossing Ink
Crisp Dye Inks: Coral Berry, Cotton Candy, Ruby Red, Warm Sunshine, Mango Smoothie, Dark Chocolate
Cardstock
Classic Crest Solar White Cardstock
Watercolor Paper Set (A2 loose sheets)
Jet Black Cardstock
Coloring Medium
Watercolor Brush Markers - Winter Wonderland Set
Other
Pure White Ink Spray
Instant Dimension Foam Tape
Pure White Crisp Embossing Powder
Mini Blending Brush Set
6. Color the white-embossed floral elements using the coordinating Tulips & Friends Coloring Stencil and Blending Brushes. Use Cotton Candy and Coral Berry Dye Inks for the tulip heads, Warm Sunshine, Mango Smoothie, and Dark Chocolate Dye Inks for the smaller flowers, and Frayed Leaf, Forest Glades, and Evergreen Dye Inks for the leaves.
7. Stamp the tulip details using the layering stamp set with Ruby Red Dye Ink. Add Pure White Ink Spray splatters to add interest and hide imperfections.
8. Create sentiment strips (whiteembossed on Jet Black Cardstock) using the sentiments from the same stamp set and adhere them to the floral background panel with foam tape.
9. Foam-mount the panel onto a white card base using Instant Dimension Foam Tape.
SEE MORE ON OUR BLOG LOVELY
04
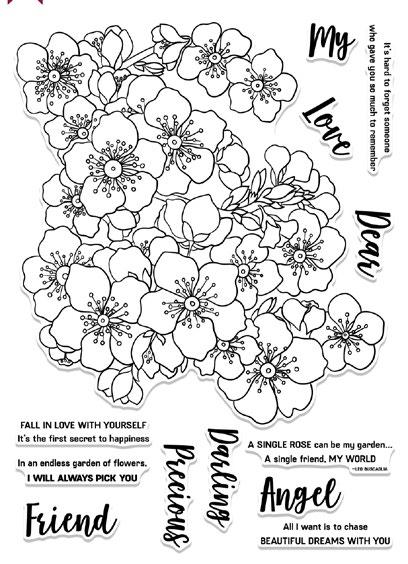
2 BEAUTIFUL FLORAL CARDS WITH JUST 1 STAMP
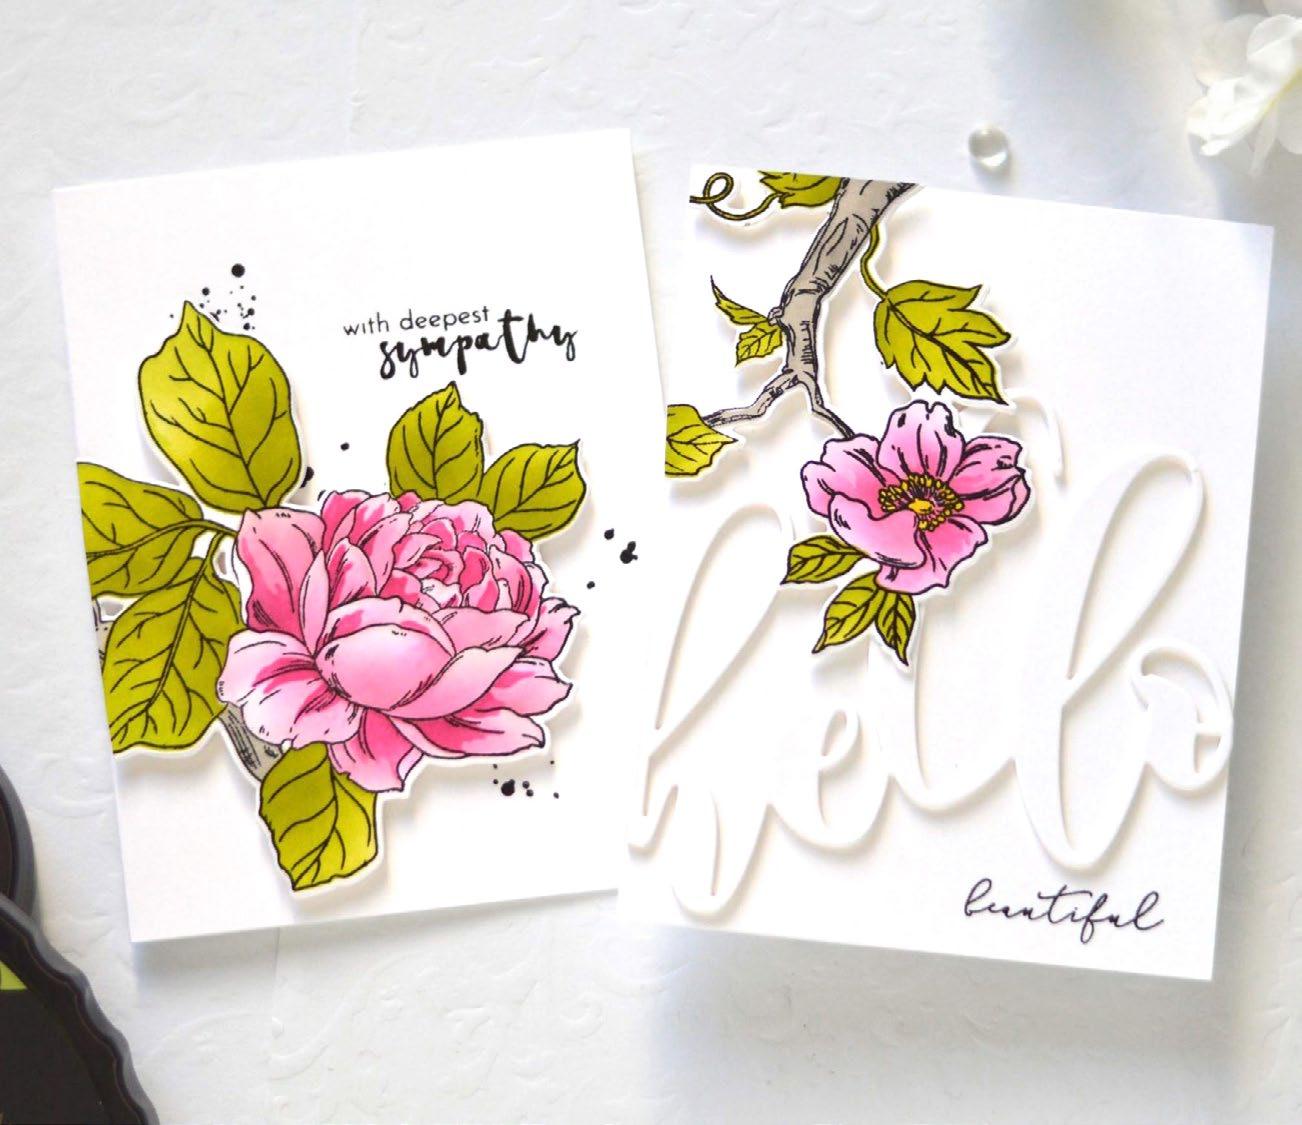 BY THERESE CALVIRD
INSTRUCTIONS
1. Create two 4 ¼” x 5 ½” card bases from Classic Crest Solar White Cardstock.
2. Start by stamping using the floral image from the Build-A-Garden: Magnificent Branch stamp set with Permanent Black Crisp Dye Ink. The large image can be easily cut into two pieces to make two focal points for two cards.
3. Use the coordinating Layering Stencil Set to quickly and easily add color to your floral image with dye inks.
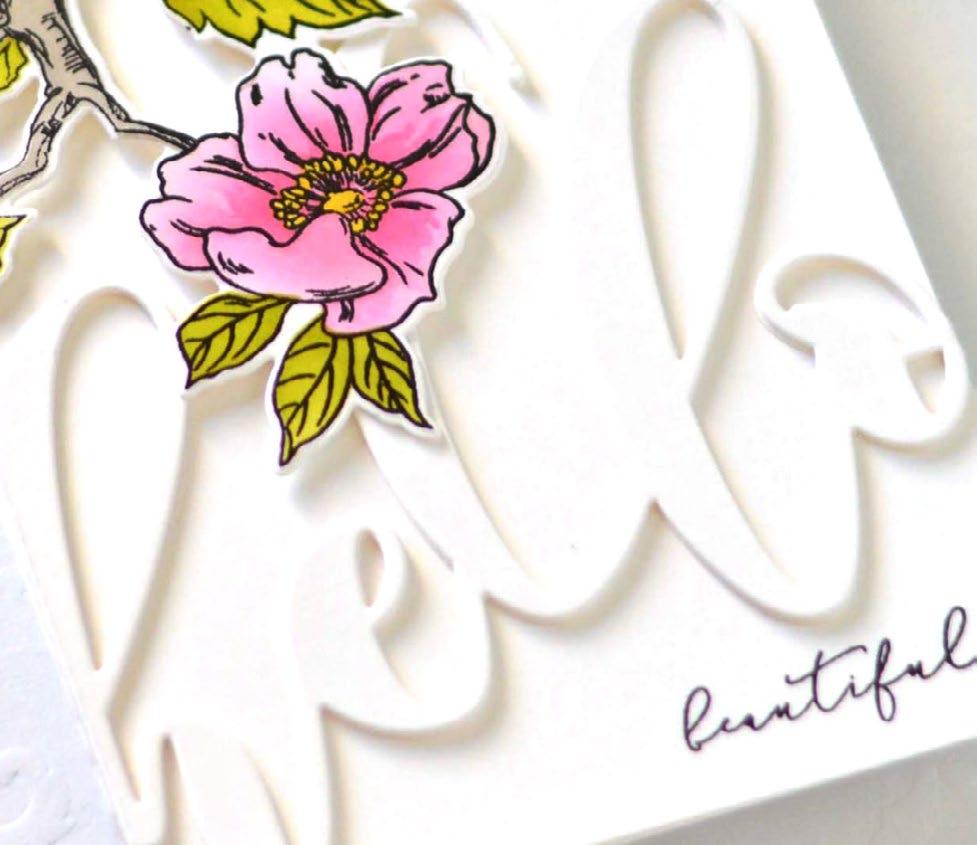
4. After cutting the large floral image into two pieces using the Build-A-Flower: Magnificent Branch Add-On Die, start working and positioning the elements on separate cards.
SUPPLIES
Stamp & Die Sets
Build-A-Garden: Magnificent Branch
Build-A-Garden: Magnificent Branch
Add-On Die
Inky Bouquet Stamp Set
Blossom Wreath Stamp Set
Mega Hello Die
Inks
Obsidian Pigment Ink
Crisp Dye Inks: Permanent Black, Pink Diamond, Rubellite, Bamboo, Olive, Morning Frost, Evening Gray, Honey Drizzle
Cardstock
Classic Crest Solar White Cardstock
Other
Instant Dimension Foam Tape
Mini Blending Brush Set
Detailed Blending Brushes
Glue Tape
5. Embrace the “white space” on both floral cards. On the first card, create ink splatters with Obisidian Ink and stamp the sentiment from the Inky Bouquet Stamp Set using the same black ink.
6. Enhance the second card by adding a layered Mega Hello die-cut to the front, creating a tone-on-tone white embossed effect.
7. Complete the design on the second card by adding a sweet sentiment from the Blossom Wreath Stamp Set.
SEE MORE ON OUR BLOG
05
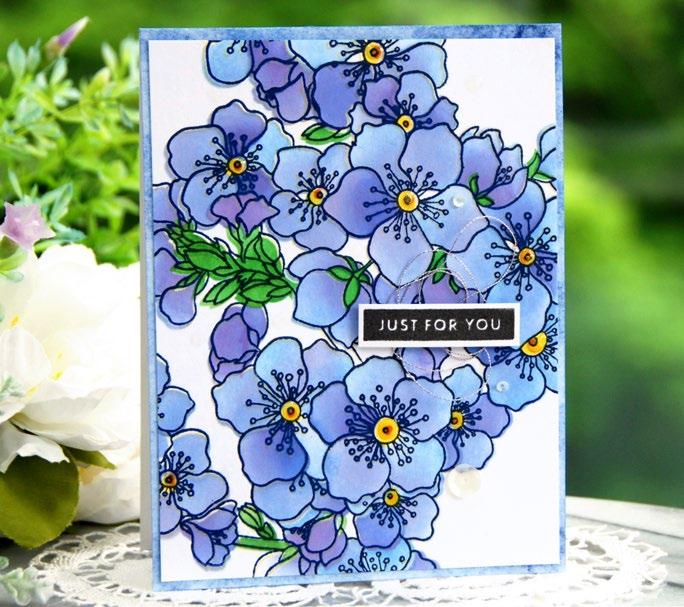
CREATE SOFT LOOKS WITH NO-LINE COLORING
BY AGA MALYSZEK
INSTRUCTIONS
1. Create a 4 ¼” x 5 ½” card base from Classic Crest Solar White Cardstock.
2. Use a patterned paper from the Celebrations 6x6 Paper Pack as the background.
3. Stamp the elements from the Garden Grow Stamp Set onto a white card panel using Silver Stone Crisp Dye Ink for a light impression, ensuring that the outlines of the stamped images are not visible after coloring.
SUPPLIES
Stamp & Die Set
Garden Grow Stamp & Die Set
Inks
Crisp Dye Inks - Silver Stone, Permanent Black
Cardstock
Classic Crest Solar White Cardstock
Celebrations 6x6 Paper Pack
Coloring Mediums
Artist Alcohol Markers: Tropical Garden Set E, Water Garden Set G, Sunshine Valley Garden Set F
4. Color the stamped pieces using Altenew Artist Alcohol Markers. Use Moss, Olive, Parrot, Pure Graphite, Industrial Diamond, Silver Stone, and Limestone from the Tropical Garden Artist Alcohol Markers Set E, and Rubellite and Razzleberry from the Sunshine Valley Garden Artist Alcohol Markers Set F, as well as Hazelnut and Almond Butter from the Water Garden Artist Alcohol Markers Set G.
5. Arrange all the colored images on the card and add some small uncolored elements for a contrasting look.
6. Finish off the card by stamping a sentiment using Permanent Black Crisp Dye Ink.
SEE MORE ON OUR BLOG
06
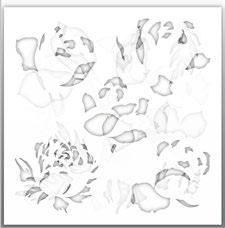
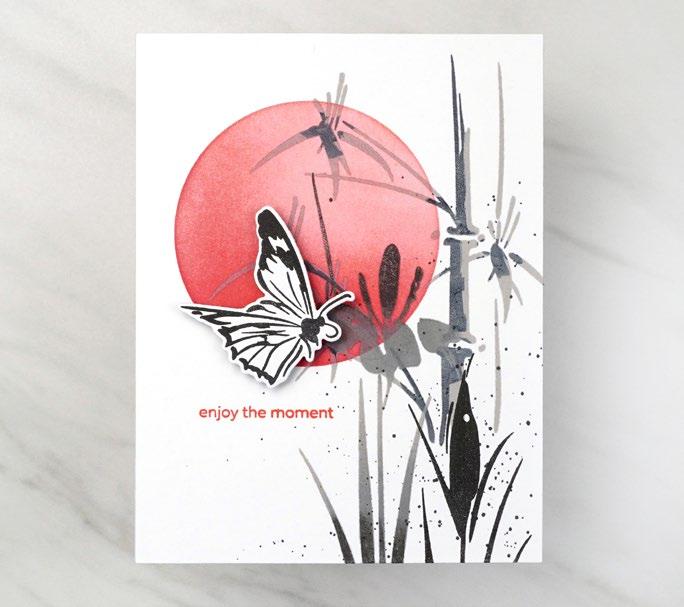
STUNNING WATERCOLOR BACKGROUND WITH SILHOUETTES
BY ERUM TASNEEM
INSTRUCTIONS
1. Create a 4 ¼” x 5 ½” card base from Classic Crest Solar White Cardstock.
2. Cut an A2 watercolor cardstock one inch smaller than the card base.
3. Apply water to the top one-third portion of the panel. Start by adding Starry Night watercolor from the Artists’ Watercolor 24 Pan Set, then extend it outwards with Lapis Lazuli watercolor.
4. Leave a space and add another band of clean water to the middle section of the panel. Apply Sea Shore watercolor to this area and blend it with the blue to create a smooth transition.
SUPPLIES
Stamp Set
Meadow Reflections Stamp Set
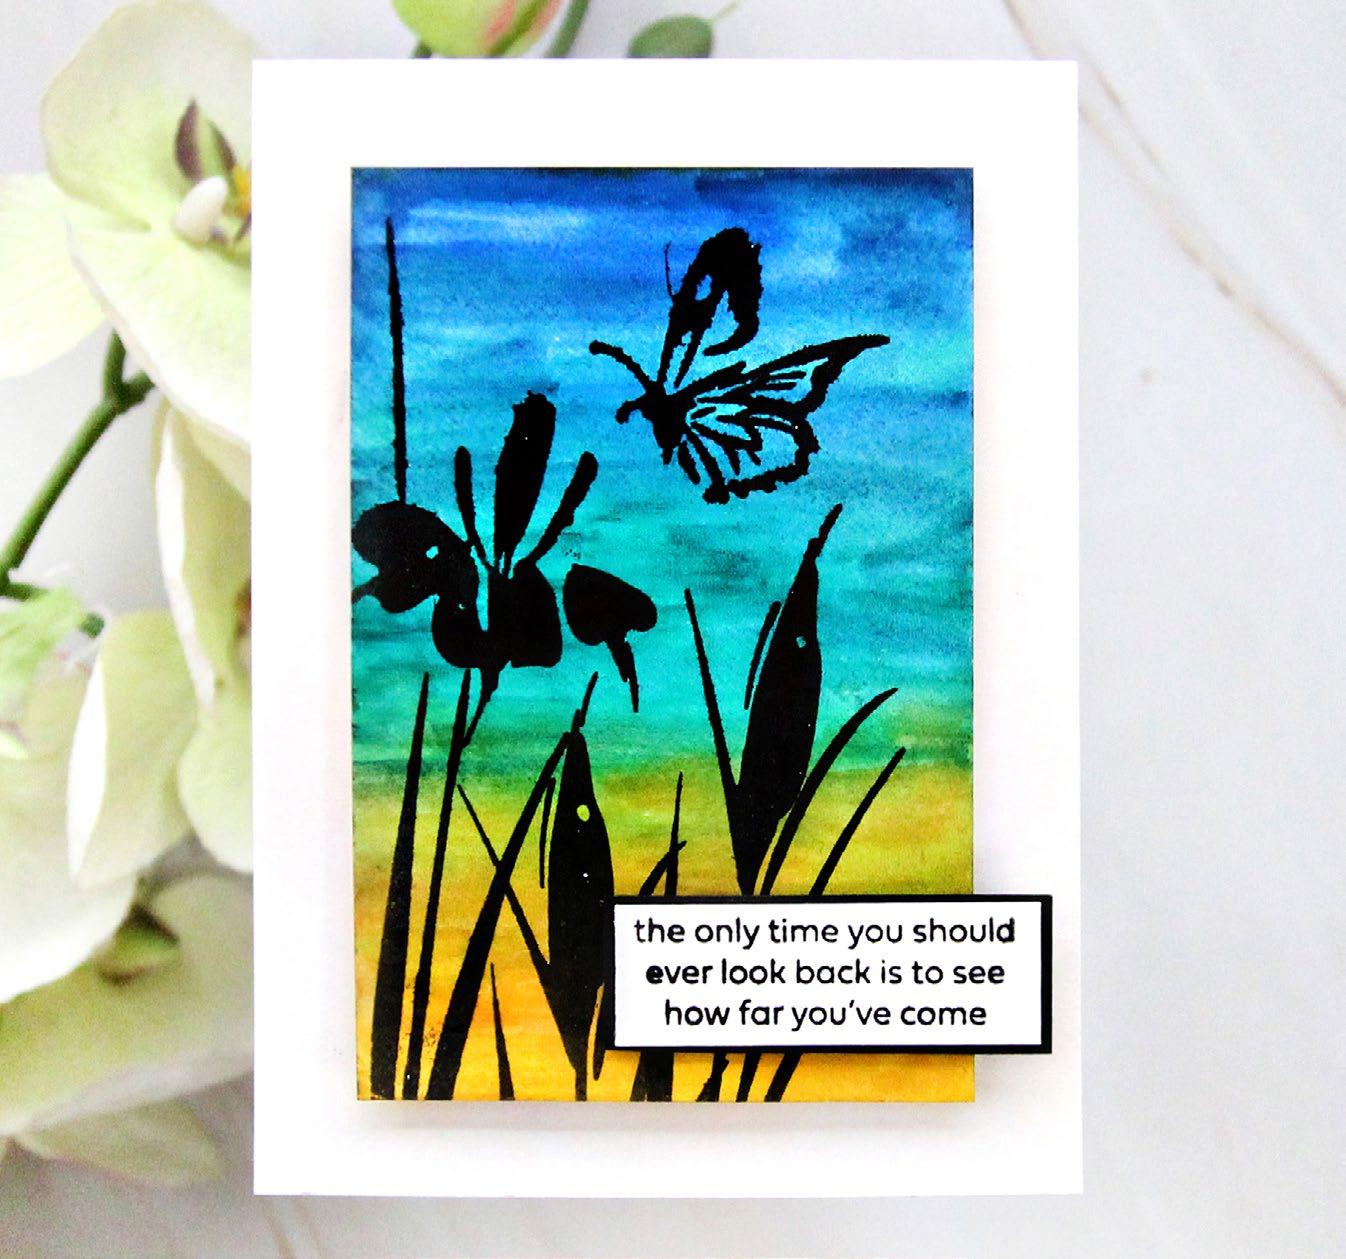
5. Apply water to the lower edge of the panel and add a warm yellow tone using a mix of Summer Afternoon, Fiery Sunset, and Delectable Delights watercolors.
Ink
Obsidian Pigment Ink
Coloring Medium
Artists’ Watercolor 24-Pan Set
Cardstock
Classic Crest Solar White Cardstock
Watercolor Paper Set (A2 loose sheets)
Other
Instant Dimension Foam Tape
6. Blend the Sea Shore watercolor and the mix of yellow pigment together for a seamless transition.
7. Add more concentrated pigment as strokes on the wet panel to create texture, using different colors of watercolor on different bands to add variation.
8. Dry the panel completely.
9. Use Obsidian Pigment Ink to stamp the silhouette images from the Meadow Reflections Stamp Set. Set the ink using a heat tool.
10. Adhere the panel onto the card base using Instant Dimension Foam Tape.
11. Adhere the sentiment onto the card panel with foam tape.
SEE MORE ON OUR BLOG
07
WITH RED FLORALS
BY EMILY MIDGETT
INSTRUCTIONS
1. Trim down a full-size slimline card base from Classic Crest Solar White Cardstock.
2. Stamp the large main image from Project Kit: Silk Art onto white cardstock using Crimson Crisp Dye Ink. Tap Velvet Crisp Dye Ink around the edges of the flowers and blend it with a blending tool to create a smooth transition.
3. Leave the leaves a solid, vibrant red for added interest.
4. Die cut the finished image using the coordinating dies included in the kit.
5. Use the Classic Pinecones Slim 3D Embossing Folder to emboss the card base, maintaining the holiday theme.
SUPPLIES
Stamp & Die Sets
Craft Your Life Project Kit: Silk Art
Tall Alpha Die Set
Itty Branches Die Set
Happy Holidays Script Die Set
Embossing Folder
Classic Pinecones Slim 3D Embossing Folder
Inks
Crisp Dye Inks: Crimson, Velvet
Cardstock
Classic Crest Solar White Cardstock
Red Sunset Gradient Cardstock Set
Other
Iridescent White Pearls
6. Arrange the red floral images around the edge of the embossed background, trimming some off and using the off-cuts along the opposite edges. Adhere the stamped images to the card front using Instant Dimension Foam Tape.
7. Add sprigs of berries cut from Red Sunset Gradient Cardstock using the Itty Bitty Branches Dies.
8. Create the sentiment by die cutting the calligraphic “holidays” using the Happy Holidays Script Die and “happy” using the Tall Alpha Dies. Use red glitter paper for added sparkle.

9. Adhere the sentiment die-cuts with foam adhesive for dimension.
10. Add a final touch to the holiday card by including a few iridescent white pearls for shine and textural difference.
SEE MORE ON OUR BLOG EASY CHRISTMAS CARD IDEA
08
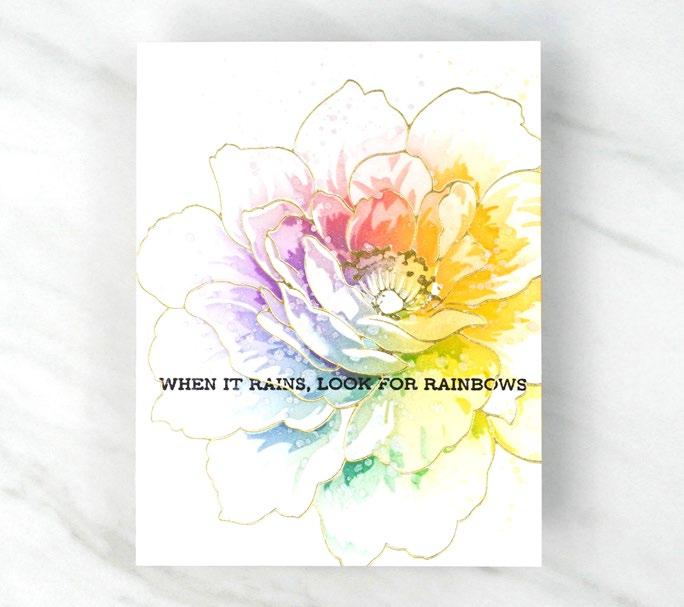
RAINBOW INK SMOOSHING FOR FLORAL CARDS
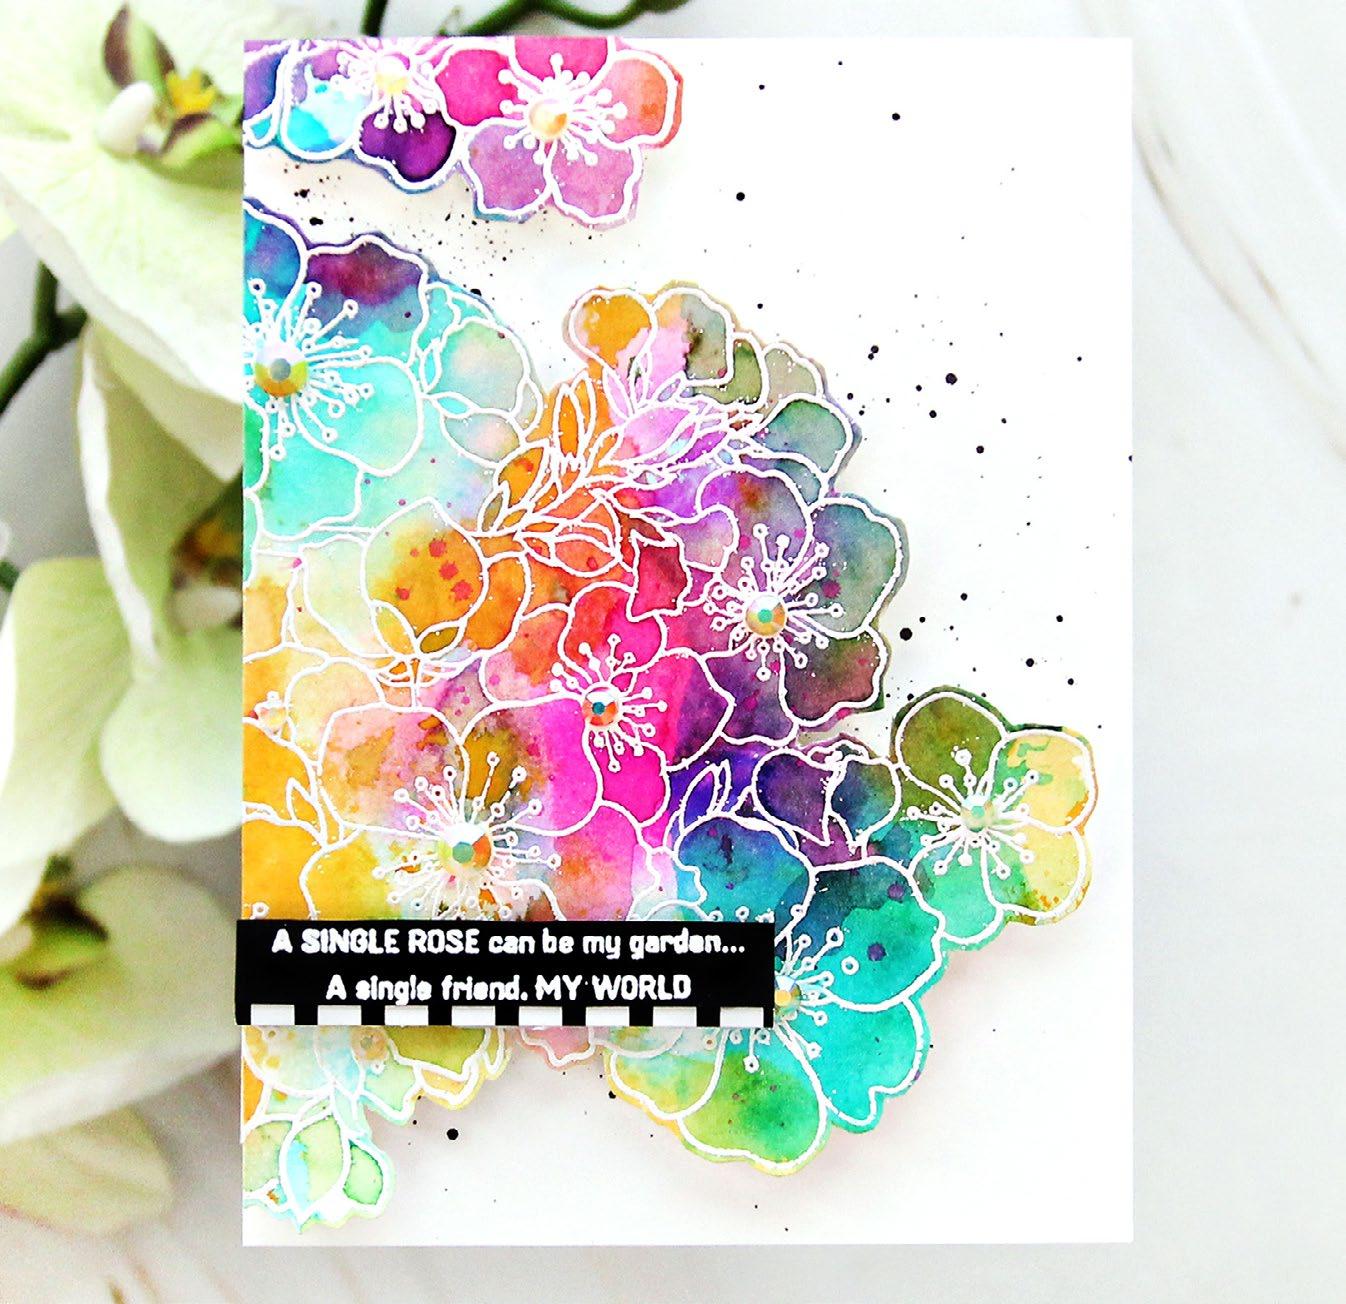 BY ERUM TASNEEM
INSTRUCTIONS
1. Create a 4 ¼” x 5 ½” card base from Classic Crest Solar White Cardstock.
2. Heat emboss the image from the Captivating Blooms Stamp Set in Pure White Crisp Embossing Powder on A2 watercolor cardstock.
3. Apply Magenta, Sunray, and Aqualicious Crisp Dye Inks onto the watercolor palette. Spray a bit of water using the Fine Mister spray on the inks and the watercolor panel.
4. Gently press the panel onto the inks, leaving it for a couple of seconds. Repeat this step until satisfied. Dry the panel.
SUPPLIES
Stamp Set
Captivating Blooms Stamp Set
Inks
Embossing Ink
Crisp Dye Inks: Magenta, Sunray, Aqualicious, Pinkalicious, Teal Cave, Snapdragon
Coloring Medium
Watercolor Essential 12 Pan Set
Cardstock and Paper
Classic Crest Solar White Cardstock
Essential Black & White 6x6 Paper Pack
Watercolor Paper Set (A2 loose sheets)
Other
Pure White Crisp Embossing Powder
Instant Dimension Foam Tape
Fine Mister Spray
5. Apply individual inks if more coverage of a specific color is desired. Use Pinkalicious, Teal Cave, and Snapdragon Crisp Dye Inks.
6. Once satisfied with the look, completely dry the panel.
7. Fussy cut the image, leaving an outline. Set it aside.
8. On the card base, apply fine black splatters from the Watercolor Essential 12 Pan Set.
9. Adhere the watercolored image onto the card base using Instant Dimension Foam Tape.
10. Heat emboss the sentiment on black patterned paper in Pure White Crisp Embossing Powder and cut it to size.
11. For finishing touches, add a strip of paper from the Essential Black and White 6x6 Paper Pack behind the sentiment.
SEE MORE ON OUR BLOG
09
FEATURED PRODUCTS


Note: Gray SKU represents coordinating die set.

CAPTIVATING
WREATH ALT4115 RETAIL $23.99 ALT4116 RETAIL $11.99 BUILD-A-GARDEN: MAGNIFICENT BRANCH ALT7052BN RETAIL $35.00 ALT7052-DIE RETAIL $24.99
TULIPS & FRIENDS ALT7163BN RETAIL $35.00 ALT7163-DIE RETAIL $21.00
BLOSSOM
BUILD-A-GARDEN:
BLOOMS ALT7176 RETAIL $23.99
GROW ALT1051 RETAIL $23.99 ALT1145 RETAIL $38.00
BOUQUET ALT6169 RETAIL $15.99 ALT6170 RETAIL $10.99
GARDEN
INKY
ALT7004 RETAIL $23.99 ALT7005 RETAIL $10.99 HAPPY HOLIDAYS SCRIPT DIE SET ALT4550 RETAIL $10.99 ITTY BRANCHES DIE SET ALT7019 RETAIL $24.00 MEGA HELLO DIE ALT2230 RETAIL $15.00 SIMPLE GREETINGS DIE SET ALT4776 RETAIL $11.99 GOLDEN DAYS HOT FOIL PLATE ALT6831 RETAIL $37.99
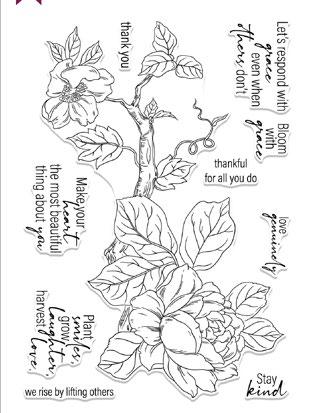
MEADOW REFLECTIONS
MORE DESIGN INSPIRATION


STAY CONNECTED Download our FREE mobile app! altenew.com blog.altenew.com facebook.com/altenew instagram.com/altenewllc pinterest.com/altenew youtube.com/altenew tiktok.com/@altenew support@altenew.com (800) 593-1089
