17 minute read
Revit MEP
from AUGIWorld
by AUGI, Inc.
Revit 2020 – MEP PRODUCT FOCUS by: Travis Head Revit Build Machine (Part II)
In my previous article, I discussed how you can build a fast Revit machine yourself using parts from local or online retailers for only $1000 to $1100, as opposed to the $4000 they might cost you to buy an equivalent machine from a computer manufacturer that specializes in Revit machines. In that article, I listed out the parts you would need and some things to look for. But, I assumed the reader had some prior knowledge of computer parts and how to put them together. ➲
In this article, I’m going to speak more to those who aren’t as comfortable with computer parts and building a machine themselves. I’ll go into much more detail on things you need to look for and consider when stepping off into these uncharted waters. Hopefully, after reading this edition, you’ll have everything you need to know to take the plunge and build your own Revit workstation, and save a bunch of money doing it.
PROCESSOR The most important characteristic of your processor for Revit is the clock speed. That’s why we need to go with Intel’s Core I7’s or Core I9’s. I choose I7’s over I9’s. But, if you end up going with an I9 instead, that’s quite alright. Just make sure you adjust the model numbers and specs for other items accordingly. For the rest of the discussion, I’ll stick to the I7’s. But everything will be pertinent to each.
Now, to increase the clock speed as high as possible, we need to be able to overclock that processor. Overclocking means boosting the clock speed even higher than the max speed the processor is rated for. And for that, you need to go with the processor models that have the letter “k” at the end of the model name. For instance, on our current builds, we might go with the Intel i7-9700k processor. The “k” means its clock speed is not locked to a specific value on the high end, but can be “overclocked” to a higher max speed than the equivalent processor that isn’t a “k” type (I7-9700, for example).
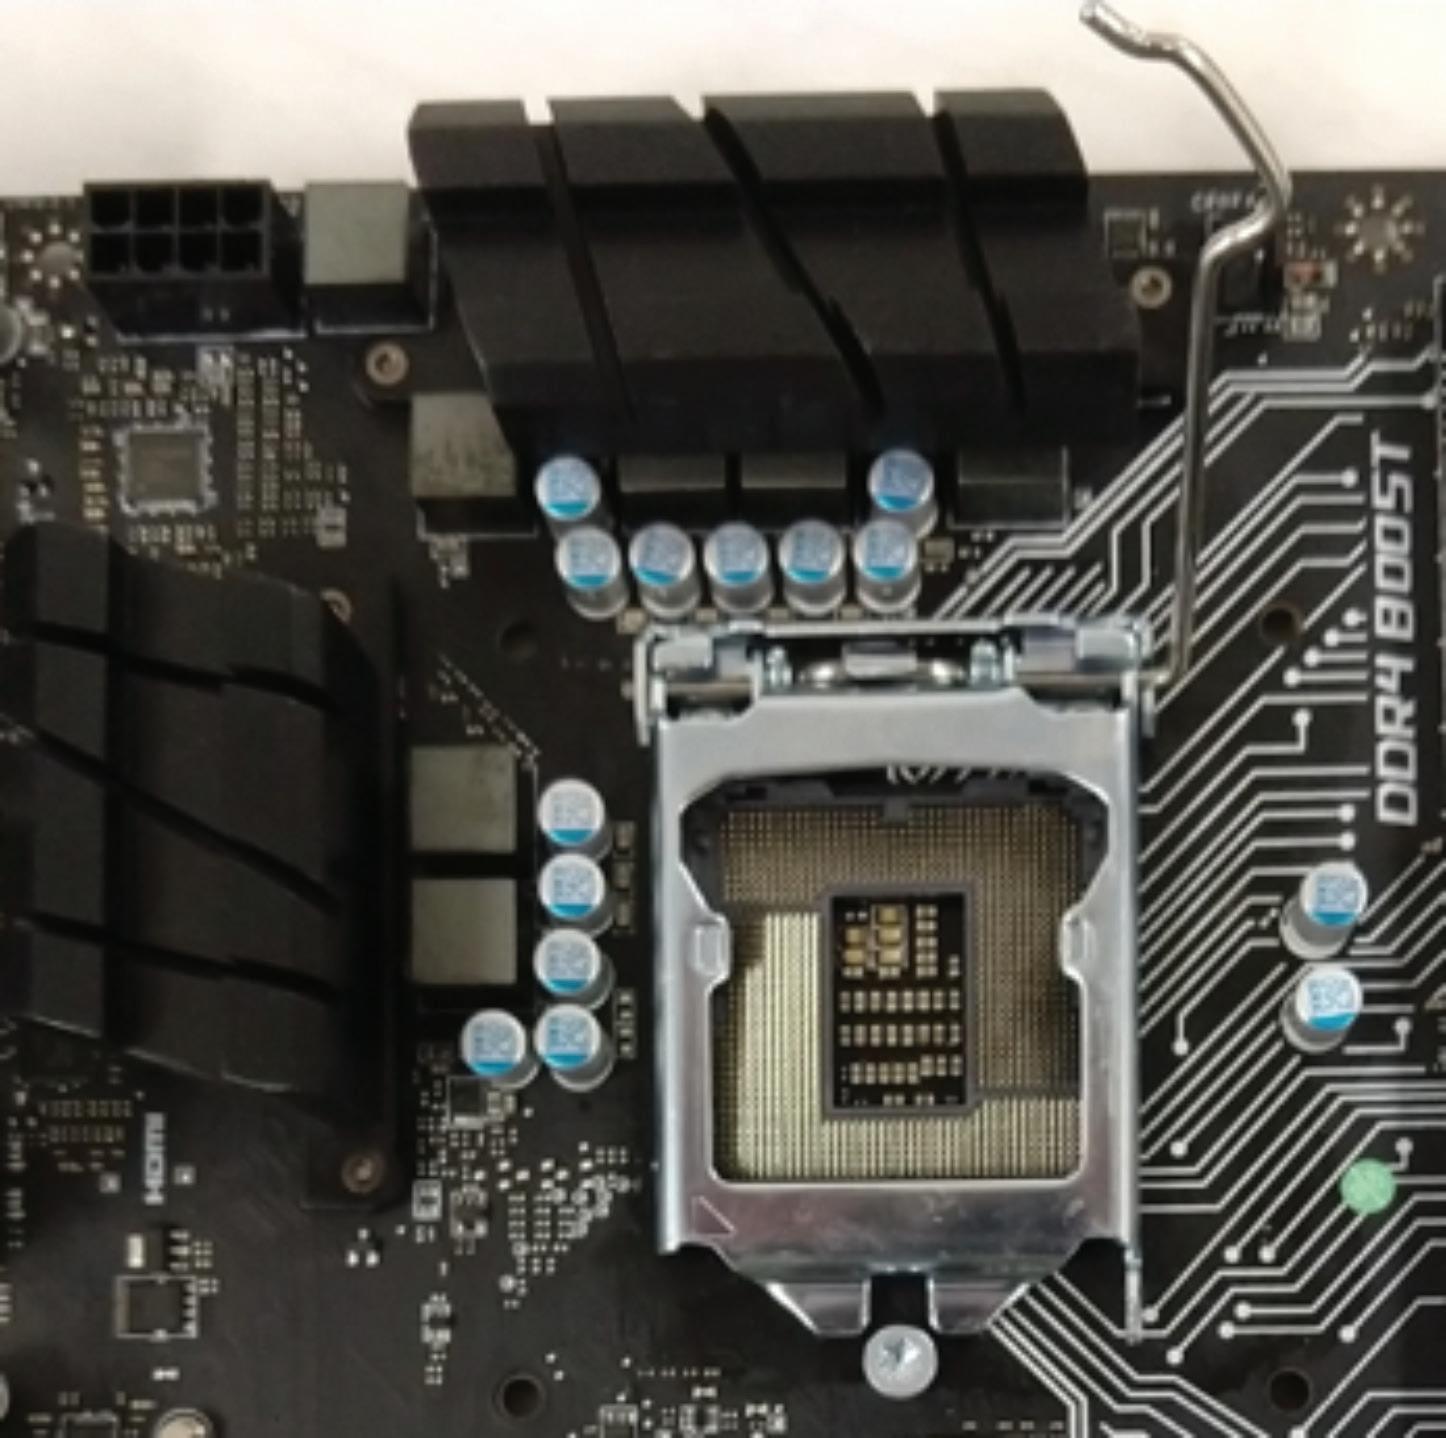
“socket” on the motherboard that the processor fits into. There are multiple types, depending on the specific processor manufacturer and model line. The Core I7’s have been using the same socket type for quite some time. You’ll see it listed on the motherboard specs as socket LGA115x. The Core I7-9700k uses the LGA1151 socket specifically, and so does the I9-9900k. So, make sure you get a motherboard that has that socket type.
Figure 1 shows what the processor socket for an Intel i7 processor looks like:
(Currently there’s not a processor installed. This gets covered up by the liquid cooler pump, as you’ll see in later pictures)
MOTHERBOARD The motherboard, or mainboard, has several features that you must take into consideration when choosing which one to go with. First, you have to choose a motherboard that is made for your processor that you’ve chosen. That’s usually not that difficult, as motherboards are designated specifically for either Intel processors or AMD processors. You’ll be able to either sort for that online, or easily find that information in the description. And, as we mentioned in the processor section, one of the important things you’ll need to look for first is the socket type the processor you’ve chosen uses. I already went into detail about the number of memory slots and the Northbridge chipset in the prior article. Figure 1
Now, you’ll have to decide what size class you want your motherboard to be. There are basically three sizes: ATX, mATX, and ITX. Motherboards are basically designed by all manufacturers to be as standardized as possible. ATX is a design of motherboard that’s been around for years. It’s the largest size/style of consumer-grade motherboards. The mATX is very similar in layout design as the ATX, just with some extra expansion features removed to be able to make the board shorter in length. ITX boards are for very small compact builds and really not useful for this. Whether you go with the larger ATX or the smaller mATX boards will depend on how large a case you want and what type of cooling you decide to use. Both of those we’ll talk about later.
Now for hard drive connections. All motherboards these days are going to have multiple SATA type cabled hard drive connections. If that’s all it has, that will be fine. However, if you can spare a few more dollars in your budget, get an M.2 PCIe SSD as it will be a lot faster than a standard SATA Figure 2
Revit 2020 – MEP PRODUCT FOCUS
Revit 2020 – MEP PRODUCT FOCUS SSD. But they can be up to $100 more than a comparable SATA SSD, and it’s well worth the extra money. Check the motherboard specs and see if it has an M.2 drive slot, and that it supports the faster PCIe M.2 type. We’ll talk more about hard drive considerations later. Make sure you get a motherboard that has at least three fan headers. Fan headers are typically labeled “CPU Fan” or “Sys Fan”. CPU Fan headers are for exactly that, the CPU cooling fan, and the Sys fans are for extra cooling fans that are mounted to the case to bring in cool air or to push out hot air. If you can get a motherboard that has two CPU Fan headers, that will be even better for liquid cooling (more on that later).
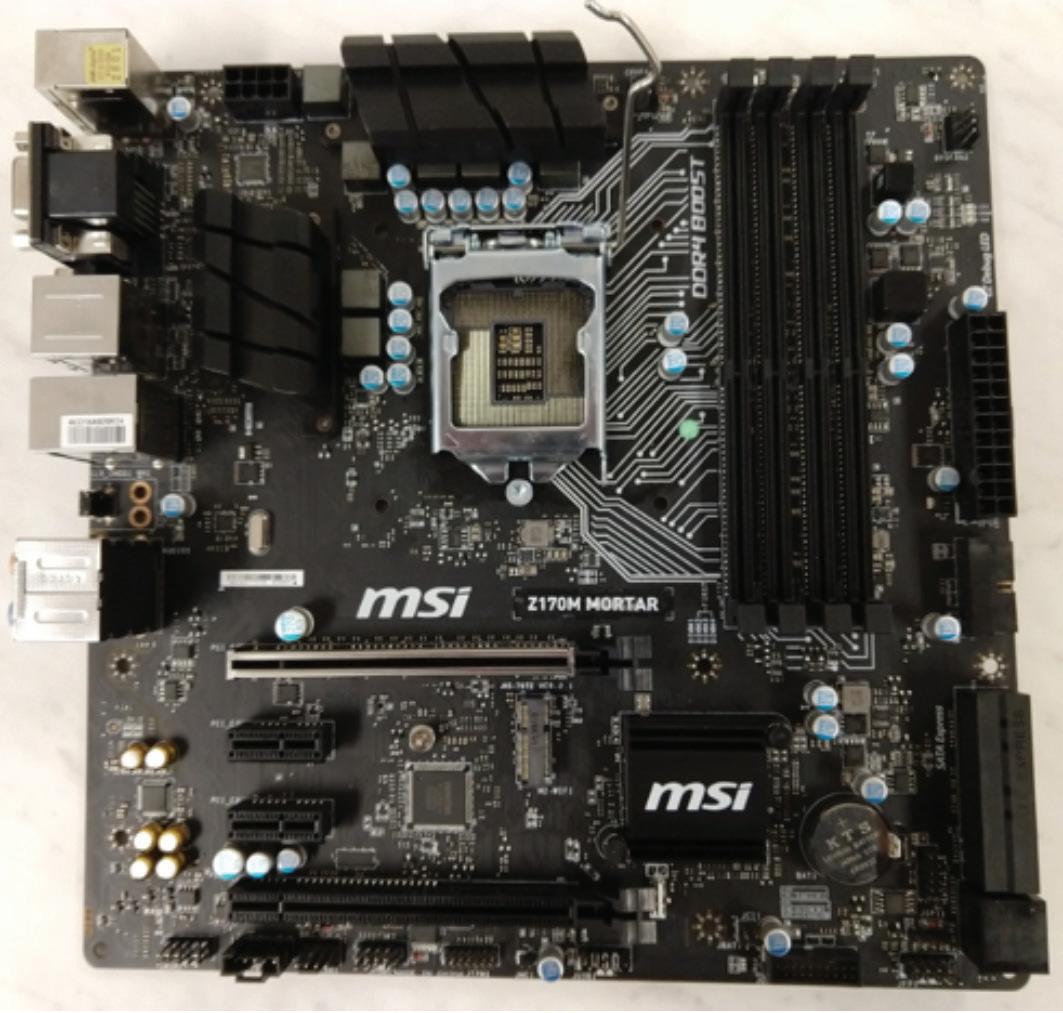
Figure 2 shows an example of a mATX motherboard.
MEMORY Memory is incredibly important where Revit is concerned. The more memory you can afford, the better. It’s also wise to provide the memory in the form of two equal size memory sticks that are the fastest speed the motherboard will support. Also, get a motherboard with four memory slots to provide space for adding more memory in the future. Memory is generally the least expensive and the easiest upgrade to do, especially if you have extra memory slots on your motherboard to add to. In the motherboard pictured above, the four memory slots are the long vertical black strips to the right of the processor socket.
Memory operates better and faster in a dual channel configuration, which will happen automatically if you put in two sticks that are
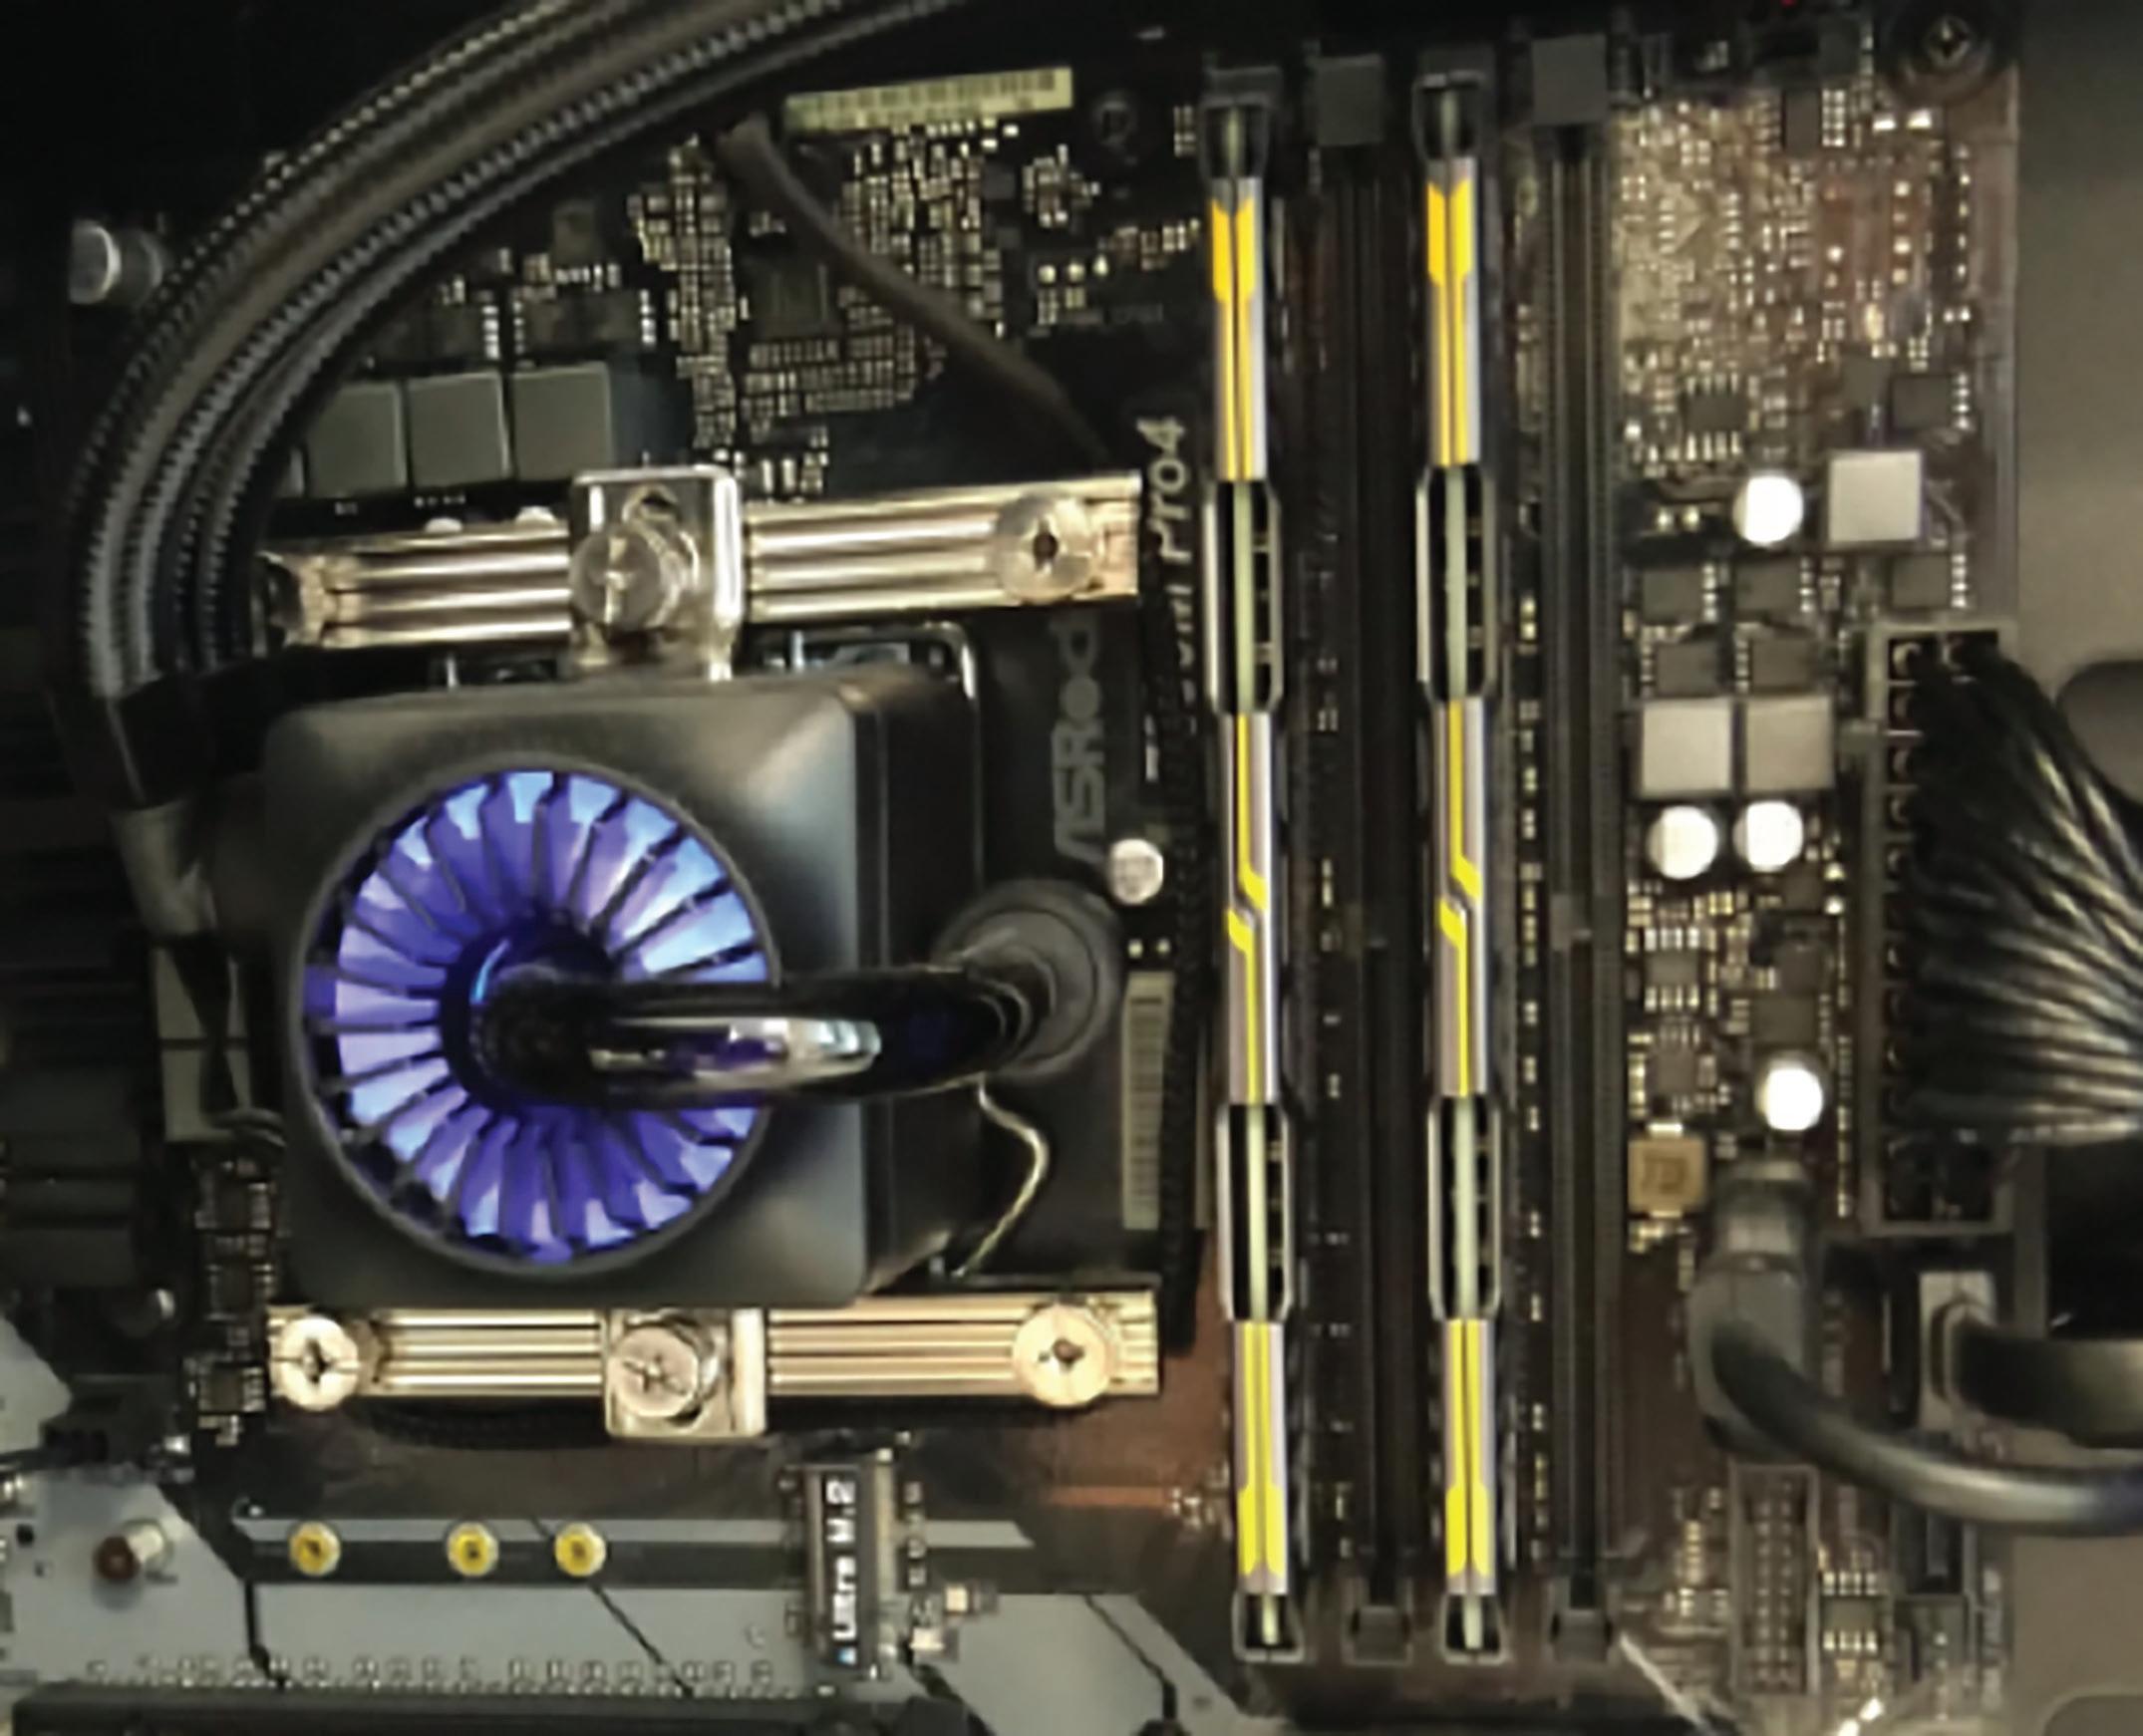
exactly the same (brand, model, timing, size, etc.). You’re usually best to find memory kits that come with two identical sticks that combine for the total size you want. That way you know everything between the two sticks is identical. For example, get a kit with two 8GB sticks for 16GB total, or two 16GB sticks for 32GB total. To have the memory sticks operate in dual channel mode, with four memory slots on the motherboard, you’ll have to put them into alternating slots. For example, slots 1 & 3 or slots 2 & 4 (or as they are sometimes numbered from 0, it would be 0 & 2, or 1 & 3). Figure 3 shows a motherboard with the two sticks of memory installed in two of the four alternating memory slots.
(Here you also see the liquid cooler pump with the coolant tubes running off to the radiator, and the multi-wire power supply connector to the right of the memory slots)
HARD DRIVE The hard drive is where all of your data and Windows itself resides. Hard drives are basically of two main types: (1) Old style magnetic rotating disks hard drives (commonly abbreviated HDD), and (2) solid state drives that have no moving parts and are made up of different types of memory chips (commonly abbreviated SSD). Spend the extra money for an SSD. The speed difference between a solid state drive and a traditional magnetic hard disk drive is huge. No matter how much you spend on the fastest processor and memory, it will mean nothing if you put a magnetic hard disk drive in it. So, SSD all the way.
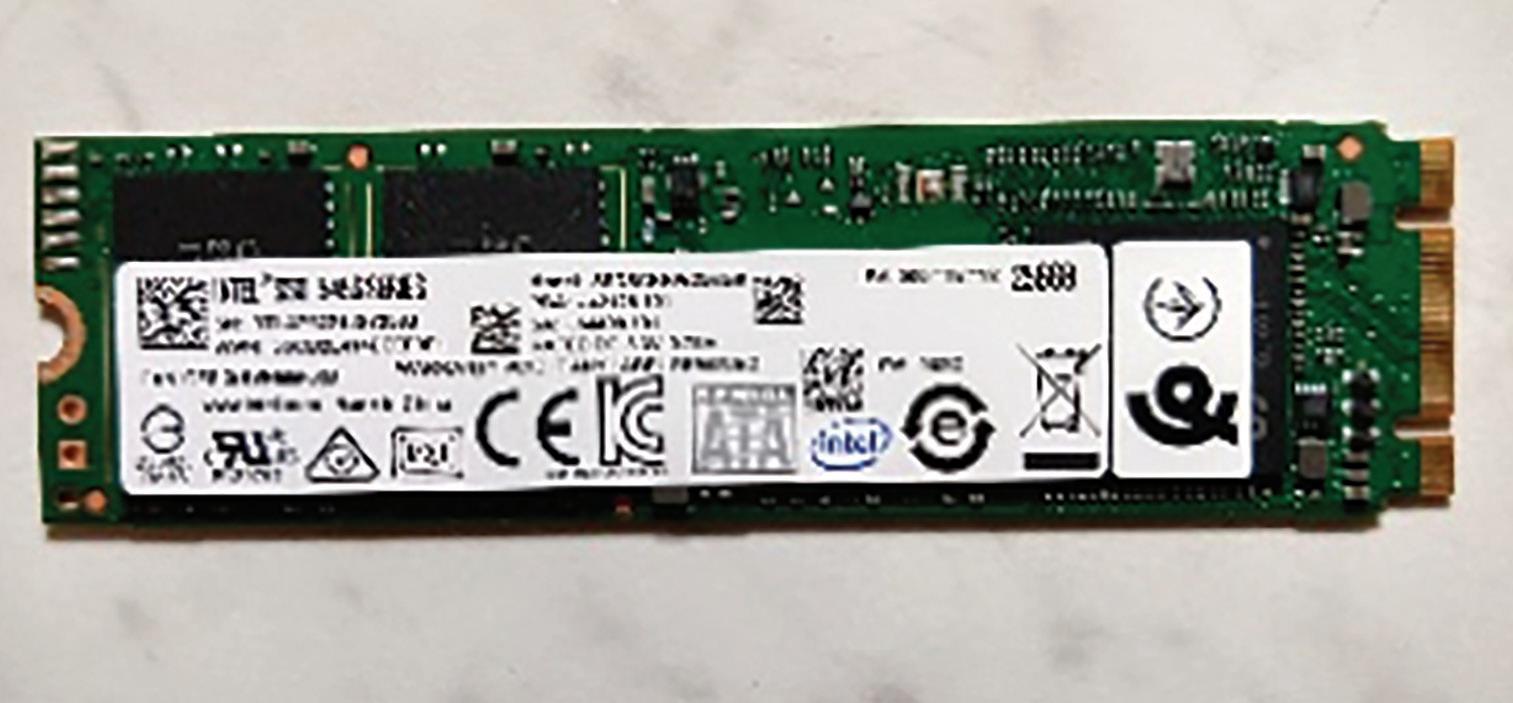
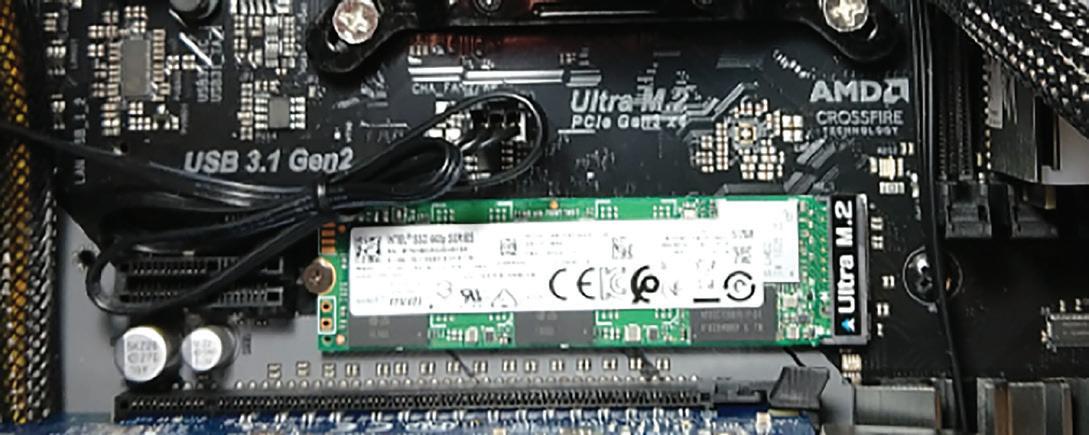
SSD’s come in multiple different types. The most common and least expensive type is a 2.5” wide, flat rectangle that has connectors on one end for a SATA power cable, and a SATA data cable. Those are usually referred to as a “2.5 inch internal SATA drive”. SATA is the most common type of drive connection. Your power supply will have SATA power cables for the power connection, and your motherboard will have SATA data connectors that will come with one or two SATA data cables to connect the drive to the motherboard. However, you can get an even greater speed increase, for anywhere between $50 and $100 dollars more, by going with a “PCIe M.2 SSD”. M.2 drives have the added benefit of not needing a SATA data cable or a SATA power cable because they attach directly to a dedicated M.2 connector on the motherboard. I talked more about M.2 drives, as well as drive capacity, in the previous article. Figures 4 & 5 show an example of what an M.2 drive looks like.
Revit 2020 – MEP PRODUCT FOCUS
COOLER: Heat is the bane of all computers, and much more so for Revit. For that reason, I chose to go the route of liquid cooling as I felt it would get me the most cooling power for my money. Now don’t panic! I’m sure you’re conjuring up images of those display builds you’ve seen for full-time gamers, with tubes and canisters all over the place. All filled with dayglow-green antifreeze. No, I’m not talking about that. I’m referring to All-In-One liquid coolers (AIO for
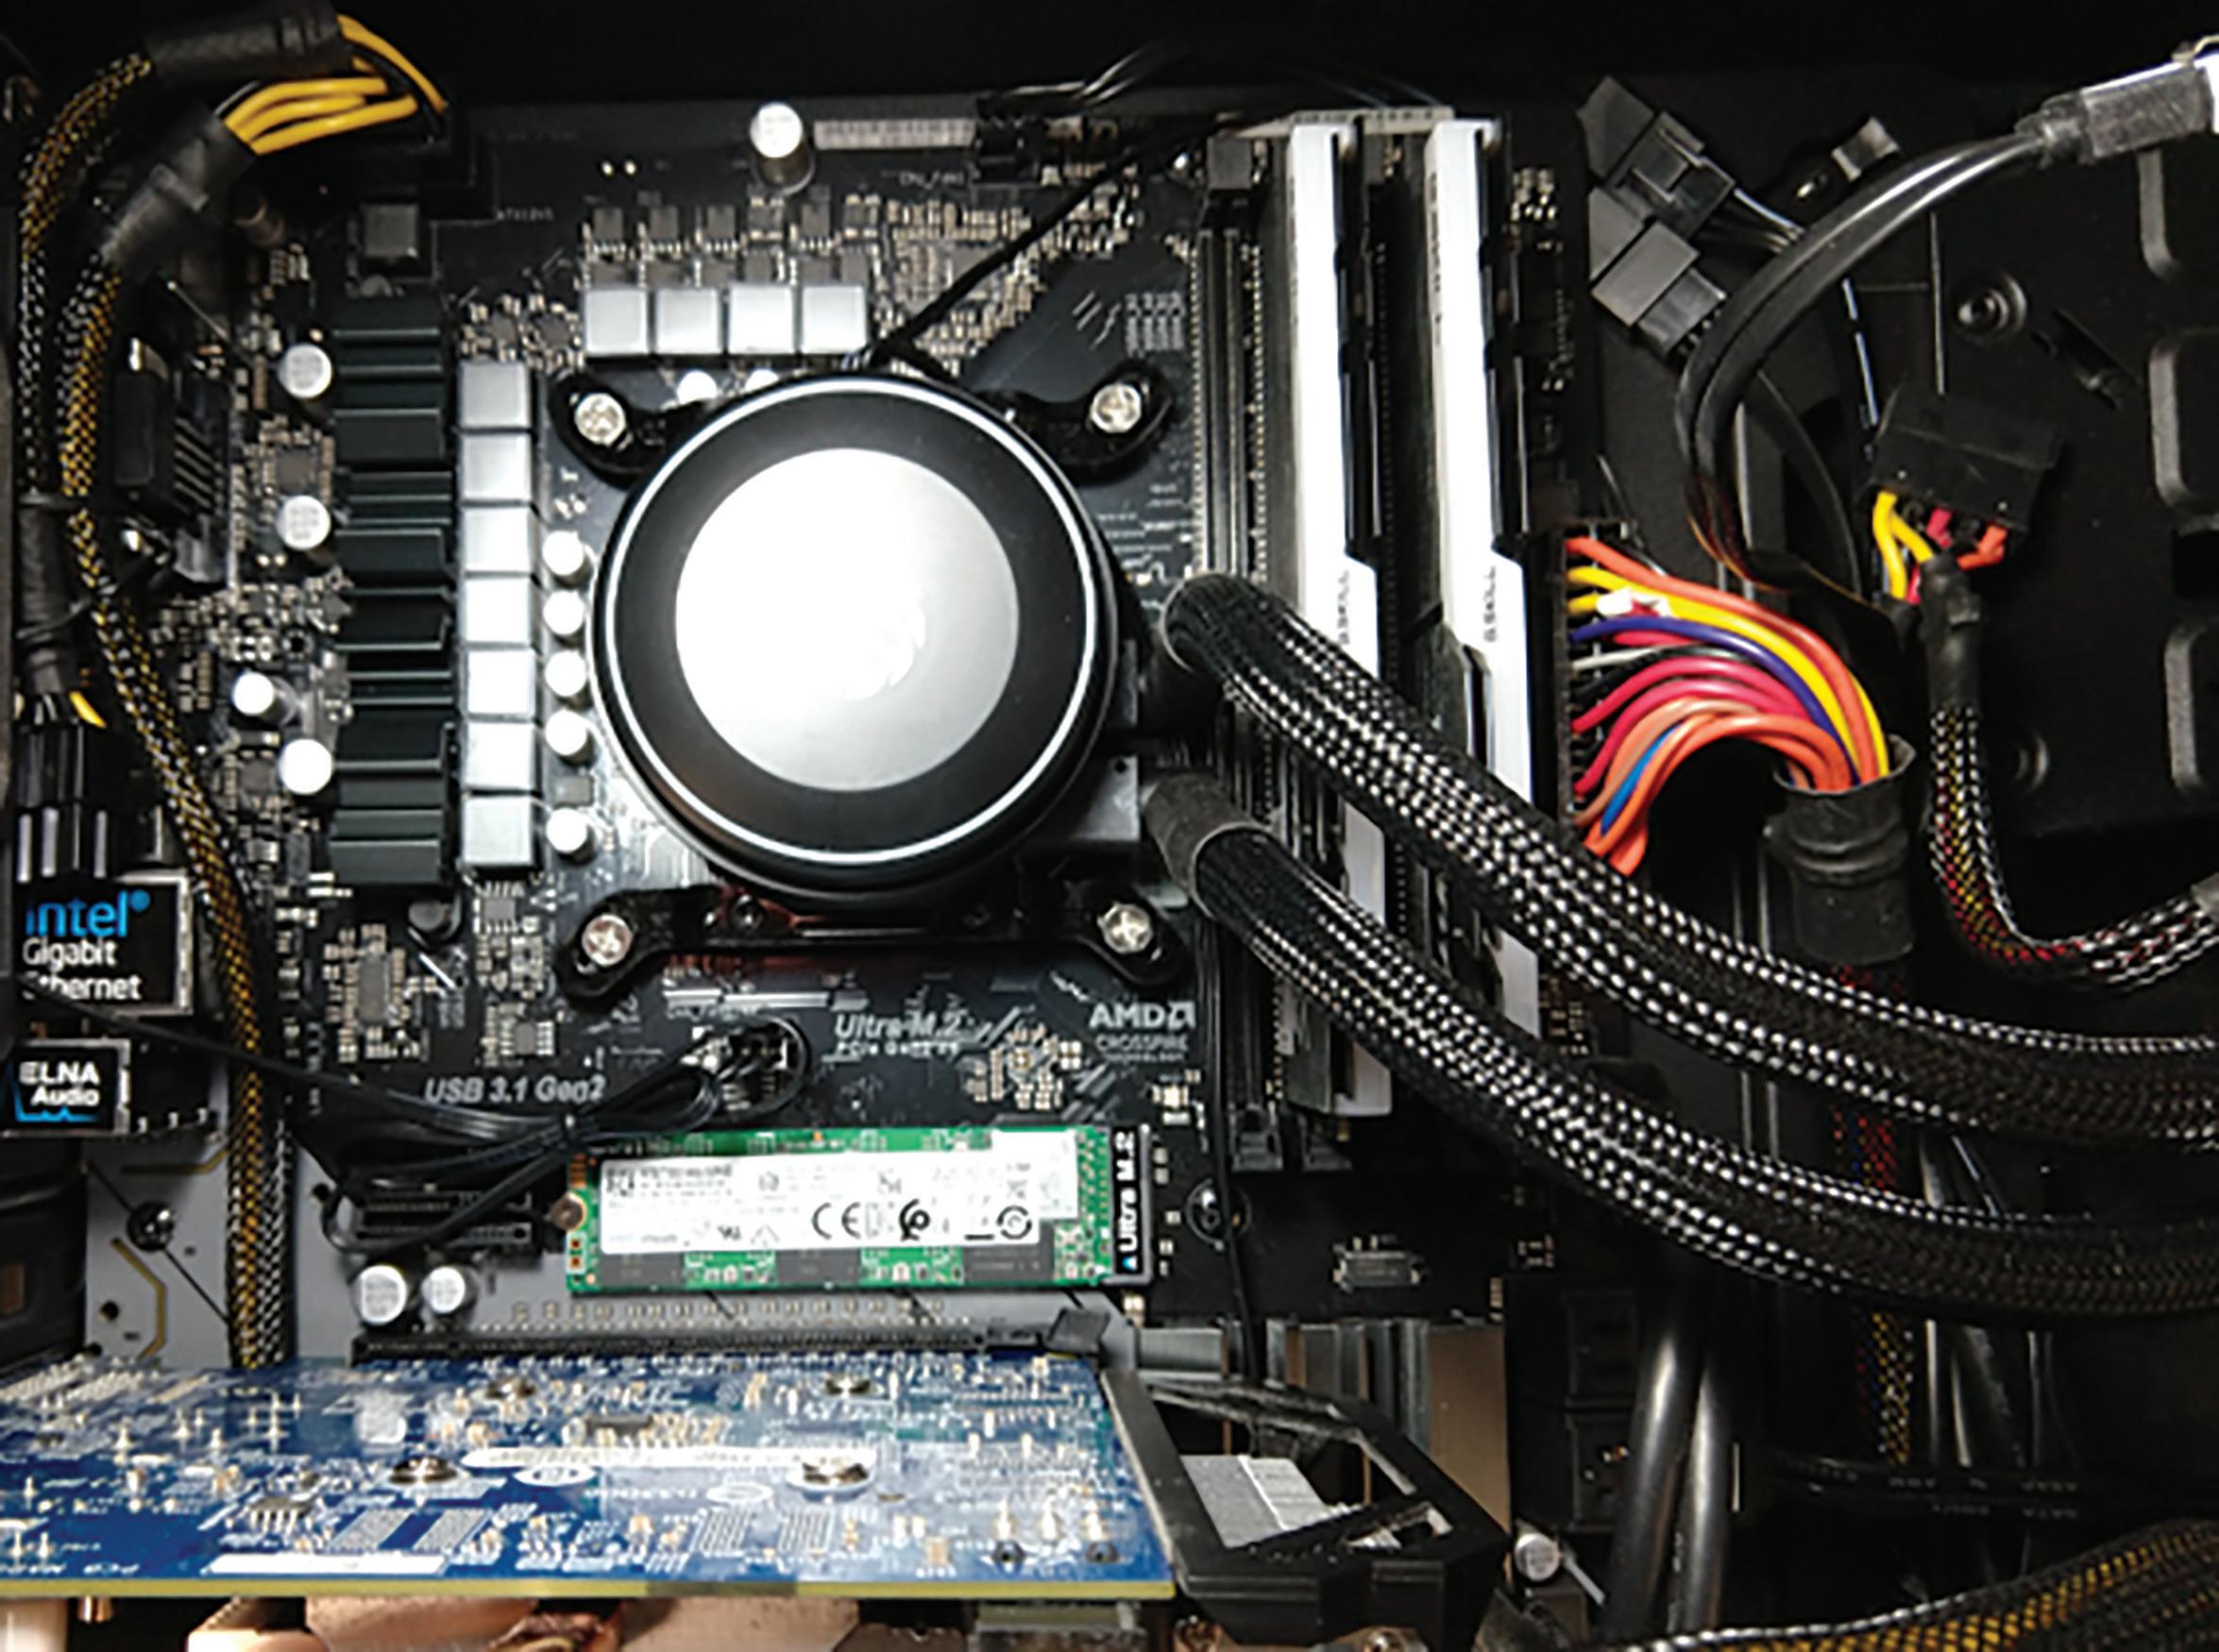
Figure 7
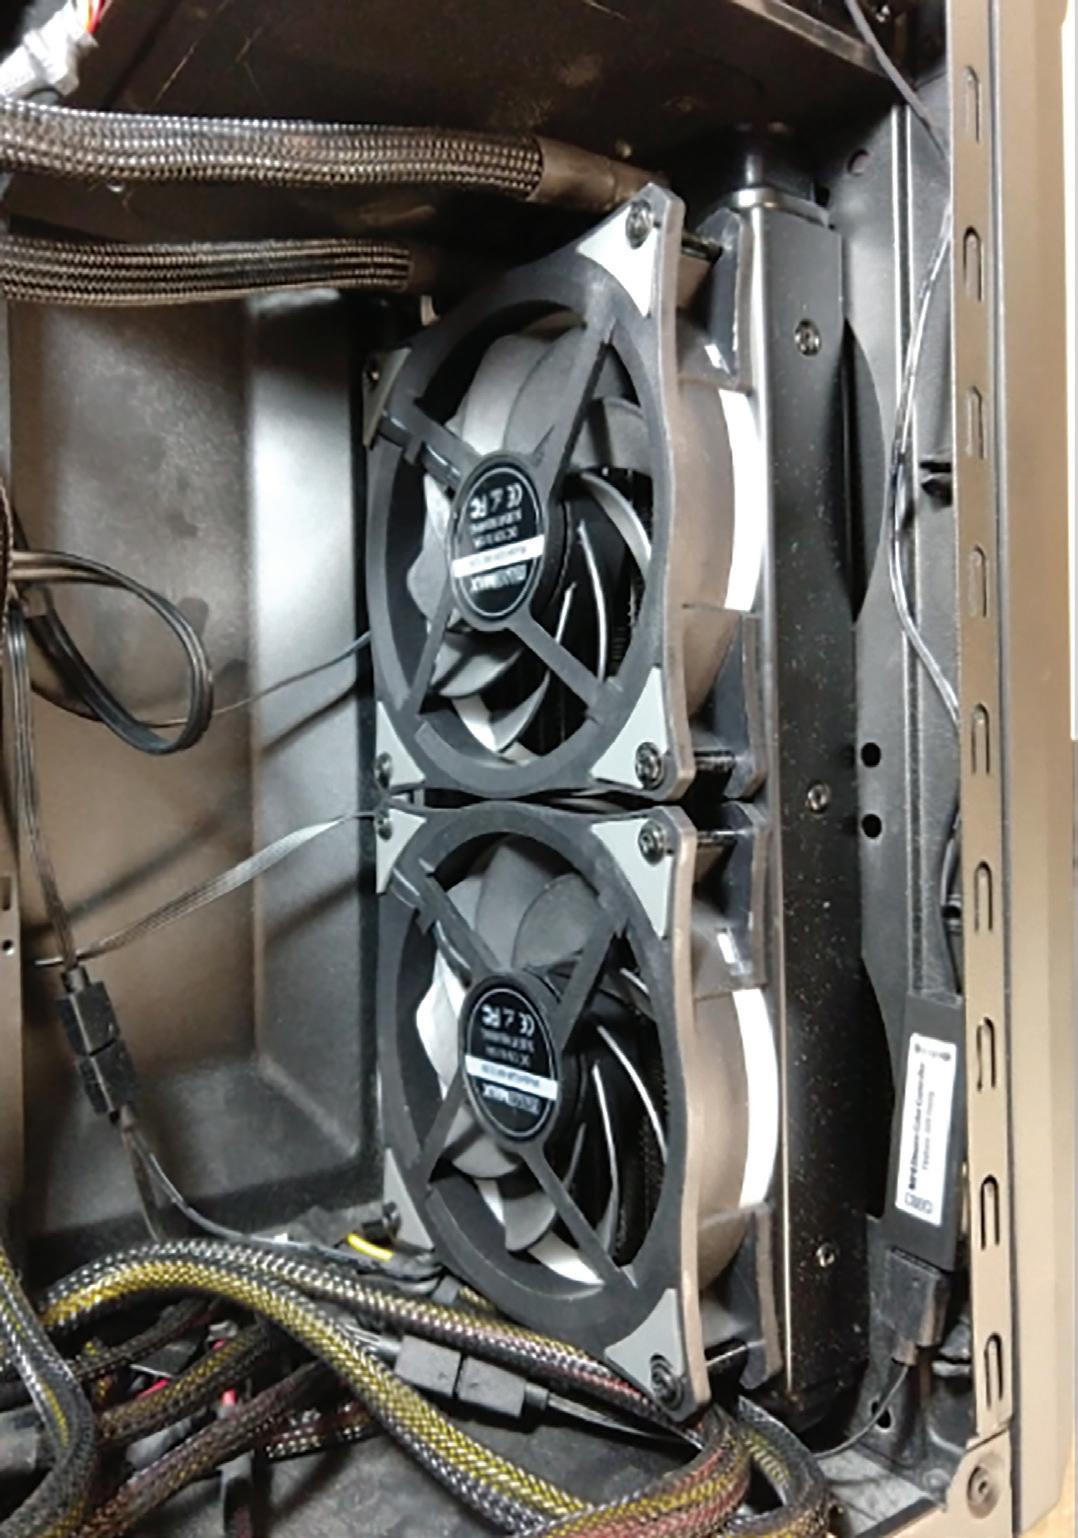
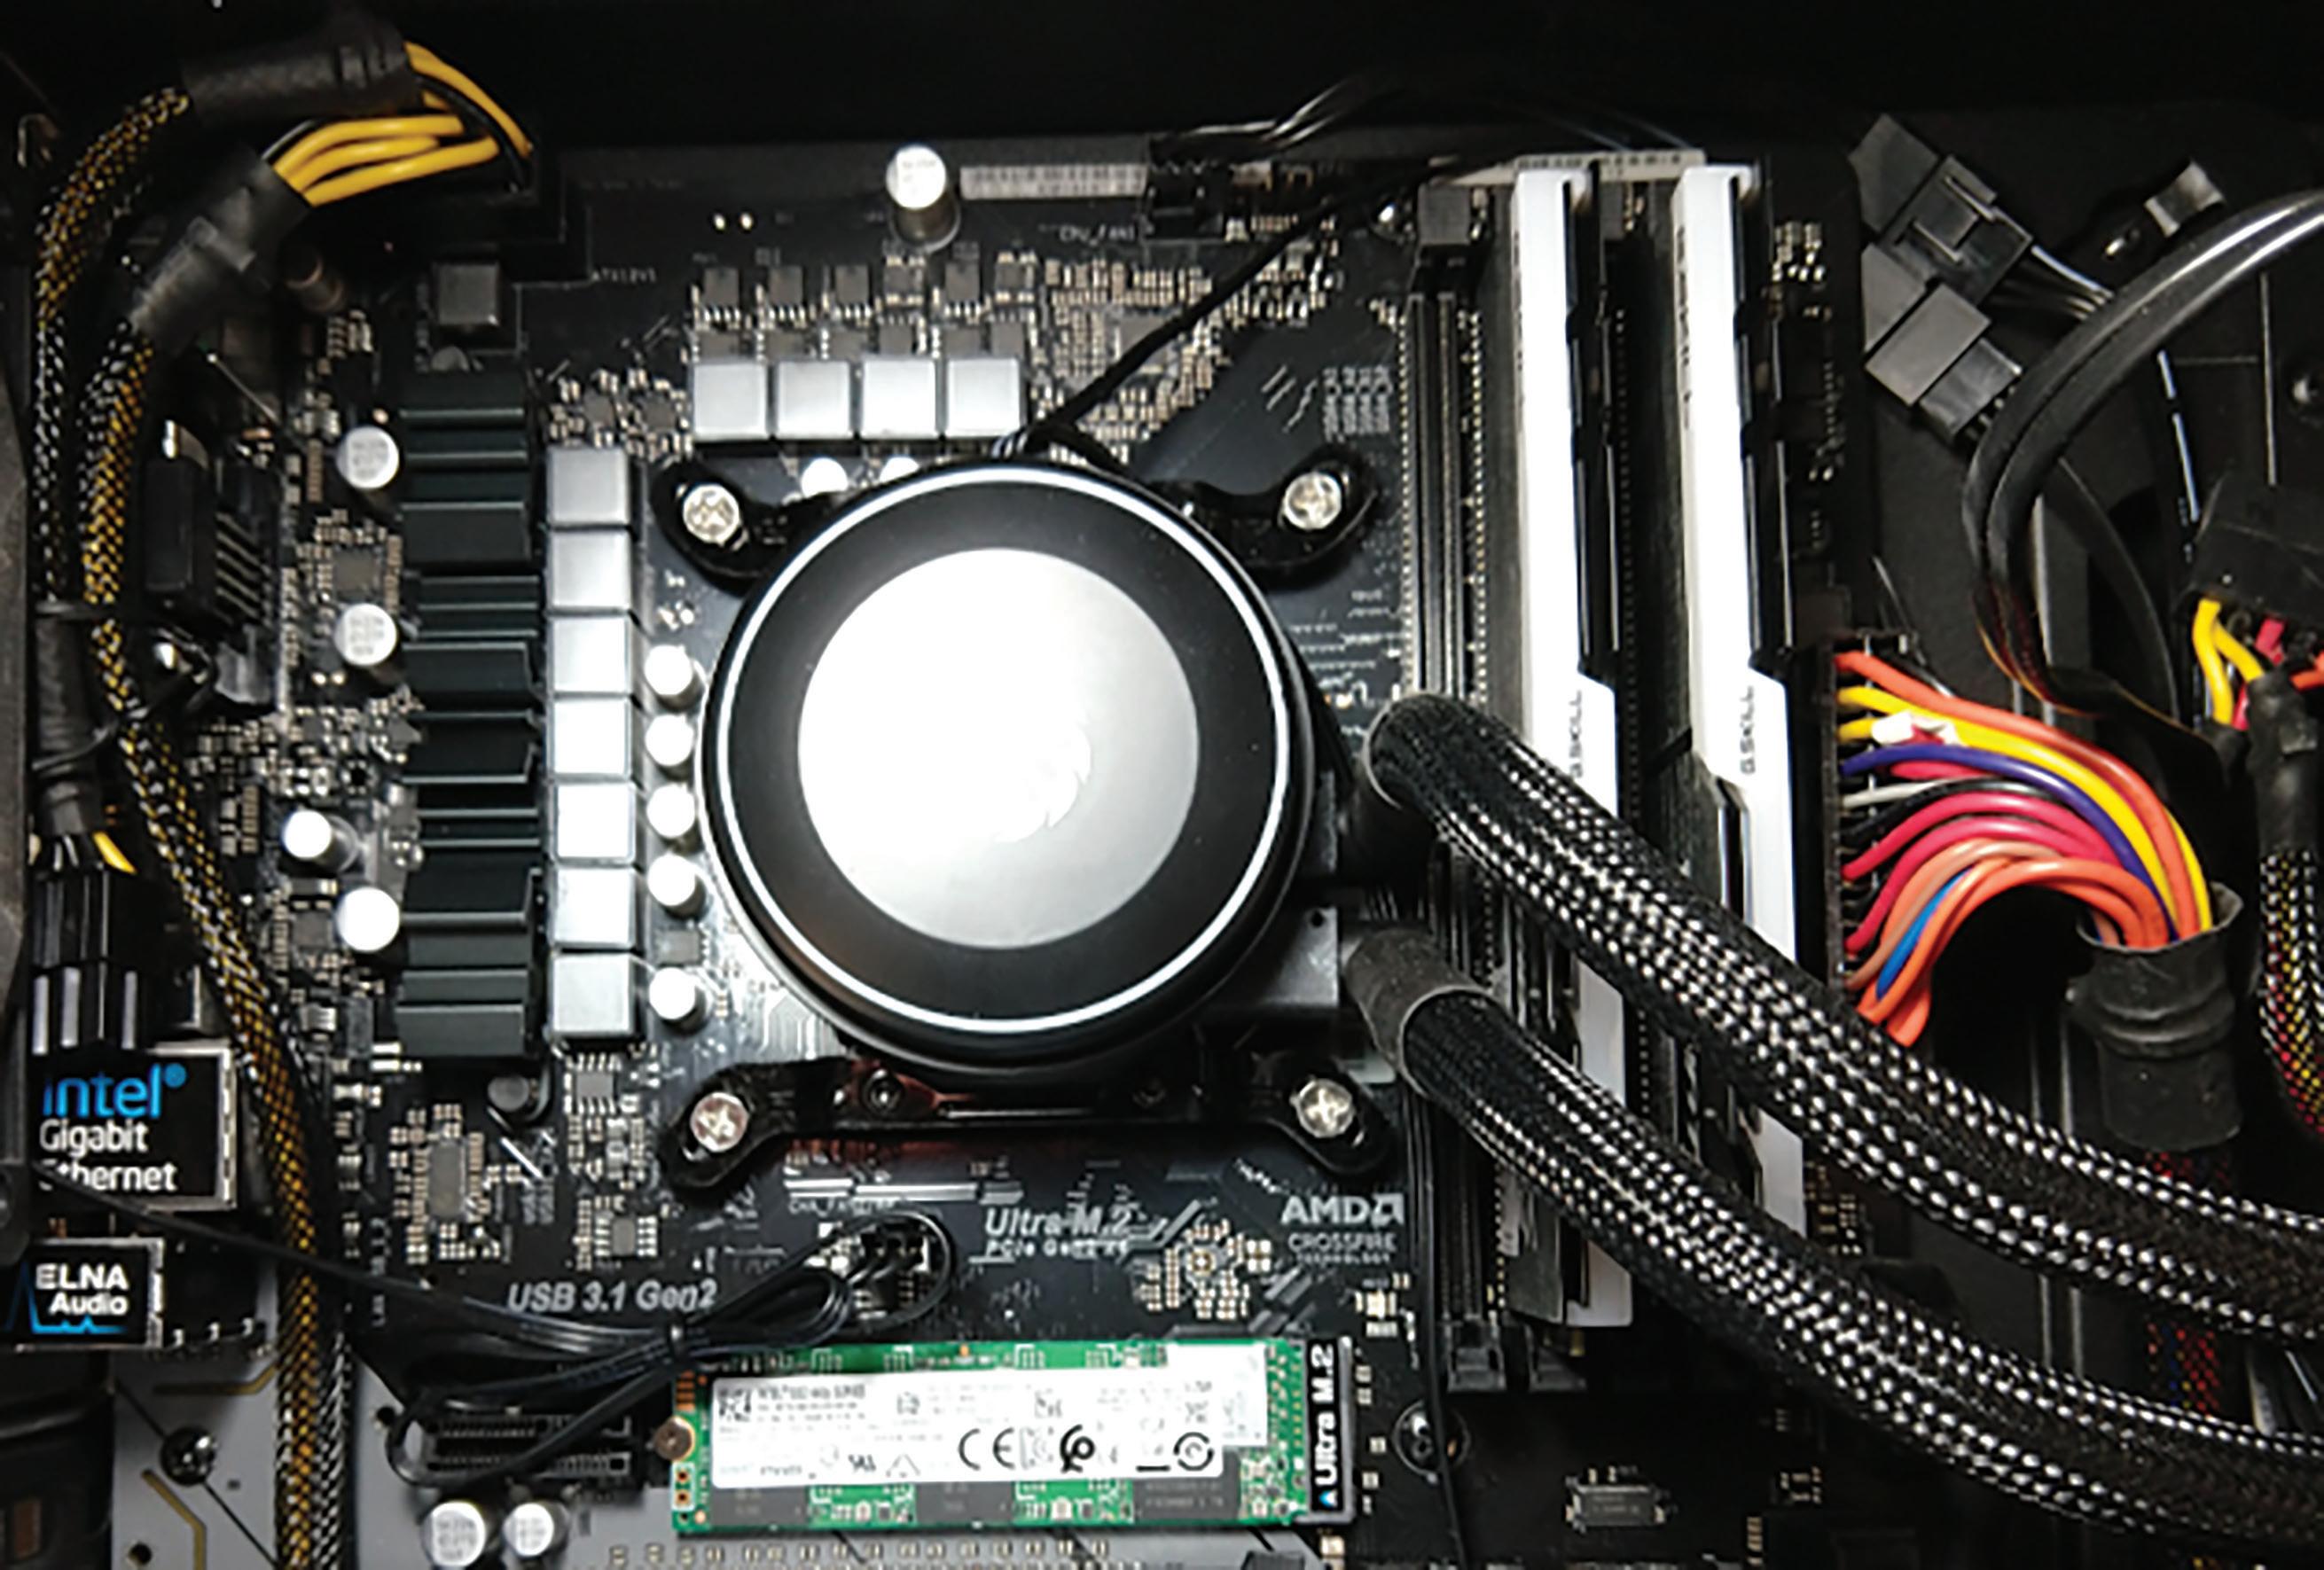
April 2020 short). None of the tubes are clear on these (they’re black or grey typically). So, unfortunately, you’re not going to get that cool dayglow antifreeze look. In some of my other pictures in this article, you may notice that you can get liquid coolers with colored led lighting effects on the pump and on the radiator fans. But, it’s completely unnecessary, and absolutely optional. Figure 6 shows what one looks like installed.
I talked about liquid coolers at length in the previous article. So, I won’t go back over all that ground. When putting in a liquid cooler, great care has to be taken to make sure the radiator fans are mounted correctly to get the right airflow (Figure 7). The fan has to be mounted so that the airflow comes from the outside of the case and flows across the radiator to the inside of the case. The radiator will not remove the heat off of the processor if hot air from
Revit 2020 – MEP PRODUCT FOCUS inside the case flows through the radiator to the outside. Also, notice in the picture that I have the fans installed on the interior side of the radiator. That’s because the air will flow more efficiently through the radiator if it’s “pulled” through by the fans from the inside, rather than “pushed” through from the outside. Yes, the air coming off the radiator into the machine will be hot, but that’s why you’ll have at least one other case fan to pull the hot air out. More on cases later. It’s undoubtedly possible to do overclocking on the processor with a more traditional air cooler instead of the liquid cooler. And, possibly spend a little less money. But I didn’t go that route, so I don’t have any recommendations on those. Just don’t try to do it with the stock cooler that comes in the box with the processor. That one’s not going to cut it.
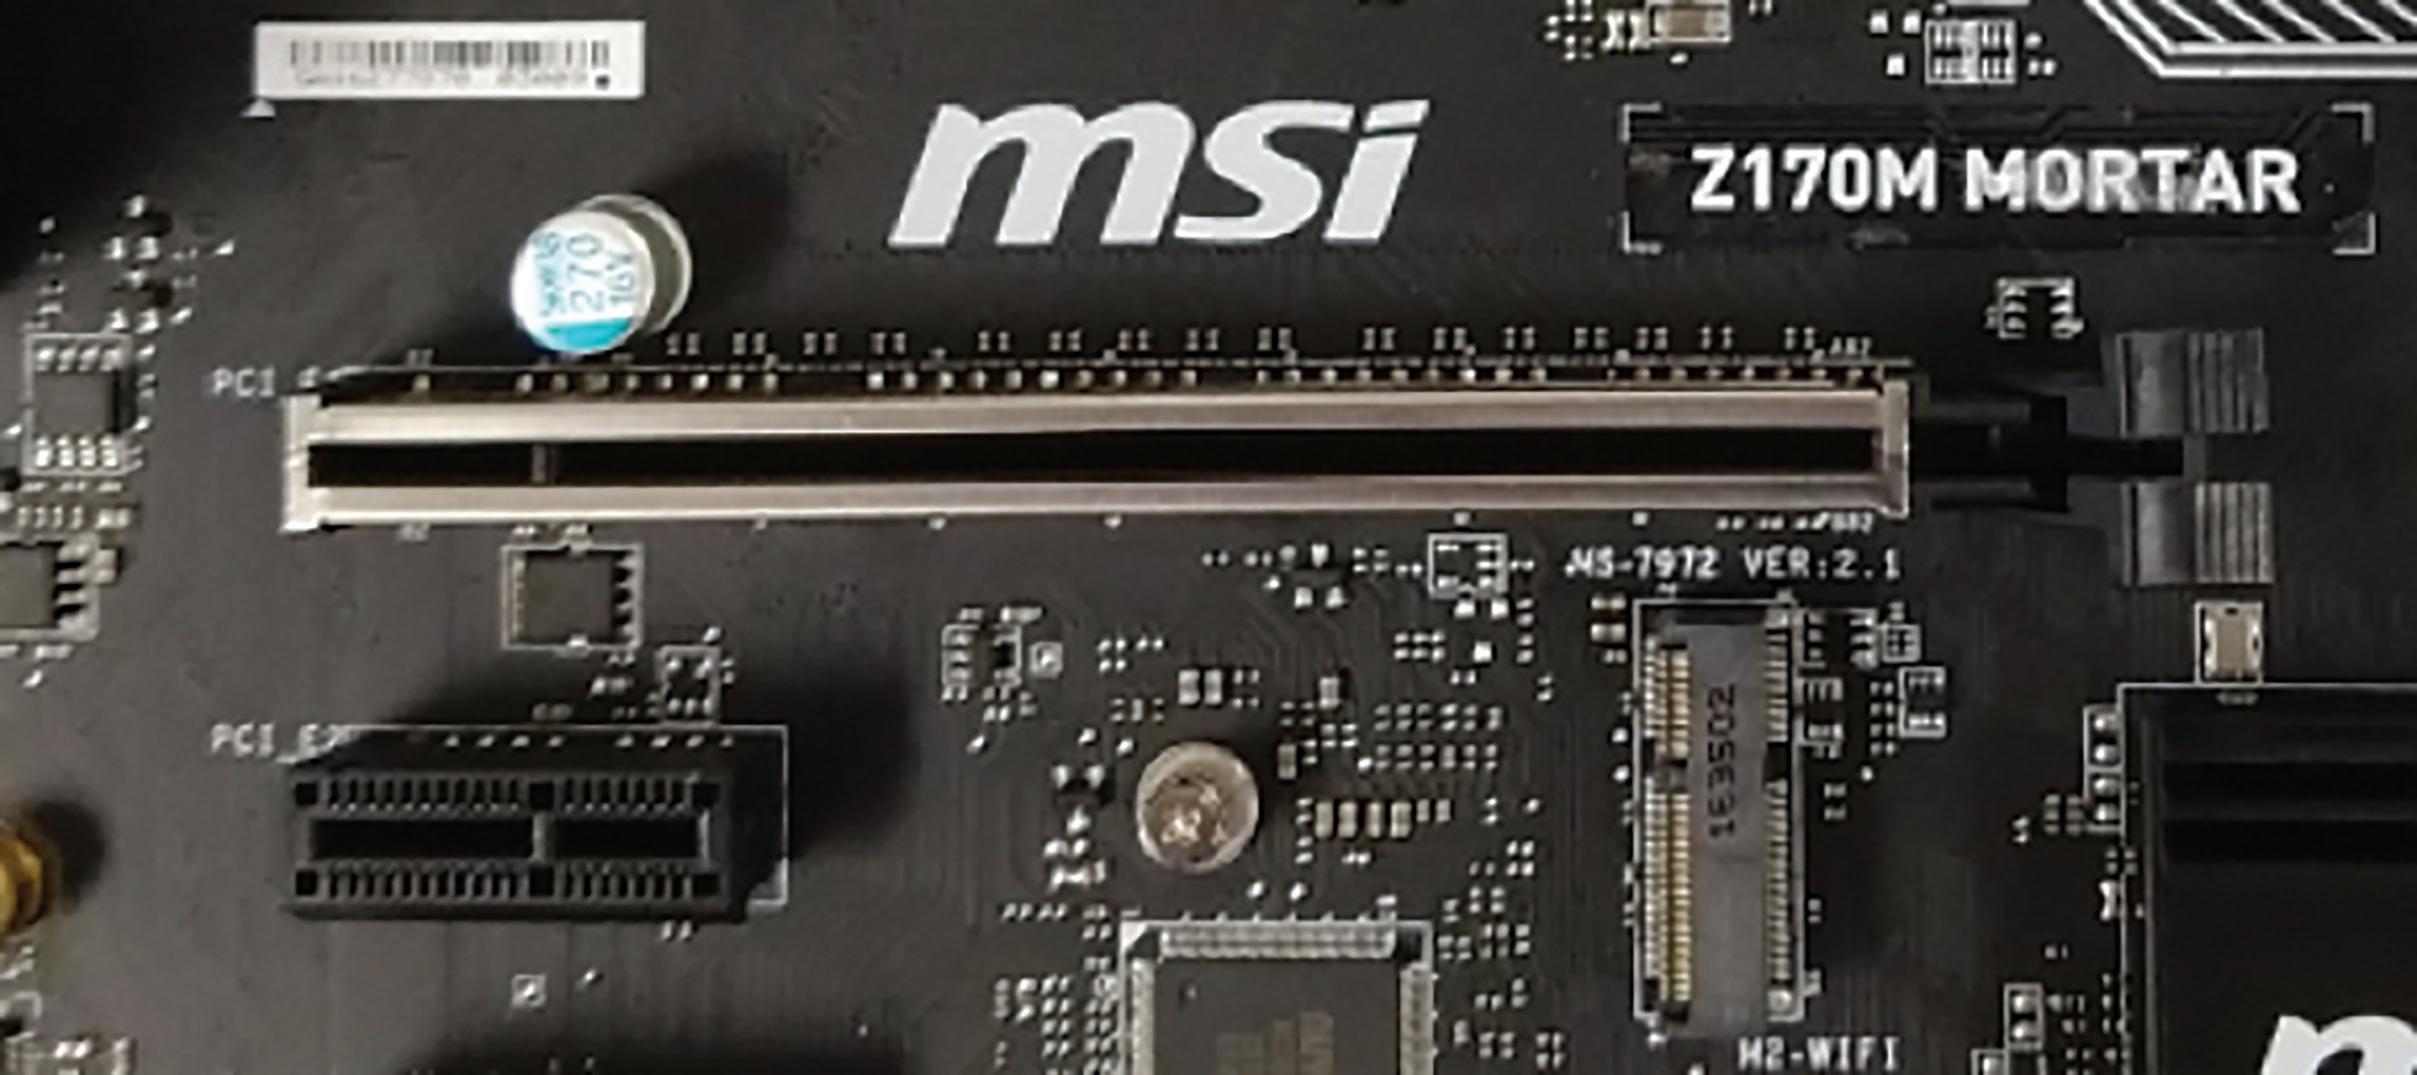
VIDEO CARD I talked about the need for a separate video card in the last article, and some recommended types and specs. Your motherboard will have at least one long PCIe slot specifically for the video card. See Figure 8.
Since there are three or four various different types of video ports used in the PC industry (HDMI, Display Port, DVI, and VGA) you’ll have to make sure you get monitors that have the port type your video card has on it, or get adapters. Video cards typically have at least two or three ports on them. Again, any combination of the four I mentioned above. What I typically buy has one HDMI, one Display Port, and one DVI. So, pretty flexible.
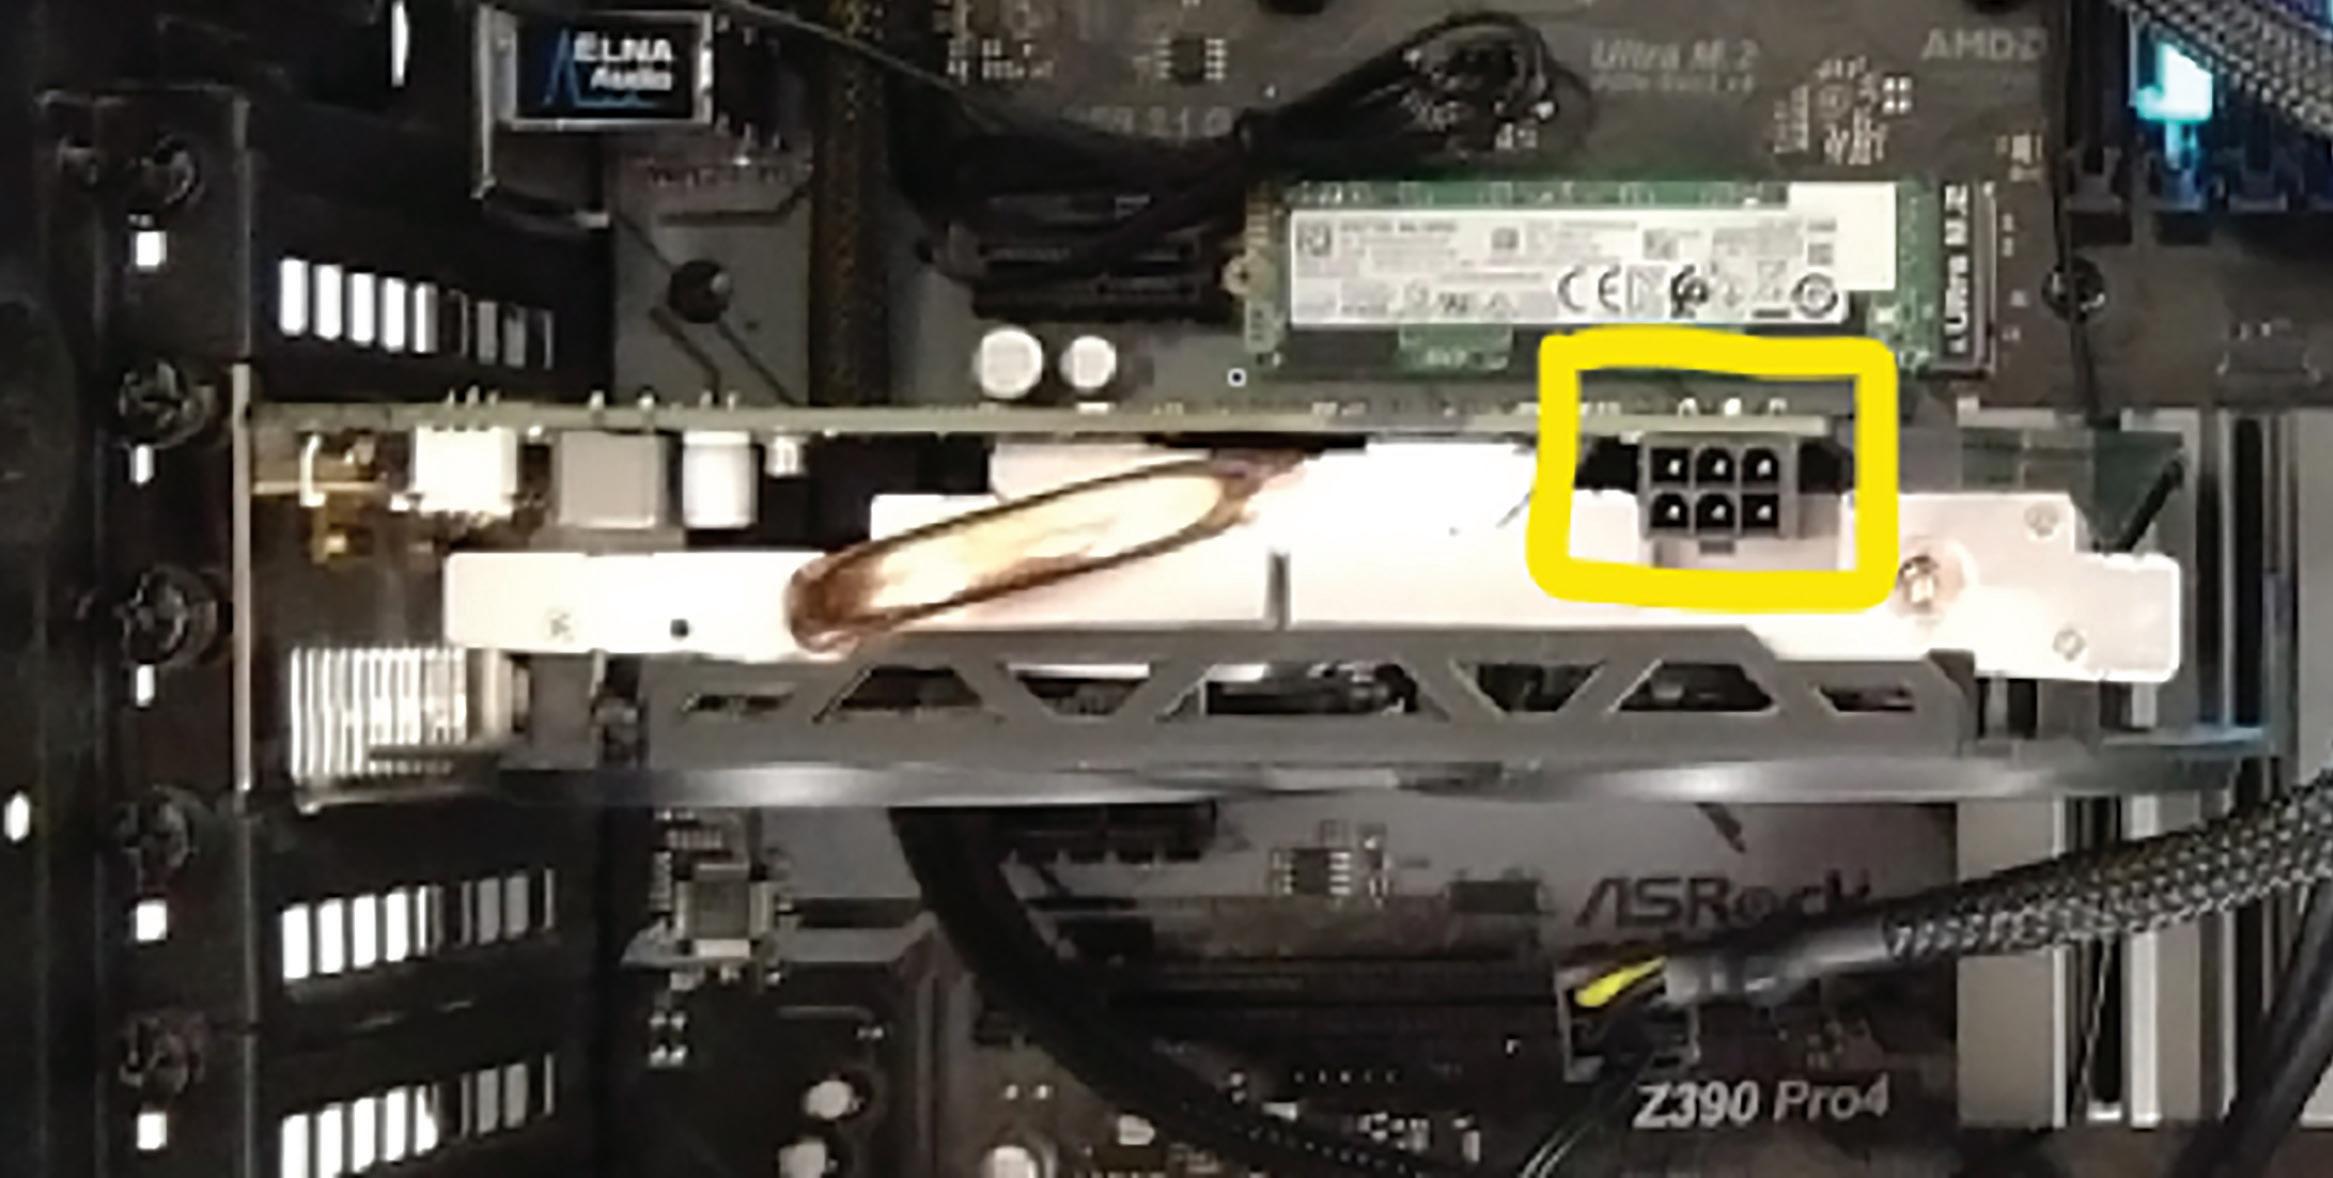
When you buy a video card, one thing to note is whether it takes a separate connection from your power supply, and how many connection pins it has. If it does, it will be either a 6 pin connection or an 8 pin. This will come into play when choosing a power supply below.
CASE Cases come in all kinds of sizes, colors, materials, and configuration. Do you want a traditional all black steel rectangle case, or do you want the cool flame-red designer case with glass panels? You can decide for yourself on color & style. For our discussion, I’m sticking to discussing sizing and configuration. Since I already talked about most of that in the previous article, I’m only going to add a couple of things here.
The size mostly hinges on two things: the size of the motherboard, and the size of the AIO liquid cooler radiator. Just like the motherboard comes in ATX or mATX sizes, so do the cases. So that one is fairly easy. ATX cases are larger, and mATX cases are smaller. You’ll find more ATX cases that will fit a front mounted 240 radiator, but I’ve been able to find some in mATX also. Just not as many. I like getting a smaller case. So, I tend to go for the mATX size, but I’ve done both.
As stated earlier in our discussion of the liquid coolers, you want the fans mounted to the radiator so the air flows from outside the case to inside the case. And, the fans work better pulling the air across the radiator than pushing it through. So, I like to have the radiator mounted farthest to the outside and the fans mounted to the radiator on the inside, pulling the air in. And with front mounting the radiator, if you go with a mATX case, you’ll probably want to avoid cases that have an external drive bay for an optical drive. Even if the case has front mounts that would seem to fit the 240 radiator, the drive bay mount on the inside usually interferes with the radiator.
Another important thing to consider when doing a computer build is cleaning the case. As I’ve discovered over the years, 120mm fans pulling in air across your radiator tends to also pull in dust, and you don’t want that dust to coat the intake side of your radiator, because that will eventually block the airflow through the radiator which will cause your processor to overheat. So, I’ve found that
you have to periodically clean the dust from your radiator intake. You can find cases that provide a dust filter to cover the radiator/ fan mount areas at the front of the machine, making it much easier to vacuum the dust off. Sometimes those filters are even removable, making it that much easier to clean the dust out without having to remove the front cover from the case.
POWER SUPPLY Every computer has to have a power supply. It’s a box that takes your power cord from your wall outlet and splits the power up into separate cables that supply power to the different internal components. The things you’ll need to decide on in a power supply
Revit 2020 – MEP PRODUCT FOCUS are the power capacity, power cable types and number, and then how efficient you want it to be. I already talked about the capacity in the previous article, so I won’t rehash that here. Power supplies also come in what’s called an 80 Plus efficiency rating. That means how much above 80% power efficiency rating they are. No power supply supplies 100% of the power they receive from the wall to the computer. Some wattage is lost inside the power supply due to various factors. If a 500W power supply is 80% efficient, that means if all 500W is needed by the computer, it will have to draw 625W from the wall outlet to provide 500W to the computer. The higher the efficiency rating, the closer to 100% that efficiency will be. The efficiency rating is listed in Bronze, Gold, Platinum, and Titanium ratings, from least efficient, to most efficient. That is really just a preference on your part. How much do you want to spend on the power supply to minimize the power used by the computer?
Next, you’ll have to determine the power cables needed by the components you’ve chosen. There are three basic things to consider here. Most motherboards these days have a large 24- pin power connector. So, most power supplies have either a 24-pin main power connector, or a 20+4 split connector for older boards that use the older 20 pin connector. Either will be fine for modern boards with the 24-pin connector. Your board is also going to have an extra 8 pin power connector. And, most power supplies have that cable also. Just make sure yours does. Figure 9 shows the two different power connectors (yellow and black wires in upper left, and multi-colored wires in center right).
If your video card requires a power connection, make sure the power supply you choose has a PCIe power connector that has the
Revit 2020 – MEP PRODUCT FOCUS
26 number of pins that your video card requires. These will either be 6 pin, or 8 pin. Power supplies will either have one or the other, or both, or, one or two 6+2 split pin connectors. Any will work as long as one of the connectors has the total number of pins your video card needs. Notice the 6-pin power connection on the side of my video card in Figure 10. Figure 11
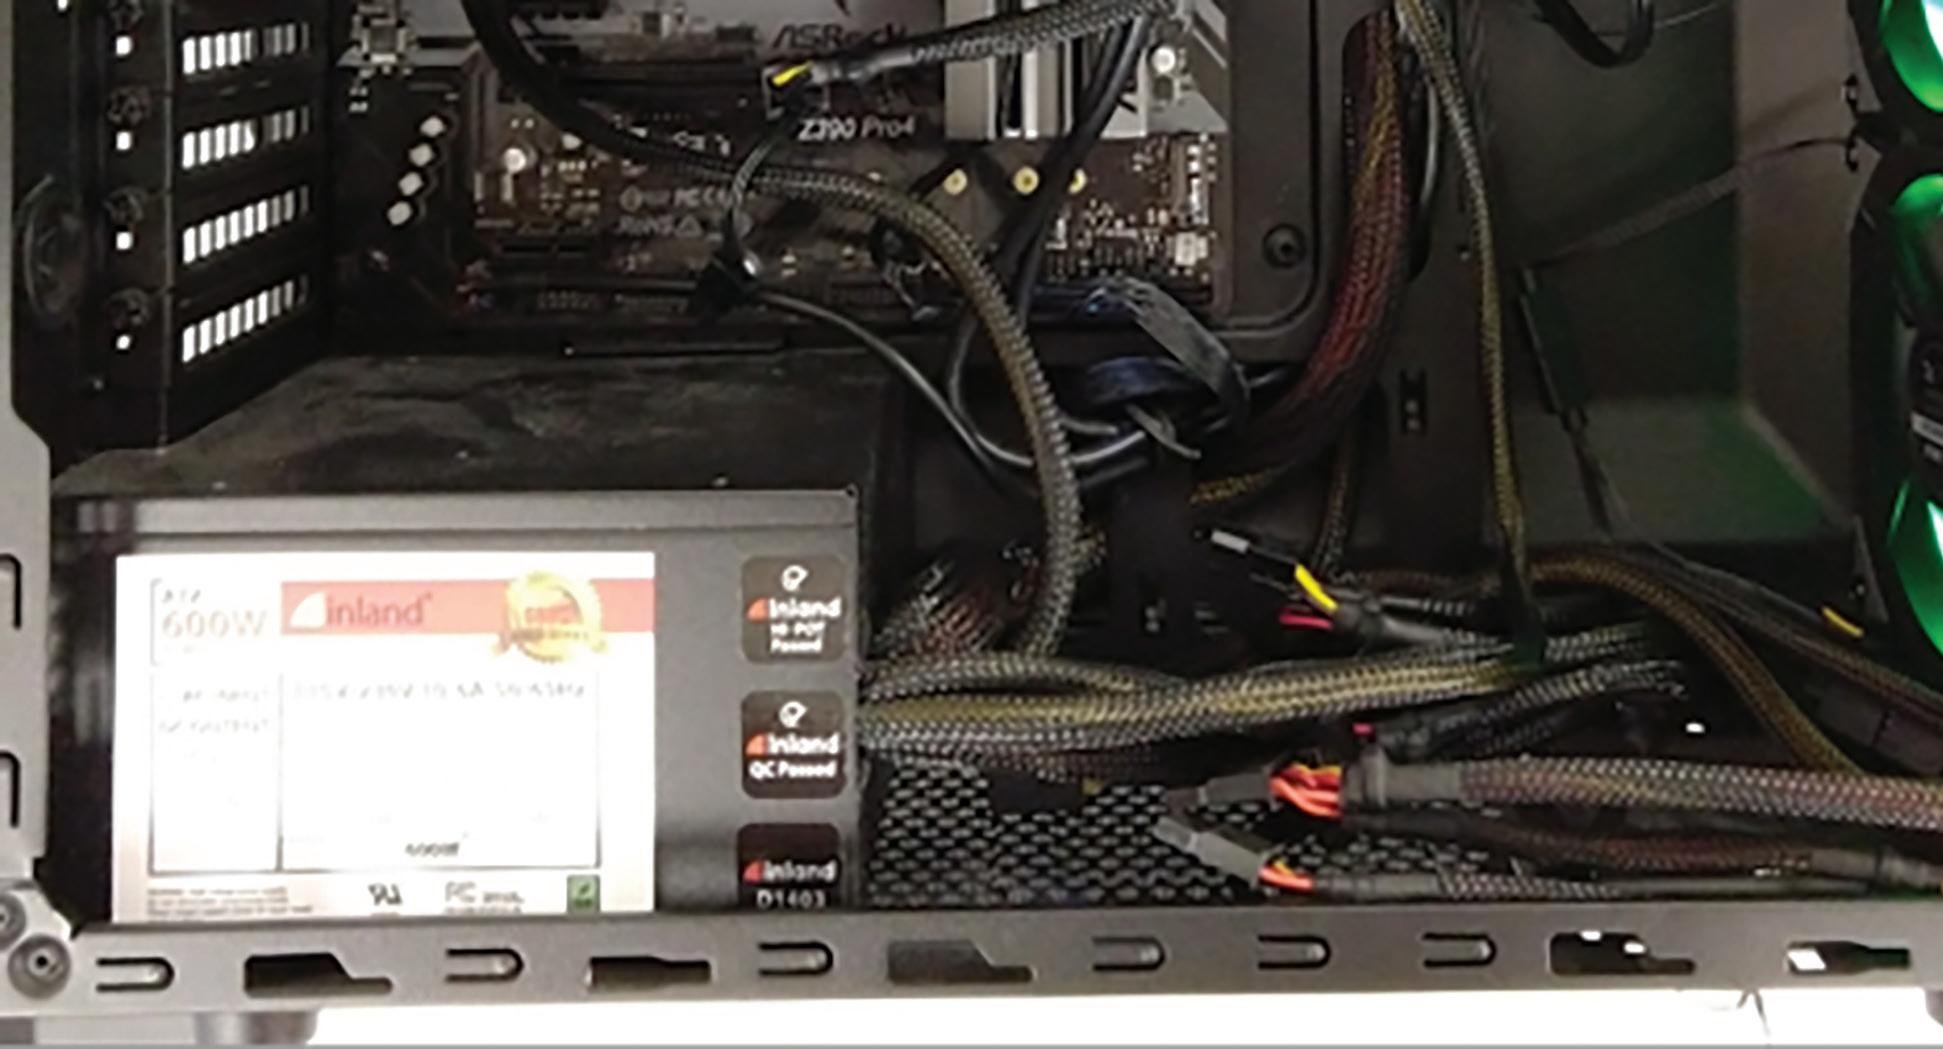
There’s one last consideration on power supplies, and that’s whether to go with a modular or non-modular style. That refers to whether all the power cables that come with the power supply are pre-wired into the power supply, or if they are separate and can be plugged in to the power supply as needed. See Figure 11 for the cables coming off of a non-modular power supply.
They can create a mess inside your case.
Going with a modular power supply will cost more, maybe $30- 40, but will be a lot cleaner on the inside of your case, as you will only need the cables you actually will use. The lower cost nonmodular power supplies will end up with a lot of cables that you won’t need, and you’ll have to do something with them inside the case. A prime example of this would be the many old-style Molex power connectors that most lower-cost power supplies have that we mostly don’t use anymore. On non-modular power supplies, they are hard wired into the power supply and you can’t remove them. But, a warning: if you do go with a modular power supply, make sure you hold on to all the extra cables and make sure you know which machine they go to so you can find those cables later if you need to add something.
www.augi.com retailer for around $1000. For specific mounting and assembly instructions, most of these individual components come with detailed installation instructions. The last part will be to talk about BIOS settings, but that will be a conversation for a later article.
Travis L. Head IT & CAD Manager Reed, Wells, Benson & Company MEP Consulting Engineers
For the past 11-1/2 years I have been the entire IT & Network Administration Department, and CAD Department Manager, for a 55 person MEP Engineering firm in Dallas, Texas. Prior to this position, I worked as the IT Manager, the Autodesk Software Coordinator, and an Electrical Designer for another small MEP firm, also in Dallas. I’ve been responsible for the initial Revit implementation, installation, setup, and training at both companies. I’ve been building Windows PC’s for over 20 years and have been building overclocked & water-cooled workstations for Revit for the past 5 years.
Accelerate your career
Learn new skills with hundreds of free online resources

