3 minute read
3ds Max
from AUGIWORLD
by AUGI, Inc.
12 Tips & Tricks You Need to Know
Here are twelve tips & tricks for 3ds Max you need to know. Tip 1: The progressive shadow with viewports in high-quality mode can be disabled in the viewport settings by turning off
Progressive Skylight. Alternately, increase the time it takes to generate so it is less distracting.
Tip 2: Use the Place Highlight tool to interactively set the location of light based on where you want highlights on your scene. See Figure 1.

Figure 1.
Tip 3: With the HDRI lighting option, we can add multiple HDR lights (umbrella lights, warm lights, cool lights, etc.). To control the point where the light targets an object interactively in the viewport, use the Convert to Point Helper option in the HDR light material setting. We can use the Place Highlight tool with the Point Helper object. See Figure 2.

Figure 2.
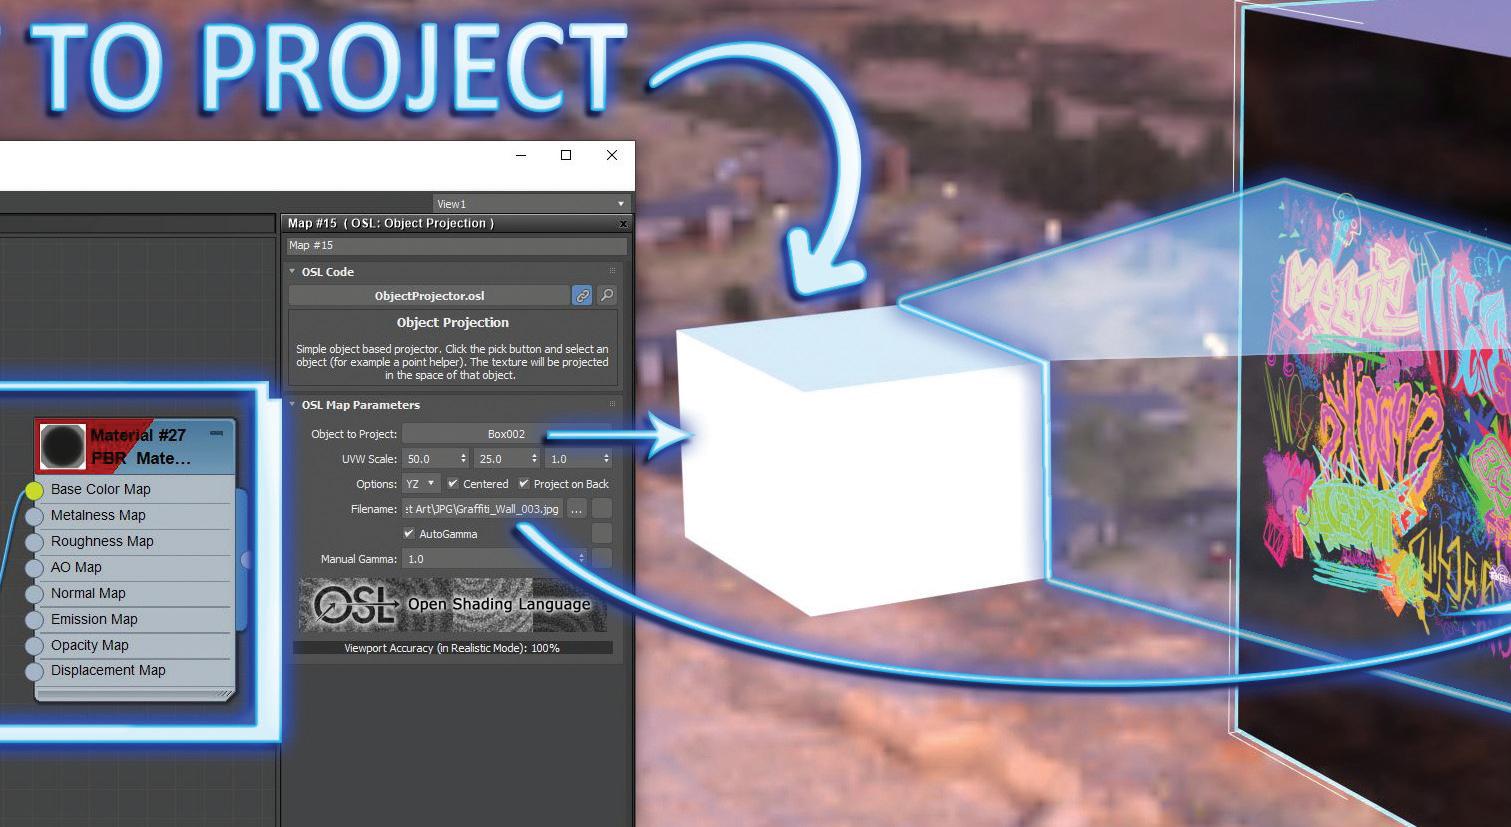
Tip 4: Projection mapping is a simple way to quickly project a material onto an object. One way to use this tool is to add details to objects that can be used with compositing work. See Figure 3.

Figure 3.
Tip 5: The Select and Place tool allows us to drag objects across the surface of other objects. Rightclick over the icon to control various options. Holding SHIFT will dragging, allows us to quickly copy the object. See Figure 4.

Figure 4.
Tip 6: Blended box maps allow us to add up to 6 different textures representing 6 sides of a cube (left, right, front, back, top, and bottom) and blend them together. Applying the material to an object will treat it like a cubed UVW map. It takes some

thinking outside of the box (get it?), but it can be applied to objects in all kinds of ways. Some examples are, mapping the sides of buildings where details are not important, or applying interesting patterns to creatures without unwrapping. See Figure 5, where I applied a few textures to the lizard using the blended box map.
Tip 7: Motion Paths can be converted to splines. See Figure 6.

Figure 6.
Tip 8: Ghosting is an important tool for animation. 3ds Max does this well. We can modify the settings for ghosting under the Customize Menu -> Preferences -> Viewport Tab. See Figure 7.

Figure 7.
Tip 9: We can increase the size of the text in the Script Editing window by holding CTRL and scrolling the middle mouse button.
Tip 10: Spacebar in the viewport brings up play animation and maximize viewport.
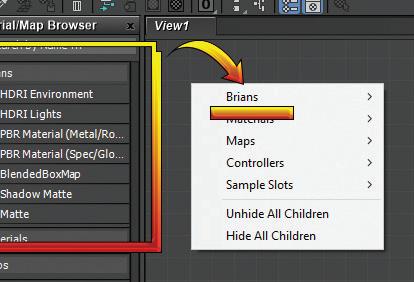
Tip 11: We can create groups in the material slate editor, and by dragging that group to the top, they become the first items accessible when we rightclick in the view. See Figure 8.

Figure 8.
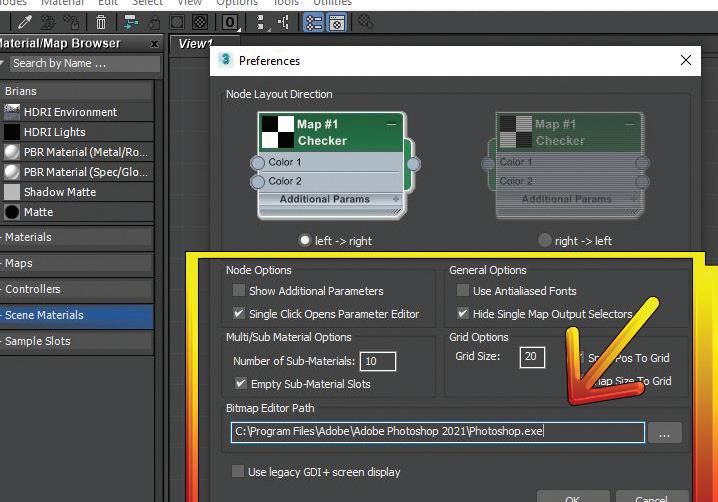
Tip 12: We can assign the default program to edit bitmaps when right-clicking over them in the material slate editor. Select Tools->Preferences and then set the path accordingly.

Figure 9.
Brian Chapman is an Autodesk Authorized Developer, Digital Artist, and Application Specialist for an engineering firm located in Las Vegas, Nevada. Brian shares tips and tricks at procad.blog with a portfolio of digital artwork and renderings at emptypawn. com. He can be reached at procadman@pro-cad.net.


