3 minute read
3ds Max
from AUGIWORLD
by AUGI, Inc.
Creating an HDRI Loader Using Maxscript
This month, we’ll introduce how we can use Maxscript to create an interface to work with HDRI environments and the Arnold renderer built into 3Ds Max. We use HDR images to help achieve realistic lighting in 3D environments for several years. Users often collect several of them to help with look development and final rendering. Having quick access to these files and manipulating them helps users focus on the shot rather than repeating mundane and straightforward tasks. Let’s begin with the basic elements we’ll need to build our interface. See Figure 1 for a few of the elements we’ll be discussing. I assigned numbers to elements we’ll be discussing throughout the article.
We’ll need to set our scene up with the Arnold renderer and HDRI environment for this exercise. Since this is a customization article, which implies more advanced skill is required, we assume you are familiar with those specific processes. So, let’s begin building our interface.
The simplest way to review which values we can manipulate with Maxscript for an HDRI image is to review the code used to build the OSL HDRI node. As you can see in Figure 1, the number 1 represents the HDRI node. With the HDRI node selected, we can toggle the options marked with the number 2. This step will allow us to select the pencil icon, which will open the OSL editor to see the code. DO NOT EDIT THIS CODE. Be very careful when working in this environment.


Figure 2 The editor displays all the various attributes we will be able to manipulate. I’ve highlighted a few in Figure 2; however, we can manipulate all attributes displayed in the editor (and the HDRI node when we select it) using Maxscript.
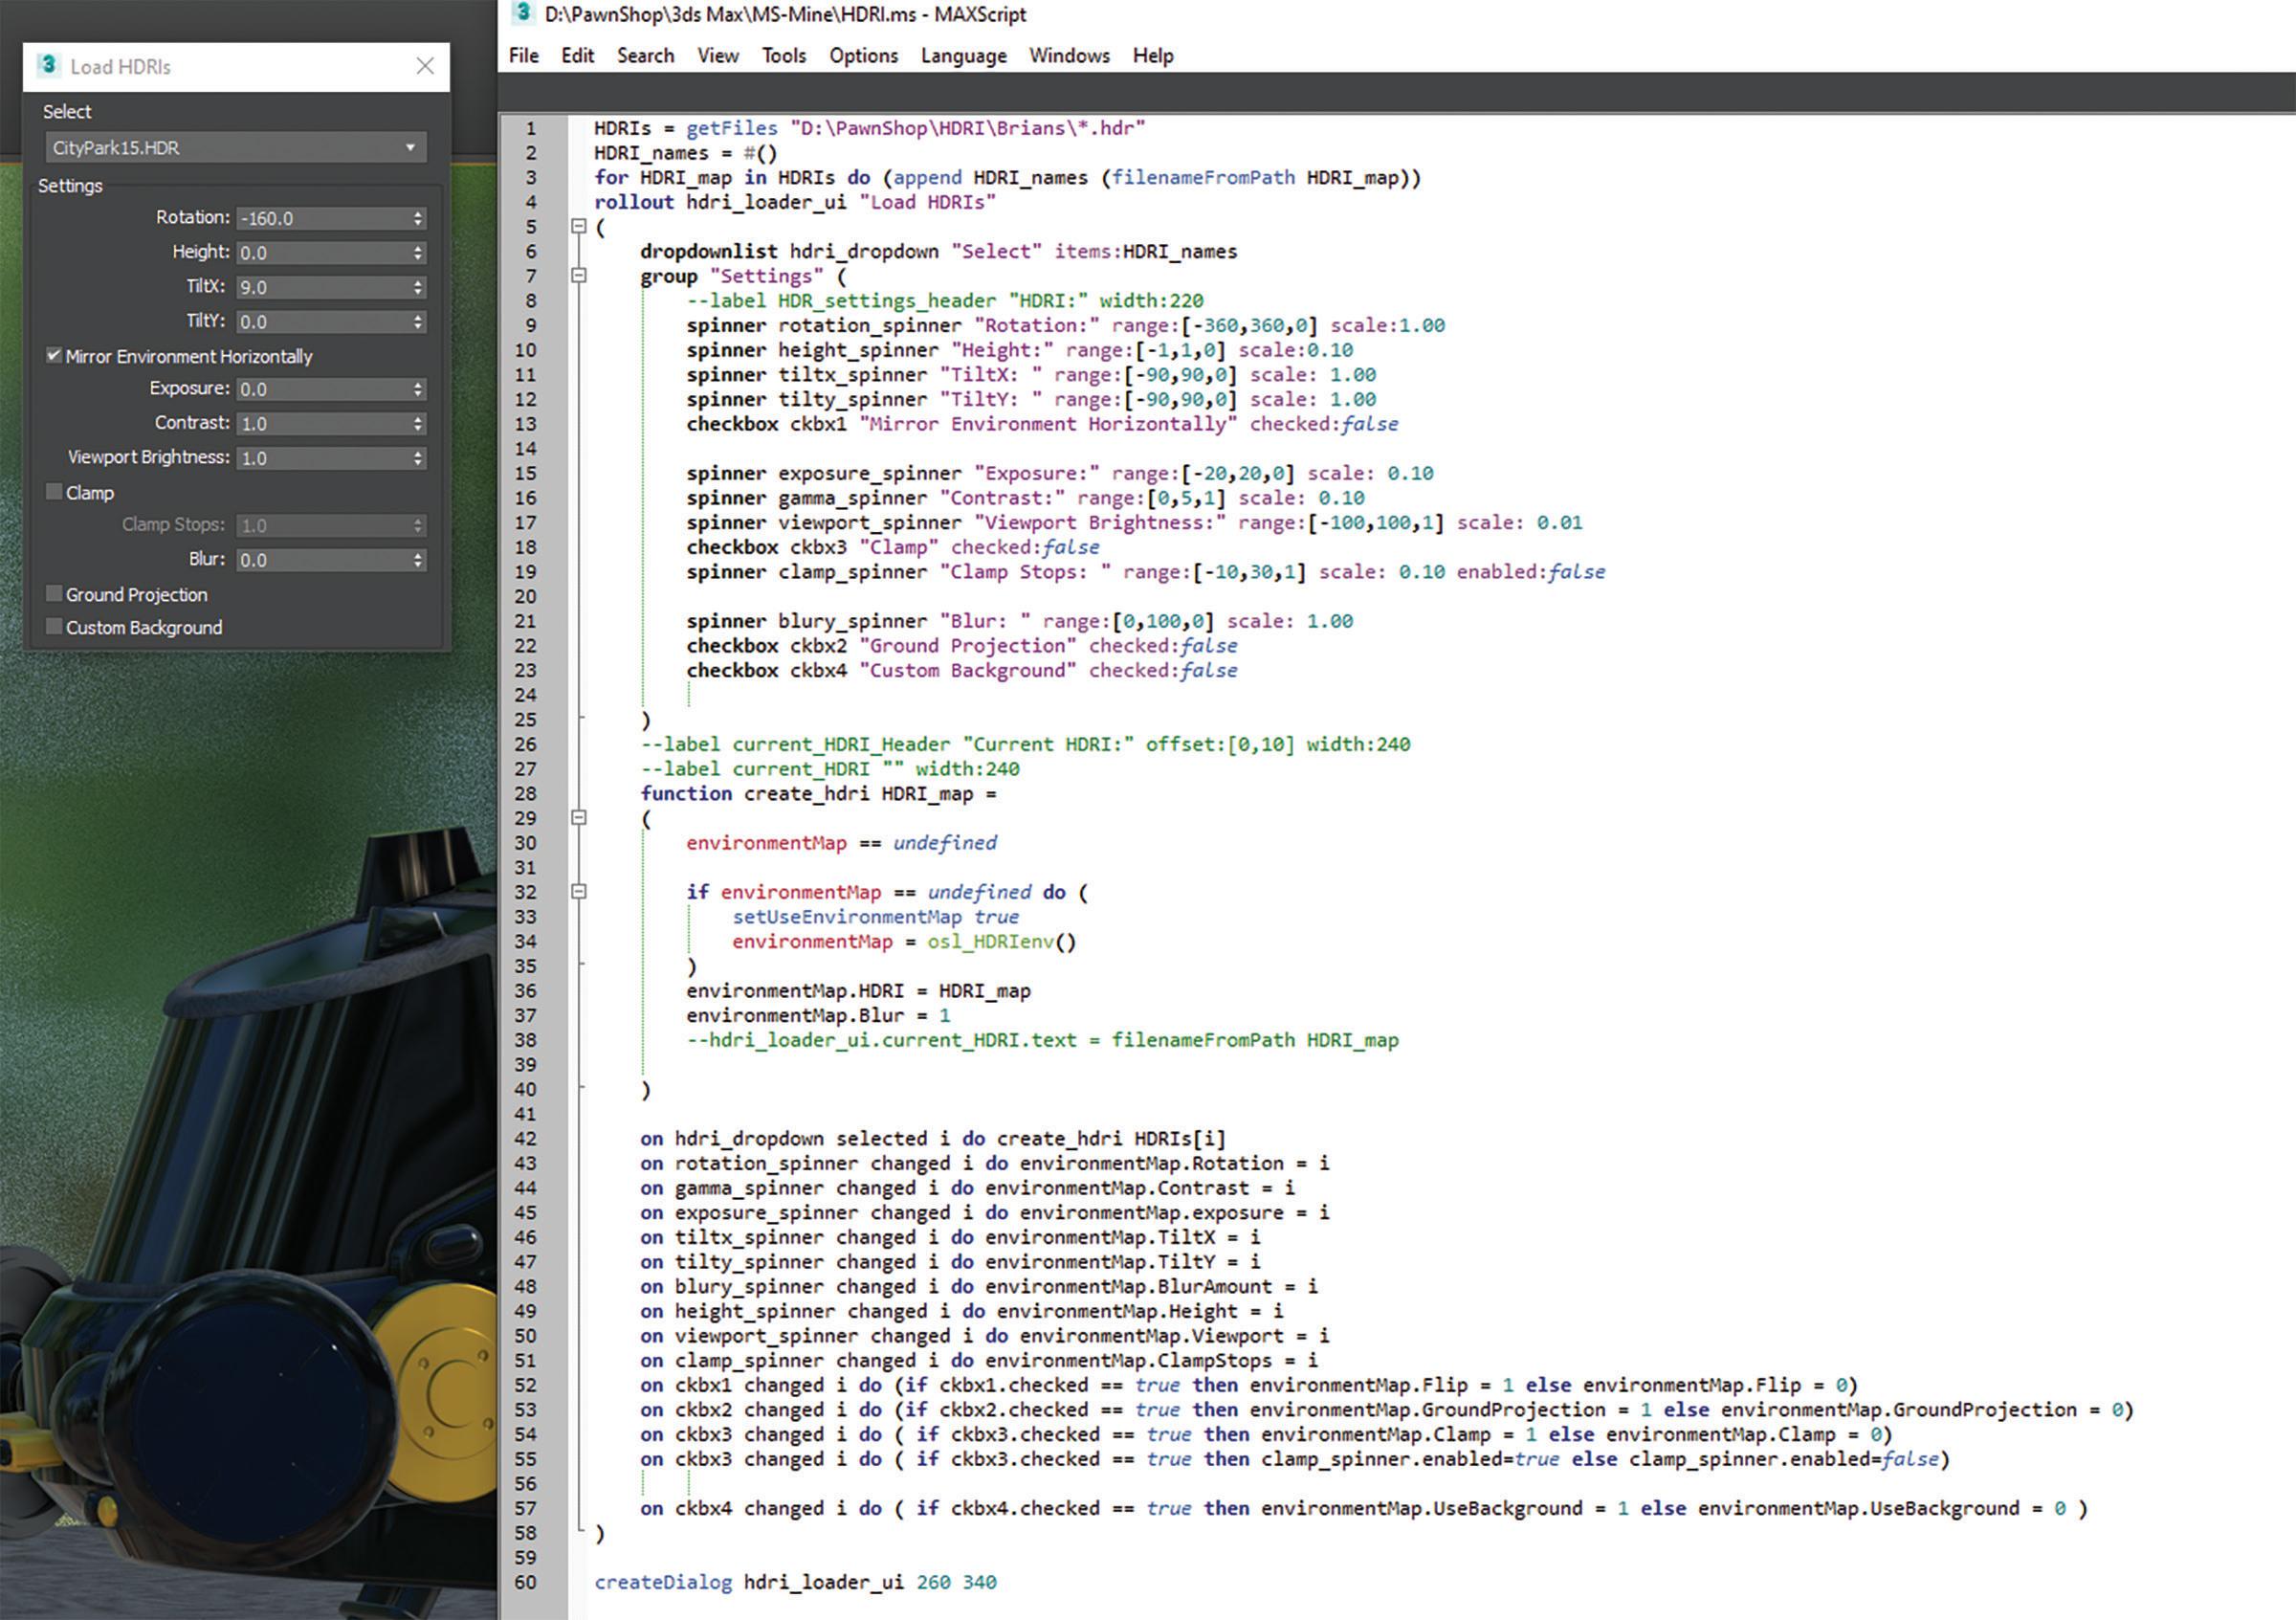
Figure 3 is the code required to build the interface. I marked number 3 in Figure 1.
You are welcome to download the Maxscript file from my google drive location here: https://drive.google.com/file/d/1dGI3trvcsZELwVGHG a6jjEy6epbO-EVn/view?usp=sharing
Let’s step through elements in the code that you will need to modify to customize the interface for your use.
Line one is the location of the HDRI files on your drive. Revise this line to match the location on your own drive. Be sure to modify the drive location only while keeping the quotations.


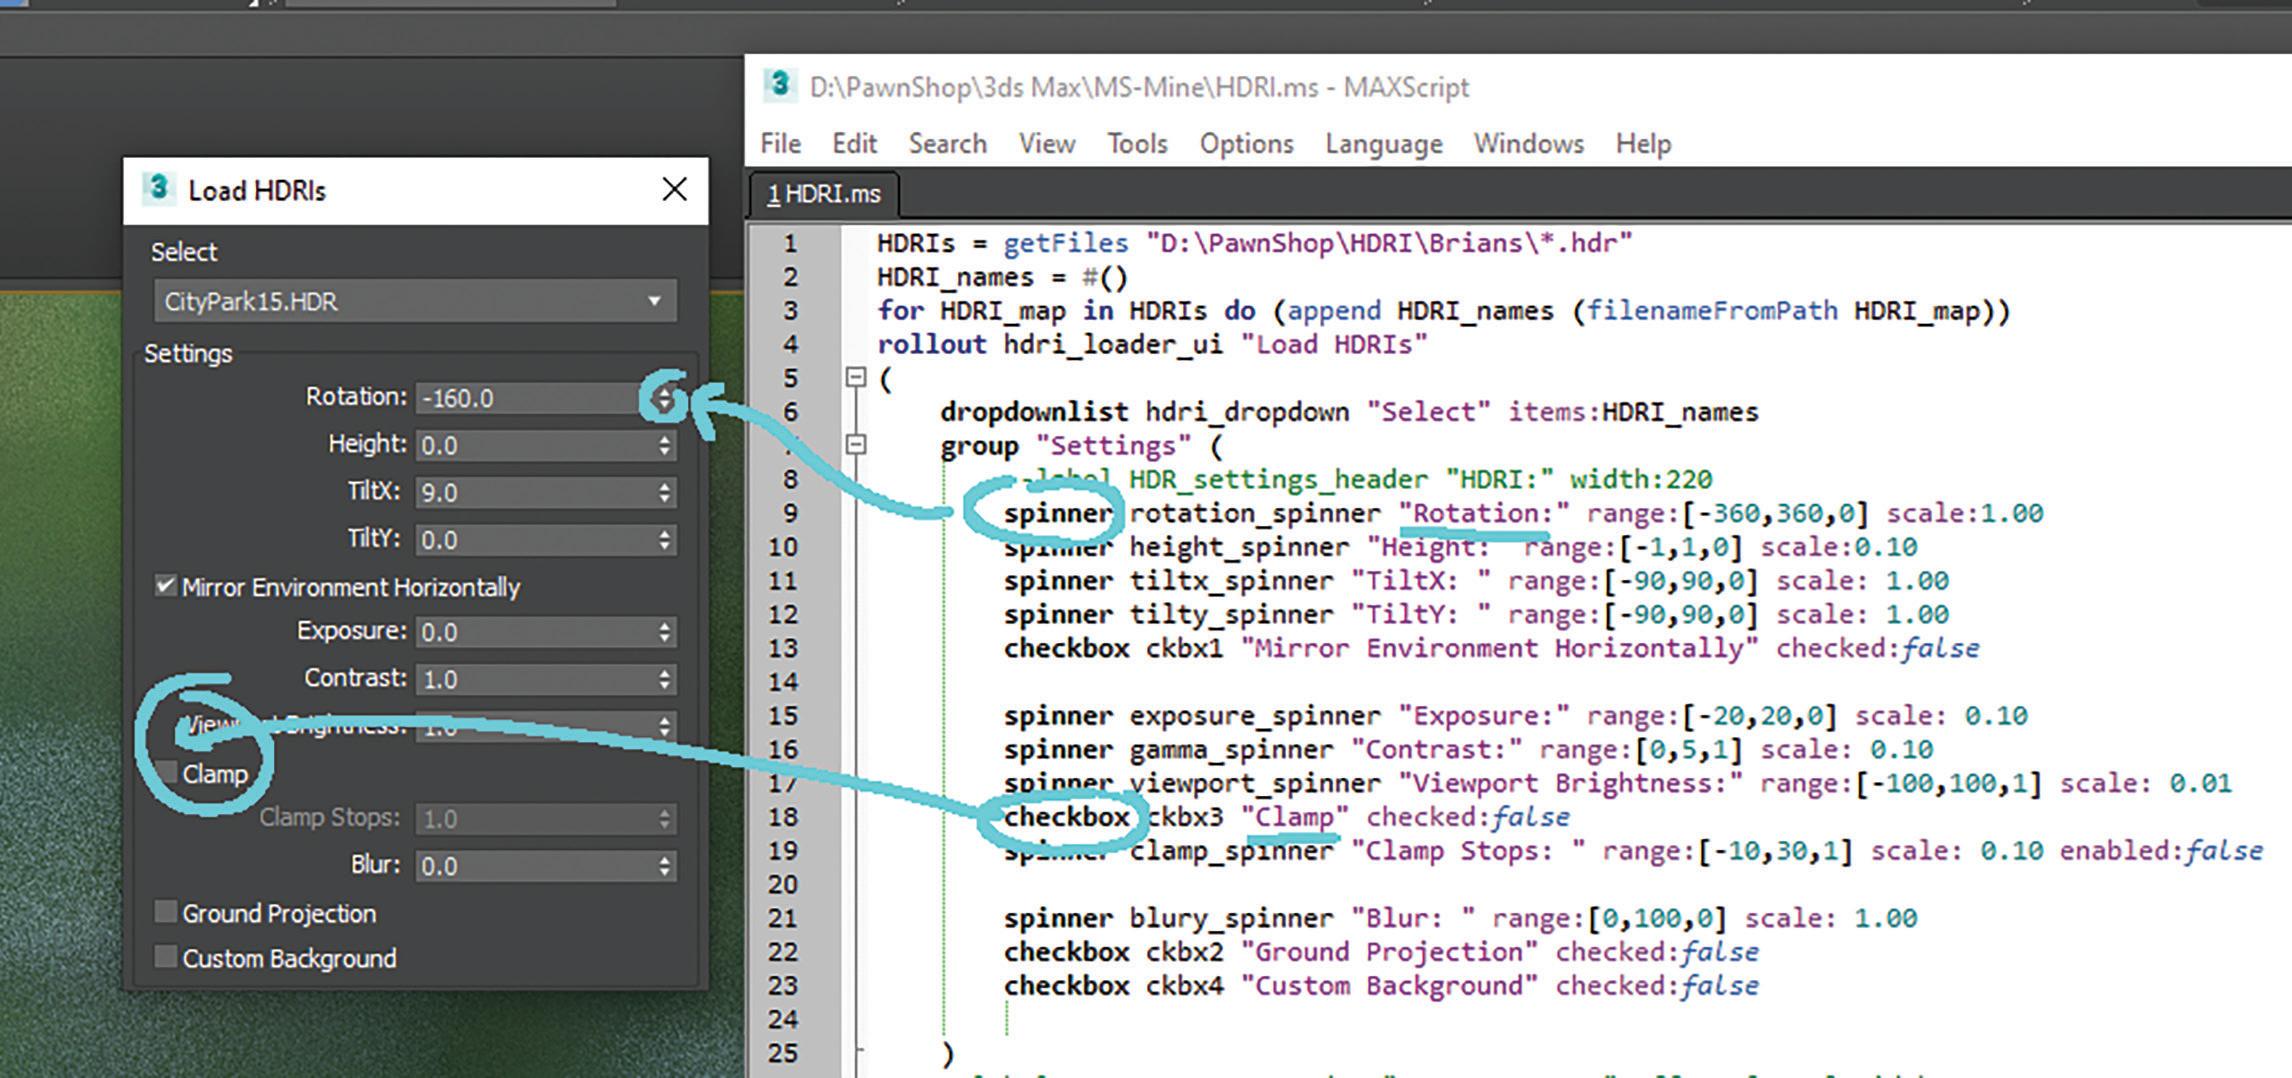
Figure 4
Line four represents the title of the interface in quotations. You can modify this be anything you want, such as you or your company’s name.
Lines 9 through 23 represent the various attributes I selected from the OSL editor and added to the interface that we can manipulate. You can see that these are represented in different forms, primarily spinners and checkboxes in this case. See Figure 4.
As you can see, the names I’ve underlined in quotations given to the object are displayed next to them, so you’ll want to be clear and concise. You can also see that spinners require assigned values in the range and scale categories. The ranges displayed in the brackets give the minimum value the spinner can go to, the maximum value the spinner value can reach, and the default value to start with (in that order). The scale represents the increment we want the spinner to adjust when we select it. If we type in 1.00, the values will increment by 1 unit each time we select it. If we select 0.10, the increment will be in tenths. We can assign them as not checked as displayed by the “checked:false” cod for checkboxes.
Lines 28 through 40 ensure the code is setting the HDRI and manipulating the correct one. line 43 says: on rotation_spinner changed i do environmentMap.Rotation = i
The letter i represents the value in the spinner box. This code says if the value of i (or the spinner value) is changed, then set the environmentMap.Rotation to that value.
This concludes the introduction of how we can manipulate HDRI images using a simple interface we can customize on our own. Additionally, we can use the template provided to learn to guide us in building interfaces for just about anything we want to manipulate in 3Ds Max. Enjoy, and thanks for reading!
Brian Chapman is an Autodesk Authorized Developer, 3D Artist, and Application Specialist in Las Vegas, Nevada. You can reach out to Brian at procadman@ pro-cad.net


