2 minute read
Products and Services
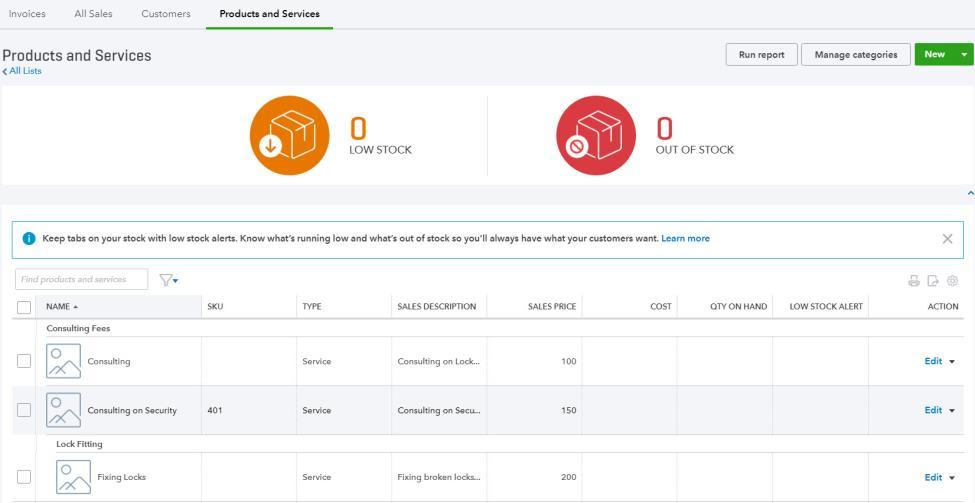
This section takes us through how to set up products and services list in QuickBooks Online. The products and services list represents the list of products and/or services that you sell. You will use items from the products and services list when you create customer invoices, enter purchase orders, and work with inventory. When completing an invoice, a product or service must be created. This can be done on the fly.
Note: Inventory Item will only display as a selection option in QuickBooks Online Version Plus and if Inventory Tracking has been turned on.
Advertisement
When setting up a new file, the default Products and Services created by default are ‘Hours’ and ‘Services’. Additional Products and Services can be manually created. To locate the Products and Services list, select the Gear icon > Lists > Products and Services.

Select New from the top right of the screen. Once the appropriate type has been selected, complete the setup process.


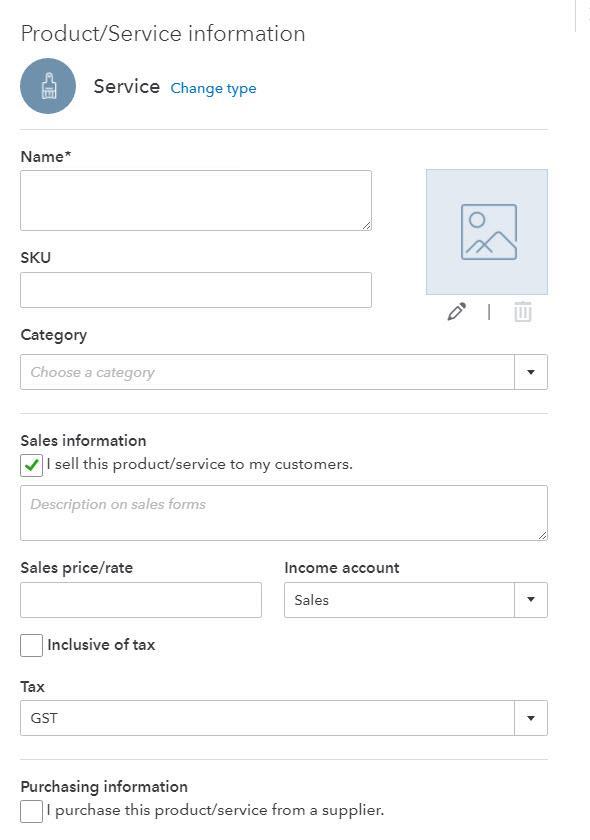
Name - the name of the service, such as consulting services, repair, cleaning, etc. The name must be a unique name.
SKU - Stock Keeping Unit number. An individual type of product will have its own individual SKU number. Category - is a means of classifying Products and Service sold to customers. Additionally, categories save you time when completing transaction forms, since you can search for items by category Sales Information description - Enter the description of the service in the “Description on sales forms” field. The description will automatically populate the description field on a Sales form. Sales Price/Rate - Add a price in this field if the price is fixed. The price will automatically populate the ‘Rate’ column on a Sales form. If a price is not added during the setup process, it can be added directly in the Sales form.
Note: Inclusive of Tax - the tick box is selected if the price entered is to include GST.
Income account
Select an ‘Income’ account type that is associated with this product or Service. Pay attention to the account being selected to ensure it is an Income account.
Note: the income accounts need to be setup PRIOR to Product and Service setup.
Tax – select the relevant GST tax code for income e.g. GST. Purchasing Information - tick the select box if the Product or Service being set up is also used for Purchasing. Set up as required. To exit the screen click Save and Close.


