


High-performance ABS Digimatic Indicator


High-performance ABS Digimatic Indicator


New-generation ID series making measurement operations smoother and enhancing production quality
Bidirectional serial communication that helps increase work efficiency
Meeting the need for more precise measurements
Enabling more precise measurement 0,5 μm digital step
The ID-C and ID-F ranges now include models with 0,0005 mm digital step. The units are also capable of digital step switching.*
*Except for the ID-C 0,01 mm digital step model
management of ID-C/ID-F.
The ID-C/ID-F units are Mitutoyo’s first measuring tools to support bidirectional serial communication, dramatically improving work efficiency.* They can be easily connected and linked with a PC via a USB input tool, etc., and in addition to conventional measurement data collection. They also enable control and setting of the ID-C/ID-F units, collection of gauge information, and other operations to be performed in batches via the PC.
*Achieved through I/F compatible with an original bidirectional serial communication specification (Digimatic S1). ► See P.6 for details.
• An optional cable and measurement data input unit are required for bidirectional serial communication.
• USB-ITPAK V3.0 must be installed on the PC used for communication.
Function example (1) Control of ID-C/ID-F from PC
New model (ID-C/ID-F + USB-ITPAK V3.0)
• Batch zero setting and power ON/OFF operation, etc. of multiple ID-C/ID-F units is made possible by use of the dedicated software “USB-ITPAK.”
Old model (Old ID-C/ID-F + USB-ITPAK V2.1)
• For older ID-C/ID-F units that do not support bidirectional serial communication, zero setting must be performed individually on each unit.
Function example (2) Measuring instrument setting
New model (ID-C/ID-F + USB-ITPAK V3.0)
• Various functions of ID-C/ID-F units can be set from USB-ITPAK.
• The contents of various function settings can be saved on a PC, and the same settings can be copied to other ID-C/ID-F units.
Reduced work time for setting
Old model (Old ID-C/ID-F + USB-ITPAK V2.1)
• Since bidirectional serial communication is not supported, function setting from a PC is not possible.
Enhanced work efficiency thanks to superior readability
The units have large screens that can display various information in an easy-to-read manner. They also have an analog bar, convenient for observing subtle movements such as the approach to tolerance.
Frequently used functions can be set to the buttons for easy operation
The ease of use has been greatly enhanced thanks to these three large buttons. Users can preset any frequently used function to the buttons for easy operation.
Parameter setting mode
• Counting direction switching
• Tolerance judgment function setting
• Calculation function setting
• Resolution switching
• Function lock setting
Switching between ABS length measurement system (preset) and INC measurement system (zero set)


Power ON/OFF
• Data output (when connected to an external device)
• Data hold (when not connected to an external device)
Enhanced measurement work efficiency
The result of the spindle movement value multiplied by a calculation coefficient can be displayed in real-time. This prevents additional work when measuring while using jigs or other similar tools.
f(x) = Ax
f(x): Displayed value
x: Spindle movement value
A: Selected value
first Mitutoyo measuring tools to support bidirectional serial communication.
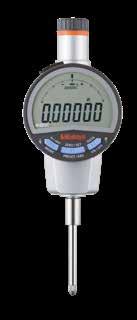
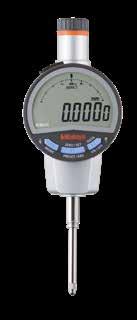
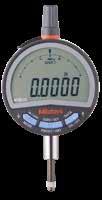
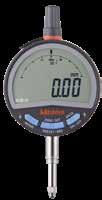
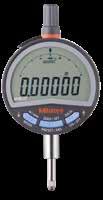


 543-730B
543-722B
543-720B
543-737B
543-700
543-702B
543-717
12,7 mm/0,5 in models
Low measuring force models*1 25,4 mm/1 in, 50,8 mm/2 in models
Display 7 segments height: 11 mm, Analog bar (±20 scale)
Display rotation 330 °
Protection level*2
Equivalent to IP-42
Possible plunger direction All directions 0,0005 mm models: Plunger downward only 0,01 mm models: Up to direction in which plunger is horizontal
Power supply Lithium metal battery CR2032 (1pc.)
Up to direction in which plunger is horizontal
Battery life*3 Approx. 2,5 years (normal use), Approx. 2,700 hours (continuous use)
Detection method
Electrostatic capacitance type absolute linear encoder Response speed No limit
Errors, Alarms Various setting errors, Sensor error, Display overflow, etc. Operating temperature 0 to 40 °C
temperature
*1: See the order numbers with an asterisk 2 (*2) in the table above.
*2: Protection level (IP=Ingress Protection) is based on IEC 60529/DIN40050 Part 1/JIS D0207, C0920. The levels shown are valid for factory conditions only.
*3: When the data processor is not connected. Battery life depends on use of the indicator. Use the above value as a guide.
Note: Products with an Order No. suffixed "B" have a flat back, and other models have a center-lug back.
Note: All products have a flat back.
Note: All products have a flat back.
*1 To denote your AC power cable add the following suffixes to the order No.: D for CEE (continental Europe), E for BS (United Kingdom) *2 These values apply at 20 °C. *3 Error of indication for the total measuring range
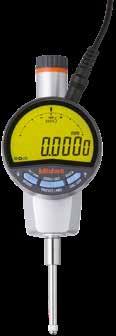

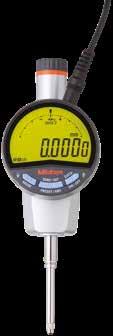


No.02AZF700
No.02AZG011
Please note that a conventional ID-C/ID-F cable cannot be used because the shape of the connector is different.

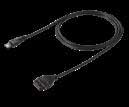
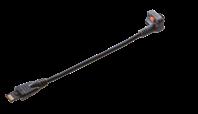

Standard U-WAVE-TM and U-WAVE-TMB dedicated connection cable

No.02AZG021
U-WAVE-TM and U-WAVE-TMB dedicated connection cable for foot switch
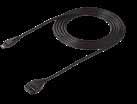
Buzzer type No.264-627 Waterproof/dustproof type No.264-626 Transmitter (U-WAVE-TMB)




USB-ITPAK is a useful software used to create procedures when inputting measurement data into Excel sheets. The latest version allows the user to perform batch power-on for ID-C/ID-F units, batch power-off at the end of measurement, batch zero setting and presetting, data acquisition instruction from a PC, etc.
This function can be implemented even if the measuring instrument does not support bidirectional serial communication. After setting, measurement values are automatically sorted into an Excel sheet as needed.
Only the number of measurement items is preset. (Example: number of measurement items = 3)

Batch setting of ID-C/ID-F units can be performed from your PC. Moreover, the settings can be saved on your PC and set to other ID-C/ID-F units. You can perform settings without even touching the ID-C/ID-F units.
With normal input
(Entered into column A only.)
With automatic sorting function
(Once entered into column A, similar data is automatically classified.)
Compatible OS
• Presetting
• Resolution
• Tolerance setting ...etc.
Symbols:
: Can be used only when connected with USB-ITPAK V3.0 and ID-C/ID-F;
: Can be used; : Cannot be used
d1: 1st generation, unidirectional communication, 6-digit communication / d2: 2nd generation, unidirectional communication, 8-digit communication
Digimatic S1 3rd generation, bidirectional serial communication, 8-digit communication
Windows 2000 SP4, Windows XP SP2 or later, Windows Vista, Windows 7, Windows 8 / 8.1
Windows 10 ✓
Functions
Sequential measurement
Batch measurement
Individual measurement
Simple measurement function
Measuring instrument setting
Measurement history
Device information
With this method, when using one or several measuring instruments, the measurement data are input into an Excel sheet from the measuring instrument(s) registered in advance.
With this method, measurement data are acquired in batches from several measuring instruments and input into an Excel sheet.
The Excel sheets and cells for inputting measurement data are set individually for each measuring instrument. With this method, measurements performed randomly by multiple operators can be input from each instrument into their specified sheets and cells.
This function makes it possible to start measuring without prior detailed settings and to sort data into Excel columns according to the measurement location.
This function is used to change the various settings (zero setting, registration of preset values, setting of unit, counting direction, and tolerance) of connected measuring instruments.
This function saves information on the measurement operator and the measurement equipment used within the measurement data. (It records in the data who used what to measure the data.)
This function reads various information about connected measuring instruments (model, serial No., calibration date) and displays it on the PC.
Data input into Microsoft Excel This function is used to input values into user-specified cells in Excel.


Text data input with virtual keyboard
Security USB dongle for V2.1
This function is used to input text (characters and values) into specified cells in Excel.
For USB-ITPAK V2.1 (cannot be used with V3.0)
USB dongle for V3.0 Can also be used with USB-ITPAK V2.1
✓ ✓
✓ ✓
✓
✓
✓
✓
✓
✓
Whatever your challenges are, Mitutoyo supports you from start to finish.
Mitutoyo is not only a manufacturer of top quality measuring products but one that also offers qualified support for the lifetime of the equipment, backed up by comprehensive services that ensure your staff can make the very best use of the investment.
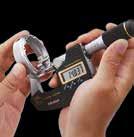
Apart from the basics of calibration and repair, Mitutoyo offers product and metrology training, as well as IT support for the sophisticated software used in modern measuring technology. We can also design, build, test and deliver measuring solutions and even, if deemed cost-effective, take your critical measurement challenges in-house on a sub-contract basis.


www.mitutoyo.eu
Note: All information regarding our products, and in particular the illustrations, drawings, dimensional and performance data contained in this printed matter as well as other technical data are to be regarded as approximate average values. We therefore reserve the right to make changes to the corresponding designs, dimensions and weights. The stated standards, similar technical regulations, descriptions and illustrations of the products were valid at the time of printing. In addition, the latest applicable version of our General Trading Conditions will apply. Only quotations submitted by ourselves may be regarded as definitive.
Mitutoyo Europe GmbH
Borsigstraße 8-10
41469 Neuss
Tel. +49 (0) 2137-102-0
info@mitutoyo.eu
www.mitutoyo.eu