A NEW ENDO-RESTO APPROACH IN DIGITAL DENTISTRY
DR. SIMONA CHIRICO, PROF. MASSIMO MARIO GAGLIANI, ITALY FEBRUARY 2023chanical resistance and aesthetics, with the integration of this with the surrounding tissues.
The luting of the restorations can be accomplished either with the BRILLIANT EverGlow composite in a paste or flow composition, making the steps of removing the material and its polymerization easier.
Introduction
The endodontic treatment of severely compromised teeth and their restoration represent an everyday challenge in the clinical dental practice. The advent of increasingly high-performance endodontic instruments, CAD / CAM technologies by chair-side systems and the related materials drastically reduced the rehabilitation times of these teeth, allowing the treatments to be performed in a single visit.

This procedure might be an interesting alternative to the usual one; it discloses a new way of thinking in which restorative preparation and digital impression, has made before the endodontic treatment; in fact, right after a complete removal of carious tissues or damaged restorations, the clinician should orient the whole preparation, except the access cavity, to seal dentin and prepare the tooth for the indirect restoration. At the end of this phase a digital impression should be taken and addressed to the milling procedure; during this period the root canal treatment might be accomplished and, at the end, the restoration could be cemented, sometimes without removing the rubber dam.
Inclusions criteria consist in:
Carious lesions with pulp involvement (need endodontic treatment);

– Carious lesions that have caused the loss of at least one cusp (need indirect restoration);
Inappropriate endodontic treatment (need endodontic retreatment);
Presence of apical lesions (need endodontic treatment/retreatment)
– Willingness of the patient to undergo a long appointment;
Exclusions criteria consist in:
Invasion of the supracrestal attachment during the margins preparation;
– Acute or chronic periapical abscess;
– Temporomandibular disorders (TMD);
– Vertical root fracture
The potential advantages of this procedure should be summarized:
– Immediate Dentin Sealing before the usage of irrigating solutions might guarantee a better sealing by the adhesive systems
The access cavity might be better controlled during the shaping and sealing steps
– Adverse effects on adhesion process generated by any kind of sealer might be avoided
The single visit procedure reduces time for patient and clinician
In a single visit procedure, the restoration might enhance the overall sealing of the endodontic space
The use of COLTENE endodontic instruments, which have features suitable for this procedure, is clearly recommended to obtain a conservative shaping of the root canal system.
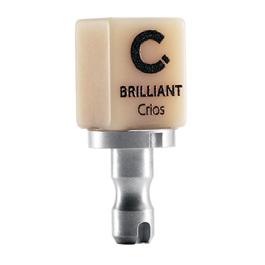
The use of the resin composite CAD/ CAM block BRILLIANT Crios, as a material for partial indirect restorations, guarantee excellent performances both for me -
Case 1
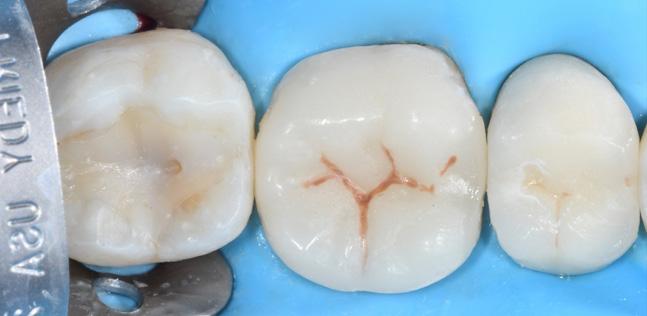
A female 38-year-old patient had an emergency appointment due to pain and high sensitivity of heat and cold in the fourth quadrant. After carrying out the physical and radiographic examination, the presence of a large carious lesion with pulp involvement first lower molar, which had an old composite restoration, was clinically and radiographically assessed. A poor oral hygiene and gingivitis in the acute phase was also detected (Figures 1, 2). Since the patient was pregnant and would have given birth after 3 weeks, a single session procedure was encouraged and the new protocol "Endo-Resto approach in digital dentistry" was chosen.
PHASE 1 –Isolation and cavity preparation
After applying the rubber dam to isolate the fourth quadrant, the removal of the old restoration to evaluate the extent of the carious extension was accomplished (Figure 3). Later a full toilette of the dentine was completed, the margin relocation performed and the cavity refined for proceed with the endodontic treatment (Figure 4). All the margins were perfectly visible and the contour of the future endocrown should not be modified by the root canal treatment procedures. The root canal system at this time should be already prepared.


(Figure 4)
PHASE 2 –Impression
In this case, to give a little rest to the patient, the rubber dam was removed but most of the time it should be left in place during the digital impression procedure.


A part of teflon was placed in the bottom of the pulp chamber, for a height of about 1.5 mm. This tool was used to simulate the subsequent covering of the floor with the flow, after finishing the endodontic treatment. Once the correctness of the canal closure was verified, the chair-side digital protocol started with the use of Cerec Primescan. After selecting the tooth (46), the type

of restoration (inlay / onlay) and the material to be used (Coltene - BRILLIANT Crios), the impressions of the upper and lower hemiarchs and the bite were recorded (Figures 5, 6, 7).
In this way the milling machine was able to produce the endocrown, during the execution of the endodontic treatment.


Once this procedure was completed, the margin preparation of 46 was drawn (Figure 8), ready to be restored with an endocrown, and the final project previewed (Figure 9). When everything was finished, the process continued with the milling of the BRILLIANT Crios A2 HT composite block (Figures 10, 11).

PHASE 3 –Endodontic treatment
The root canal shaping was carried out with the Hyflex EDM instruments - Shaping set medium 25 mm, alternating the use of CanalPro sodium hypochlorite at each step (Figures 12, 13). After completing the root canal instrumentation and drying the canals using Paper Points


Greater Taper .04 COLTENE paper cones,


GuttaFlow bioseal root canal cement was applied and closed by vertical hot condensation with Hyflex EDM Guttapercha points. (Figures 14, 15, 16).


PHASE 4 –Restoration
After the endodontic treatment (Figure 17), a layer of BRILLIANT EverGlow Flow (Figure 18) was applied to the bottom


of the pulp chamber (Figure 19). Once the milling of the block was completed (working time about 9 minutes), a try-in check was done. Afterwards, the endocrown was finished and polished (Figures 20, 21). We continued with the conditioning phases of the restoration, carrying out, in the order: sandblasting (Figure 22), application of the adhesive ONE COAT 7 UNIVERSAL (Figure 23).

After applying the rubber dam again, isolating the fourth quadrant, the conditioning of tooth 46 was performed: etching (Figure 24), ONE COAT 7 UNIVERSAL adhesive (Figures 25, 26).


At this point, the luting of the endocrown took place using the heated composite BRILLIANT EverGlow A2/B2 (Figures 27, 28). After removing all the excesses, the polymerization took place for a time of 90 seconds per surface (occlusal, buccal, lingual). Post luting polishing was performed using the DIATECH ShapeGuard Composite Polisher Kit (Figures 29, 30).


After removing the rubber dam, a post-luting clinical check of the endocrown was performed (Figure 31). The execution time of this new protocol
“Endo-Resto approach in digital dentistry” was 2 hours and 30 minutes.
10 days after the endo-resto treatment, the patient is seen for both a clinical and radiographic control to evaluate the integration of the restoration with the surrounding tissues (Figures 32, 33).
Case 2
A male 62-year-old patient had an emergency appointment due to pain and high sensitivity of heat and cold in the third quadrant. After carrying out the physical and radiographic examination, the presence of a large carious lesion with pulp involvement first lower molar, which had an old amalgam restoration, was clinically and radiographically assessed (Figures 1, 2). The patient was offered to treat this tooth in a single visit with the new protocol "Endo-Resto approach in digital dentistry”, which he accepted.

PHASE 1 –
Initial digital impression
The session began immediately with the digital impression, concerning the left lower arch, the upper one and the buccal bite (Figures 3, 4, 5). It is important to start with the impression because, after having prepared the tooth under the rubber dam and recorded the new impression, the software is able to match and recognize the two components.


PHASE 2 –
Isolation und preparation
After applying the rubber dam to isolate the third quadrant (Figure 6), the amalgam was removed and the mesial margin was relocated. Then, the cavity was prepared, according to the endocrown, and the pulp chamber was opened according to the endodontic treatment (Figure 7).

PHASE 3 –
Final digital impression and procedures
Before the digital impression, teflon was applied on the pulp floor, with the aim of simulating the thickness of the subsequent layer of flow that will be applied at the end of the endodontic treatment (Figures 8, 9).
Once the correctness of the canal closure was verified, the chair-side digital protocol continued. Tooth 36 was cut out from the previous scan, and the
preparation under rubber dam was recorded, with the adjacent teeth as reference (Figure 10).


Once this procedure was completed, the margin preparation of 36 was drawn (Figure 11), ready to be restored with an endocrown, and the final project previewed (Figure 12). When everything was finished, I continued with the milling of the BRILLIANT Crios A2 HT composite block (Figures 13,14) and then the endodontic treatment.


PHASE 4 –Endodontic treatment

The root canal shaping was carried out with the Hyflex EDM instruments - Shaping set medium 25mm, alternating the use of CanalPro sodium hypochlorite at each step (Figures 15, 16). After completing the root canal instrumentation and drying the canals using Paper Points


Greater Taper .04 Coltene paper cones, GuttaFlow bioseal root canal cement was applied and closed by vertical hot condensation with Hyflex EDM Guttapercha points. (Figures 17, 18, 19).

After the endodontic treatment (Figure 20), a layer of BRILLIANT EverGlow Flow (Figure 21) was applied to the bottom of the pulp chamber (Figure 22).

PHASE 4 –Endcrown luting procedure

Once the milling of the block was completed (working time about 11 minutes), the endocrown was tried in, finished and polished (Figures 23, 24). We continued with the conditioning phases both of the restoration and the tooth. For the first one it consisted in: sandblasting (Figure 25), application of the


universal adhesive ONE COAT 7 UNIVERSAL (Figure 26). For the second one: etching, ONE COAT 7 UNIVERSAL adhesive (Figures 27, 28).

At this point, the luting of the endocrown took place using the heated composite BRILLIANT EverGlow A2/B2 (Figures 29, 30). After removing all the excesses, the polymerization took place for a time of 90 seconds per surface (occlusal, buccal,


lingual). Post luting polishing was performed using the DIATECH ShapeGuard Composite Kit (Figures 31, 32).

After removing the rubber dam, a post-luting clinical and radiographic check of the endocrown was performed (Figures 33, 34). The execution time of this new protocol “Endo-Resto approach in digital dentistry” was 2 hours and 20 minutes.

– Graduated in Dentistry at University of Milan in 2016.
Master in Restorative and Aesthetic Dentistry at University of Bologna in 2021.
– Active in Restorative Dentistry, Endodontics and Digital Dentistry since 2017.

– Private practice in Milan and Desio (MB).
– Scientific coordinator of “Dentistry33 – Edra”.
– Active in Restorative Dentistry and Endodontics since 1990.
– Became Researcher at the University of Milan in 1992; was upgraded to Associate Professor in the same University in 2000.
– Member of the major international and national societies on Restorative
& Endodontics and one of the five founders of the Digital Dental Academy (DDA).

– Published several papers on Restorative & Endodontics topics in all the major international journals.
– Since 2014, Scientific Coordinator for Editorial Group Edra.
