caofm erfnq34 ser

Page 1

• STEP- BY-STEP HOMEMADE PASTA • HOW TO MAKE BACON JAM • CORNME AL TASTE TEST •

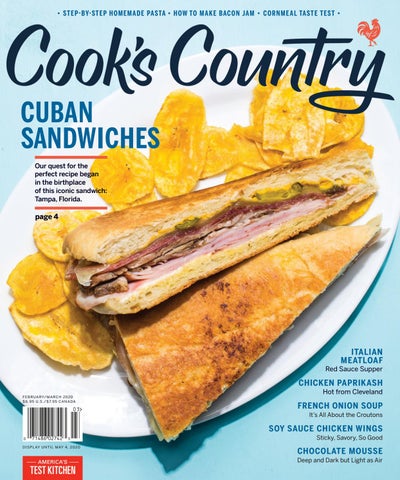
CUBAN SANDWICHES Our quest for the perfect recipe began in the birthplace of this iconic sandwich: Tampa, Florida.

page 4

ITALIAN MEATLOAF Red Sauce Supper

CHICKEN PAPRIKASH Hot from Cleveland F E B RUA RY/ M A RC H 2020 $ 6. 9 5 U.S. / $7. 9 5 CA N A DA

FRENCH ONION SOUP It’s All About the Croutons

SOY SAUCE CHICKEN WINGS Sticky, Savory, So Good D I S P L AY U N T I L M AY 4, 2 0 2 0

CHOCOLATE MOUSSE Deep and Dark but Light as Air


LETTER FROM THE EDITOR

Chief Executive Officer David Nussbaum Chief Creative Officer Jack Bishop Editor in Chief Tucker Shaw Executive Managing Editor Todd Meier Executive Food Editor Bryan Roof Deputy Editor Scott Kathan Deputy Food Editor Morgan Bolling Senior Editor Cecelia Jenkins Associate Editors Alli Berkey, Matthew Fairman Photo Team/Special Events Manager Tim McQuinn Test Cooks Mark Huxsoll, Jessica Rudolph Lead Test Cook, Photo Team Eric Haessler Assistant Test Cooks, Photo Team Hannah Fenton, Jacqueline Gochenouer, Gina McCreadie, Christa West Copy Editors Christine Campbell, April Poole, Rachel Schowalter Contributing Editor Eva Katz Senior Science Research Editor Paul Adams Hosts & Executive Editors, Television Bridget Lancaster, Julia Collin Davison Executive Editors, Tastings & Testings Hannah Crowley, Lisa McManus Senior Editors, Tastings & Testings Lauren Savoie, Kate Shannon Associate Editor, Tastings & Testings Miye Bromberg Assistant Editors, Tastings & Testings Riddley Gemperlein-Schirm, Carolyn Grillo, Emily Phares Creative Director John Torres Photography Director Julie Cote Art Director Susan Levin Associate Art Director Maggie Edgar Art Director, Tastings & Testings Marissa Angelone Senior Staff Photographers Steve Klise, Daniel J. van Ackere

H

Staff Photographer Kevin White Photography Producer Meredith Mulcahy

make a sandwich? Seems like an easy enough question to answer. You just grab a couple of pieces of bread and put a slice of cheese and some sort of meat or vegetable between ’em. Right? Well, sure—that would be a sandwich. But a great sandwich can be so much more. If you want evidence, turn to page 5 to learn about our experience creating a recipe for Cuban sandwiches, that popular Florida-born construction of roast pork, ham, salami, Swiss cheese, and pickles stacked onto sliced bread and lightly toasted. Like other truly remarkable sandwiches, it’s really just a pile of ingredients that taste great on their own but, when brought together, create something that’s more than the sum of its parts. Something with a story. Something with a soul. That’s what cooking is all about, isn’t it? Taking a little of this, a little of that, and putting it together in a careful way to create an experience and tell a story. OW DO YOU

Senior Director, Creative Operations Alice Carpenter Senior Editor, Special Projects Christie Morrison Senior Manager, Publishing Operations Taylor Argenzio Imaging Manager Lauren Robbins Production & Imaging Specialists Tricia Neumyer, Dennis Noble, Amanda Yong Deputy Editor, Editorial Operations Megan Ginsberg Editorial Assistants, Editorial Operations Tess Berger, Sara Zatopek Test Kitchen Director Erin McMurrer Assistant Test Kitchen Director Alexxa Benson Test Kitchen Manager Meridith Lippard Test Kitchen Facilities Manager Kayce Vanpelt Senior Kitchen Assistant Receiver Heather Tolmie Senior Kitchen Assistant Shopper Avery Lowe Kitchen Assistants Gladis Campos, Blanca Castanza, Amarilys Merced Chief Financial Officer Jackie McCauley Ford Senior Manager, Customer Support Tim Quinn Customer Support Specialist Mitchell Axelson

TUCKER SHAW P.S. Speaking of a story, visit CooksCountry.com/ thetestcook to see our behind-the-scenes video series detailing the development of this recipe. You’ll see every step of our process in vivid detail. What story will your dinner tell tonight?

Editor in Chief

Illustration: Hannah Jacobs

Event Coordinator Michaela Hughes Chief Digital Officer Fran Middleton VP, Marketing Natalie Vinard Director, Audience Acquisition & Partnerships Evan Steiner Director, Social Media Marketing Kathryn Przybyla Social Media Coordinators Charlotte Errity, Sarah Sandler, Norma Tentori Chief Revenue Officer Sara Domville Director, Public Relations & Communications Brian Franklin Public Relations Coordinator Madeleine Cohen Senior VP, Human Resources & Organizational Development Colleen Zelina

BUON APPETITO Big Flavors from Italian America This book is an homage to the generous, gutsy, red-sauced family-style cooking born in Italian American kitchens from coast to coast, with 130 tested-and-perfected recipes. This is food we never tire of—simple, hearty weeknight meals; baked pastas and roasts fit for Sunday dinner; and a baker’s assortment of rustic breads and sweets. Order your copy at AmericasTestKitchen.com/bigflavors.

Human Resources Manager Jason Lynott

Find us on Facebook facebook.com/CooksCountry Find us on Instagram instagram.com/CooksCountry Follow us on Pinterest pinterest.com/TestKitchen Follow us on Twitter twitter.com/TestKitchen

Circulation Services PubWorX ProCirc


2 ASK COOK’S COUNTRY 3 K I TC H E N S H O RTC U TS P R O D U C T TA S T I N G

White Chocolate Chips

America’s Test Kitchen is a real test kitchen located in Boston. It is the home of more than 60 test cooks, editors, and cookware specialists. Our mission is to

17 G E T T I N G T O K N O W

Food Processors

test recipes until we understand exactly how and why they work and eventually arrive at the very best version. We also test kitchen equipment and

24 C O O K I N G C L A S S

Fresh Hand-Rolled Pasta

supermarket ingredients in search of products that offer the best value and performance. You can watch us work by tuning in to America’s Test Kitchen (AmericasTestKitchen.com) and Cook’s Country

26 O N E PA N

Spiced Chicken Kebabs Dinner

(CooksCountry.com) on public television, and you can listen to our weekly segments on The Splendid Table on public radio. You can also follow us on Facebook, Twitter, Pinterest, and Instagram.

27 S L O W C O O K E R

Chicken Marbella

28 C O O K I N G F O R T W O

Sausage Strata

29 H O W T O M A K E

Bacon Jam

30 P R O D U C T TA S T I N G

Cornmeal

31 E Q U I P M E N T R E V I E W

Countertop Vacuum Sealers

32 H E I R L O O M R E C I P E

Pizza Dip

33 G R E AT A M E R I C A N C A K E

Kahlúa Cheesecake

11

Cuban Sandwiches

6

14

A great sandwich is built on great parts. This Florida original is no exception.

Garlic Steaks

8

Paprika gets its time in the spotlight in this rich, comforting dish.

16

Garlic goes on the steaks before, during, and after cooking. We’re not messing around here.

3RUN 6WURJDQRĮ

9

Italian Meatloaf

18

3DUPHVDQ 5RDVWHG &DXOLķRZHU

19

Napa Cabbage Salad Crisp, refreshing napa cabbage is the flavorful salad green you never knew you loved.

Soy Sauce Chicken Wings One test cook shares her family’s savory, sticky, slightly sweet wings with a wider audience.

20

26

French Onion Soup Crunchy croutons, melty cheese, and savory soup all in one bite. But is there a faster way to French-onion bliss?

Are your roasted vegetables in need of a boost? Parm to the rescue.

13

Fully Loaded Twice-Baked Potatoes The elusive goal: crisp, sturdy skins.

All the soulful flavor of Sunday supper with none of the fuss—meatloaf just got a whole lot more interesting.

12

No-Fail Dark Chocolate Mousse Fluffy. Rich. And . . . easy?

We love the traditional version of this soothing, creamy dish. But we hate the price tag.

10

Chicken Paprikash

22

Carrot Snack Cake With our recipe, carrot cake is easier, faster, and tastier than ever. PLUS Searching for the Best Big Spatula

Cook’s Country magazine (ISSN 1552-1990), number 91, is published bimonthly by America’s Test Kitchen Limited Partnership, 21 Drydock Avenue, Suite 210E, Boston, MA 02210. Copyright 2020 America’s Test Kitchen Limited Partnership. Periodicals postage paid at Boston, MA, and additional mailing offices, USPS #023453. Publications Mail Agreement No. 40020778. Return undeliverable Canadian addresses to P.O. Box 875, Station A, Windsor, ON N9A 6P2. POSTMASTER: Send address changes to Cook’s Country, P.O. Box 6018, Harlan, IA 51593-1518. For subscription and gift subscription orders, subscription inquiries, or change of address notices, visit AmericasTestKitchen.com/support, call 800-526-8447 in the U.S. or 515-237-3663 from outside the U.S., or write to us at Cook’s Country, P.O. Box 6018, Harlan, IA 51593-1518. PRINTED IN THE USA.

33


ASK COOK’S COUNTRY

by Cecelia Jenkins

Mushroom Cleaning What’s the best way to clean mushrooms? Is it OK to wash them, or will the water make them soggy? –Emily Scott, Milford, N.H. Many cooks fear that rinsing mushrooms will cause them to soak up water like a sponge, turn soggy, and steam— rather than brown—in the pan. In the test kitchen, we found that rinsing was actually fine for many mushrooms, as long as we rinsed them whole (before chopping). We proved this by weighing whole mushrooms before and after washing. We found that mushrooms without their gills fully exposed (button, cremini, etc.) did not absorb much water while being rinsed in a colander. Just make sure to dry the mushrooms before prepping and cooking—a quick spin in a salad spinner works well—so they’ll be able to brown. However, varieties with exposed gills, such as portobellos, did absorb a lot of water when rinsed, and that absorption did adversely affect how they cooked, so for these varieties we recommend brushing off the dirt with paper towels or a pastry brush instead. T H E B O T T O M L I N E : It’s OK to rinse mushrooms such as buttons and cremini; for varieties with their gills exposed, simply brush away the dirt instead.

FEW GIL LS E XP OSE D OK to wash with water

G IL LS EX POS ED Brush clean and keep dry

What, Exactly, Is Canadian Bacon? –Shelly DeSalvo, Boise, Idaho Canadian bacon, commonly known in Canada as “back bacon” or “peameal bacon” (it is sometimes rolled in ground yellow peas before being sliced), is made from cured and smoked pork loin—which is much leaner than the pork belly used to make American bacon. Canadian bacon is closer to mild ham than it is to assertive American bacon. It is fully cooked and can be eaten directly out of the package— although most cooks like to warm it in a skillet before eating it. It’s the traditional choice of meat for eggs Benedict and for a famous American fast-food sandwich. T H E B O T T O M L I N E : American bacon comes from fatty pork belly and is assertively seasoned with salt and sugar before being smoked. Canadian bacon is made from lean pork loin and is much milder.

NORTH OF THE BORDER Canadian bacon is leaner than American bacon.

Searing Scallops Do you have a preferred method for cooking sea scallops? –Ronald Thomas, Hamilton, Mont. Sea scallops are one of our favorite types of seafood to cook (and eat!). But these mollusks are delicate and easily overcooked—and overcooked scallops are rubbery. They are best quickly seared to build a flavorful crust on the outside while the inside remains silky. Cooking scallops successfully starts at the fish counter. Avoid “wet” scal1. Prep Dry the scallops well and season lops, which are treated with chemicals them only when the pan is preheating. to preserve them; they are typically bright white and are often sitting in a pool of cloudy liquid in the case. We much prefer “dry” scallops, which haven’t been treated. Dry scallops often have a rosy tint, feel tacky, and taste much better. Next, make sure to dry the scallops before searing them—the cooking time for searing scallops is so short that extra moisture can throw off the timing. Make sure your skillet (nonstick, traditional, and cast-iron all work well) and oil are thoroughly preheated before adding the scallops. Since salt 2. Sear Place the scallops in a ring around draws moisture out of foods over time, the circumference of the hot skillet. you don’t want to salt scallops too far in advance: Season them just before they go into the hot skillet. And finally, don’t overcrowd the skillet; giving each scallop a little room ensures that it will sear, not steam. We like to position the scallops in a ring around the skillet’s circumference, starting at the handle so that we can easily remember which of them went into the skillet first. The cooking goes quickly. You know the scallops are perfectly done when they’re translucent in the middle (about 115 degrees) and opaque near the top and bottom, with deep golden crusts. 3. Finish For even cooking, flip them and You can baste the cooking scallops with pull them out of the pan in the same order. melted butter to add flavor, if you like. T H E B O T T O M L I N E : Buy “dry” scallops, and then dry them thoroughly. Preheat a pan to ripping hot, season the scallops at the last minute, don’t overcrowd them in the pan, and cook them for just a minute or so per side.

2 C O O K ’S C O U N T RY • F E B RUA RY/ M A R C H 202 0

SI MP LE SE AR ED SCA LLOPS

Serves 4

Be sure to purchase “dry” scallops and remove the tough tendon attached to the side. To ensure that the scallops develop the best crust when cooking on a gas stovetop, place them in a ring around the circumference of the skillet (not directly in the center): Here they sit just above the burner, a spot that will always be hotter than the pan’s center. In this orientation, you can use the handle as a marker to help keep track of which scallops went into the skillet first. Start at the handle and add them clockwise so you know the order in which you should flip them (first to last). 1½ pounds large sea scallops, tendons removed 2 tablespoons vegetable oil, divided ¾ teaspoon table salt ¼ teaspoon pepper Lemon wedges

1. Place scallops on clean dish

towel and place second clean dish towel on top. Gently press to blot liquid. Keeping towel on top, let scallops sit at room temperature for 10 minutes while towels absorb moisture. 2 . Heat 1 tablespoon oil in 12-inch nonstick skillet over high heat until just smoking, about 2 minutes. Sprinkle scallops on both sides with salt and pepper. Add half of scallops, flat side down, in single layer around circumference of skillet; cook for 3 minutes, flipping halfway through cooking. Transfer scallops to plate and tent with aluminum foil. Repeat with remaining 1 tablespoon oil and remaining scallops. Serve with lemon wedges.


Are All White Chips the Same?

KITCHEN SHORTCUTS

by Carolyn Grillo Compiled by Matthew Fairman

kitchen, we love white chocolate chips in all sorts of sweets. According to the U.S. Food and Drug Administration, white chocolate must contain at least 20 percent cocoa butter. Many products replace some—or all—of that cocoa butter with refined fats; these products can’t legally be PRODUCT called white chocolate. Instead, they’re labeled white baking TASTING chips, morsels, or melting wafers. (For simplicity, we’ve chosen to refer to these products as “white chips.”) We gathered two varieties of white chocolate chips and four varieties of white chips and tasted them plain and in bark; then we pitted the white chocolate chips against our highest-ranking white chips in blondies. Surprisingly, we preferred white chips in both flavor and texture. Some tasters described the white chocolate chips as complex, but others noticed off-putting sour notes. In bark, the white chocolate chips were “too soft,” while the white chips were “snappy.” Our new favorite chips, Ghirardelli Classic White Baking Chips, are milky, sweet, and smooth. Whether you’re adding them to cookies or melting them for bark, they are sure to please. IN THE TEST

Don’t Waste Those Wipes –Anne Hsu Gibson, Boulder, Colo. I often use cleaning wipes for my kitchen counters, and I’ve noticed that there’s always extra fluid at the bottom of the canister when the wipes run out. Instead of just tossing the whole thing into the recycling bin, I now stick a couple of paper towels into the canister, shake it up, and eke out a few more “cleaning wipes.”

RECOMMENDED

Cork It with a Carrot –Benjamin Musher, Houston, Texas

Ghirardelli Classic White Baking Chips

TASTERS’ N OT ES The “mild flavor” was “milky” with hints of “vanilla,” “caramel,” and “butterscotch.” The chips were “creamy” when eaten plain and “smooth” and “dense,” with a good “snap and crunch,” in bark.

Our Favorite

Price: $4.59 for 11 oz

($0.42 per oz) Type: White chips

My wife and I opened a bottle of sparkling wine. We didn’t finish the bottle, and we couldn’t fit the original cork back into the bottle’s mouth.

Ghirardelli White Melting Wafers

In a pinch, we stuck a peeled carrot

Price: $4.99 for 10 oz ($0.50 per oz) Type: White chips

into the bottle opening to use as a

The flavor of our runner-up was “subtle” with “caramel notes.” It produced a bark with a “firm” consistency and a “nice bite.” Tasters really liked its “lovely creamy texture.”

substitute cork. The tapered shape of the carrot provided a surprisingly tight seal, and the wine was still fizzy the next day.

We found these chips, which contain some cocoa butter, “milky,” “sweet,” and “smooth.” One taster described their texture as “firm, which is a good thing for bark,” yet “still melts on my tongue.”

Guittard Choc-Au-Lait Baking Chips Price: $5.33 for 12 oz

($0.44 per oz) Type: White chips

The flavor of our lowest-ranking white chips reminded tasters of “marshmallow and coconut.” Tasters called this sample “very sweet,” with notes of “fake vanilla.”

Nestlé Toll House Premier White Morsels Price: $2.99 for 12 oz

($0.25 per oz) Type: White chips

The bark made with these real chips was “way too soft.” However, our tasters liked the chips’ “creamy” texture when sampling them plain, describing the flavor as “complex.”

Guittard Collection Etienne Crème Français 31% Cacao White Chocolate Wafers Price: $16.98 for 1 lb ($1.06 per oz) Type: White chocolate

Illustration: Hannah Jacobs

No Meat Pounder, No Problem –Macon Torterich, Surprise, Ariz.

Callebaut Recipe No. W2 Finest Belgian White Chocolate Callets

I don’t own a meat pounder, but I’ve discovered a great substitute that I can

Price: $30.00 for 2 lb ($0.94 per oz) Type: White chocolate

use when recipes call for thin cutlets of meat: a dowel-style rolling pin. I hold

Tasters described these real chips as “nutty” and “sour,” with a “rich” texture. The chips didn’t perform well in bark because they contain cocoa butter; the bark remained “squishy” and “too soft.”

one end of the pin and gently pound the meat with the other end. The rolling pin is heavy enough to give me good leverage but not so heavy that it tires out my arm or wrist while pounding. F E B RUA RY/ M A R C H

2020 •

COOK’S

COUNTRY

3


ON THE ROAD To learn the secrets to perfecting the iconic Cuban sandwich, we went straight to its birthplace: Tampa, Florida.

The annual Cuban Sandwich Festival, created by Victor Padilla and Jolie GonzalezPadilla, has become a massive two-day event that transforms Centennial Park in Tampa’s Ybor City neighborhood with music, performances, and, in 2019, a winning attempt at a world record for the longest Cuban sandwich—183 feet. Ybor City, most historians and other experts agree, is the birthplace of the Cuban sandwich, which reflects the Cuban, Italian, German, and Spanish influences present in Tampa. The marquee event is a contest to crown the best Cuban sandwich maker in the world. Contestants like Daniel Navarro (top right) and Iliana Cordero (below) often present twists on the theme to a strict panel of judges; for example, cooks from Miami may present sandwiches “Miami-style,” in which the salami, essential in Tampa-style versions, is left off.

Made in

AMERICA

CUBAN SANDWICH FESTIVAL

Text by Bryan Roof; photos by Steve Klise

I

the Cuban sandwich is an enduring source of pride, sustenance, and fierce debate. Connoisseurs take strong stands on each element. Cuban sandwiches are derived from mixto sandwiches, which were popular in Cuba more than a century ago. “As the sandwich emigrated from Cuba to Key West and eventually to Tampa, the name evolved from ‘mixto’ to ‘Cubano’ and ‘Cuban,’” says historian Jeff Houck. They were a common lunch for laborers in the cigar factories, made with a variety of meats that could survive in paper sacks at room temperature. No mayonnaise, tomato, or lettuce. N TA M PA , F L O R I D A ,

Illustration: Hannah Jacobs


LA SEGUNDA BAKERY La Segunda Bakery in Ybor City sold its first loaf in 1915. Today, employees including Anthony Sanches (below left) and Bryant Valdez (below right) produce 20,000 loaves of Cuban bread daily. The massive operation lacks climate control, a challenge in Florida. “The bread takes on the personality of the weather—humidity and heat,” says co-owner Copeland More. Bakers adjust the process based on the weather that day—the dough might move in and out of the refrigerator or spend extra time in the steam-fed proof box to account for the temperature. Each loaf is baked with a palm frond on top (left) for a signature La Segunda look.

Meanwhile, Back in the Test Kitchen by Cecelia Jenkins

Editor Bryan Roof returned from the Cuban Sandwich Festival in Tampa, he set a goal for me: Create a home recipe for Cuban sandwiches that would stand up to the prizewinners he’d tasted. The sandwich is familiar on a basic level: Roasted spiced pork, ham, Swiss cheese, dill pickles, and yellow mustard on soft bread that’s pressed and toasted until golden brown. In Tampa, the sandwich also includes Genoa salami. That’s a fantastic combination any way you look at it, so it’s no surprise that there are as many variations of the sandwich as there are fans of it. I wanted to take it back to its Tampa roots: Yes, there’d be salami on it; yes, I’d follow the traditional, particular order of components and amounts of each; yes, I’d even make the bread; yes, all this for a sandwich. And yes (!), it would be worth it. Let’s start with the bread. A Cuban sandwich must be made on golden Cuban bread that’s fluffy on the inside and crisp on the outside, which is not easy to find outside Florida. It’s traditionally enriched with lard for a savory flavor (not sweet or yeasty like a typical sandwich loaf). When the fully assembled sandwich is toasted on the griddle, the bread is just sturdy enough to hold the many layers together as the flavors fuse. I found it essential to slice the roast pork very thin. Thick slices interfered with a clean, even press, and shredded pork was harder to distribute evenly on the bread. Cooling the roast so it firmed up a bit before slicing meant that I could achieve the perfect thinness with a good sharp knife. Taking inspiration from some creative cooks at the Tampa festival, I included a swipe of flavorful mojo on each bottom slice of bread for extra complexity and brightness. After 35 pork butts; 80 loaves of bread; and piles of ham, cheese, pickles, and more, I pressed and toasted my final batch of sandwiches. I cut them into their characteristic triangle shape, and coworkers began to swarm. The work is worth it. Just make sure you eat it point side up. AFTER EXECUTIVE FOOD

COLUMBIA RESTAURANT Opened in 1905 as Columbia Saloon, Columbia Restaurant in Ybor City originally served as a tasting room for Florida Brewing Company. In addition to beer, they served café con leche and mixto sandwiches. They’ve been sourcing bread for their sandwiches, which they consider the definitive Cuban sandwiches, from La Segunda Bakery for nearly 100 years. Andrea Gonzmart-Williams (left) is the fifth-generation owner. “The architecture of the sandwich is absolutely paramount. It has to be precise to be that original flavor.” Even the application of the mustard is given serious consideration, and at Columbia it must go only on the top piece of bread. Historian Jeff Houck tells me, “If [the mustard] goes on the bottom, it coats your tongue. When it’s on top, it blossoms on the roof of your mouth and colors the entire experience.”

For a link to a video series that details the development of the recipes we used to make our version of a Cuban sandwich, go to CooksCountry.com/ thetestcook.

OUR RECIPES


CUBA N SAN DWI C H ES Serves 4

We strongly prefer to use our Cuban Bread for this recipe. But if you don’t have the time to make it, you can use four 7- to 8-inch soft white Italian-style sub rolls or two 15-inch loaves of soft supermarket Italian or French bread. Do not use a thick-crusted rustic or artisan-style loaf or a baguette. To make slicing the Cuban Roast Pork easier, be sure to chill it thoroughly beforehand. Mojo and mayonnaise aren’t typical ingredients in Tampa-style Cuban sandwiches, but they make nice additions. 1 recipe Cuban Bread (recipe follows) ¼ cup mojo from Cuban Roast Pork with Mojo (optional) (recipe follows) ¼ cup mayonnaise (optional) 12 ounces thinly sliced deli ham

CUBAN SANDWICHES A great sandwich is built on great parts. This Florida original is no exception.

10 ounces thinly sliced Cuban roast pork from Cuban Roast Pork with Mojo (2 cups) (recipe follows) 3 ounces thinly sliced deli Genoa salami with peppercorns 6 ounces thinly sliced deli Swiss cheese 16 dill pickle chips ¼ cup yellow mustard 4 tablespoons unsalted butter, cut into 4 pieces, divided

1. Adjust oven rack to middle position

and heat oven to 200 degrees. Set wire rack in rimmed baking sheet. Cut each loaf of bread in half crosswise, then cut each piece in half horizontally. 2 . Brush bread bottoms with mojo, if using, and spread with mayonnaise, if using. Layer on ham, followed by pork, salami, Swiss cheese, and pickles, overlapping and/or folding meats as needed to keep them from overhanging sides of bread. Spread mustard on bread tops. Cap sandwiches with bread tops. 3. Melt 1 tablespoon butter in 12-inch nonstick skillet over medium-low heat. Place 2 sandwiches in skillet, right side up, in alternating directions, and spread far apart. Place heavy Dutch oven on top and cook until bottoms of sandwiches are uniformly golden brown and feel firm when tapped, 5 to 7 minutes, rotating sandwiches in skillet as needed. (You will need to flip sandwiches to tap them.) 4. Transfer sandwiches to cutting board. Melt 1 tablespoon butter in now-empty skillet. Return sandwiches to skillet toasted side up. Place Dutch oven on top and continue to cook until second side is uniformly golden brown and feels firm when tapped, 3 to 5 minutes longer. 5. Transfer toasted sandwiches to prepared wire rack and place in oven to keep warm. Wipe skillet clean with paper towels. Repeat with remaining 2 tablespoons butter and remaining 2 sandwiches. Cut sandwiches in half on steep diagonal and serve.

by Cecelia Jenkins

E Pluribus Sandwich The traditional ingredients in a Cuban sandwich reflect the unique cultural mix of its birthplace in Ybor City. Mojo roast pork showcases Cuban and Spanish influences, while Genoa salami and yellow mustard and pickles have Italian and German roots.


CU BAN B RE AD Makes two 15-inch loaves

CUBA N ROAST POR K W I TH M OJO Serves 6 to 8

Avoid buying a pork butt wrapped in netting; it will contain smaller, separate lobes of meat rather than one whole roast. The pork will take longer to cook in a stainless-steel pot than in an enameled cast-iron Dutch oven, the pot we used while developing the recipe. If using a stainless-steel pot, place a sheet of aluminum foil over the pot before affixing the lid. If you plan to make Cuban sandwiches with the leftovers, it is best to slice only what you want to serve and then slice the chilled leftover pork for the sandwiches. You will need about 10 ounces, or 2 cups, of pork and ¼ cup of mojo for the sandwiches. If using table salt, cut the amounts of salt in half. PORK 1⁄3 cup kosher salt 1⁄3 cup packed light brown sugar 1 tablespoon grated lime zest (2 limes) 1 tablespoon grated orange zest 3 garlic cloves, minced 2 teaspoons ground cumin 2 teaspoons dried oregano ½ teaspoon red pepper flakes 1 (5-pound) boneless pork butt roast with fat cap M OJ O 1⁄3 cup extra-virgin olive oil 6 garlic cloves, minced 1⁄3 cup pineapple juice 1⁄3 cup orange juice 1⁄3 cup lime juice (3 limes) 1 tablespoon yellow mustard 1¼ teaspoons ground cumin 1 teaspoon kosher salt ¾ teaspoon pepper ¾ teaspoon dried oregano ¼ teaspoon red pepper flakes Thinly sliced onion rounds

Cuban roast pork should be tender, juicy, and full of the mojo flavors of citrus, garlic, oregano, and cumin. After testing, we nailed down three keys to a flavorful, moist, sliceable roast pork, just right for a sandwich or to serve by itself. • For juicier pork we use an overnight dry rub instead of a wet marinade to season. Don’t worry: Our fruity, fresh mojo for serving gives you the citrus punch you expect. • For tender meat with a burnished look, we first braise the pork in water, covered, to break down its tough connective tissue and collagen. We then roast it uncovered to caramelize its exterior. • A garnish of crisp raw onion helps cut through all the porky richness.

1. FO R T HE P ORK : Combine salt,

sugar, lime zest, orange zest, garlic, cumin, oregano, and pepper flakes in bowl. Using sharp knife, trim fat cap on pork to ¼ inch. Cut 1-inch crosshatch pattern in fat cap. 2. Place pork on large double layer of plastic wrap. Sprinkle pork all over with salt mixture. Wrap pork tightly in plastic, place on plate, and refrigerate for at least 12 hours or up to 24 hours. 3. Adjust oven rack to middle position and heat oven to 325 degrees. Unwrap pork; transfer to Dutch oven, fat side up; and pour 2 cups water around pork. Cover, transfer to oven, and cook until meat registers 175 degrees in center, 2½ to 3 hours. 4. Uncover pork and continue to cook until meat registers 195 degrees in center and fork slips easily in and out of meat, 45 minutes to 1¾ hours longer. Transfer pork to carving board, tent with aluminum foil, and let rest for 45 minutes. 5. FO R T HE MOJ O : While pork rests, heat oil and garlic in small saucepan over low heat, stirring often, until tiny bubbles appear and garlic is fragrant and straw-colored, 3 to 5 minutes. Let cool for at least 5 minutes. Whisk pineapple juice, orange juice, lime juice, mustard, cumin, salt, pepper, oregano, and pepper flakes into cooled garlic oil. 6. Slice pork as thin as possible (some meat may shred; this is OK) and transfer to serving platter. Serve with onion and mojo.

Covering the bread with the disposable pan during baking traps steam to create a crispier crust. You can substitute shortening for the lard, if desired. We prefer the flavor that the overnight fermentation provides, but if you’re strapped for time, you can ferment the sponge for at least 1 hour or up to 4 hours at room temperature instead. Be gentle when slashing the shaped loaves or they will bake up wide and squat. As a table bread, these loaves are best eaten warm, but for Cuban sandwiches, we found that two-day-old bread is still acceptable. S PON GE ¼ cup water ¼ cup (1¼ ounces) all-purpose flour ½ teaspoon instant or rapid-rise yeast D OUGH 3 cups (15 ounces) all-purpose flour 2 teaspoons instant or rapid-rise yeast 1½ teaspoons table salt 1 cup warm water (110 degrees) ¼ cup lard 1 (16 by 12-inch) rectangular disposable aluminum roasting pan

1 . FO R T HE S P O N G E : Whisk water,

flour, and yeast with fork in liquid measuring cup until consistency of thin pancake batter. Cover with plastic wrap and refrigerate overnight (sponge will rise and collapse). 2 . FO R T HE DO U G H: Whisk flour, yeast, and salt together in bowl of stand mixer. Add warm water, lard, and sponge. Fit mixer with dough hook and mix on low speed until no dry flour remains, about 2 minutes, scraping down bowl as needed. Increase speed to medium and knead for 8 minutes. (Dough will be sticky and clear sides of bowl but still stick to bottom.) 3. Turn out dough onto lightly floured counter, sprinkle top with flour, and knead briefly to form smooth ball, about 30 seconds. Transfer dough to greased large bowl and turn to coat. Cover with plastic and let dough rise at room temperature until doubled in size, about 45 minutes. 4. Line rimless baking sheet with parchment paper. Turn out dough onto floured counter and cut into 2 equal pieces, about 14 ounces each. 5. Working with 1 piece of dough at a time, flatten into 10 by 6-inch rectangle with long side parallel to counter’s edge. Fold top edge of rectangle down to midline, pressing to seal. Fold bottom edge of rectangle up to midline, pressing to seal. Fold dough in half so top and bottom edges meet; pinch seam and ends to seal. Flip dough seam side down and gently roll into 15-inch loaf with tapered ends. 6. Transfer loaf, seam side down, to 1 side of prepared sheet. Repeat shaping with second piece of dough and place about 3 inches from first loaf on other side of sheet. Cover loosely with plastic and let rise at room temperature until puffy, about 30 minutes. Adjust oven rack to middle position and heat oven to 450 degrees.

At La Segunda Bakery (see “Made in America” on page 4), the pan cubano is airy and light, with a paper-thin crust—just right for sandwiches or for buttering and eating. • For a fluffy interior crumb we make a “sponge” of water, flour, and yeast that we allow to ferment overnight before adding it to the rest of the ingredients. This step helps create the carbon dioxide bubbles that give the finished bread its characteristic airy texture. • We cover the loaves with a rectangular disposable aluminum roasting pan for the first part of baking; the pan traps steam, which then condenses on the bread. This moisture gelatinizes the starches on the outside of the bread, creating the thin, crisp crust we were after.

7. Using sharp paring knife in swift, fluid motion, make ⅛-inch-deep lengthwise slash along top of each loaf, starting and stopping about 1½ inches from ends. Cover loaves with inverted disposable pan. Bake for 20 minutes. Using tongs, remove disposable pan and continue to bake until loaves are light golden brown and centers register 210 degrees, 10 to 12 minutes longer. 8. Transfer loaves to wire rack and let cool for 30 minutes. Serve warm. TO MAK E AHEA D

Fully cooled loaves can be wrapped in aluminum foil and stored at room temperature for up to 2 days. Cooled bread can also be wrapped in plastic wrap, then in foil, and frozen for up to 1 month. Unwrap and warm before serving.


Garlic Steaks

GAR LI C STE AKS Serves 4

We developed this recipe using a nonstick skillet, but a cast-iron skillet will also work well. If you’re using table salt, use 1½ teaspoons for the steaks and ¼ teaspoon for the garlic sauce and toasted garlic.

Garlic goes on the steaks before, during, and after cooking. We’re not messing around here. by Alli Berkey

STE AKS ¼ cup extra-virgin olive oil 6 garlic cloves, minced 1 tablespoon kosher salt, divided 1½ teaspoons pepper, divided 2 (1-pound) boneless strip steaks, 1½ inches thick, trimmed

way to infuse steak with garlic flavor? That was the question I asked myself—and my colleagues—when my editor gave me the assignment to develop a recipe for garlicky strip steaks. (Strip steak is a favorite cut in the test kitchen for its combination of tenderness and big flavor.) Was a garlic rub the best path forward? A garlicky oil marinade? A garlic-laden finishing sauce? I headed into the test kitchen to try them all. Early tests proved that while steaks rubbed with garlic powder and granulated garlic tasted OK, they lacked the sharp kick of fresh garlic. So next I tested oil-based marinades with fresh garlic prepped in three different ways: minced, sliced, and smashed whole cloves (we know that garlic’s flavor compounds are oil-soluble, so the oil helps the garlic express its potential). Minced garlic provided the most garlic flavor by far, which makes sense because the more finely garlic is chopped, the more flavor compounds are exposed. After 4 hours, I rinsed off the marinade (and dried the steaks). Rinsing before cooking prevented the bits of garlic in the marinade from burning in the skillet and turning bitter. I was glad to find that this rinsing didn’t diminish the garlic flavor that had penetrated the steaks. W H AT ’ S T H E B E S T

GAR L I C SAUC E A ND TOASTE D GARLI C 4 tablespoons unsalted butter, softened 1 garlic clove, minced, plus 6 garlic cloves, smashed and peeled ½ teaspoon kosher salt ¼ teaspoon pepper ¼ cup extra-virgin olive oil 2 sprigs fresh thyme

1. F OR TH E S T E A KS : In 1-gallon

Serving already-garlicky steaks with a potent garlic sauce makes them over-the-top delicious.

The meat tasted great—but, well, I have a thing for garlic and I wanted more. I found that lightly browning whole cloves of garlic in the oil I then used to cook the steaks was a solid move for ramping up the garlic flavor. Serving those mellowed, browned cloves with the steak added yet another layer of garlic flavor. And finally, whisking some of the hot garlic-infused oil into a simple combination of softened butter and minced garlic gave me

a potent condiment to serve alongside the steaks. To minimize smoking and ensure perfectly cooked meat, I started the steaks over medium heat, flipping them every few minutes. Gradually, a dark, savory, seasoned crust developed on each side. The resulting steaks were incredible: deeply browned, perfectly cooked, and smelling and tasting of rich, bright garlic. Fellow garlic lovers, I think we have a new favorite dish.

Using Homemade Garlic Oil to Create Multilayered Garlic Flavor

1. Brown smashed garlic cloves in oil with fresh thyme sprigs.

2. Add some garlic oil to butter and minced garlic to make serving sauce.

8 C O O K ’S C O U N T RY • F E B RUA RY/ M A R C H 2020

3. Cook steaks in remaining garlic oil; serve with sauce and toasted garlic cloves.

zipper-lock bag, combine oil, garlic, 2 teaspoons salt, and 1 teaspoon pepper. Place steaks in bag and seal. Turn bag to evenly coat steaks in marinade. Refrigerate for at least 4 hours or up to 24 hours. 2. Remove steaks from marinade and rinse under cold water to remove any pieces of garlic; discard marinade. Pat steaks dry with paper towels. Sprinkle steaks with remaining 1 teaspoon salt and ½ teaspoon pepper; set aside. 3. F OR TH E G A R LI C S A UC E A N D TO A S TE D G A RL IC : Combine

butter, minced garlic, salt, and pepper in bowl. Heat oil, thyme sprigs, and smashed garlic in 12-inch nonstick skillet over medium heat until garlic has softened and turned light brown, about 5 minutes, flipping garlic as needed to ensure even browning. 4. Remove smashed garlic from skillet with slotted spoon and set aside; discard thyme sprigs. Add 2 tablespoons hot garlic oil from skillet to butter mixture and whisk to combine (mixture should be emulsified and creamy). Set aside. 5. Heat remaining 2 tablespoons garlic oil in skillet over medium heat until just smoking. Add steaks and cook, flipping every 2 minutes, until well browned and meat registers 115 degrees (for medium-rare), 12 to 16 minutes. Transfer steaks to carving board, tent with aluminum foil, and let rest for 10 minutes. Rewhisk sauce to make fluid again. Slice steaks thin and serve with sauce and reserved smashed garlic.


3RUN 6WURJDQRĮ We love the traditional version of this soothing, creamy dish. But we hate the price tag. by Natalie Estrada

D U R I N G T H E B L E A K winter months here in the Northeast, nothing’s quite as comforting as a bowl of warm stroganoff—soft noodles, strips of tender and flavorful meat, and a supercreamy sauce. But instead of using expensive beef tenderloin, the cut most frequently called for in recipes for this dish, I wanted to use pork tenderloin, a favorite in my kitchen for its faintly sweet flavor and relatively low price. Traditional? Nope, and that’s OK. I knew that I had to cook the pork relatively quickly so it wouldn’t dry out. I began by cutting the tenderloin in half lengthwise and then sliced each half ¼ inch thick. Next, I dredged the pork in flour to promote browning. I seared the pieces for about 3 minutes and then removed them from the pot with a slotted spoon. The leftover fond served as a base to build a flavorful sauce. I added mushrooms, onion, sage, garlic, and tomato paste for a savory underpinning. Once these ingredients started to brown, I added chicken broth and wine, scraped up the fond, and continued to cook the sauce until it was silky. I returned the pork to the mix, poured the saucy mixture over cooked egg noodles, and . . . well, let’s just say this stroganoff was missing some punch. It was watery and weak without much pork flavor. My first move was to introduce some pancetta up front. I cut it up and rendered its fat in the pot before cooking the tenderloin. This added deep, meaty, complex notes to enhance the tenderloin’s more demure flavors. Next, I decided to cook the noodles directly in the sauce, allowing them to soak up more flavor while also adding a bit of starchy body to the sauce. A quick 10-minute simmer and the noodles were al dente. Off the heat,

Porky Pancetta We call for pancetta when we want salty, savory, porky flavor without the overt sweetness or smokiness of bacon. It freezes beautifully, so it’s easy to keep at the ready. It’s typically sold rolled; to cut even pieces, first unroll the pancetta to flatten it, and then use a sharp knife to cut it into the desired shape.

I added tangy sour cream and a bit more sage and sprinkled some chives over the top. I finally achieved what I’d been searching for: a stroganoff that was satisfying, comforting, and rich—and easy enough (just one pot!) for a weeknight. POR K STROGA NO FF Serves 4

Be sure to buy a ¼-inch-thick hunk of pancetta from the deli counter rather than presliced pancetta, as larger chunks are important here. 3 ounces pancetta, cut into 1⁄4-inch pieces 1 tablespoon extra-virgin olive oil 1 (12-ounce) pork tenderloin, trimmed, halved lengthwise, and sliced crosswise ¼ inch thick 3 tablespoons all-purpose flour, divided 1 teaspoon table salt, divided

Pork tenderloin cooks in a flash and is supremely tender in this flavorful one-pot dish.

1 teaspoon pepper, divided 3 tablespoons unsalted butter, divided 12 ounces cremini mushrooms, trimmed and sliced thin 1 large onion, chopped fine 4 teaspoons chopped fresh sage, divided 3 garlic cloves, minced 2 teaspoons tomato paste 4 cups chicken broth ¼ cup dry white wine 8 ounces (4 cups) egg noodles ½ cup sour cream 2 tablespoons minced fresh chives

1. Cook pancetta and oil in Dutch

oven over medium heat until pancetta is lightly browned and crispy, about 10 minutes. Using slotted spoon, transfer pancetta to large plate, leaving fat in pot. 2. Toss pork, 2 tablespoons flour,

½ teaspoon salt, and ½ teaspoon pepper together in bowl. Add 1 tablespoon butter to fat left in pot and melt over high heat. Add pork in single layer, breaking up any clumps, and cook, without stirring, until browned on bottom, about 2 minutes. Stir and continue to cook until pork is no longer pink, about 1 minute longer. Transfer to plate with pancetta. 3. Melt remaining 2 tablespoons butter in now-empty pot over medium heat. Add mushrooms, onion, remaining ½ teaspoon salt, and remaining ½ teaspoon pepper and cook until any liquid has evaporated and vegetables have just begun to brown, 7 to 9 minutes. Add 1 tablespoon sage, garlic, tomato paste, and remaining 1 tablespoon flour and cook until fragrant, about 30 seconds. 4. Stir in broth and wine and bring to simmer, scraping up any browned bits. Stir in noodles and cook, uncovered, stirring occasionally, until noodles are just tender, 9 to 11 minutes. 5. Add pork and pancetta and cook until warmed through, about 1 minute. Off heat, stir in sour cream and remaining 1 teaspoon sage until thoroughly combined. Season with salt and pepper to taste. Sprinkle with chives and serve.

Bovine Inspiration We used a trick for cooking beef to keep the pork tender and flavor the sauce.

1. Dredge pork in flour, salt, and pepper.

2. Brown in a single layer in butter.

F E B RUA RY/ M A R C H

2020 •

COOK’S

COUNTRY

9


Italian Meatloaf All the soulful flavor of Sunday supper with none of the fuss— meatloaf just got a whole lot more interesting. by Matthew Fairman

lot of things you can do to jazz up a meatloaf. You can, of course, wrap it in sweet, smoky, salty bacon. You can make a gravy. Glazes—whether ketchup, barbecue, or sweet-and-sour—are always good. The test kitchen even has a recipe for Frosted Meatloaf that calls for covering the loaf in mashed potatoes. But I had another idea, born out of a thought that a meatloaf is really just an oversize, loaf-shaped meatball. I wanted to create a meatloaf with flavors inspired by Italian cuisine. So I topped the whole thing with savory tomato sauce and melted cheese to make meatballs and marinara in meatloaf form. My recipe starts with an intensely flavorful meat mixture—ground beef, deeply seasoned sweet Italian sausage (you can use hot sausage if you prefer), Parmesan cheese, garlic, and oregano—but instead of rolling dozens of meatballs, you make just one (in a loaf shape, of course). Mixing in a paste of crushed saltines, eggs, and milk ensures that the meatloaf holds its shape and stays perfectly moist. From there, it’s a simple matter of whipping together a bright, garlicky 5-minute tomato sauce; pouring it over the meatloaf in a casserole dish; and baking it all together (covered for the most efficient cooking) for about an hour. During that hour of hands-off cooking, the flavors of the meatloaf and the sauce mingle and meld, elevating and enriching each other in the process. The bright tomato sauce is mellow, complex, and meaty, and the meatloaf— like the best meatballs—is supersavory and unbelievably tender and juicy. To take this dish to the next level, I topped the meatloaf with creamy, rich fontina (which I melted under the broiler right before serving) and a sprinkling of fresh chopped basil. This combination of meatloaf and sauce is familiar and comforting yet unexpected and exciting—like a surprise visit from an old friend. And if you have leftovers, they make the best meatloaf sandwich ever. THERE ARE A

10 C O O K ’ S C O U N T R Y

This supersavory meatloaf is made with Italian sausage and seasoned with garlic, herbs, and Parmesan cheese.


I TA LIA N MEATLOAF Serves 6 to 8

Grate the Parmesan using a rasp-style grater; shred the fontina on the large holes of a box grater. If making our Italian Meatloaf Sandwich, set aside 1 cup of sauce before slicing the meatloaf. SAUCE 1 tablespoon extra-virgin olive oil 5 garlic cloves, sliced thin 1 (28-ounce) can crushed tomatoes 1 (15-ounce) can tomato sauce ¼ teaspoon red pepper flakes ¼ teaspoon table salt

LEFTOVERS M E ATLOA F 35 square saltines

ITA LIAN ME AT LOA F SANDWI CH

¾ cup whole milk

Serves 2

We developed this recipe using Pepperidge Farm Garlic Bread.

2 large eggs 1 pound 85 percent lean ground beef 1 pound sweet Italian sausage, casings removed

1 (12-inch) loaf frozen garlic bread

2 ounces Parmesan cheese,

3 (½-inch-thick) slices Italian Meatloaf

grated (1 cup)

1 cup tomato sauce from Italian

1 teaspoon granulated garlic

Meatloaf

1 teaspoon dried oregano ½ teaspoon table salt ½ teaspoon pepper ¼ teaspoon red pepper flakes 4 ounces fontina cheese, shredded (1 cup) 3 tablespoons chopped fresh basil

1 . FOR THE SAU CE: Adjust oven

rack to middle position and heat oven to 400 degrees. Heat oil in large saucepan over medium heat until shimmering. Add garlic and cook until lightly browned, about 1 minute. Stir in tomatoes, tomato sauce, pepper flakes, and salt. Bring to simmer and cook until flavors have melded, about 5 minutes. Remove from heat; cover to keep warm. 2 . FOR TH E MEAT LOAF : Spray broiler-safe 13 by 9-inch baking dish with vegetable oil spray. Place saltines in large zipper-lock bag, seal bag, and crush saltines to fine crumbs with rolling pin. Whisk saltines, milk, and eggs together in large bowl. Let sit until saltines are softened, about 5 minutes.

3 ounces mozzarella cheese, shredded

Whisk saltine mixture until smooth paste forms. Add beef, sausage, Parmesan, granulated garlic, oregano, salt, pepper, and pepper flakes and mix with your hands until thoroughly combined. 3. Transfer beef mixture to prepared dish. Using your wet hands, shape into 9 by 5-inch rectangle; top should be flat and meatloaf should be 1½ inches thick. Pour sauce over meatloaf. Cover dish with aluminum foil and place on rimmed baking sheet. Bake until meatloaf registers 160 degrees, 1 hour 5 minutes to 1¼ hours. 4. Remove sheet from oven, uncover dish, and sprinkle meatloaf evenly with fontina. Heat broiler. Broil meatloaf until cheese is melted, about 2 minutes. Let rest for 15 minutes. 5. Using 2 spatulas, transfer meatloaf to cutting board. Spoon off any excess grease from tomato sauce. Slice meatloaf 1 inch thick. Transfer slices back to sauce in dish, sprinkle with basil, and serve.

(¾ cup) ¼ cup grated Parmesan cheese

35

½ cup fresh basil leaves, cut into thin strips

1 . Cook bread according to package

Saltines? Yes!

instructions. 2. Adjust oven rack 6 inches from broiler element and heat oven to 400 degrees. Place meatloaf slices in small, ovensafe casserole dish and pour tomato sauce over top. Bake until just heated through, 10 to 15 minutes. Remove dish from oven and heat broiler. 3. Line rimmed baking sheet with aluminum foil. Place bread bottom on prepared sheet. Spread half of tomato sauce on bread bottom, then top with meatloaf, overlapping slices slightly. Spread remaining tomato sauce over meatloaf. Top meatloaf with mozzarella and Parmesan. 4. Broil sandwich bottom until cheese is melted and just beginning to brown, 2 to 4 minutes. Sprinkle with basil. Top with bread top, slice in half, and serve.

This recipe uses a panade (paste) of crushed saltines, milk, and eggs to help keep the meatloaf moist and tender. We found that the meatloaf made with saltines had a better texture than meatloaf made with torn bread.

Teaching Meatloaf to Speak Italian

1. Make 5-minute tomato sauce.

2. Shape beef mixture into loaf in dish.

3. Pour sauce over beef, cover, and bake.

4. Uncover, top with fontina, and broil.

F E B RUA RY/ M A R C H

2020 •

COOK’S

COUNTRY

11


Parmesan Roasted Cauliflower Are your roasted vegetables in need of a boost? Parm to the rescue. by Alli Berkey

a transformative ingredient. The salty, savory shavings can turn even the blandest bunch of vegetables into something special. I set out to test this idea with roasted cauliflower. My first stab was to trim a few heads of cauliflower into florets, toss them with a little oil and grated Parmesan, and roast them. But once the cauliflower started giving up its moisture in the hot oven, the cheese steamed right off. Next, I tried roasting the florets for a bit before adding the cheese, but again the cheese slid off the cauliflower and onto the baking sheet. I needed a binder of some sort to act as a glue between the oiled florets and the grated cheese. Typically, we think of “gluing” agents as wet ingredients such as eggs or milk, but the oily Parmesan needed the opposite. I tried adding a few tablespoons of cornstarch to the cheese, hoping the powdery starch would absorb and trap a bit of the liquid released by the roasting cauliflower and prevent the Parmesan from sliding off. It worked! A flip halfway through roasting ensured even browning and a tasty, crisp Parmesan coating. This one’s a keeper.

PA R M E S A N C H E E S E I S

Serves 4

You will need to purchase 3 pounds of whole cauliflower (one to two heads) to yield 2 pounds of florets. You can also use precut cauliflower florets. For the best results, we recommend using freshly grated Parmesan cheese; use a rasp-style grater to grate the Parmesan. If using canned Parmesan, omit the salt and season with salt and pepper to taste before serving. 3 ounces Parmesan cheese, grated (1½ cups) 2 tablespoons cornstarch 1 teaspoon minced fresh thyme ¾ teaspoon table salt ½ teaspoon pepper 2 pounds cauliflower florets, cut into 2-inch pieces 3 tablespoons extra-virgin olive oil

1. Adjust oven rack to lowest position

and heat oven to 450 degrees. Spray rimmed baking sheet with vegetable oil spray. Stir Parmesan, cornstarch, thyme, salt, and pepper in bowl until thoroughly combined; set aside. 2. Toss cauliflower and oil together in large bowl. Add Parmesan mixture to cauliflower mixture and toss until well coated. Pour contents of bowl onto prepared sheet, scraping out any remaining Parmesan from bowl with rubber spatula. Shake sheet to distribute cheese and cauliflower evenly. Where possible, flip florets cut side down. 3. Roast cauliflower until bottom edges of florets begin to brown, about 15 minutes. Remove sheet from oven and flip florets using thin metal spatula. Continue to roast until cauliflower is tender and spotty brown, about 5 minutes longer. 4. Transfer sheet to wire rack and let cool for 5 minutes. Using thin metal spatula, transfer cauliflower and any accompanying cheese to serving platter. Serve.

Parm Appeal What is it about Parmesan cheese, anyway? The good stuff, real Parmigiano-Reggiano from Italy, is a potent, hard cheese with unrivaled complexity and nuanced flavor. It’s sweet, nutty, sharp, fruity, and, most of all, savory. That last quality comes in part from its high levels of naturally occurring glutamates—the chemical compounds that produce umami, or savory, flavor. So Parmesan not only adds cheesy flavor but also brings a background savoriness to dishes. Since a little goes a long way, it is well worth its hefty price tag.

PAR MESAN ROASTED CAULI FLOWER

Step by Step

1. Cut cauliflower florets into 2-inch pieces.

12 C O O K ’ S C O U N T R Y • F E B R U A R Y / M A R C H 2 0 2 0

2. Coat florets with Parmesan mixture.

3. Brown 1 side, then flip, taking care not to disturb coating.


Napa Cabbage Salad Crisp, refreshing napa cabbage is the flavorful salad green you never knew you loved. by Morgan Bolling

N A P A C A B B A G E — THE OBLONG,

pale green variety used for kimchi, Asian slaws, and stir-fries—isn’t really a salad green. Or is it? A few months back I was intrigued to see a napa cabbage salad on a menu during a trip to, of all places, California’s Napa Valley (the vegetable’s name has its roots in Japan, not California). The salad featured chopped cabbage scattered with crumbled bacon and topped with blue cheese dressing. The crinkly pieces of cabbage readily clung to lots of dressing (a good thing!) but still maintained a bright flavor and refreshing crunch. It convinced me to bring the idea of a napa cabbage salad into the test kitchen for a closer look. I started by cutting a small head of napa cabbage into rough pieces and tossing the leaves with a favorite buttermilk–blue cheese dressing. But this dressing was fortified with mayonnaise and felt too heavy and rich here—it overwhelmed the cabbage’s fresh flavor. I pivoted to a lemon vinaigrette with blue cheese sprinkled over the salad at the end; this was OK, but not nearly as good as when I whisked the blue cheese right into the lemony dressing. Delicious. To add substance to the salad, I tossed in some sliced grape tomatoes and cucumber. A bit of red onion, sliced thin, helped balance the richness of the bacon and cheese. Chopped basil added a bright pop of herbal flavor. This refreshing salad casts napa cabbage in a whole new light.

Crispy bacon, pungent red onion, fresh basil, and an easy blue cheese dressing add interest to this refreshing salad.

NA PA CA BBAGE SAL AD

Serves 4 to 6

For a creamier dressing, buy a wedge of blue cheese (instead of a crumbled product) and crumble it yourself. You can substitute cherry tomatoes for the grape tomatoes, if desired. 4 slices bacon, cut into ½-inch-wide strips 3 ounces blue cheese, crumbled (3⁄4 cup) ¼ cup extra-virgin olive oil 2½ tablespoons lemon juice 1 teaspoon pepper ¾ teaspoon table salt 1 small head napa cabbage

½ English cucumber, halved lengthwise

Breaking It Down

and sliced thin crosswise ½ cup thinly sliced red onion, rinsed ¼ cup chopped fresh basil

1 . Cook bacon in 12-inch nonstick

skillet over medium heat until crispy, 7 to 9 minutes. Using slotted spoon, transfer bacon to paper towel–lined plate. Let cool for 5 minutes. 2 . Whisk blue cheese, oil, lemon juice, pepper, and salt in large bowl until slightly creamy with chunks of blue cheese, about 10 seconds. Add cabbage, tomatoes, cucumber, onion, basil, and bacon; toss to combine. Season with salt and pepper to taste. Serve.

1. Halve cabbage lengthwise, then cut each half into 11⁄2-inch strips.

(11⁄2 pounds), cut into 1½-inch pieces (about 9 cups) 8 ounces grape tomatoes, halved

A Lighter, Fresher Cabbage Napa cabbage (sometimes labeled Chinese cabbage) is much more crisp and delicate in texture than the waxy, thick leaves of red or green cabbage. The size of a loaf of sandwich bread, it has a light crunch and refreshingly sweet flavor that is appealing both raw and cooked. In addition to using it in salads, try shredding it for an Asian slaw or adding chopped leaves to stir-fries.

2. Cut crosswise at 11⁄2-inch intervals to make even-size pieces. F E B RUA RY/ M A R C H

2020 •

COOK’S

COUNTRY

13


ON THE ROAD

I

CHICKEN PAPRIKASH Serves 4 to 6

We call for removing the skin from bone-in chicken thighs here. Rather than discarding the skin, try crisping it in a skillet in a little oil set over medium-high heat and setting it aside for a snack. Be sure to use sweet Hungarian paprika here, not hot or smoked, and make sure it’s fresh (once opened, paprika loses its flavor quickly). Serve with Buttered Spaetzle (recipe follows) or buttered egg noodles. ¼ cup extra-virgin olive oil

T’S MIDAFTERNOON

1 large onion, halved and sliced thin

I make my way through crosstown traffic to Balaton, a strip-mall restaurant in Shaker Square on the outskirts of Cleveland, Ohio. I arrive during quiet time—the period just after lunch but well before dinner. I order chicken paprikash with a side of cucumber salad and lángos, a Frisbee-size disk of fried bread that is meant to be torn into pieces and dipped into paprika-dusted sour cream and garlic butter. Sisters Erika Nagy Johnson and Krisztina Nagy Ponti have worked at Balaton since they immigrated to Cleveland from Budapest in 1989. Erika was 14 and had just finished eighth grade; Krisztina had attended culinary school in Hungary and was just 17. When they first started working at Balaton, the restaurant was owned by their great aunt, Terezia Nevery. After escaping the violence of the Hungarian Revolution in 1956 and immigrating to the United States, Terezia opened Balaton in 1964; she based the menu on the simple cuisine of her homeland near Lake Balaton in west-central Hungary. Shortly after relocating the restaurant to its current location in 1998, Terezia passed away and Krisztina took ownership of Balaton with her husband. Erika turns to a picture of Terezia that hangs on the wall near the front of the restaurant and says, “Who knew that one day we were going to continue her legacy?” Krisztina tells me with passion in her voice, “In order for the recipes to stay the same, to stay in the family, we always have to be here. It’s not like you can just show someone what to do. It has to be in your heart, it has to be in your soul, in order to produce the same thing over and over. But you have to do it with love, just like you would do it for your family.”

1 red bell pepper, stemmed, seeded,

AS

Sister Act

and sliced thin 1 (14.5-ounce) can diced tomatoes, drained 5 garlic cloves, chopped fine 2 teaspoons table salt, divided 8 (5- to 7-ounce) bone-in chicken thighs, skin removed, trimmed ¾ teaspoon pepper 2½ cups chicken broth 2 tablespoons paprika, plus extra

Erika Johnson and Krisztina Ponti carry on their family legacy by serving the foods of their Hungarian homeland. Text by Bryan Roof; photos by Steve Klise

14 C O O K ’ S C O U N T R Y • F E B R U A R Y / M A R C H 2 0 2 0

One of the six iconic Cleveland signs scattered around the city (top); Erika (above) stirs her brick-red paprikash with a wooden paddle stained a deep mahogany after years of use; Krisztina (left, with her sister), does all the baking for the 100-seat restaurant (below).

for serving ¼ teaspoon cayenne pepper 1⁄3 cup sour cream, plus extra for serving 3 tablespoons all-purpose flour 2 tablespoons chopped fresh parsley

1. Heat oil in Dutch oven over

medium-high heat until shimmering. Add onion, bell pepper, tomatoes, garlic, and 1 teaspoon salt and cook, stirring often, until vegetables are softened and fond begins to develop on bottom of pot, about 10 minutes. 2 . Sprinkle chicken with pepper and remaining 1 teaspoon salt. Stir broth, paprika, and cayenne into pot, scraping up any browned bits. Submerge chicken in broth mixture and bring to simmer. Reduce heat to medium-low, cover, and simmer until chicken is very tender and registers at least 195 degrees, about 30 minutes, stirring and flipping chicken halfway through simmering. 3. Whisk sour cream and flour together in bowl. Slowly whisk ½ cup cooking liquid into sour cream mixture. Stir sour cream mixture into pot until fully incorporated. Continue to simmer, uncovered, until thickened, about 5 minutes longer. Off heat, season with salt and pepper to taste. Let stand for 5 minutes. Sprinkle with parsley and serve with extra paprika and extra sour cream.


BUTTE RED SPA ET ZLE Serves 6 to 8

The 13 by 9-inch disposable aluminum pan serves as a makeshift sieve for portioning the batter. 2 cups all-purpose flour ¾ teaspoon table salt, plus salt for cooking spaetzle ½ teaspoon pepper ¼ teaspoon ground nutmeg ¾ cup whole milk 3 large eggs 1 (13 by 9-inch) disposable aluminum pan 2 tablespoons unsalted butter, melted

1. Whisk flour, salt, pepper, and nut-

Paprika is made from dried red peppers that are ground to a powder. There are dozens of varieties. We call for sweet paprika here.

Chicken Paprikash Paprika gets its time in the spotlight in this rich, comforting dish.

meg together in large bowl. Whisk milk and eggs together in second bowl. Slowly whisk milk mixture into flour mixture until smooth. Cover and let rest for 15 to 30 minutes. 2. While batter rests, use scissors to poke about forty ¼-inch holes in bottom of disposable pan. Bring 4 quarts water to boil in Dutch oven. 3. Add 1 tablespoon salt to boiling water and set prepared disposable pan on top of Dutch oven. Transfer half of batter to disposable pan. Use spatula to scrape batter across holes, letting batter fall into water. Boil until spaetzle float, about 1 minute. Using spider skimmer or slotted spoon, transfer spaetzle to colander set in large bowl to drain. Repeat with remaining batter. 4. Discard any accumulated water in bowl beneath colander. Pour spaetzle into now-empty bowl. Add melted butter and toss to combine. Serve. Make the batter and let it rest for 15 to 30 minutes.

by Jessica Rudolph

Illustration: Hannah Jacobs

A TRADITIONAL HUNGARIAN

stew of chicken pieces, onion, peppers, and sour cream, paprikash features the sweet, toasty flavor of paprika as its backbone. But many recipes for this dish seem so loaded with paprika that they end up with a harsh, bitter taste. After visiting Balaton in Cleveland, Ohio (see “Sister Act”), Executive Food Editor Bryan Roof clued me in on why that is: Paprika’s delicate flavor is very sensitive to heat, and unlike other ground spices that benefit from blooming in hot oil, paprika becomes acrid almost instantly when cooked over high heat in hot fat. At Balaton, they avoid this by adding paprika to their paprikash and goulash off the heat. This way, the paprika blooms and develops flavor in the braising liquid

rather than in searing-hot oil, avoiding the risk of burning. Inspired, I hit the test kitchen to develop a recipe for chicken paprikash that I hoped would taste primarily of fruity, earthy paprika. As they do at Balaton, I started by cooking sliced onion, bell pepper, tomatoes, and lots of garlic together until they were softened, sweet, and beginning to brown. I added chicken broth and just 2 tablespoons of paprika (enough to flavor and color the dish without clobbering it) and then nestled chicken pieces into the pot. I chose bone-in thighs, knowing they’d cook up tender and juicy in my braise without any risk of overcooking, and I removed their skin before cooking to avoid a greasy finished dish. I braised the chicken

until it was completely tender and then finished the braise by stirring in a paste of sour cream and flour to thicken and enrich the sauce. Tasters loved the velvety texture of the sauce and how all the components enhanced—rather than obscured—the natural sweetness of the paprika. For a bit more of a peppery punch, I tried adding just ¼ teaspoon of cayenne. The resulting stew tasted perfectly balanced: The cayenne underlined the subtle warmth of the paprika without adding outright heat. To serve it, I spooned the chicken and ample sauce over homemade spaetzle (though egg noodles were just as good) and topped it all with a dollop of sour cream, a scattering of chopped parsley, and a bit more paprika to highlight the star of the dish.

Create your own noodle maker by using scissors to punch 40 holes in the bottom of a disposable aluminum pan.

Pour half the batter into the pan and use a spatula to press the batter through the holes and into the boiling water.

F E B RUA RY/ M A R C H

2020 •

COOK’S

COUNTRY

15


No-Fail Dark Chocolate Mousse Fluffy. Rich. And . . . easy? by Morgan Bolling

CH OCOL AT E MO USS E

Serves 6 to 8

If using pasteurized eggs here, increase the high-speed whipping time to 8 to 10 minutes. To bring the eggs to room temperature quickly, place the whole, uncracked eggs in a bowl of warm water for 15 minutes. We developed this recipe using Ghirardelli 60% Premium Baking Chips. We call for individual serving glasses or ramekins, but this mousse can also be chilled in a large serving dish. Just increase the chilling time to at least 8 hours. MOUSS E 8 large eggs, room temperature 2 tablespoons sugar 12 ounces bittersweet chocolate chips ¼ cup water WHIPPE D CR E AM 1½ cups heavy cream, chilled 4 teaspoons sugar 1 teaspoon vanilla extract

1. F OR TH E M O U S S E: Using stand You can make this crowd-pleaser up to two days ahead.

A I R Y , L I G H T, S W E E T, and

flavorful—what’s not to like about chocolate mousse? Unfortunately, the answer is often an overcomplicated recipe. Many versions call for some variation on the following rigmarole: Whipping cream, whipping egg whites, melting chocolate (often with egg yolks and butter), folding in the egg whites, and then adding the whipped cream—all without causing the delicate mixture to deflate. I wanted a foolproof recipe for chocolate mousse that streamlined the process. To get started, I made half a dozen recipes from well-known dessert cookbooks. The one that best combined simplicity with good flavor called for whisking egg yolks into a mixture of melted chocolate and butter before folding in sweetened whipped egg whites. Without any whipped cream and with minimal sugar, this mousse had an intense dark chocolate flavor. But it also had a marshmallow-like texture that my tasters found unappealing. When I tried to reduce the number of egg whites, the mousse became too

heavy and ganache-like. A coworker suggested whipping whole eggs instead of just whites, a trick she had used to great effect in an olive oil cake. Because whole eggs don’t hold as much air as egg whites when whipped, the hope was that my mousse would turn out less poofy. I whipped the whole eggs until they had tripled in volume and reached the ribbon stage, and then I folded them into the melted chocolate. As I’d hoped, this mousse was light and fluffy yet lusciously creamy. I worked out a few more details through testing. Melting the chocolate with water (instead of butter, which dulled the flavor) resulted in a mousse with an even more pronounced chocolate flavor. Using room-temperature eggs helped prevent lumps in the final mousse—plus, they whipped more efficiently. Deflating the eggs a little while folding was OK, but it was important to use a large bowl and scrape the bottom while folding to incorporate everything thoroughly. Finally, refrigerating the mousse for at least 6 hours gave it just

16 C O O K ’ S C O U N T R Y • F E B R U A R Y / M A R C H 2 0 2 0

the right amount of structure: The mousse melts in your mouth, but it can still hold its shape on a spoon. With just four ingredients and no egg separating, I’d finally found a recipe that was dead easy to make and—better yet—absolutely delicious.

Properly Whipped Eggs We whip a combination of whole eggs and sugar in a mixer until it’s tripled in volume and ribbons form when the mixture is dribbled from the whisk attachment.

mixer fitted with whisk attachment, whip eggs on medium speed until foamy, about 1 minute. Add sugar, increase speed to high, and whip until tripled in volume and ribbons form on top of mixture when dribbled from whisk, 5 to 7 minutes. Set aside. 2. Microwave chocolate chips and water in large bowl at 50 percent power, stirring occasionally with rubber spatula, until chocolate is melted, about 2 minutes. 3. Whisk one-third of egg mixture into chocolate mixture until fully combined. Using clean rubber spatula, gently fold in remaining egg mixture, making sure to scrape up any chocolate from bottom of bowl, until no streaks remain. 4. Portion mousse evenly into 6 to 8 serving glasses or ramekins, cover with plastic wrap, and refrigerate for at least 6 hours or up to 48 hours. 5. F O R T HE WH I P PE D CR E AM :

Using stand mixer fitted with whisk attachment, whip cream, sugar, and vanilla on medium-low speed until foamy, about 1 minute. Increase speed to high and whip until stiff peaks form, 1 to 3 minutes. 6. Top mousse with whipped cream before serving.


Roasted Chicken Breasts with Green Israeli Couscous

30-MINUTE SUPPER

Korean-Style Sloppy Joes with Kimchi Slaw

Steak Tips with Sweet Potato Wedges

30-MINUTE SUPPER

Greek-Spiced Pork Chops with Warm Zucchini-Feta Salad

30-MINUTE SUPPER

30-MINUTE SUPPER


Steak Tips with Sweet Potato Wedges Serves 4 Sirloin steak tips are often sold as flap meat. Use small potatoes, about 8 ounces each, because they will fit more uniformly on the baking sheet.

Roasted Chicken Breasts with Green Israeli Couscous Serves 4 We recommend using a rasp-style grater to grate the lemon zest.

2 pounds small sweet potatoes, unpeeled, cut lengthwise into 1½-inch wedges ¼ cup vegetable oil, divided 1½ teaspoons granulated garlic 1½ teaspoons table salt, divided ¾ teaspoon pepper, divided ¼ cup honey 1 tablespoon lime juice 1 teaspoon cornstarch

4 cups chicken broth, divided 2 cups fresh parsley leaves 1 tablespoon grated lemon zest plus 1 tablespoon juice 1¼ teaspoons table salt, divided ¾ teaspoon pepper, divided 4 (10- to 12-ounce) bone-in split chicken breasts, trimmed 4 tablespoons unsalted butter, divided 1½ cups Israeli couscous

2 pounds sirloin steak tips, trimmed and cut into 2-inch chunks

1 onion, chopped fine

1 jalapeño chile, stemmed, halved, seeded, and sliced thin crosswise

3 garlic cloves, minced

¼ cup chopped fresh cilantro

¼ cup chopped fresh basil

1. Adjust oven rack to middle position and heat oven to 450 degrees. Line

1 . Adjust oven rack to middle position and heat oven to 425 degrees.

rimmed baking sheet with parchment paper. Toss sweet potatoes, 2 tablespoons oil, granulated garlic, ½ teaspoon salt, and ¼ teaspoon pepper together in bowl. Arrange potatoes cut side down in single layer on prepared sheet. Roast until tender and bottoms are browned, 25 to 30 minutes. 2 . While potatoes roast, whisk honey, lime juice, and cornstarch in second bowl until cornstarch is fully dissolved; set aside. Sprinkle steak tips with remaining 1 teaspoon salt and remaining ½ teaspoon pepper. Heat remaining 2 tablespoons oil in 12-inch nonstick skillet over medium-high heat until just smoking. Add steak tips and cook until browned on all sides and meat registers 120 to 125 degrees (for medium-rare), about 7 minutes. Transfer steak tips to large plate and tent with foil. 3. Pour off fat from skillet. Add honey mixture and jalapeño to now-empty skillet and cook over medium-low heat until mixture is thickened and jalapeño is tender, about 2 minutes. Drizzle steak tips and sweet potatoes with honey mixture and sprinkle with cilantro. Serve.

Process 1 cup broth, parsley, lemon zest, ¾ teaspoon salt, and ½ teaspoon pepper in blender until smooth, about 30 seconds. Set aside. 2. Pat chicken dry with paper towels and sprinkle with remaining ½ teaspoon salt and remaining ¼ teaspoon pepper. Melt 1 tablespoon butter in Dutch oven over medium-high heat. Add chicken and cook until golden brown on both sides, about 6 minutes. Transfer chicken to rimmed baking sheet. Roast until chicken registers 160 degrees, 18 to 20 minutes. 3. While chicken roasts, melt 1 tablespoon butter in now-empty pot over medium heat. Add couscous, onion, and garlic and cook until onion is softened and couscous is lightly toasted, about 4 minutes. Stir in parsley mixture and remaining 3 cups broth and bring to simmer. Cook, uncovered, stirring often, until nearly all liquid has been absorbed, about 14 minutes. Off heat, stir in basil, lemon juice, and remaining 2 tablespoons butter. Serve chicken with couscous.

Greek-Spiced Pork Chops with Warm Zucchini-Feta Salad

Korean-Style Sloppy Joes with Kimchi Slaw

Serves 4 Substitute basil and goat cheese for the oregano and feta for a creamier zucchini salad.

Serves 4 One cup of coleslaw mix plus 1 tablespoon of sriracha can be substituted for the kimchi.

4 zucchini (8 ounces each), quartered lengthwise and cut crosswise into 2-inch pieces ¼ cup oil-packed sun-dried tomatoes, drained and chopped, plus 3 tablespoons sun-dried tomato oil, divided 1 shallot, sliced thin 2½ teaspoons kosher salt, divided

1 cup kimchi, chopped ¼ cup mayonnaise ¾ teaspoon pepper, divided ½ cup ketchup 3 tablespoons soy sauce

2 garlic cloves, sliced thin

2 tablespoons toasted sesame oil

1¼ teaspoons pepper, divided

1 tablespoon packed brown sugar

4 (6- to 8-ounce) boneless pork chops, ¾ to 1 inch thick, trimmed

3 garlic cloves, minced

2 teaspoons grated lemon zest plus 1 teaspoon juice

1 pound 85 percent lean ground beef

2 teaspoons dried oregano

4 hamburger buns

2 ounces feta cheese, crumbled (½ cup) 2 tablespoons fresh oregano leaves 1. Cook zucchini, 2 tablespoons tomato oil, shallot, 1 teaspoon salt, garlic,

and ¼ teaspoon pepper in 12-inch nonstick skillet over medium-high heat until zucchini is just tender and lightly browned, 10 to 12 minutes. Transfer to serving bowl. Set aside. 2 . Pat pork dry with paper towels and sprinkle with lemon zest, dried oregano, remaining 1½ teaspoons salt, and remaining 1 teaspoon pepper, pressing to adhere. Heat remaining 1 tablespoon tomato oil in now-empty skillet over medium-high heat until just smoking. Add pork and cook, flipping every 2 minutes, until well browned and meat registers 140 degrees, 8 to 10 minutes. Transfer to carving board, tent with foil, and let rest for 5 minutes. 3. Add feta, fresh oregano, sun-dried tomatoes, and lemon juice to zucchini mixture and stir to combine. Slice pork and serve with zucchini.

1 . Combine kimchi, mayonnaise, and ¼ teaspoon pepper in bowl; set

aside. In second bowl, whisk ketchup, soy sauce, oil, sugar, and garlic until smooth. 2. Cook beef and remaining ½ teaspoon pepper in 12-inch nonstick skillet over medium heat until beef is no longer pink and begins to brown, 8 to 10 minutes. Stir in ketchup mixture and cook until sauce thickens slightly, about 1 minute. 3. Divide beef mixture and kimchi mixture among bun bottoms. Cover with bun tops and serve.


Spicy Italian Sausage with Cheddar Grits and Cherry Tomatoes

30-MINUTE SUPPER

Chickpea Shakshuka

Seared Scallops with Butternut Squash

30-MINUTE SUPPER

Curried Chicken Noodle Soup

30-MINUTE SUPPER

30-MINUTE SUPPER


Seared Scallops with Butternut Squash Serves 4 For the best browning, do not move the scallops once you’ve added them to the skillet, except to flip them. 3 pounds butternut squash, peeled, seeded, and cut into 1⁄2-inch pieces (8 cups) ¾ cup chicken broth 6 tablespoons unsalted butter, divided 1¾ teaspoons table salt, divided 1½ pounds large sea scallops, tendons removed ¾ teaspoon pepper, divided 2 tablespoons vegetable oil, divided ½ cup half-and-half 1 tablespoon chopped fresh sage ½ teaspoon grated lemon zest plus 2 teaspoons juice

Spicy Italian Sausage with Cheddar Grits and Cherry Tomatoes Serves 4 Serve sprinkled with thinly sliced scallions. We developed this recipe using Quaker Quick 5-Minute Grits. 3 cups water 3 tablespoons unsalted butter 1 teaspoon table salt, divided ¼ teaspoon pepper ¾ cup quick-cooking grits 4 ounces sharp cheddar cheese, shredded (1 cup) 1 pound sweet Italian sausage, casings removed 1 onion, chopped fine 10 ounces cherry tomatoes, halved 3 tablespoons chopped jarred hot cherry peppers, plus 1 tablespoon brine ¾ cup chicken broth

1. Combine squash, broth, 4 tablespoons butter, and 1 teaspoon salt

in large saucepan. Cover and cook over medium-high heat, stirring occasionally, until squash is tender, about 25 minutes. 2 . About 10 minutes before squash is ready, pat scallops dry with paper towels and sprinkle with ¼ teaspoon pepper and remaining ¾ teaspoon salt. Heat 1 tablespoon oil in 12-inch nonstick skillet over high heat until just smoking. Add half of scallops, flat side down, and cook, without moving them, until well browned, about 1½ minutes. Flip and cook until browned on second side, about 1½ minutes. Transfer to plate and tent with foil. Wipe skillet clean with paper towels; repeat with remaining 1 tablespoon oil and remaining scallops. 3. Using potato masher, mash squash until smooth. Stir in half-and-half and remaining ½ teaspoon pepper. Set aside and cover to keep warm. Melt remaining 2 tablespoons butter in now-empty skillet over medium heat. Cook, swirling skillet occasionally, until butter turns dark golden brown and has nutty aroma, 1 to 2 minutes. Off heat, stir in sage and lemon zest and juice. Serve squash topped with scallops and drizzled with sauce.

saucepan over high heat. Whisk in grits. Cover, reduce heat to low, and cook, whisking occasionally, until grits are cooked through, 5 to 7 minutes. Off heat, stir in cheddar. Set aside and cover to keep warm. 2. Cook sausage and onion in 12-inch nonstick skillet over medium-high heat until sausage is cooked through and onion is lightly browned, 5 to 7 minutes, breaking up sausage with wooden spoon. Off heat, using slotted spoon, transfer sausage and onion to bowl; set aside. Pour off all but 1 tablespoon fat from skillet. 3. Heat fat left in skillet over medium-high heat until just smoking. Add tomatoes and remaining ¼ teaspoon salt and cook, without stirring, until just starting to brown, about 3 minutes. Stir in peppers and cook until tender, about 2 minutes. Add broth, pepper brine, and reserved sausage mixture to skillet and cook until slightly thickened, about 3 minutes. Serve sausage mixture on top of grits.

Curried Chicken Noodle Soup

Chickpea Shakshuka

Serves 4 Serve this soup with lime wedges.

Serves 4 We like to sprinkle the shakshuka with parsley leaves and serve it with crusty bread.

1 . Bring water, butter, ¾ teaspoon salt, and pepper to boil in large

2 tablespoons vegetable oil 1 onion, halved and sliced thin

2 tablespoons extra-virgin olive oil, plus extra for drizzling

3 carrots, peeled and cut into 2-inch-long matchsticks

1 onion, chopped fine

1 teaspoon table salt

1 cup jarred roasted red peppers, rinsed, patted dry,

½ teaspoon pepper 6 cups chicken broth 4 ounces rice vermicelli ¼ cup canned coconut milk 2 tablespoons Asian chili-garlic sauce 1 (2½-pound) rotisserie chicken, skin and bones discarded, meat shredded into bite-size pieces (3 cups) 1 cup fresh Thai basil leaves

and chopped coarse 1 teaspoon table salt ½ teaspoon pepper 1 (15-ounce) can chickpeas, rinsed 1½ teaspoons smoked paprika 1 teaspoon ground cumin 1 (28-ounce) can crushed tomatoes 8 large eggs 2 ounces goat cheese, crumbled (½ cup)

1. Heat oil in Dutch oven over medium-high heat until shimmering. Add

onion, carrots, salt, and pepper and cook until vegetables are just softened, about 4 minutes. 2 . Add broth, noodles, coconut milk, and chili-garlic sauce and bring to boil. Reduce heat to medium-low and simmer until noodles are softened, about 3 minutes. 3. Stir in chicken and cook until chicken is heated through, about 5 minutes. Stir in basil and serve.

1 . Heat oil in 12-inch nonstick skillet over medium-high heat until shim-

mering. Add onion, red peppers, salt, and pepper and cook until onion is softened, about 4 minutes. Add chickpeas, paprika, and cumin and cook until fragrant, about 1 minute. Stir in tomatoes and bring to simmer. Cover, reduce heat to medium-low, and cook until flavors meld, about 5 minutes. 2. Off heat, using back of spoon, make 8 shallow 1½-inch indentations in sauce (seven around perimeter and one in center). Crack 1 egg into each indentation. Spoon sauce over edges of egg whites so that whites are partially covered and yolks are exposed. 3. Return skillet to medium-high heat and bring to simmer. Cover, reduce heat to medium-low, and cook until whites are fully set, about 8 minutes, rotating skillet occasionally for even cooking. Sprinkle shakshuka evenly with goat cheese. Serve, drizzled with extra oil.


Food Processors

One motor, many tasks: A good food processor is incredibly versatile and can save you loads of time and effort in the kitchen—if you know how to get the most out of it. by Scott Kathan

GETTING TO K N OW

Processor Q & A

Why You Need One FOR GRI N DIN G M EAT You can grind different cuts to customize flavor and fat levels. Partially freeze cubed meat to make processing more efficient and overprocessing less likely. FOR DOUGH Food processors mix and knead bread dough efficiently, and they’re great for making pie and pastry doughs, too. FOR CHOP PI NG A ND GR I NDI N G VEGETABLES, GRAINS, AND NUTS Err on the side of underprocessing— there is no going back! We prefer to use the pulse button rather than continuously run the machine. FOR S L IC I N G AN D S HR E DDIN G V EGETA BL ES AN D C HEES E Slicing: Potatoes for a gratin or homemade chips, cucumbers for salads, cabbage for coleslaw or sauerkraut—the slicing disk makes fast and easy work of prepping them all. Shredding: A food processor can shred carrots, potatoes, squash, and even cheese. Chilling foods firms them up so they shred cleanly; spraying the feed tube with vegetable oil spray before starting makes cleanup easy and helps prevent the disk from getting gummed up.

What Makes a Good Food Processor?

Can I puree soups and make smoothies in a food processor? We don’t usually recommend it, in part because many food processors leak when filled with liquid (our winner does not). Use a blender—which is designed for use with liquids—for those tasks instead.

1

When do I pulse rather than let the machine run? In the test kitchen, we almost always use the pulse button, which gives us greater control and leads to fewer instances of overprocessing.

Minimal gap between bottom of feed tube and shredding disk

What’s the best way to clean a dirty processor bowl? Let the machine do the work for you by adding some water and a little dish soap to the bowl and running the machine for a few seconds. Rinse it with hot water, and then let it dry. If you want to soak the bowl (which can help discourage lingering aromas), put a cork in the center hole so you can fill the bowl with soapy water.

2 Sharp metal blade

3 Minimal gap between blade and sides and bottom of bowl

4 Heavy base

OUR WINNER Cuisinart Custom 14 Cup Food Processor ($200)

5 Responsive pulse button

Unexpected Uses M A KE NU T BU TT E RS !

MAKE BR EAD C RU MBS !

Process 4 cups roasted peanuts or almonds for 5 to 7 minutes, scraping down sides of bowl as needed.

Tear or cut bread— of any kind—into pieces and pulse.

CRUS H ICE! Pulse 1 to 2 cups ice cubes until finely ground.


Fully Loaded Twice-Baked Potatoes

Twice-baked potatoes, done three ways: with Bacon and Cheddar, Chorizo and Chipotle (below left), and Pancetta and Mozzarella (below right).

The elusive goal: crisp, sturdy skins. by Natalie Estrada

T H E T W I C E - B A K E D P O T AT O E S

I’ve eaten in restaurants looked great on the plate, but more often than not, their skin was leathery and bland, and their filling lacked flavor. I wanted to right these wrongs. The path to better potato skins was blazed by a recent test kitchen recipe for baked potatoes. Instead of brushing the skins with oil, as many recipes instruct but which turns the skins tough, I pricked each spud a few times with a fork and then dunked the potatoes in a saltwater solution before baking. Pricking the potatoes prevents steam from building up inside them, and the salty bath seasons the skins and encourages them to dry and crisp in the oven. After letting the baked potatoes cool to room temperature and scraping out

Removing the Potato Flesh Use a gentle hand.

their insides, I had to figure out the best ingredients for my filling. Cheddar and sour cream packed a ton of flavor, but the half-and-half called for by most versions wasn’t doing much. It was better, I found, to replace the half-and-half with butter for a rich (but not too rich) filling. And while some recipes call for sprinkling bacon and scallions over the finished potatoes, we liked them mixed into the filling for maximum impact in every bite. T WI C E-BA KED POTATOES W I T H BACON AN D C H ED DAR C HEESE

Serves 4

Try to find potatoes of equal size and weight to ensure even cooking. Larger potatoes will work, but the baking time in step 1 will be longer. This recipe can easily be doubled. 4 (8- to 10-ounce) russet potatoes, unpeeled 1⁄4 teaspoon table salt, plus salt for moistening potatoes 4 slices bacon, cut into ½-inch pieces 5 tablespoons unsalted butter, melted, divided ¼ cup sour cream ¼ teaspoon pepper 3 ounces sharp cheddar cheese, shredded (¾ cup) 4 scallions, sliced thin

1. Adjust oven rack to middle posi1. With cooled potatoes arranged so that they are sitting on their most stable sides, cut off top 1⁄4 inch and discard.

2. Use fork to poke, twist, and carefully remove flesh from potatoes.

tion and heat oven to 450 degrees. Prick each potato lightly with fork in 6 places. Dissolve 1 tablespoon salt in ½ cup water in large bowl. Add potatoes and toss so exteriors are evenly moistened. Place potatoes on wire rack set in rimmed baking sheet. Bake until centers register 205 degrees, 50 minutes to 1 hour. Let potatoes cool for 15 minutes. Reduce oven temperature to 400 degrees. 2. While potatoes bake, cook bacon in 12-inch ovensafe nonstick skillet over medium heat until crispy, 5 to 7 minutes. Using slotted spoon, transfer bacon to paper towel–lined plate; set aside. Discard fat in skillet or reserve for another use. Wipe skillet clean with paper towels.

18 C O O K ’ S C O U N T R Y • F E B R U A R Y / M A R C H 2 0 2 0

3. With potatoes sitting on flat

sides, cut off top ¼ inch and discard. Using fork, carefully remove potato flesh from remaining portion of potato by poking and twisting at insides to loosen, leaving ¼-inch wall all around inside of potato. Transfer potato flesh to medium bowl. Set aside potato shells. 4. Using potato masher, mash potato flesh until smooth. Stir in 3 tablespoons melted butter, sour cream, pepper, and salt until incorporated. Stir in cheddar, scallions, and reserved bacon until combined. Season with salt and pepper to taste. 5. Divide filling evenly among potato shells (scant ¾ cup each), mounding filling over tops of potatoes. Fluff up top of filling with tines of fork. Brush 1 tablespoon melted butter in now-empty skillet and place potatoes in skillet. Brush remaining 1 tablespoon melted butter over tops of potatoes. 6. Bake until potatoes are warmed through and beginning to brown on top, 20 to 23 minutes. Let cool for 10 minutes before serving.

TO MAKE A HEA D

At the end of step 4, let potatoes cool completely. Cover with plastic wrap and refrigerate for up to 24 hours. To serve, continue with step 5, increasing baking time by 10 minutes. TW ICE- BAKED P OTATO ES WITH CH OR I ZO A ND CH IP OTLE

Substitute 4 ounces Mexican-style chorizo sausage, casings removed, for bacon. Cook chorizo in 12-inch skillet over medium heat, breaking up meat with wooden spoon, until well browned and cooked through, 5 to 7 minutes. Substitute Monterey Jack for cheddar and 1 tablespoon minced canned chipotle chile in adobo sauce for pepper. TW ICE- BAKED P OTATO ES WITH PANC E TTA AN D M OZZAR ELLA

Substitute 4 ounces pancetta, cut into ¼-inch pieces, for bacon; 3 ounces shredded whole-milk mozzarella and ¼ cup grated Parmesan for cheddar; and 1 minced shallot and 1 teaspoon chopped fresh thyme for scallions.


Soy Sauce Chicken Wings

fat enough time to render fully while the meat stayed juicy and tender. A final flourish of sliced scallions added a welcome freshness plus visual appeal to boot—I think Nana would approve.

One test cook shares her family’s savory, sticky, slightly sweet wings with a wider audience.

SOY SAUCE C HIC K EN WIN GS

Serves 4 to 6

We prefer to buy whole chicken wings and butcher them ourselves because they tend to be larger than wings that come presplit. If you can find only presplit wings, opt for larger ones, if possible. Three pounds of chicken wings is about 12 whole chicken wings, which will yield about 24 pieces of chicken (12 drumettes and 12 flats) once broken down.

by Jessica Rudolph W H E N I WA S growing up, the

best part of family birthday celebrations was my Nana’s soy sauce chicken wings. They were so simple—whole wings marinated in soy sauce, vegetable oil, and garlic powder and baked in a dish—but they were intensely seasoned and almost impossibly tender, with a sticky, savory skin that always left us clamoring for more. More than a decade has passed since I’ve tasted Nana’s wings, but after stumbling across an old jotted-down recipe of hers, I have been itching to re-create them. I made a batch for my coworkers, and we agreed that, with just a bit of work, these easy, tasty wings would be a perfect fit for our Cook’s Country readers. I brought my Nana’s recipe into the test kitchen and got to work, hoping to improve it while staying true to its straightforward spirit. My first tweak was obvious: Nana’s whole wings were cumbersome to eat and stayed a bit flabby at the joint. Splitting the wings into flats and drumettes allowed more fat to render out and made them easier to handle. Next I nixed the garlic powder,

¾ cup soy sauce ¼ cup vegetable oil ¼ cup packed brown sugar 12 garlic cloves, smashed and peeled ½ teaspoon cayenne pepper 3 pounds chicken wings, cut at joints, wingtips discarded 2 scallions, sliced thin on bias

1. Combine soy sauce, oil, sugar, garlic,

Brown sugar lends a caramelly depth to these garlicky, pleasantly salty wings.

suspecting that I could get better garlic flavor by using fresh garlic in the marinade. Minced garlic stuck to the wings and burned and turned bitter in the oven, but whole smashed garlic cloves imbued the marinade with unmistakable garlic flavor. A pinch of cayenne pepper brought extra verve. The wings were coming together, but my tasters were hoping for a little more depth and a more refined soy flavor. A quarter cup of brown sugar added caramel-like

THE AMERICAN TABLE

Breaking Down the Wings

1. To remove wingtips, cut through joints where wingtips meet drumettes.

sweetness that brought everything into balance. With the flavor now spot-on, I just had to nail down the texture. I had been crowding the wings in a baking dish, like Nana had, but when I spread them out on a rimmed baking sheet and gave them room to breathe, the fat in each wing was able to fully render, making the skin sticky-soft all over without any chewy fat pockets. A little more than an hour in a 350-degree oven gave the

and cayenne in 1-gallon zipper-lock bag. Add wings to marinade, press out air, seal bag, and turn to distribute marinade. Refrigerate for at least 2 hours or up to 6 hours. 2 . Adjust oven rack to middle position and heat oven to 350 degrees. Line rimmed baking sheet with aluminum foil and spray with vegetable oil spray. Remove wings from marinade and arrange in single layer, fatty side up, on prepared sheet; discard marinade. Bake until evenly well browned, about 1 hour 5 minutes. Transfer wings to platter, sprinkle with scallions, and serve.

2. To separate pieces, cut through joints where drumettes meet flats.

During the 17th and 18th centuries, when ingredients from Asia were first being imported to Europe and North America in a big way, the terms “soy sauce” Soy Sauce, and “catchup” were often used to Savannah-Style refer to the same (or variations on the same) product: a fermented cooking sauce used to add savory depth to many dishes. By 1766, Samuel Bowen was producing a homegrown product, Bowen’s Patent Soy, near Savannah, Georgia, to sell in several American ports and in England. It wasn’t until later that “ketchup” was used to refer to a tomato-based product.

F E B RUA RY/ M A R C H

2020 •

OUR PICK Our favorite soy sauce is balanced and savory, with deep fermented flavor.

COOK’S

COUNTRY

19


French Onion Soup

Large croutons are unwieldy and hard to navigate. Our bite-size croutons are easier to eat.

Crunchy croutons, melty cheese, and savory soup all in one bite. But is there a faster way to French-onion bliss? by Jessica Rudolph

savory-sweet French onion soup topped with crunchy croutons and bubbly cheese is as comforting as my favorite slippers. But here in the test kitchen, we’re never satisfied with the status quo, so I decided to take another look at this bistro favorite to see if I could create a recipe that cut down on the time needed to caramelize the onions and still produced a great soup. I tried all manner of “innovative” ingredients to achieve this goal. While most iterations of my soup were fine, I was left facing an unavoidable fact: This classic is a classic for a reason, and there’s no beating the understated simplicity of traditional French onion soup. Test after test, tasters preferred slow-cooked onions simmered with just broth, wine, and herbs to any fancy curveball variations I threw at them. I decided to stick with a (mostly) traditional version of this perennial favorite, streamlined as much as possible for the home cook. Unable to lean on the crutch of distracting additions, I had to nail down perfectly caramelized onions. After dozens of tests, I landed on a method that takes about an hour but requires little more than patience and some stirring. The onions come out meltingly soft, golden brown, and full of flavor. To pick up all the flavorful bits of fond stuck to the bottom and sides of my pot, I deglazed with a hefty pour of red wine—which had a more richly savory taste than white—before adding beef broth, fresh thyme sprigs, and bay leaves. After a little simmering to meld the flavors, I ladled the soup into crocks, topped it with croutons and cheese, and placed the crocks (on a rimmed baking sheet) in a preheated oven until the cheese was bubbling. The result? A rich, sweet, perfect onion soup topped with soft, melted cheese. C’est magnifique!

A CROCK OF


Getting the Top Right F RE NC H ON I ON SOU P

1. Melt butter in Dutch oven over

Serves 6

medium-high heat. Stir in onions, 1 teaspoon salt, and sugar. Cover and cook, stirring occasionally, until onions release their liquid and are uniformly translucent, about 20 minutes. 2. Uncover and cook until liquid has evaporated and browned bits start to form on bottom of pot, 5 to 10 minutes. Reduce heat to medium and continue to cook, uncovered, until onions are caramel-colored, 30 to 40 minutes longer, stirring and scraping with wooden spoon as browned bits form on bottom of pot and spreading onions into even layer after stirring. (If onions or browned bits begin to scorch, reduce heat to medium-low.) 3. Stir in wine, scraping up any browned bits, and cook until nearly evaporated, about 1 minute. Stir in broth, thyme sprigs, bay leaves, ½ teaspoon pepper, and ½ teaspoon salt. Increase heat to high and bring to boil. Reduce heat to medium-low and simmer, uncovered, for 30 minutes. 4. While onions simmer, adjust oven rack to middle position and heat oven to 350 degrees. Toss baguette, oil,

Be patient when caramelizing the onions; the entire process takes 55 to 70 minutes. If you don’t have ovensafe soup crocks, form six individual piles of croutons on a baking sheet, cover them with the cheese, and broil them on the middle oven rack until the cheese is melted, 1 to 3 minutes. Then use a spatula to transfer the crouton portions to the individual filled soup bowls. 4 tablespoons unsalted butter 4 pounds onions, halved and sliced thin 1¾ teaspoons table salt, divided 1 teaspoon sugar 1 cup dry red wine 8 cups beef broth 4 sprigs fresh thyme 2 bay leaves ¾ teaspoon pepper, divided 6 ounces baguette, cut into 1-inch cubes 3 tablespoons extra-virgin olive oil 8 ounces Gruyère cheese, shredded (2 cups) 1½ ounces Parmesan cheese, shredded (½ cup)

N I N G OW R B

O NI ON S

AROUND 60–70 MINUTES

The onions are now fully caramelized: soft, sticky, and deep brown. This is your intensely flavorful base for French onion soup.

4

1 GET T ING STA RT ED

Place sliced onions into the pot with butter, salt (which helps them release liquid), and sugar. Cover (to help onions break down) and cook over medium-high heat.

remaining ¼ teaspoon salt, and remaining ¼ teaspoon pepper together in bowl. Transfer to rimmed baking sheet and bake until golden and crisp, 15 to 18 minutes. Remove sheet from oven and set aside. Increase oven temperature to 500 degrees. 5. Set six 12-ounce ovensafe crocks on second rimmed baking sheet. Discard thyme sprigs and bay leaves and season soup with salt and pepper to taste. Divide soup evenly among crocks (about 1½ cups each). Divide 1 cup Gruyère evenly among crocks, top with croutons, and sprinkle with remaining Gruyère, then Parmesan. Bake until cheeses are melted and soup is bubbly around edges, 5 to 7 minutes. Let cool for 5 minutes before serving.

BACKSTORY It is impossible to know when French-style onion soup was first conceived and cooked; cheap brothy meals were common fare in medieval Europe and likely predate the very concept of France as a political entity. But in the 18th and 19th centuries, the soup’s signature gratiné topping of relatively expensive cheese transformed the humble dish into something that even wealthy eaters rhapsodized over. As kings and emperors rose and fell like so many guillotine blades, the soup remained, achieving renown among the myriad vendors and patrons of the vast Les Halles market in Paris, where it became prized for its restorative (and hangover-soothing) properties.

2

AROUND 30 MINUTES

3

As the liquid continues to cook off, the onions start to brown and flavorful fond continues to form on the bottom of the pot. Scrape up the fond and stir it into the onions.

1. Toss cubed baguette with olive oil, salt, and pepper in bowl.

2. Toast croutons in 350-degree oven until crisp and golden brown.

3. Top soup with Gruyère, croutons, more Gruyère, and grated Parmesan.

AROUND 20 MINUTES

The onions have released most of their liquid. Remove the lid to allow the liquid to evaporate, and then turn down the heat to medium to promote even cooking. 4. Bake in 500-degree oven until cheese is fully melted. F E B RUA RY/ M A R C H

2020 •

COOK’S

COUNTRY

21


Carrot Snack Cake With our recipe, carrot cake is easier, faster, and tastier than ever. by Matthew Fairman

cake is an informal, stir-together affair that will make you wonder why you ever spent more time or effort on complicated layer cake versions. There’s no stacking of layers, no finicky piping, and no meticulously crafted marzipan carrots here. There’s just a simple-to-prepare carrot cake that’s moist, sweet, and perfectly spiced. A few uncommon (but easy) techniques helped me ensure consistently delicious results. Some carrot cakes “And then, of bake up unpleasantly course, there’s dry, but my version is the one essential perfectly soft and moist. component: the To achieve this, I soaked cream cheese the still-hot cake in butfrosting.” termilk syrup. The sweet, mildly tangy buttermilk syrup not only upped the ante texturally but also added a layer of flavor that brightened and balanced the sweetness of the cake while enhancing the tanginess of the cream cheese frosting. CARROT SNACK CAKE Serves 12 to 16 A good carrot cake recipe judiShred the carrots in a food processor ciously employs warm spices and fitted with the shredding disk or on the fruit to complement the earthy flavor large holes of a box grater. One pound of the carrots. My recipe calls for of carrots is about six medium carrots just the right amount of convenient and will yield about 12 ounces of shredpumpkin pie spice—a four-in-one ded carrots after peeling and trimming. mix of cinnamon, ginger, nutmeg, and allspice—to save time on pulling CAK E out and measuring individual spices. 1 cup golden raisins I used the time I saved to quickly ¼ cup orange juice plump and soften golden raisins in a 2½ cups (12½ ounces) all-purpose flour bit of fragrant orange juice, layering 1 tablespoon pumpkin pie spice in additional complementary flavors. 2 teaspoons baking powder A generous pinch of salt awakened all 1 teaspoon baking soda these flavors, ensuring that none of ¾ teaspoon table salt them went unnoticed. 1½ cups packed (10½ ounces) And then, of course, there’s the one light brown sugar essential component: the cream cheese 1¼ cups vegetable oil frosting. I made sure that there was 4 large eggs plenty of it and that it wasn’t so sugary 1 tablespoon vanilla extract as to overwhelm the pleasant tang of 1 pound carrots, peeled and shredded the cream cheese. I also made it easier (3 cups) by simply processing all the ingredi1 cup (4 ounces) confectioners’ sugar ents in a food processor (the same one 2⁄3 cup buttermilk we used to shred the carrots). Topped with toasted pecans for crunchy conFROSTI NG trast and visual appeal, it’s a snack cake 12 ounces cream cheese, softened for any time of day. 2 cups (8 ounces) confectioners’ sugar THIS CARROT SNACK

22 C O O K ’ S C O U N T R Y • F E B R U A R Y / M A R C H 2 0 2 0

8 tablespoons unsalted butter, softened 1 teaspoon vanilla extract 1⁄8 teaspoon table salt 1 cup pecans, toasted and chopped

1 . FO R T HE C A KE : Adjust oven rack

to middle position and heat oven to 350 degrees. Spray 13 by 9-inch baking pan with vegetable oil spray. Combine raisins and orange juice in small bowl. Microwave, covered, until hot, about 1 minute. Let stand, covered, until raisins are soft, about 5 minutes. 2. Whisk flour, pumpkin pie spice, baking powder, baking soda, and salt together in medium bowl; set aside. Whisk brown sugar, oil, eggs, and vanilla in large bowl until smooth; stir in carrots and raisin mixture. Stir in flour mixture with rubber spatula until just combined. 3. Transfer batter to prepared pan and smooth top with rubber spatula. Bake until toothpick inserted in center of cake comes out clean, 33 to 38 minutes, rotating pan halfway through baking. Transfer pan to wire rack.

4. Immediately whisk confectioners’

sugar and buttermilk together until smooth. Brush buttermilk syrup evenly over entire surface of hot cake (use all of syrup). Let cake cool completely in pan on wire rack, about 3 hours. 5. F O R T HE FR O S TI N G: Process cream cheese, sugar, butter, vanilla, and salt in food processor until smooth, about 30 seconds, scraping down sides of bowl with rubber spatula as needed. 6. Spread frosting evenly over surface of cake, leaving ½-inch border. Sprinkle frosting evenly with pecans. Serve. TO MAK E AHEA D

Frosted cake can be covered with plastic wrap and refrigerated for up to 2 days. CAR ROT-GIN GE R SN ACK CAK E WI TH CA RDAM OM

Substitute 1 teaspoon ground cinnamon and 1 teaspoon ground cardamom for pumpkin pie spice. Stir in 1½ tablespoons grated fresh ginger with carrots and raisin mixture in step 2. Sprinkle 2 tablespoons finely chopped crystallized ginger over top of frosted cake with pecans in step 6.


Easier, Fresher Carrot Cake in Six Simple Steps All That Glitters

1. Microwave raisins and orange juice (covered) and let stand.

2. Whisk dry ingredients together in bowl.

3. Whisk brown sugar and wet ingredients together in separate bowl.

Many of the carrot cake recipes we came across in our testing rely on raisins to add pops of rich sweetness and chewy texture. Our version does, too. We call for golden raisins, also called sultanas, which we like here for their mild flavor and soft texture. Fun fact: Both dark and golden raisins are typically made from green Thompson grapes. The difference is that dark raisins are dried longer, while golden raisins are dried for a shorter period and often contain a chemical additive that helps preserve their bright hue. Shallow wrinkles

Bright, golden color

4. Stir carrots and raisin mixture into wet ingredients, then stir in dry ingredients.

5. Bake, then brush hot cake with buttermilk syrup.

Searching for the Best Big Spatula of ten, we grab a fish spatula when we want to flip or transfer food. But occasionally we find ourselves wishing we had a tool that EQUIPMENT was a bit bigger— REVIEW something that could help pick up heavier foods, such as a roast or a cake, or flip more pieces of food, such as roasted vegetables, at a time. The solution can be found on the short-order line at your local diner. Offset metal turners look like supersize offset spatulas: Their heads are broad and long, making them ideal for heavy-duty or high-volume tasks. We wanted to know whether these tools would be worth stocking in home kitchens, so we bought eight models, priced from about $6 to about $32, and put them to the test, using them to lift tarts and hams; to flip and transfer roasted cauliflower and hash browns; and to smash, flip, and transfer burgers. We liked most of the turners, though some models were better at certain tasks than others. Testers liked heads with plenty of surface area that could pick up a significant amount of NINE TIMES OUT

food without being unwieldy. They also preferred models with long but relatively narrow heads measuring about 7.5 by 3 inches. These longer heads made it easier for testers to flip and transfer foods and provided more distance between their hands and the hot cooking surfaces. The thickness of the heads was also important. Our favorite turners were sturdy enough to support a whole tart but flexible enough to wiggle under food easily. Overall, testers preferred unperforated heads with rounded edges that slipped under food more fluidly. Models with a nearly 90-degree

GO LD E N RA ISIN S

6. Make cream cheese frosting in food processor, frost cooled cake, and serve.

Our Favorite

by Miye Bromberg

angle between head and handle gave us more leverage and kept our hands higher above the cooking surface than models with shallower angles. Handle design also helped determine our winner. Handles that were about 5 inches long were long enough to accommodate hands of all sizes and allowed for more control when flipping or lifting. We also liked easy-to-grip handles made from soft or textured plastics. The Dexter Russell Steak Turner (model S286-8PCP) is our winner. Its solid head is long and spacious, so it can scoop up plenty of food at a time. While the back end of the head is thick and sturdy, its front edge is thin, flexible, and rounded, allowing it to slip easily under food. And its textured plastic handle, set at a steep angle, is grippy and allows for good control. For a less expensive option, consider our Best Buy from Mercer Culinary, which performed almost as well. Go to CooksCountry.com/mar20 to read the full testing results and see the complete chart.

H IG HLY RECO MMEN DED Dexter Russell Steak Turner Comments: With a head that was thin and flexible in the front and thick and sturdy at the back, this long, relatively broad turner scooped up lots of food.

R ECO MME NDED Mercer Culinary M18310 Hell’s Handle High Heat 8" x 3" Perforated Rounded Edge Turner

c Pri

$ e:

.45 28

Best Buy

Comments: We liked this model almost as much as we liked our winner, but its perforations caught on food.

99 13.

Pri

$ ce :

Winco High Heat Square Edge Turner, Orange Nylon Handle, 7¼" x 3" Blade Comments: We loved

the handle and the broad head. However, the head’s squared edges damaged the tart crust.

Pri

$ ce :

5 5.5

Dexter Russell Rounded 6x3 Turner Comments: The smaller version of our winner offered more control but couldn’t handle as much food.

F E B RUA RY/ M A R C H

6 19.4

Pri 2020 •

COOK’S

$ ce :

COUNTRY

23


COOKING CLASS

Fresh Hand-Rolled Pasta

Rolling out pasta by hand is fun—and it produces beautifully tender, tasty noodles every time. by Matthew Fairman FR ESH PASTA

Serves 4 to 6 (Makes 1 pound) The longer the dough rests in step 2, the easier it will be to roll out. When rolling out the dough in step 4, be sure to avoid dusting the dough with too much flour; that may result in the dough snapping back into shape as you roll. Cook the noodles within 1 hour of cutting them. 2 cups (10 ounces) all-purpose flour 2 large eggs plus 6 large yolks 2 tablespoons extra-virgin olive oil Table salt for cooking pasta 1. Process flour, eggs and yolks, and oil

in food processor until mixture forms cohesive dough that feels soft and is barely tacky to touch, about 45 seconds. (If dough sticks to your fingers, add up to 1⁄4 cup flour, 1 tablespoon at a time, until barely tacky. If dough doesn’t become cohesive, add up to 1 tablespoon water, 1 teaspoon at a time, until it just comes together; process 30 seconds longer.) 2. Turn out dough ball onto clean counter; knead until smooth, about 30 seconds. Shape dough into 6-inch-long cylinder. Wrap in plastic wrap. Let rest at room temperature for at least 1 hour or up to 4 hours. 3. Cut cylinder crosswise into 6 equal pieces. Working with 1 piece of dough (rewrap remaining dough), dust both sides with flour, place cut side down on clean counter, and press into 3-inch square. 4. Using heavy rolling pin, roll into 6-inch square. Dust both sides of dough lightly with flour. Starting at center of square, roll dough away from you in 1 motion. Return rolling pin to center of dough and roll toward you in 1 motion. Repeat rolling steps until dough sticks to counter and measures roughly 12 inches long. 5. Lightly dust both sides of dough with flour. Roll dough until it measures roughly 20 inches long and 6 inches wide, frequently lifting dough to release it from counter. (Outline of your fingers should be easily visible through dough.) If dough firmly sticks to counter and wrinkles when rolled out, dust dough lightly with flour. 6. Transfer pasta sheet to clean dish towel on counter and let stand, uncovered, until firm around edges, about 15 minutes.

Meanwhile, roll out remaining dough. Starting with 1 short end, gently fold first pasta sheet at 2-inch intervals until sheet has been folded into flat, rectangular roll. 7. Using sharp chef’s knife, slice crosswise into 1⁄8-inch-thick noodles for linguine, ¼-inch-thick noodles for tagliatelle, or ½-inch-thick noodles for pappardelle. Use your fingers to unfurl pasta; transfer to rimmed baking sheet. Repeat folding and cutting with remaining pasta sheets. 8. Bring 4 quarts water to boil in large Dutch oven. Add 1 tablespoon salt and pasta and cook until tender but still al dente, about 3 minutes. Reserve 1 cup cooking water. Drain pasta and toss with desired sauce, adjusting consistency with reserved cooking water as needed. Serve immediately. TO MA K E AH EAD At end of step 7, place baking sheet in freezer and freeze until pasta is firm. Transfer pasta to zipper-lock bag and freeze for up to 2 weeks. Cook pasta from frozen as directed in step 8. GA RLI C OIL PASTA SAUC E WIT H PARS LEY A ND PECOR I N O

Serves 4 to 6 (Makes enough for 1 pound pasta) For the best results, use a high-quality extra-virgin olive oil. 1⁄3 cup extra-virgin olive oil 4 garlic cloves, sliced thin ½ teaspoon table salt ½ teaspoon pepper ¼ teaspoon red pepper flakes 1 pound cooked pasta, plus 1⁄2 cup pasta cooking water ¼ cup chopped fresh parsley 4 teaspoons lemon juice Grated Pecorino Romano cheese 1 . Combine oil, garlic, salt, pepper, and

pepper flakes in 12-inch skillet. Cook over medium heat until garlic is lightly toasted, 2 to 4 minutes. 2. Add pasta and pasta cooking water; toss to combine. Off heat, stir in parsley and lemon juice. Season with salt and pepper to taste. Serve immediately, passing Pecorino separately.

24 C O O K ’ S C O U N T R Y • F E B R U A R Y / M A R C H 2 0 2 0

You can custom-cut the dough into different widths (above). We chose to pair ½-inch-wide pappardelle with our Garlic Oil Pasta Sauce with Parsley and Pecorino (below).


Lots of Yolks = Supple Dough

Separation Anxiety?

Dough for pasta that is rolled out with a pasta machine usually calls for two eggs for 2 cups of flour; our dough, which is rolled much less, ups the ante with an additional six egg yolks for the same amount of flour. The extra fat in the yolks makes for a softer dough (and softer noodles) that rolls out easily with minimal snapback, in part because the fat interrupts gluten strands from forming.

The two best tools for separating egg yolks from whites are your hands and the eggshells themselves.

2 WH O L E EGG S

Shell Method: Crack egg on flat surface and, working over bowl, tip contents of egg back and forth between pieces of shell, letting white fall into bowl and leaving yolk in 1 half of shell.

Hand Method: Crack egg on flat surface and open shell so yolk and white fall into your cupped hand. Slightly open your fingers so white can slip into bowl below, leaving yolk in your hand.

Rolling Out Dough: Best Practices Apply even pressure with your hands throughout rolling motion.

Roll in single, deliberate motions rather than quickly back and forth.

Periodically brush surface of dough with your hands to remove excess flour and monitor thickness.

6 EGG YO LKS

To prevent pressing and smearing edges too thin, do not roll pin off edges of dough.

1⁄2 inch

1⁄4 inch

1⁄8 inch

Noodle Guide 1. Pappardelle = 1⁄2 inch wide 2. Tagliatelle = 1⁄4 inch wide 3. Linguine = 1⁄8 inch wide

Illustration : Hannah Jacobs

Ten Steps to Fresh Pasta

1. Weigh flour Use a digital scale to weigh out 10 ounces of all-purpose flour. Why? While the recipe will work using the volume equivalent of 2 cups, it has less room for error if you weigh the flour.

2. Process dough Process the flour, eggs and yolks, and olive oil in a food processor for 45 seconds. Why? The efficient mechanical action of the processor brings the dough together quickly.

3. Check and adjust dough Add either flour or water as needed to create a cohesive dough. Why? The moisture content of this dough needs to be right in order to produce a workable dough.

4. Knead dough, then let rest Knead until smooth, shape into a log, wrap, and let rest on the counter. Why? Resting allows the gluten in the dough to relax, making for a malleable dough that won’t spring back excessively when rolled.

5. Divide into 6 pieces Use a bench scraper or chef’s knife to divide the dough into six equal pieces. Why? Since we roll the dough very thin, each piece has to be fairly small at the start of rolling.

6. Prepare to roll Dust one piece of dough with flour, and then pat it into a square. Why? Pressing the dough flat before rolling it makes it much easier to control the finished shape of the pasta sheet.

7. Roll into rectangle Slowly roll the dough into a thin 20 by 6-inch sheet. Why? Rolling to these specific dimensions ensures a dough of proper thickness.

8. Lay sheets out to dry Transfer the pasta sheet to a dish towel. Let it stand, uncovered, until it’s slightly dried and firm. Repeat with the remaining pieces. Why? Drier dough can be folded up (for cutting) without sticking.

9. Fold and cut Gently fold one pasta sheet at 2-inch intervals until it’s fully rolled up. Then slice it thin. Why? Slicing the log requires only short, easily controlled knife cuts that help ensure even noodles.

10. Unfurl and cook Unfurl the noodles and transfer them to a rimmed baking sheet; repeat with the remaining sheets. Boil the noodles for 3 minutes. Why? Unwinding the noodles before cooking prevents clumping.

F E B RUA RY/ M A R C H

2020 •

COOK’S

COUNTRY

25


O N E PA N

Spiced Chicken Kebabs Dinner We used the oven (and broiler) to make a spiced chicken and vegetable dinner that tastes like it just came off the grill. by Alli Berkey love about grilled meat on a stick? It’s easy to cook (the skewer holds together small pieces that are otherwise hard to manage over the fire), easy to eat (the food is already cut into bite-size pieces), easy to serve (one kebab usually feeds one person), and easy to customize (what you thread onto each skewer is up to you). But do you have to put away the skewers when temperatures are low? I wanted an easy, weeknight-friendly supper of chicken kebabs that tasted of char but could be cooked indoors. And I wanted to cook it all on one pan for easy cleanup. Step one was choosing between chicken breasts and chicken thighs; I went with the breasts because they require less prep and take less time to cook. I cut four boneless, skinless chicken breasts into 2-inch chunks,

W H AT ’ S N O T T O

Setup for Success Timing and positioning on the baking sheet are everything here.

P OTATOES Get a head start in the oven

B ROCCOLI F LO RE TS Go in the center of the baking sheet

C HI C KEN KE BABS Sit on top of the potatoes, closest to the heat of the broiler element

seasoned the chunks with salt and pepper, threaded them onto skewers, and broiled them for about 15 minutes, flipping them halfway through. Not bad, but the chicken chunks were a tad dry and dull. They needed flavor. I tried all kinds of marinades, spice rubs, and glazes before landing on a single ingredient that may be unmatched for its combination of potent flavor and ease of use: Thai red curry paste. Marinating the chicken in this aromatic mixture of ginger, chiles, lemongrass, garlic, and spices imbued it with deep flavor; the kebabs tasted superseasoned but didn’t necessarily read as Thai. Adding some plain yogurt to the marinade thinned it out so it coated the chicken more evenly and helped the meat brown and char more readily under the broiler’s fiery breath. To round out the meal, I decided on small red potatoes and broccoli, knowing that the potatoes would need more than a quick stint under the broiler to cook through. I experimented with cutting the vegetables into different shapes and broiling and roasting them at different temperatures before landing on a foolproof method. First, I gave halved potatoes a head start in a 475-degree oven until they were browned on their cut side. Then, I removed the baking sheet from the oven, heated the broiler, piled the broccoli florets in the middle of the sheet, placed the kebabs around the perimeter, and broiled the whole lot for about 15 minutes, flipping the kebabs halfway through cooking. By following this method, I was able to achieve tender and nicely browned potatoes, broccoli florets with a little smoky char, and perfectly charred, deeply seasoned chicken that tasted like it had been cooked on a grill. A quick stir-together yogurt sauce—using more of both the curry paste and the yogurt called for in the marinade, plus lime juice for extra brightness and cilantro for freshness— for serving on the side made all the flavors pop even more. This supper provides a taste of summer all year round—all on one pan.

26 C O O K ’ S C O U N T R Y • F E B R U A R Y / M A R C H 2 0 2 0

A secret ingredient—red curry paste—adds deep savory flavor to these tasty chicken kebabs.

O NE-PAN CHI CKEN KE BABS WI TH POTATOES AN D BROCCOLI

Serves 4

When shopping, look for small red potatoes measuring 1 to 2 inches in diameter (about the size of a golf ball). We developed this recipe using Thai Kitchen Red Curry Paste; a 4-ounce jar is plenty here. You will need four 12-inch metal skewers for this recipe. C HIC KEN ½ cup plain Greek yogurt 2 tablespoons red curry paste 1 tablespoon vegetable oil 1 teaspoon table salt ½ teaspoon pepper 4 (6- to 8-ounce) boneless, skinless chicken breasts, trimmed and cut into 2-inch chunks SAUCE ½ cup plain Greek yogurt ¼ cup chopped fresh cilantro 1 tablespoon lime juice 1 tablespoon water 1 teaspoon red curry paste ¼ teaspoon table salt 1⁄8 teaspoon pepper V EG ETA BL ES 1½ pounds small red potatoes, unpeeled, halved ¼ cup vegetable oil, divided ¾ teaspoon table salt, divided

½ teaspoon pepper, divided 1 pound broccoli florets, cut into 2-inch pieces

1. F OR T H E CH ICKEN : Adjust oven

rack to middle position and heat oven to 475 degrees. Whisk yogurt, curry paste, oil, salt, and pepper together in medium bowl. Add chicken and stir to combine. Let marinate for at least 30 minutes or up to 1 hour. Thread chicken onto four 12-inch metal skewers; set aside. 2. F OR TH E S A U CE : Whisk all ingredients together in bowl. 3. F OR T H E V EGE TAB L E S: Line rimmed baking sheet with aluminum foil. Toss potatoes, 2 tablespoons oil, ½ teaspoon salt, and ¼ teaspoon pepper together on prepared sheet. Arrange potatoes, cut side down, around outside of sheet. Bake until bottoms begin to brown, about 15 minutes. 4. Remove sheet from oven and heat broiler. Toss broccoli, remaining 2 tablespoons oil, remaining ¼ teaspoon salt, and remaining ¼ teaspoon pepper together in medium bowl. Place broccoli in center of sheet. Place kebabs around perimeter of sheet on top of potatoes. Return sheet to oven and broil until chicken is lightly charred on top, about 8 minutes. Flip kebabs and continue to broil until lightly charred on second side and chicken registers 160 degrees, 6 to 8 minutes longer. Serve kebabs with vegetables and sauce.


SLOW COOKER

Chicken Marbella

S LOW-CO O KER

The slow cooker can muddy things up. We wanted something brighter.

Serve with crusty bread or couscous.

CH I CKE N M ARB E LLA

by Natalie Estrada and Morgan Bolling

Serves 4 to 6

8 (5- to 7-ounce) bone-in chicken thighs, trimmed 1½ teaspoons table salt, divided

treasured recipes featured in The Silver Palate Cookbook, which was written by Sheila Lukins and Julee Rosso and first published in 1982, is Chicken Marbella. At first glance, both then and now, the combination of ingredients will surprise some: Chicken parts stewed with prunes, olives, and wine? But Lukins and Rosso’s bold combination is lovely. We set out to create an equally lovely version for the slow cooker. As is common in the test kitchen, our first move was just to put all the ingredients into the slow cooker, turn it on, and walk away—to see what would happen. We chose chicken thighs because their dark meat is well suited to the long, gentle cooking of the slow cooker. After a few hours, we found juicy, tender, beautifully seasoned chicken—swimming in a muddy, one-note, superfatty sauce. While deeply savory, the sauce lacked the complex sweet, salty, briny, fruity, meaty profile that made its original iteration so appealing. Solving the fat issue was easy: Parcooking the chicken thighs for 10 minutes skin side down in a skillet before transferring them to the slow cooker rendered a fair amount of fat in the skin without sacrificing any meaningful flavor. Finishing the parcooked thighs in the slow cooker was a “set it and forget it” situation. Fixing the dull prune-olive sauce was the tricky part. We tried cooking the sauce separately in a saucepan and introducing it to the slow-cooked chicken only when the dish was ready to serve, but the result felt disjointed—the flavors never had a chance to come together. Instead, we tried including a portion of the prune-olive mixture (pureed in a food processor for ease of preparation and maximum flavor transfer) in the slow cooker with chicken broth and wine to keep the chicken company as it stewed and then adding the rest of the sauce (boosted with a splash of orange juice) just before serving. Finally we tossed in chopped parsley to finish. There. A complex mix of depth and brightness, framing juicy chicken thighs, with inexpensive ingredients and not a lot of work. With a bit of crusty bread or couscous on the side, it’s just right for a rustic supper. AMONG THE MANY

1 teaspoon pepper, divided ½ cup pitted green olives ½ cup plus 1⁄3 cup pitted prunes, halved, divided 3 tablespoons capers, rinsed, divided 1 tablespoon packed brown sugar 3 garlic cloves, minced 1 teaspoon dried oregano ¼ teaspoon red pepper flakes 1 cup chicken broth ¼ cup dry white wine 1 tablespoon orange juice 1 tablespoon chopped fresh parsley

1. Pat chicken dry with paper towels

and sprinkle with ½ teaspoon salt and ½ teaspoon pepper. Place chicken, skin side down, in cold 12-inch nonstick skillet. Cook over medium-high heat until fat is rendered and skin is well browned, 8 to 10 minutes. Transfer chicken to slow cooker, skin side up. 2 . Pulse olives, ½ cup prunes, 2 tablespoons capers, sugar, garlic, oregano, pepper flakes, remaining 1 teaspoon salt, and remaining ½ teaspoon pepper in food processor until finely chopped, about 10 pulses. Set aside ¼ cup olive mixture. 3. Distribute remaining olive mixture over chicken. Add broth, wine, and remaining ⅓ cup prunes. Cover and cook until chicken is tender, 4 to 6 hours on low. 4. Transfer chicken to shallow serving platter. Stir orange juice, reserved olive mixture, and remaining 1 tablespoon capers into sauce in slow cooker. Season with salt and pepper to taste. Pour sauce over chicken and sprinkle with parsley. Serve.

A combination of fruity prunes and briny olives forms the sweet-savory flavor base of this iconic dish.

A Cold Start When The Silver Palate Cookbook was published in 1982, it didn’t have much competition for its style of cooking—global flavors filtered through an American lens. But authors Sheila Lukins and Julee Rosso knew American home cooks were ready for cookbooks with a more contemporary vibe. For home cooks whose previous go-tos had included doorstops such as Joy of Cooking, The Silver Palate Cookbook had a distinct point of view: fresher ingredients (arugula! pesto!); bolder flavors (olives! anchovies!); and a relaxed, friendly, family-style feel. Wear your jeans to dinner, this book said, and don’t worry if the silverware doesn’t match. Nearly 40 years later, it’s still considered an essential cookbook in kitchens across the United States.

Starting the chicken thighs skin side down in a cold skillet encourages their fat to render more efficiently.

THE AMERICAN TABLE

F E B RUA RY/ M A R C H

2020 •

COOK’S

COUNTRY

27


COOKING FOR TWO

Sausage Strata for Two Can’t decide between French toast or sausage and eggs? You don’t have to!

by Jessica Rudolph

as old as brunch itself: Savory or sweet? Eggs and sausage or pancakes and waffles? I’m firmly settled in the “both” camp. That zone on your plate where the syrup has started to seep over and infiltrate the savory side? That’s where my favorite bites are, and that’s what I wanted my breakfast strata to taste like. I wanted an easy dish for a lazy day that would serve two people, and I wanted to pack it with all the best parts of breakfast. To start, I browned some bulk breakfast sausage, tossed it with torn sandwich bread and shredded cheddar cheese, poured a simple mixture of milk, eggs, and maple syrup over it, and baked it in a small casserole dish until it was puffy and golden brown. The strata was beautiful and tasty, but I wanted more complexity. First, I added minced fresh sage to amplify the sausage’s flavor. Then I swapped out the white bread for sweet and eggy brioche, which accentuated the maple syrup’s sweetness and drove home the strata’s French-toast-y flavor. This was a big step in the right direction, but overall the casserole was skewing a little sweet, so I swapped out the regular sausage for hot. The extra heat struck a harmonious balance with the nuttiness of the cheese and the sweetness of the syrup. Happy with the sweet-savory flavor, I considered my method. I wondered if I could cut down on dishes and bake my strata in the skillet I’d used to brown the sausage. I reached for an 8-inch nonstick ovensafe skillet, the perfect size for a casserole for two, and it worked beautifully: My strata had a custardy-soft inside and a crisp golden crust above and below. Better yet, I found I could refrigerate the fully assembled strata overnight and bake it in the morning for an even more relaxing morning in. IT’S A QUESTION

This savory strata has just a hint of sweetness from a splash of maple syrup.

SAUSAGE STRATA FO R TWO

Two small brioche rolls should yield the 4 ounces needed for this recipe. For a less spicy dish, substitute regular pork sausage for the hot. We like the sweetness that maple syrup adds here, but you can omit it for a more savory strata. If you don’t have an 8-inch ovensafe nonstick skillet, cook the sausage in a 10-inch skillet and assemble and bake the strata in a greased 9-inch pie plate. ¾ cup whole milk 3 large eggs 1 tablespoon maple syrup ¼ teaspoon table salt ¼ teaspoon pepper 4 ounces brioche, torn into 1-inch pieces (3 cups) 4 ounces sharp cheddar cheese, shredded (1 cup) 6 ounces hot bulk pork breakfast sausage 1 teaspoon minced fresh sage

1. Adjust oven rack to middle position

and heat oven to 375 degrees. Whisk milk, eggs, maple syrup, salt, and pepper together in large bowl. Add brioche and cheddar and stir to combine; set aside. 2. Cook sausage in 8-inch ovensafe nonstick skillet over medium heat until browned, about 8 minutes, breaking meat into small pieces with wooden spoon. Add sage and cook until fragrant, about 30 seconds. Transfer to bowl with brioche mixture and stir to combine. 3. Transfer strata mixture to now-empty skillet and smooth into even layer. Bake until puffed and lightly browned, about 30 minutes (strata will puff above rim of skillet). Let rest for 10 minutes. Serve. TO MAK E A H EAD

At end of step 2, strata mixture can be transferred to greased 9-inch pie plate, covered with plastic wrap, and refrigerated for up to 24 hours. Bake in pie plate.

Cheese Whiz

Top Skillet

Buying Maple Syrup

When we held a taste test of supermarket sharp cheddar cheeses, Cabot Vermont Sharp Cheddar came out on top. We were impressed by its “nutty,” “almost smoky” flavor and “complex” sharpness.

An 8-inch nonstick skillet is a useful pan to have when cooking for two. Our favorite is the OXO Good Grips Hard Anodized Pro Nonstick 8-Inch Fry Pan ($30).

Maple syrup is essential in the test kitchen. A recent taste test surprised us: We didn’t find many differences among the products in our lineup. That said, we prefer to use 100% pure maple syrup and like the full flavor of syrups labeled Grade A Dark Amber.

28 C O O K ’ S C O U N T R Y • F E B R U A R Y / M A R C H 2 0 2 0


HOW TO MAKE

Bacon Jam Do you like bacon? Then this sweet-savory spread will be your jam. by Matthew Fairman publish in Cook’s Country goes through rigorous testing, not only in our own test kitchens but in dozens of home kitchens across the country. This is, of course, thanks to our dedicated cadre of volunteer home testers (visit the link at the end of the recipe for more information). The feedback we get from our readers—who test our recipes in their home kitchens with their own groceries and pots and pans—is absolutely essential to refining our recipes. Contributing Editor Eva Katz, an experienced cook and a very tough critic, also runs through and assesses each of our recipes in her home kitchen. If there’s a problem with the method or the flavor isn’t perfect, she tells us about it. Not every recipe survives her thoughtful, honest, and sometimes heartbreaking review. A thumbs-down from Eva means the test cook has to get back in the kitchen, or possibly even that the recipe has to be scrapped. Here’s what she had to say about this bacon jam: “I ate some of this spread on a slice of toasted whole-grain bread topped with a slice of cheddar cheese. Delicious. It was complex and well balanced. It hits the entire flavor spectrum: smoky, sweet, sour, umami, and salty. It’s an easy recipe, and I think anyone who likes bacon would like this jam—9.5 out of 10.” When I read her notes, I beamed like a proud parent. I’d tinkered with the recipe for weeks. I’d tested thick-cut bacon against classic slices and found that the thick-cut bacon remained too chewy in the finished jam. I’d chosen maple syrup over other sweeteners because it perfectly complemented the smoky, salty bacon and yielded a spreadable jam. I’d tested half a dozen cooking methods until I was absolutely sure I had to begin by crisping up the bacon and rendering the fat. Without that step, the jam was greasy and the bacon was flabby. Once I had the jam where I wanted it—unctuous and spreadable, smoky and salty, with just the right amount of balancing sweetness and acidity— I was unable to stop eating it. I’ve slathered it on egg sandwiches. I’ve dipped apple slices into it as an afternoon snack. I’ve put it out with a fancy cheese plate for my family. I’ve even whisked it into a vinaigrette. E V E RY R E C I P E W E

1. Cook bacon in skillet and transfer to paper towel–lined plate.

3. Add liquids, cayenne, and bacon to pan. Boil and cook until liquid evaporates.

2. Sauté aromatics in bacon fat until onion is softened and browned.

4. Discard thyme sprigs and pulse bacon mixture in food processor until minced.

So here’s the recipe. Try it. I can’t wait to have your feedback on it, too, and to see what ingenious uses you find for it. As for me, I’ve got a batch in the fridge and a list of plans. First, burgers with bacon jam. Then I might double down on the bacon in some BLTs. Would it be too much to stir it into some banana pancake batter? We’ll see. BACO N JAM

Serves 8 to 10 (Makes about 1¼ cups)

Do not use thick-cut bacon in this recipe. We like cider vinegar here, but you can experiment with other vinegars if you like. You can use more or less cayenne to suit your preferences; the ⅛ teaspoon we call for provides just a hint of heat. 1 pound bacon, cut crosswise into ½-inch-wide strips 2 cups thinly sliced onion 4 sprigs fresh thyme 2 garlic cloves, smashed and peeled 4 cups water 1⁄3 cup cider vinegar 1⁄3 cup maple syrup 1⁄8 teaspoon cayenne pepper

1. Cook bacon in 12-inch nonstick

skillet over medium heat until crispy, 15 to 18 minutes. Using slotted spoon, transfer bacon to paper towel–lined plate; set aside. Pour off all but 2 tablespoons fat from skillet. 2 . Heat fat left in skillet over medium heat until shimmering. Add onion, thyme sprigs, and garlic and cook until onion is softened and browned, 5 to 7 minutes. Stir in water, vinegar, maple syrup, cayenne, and reserved bacon. Increase heat to medium-high and bring to boil. Cook, stirring occasionally, until nearly all liquid has evaporated and mixture begins to sizzle loudly, 22 to 28 minutes. 3. Remove from heat and let cool for 15 minutes. Discard thyme sprigs. Transfer bacon mixture to food processor and pulse until minced, 15 to 20 pulses. Serve warm. (Jam can be refrigerated for up to 4 days. To serve, cover and microwave for 1 minute, stirring halfway through microwaving.)

F E B RUA RY/ M A R C H

Join our thousands of home recipe testers! Visit CooksCountry.com/ recipetesting to sign up.

2020 •

COOK’S

COUNTRY

29


P R O D U C T TA S T I N G

Tasting Cornmeal

Our favorite product produced a tender cornbread with a pleasant flavor.

by Emily Phares

Our Favorite

WE RECOM MEND EVERY COR NME AL W E TASTED.

1 pantry essential, whether we’re making cornbread or corn pancakes. When our former favorite was discontinued, we chose five nationally available products to test. We made Southern-Style Skillet Cornbread and (to see how the products performed when combined with flour) Cornmeal Buttermilk Pancakes. Every cornmeal produced satisfactory pancakes. The cornbreads were much more revealing—their textures ranged from smooth, moist, and tender to grainy and crumbly. To assess the grind sizes of the cornmeals, we sifted them. Despite being labeled as “fine,” one product was much finer than the rest, while another was much coarser. The grind sizes of the other three products fell somewhere in between. Tasters found cornbread made with the very coarse cornmeal to be “grainy” and “gritty.” But overall, tasters cared more about how moist the cornbreads were than how rough or fine they were in texture; tasters strongly preferred the two “moist” cornbreads to the three that were perceived as drier. To learn why only some of the cornmeals produced moist cornbreads, we talked to Dr. Charles Hurburgh, professor of agricultural and biosystems engineering at Iowa State University. He explained that the moistness of a cornbread probably has more to do with whether or not the corn kernels were degerminated prior to grinding than how finely or coarsely they were ground. Dr. Hurburgh said it’s standard practice for high-capacity mills to remove the germ—the part of the corn kernel CORNMEAL IS A

2 that contains vitamins, enzymes, and corn oil—prior to grinding the corn. There are two reasons for this. First, manufacturers can sell the corn oil they harvest from the germ. Second, the oil in the germ will turn rancid over time, so removing the germ prior to grinding helps prolong a cornmeal’s shelf life. According to our science research editor, a cornmeal’s label may report that it contains 0 grams of fat, but that doesn’t mean it contains no fat at all. The amounts are just too small to register when calculating the nutritional information. He also noted that, on average, the fat content of degerminated cornmeal is 1.75 percent, whereas the fat content of germ-in cornmeal is almost 4 percent. Though this difference may be small, it can have a big impact: Cornmeals made from kernels with their fatty germs intact would be more likely to produce a moist cornbread. Sure enough, our two favorite products—the ones that produced particularly moist cornbreads—were made from corn that was not degerminated. As for flavor, tasters noted that some of the cornbreads were more “subdued” in flavor, while others had a “prominent” corn taste. We preferred the more neutral, “buttery” flavor of our favorite cornmeal to the “very strong” corn flavor of our lowest-ranked product. Ultimately, we can recommend every cornmeal we tasted. Our favorite, Anson Mills Antebellum Fine Yellow Cornmeal, made tender, cakey cornbread. Since we had to order this cornmeal online, we also chose a winning supermarket brand: Goya Fine Yellow Corn Meal.

30 C O O K ’ S C O U N T R Y • F E B R U A R Y / M A R C H 2 0 2 0

3

4

RECO MMENDED 1 Anson Mills Antebellum Fine Yellow

5 TASTERS ’ N OTES

Ingredients: Organic John Haulk corn Degerminated: No Fat: Not listed

This germ-in cornmeal produced a cornbread that was “moist,” soft, and tender, with a smooth, cakey texture that was “not too crumbly.” Instead of being corn-forward, its flavor was more muted, with some tasters noting a “nice butter flavor.”

2 Goya Fine Yellow Corn Meal Price: $1.99 for 24 oz ($0.08 per oz) Ingredients: Yellow corn meal enriched with iron, niacin, thiamin, riboflavin, folic acid Degerminated: No Fat: 0 g per serving

Another germ-in product, our runner-up produced a really moist cornbread. Its smooth texture “holds together well” without crumbling. It had an understated yet “pleasant” and “savory” flavor that we liked.

3 Aunt Jemima Yellow Corn Meal Price: $11.00 for 80 oz ($0.14 per oz) Ingredients: Degerminated yellow corn meal,

This cornmeal was degerminated, which likely contributed to the relatively dry (but not too dry) crumb in the cornbread made from it. We liked the “nice medium texture” and “buttery” flavor.

Cornmeal Price: $5.95 for 12 oz ($0.50 per oz), plus ship-

ping ($9.44 for four 12-oz bags)

niacin, reduced iron, thiamin mononitrate, riboflavin, folic acid Degerminated: Yes Fat: 0 g per serving

4 Bob’s Red Mill Fine Grind Cornmeal Price: $2.59 for 24 oz ($0.11 per oz), plus ship-

ping ($13.34 for two 24-oz bags) Ingredients: Whole grain corn Degerminated: No Fat: 1.12 g per serving

5 Quaker Yellow Corn Meal Price: $2.69 for 24 oz ($0.11 per oz) Ingredients: Degerminated yellow corn meal,

niacin, reduced iron, thiamin mononitrate, riboflavin, folic acid Degerminated: Yes Fat: 0.5 g per serving

Labeled “fine grind,” this cornmeal looked a lot coarser than the rest. In cornbread, it was “earthy” in flavor and “grainy” in texture. One taster lamented that the “flavor is pleasant, but it feels like I’m eating couscous.”

Our lowest-ranked cornmeal was “dry,” with a “crumbly” texture that one taster said “falls apart very easily.” Some liked the “nice, gritty texture.” This cornmeal also had a “prominent” corn flavor that, as one taster put it, “reminded me of a tortilla chip.” CORN KERNEL

Germ = Fat = Moist Cornbread

ENDOSPERM

Sometimes a corn kernel’s germ—which contains vitamins, enzymes, and corn oil—is removed before the corn is ground, which can lead to drier baked goods. Cornmeals made from kernels with their germ intact are more likely to produce moist cornbread.

EMBRYO (GERM)


EQUIPMENT REVIEW

Countertop Vacuum Sealers If you regularly buy or prepare food in bulk, this appliance can save you time and money— but only if it’s easy to use. by Kate Shannon KEY

buy or prepare food in bulk, a vacuum sealer can save you time and money. These machines remove air from storage bags before sealing them tightly, which protects the foods inside from moisture loss or gain and helps them stay fresher longer. To find the best product, we purchased seven models priced from about $49 to about $385 and used them to vacuum-seal various foods, from berries to blade steaks. We then stashed the sealed bags in our freezer or pantry and checked them regularly over a period of months for loose seals or signs of food degradation. We also rated each machine on the user-friendliness of its design. Based on performance alone, we could recommend every machine we tested. Each machine removed air, pulling the bags tight around every type of food, and then melted a sturdy seal into the plastic. We measured each machine’s vacuum power on a scale from 0 percent (normal atmosphere) to 100 percent (every single molecule of air removed from bags). The machines all performed respectably, with scores ranging from about 68 percent to about 78 percent. The vacuum-sealed foods also held up well over time: After six months, all the pantry bags were still tightly sealed, and, with the exception of the steaks, most of the frozen food samples showed no signs of ice. (The steaks developed small patches of ice crystals after about six weeks.) Next we evaluated ease of use. We liked clearly labeled control panels that made it easy to select a setting. Every

hard time figuring out this machine. It sealed foods well, but closing the lid required a lot of force.

Poor +

Nesco Deluxe Vacuum Sealer Model: VS-12 Price: $90.02 Vacuum Strength: 75.20% Compatible with Generic Bags: Yes Weight: 6 lb, 1 oz Dimensions: 15¾ x 7¾ x 4¾ in

Vacuum sealing removes most of the air around foods (such as the strawberries above), so they last longer and freeze better.

machine had an automatic and a manual setting, both of which we found essential; additional controls such as a pulse button or a gentle setting were nice but not critical. Before any of the machines could pull air from bags, their lids had to be firmly locked. On some machines this was surprisingly difficult, thanks to lids that were awkwardly positioned or that required a good deal of force to close; this made us worry that we would break them. The size of the machines also mattered: Some were sturdy but too heavy to easily move and store, while some lighter models felt flimsy. In the end, our favorite was the Nesco Deluxe Vacuum Sealer, a sturdy yet relatively light and compact machine with an easy-to-read display screen and a lid that we could easily lock firmly into place. Less expensive than some of the other models tested, it’s a great choice for home cooks who vacuum-seal regularly. Go to CooksCountry.com/mar20 to read the full testing results and see the complete chart.

RECO M ME NDE D

Model: GVS455 Price: $49.99 Vacuum Strength: 76.87% Compatible with Generic Bags: Yes Weight: 5 lb, 4½ oz Dimensions: 15¾ x 8 x 3½ in Comments: First-time users had a

Fair ++

HI GH LY RECO MMEN DED

I F Y O U R E G U L A R LY

Gourmia Vacuum Sealer

Good +++

Comments: We liked this model’s intuitive control panel and stellar performance. The handle locked the lid into place with a reassuring click, and the “gentle” setting and pulse modes both worked well when vacuum-sealing fragile foods such as strawberries.

Performance +++ Ease of Use +++ Handling +++

VacMaster PRO350 Professional Vacuum Sealer - 12″ Seal Bar Model: PRO350 Price: $298.19 Vacuum Strength: 77.99% Compatible with Generic Bags:

Yes, but company rep discouraged use Weight: 19 lb, 8 oz Dimensions: 15 x 13¾ x 6¼ in Comments: If you like tinkering with vacuum strength and seal times to find the optimal settings for your favorite foods, this heavy-duty and highly customizable machine might be for you.

Performance +++ Ease of Use +++ Handling ++1⁄2

The FoodSaver FM2000 Vacuum Sealing System Model: FM2000 Price: $71.03 Vacuum Strength:

70.19% Compatible with Generic Bags: Yes, but company rep

discouraged use Weight: 3 lb, 14¼ oz Dimensions: 16 x 5¾ x 4 in Comments: We loved this sealer’s slim, compact design; sleek user interface; and manual control setting (which came in handy when sealing delicate foods). It didn’t have a countdown screen but was otherwise very easy to use.

Performance +++ Ease of Use ++1⁄2 Handling +++

RECOMMENDED WI TH RESERVAT IONS

N OT R ECOMM ENDED

Weston Pro-2300 Vacuum Sealer

NutriChef Vacuum Sealer

Model: 65-0201 Price: $382.00 Vacuum Strength: 67.96% Compatible with Generic Bags: Yes, but company rep discouraged use Weight: 21 lb, 15 oz Dimensions: 19 x 13½ x 5¾ in Comments: This machine was the heaviest, bulkiest,

Model: PKVS35STS Price: $74.71 Vacuum Strength: 73.53% Compatible with Generic Bags: Yes Weight: 3 lb, 5 oz Dimensions: 16 x 5¼ x 2¾ in Comments: It took a lot of trial and error to

and priciest model we tested, but it performed well.

use this machine successfully.

Crenova VS100S Food Vacuum Sealer Model: VS100S Price: $59.99 Vacuum Strength: 76.87% Compatible with Generic Bags: Yes Weight: 2 lb, 103⁄8 oz Dimensions: 13½ x 5¾ x 2¾ in Comments: This model kept pace

with others, but we had to press hard on the lid to close it.

F E B RUA RY/ M A R C H

2020 •

COOK’S

COUNTRY

31


HEIRLOOM RECIPE

RECIPE INDEX Main Dishes

Pizza Dip This dip is creamy, savory, and hot—just perfect for a movie night or game day. It smells too good to resist, but don’t skip the cooling time. Right out of the oven, the dip is hot enough to burn your tongue. H EIR LOO M P IZ Z A D I P

Serves 6 For the best results, buy a stick of pepperoni, not packaged presliced pepperoni. Serve with breadsticks, crackers, or toasted baguette slices. 8 ounces cream cheese, cut into 8 pieces ¾ cup jarred pizza sauce 1 garlic clove, minced ½ teaspoon dried oregano ¼ teaspoon red pepper flakes 4 ounces whole-milk mozzarella cheese, shredded (1 cup) 3 ounces pepperoni, cut into ¼-inch pieces 1 ounce Parmesan cheese, grated (½ cup) 6 tablespoons thinly sliced scallions, divided

1 Adjust oven rack to middle position and

heat oven to 425 degrees. 2. Microwave cream cheese in large bowl until soft, 20 to 30 seconds. Stir in pizza sauce, garlic, oregano, and pepper flakes until thoroughly combined. Stir in mozzarella, pepperoni, Parmesan, and 1⁄4 cup scallions. 3. Transfer cream cheese mixture to 1-quart casserole dish and smooth top with rubber spatula. Bake until spotty brown and bubbling at edges, 17 to 20 minutes. Let cool for 10 minutes. Sprinkle with remaining 2 tablespoons scallions. Serve.

We’re looking for recipes that you treasure—the ones that have been handed down in your family for a generation or more, that always come out for the holidays, and that have earned a place at your table and in your heart through many years of meals. Send us the recipes that spell home to you. Visit CooksCountry.com/recipe_submission (or write to Heirloom Recipes, Cook’s Country, 21 Drydock Avenue, Suite 210E, Boston, MA 02210) and tell us a little about the recipe. Include your name and address. If we print your recipe, you’ll receive a free one-year subscription to Cook’s Country.

COMING NEXT ISSUE Last year in Asheville, North Carolina, Executive Food Editor Bryan Roof came face-to-face with an extraordinary Banana Pudding Pie with a beautiful toasted meringue top, and he knew it was something we had to share with the world. We’ll publish our recipe next issue, along with recipes for Green Chicken Enchiladas, Pork with 40 Cloves of Garlic, Slow-Cooker Pork Ramen, Strawberry-Rhubarb Crisp, and more.

Chicken Paprikash 14 Chickpea Shakshuka RC Cuban Roast Pork with Mojo 7 Cuban Sandwiches 6 Garlic Steaks 8 Greek-Spiced Pork Chops with Warm Zucchini-Feta Salad RC Italian Meatloaf 11 Italian Meatloaf Sandwich 11 Korean-Style Sloppy Joes with Kimchi Slaw RC One-Pan Chicken Kebabs with Potatoes and Broccoli 26 Pork Stroganoff 9 Roasted Chicken Breasts with Green Israeli Couscous RC Sausage Strata for Two 28 Seared Scallops with Butternut Squash RC Simple Seared Scallops 2 Slow-Cooker Chicken Marbella 27 Spicy Italian Sausage with Cheddar Grits and Cherry Tomatoes RC Steak Tips with Sweet Potato Wedges RC

A tiny version of this rooster has been hidden in a photo in the pages of this issue. Write to us with its location, and we’ll enter you in a random drawing. The first correct entry drawn will win our favorite inexpensive blender, and each of the next five will receive a free one-year subscription to Cook’s Country. To enter, visit CooksCountry.com/rooster by February 29, 2020, or write to Rooster FM20, Cook’s Country, 21 Drydock Avenue, Suite 210E, Boston, MA 02210. Include your name and address. Pat Vignocchi of Northbrook, Illinois, found the rooster in the October/November 2019 issue on page 9 and won our favorite broiler-safe baking dish.

WEB EXTRAS Free for four months online at CooksCountry.com/mar20

Side Dishes Buttered Spaetzle 15 Parmesan Roasted Cauliflower 12 Twice-Baked Potatoes with Bacon and Cheddar Cheese 18 with Chorizo and Chipotle 18 with Pancetta and Mozzarella 18

Chocolate Layer Cake Rounds Food-Processor Vanilla Frosting

Bread and Pasta Cuban Bread 7 Fresh Pasta 24

Sauce Garlic Oil Pasta Sauce with Parsley and Pecorino 24

Soups and Salad Curried Chicken Noodle Soup RC French Onion Soup 21 Napa Cabbage Salad 13

Starters Heirloom Pizza Dip 32 Soy Sauce Chicken Wings 19

Condiment Bacon Jam 29

Desserts Carrot Snack Cake 22 Ginger, with Cardamom 22 Chocolate Mousse 16 Kahlúa Cheesecake INSIDE BACK COVER

RC=Recipe Card 32 C O O K ’ S C O U N T R Y • F E B R U A R Y / M A R C H 2 0 2 0

FIND THE ROOSTER!

READ US ON IPAD Download the Cook’s Country app for iPad and start a free trial subscription or purchase a single issue of the magazine. All issues are enhanced with Cooking Mode slide shows that provide step-by-step instructions for completing recipes, plus expanded reviews and ratings. Go to CooksCountry.com/iPad to download our app through iTunes.


GREAT GREAT AMERICAN AMERICAN CAKE CAKE

Kahlúa Cheesecake Coffee, cheesecake, and chocolate cake come together in a dessert that’s sure to hit the bull’s-eye. by Sarah Ewald

TO MAKE THIS CAKE,

TO ASS EMBL E:

YOU WILL NEED:

Set 1 cake round in 9-inch springform pan. Spread cheesecake mixture over cake round in pan in even layer. Place remaining cake round on top of cheesecake mixture. Cover with plastic wrap and refrigerate until set, about 6 hours. Run thin knife between cake and side of pan; remove side of pan. Transfer cake to cake stand or plate. Run offset spatula around cake sides to smooth cheesecake flush with cake.

1½ teaspoons unflavored gelatin ½ cup Kahlúa 6 ounces white chocolate, chopped 1 cup heavy cream 1 pound cream cheese, softened ½ cup (3½ ounces) sugar 2 (9-inch) Chocolate Layer Cake Rounds* 1 recipe Food-Processor Vanilla Frosting* 6 ounces bittersweet chocolate, melted and cooled slightly 2½ tablespoons (½ ounce) Dutch-processed cocoa powder FO R THE C HEESECAKE:

Sprinkle gelatin over Kahlúa in small saucepan and let sit until gelatin softens, about 5 minutes. Cook gelatin mixture over low heat until edges are just bubbling. Add white chocolate and continue to cook, stirring constantly, until just melted and smooth, about 2 minutes longer. Set aside and let cool for 15 minutes. Using stand mixer fitted with whisk attachment, whip cream on medium-high speed until soft peaks form, 1 to 2 minutes; transfer to medium bowl and set aside. Fit now-empty mixer with paddle and beat cream cheese and sugar on medium-high speed until light and fluffy, 2 to 3 minutes. Reduce speed to medium-low, add cooled white chocolate mixture, and beat until just combined, about 30 seconds, scraping down bowl as needed. Using rubber spatula, gently fold in whipped cream until combined.

TO D ECORATE:

Fit 3 pastry bags with small star tips. Transfer ½ cup vanilla frosting to 1 pastry bag. Whisk bittersweet chocolate into remaining frosting in bowl until fully combined. Transfer 2½ cups chocolate frosting to second pastry bag. Whisk cocoa into remaining chocolate frosting in bowl until fully combined, then transfer to third pastry bag. (You will have 2 shades of chocolate frosting: light and dark.) Cover sides of cake with stars of light chocolate frosting. Pipe bull’s-eye pattern of stars over top of cake, starting with dark chocolate frosting at edge and alternating colors with each row. Refrigerate until frosting is firm, about 45 minutes. Serve. *Our recipes for Chocolate Layer Cake Rounds and Food-Processor Vanilla Frosting are available for free for four months at CooksCountry.com/ kahluacake.


Turn static files into dynamic content formats.

Create a flipbook
Issuu converts static files into: digital portfolios, online yearbooks, online catalogs, digital photo albums and more. Sign up and create your flipbook.