
1 minute read
■ Setting Up and Managing Outlook and Exchange

from Microsoft Office 365
by EckoTango

FIGURE 3-10 After you add the domain name and click Check Domain, Office 365 displays the information found about your pre-existing domain.
Click Next to continue the process. In the Verify Domain window, if you’re ready to transfer the domain to your Office 365 account, follow the instructions provided to create a subdomain, edit the DNS settings, and complete the necessary permissions. You might need to involve your domain registrar in this process. Finally, click Verify to finalize the process and make the domain available to Office 365. The entire operation might take up to 72 hours to complete. In the meantime, your added domain will appear as Pending Verification in the domain table in the Domains window.
Advertisement
Now that you’ve got your users set up in the site, you’re ready to begin setting up your services. Let’s start with Outlook and Exchange, which you can use to create new mailboxes, create groups, set up calendars, and more.
Begin the process by clicking Admin and, in the Admin Overview window, click General Settings in the Outlook area. The Exchange Online screen appears (shown in Figure 3-11), where you can set up defaults for a number of features, including the following: ■ Add mailboxes
■ Create distribution lists
■ Set up external contacts ■ Add other email accounts to Exchange Online
Tip The Exchange Online settings you enter control the settings available in other aspects of Office 365 as well, including the way email works for your user accounts and the types of lists and contacts that are available in the Outlook Web App and in Lync Online.
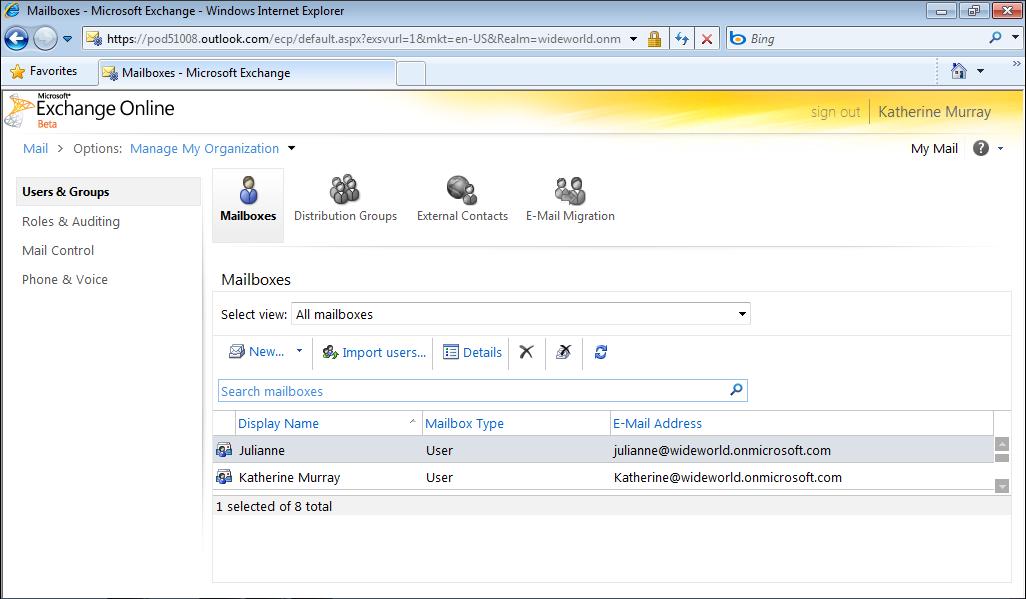
FIGURE 3-11 Exchange Online enables you to set up the way you want email to work in Office 365.
The Mailboxes features in Exchange Online follow steps similar to the ones you’ve already taken to set up your users in Office 365. You can click New in the Mailboxes screen to


