2 minute read
Editing Your Picture
from Microsoft Office 365
by EckoTango
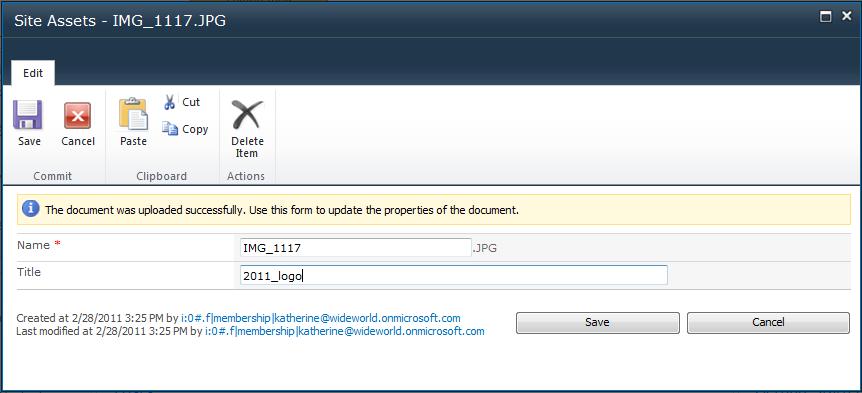
9. In the Site Assets dialog box, type a title for the image (which also serves as alternate text for readers who can’t see the visual), and click Save. (See
Figure 5-10.)
Advertisement
FIGURE 5-10 Enter a title for the picture in the Site Assets dialog box.
The picture is added to your page, and the editing tools appear so that you can fine-tune the way the image looks on your page.
Note The Site Assets folder is probably fine for storing your pictures unless you want to create a specific folder related to your current project. If you have already created another folder and want to save the uploaded image to that folder, click the Upload To arrow and choose the folder you want. Then click OK.
If you’ve done any website work in the past, you probably remember how much of a pain it was to get images in the site that look just the way you want them to. And if you really wanted to change a few picture basics—like maybe add a border, change the size of the image, or realign it on the region of the page where you placed the picture—you needed to remember the commands so that you could manipulate the picture by hand. Well, not any more. With Office 365, once you place the picture on the page, the Picture Tools Design tab displays the tools you need to make those sorts of changes easily. With just a few clicks and keystrokes, you’re done. Here are the simple steps: 1. Click the image you just added to the page. The Picture Tools Design tab appears. (See Figure 5-11.)
2. To change the way the image aligns with the text on the page, click Position and choose the option you want from the displayed list. 3. To add or remove a border, click Image Styles and click your choice. 4. To resize a picture, click in the Horizontal Size or Vertical Size box and type the new measurement for the image (in pixels). If you want to preserve the aspect ratio of the picture, leave the Lock Aspect Ratio check box selected. 5. When you’re finished making changes, simply click outside the picture and the tools disappear.

FIGURE 5-11 Use the tools on the Picture Tools Design tab to enter the alternate text, change the position, or resize the image.
Tip The Change Picture tool on the Picture Tools Design tab is a real timesaver once you’ve got an image on the page in the size and position you like. You can just swap out a picture by clicking Change Picture, navigating to the folder where the image is stored, selecting it, and clicking Open. The new picture is placed in the same position as the previous one, and the same settings are applied to the new image. Nice!


