2 minute read
■ Receiving and Sending Email on Your Phone

from Microsoft Office 365
by EckoTango

No matter what kind of work you want to get done while you’re on the road, you can easily open, view, edit, and share your Office 365 files and stay in touch with your team along the way.
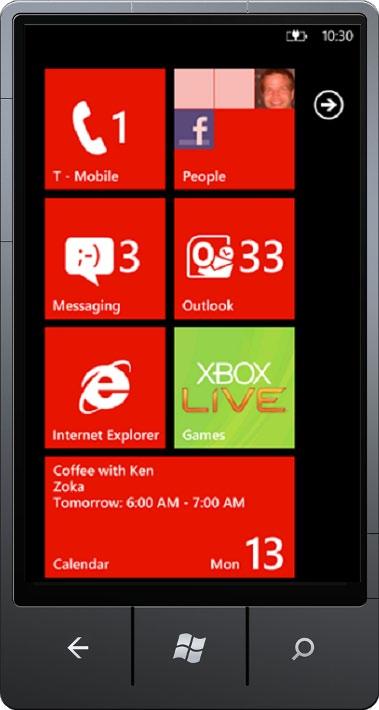
In Chapter 2, “Getting Started with Office 365,” you learned how to set up your Office 365 email so that you can view it and respond to it on your mobile phone. The process varies depending on the type of phone you have. After you’ve set up the phone to work with Office 365, you can view your email simply by tapping the email icon on your Start screen. If you’ve set up your Office 365 mail as your primary mail account, the Outlook icon on your Windows Phone 7 start screen shows the number of emails waiting for you to review, as shown in Figure 9-1. (If you’ve set up a different email account as your primary account, that account will appear by default in the Outlook icon, providing of course it is an Outlook-based account.)
Advertisement
FIGURE 9-1 Your Windows Phone 7 shows you the number of emails awaiting your attention.
To read your email, tap the Outlook icon. The messages appear in a list on your phone. (See Figure 9-2.)
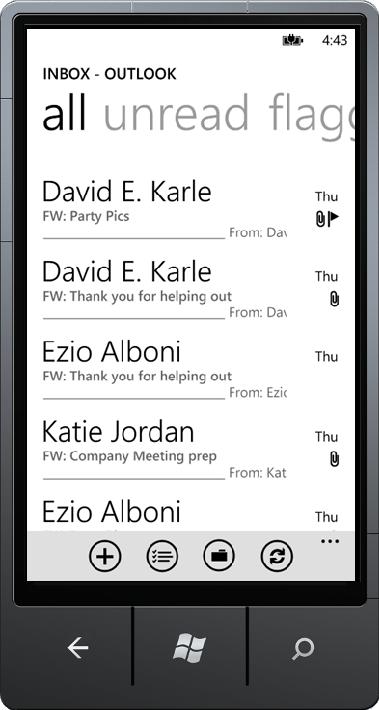
FIGURE 9-2 Tap the Outlook icon to review the list of available messages.
Next, tap the message you want to see, and it opens on your screen, pictures and all. (See Figure 9-3.)

Click to display email options.
FIGURE 9-3 The email message opens in your phone display.
You can tap the three dots in the lower right corner of the phone display to see email options that enable you to reply to or forward the message. To respond to the message, tap Reply and type the message you want to send on the keyboard that appears in the phone window. Then tap the Send button to send the message. When you’re ready to delete email messages you no longer need, tap the area of the screen to the left of the message in the Inbox screen. A check mark appears to the left of the message. You can scroll through the list and tap to add check marks to all the messages you want to delete. Tap Delete at the bottom of the Inbox window to remove the messages. (See Figure 9-4.) If you’d rather file the messages for safekeeping, you can tap Folder and choose the folder in which you’d like to save the selected messages.
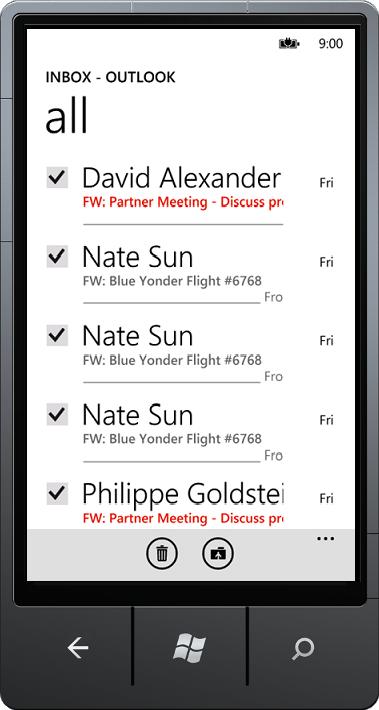
FIGURE 9-4 Tap to select the messages you want to remove, and then tap Delete.
Tip To learn more about mastering your Windows Phone 7, see Windows Phone 7 Plain & Simple, by Michael Stroh (Microsoft Press, 2010).
Tip Thanks to the flexibility of Office 365, you can use the iPhone and iTouch—as well as your Mac computer—to access, edit, and update the files in your SharePoint team site. Using your iTouch to connect to Office 365 is similar to both the Windows 7 and Windows Mobile 6.5 phones in that you can use your phone’s web browser to access your Office 365 account.


