Raspberry Pi 4 or 5 and Pico
Cool Projects for Test, Measurement, and Control
Günter Spanner
booksbooks

Cool Projects for Test, Measurement, and Control
● Dr. Günter Spanner● This is an Elektor Publication. Elektor is the media brand of Elektor International Media B.V.
PO Box 11, NL-6114-ZG Susteren, The Netherlands Phone: +31 46 4389444
● All rights reserved. No part of this book may be reproduced in any material form, including photocopying, or storing in any medium by electronic means and whether or not transiently or incidentally to some other use of this publication, without the written permission of the copyright holder except in accordance with the provisions of the Copyright Designs and Patents Act 1988 or under the terms of a licence issued by the Copyright Licencing Agency Ltd., 90 Tottenham Court Road, London, England W1P 9HE. Applications for the copyright holder's permission to reproduce any part of the publication should be addressed to the publishers.
● Declaration
The authors and publisher have used their best efforts in ensuring the correctness of the information contained in this book. They do not assume, or hereby disclaim, any liability to any party for any loss or damage caused by errors or omissions in this book, whether such errors or omissions result from negligence, accident or any other cause.
● Cautions and Disclaimers
- The circuits and boards (Raspberry Pi, Raspberry Pi Pico) in this book may only be operated with tested, doubleinsulated safety power supplies. Isolation failure of a simple power supply could lead to life-threatening voltages on non-insulated components.
- Powerful LEDs can cause eye damage. Never look directly into an LED!
- The author and publisher assume no liability for damages arising from the construction of the described projects.
- Electronic circuits can emit electromagnetic interference. As the publisher and author have no control over the user's technical implementations, the user is responsible for complying with relevant emission limits.
Program Download. The programs from this book can be downloaded from the Books section in the Elektor Store: http://www.elektor.com/20828 or search for the book title. If a program is not identical to the one described in the book, the version from the download should be used as it represents the most current version.
● British Library Cataloguing in Publication Data
A catalogue record for this book is available from the British Library
● ISBN 978-3-89576-608-4 Print
ISBN 978-3-89576-609-1 eBook
● © Copyright 2024 Elektor International Media
www.elektor.com
Editor: Jan Buiting, MA
Prepress Production: D-Vision, Julian van den Berg
Printers: Ipskamp, Enschede, The Netherlands
Elektor is the world's leading source of essential technical information and electronics products for pro engineers, electronics designers, and the companies seeking to engage them. Each day, our international team develops and delivers high-quality content - via a variety of media channels (including magazines, video, digital media, and social media) in several languages - relating to electronics design and DIY electronics. www.elektormagazine.com
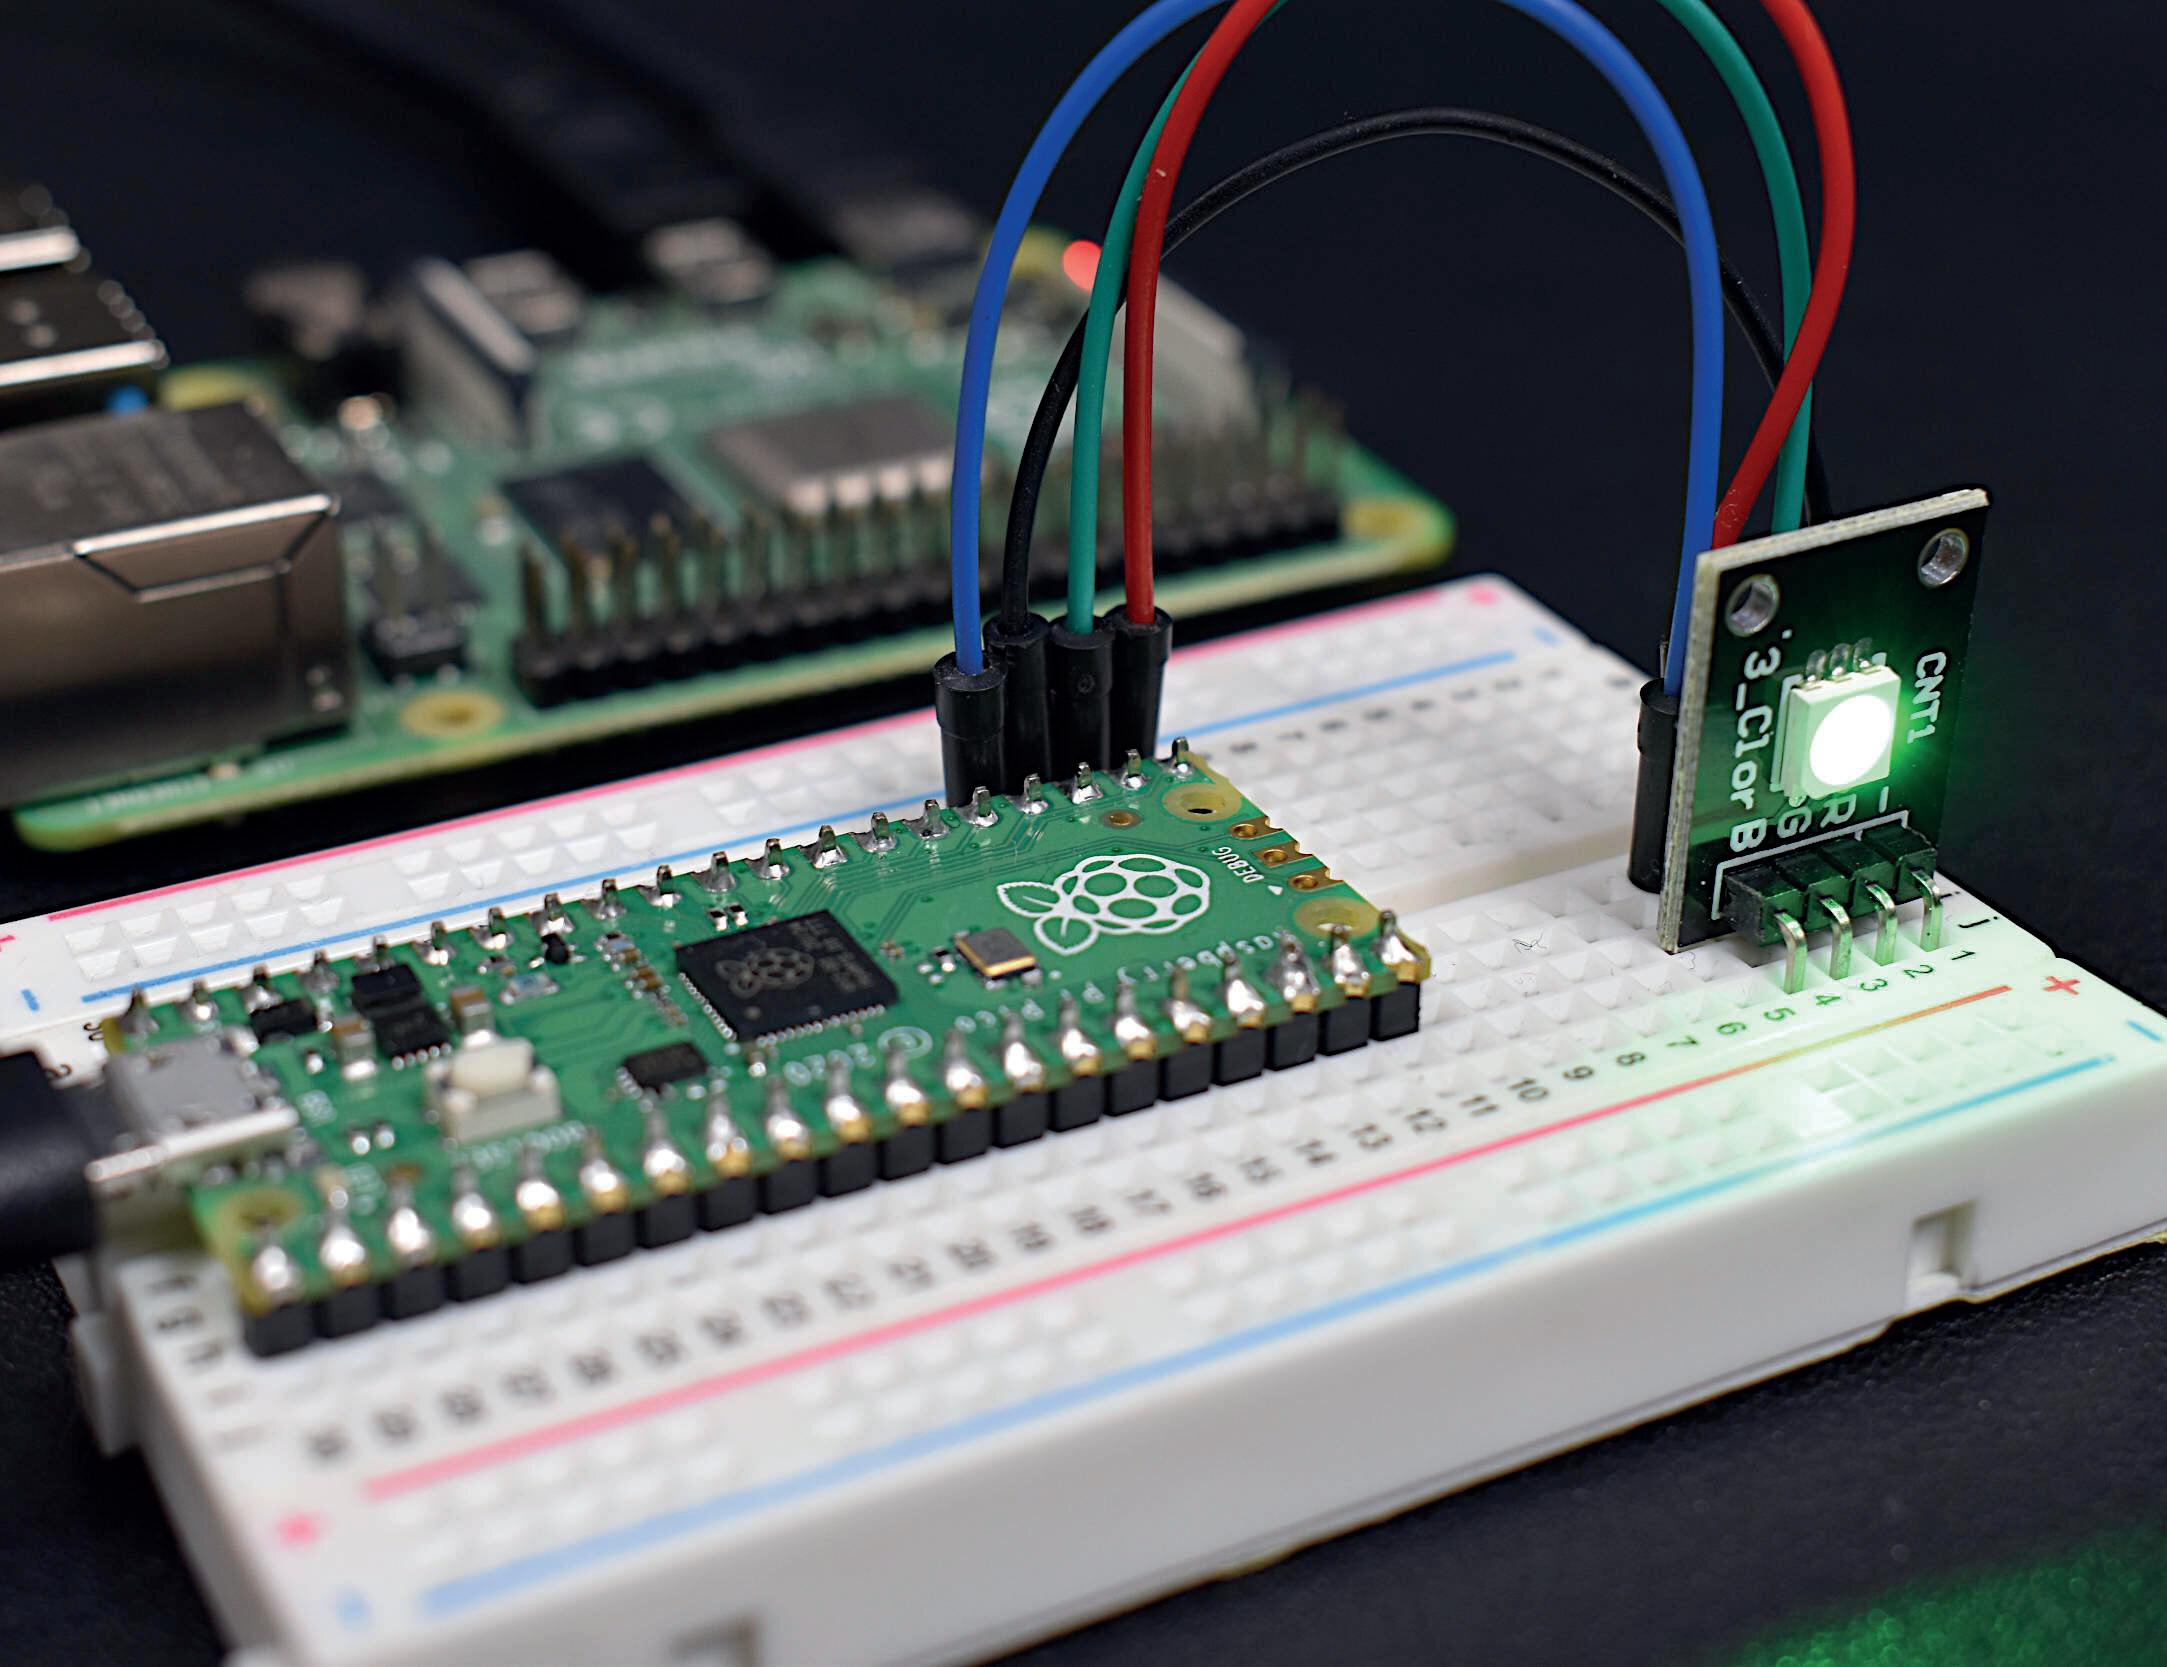
The Raspberry Pi has dominated the maker scene for many years. In particular, the I/O pins of the mini-computer have made it one of the most popular processor boards of all time. However, the Pi also has some disadvantages. For one, the pins are directly connected to the processor without a driver or protective circuitry. This means that the central controller and thus the entire Raspberry Pi unit can be easily destroyed. Even a brief contact with the 5 volt supply voltage can mean the end of the controller board.
Additionally, the classic Raspberry has no analog inputs, making direct measurement of analog values impossible. Therefore, photo diodes, NTCs, Hall sensors, and the like cannot be read directly. This problem can be elegantly solved with the Pico. It can easily take on diverse measurement tasks as a so-called "front end". Furthermore, the Pico is significantly cheaper than a Raspberry Pi 4 with 8 gigabytes or a Pi 5 with 4 GB of RAM. If a wrong connection leads to the destruction of the Pico, that's much easier to bear, especially for non-professional users.
The classic Raspberry Pi and the Pico thus become the ideal duo for solving demanding measurement tasks. In addition to many applications of the individual boards, this book will therefore present projects that combine the advantages of both systems.
This book introduces the vast and highly relevant field of modern controller technology using the two well-known boards, "Raspberry Pi" and "Raspberry Pi Pico". The general basics of electronics and electrical engineering are only covered to the extent necessary for the construction of circuits and experiments. A more in-depth introduction to these basics can be found in relevant literature.
In addition to an introduction to the operation and function of the controller boards themselves, the book also focuses on data acquisition and processing with digital processors. Both the classic Raspberry Pi motherboard and the Raspberry Pi Pico microcontroller are well-suited for this purpose. This is one of the reasons why both systems are popular and have found a wide range of users.
The Raspberry Pi family boards are affordable and easy to use, making them excellent entry-level systems for the broad field of electronics, controller technology, and digital acquisition and processing of sensor data. However, this book does not just explain the simple application of the boards, but also shows how to create practical, usable devices including
• a computer thermometer;
• a voltmeter;
• a frequency meter and frequency generator.
Additionally, the book covers highly interesting applications like
• an energy monitor;
• an app that tells you which astronauts are in orbit;
• a mini-monitor for the current Bitcoin rate.
For successful work with the book, two components are really necessary:
• a Raspberry Pi in its classic version;
• a Raspberry Pi Pico.
The classic Raspberry Pi is now available in its fifth version. It can be viewed as a powerful computer that offers significant improvements in performance and equipment compared to its predecessors. However, the latest version is largely backward compatible with its predecessors. This has significantly increased the number of possible applications. With the Raspberry Pi 5, projects that previously failed due to low memory and slow processing speed are now possible.
The performance features of the Pi 4 and even more so of a Pi 5 are comparable to those of a modern PC:
CPU Broadcom BCM2711
Quad-Core Cortex-A72 64-bit, 1.5 GHz
RAM Either 1, 2, 4, or 8 GB
LPDDR4 SDRAM
WLAN 802.11.b/g/n/ac
(2.4 and 5 GHz)
Broadcom BCM2712
Quad-Core Cortex-A76 64-bit, 2.4 GHz
Either 4 or 8 GB
LPDDR4 SDRAM
802.11ac
(2.4 and 5 GHz)
Bluetooth 5.0 5.0 & Bluetooth Low Energy
USB 2.0 and 3.0 (2 ports each) 2.0 and 3.0 (2 ports each)
LAN Gigabit Ethernet RJ45 Port Gigabit Ethernet, with PoE+ support
HDMI 2x Micro-HDMI
2x Micro-HDMI
In addition, there are 40 GPIO pins that are connected to a pin header. The connections are also compatible with earlier versions, so any existing plug-in modules (so-called HATs) can still be used.
The following interfaces are also available:
• DSI display port
• CSI camera port
• 4-pole stereo audio and composite video connection (Pi 4)
• Real-time clock (Pi 5)
While a Raspberry Pi 4 will work with older operating systems, the for Raspberry Pi 5 the 2023 version of Raspberry Pi OS called Bookworm is required. A proper Raspberry Pi 4 power supply should be able to supply 5 V at 3 A via a USB-C connector. The Raspberry Pi 5 is a higher-performance computer than Raspberry Pi 4, and problems with under-powered supply may occur. A high-quality 5 V, / 5 A USB-C power supply, such as the Raspberry Pi 27-watt USB-C Power Supply is highly recommended.
Unfortunately, the Raspberry Pi 5 won't fit the type 4 case. Furthermore, the 5 is faster and more powerful than prior-generation Raspberry Pis, and like most general-purpose computers, it will perform best with active cooling. The Raspberry Pi Case for Raspberry Pi 5, with its integrated fan, is one way to provide this.
For proper work with this book, a Raspberry Pi with 4 or 8 GB RAM is recommended. This variant allows for smooth work and also offers enough headroom for more extensive projects.
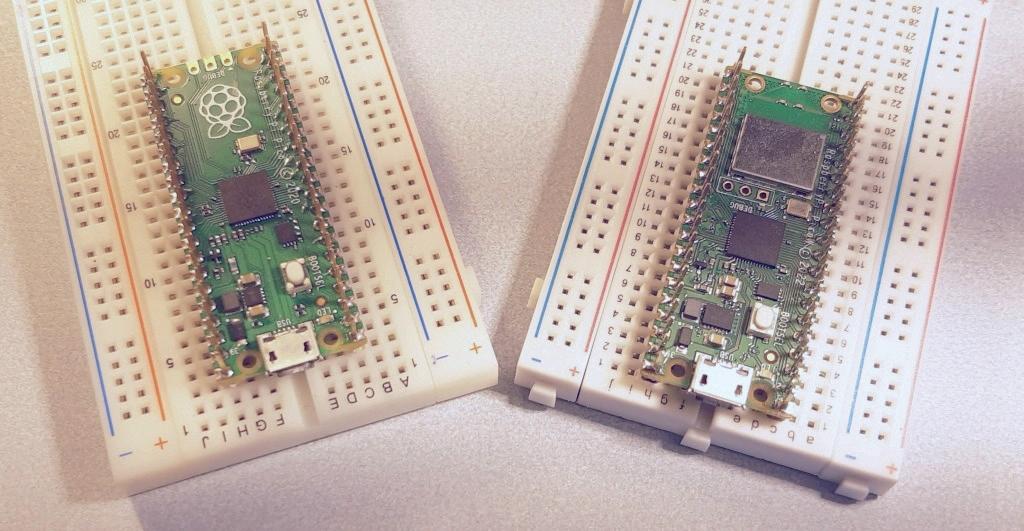
In addition, a Raspberry Pi Pico is required for most projects. This board is also available in several versions. Unlike the first version, the newer boards also have a WLAN interface thanks to the Infineon wireless chip ("Pico W"). Like the Pico, the heart of each Pico W is also an RP2040 controller. This caused a sensation as it was the first silicon chip produced by the Raspberry Pi Foundation itself.
Since both versions are supplied with or without pin headers, the following four versions result:
Most of the projects in this book can be done with a classic Pico. Applications with WLAN functionality are of course reserved for the Pico W.
The Pico has the following features:
• Processor: RP2040 (dual ARM Cortex-M0+ at 133 MHz);
• RAM: 256 KB;
• Flash memory: 2 MB flash for code and data.
The Pico W supports IEEE 802.11 b/g/n WLAN and Bluetooth 5.2 featuring the CYW43439 chip. In addition, the most important interfaces are available:
• 2x UART
• 2x SPI bus with two separate bus systems
• 2x I2C
• 16 PWM channels
The Raspberry Pi has undoubtedly made history. Its development represents an incredible success story. It is the first single-board computer from a globally active foundation that has been sold millions of times. After the first prototypes were completed in 2006, the first Raspberry Pi was offered on the market six years later. The goal of providing young people with cost-effective computer technology for their own projects was achieved beyond any doubt.
Eben Upton, the initiator of the Raspberry Pi project, recognized a serious problem in education. Eben studied Physics and Engineering at the University of Cambridge before working for renowned companies such as Broadcom, Intel, and IBM. He worked on his single-board computer project for five years, from 2006 to 2011, mostly in the evenings and on weekends.
Hardware and computer systems were only available at high prices. This led to a situation where students and pupils hardly dealt with computer science, and the computer industry suffered from a lack of skilled workers. A novel and low-cost computer system should fundamentally change this. Since computer manufacturers always liked to use fruits as namesakes ("Apple, Acorn, Apricot, etc."), this tradition was to be continued with the Raspberry. The addition "Pi" on the other hand, referred to the programming language Python, with which the devices are mainly programmed.
The Raspberry Pi has left a clear mark in the history of computer technology. It is an incredible story, from an engineer building single-board computers in his spare time to a global foundation that has sold over 15 million devices worldwide.
The history of the Raspberry Pi began in 2006 with the creation of the first prototypes. Six years later, the first Raspberry Pi was born. The main goal was to help young people discover computer technology at low cost - a maximum of around $30 was the target. Now that you understand why the Raspberry Pi exists, let's learn more about the hardware specifications and the development of the Raspberry Pi from the beginning.
Originally, only two models were planned:
• Model A (affordable)
• Model B (fast)
The first version cost about $25, which was achieved by making a special selection of hardware components, such as fewer USB ports and less RAM. The Raspberry Pi 1 Model A had the following specifications:
• Processor: ARM 700 MHz
• Memory: 256 MB
• 1 USB port
• 8 GPIO pins
• HDMI, audio, and SD slot
The Pi 1 Model A+ followed, among others, with 17 GPIO pins and a Micro-SD card slot instead of an SD card slot. This made the Raspberry Pi 1 Model A+ smaller and lighter than the first version.
The Model B is a more powerful version with 512 MB, 2 USB ports, HDMI, and a 10/100 Ethernet port. With 500,000 units sold in the first 6 months, it was a tremendous sales success.
In 2015 and 2016, the Raspberry Pi 2 B was released with two sub-versions. For the first time, this broke through the 1 GB RAM barrier. In February 2016, the Raspberry Pi B version 3 was released, which introduced wireless communication capabilities such as Wi-Fi and Bluetooth directly on the main board. This was followed by the Pi 3 B+ and the "Zero" model. The Zero was the first board that was significantly smaller than the previously known versions (about 65 mm x 30 mm). Due to the lack of space, there are fewer ports, but the CPU and RAM are sufficient for many projects. This was followed by the Zero W with Wi-Fi and Bluetooth, as well as a built-in camera connector.
The sales figures of the Raspberry Pi Foundation speak for themselves:
by 2012: about 500,000 units sold;
by 2013: about 2 million units sold;
by 2015: about 5 million units sold;
by 2016: about 10 million units sold;
by 2017: about 12 million units sold;
by 2018: about 20 million units sold.
In 2020, the 30 million pieces mark was exceeded. The Raspberry Pi has thus become one of the most successful "mother boards" of all time!
The Raspberry Pi Pico was introduced in January 2021 carrying a retail price tag of 4 US dollars. It was the first board from the Raspberry Pi Foundation based on a single microcontroller chip. The RP2040 controller, independently developed by the Raspberry Pi Foundation, features an Arm Cortex M0+ processor core, as well as a flexible clock frequency of up to 133 MHz.
Although the Pico is not technically superior to other controllers, it quickly established itself in the market. The affordable price and some special features such as the programmable input-output units (PIO) certainly played a significant role in the Pico's success.
Since mid-2022, a WiFi-enabled version of the Pico, the Pico W, has also been available. It is expected to pose a serious competition for rival boards.
Like the first Raspberry Pi, the Raspberry Pi Pico was not developed with the goal of achieving maximum commercial success. The main focus was simply to cover the costs and generate a small profit that would allow the development of new versions. The most important hope was once again to offer a development board that is easy to use, powerful, flexible, and as inexpensive as possible. These goals were achieved, and with a price of 4 dollars, the Pico achieved the fantastic milestone of 1 million units sold after one month on the market.
With the Raspberry Pi Pico, the company aims to achieve similar goals as with the Raspberry Pi. What was accomplished with the first board in general computing is intended to be achieved with the Pico in microcontroller technology. Therefore, the RP2040 chip is of great importance for the future development of the Pi Foundation.
It is certainly worth keeping an eye on the Pico. Given the strong response, it is very likely that the number of projects and applications for the Pico will increase as much as for the classic Pi. This creates a multitude of new options, particularly when considering the possibilities that arise from the combination of both worlds.
Although it essentially represents a complete motherboard, the Raspberry Pi is not much larger than a credit card. It requires relatively little power and instead of a hard drive, it comes with a simple SD card. The Pi can be connected to any computer monitor with an HDMI or DVI input. Of course, calling the Pi a "computer" is not entirely accurate. A complete computer, such as a PC, also requires ancillaries like a screen, a power supply, a keyboard, a mouse, and some for of mass storage. None of these essential accessories are included in the purchase price of the Raspberry. When factoring in these necessary accessories, the often-advertised "computer" at a low price looks a bit different.
With the Raspberry Pi, you only get a mother board. Nevertheless, the Pi is used by makers, hobbyists, professional technicians, and even scientists. It can be used to implement complex and highly innovative projects inexpensively. In addition to its extensive functionality as a classic computer, the Raspberry also has a GPIO pin header (General Purpose Input Output). This allows electronic components to be directly controlled. Therefore, the Pi is ideal for capturing, evaluating, and displaying sensor values. But it is also possible to control actuators such as stepper motors or servos.
Especially when combined with the programming language Python, the Raspberry provides an optimal environment for implementing all kinds of ideas. In the field of sensor technology, robotics, or home automation, the Pi offers possibilities that were previously reserved for expensive and complex dedicated systems.
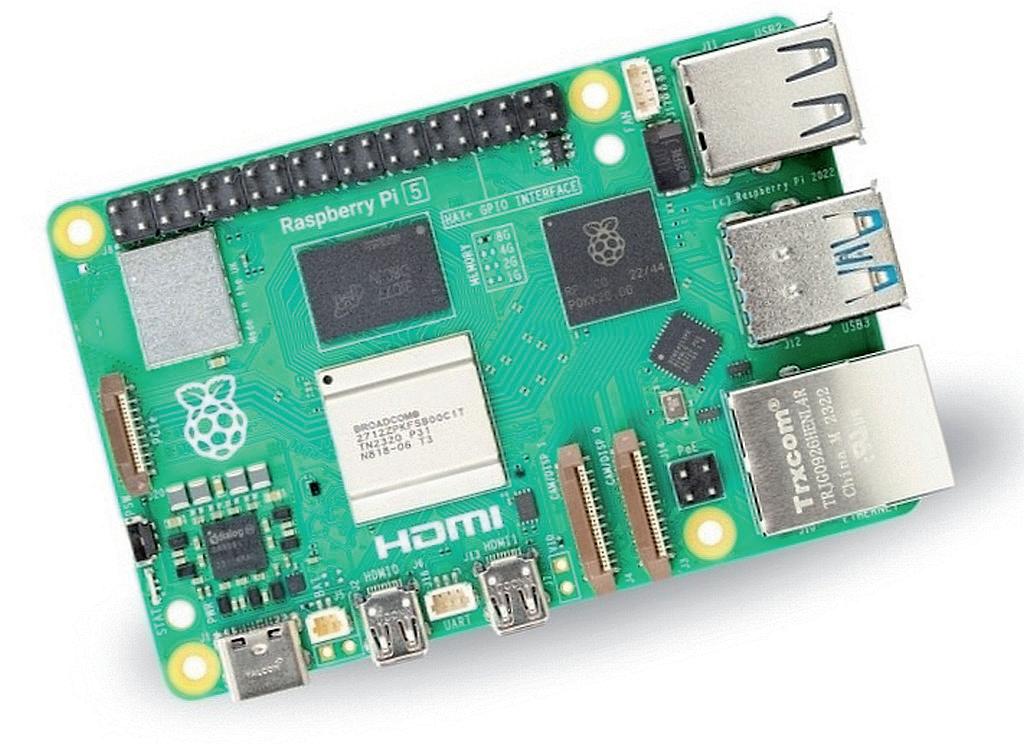
The following image shows the various functional units and interfaces of a Pi 5. It is important to note the GPIO pin header in the upper left corner of this image.
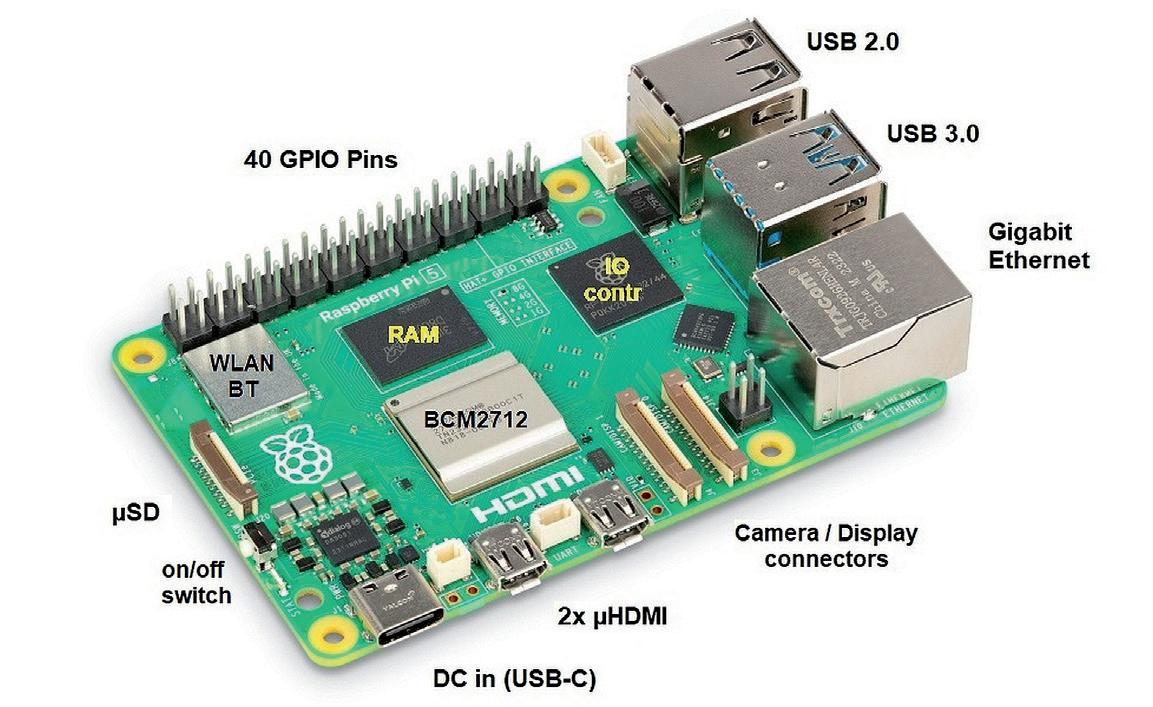
The Raspberry Pi offers a whole range of connectivity options:
• A USB-C port for power (5 V at up to 5 A, which corresponds to a power consumption of up to 25 watts). The actual power consumption is usually much lower and heavily depends on the CPU load and the power requirements of the peripherals connected to the pin header or USB ports.
• Two USB 3.0 and two USB 2.0 ports (all in USB-A format) for devices such as
- USB sticks;
- hard drives;
- SSDs;
- keyboards;
- mice
and other USB peripherals can be connected to these ports. However, it's important to note that the Pi 5 can only supply a maximum of 1200 mA to all four USB ports combined.
• Two micro-HDMI outputs for audio and video, with a resolution of up to 3,840 × 2,160 pixels (4 K). A monitor can be driven at 60 Hz even at full resolution. If two 4 K monitors are connected simultaneously, the refresh rate drops to 30 Hz.
• The combined audio-video output for a four-pole 3.5 mm jack is not available on the Pi 5. If the video signal is not used on a pi 4, the audio signal is available there on a standard three-pole 3.5 mm jack.
• Micro-SD slot (SDHC)
• Ethernet port (Gigabit Ethernet)
• A 40-pin header with general-purpose input/output contacts (GPIOs), as well as UART, I²C bus, SPI bus, and I²S audio.
• A four-pin header for connecting a power-over-ethernet expansion ("PoE HAT").
• Built-in Wi-Fi adapter (2.4 GHz and 5.0 GHz, IEEE 802.11ac)
• Bluetooth adapter (Version 5, BLE)
The Raspberry Pi and the SD card with the operating system are not usually delivered as a complete system. To work with the Pi, the latest operating system must be loaded onto the SD card. The following sections explain the best approach for doing this.
The power supply is crucial for the stable and reliable operation of the Raspberry Pi. In principle, discarded smartphone power supplies could also be used to power the Pi. However, this can lead to serious problems. Depending on how busy the CPU is and how many additional components such as a mouse, keyboard, USB sticks, camera module, or other peripherals are connected, the Raspberry Pi models require up to over 25 watts of power. At a supply voltage of 5 V, this corresponds to a current of up to 5000 mA. Without external devices and in idle mode, about 5 W or 1000 mA is usually sufficient. Nevertheless, the power supply must be designed to ensure that the mini computer runs stably even under maximum load.
If the power supply is undersized, effects occur that do not initially appear to be related to inadequate power supply, as dropouts in the keyboard, mouse, screen display, and connection problems in LAN and WLAN can have various causes. An important indication that the power supply could be problematic is a lightning symbol in the upper right corner of the screen.
Many plug-in power supplies for charging smartphones and tablets do not provide highly stable voltages because stability of the output voltage is not critical when charging batterypowered devices. However, for a Raspberry Pi, a stabilized operating voltage of 5 V is required.
In case of under voltage, the Raspberry Pi disables USB ports. This leads to malfunctions of individual USB devices or the entire system. When the minimum voltage is available again, the USB port and the connected devices are put back into operation. The keyboard and mouse also automatically reconnect, but LAN and WLAN connections often need to be manually reactivated.
In principle, the Raspberry Pi is powered with a nominal voltage of 5.0 V at the USB input. Ideally, it should even be 5.1 V because losses occur through plug connections and cables. In addition, voltage stabilization is subject to individual variation, and small fluctuations can be compensated for by the slightly higher voltage.
Furthermore, the so-called "brown-out" threshold of the Pi is very tightly designed. At this voltage limit, internal mechanisms for limiting power consumption are activated. Here, too, a slightly higher input voltage provides additional safety margin.
In addition to the voltage level, the current characteristic is the second important parameter of a power supply. Unlike previous models, the current Raspberry Pi runs best with a USB power supply with 5.1 volts and 5 Amps maximum current.
In addition to the lightning symbol on the screen, the red LED of the Raspberry provides information on problems with the power supply. Normally, this LED lights up continuously. However, if it starts blinking, an under voltage problem is usually the cause. In this case, you should check the total power consumption of the Pi. External USB components should be considered in particular.
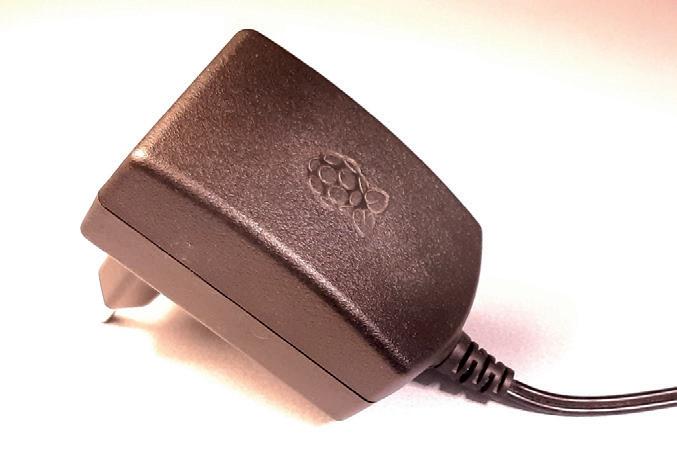
To avoid the many problems that can occur with an unstable power supply, a power supply approved specifically for the Pi with a correspondingly stabilized voltage of 5.1 V should be used. The following image shows such a plug-in power supply.
Concerning the cooling requirements, for normal usage, adding cooling is optional. The idle power consumption of a Raspberry Pi 4 and a Pi 5 is about the same. Only under heavy continuous load the board may go into thermal throttling. Therefore, if the Pi 5 will be used under high performance conditions, an active cooling device like a fan is recommended (example in Figure 3.9).
Note: Raspberry Pi models have different USB ports for power supply:
• Up to the 3 series, micro-USB ports were common.
• However, the Raspberry Pi 4 and Pi 5 have a USB-C port.
The operating system for the Pi is installed using a PC with an SD card reader. Downloads are available for the following major operating systems:
• MS Windows
• macOS
• Ubuntu for x86
They can be found at: https://www.raspberrypi.com/software/.
The PiOS operating system is written to a new or newly formatted µSD card (at least 16 GB). In the installer's selection menu, choose the option Raspberry Pi OS (32-bit). After that, all you have to do is insert the card into the Pi and boot it up.

Alternatively, pre-installed SD cards can also be purchased, which already have the operating system ready to go. This is definitely the easiest option. Often, so-called "bundles" are also offered, which include both the Raspberry PI itself and a compatible SD card with preinstalled Raspbian.
After booting up the new operating system, certain settings such as the selection of the country category or the keyboard must be made. In addition, Wi-Fi access can also be set up. The required password for this can usually be found on the home Wi-Fi router or in its accompanying manual.
For this book, Pi OS 12 "Bookworm" is used. Unfortunately, it is not guaranteed that all programs and hardware variations will work under earlier or later versions of Pi OS. If unexpected errors occur, it is therefore advisable to consider switching to Pi OS version 12.
After the complete start-up, the graphical desktop of Pi OS appears.

Working with the Raspberry Pi will require the use of a so-called "(LX-) Terminal" from time to time. This can be opened by clicking on the small icon located in the bottom left corner of the Pi desktop.

If a ready-installed system is available, its version can be read using the terminal by entering:
cat /etc/os-release resulting in:
PRETTY_NAME="Debian GNU/Linux 12 (bookworm)"
NAME="Debian GNU/Linux"
VERSION_ID="12"
VERSION="12 (bookworm)"
VERSION_CODENAME=bookworm
ID=debian
HOME_URL="https://www.debian.org/"
SUPPORT_URL="https://www.debian.org/support"
BUG_REPORT_URL="https://bugs.debian.org/"
This way, it can be determined whether the desired version is already installed or whether an update needs to be carried out.
The Pi OS, which is tailored for the Raspberry Pi, is a special version of Linux. In Linux, many objects, such as interfaces, are also represented as files. Therefore, it is advantageous to at least get a rudimentary overview of the Pi's file system. All files are stored in folders in a tree-like structure as usual:
/ bin
boot
dev
etc
home - {user} - desktop - python_games - further directory
usr
var
The "{user}" directory uses the username provided during installation. Initially, this structure is not of great importance. However, it becomes important later, especially when searching for or storing different files. In this case, the above file tree can be used as a reference.
When working with the Pi, it is important to note that Linux distinguishes between uppercase and lowercase letters. The following table provides an overview of the most important Linux commands. These are frequently needed when working with the terminal:
ls list files
ls -l bzw. ls -lh list files including access rights
shutdown-h now shut down the Raspberry Pi (-h = halt)
shutdown-r now restart the Raspberry Pi (-r = restart)
cd xyz change directory to xyz
cd .. go up one directory
mkdir xyz make new directory
rmdir xyz remove directory
nano file edit file
rm file delete file
mv datA datB move or rename a file
pwd print current workingdir e. g. /home/pi
whoami show user name, e. g. pi
date show date and time
ifconfig sow IP information
whatis short info on a command
man extensive info on a command e.g., man ls
df / -h show memory size
lsusb show available USB devices
Even though Pi OS has a graphical interface, it is not always possible to avoid using classic Linux commands. Therefore, at least the basic commands should be familiar to experienced users.
A remote desktop connection allows you to control one computer from another. This is particularly useful when using the Raspberry Pi as it allows you to avoid using an additional monitor or switching between two systems.
While the Raspberry Pi can be operated almost exclusively via the console, some programs can only be controlled through the graphical user interface (GUI). The "Remote Desktop" is available on all modern Windows systems. As no additional software is required, it is suitable for use with the Raspberry Pi.
On the Pi, only one new package needs to be installed:
sudo apt-get install xrdp
The most important and recommended settings are already pre-defined. After installation, you can log in directly. Either the computer name of the Raspberry Pi or its internet address can be used for this:
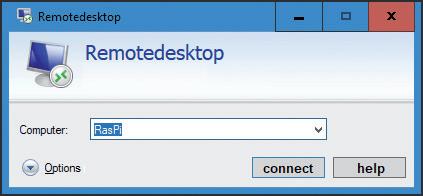
On the Windows PC, the connection is established by starting the "Remote Desktop". For Mac OS, there is an app from Microsoft available while for Linux the function "rdesktop" is available.
It should be noted that under Pi OS 12, a user who is already logged in cannot be logged in again via remote desktop. If necessary, the auto-login of the system must be turned off.
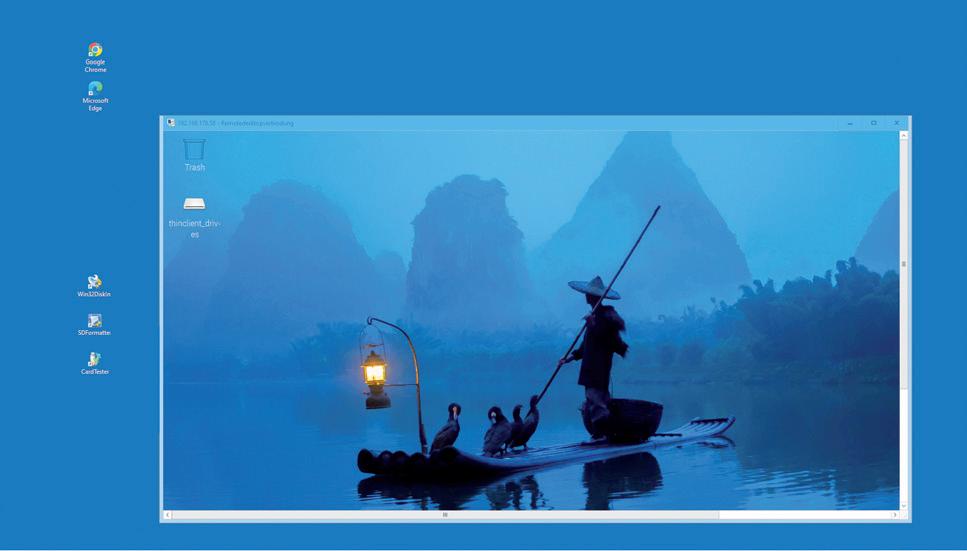
After logging in, the Pi is available as its own window within Windows:
The following keyboard shortcuts have proven to be useful for working with Remote Desktop:
• ctrl+alt+break switches the Remote Desktop to full screen mode and back to windowed mode
• alt+tab can be used to switch between individual applications in full screen mode
• alt-insert works similarly to alt+tab in windowed mode
By pressing alt-PgDown and alt-PgUp, applications can also be switched in windowed mode. In addition, the "copy-and-paste" function can be used across PC and Raspberry systems.
But not only Windows PCs can act as Remote Desktops. Corresponding apps can also be installed on Android smartphones or tablets. This makes these devices usable as "wireless screens". Since this application does not demand particularly high requirements in terms of storage capacity or CPU performance, even older Android devices can be used. This way, perhaps some older tablets or phones will find a useful application once again.
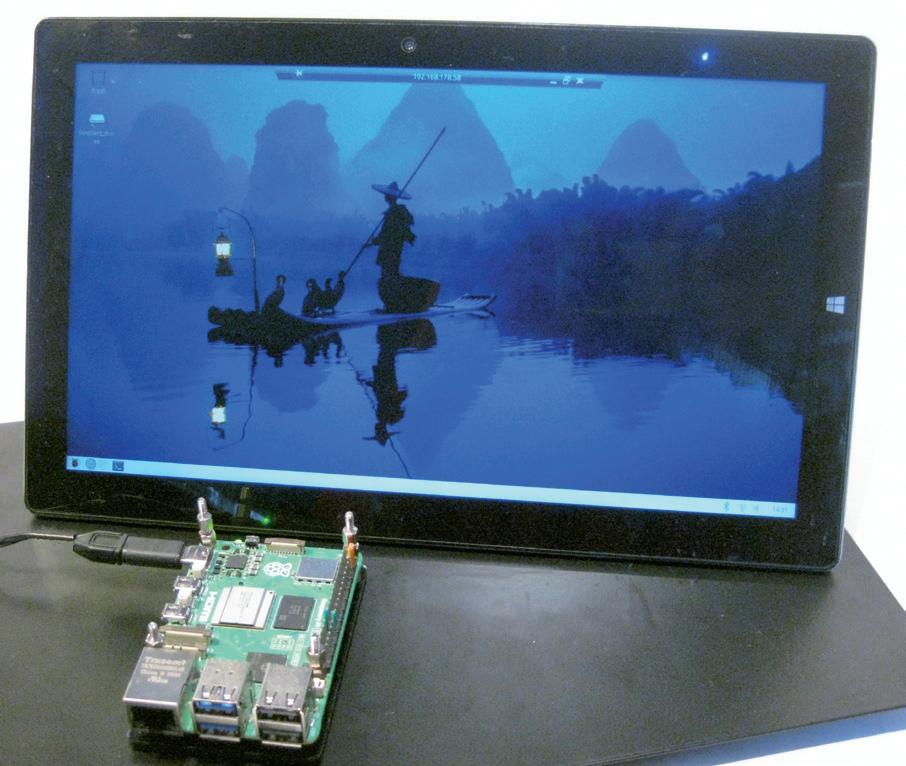
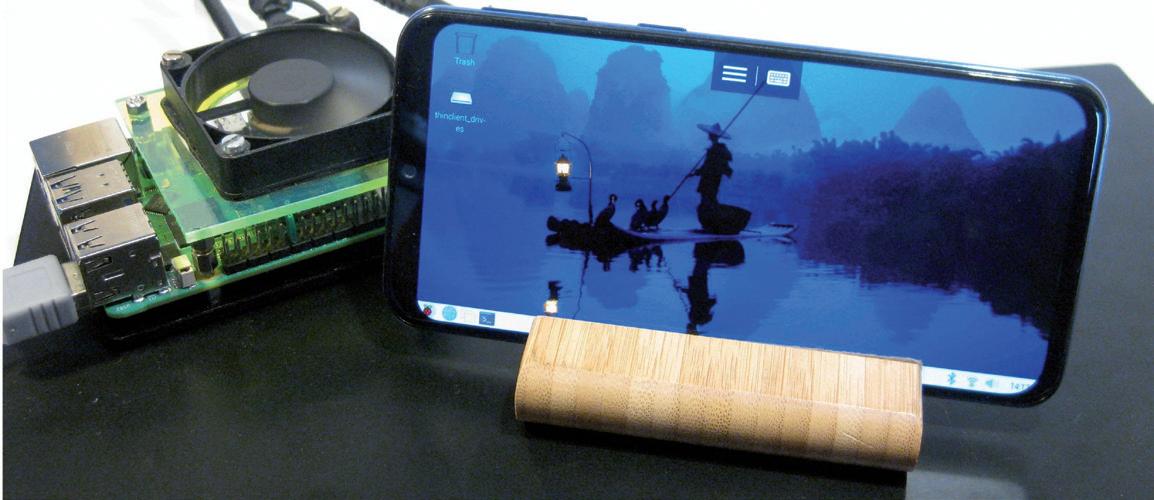
The Remote Desktop app from Microsoft can be easily installed via the Play Store. After starting the app, the Raspberry can then be accessed via the "+" icon in the app. The following figure shows how an older tablet can be used as a compact and wireless screen for the Pi.
This
If you not only want to exchange data via copy-and-paste, but also transfer entire files between your PC and Raspberry Pi, then FileZilla is the tool of choice. This program provides free server and client software for file transfer via FTP and SFTP. With the FileZilla client, users can connect to an FTP/SFTP server and upload and download files. The program is available as a free download on the internet (see LINKS.txt in the download package). After installation and starting the program, a connection can be established directly from the PC to the Raspberry Pi. The following inputs are required for this:
Server: IP of Raspberry Pi
User name: User name of the Raspberry Pi
Password: Applicable password
Port: 22
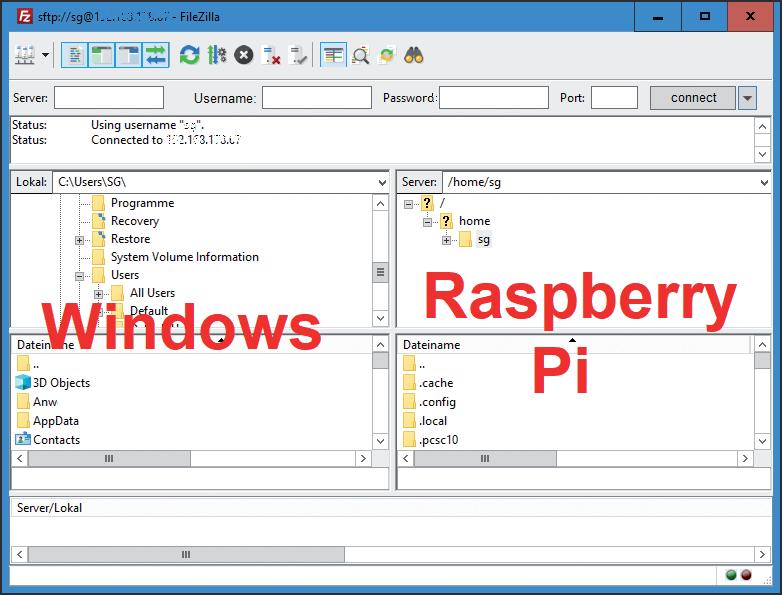
Now files can be exchanged, copied, or moved between the PC and the active Pi just like with Windows Explorer.
Thus, the Pi is ready for use and can be controlled either directly via keyboard or HDMI monitor or via an external PC system. In the next section, we will take a closer look at the Pico and put it into operation.
1. How can you list files in the LX Terminal?
2. How do you find out which user is currently logged in on a Pi?
3. Connect the Raspberry Pi to an Android phone and exchange some files between the two systems.
The Raspberry Pi has dominated the maker scene for many years. Freely accessible I/O pins have made it one of the most popular processor boards of all time. However, the classic Raspberry Pi has no analog inputs. Direct measurement of analog values is therefore not possible. Consequently, photodiodes, NTCs, Hall sensors, etc. cannot be read directly. In addition, the pins are connected directly to the exposed contacts, i.e. without a driver or protection circuit. This can quickly destroy the central controller and thus the entire Raspberry Pi.
These problems can be elegantly solved with the Pico. As a front-end, it can easily handle a wide range of measurement tasks. In addition, the Pico is much cheaper than a classic Raspberry Pi 4 or 5. If a faulty circuit leads to the destruction of the Pico, this is relatively easy to handle. This makes the combination of a classic Raspberry Pi 4 or 5 and the Pico an ideal pair.
The book introduces the broad and highly topical field of modern controller technology using the combined force of a Raspberry Pi 4 or 5 and a Raspberry Pi Pico. In addition to a detailed introduction to the operation and functionality of the controller boards themselves, the book also focuses on data acquisition and processing with digital processors. Especially the combination of both systems offers a wide range of interesting possibilities.
Some practical projects from the contents:
> USB between Raspberry Pi 4 or 5 and Pico
> I2C Communication and Pico as an I2C device
> Voltmeter and Computer Thermometer
> Pico W as a Web Server and WLAN Scanner
> Frequency Meters and Generators
> OLED Displays on Raspberry Pi 4 or 5 and Pico
> Energy Saving Monitor
> Which Astronauts are in Orbit?
> Mini Monitor for Current Bitcoin Exchange Rate
The programs from this book can be downloaded free of charge. Head to: www.elektor.com/books, then search for the book title.

Günter Spanner has been working in the field of electronics development and technology management for several large companies for almost 30 years.
In addition to his work as a lecturer, he has successfully published articles and books on the topics of bioelectronics, microcontrollers and sensor technology, and has created courses, learning packages and maker kits.
He is also known to a wide audience through his highly regarded technical lectures and webinars.
Elektor International Media
www.elektor.com
