6 minute read
TOP SHELF

from Gdgbvgnbvgh

N A T U R A L C H O I C E
SW 7011 SHERWIN-WILLIAMS.COM
Advertisement
PLAN YOUR SHELF PLACEMENT SO YOU CAN SCREW INTO WALL STUDS. IF THAT’S NOT POSSIBLE, USE HEAVY-DUTY DRYWALL ANCHORS RATED FOR THE PROPER WEIGHT.
TOP

Step up your shelving game with these freestanding and hanging solutions that are creative, customizable, and anything but cookie-cutter.
PROJECTS JENI WRIGHT PHOTOGRAPHS CARSON DOWNING WORDS MARIA V. CHARBONNEAUX
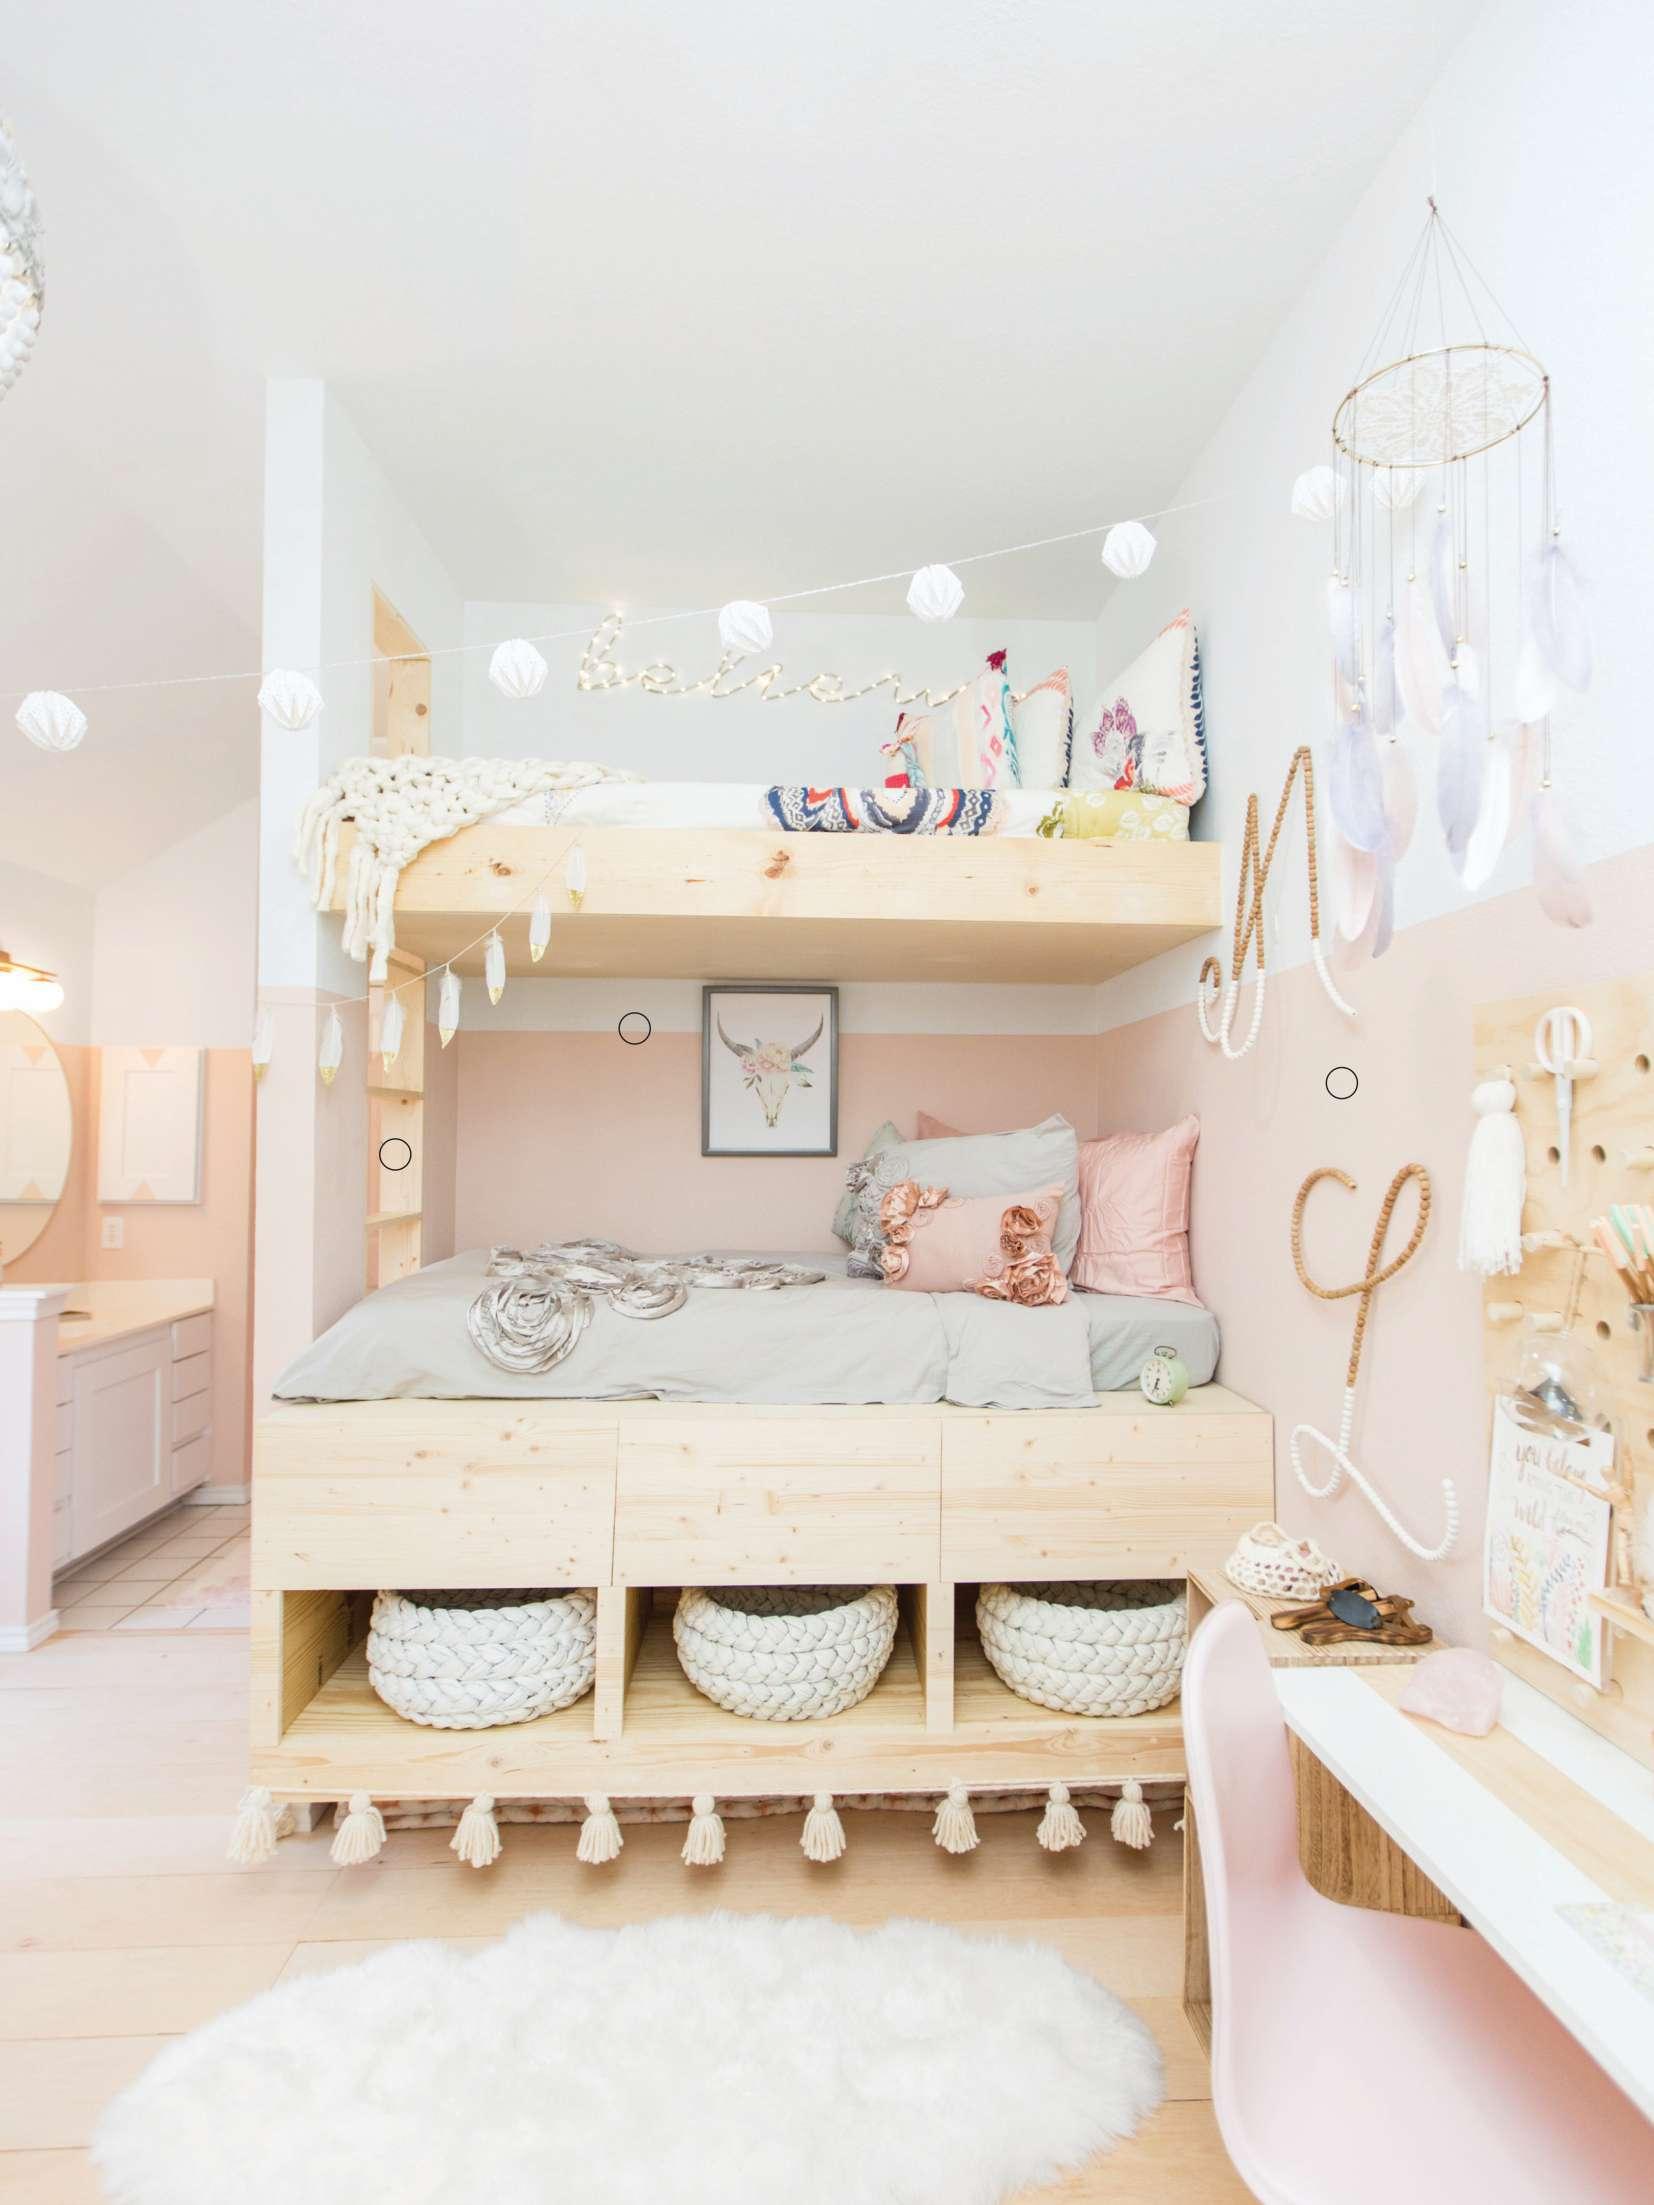
ON THE CURVE Create sky-high architectural interest with floating shelves, left, and an ombré arch paint treatment, opposite. To make the arch, determine the placement for your top shelf; mark with a horizontal line that’s an inch wider than your shelf on either side. From the line’s ends, draw plumb lines to the baseboard. Insert a pushpin into the wall at the center of the horizontal line. Tie opposite ends of a string to the pushpin and a pencil—the distance between the two should be exactly half the distance of your horizontal line. Draw an arch that connects the vertical lines; mask off the outside edge with small bits of painters tape to match the curve. To create the gradient effect, paint four sections in coordinating hues. Once dry, apply a second coat to the bottom section: Add glaze to thin the paint, and then brush and blend the top half of the bottom section into the bottom half of the adjacent section where the color transitions. Repeat this process for each of the remaining colors and sections, gradually increasing the ratio of glaze to paint each time. Hang the floating shelves as directed using the provided brackets (A).
A
AT TACH SHELF BRACKETS TO THE STUDS. CAMOUFLAGE BY PAINTING THEM THE SAME COLOR AS THE WALL OR PLACING A PIECE OF ART IN FRONT OF THEM.

RAINBOW BRIGHT No need to hunt for a pot of gold with this affordable shelf, above. Inexpensive window wells ($15 each) are the magical ingredient for this rainbow-inspired project. Start by spraying two corrugated steel window wells (ours measure 37 inches wide and 12 inches deep) with bonding primer. Once dry, spray-paint stripes in four pastel hues on both sides, allowing colors to fade into one another. Seal with acrylic clear spray. Using a circular saw, cut a 1×16 pine board so it’s 13 inches wide and 67¾ inches long. Then cut a 1×10 into two 30-inch shelves. Sand and seal the shelves. Arrange one window well on the top of the long shelf and the other on the underside, making sure they’re evenly spaced. Secure them to the board using #10 ¾-inch wood screws and washers.
I N N O C E N C E
SW 6302 SHERWIN-WILLIAMS.COM
TOUCH DOWN Hanging shelves attached to a longer shelf add a gravitational pull and more display space, this photo. Prep your short boards by drilling 1-inch-diameter holes inset about 1½ inches from each corner. Determine the exact placement of the short shelves beneath the long one, and then mark and drill 1-inch holes into the larger board so they line up. Hang the shelves from 1-inch cotton rope.
TIE OVERHAND KNOTS AT THE ROPE ENDS AND BENEATH THE BOARDS, MAKING SURE THEY’RE LEVEL. TRIM AND FRAY ROPE ENDS TO CREATE TASSELS.

TEAM UP Pair acrylic display boxes with 1-inch Baltic birch plywood to score big style points, below. Stack a combo of 9¾×9¾-inch, 12×16-inch, and 4×4-inch display cubes on plywood shelves (ours are 12×60 inches) to create a customizable unit with varying shelf heights. Note: Because components aren’t secured to one another, this project is for homes without young children—or pets that may climb.

THESE DISPLAY CASES ARE LIDDED, SO PLACE YOUR DECORATIVE OBJECTS INSIDE AS YOU BUILD. BONUS–THEY’LL KEEP EVERYTHING DUST-FREE!
IN YOUR CORNER This space-saving floating corner shelf, left, tucks away easily. Cut an 8-foot Douglas fir 4×4 into the following: one 17-inch block, three 13¾-inch blocks, five 10¼-inch blocks, and six 7¼-inch blocks. Sand all surfaces; wipe away dust. Stand the longest block on end, and apply wood glue on two adjacent sides. Attach two of the 13¾-inch blocks, and then glue the third one in between them at the corner. Using a similar method, add the remaining blocks (A). Making sure all blocks are aligned, clamp in place as glue dries. Once dry, sand the sharp corners. Seal with varnish or acrylic sealer, if desired. Hang using metal French cleats secured to two adjacent sides of the shelf (B) and the wall, making sure they’re level. Use wall anchors if you can’t find a stud.

A
B
R I C E G R A I N
SW 6155 SHERWIN-WILLIAMS.COM

FOUND AT HOME IMPROVEMENT STORES, SOLID WOOD ROOF PANEL CLOSURE STRIPS FIT TOGETHER FOR STACKABLE BOXES.
Find detailed how-to for similar boxes: BHG.com/ModularBoxes

BOX BUILDING 101 This playful shelving unit, left, starts with simple wood box shelves in two sizes—ours measure 18×12×12 inches and 18×9×12, above. Purchase them or construct your own from ¾-inch medium-density fiberboard (MDF) like we did. Using a table saw, cut 18×12-inch panels for the tops and bottoms of all the boxes, 10½×12-inch side panels for the large boxes, and 7½×12-inch side panels for the small boxes. Assemble the boxes using butt joints—glue first, secure with brad nails, and clamp while glue dries. For added strength, add back panels, if desired. Pin-nail roof panel strips in place before filling all nail holes, sanding, and painting.
BRING THE OUTDOORS IN Grow the vertical storage space above a desk or a console table—no green thumb necessary, right. Here’s the trick: When turned upside down, a half-round window box planter becomes a divided filing shelf. To give it a more indoor-ready look, apply a coat of pretty paint. Lightly sand the planter to rough up the finish, and spray with a bonding primer. Once dry, spray two light, even coats of paint in your desired color. Screw it into the wall using wall anchors for stability. We like metal E-Z Ancor Drywall and Stud Anchors because they don’t require predrilling and can hold up to 50 pounds.

USE A REPURPOSED HALF-ROUND HANGING PLANTER FOR NOTEBOOKS, FILE FOLDERS, AND OTHER LIGHTWEIGHT ITEMS THAT CAN SUPPORT THEMSELVES AGAINST THE WALL AND THE PLANTER’S FRAME.
PL ATFORM ST YLE Give your room vintage vibes by turning a collection of reclaimed drawers, below, into a groovy wall shelf. Curate drawers in various sizes, shapes, and colors. Flip the drawers upside down and align the bottoms to create a flat surface for the base row. (You may need to alter drawer depths.) Screw the drawers together. Outfit with heavy-duty D-rings to hang from the wall in studs.

S O F T A P R I C O T
SW 6352 SHERWIN-WILLIAMS.COM IF YOUR DRAWERS ARE TOO DEEP, CUT THEM TO THE RIGHT SIZE AND FIT NEW BACKS FROM 1-INCH-THICK PLYWOOD.