5 Minute Data logging Activities CONTENTS 01 02 03 04 05 06 07 08 09 10 11 12 13 14 15 16 17 18 19 20 21 22 22 23 24 25
-
Temperature Race ..................................................................................................2 Cooling effect of evaporation ...................................................................................3 Light - Transparent, Translucent and Opaque............................................................4 Muffling Sound .......................................................................................................5 Find the body! ........................................................................................................6 Thermal imaging.....................................................................................................7 Testing for Acidity ...................................................................................................8 Chemistry and fizzy sweets ......................................................................................9 Cola and Alka Seltzer reaction ................................................................................ 10 Pulse ................................................................................................................... 11 Heart Rate – Armchair gymnastics.......................................................................... 12 The chocolate effect! ............................................................................................ 13 Breathing ............................................................................................................. 14 Sweating .............................................................................................................. 15 Transpiration: Water loss from plants ..................................................................... 16 Reaction Times ..................................................................................................... 18 Hit the brakes! ..................................................................................................... 20 Timing cars .......................................................................................................... 22 Measuring speeds on a runway .............................................................................. 23 Acceleration due to gravity .................................................................................... 24 Dynamo effect ...................................................................................................... 25 Dropping a magnet through a wire coil - Voltage ..................................................... 26 Dropping a magnet through a wire coil - Current ..................................................... 27 Walk this way! ...................................................................................................... 28 Measuring the speed of sound in air ....................................................................... 29 Heart rate and exercise ......................................................................................... 30
The worksheets in this book guide you into setting up an activity using the EasySense software.
Copyright: all rights reserved. This manual may be copied for use within the premises of the purchaser’s establishment on condition that it is not loaned, sold or used outside the Licensee's premises. Data Harvest's policy is to continually improve products and services, so we reserve the right to make changes without notice. It is acknowledged that there may be errors or omissions in this publication for which responsibility cannot be assumed. No liability will be accepted for loss or damage resulting from use of information contained in this manual or from uses as described. Data Harvest Group Ltd., 1 Eden Court, Leighton Buzzard, Bedfordshire LU7 4FY Tel: +44 (0)1525 373666, Fax: +44 (0)1525 851638 e-mail: sales@data-harvest.co.uk, support@data-harvest.co.uk Website: www.data-harvest.co.uk
Document No: DO239 (2)
5 Minute Data Logging Activities
DO239 (2)
01 - Temperature Race Read A simple short activity using 2 Temperature sensors. Find out who can put more energy into a Temperature sensor over a one minute period. The data can then be used to explore the various analysis and display tools in the EasySense software.
What you need 1 x EasySense logger 2 x Temperature sensors 2 volunteers What you need to do 1. Connect the Temperature sensors to the data logger. Lay one of the sensors on the bench next to each volunteer. 2. Set the EasySense software to Level 3. Select Graph from the Home screen. From the logging wizard set up as: Step 1 Select Next
Step 2: Total recording time = 1 minute Interval = 100 ms
Step 3: Start condition = None
3. Select the Start icon to begin logging. Each volunteer should pick up a Temperature sensor and hold the tip in their hand. They should warm the tip in any way they can think of over the minute.
Results Use Zoom In to make the graph data fill the screen.
Use Values
Use Difference to find the change of value from the beginning to the end of the graph for each line.
Use Area to find the area under the whole graph for both the sensors. (Shading lines will mark the section under the graph for whichever sensor is currently selected on the Y-axis. The area value for both sensors will be shown in the data value boxes). Use Add Text to label the graph.
to explore the data and find the maximum temperature for each line.
Questions Is there a winner? Is the graph with the highest maximum temperature, the same as the one with the greatest difference from start to finish, and the same as the one with the greatest area? If not, explain why. 2
5 Minute Data Logging Activities
DO239 (2)
02 - Cooling effect of evaporation Read This experiment shows the process by which the temperature of a liquid can be changed (evaporation). It introduces the use of Overlay in the EasySense software.
Temperature sensors taped down but protruding with ends covered with small wads of cotton wool
What you need 1 x EasySense logger 2 x Temperature sensors Very small pieces of cotton wool, or strips of absorbent tissue Volatile liquid such as propanol, after-shave or cologne Dropper or pipette Sticky tape to secure the Temperature sensors to a bench What you need to do 1. Assemble the apparatus as shown. Connect the Temperature sensors to the data logger. 2. Wind very small pieces of cotton wool to the protruding end of each Temperature sensor. Both pieces should be the same size and shape. 3. Select Graph from the Home screen. From the logging wizard set up as: Step 1 Select Next
Step 2: Total recording time = 2 minutes Interval = 200 ms
4. Select the Start icon
Step 3: Start condition = None
to begin logging.
5. Place 2 drops of the volatile liquid on one Temperature sensor. Leave the second sensor dry as the control. 6. When logging has finished replace the cotton wool with new pieces the same size. 7. Select Overlay
and repeat with other liquids, including water.
Results Use Auto scale graph 0 to Max or Zoom In to make the graph data fill the screen. Use Values to explore the changes during the experiment. Use Difference to find out how much the temperature changed from the maximum
to the minimum value for each liquid. Use Add Text to label the lines of data.
Questions What was the change in temperature for the liquids you measured? Apart from the temperature change, how could you tell that the liquid was evaporating? 3
5 Minute Data Logging Activities
DO239 (2)
03 - Light - Transparent, Translucent and Opaque Read This activity introduces SnapShot and uses a Light sensor (0 – 1000 Lux range) to measure the amount of light blocked by a variety of materials.
What you need 1 x EasySense logger 1 x Light Level sensor (set to the 0 – 1,000 Lux range) Light source (torch or mains lamp) Variety of materials (transparent, translucent and opaque materials e.g. clear polythene, coloured film, paper or card)
What you need to do 1. Set up the apparatus with the light source pointing towards the Light sensor. Connect the Light sensor to the data logger. 2. Select SnapShot from the Home screen. 3. Select the Start icon to begin logging. 4. Tap in the graph area to take the first measurement with no material between the light source and sensor (the control). 5. Place a sample of material in front of the light source, and tap in the graph area to take the second measurement. 6. Repeat until all the samples have been tested. Select Stop
to finish.
Results Use Add Text to put labels on the bar graph marking the results as Control, Translucent, Transparent or Opaque.
Questions Explain what the terms translucent, transparent and opaque mean?
4
5 Minute Data Logging Activities
DO239 (2)
04 - Muffling Sound Read This activity introduces the concepts that sound travels better through some materials than others and that some materials are better sound insulators than others.
Noise maker buried in box
What you need 1 x EasySense logger 1 x Sound sensor set to the dBA range Large box and a variety of materials e.g. crumpled newspaper, polystyrene chips, fabric,
wadding, bubble wrap, etc. Noise maker e.g. Alarm clock.
What you need to do 1. Connect the Sound sensor to the data logger and position above an empty box. 2. Select Graph from the Home screen. From the logging wizard set up as: Step 1 If the graph’s Y-axis heading shows Sounds (mV):
Step 2: Total recording time = 20 seconds Interval = 50 ms
1. Select the sensors name (Sound). 2. Select Sound (dBA) as the range, OK 3. Select Next
Step 3: Start condition = None
3. Place the noise maker in the box (with no test material) and select Start to record a control set of data. 4. When logging has stopped add one type of test material to the box so the noise maker is buried. 5. Select Overlay then Start to begin logging. 6. Repeat with the other materials provided.
Results Use Add Text to label each graph line with the name of the material used. Questions Which material was best at muffling sound? Which was the worst at muffling sound? Explain why you think this might be.
5
5 Minute Data Logging Activities
DO239 (2)
05 - Find the body! Read This activity introduces the Infrared sensor and its ability to measure radiated heat as energy. When seeking living persons buried under rubble a rescue worker may use an infrared device to locate warm areas so they know where to dig. In this activity, a box of polystyrene chips represents rubble, and the challenge is to ‘find the body’.
What you need 1 x EasySense logger 1 x Infrared sensor – set to the Irradiance 20 W/m2 range Box of polystyrene chips (or crumpled newspaper) Several small sealed bottles of hot water Several small flags to act as markers What you need to do 1. Connect the Infrared sensor to the data logger. Set up the apparatus and hide the hot water bottles under the ‘rubble’. 2. Select Meters from the Home screen. Maximize the section window to make the numbers fill the screen. Note: If the name on the top of the section window doesn’t read Irrad. 20 W/m2sr stop logging and from the Settings menu select Sensor Config, select Change Range and select Irrad. 20 W/m2 as the range. Select Start for the change in range to be detected.
3. Scan the surface of the ‘rubble’ to locate a person – the measurements will rise significantly if a hot body is detected. 4. Mark the ‘hot’ area with a flag and continue the search. 5. Select Stop to finish. 6. Dig the flag marked areas to see if you have located any hot water bottles.
6
5 Minute Data Logging Activities
DO239 (2)
06 - Thermal imaging Read This simple activity introduces the Infrared sensor and its ability to measure radiated heat as energy. NASA satellites use infrared sensors to create a thermal image of the earth. You will produce a graph of the residual heat radiated from a hand print on the laboratory bench.
What you need 1 x EasySense logger 1 x Infrared sensor – set to its lowest range (20 Irrad. W/m2) What you need to do 1. Connect the Infrared sensor to the data logger. 2. Rest the palm of your hand on the bench as though in the centre of a 20 cm x 20 cm square. 3. Select EasyLog from the Home screen.
Note: If the Y-axis doesn’t read Irrad. 20 W/m2 select the New icon name, select Irrad. 20 W/m2 as the range, OK and then Finish.
, tap on the Infrared sensors
4. Remove your hand and select Start to begin logging. 5. Use the Infrared sensor to scan slowly along the bench as shown in the Fig. b to record the residual heat.
6. Select Stop
to finish.
Results Use Autoscale to make the graph display fill the screen. Use Add Text to label the graph – first finger, thumb, etc.
7
5 Minute Data Logging Activities
DO239 (2)
07 - Testing for Acidity Read This activity introduces the pH sensor, as a method of finding out whether a solution is acid, alkaline or neutral, and the use of SnapShot, to record individual readings for comparison.
What you need 1 x EasySense logger 1 x pH Adapter and Electrode 6 beakers and various solutions (all at room temperature) to test e.g. A = fizzy pop, B =
soap solution, C = vinegar, D = salt solution, E = lemon juice and F = sodium bicarbonate A beaker and wash bottle of distilled water
What you need to do 1. Connect the pH sensor to the data logger. 2. Select SnapShot from the Home screen. Select Start to begin logging. 3. Carefully put the pH electrode into solution A, wait until the pH value stabilises and then tap in the graph area to record the pH value for solution A. 4. Rinse the electrode carefully in water, and then repeat for all the other solutions. 5. Select Stop
to finish.
Results Use Add Text to label each data point with the test solutions letter. Questions pH values range from 1 to 14. Find out what the pH values are for acid solutions, alkaline
solutions and neutral solutions. Use this information to decide what type of solutions A, B, C, D, E and F are. Explain why the pH electrode is washed before using it in the different solutions.
8
5 Minute Data Logging Activities
DO239 (2)
08 - Chemistry and fizzy sweets Read This experiment uses the Temperature sensor to measure a small change during a chemical reaction. Some primary children in Staffordshire completed a Tuck Shop survey and found that Sherbet fountains and other fizzy sweets sold well in the summer, but hardly at all in the winter. They wanted to test why this should be, so set up the following experiment.
What you need 1 x EasySense logger 1 x Temperature sensor Beaker – 250 cm3 Warm water (37°C approx. to simulate mouth temperature) 1 teaspoon (5 cm3) of citric acid 2 teaspoons (10 cm3) of bicarbonate of soda What you need to do 1. Connect the Temperature sensor to the data logger. 2. Select Graph from the Home screen. From the logging wizard set up as: Step 1 Select Next
Step 2: Total recording time = 2 minutes Interval = 200 ms
Step 3: Start condition = None
3. Pour 100 cm3 of warm water into a beaker and position the Temperature sensor. 4. Select Start to begin logging. Add the bicarbonate of soda, stir with the Temperature sensor, and then add the citric acid and stir (it will fizz wildly at first).
Results Use Values to explore the data on the graph. Use Auto scale to make the data fill the screen.
Use Difference
to find out how much the temperature changed during the experiment.
Question By how much did the temperature of the water change from the start to the end of the fizz? 9
5 Minute Data Logging Activities
DO239 (2)
09 - Cola and Alka Seltzer reaction Read Alka Seltzer tablets are taken to neutralize an acid stomach. In this experiment, you will use the cola to represent an ‘acid stomach’, and compare the effect of a solid tablet against a crushed tablet.
What you need 1 x EasySense logger 1 x pH Adapter and Electrode 1 x Beaker 250 cm3 2 x 100 cm3 of cola ½ Alka Seltzer tablet - solid ½ Alka Seltzer tablet – crushed Distilled water What you need to do 1. Connect the pH sensor to the data logger. 2. Add 100 cm3 of cola to the beaker and position the pH electrode in the cola. 3. Set the EasySense software to Level 2 or 3. Select Graph from the Home screen. From the logging wizard set up as: Step 1 Select Next
Step 2: Total recording time = 2 minutes Interval = 200 ms
Step 3: Start condition = None
4. Select Start to begin logging and add the solid Alka Seltzer tablet to the cola. 5. When logging has finished empty and clean the beaker. Rinse the pH electrode in the water. 6. Pour 100 cm3 cola into the clean beaker, and position the pH electrode in the cola. 7. Select Overlay 8. Select Start
. to begin logging and add the crushed Alka Seltzer tablet to the cola.
Result Use Zoom or Autoscale to make the graph display fill the screen. Use Add Text to label each graph line to show which line the solid tablet produced and which the crushed tablet produced.
Use Gradient
to determine the rate of reaction.
Question Can you explain why there is a difference between the rates of these reactions? 10
5 Minute Data Logging Activities
DO239 (2)
10 - Pulse Read This quick activity introduces the heart waveform range of the Heart Rate Sensor, and is the ideal introduction to any heart rate investigation.
What you need 1 x EasySense logger 1 x Heart Rate sensor – set to the Heart wave (mV) range What you need to do
1. Connect the Heart rate sensor to the data logger. 2. Select Graph from the Home screen. From the recording wizard set up as below: Step 1
Step 2:
Step 3:
If the graph’s Y-axis heading shows Heart rate (bpm):
Total recording time = 10 seconds Interval = 50 ms
Start condition = None
1. Select the sensors name (Heart rate). 2. Select Waveform as the range, OK 3. Select Next
3. Clip the sensor onto your finger or ear lobe, wait until the LED on the sensor flashes on and off regularly. 4. Select Start
to begin logging, stay as still as possible.
5. When the recording has finished select Overlay . 6. Clip the sensor onto another volunteer’s finger or ear lobe and repeat.
Results Use Show or Hide Channels to hide the second set of heart wave data (so only one graph
line is shown). Count the number of peaks over the 10 seconds, multiply by 6 to find the first person’s heart beats per minute. Use Add Text to label the data as the number of beats per minute. Repeat with the second person’s data.
Extension activity
Repeat this activity after exercise to compare resting heart rate with exercising heart rate. Note: There is a wide variation in people’s heart rates. If you have cold hands rub them together to improve the blood circulation in the finger tips before attaching the sensor.
11
5 Minute Data Logging Activities
DO239 (2)
11 - Heart Rate – Armchair gymnastics Read This activity introduces the Heart Rate sensor, which can clip on either your index finger or ear lobe. This simple heart rate sensor works well as long as it is kept still, and you are indoors.
What you need 1 x EasySense logger 1 x Heart rate sensor set to Heart rate (bpm) range
What you need to do 1. Connect the sensor to the data logger. 2. Select Graph from the Home screen. From the recording wizard set up as below: Step 1
Step 2:
Step 3:
If the graph’s Y-axis heading shows Heart wave (mV):
Total recording time = 2 minutes Interval = 200 ms
Start condition = None
1. Select the sensors name (Heart wave). 2. Select Beats/min as the range, OK 3. Select Next
3. Clip the sensor onto your finger or ear lobe and wait until the LED on the sensor flashes on and off regularly. 4. Sit comfortably and then select Start
to begin logging.
5. Stay still for 20 seconds, and then raise your right hand for 20 seconds. 6. Lower your right hand and stay still for 20 seconds. 7. Without moving your left hand, stand up and stand still for 20 seconds. 8. Raise your right hand and wave it around for 20 seconds. 9. Lower your right hand, sit down and stay still until the recording finishes.
Results Use Zoom or Auto scale to make the graph display fill the screen. Use Add Text to label the different activities. Questions Does your heart always beat at the same rate? When did your heart beat fastest? What was your heart rate at the start? Was your heart rate at the end the same as at the start? 12
5 Minute Data Logging Activities
DO239 (2)
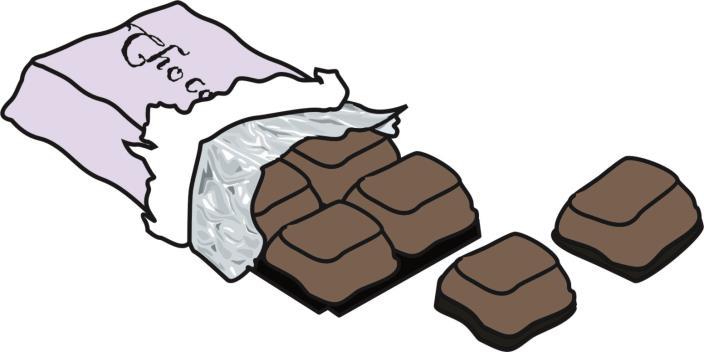
12 - The chocolate effect! Read This is a fun activity based on the Heart rate sensor. We know that our heart rate alters as we exercise, but this activity explores something else that can alter our heart rate – eating chocolate!
What you need 1 x EasySense logger 1 x Heart rate sensor set to the Heart rate (bpm) range Chocolate (with a wrapper that rustles; it works better if it is obvious what they are getting!) What you need to do 1. Connect the sensor to the data logger. 2. Select Graph from the Home screen. From the recording wizard set up as below: Step 1
Step 2:
Step 3:
If the graph’s Y-axis heading shows Heart wave (mV):
Total recording time = 5 minutes Interval = 500 ms
Start condition = None
1. Select the sensors name (Heart wave). 2. Select Beats/min as the range, OK 3. Select Next
3. Clip the sensor onto your finger or ear lobe and wait until the LED on the sensor is flashing on and off regularly. 4. 5. 6. 7.
Select Start to begin logging. Keep your finger still and sit quietly for 30 seconds to record your resting heart rate. Take a bite of chocolate. Enjoy! Let the heart rate return to its resting rate and then take a second bite of chocolate.
Results Use Zoom or Auto scale to make the data fit the screen. If the data looks jagged, use Smoothing (from the Tools menu) to smooth the data.
Use Values
to read the information from the graph.
Questions By how much did your heart rate change when you were eating chocolate? Did your heart rate change as much during the second bite of chocolate? Extension activity Try another stimulant e.g. caffeine in cola or Red Bull, or hot drinks such as tea and coffee.
13
5 Minute Data Logging Activities
DO239 (2)
13 - Breathing Read This activity introduces the Oxygen sensor measuring the oxygen content of air. You will find out how much oxygen is consumed when you breathe in and out whilst sitting quietly. You may then go on to compare the result with the oxygen consumed after a short burst of exercise. Warning! Only a single breath should be captured. Do not re-breathe the air from the bag. Make sure the bag has been completely emptied between uses to prevent re-breathing.
What you need 1 x EasySense logger 1 x Oxygen adapter and electrode set to the 0 – 25% O2
range Medium sized bag for breathing into
What you need to do 1. Fill the membrane cap with electrolyte and screw it onto the electrode. Connect the Oxygen electrode to the adapter, and the adapter to the data logger. Leave the Oxygen sensor hanging vertically for approximately 30 minutes. 2. Select Graph from the Home screen. From the recording wizard set up as below: Step 1
Step 2:
If the graph’s Y-axis heading shows Oxygen (%Sat): Total recording time = 1 minute 1. Select the sensors name (Oxygen). Interval = 100 ms 2. Select Oxygen 0-25%O2 as the range, OK 3. Select Next
Step 3: Start condition = None
3. Select Test Mode (Tools menu) to check the oxygen reading. When it’s stable turn the black knob on the adapter until the reading is 21%. The Oxygen sensor is now ready for use. 4. Place the Oxygen electrode inside the bag and select Start
to begin logging.
5. Take a deep breath, breathe out slowly into the bag and then hold the bag shut. 6. When the recording has finished remove the Oxygen sensor from the bag.
Results Use Values
to find the minimum value and Add Text to label it.
Use Difference
to find out how much the oxygen level changed.
Questions How much difference was there between the start and the lowest value? How much oxygen did you consume during one breath? What other gases are exhaled when you breathe out? Extension activity
Do some vigorous activity e.g. running up and down stairs, then repeat the activity and compare results.
14
5 Minute Data Logging Activities
DO239 (2)
14 - Sweating Read When the Humidity sensor/cup is placed against the skin it will record the change of humidity caused by sweating. Once this effect has been experienced, you are ready to investigate whether antiperspirants are effective.
What you need 1 x EasySense logger 1 x Humidity sensor 1 Plastic drinks cup (e.g. from water cooler) with a hole in its base Range of products to test e.g. Deodorant or Antiperspirant – roll on liquid, or cream Hazard Information: Do not apply products to broken skin. If you know you are sensitive to any of the products being presented do not use them.
What you need to do 1. Fit the cup onto the Humidity sensor and connect the sensor to the data logger. 2. Set the EasySense software to Level 2 or 3. Select Graph from the Home screen. From the recording wizard set up as below: Step 1
Step 2:
Step 3:
Select Next
Total recording time = 2 minutes Interval = 200 ms
Start condition = None
3. Select Start to record the humidity in the room for the full two minutes. This is your control data which you will use for comparison. 4. Place the open end of the cup firmly either against the palm of your hand, or against the inner lower arm. 5. Select Overlay then Start . This set of data will be the indicator of sweating before any treatments. 6. Apply antiperspirant or deodorant to the same area of skin. Select Test Mode (Tools menu) to check that the humidity level has returned to the room level (as measured in 3.). 7. Place and hold the cup firmly over the area where antiperspirant has been applied and select Start . 8. Repeat with any other products supplied.
Results Use Zoom In or Autoscale to make the graph display fill the screen. Use Add Text to label each line e.g. room, skin, antiperspirant.
Use Values each line.
to explore the data. Use Gradient
Questions Which product performed best? Explain your answer. 15
to compare the rate of change of
5 Minute Data Logging Activities
DO239 (2)
15 - Transpiration: Water loss from plants Read This experiment uses the Humidity sensor to compare transpiration from leaves of different plants. Transpiration is the engine by which water is drawn through the plant and up into the leaves. Plants use the water for photosynthesis and structural support. A lack of water will lead to wilting of the plant. Some plants wilt in the midday sun as a protection against water loss e.g. Beet plants.
What you need 1 x EasySense logger 1 x Humidity sensor 2 x Plastic beakers, one with a hole in the base 2 x Card discs with hole in the centre, or cling film Several leaves of similar size What you need to do
Experiment apparatus
Control apparatus
1. Assemble the apparatus without the Humidity sensor or leaf in place. If cling film is used instead of card, make a small hole in the centre suitable for a leaf stem. Connect the Humidity sensor to the data logger 2. Select Graph from the Home screen. From the logging wizard set up as: Step 1 Select Next
Step 2: Total recording time = 2 minutes (at least) Interval = 200 ms
Step 3: Start condition = None
3. Select Test Mode (Tools menu) and check the normal humidity reading in the room.
16
5 Minute Data Logging Activities
DO239 (2)
4. Position the Humidity sensor in the upper chamber, select Start and record for at least 2 minutes (control). 5. At the end of the recording, remove the upper chamber and allow the Humidity sensor to return to the normal room reading (approx 3 – 4 minutes). 6. Select Overlay
. Place Leaf 1 in the small hole, place the upper chamber and Humidity
sensor in position, select Start to record another set of data. 7. Repeat step 5 and 6 to test leaves 2 and 3.
Results Use Values
and Difference to find the lowest humidity, highest humidity and the difference between the lowest and highest reading for each leaf type. Leaf type
Lowest humidity
Highest humidity
Difference between the lowest and highest humidity
Questions How does the size of the leaf change how quickly the humidity changes inside the chamber? Does the type of leaf have any effect on how quickly the humidity changes inside the chamber?
Extensions Use the same set up to: Investigate the effect of light on the rate of transpiration. Investigate from which side of the leaf transpiration is greater. You will require 3 identical leaves. Smear Vaseline on the top surface of one leaf, on the lower surface of the second leaf, leaving the third clear. Investigate whether the transpiration rate is the same for different types of leaf e.g. shiny leaves, silver leaves, hairy leaves, etc. Does the colour of the light have any effect? Place a coloured filter (gel) between the light and the leaf. Which colour has most effect?
17
5 Minute Data Logging Activities
DO239 (2)
16 - Reaction Times Read This investigation will look at reaction times and factors than may alter them. A reaction time is the quickest time an individual can respond to a stimulus.
What you need 1 x EasySense logger 2 x Push Button Reaction Switches (one of which must have an LED) Various items to use as distractions e.g. sound source (Walkman), mobile telephone What you need to do
The tester presses the switch with the LED, and the responder pushes the second switch as soon as he/she see the LED light. This produces a timed response and the software records the reaction times as metres per second.
1. Connect the switches to the inputs labeled A and B on the data logger (switch A is for the tester, switch B for the responder). 2. Measure the distance from the responder’s eye to thumb tip (this is the distance from A to B) in metres.
3. Set the EasySense software to Level 2 or 3. Select Timing from the Home screen, from the recording wizard set up as: Speed/Velocity
From A to B
Enter the distance from the responder’s eye to thumb
Set the number of decimal places to show
Tick the box next to Time A to B
4. Make sure the responder can see the LED on the testers switch but cannot see any movement of the tester’s hand or fingers (A CD ROM stuck on the front of the switch with the LED showing through the centre hole works well). 5. Select Start . 6. The tester should press their switch; the responder should then press their switch as soon as they see the LED on the tester’s switch light up. 7. Repeat several times to enable an average to be calculated. When enough testing has taken place, select Stop . 8. Select Show Statistics (Analysis menu) to find the average (mean).
Extensions Let the responder listen to some music on a pair of headphones and repeat the experiment. Let the responder listen to a tape of instructions that need following and repeat the test. Let the responder have a drink containing caffeine, e.g. Cola or coffee to see if the reaction times vary.
18
5 Minute Data Logging Activities
DO239 (2)
Results The results will be presented as time and speed from A to B. This gives a direct value of the speed of reaction. Be aware of the range of the time scale used, as it is normal to express reaction times as tenths or hundredths of a second.
Questions 1. How does your reaction time compare to the values printed in textbooks or on the web? 2. Collect the averages for the rest of the group, or class. Calculate the average for the class. How many people fall below the average? Is there a difference between genders? Calculate the average for female, and average for male responders. 3. Find out about stopping distances from a textbook. Knowing your reaction times, how far will you travel before stopping using the stopping values in the Highway Code at 30 mph, 40 mph and 50 mph? 4. The test using taped instructions simulate a phone call when driving. How did this test affect the reaction time and ultimately the stopping distance? 5. If you have access to a scientific calculator and have sufficient data, you can do a statistical test called standard deviation. If you calculate the s.d. this will allow you to compare data from other reaction time experiments with more certainty.
Identifying errors Make a list of the possible sources of error in this experiment, and then attempt to quantify
the errors in terms of how much they have affected the results. Discuss the errors identified with others to see if they are realistic or come from preconceived ideas about reaction times.
Notes on Standard Response: The gap between two neurons (the synapse) has physical properties that introduce a time delay (latency) of approx. 10 ms per synapse. The neuron can carry the message at a maximum speed of 30 metres per second. Taking both these factors into consideration, it would be unlikely to see a reaction time of below 0.02 seconds.
19
5 Minute Data Logging Activities
DO239 (2)
17 - Hit the brakes! Read This ‘reaction time’ investigation provides a simple model for the time taken to depress the brake pedal of a car after a stimulus.
What you need 1 x EasySense logger 1 x Push Button Reaction Switch 1 x Timing Mat Various items to use as distractions e.g. sound source (Walkman), mobile telephone
What you need to do Reaction times are recorded by the tester pressing the Push switch and the responder stepping on the Timing mat to produce a timed response. 1. Connect the tester’s push button switch to input A on the data logger. Connect the responder’s timing mat to input B. 2. Measure the distance from the responder’s eye to the sole of their shoes (this is the distance from A to B). 3. Set the EasySense software to Level 2 or 3. Select Timing from the Home screen, from the recording wizard set up as below: Speed/Velocity
From A to B
Enter the distance from the responder’s eye to shoes
Set the number of decimal places to show
Tick the box next to Time A to B
4. Make sure the responder can see the LED of the tester’s switch but cannot see any movement of the tester’s hand or fingers (a CD ROM stuck in front of the switch with the LED showing through the centre hole works well). The responder may need to stand in order to exert sufficient pressure on the Timing mat. 5. Select Start . 6. The tester should press their switch; the responder should stand on the Timing mat as soon as they see the LED on the tester’s switch light up. 7. Repeat several times to enable an average to be calculated then select Stop 8. Select Show Statistics (Analysis menu) to find the average (mean).
.
Extensions Let the responder listen to some music on a pair of headphones and repeat the experiment. Let the responder listen to a tape of instructions that need following and repeat the test. Let the responder have a drink containing caffeine, e.g. Cola or coffee to see if the reaction
times vary. Compare the average ‘hitting the brakes’ times to the simple ‘reaction time’ test.
20
5 Minute Data Logging Activities
DO239 (2)
Results The results will be presented as time and speed from A to B. This gives a direct value of the speed of reaction. Be aware of the range of the time scale used, as it is normal to express reaction times as tenths or hundredths of a second.
Questions 1. How does your reaction time compare to the values printed in textbooks or on the web? 2. Collect the averages for the rest of the group, or class. Calculate the average for the class. How many people fall below the average? Is there a difference between genders? Calculate the average for female, and average for male responders. 3. Find out about stopping distances from a textbook. Knowing your reaction times, how far will you travel before stopping using the stopping values in the Highway Code at 30 mph, 40 mph and 50 mph? 4. The test using taped instructions simulates a phone call when driving. How did this test affect the reaction time and ultimately the stopping distance? 5. If you have access to a scientific calculator and have sufficient data, you can do a statistical test called standard deviation. If you calculate the s.d. this will allow you to compare data from other reaction time experiments with more certainty.
Identifying errors Make a list of the possible sources of error in this experiment, and then attempt to
quantify the errors in terms of how much they have affected the results. Discuss the errors identified with others to see if they are realistic or come from preconceived ideas about reaction times.
21
5 Minute Data Logging Activities
DO239 (2)
18 - Timing cars Read This investigation introduces the use of 2 Light gates to record accurately the time taken for a car to travel from Light gate A to Light gate B. The software will calculate the speed from A to B.
Light gate connected to input B
Start line
Light gate connected to input A
What you need 1 x EasySense logger 2 x Light gates Inclined plane and a selection of toy cars What you need to do
Timing starts when the car breaks Light gate A’s light beam and stops when the car passes through Light gate B beam. 1. Connect the Light gate at the top of the ramp to input A and the one near the bottom to input B on the data logger. Measure the distance between the two Light gates. Mark a Start line for the cars. 2. Select Timing from the Home screen, from the recording wizard set up as below: Speed/Velocity
From A to B
Enter the distance between the two Light gates
3. Select Start . 4. Let the first car run down the inclined plane, repeat several times to get a good average. 5. Repeat using all the toy cars provided.
Extensions Try changing the height of the inclined plane and repeating the experiment. Try adding mass (plasticine) to the cars and repeat the experiment. Results Record in a table the average time and speed from A to B for each car plus the distance travelled. Car
Average Time
Distance travelled
Average speed
Questions Why was it important to mark a start line? Which car had the fastest time and which had the slowest time? Can you offer an explanation as to what made the difference? Does making the inclined plan steeper make any difference to the results? Is there a pattern when comparing the different heights and the average speeds? 22
5 Minute Data Logging Activities
DO239 (2)
19 - Measuring speeds on a runway Read When a trolley or toy car moves freely down a slope, it appears to get faster as it nears the bottom. In this experiment, you will measure the speed of the trolley at different points along an inclined plane by moving the position of the Light gate. An interrupt card fitted to the car will break the Light gate’s beam. The software records the time that the beam is broken by the card. The length of the card is entered in the software, which will then calculate the speed. Speed = Distance (length of card) Time (taken for the card to go through the Light gate)
What you need 1 x EasySense logger 1 x Light gate Trolley and inclined plane OR toy car and ramp with marks at 5 cm intervals Card 3 cm long, with a marked centre point fitted to the top of the trolley or toy car What you need to do 1. Assemble the apparatus. Connect the Light gate to input A on the data logger. 2. Fix the Light gate at position 1 on the inclined plane (5 cm from the end). 3. Select Timing from the Home screen, from the recording wizard set up as below: Speed/Velocity
At A
Single interrupt card
Enter the length of the interrupt card
4. Select Start . 5. Align the centre mark of the card on the trolley with the start line and release the trolley. The speed will be shown on the graph. If any mishaps occur select the incorrect reading, Delete
then repeat the reading.
6. Place the Light gate at the second position on the slope (10 cm from the end), and repeat the experiment. 7. Repeat with the Light gate at position 3, 4 and 5 on the slope.
Questions Compare the speed values at 5 cm with those at positions 2, 3, 4 and 5. Is there a pattern in the way speed changes with distance?
Extensions Repeat the experiment with the slope at different heights. Does the shape of the graph change? Does the mass of the trolley or car change the result? Load masses on to the trolley to find out.
23
5 Minute Data Logging Activities
DO239 (2)
20 - Acceleration due to gravity Read This investigation uses a double interrupt card and a single Light gate to measure acceleration due to gravity. The card has two equal width segments. Timing measures the initial velocity as the first segment passes through the Light gate and the final velocity when the second segment passes. The software calculates acceleration from the resulting change of velocity per second.
What you need 1 x EasySense logger 1 x Light gate Retort stand and clamp Double interrupt card Ruler (mm divisions) What you need to do 1. Set up the apparatus as shown, connecting the Light gate to input A on the data logger. 2. Mark up to 7 start positions on the retort stand (position 1 should be as close the Light gate as possible without breaking the beam). 3. Set the EasySense software to Level 2 or 3. Select Timing from the Home screen, from the recording wizard set up as below: Acceleration
At A
Double interrupt card
Enter the segment width
4. Select Start . 5. Hold the timing card at position 1 and drop through the Light gate. 6. Repeat 4 more times to obtain 5 results (If any mishaps occur select the incorrect reading and delete ). Select Stop . 7. Select Show Statistics (Analysis menu) to find the average acceleration for position 1. 8. Select Start . Drop the timing card from position 2 to obtain 5 results. Continue the experiment for each position, and build up a table of results. Position 1
Position 2
Position 3
Position 4
Position 5
Position 6
1 2 3 4 5 Average
Questions Does the acceleration of a falling object change as it falls to earth? As the timing card was dropped from different heights, the initial and final velocities
measured by the software would have been different. Explain how different initial and final velocities can lead to the same calculated value of acceleration. 24
5 Minute Data Logging Activities
DO239 (2)
21 - Dynamo effect Read In this experiment a Voltage sensor is used to show the effect of spinning a magnet inside a wire coil – a simple dynamo.
Wire Coil
What you need 1 x EasySense logger 1 x ±1 V Voltage sensor 1 Wire Coil 1 strong magnet suspended on a string or rubber band What you need to do
1. Assemble the apparatus as shown in the diagram, connect the Voltage sensor to the data logger. 2. Ensure that the magnet is free to spin within the centre of the coil. 3. Select Graph from the Home screen. From the recording wizard set up as below: Step 1
Step 2:
Step 3:
Select Next
Total recording time = 20 seconds Interval = 50 ms
Start condition = None
4. Twist the magnet by 20 – 30 turns and hold it. 5. Select Start , and release the magnet (if the magnet touches the side of the coil, adjust its position, and restart data capture).
Results Use Add Text to label the start and finish of one complete cycle. Questions What was the maximum voltage created? How was the voltage related to the speed of rotation of the magnet? How many revolutions did the magnet make? Explain your answer. What description is given to a voltage which changes like this?
25
5 Minute Data Logging Activities
DO239 (2)
22 - Dropping a magnet through a wire coil (Voltage sensor) Read This simple and very fast activity introduces the need for fast data logging. A single wire will produce a small current if it is moved through a magnetic field. The current produced is described as induced. The same effect can be produced when a magnet is moved across a wire. If the wire is coiled the effect is greater. Faraday discovered that the current produced is controlled by the speed of the magnet’s movement, the strength of the magnet and the number of coils.
What you need 1 x EasySense logger 1 x ±1 V Voltage sensor 1 x Wire oil 1 strong Alnico magnet
Wire Coil
What you need to do 1. Assemble the apparatus as shown with the Voltage sensor connected to the data logger. 2. Make sure there is something soft for the magnet to fall onto. 3. Set the EasySense software to Level 2 or 3. Select Graph from the Home screen. From the recording wizard set up as below: Step 1 Select Next
Step 2:
Step 3:
Total recording time = 500 ms Interval = 500 s
Start Condition = Voltage Rises above, 40 mV with 50% Pre-trigger
(The trigger value is dependent on the strength of the magnet. If a weak magnet is used you may need to alter this value).
4. Select Start to begin logging. 5. Drop the magnet through the coil - take note of which pole enters the coil first. 6. Select Overlay . Select Start to begin logging again. 7. Drop the magnet through the coil again making sure the opposite pole of the magnet enters the coil first.
Results Use Show or Hide channels to hide the second set of data.
Use Values to find the maximum value of both peaks. Use Show or Hide channels to hide the first set of data and show the second set.
Use Values
to find the maximum value of both peaks.
Questions Explain why the values of the two peaks are not the same. Why are the peaks opposite in direction? 26
5 Minute Data Logging Activities
DO239 (2)
22 - Dropping a magnet through a wire coil (Current sensor) Read This simple and very fast activity introduces the need for fast data logging. A single wire will produce a small current if it is moved through a magnetic field. The current produced is described as induced. The same effect can be produced when a magnet is moved across a wire. If the wire is coiled the effect is greater. Faraday discovered that the current produced is controlled by the speed of the magnet’s movement, the strength of the magnet and the number of coils.
What you need 1 x EasySense logger 1 x ±100 mA Current sensor 1 x Wire coil 1 strong Alnico magnet
Current Sensor
Wire Coil
What you need to do 1. Assemble the apparatus as shown with the Current sensor connected to the data logger. 2. Make sure there is something soft for the magnet to fall onto. 3. Set the EasySense software to Level 2 or 3. Select Graph from the Home screen. From the recording wizard set up as below: Step 1
Step 2:
Step 3:
Select Next
Total recording time = 500 ms Interval = 500 s
Start Condition = Current, Rises Above, 4 mA with 50% Pre-trigger
(The trigger value is dependent on the strength of the magnet. If a weak magnet is used you may need to alter this value).
4. Select Start to begin logging. 5. Drop the magnet through the coil - take note of which pole enters the coil first. 6. Select Overlay . Select Start to begin logging again. 7. Drop the magnet through the coil again making sure the opposite pole of the magnet enters the coil first.
Results Use Show or Hide channels to hide the second set of data.
Use Values to find the maximum value of both peaks. Use Show or Hide channels to hide the first set of data and show the second set.
Use Values
to find the maximum value of both peaks.
Questions Explain why the values of the two peaks are not the same. Why are the peaks opposite in direction? 27
5 Minute Data Logging Activities
DO239 (2)
23 - Walk this way! Read This investigation introduces the Motion sensor with a simple walking activity. The Motion sensor is an ultrasonic sensor. It sends out an ultrasonic pulse and times how long each pulse takes to return to the sensor.
What you need 1 x EasySense logger 1 x Motion sensor set to a distance range What you need to do 1. Set up the Motion sensor as shown in the diagram and connect to the data logger. Make sure you have enough space to move backwards and forwards without bumping into anything. 2. Select Graph from the Home screen. From the recording wizard set up as below: Step 1 If the sensor’s name is listed as Time not Distance: 1. Select the sensors name (Time). 2. Select Distance as the range, OK 3. Select Next
Step 2:
Step 3:
Total recording time = 30 seconds Interval = 20 ms
Start Condition = None
3. Stand several metres away from the front of the sensor, and ask a partner to select Start 4. Move forward slowly, stand still and then move faster towards the sensor, then move backward. 5. When logging has stopped select Overlay
. Ask your partner to copy your movements using
your graph as a guide. When they are in position select Start 6. Repeat with other volunteers.
.
Results Use Zoom to display the graphs more clearly. Use Add Text to identify whose line is whose. Select which graphs to display or hide using Show or Hide Channels.
Use Values
to view the distance readings
Questions Whose graph matched best with the original line? When you move faster, how does the distance-time graph change? If you stand still, what does the distance-time graph for your movement look like? 28
.
5 Minute Data Logging Activities
DO239 (2)
24 - Measuring the speed of sound in air (Motion sensor) Read The Motion sensor measures distance by calculating the time for a pulse of ultrasound to travel to an object and return. We can therefore use it to calculate the speed of sound in air.
(1 metre minimum)
What you need 1 x EasySense logger 1 x Motion sensor - set first to the Time range then the Distance range 1 x Temperature sensor (for extension activity) Calculator What you need to do 1. Connect the Motion sensor and the Temperature sensor to the data logger. 2. Select Meters from the Home screen. If the name in the Numeric window doesn’t read Time (us) stop logging and select Sensor Config from the Settings menu. Select Change Range and select Time. Select Start for the change in range to be detected.
3. Select a second numeric window . Select to display Temperature in this window. 4. Position the Motion sensor as shown in the diagram. The flat surface needs to be a good reflecting surface. Ensure the face of the sensor is vertical and at least 1 metre from the flat surface. 5. Select Start . Meters will display a reading of the time it takes for the pulse to travel to the flat surface and back again (2d). The time reading will be in microseconds (s). Keep a record of the time and temperature. 6. Select Stop
.
7. Change the Motion sensors range to Distance, select Start distance (d) in metres.
and measure the exact
To change the range: Select Sensor Config from the Settings menu, select Change Range and select Distance (m). Select Start for the change in range to be detected
Results
Convert the reading from microseconds to seconds i.e. 1 microseconds = 10-6 seconds so divide by 1,000,000 e.g. 5855 s = 0.005855 seconds. Use the equation: Velocity = Distance divided by Time to find the velocity of sound in metres per second. (Remember the pulse has travelled twice the distance recorded).
Extension:
The value of velocity of sound increases with temperature. At 0°C the velocity of sound = 331.3 metres per second. The velocity of sound increases at 0.607 metres per second per degree Celsius. (Ref Kaye and Laby) At 24 °C speed/velocity of sound = (24 x 0.607) + 331.3 = 345.9 metres per second. Compare your results with the standard. 29
5 Minute Data Logging Activities
DO239 (2)
25 - Heart rate and exercise Read This activity introduces the Polar Heart Rate Exercise sensor and is an opportunity to find out more about heart rate and how it is affected by exercise.
What you need 1 x EasySense logger 1 x Polar Heart Rate sensor (receiver and transmitter belt) What you need to do
1. Attach the Polar Heart Rate transmitter belt around the chest. Connect the Polar Heart Rate receiver sensor to the data logger. 2. Select Graph from the Home screen. From the logging wizard set up as: Step 1 Select Next
Step 2: Total recording time = 5 minutes Interval = 500 ms
Step 3: Start condition = None
3. Select Test Mode (Tools menu) and check that the sensor is receiving a signal from the transmitter belt (is the red LED flashing?). 4. Select Start to begin logging. 5. Staying within 80 cm of the Polar Heart Rate receiver, exercise using a stepper, exercise bike or rowing machine until logging stops.
Results Use Values
to find the highest and lowest heart rate measurement.
Questions What is your resting heart rate? By how much did your heart rate increase when you were exercising? Extension Activity Find out about ‘target zones’. 30
5 Minute Data Logging Activities
DO239 (2)
Extend the data logging period to record recovery rate as well as the changes to heart rate during exercise. Find out about fitness levels.
Note: The Target Zone can be calculated using the Karvonen formula. This takes into account a person’s fitness level by incorporating their morning resting heart rate (MRHR). The morning resting heart rate (MRHR) is found by taking a reading for 3 days, and finding the average. When checked periodically, this number should stay steady, or even go down if the person is becoming fitter. A raised number could mean one or more of the following: 1. That they have not recovered from a hard workout the day before. 2. That they need more rest. 3. That their body has begun to fight off an oncoming illness. The Target Zone is calculated as follows: Max heart rate (220) minus age = estimated maximum heart rate (HRMx) HRMx minus MRHR = multiplier. To find a personal target zone: Multiplier x .60 +MRHR = ( ) 60% limit number Multiplier x .70 + MRHR = ( ) 70% limit number Example: Lee is 31 years old and his morning resting heart rate is 68 220 – 31 = 189 189 – 68 = 121 121 x .60 = 72.6 +68 = 141 121 x .70 = 84.7 + 68 = 153 His 60 – 70% target zone would be 141 - 153
31