User Manual

Hi, this is IME3D X-MAKER.
X-MAKER, an AI-powered 3D printer, is a brand new product with gamification 3D design App.Thanks to minimalist interaction design, intelligent algorithms and high-speed Wi-Fi data transmission, one-press printing feature makes this 3D printer available to everyone to create anything. X-MAKER is not only a 3D printer, but also bundled with powerful software and rich content, like "Things", "Theme", "Design" and "Explore" modules, which are constantly updated. No matter you are a beginner or an advanced player, you will always have new ways to play.
X-MAKER -- Make Creativity Touchable.
X-MAKER,让创意触手可及。
Our Product 3D Printer Instructions Power on Welcome setup Install filament holder Install filament Touchscreen Load filament Unload
Model printing Printing complete Change filament Move Calibration Control More settings Product composition Packing list Main components X-MAKER App Download Introduction Things / Theme / Design Print 01 05 20 Contents X-PRINT Specifications Download Interface Model editing Model slicing Model printing 26 31 Notices 32 Troubleshooting 33 Support and help 34 01
filament
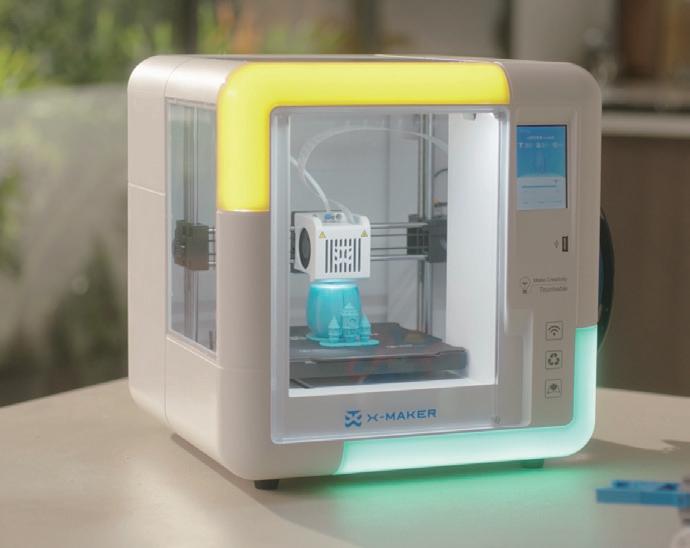
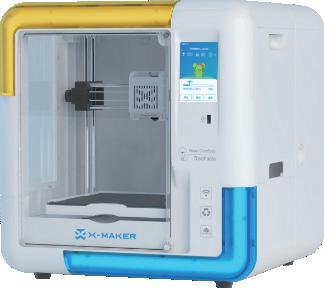
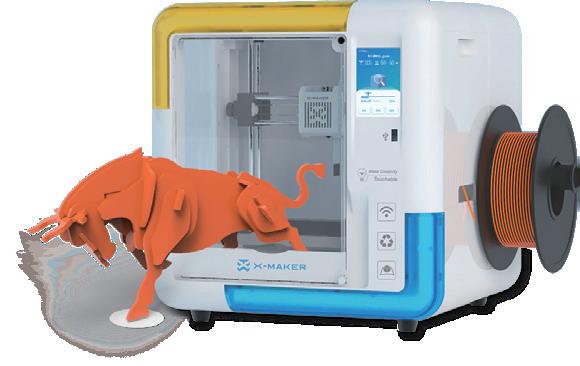
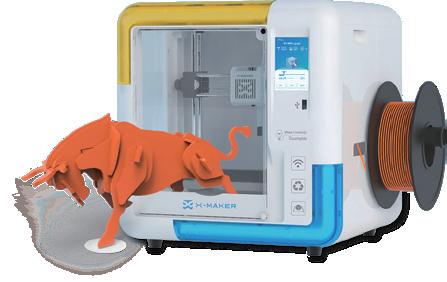
Our Product X-MAKER Design App X-PRINT Slicing Software X-MAKER 3D Printer 02 Product composition
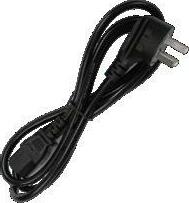
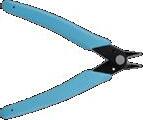
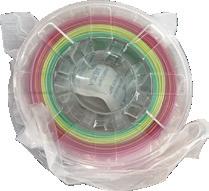
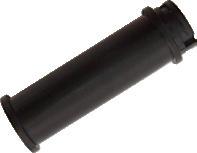
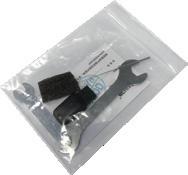

Flexible & Magnetic Baseplate x1 U Disk x1 Quick Start x1 Power Cord x1 Tool Kit x1 Printable creative models X-MAKER App installer X-PRINT installer PLA Filament x1 Filament Holder x1 3D Printer x1 Pliers x1 03 Packing list
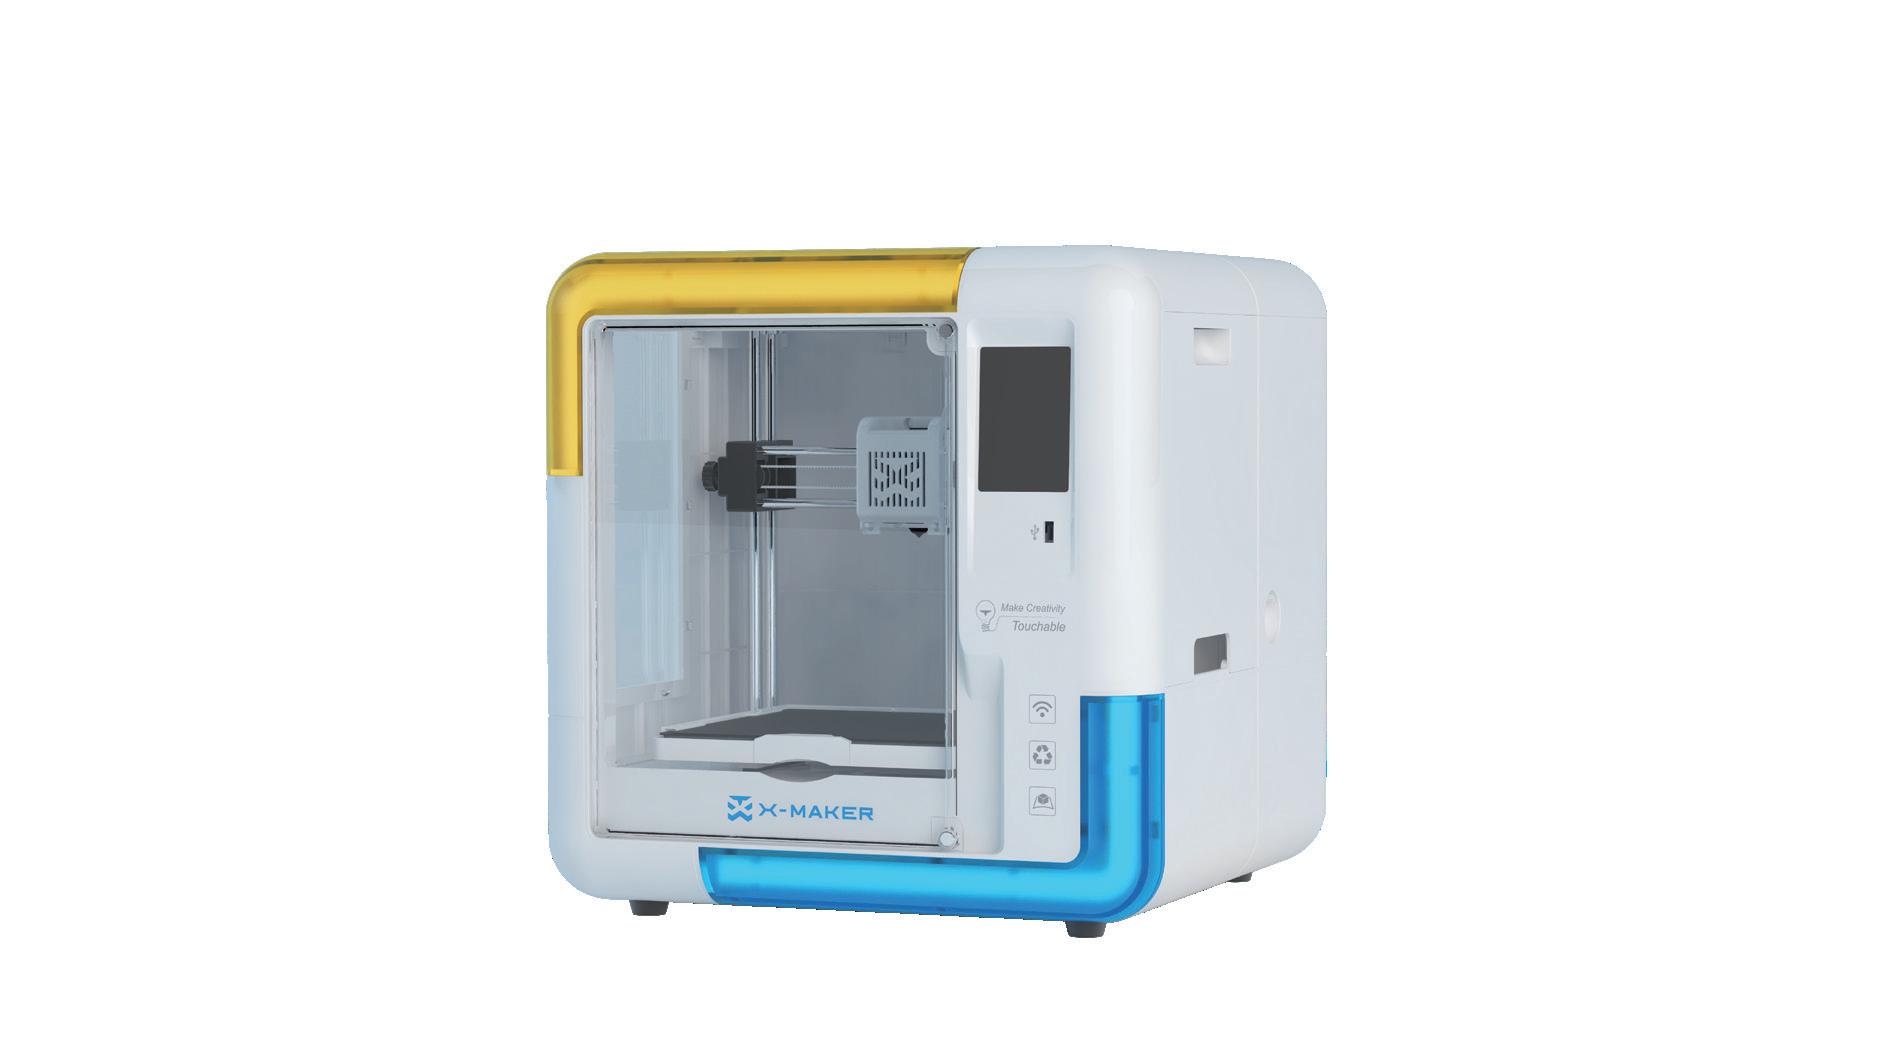
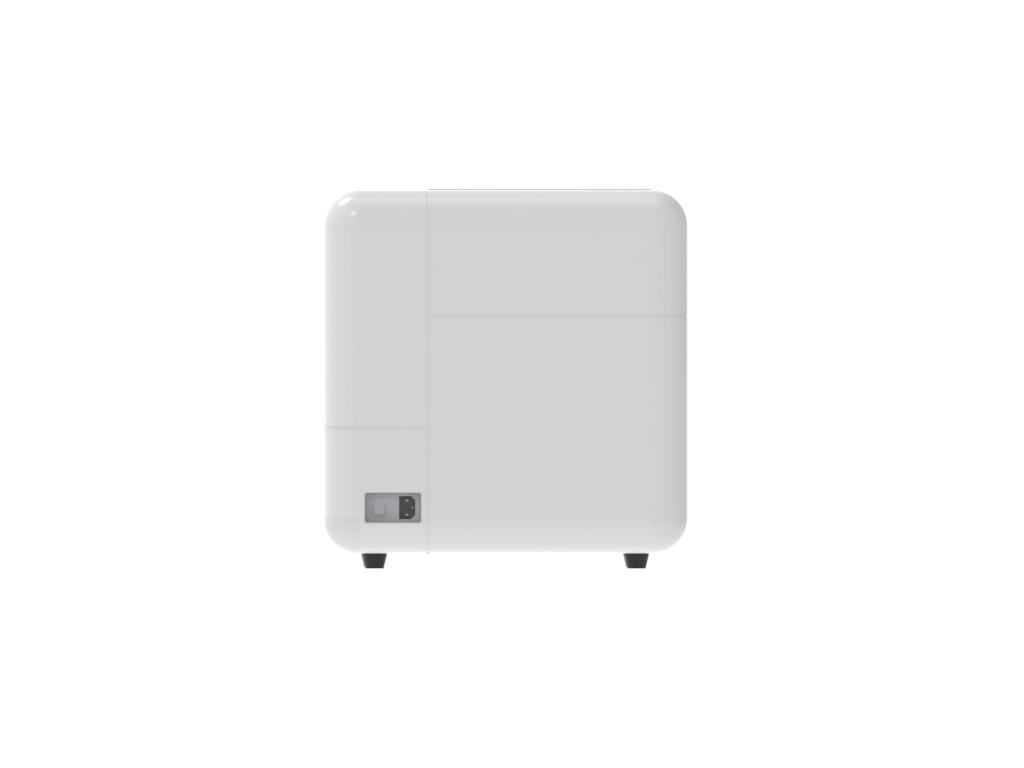
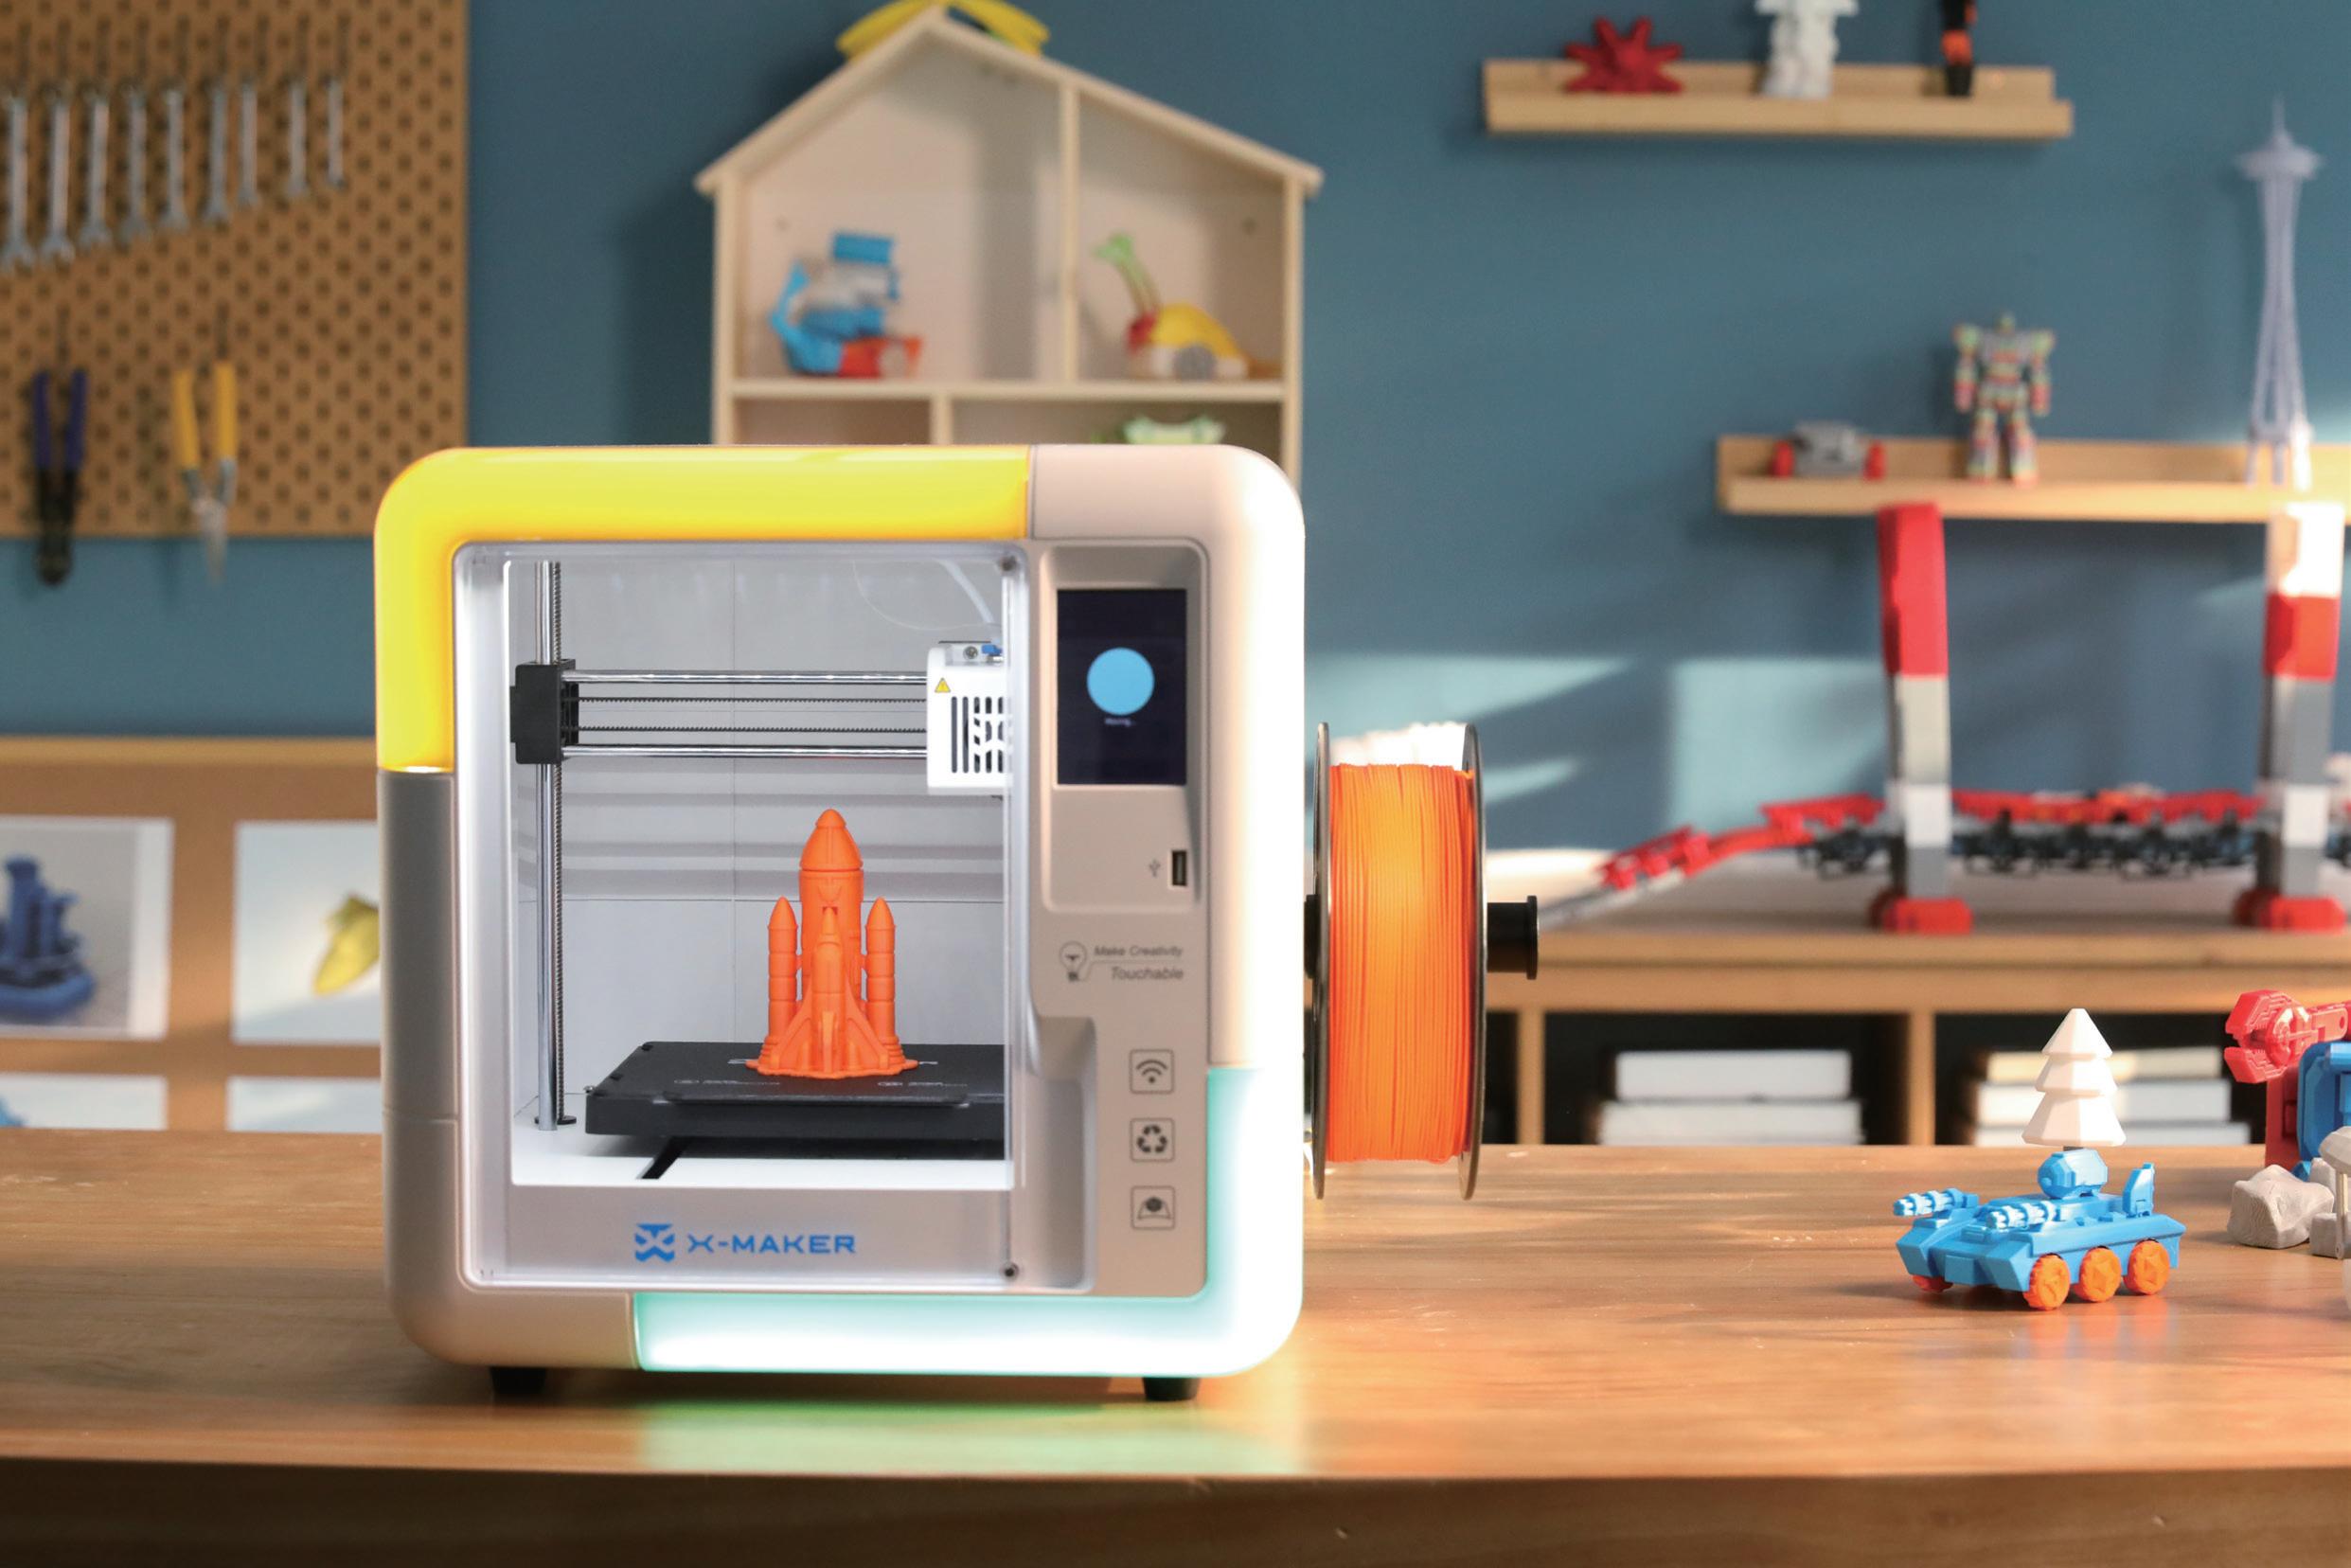
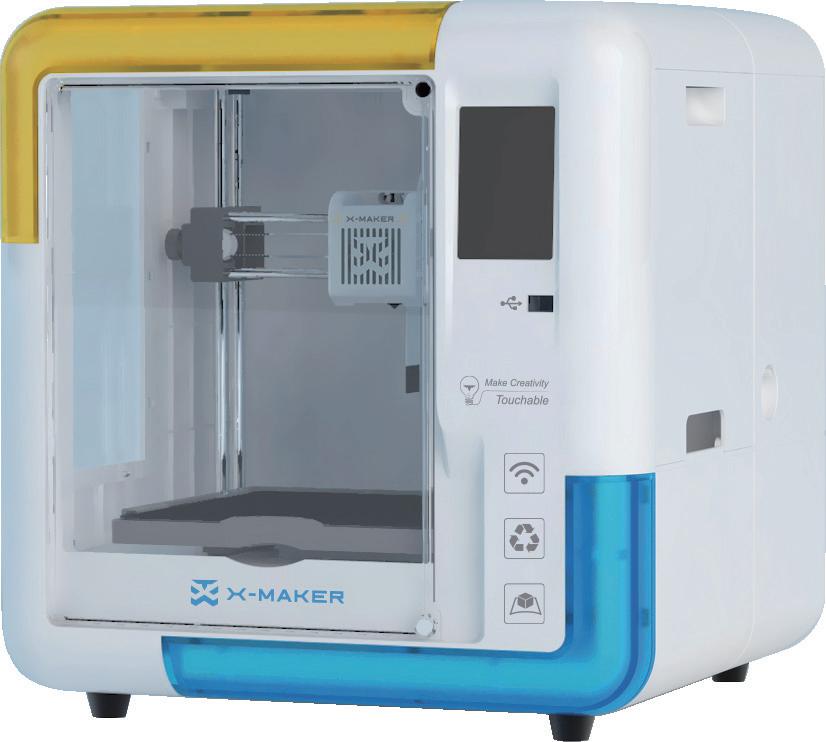
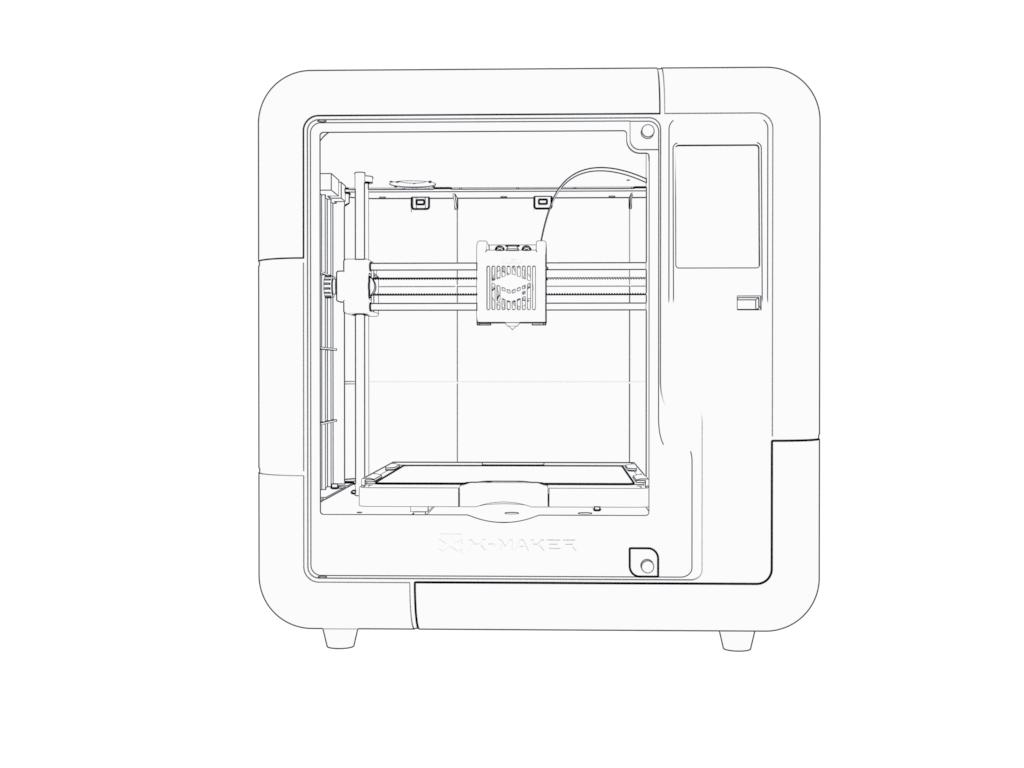
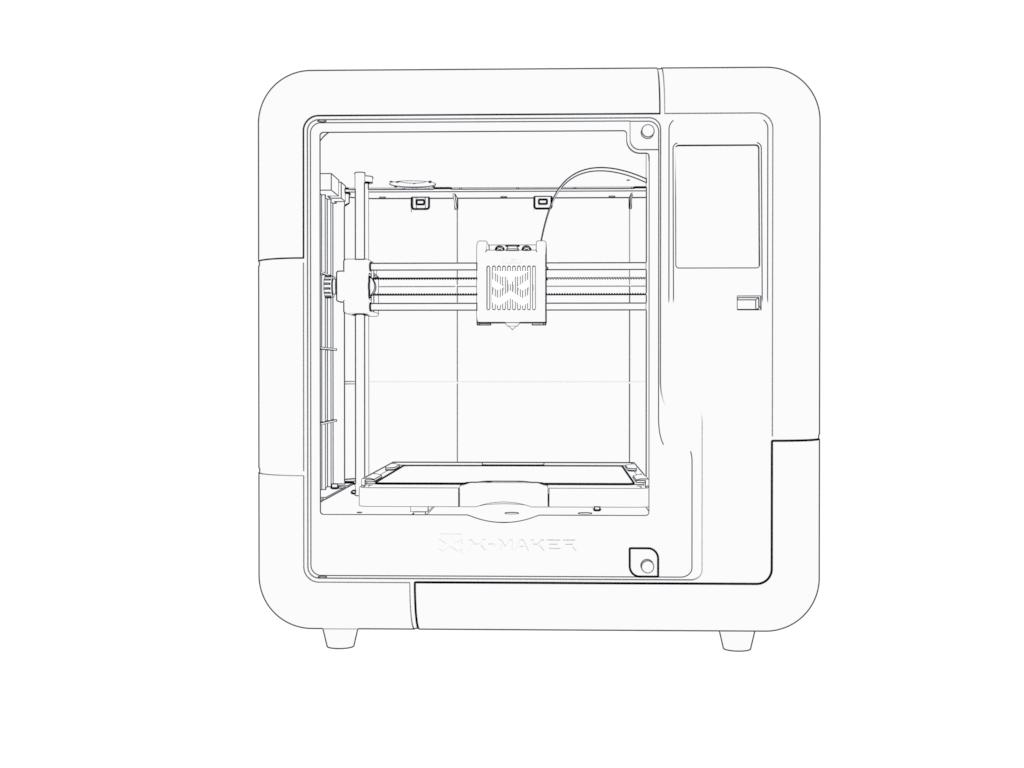
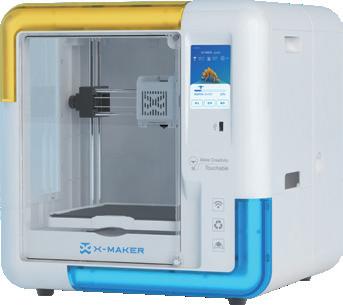
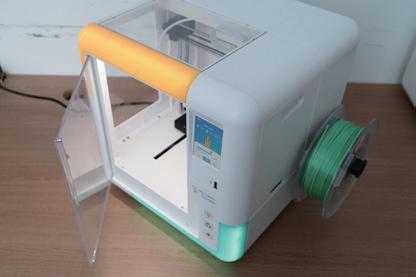
Main components 04 Power Switch Power Entry Miniframe Box Door Frame Light Door Frame Light Nozzle Flexible & Magnetic Baseplate Printing Platform Touchscreen USB Port Holder Placement Filament Inlet Baffle Extruder Filament Error Sensor
3D Printer
Power On
Connect the power cord to the printer and the other end to a power outlet. (Please keep your hands dry.)
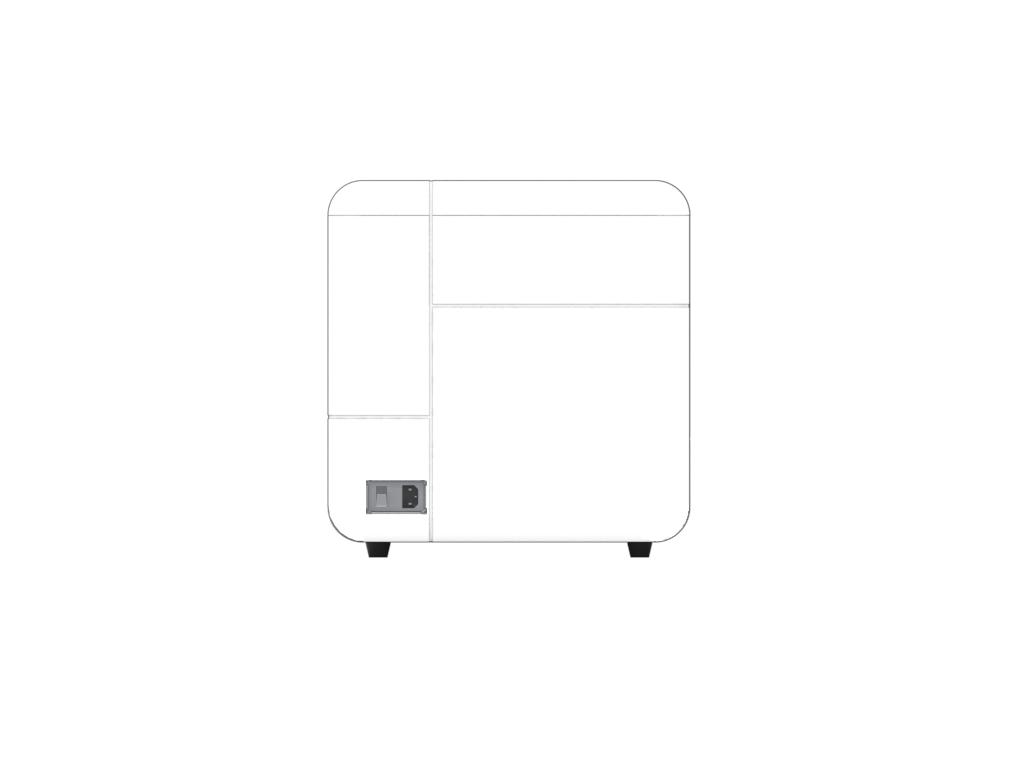
Turn on the printer using the power switch at the back.
05
Welcome setup
After power on, the welcome setup will appear on the touchscreen. Follow the steps and complete the setup.
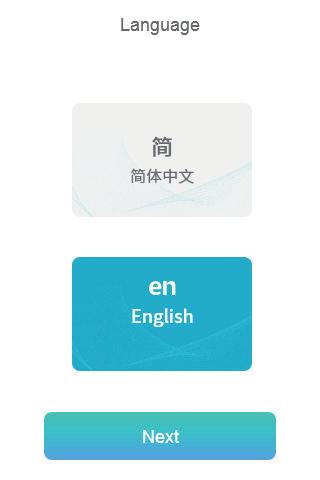
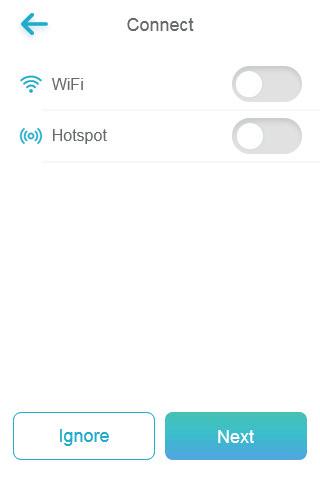
Language Connection
Select your preferred language. You can also change it by going to "Setting -> Language".

Wi-Fi: With the same WLAN, X-MAKER App can be connected to the printer.
Hotspot: When no WLAN network is available, hotspot on the printer can provide Internet access to the App.

06
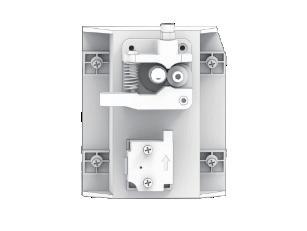
Install filament holder
Filament Inlet Filament Inlet
Install filament holder
Install the holder on the right side of the printer.
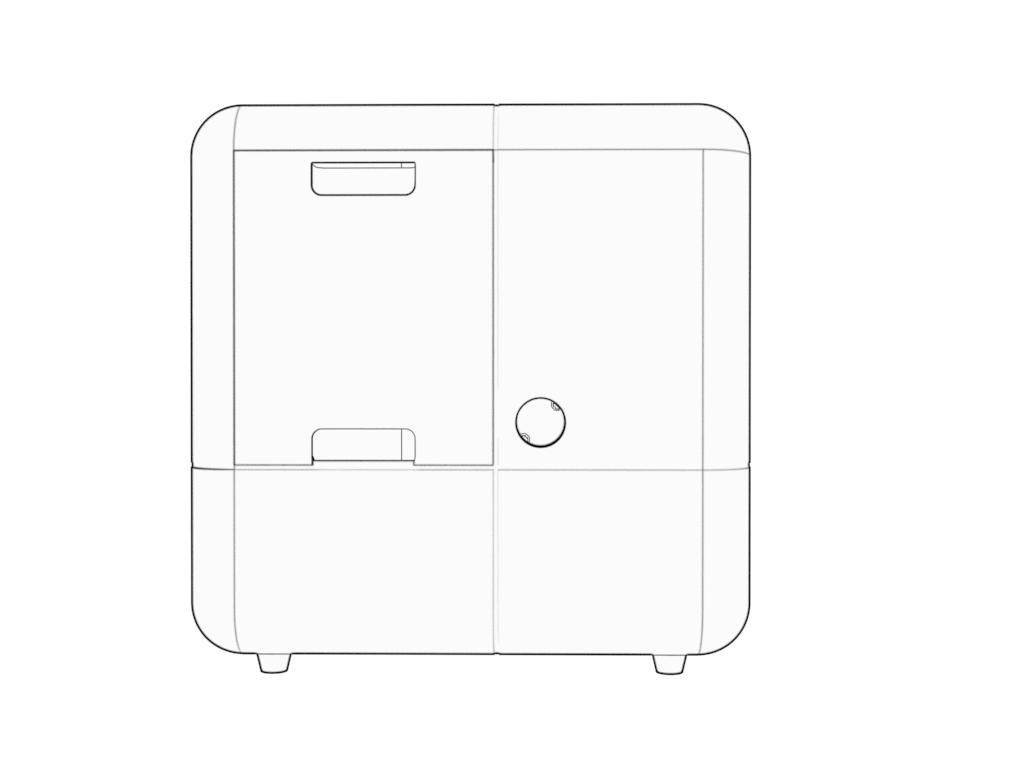
Right Wrong
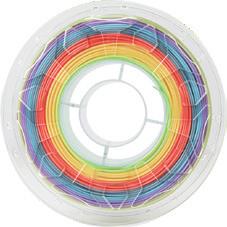
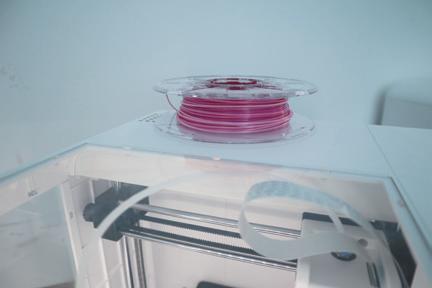
Place the spool
Place the spool of filament on the holder.
(Please make sure the filaments are not knotted or intersected.)
07
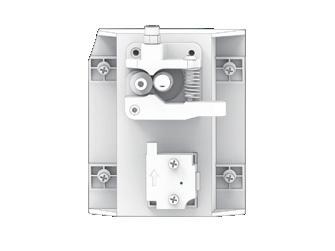
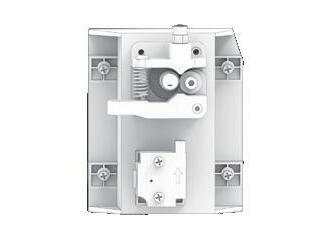
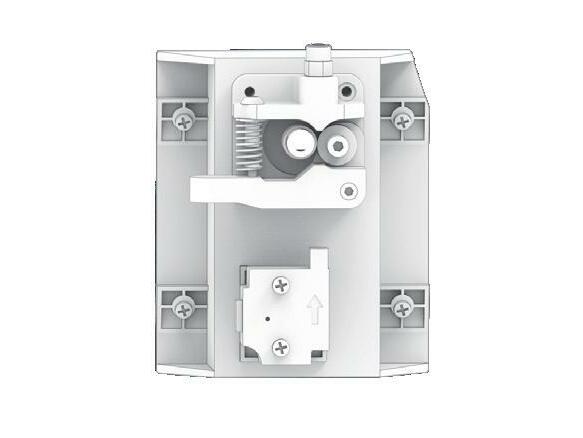
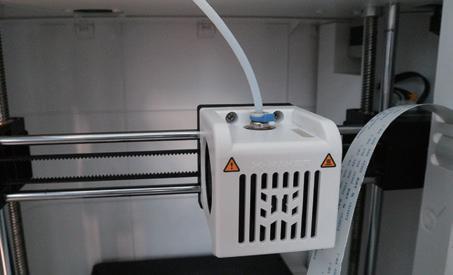
Install filament
Filament Inlet
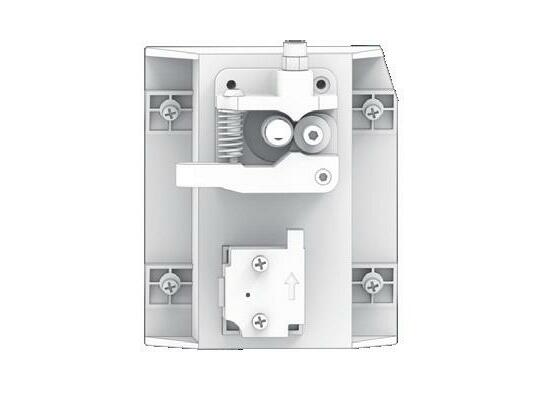
Note: The tip of the filament should be straightened and cut into an oblique angle.
Instruction
Insert the tip into the filament inlet until the prefeeder grabs the material. Push the spring upward (as shown by the red arrow in the above figure), to make the filament enter smoothly.
08
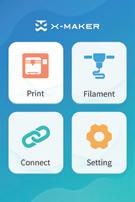
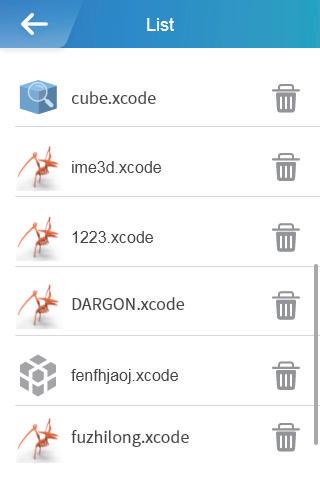
Functions
Print: select the file to print
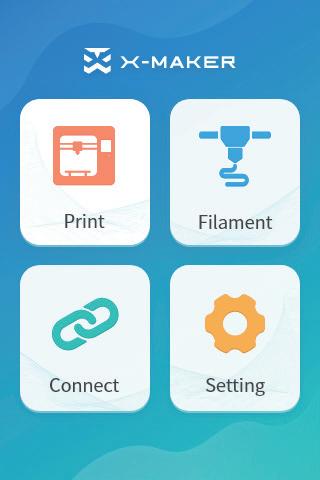
Filament: load / unload
Connect: network connection
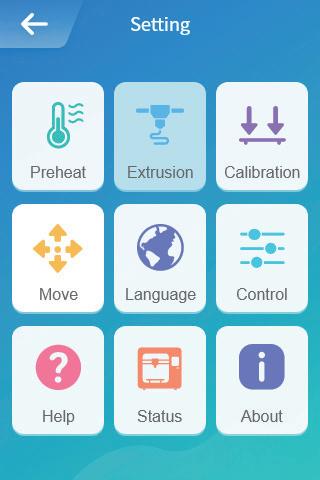
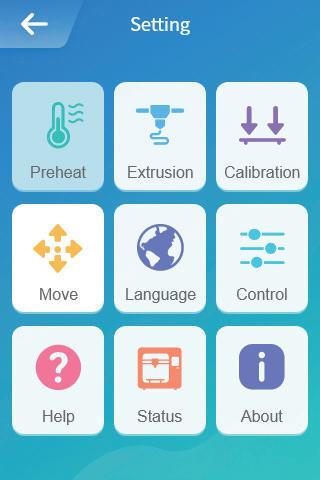
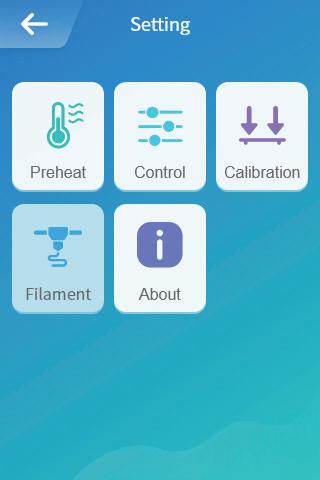
Setting: more settings
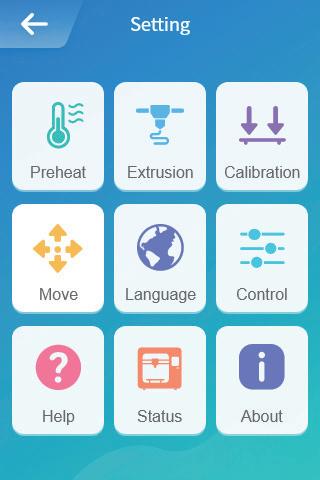
Preheat: nozzle/hotbed heating and cooling
Extrusion: load or unload manually
Calibration: adjust the distance between the nozzle and baseplate
Move: adjust X/Y/Z axes
Language: change language
Control: switches for light, fan and power loss recovery
Help: more information
Status: printer status
About: printer specifications
Homepage Setting
09
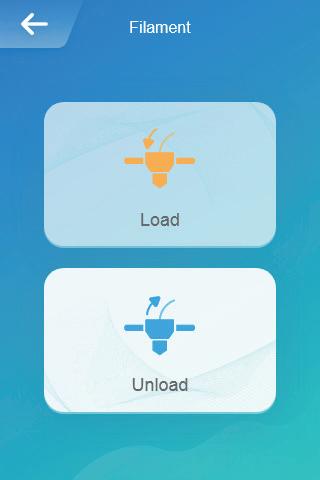
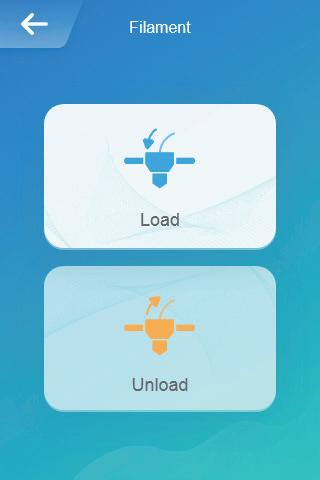
Load filament

Method 1
Go to "Filament -> Load" and wait for the nozzle to heat up. When the nozzle reaches target temperature, filament will be loaded automatically. Wait for the filament outflows from nozzle and press [Cancel] button.
Method 2
Go to "Setting -> Preheat" and set target temperature, then select "Start" to continue. (Target temp for PLA is 200 °C, and for ABS is 230 °C. If you use a third-party material, please refer to its target temperature on the packing box.)
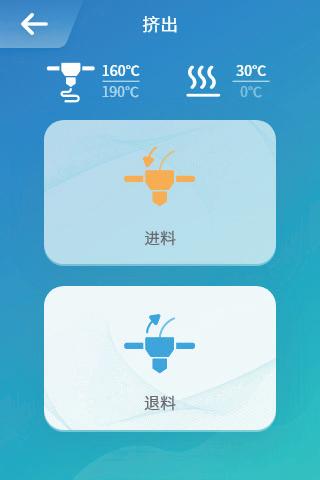


Go to "Extrusion -> Load" and set the feeding length to 10mm. Loading is finished until filament outflows from nozzle.
Note: Filaments should be pushed to the end of the pipe to make it outflows from nozzle as soon as possible.
10
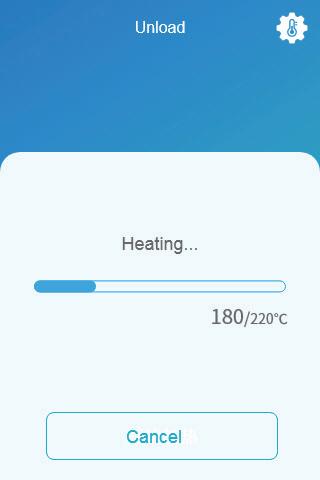
Unload filament

Method 1
Go to "Filament -> Unload" and wait for the nozzle to heat up until the filament unloads below the gear of extruder and pull out the filament directly.
Method 2
Go to "Setting -> Preheat" and set target temperature, then select "Start" to continue. (Target temp for PLA is 200 °C, and for ABS is 230 °C. If you use a third-party material, please refer to its target temperature on the packing box.)
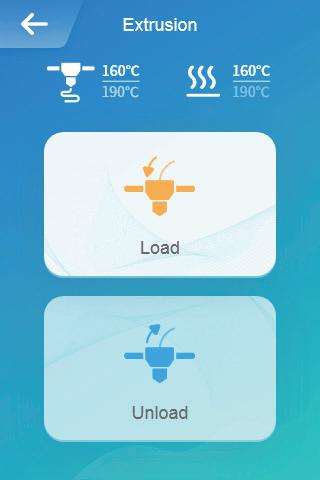
Go to "Extrusion -> Unload" and set the feeding length to 10mm. Repeat the above operation for 3-5 times until the end of the material outflows to the filament inlet. Push the spring upward and pull out the filament.
11
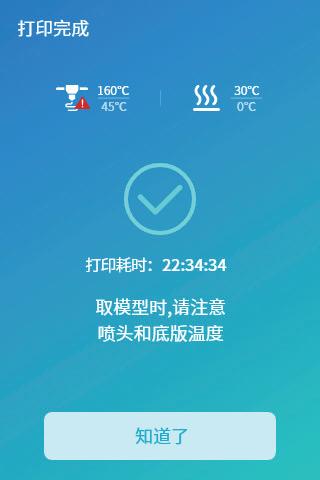
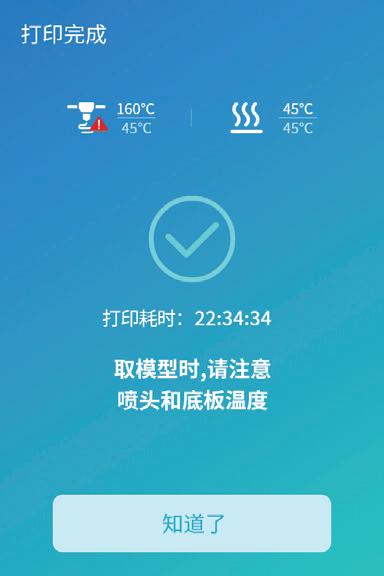
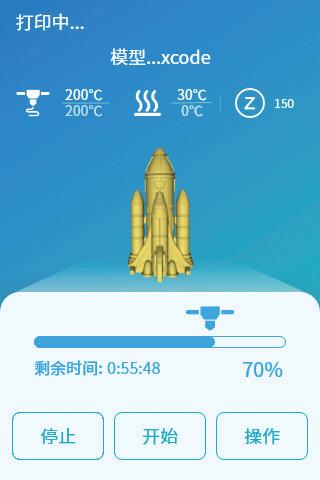
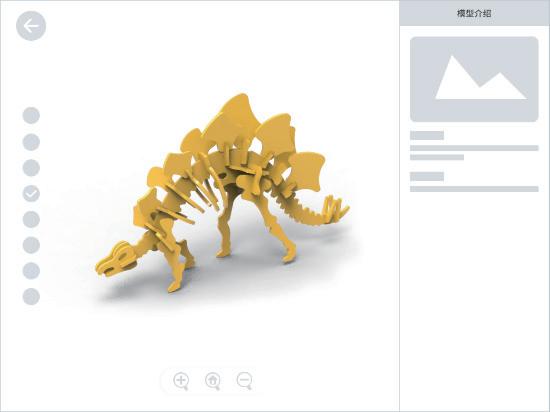
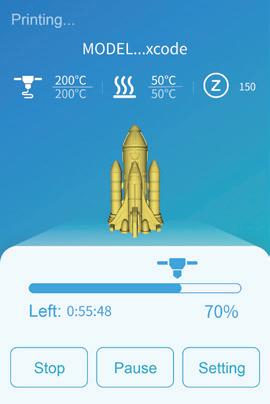
Print status
File name
Current temperature of nozzle Target temperature of nozzle 3D Viewer
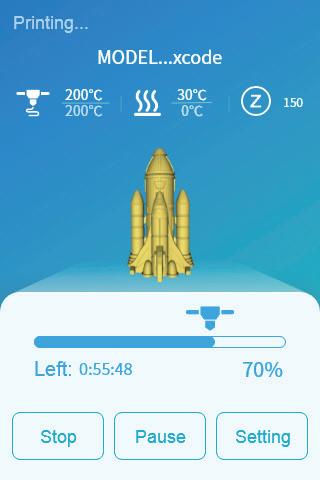
Model printing
Current temperature of hotbed Target temperature of hotbed
Current Z-axis coordinate
Remaining time
Printing interface
You can print the model by performing the following steps
1. Get your model for slicing using X-PRINT.
Pause/Start (Printing can be resumed.)
More settings
Print progress Stop (Printing can't be resumed.)
2. Upload the file to the printer and print by one-press printing. (Ensure your printer and X-MAKER App are connected to the same WLAN.) * Alternatively, you can save the file to a U-disk for printing with offline printers.
12
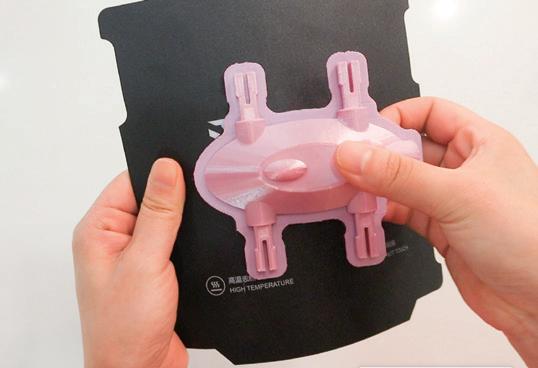
Printing complete
Remove the print
Once the print job is finished, allow the baseplate to cool down for 5 minutes before reaching inside. If the print is removed without complete cooling, some parts of the print may adhere to the baseplate. (*Don't touch the nozzle and allow it to cool down below 45 °C in case of burns.)
Use pliers to remove the support structures of the print.
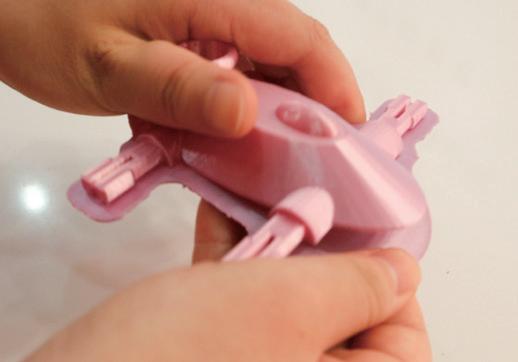

Remove the print
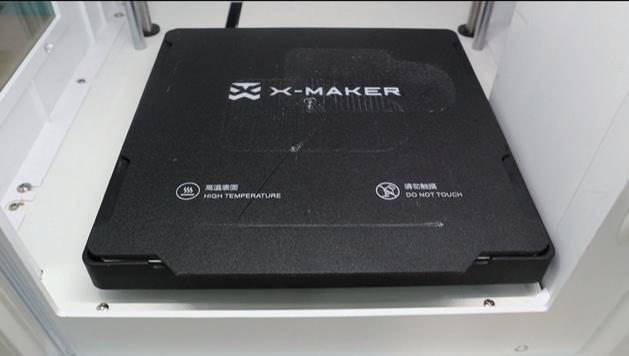
Place the baseplate
Remove support material
After removing the print, use tools to carefully clean remaining parts of the print on the baseplate. Put the baseplate back on the heating platform. (As shown in the figure below)
13
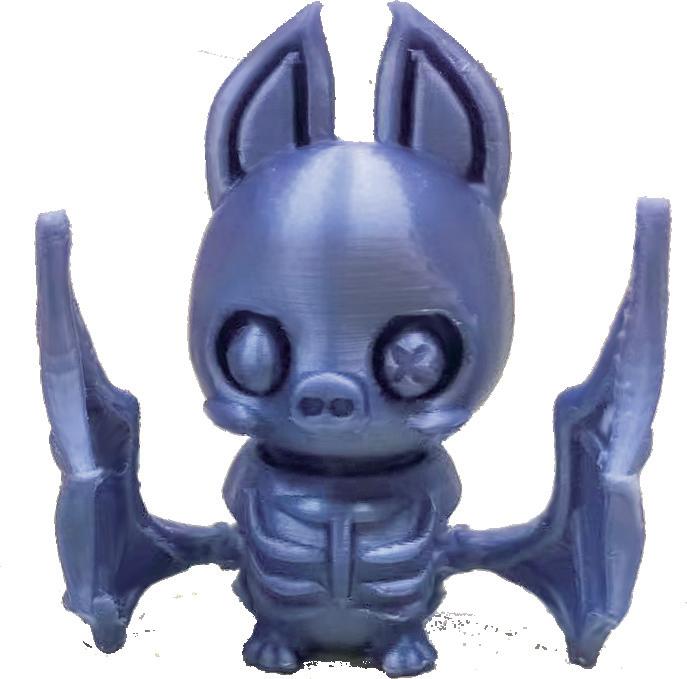
Remove support material
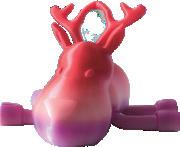
Some models have overhanging parts. In this case, you must print a support structure under the model to prevent these parts from falling down. The support structures need to be removed when the print is finished. you can remove the support structures manually or using pliers.
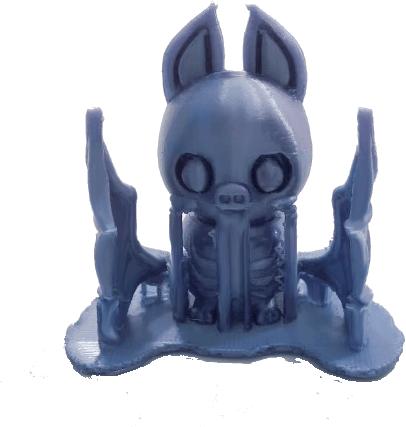
The picture on the left shows the model with the support structure.The picture on the right shows the model with the support removed.
pliers

Model with the support
Model with support removed
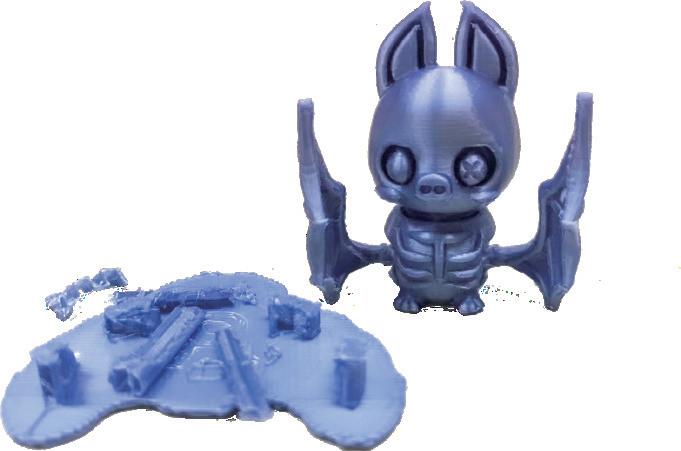
Remove the support with care and do not damage the model.
Use pliers carefully and children should be under constant supervision during the process.
14
Change filament
In an idle state
Go to "Filament -> Unload" and wait for the nozzle to heat up until the filament unloads below the gear of extruder. Pull out the filament and load a new spool of filament.
During printing
Go to "Pause -> Filament -> Unload" and wait for the nozzle to heat up until the filament unloads below the gear of extruder. Pull out the filament and load a new spool of filament. Then, press [Start] button to proceed with the print job.
Note:Don't touch the [Stop] button mistakenly, or your print job can't be continued.
15
Move
To ensure optimal printing results, you need to perform XYZ axes calibration during maintenance. Go to "Setting -> Move -> Reset" and wait for XYZ axes to reset. Select the moving distance: 1mm, 5mm, or 10mm. Press the [+/-] button and move XYZ axes. (If the distance is set to 10mm, press the [+/-] button once and the X/Y/Z axis moves 10mm accordingly; press twice and it moves 20mm.)
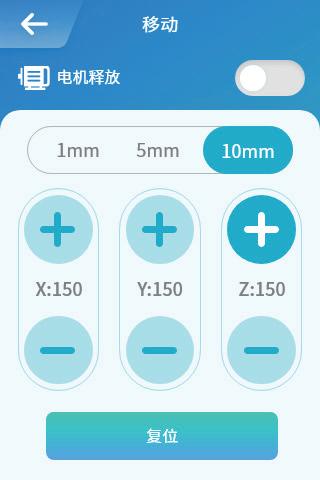
Motor release
Turn on this mode and you could adjust the nozzle and baseplate manually. Turn off this mode and the printer will be energized again. You could only adjust the nozzle and baseplate using the touchscreen. (See "Move" operations for more information)
Move
X/Y/Z axes
16
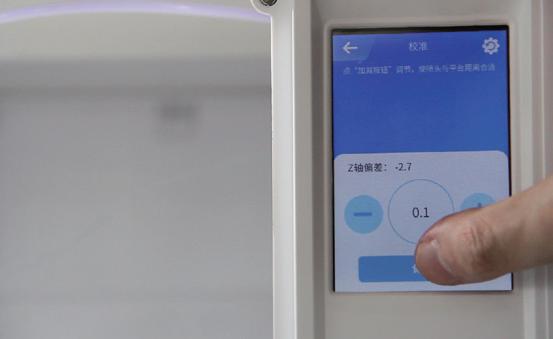
Calibration
After using X-MAKER 3D printer for a long time, calibration should be performed to adjust the distance between the nozzle and baseplate. Manual leveling is required in the case of prints warping.
1. If the distance between them is too wide, your print won't properly adhere to the baseplate.
Note: Calibration is a professional operation. Usually, there is no need to perform manual calibration. The distance has been set before printers leave the factory. It is recommended to adjust the offset value in the range from -0.5mm to 0.5mm.
Calibration
Leveling
2. If the nozzle is too close to the baseplate, it can prevent material from extruding. Make sure there is no excess material below the tip of the nozzle before calibration, or you might get inaccurate results; Place calibration card in between the nozzle and baseplate and go to "Setting -> Calibration". Z offset value is shown on the touchscreen; Use the touchscreen controls to adjust the distance until you feel some resistance when moving the card. Select [Save] to continue. (Press [+] button once and the nozzle will be raised by 0.1mm; press [-] button once and the nozzle will be lowered by 0.1mm.) Click [Leveling] again and the nozzle will move to nine points following the sequence shown in the right picture.
Repeat Step 3 above for each point and adjust the distance between the nozzle and baseplate until you feel some resistance when moving the card. Click [Complete] button and calibration is finished!
Leveling sequence
17
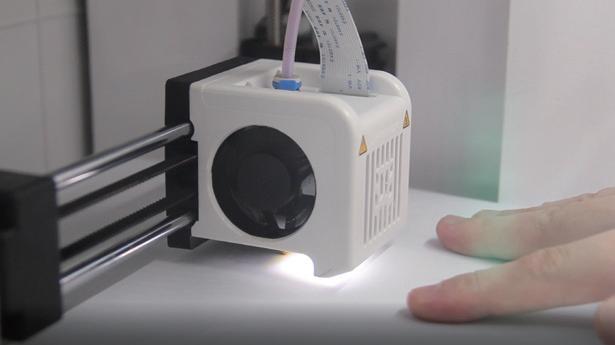
Control
CONTROL includes switches for internal light, external light, fan, ES mode, child lock, power loss recovery and filament error sensor.
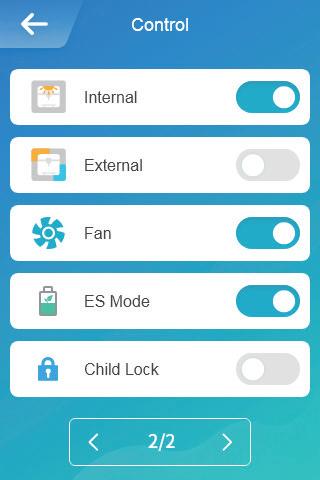
Internal: control the lights inside
External: control the lights outside.
Fan: control fans to cool down
ES Mode: lower the temperature inside for optimal printing results
Child Lock: prevent print stop or other problems caused by children's mistaken touching
Power Loss Recovery: proceed with the print job after a power failure
FES: pause the print job automatically and prompt you to change filament when the filament runs out.
* It is not recommended to turn off the fan.
Control
18
More settings
Help
Here you can see a QR code for exploring courses, as well as a QR code for downloading X-MAKER App.


Explore gameplay Download
Status
Nozzle temperature, baseplate temperature and XYZ coordinates are shown in this page.
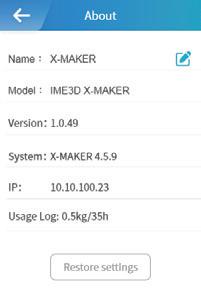
About
From here, you can know about X-MAKER 3D printer's name, model, firmware version and IP address.
· Product name: Printer's name can be changed.
· Version: Current firmware version can be viewed.
· Usage log: Logs for printing can be seen.
· IP address: Each printer's IP is unique, so it's convenient to connect with X-MAKER App.
*It is not recommended to perform a "Factory Reset". Once it is performed, all records will be cleared.
19
For Windows PC
You can download X-MAKER App at en.ime3d.com/Downloads.

For Android Tablet / iPad
Go to "Setting -> Help" using the touchscreen and scan the QR code for download with your tablet/iPad.
Search the name of X-MAKER in the app stores and download.
*Windows 7 or above Store
Open the app store Search "X-MAKER" / "XMAKER" Click "Download"
20
X-MAKER App Download
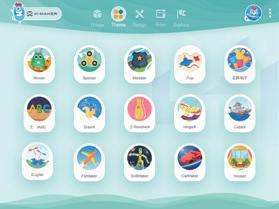
Introduction
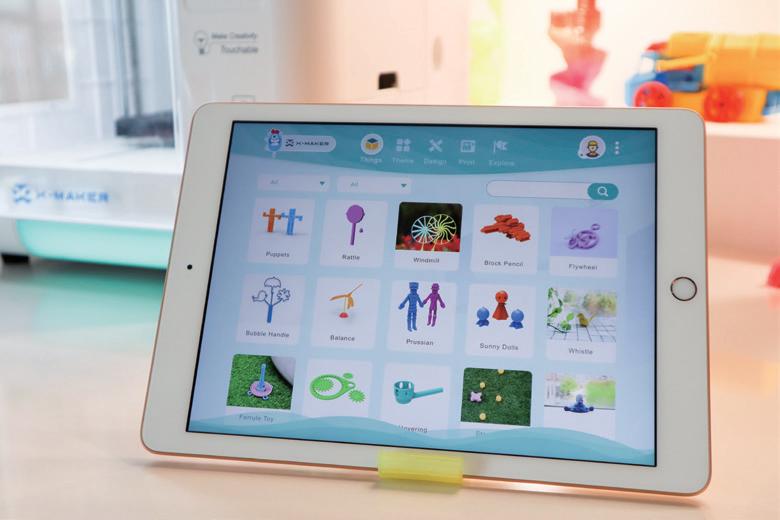
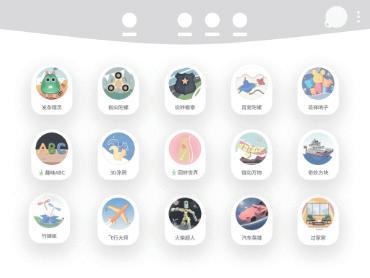
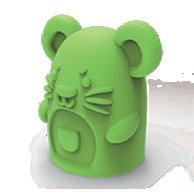
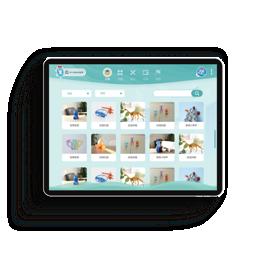
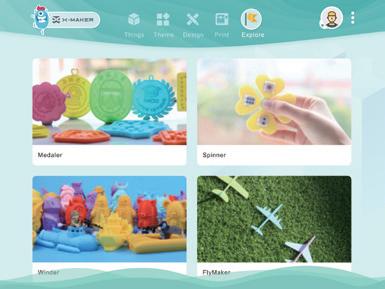
Things
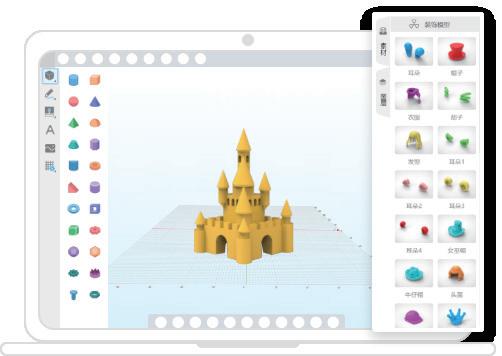
Theme
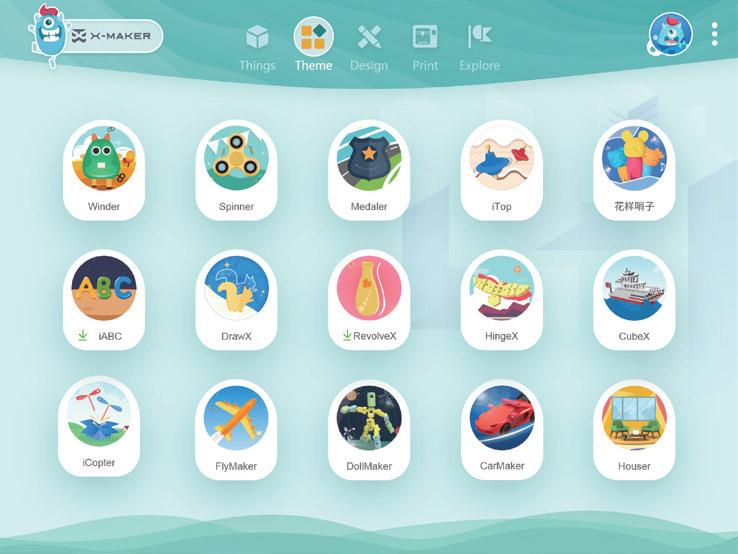
21
Various and growing well designed model database
Gamification 3D design mini programs
Two LEGO-style and user-friendly design apps AI-powered one-press printing feature
Constant new gameplay and exploration Design Print Explore


22
& stable Wi-Fi
printing All Eduction Creativity&Fun Household Toys & Games All Animal Science Plant Traffic Festival Task3 Task1 Task2
Things Well-designed 3D model library in four categories Creat anything with your infinite creativity Original well-designed 3D model library High-speed
connection 3D real-time view Intelligent data process for one-press


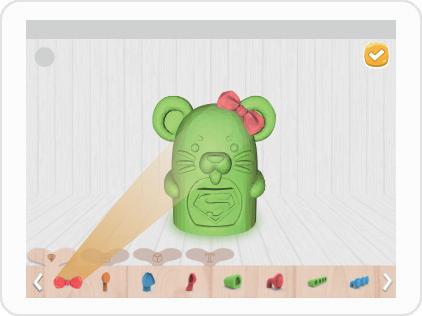

23 Theme Gamify 3D Customized Gadgets for Personalized Design Make Creation Touchable 智能优化算法,轻松一键打印 15 gamify 3D design gadgets Diverse themes can be selected Customize unique model toys High-speed Wi-Fi transmission for printing
Graphic & Modeling 3D Design Apps for Advanced Creation
Two powerful 3D-design apps
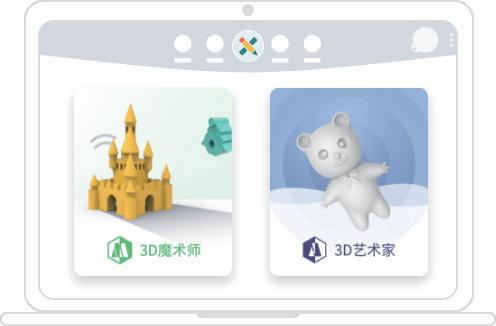
Magic 3D geometry design
High-speed Wi-Fi transmission for printing Compatible with imported models
智能优化算法,轻松一键打印
24
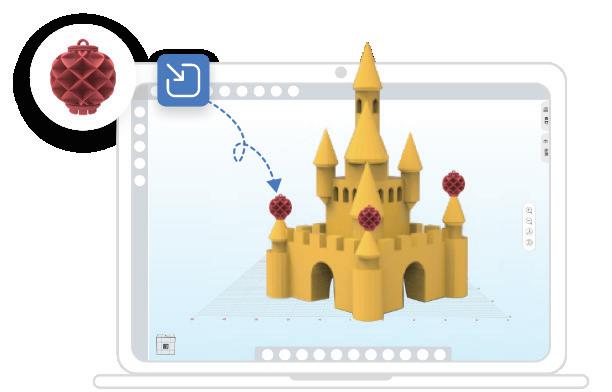
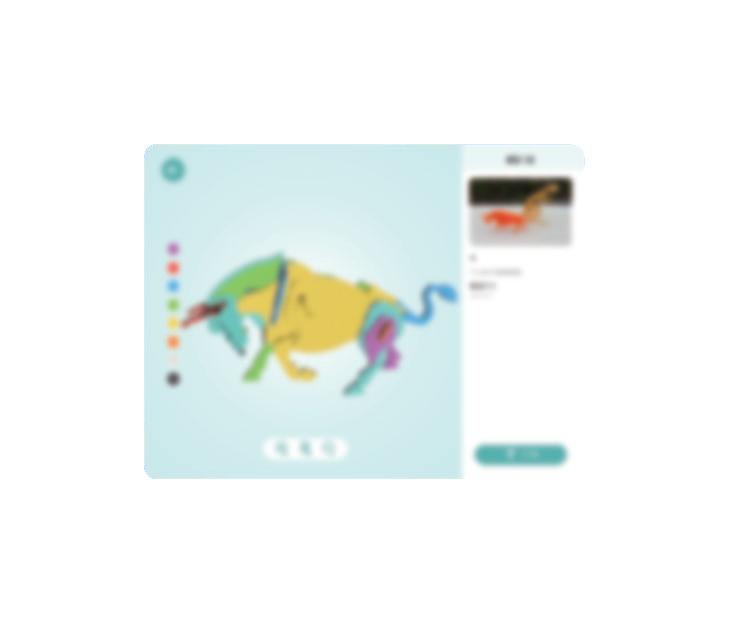
Design
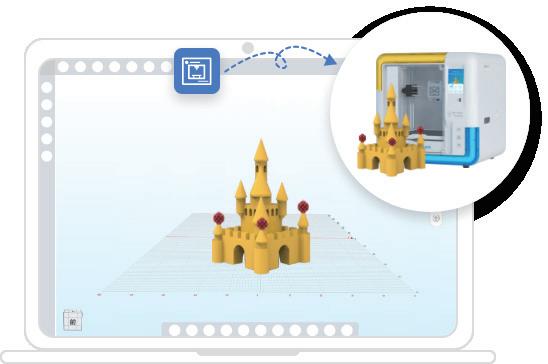
Print
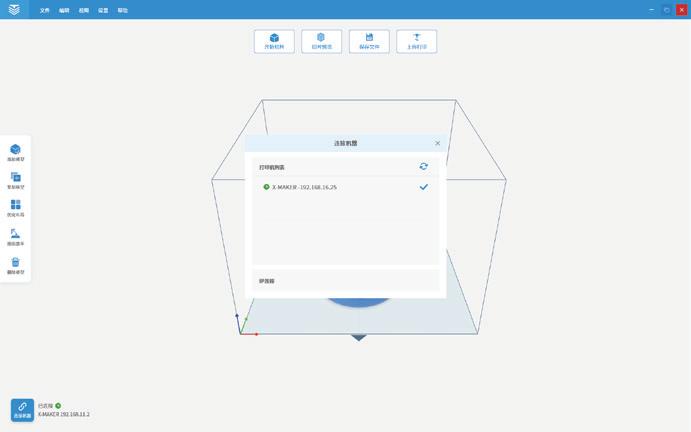
Connect to printer
Press the button at the upper right corner and search for available printers automatically.
Select your X-MAKER 3D printer and connect to it. (Ensure your printer and X-MAKER App are connected to the same WLAN.) Alternatively, you can perform IP Connection if your printer cannot be found. (IP address can be found by navigating to "Setting -> About" using the touchscreen.)

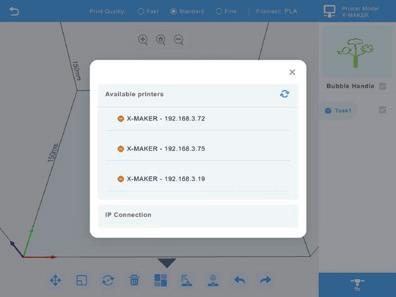
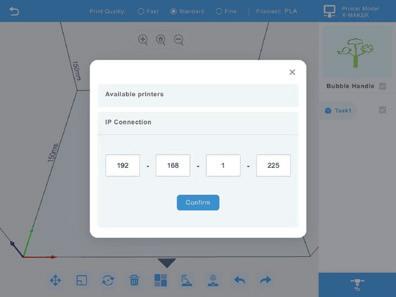
Search for printer IP connection Search for IP address
One-press printing
Click the [Print] icon. The print job will be divided into several tasks with automatical slicing, while all files are uploaded to the printer directly. In each task, you can see how your models are sliced. Press the [Print] icon again to start printing.

25
X-PRINT
Slicing Software
After successfully setting up the printer and X-MAKER App, install X-PRINT - IME's free slicing software on your computer. You can download X-PRINT at en.ime3d.com/downloads.
Supported OS
Windows
System Requirements
· Display card compatible with OpenGL 2
· Intel Core 2 or AMD Athlon 64 or later
· At least 4GB of memory (8GB or above is recommended)
· 64-bit processor
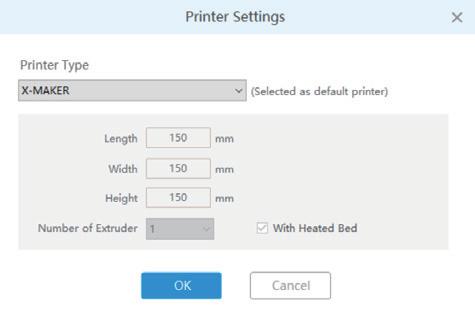
Installation
After downloading, run the installer to complete the installation of X-PRINT. When opening X-PRINT for the first time, you will be asked to select your X-MAKER 3D printer.
* If you skip this step, you can connect to the printer laterby going to "Setting -> Printer".
26
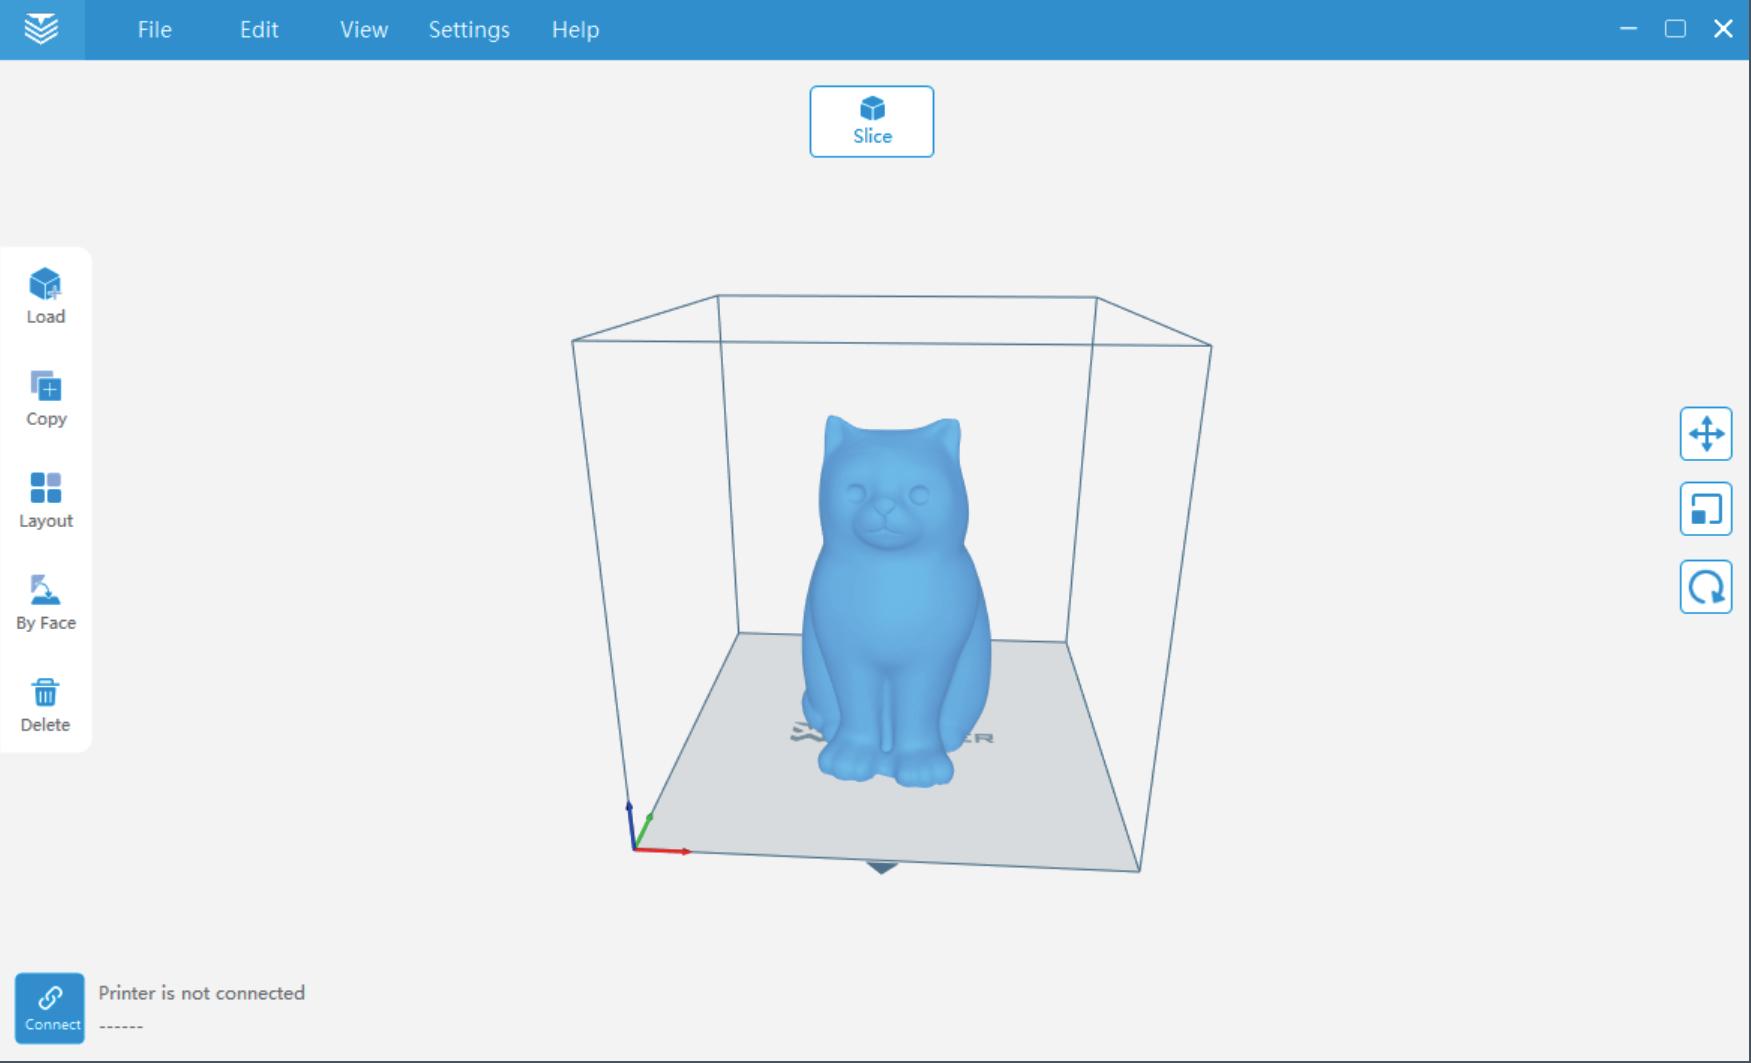
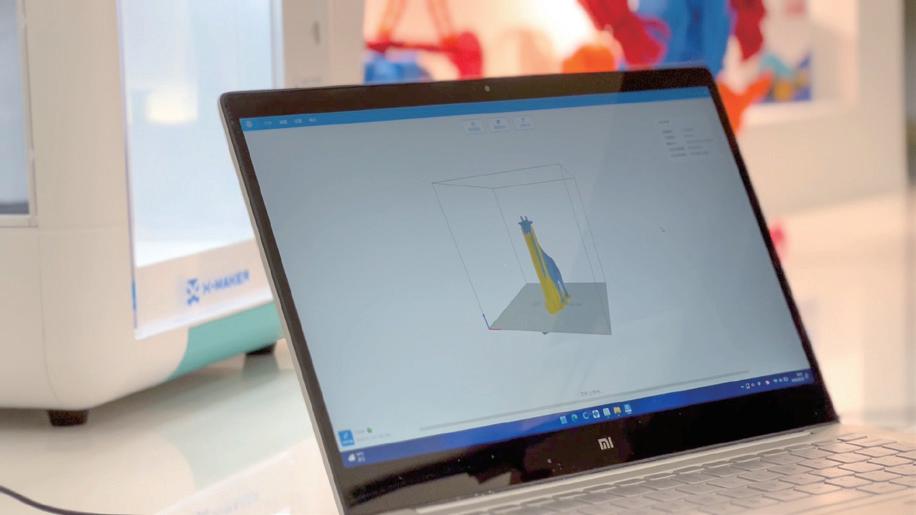
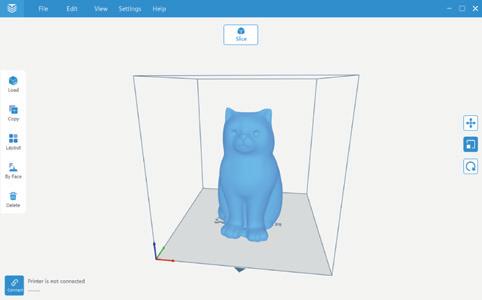
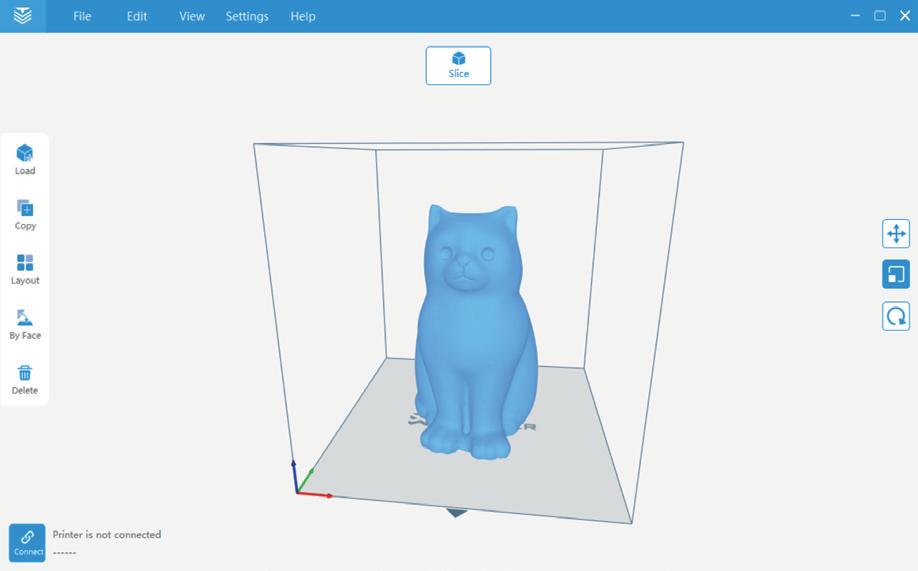
Interface UI elements of X-PRINT 1 Menu bar 2 Adjustment tools 3 Printer connection 4 [Slice] button 5 Working range 6 Model editing panelEditing 7 3D Viewer 27 1 4 5 7 6 2 3
Model editing
X-PRINT includes functions to move, scale, rotate, or duplicate parts and optimize layout. Optimal layout can reduce the need for support material.
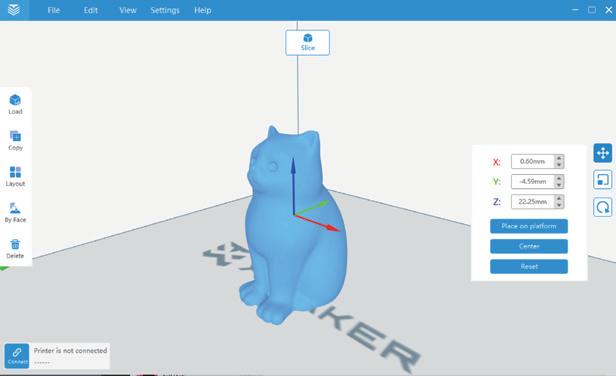
Move
Select the model you would like to move and click the [Move] button. You can move the model by setting exact coordinates of it or dragging arrow handles. You can also use [Centered] or [Place on baseplate].
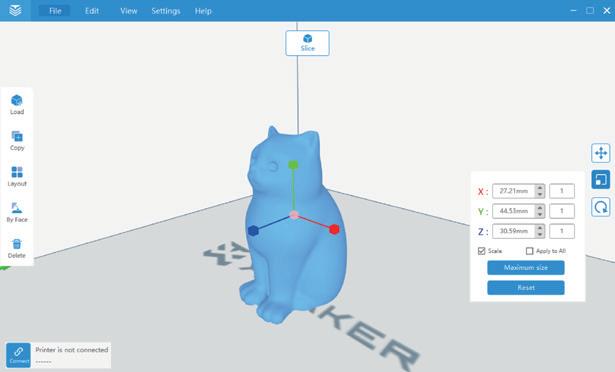
Scale
Select the model you would like to scale and click the [Scale] button. You can scale the model by setting the exact model size in millimeters or dragging arrow handles. You can also print the model at the maximum size.
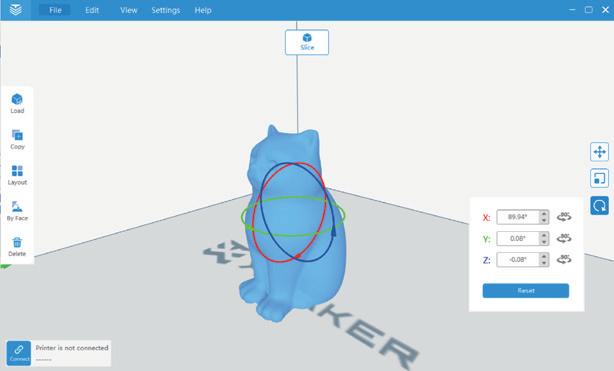
Rotate
Select the model you would like to rotate and click the [Rotate] button. You can rotate the model by setting the exact rotate degrees or dragging rotate hoops.
For more information about X-PRINT, please consult the X-PRINT user manual at en.ime3d.com/Support/XMaker
28
Model slicing
Prepare the model for slicing before the print stage. Go to "Settings -> Slice settings" and set the parameters controlling
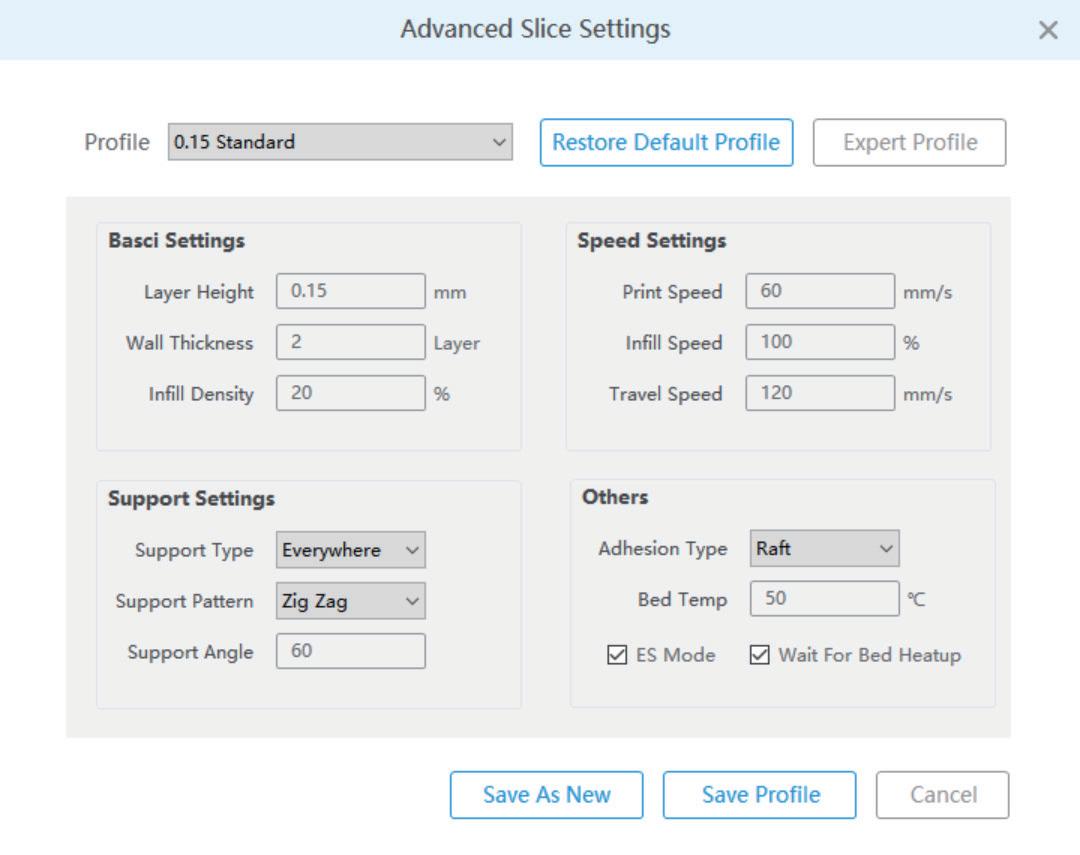
Layer height: Layer height is the thickness at which each horizontal layer is sliced. A thinner layer height produces a higher resolution. Similarly, thicker layer heights reduce resolution.
Infill density: Infill density refers to the printing of internal structures. 0% infill prints a completely hollow model. A 100% infill prints a completely solid model.
Print speed: A faster print speed decreases print time, but with reduced strength and toughness.
Adhesion type: Different adhesion types help to improve adhesion to the baseplate to prevent the model from sliding. These parts needs to be removed after printing.
Support type: Some models have overhanging parts. In this case, you must print a support structure under the model to prevent these parts from falling down. The support structures can be removed during post-processing.
Bed temp: Set the bed temperature during printing.
For more information about X-PRINT, please consult the X-PRINT user manual at en.ime3d.com/Support/XMaker
29
Model printing
Once slice settings are in place, press the [Slice] button. When the process completes, it will go to the preview stage and immediately show a [Print] button, as well as a [Save] button. Press the [Save] button and save the files to your computer as Xcode / Gcode. Press the [Print] button and print it via the network that X-MAKER 3D printer has connected to.
One-press printing
Make sure that your printer and X-PRINT are connected to the same WLAN and the file can be uploaded to the printer
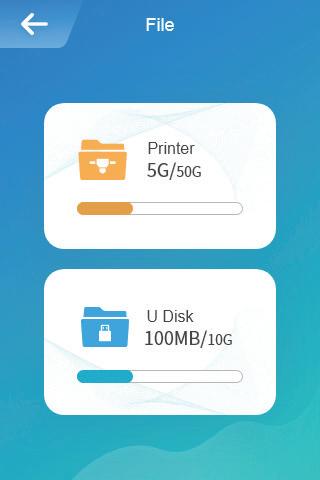
U-disk printing
You can also save the file to a USB for printing if the network is in bad condition.
30
31
Specifications Name: X-MAKER 3D printer Model: V4.0 Bed temp: ≤110℃ Compatible filaments: PLA/ABS Nozzle diameter: 0.4mm Language: Chinese / English
Printer dimension: 360*370*370 mm Net weight: 10.9 kg Grossweight: 13.45 kg Package dimension: 440*440*460 mm Control panel: 3.5-inch touch screen Maximum build volume: 150*150*150 mm Connectivity: Wi-Fi / U disk File type: Xcode / Gcode Supplied software: X-MAKER App / X-PRINT * Recommended max ambient temp: 35℃ Nozzle temp: ≤265℃ Input: AC power 200V~240V, 50/60Hz 1.6A FCC ID:2A35N-V04 USB2.0 Output:5V 0.5A
Notices
For printer stability and optimal results, please pay attention to the following matters
IME3D filaments are recommended. Do not frequently change filaments of different brands or types to avoid nozzle jamming.
Please notice the supported versions. X-MAKER App can some Android smartphones but experience might be affected because of limited screen width.
Recommended ambient temp for using the printer is 0-35℃. If you don't use it, please turn off the power of the printer.

Close the glass door and don't reach inside while they are in operation. Ensure there is no problem on the first layer of the model after printing.
Do not block the air outlet on the top of the printer during printing. Do not move the printer while they are in operation.
Never disassemble the printer without professional instructions to avoid unnecessary damage.
For more information, please visit en.ime3d.com.
32
Troubleshooting
1. Nozzle not heating up
· Check if the silicone below the nozzle falls off. If it did, put it back after the nozzle cools down, and then restart the printer.
· Check if the nozzle cable is loose. Turn off the printer, plug the cable again and then turn on the printer using the power switch. (It is forbidden to plug cables when the power is on.)
2. Extrusion problems
· Check if the extrusion motor is working properly. If not, please consult our after-sales customer service.
· Unload the filament, cut off the tip of it, then straighten the top and reload.
· Set the temperature to 250 degrees and load filaments for 2-3 times to push out the residue in the nozzle.
· Check if the nozzle has been blocked. If it did, heat up the nozzle and set the temperature to 250 degrees, then clean the hole (0.4mm) at the end of the nozzle with the nozzle cleaner.)
3. Print not sticking to baseplate
· Check if the slicing temperature meets the required temperature for filaments.
· Check if the distance between the nozzle and baseplate is too wide. If it did, calibrate the baseplate and adjust the distance.
4. U-disk not read
· Check if the U disk is damaged. Plug the U disk and try again.
· If the U disk is not matched for printer, please check whether its file system is FAT32; If not, please format the U disk and modify its file system to FAT32.
5. Printing paused or interrupted
· Check if the filament has been consumed. If it did, replace the filaments.
· Check if the filament is broken.
· Check whether the nozzle is clogged. If it did, clean the nozzle.
· Check if the filaments and spool are wrapped or intersected.
For more user manual and instructions, please visit en.ime3d.com/Support/XMaker.
33
More interesting gameplay and usage technique will be updated in X-MAKER App "Explore" module and on our website.
Our website: en.ime3d.com
Scan for more support

1. Please carefully read and understand the contents of this user manual before using.
2. Within the warranty period, repaired machines can still enjoy the remaining warranty service.
3. Please retain all packaging for warranty purposes, in case of problems during the express delivery process.
4. When applying for QA service, please provide product code, purchase voucher, order ID and invoice. Failing that, the company has the right to refuse offering QA service.
5. Service Hours: Monday to Friday, 9:30 - 18:00 (except official holidays)
Hotline: 021-65113005
E-mail: service@aoweidig.com
Thank you for your support and trust in our products!
If you have any suggestion or idea about our products and services, please send us the e-mail (service@aoweidig.com).
Your feedback and suggestions are of great importance to us. Wish more cooperation with you!
34
Support and help
Explore Warranty messages


Product Name: X-MAKER 3D printer Product Type: V4.0 Manufacturer: Aowei (Shanghai) Digital Technology Co., Ltd. Contact: +86-21-60719032 Address: Building 12, No. 51, Lane 1895, Hutai Road, Shanghai, China
