8 minute read
5.3. Writing the Main Code of the App


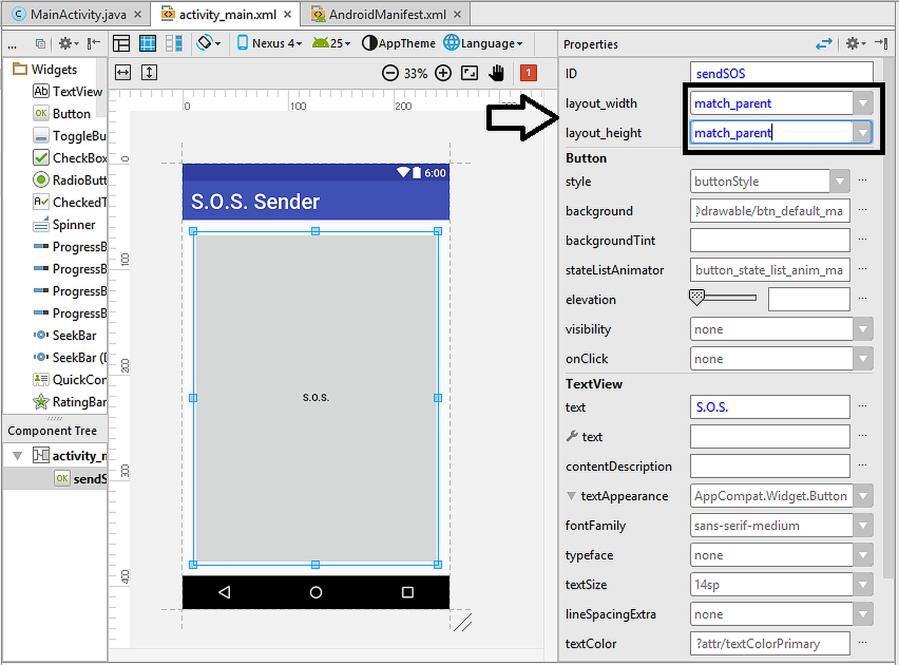
Figure 5.16. Changing the label of the button
5.3. Writing the Main Code of the App
Advertisement
Since we don‟t need any other widget in the GUI, we can now continue to programming the app. We will do the programming in the MainActivity.java file. In order to open this file, navigate to the project explorer in Android Studio and then double-click on the MainActivity located under java com…..lightheadapp as shown below:
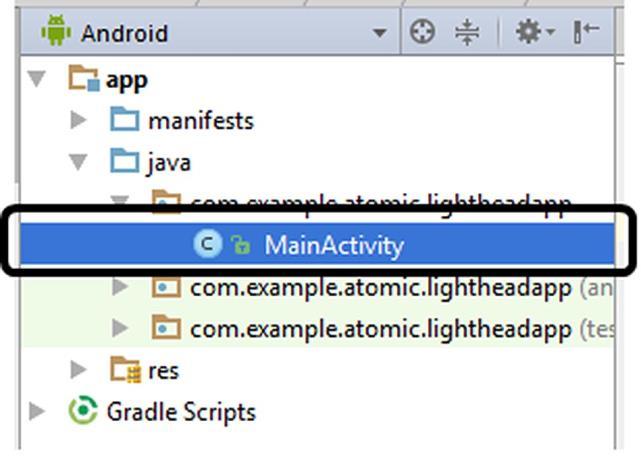
Figure 5.17. Opening the MainActivity.java file in Android Studio
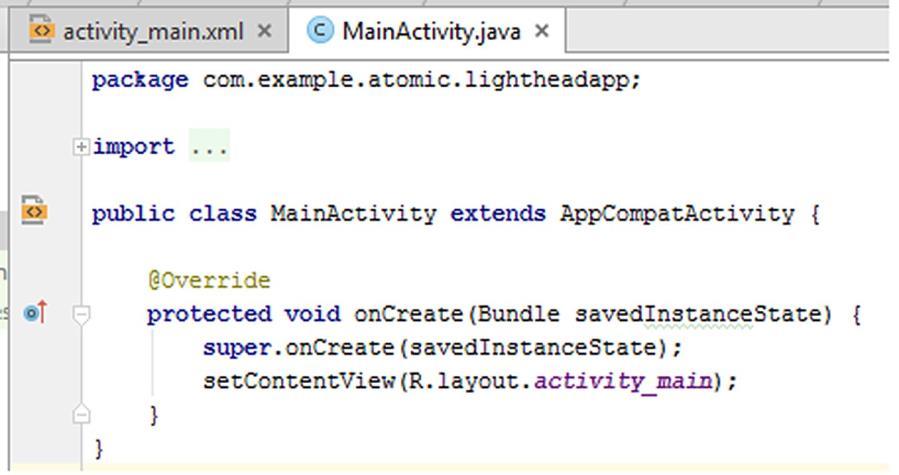
Figure 5.18. The default MainActivity.java file
The MainActivity.java file shown above is the default file generated by Android Studio. Some code lines are hidden by default as shown by … in the import line. You can open these codes by clicking on the … there as shown below:
Figure 5.19. The default MainActivity.java file after opening the hidden lines
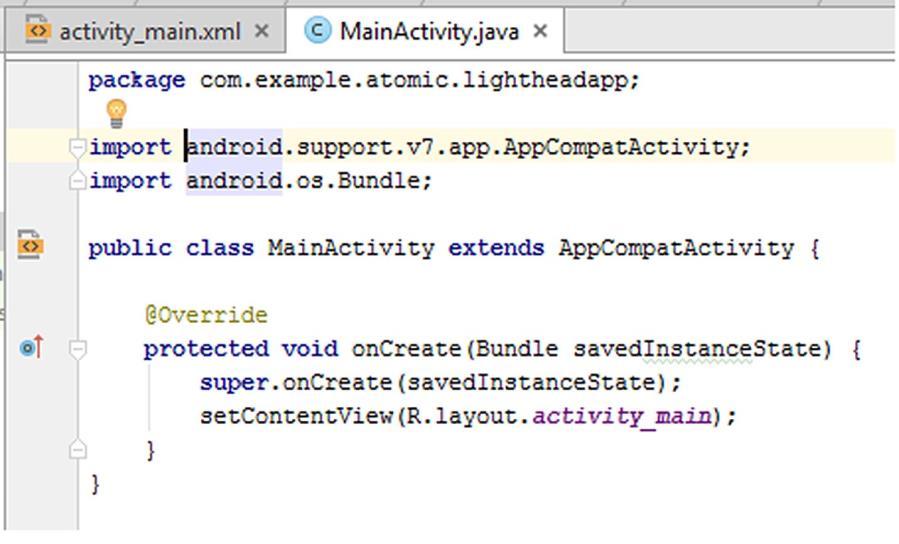
Let‟s analyse the default MainActivity.java code line by line:
The first line is the package definition as in usual Java code. It shows to which package this file belongs to. The next two lines are import lines which import the required libraries. In our file, the AppCompatActivity and Bundle libraries are imported. They contain the base methods for user interaction and passing data among different activities. The next line declares the MainActivity class which extends the
AppCompatActivity class. This is like the class definition in
Java. As in Java, the class name in Android should match the name of the .java file. In this case, the file is MainActivity.java therefore the name of the class is MainActivity. Then an @override command is placed by default. It is used to tell the compiler that the current class will override any existing superclasses. The sixth code line defines a method called onCreate(). All activities are started by a sequence of method calls. onCreate() method is the first of these calls.
The next line, super.onCreate(savedInstanceState);, tells that our code will be executed in addition to the existing code (if any) of the parent class. In the last line, setContentView() method sets the activity content from a layout source. We have set up our app‟s layout in the file activity_main.xml. Android accesses all resources via an auxiliary class called “R”. The R class is a special class which enables Android to utilize the resources in a simpler way compared to accessing via file paths. The argument of the
setContentView() method is R.layout.activity_main which means “set the content of the activity to be the layout residing in activity_main.xml”.
We hear the word activity a lot in Android programming. Activity is a class that manages the user interface and the interaction of the app with the user.
When an activity is launched, it can exist in various states as shown in Figure 5.20.
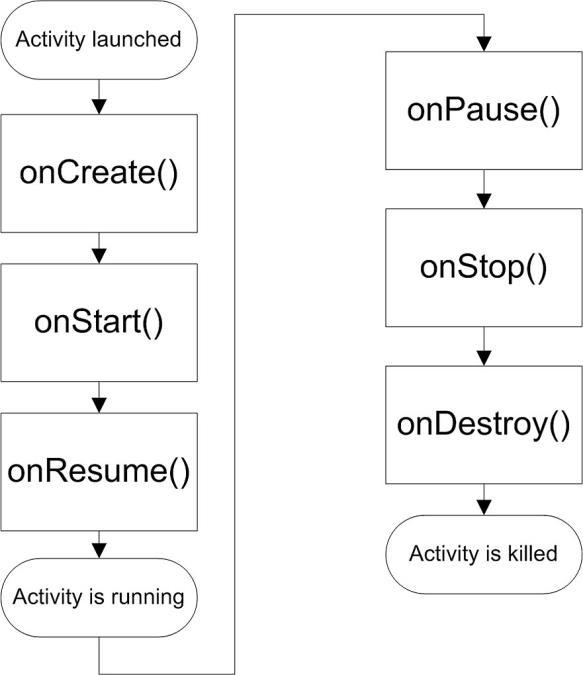
Figure 5.20. Several phases of an activity
As you can see from the figure above, an activity may have several phases. These phases depend on the activity itself as well as the Android operating system. For example, if another activity needs a lot of memory, the current activity may be paused (onPause()) because Android gives precedence to the other activity.
In the MainActivity.java file of our app, the onCreate() method is called when the activity is first created. All static set up are done inside this method.
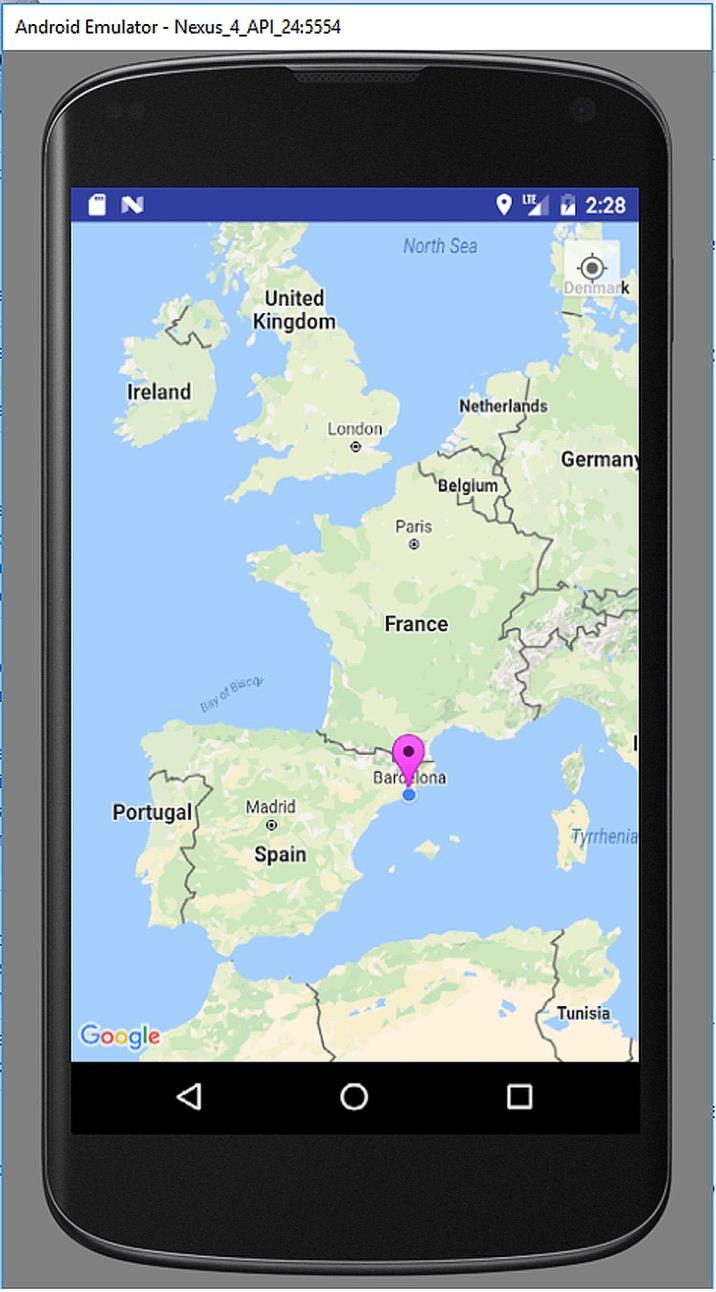
If we run our app at this stage, we should see the layout we designed. We can run it in the simulator by hitting the “Run” button and selecting an emulator as we did in Chapter 3. The Nexus 4 emulator running our app is shown in Figure 5.21.
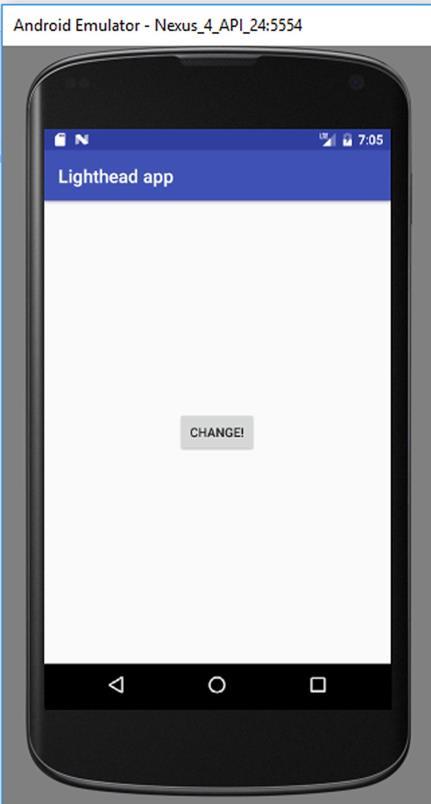
Figure 5.21. The app in the emulator
When we click on the Change! button, nothing happens at this stage because we didn‟t write the code to handle the button clicks yet. Let‟s code the necessary operations to change background colour by the button clicks as we aim to do for this app.
In order to check the button continuously, the app needs to “listen” the button. Therefore, we need to create a button listener method and call it when the activity first starts. We can give any name to out button listener method such as myButtonListenerMethod(). In this method, we need to find the button widget using the mentioned R class and create a button object to access the button. I know this may seem a bit confusing for now but I‟m sure you‟ll get used to it soon. These are shown in Code 5.1.
public void myButtonListenerMethod() { Button button = (Button) findViewById(R.id.button); }
Code 5.1
We can now access the button using the button object that is created by
line Button button=(Button) findViewById(R.id.button). findViewById() method finds the views (widgets, layouts, etc.) using their IDs. Remember that we have given the ID “button” to our button widget during the layout design. Hence, we accessed it using the R class
as R.id.button.
There is another special method called setOnClickListener() in Android SDK. This method continuously listens to the clicks on a button. Everything those will be performed when a click on the button should reside inside this method. This method is applied on the button we want to listen to as follows:
public void myButtonListenerMethod() { button = (Button) findViewById(R.id.button); button.setOnClickListener(new View.OnClickListener() { @Override public void onClick(View v) {}
}
Code 5.2
In the above code:
A new onClickListener is created by new
View.OnClickListener() and then this object is made an argument to the setOnClickListener() method , which is applied on the button object. It then it overrides the superclass listeners with the @Override directive (there‟s no superclass listeners in our example, this directive is automatically generated by Android Studio). Finally, a method called onClick() is called when the button is clicked.
All code lines that will be run when the button is clicked will go inside
the onClick(View v) method.
Note: You‟ll notice that Android Studio auto-completes your code in an intelligent way. In my opinion, Android Studio is excellent in this feature.
Our aim is to change the background colour from red to blue and vice versa as the button is clicked. In the activity_main.xml file, we saw that our GUI has a RelativeLayout element as the main layout that fills the screen. Because of this, we can access the background using the following code:
RelativeLayout bgElement = (RelativeLayout) findViewById(R.id.activity_main);
Code 5.3
In this code, we have generated a RelativeLayout object called bgElement from which we can access all of the properties of the background of the app.
We now need to check the colour of the bgElement. This is because we will change its colour according to its current colour. If it is red now, the button will change it to blue. If it is blue now, the button click will turn it to red.
int color = ((ColorDrawable) bgElement.getBackground()).getColor();
Code 5.4
In this code, the colour of the background of the layout of the app is
taken by bgElement.getBackground()).getColor(); and then converted to the type ColorDrawable, which expresses the colour as an integer. Then, this integer value is assigned to the color variable. In short, the colour of the background will be expressed in the variable named colour as an integer.
We will now utilize a decision making statement to change the colour such as:
If the colour is red, change to blue; else (= if the colour is blue) change to red.
We can do this by the following code:
if (color == Color.RED) { bgElement.setBackgroundColor(Color.BLUE);
else { bgElement.setBackgroundColor(Color.RED);
}
Code 5.5
There‟s a special class called Color in Android SDK for doing colour related operations. The expressions Color.RED and Color.BLUE represent the integer values corresponding to the red and blue colours, respectively. Therefore, the color variable, which contains the integers corresponding to the background colour, will be compared to the integer value of red by the expression color == Color.RED. If they are equal, this means that the background is currently red and will be changed to blue when the button is clicked. Else, the background is currently blue and will be changed to red when the user clicks the button.
Combining all these code lines, we reach the button listener method shown in Code 5.6.
public void myButtonListenerMethod() { button = (Button) findViewById(R.id.button); button.setOnClickListener(new View.OnClickListener() { @Override public void onClick(View v) {
RelativeLayout bgElement = (RelativeLayout) findViewById(R.id.activity_main); int color = ((ColorDrawable) bgElement.getBackground()).getColor(); if (color == Color.RED) { bgElement.setBackgroundColor(Color.BLUE); }
else { bgElement.setBackgroundColor(Color.RED); }
}
Code 5.6 (cont‟d from the previous page)
Please note that we could use the if–else statement without curly brackets since there are only one line codes inside their blocks. However, I have written them with brackets for the sake of completeness.
We now have to call this button listener method when the activity is first created. Therefore, we have to call it inside the onCreate() method as follows:
protected void onCreate(Bundle savedInstanceState) {
super.onCreate(savedInstanceState); setContentView(R.layout.activity_main); myButtonListenerMethod();
}
Code 5.7
However, we are not done yet because the background is transparent by default when an activity is first created. Therefore, we have to set it to red or blue on creation. Let‟s set it as red by improving Code 5.7 as follows:
protected void onCreate(Bundle savedInstanceState) {
super.onCreate(savedInstanceState); setContentView(R.layout.activity_main); RelativeLayout bgElement = (RelativeLayout) findViewById(R.id.activity_main); bgElement.setBackgroundColor(Color.RED); myButtonListenerMethod();
}
Code 5.8
In this code, the background is accessed and then set as red at the start of the app. Please note that we need to define a separate bgElement object inside the onCreate() method; we can‟t use the bgElement defined inside the button listener method. This is because all variables and objects declared in a method are valid only inside that method (also called as scope of variables).