5 minute read
10.3. Developing the Main Code

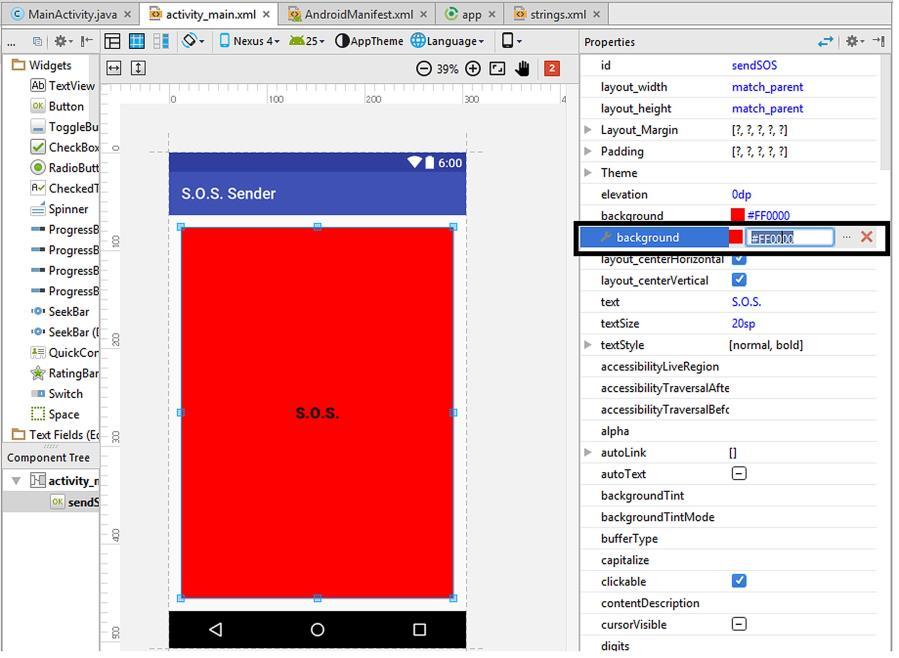
In my opinion, making the S.O.S. button red is a good choice therefore I entered the hex code of red #FF0000 into this box. However, this is only a personal choice and you can enter any colour code you‟d like. You can find the colour codes in several sites such as http://www.color-hex.com/. After entering the colour code, remember to hit enter on the keyboard and then the button‟s colour will be changed to red as follows:
Figure 10.7. Setting the button‟s background colour
Advertisement
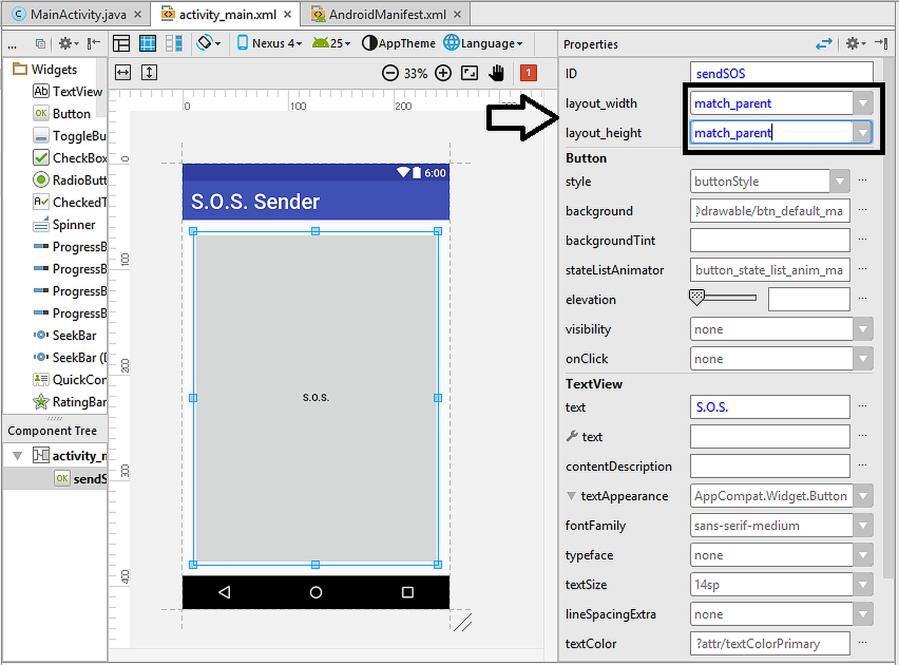
We‟ve set the background colour, great. However the S.O.S. label of the button seems tiny now. Let‟s edit its properties. As the first step, let‟s switch back to the popular properties of the button by clicking the View all properties button again as indicated in Figure 10.8.
I‟ve set the text size as 72sp and its type as bold as shown in Figure 10.9.
10.3. Developing the Main Code
We‟ve now completed the simple UI of our app. Let‟s move on to the coding part now, which is more fun.
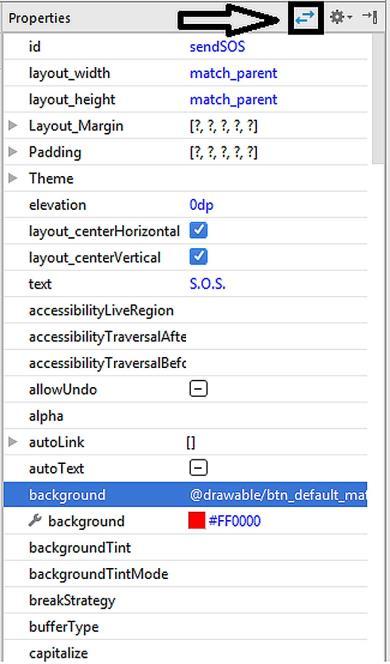
Figure 10.8. Switching back to the common properties
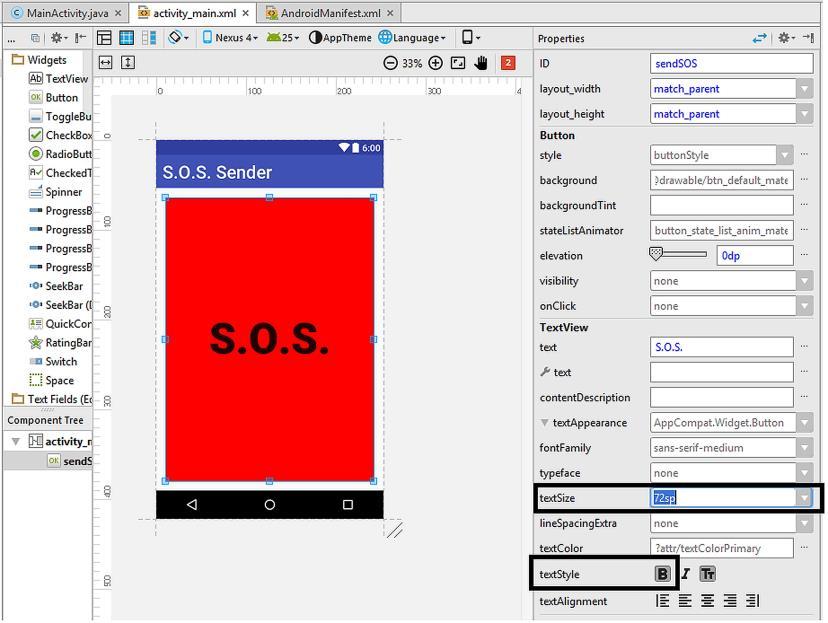
Figure 10.9. Setting the text size and type
The app will take longitude and latitude data from the GPS receiver. This data is a floating point number therefore let‟s declare two double type variables to hold the location data as follows:
double latitude = 0; double longitude = 0;
Code 10.3
Let‟s define a GPSReceiver class to manage the GPS part with the LocationListener implementation as we did in the previous chapter:
public class GPSReceiver implements LocationListener {
Code 10.4
Android Studio will warn us for implementing the required methods at this point:
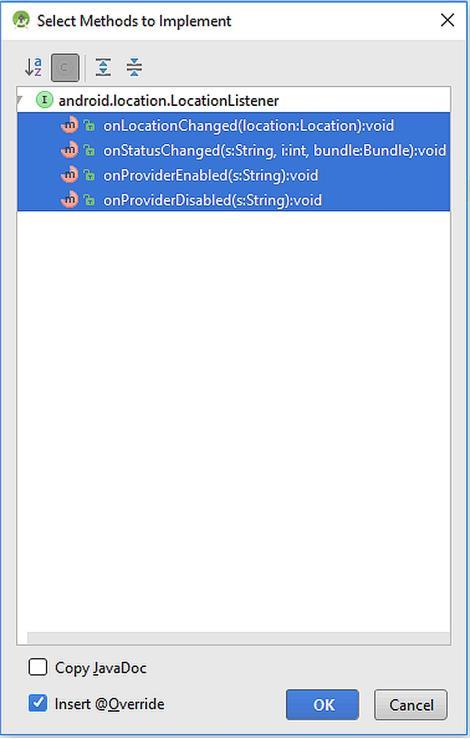
Figure 10.10. The required methods for the LocationListener
Hit OK in this dialog and the methods onLocationChanged(),
onStatus(), onProviderEnabled() and onProviderDisabled() will be added to the MainActivity.java. onStatusChanged() is called when a change in the location occurs. Similarly,
onProviderEnabled() and onProviderDisabled() methods are called when the GPS receiver is enabled and disabled, respectively. onStatusChanged() is called if the GPS status is changed.
We can populate the onProviderEnabled() and
onProviderDisabled() methods as follows:
@Override public void onProviderEnabled(String s) {
Toast.makeText(getApplicationContext(), "GPS Enabled!", Toast.LENGTH_LONG).show();
@Override public void onProviderDisabled(String s) {
Toast.makeText(getApplicationContext(), "Please enable GPS!", Toast.LENGTH_LONG).show();
} }
Code 10.5
The Toast class is used to show a temporary message on the screen. Therefore, if the GPS is disabled, it will display “Please enable GPS!” whereas when the GPS is enabled by the user, it will inform saying that “GPS is enabled!”.
The actual location receiving happens inside the onLocationChanged() method. Firstly, let‟s define a location object which will hold the location data just after the longitude and latitude variable declarations as follows:
private LocationManager manager;
Code 10.6
Now, we can populate the onLocationChanged() method as follows:
public void onLocationChanged(Location location) { if (location != null) { latitude = location.getLatitude(); longitude = location.getLongitude(); Toast.makeText(getApplicationContext(), "READY TO SEND!!!", Toast.LENGTH_LONG).show(); } else { Toast.makeText(getApplicationContext(), "NOT READY YET...", Toast.LENGTH_LONG).show(); }
}
Code 10.7
If the location data isn‟t null, i.e. if the location data is received successfully, the longitude and latitude data will be assigned to
longitude and latitude variables, respectively. getLongitude() and getLatitude() methods extract the longitude and latitude data from the location object. If the location data is received without any problem, a dialog will display “READY TO SEND!” text on the screen otherwise it‟ll write “NOT READY YET...”.
We‟ve declared our custom method for handling the GPS data operations. Now it‟s time to define a GPSReceiver object as follows:
private GPSReceiver receiver;
Code 10.8
We can define it just below the LocationManager object definition shown in Code 10.6 so that it can be accessed from any method in the activity.
Next, let‟s create the button listener method which will do the SMS sending when the sendSOS button‟s clicked:
public void myButtonListenerMethod() {
Button button = (Button) findViewById(R.id.sendSOS);
button.setOnClickListener(new View.OnClickListener() { @Override public void onClick(View v) { SmsManager sms = SmsManager.getDefault(); String phoneNumber = "xxxxxxxxxxxx"; String messageBody = "Please take me from
longitude: " + Double.toString(longitude) + " and latitude: " + Double.toString(latitude); try { sms.sendTextMessage(phoneNumber, null, messageBody ,null, null); Toast.makeText(getApplicationContext(), "S.O.S. message sent!", Toast.LENGTH_LONG).show();
} catch (Exception e) { Toast.makeText(getApplicationContext(), "Message sending failed!!!", Toast.LENGTH_LONG).show(); }
}
Code 10.9 (con‟t from the previous page)
In this button listener method:
The button object is created at first, Then an SmsManager object called sms is declared inside the
onClick() method, Next, the phone number which will receive our SMS is defined in the variable named phoneNumber (please enter a valid receiving phone number in the place of xxxxxxxxxx!!!), The messageBody is also declared as a String using the longitude and latitude data. Finally, the SMS is sent programmatically by the
sendTextMessage() method. The try – catch statement is used to check if there‟s an error sending the SMS message. If there‟s no error, a message saying “S.O.S. message sent!” will be displayed. Otherwise, it‟ll display “Message sending failed!!!”.
As you can see, the sendTextMessage() method has five arguments. We‟ve set the unused arguments to null. We could use these unused arguments for extended functionality such as checking if the SMS is actually received by the receiving part.
Finally, we need to call the button listener and GPS related methods inside the onCreate() method as usual:
protected void onCreate(Bundle savedInstanceState) { super.onCreate(savedInstanceState); setContentView(R.layout.activity_main); myButtonListenerMethod(); receiver = new GPSReceiver(); manager = (LocationManager) this.getSystemService(Context.LOCATION_SERVICE);
manager.requestLocationUpdates(LocationManager.GPS_PROVIDE R, 1000L, 1.0F, receiver);
}
Code 10.10
The complete MainActivity.java is also given as follows: