
13 minute read
hand drawn vegetation
Workflow
Hand drawn vegeta on is a great way to create unique linework vegeta on that can be distorted in photoshop and used in mul ple drawings. Hand drawn can be accurate and true to the species habit or more abstract and collage like, depending on your goals for the drawing.
Advertisement
>draw from life or herbaria specimens >scan drawing >adjust levels and curves to get clean lines >delete background if desired
● note : hand drawn vegetation is great for layering plants and shrubs to add depth to a drawing, however depending on drawing style trees can also look very stamplike and repetitive. Keep this in mind when
choosing a drawing style.
Angela Moreno-Long “Conzya canadensis Studies”
Francis Halle
Hand Drawn Vegetation
Cleaning Up a Scan
1. Scan Drawing or Photograph Drawing 2. Adjust Se ngs in Photoshop 3. Export PNG try to use bright lighting with limited shadows if photographing adjust using Levels, Curves, and Brightness/Contrast

Melody Stein

Vector Traced Vegetation
Drawing Vegetation Digitally
1. Place found images of species into Rhino ‘picture’ command>browse to image>specify size and location 2. Use polyline and curves to trace


3. Export Linework and Edit in Illustrator select lines>File>Export Selected...>Save to Adobe Illustrator 4. Adjust lineweight and add colors (Illustrator)


Collaged Vegetation
Workflow
If you have unique engravings, drawings, or images of a desired species you can collage these into new specimens to use in your drawings.
>scan or download found imagery >adjust levels and curves in Photoshop and delete background with a mask or color range selection >select portions of image with lasso or marquee >Ctrl+J or Layer>New Layer>New Layer from Selection >Collage into a unique specimen >export PNG

● note: be aware if you use licensed or copywritten images or drawings that you must transform the images enough that they are your own unique creations and not plagiarizing someone’s work.
Collaged Plant


Found Herbaria Specimen Engravings

Using 3D Vegetation Libraries
Workflow
Lumion has a robust library of 3D trees, vegeta on and people that can be used for renderings or exported as 2D images to create more realis c vegeta on in drawings. This is especially helpful for views or axons where you want a specifi c angle view of vegeta on. The Sun Study eff ect is also a helpful tool for visualizing shadows.
>place trees in lumion >adjust view and save >export render layers >delete background in photoshop >(optional) edit in photoshop using filter gallery
Lumion Interface (for exporting vegetation)
Layer Management (similar to Adobe Suite)


Content/Object Library Object Edit Tools Object Selec on Toggle (like Gumball in Rhino) Render Tools
1. Place Vegeta on Into Scene from Library Place > Nature Library > select desired tree > click to place into scene
“Nature Library” “Place” search for a specifi c species


2. Adjust Tree (s)

Select Click to select tree>drag to move Rotate Scale Click to select tree> use sliders to rotate in X-Y-Z Click to select tree> use sliders to scale tree


Place on Landscape use if tree is floating in Z space Object Menu (tree must be selected to see this)
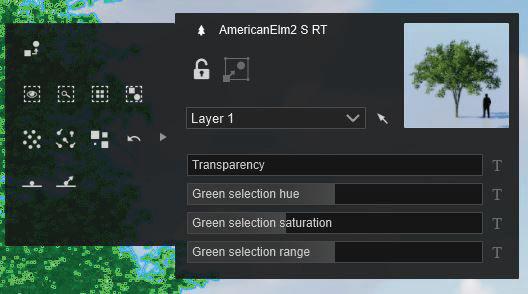
Edit and Adjust Colors and Transparency
3. Set and Save View Photo > set view by panning and adjusting focal length > store camera> render
Photo Click to enter render panel

Build Click to return to model space Render Panel


Set Camera Eye Level
Store Camera (like Named View in Rhino) Set Camera Focal Length
Mouse Commands for Changing View: Right Click: Pan Camera Left Click: Update changes from model space Click + Hold Scroll Wheel: Pan camera height Left/Right Arrow Keys: rotate left/right Up/Down Arrow Keys: zoom in/zoom out Export Render
4. (op onal) Adjust Shadows >set view for render>”Add Effect”>Sun>Sun Study >Adjust angle, time, date, season, and location >export render layers


1. Add Sun Study Eff ect 2. Adjust se ngs 3. Export Render Image with Ligh ng Map >“Add Effect” in Fx Menu>Sun>Sun Study The Lighting Map and Material ID additional render outputs can be used in Photoshop to select elements, delete background and isolate shadows
5. Export View Render > select additional output formats > select export resolution quality > save to folder
1. Select Render Resolu on and Addi onal Outputs note: the higher the resolution the longer the render time
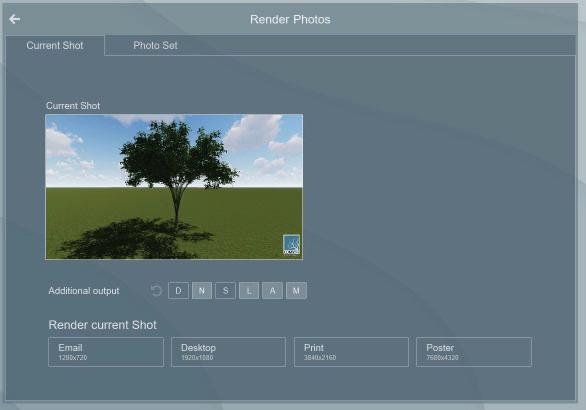
2. Create PNG in Photoshop use ‘Lighting Map’, ‘Material ID’, and ‘Sky Alpha’ Additional Outputs to isolate selections in Photoshop to delete background > use tree and shadow PNG

Lighting Map

Material ID Sky Alpha
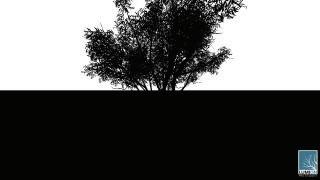
6. (op onal) Adjust in Photoshop
Use Mask and or Color Selection to delete background
Play around and edit using adjustment layers, Filter Gallery (Filter>Filter Gallery) and Layer Blending Mode to manipulate the vegetation

Example:


Scale Reference for Drawing
Workflow
When working between 3D model space and 2D drawings a simple scale reference is helpful for placing vegeta on and people without having to use heavy 3D trees in your model space.
>draw polyline to reference element height >place polyline reference at different locations >make2D your Named View >export linework >import as layer in your Illustrator or Photoshop drawing making trees and people that are a correct scale for the perspec ve of your drawing
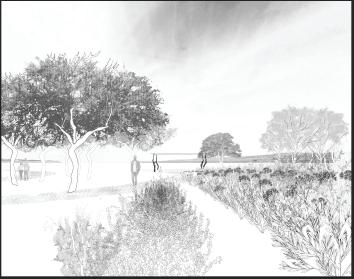
1. Draw Polyline Reference make sure your “osnap” is on by selecting at the bottom of your screen>’polyline’ command>click to place start of polyline snapped to your groundplane
with polyline command active>type the height of your element (for example 25’ for a tree or 6’ for a person>shift+click in right or front view to place an orthagonal vertical line at your desired height


2. Populate Model with Reference Lines
you DO NOT need to place a line for every tree, only at key locations relevant to the view you are drawing, enough to provide you with a reference for scale at different distances. 1-3 lines at a few key intervals is enough
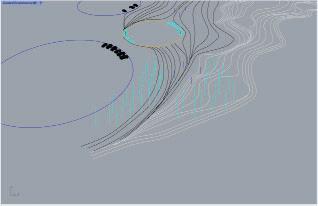
perspec ve view of model

3. Named View-save your viewport Use Named View to save the settings and viewport of your drawing


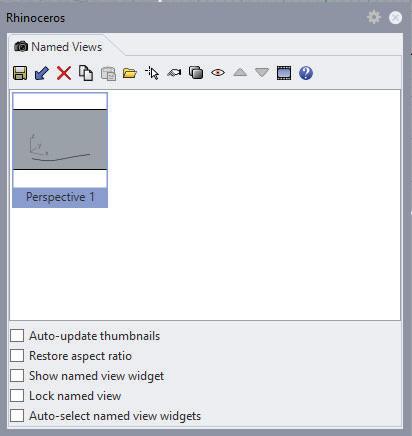
adjust camera and perspec ve se ngs navigate to named views save your viewport
4. Make2D-export your lines in your Named View viewport select all lines>with all lines selcted click into Top View>’Make2D’command>set view to ‘Named View Name’ and Projection to ‘View’ (Top)

Make2D linework is sent to origin (0,0,0)>select lines>File>Export Selected...>Save to AI file
5. Use Linework in Drawing Use reference lines as a layer in drawing to size vegetation and people elements


Ways to Represent People in Your Drawings
People are an important part of drawings to communicate atmosphere, usage, and scale. The style you select is dependent on aesthe c goals as well as what you are trying to communicate about a design. Be mindful of who the users may be specifi c to your design context, what ac vies they might be doing in the design and details like clothing that matches the season of your drawing. The list of sources in the introduc on include a variety of websites that emphasize diversity in representa ons of people and ac vi es.
PNG people can be found online (see resource list) or you can easily make your own from images. PNG Image people create a more realis c drawing while silhoue es are be er for drawings showing larger scales or gatherings of people.
Workfl ow
Vector PNG Silhoue e: Place PNG in Illustrator > Image Trace > Expand > adjust color fill and outline (see Page 7)
Raster PNG Silhoue e: Delete background>Ctrl + click to select layer > Select > Load Selection > Channel: “layer name” Transparency> Shift + Backspace to fill selection with solid color (see Page 8)
Make Your Own PNG from Image: Use Object Selection and Lasso tools to select people > Ctrl+J selection to create new layer with person selection> Turn off background
PNG Image Cutouts and Silhouettes

Scape “The Chattahoochee RiverLands”

YellowOffi ce “Durana Lot 1”
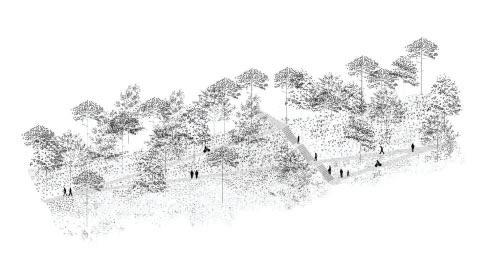
CAD Block People
For linework drawings in which you want greater detail than just silhoue es or outlines use pre-made CAD Block libraries of people. These can be adjusted and tailored depending on drawing style (e.g fi lling in hair or clothes)
Workfl ow
Download library>open in Illustrator>use vector lines (see Page 5 for resource list) OR Trace image in Rhino>export lines>edit in Illustrator
Hand drawn fi gures add a unique iden ty to a drawing
Workfl ow
scan in drawing>adjust levels and curves to get clean lines in Photoshop >delete background (see Page 11)
Cutouts can add a playful illustra on feel to drawings and provide specifi city in representa on of people while not being totally photo-realis c.
Vector cut out libraries exist for download or you can create your own.
Workfl ow
Adobe Illustrator: Image Trace > “Color” mode > adjust settings > Expand > delete background
Photoshop: Delete background>select layer>Filter>Filter Gallery>Artistic>Cutout

Chelsea Kilburn “That Sinking Feeling” 2020 GSD MLA Thesis Prize
Hand Drawn
Vector Illustration Cutouts
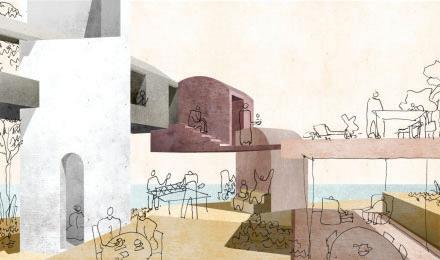
Tatiana Bilbao from Louisiana Museum Exhibit

Xin Feng and Jiani Zhang, Core IV Studio Spring 2020
Drawing Shadows
Manipulating PNGs in Photoshop
Workflow
When working in Photoshop crea ng views or renders you can quickly add shadows to people, trees, and infrastructure using the PNG and warp func on. This technique is best when working only in Photoshop and you need sugges ve shadows, not shadows specifi c to a certain place and me.
>make a copy of PNG item (person, tree, element) >Ctrl + T to transform PNG>Ctrl+Click on corners to Free Transform the element >Free Transform the shape at desired angle on ground mimicking a shadow >Select Layer by clicking layer then select>load selec on> “layer name” transparency> ‘OK’ >with element selected Sh +Backspace>Fill with Black >change opacity and blending mode depending on how crisp and dark or light you want your shadows >add a Gaussian Blur of 2 or 3 to so en edges> Filter>Blur>Gaussian Blur...
● note : if there are existing shadows in an image you are using you can follow these as a guide. It’s ok to estimate, but make sure all your shadows are the same direction and length and make sense in relationship to where the sun is in your drawing. 1. Duplicate element


2. Free Transform copy to shadow form
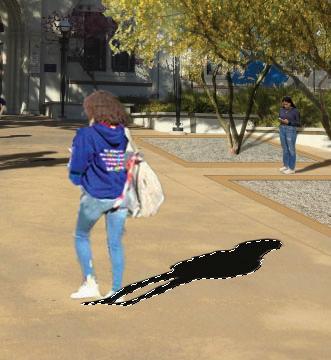
3. Fill layer with black
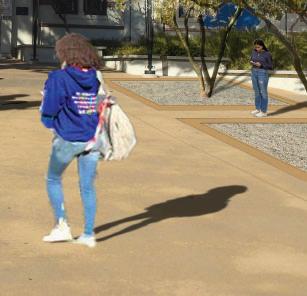
4. Ajdust opacity, blending mode and add blur
Drawing Shadows
Shadows in Plans-Illustrator
Workflow
Adding shadows in plan drawings add depth and context informa on to your drawing.
>add vector plan trees to artboard >copy trees to new layer under original tree layer (this is your shadow layer) >fill shadow layer trees with black and no outline >offset shadow layer depending on angle of sun >change opacity to desired shadow intensity
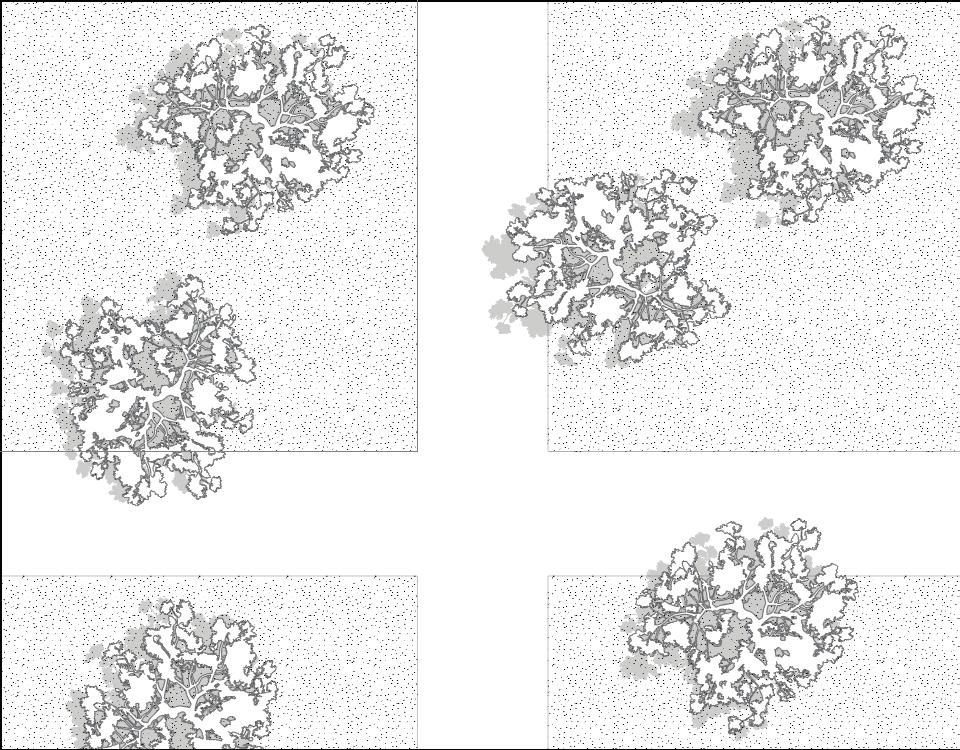
1. Duplicate Tree Layer Select layer> drag down to “create new layer” icon to duplicate

2. Fill Shadow Layer Trees and Off set select all shadow layer trees and fill black with no outlines>drag or arrow key move to offset shadow layer to desired angle
3. Adjust Opacity Create New Layer

adjust opacity of shadow layer to desired shadow intensity

Opacity
Drawing Shadows
Projecting Shadows in Photoshop
Workflow
O en you need to adjust shadows as they cast onto objects in your drawings. Perspec ve Warp in Photoshop is a useful tool to create realis c shadow behavior.
1. Enable Perspec ve Warp With shadow layer selected > Edit> Perspec ve Warp...> Follow on screen instruc ons 2. Defi ne Planes

Click+drag to defi ne the planes of the object you are projec ng onto
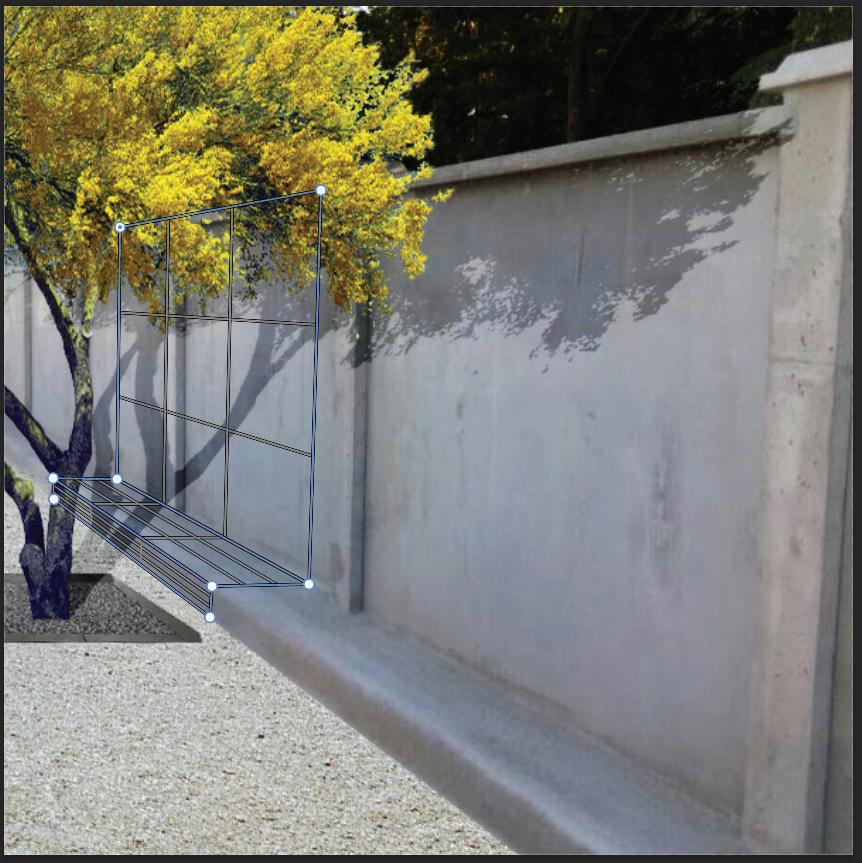
3. Adjust Planes 4. Exit Perspec ve Warp Drag the corners of your planes to adjust perspec ve When you have desired warp hit ‘Enter’ to exit


Drawing Shadows
Projecting Shadows in Rhino
Workflow
You can also use the ‘Project’ command in Rhino to create shapes mapped to surfaces. This can be used to get shadow warp shapes on terrain surfaces.
1. Place Shapes Place 2D linework of shape you want to project > place above the surface (in Z space). In this case tree canopy shapes are placed at tree reference lines.

2. Project Select lines/shapes you want to project > type ‘Project’ > Select surface you want to project to > Choose ‘DeleteInput=yes’


