
CONTENTS - CLICK CATEGORY TO VIEW DENTAL EDUCATION HUB ORTHODONTIC 04 12 COSMETIC & RESTORATIVE PREVENTATIVE 14 48 HANDPIECES INSTRUMENTS 72 76 ENDODONTICS PAIN CONTROL 56 68 INFECTION CONTROL EQUIPMENT 78 90 PROSTHETICS 3D PRINTING 96 103
As we embark on a new year, the team at Henry Schein would like to extend our warmest wishes for a successful and prosperous 2023. We hope you had a relaxing break during the holiday season and are ready to tackle the opportunities and challenges ahead.
Even though there are economic uncertainty, rising inflation and interest rates, and ongoing supply chain disruptions, we are committed to being your Trusted Business Partner and helping you navigate this year.
We continue to offer a range of initiatives to support your practice in 2023 including:
• A wide selection of market-leading brands and products from a diverse portfolio of global leading suppliers, ensuring consistent availability and timely delivery to your practice.
• A growing portfolio of Henry Schein branded products to provide high-quality, cost-effective alternatives to help alleviate the rising inflationary pressures. PAGE 79

• Australia’s most widely used online ordering portal, henryschein.com.au with over 5,000 practices utilizing its features such as faster ordering, onlineonly savings and discounts, and efficiency tools such as ordering templates, track and trace, and invoice availability.
• Our comprehensive loyalty program, HenrySchein360, offering discounts across products and brands, as well as monthly loyalty-based rebates and savings on key business solutions such as Hicaps, Insurance, training, practice management software, patient finance solutions, and marketing.
• DentalEducationHub.com.au, one of Australias leading online learning platform for dental professionals, featuring a wealth of free content for you and your staff, regularly updated with new webinars and courses. PAGE 5

• And most importantly, our team of highly experienced Specialists, Relationship Managers, Customer Care Agents, and In-House Service Technicians, dedicated to supporting and partnering with your practice to navigate and thrive in these uncertain times.
Finally, I would like to remind you that the governments Temporary Full Expensing tax incentive for capital equipment ends on June 30 which enables you to depreciate the full value of assets with an individual value upto $150,000 in the first year rather than over the usable life.
This can help bring many benefits including financial savings, cash flow injections, accelerated upgrades and boosting staff morale.
But to take advantage, the equipment must be delivered and installed prior to June 30.
To help enable this we have worked tirelessly to ensure we have the right stock and our factory trained technician availabile, but encourage you to plan ahead to make the most of these incentives. Read more on PAGE 90 or register for our webinar series CLICK HERE
We encourage you to take advantage of all these initiatives and look forward to being your partner in achieving success over the year ahead.
DID YOU KNOW?
3 henryschein.com.au 03 ONLINE T V CALUM COOGAN Marketing Communications Digital & CX Manager
THE ENAMEL ON THE TOP SURFACE OF YOUR TOOTH IS THE HARDEST PART OF YOUR ENTIRE BODY
INSIGHT HYAKU100
CELEBRATE 100 YEARS WITH GC

On corporate identity and the pursuit of ‘work’: a reflection of GC’s 100 years
Tales of grassroots, ground-up success are still the narratives we love to celebrate. Resilience after loss. Triumph through adversity. Such is the blueprint for an idealist seeking change. For GC founders Kiyoshi Nakao, Yoshinosuke Enjo and Tokuemon Mizuno, the challenges of the market in a post-war world only fuelled their vision: to bring value to society through quality and innovative dental products, serving the vitality of people across the globe.
Formed in Japan in 1921, GC’s entry into the dental manufacturing field a year later with ‘Standard Cement’ came short of the breakthrough they had anticipated. Coming to terms with the reality of running an enterprise, the founders learned to embrace an external voice, one most important: the customer. So began a lifelong devotion to serving the needs of the end user, fulfilled by continual improvement and true, quality products.
Today, the term ‘social responsibility’ is a stakeholder expectation when implementing corporate governance — yet for GC, the answer to such newer concepts like corporate social responsibility was founded one century prior. Its 100-year philosophy of SEMUI, a combination of ‘selflessness, objectivity, charity and wisdom’ is the persisting legacy of its founders today. These unchanging values continue to enable outstanding contributions to the dental industry whilst improving global welfare through oral healthcare - all the while championed
by GC’s unique sentiment on ‘work’, one seldom endorsed around the world:
“Translated to English, the Japanese verb hataraku means work, which has two meanings: ‘labour of efforts’ and ‘a composition or product of art’.”
For associates of GC, the meaning holds a higher purpose. Stripped of its complicated undertones of ‘labour’, ‘work’ should mean to realise a vision; to conceptualise, create and complete. The success of GC on a global scale for 100 years and counting is thus owed to its internal operational model; one that departs from the traditional ‘employer vs. employee’ framework. Instead, GC culture focuses on the spirit of all associates — Nakama — and their united, localised efforts to serve the development of dental science and public oral health care worldwide.
With the strength of Nakama, GC maintains its status of a privately held company independent from investors and external capital, ensuring the prioritisation of innovation and sustainable growth for many years to come. Operating in over 100 countries today, GC’s industry-leading products and services is an exceptional testament to its own success, powered by 100 years of history, a robust organisational identity and an uncompromising philosophy:
“True products are made for the good of others, not for the sake of oneself.” – Kiyoshi Nakao
04 Read More and Register for On Demand CLICK HERE
DENTAL EDUCATION HUB
SURGERY SETUP SOLUTIONS WEBINAR SERIES
In recent years, the increasing challenges on global supply, economic instability, have changed the way of acquiring new equipment, consumables, and dental products in general. With this new scenario, Henry Schein has prepared a package of actions & tools to ensure you purchase dental equipment timely and capitalises on the current Government Stimulus. From expert advice, up to flexible finance options and aggressive pricing, Henry Schein has on offer a tailored mix of solutions that makes NOW the perfect time to purchase world class equipment in the recent years.
Tune in to the Surgery Setup Solutions Webinar Series being held throughout the month of February. Log in to the FREE Live webinars to gain insights on an array of topics including finance, fitout, surgery set up considerations and marketing.
Practice funding 101
The ins and outs of simple, bespoke finance
Sarah Zhou, Credabl
TUES 7 FEB
1 Non Clinical CPD
READ MORE
Practice finance 2023 specialised update
Brenton Hunt, Medfin

TUES 14 FEB
1 Non Clinical CPD
READ MORE
How to maximise your cash flow during start up or expansion of your practice
Luke Truscott, BOQ
TUES 28 FEB
1 Non Clinical CPD
READ MORE
05 henryschein.com.au
DENTAL EDUCATION HUB


06 Optic White Light Up In-Chair Whitening System Amelia Seselja & Jasmine Bell 1 CPD Credit Monday 6 March READ MORE Explore over 270 hours of clinical and business related content all in one place with access to DENTAL EDUCATION HUB UPCOMING CPD COURSES YOUR FREE GO-TO RESOURCE FOR Dr Gordon Christensen Clinical Courses Dr. Gordon J. Christensen Access courses online until January Dr Harry Reveal Online Training Course Dr Joe Alphonse 3 CPD | $450
10 February MyLunos - Correct prophalaxis and treatment modalities Dr Jana Norkin, DiS 1 CPD Credit Wednesday 22 February How to introduce Reveal to your patients Dr Joe Alphonse, GP 1 CPD Credit Thursday 2 March READ MORE READ MORE READ MORE READ MORE
Friday
COURSES AND EVENTS FOR
DENTAL EDUCATION AND CPD
courses, webinars, podcasts and articles. View our upcoming courses and webinars below.

Endodontics Mastered
2 Day Course
Harry Mohan, Dr Aaron Gascoigne & Dr Monique Cheung
16 CPD | $2,200
Saturday 11 – Sunday 12 February
READ MORE
The STA, New Technology, Injection Techniques, and Benefits for Delivery of Local Anaesthesia
Dr Eugene Casagrande

1 CPD Credit
Tuesday 7 March
READ MORE
New prebiotic and biomimetic approaches for treating oral disease

Prof Eric Reynold AO & Prof Ian Meyers
OAM BDSc, FICD, FADI, FPFA, FRACDS
1CPD Credit
Wednesday 8 March
READ MORE
Insight Hyaku100

7 CPD Credit
Saturday 18 February
READ MORE
Elements of successful local anaesthetic and what could go wrong?
Dr Gregory Mahoney


1 CPD Credit
Thursday 9 March
READ MORE
07 1300 65 88 22
DENTAL EDUCATION HUB
HOW TO AVOID NO SHOWS
FRIENDLY POLICIES FOR YOUR PATIENTS
No-shows are a common nuisance to dentistry practices - surveys show they can add up to 10% of all appointments!1 No-shows happen when patients don’t come to their scheduled appointments, without notifying staff or cancelling. This phenomenon hurts both clinical practices and patients, through many negative impacts. So let’s see how you can identify high-risk patients and greatly minimize missed appointments.
Why no-shows happen and who is most at risk
It may seem that these days, thanks to the many communications channels available like e-mail, texting, cell phones, automatic reminders, etc., it shouldn’t be difficult to cancel or honor an appointment. And yet no-shows keep happening, so which factors are at play?
Can you predict which patients are at high risk?
Many studies2,3,4 have tried to predict no-shows and reveal that patients miss appointments for a variety of reasons. While some factors are linked to patients’ negative perceptions of the healthcare system, others are related to their socio-economic status.
Many factors are tied to external circumstances and patient history. It goes without saying that those who have previously missed appointments indicate a much higher risk of no-show. You can reasonably expect the following situations to hinder compliance with appointment keeping5,6 : competing work or meetings, lack of available transportation and geographical distance from clinic, related patient health issues (pre-existing conditions), appointments made by others than the treated patient, low appointment urgency, first appointments, long intervals between appointments.
Personal perceptions play a big role
• Negative emotions: fear of pain, anxiety, overwhelmed, etc.
• Distrust, or perceived disrespect from the healthcare system: waiting times, staff treatment, feelings of being ignored, etc.
• Confusion or misunderstanding about the scheduling system.
5 tips to deal with specific no-show situations
We recommend you to do some in-house research, to identify which groups of patients are not honoring their appointments - as it can differ from one practice to another. As for some high-risk situations, you can implement specific protocols to fit each patient group or demographic. A few examples:
• Some patients may have financial constraints or no insurance coverage. Offer these patients financing plans in order to combat no-shows.
• Hire multilingual and multicultural staff when possible; this will improve patient experience for international people or non native-speakers.
• To reach younger patients, reinforce your social media presence. You can also use social media for patient support and outreach.
• Prioritize phone calls for older patients and use their preferred communication channels.
Reinforce reminders and communications for people who may lack a support system.
PRACTICE MANAGEMENT 08
Did you know?
Certain personality types are more prone to noshows: controlling and performing types7. Have your staff learn to identify types to communicate more effectively.
And don’t forget that new patients have no personal relationship with you yet. Extending a personal welcome after their 1st visit could ensure they return.
Negative impacts of no-shows: everybody is concerned8
• Disruption and heavy financial impact: unpredictable schedules and non-optimized booking means idle time, “chair time” loss with potentially less patients, so less business (losing up to thousands $ a year9). As a result, practitioners are forced to charge more for their services, so other patients lose as well.
• Reputation impact: ignoring no-shows can hurt your reputation, as word gets around that patients are not honoring appointments, it can cause widespread unreliability.
• Patients’ health is jeopardized in the longrun: delaying their treatment can cause future complications, and patients who wait are more likely to need expensive emergency care later on. Dentists agree that prevention is key, so it’s important for everyone involved to minimize no-shows.
Try these 4 approaches to prevent and avoid no-shows
Some practices have gone to extreme lengths to discourage no-shows. No-shows are a hindrance of course, but the goal for dentists is to set firm
boundaries, all while maintaining a friendly practice and without alienating their patients. You can never fully eliminate them, but you can implement new practices and focus on preventive measures to strongly minimize no-shows.
Of course, all of these tips depend on your practice’s policies and your personal relationships with patients. Digitise your administration and implement clear policies
• Multiple and automated reminders: implement an automatic confirmation protocol in the days leading up to the appointment (and leverage different channels)10. Invest in an SMS/text system to avoid using up too much manpower. You can also ask patients to confirm their appointment.
• Set up electronic forms for patient intake: patients who fill out forms in advance are much more likely to come.11
• Hybrid system: Set up your practice to accommodate same-day/short-notice appointments, on top of pre-appointments. (Organize tools and keep stock ready in advance, account for extra time, etc.)12

• Quick rescheduling is not permitted. Ex: missed appointment can only be rescheduled after 2 weeks. This creates “demand” for appointments.
• Write and share a clear cancellation or “broken appointment” policy and explain the impact on your business.
henryschein.com.au
PRACTICE MANAGEMENT 09
Better communication to get patients invested13
• Educate patients: Explain procedures as you go and answer any questions. Offer brochures, etc. And go over all the details before a patient leaves the clinic.14
• Create “value”: You can implement different methods of internal marketing to establish your practice as valuable for your patients. 15
• Talk patients out of cancelling if they don’t give immediate valid reasons and offer alternative solutions (financing, etc.)16
• Be empathetic when real emergencies and accidents do happen to keep patients from showing up.
Leverage new solutions for pain management and single-session treatments
• Invest in innovative dental products to improve patient experience and lessen pain, which will reduce chances of no-shows from fearful patients. You can use ergonomic syringes, high quality needles, or biocompatible solutions for minimally invasive procedures. Painless procedures also improve your overall reputation.
• Use versatile products that let you adapt treatments according to patients’ profiles and attendance history. For instance, using Biodentine practitioners can do a Bio”bulk-fill” procedure, where they use only one material to fill the cavity. This helps to easily and quickly treat at-risk patients, sometimes in one setting when the case allows it.
Create a specific system for unreliable patients
• Have scheduling coordinators or assistants call personally to confirm. Or train scheduling coordinators to learn what works best for each patient.
• Put repeat offenders on a separate scheduling system. EX: Put them on a “quick call” list - to check their availability the day of a cancellation. Try to schedule them during challenging slots - Don’t fill up “prime time” slots with unreliable patients.17
• Ask for a financial “deposit” to schedule appointments. Patients forfeit the deposit if they don’t show up!
How effective are strict policies and penalties?
Studies and testimonials show that strict measures and financial penalties usually aren’t worth your time. You could charge a fee for broken appointments or threaten to charge patients after too many missed appointments - even if you don’t intend to. This works best for repeat offenders, but be warned that this method rarely works.
You risk making patients angry and being stuck with unpaid fines. No one likes to lose patients, but many dentists will prefer to deregister a patient from their practice after too many no-shows.19
References
1 McGuire, Jen. No More No-shows. Dentaleconomics.com - Jan 17, 2014. Accessed June 2, 2021 https://www.dentaleconomics. com/practice/article/16390417/no-more-noshows
2 Bedford, Lydia & Weintraub, Collin & Dow, Alan. (2020). Into the Storm: a Mixed Methods Evaluation of Reasons for Nonattendance of Appointments in the Free Clinic Setting. SN Comprehensive Clinical Medicine. 2. 1-7. 10.1007/s42399-02000585-6. https://www.researchgate.net/publication/345394875_ Into_the_Storm_a_Mixed_Methods_Evaluation_of_Reasons_for_ Non-attendance_of_Appointments_in_the_Free_Clinic_Setting
3 Lacy, Naomi L et al. Why we don’t come: patient perceptions on no-shows. Annals of family medicine vol. 2,6 (2004): 541-5. doi:10.1370/afm.123 https://www.ncbi.nlm.nih.gov/pmc/articles/ PMC1466756/
4 Parsons, Joanne, Bryce, Carol and Atherton, Helen. Which patients miss appointments with general practice and the reasons why: a systematic review. British Journal of General Practice 2021; 71 (707): e406-e412. DOI: https://bjgp.org/content/71/707/e406
5 Pfeifer, Erika. Oh no! A No-Show! Why Patients Don’t Show Up For Appointments, and How to Reduce Patient No-Shows. equiscript.com. Accessed June 2, 2021. https://www.equiscript. com/blog/patient-no-shows
6 Toland, Bill. No-shows cost health care system billions. Postgazette.com https://www.post-gazette.com/business/businessnews/2013/02/24/No-shows-cost-health-care-system-billions/ stories/201302240381 Published Feb 24, 2013. Accessed June 2, 2021.
7 McGuire, Jen. Ibid
8 Ibidem
9 Long, Ryan. Reducing the cost of cancellations in your dental practice. Dentistryiq.com. https://www.dentistryiq.com/practice-management/patient-relationships/article/16350458/reducing-the-cost-of-cancellations-in-your-dental-practice
Published July 24, 2015. Accessed June 2, 2021
10 Levin, Roger P. 3 ways to reduce no-shows in your dental practice. Dentistryiq.com https://www.dentistryiq.com/practice-management/patient-relationships/article/16367557/3ways-to-reduce-noshows-in-your-dental-practice November 26, 2018. Accessed June 2, 2021.
11 RevenueWell. 6 Ways to Eliminate No-Shows at Your Dental Practice. revenuewell.com https://www.revenuewell.com/article/ eliminate-dental-no-shows/ Accessed June 2, 2021.
12 McGuire, Jen. Ibid
13 Ibidem
14 McKenzie, Sally. How to reduce cancellations and no-shows and grow the bottom line of your dental practice. Dentistryiq. com https://www.dentistryiq.com/practice-management/practice-management-tips/article/16350380/how-to-reduce-cancellations-and-noshows-and-grow-the-bottom-line-of-your-dentalpractice Published July 20, 2015. Accessed June 2, 2021.
15 Levin, Roger P. Ibid
16 Colicchio, Heather. Handling dental patient cancellations and noshows. Dentistryiq.co https://www.dentistryiq.com/front-office/ scheduling/article/16367917/handling-dental-patient-cancellations-and-noshows Published May 17, 2018. Accessed June 2, 2021.
17 Colicchio, Heather. Ibid.
18 Du Molin, Jim. Dental Management Survey: How Do You Handle Missed Appointments? Thewealthydentist.com http://www.thewealthydentist.com/blog/4943/dental-management-survey-handle-missed-appointments/ Accessed June 2, 2021.
19 Du Molin, Jim. Ibid
10
PRACTICE MANAGEMENT
INVOICES ONLINE

Log onto your account to download past invoices.
FEB 2023 SCHEINING PRICES
11 1300 65 88 22
TO CART
TO CART directly from our catalogue
ADD
ADD
HENRY SCHEIN ONLINE
Browse our latest offers and promotions and
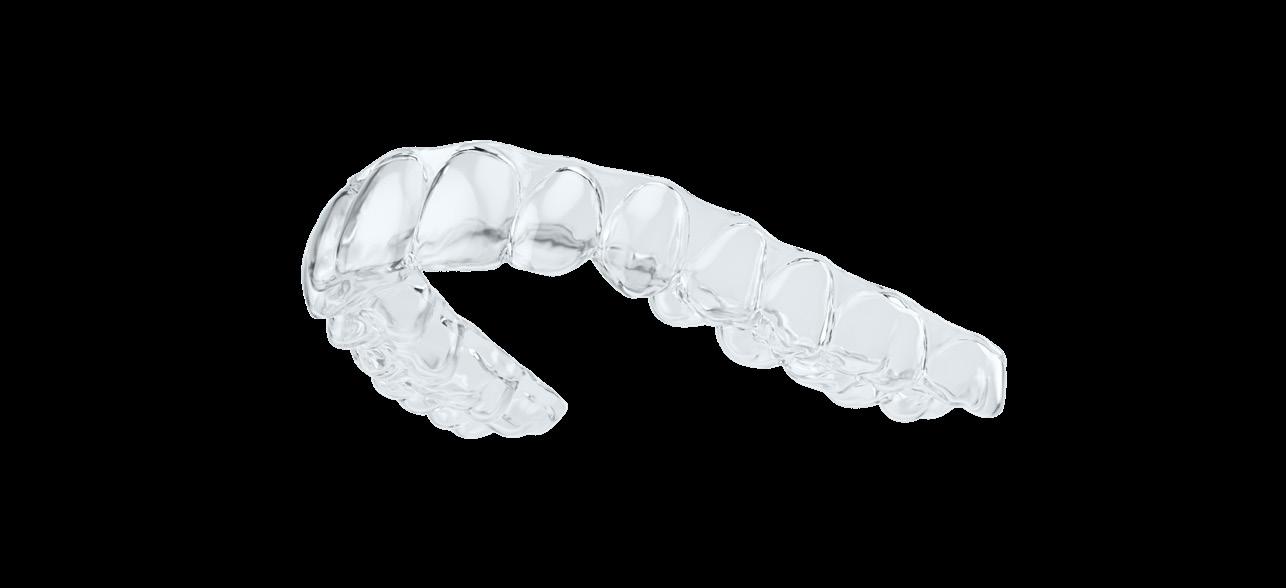
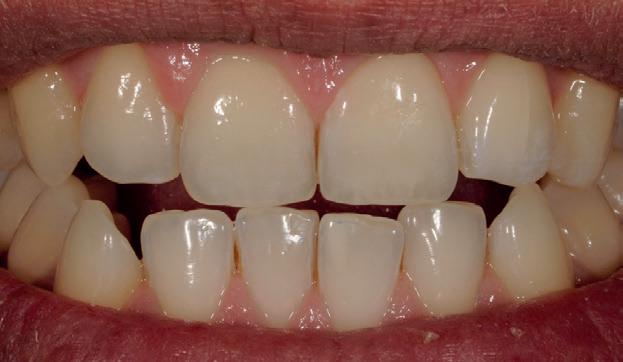
REVEAL CLEAR ALIGNERS
THE CLEAR CHOICE FOR A BEAUTIFUL SMILE
A crystal-clear aligner solution developed by industry experts.
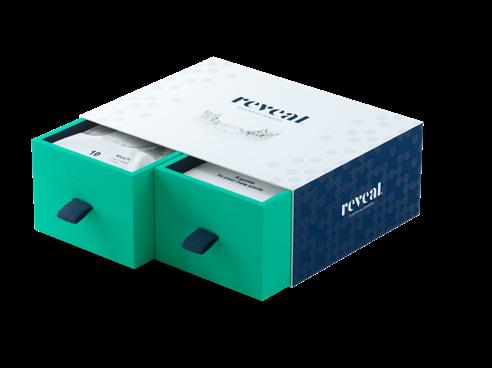
With decades of experience creating some of the world’s most innovative orthodontic appliances, Henry Schein® Orthodontics™ delivers Reveal, a state-of-the-art clear aligner with next-generation aesthetics, efficiency, and treatment predictability.
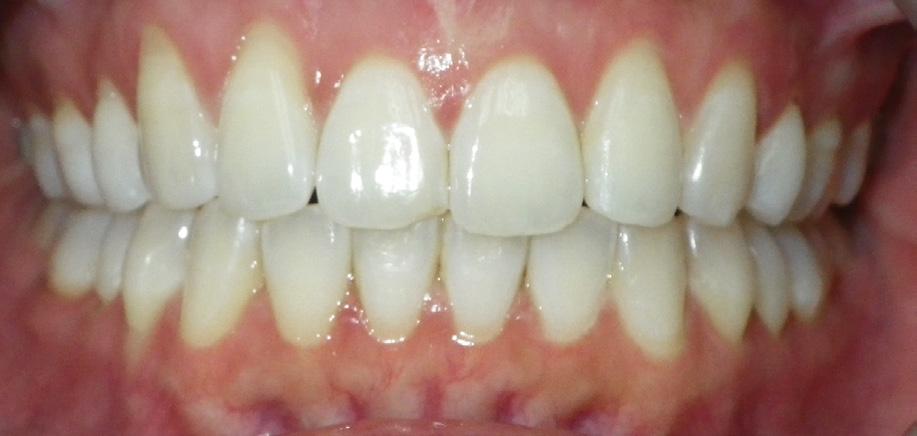
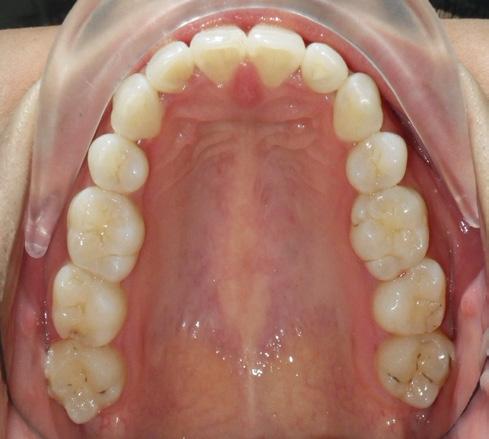
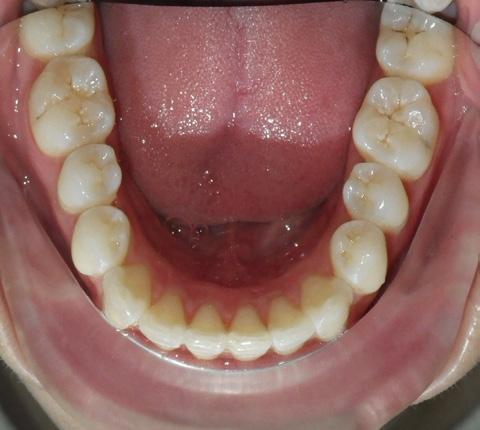
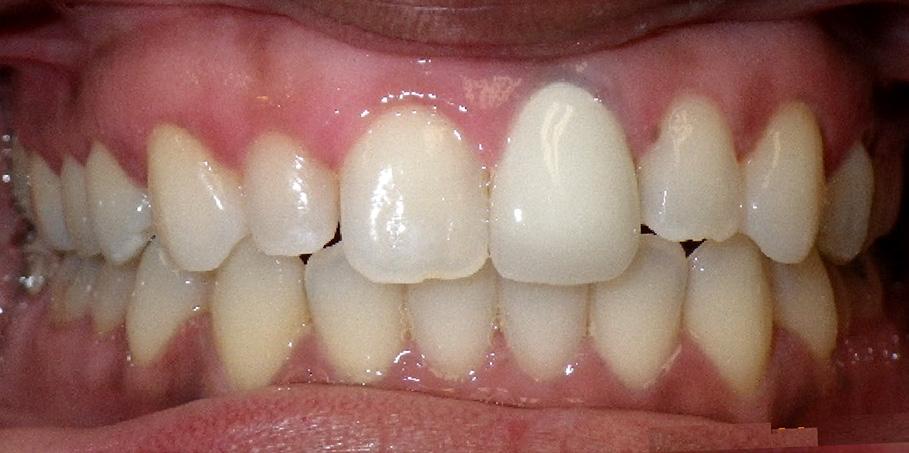
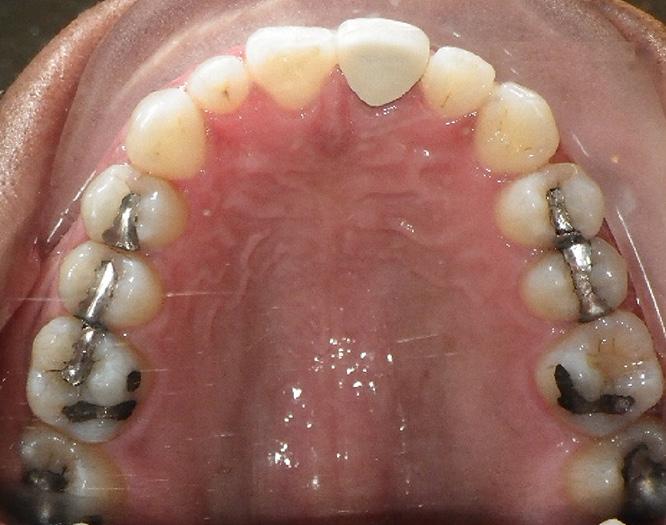
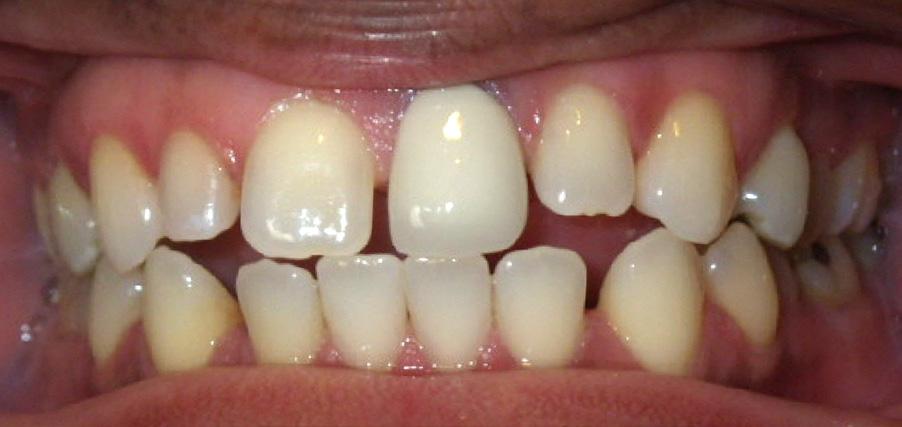
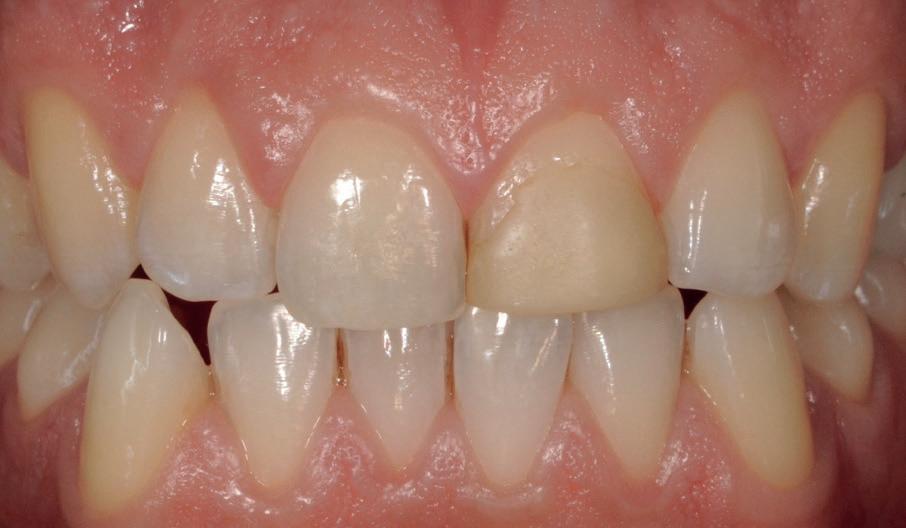
Case Description
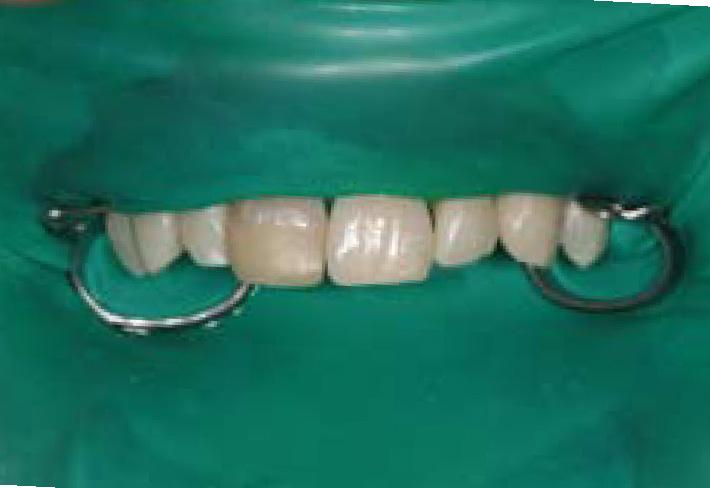
Lower Anterior Crowding - 34 year old Female
Pre Treatment
Treatment Planning
Number of aligners: Upper 25 Lower 25
Duration of treatment: 9 months
Final Results
12 ORTHODONTICS
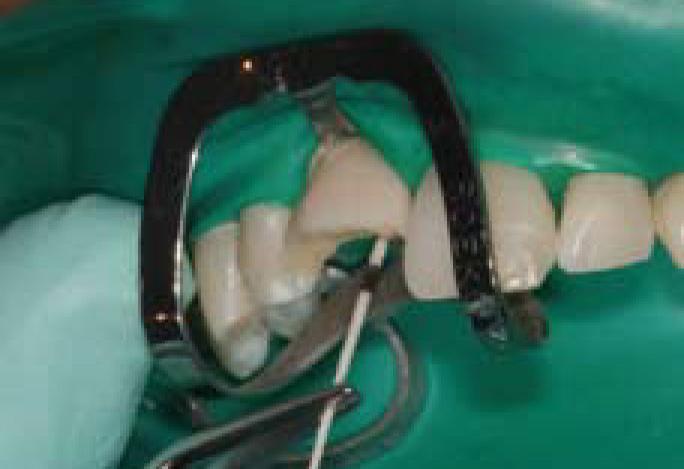
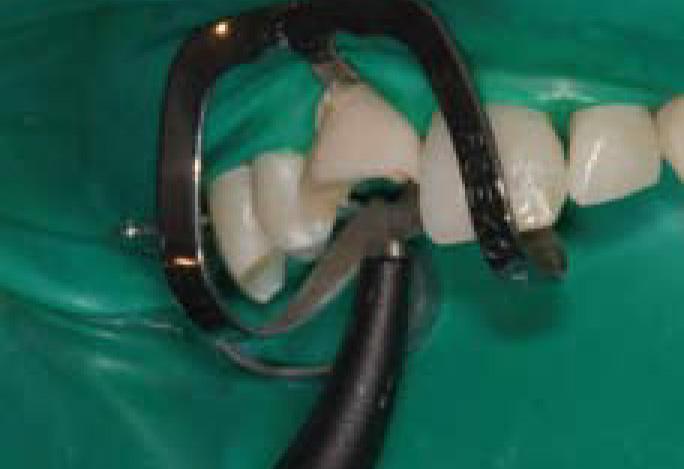
“I’ve been very impressed with precision of movement with Reveal aligners, all while using little to no attachments. I find myself hardly ordering refinements anymore. Reveal meets patient expectations when it comes to Clear Aligner Therapy - a comfortable aligner that stays clean with hardly any attachments. It makes for a much more compliant patient. The ease of use of Reveal allows for shorter appointments making it a much more profitable clear aligner.” - Dr. Joe Alphonse, Oatlands, NSW

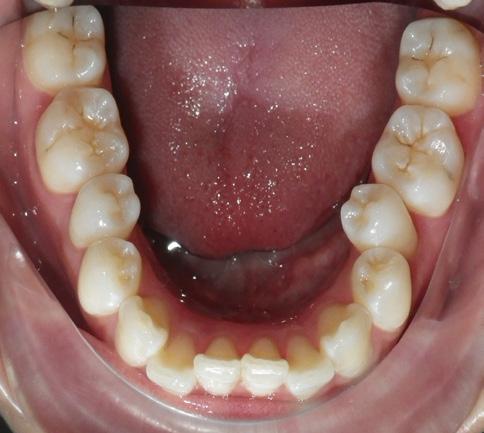
Case Description
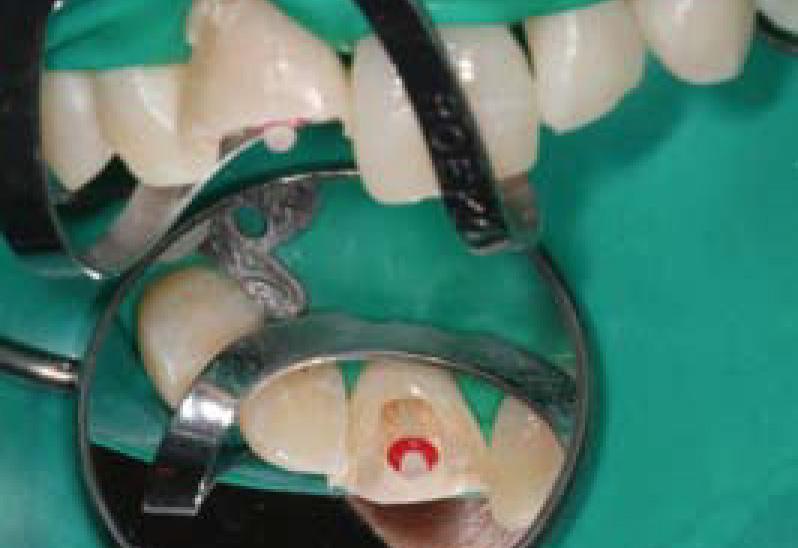
Spacing & Open Bite - 35 year old Female
Pre Treatment
Treatment Planning

Number of aligners: Upper 22 Lower 22

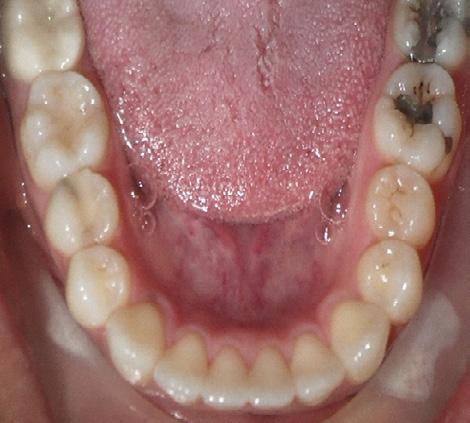
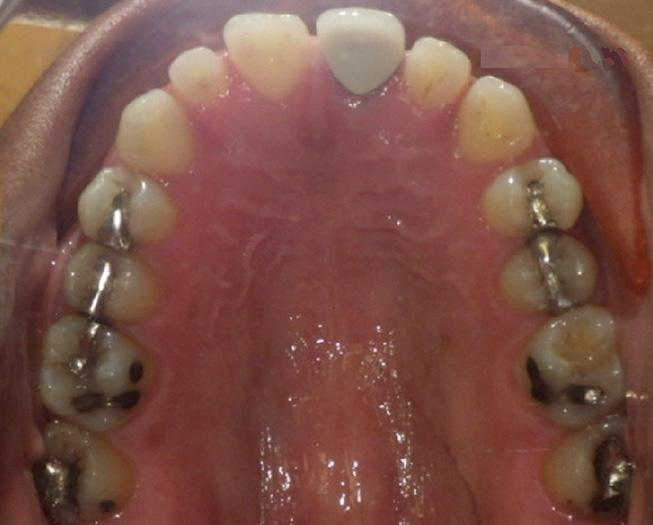
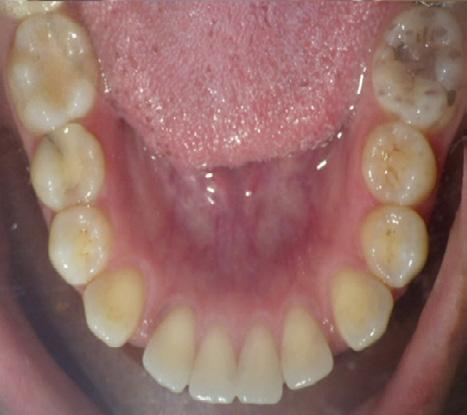
Duration of treatment: 12 months
Final Results
13 1300 65 88 22 ORTHODONTICS
CASE BOOK CLICK HERE
REPAIR TECHNIQUE GUIDE
YOUR STEP-BY-STEP TECHNIQUE
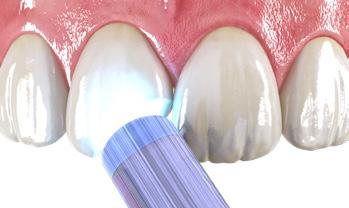
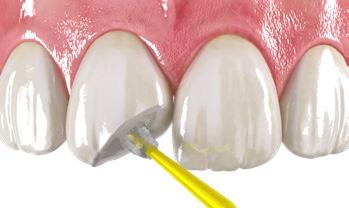
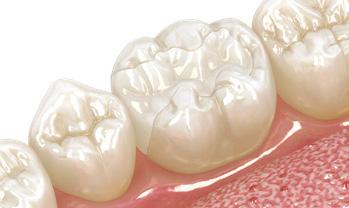
From metal-based, composite, zircona, glass or hybrid ceramic, we have your restorations covered with this step-by-step repair technique guide. Whether your case involves tooth structure— or not, learn how GC’s range of restorative products are used to achieve optimal results.
Metal-Based Indirect Restorations (precious and non-precious) without involvement of tooth structure.
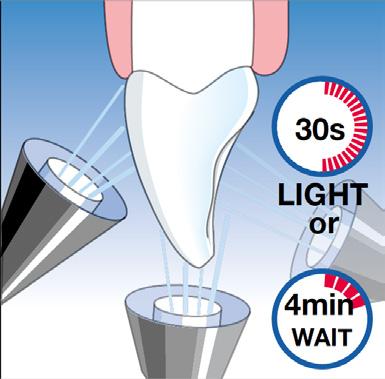
LIGHT CURING TIME OF G-PREMIO BOND DISTANCE FROM LIGHT GUIDE TIP
Light curing unit <10mm >10mm
Halogen / LED (700 mW/cm²) 10 sec 20 sec
High power LED (>1200 mW/cm²) 5 sec 10 sec
14
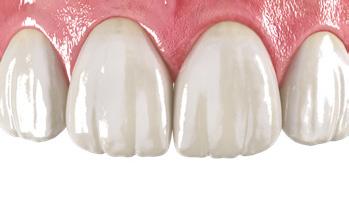
8. Final result.
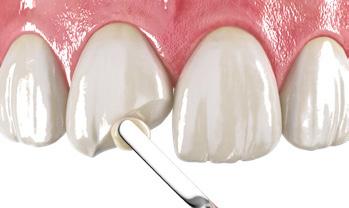
7. Build-up with composite (e.g. G-ænial or Essentia) and light-cure each layer.
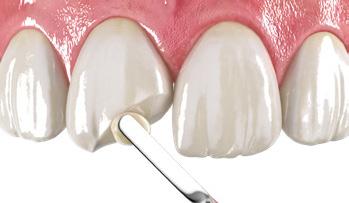
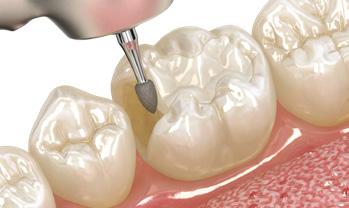
2. Apply Ceramic Primer II or G-Multi PRIMER only onto the ceramic surface to be repaired. Dry.
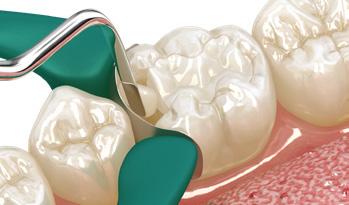
1. Roughen the bonding surface with a coarse diamond bur. Rinse and dry.
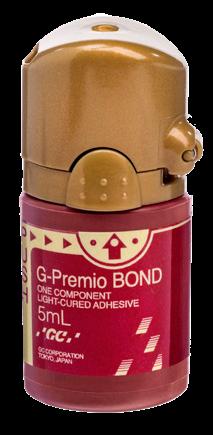
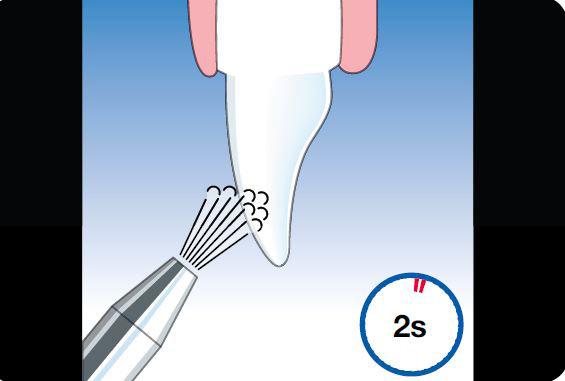
3. Apply G-Premio BOND to all bonding surfaces. Wait 10 sec.
5. Light cure following below guidelines.
4. Dry with maximum air pressure for 5 sec.
6. Apply Essentia Masking Liner onto the metal surface and light cure each layer for 20 sec.
COSMETIC & RESTORATIVE
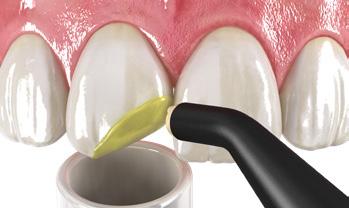
Indirect restorations made of glass-ceramics, zirconia, alumina & hybrid ceramics (e.g. CERASMART) without involvement of tooth structure
1. Roughen the bonding surface with a coarse diamond bur. Rinse and dry.
2. Apply Ceramic Primer II or G-Multi PRIMER only onto the surface to be repaired*. Dry. *In case of monolothic zirconia or alumina, the use of Ceramic Primer II or G-Multi PRIMER is not needed.

3. Apply G-Premio BOND to all bonding surfaces. Wait 10 sec.
4. Dry with maximum air pressure for 5 sec.
5. Light cure following below guidelines.
LIGHT CURING TIME OF G-PREMIO BOND DISTANCE FROM LIGHT GUIDE TIP
Light curing unit <10mm >10mm
Halogen / LED (700 mW/cm²) 10 sec 20 sec
High power LED (>1200 mW/cm²) 5 sec 10 sec
6. Build-up with composite (e.g. G-ænial or Essentia) and light-cure each layer.
7. Final result.
Intra-oral repair of composite restorations without involvement of tooth structure
1. Roughen the bonding surface with a coarse diamond bur. Rinse and dry.
2. Apply G-Premio BOND to all bonding surfaces (including tooth structure). Wait 10 sec.

3. Dry with maximum air pressure for 5 sec.
4. Light cure following above guidelines.
5. Build-up with composite (e.g.G-ænial or Essentia) and light-cure each layer.
6. Final result.
15 henryschein.com.au
COSMETIC & RESTORATIVE
REPAIR TECHNIQUE GUIDE
YOUR STEP-BY-STEP TECHNIQUE CONTINUED

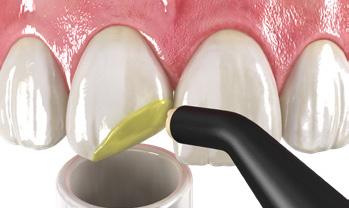
Intra-oral repair of indirect restorations made of glass-ceramics, zirconia, alumina & hybrid ceramics (e.g. CERASMART270) with involvement of tooth structure


2. Apply Ceramic Primer II or G-Multi PRIMER only onto the surface to be repaired*. Dry. *In case of monolothic zirconia or alumina, the use of Ceramic Primer II or G-Multi PRIMER is not needed.


3. Apply G-Premio BOND to all bonding surfaces (including tooth structure). Wait 10 sec.

5. Light cure following below guidelines.
6. Build-up with composite (e.g. G-ænial or Essentia) and light-cure each layer.
16
7. Final result.
1. Roughen the bonding surface with a coarse diamond bur. Rinse and dry.
4. Dry with maximum air pressure for 5 sec.
CLICK HERE (indirect and direct) p.5 REPAIR TECHNIQUE GUIDE Download the brochure LIGHT CURING TIME OF G-PREMIO BOND DISTANCE FROM LIGHT GUIDE TIP Light curing unit <10mm >10mm Halogen / LED (700 mW/cm²) 10 sec 20 sec High power LED (>1200 mW/cm²) 5 sec 10 sec COSMETIC & RESTORATIVE
INITIAL LISI BLOCK
NEW FOR CEREC
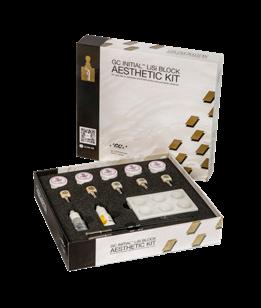
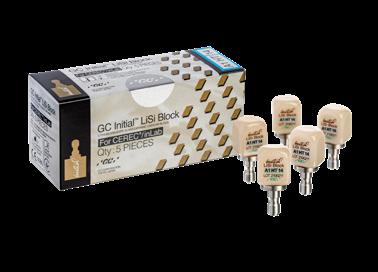
Fully crystallised lithium disilicate CAD/CAM block for chairside solutions
To bring fast solutions for one appointment dentistry, GC has further developed HDM technology for CAD/CAM dentistry by optimizing the crystal size and glass matrix stiffness. Thanks to this new technology, good machinability, marginal integrity, polishability, and wear resistance are achieved at the same time. The result is a strong and easyto-mill block that offers the same strength with or without firing.*
Just Mill, Polish and Place
Initial LiSi Block can dramatically reduce process time: no need to fire, glaze, characterize and cool. This saves up to 40% in the time^ required to create your restorations, also reducing the chair time for you and your patient. You just need to mill, polish and place!
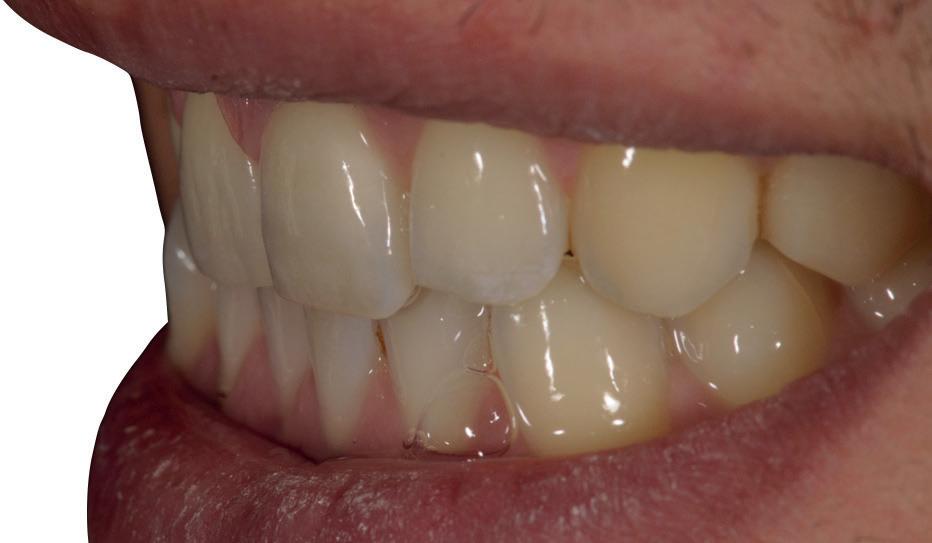
Function Meets aesthetics
I’m totally excited about the natural opalescence and color matching of the HT version of LiSi Blocks.
MDT Christian Hannker, Germany

I love the opalescence of LiSi Block and as a consequence thereof the color stability and perfect matching.
Dr. Christian Lampson, Germany

CLICK HERE 17 1300 65 88 22
COSMETIC & RESTORATIVE
Images courtesy of MDT Christian Hannker & Dr. Christian Lampson, Germany
Find out more
Under testing conditions based on IFU
Source: GC R&D, Japan, Data on file
Images courtesy of MDT Marco Muttone & Dr. Alessandro Iorio, Italy
^
*
PRESENTATION OF A STUDY WITH ILLUSTRATIVE CASES
In addition, thanks to advances in adhesive dentistry and the advent of cements that bond strongly to a diverse range of materials, cements have come into wide clinical use that can cope with the many types of materials used for the fabrication of prosthetic appliances.
At our hospital, we select the treatment method most suitable for each case by appropriately specifying various types of prosthetic appliance according to the status of each case. For example, we may specify zirconia prosthetic restorations fabricated by the CAD/CAM system, or silica-based ceramic prostheses, or those made of lithium disilicate glass, as the case dictates.

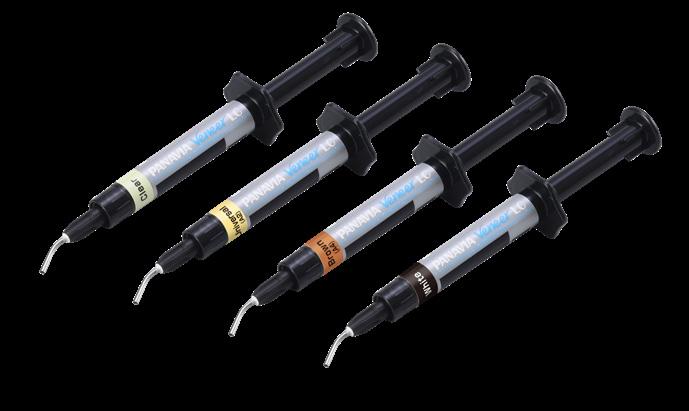
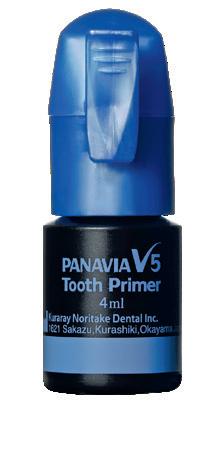
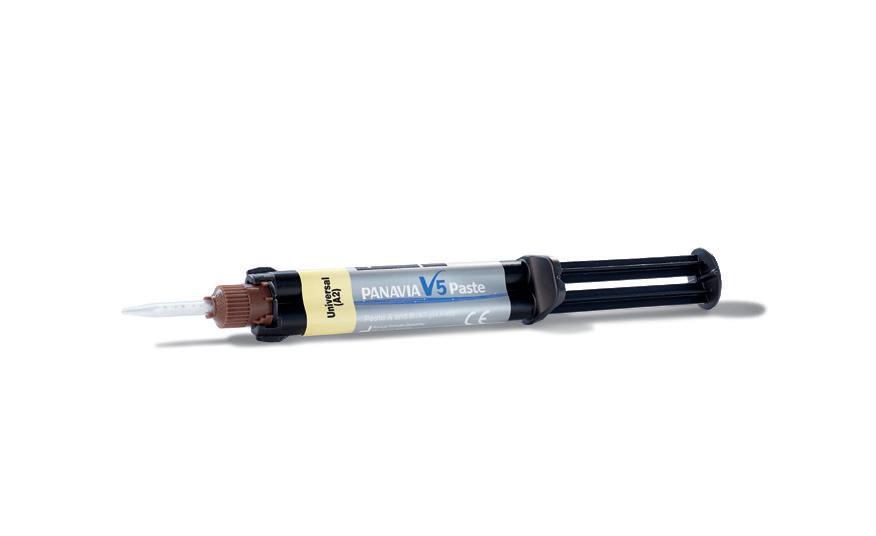
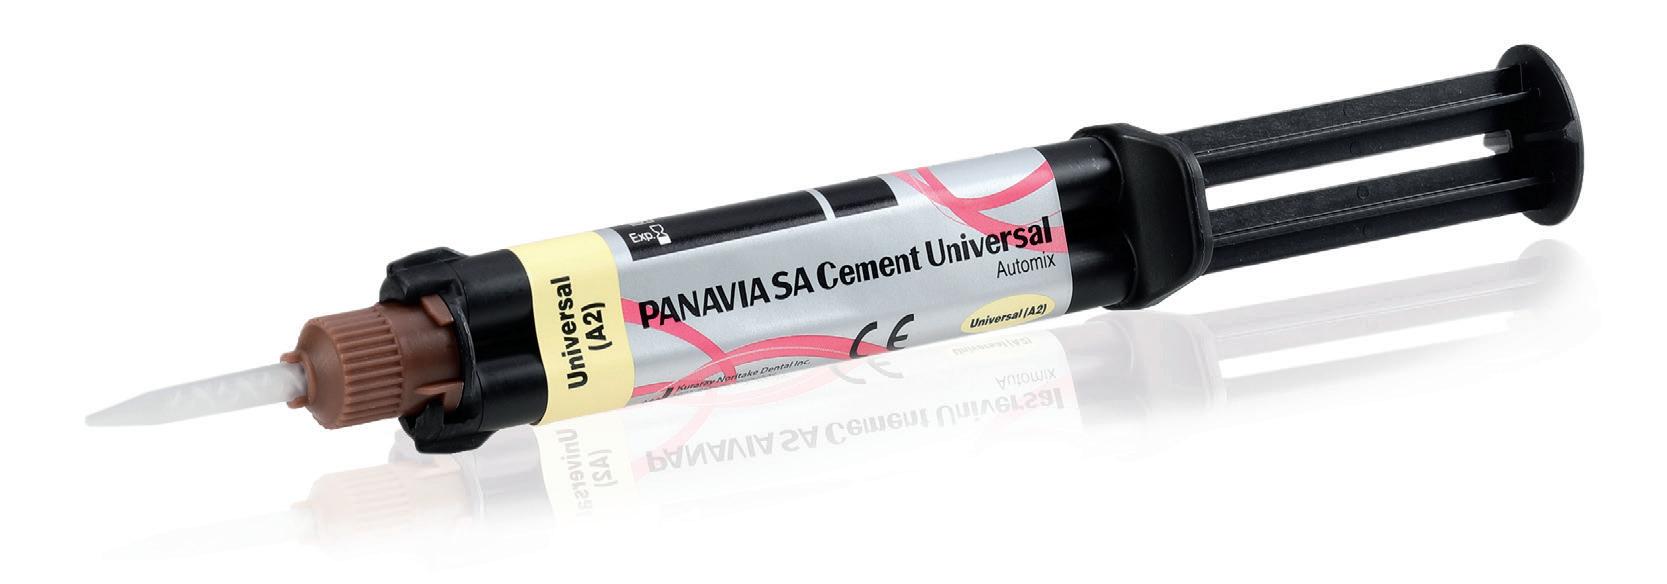
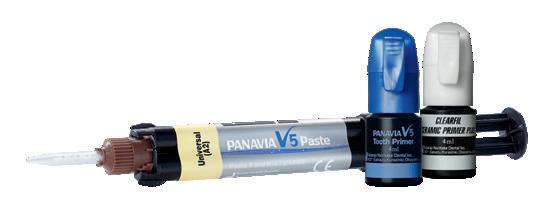
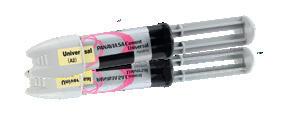
PANAVIA™ V5 is a resin cement system that bonds strongly to various types of prosthetic appliance, as well as to tooth structure. PANAVIA™ Veneer LC, a new resin cement system developed by Kuraray Noritake Dental Inc., has suitable characteristics for bonding laminate veneers, using two types of primer that can be used in common with PANAVIA™ V5.
Here are some clinical examples of its advantages as a resin cement system used for laminate veneers restorations.
Features
At our hospital, we often select laminate veneer restoration among the options for treating cases requiring aesthetic improvement.
There is now a gradual increase toward the the use of laminate veneer restorations made with zirconia, making these a promising choice for consideration, in addition to lithium disilicate glass laminate veneers.
What makes a resin cement suitable for laminate veneer restoration?
Generally, during laminate veneer restoration, a thin shell-like prosthetic appliance is bonded to the surface of the tooth.
This means that, as compared with the resin cements used for prosthetic appliances for crowns, those used for laminate veneer restoration are required to have better flowability, or the characteristic of spreading smoothly, and a paste needs to be easy to shape so as not to displace the prosthesis as it is being fitted on the tooth.
Moreover, laminate veneers are often used for the aesthetic improvement of anterior teeth. Therefore, the resin cement used must provide sufficient working time (stability under ambient light), and excess cement must be easy to remove.
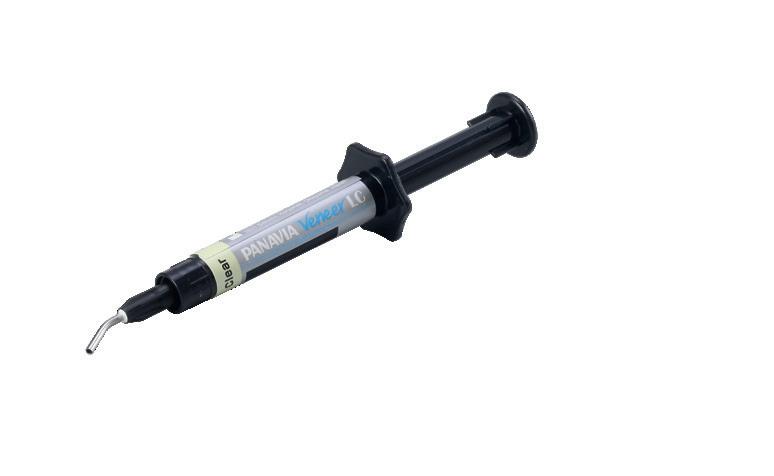
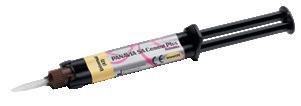
PANAVIA™ Veneer LC
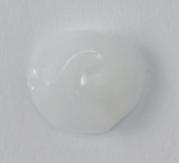
This product is a light-cured resin cement system used for bonding laminate veneers, inlays and onlays that are sufficiently translucent for the purpose.
PANAVIA™ Veneer LC Paste, the main component of the PANAVIA™ Veneer LC system, is heavily loaded with microfillers, to make sure the resultant film is thin and the material is easy to handle.
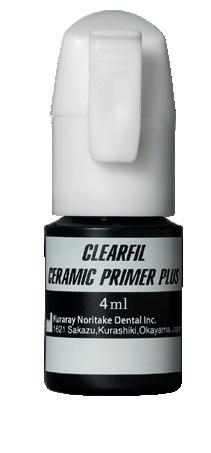
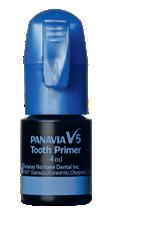
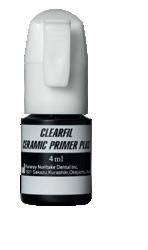
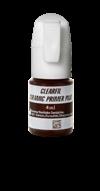
In addition, this resin cement system also includes PANAVIA™ V5 Tooth Primer (an abutment conditioning agent) and CLEARFIL™ CERAMIC PRIMER PLUS (a prosthesis conditioning agent) as standard components, providing a platform common to PANAVIA™ V5.
18 COSMETIC & RESTORATIVE
In recent years, the application and advancement of digital technology in dentistry has made it possible to accomplish the fabrication of highly accurate prosthetic zirconia appliances that were difficult to mill using the previously available technology.
HIGH FILLER LOADING
Spherical silica filler

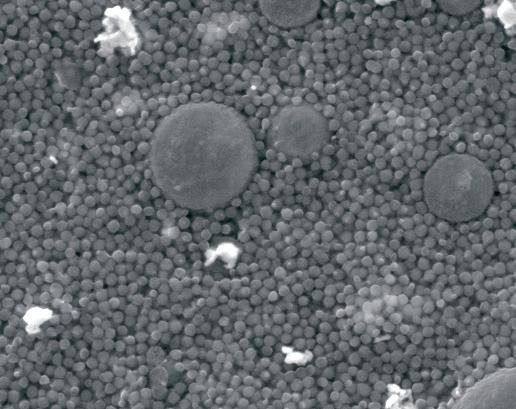
Flow and formability (not runny) combined Excellent polishability & gloss durability
Nano Cluster Filler
Reduction of stringing (Good handling)
Ytterbium trifluoride
Radiopacity
The use of these novel filler types results in an excellent level of polishability and gloss retention as well as easy handling
SIMPLE RESIN CEMENT SYSTEM
PROSTHETIC RESTORATIONS PRE-TREATMENT
ABUTMENT PRE-TREATMENT
LIGHT-CURED TYPE
Laminate veneer restorations for multiple teeth*
PANAVIA™ Veneer LC Paste
Two types of primer are used in common with PANAVIA™ V5 to condition prosthetics and abutments.
DUAL-CURE TYPE
CLEARFIL CERAMIC PRIMER PLUS
PANAVIA V5 Tooth Primer
Available for a wide range of applications
PANAVIA
SPECIFICATIONS
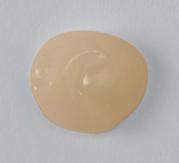
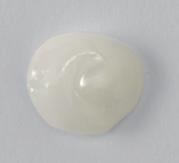
SHADE COMPOSITION
• The same lineup of shades as that of PANAVIA™ V5 (excluding Opaque)
• PANAVIA™ V5 Try-in Paste can also be used.
PANAVIA™ Veneer LC Paste
Clear Universal Bleach Brown
PANAVIA™ V5 Try-in Paste
Clear Universal White Brown
* Those that have a sufficient level of translucency and are less than 2.0 mm thickness
19
COSMETIC & RESTORATIVE
henryschein.com.au
1 μm
Source: Kuraray Noritake Dental Inc. Measurements may vary under different measuring conditions.
1μm
COSMETIC & RESTORATIVE
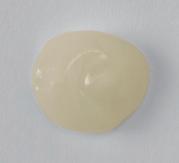
There are not a few cases when a laminate veneer restoration is selected, in order to make a morphological correction while maintaining the colour of the abutment intact. In such a case, it is preferable to select a resin cement that – to the extent possible – has little or no effect on the colour of the prosthesis. PANAVIA™ Veneer LC comes in four shades (Clear, Universal, Brown and Bleach) that are adjusted for the same colours as those of PANAVIA™ V5 (excluding Opaque). PANAVIA™ V5 Try-in Paste, which makes it possible to simulate the colour and film thickness of the final composite cement in the trial-fit stage, can be used with PANAVIA™ Veneer LC resin cement as a try-in paste for laminate veneer restoration. This also makes this product promising as a resin cement for laminate veneer restoration.
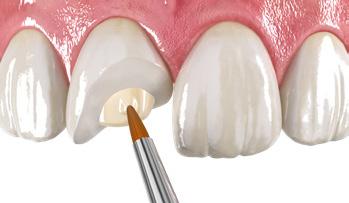
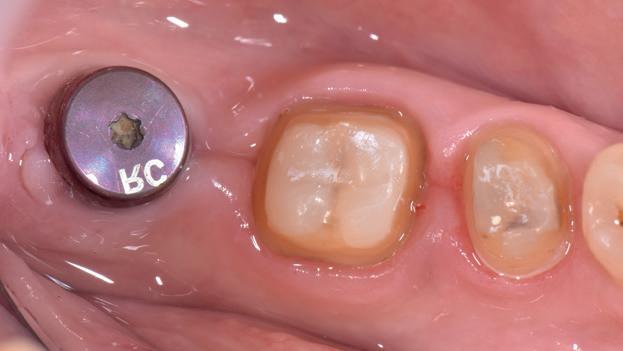
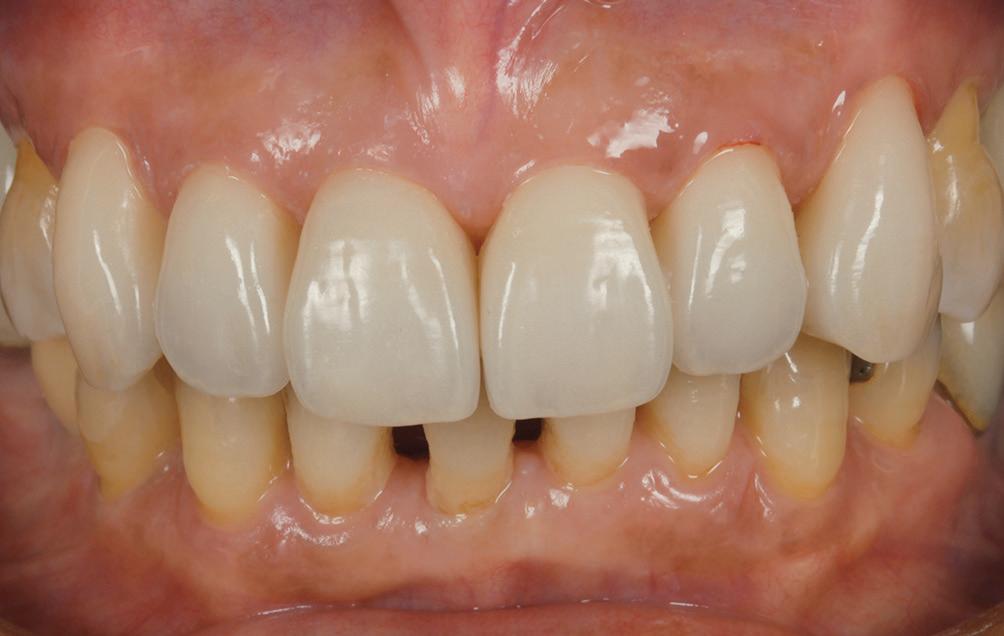
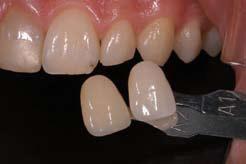
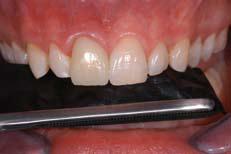
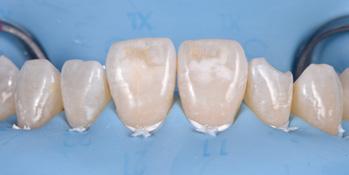
Case Report
At our hospital, we use lithium disilicate glass and zirconia as materials when fabricating laminate veneer restorations. The following case reports are provided to illustrate using PANAVIA ™ Veneer LC as a resin cement, with some technical points explained.
Case 1 by Yohei Sato (DMD, PhD) and Keisuke Ihara (CDT)
Laminate veneer restoration using lithium disilicate glass prosthetic restorations with PANAVIA ™ Veneer LC (clear)
20
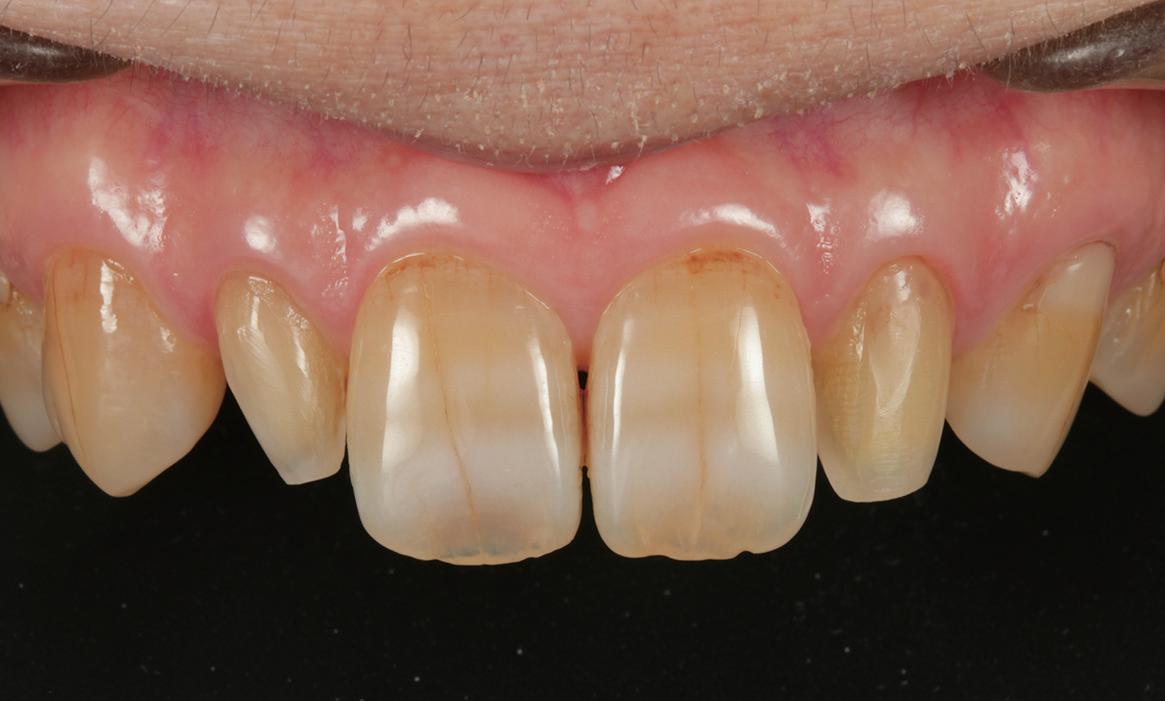
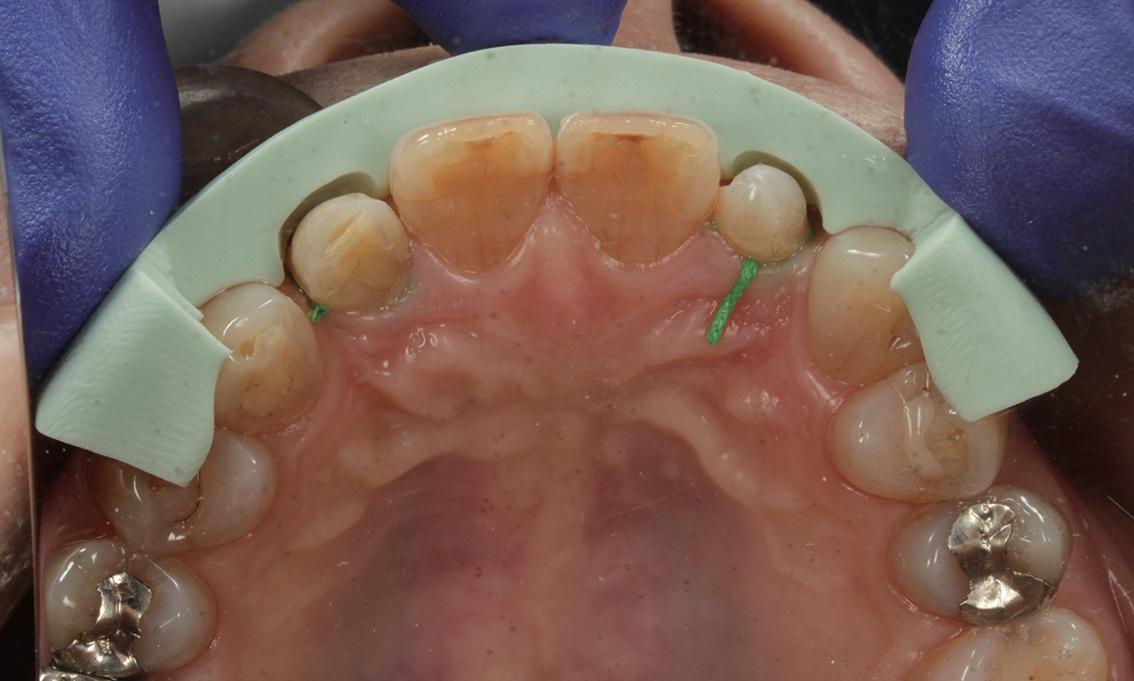
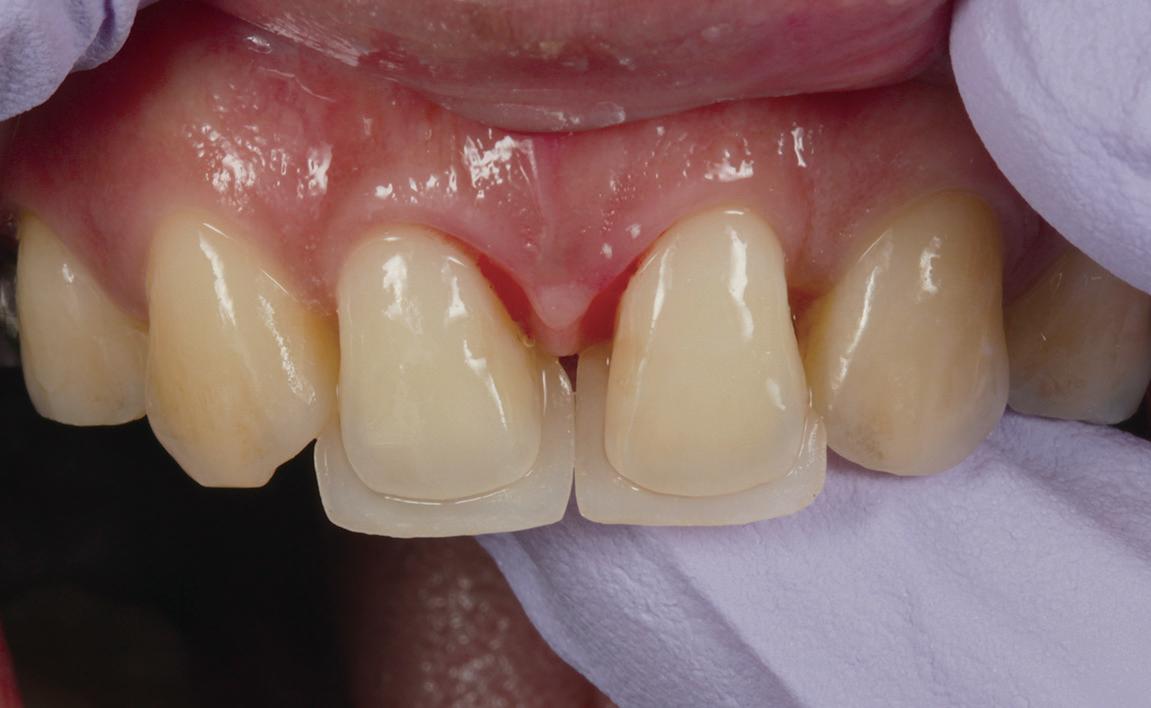
Fig. 1 The patient visited us with a chief complaint of a desire for improved aesthetics of the maxillary right and left lateral incisors.
Fig. 2 A core fabricated from a diagnostic wax model was applied and the necessary clearances were determined.
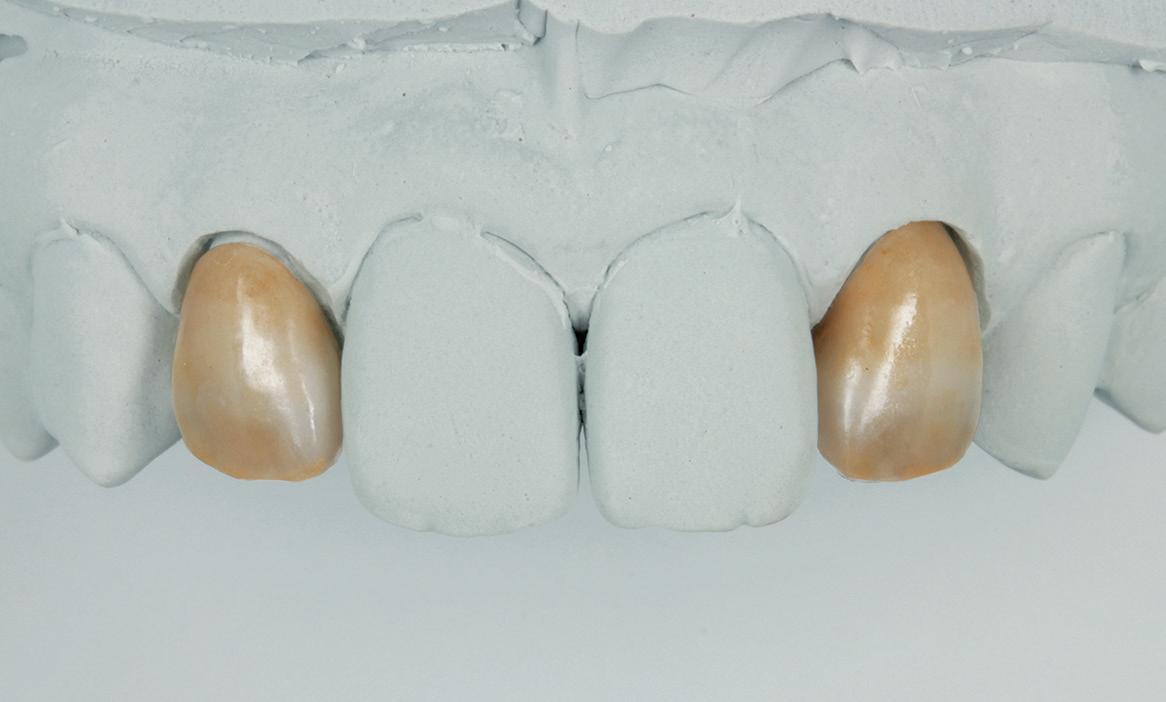
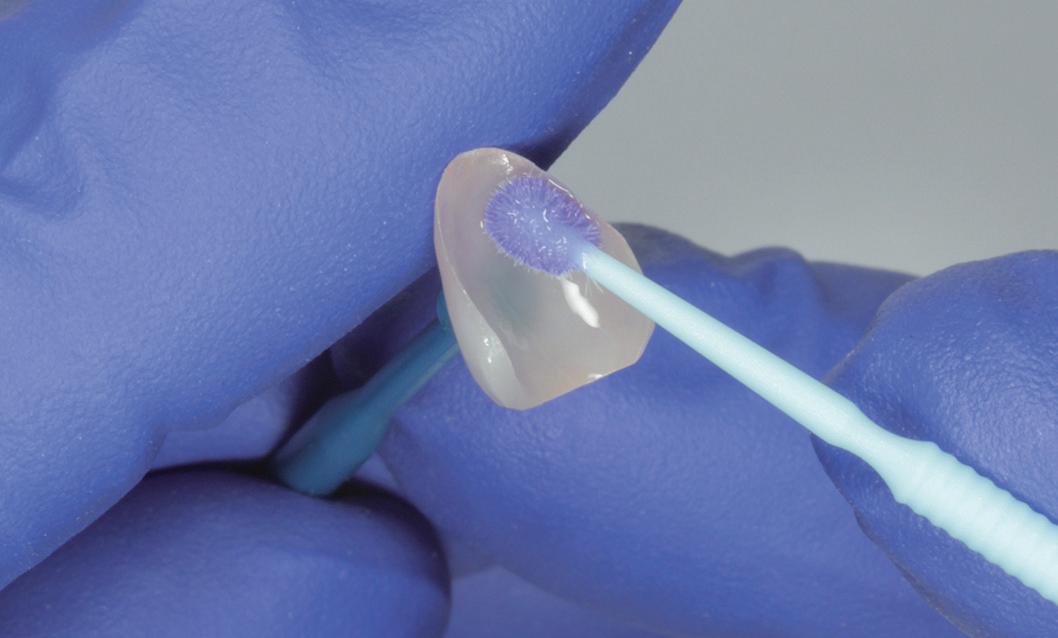
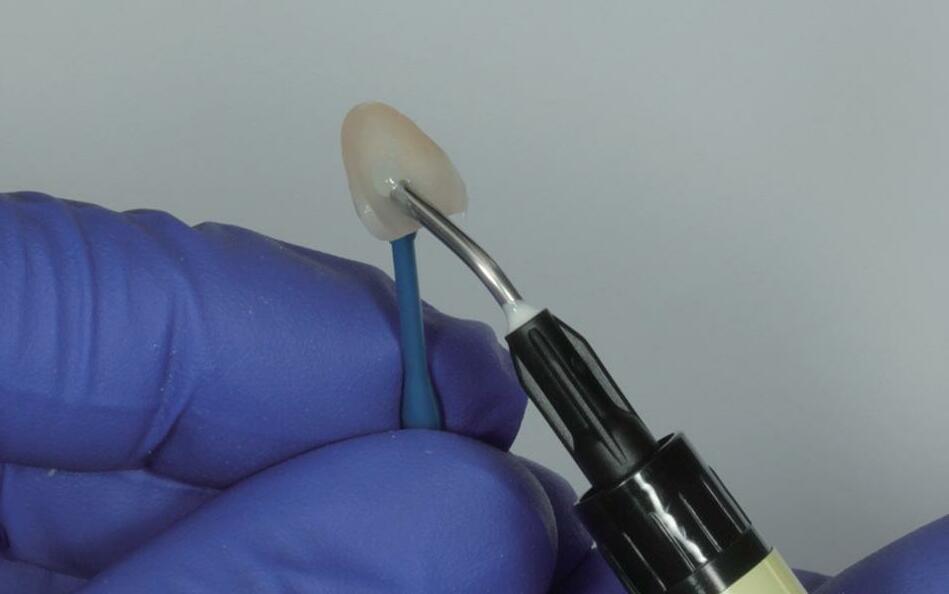
Fig. 5 After a trial fitting, the inner surface of the laminate veneer was cleaned with KATANA™ Cleaner. The inner surface was conditioned according to the prosthesis‘ IFU.
Fig. 6 Milling CLEARFIL™ CERAMIC PRIMER PLUS was applied and dried to silane couple the restoration.
Fig. 3 Since the teeth are microdonts, the preparation of each abutment was completed by simply exposing a fresh surface to be covered by the laminate veneers.
Fig. 4 A layer of porcelain was applied on the lithium disilicate glass substrate, to make a complete laminate veneer.
water-washing and compressed air-drying.

FINAL SITUATION
COSMETIC & RESTORATIVE
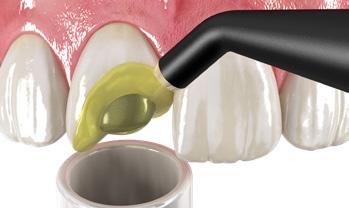
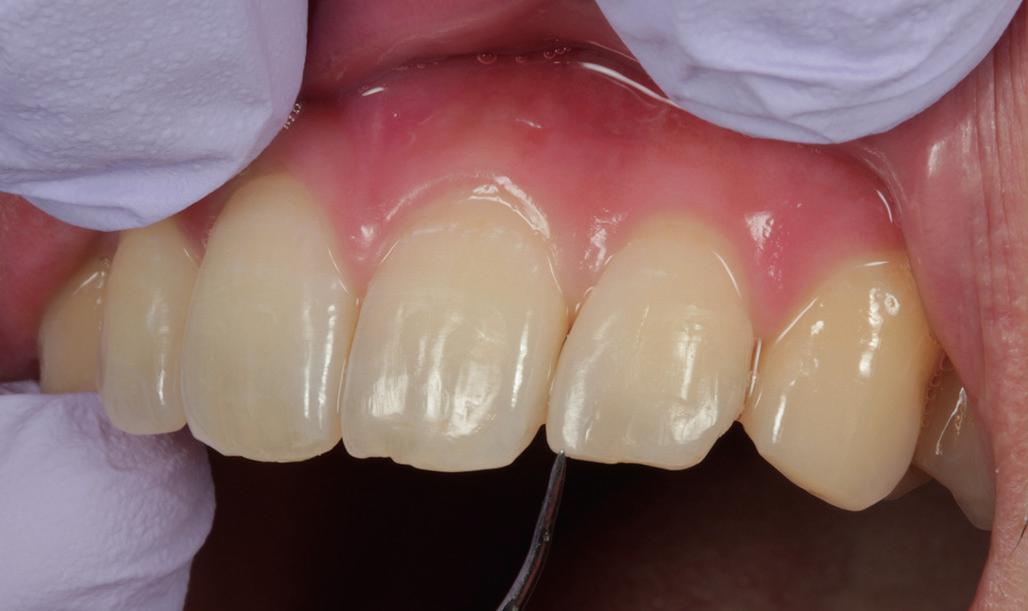
Fig. 7 After a trial fitting, KATANA™ Cleaner was applied to the abutment, and rubbed for more than 10 seconds. Then, it was washed off sufficiently (until the cleaner color had completely disappeared), and dried with compressed air.
Fig. 9 PANAVIA V5 Tooth Primer was applied and left for 20 seconds before compressed-air drying.
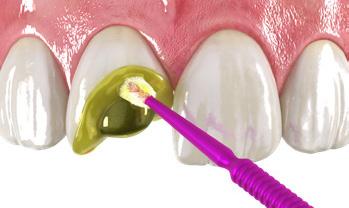
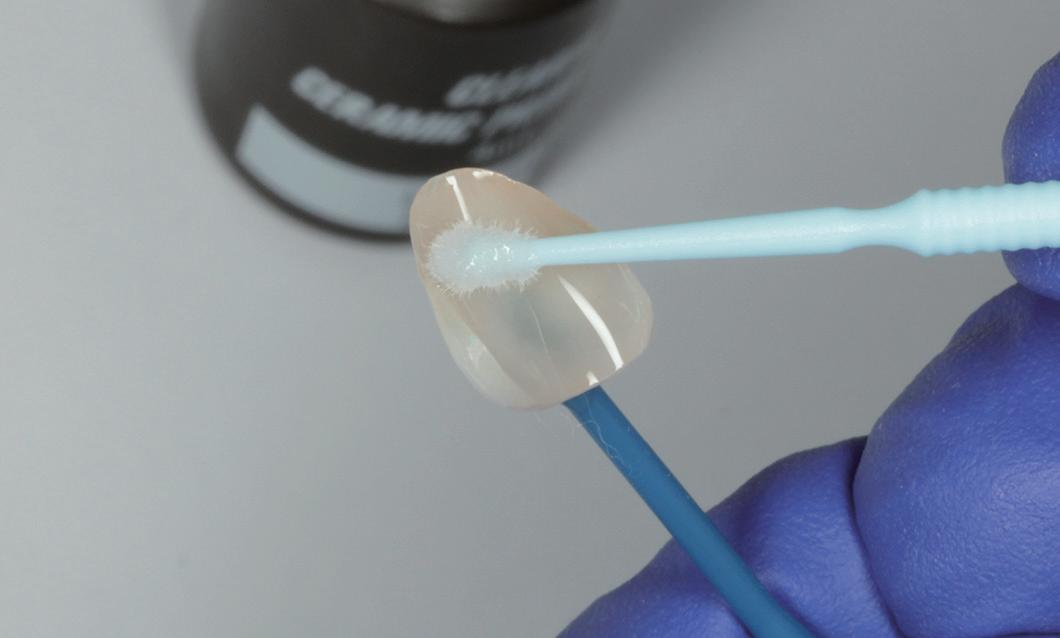
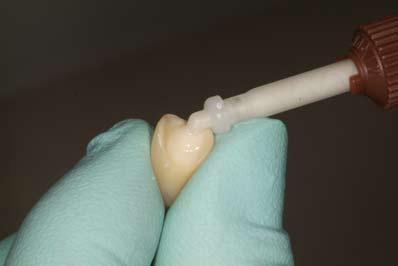
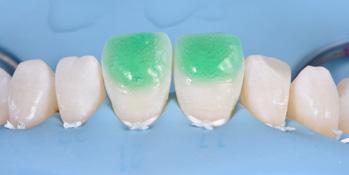
Fig. 10 PANAVIA Veneer LC Paste was applied to the inner surface of the laminate veneer.
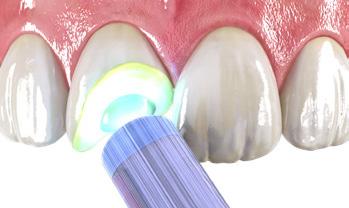
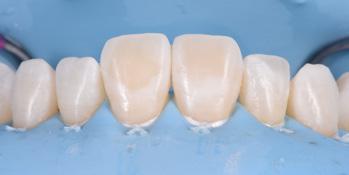
Fig. 11 The laminate veneer was seated and the fit checked. Then, the excess cement was tack-cured (not more than 1 second at any one point) and removed. Finally, the restoration was light-cured and finished.
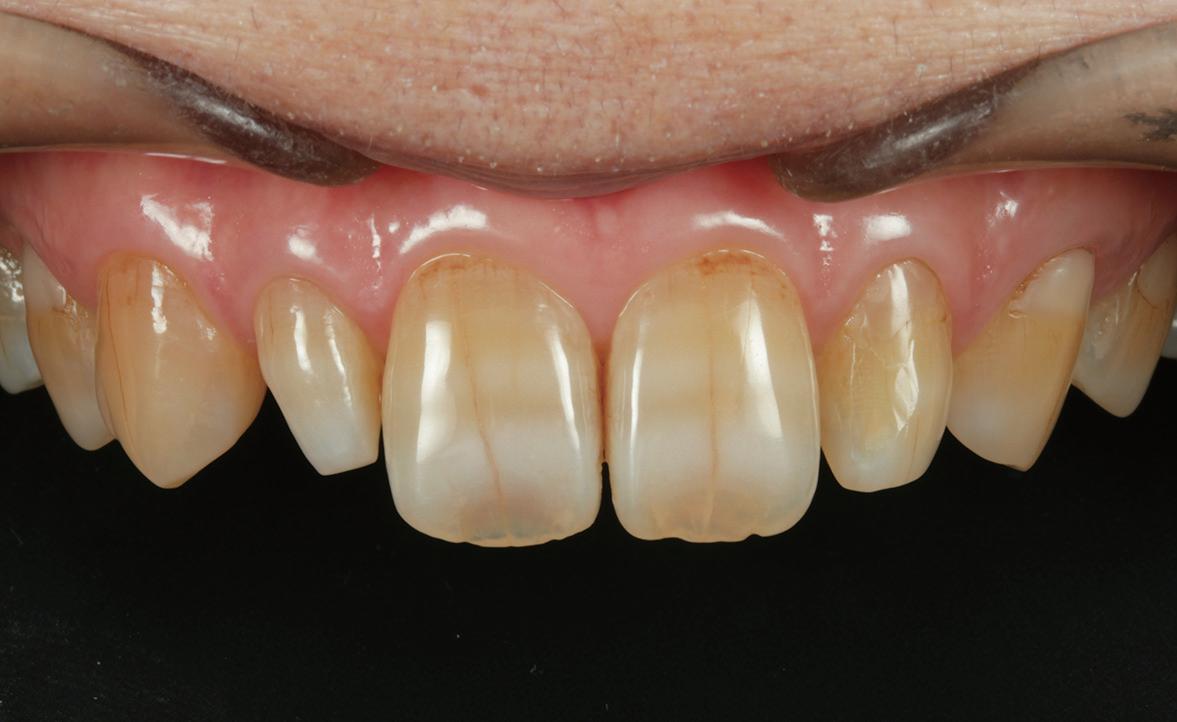
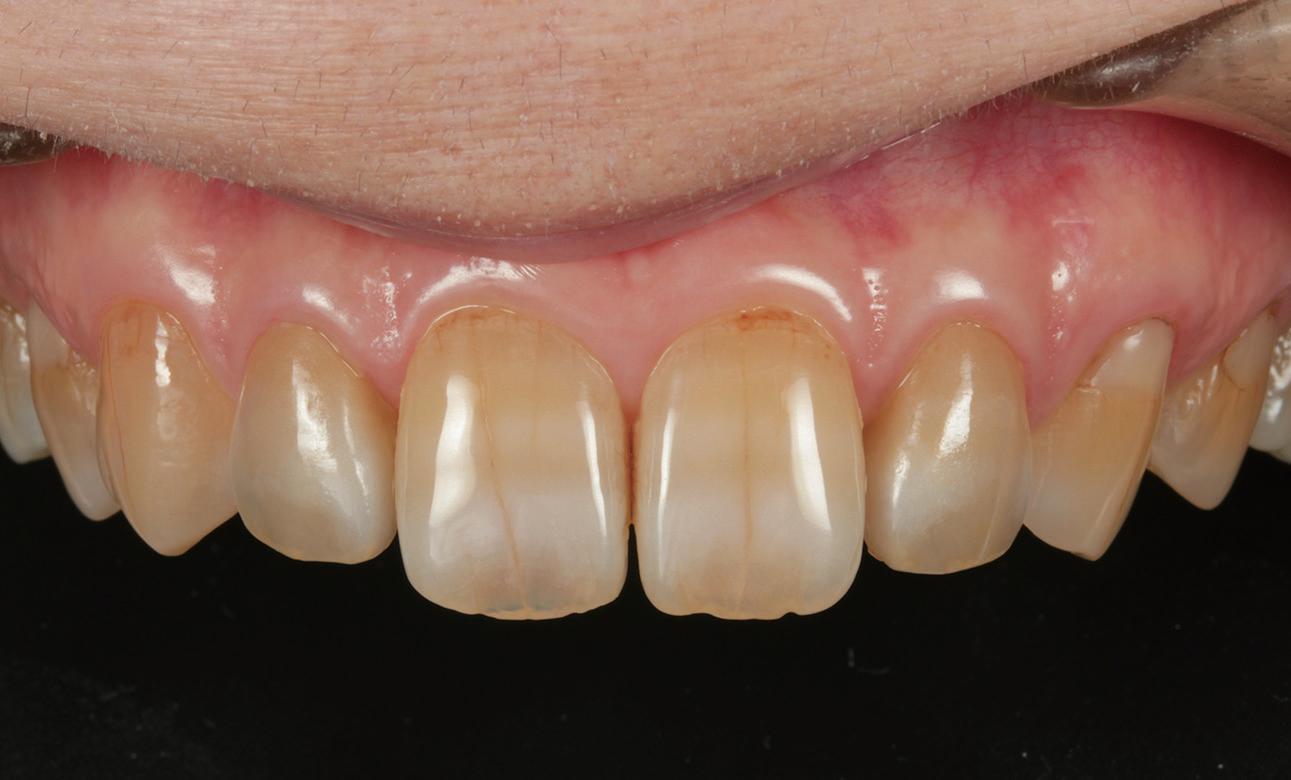
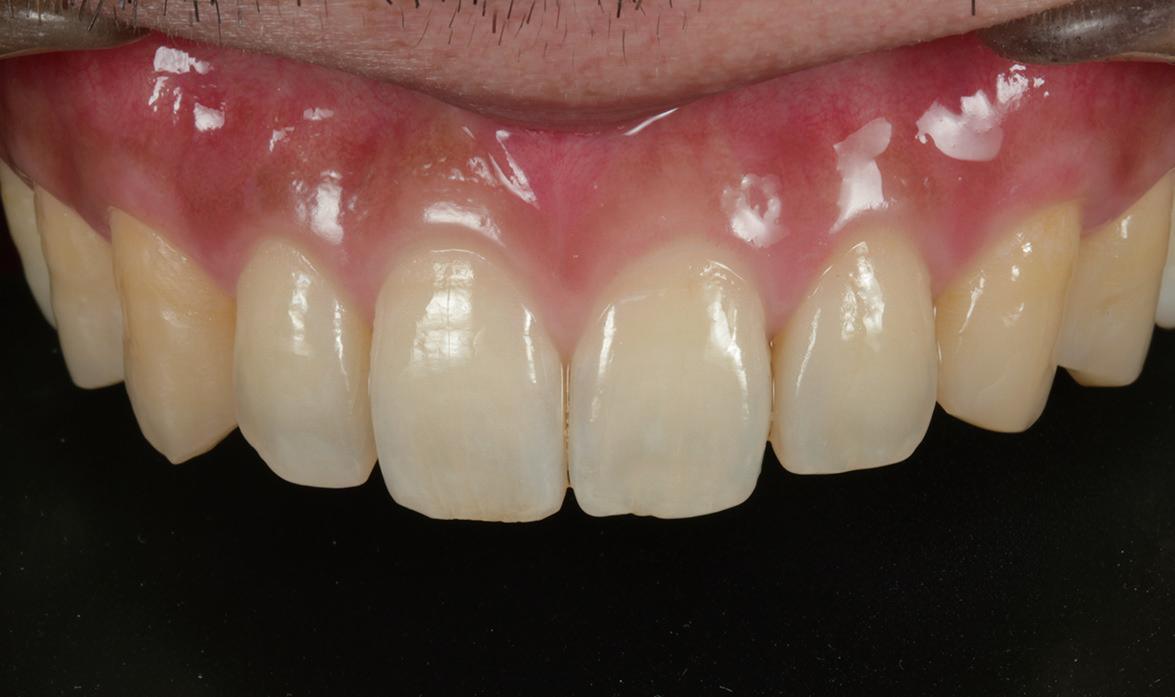
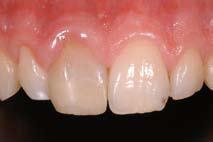
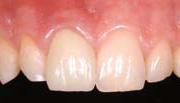
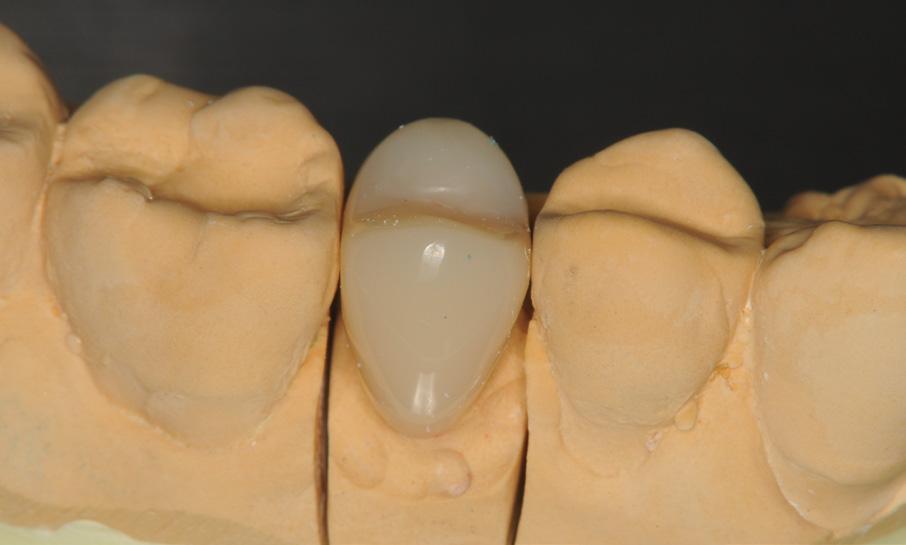
Fig. 12 This photo shows the laminate veneer restorations one month after placement. The morphology and colour of the right and left lateral incisors have been improved, providing a good balance to the entire anterior dentition.
21 1300 65 88 22
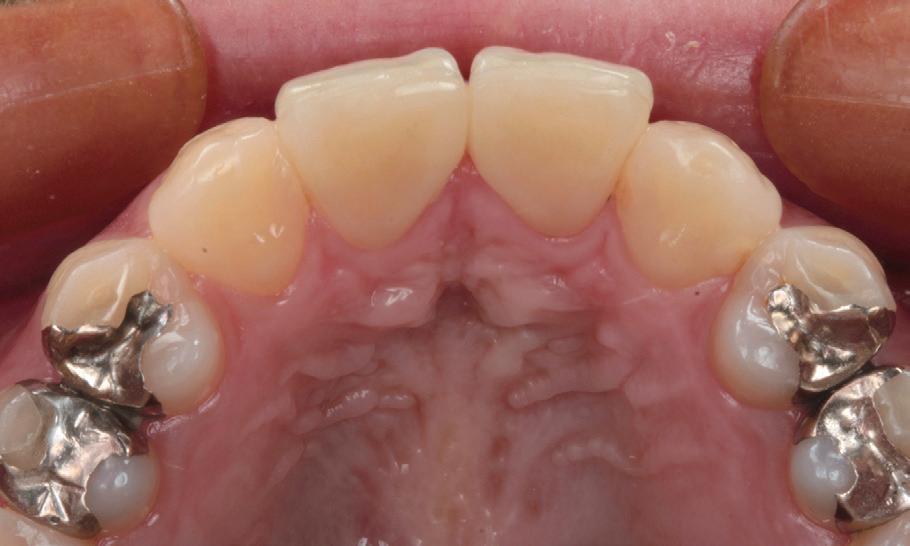
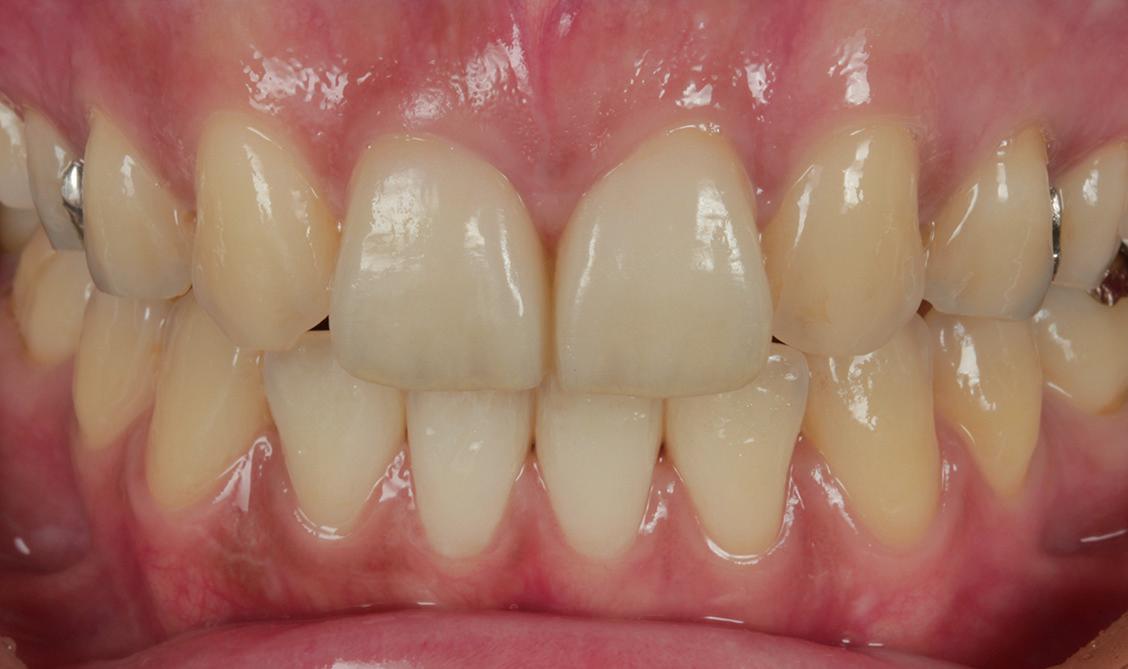
Case 2 by Yohei Sato (DMD, PhD) and Keisuke Ihara (CDT)
Laminate veneer restoration using KATANA™ Zirconia STML prostheses with PANAVIA™ Veneer LC (Clear)
22 COSMETIC & RESTORATIVE
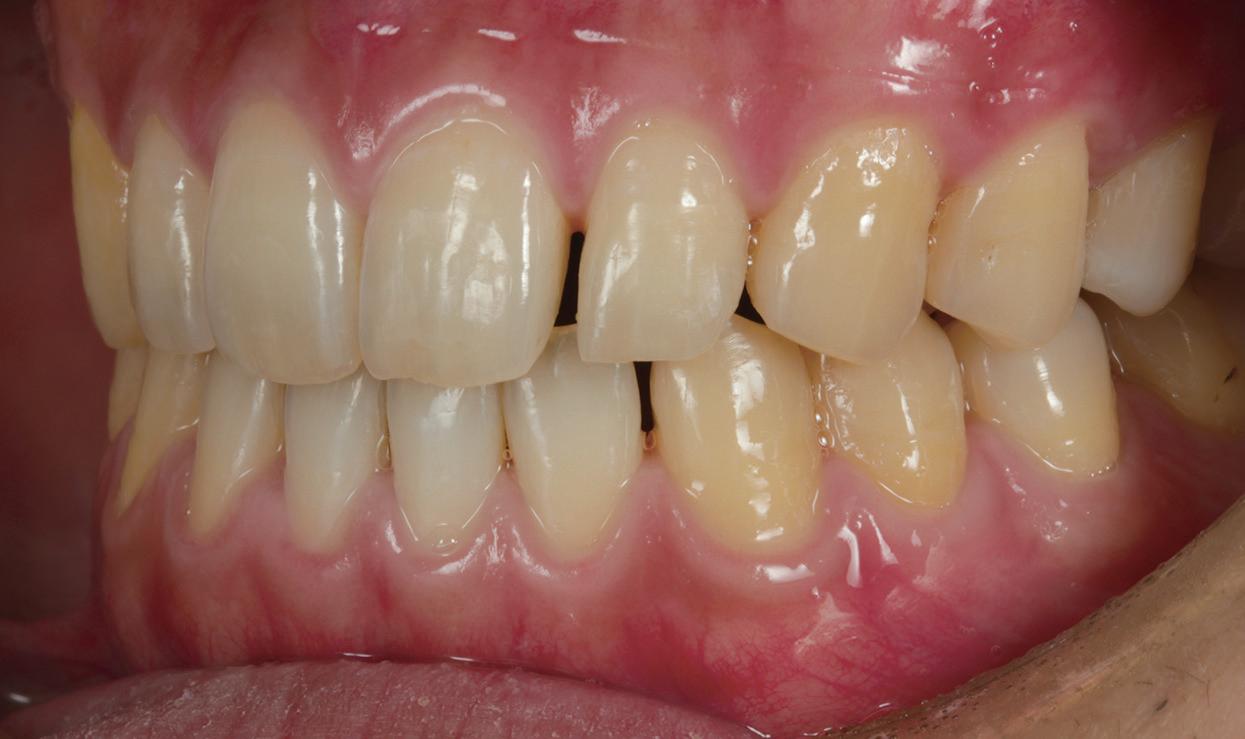
Fig. 1 The patient was referred to our hospital by an orthodontist. The chief complaints were improper aesthetics of the teeth due to black triangles at the edges of the gaps between the teeth and occlusal wear of the teeth.
Fig. 2 On the basis of the pre-treatment diagnosis using a mockup, the abutments were prepared without anesthesia, keeping in mind that the enamel should be preserved to the extent possible.
Fig. 3 Since a fixation retainer was installed on the palate side, it was difficult to take impressions using silicone. Therefore, an intraoral scanner for impression taking was used.
Fig. 4 A layer of porcelain on each of KATANA™ Zirconia STML substrates was applied to complete the laminate veneer restorations. The inner surface of each restoration was sandblasted, being careful to prevent chipping.
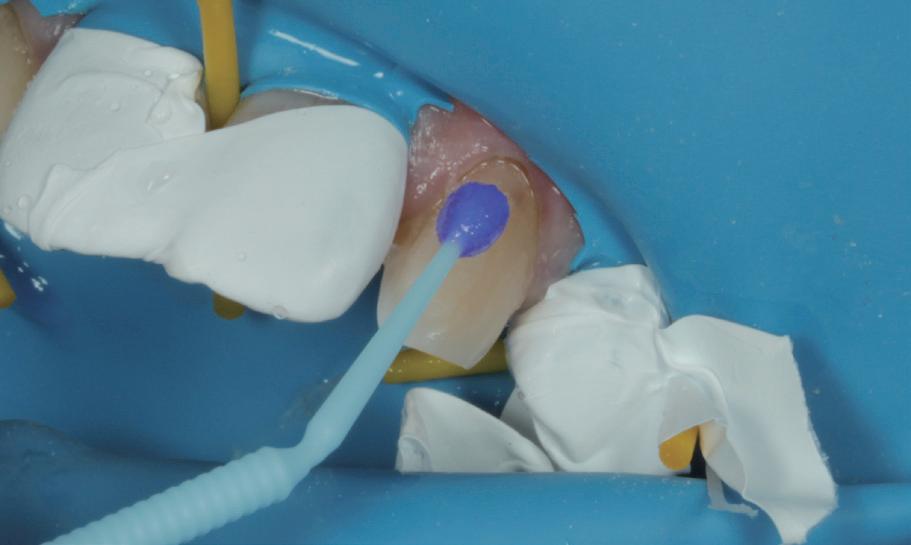
Fig. 5 After trial fitting, bonding inhibiting substances as blood and saliva were removed using KATANA™ Cleaner.
Fig. 6 Milling CLEARFIL™ CERAMIC PRIMER PLUS, which contains the phosphoric ester monomer MDP, was applied and dried using compressed air.
23 henryschein.com.au
Fig. 12 The photo shows the inside of the oral cavity one month after the fitting of the laminate veneer restorations. It can also be noted that the teeth’s marginal gingiva has been improved, thanks to the good fit of the laminate veneer restorations.
Fig. 8 PANAVIA™ V5 Tooth Primer was applied and left for 20 seconds, then dried with compressed air.
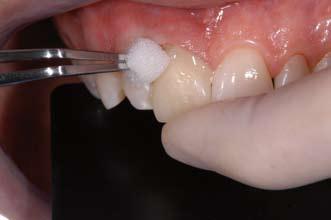
Fig. 9 PANAVIA™ Veneer LC Paste was applied and the laminate veneer was seated. For this case, we treated six teeth during one session.
Fig. 10 The unpolymerized excess paste was removed with a brush. PANAVIA™ Veneer LC Paste is a light-cured type, which was designed to provide sufficient working time.
COSMETIC & RESTORATIVE
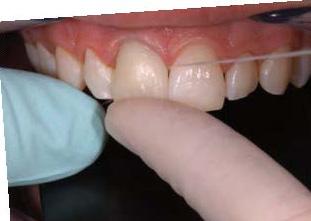
Fig. 11 This photo shows the results after the final light curing. Since the excess cement was easily removed, there were almost no cement residues.
FINAL SITUATION
Case 3 by Yohei Sato (DMD, PhD) and Keisuke Ihara (CDT)
Laminate veneer restoration using silica-based ceramics with PANAVIA™ V5 (Clear)
Case 4 by Yohei Sato (DMD, PhD) and Keisuke Ihara (CDT)
Laminate veneer restorations using lithium disilicate glass with PANAVIA™ V5 (Clear)
24 COSMETIC & RESTORATIVE
Fig. 1 The maxillary left lateral incisor is a microdont and there is a void on its mesial side.
Fig. 2 In order to fill the mesial void, a veneer was suggested. Such veneer was cemented with PANAVIA™ V5.
Fig. 3 The photo shows the veneer 4 years after cementation. Due to appropriate post-operative maintenance, excellent aesthetics have been maintained, with no discoloration at the cement line.
Fig. 1 The maxillary right and left lateral incisors had been brought into contact with the central incisors by an orthodontist. A set of sandwich veneers consisting of two veneers that covered the labial and palatal surfaces of each lateral incisor were fabricated.
Fig. 2 The photo shows the sandwich veneers 2 years and 6 months after cementation. The aesthetic appearance of the veneers is just as fine as when they were first cemented.
Fig. 3 The occlusal surfaces of the restorations 2 years and 6 months after cementation. The cement line is also visually unobtrusive.
Laminate veneering is one of the most sensitive restoration techniques among bonding operations.
As indicated in these case reports, it is absolutely necessary to perform the procedures in a reliable and accurate manner, including adequate tooth preparation and moisture control for strong bonding, securing the prosthetic appliances to the tooth structure, and removing excess cement.

We have been using PANAVIA™ V5 as a resin cement for almost all crown restoration cases, with good results. This indicates that we think it is a highly reliable cement (i.e., especially as shown by cases 3 and 4). It is particularly important, when fitting partial veneers that include additional veneers and laminate veneers for multiple teeth, to place the restoration in the correct position before a dual-cure cement begins to polymerize. Therefore, these treatments require a considerable level of concentration and speed.
Using laminate veneers to treat multiple teeth may sometimes require dividing the number of teeth to be treated at one time into smaller groups (that is, using divided sessions) due to complicated cementation procedures involved.

However, if the surface of a tooth adjacent to where a laminate veneer is planned to be fitted during the next session is contaminated with excess cement, this could have an adverse effect on the subsequent restoration placement. Therefore, we tend to try to fit all the restorations at one time, if possible. PANAVIA™ Veneer LC, developed by Kuraray Noritake Dental Inc., features the provision of
sufficient working time, making it possible to seat laminate veneers over multiple teeth without stress. In addition, we can also use the same primers as are used for PANAVIA™ V5, so there is no need to change the current cementation systems substantially and this is more economical. Because this is a light-cured system, it is necessary to take translucency into account, but it does cover almost all types of material and the thickness range of ordinary laminate veneers.
The cement paste also has a fine consistency, almost completely eliminating the stress we used to experience during every previous laminate veneer treatment, such as having difficulty seating the restoration accurately and rushing to remove excess cement. It is expected that PANAVIA™ Veneer LC will become the resin cement of choice for laminate veneer restorations. This product is a light-cured resin cement. Therefore, its Instructions for Use contains this precaution: “The product should be used only for restorations that are less than 2.0 mm thickness and of sufficient translucency.” to permit light penetration for curing purposes. In addition, prior to using this product, it is also necessary to check its use conditions, including the usable prostheses, the prosthesis thickness that can be accommodated and the light-curing conditions, when using it for the restoration of metal oxide ceramics, such as zirconia.
Generally, for zirconia laminate veneer restoration, the usable prosthesis thickness is set to less than 1.2 mm. Therefore, this product is appropriate for such a clinical use.
COSMETIC & RESTORATIVE
RESTORATION TYPE AND SHADE Maximum restoration thickness TYPE OF CURING LIGHT (Light intensity) High-intensity BLUE LED (> 1500 mW/cm2) BLUE LED (1000~1400 mW/cm2) Halogen lamp (> 400 mW/cm2) Laminate veneer Curing time Silica-based ceramic (e.g. conventional porcelain, lithium disilicate) BL shades, A1, A2, A3, A3.5, B1, B2 2.0 mm Three times for 3 sec. or Twice for 5 sec. 10 sec. 20 sec. Other shades 20 sec. Hybrid ceramic, composite resin All shades KATANA™ Zirconia STML/UTML/YML, KATANA™ Zirconia Block STML 1.2 mm Inlays, onlays Curing time Silica-based ceramic, hybrid ceramics, composite resin All shades 2.0 mm Three times for 3 sec. or Twice for 5 sec. 10 sec. 20 sec. KATANA™ Zirconia STML/UTML, KATANA™ Zirconia Block STML 1.2 mm Shade and Depth of cure Universal (A2), Clear, Brown (A4) 1.5 mm White 1.0 mm
YOHEI SATO, DMD, PhD Department of Removable Prosthodontics, Tsurumi University School of Dental Medicine, JAPAN
25 1300 65 88 22
KEISUKE IHARA, CDT i- Dental Lab, JAPAN
THE MONOBLOCK TECHNIQUE
A REVOLUTION IN ADHESIVE DENTISTRY?
A composite cement with an integrated bonding system that can also be used as a core build up material has been a long-awaited dream in restorative dentistry.
According to standard practice today, 3 to 4 different materials, which are often from different manufacturers, are required for bonding to dentin and enamel, fabricating composite core build ups, and adhesive cementation. Since modern composite materials in dentistry are still based on methacrylate, combining materials – for example, a bond from one manufacturer with the composite of another – is often not a problem. Nevertheless, it would be desirable to have one integrated system available.
Coltène/Whaledent has recently developed a dualcuring composite material that can be used as a cement as well as a core build up material (ParaPost Para- Core Automix 5 ml). A chemical curing dentin bonding agent, which is compatible with the material, is also available (ParaBond consists of a Non-Rinse Conditioner and Adhesive A & B, which requires mixing before application; and is why it is defined as a two-step bonding system). ParaBond and ParaCore can be used for: 1. adhesive cementation of a root canal post, 2. fabrication of a core build up, and 3. adhesive cementation of a permanent restoration. Coltène/Whaledent describes this time-saving application as the “Monoblock Technique.”
The ParaBond/ParaCore System demonstrated excellent sealing against marginal microleakage, which
indicates good to very good clinical viability 20.
The Monoblock Technique is particularly suitable when light-transmitting, metal-free root canal posts are used with endodontically-treated teeth that will be fitted with a crown. Root canal posts provide greater retention of the core build up, and distribute masticatory forces along the interface of the residual tooth structure 3, 10, 17. The use of metal-free root canal posts prevent the greyish translucency at the gingival margin caused by the light reflexion from metal root canal posts.
Publications regarding the use of root canal posts recommend that any further weakening of the residual tooth structure caused by the use of a post should be avoided as much as possible. Root canal posts are primarily indicated whenever there is over 50% loss of tooth structure. The smallest diameter of root canal post should always be used to ensure that there is no overloading of the abutment tooth by the final restoration 4 , 5, 13, 19.
From an aesthetic point of view, preference should be given towards the use of a glass fibre reinforced or ceramic root canal post; in which a direct core build up is generally fabricated during the same appointment. Ceramic root canal posts can however also be combined with a ceramic core using the indirect technique.
26
Fig. 1: Preoperative clinical situation
Fig. 2: Sufficient root canal filling
Fig. 3: Shade selection by the dental technician
COSMETIC & RESTORATIVE
There are conflicting opinions regarding the necessary properties for root canal posts and core build up materials. Some authors stipulate that root canal posts and dentin should have a similar modulus of elasticity 1, 2, 9, 14, whereas others claim that the rigidity of root canal posts will increase the service life expectancy of the post 1, 15. Neither theory is supported by adequate clinical studies. In regards to direct core build up materials, amalgam is far superior in terms of its strength and dimensional stability, although it has definite disadvantages, such as discoloration of the tooth structure due to corrosion, which rules out its use in the anterior region. Composites have a high flexural strength, while glass ceramics appear to be very suitable for fabricating a core build up in the anterior region 20.
Glass fibre reinforced root canal posts
According to a recently released meta analysis 6, prefabricated glass fibre reinforced and ceramic root canal posts failed more quickly than custom casted, metallic root canal posts. However, the failure pattern of the prefabricated glass fibre reinforced root canal posts was significantly more favourable than prefabricated or custom cast metal posts. It can be concluded from these and other results based on in vitro studies 7, 11, 18 that glass fibre reinforced root canal posts are highly suitable for clinical use.
Initial clinical data supports this supposition 8. Although the radiopacity of glass fibre reinforced root canal posts still needs improvement, retreatment in the case of a fracture or an endodontic emergency can be completed without any problem.
Unfortunately, there are still no relevant long-term studies; and a projection of the clinical behaviour based on the in vitro results should be treated with caution.
Clinical case presentation
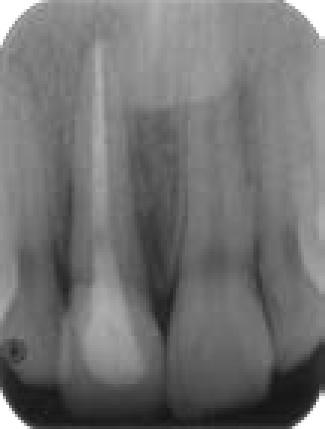
A 19 year-old patient was seeking an aesthetic improvement in the upper right central tooth (Fig. 1). During the clinical examination a horizontal fracture line was detected on the labial aspect of the tooth, which ran approx. 4 mm coronally to the gingival margin (Fig. 1).
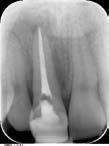
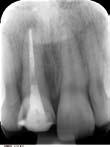
In addition, the mesiodistal width was 1 mm less compared to tooth 21. The gingival zenith of teeth 11 and 21 were at the same level. A sufficient root canal filling on tooth 11 was visible on the radiograph (Fig. 2).
There were two alternative treatment options: insert a glass fibre reinforced root canal post and crown the tooth with an all-ceramic restoration; or perform internal bleaching and insert a glass fibre reinforced post without fitting a crown. The patient agreed to the first treatment option. The tooth shade was selected using a standardized shade guide (Fig. 3).
A glass fibre reinforced root canal post was then fitted, adhesively cemented and a direct core build up fabricated using the ParaBond/ParaCore System (Fig. 4 – 28).
A dental radiograph was taken afterwards to check the post (Fig. 29).
27 henryschein.com.au
Fig. 7: Tooth with the old restoration removed and exposure of the root canal filling
Fig. 4: Preoperative clinical situation with a latex rubber dam
Fig. 8: Removal of the root canal filling at the entrance of the root canal using a Diatech diamond FG 850L 016 12ML
Fig. 9: Removal of the root canal filling and preparation of the root canal using a Gates 1 + 2
Fig. 5: Preoperative clinical situation with a Roeko rubber dam clamp for the anterior teeth
Fig. 6: Removal of the old restoration using a Diatech diamond FG 850L 016 12ML
COSMETIC & RESTORATIVE
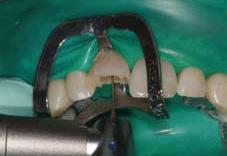
The tooth was then prepared. The sulcus was widened using the double cord technique. The double mix technique using an addition-cured silicone was used for taking the impression (Fig. 30 – 37). In this case, AFFINIS PRECIOUS was selected, which features optimal surface affinity. This property ensures that the correction material covers the tooth surfaces immediately, even in a moist environment; and is therefore crucial for producing accurate impressions. Silver pigmentation allows excellent detail readability for assessing the quality of the impression. A direct temporary restoration was then fabricated and fitted using a silicone-based temporary cement (Fig. 38 + 39). 10 days later, the condition of the soft tissue was excellent (Fig. 40–43).
Conclusion
The emergence profile of the completed glass ceramic crown was very successful and corresponds well with the adjacent tooth (Fig. 44).
Following permanent adhesive cementation using the ParaBond/ParaCore System, the glass ceramic crown had a very acceptable length-width ratio; and the surface texture as well as the reflexion lines were an excellent match to the adjacent tooth. The gingival zenith and formation of the central papilla were highly satisfactory (Fig. 45 – 59).
Seven days after the crown was permanently fitted, the adjacent teeth were rehydrated again and exhibited a harmonious shade match with the restored tooth (Fig. 60). An excellent marginal seal was confirmed on a follow up radiograph (Fig. 61).
The Monoblock Technique using ParaBond and ParaCore saves time and material; and is very versatile in an important area of restorative dentistry.

28
Fig. 10: Removal of the root canal filling and preparation of the root canal using a Moser 1-3
Fig. 11: The tooth is then prepared using ParaPost drills in sequentially larger sizes until the predetermined diameter and depth is achieved.
Fig. 12: Trial placement of the ParaPost Fiber Lux
Fig. 16: Non-Rinse conditioner is massaged into the root canal and onto the con tact surface for 30 seconds
Fig. 17: Excess Non-Rinse conditioner is removed from the root canal using a sterile paper point
Fig. 18: The tooth is then dried for 2 seconds using a gentle air stream
Fig. 13: Seated ParaPost Fiber Lux Fig. 14: Irrigation of the root canal with sodium hypochlorite
Fig. 15: Drying of the root canal with sterile paper points
COSMETIC & RESTORATIVE
29 1300 65 88 22
Fig. 19: The adhesive A+B, mixed to a 1:1 ratio, is left in the root canal and on the contact surface for 30 seconds
Fig. 20: Removal of excess adhesive from the root canal using a sterile paper point
Fig. 21: The tooth is then dried for 2 seconds using a gentle air stream
Fig. 22: Application of ParaCore core & resin cement directly into the root canal using the root canal tip
Fig. 23: Untreated ParaPost Fiber Lux Post is pre-coated with ParaCore and cemen ted into the root canal
Fig. 24: Removal of excess ParaCore
Fig. 25: Translucent ParaPost Fiber Lux Post is light cured for 20 s using the Coltolux LED to fixate it into place
Fig. 26: Free-hand core build up using ParaCore core & resin cement
Fig. 27: The core build up is then contoured manually.
Fig. 28: Each side of the core build up is polymerized for 20 seconds
Fig. 29: Radiograph after cementation of the post
Fig. 30: A Comprecord retraction cord size 0 is placed
Fig. 31: Preparation of the tooth using different types of Diatech diamonds
Fig. 32: Completed tooth preparation
COSMETIC & RESTORATIVE
Fig. 33: Closed gingival sulcus


30
Fig. 34: Second retraction cord for gingival compression
Fig. 35: Removal of the second retraction cord
Fig. 36: Open gingival sulcus before taking the impression
Fig. 46: Comprecord retraction cord in the sulcus
Fig. 47: The restoration is tried in again with the retraction cord in place to ensure for an accurate fit
Fig. 48: The inside of the restoration is etched…
Fig. 43: Prepared tooth before placement of the permanent restoration
Fig. 44: Trial placement of the permanent restoration
Fig. 45: The gingiva is slightly compressed using a retraction cord to ensure for optimal cementation
Fig. 37: Double mix impression using AFFINIS heavy body and AFFINIS PRECIOUS light body
Fig. 38: Trial placement of the temporary restoration fabricated using CoolTemp Natural
Fig. 39: Temporary restoration is cemented using TempoSIL 2
Fig. 40: Removal of the temporary restoration at the second appointment
Fig. 41: Prepared tooth and healed gingiva
COSMETIC & RESTORATIVE
Fig. 42: The prepared tooth is cleaned using a fluoride-free cleaning paste


31 henryschein.com.au
Fig. 49: … and silanized – always according to the manufacturer’s instructions
Fig. 50: The non-rinse conditioner is massaged in for 30 seconds
Fig. 51: The non-rinse conditioner is dried using a gentle stream of air
Fig. 52: The mixed adhesive is applied onto the prepared tooth and left for 30 seconds
Fig 53: The adhesive is dried for 2 seconds using a gentle stream of air
Fig. 54: The Root Canal Tip can be shortened using a scalpel for easy extrusion
Fig. 55: ParaCore is applied directly into the crown
Fig. 56: Initial removal of the excess cement using a sponge pellet
Fig. 57: Removal of excess cement interproximally using dental floss
Fig. 59: Occlusion is checked using Hanel articulating paper
Fig. 60: Postoperative clinical situation
Fig. 58: ParaCore can be chemically cured or light cured
View products used in this article CLICK HERE References CLICK HERE COSMETIC & RESTORATIVE
Fig. 61: Postoperative radiograph
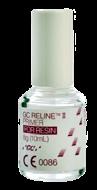
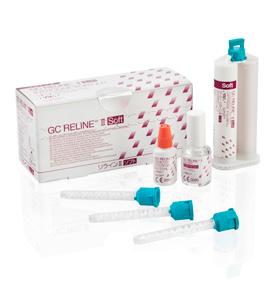
GC RELINE II SOFT AND EXTRA SOFT
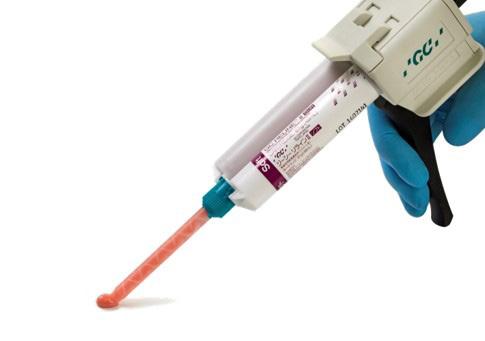
SOFT SILICONE RELINING MATERIALS IN CARTRIDGE DELIVERY
Irritation, extractions or implant placement will lead to changes in soft and hard tissues and it will be needed to adapt the dentures to those new local conditions.


Because elderly patients are getting healthier and stay active longer, they want to be able to continue smiling, speaking and enjoying eating at all times; even when wearing dentures. Reline II Soft and Extra Soft from GC have been designed to create a soft layer between the denture and the mucosa which will maintain comfort and function for weeks and up to several months.
Straightforward application & handling, throughout the entire procedure

32
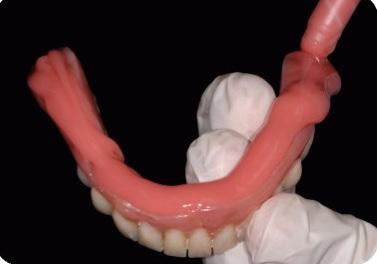
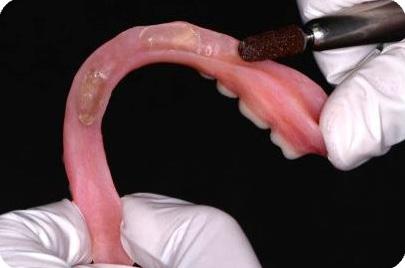
2. Relieve the area to be relined and roughen the surface.
1. Initial denture, to be relined following the placement of 4 implants.
3. Apply GC RELINE II Primer on the area to be relined. Gently dry with air.
5. Apply GC RELINE II (Extra) Soft. Working time is 2’00”.
4. Easy cartridge delivery.
6. Seat the denture in the mouth and muscle trim. Retain in situ for 5’00”.
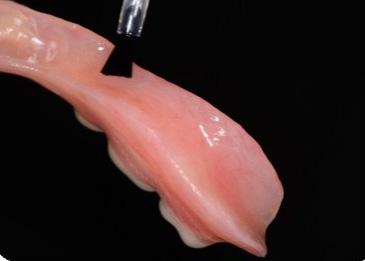
8. Finish with GC RELINE II WHEEL FOR FINISHING.
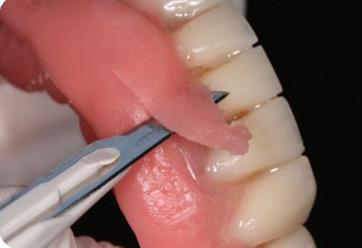
7. Remove the excesses using a scalpel or scissors. Trim with GC RELINE II POINT FOR TRIMMING.
CLICK HERE Fit and comfort for an active life RELINE II Soft & II Extra Soft from GC Soft silicone relining materials in cartridge delivery Download the product brochure COSMETIC & RESTORATIVE
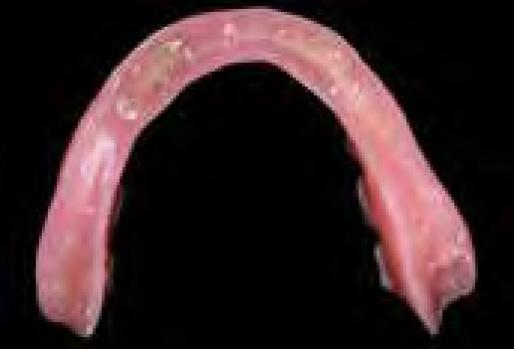
9. Relined denture.
INFILTRATION OF ENAMEL DEFECTS
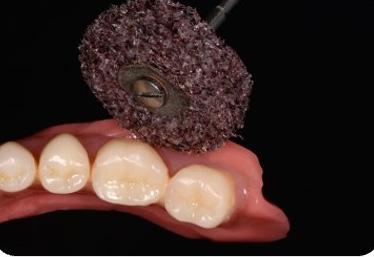
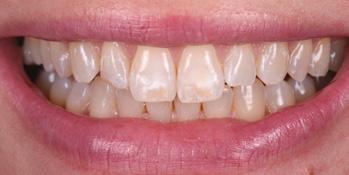
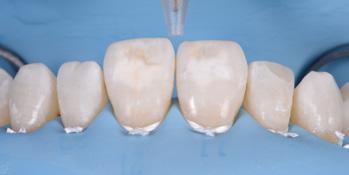
Laura (38) was referred to my clinic for the removal of the enamel discolouration on tooth 11 and 21 and a small composite restoration on tooth 12. Treatment of the enamel defects was performed by; (1) rubberdam isolation, (2) cleaning and removal of the surface enamel layer with air-abrasion (AquaCare, Velopex), (3) enamel acid-etching with 15% hydrochloric acid (Icon Etch, DMG), (4) enamel infiltration with a TEGDMA-based resin (Icon Infiltrant, DMG), (5) a little cosmetic bonding with composite (Asteria Estelite, Tokuyama) and (6) some final finishing (Green Stone, Shofu) and polishing (Diacomp Twist, EVE).
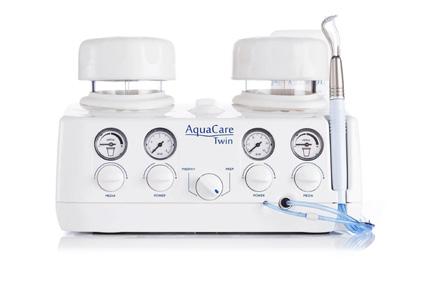


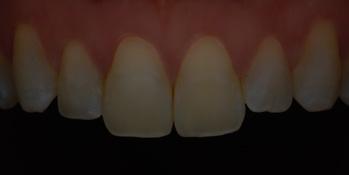
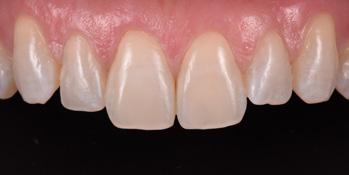
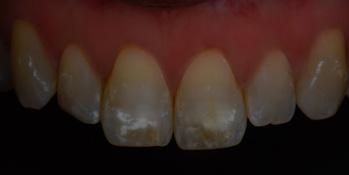
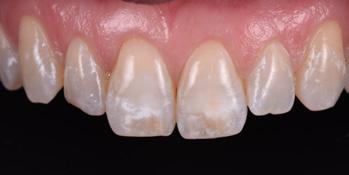

Although there was both yellow and white discolouration present within the enamel, infiltration seemed to be successful without visual remnants of the yellow discoloration. The air-abrasion is very useful in these cases to clean, remove the surface enamel layer and to remove hypomineralized enamel if necessary; hypomineralized enamel is softer and therefore easily removed with air-abrasion without harming the neighbouring enamel too much.
33 1300 65 88 22
ERIK JAN MUTS Karma Dentistry Netherlands
1 Initial Situation
6 Acid-etching for two minutes with 15% hydrochloric acid (Icon Etch, DMG) to create access to the porosity
2 Both yellow and white discolouration is visible
7 After infiltration of the porosity with a TEGDMA based resin (Icon Infiltrant, DMG)and some minor cosmetic bonding (Asteria Estelite, Tokuyama).
3 Cross-polarized picture to be able to analyse the hypomineralisation even better
8 Final result after check-up.
4 Full rubber dam isolation is mandatory when performing infiltration treatment due to the harmful effects to the soft tissue of the materials used.
9 Cross-polarized picture to check differences in colour
5 Cleaning and air-abrading the teeth for a better etching effect, which will facilitate an easy infiltration process (AquaCare, Velopex).
Find out more CLICK HERE COSMETIC & RESTORATIVE
10 Happy Laura.
CEMENTATION IN THE AGE OF DIGITAL DENTISTRY
USING THE NEXT-GENERATION SELF-ADHESIVE CEMENTS
A REVIEW BY TOMOHIRO TAKAGAKI
Introduction
In recent years, the use of CAD/CAM systems for the production of indirect restorations has become increasingly popular.
The shortage of young, qualified staff in the field of dental technology in Japan1) is likely to contribute to a further increase of automated production techniques such as CAD/CAM, which require fewer manual production steps compared to traditional manufacturing techniques.
Also globally, the number of restorations fabricated using CAD/CAM systems is rapidly increasing. This leads to an even more widespread use of innovative, tooth-coloured restorative materials such as zirconia, silicate ceramics and resins.
Demand for placing restorations using the principle of adhesion by resin cements is more and more increasing in daily clinical settings. However, it is difficult and complicated to condition the tooth and restoration surfaces using many primers correctly.
In addition, the combination of many different components is time-consuming, complex and cost-intensive. Self-adhesive resin cements, which do not require conditioning the surface of teeth or some restorations with primers, have been released recently, and have become popular among dental practitioners.
However, there are many reports2) on the dislodgement of resin-based CAD/CAM restorations and full-zirconia crowns that have been placed using self-adhesive cements. Hence, demand is high for a resin cement system that is both simple to use and reliable in performance.
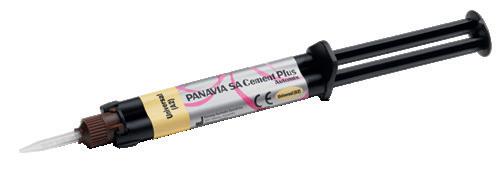
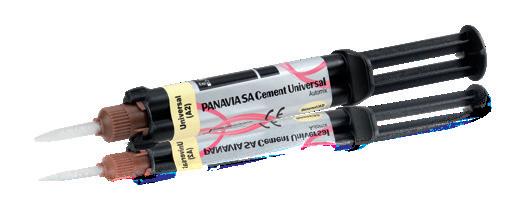
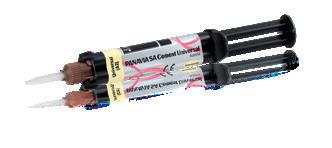
In this document, I explain the fundamental technology of resin cement systems and their range of applications. In addition, I will introduce the method of using a next-generation self-adhesive cement, PANAVIA™ SA Cement Universal (Kuraray Noritake Dental Inc., Fig. 1), as an example.
34 COSMETIC & RESTORATIVE
Fig 1. Panavia SA Cement Universal from Kuraray Noritake Dental Inc.
Adhesive resin cements which require primer treatment.
Classification of resin cements
Conventional resin cement systems usually come with primers which are used for conditioning tooth structure and restorations, respectively. Using early systems, it was necessary for the operator to select the most appropriate primer properly according to the type of restorative material that needed conditioning.
In recent years, resin cement systems incorporating a universal bond as a system component have been introduced. They can also be used as a tooth structure bonding system for direct restorations.
Figure 2 shows the classification of resin cement systems by the system component.
Resin cement systems can roughly be classified into two categories: "Resin cements which require primer treatment", which condition tooth structure and crown restorations using primers or a universal bond, and "self-adhesive cements", which contain functional monomers and do not require tooth surface conditioning.
Representative examples of these two types of resin cements are PANAVIA™ V5 and PANAVIA™ SA Cement Plus (Kuraray Noritake Dental Inc.).
PANAVIA™ V5 is a resin cement which requires the conditioning of tooth structure and crown restorations using primers. This product does not contain functional monomers in the cement itself, which aims at improving the aesthetics and polymerization properties of the resin cement. Therefore, the tooth structure needs to be conditioned using PANAVIA™ V5 Tooth Primer (Kuraray Noritake Dental Inc.) containing the functional monomer MDP, which penetrates deeper into the tooth structure for reliable adhesion. The surface of the restorations is conditioned using CLEARFIL™ CERAMIC PRIMER PLUS (Kuraray Noritake Dental Inc.).
It also contains MDP, this time responsible for creating a strong chemical bond to zirconia and non-precious metals, and y-MPTS, a silane-coupling agent which is effective for conditioning silica-based ceramics and silica-based fillers contained in CAD/CAM restorations.
PANAVIA™ V5 uses two types of primer for tooth structure and restorations, respectively, to make it possible to bond to a variety of restorative substrates while assuring a high level of bond to tooth structure3)
35 henryschein.com.au COSMETIC & RESTORATIVE
Self-adhesive resin cement system.
Self-adhesive resin cement system. Self-adhesive resin cement system (supplied with a universal bond used for conditioning tooth structure).
Fig. 2 Classification of resin cement systems currently available on the market. Resin cement systems can roughly be divided into two categories: Resin cements which require primer treatment and self-adhesive resin cements. Some of these two types are used with a universal bond whose performance is different depending on the product used.
Supplied with primers for conditioning tooth structure and restorations.
Supplied with a universal bond that conditions tooth structure only.
Supplied with a universal bond that conditions both tooth structure and restorations.
Figure 3 shows the bonding mechanism of each of the two resin cement systems.
The other product, PANAVIA™ SA Cement Plus, a self-adhesive cement, contains MDP in the resin cement to deliver an excellent bonding performance to tooth structure, zirconia, and non-precious metals. However, since the chemical adhesion to resin-based materials and silica-based ceramics of this cement is limited, resin-based CAD/CAM restorations or lithium disilicate glass ceramic restorations need to be conditioned separately. In addition, the self-adhesive cement does not contain any water so that its bonding performance to tooth structure is not sufficient, compared with resin cements using primers for conditioning4). It is recommended that a universal bond is used for tooth surface treatment when mounting a restoration that does not have any mechanical retention force.

PANAVIA™ SA Cement Plus can be used with a CLEARFIL™ Universal Bond Quick (Kuraray Noritake Dental Inc.) for tooth surface treatment. In this way, a stable adhesion on the part of tooth structure is established (Fig. 4).
Advent of a really "universal" self-adhesive cement
Universal bonding agents and conventional self-adhesive cements have a very useful product concept with regard to the purpose of reducing the trouble of conditioning tooth and restoration surfaces before bonding. As mentioned above, however, there is no denying that the use of such materials gives rise to some confusion in clinical settings because they are not completely "self-adhesive" for crown restorations. For instance, PANAVIA™ SA Cement Plus, a conventional self-adhesive resin cement, needed a separate silane treatment for silica-based ceramics or resin-based CAD/CAM restorations.
This is why PANAVIA™ SA Cement Universal (Fig. 1), a new self-adhesive cement, has been introduced by Kuraray Noritake Dental Inc.. It contains a novel silane-coupling agent (LCSi monomer) (Fig. 5) in the resin cement so that there is no need to condition silica-based restoratives with a silane-coupling agent separately (Fig. 6). In addition, PANAVIA™ SA Cement Universal also contains MDP, the functional monomer already contained in conventional self-adhesive cements, to bond well to zirconia ceramics and non-precious metals without using any primer. Therefore, it can be said that PANAVIA™ SA Cement Universal is really a "self-adhesive" resin cement which can be used for the bonding of any type of indirect restorations. It is also possible to use universal bonds for conditioning tooth structure as before (Fig. 7). This procedure is preferable whenever a particularly strong bond to a tooth abutment is needed.

36 COSMETIC & RESTORATIVE
PANAVIA ™ V5 Enamel Enamel Resin cement Resin cement Restorations Restorations Dentine Dentine MDP MDP Zr Zr MDP MDP MDP MDP MDP MDP MDP y-MTPS Si Si
Fig. 3 Bonding mechanism of PANAVIA™ V5 and PANAVIA™ SA Cement Plus (a conventional self-adhesive resin cement) seen from the aspect of functional monomers. PANAVIA™ V5 does not contain any functional monomers in its cement. PANAVIA™ V5 Tooth Primer and CLEARFIL™ CERAMIC PRIMER PLUS, two components of the PANAVIA™ V5 system, perform their respective roles of conditioning. In PANAVIA™ SA Cement Plus, the MDP contained in its cement reacts to tooth structure, zirconia ceramics, or non-precious metals. Silica-based ceramics need to be conditioned separately, using a silane-coupling agent.
Fig. 4 PANAVIA™ SA Cement Plus can be used with CLEARFIL™ Universal Bond Quick. It is possible to use CLEARFIL™ Universal Bond Quick, a highly reliable, one-step bond system which contains a novel amide-based monomer.
PANAVIA ™ SA Cement Plus (a conventional self-adhesive resin cement)
Conventional silane-coupling agent (y-MPTS) A novel, long carbon-chain silane-coupling agent (LCSi)
PANAVIA ™ SA Cement Plus (a conventional self-adhesive
PANAVIA ™ SA Cement
Placement
of resin-based
CAD/CAM
using PANAVIA™ SA Cement Universal
restorations
Our research results* shows that it is especially useful to use PANAVIA™ SA Cement Universal when placing resin-based CAD/CAM restorations in the mouth. When using conventional self-adhesive cements, it was necessary to perform a silane treatment in order for the cement to bond to the fillers exposed by sandblasting.
PANAVIA™ SA Cement Universal allows the operator to apply the cement and place the restoration immediately after sandblasting (Fig. 8).At our department, we evaluated the bonding performance of PANAVIA™ SA Cement Universal to CAD/CAM resin blocks, using a CAD/CAM resin block as an example. The results showed that PANAVIA™ SA Cement Universal offers the same level of bond strength as the conventional cement system without requiring a separate silane treatment (Fig. 9).
Fig. 7 Difference in the shear bond strength of PANAVIA™ SA Cement Universal to tooth structure with versus without the use of CLEARFIL™ Universal Bond Quick. Even if no conditioning is performed, PANAVIA™ SA Cement Universal bonds to tooth structure to some degree due to the action of MDP contained in the cement. It is advisable to use CLEARFIL™ Universal Bond Quick for the abutment tooth in cases with insufficient mechanical retention or if a particularly strong bond between the tooth structure and the restoration is required.
37 1300 65 88 22 COSMETIC & RESTORATIVE
Fig. 6 Difference between PANAVIA™ SA Cement Plus (conventional self-adhesive cement) and PANAVIA™ SA Cement Universal (novel self-adhesive cement). PANAVIA™ SA Cement Universal contains a silane-coupling agent (LCSi) in the cement so that it bonds well to silica-based ceramics without requiring a separate silane treatment.
Fig. 5 Difference in chemical structure between "y-MPTS" (a conventional silane-coupling agent) and "LCSi" (a long carbon-chain silane-coupling agent contained in PANAVIA™ SA Cement Universal)
Universal Enamel Enamel Resin cement Resin cement Restorations Restorations Dentine Dentine MDP MDP Zr Zr MDP MDP MDP MDP MDP MDP MDP MDP LCSi LCSi LCSi MDP Si Si
Silyl group Polymerization group • spacer O O O O Si(OMe)3 Si(OMe)3 O O O O Si(OMe)3 Si(OMe)3
30 25 20 15 10 5 0 (MPa) Enamel Dentin Shear bond strength without conditioning 30 25 20 15 10 5 0 Enamel Dentin (MPa)
Data source: Kuraray
Shear bond strength obtained when performing tooth surface treatment
Noritake Dental Inc.
Fig. 8 Differences in the procedure of placing resin-based CAD/CAM restorations with PANAVIA™ SA Cement Plus and with PANAVIA™ SA Cement Universal. It is not necessary to perform a silane treatment separately when placing resin-based CAD/CAM restorations with PANAVIA™ SA Cement Universal. Sandblasting should be performed immediately before the placement of the restoration, observing the instructions for use of the resin block manufacturer (alumina oxide grain size: 50 µm; air pressure: 1 to 2 bar). If trial fitting of the restoration is conducted in the mouth after sandblasting, the prepared tooth should be cleaned using a phosphoric acid etching agent.
Fig. 9 Micro-tensile bond strength to a CAD/CAM resin block. Without requiring a separate silane treatment, PANAVIA™ SA Cement Universal offers the same level of bond strength as obtained by using the conventional cement system (CLEARFIL™ CERAMIC PRIMER PLUS + PANAVIA™ SA Cement Plus).*
*https://pubmed.ncbi.nlm.nih.gov/34832458/
Conventional self-adhesive cement system (CLEARFIL™ CERAMIC PRIMER PLUS + PANAVIA™ SA Cement Plus)
Case 1
Clinical procedure for placing a resin-based CAD/CAM crown using PANAVIA™ SA Cement Universal (Figs. 10 to 18)
38 COSMETIC
Sandblasting
Primer Plus
& RESTORATIVE
Ceramic
PANAVIA™ SA Cement Universal PANAVIA™ SA Cement Plus No primer is required 100 90 80 70 60 50 40 30 20 10 0 (MPa) PANAVIA™ SA Cement Universal alone
Fig. 10 Resin-based CAD/CAM crown (for the maxillary left second premolar) fabricated using KATANA™ AVENCIA™ Block.
Fig. 11 After trial fitting and immediately before placement, it is advisable to sandblast the crown with alumina powder at 1 to 2 bar pressure.
Case study
The clinical procedure for placing a resin-based CAD/CAM restoration (Case 1) using PANAVIA™ SA Cement Universal as a cement is shown in Figs 10 to 18. The clinical procedure for placing a full-zirconia crown (Case 2) also using PANAVIA™ SA Cement Universal is shown in Figs 19 to 27.
Conclusion
It can be said that the self-adhesive cement technology has finally reached maturity with the advent of PANAVIA™ SA Cement Universal, a "really" self-adhesive cement. Of course, some pretreatments of the tooth structure and restorative surfaces are still required, such as cleaning of the restoration surface or removal of temporary cement from the abutment. In all, it may be concluded that PANAVIA™ SA Cement Universal is a reliable and high-performance resin cement, which has simplified the previously complicated pre-cementation procedures.
39 henryschein.com.au COSMETIC & RESTORATIVE
Fig. 12 Application of CLEARFIL™ Universal Bond Quick to the tooth abutment. Air dry. The bond should not be light cured, because both CLEARFIL™ Universal Bond Quick and PANAVIA™ SA Cement Universal have a touch-cure performance by which both materials start curing immediately upon contact with each other.
Fig. 13 Application of PANAVIA™ SA Cement Universal inside the crown. As mentioned above, there is no need to perform a silane treatment.
Fig. 14 Placement of the crown in the mouth. Since the resin cement has an appropriate level of consistency, any excess cement remains near the margins, without running too much.
Fig. 15: Tack-curing of the resin cement using a light-curing unit for only 2 to 3 seconds for each spot. This makes it possible to remove any excess cement easily.
Fig. 16 Removal of the semi-cured excess cement using a dental probe. The excess cement should be easily removable in a lump.
Fig. 17 After removing the excess cement, the resin cement is light cured inside the crown over the restoration.
Fig. 18 Placement of a resin-based CAD/CAM crown completed.
Case 2
40
COSMETIC & RESTORATIVE
using PANAVIA™ SA Cement Universal
Fig. 20 Cleaning of the restoration contaminated with saliva during trial fitting. In order to obtain mechanical retention, the surface of the restoration should be treated with a sandblasting
Fig. 24 Tack curing of any excess cement using a light-curing unit.
Fig. 27 State of the restoration immediately after placement. Using conventional resin cements, there might be a risk that excess resin cement aroused may not be removed completely. However, PANAVIA™ SA Cement Universal features easy removal of excess cement, and almost no residual excess cement was observed during the clinical check-up.

References
1) Study meeting on the training and retention of dental technicians, Reference material 2, Ministry of Health, Labour and Welfare
2) Kazuhiko Suese: Investigation study on the introduction of CAD/CAM crowns into health insurance coverage during the initial stage. Proceedings of the Academic Meeting of Japan Academy of Digital Dentistry. 5 (1): 85 - 94, 2015

3) San San May Phyo Aung, Tomohiro Takagaki, Aye Ko Ko, Sumayah Halabi, Takaaki Sato, Masaomi Ikeda, Toru Nikaido, Michael F Burrow, Junji Tagami: Adhesion durability of dual-cure resin cements and acid-base resistant zone formation on human dentin. Dental Materials, 2019 in press.
4) Yuki Naruse, Tomohiro Takagaki, Naoko Matsui, Takaaki Sato, Alghamdi Ali, Masaomi Ikeda, Toru Nikaido, Junji Tagami: Effect of alumina-blasting pressure on adhesion of CAD/CAM resin block to dentin. Dent Mater J, 37 (5): 805-811, 2018.
TOMOHIRO TAKAGAKI
Department of Operative Dentistry, Division of Oral Functional Science and Rehabilitation, School of Dentistry, Asahi University Hozumi 1851, Mizuho City, Gifu Prefecture 501-0296, Japan Department of Cariology and Operative Dentistry, Graduate School of Medical and Dental Sciences, Tokyo Medical and Dental University (part-time instructor)
41 1300 65 88 22
COSMETIC & RESTORATIVE
Fig. 25 Removal of the excess cement using a dental probe or floss.
Fig. 26 After removal of the excess cement, the resin cement is light cured completely.
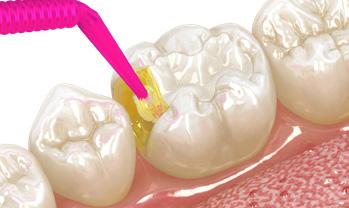
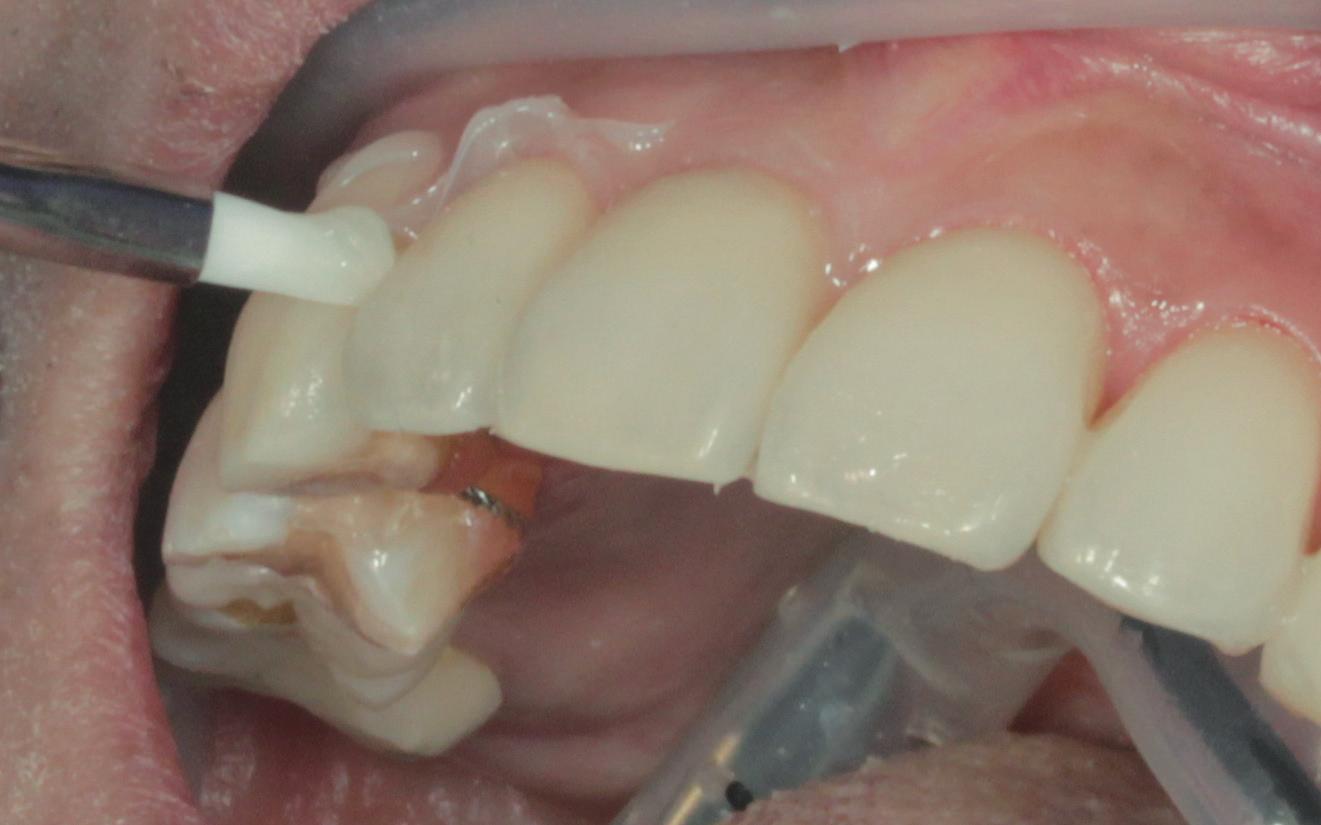
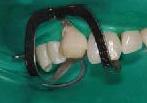
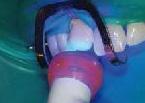
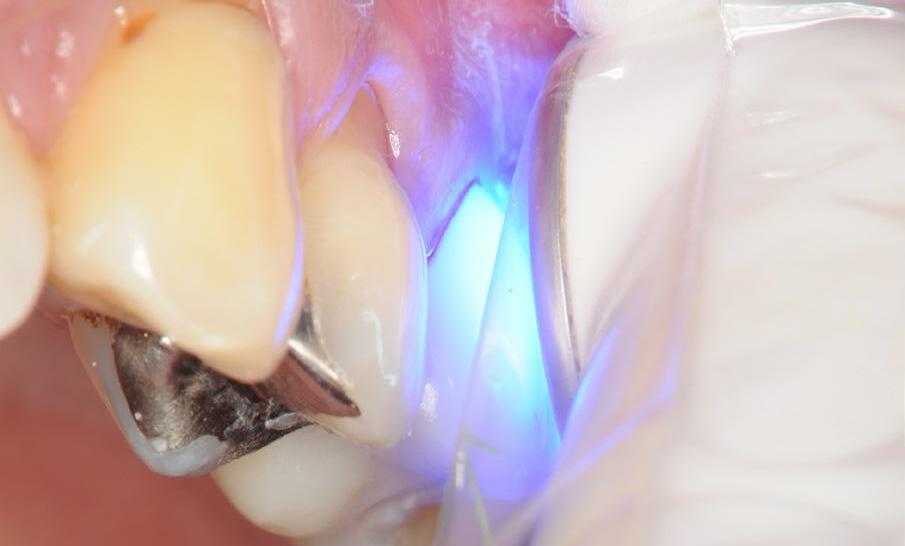
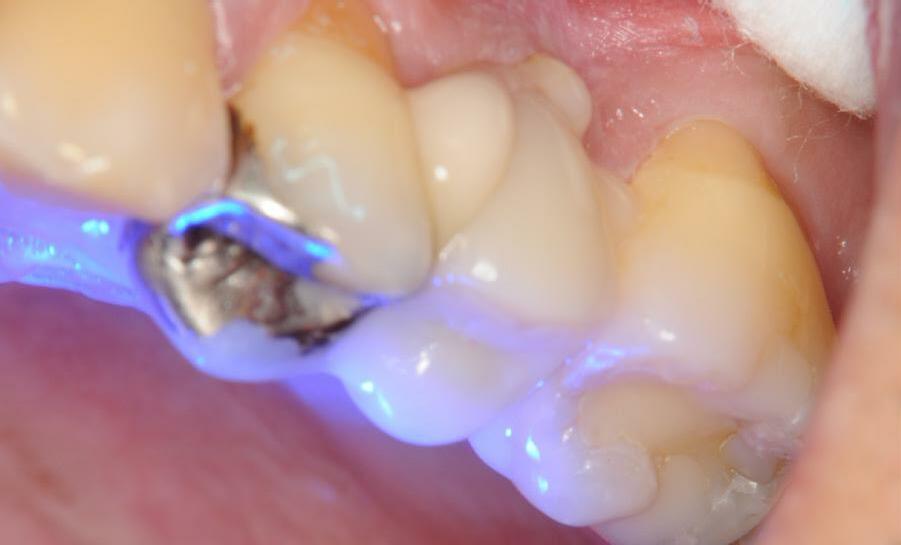
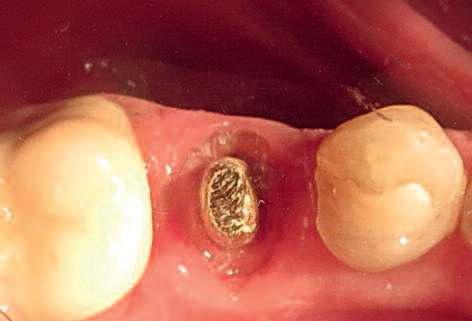
GINGIVAL PREPARATION WITH RACEGEL LOOKING FOR A QUICK AND EXCELLENT OPTION IN RETRACTION AND HEMOSTASIS
Introduction
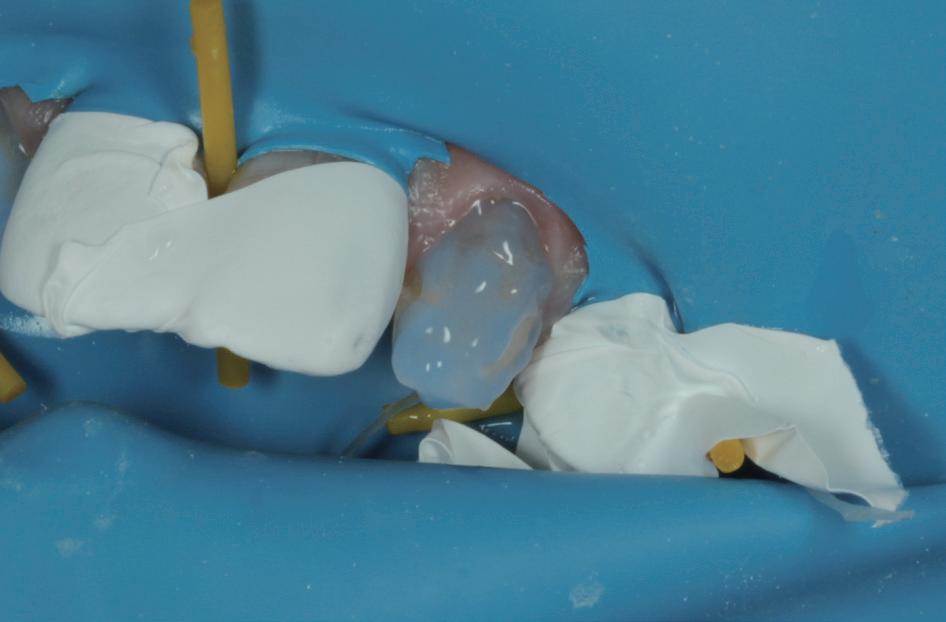
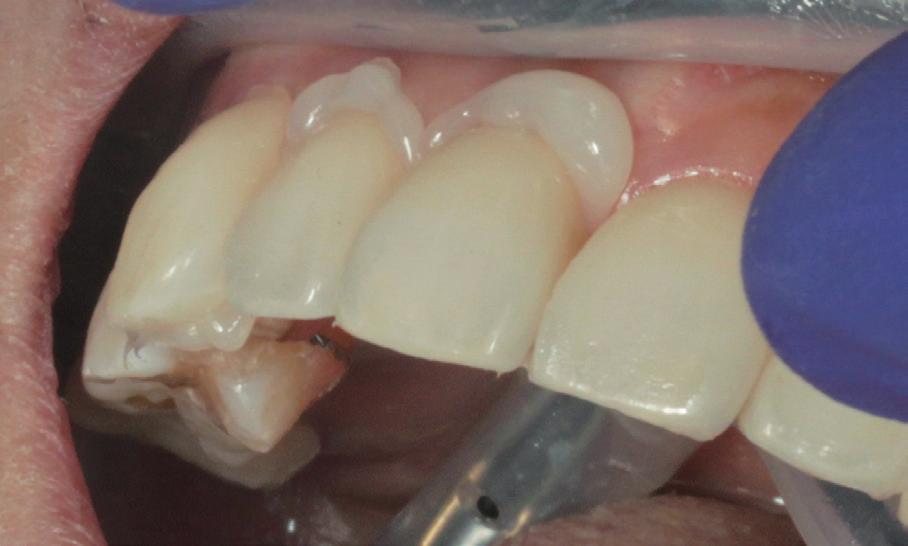
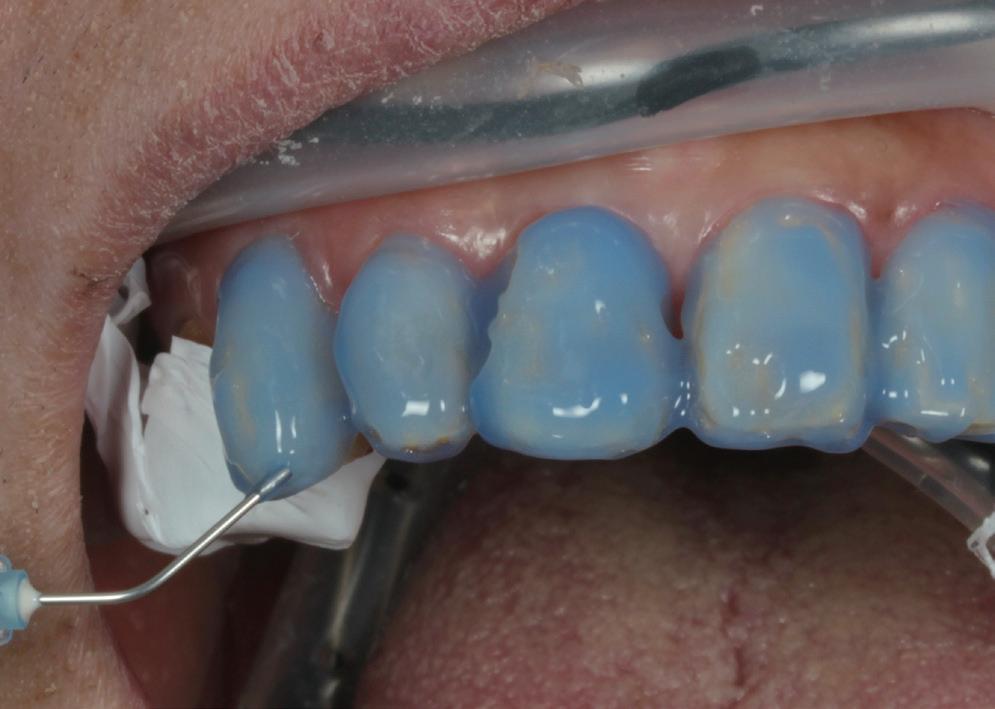
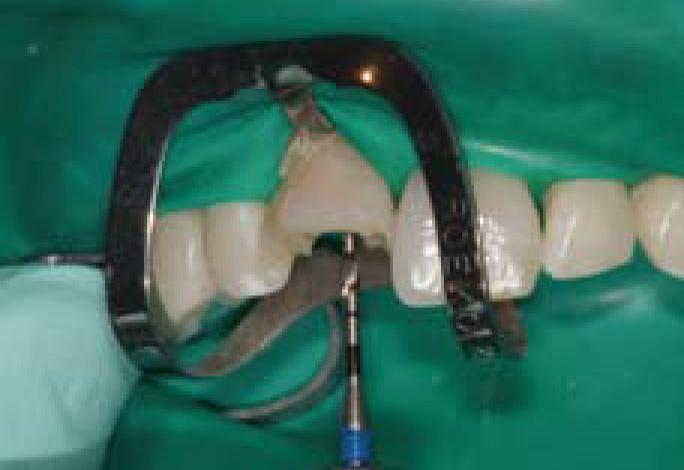
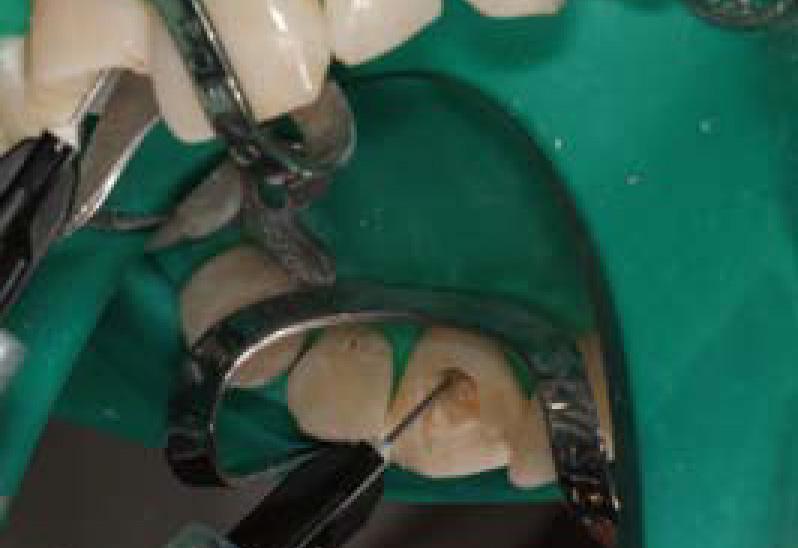
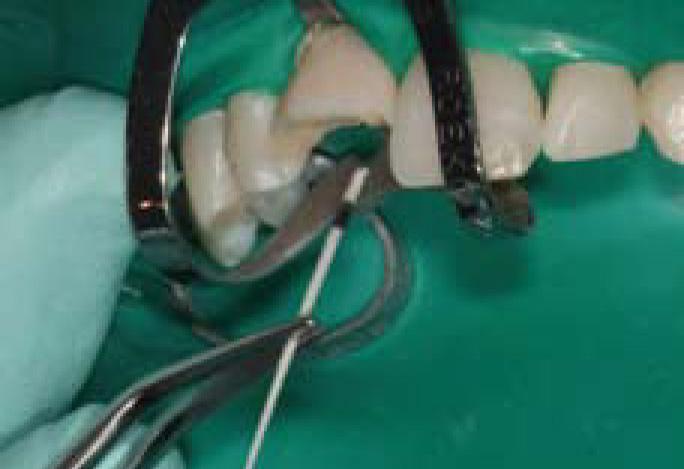
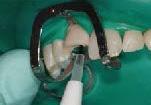
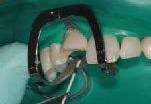
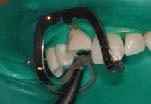
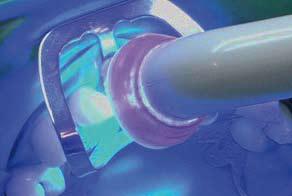
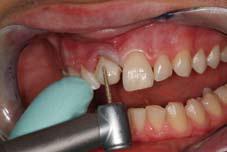
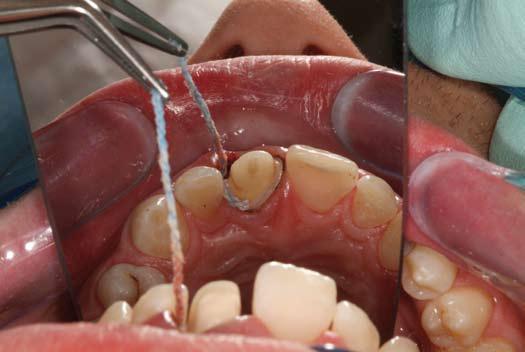
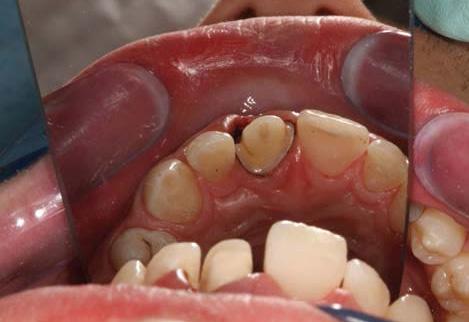
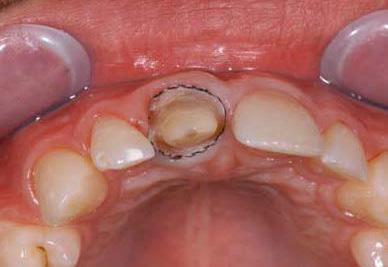
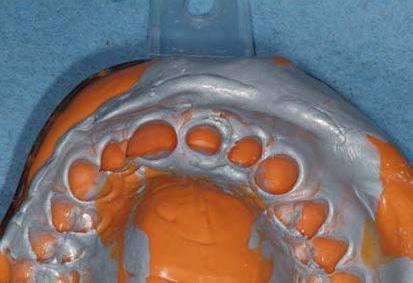
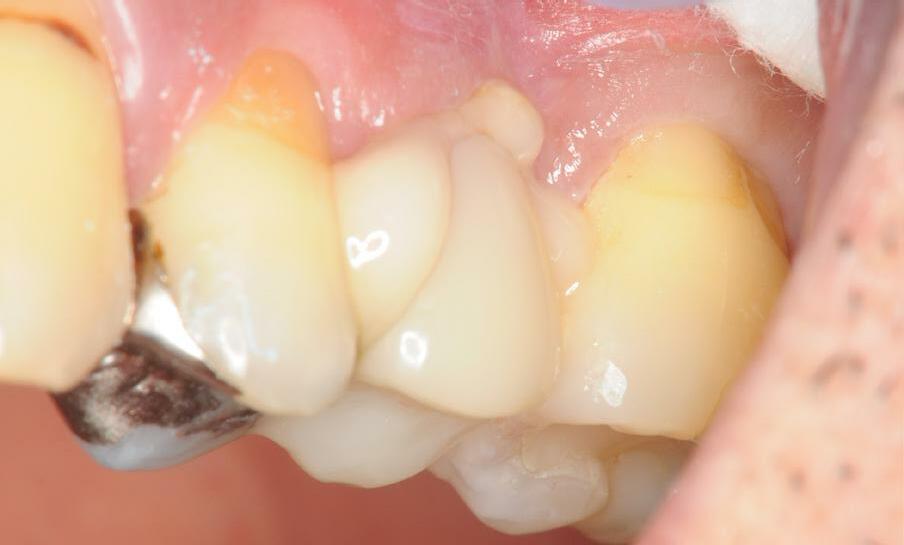
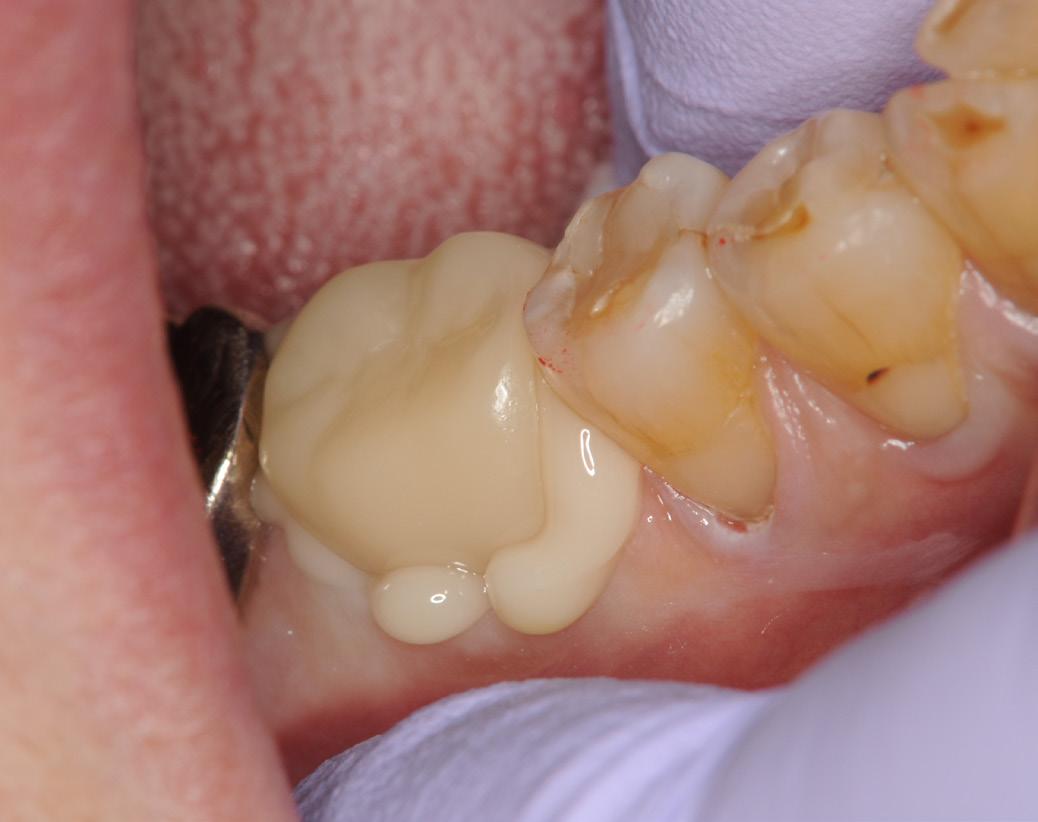
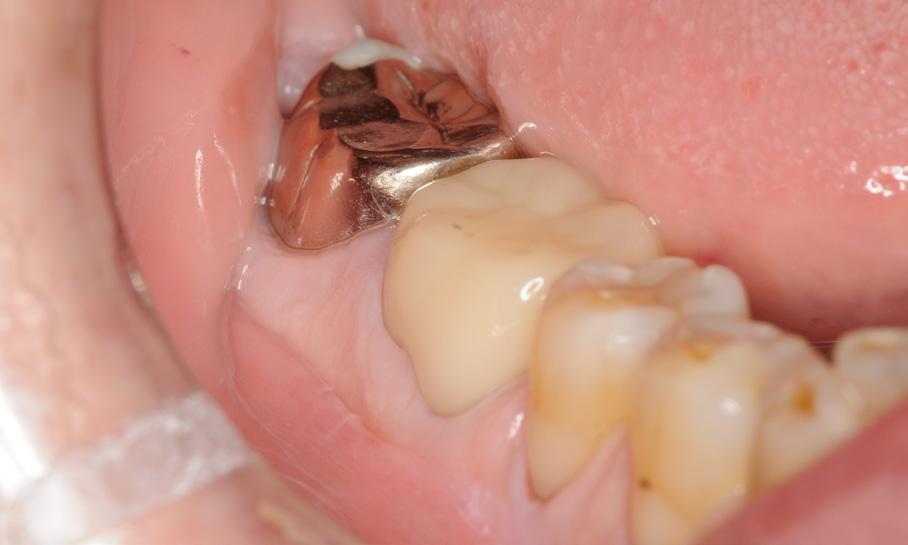
Beyond the great advances in materials, techniques and procedures in the dental laboratory, as well as in impression materials, there remains an undoubtedly critical point in indirect techniques: the achieving of proper gingival retraction and effective control of bleeding and gingival fluid in the critical area of the cut margins at the gingival level of the preparations. This is the area that most often has errors from the standpoint of accumulation of blood, lymphatic exudates and cutting remains.
To achieve quality results in all work performed in regular practice, it is not only necessary to have periodontal health parameters, such as a lack of gingival inflammation and periodontal pockets through treatment and prevention carried out with the patient, as well as identification of the different dental, periodontal, bone, biotypical and anatomical particularities of each case, but also to have a fast, predictable and effective method of gingival retraction and hemostasis that makes it applicable to 100% of cases.
Of course, these features are not always fulfilled by techniques such as the retraction cord in all its different forms, tissue laser, pastes, gels, etc.
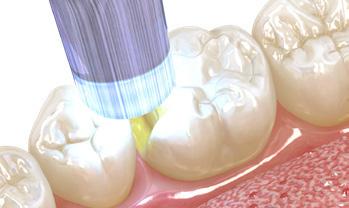
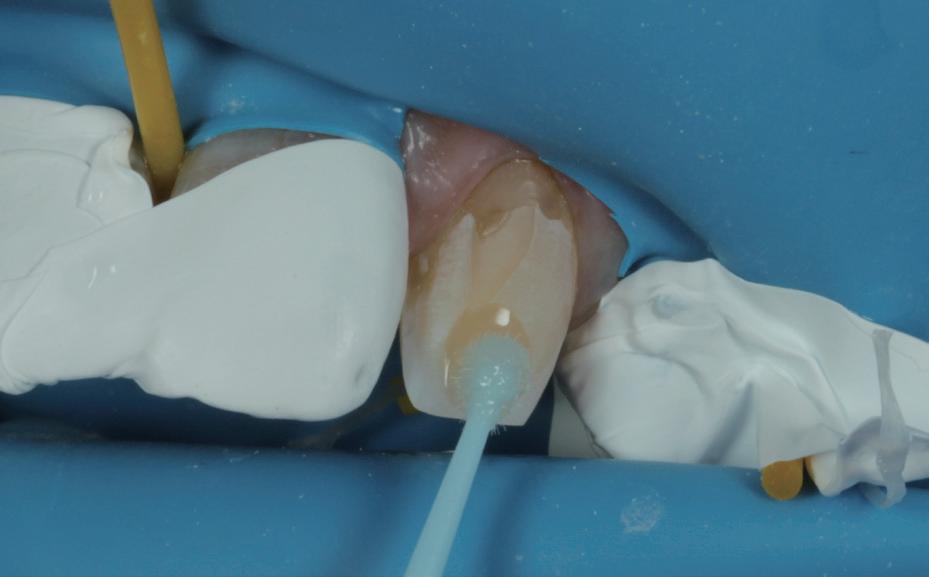
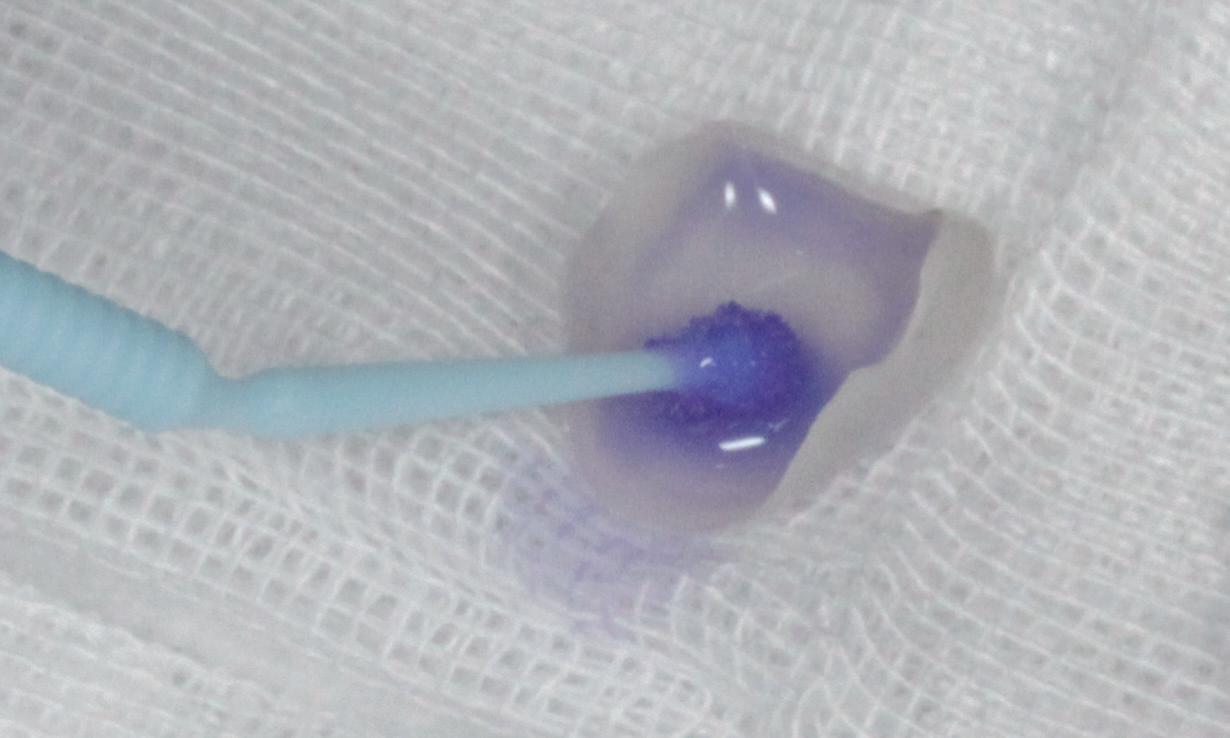
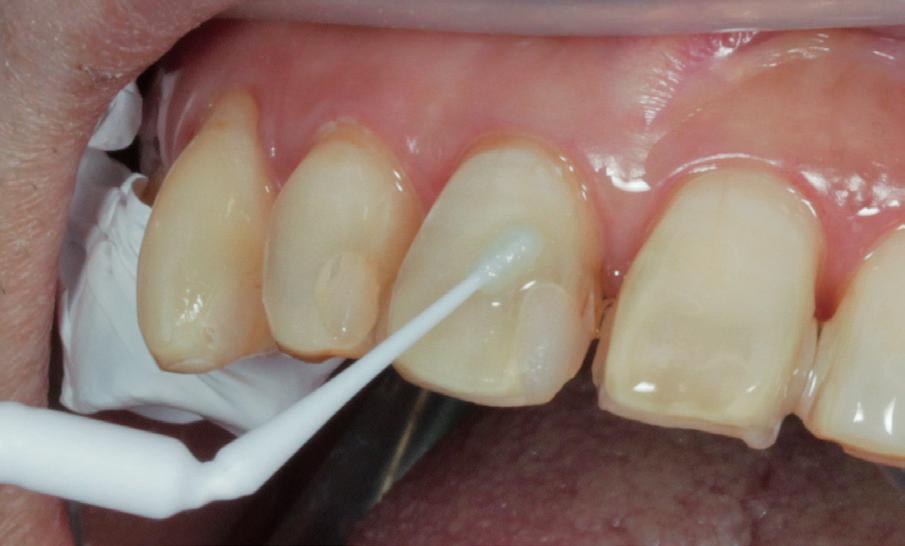
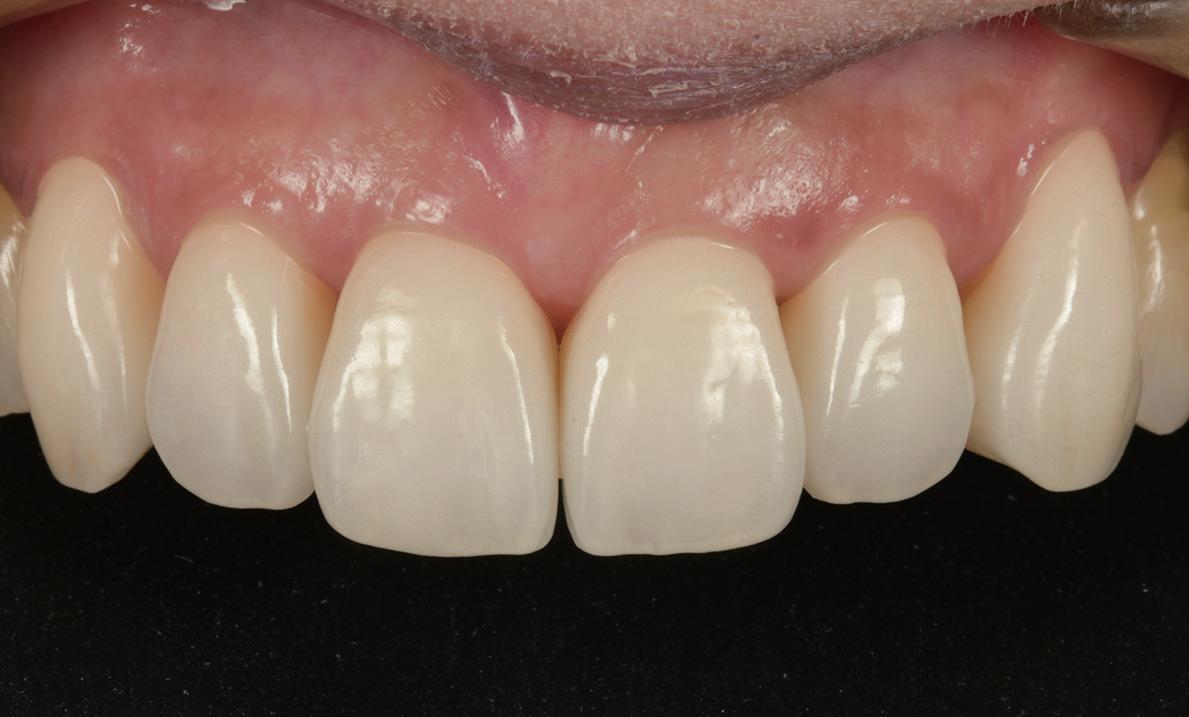
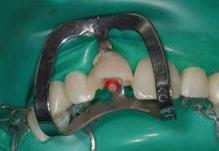
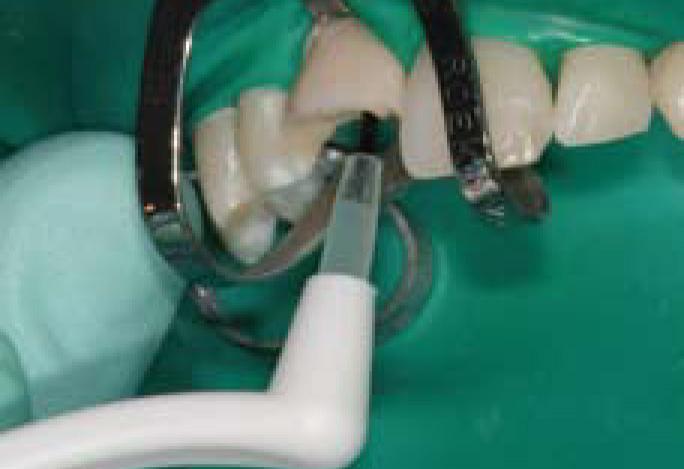
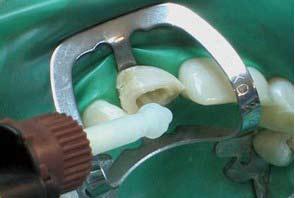
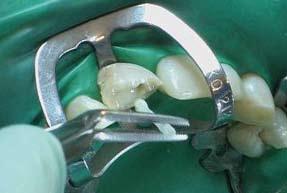
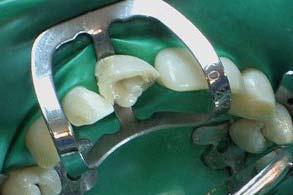
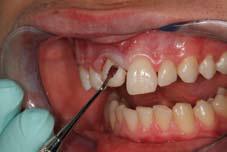
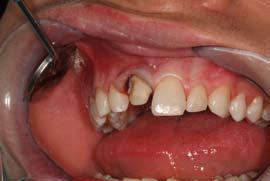
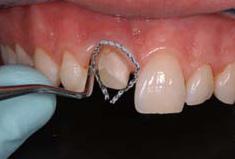
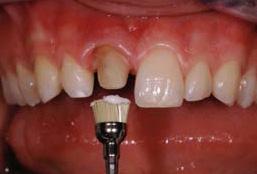
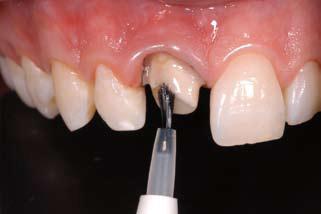
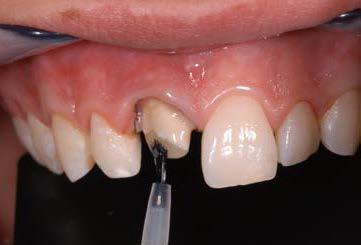
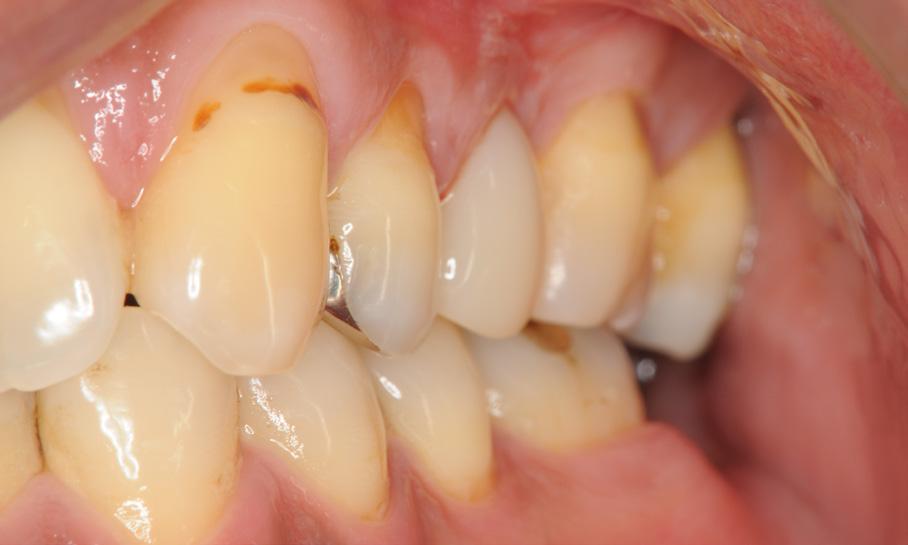
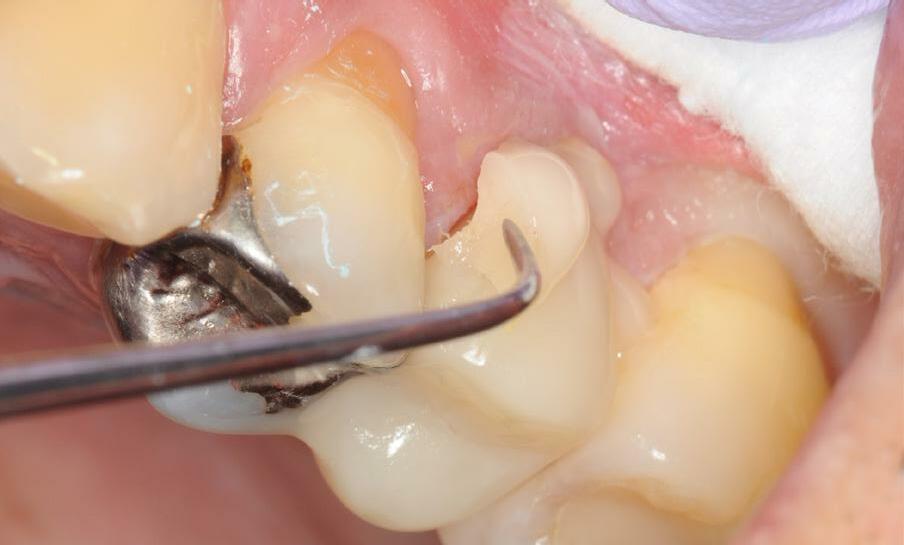
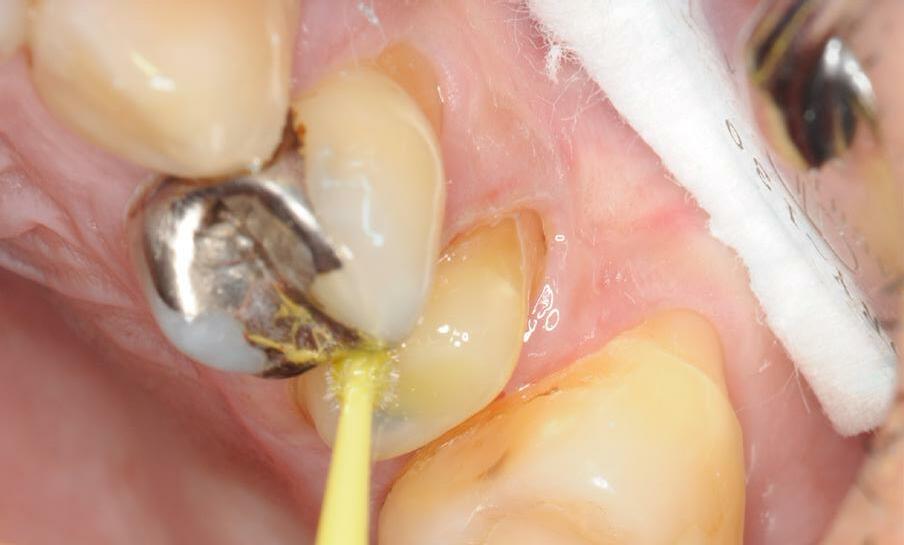
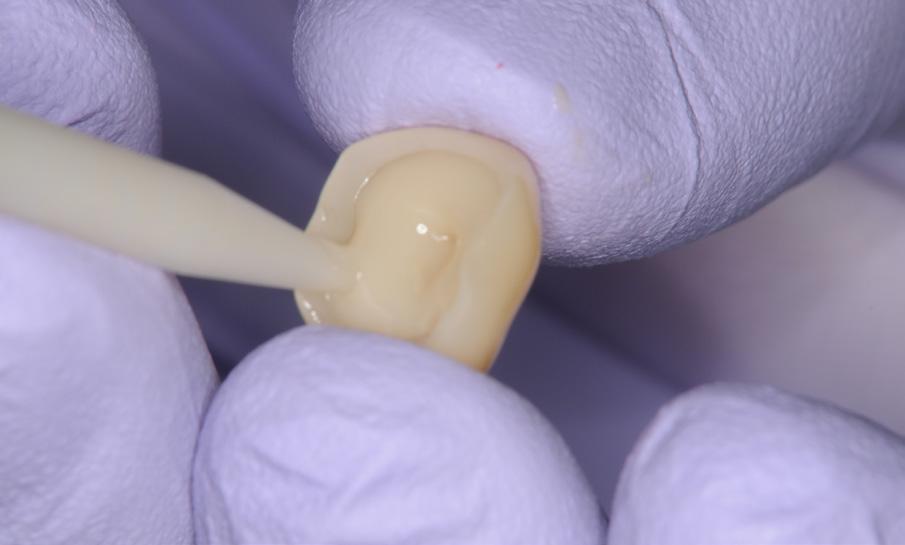
Case Report No.1
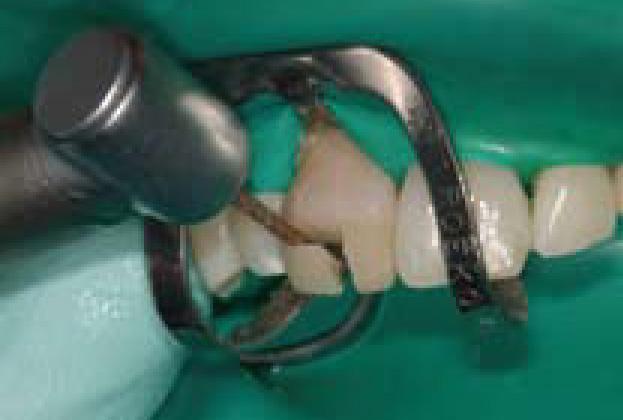
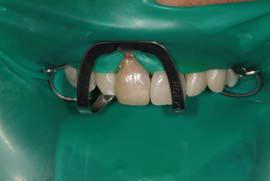
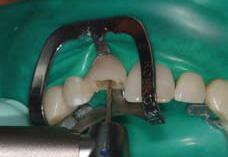
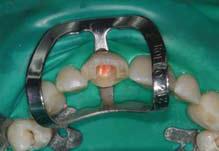
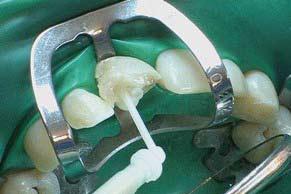
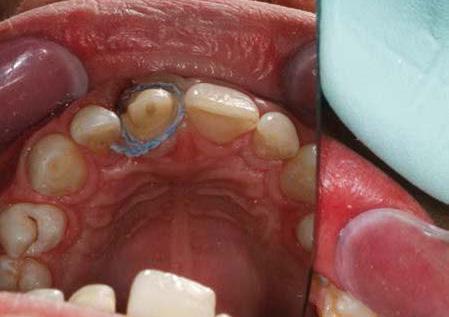
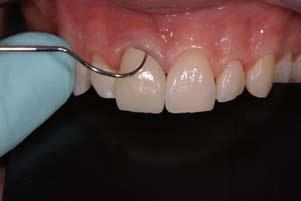
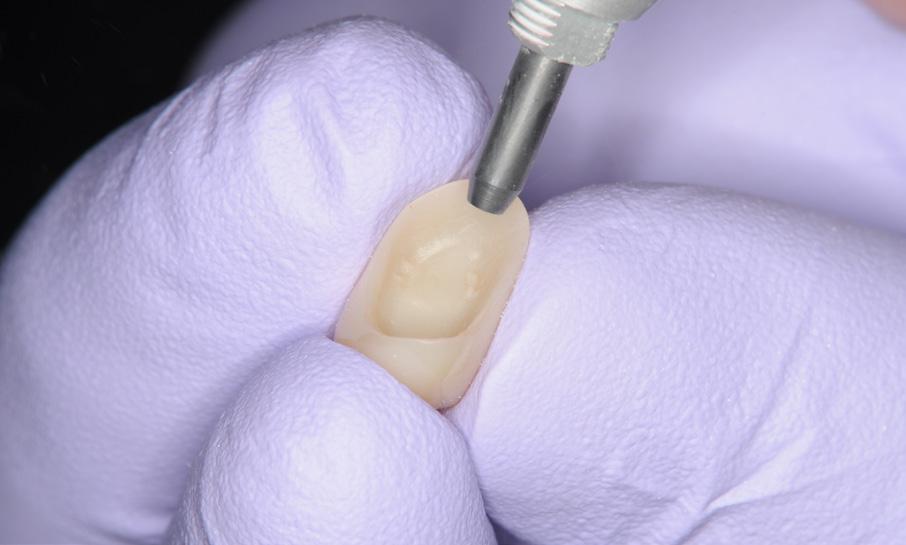
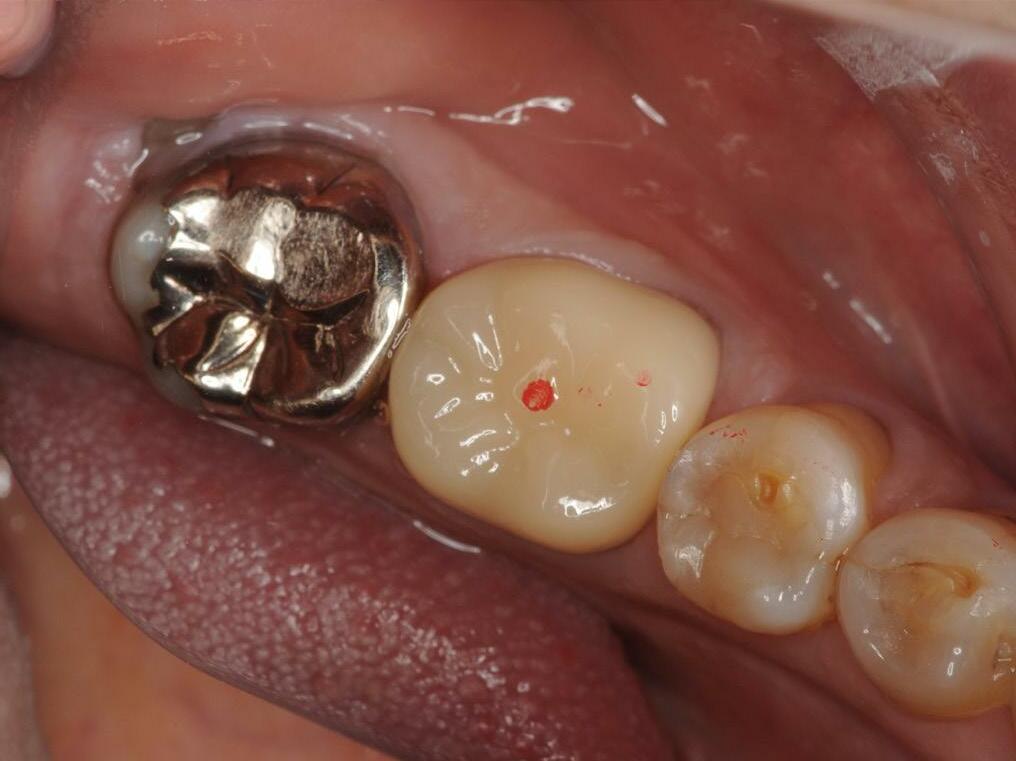
Here we have a typical case of a lower second premolar, where the stump has just been cut to take an impression and create a ceramic crown. As is typical for this type of case, the cut was done taking the preparation shoulder margin slightly below the crest, within the gingival
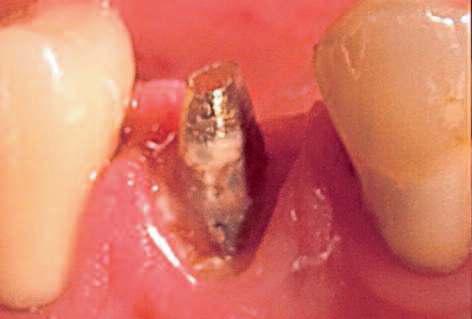
These materials used alone or in combination with others can become effective, but barely meet the need of ease of application, which is essential for it to be used in all clinical cases.
The most significant point is that, especially in thin gingival biotypes, over-manipulation of the tissue will result in a possible gingival recession. Racegel is ideal for this type of case since it brings together several advantages, and because its presentation in the form of a syringe with a fine dispenser tip allows a perfect application around the preparation. Furthermore, its main features are:
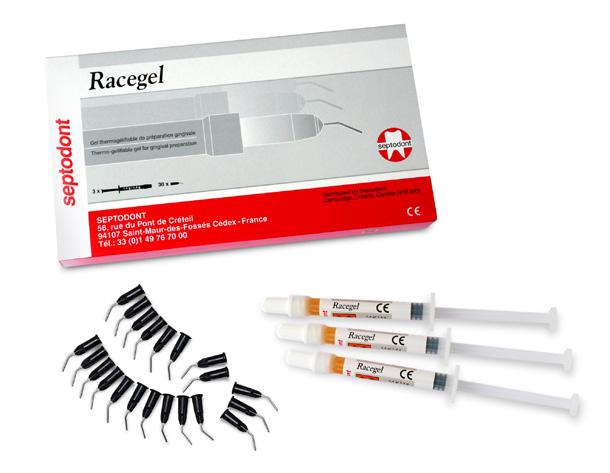
• Thermodynamic chemistry that creates increased viscosity in the oral cavity, which is reversed when water is applied for easy removal.
• It is orange in color, so it is easily seen during its application and its complete removal can be verified.
• It contains 25% aluminum chloride for optimal control of bleeding and gingival fluid.
• It can be used alone or in combination with a retraction cord and can also be used alone for control of hemostasis.
sulcus, but the space found in this sulcus is not the most suitable for placing a traditional retraction cord, since it would traumatize the gingival tissue; even finer cords would compromise the junctional epithelium,... especially in an example such as this case, where the gingival biotype is thin.
42
Here we can see that the use of a gingival retraction method is imperative to carry out the final impression of the stump.
Application of the retraction cord would involve a risk of altering the junctional epithelium.
COSMETIC & RESTORATIVE
Racegel applicator tip provides superior control and accuracy when dispensing the product in the exact place.
Case Report No.2
IIn this case, the gingival biotype is medium, but it is imperative to effectively achieve a good retraction since the area is of very high functional and aesthetic compromise, where the stability of the gingival tissue and the need for a good impression are critical.
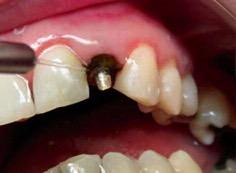
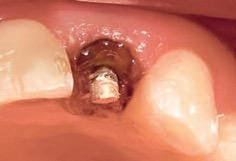
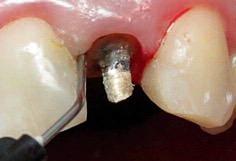
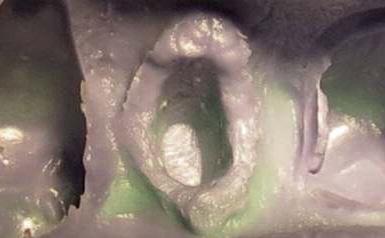
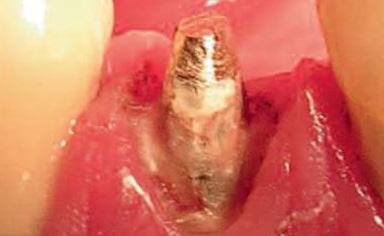

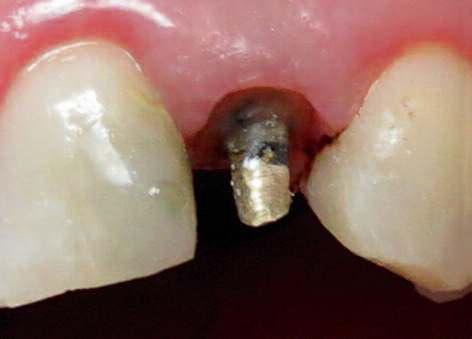
Conclusion
In the effort to achieve excellence in the vast majority of clinical cases that are seen in the busy offices of current dental practice, there is no doubt that Racegel is one of the best options for gingival preparation, since it effectively brings together retraction and hemostasis with speed and simplicity of application.
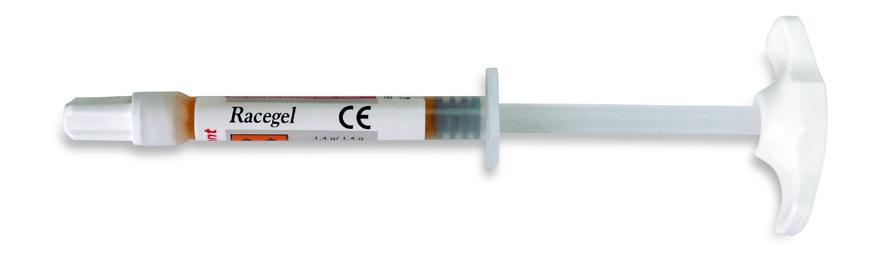
However, each case should always be evaluated individually to find the best technique to perform.

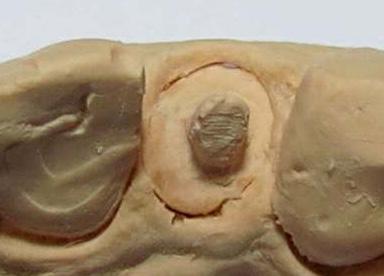
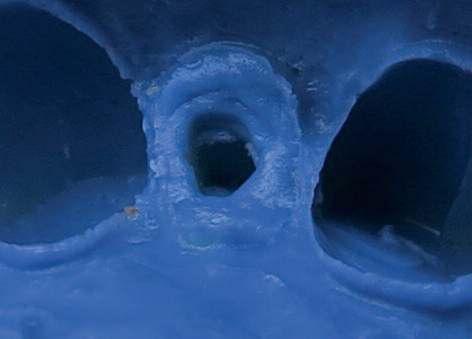
43 henryschein.com.au
Because of its color, Racegel contrasts sharply with the surrounding tissue.
One to three minutes after the application of Racegel, it can be clearly seen how the shoulder margins are left cleanly and clearly exposed.
The resulting impression shows how Racegel fulfilled the task of properly exposing the preparation margins, affording an excellent working model for the laboratory.
Beginning of syringe application.
Racegel works for 1 to 3 min.
It is removed with a water jet, taking advantage of the thermodynamic characteristic of Racegel.
The preparation margins can be clearly seen in the impression
DR. LUIS FABIÁN BROTOS DUHART Private Practice in Montevideo, Uruguay. Volunteer Internship, Dental Surgery area, APEX Cerro in 1998. Level II Professor of Occlusion and Prosthodontics Universidad de la República, Montevideo, Uruguay. Clinic Assistant in Continuing Education Courses, Clínica Dr. Juan Carlos Ibañez, Córdoba, Argentina.
The margins can be clearly seen in the model.
View Racegel on Online
COSMETIC & RESTORATIVE
CLICK HERE
HALO™ SECTIONAL MATRIX SYSTEM
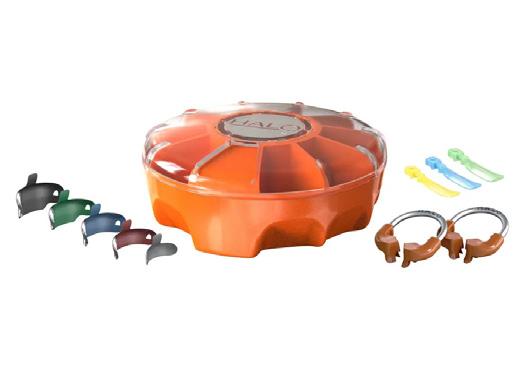
Introduction
The restoration of the proximal surface of Class II cavities has always been an important objective for the dental practitioner. There are several reasons why the reestablishment of optimum form and function is important: support, alignment, and stabilization of the dentition are the fundamental ones. Also, the protection and preservation of both tooth and interdental gingival papilla, and consequently, the rest of the periodontal complex. A good contact between teeth helps to prevent food impaction and deter the formation of proximal carious lesions.
Several features like the correct interproximal form or contour (embrasure shape), optimum proximal contact surfaces, consistent marginal ridge elevations, and central groove continuity within a dental arch are paramount. Absent or open contacts and/or proximal contact surfaces may give room to poorly aligned dentition, which in turn may cause food impaction, halitosis, caries formation, and periodontal disease— just some of the reasons why the knowledge of accurate tooth anatomy is essential for a functional dental rehabilitation.
With the requirement of so many anatomic details, the optimum form and function associated with the proximal surface tooth anatomy has included numerous obstacles over the years, especially after the improvement of esthetic materials to be used in the posterior region. If by one side the development of new toothlike composite resins and bonding technique allowed for conservation of tooth structure, by the other it brought new challenges and problems.
Tight, well-contoured proximal contact areas in the posterior region were more easily achieved with dental amalgam, especially due to its mechanical properties and handling characteristics. Today, composite resin has replaced the metallic direct material as the posterior restorative material of choice, with reports of it being used in at least 58% of posterior restorations according to some studies. The way in which posterior composite restorations are now placed went through a rapid change in the last few years, greatly because of the change and improvements in composites’ composition and formulas, and the new materials and technologies available. Nevertheless, persistent challenges are still encountered by the practitioner, and new improvements in this field will be discussed further ahead.
Matrix Systems
In order to facilitate the reconstruction of proximal contact surfaces, several different matrix systems have been proposed. The re-creation of proximal anatomy is based on three pillars: the matrix or band, the wedges (generally made of wood or plastic), and the device responsible for holding the matrix in place (the matrix retainer). It is important to note that a rapid separation is also desired, which is usually accomplished by the wedge, the ring (in systems where it is available as the matrix retainer), or both. In the last decades, all three: matrices, wedges, and ring (matrix retainers) went through rapid changes and development.
Historically, the Tofflemire system is probably the most popular matrix system. When used with amalgam, it produced good and predictable anatomy and contact points. Today, it is still employed for insertion of composite resin, bein g widely used around the world. However, more developed matrix systems have been introduced, bearing great characteristics more suitable for the demands posed by composites. One of the main reasons is because of the peculiarities of the contact point that is obtained with the use of the Tofflemire matrix systems—usually too close to the occlusal surface. It is common that after even the initial occlusal adjustments, the contact point is lost due to this proximity. Another common mishap is when there is a fracture of this anatomical portion of the restoration. Ring matrix systems that include a separation ring, sectional matrices, and custom-fitted plastic wedges have become popular, with one of the first matrix systems being introduced in the 1990s. It was the first generation to utilize this concept exclusively as the restoration of posterior teeth using composite resin increased.
44
COSMETIC & RESTORATIVE
Mechanical Separators
Tooth displacement is achieved with a maximum interdental separation of about 0.55 kg/mm, and it is important to compensate for the thickness of the matrix when this one is removed. According to Owens et al. (2016), “The practice of flossing has traditionally been the method for the evaluation of proximal contact achievement, with designations of tight, weak, or open.” Even though it is an empirical form of classification, the distinctive “click” felt when the dental floss goes through the proximal restored area is usually a good sign, and something that many dentists seek, as it usually implies a good contact point.
It is good to remember that in the days of the dental amalgam, both the expansion suffered by the material and the packing required by the insertion technique greatly helped the dentist to achieve a good contact point/surface between the posterior teeth. With the passivity of insertion when using composite materials, the pressure delivered by the separation ring (or spring clamp) systems and the wedges became responsible for the separation force. This combination (ring and wedges) should guarantee the movement of the tooth and compression of the periodontal ligament space, allowing for an improved separation. The idea behind rings (or clamps) is to provide the separation necessary to achieve proper interproximal anatomy. From the myriad of designs available, some do not adapt well to the interproximal-occlusal anatomy, failing to provide a good contact between matrix and tooth.
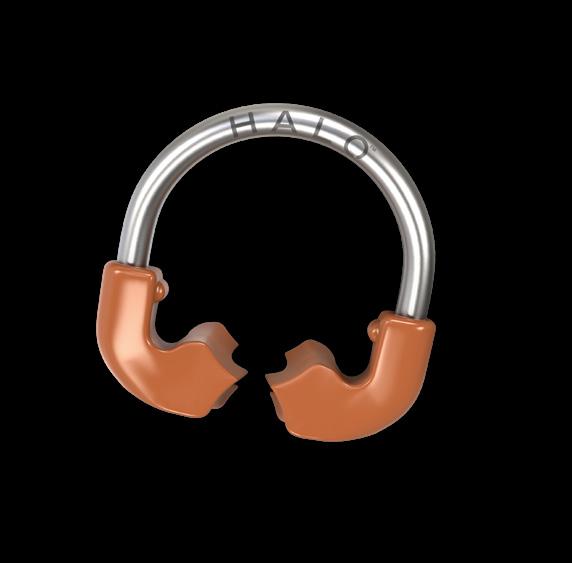
This in turn results in flash on the margins of the restoration that must be dealt with in the finishing step. Others allow for a tighter contact, but sometimes they misshape the matrix band, collapsing it in cases where a wider Class II cavity is present or a cusp is missing. There is also the problem of some rings being too bulky to be used in challenging areas, such as what happens to the second upper molar region. A novel concept on this field, the Halo™ Sectional Matrix System Ring proposes a solution with a unique beak design with built-in anatomical contours that mimic the natural anatomy and helps to decrease the finishing time. (Figure 1). The Ni-Ti metallic ring is fabricated with glass-filled nylon tines that are strong and rigid, which presents a 3D anatomy.
This unique design provides a better separation, and at the same time, adapts the sectional matrix more tightly around the tooth without collapsing it on the margins where wider Class II restorations are present. (Figure 2)As for the other component responsible for separation, the wedges, these can be fabricated in many materials. The most popular design is still the wooden wedges.
Available in many sizes they are a popular material, but can be harmful for the gingival papilla. On one side they provide a good separation
force, on the other this happens with the expense of compressing, sometimes harming, this portion of the periodontal apparatus. Another fundamental role of the interdental wedge is to help adapt the matrix band, providing a good contour and a perfect fit to the tooth structure.
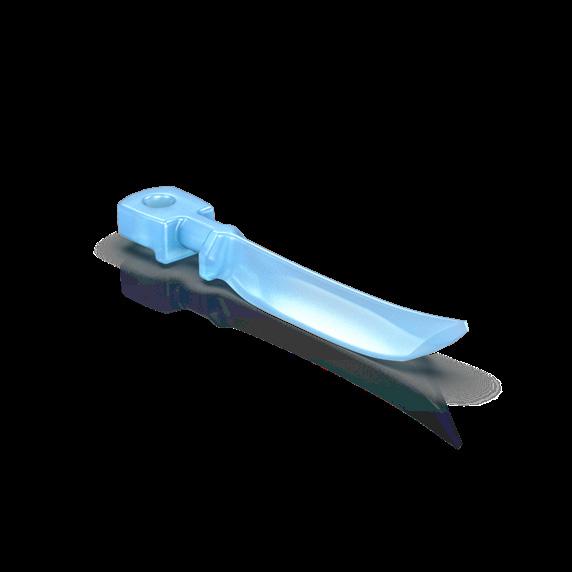
Since the interproximal region is blocked from direct view after the completion of the restoration, this is important to avoid any hidden overhangs, and the subsequent risk of recurrent decay due to bacterial colonization. For this purpose, a new shape has been proposed in the last decade which is gentler to the soft tissues. It has a V-shape, and it helps to achieve a better adaptation to the interproximal region.
The problem is that some of the wedges may be too soft, therefore helping to adapt the matrix to the tooth, but failing to provide a good separation. The new Halo Sectional Matrix System comes with an innovation: the wedges have a hollow design but are also firm (Figure 3). This new material provides an active wedging for enhanced separation, but makes the wedge gentle to the gingival papilla and easy to place.
It also allows the wedges to be stacked when multiple wedges are needed, providing a perfect adaptation between the matrix band and the tooth, making sure no overhangs will be present on the final restoration.
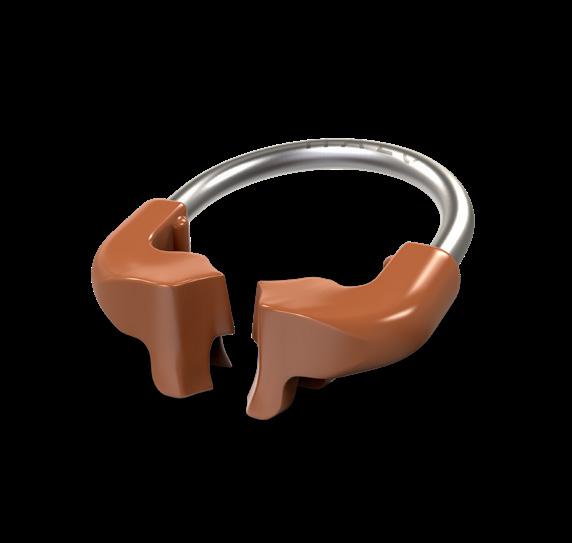
45 1300 65 88 22
Figure 1. Figure 3.
COSMETIC & RESTORATIVE
Figure 2.
Matrices

One of the main purposes of the matrix (band) is to contain the restorative material so it can be shaped into the proper lost proximal anatomy. Matrices can be either circumferential or sectional. They are the fundamental part for achieving the proper anatomy of the tooth, as it is the type of matrix system and not the composite resin material that is primarily responsible for the tooth anatomy.
That is exactly one of the main problems of the Tofflemire-type matrices when used with composites: it delivers an anatomy too parallel or too trapezoidal in relation to the tooth. As mentioned above, the contact point obtained is too close to the occlusal surface, and with occlusal adjustments, it might be removed.
In addition to the lack of a well-contoured profile from occlusal to cervical, they are likely to create problems for the gingival papilla region in terms of food impaction. Also situations like these are more prone to fracture over time because of the masticatory loading.
A class of matrices worth mentioning is the automatrices, sometimes used because of their ease of placement. However, these matrices usually present the same anatomical setbacks similar to those of the circumferential, discussed above. Novel designs in matrix shapes and thickness (together with new rings and wedges) allowed for a better and predictable anatomy, both in occlusal and proximal, the so-called sectional matrices.
One of the reasons why the sectional matrix provides an improved interproximal anatomy with proper marginal adaptation is because such systems can be customized according to the variety of the shapes and surfaces of the proximal surfaces of different teeth. However, it is necessary that a ring (and/or the wedge) acts as a displacement force, otherwise, there’s always the risk of getting a suboptimal contact surface contour. In case of excessive separation force, the matrix might get wrinkled.
There are two types of curvatures in the metallic bands for the Halo Sectional Matrix System: one is the “wrap-around” curvature, going from lingual to buccal, and the other curvature goes from gingival to occlusal (Figure 3). The buccal-lingual curvature is unique to each size of band and it is not incrementally sized, giving the right anatomy for the right tooth. When used with its uniquely designed ring, the matrix is adapted rather than “smashed” against the tooth. In that way, it is possible to achieve both a good separation and the proper anatomy at the same time.
The Halo band’s curvature also has a natural anatomical shape based on measurements from actual teeth, and the curve at the marginal ridge
creates ideal occlusal embrasure, reducing finishing time and occlusal adjustments.
(Figure 4)
There are no doubts that composite resins have achieved prominence as a posterior Class II restorative material. Improvements in both mechanical and optical properties led to greater survival rates, sometimes similar to those typically and historically found with amalgam restorations.
One of the primary challenges for dentists when restoring posterior teeth using composite resin is the establishment of anatomically correct proximal contacts. It is well-known that sectional matrices and separation rings for insertion of Class II composite resin restorations resulted in stronger contact surfaces compared to the utilization of traditional circumferential (Tofflemire) bands and wood wedges. The usage of the latter in conjunction with current materials (such as composite resin) may lead to clinical failure and decreased longevity of these restorations. Today, a new matrix system has moved further ahead, refining the anatomy provided by the matrix, the adaptability of the ring, and the separation force of the wedges.
The innovations brought by the Halo Sectional Matrix System allow clinicians to achieve a more precise proximal contact surface with anatomically correct contours faster and more easily, a fundamental step for optimum form and function of the dentition

Reference
Owens BM, Phebus JG. An evidence-based review of dental matrix systems. Gen Dent. 2016 SepOct;64(5):64-70. PMID: 27599285.
46
Figure 4.
CLICK HERE Halo Sectional Matrix System White Paper Read more COSMETIC & RESTORATIVE
DR. RAFAEL BEOLCHI São Paulo, Brazil
Like


47 henryschein.com.au DENTAL SOLUTIONS
OF AN ARTICLE YOU’D LIKE TO SEE?
SOLUTIONS NOV DEC 2022 AUG / SEPT 2022
DO YOU HAVE A REQUEST
DENTAL
what you see but not satisfying all your needs?
us know what articles and content you would like to see in upcoming editions of Dental Solutions.
SOLUTIONS MAY / JUNE 2022 2022 DENTAL SOLUTIONS VOLUME CLICK HERE
Let
DENTAL
OPTIC WHITE LIGHT UP IN-CHAIR WHITENING KIT
FREQUENTLY ASKED QUESTIONS
Colgate has just launched its Optic White Light Up In-Chair Whitening. This system is a simple and effective in-chair whitening system for patients, with a treatment time of just 30 minutes*.
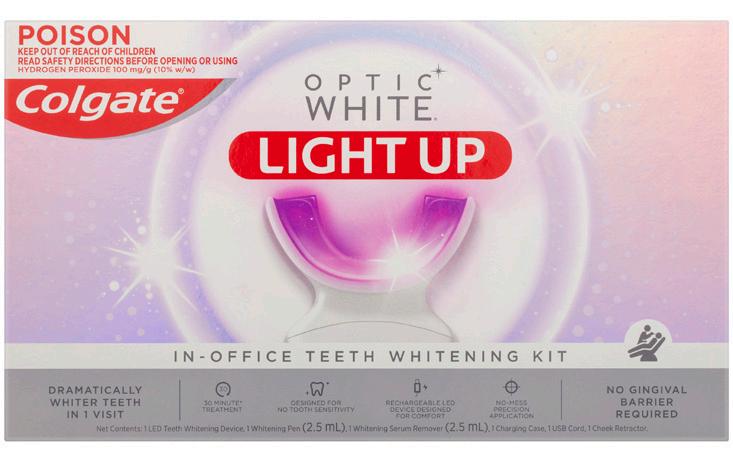
1. How is this in-chair whitening different?
The differences start with the formula. The unique 10% hydrogen peroxide quick dry serum is delivered via the precision pen to enable an easy application - with no mess, and no need for gingival barriers or custom trays.
The LED device uses light energy to amplify the whitening power of the hydrogen peroxide film even further.
Our unique light device contains approximately 700 or more LED lights that give off a very specific light in the range of 410 nm wavelength (Indigo). This is a shorter wavelength compared to other systems, and therefore delivers higher energy that helps accelerate the whitening.
2. How many shades of improvement can be expected from the 30 minute in-chair treatment?
The Optic White in-chair system may result in up to 5.9 shades of improvement after treatment, compared to the initial shade.
3. Will the device increase the tooth temperature?
No, the LED device uses light energy and does not produce heat.
4. Do you need a gingival barrier?
No, you don’t need a gingival barrier.
5. Does Optic White Professional In-Chair include anti-sensitivity components?
The system has been designed for no sensitivity.
6. Can you do more than the three 10-minute applications for your patients? For example, could you do a fourth application?
The Optic White in-chair system has been designed for 3 x tenminute sessions. It has not been tested beyond 3 applications. For your patient’s whitening maintenance, you can provide them with the Optic White Light Up 6% Hydrogen Peroxide Refill Pen to take home with the LED device from the in-chair system you have used for their treatment session.
7. What is the shelf life of the 6% and 10% hydrogen peroxide Pens?
The shelf life is 24 months.
48
PREVENTATIVE
8. Does the LED device have to be fully charged because it needs to last for 30 minutes (3 - 10 minute sessions) ?
Yes, it is recommended a full 4 hours charging session before using.
9. Can patients take the LED Device Home?
Yes, the LED light device is rechargeable, the patient takes this home and can purchase the 6% Refill Pen for their whitening maintenance.
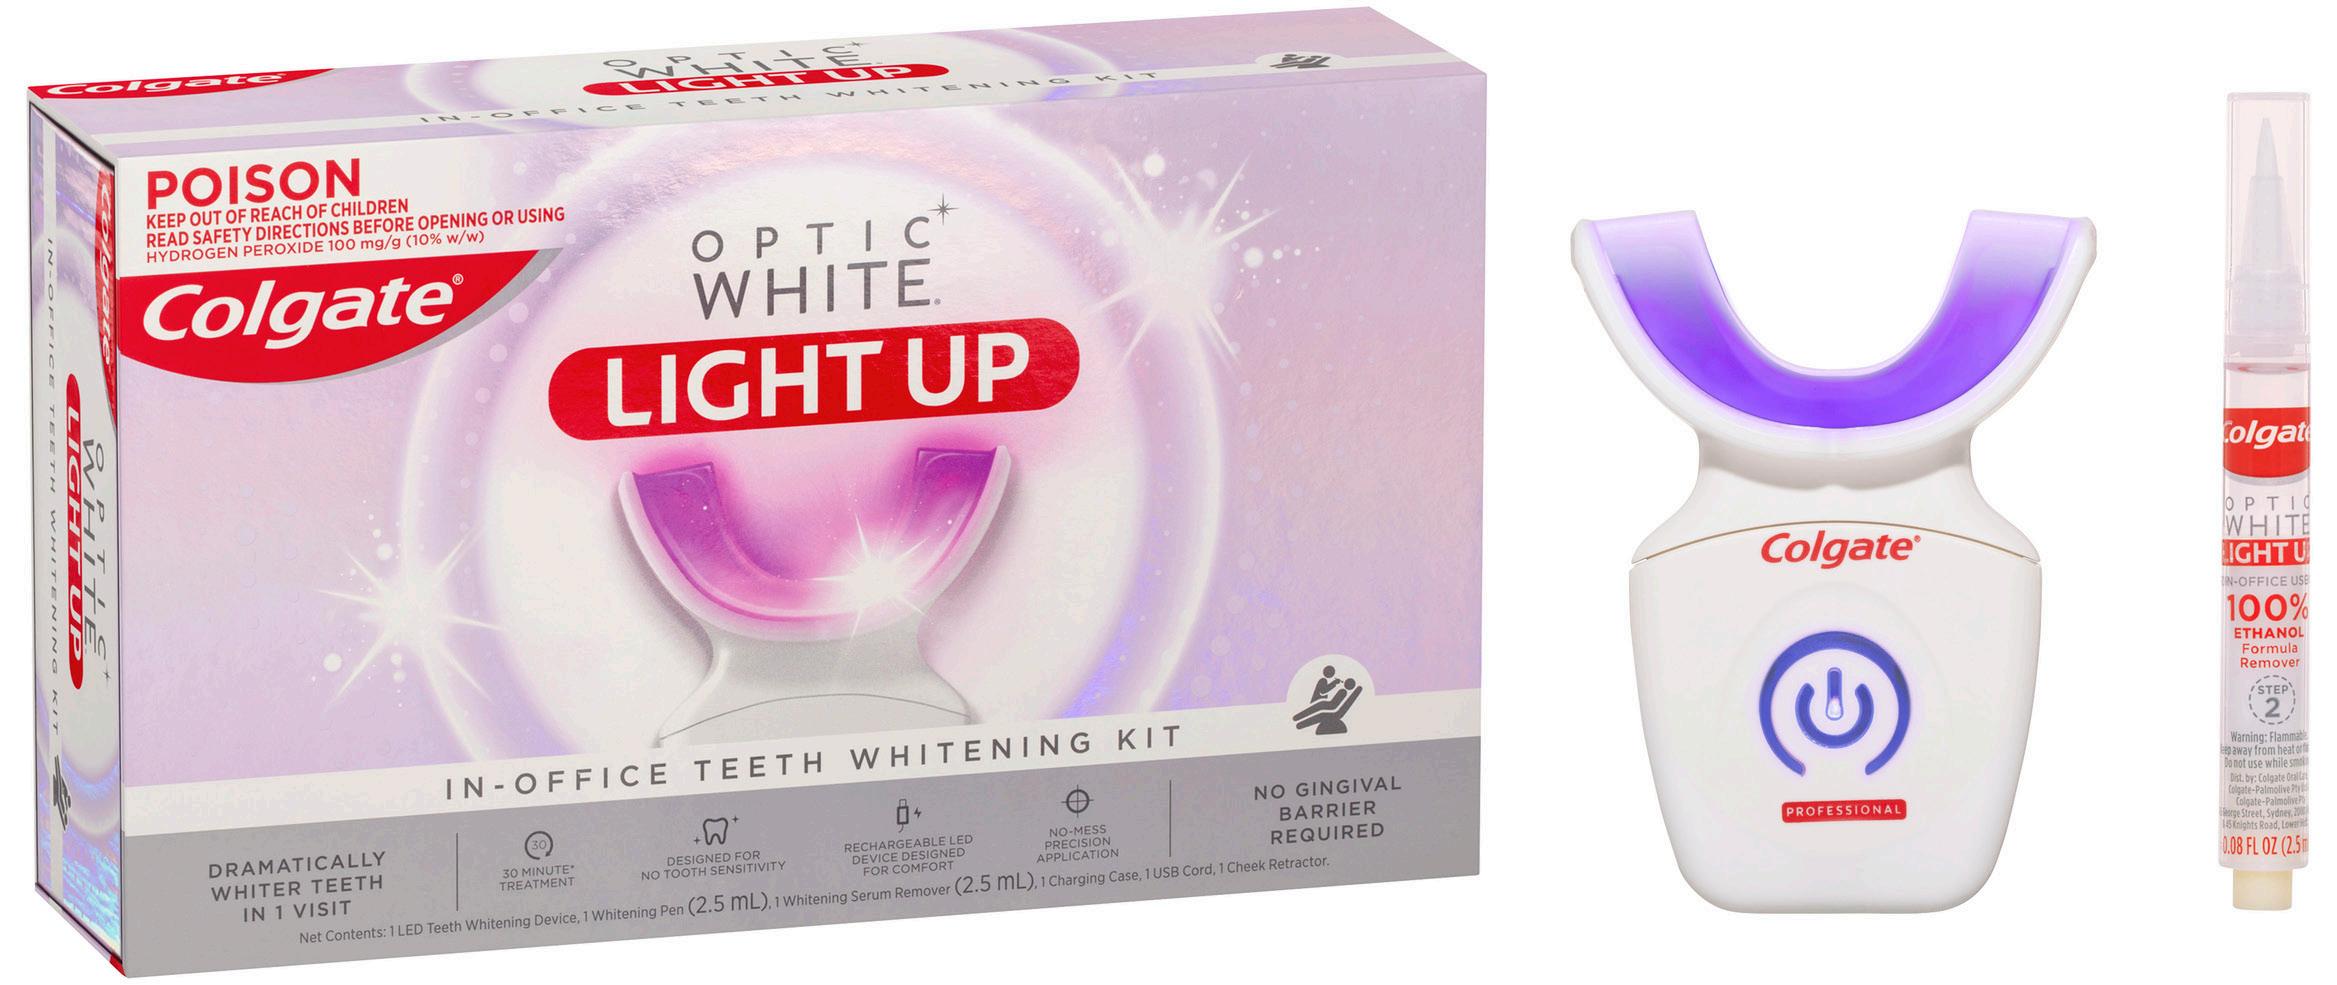
10. Do the teeth need to be dried prior to applying the hydrogen peroxide serum?
Yes, it is very important that the teeth are dry prior to applying the layer of serum. The serum is not water friendly. If teeth are not dry, it will not flow and attach to the tooth surface.
11. Should a patient have a dental cleaning prior to the Professional Whitening In-chair?
The need for a professional dental cleaning should be evaluated by the professional before the whitening session. If the patient examination reveals presence of plaque or extrinsic stains, it is best to remove these before whitening to ensure the best results.
* Refer to the leaflet for full instructions
49 henryschein.com.au PREVENTATIVE
View Optic White Light Up on Online CLICK HERE How to use Optic White Light Up WATCH VIDEO
OCCLUSAL GUARDS
HOW DO THEY PROTECT TEETH?
Recent global events causing uncertainty of the future, and change from our normal ways of living prior to COVID-19, has led to an increase in patients presenting with worn, chipped or cracked teeth.1
Increased stress levels in life lead to increased or new incidences of grinding and clenching habits during the night or day which may not have previously existed, leading to significant shear forces being exerted on teeth and fracturing or wearing the enamel.2
Whilst the foundations of prevention in dental health have previously focused more on the oral hygiene habits of regular brushing and flossing to maintain healthy gums and teeth, protecting the biting surfaces of the teeth from grinding and clenching is now an additional, critical, preventative focus.
One great way to help protect your patient’s teeth in the long term is the use of an occlusal guard.

An occlusal guard or occlusal splint is a dental appliance that is custom fitted to the biting or occlusal surfaces of the teeth in an arch to provide a protective barrier against the opposing teeth. Usually made out of a hard acrylic or nylon material, occlusal guards help protect teeth by being a stressbreaker between the upper and lower teeth.
In cases of patients who either grind (movement of teeth against each other horizontally) or clench (movement of teeth against each other vertically) their teeth during sleep, an occlusal guard can also provide other benefits including relief of jaw or temporomandibular joint (TMJ) pain as well as headaches.
For patients who also suffer from sleep apnoea and do not tolerate a continuous positive air pressure (CPAP) device, some occlusal splints help position the mandible in a forward position allowing opening of the airways to facilitate better oxygen flow during sleep, to the brain. These are commonly referred to as mandibular-repositioning splints.
The type of occlusal guard that is required for a patient is highly dependent on the symptoms they exhibit resulting from teeth grinding or clenching.
However overall, occlusal guards can generally be classified by single arch or dual arch guards as well as by the hardness of the exterior/interior surface, being either hard or a combination of hard/hard and hard/soft.
Importantly, there are some boil-and-bite occlusal guards which can be purchased at pharmacies without seeing a dentist, however patients should be educated that prescribed customised splints have always been shown to produce better results in the long term.
Fabrication of a customised occlusal guard usually requires either an impression or scan of the teeth surfaces and prescribed bite registration which will dictate the thickness and bite relationship of the teeth when the occlusal splint is worn.
After fabrication, it is expected that the occlusal guard will then need to be fitted and possibly adjusted, sometimes over time, to ensure it is comfortable and balanced.
Be sure to advise patients that like anything new, like a pair of shoes, occlusal guards do need to be adapted to and worn in.
Educating your patients on regular cleaning and maintenance of the occlusal guard will ultimately ensure it lasts as long as possible however should the occlusal guard be worn down to the point it is no longer protective or relieves pain symptoms, this suggests the splint has done its job and fabrication of a new occlusal splint may be required.
50 PREVENTATIVE
To best care for an occlusal splint, it is important that the splint be cleaned with a toothbrush and soapy water especially on the interior surface which contacts the teeth biting surfaces.
Be sure to instruct your patients not to use toothpaste to clean the occlusal splint as the small abrasive particles can wear the splint faster. Patients can also use oral appliance cleansing tablets which dissolve in water producing a chemical solution that disinfects and cleans an occlusal guard.
Occlusal guards are a simple but effective strategy to not only protect the teeth from wearing, chipping or cracking, but also help to relieve jaw pain, headaches and in some cases sleep apnoea. If you see a patient with early signs of wear of their enamel surfaces, be sure to have a conversation with them about how an occlusal guard could be a great solution to protect their teeth in the long term and prevent unwanted dental complications from clenching and grinding.
These conversations with patients also help to add value to our existing prevention focus of improving oral hygiene to facilitate good dental health.
References
1. Mirhashemi A, Khami MR, Kharazifard M, Bahrami R. The evaluation of the relationship between oral habits prevalence and COVID-19 pandemic in adults and adolescents: A systematic review. Front Public Health. 2022;10:860185. doi:10.3389/ fpubh.2022.860185
2. Nosrat A, Yu P, Verma P, Dianat O, Wu D, Fouad AF. Was the Coronavirus disease 2019 pandemic associated with an increased rate of cracked teeth? J Endod. 2022;48(10):12411247. doi:10.1016/j.joen.2022.07.002
3. Do I need a night guard for teeth clenching. Colgate.com. Published November 1, 2022. Accessed November 2, 2022. https://www. colgate.com/en-us/oral-health/bruxism/do-ineed-a-night-guard
4. How to stop clenching teeth. Colgate.com. Accessed November 2, 2022. https://www. colgate.com/en-us/oral-health/bruxism/how-tostop-clenching-teeth
5. Grinding teeth can lead to facial pain. Colgate. com. Published November 1, 2022. Accessed November 2, 2022. https://www.colgate.com/ en-us/oral-health/bruxism/grinding-teeth-canlead-to-facial-pain
Author Bio
Dr Kaejenn Tchia is a recent graduate working in a corporate private practice in Darwin, Northern Territory.
He is the current Treasurer of the Australian Dental Association NT Branch Inc.
In 2020, he was an inaugural member of the Bupa Dental Corporation Clinical Advisory Panel, helping guide strategic direction and providing input towards clinician development within the network of practices.
He is passionate about helping and collaborating with fellow dental colleagues, recently embarking on a new journey to help recent graduates eliminate burnout through a 6-step B.E.L.I.E.F System through his motivational coaching platform, The Limitless Dentist.
Kaejenn is a member of the Colgate Advocates for Oral Health Editorial Community and hopes to use this platform to raise awareness of the importance of mental health in dentistry and provide mindset tools, which can help his colleagues unlock their next level of growth and success.
 DR KAEJENN TCHIA BDS Darwin, Australia
51 1300 65 88 22 PREVENTATIVE
View Colgate Advocates for Oral Health Articles View Colgate product range CLICK HERE CLICK HERE
TREHALOSE
BEST EFFICACY FOR SUPRAGINGIVAL STAIN AND BIOFILM REMOVAL
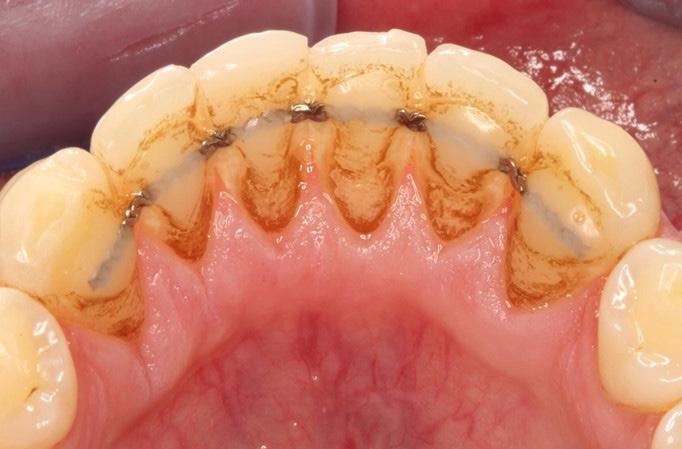
Dürr Dental has recently launched its portable unit in Australia, the MyLunos handpiece, which has been available overseas since 2017.
In terms of reprocessing, all components are autoclavable and can be placed in the ultrasonic bath, reducing risk of clogging and ease of maintenance. Furthermore, clinicians and patients can feel safe regarding the hygienic use of the device. The primary benefits of subgingival air polishing are its gentler application and shorter treatment time in comparison to hand instrumentation and ultrasonic scalers.
One of the low-abrasive powder materials, a non-cariogenic disaccharide, trehalose, has demonstrated equivalent outcomes to ultrasonic scaling over 12 months in terms of reducing periodontal pockets and bleeding on probing in patients with pocket depths of 5-9mm.
This was conducted using the new sterile perio tip (pictured) designed by Dürr Dental, which has
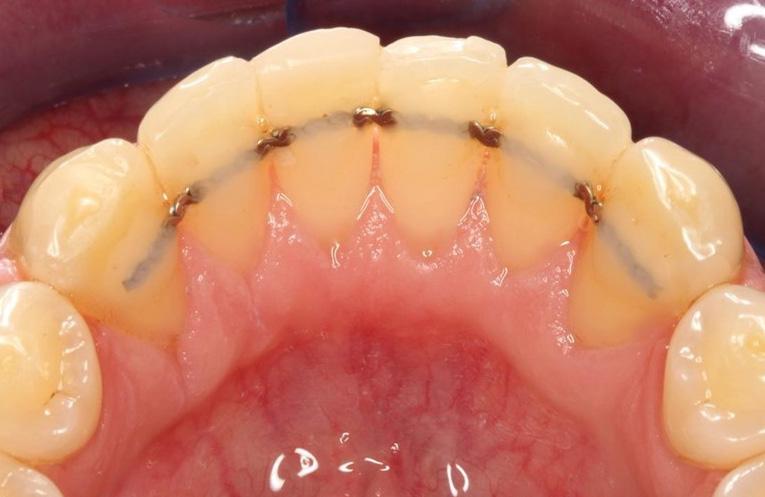
a small flexible diameter, allowing easy entry into the periodontal pocket, providing a much more comfortable experience for the patient compared to ultrasonic scaling.
In contrast to an apical streaming tip, the single opening on the lateral surface of the tip enables optimal redirection of the compressed air towards the root surface, lowering the risk of emphysema.
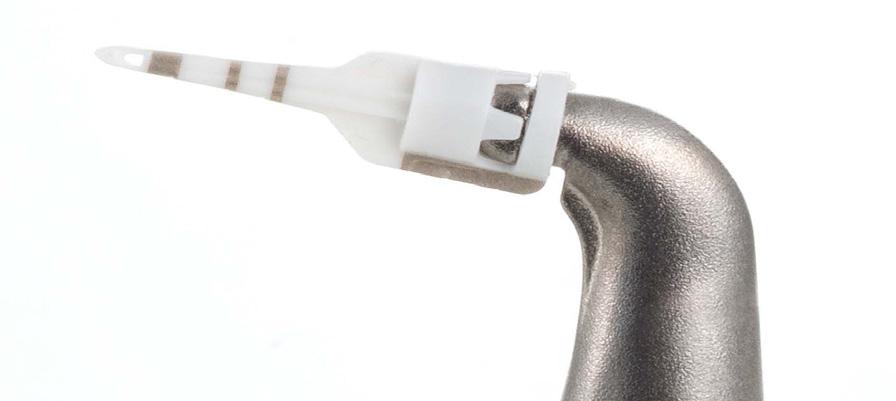
Trehalose, which is substantially less abrasive than glycine and sodium bicarbonate, has also demonstrated the best efficacy for supragingival stain and biofilm removal.
The MyLunos Supra nozzle allows easy removal of plaque and stains using trehalose that can be integrated into routine hygiene visits, cleaning around orthodontic brackets, or preparing for fissure sealants.
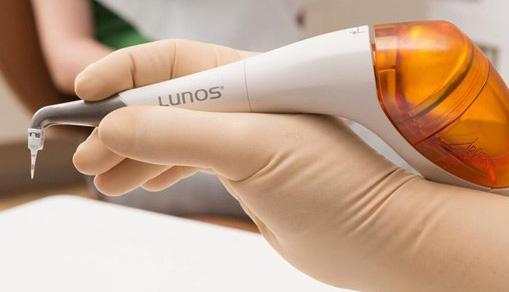
52 PREVENTATIVE
Before After
Morawietz, M, et al. 2020, Cleaning performance in comparison to surface roughness
There are three flavours of the trehalose-containing Gentle Clean powder for supragingival application: orange, spearmint, and neutral. Additionally, a neutral-flavoured Perio Combi powder is offered as a one-for-all powder for both supragingival and subgingival treatments. Patients no longer need to feel the unpleasant grittiness commonly associated with air polishing due to trehalose’s exceptional water solubility, along with a pleasant tasting experience.


REFERENCES
Kruse, A.B., Wölki, B.J., Woelber, J.P. et al. Subgingival air polishing with trehalose powder during supportive periodontal therapy: use of a conical shaped tip during a randomized clinical trial. BMC Oral Health 22, 70 (2022). https://doi.org/10.1186/ s12903-022-02109-1
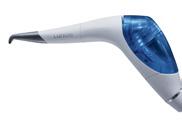


Before
Treatment
53 henryschein.com.au PREVENTATIVE End Result
View the Lunos Product Range on our website FREE Webinar from Lunos CLICK HERE CLICK HERE CLICK HERE 2. an extensive product handpieces to powder terms of product ingredients LUNOS® HAS FOUR REASONS FOR BRIGHTER SMILES Download the product brochure
MASKING WHITE SPOT LESIONS WITH ICON
DR. INGO FRANK
White spot lesions are early signs of demineralization under anapparently intact enamel surface layer. These early enamel lesionsshow a whitish appearance as a result of an increased porosity within the lesion due to mineral loss [1].
In case of poor oral hygiene or salivary hypofunction even on buccal surfaces of the teeth a plaque accumulation can result in white spot lesions [2]. Especially in patients that underwent orthodontic treatment with brackets white spot lesions can occur due to the difficulties to clean the area adjacent to the bracket. Several clinical studies show a high prevalence of white spot lesions after bracket removal [3, 4].
With preventive strategies like improvement of the oral hygiene and topical fluoride application there is a good chance of arresting early lesions. Though the caries progression may be stopped the whitish appearance often remains as the remineralization is superficial and there is still a porous lesion body underneath [2]. In addition to that stains can be incorporated into the lesion with the result of a brownish appearance of the lesion (brown spots) which often leads to even more esthetic deficiencies. That is why the dentist may become confronted with the patients desire to rehabilitate esthetics. Treating non-cavitated white spot lesions may include tooth bleaching, micro-abrasion, composite fillings or even prosthetic restorations like veneers or combinations of these treatments [5]. With the infiltrant the porosities in the lesion body are occluded. Therefore, this treatment may be used not only to arrest enamel lesions but also to improve the esthetic appearance of buccal white spots.
Clinical case report
A 19 year-old male patient complained about the appearance of his upper front teeth due to whitish lesions on the vestibular surfaces. He had an orthodontic treatment with brackets during adolescence and when the brackets were removed
the white spot lesions became apparent. In order to fulfill the patient´s desire of an esthetic improvement we suggested an Icon treatment to mask the lesions.
All these options are quite invasive implying tooth structure loss. As a micro-invasive alternative caries infiltration (Icon) can be applied to prevent further caries progression. It imbeds the adjunctive effect of masking the whitish appearance of the lesions.
Discussion
The manifestation of white spot lesions after bracket removal is a common side effect due to the impeded oral hygiene adjacent to the bracket during orthodontic treatment [3, 4, 6]. As esthetic demands of the patients arise dentists do not only have to take care of preventing a further progression of the lesions but also have to deal with the patient´s wishes of masking these lesions which can be esthetic compromising. In contrast to other treatment options like composite filling, microabrasion or bleaching, Icon offers a micro-invasive treatment tool without drilling that can not only stop the lesions progressions but also can mask the whitish appearance of the white spot lesions. In case of adjacent cavitated lesions Icon can be successfully combined with a conventional filling in this area. When the cavitated lesion is restricted to enamel the infiltrant even enhances the shear bond strength of the adhesive [7]. Filling procedure and infiltration can be combined in one step. When the cavitation involves dentin the filling should be performed before the Icon treatment as the hydrochloric acid of the Icon-Etch might lead to a decrease of shear bond strength of the adhesive to dentin [8].
54
PREVENTATIVE
Fig.7: When Icon-Dry is applied, the lesions disappear for thewetting moment. This gives the operator a preview of the results. If the whitish-opaque coloration on the etched enamel diminishes, the procedure can be continued with the infiltrant application. If the lesions are still visible, the etching step should be repeated. After 30 seconds the surfaces are thoroughly dried with oil free and water-free air.
Fig.
After the infiltrant has been applied on all treated surfaces, the infiltrant is set for 3 minutes. Excess material is removed with a cotton wad and dental floss before it is light cured for 40s. This infiltrant step is repeated letting the infiltrant set again for 1 minute before excess removal and light curing. Finally the surfaces are polished.
Conclusion
With Icon white spot lesions can be masked effectively. It is micro-invasive to the treated enamel surfaces, prevents further demineralization and is easy in handling and application. In case of white spot lesions occurring next to cavitated lesions Icon can successfully be combined with a conventional filling of the cavitated lesion.
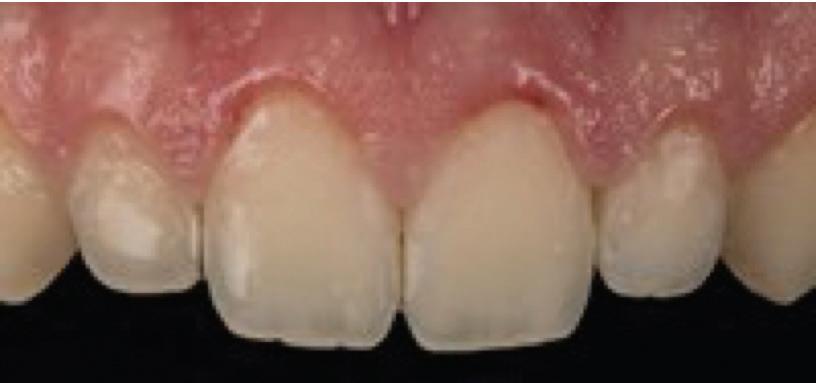
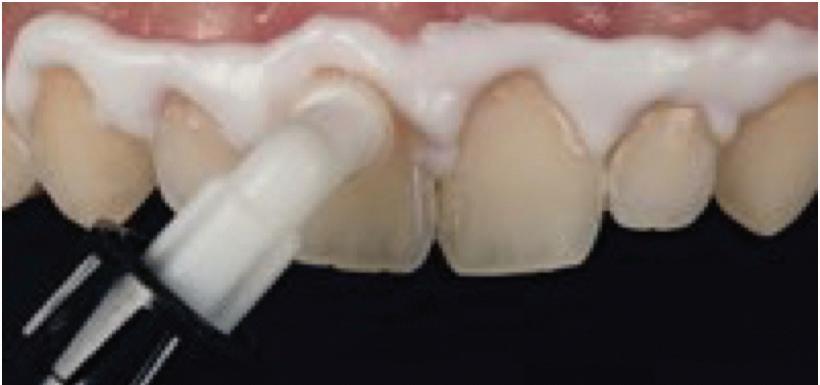
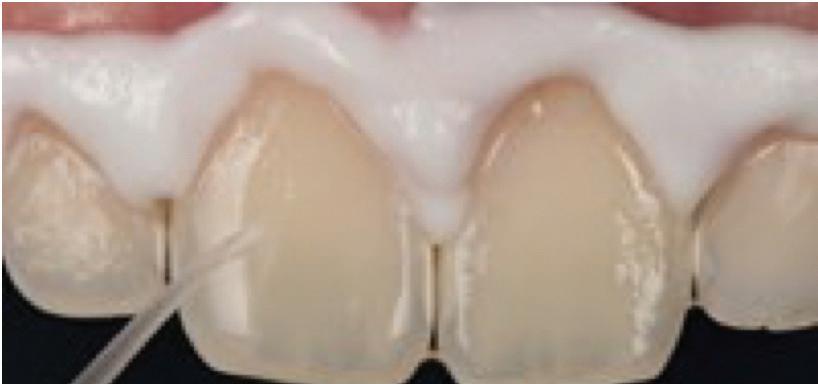
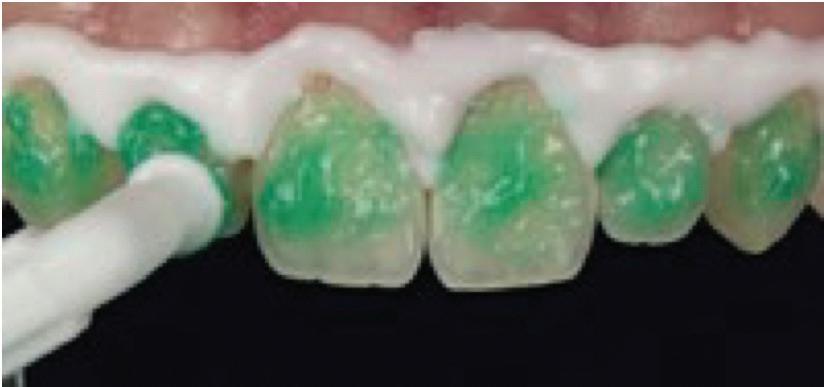
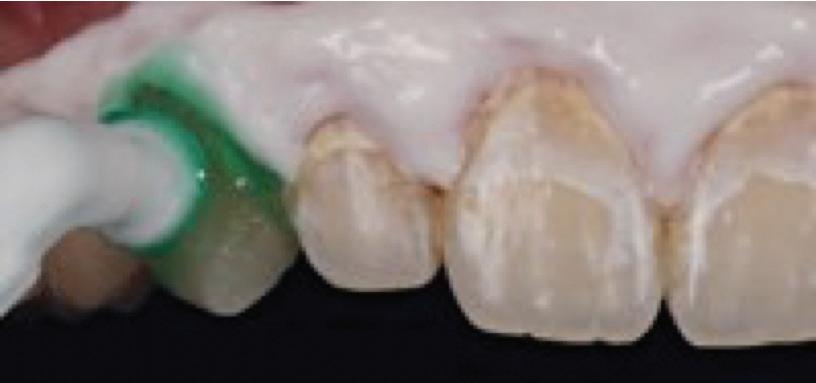
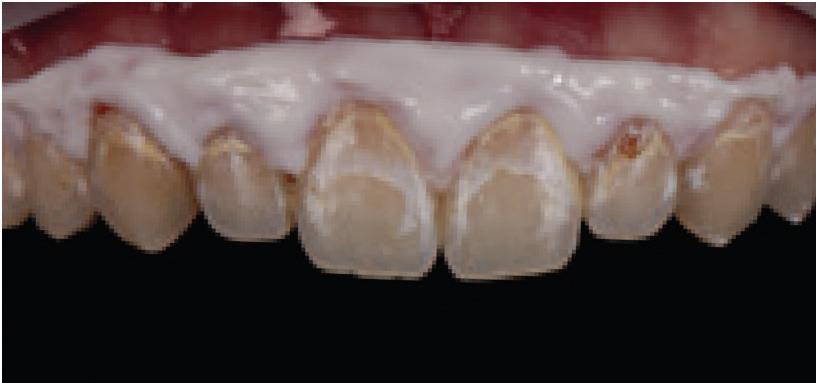

Key Learnings
• Infiltration treatment can be combined with direct composite restoration when both white spots and cavitated caries lesion exist on enamel.
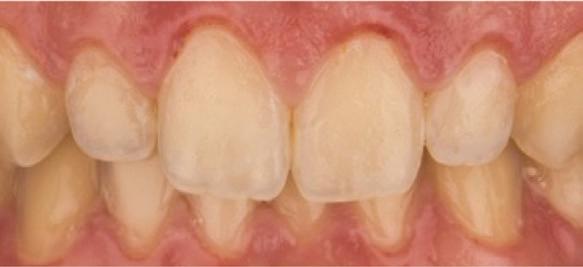
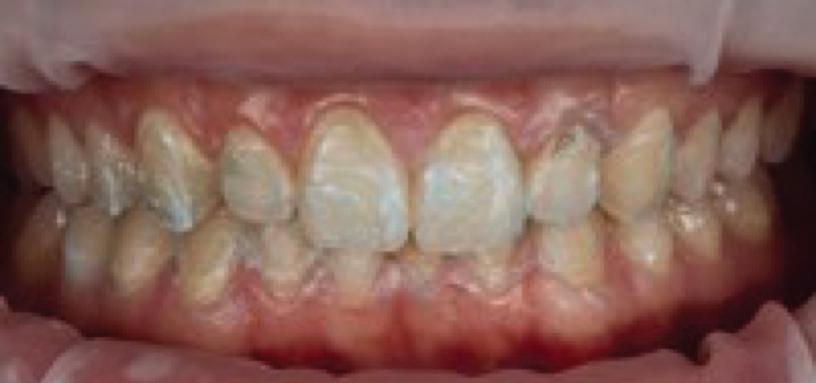
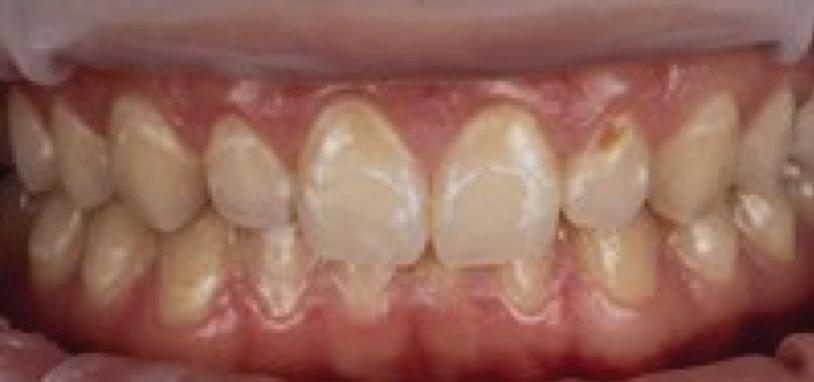
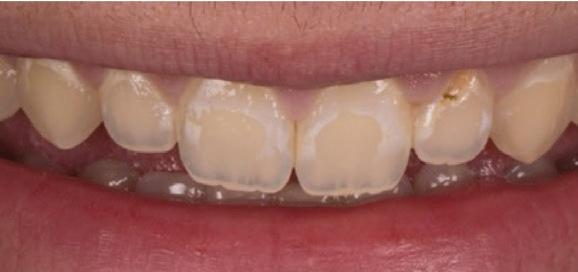
• When the cavitated lesion is restricted to enamel the infiltrant even enhances the shear bond strength of the adhesive. Filling procedure and infiltration can be combined in one step.
• When the cavitation involves dentin, the filling should be performed before the Icon treatment as the hydrochloric acid of the Icon-Etch might lead to a decrease of shear bond strength of the adhesive to dentin.
55 1300 65 88 22
DR. INGO FRANK Praxisklinik Dres. Bayer, Kistler, Kistler, Elbertzhagen, Frank, Neugebauer & Kollegen, Landsberg am Lech, Germany
Fig.1: Initial situation before treatment with Icon.
Fig. 2: In order to get an accessible isolated working field optragate was applied.
Fig. 3: Professional cleaning of the vestibular surfaces with fluoride free prophylaxis paste.
Fig.4: For the application of Icon an optimal dry working field is mandatory. Furthermore any contact of the material with the gingiva should be avoided. In this case the liquid dam was applied.
Fig. 5: Application of the Icon-Etch for 2 minutes to condition the lesion surface.
Fig. 6: The etching gel is covering all white spot lesions of the vestibular surface of the teeth13-23. The cavitated lesion on the vestibular surface of tooth 22 has been treated with a composite filling. After 2 minutes the etching gel is removed with water spray for 30 seconds and the surface is dried.
9:
Fig. 10: Final result after Icon treatment. The white spot lesions are masked and a highly satisfying result with large improvement of the esthetic appearance could be achieved.
PREVENTATIVE
Fig.8: Application of the infiltrant.
COMPLEX CANAL SYSTEMS
PRIMARY & SECONDARY TREATMENT WITH THE AID OF A MARTENSITIC FILE SYSTEM
The chemomechanical preparation of the root canal system is an elementary part of endodontic therapy. The purpose of mechanical preparation is to remove infected dentin and make the canal system accessible for cleaning and disinfection with irrigation fluids.
The success of endodontic therapy depends largely on the complete cleaning of the entire root canal system. The preparation should always be adapted to the degree of infection of the endodontic. Severe or abrupt curvatures, calcification of the canals or similar anatomical peculiarities can make it difficult to produce an adequate apical diameter and cone thus placing high requirements on the file systems. Heat treatment of endodontic nickel-titanium file systems can decisively change the material properties to avoid iatrogenic damage through increased flexibility and reduced recovery effect. In the following, the systematic preparation of complex root canal systems is demonstrated using three case studies.
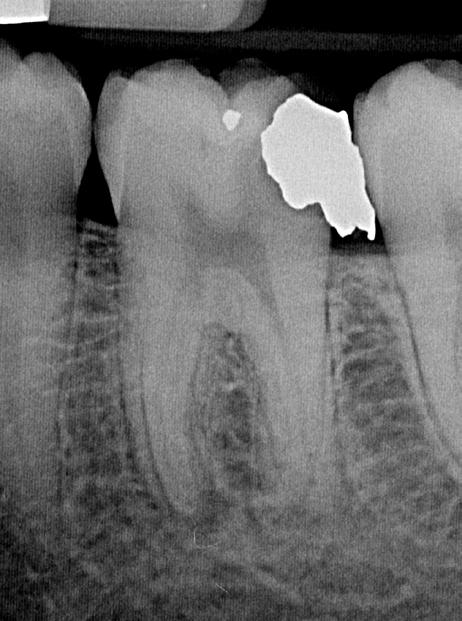

CASE 1: Primary treatment of a first lower molar with radix entomolaris
A 34-year-old female patient was referred to us for further treatment of tooth 36. After the diagnosis of irreversible pulpitis by the general dentist, initial pain therapy was carried out in the form of caries excavation, trephination of the pulp chamber, medicinal insertion and adhesive build-up filling. The patient presented to our practice with significantly reduced symptoms.
Clinical findings
Tooth 36 had no increased probing depths circularly and was conservatively restored with an adhesive preendodontic build-up filling.
Radiographic findings
The diagnostic radiograph taken preoperatively shows an insufficient amalgam filling in the distal proximal space. The mesial root shows periapical osteolysis (figure 1).
A mesiobuccal, mesiolingual, distobuccal and distolingual root canal was probed using a microopener. The preparation of the primary access cavity for better accessibility of the canals was carried out with long-neck carbide round bur.
Based on the preoperative diagnostic X-ray, the length of the root canals could be preliminarily approximated. The canals were continuously rinsed with 6% NaOCl during the further course of therapy. After preparation of the access cavity, coronal expansion of the root canals followed using EdgeEndo X7 files size 17.06.
Electrometric determination of the canal length using a Morita Root ZX Mini Apex Locator was performed with C-Pilots size 8-10. After the working length was determined, the glide path was rotationally extended with EdgeFile X7 size 17.04 and 25.04 and finally prepared to 30.04 (Figure 2).
Therapy
The endodontic treatment took place in one session. After anaesthesia and placement of the rubber dam, the provisional filling was removed and the initial intracoronal diagnosis was made.
The preparation was followed by a rinse with 17% EDTA for 60 seconds per canal, followed by the final soundactivated rinse with 6% NaOCl for 60 seconds per canal. The preparation and the fit of the congruent EdgeEndo X7 gutta-percha tips were confirmed with the help of a master point image (Figure 4). After drying the canals and access cavity with microsuction and paper tips, the obturation of the canal system followed using the warm vertical compaction technique.
A heat-resistant bioceramic sealer was used for this purpose (figure 3). The subsequent closure was done with a bulk fill flow composite (figure 5).
56 ENDODONTICS
Figure 1 Preoperative diagnostic image
The 61 year old patient presented for primary root canal treatment at 27 after referral by his general dentist. The tooth had been crowned about 2 years ago and the patient was symptom-free. In the course of the radiological check-up after apicoectomy of tooth 26, a periapical osteolysis had been detected on tooth 27.

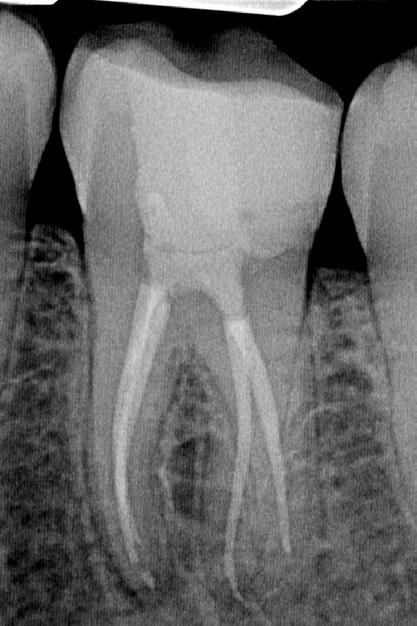
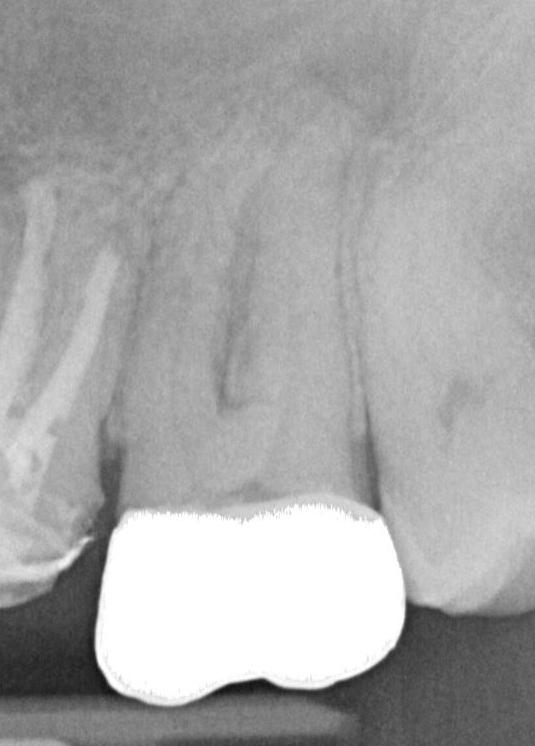
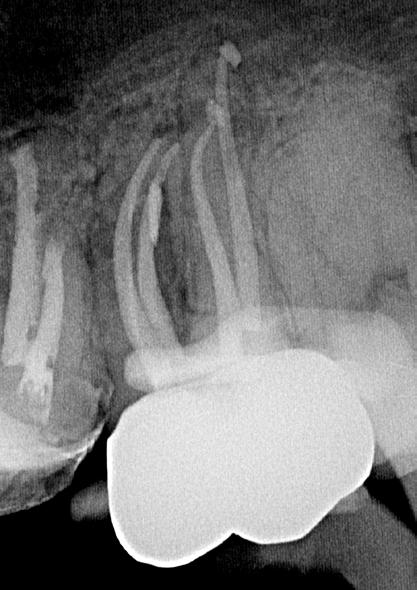
Clinical findings
Tooth 27 showed a sufficient restoration. No increased probing depths were palpable and both cold and percussion tests were negative.
Radiographic findings
Tooth 27 shows periapical osteolysis in the sense of chronic apical periodontitis (Figure 6).
Therapy
The primary endodontic treatment of tooth 27 was also performed in one session. After trephination, the initial intracoronal diagnosis and visualisation of the four canal orifices was performed using a long-neck carbide round bur. An EdgeFile X7 size 17.06 was used for coronal expansion of the canals. The creation of the glide path could be done purely mechanically.
For this purpose, EdgeFile X7 sizes 17.04, 17.06 were used in an alternating manner until the approximately radiographically determined preliminary working length was reached. After electrometric determination of the working length with C-Pilot files size 8 and 10, further preparation was carried out with EdgeFile X7 size 20.06, 25.06 and 30.06. After final preparation, the canals were rinsed with 17% EDTA for 60 seconds. As a final rinse 6% NaOCl was sonically activated. A masterpoint image was taken to verify the preparation and the fit of the adapted guttapercha tips (figure 7). After drying with micro aspiration and paper tips, all canals were obturated with bioceramic sealer using a warm vertical filling technique (figure 8). Adhesive closure was carried out with Bulk Fill Flow composite (figure 9).
57 henryschein.com.au
CASE 2: Primary treatment of an upper second molar
Figure 2 View of the mesial canal system after preparation
Figure 6 Preoperative diagnostic image
Figure 3 View after obturation
Figure 7 Masterpoint image
Figure 4 Masterpoint image
Figure 8 Control image after root canal filling
Figure 5 After root filling and adhesive closure
Figure 9 Control image after adhesive closure
ENDODONTICS View EdgeFile X7 online CLICK HERE
ENDODONTICS
CASE 3: Revision of an upper second molar
A 54-year-old patient presented with acute complaints on tooth 27. He had been referred by his general dentist for further treatment after he had, according to his own statement, unsuccessfully searched for a second mesiobuccal canal.
Clinical findings
Tooth 27 had a provisionally closed access cavity. The tooth responded positively to the percussion test and palpation of the vestibule revealed a pressure dolence in the area of the mesiobuccal root.
Radiographic findings
The preoperative radiograph (Figure 10) shows tooth 27 already trephined by the previous practitioner. The root filling appears inhomogeneous. The root filling material in the mesiobuccal canal is extended beyond the radiographic apex and there is periapical osteolysis of the mesiobuccal root.
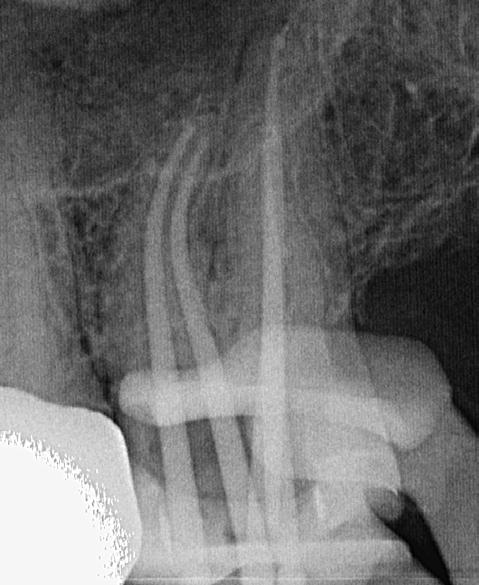
The opening and initial preparation of the second mesiobuccal canal was carried out using the EdgeFile X7 size 17.04, 17.06 in an alternating manner as described above.
After electrometric determination of the working length of all canals, the preparation was continued with EdgeFile X7 at full working length.
In the first mesiobuccal canal, distobuccal and palatal preparation was completed with EdgeFile X7 size 40.06, while the second mesiobuccal canal was prepared to 30.06 (Figure 13).
Therapy
The revision treatment was carried out in two sessions. After placing the rubber dam, the temporary filling was removed, and the access cavity was cleaned. This was followed by intracoronal diagnostics (figure 11). Bacterial colonized root filling material was found in the mesiobuccal, distobuccal and palatal canals.
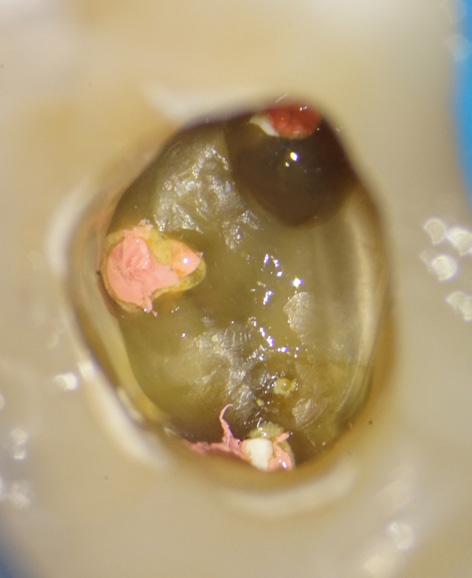
The orifice of the mesiobuccal canal was widened in the palatal direction. Removal of a mesial dentin overhang with a long-shaft round bur exposed the orifice of the second mesiobuccal canal, which was displaced far in the palatal direction.
The root filling material was removed using EdgeFile X7 size 25.06 and 17.06 in a crown-down technique to reduce the spread of germs and bacterial colonized root filling material apically.
After completion of the preparation, the canals were dried, calcium hydroxide was placed to full working length and the tooth was provisionally closed with an adhesive composite filling. Further treatment took place after two weeks when the patient was symptom-free. After renewed electrometric control of the working length, preparation of a master point image (figure 12) and sound-activated final rinsing with 17% EDTA and 6% NaOCl, the canals were filled with bioceramic sealer using the warm vertical filling technique (figure 15).
The direct adhesive closure of the access was carried out with a bulk fill flow composite (figure 14).
58
Figure 10: Preoperative diagnostic image
Figure 11: After working out the primary access cavity; showing the mb2 near the palatal canal.
Figure 12: Masterpoint image
Discussion
Systematic preparation of the root canal system includes opening up the canal system and securing a glide path as well as consecutive expansion of the canal system from coronal to apical. Minimally invasive endodontic concepts focus on preserving the coronal pericervical dentin. However, a rational approach to a minimally invasive endodontic procedure should include sufficient preparation of the apical zone in addition to reduced coronal substance removal.
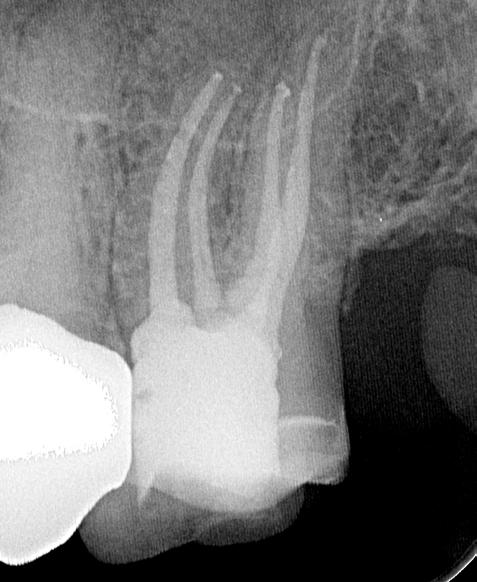
After coronal expansion of the 17.06, the change to the file of size 17.04 is made, which is used in short pecking working movements until the preliminary radiographically determined working length is reached.
In case of resistance, the file 17.06 is passively brought to the previously achieved length and then allows further advancement of the 17.04. In many cases, time-consuming manual glide path preparation can thus be dispensed with.
It should allow sufficient contact with irrigation fluids for tissue dissolution and disinfection and should therefore be adapted in size and conicity to the degree of infection of the endodontic site. A coronal-to-apical approach offers the advantage of increased tactility and reduced stress on the file due to reduced contact with the canal wall and can also reduce the spread of bacteria to the apical side. Newer heat-treated file systems with reduced maximum diameter such as EdgeFile X7 from EdgeEndo offer increased safety and efficiency due to their improved material properties and geometry. In our practice, initial mechanical glide path setting with EdgeFile X7 size 17.04 and 17.06 has proven to be particularly effective in canal systems that are difficult to access. The files are used alternately for this purpose.
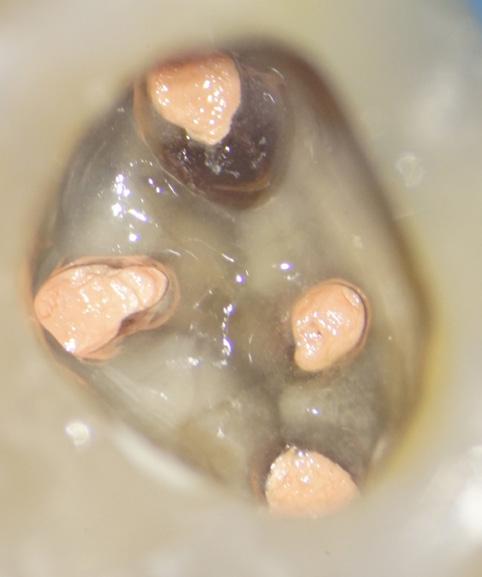


Further preparation is carried out in taper 04 or 06, depending on the anatomical situation, the degree of infection and the planned filling technique.
The maximum cross-section of the EdgeFile X7, reduced to 1 mm, allows the substance of the pericervical dentin to be preserved even when preparing large apical diameters and offers increased flexibility in curved root canals. In the present cases, due to the above-mentioned advantages, both difficult-to-access and multiplanar curved root canals could be prepared in a safe, efficient, and rational minimally invasive manner with the help of a simple file protocol.
59 1300 65 88 22
Figure 14: After obturation and adhesive closure
Figure 15: Access cavity after obturation
ENDODONTICS
Figure 13: Root canal system after treatment
DR. PHILIPP EBLE Board Certified Endodontist Germany
built- in patency (OGP) delicate in canals. helps to formation. forward released apex convenience the first other manufactured by establishing a the used ZX2 can efficiency, provide
ENDODONTIC MOTORS
BELLS & WHISTLES OR USEFUL FUNCTIONS?
Thinking ahead focused on life
There are many factors that contribute to predictable endodontics. Typically, a lot of focus is directed to the efficacy, safety and ease of use of the latest rotary NiTi file systems on the market and often there is less consideration afforded to the motors that drive these rotary systems. The objective of this article is to describe some of the latest features available in endodontic motors and consider if this technology has real value in practice.
Many of the currently available motors have preset speed and torque settings for popular file systems and sequences, however being able to customise the speed and torque settings to your own specific needs and then save them to the motor’s memory is a useful function. A conscious choice of settings rather than adopting a plug and play type approach is often a good idea, so you are always mindful of the appropriate speed, torque settings and safety features relevant to the size of the file and the stage of preparation.
With the exception of reverse cutting file systems that require a motor with a reciprocating action, forward cutting rotary endodontic files can be used in all manufacturer’s endodontic motors.
A light weight compact, cordless endodontic specific motor with a small handpiece head size, independent of the chair may provide easier access and greater tactile feedback.
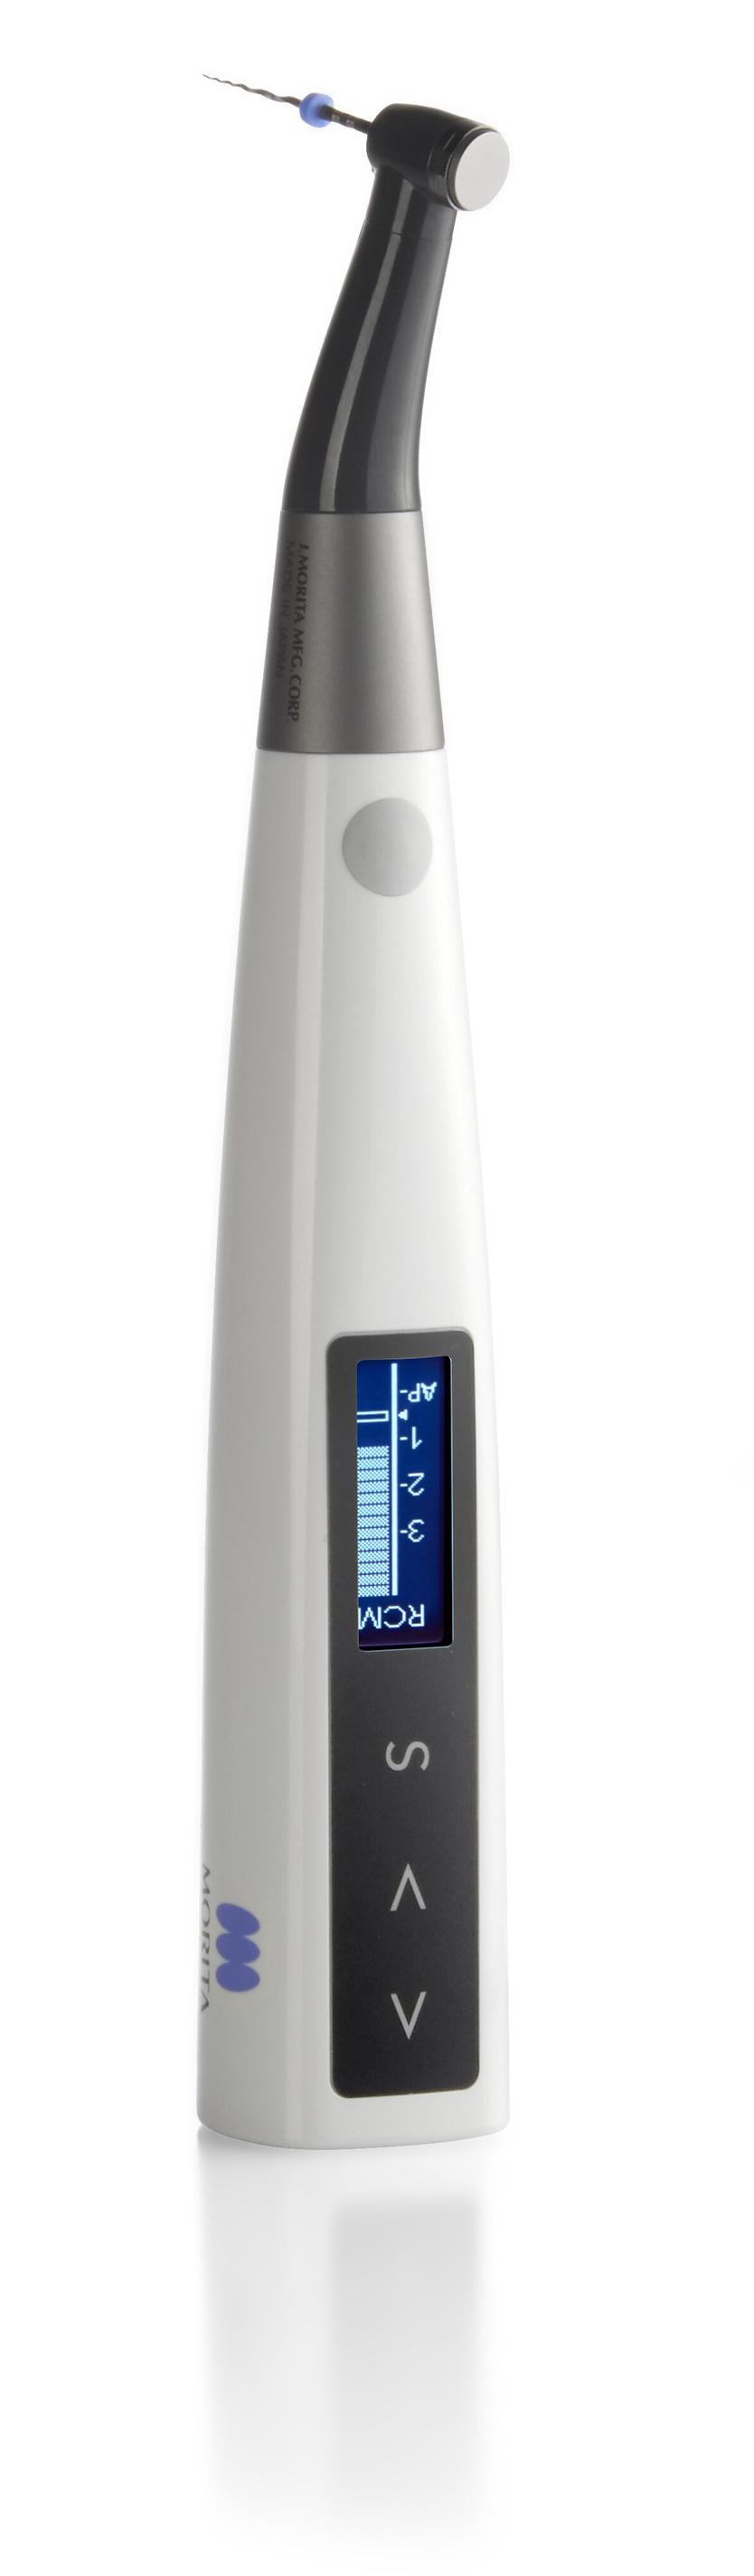
In terms of each stage of canal preparation, the useful features of an endodontic motor include:
1. Coronal Flaring & Straight line access
Typically with crown-down preparation a larger taper file is used to create the coronal flare. As a general rule, for larger taper files the torque setting trigger can be set higher, but it is best to note the maximum speed and torque setting recommendations specific to the file system of choice. Setting the torque trigger at a specific value in Ncm allows torque reverse safety features to be employed. True torque reverse is one of the most important safety features in an endodontic motor. It ensures that when the torsional load on the file reaches the preset torque trigger, the motor will reverse the file, therefore releasing the torsional load on the file and reducing the risk of file fracture.
Some of the newer motors allow selection of multiple torque settings, even up to a high 5 Ncm. The speed settings available on most motors will range between 150 and 1000rpm. Traditionally most rotary file systems have optimal cutting speed recommendations around the 300rpm mark, but it’s a benefit to have adjustable speed settings as some of the newer file systems have a higher optimal cutting speed of up around the 500rpm mark.
60
ENDODONTICS
2. Apex Location
Some endodontic motors also have an integrated apex locator built into the motor, which for workflow purposes is a convenient addition. The function and accuracy of the apex locator built into the Morita Tri Auto ZX2 cordless motor is comparable to that of the Morita standalone apex locators such as the Root ZX. Although apex location features can be employed in these units in an “automatic” function whilst instrumenting the canal, using the apex location function independently and then using your working length to instrument independently may offer more control and accuracy.
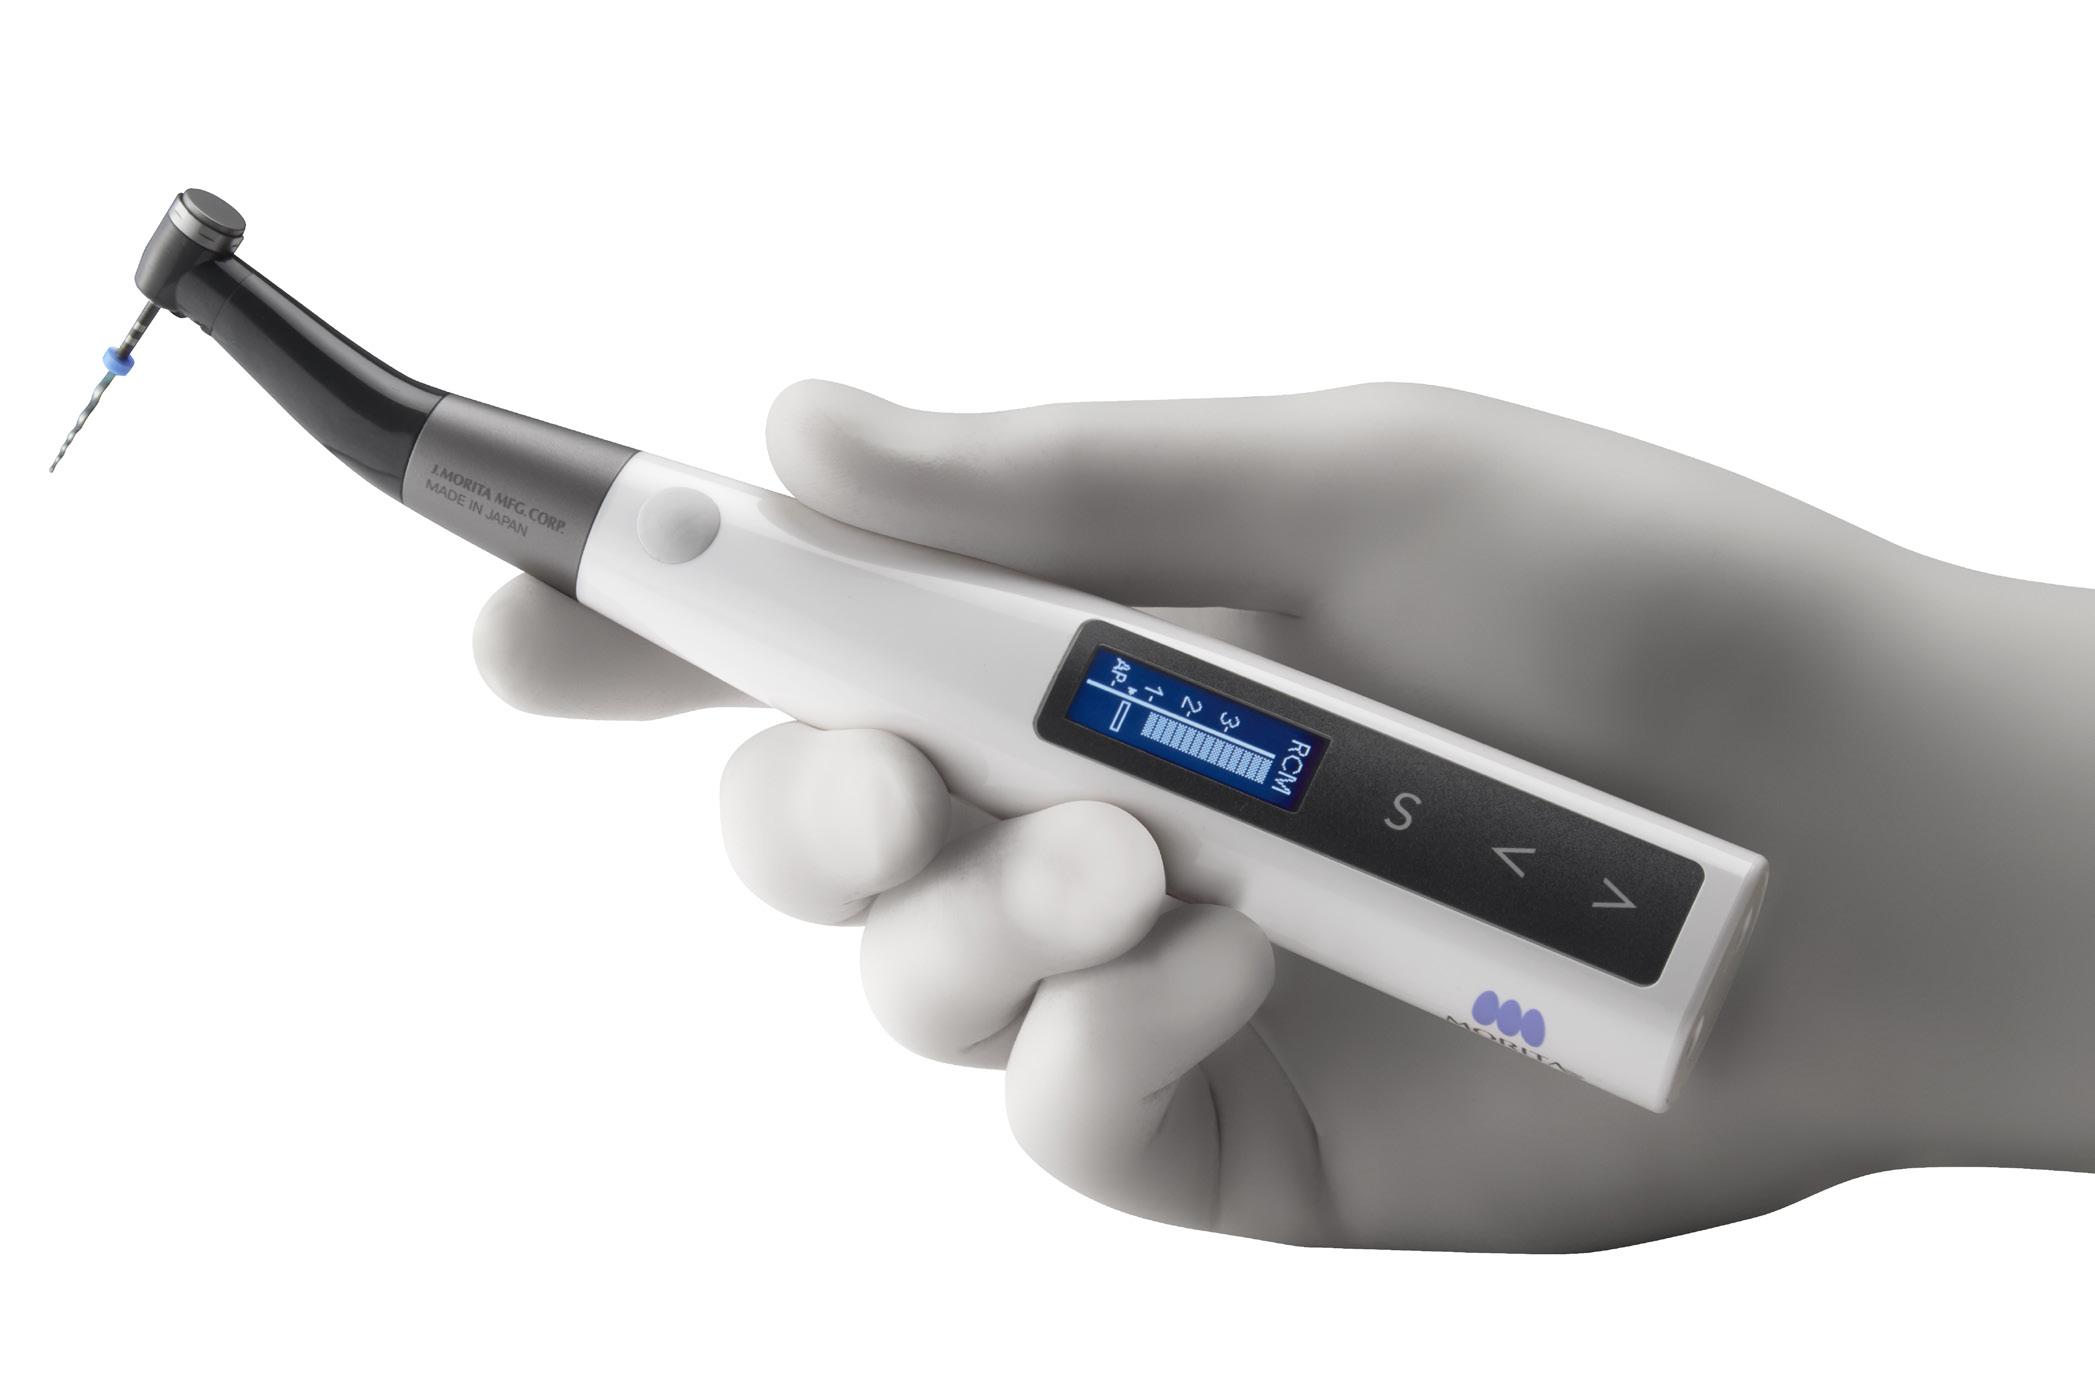
3. Preparation of the Glide Path
Traditionally glide path preparation has been achieved using stainless steel hand files. The advent of a patented glide path motion has enabled fatigue reducing, predictable and safer mechanical preparation of a glide path using .02 taper stainless steel or Ni-Ti rotary files. The OGP (Optimum Glide Path) mode in Morita’s Tri Auto ZX2 is a combination of a watch winding and balanced force motion. It is a constant action that replicates hand filing with a choice of 3 angles.
4. Canal shaping
Using a Crown Down file sequence can reduce the risk of file fracture during canal shaping and apical sizing. The latest intelligent torque reverse motions can reduce file fatigue and assist with increasing efficiency and safety. (Pedulla,E et al.)
OTR (Optimum Torque Reverse) is an Intelligent Torque
Reverse that is employed when the torsional load on the file reaches the preset torque trigger. Instead of the file reversing out of the canals, with the OTR function the file only reverses 90 degrees then returns to forward cutting for 180 degrees and continues to progress down the canal. The file will repeat this action until the torsional load on the file is relieved. This allows the file to continue and safely progress down the canals, whilst decreasing the risk of instrument fracture.
trigger. This is a useful feature as it gives you feedback and awareness of the stresses on the files, as well as slowing the rotational speed down to reduce the risk of instrument fracture.
There are definite advantages to the latest advances in endodontic motors that potentially increase endodontic preparation predictability, safety and efficiency. Purchasing endodontic motors manufactured by reputable dental equipment manufacturers who will offer support and education is recommended.
Pedulla E, Corsentino G, Ambu E, Rovai F, Campedelli F,Rapisarda S,La Rosa GR, Rapisarda E,Grandini S. Influence of continuous rotation or reciprocation of Optimum Torque Reverse motion on cyclic fatigue resistance of nickel-titanium rotary instruments. Int Endo J.May;51(5) 522-528.Doi:10.1111/iej.127689. Epub 2017 Apr 25.
61 henryschein.com.au
ENDODONTICS
DR. JEFF WARD BDS, MDSc, GradDipClinDent, MRACDS(Endo), FPFA Melbourne, Australia
RESTORING ENDODONTICALLY TREATED TEETH

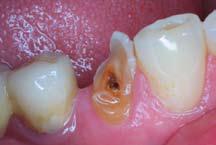
A SIMPLIFIED TECHNIQUE
Restoring endodontically treated teeth is one of the procedures that we regularly see in our dental offices. This type of situation - which represents a specific issue because the tooth structure is compromised - is currently one of the biggest challenges for the practitioner (1).
When we find a tooth that has been restored with a post and core/crown, we understand that they are all made from different materials, but at the same time, they should all function as a one unit (2).
Teeth restored with flexible fibre posts are at less risk to suffer from root fractures and have also exhibited longer life-spans than those restored with rigid materials (3).
As the deformation of the post closely resembles that of the cement – deflection to occlusal forces – it will be better at reducing the incidence of root fractures.
This is the reason why the mechanical and adhesive properties of the cement are as important as those for posts (4). This long and complex restorative procedure has been reduced to a simplified technique by introducing fibre posts and materials with adhesivecementation properties that can perform like a core and also like a permanent cement for the final restoration. All-in-one systems for cementing the post, preparing the core and cementing the final restoration, such as ParaCore Automix 5ml Syringe System (Coltène/ Whaledent), are excellent options for use with these procedures (Fig. 1).
CLINICAL CASE
The patient presented with a coronal fracture in the buccal, lingual and distal aspects of the first lower-right premolar (Fig. 2).
The first procedures are: a) diagnose and determine if the tooth can be restored, and b) its prognosis. The clinical and radiographic exams will allow us to make the correct decision. In this case, the tooth has already undergone root canal treatment (Fig. 3). The correct treatment is to restore the tooth with a fibre post and crown. The type and size of post will be determined by radiographic analysis, and we will always respect the principles of endodontic sealing. We decided to use the ParaPost Fibre Lux yellow post (Coltène/Whaledent) (1.0mm) (Fig. 4).
Since we will use an adhesive technique, we recommend the use of a rubber dam, since it not only improves the visibility, but also provides a dry and contaminant- free site (Fig. 5).
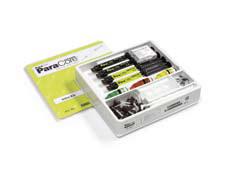
62
Fig. 1: ParaCore Automix 5ml Syringe System (Coltène/Whaledent)
Fig. 2: Preoperative situation
Fig. 3: Radiographic evaluation
ENDODONTICS
Immediately after this, we clean and eliminate caries with the indicated drills - depending on the posts to be used – and prepare the site for the ParaPost Fibre Lux post (Coltène/Whaledent) (Fig. 6). Once the site has been prepared for the post and we have verified that the remaining gutta-percha is in the apical portion, we then place the post into the root canal (Fig. 7) and adjust the length of the post as needed. In this case, we had to reduce the apical length of the post by 1 mm using a diamond bur (Fig. 8). Now, it is time to prepare the tooth with the ParaBond Non-Rinse Conditioner from the ParaCore Automix 5ml Intro Kit (Coltène/Whaledent) (Fig. 9 and 10). Message it for 30 seconds inside the root canal and on the crown, and dry it using air and paper points to eliminate any residual conditioner (Fig. 11).
Once the root canal has been dried, but not dehydrated, the ParaBond Adhesive from the ParaCore Automix 5ml System (Coltène/Whaledent) should be applied (Fig. 12). Mix equal parts of liquid A+B. To allow better access into the canal, use a mini sponge to apply the mixed components for 30 seconds to all previously prepared structures (Fig. 13). The next step is to thin down the adhesive with air to eliminate the solvent before light curing for 20 seconds (Fig. 14). Now we are ready to cement the post by injecting the ParaCore Automix 5ml cement into the canal (Fig. 15) using an endodontic tip and placing the post in the correct position. We then remove any excess and light cure for the final 20 seconds (Fig. 16, 17 and 18).
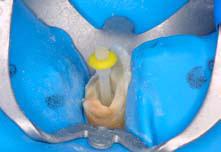
Following this, we proceed by rebuilding the core immediately and syringe the ParaCore Automix 5ml cement (Coltène/ Whaledent) into the ParaForm (Coltène/Whaledent) matrix for cores. This will form the preliminary shape of the core. It is then placed on the tooth and light-cured again for 40 seconds (Fig. 19, 20 and 21). We can then proceed with preparing the core (Fig. 22), taking the impression and evaluating with x rays (Fig. 23). Once the final restoration has been verified and adjusted, we can cement it using the same ParaCore Automix 5ml cement (Coltène/Whaledent). We had previously used ParaBond Non-Rinse Conditioner (Coltène/Whaledent) for 30 seconds (Fig. 24), and after drying we had placed the Adhesive ParaBond A+B (Coltène/Whaledent) for 30 seconds (Fig. 25). At this point, we can cement the restoration permanently by light curing for 20 seconds (Fig. 26) to create one homogenous unit comprising the fibre post, core, permanent cement and crown. Thanks to the advances of this all-in one system, we can now cement the fibre post with the same material that was used for building up the core and cementing the final restoration. The good prognosis that we had been looking for is now reality. The bonding and adhesion seen under a scanning electron microscope proves it (Fig. 27 and 28).
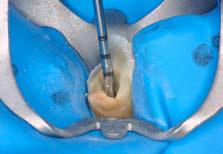
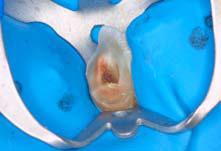
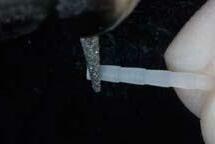
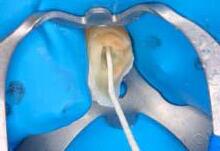
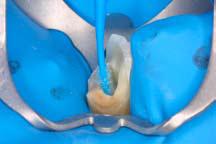
63 1300 65 88 22 ENDODONTICS
Fig. 10: Placement of the ParaBond NonRinse Conditioner (Coltène/Whaledent)
Fig. 7: Trial seating of the ParaPost Fiber Lux post (Coltène/Whaledent)
Fig. 4: ParaPost Fiber Lux (Coltène/ Whaledent)
Fig. 11: Removal of the residual conditioner
Fig. 12: ParaBond Adhesive (Coltène/ Whaledent)
Fig. 8: Adjusting the length of the post Fig. 9: ParaBond Non-Rinse Conditioner
Fig. 5: Isolation using a rubber dam
Fig. 6: Preparation of the site for the post
CONCLUSIONS
As this technique is highly simplified, the probability of errors occurring is much lower: The ParaCore Automix 5ml all-in one system (Coltène/Whaledent) provides us with an alternative that is fast and efficient for restoring teeth which have undergone endodontic treatment.
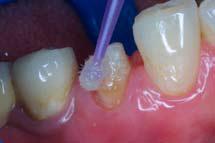
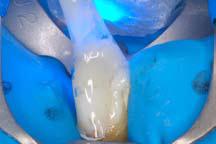
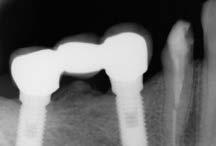
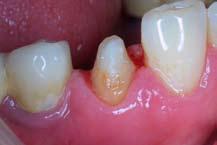
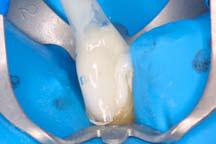
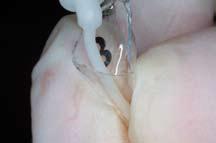
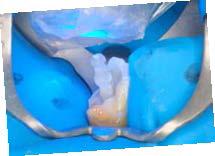
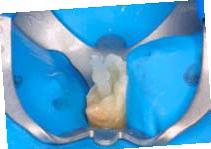
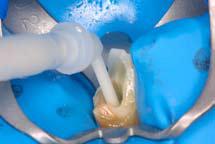
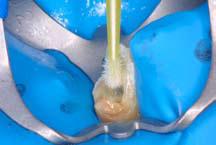
64
Fig. 13: Placement of the ParaBond Adhesive (Coltène/Whaledent)
Fig. 15: ParaCore Automix 5ml cement (Coltène/Whaledent)
Fig. 16: Injection of the ParaCore cement (Coltène/Whaledent)
Fig. 17: Placement of the post
Fig. 18: Light curing the cement
Fig. 19: Placement of the ParaCore cement (Coltène/Whaledent) in the ParaForm Coreformer matrix
Fig. 20: Matrix in place
ENDODONTICS
Fig. 21: Light curing the core
Fig. 24: Placement of the ParaBond NonRinse Conditioner
Fig. 22: Final preparation
Fig. 23: Evaluation with X-rays
Fig. 14: Thinning down the adhesive
View products used in this article
REFERENCES
1. Geirsson J., Sigurdsson.- Posts in Endodontically Treated Teeth. J Esthe. And Rest. Dent. Sep-Oct. 2003.
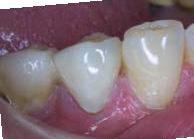
2. Pitel M., Hicks N.- Evolving technology in endodontic posts. Comp. of Cont. Educ. in Dent. January 2003.
3. Mannocci F., Ferrari M., Watson T.- Intermittent Loading of teeth restored using quartz fiber, carbon -quartz fiber and zirconium dioxide ceramic root canal posts. J. Adhes Dent. Jan 1999.
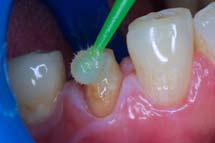
4. Baldissara P.- Mechanical Properties and in Vitro Evaluation (Chapter 5) . In Ferrari M., Scotti R.- Fiber Posts. Characteristics and Clinical Applications. Masson. 2002.

5. Dentistry [Internet]. 2017;1–9. Available from: http:// dx.doi.org/10.1016/j.prosdent.2017.03.008
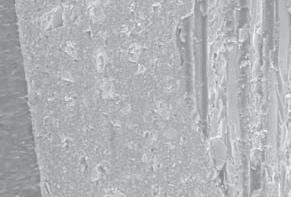
65 henryschein.com.au ENDODONTICS
Fig. 25: Placement of the ParaBond Adhesive Fig. 26: Final restoration
Fig. 27 and 28: Scanning electron microscope images showing the fiber Post cemented with ParaCore Automix 5ml cement (Coltène/Whaledent). Photos are the courtesy of Dr. Enrique Kogan and Dr. Rodrigo Arias.
CLICK HERE
DR. ENRIQUE KOGAN & ALEJANDRO KOGAN B
ENDO TRACER
The EndoTracer is a special instrument intended for the preparation of the endodontic access cavity, notably in the preparation of isthmuses.
The root canals of multi-rooted teeth tend to be difficult to locate, which means that they cannot always be exposed and penetrated instantly as part of an endodontic treatment.
In many cases, an isthmus has to be created along the entire length – or at least part of it – in order to locate a hidden canal.
The EndoTracer is provided with a long slim neck to allow unob-structed view past the instrument into the access cavity.
Like that, the dentist can look right down into the deeper regions of the cavity, which greatly facilitates the exposure of the pulp chamber floor, the conservative opening of the root canal entrances and the exposure of obliterated root canals.
Minimally invasive approach
Thanks to their special design, the petite round burs – especially the sizes 004 and 006 – are ideally suitable for the fine shaping of isthmuses and canal entrances, in line with the concept of minimally invasive endodontics.
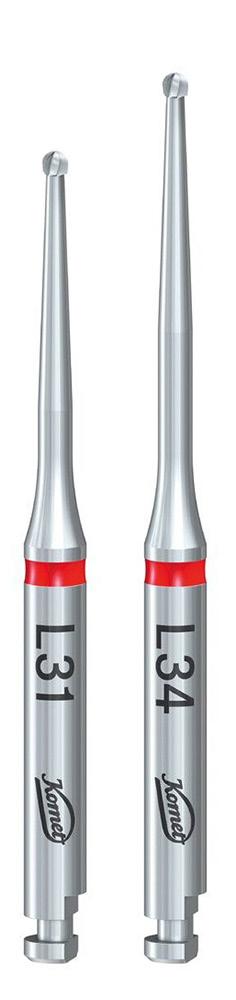
Ideal for work under a microscope
The particularly long, slender neck of the instrument allows unobstructed view past the instrument into the access cavity. Provided with a total length of 34 mm, the design of the EndoTracer was adapted in such a way that its neck has now gained 3 mm in length, which makes the instrument even more suitable for work under a microscope. The properties of the EndoTracer L34 are particularly advantageous when it comes to treating long clinical crowns.
The perfect size for any tooth
The EndoTracer comes in the lengths 31 and 34 and in 6 different sizes, i.e. 004, 006, 008, 010, 012 and 014. This means that the range comprises a perfect instrument for any clinical situation.
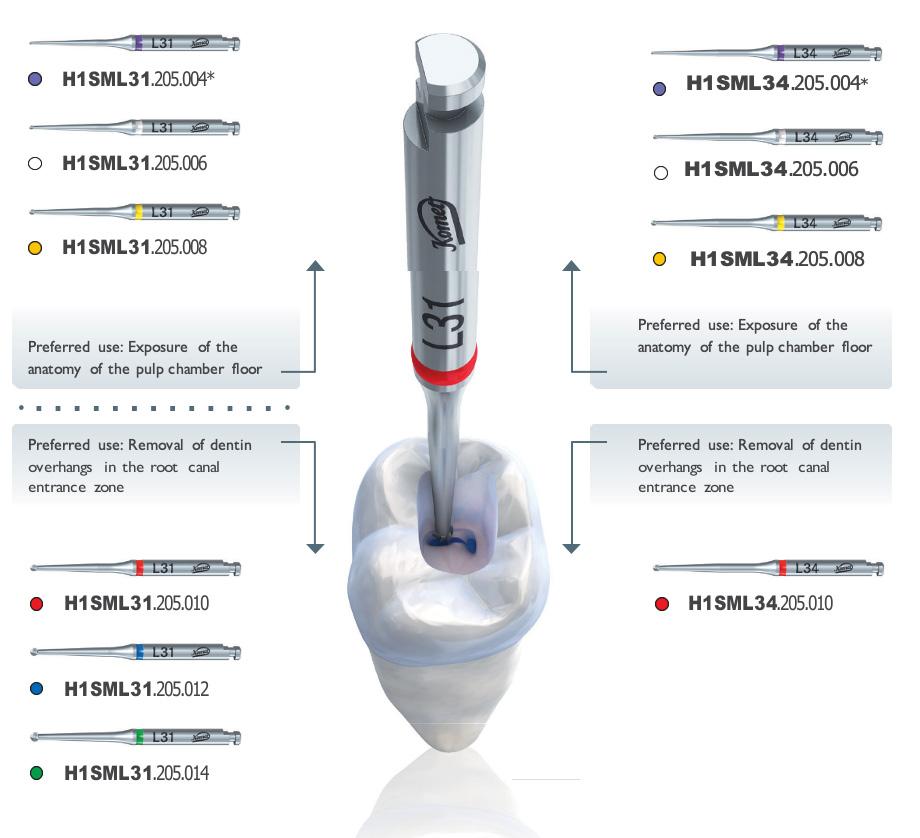
Effective toothing
The EndoTracers are provided with an effective, powerful toothing. Like that, the instruments can remove dentin the minimally invasive way and expose the access cavity practically without pressure.
66 ENDODONTICS View this product on our website CLICK HERE
IS YOUR COLD SPRAY COLD ENOUGH?
Obtaining an accurate diagnosis is a critical step in endodontic treatment.
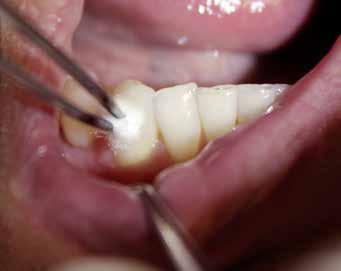
In addition to reviewing the patient’s chief complaint, medical history, dental history, and history of symptoms, objective findings must be collected, and radiographs must be reviewed in order to make a definitive diagnosis.
The normal response of nerve fibres can be tested by stimulating the nerve endings of the pulp with a cold spray. As a result of this test, the vitality (existing blood flow) of the tooth can be made.
It’s important to note that use of pain relief drugs can cause a false reading (tooth is vital but does not respond to cold) or that a false cold sensation may occur on teeth with an adjacent metal
Percussion Test
Icing the cotton pellet with Endo-Frost Cold testing with Endo-Frost
ROEKO Endo-Frost is a cold spray applied with cotton pellet for vitality check of the pulp. The normal response of nerve fibres can be tested by stimulating the nerve endings of the pulp with the cold spray.
As a result of this test, the vitality (existing blood flow) of the tooth can be verified.
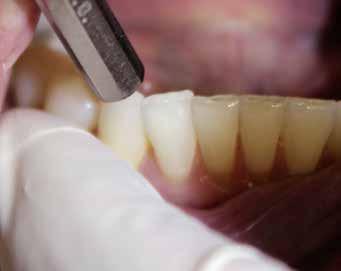
• Produces rapid response
• Needs no refrigeration
• Spray nozzle for precise application
• Neat - no dripping
• Easy to use
With a temperature of -50 ° the effective Endo-Frost spray is much colder than ice or ethyl chloride. The nonflammable diagnostic spray contains no chloroflurocarbons and is odorless.
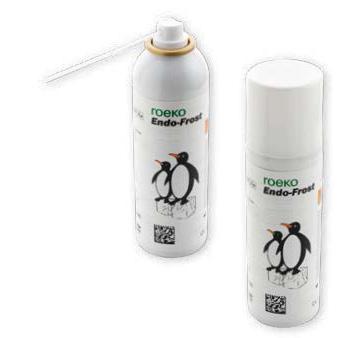
67 1300 65 88 22
View this product on our website CLICK HERE ENDODONTICS
ANAESTHESIA AT THE HEART OF THE DENTIST-PATIENT RELATIONSHIP
A dentist who administers pain-free injections will retain the full confidence of his patients. This is because, frustrating as it may seem, pain, or rather freedom from it, is still and always will be one of the main criteria by which a dentist is judged.
It is true that a patient may be frightened of going into the dental surgery and, even more so, of submitting to injection of an anaesthetic. Nervousness may sometimes result in his postponing an appointment or even purely and simply cancelling it. As the success of his practice is at stake, the dentist has no choice other than to take this anxiety into account.
To be able to instil confidence and work in a calm atmosphere, he will want to create a comfortable and efficient ambience, which enables him to care for his patient well. To do this, he will, in particular, rely on the best materials and products.
Professional confidence in Septodont products
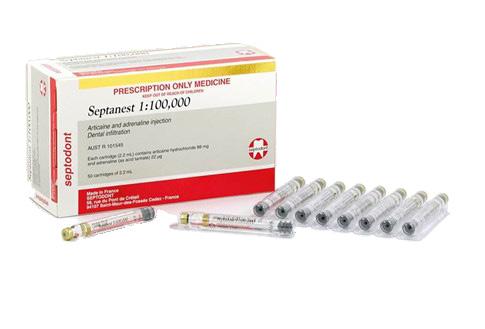
To use Septodont anaesthetics is, from the outset, to opt for the quality afforded by the world leader in dental anaesthesia. The group has gained the trust of health authorities and practitioners on a global scale, as reflected by the fact that the company manufactures and sells more than 500 million anaesthetic cartridges each year.
Septanest, the leading product in the range, is injected 4 times per second by dentists throughout the world.
A local anaesthetic with many strengths
A dentist with the patient’s interests at heart will choose to use a local anaesthetic which is latex-free, so as to avoid any allergic reaction, whether mild or severe. He will thus be able to treat his patient with confidence. The latest studies do indeed show that between 1 and 6% of the population may be sensitive to latex. As a responsible company which is concerned about the clinical use of its products, Septodont has, therefore, gone so far as to eliminate all contact with natural latex, not only for the injectable material but also in the whole process of cartridge production. The group employs synthetic materials only. With the same objective, its cartridges do not contain paraben. The single use nature of the product and the sealed packaging mean that the addition of such an antimicrobial agent is not necessary. The fact that sterilization is the final step in the manufacturing process is just as important. This method is considered as the « gold standard » by health authorities and ensures that the highest level of sterility is achieved. This step takes place after the cartridge has been filled and sealed, by contrast with the so-called aseptic filling method.
Everything that is needed to administer a successful anaesthetic
Every detail of the anaesthesia is important in instilling confidence in the patient. Each one plays its part in making this procedure one of high quality, thus avoiding any negative experience for the patient at the very time when trust in the dentist is being established.
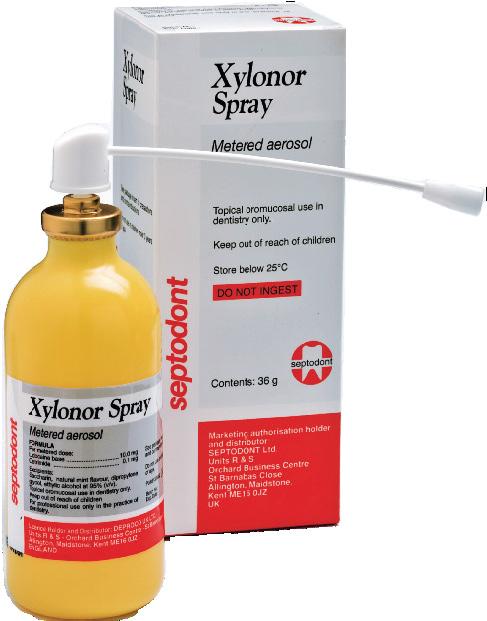
68
PAIN CONTROL
There are multiple causes of pain during the administration of an anaesthetic but the speed and smoothness of the injection are paramount.
Thus, it is recommended that the rate of injection should not exceed one millilitre per minute and the delivery should be as smooth as possible. With this in mind, the Septodont teams seek to minimize resistance to the piston within the cartridge and produce smooth flow of the anaesthetic by paying particular attention to siliconization. Silicone is distributed homogeneously within the cylinder and over the whole length of the cartridge before this is filled. The silicone, heated to more than 300 degrees, coats the glass surface and facilitates the injection procedure. In addition, the blister pack around the cartridge protects the latter from the external environment for as long a time as possible. An anaesthetic is never a trivial matter either for the dentist or the patient.

Total expertise in anaesthesia
Septodont, present at each step of anaesthesia, offers a unique profile on the world stage. The group possesses expertise in every facet of the anaesthetic procedure. It provides the practitioner with everything required. Its range of anaesthetic products currently accounts for 75% of its turnover. The company has extended its expertise to the manufacture of needles, the quality of which is fundamental in the context of an anaesthetic procedure. To achieve this, its subsidiary in the south of France develops, manufactures and markets dental needles. Thus Septodont with its leading needle brands, Septoject and Septoject XL, provides the widest available range in the world. Septoject XL has a specific feature: it has a wider bore, which means that a lower pressure suffices during the injection process. Septoject Evolution is the most recent and unique innovation in terms of equipment.
The patented needle has a bevel in the shape of a scalpel.
This is highly effective and enters tissue by cutting rather than splitting it. Septoject Evolution therefore facilitates smooth, controlled and more precise needle insertion.
Along similar lines, Septodont has developed safe injection devices, Ultra Safety Plus, offering real protection from needle-stick injury for the practitioner and the team. Moreover, legislation has recently been enacted at a European level. The 2010 European directive, which should be adopted by each member state at local level, prohibits the practice of recapping. Septodont has worked steadily since 1991 to develop a system to avoid the risk of accident when handling contaminated needles. This system incorporates a transparent protective sheath and now sets the standard.
Finally, the anaesthetic products range also contains syringes and topical anaesthetics for application to numb the tissues before injection.
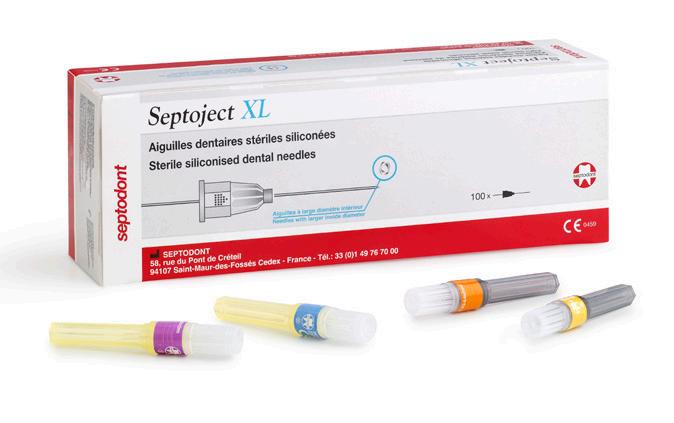
69 henryschein.com.au
PAIN CONTROL
CLICK HERE
View Septodont range online
THE STA SINGLE TOOTH ANAESTHESIA
ESSENTIAL FOR COSMETIC DENTISTRY

The STA System, a computer-controlled local anesthetic delivery (Figure 1) is not only great for single tooth anesthesia but is also very useful to administer multiple tooth anesthesia injections such as the Palatal-approach Anterior Superior Alveolar nerve block (P-ASA). The P-ASA is a single-site palatal injection, into the nasopalatine canal, which can produce bilateral anesthesia to six anterior teeth and the related facial and palatal gingival tissues (Figure 2), without causing collateral numbness to the patient’s upper lip, face, and muscles of facial expression (Figure 3) Patients really appreciate this!
Using significantly less anesthetic, this easy-toadminister injection can take the place of at least four supraperiosteal buccal infiltrations and a palatal injection. It is valuable for cosmetic restorative dentistry procedures such as composites, veneers, and crowns because you can immediately assess the patient’s smile line when the lip is used as a reference point. The P-ASA is also useful for endodontic, periodontal and implant procedures. In fact, it is recommended as the primary injection for the six maxillary anterior teeth.
During administration and postoperatively, the P-ASA is a very comfortable injection for your patients due to the STA controlled flow rate below the patient’s pain threshold, the use of minimal pressure, and the ability to easily control the needle using the Wand handpiece. Check out the simple injection technique below and find out more about the P-ASA on: It’s easy to do. Try it, you’ll like it! And so will your patients.
Clinical Injection Technique
1. Keep the STA at the STA mode.
2. Place the bevel of the 30G ½” needle on the injection site, 1mm lateral to the incisive papilla, (Figure 4) with the needle at about a 45-degree angle and apply pressure to the back of the needle and tissue with a cotton tip applicator (Figure 5).
3. After setting the system on Cruise Control, continue to administer the anesthetic at the ControlFlo rate for about 8-10 seconds. Then slowly rotate the needle to pierce the tissue.
4. Allow the anesthetic to enter the tissue for 5-6 seconds. When the incisive papilla is blanched (Figure 6), rotate the needle vertically.
5. Every 4 to 5 seconds slowly advance the needle about 1mm, creating an anesthetic pathway, (Figure 7) until you reach the injection site: the internal wall of the Nasal Palatine Canal or ½ of the length of the needle (Figure 8).
6. After a negative aspiration, administer the appropriate amount of anesthetic. (Approximately 3/4 to a full cartridge for adults and between ¼ to ½ for a child - using 2% Lidocaine 1:100,000). Use ½ this dosage when using 4% Articaine (Septocaine or Citanest 1:200,000)
7. Once you have administered the desired amount of anesthetic wait for about 6 seconds and slowly back the needle out of the tissue or withdraw the needle during the middle of the aspiration cycle.
70
PAIN CONTROL Dental Education Hub CLICK HERE Milestone Scientific website CLICK HERE
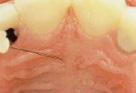


71 1300 65 88 22 PAIN CONTROL View the STA System on Online CLICK HERE DR. EUGENE R. CASAGRANDE DDS Director of International & Professional Relations Milestone
Scientific
Figure 1. STA System
Figure 2. Scope of Anaesthesia
Figure 3. Collateral Numbness
Figure 4. P-ASA Injection Site
Figure 5. Pre-Puncture Technique
Figure 6. Blanched Incisive Papilla
Figure 7. Anaesthetic Pathway
Figure 8. Nasal-Palatine Canal Site
AEROSOL DRAWBACK IN HANDPIECES
CAN IT BE ELIMINATED?
Retraction versus drawback. What is the difference?
There has been a lot of talk about anti-retraction and anti-suckback features but little clarification about what they are and how they work” Mr Sleeman said.
Mr Sleeman further clarified that “Retraction is essentially related to water being pulled back into the system through the water lines. So, retraction is strictly related to fluids and debris within those fluids”
“Many manufacturers, including Morita, have already solved this problem by introducing anti-retraction valves throughout the system.
One common type is called a duckbill valve which is held open by water pressure and clamps shut when the water stops which blocks any fluids from travelling back into the water lines.
These can be present in your treatment unit and even in your handpiece or coupling. Usually, you will find multiple anti-retraction valves as fail-safes.
Most major manufacturers, including Morita, include them within handpieces, couplings and the treatment unit. This technology has been around for a while and the ISO 7494-2 standard requires your treatment unit to include it” Mr Sleeman explained.
According to “Transmission routes of 2019-nCoV and controls in dental practice”, “high-speed dental handpieces without anti-retraction valves may aspirate and expel debris and fluids during the dental procedures.
More importantly, the microbes, including bacteria and virus, may further contaminate the air and water tubes within the dental unit, and thus can potentially cause cross-infection.”
“Should retraction occur, you can still flush and disinfect your waterlines as needed, so we can say that the potential for cross-contamination here is relatively low” Mr Sleeman said.
What is drawback and can we eliminate it? ZeroDrawback is the solution.
When asked to explain what the term Zero-Drawback means (or zero-suckback as it is sometimes known), Mr Sleeman said, “Unlike retraction, drawback is related to the air lines.
Aerosols, created during dental treatment, can be drawn back into the handpiece, your air lines and eventually into your treatment unit.
When the drive air stops, the turbine continues to spin. This creates negative pressure in the system and begins to draw aerosols back into the system, kind of like a vacuum.
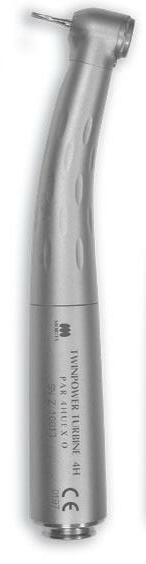
72 HANDPIECES
Here we discuss this with J Morita Manufacturing Corporation engineer, Mr David Sleeman to seek clarification on the difference between anti-retraction and Zero-Drawback.
This is also known as suck back. This effect is cumulative. Each time you activate the drive air, the draw back forces any contaminates further into the handpiece, past the coupling and eventually into your air lines and your treatment unit.
Keep in mind that you cannot disinfect and flush the air or exhaust lines of your treatment unit.
Many manufacturers will include a braking system to reduce the spinning motion of the turbine once the drive air stops.
Terminology for these types of braking systems may vary but at Morita, we call it Quick Stop.”
“A quick stop braking system can help reduce draw back but not eliminate it. The turbine continues to rotate after the drive air stops and, like any braking system, we cannot force the turbine to stop instantaneously. It takes time and during that time, draw back is occurring. In addition, smaller handpiece head sizes create less inertial force which also contributes to reducing stopping times.” Mr Sleeman said.
Smaller head sizes or quick stop braking mechanisms will help stop the turbine faster and reduce the number of possible contaminants from
being drawn back into the system. But reduction is not enough as the effect is cumulative, and even minor draw back can be pushed back into the exhaust lines and contaminate your system” Mr Sleeman emphasised.
According to “In vitro study of antisuck-back ability by themselves on new high-speed air turbine handpieces”, some manufacturers will introduce a labyrinth system to reduce draw back, but these will not eliminate the drawback effect. Only the Morita Zero-Drawback system was found to eliminate draw back through this study *
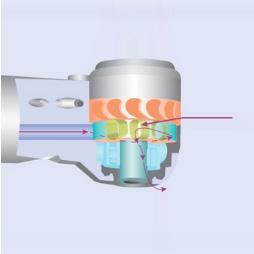
73 henryschein.com.au
Morita TwinPower Highspeed handpieces available in 5 models
Morita TwinPower Highspeed Handpiece with Zero-Drawback and anti-retraction
Top tier brand with anti-retraction and drawback reduction technology. Reduction is not enough.
Exhaust tubing
HANDPIECES View this product on our website CLICK HERE
Anti-Suckback Diffuser (ASSD)
KAVO EXPERT SERIES
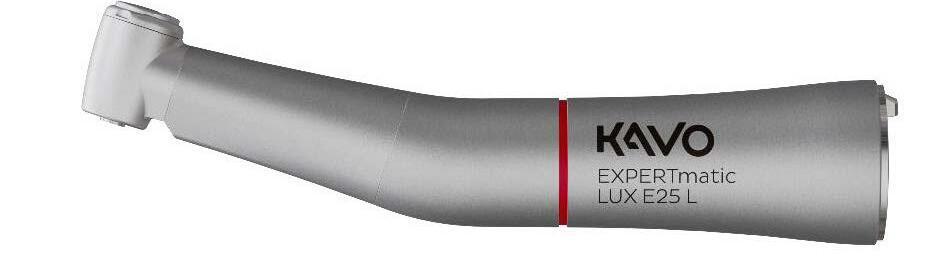
PRODUCT UPDATES & EXTENSION OF THE STANDARD WARRANTY TO 24 MONTHS
The KaVo EXPERTmatic E25 L and E25 C high speed contra-angles are two of the best-selling KaVo products and impress with efficiency, durability and high-quality workmanship. Now with CoolHead technology and exclusive ball bearings make these instruments even more robust and safe - for even more patient safety.
CoolHead technology for even more patient safety
The new KaVo CoolHead technology actively prevents excessive heating of the instrument head if the push button is pressed unintentionally during treatment while the burr is rotating, e.g. when touching the patient’s cheek. This way, practitioners can avoid painful contact. That is the level of patient safety and user comfort that KaVo customers are used to.
The CoolHead technology reduces the contact area between the push button and the rotating drive insert, resulting in less friction if the push button is pressed accidentally during operation. The potential heating of the instrument head is thus significantly reduced.
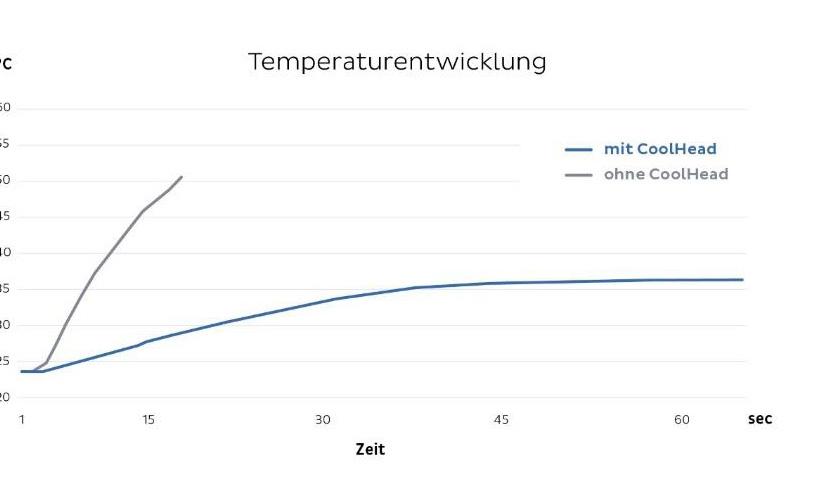
with CoolHead without CoolHead
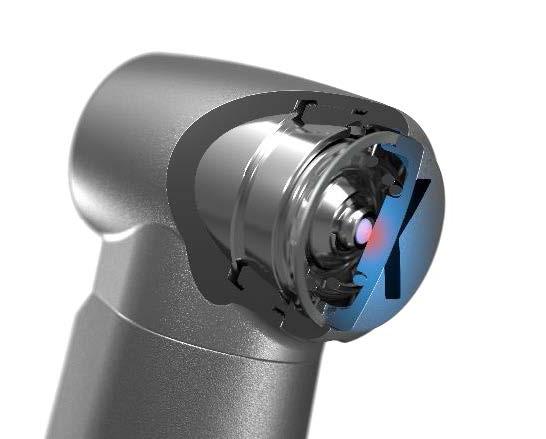
74
HANDPIECES
Time
Temperature
Optimised KaVo exclusive high-tech ball bearings for an even longer service life
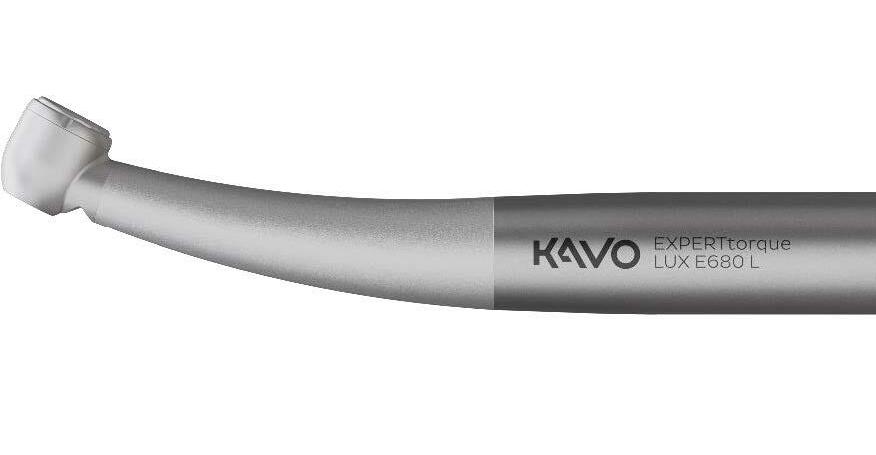
Ball bearings in dental high speed contra-angles must be able to withstand extreme speeds and loads. Ceramic ball bearings are not only lighter and more wear-resistant, but also bring advantages such as corrosion resistance, low friction and thermal shock resistance.
With the exclusive KaVo ball bearings, both the cage geometry and the cage material have been optimized, reducing wear in the ball bearing and further increasing the service life of the E25 L/C high speed contra-angles.
More Power, significant Noise Reduction
EXPERTtorque turbines
EXPERTtorque turbines stand for performance, reliability and proven quality. More power and a significant reduction in noise make the instruments even more attractive.
More power for even more efficient work
EXPERTtorque turbines impress with even more power:
• E680 turbines – maximum power approx. 29 watts at 3.5 bar
• E677 mini turbines – maximum power approx. 27 watts at 3.5 bar
• Noise reduction of 26% – for a relaxed everyday practice
By implementing technical optimizations, the running noise of EXPERTtorque turbines has been significantly reduced. KaVo was able to reduce the running noise by 2 dB(A) – this corresponds to a noise reduction of 26% and ensures a pleasant working atmosphere in the dental practice.
NOTE: In this context, KaVo would like to point out once again that this level of quality can only be guaranteed if original spare parts are used.
75 1300 65 88 22
HANDPIECES
Book in your FREE Handpiece Care & Maintenance Session to learn how to maintain Ultimate Handpiece Performance Click here to register
HISTORY OF KEY OPINION LEADERS
A TRADITION OF COLLABORATION
Key Opinion Leaders have a long history of supporting the development of our instrument product portfolio. More than 60% of our products have been developed in partnership with dental professionals, institutions, or universities.

In 1983 AIDS (Acquired Immune Deficiency Syndrome) had been officially recognized as a new infectious disease. A series of measures were then adopted concerning infection prevention procedures aimed at containing the progressive development of the epidemic. The CDC also published their first set of recommended precautions for healthcare workers and allied health professionals to prevent „AIDS transmission“.* Following these new strategies and protocols, all medical fields adopted procedures that could help prevent the risk of exposure to cross infections. For example, attention was given to hand hygiene or the compliance to use the appropriate PPE (Personal Protection Equipment) such as masks, protective eyewear, clinical gloves and adequate footwear. It was during this time that Dr. Jerge introduced the concept of adopting safety procedures for the transfer of contaminated items to Hu-Friedy who then created the first cassette in 1984. The concept of the cassette developed over the necessity to transport contaminated items during instrument reprocessing in the safest way possible, thereby reducing the risk of injury and exposure to blood borne pathogens. The container needed to protect both the product during transit and the handler from any sort of contamination. Because of this, the cassette had to be easy to clean, rigid, capable of being closed securely and robust enough to prevent instruments being damaged. Hu-Friedy developed and implemented a system for managing instruments that would enhance safety, reduce instrument breakage and increase office efficiency. The end result was the innovative IMS™ Instrument Management System.*
Active part-code: IMS™ INFINITY SERIES™ CASSETTES
* Centers for Disease Control and Prevention (CDC) ( 1983, 2 September‚ Acquired Immunodeficiency Syndrome (AIDS): Precautions for Health-Care Workers and Allied Professionals‘ MMWR Weekly 32(34):450-451
76 INSTRUMENTS
1984 - Charles Jerge
IMS™ Instrument Management System
INSTRUMENT MANAGEMENT SYSTEM CYCLE
Optimal dental infection control and prevention are facilitated by the use of solutions that allow for improved efficiency and safety. Dental instrument integrity is further enhanced by the use of Hu-Friedy’s Instrument Management System (IMS).
IMS allows clinicians to move instruments from cleaning through chairside without touching or damaging the instruments. Learn more about our Instrument Management System.
Chairside
Patient Preview & Presentation
• Systematically organizes instruments according to procedure type allowing for more focus on patients and less time spent looking for missing instruments.
• Neatly organized instruments and packaged cassettes offer a more professional appearance and can help enhance referrals.
Cleaning
• Processed & Prepped
• Dental instruments are kept together throughout the cleaning process, reducing the potential for instrument breakage or loss.
• Reduces handling of instruments, providing safer protocols and minimized risk of sharps injuries.
Sterilization
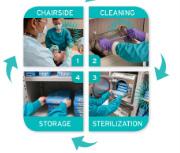
Wrapped & Ready
• Cassettes containing an entire procedures’ instruments are packaged in one sheet of wrap or one pouch for sterilization, reducing the amount of packaging consumable usage.
• The cassette design permits optimal penetration of steam to instruments during sterilization.
Storage
Neat & Complete
• Ready for use or storage until needed for increased time savings.
• Complete procedural set-ups for easy set-up and teardown.
77 henryschein.com.au INSTRUMENTS
View Savings video YouTube Download Instrument Management Systems Brochure Download Instrument Processing, Workflow and Sterility Assurance Article
WASHER DISINFECTOR
A REQUIREMENT OR A NECESSITY IN A DENTAL PRACTICE
When deciding to purchase a new piece of equipment into the practice that raises many practical questions such as Will this make my practice more efficient? What would be the daily cost for running the new piece of equipment? What type of maintenance does it entail?
Within a dental clinic, one of the most potentially hazardous steps are the cleaning of contaminated instruments. There are two methods to clean dental instruments: manual and automated cleaning. A Washer Disinfector minimizes the physical handling of instruments and the many steps involved with manual cleaning such as pre-soaking, scrubbing, and drying instruments. All these steps involve handling the contaminated instruments thereby increasing the risk of being exposed to blood and body fluids, as well as the risk of sharps injuries. In addition, to meeting the re-processing the instruments requirements, automated washing and disinfection provides a safe, effective, and efficient way to clean instruments, allowing staff to focus on the most important thing in the dental office, the patient.
Busy Specialist dental practices that perform surgical and orthodontic procedures prefer to use a washer disinfector for reprocessing the instruments prior to sterilizing the instruments. The practices have greater workload, re-processing needs, and instruments are stacked in cassettes makes using a washer disinfector a convenient and practical option. Washer Disinfectors will meet your day-to-day re-processing needs with efficiency, limited dependency on the dental staff, and providing safety from sharps injury.
As per the AS/NZS standards 4815:2006 it is recommended that calibration of the equipment is required upon commissioning, 6-12 monthly and after repair. Additional requirements include regular performance tests, daily checks for chemical residue, checking filters, cleaning jets, and door seals. For further information please refer to AS/NZS 4815:2006.
To further your understanding, different manufacturer recommended test kits and detergent that you need to consider when running a Washer Disinfector are as follows:
Soil Tests
Soil Tests are a simple, easy-to-use indicator that ensures instruments are effectively and consistently cleaned with the detergent within your Washer Disinfector.
Detergent Solutions
Detergent Solutions within a Washer Disinfector is designed to remove any type of protein/debris from instruments.
*Note: Please follow the recommended manufacturer approved soil test and detergent stated in the owner’s manual.
Cassettes
Cassettes are used for safe and efficient instrument cleaning, sterilization, and storage.
You have assessed your practice needs and require support on the various washer disinfector options available in the market to meet your requirement. Please contact our friendly Henry Schein team for further information.
78
INFECTION CONTROL
References
Rutala WA, Gergen MF, Weber DJ. Efficacy of a washer-disinfector in eliminating healthcareassociated pathogens from surgical instruments. Infect Control Hosp Epidemiol. 2014 Jul;35(7):883-5.
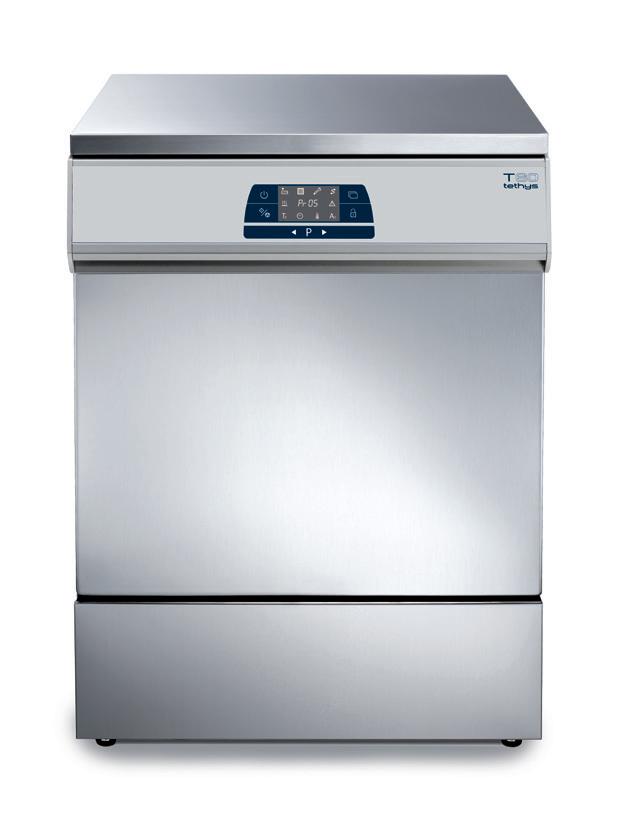
doi: 10.1086/676867. Epub 2014 May 20. PMID: 24915220.
Winter S, McDonagh G, Lappin D, Smith AJ. Assessing the efficacy and cost of detergents used in a primary care automated washer disinfector. Br Dent J. 2018 Aug 24;225(4):315-319. doi: 10.1038/ sj.bdj.2018.643. PMID: 30141495.


Ransjö U, Engström L, Håkansson P, Ledel T, Lindgren L, Lindqvist AL, Marcusson E, Rudbäck K. A test for cleaning and disinfection processes in a washer-disinfector. APMIS. 2001 Apr;109(4):299304. doi: 10.1034/j.1600-0463. 2001.d01-124. x. PMID: 11469502.
AS/NZS 4815:2006-Office-based health care facilities— Reprocessing of reusable medical and surgical instruments and equipment, and maintenance of the associated environment.

79 1300 65 88 22 CLICK HERE CLICK HERE
INFECTION CONTROL
View Mocom Washer Disinfector range online
KIRA FIELD Brand Manager RASHI JAIN Category Manager Infection Control
SciCan Hydrim C 61
MOCOM Under the bench-Tethys D60
View Hydrim Washer Disinfector online
INFECTION PREVENTION SOLUTIONS FOR DENTAL
Infection Prevention is critical in the field of Dentistry. Pathogenic microorganisms can infect both patients and dental workers and spread through contact with contaminated surfaces, instruments, and equipment.
About Whiteley and their products
Whiteley is a leading global innovator in infection prevention solutions. We are a family-owned Australian business, who have been operating since 1933. Our TGA licensed manufacturing facility is based in Newcastle, NSW. Unlike many other suppliers in the domestic infection prevention field, all our research and development is conducted in Australia.
Whiteley is committed to world leading research and innovative product development in the field of hygiene, cleaning, and infection prevention and control products.

Infection Prevention in the Dental Industry
Dental workers and their patients can be exposed to a range of pathogenic micro-organisms. These organisms can be transmitted through contact with contaminated objects such as instruments, equipment, and environmental surfaces. Good hand hygiene and surface disinfection practices are critical in reducing the risk of contamination between dental workers and patients.
Whiteley offers a range of products suitable for creating a clean and safe environment in the dental practice setting. These products include surface cleaners, disinfectants, instrument cleaners and hand hygiene products.
In May 2020, the Therapeutic Goods Administration (the TGA) confirmed that Viraclean® [AUSTL 69000], “Kills Coronavirus, SARSCoV-2 (COVID-19)”. Long the flagship product within Whiteley’s range of disinfectants, Viraclean® was the first product in Australia approved by the TGA to carry this disinfection claim against the COVID-19 virus. Viraclean® is a Hospital Grade Disinfectant intended for use on a wide range of healthcare surfaces.
Effective surface cleaning and disinfection, particularly of high touch areas (i.e., doorhandles, benchtops etc.) combined with good hand hygiene practices will assist in protecting your staff and patients, especially as we move into the winter months that inevitably bring higher rates of colds and flus. Ensuring hand sanitisers are easily accessible for patients in the waiting rooms, and staff in the practice rooms, will assist in minimising the risk of infection.
80
INFECTION CONTROL
The entire range of Whiteley’s hand hygiene products are manufactured in Australia and include Bactol® Alcohol Gel antibacterial hand rub (TGA registered, AUST R 155397), the Dermalux range of hand soaps, and Bactol® Moisturiser.
Bactol® Alcohol Gel provides antibacterial hand cleansing without the need for water. It has been specially formulated with a natural emollient to replace the skin’s lipids. This helps maintain skin integrity and prevents moisture loss leaving your hands hygienic, soft and replenished. Bactol® Alcohol Gel has been developed in compliance with the EN1500 testing standard for alcohol-based hand rubs.
Good hand hygiene is critical in preventing the spread of germs in dental practices. There are 5 simple steps you can take to improve hand hygiene compliance:
1. Ensure sanitizer dispensers or bottles are conveniently located.
2. Increase monitoring and surveillance.
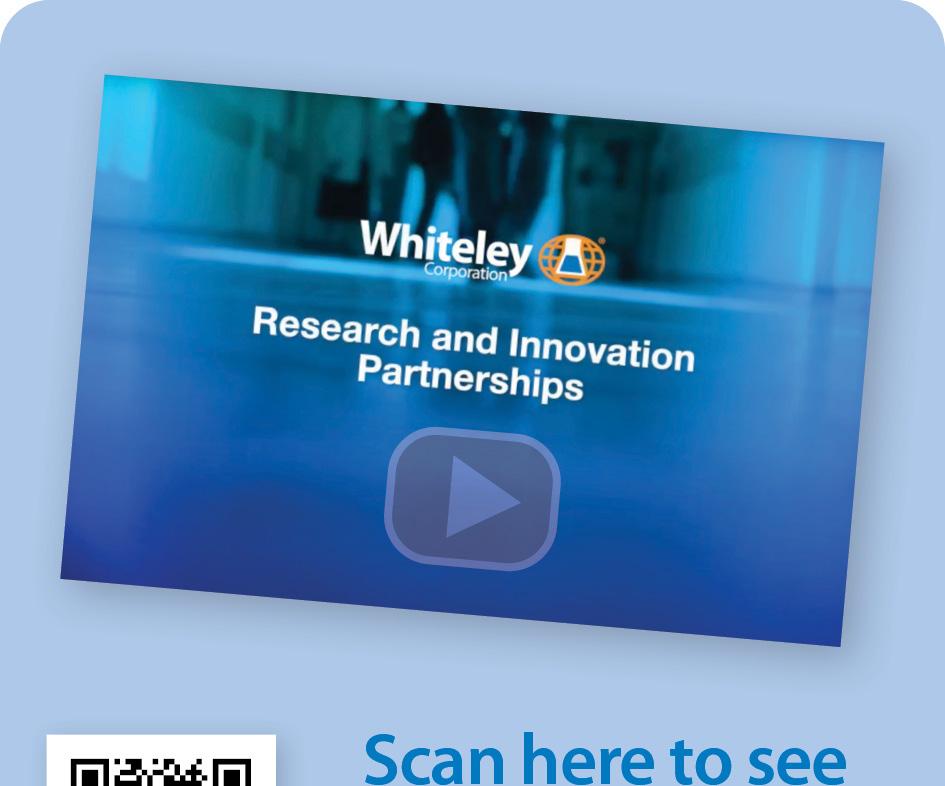
3. Choose products staff like using. This is the quickest and best method of increasing hand hygiene compliance rates.
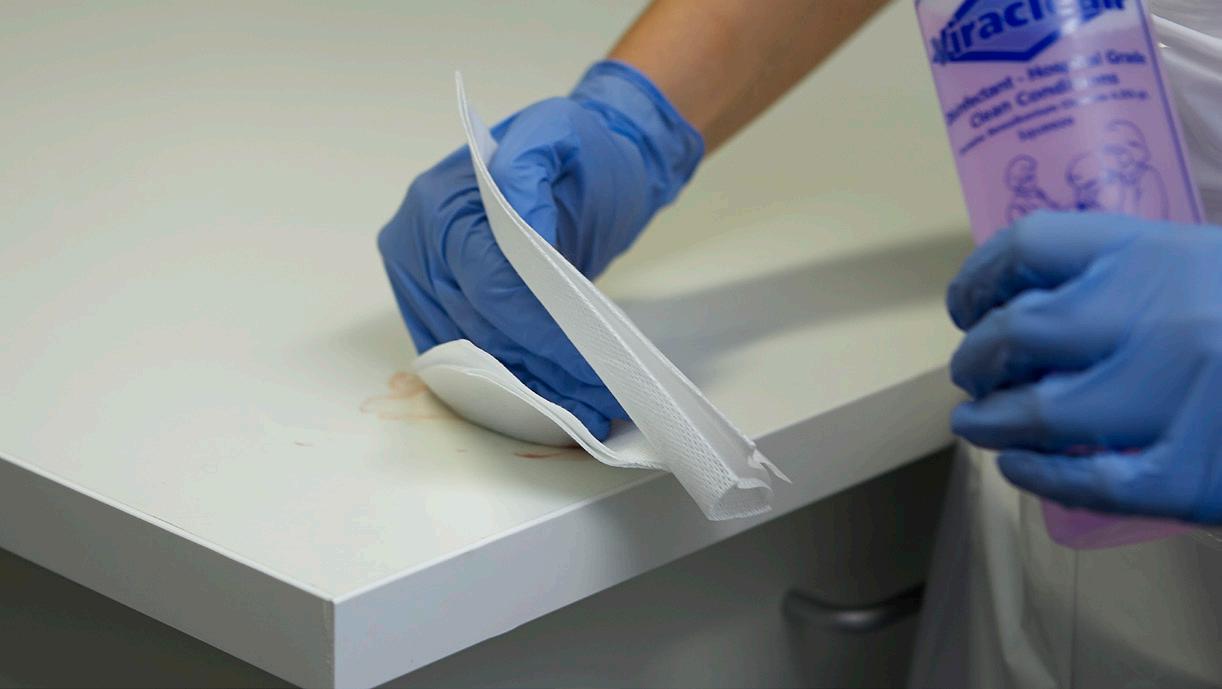
4. Use signage like the 5 Moments of Hand Hygiene posters to promote effective hand hygiene practices.
5. Encourage your team to provide feedback to each other on hand hygiene.
81 henryschein.com.au INFECTION CONTROL View Whitely range online CLICK HERE Click here to see an overview of our Research Projects
SURGICAL HAND HYGIENE
THE UNIQUE BENEFITS OF USING A SURGICAL HAND RUB
This includes surgical hand preparation – where the objective is to eliminate transient flora, reduce resident skin flora and inhibit growth of bacteria under gloves.2
Most in the dental profession performing surgical hand washing will be very familiar with the antiseptic scrubs containing chlorhexidine gluconate (CHG) or povidone-iodine (PVP) which are also routinely used in hospital operating theatre environment.
However, in more recent years surgical hand preparation has been heavily influenced by the preferred method in Europe where an alcoholbased surgical rub is considered the norm. Their introduction into Australia has been relatively slow, but as the clinical benefits of using an alcohol based surgical rub become better known and realised, its uptake has been on the rise.

So, what does the Australian Dental Association (ADA) recommend for surgical hand hygiene?
In the ADA’s most recent Guidelines for Infection Prevention and Control published 2021, the ADA states that for surgical hand hygiene that the ‘appropriate and preferred method is the application of a hand gel that is formulated specifically for surgical hand hygiene and uses an extended rubbing time – such as 90 seconds.1
These specifically formulated products for surgical use are comprised primarily with ethanol or a combination of alcohols and have been used in Europe for many years. They are typically a liquid solution instead of a gel or foam as liquid solutions
allows for much greater coverage and contact on the skin, under the nails and between the fingers. They also leave less residue on the hands.
When selecting an alcohol based surgical rub product, it must be approved by the TGA for that specific purpose. The product will include the indication for surgical hand antisepsis or surgical hand disinfection on the product label, and most importantly it will state the contact time required to meet the efficacy standards required for surgical hand preparation.
The contact time is of significant importance. An adequate amount of product must be used to ensure that the hands remain wet for the prescribed contact time. This will require multiple applications of the product. The contact time on wet hands is the minimum time needed to reduce the bacterial counts to acceptable levels.
So why consider using a surgical hand rub?
The KEY consideration is skin integrity and hand health. Your hands are your livelihood, and they should be taken care of.
1. Allergies and contact dermatitis - Some people may experience sensitivity to CHG based products or PVP which may cause irritation and severe dryness to the skin. In these cases, having an alternative product approved for surgical hand preparation is essential.
INFECTION CONTROL
82
The principles of the surgical aseptic technique must be applied to all surgical procedures undertaken in the dental practice setting.1
2. Hand care - The move to waterless hand washing with the introduction of alcohol based had rubs has seen marked improvements in skin health.
Numerous studies confirm that these formulations are well tolerated and often associated with better acceptability and tolerance than other hand hygiene products.1
Options for approved surgical hand rubs
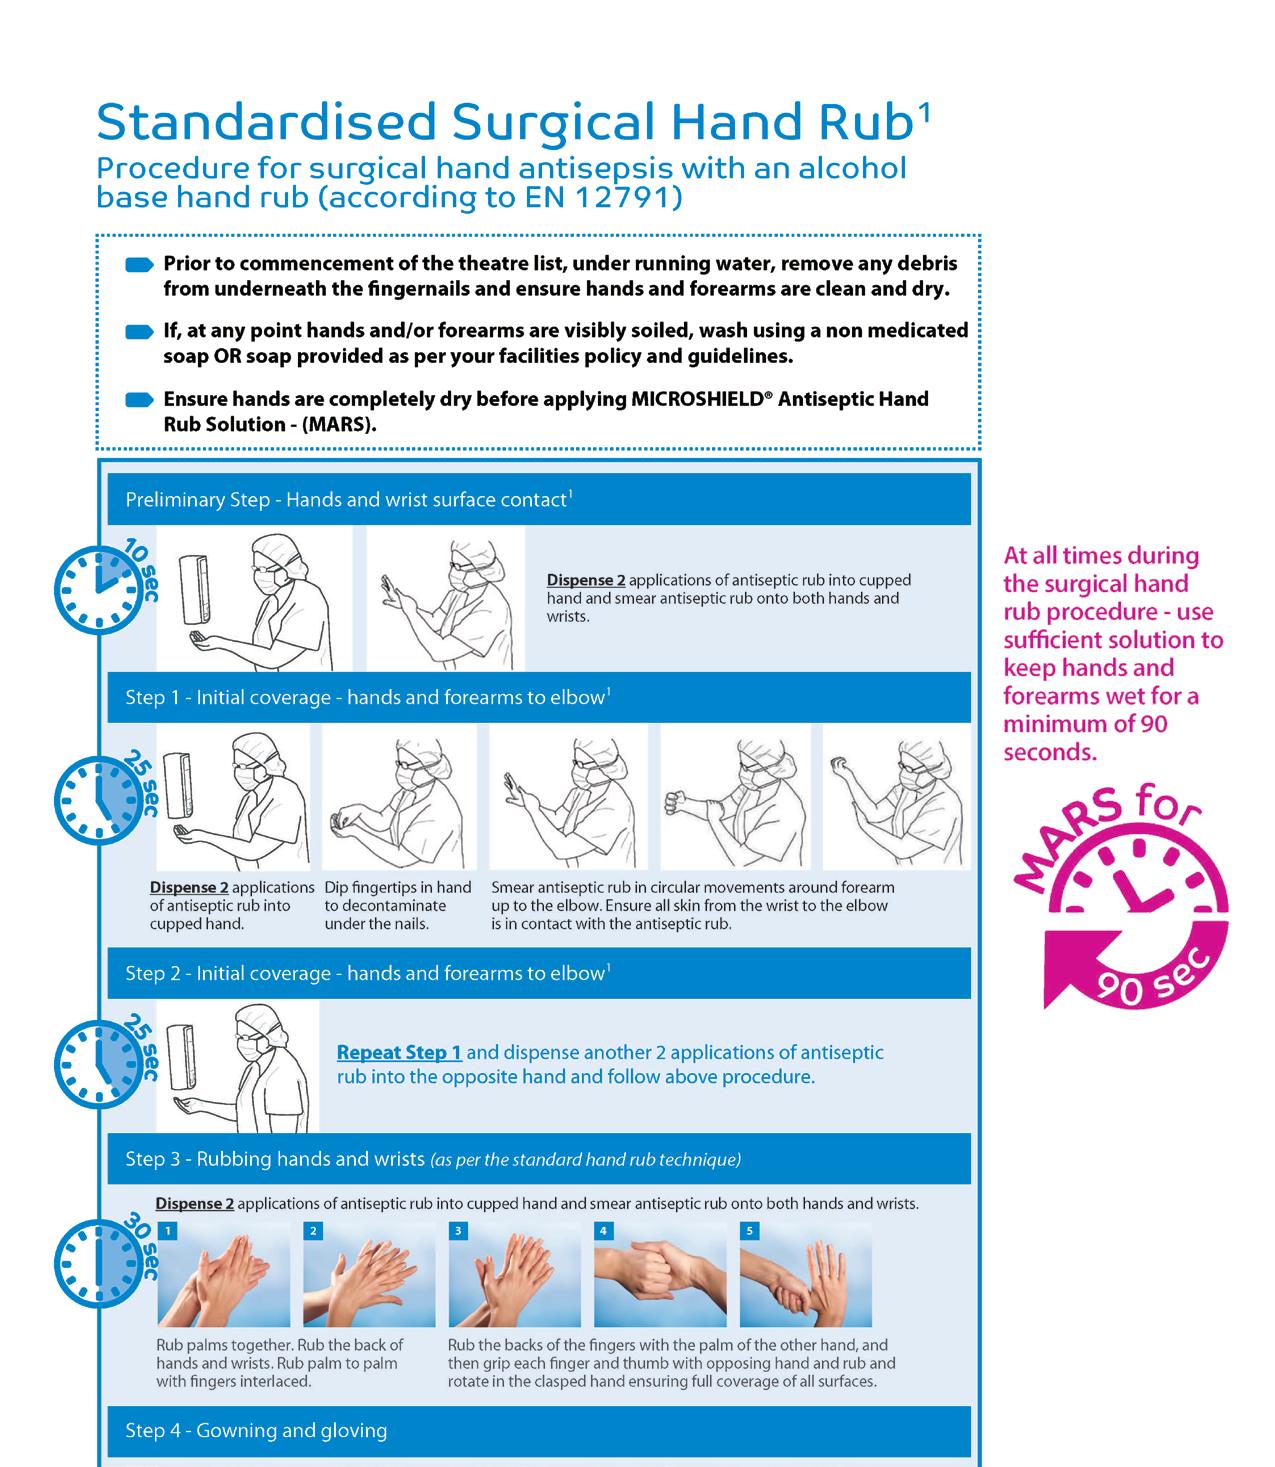
As long-time suppliers of hand hygiene solutions to the Australian dental and hospital market, the MICROSHIELD brand introduced a surgical alcohol hand rub into their range called MICROSHIELD® Antiseptic Hand Rub Solution – commonly referred to as MARS in hospitals.
What sets MICROSHIELD Antiseptic Hand Rub Solution apart from other surgical rubs in the market is its commitment to skin care without sacrificing product effectiveness.

So far, user feedback indicates that you can really feel the difference with MARS.
• MARS is indicated for surgical hand preparation in 90 seconds
• Colour-free
• Perfume-free

• Dermatologically tested
• Contains dexpanthenol for added skin care and protection
• Contains 75% v/v isopropanol and 10% v/v ethanol
• Available in 1L and 500ml pack sizes
References
1. Guidelines for Infection Prevention and Control.
4th Edition. Australian Dental Association 2021
2. WHO Guidelines on Hand Hygiene in Health Care. World Health Organisation 2009
83 1300 65 88 22
INFECTION CONTROL
online CLICK HERE
View Microshield range
LEADING GLOVE INNOVATIONS FOR
THE DENTAL INDUSTRY
Ansell’s Worker Experience Innovation (WEI) program transforms insights from workers’ day-to-day encounters and challenges into new WEI technologies and product ideas for the dental industry.
Such technologies include ERGOFORM™ ergonomic design technology to reduce muscle fatigue and HYDRASOFT™ skin moisturising technology..1
The effects of HYDRASOFT™ Skin Moisturising Technology on Skin Moisture
Hand hygiene is one of the most effective actions to reduce the spread of pathogens and prevent infections.1 Yet, consistent and constant hand washing before and after dental procedures may reduce levels of moisture and natural oils, attack the lipid layer, and reduce the skin’s ability to repair itself, leading to dry or chapped hands and potentially contact dermatitis.
As the first line of defense against microorganisms, it’s important to maintain healthy skin integrity.
HYDRASOFT™ Technology is an odorless, waterbased coating applied on the inside of the glove that helps retain moisture and rehydrate dry skin to improve the wearers’ skin condition. Skin hydration levels were measured on people performing multiple hand washes and wearing disposable gloves. Test subjects evaluated standard nitrile gloves as control and MICROFLEX® Soft White Nitrile (TQ-601) with HYDRASOFT™ Technology as test samples on each hand. The initial level of moisture detected on the hand was measured before and after wearing the control and sample gloves for 15 minutes.
Results
HYDRASOFT™ coated glove: Showed an improvement in moisture content of more than 6% after wearing the gloves for 15 minutes.

Control glove:
The moisture content worsened by 4% after wearing the glove for 15 minutes
We see that the skin moisture continues to improve several times in a row after multiple cycles of hand
The graph shows the results for moisture improvement on the hand that was wearing the HYDRASOFT™ coated glove after each cycle. It is likely that the improvement will reach a plateau value at some point, but the experiment was stopped at 4 cycles.
84
INFECTION CONTROL
Comparison between control and HYDRASOFT™ coated glove*
Effect on skin moisture after multiple hand washes with use HYDRASOFT™ of coated gloves*
Summary of other Ansell Glove Technologies in the Dental Industry

ERGOFORM™ Technology eases the strains of daily work

As healthcare professionals, you experience prolonged repetitive wrist & hand motions that can lead to musculoskeletal strain, that potentially leads to career-ending injuries. ERGOFORM™ Technology provides a more comfortable experience for the wearer, by reducing muscle exertion and improving range of motion. This lets you prolong your career and continue your passions beyond your professional life.
Reduces muscle effort by 36% in repetitive tasks compared to standard exam gloves*
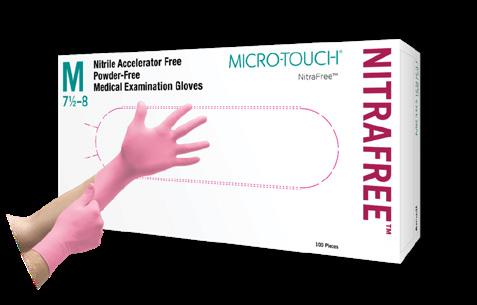
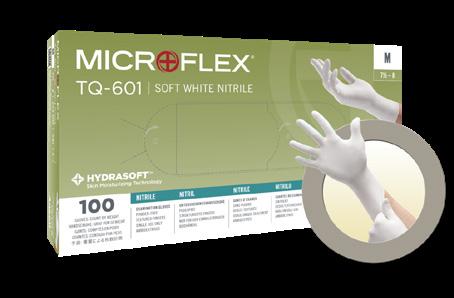

HYDRASOFT™ rescues your
hands
from being dry
Healthcare professionals frequently wash hands, change, and wear gloves for long hours in their daily work. However, this reduces moisture levels in their skin, which compromises its ability to repair itself, leading to dry and even cracked skin. HYDRASOFT™ tackles this by adding a liquid coating in gloves, leaving the wearer with improved moisture in the skin.
Retains 2x more moisture than gloves without hydrasoft™*
Skin-friendly for your comfort and peace of mind
A growing number of healthcare professionals face Type IV chemical allergies and sensitivities. They are caused by chemical accelerators used in the manufacture of gloves. Our accelerator-free manufacturing process effectively reduces the allergenic profile so you can enjoy a worry-free day at work.

Over 49% of hcws are protected against chemical type iv allergies compared to typical gloves**
References:
1. World Health Organization (WHO). World Hand Hygiene Day 2021. Seconds save lives - clean your hands. 2021 https://www.who.int/campaigns/world-hand-hygiene-day/2021
2. Data on file. Ansell Healthcare 2022.
*Based on internal testing
85 henryschein.com.au INFECTION CONTROL
Latex & Gammex
Nitrile Micro-touch
Microflex Ultraform Gammex
non Latex PI Hybrid Microflex Soft White
Nitrafree
Gammex non latex
View Ansell gloves online CLICK HERE
PCD’S & CHEMICAL INDICATORS FOR YOUR STERILISER
A hand-in-hand system for best practice in your facility
The GKE PCD, Documentation Labels and Type 6 Chemical Indicators go together to offer you a market leading solution to monitor your sterilising process and ensure the best outcomes for your patients.
Why should you consider using the GKE PCD?
The GKE process challenge device (PCD) is a high-quality product manufactured in Germany. The stainless-steel helix is a patented design, and the device will last you for more than 10,000 cycles when handled in accordance with the manufacturer IFU’s. The stainless-steel helix simulates your stainless-steel instruments, mimicking the flash-off characteristics of steam from stainless-steel.
The GKE Orange PCD meets with the requirements for the “hollow load test” of EN 867-5 which is the level of requirement for type testing B Type Benchtop Sterilisers - or in more simple terms your Daily Air Removal and Steam Penetration Test.
“Bowie Dick Tests” and “Helix Tests” are both Type Tests – meaning a test for the steriliser to ensure it can meet the parameters outlined in the standards for steam sterilisers for air removal and steam penetration. A “helix test” meeting with EN 867-5 offers a greater level of challenge to the steriliser than a porous level “Bowie Dick Test.” Therefore we recommend if you are sterilising hollow instruments (like hand pieces and burs) and do a helix test with our Orange PCD, then you don’t need to do a Bowie Dick Test as well, regardless of what else you are sterilising.
Routine Monitoring of every load is a mandatory requirement in ISO 17665-1.

Consideration should be given to the use of a PCD in every load – particularly when critical items and implants are being sterilised. Only a PCD can monitor for certain changes in the process, such as the introduction of air (or non-condensable gases) in the steam (which can prevent sterilisation from occurring) issues with the vacuum pump or even rarer issues like hairline cracks in chamber walls – trust us, it’s happened. The GKE PCD can detect minute changes in the air removal and steam penetration characteristics of the process. The steriliser itself or chemical indicators alone cannot do this (eg Type 1 process indicators or Type 6 package indicators).
And what happens if we do our Daily Air Removal and Steam Penetration Test today and it passed, but we do one tomorrow and it fails? What does that mean for all packs that were sterilised in between? It means we have no guarantee for sterility for our instruments. Routine monitoring of every load with a PCD can detect a potential issue sooner.
Simplified Batch Control Identification
The GKE Manual Documentation System offers a simplified and cost-effective method for tracking key information about the sterilisation of instruments and other items in a practice.
Computer printed documentation labels with barcodes only link the contents of a load with a sterilisation cycle.
86
INFECTION CONTROL
We must go back to other means of cycle verification to prove that a pack went through a steam sterilisation process. While electronic cycle reports or physical chart printouts verify that cycle parameters were achieved, it is also mandatory to use a Type 1 chemical indicator on all packs as visual proof each pack was exposed to a steam sterilisation process.
It’s of great importance to have an adequate means of tracking instruments from their reprocessing to their point of use. The GKE Documentation Labels with Type 1 indicator offers you the following key benefits:
1. Instant clear visual verification of a process having taken place.
2. Can remove the processed label from the pack and adhere to documentation.
3. Can be maintained for years, and chemical indicator will not change.
4. Four label colours to choose from (green, blue, red, and yellow).
GKE Type 6 Chemical Indicators for Packs
The GKE Type 6 package indicators give information about their point of placement and indicate that sterilisation conditions have been met in that position. (Note: they can’t give information about the insides of hollow instruments like a PCD can).
A Type 6 indicator is often recommended as it reacts to all critical variables, i.e. temperature, time and steam.
The benefit of the GKE indicators is the double self-adhesive backing that can be adhered to documentation (together with the Type 1 indicator).
LAUREN KONTUS BSc(EnvSc) Sales and Contracts Manager GKE Australia
87 1300 65 88 22 INFECTION CONTROL
the
online CLICK HERE
View
GKE PCD
before sterilisation after sterilisation
STERILISER TESTING DEVICES FROM MOCOM AUSTRALIA
Mocom Australia are the importers of the wellestablished and reputable Mocom brand of Sterilisers, being imported into Australia for over 20 years.

Mocom Australia also supply a range of testing devices for Sterilisers which will be detailed in this article.
From Valisafe we have the Helix Test Device. The AS/ NZS 4815:2006 require a daily air removal and steam penetration test be performed on steam sterilisers that utilize a vacuum for air removal in the pre-sterilisation stage of the process cycle. Air removal and steam penetration tests for small steam sterilisers shall conform to EN 867-5 or ISO 11140-5 as appropriate.
The Valisafe Helix device is an accurate, cost-effective way of ensuring that your Type B bench-top steriliser is performing correctly and conforms to EN-867-5, also meeting the requirements of the standards mentioned above.
The Helix device is specifically engineered for type B bench top Sterilisers, is easy to use and interpret and comes with a PCD plus 250 class 2 strips. If used in conjunction with a Mocom bench-top Steriliser, you can use the Steriliser function to program a helix test to start at any time of the day required.
Most beneficial to be programmed before the start of day so that the test is completed, and the steriliser is ready for use at the beginning of the day.
Also, from Valisafe we have Class 6 indicators.
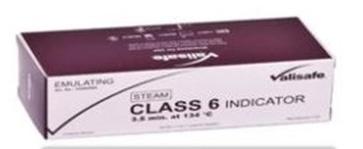
Although there are other indicators available to monitor different parameters, Class 6 indicators are the most stringent, monitoring the critical parameters of time, temperature & steam.
This offers validated security that every tray or item has been effectively processed, thereby providing a direct link between the sterility of the items and the patient.
When would you use a class 6 indicator?
• As an optional and supplementary testing protocol on top of validation of the Steriliser.
• Where on-site technical support is not available to achieve validation of new Sterilisers, temporarily loaned sterilisers, or sterilisers returned following maintenance or repair, additional monitoring with a class 6 indicator shall be used in every pack in every load. (AS4815:2006 7.3.1.3).
• For existing steam Sterilisers where no permanent record of the physical parameters of each cycle is obtained, either by printout, or direct observation.
• Or if your practice has an internal policy for the use of internal indicators, ensuring that every load is achieving Sterilisation.
Valisafe Class 6 indicators are specifically calibrated to 3.5min at 134°C cycle, and are easy to use and record, providing a clear and abrupt colour change. They conform to EN ISO 11140-1 and are cost effective with 200 strips per pack.

88
INFECTION CONTROL View Mocom testing devices online
OWEN Sales Relationship
Mocom Australia CLICK HERE
JIM
Manager
PRODUCT DISPLAY IMPROVEMENT
We are making it easier to shop - products ranges have been consolidated now with fields to choose attributes like size, shade and shape.
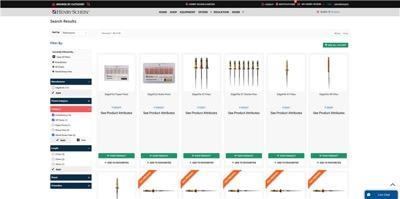
SEARCH IMPROVEMENTS
Now with advance filtering - use the boxes on the left of the search screen to search multiple brands, categories and other options.
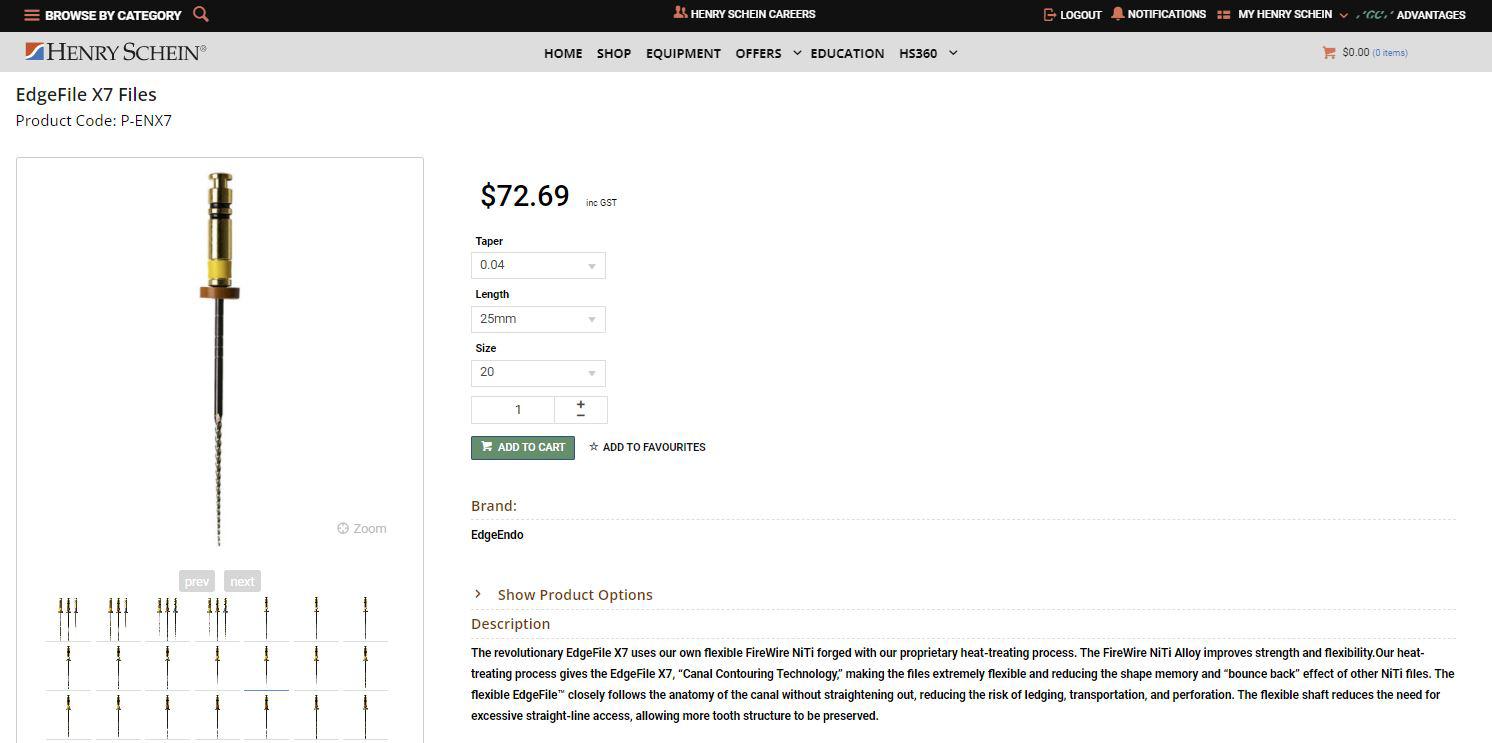
89 henryschein.com.au HENRY SCHEIN ONLINE
WHY NOW IS THE RIGHT TIME TO BUY INVESTING IN BUSINESS PURCHASES
Practices have had to navigate several years of ups and downs now, brought on by the pandemic and more recently, inflation. But the pursuit of business continuity and growth means that owners still need to make important calls for their practices.
The good news is that there are some certainties you can take advantage of. If you need new equipment, one of these certainties comes in the form of the temporary full expensing measure. The crucial factor now is that it ends on 30 June 2023, so there’s not much time left to take advantage of it.
And regardless of market conditions, reviewing your current business plans and strategies should always be top of mind and you should ask yourself what your approach to investing into new equipment should be. If upgrading or purchasing new technology and equipment fits within your plans, then considering the investment and ensuring you have access to capital for the purchase are crucial.
Last call for temporary full expensing
Temporary full expensing was extended to 30 June 2023 – and then it stops. While many have called for the measure to become permanent to help curb inflation, it did not receive any further mention in the October 2022-23 Budget. Subject to any further announcements, from 1 July 2023, all accelerated depreciation measures will have ended. Instant asset write-off will revert to a $1,000 asset cost cap and is limited to taxpayers with aggregated turnover less than $10 million.

It’s the last chance for eligible practice owners to take advantage of the settings while it’s around. After all, making significant business purchases can be much more beneficial beyond its primary purpose – i.e. cash flow, savings for other expenses or upgrades, increased patient satisfaction and also a boost to staff morale.
Pre-empt purchases and expenses in light of ongoing supply chain challenges
Another major consideration ahead of the 30 June 2023 cut-off is the supply of stock. Ongoing delays from overseas manufacturers, plus a spike in sales and stock shortages, could mean that leaving purchases to the last minute may see deliveries and installation fall outside of EOFY. So avoid cutting it too close and missing out by getting in early and beating the crowds.
When it comes to financing the goods, it’s been widely assumed that you must pay cash in order to get the write-off. However, you can actually borrow funds to acquire the eligible assets. Facilities such as a chattel mortgage, or equipment loan, may meet the criteria. You can also buy from multiple sources or buy multiple eligible items under one invoice.
90
EQUIPMENT
Equip your practice for success in 2023 and beyond
Here are a few general rules for the measure to confirm with your accountant.
• For assets you start to hold, and first use (or have installed ready for use) for a taxable purpose from 6 October 2020 to 30 June 2023, the instant asset write-off threshold does not apply. You can immediately deduct the business portion of the asset under temporary full expensing
• Goods can be new or second-hand
• Goods are first held from 6 October 2020, and first used or installed by 30 June 2023
• You can make numerous claims across many tax invoices or with multiple items on the one invoice
• It’s not a one-time-only offer, just so long as each purchase meets the criteria
• If financed, the goods must be under a specific loan type, as not all facilities are appropriate
• Assets that fall into this scheme include medical equipment and devices, dental chairs, IT equipment including servers, computer and phone hardware, along with scanners, copiers etc. Plus practice furniture, cabinetry, white goods and so on
• All work vehicles to the extent that they are used for business purposes
The team at Credabl is always here to support your plans with bespoke funding solutions. You can chat live on our website 24/7 www.credabl.com.au or call one of our specialist lenders on 1300 27 33 22.
Want to find out more?
Tune in to the Surgery Setup Solutions Webinar Series being held throughout the month of February.
Credabl is proud to be a partner of the webinar series and will present the ins and outs of how to finance your surgery.
Log in to the FREE Live & On Demand webinars to gain insights on an array of topics
• How to take full advantage of the government stimulus and maximise cashflow
• Current finance options
• Structuring your finance for success
This article is a guide only and does not constitute any recommendation on behalf of Credabl Pty Ltd (ACN 615 968 100) or any of its related bodies corporate (Credabl). The information in this article is general in nature and we have not considered your personal objectives or financial circumstances or needs when preparing it. Before acting on this information you should consider if it is suitable for your personal circumstances. Credabl is not offering financial, tax or legal advice. You should obtain independent financial, tax and legal advice as appropriate.
91 1300 65 88 22 EQUIPMENT
CLICK HERE CLICK HERE Webinar Series – Credabl Enquire Now
KAVO PILOTS GLOBAL ‘TRAIN THE TRAINER’ PROGRAM
WITH HENRY SCHEIN AUSTRALIA’S EQUIPMENT SERVICE TEAM
Each year, KaVo’s 17 dedicated training specialists from its Campus Team provide first class service and technical training to more than 1,200 distributor partners from all over the world. This is how they ensure that service technicians can perform all maintenance and service work efficiently, safely and at the level of quality expected from KaVo.
The KaVo Campus is based in Biberach, a small town in Southern Germany which is home to KaVo’s head office and hosts part of its sprawling manufacturing facility. At KaVo, dental excellence encompasses not only premium instruments and treatment units, but also excellent service and maintenance protocols. This is the proven level of all-round quality that pays off every single day.
The front steps of KaVo’s Training Campus, some 13,000km -16,000km from any point in Australia, is a mighty 24–30 hour journey to the state-of-the art facility. A journey recently undertaken in August 2022 by two of Henry Schein Australia’s experienced service technicians, Stephen Wilkinson and Mark McDonald. The purpose of their journey is to take part in a two-week world first KaVo initiative. A dedicated service and equipment training program whereby Stephen and Mark would return to Australia fully certified as service trainers of KaVo Equipment.
For the first time in KaVo’s 110+ year history, Stephen and Mark will conduct KaVo approved training programs outside of Germany with their Henry Schein Australia colleagues.
Michael Dreyer, lead KaVo trainer in the pilot, discussed some of the unique challenges this posed when the program was in a conceptual stage. “For over 100 years, our training programs have been conducted in-house, under the direct supervision of our senior team leaders. The standards we set for ourselves are very high the team prides itself on delivering excellence to our partners, and in turn to their customers. We had to ensure this formed the basis for the ‘Train the Trainer’ program. KaVo customers would expect nothing less. “A key element to the success of this program was the experience and expertise of our partner technicians, they would ultimately become an extension of KaVo and had to embody the KaVo philosophy of ‘Dental Excellence.”
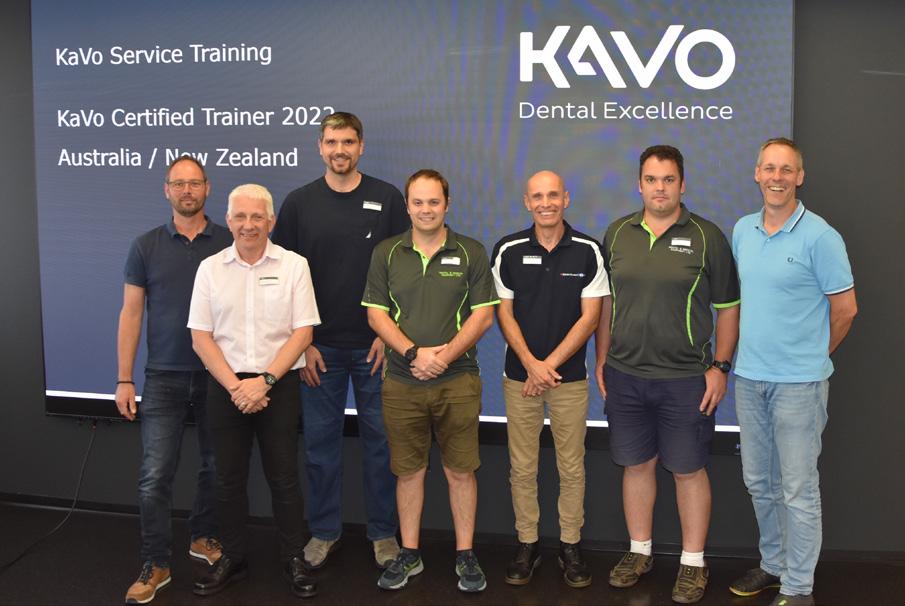
EQUIPMENT
92
When interviewed by Australasian Dentist magazine, Stephen was asked, “You’re a certified trainer of KaVo Equipment, what does this mean for Henry Schein and KaVo customers in Australia?”
“This program will have significant benefits for our customers. Whether you’re an existing customer, or a future KaVo customer, your Henry Schein technician is certified in KaVo Equipment. This includes certification on KaVo’s newest addition to their treatment unit portfolio, the KaVo uniQa.
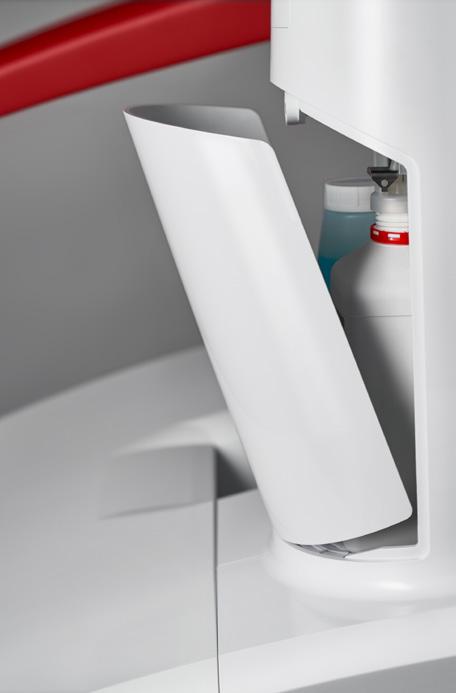
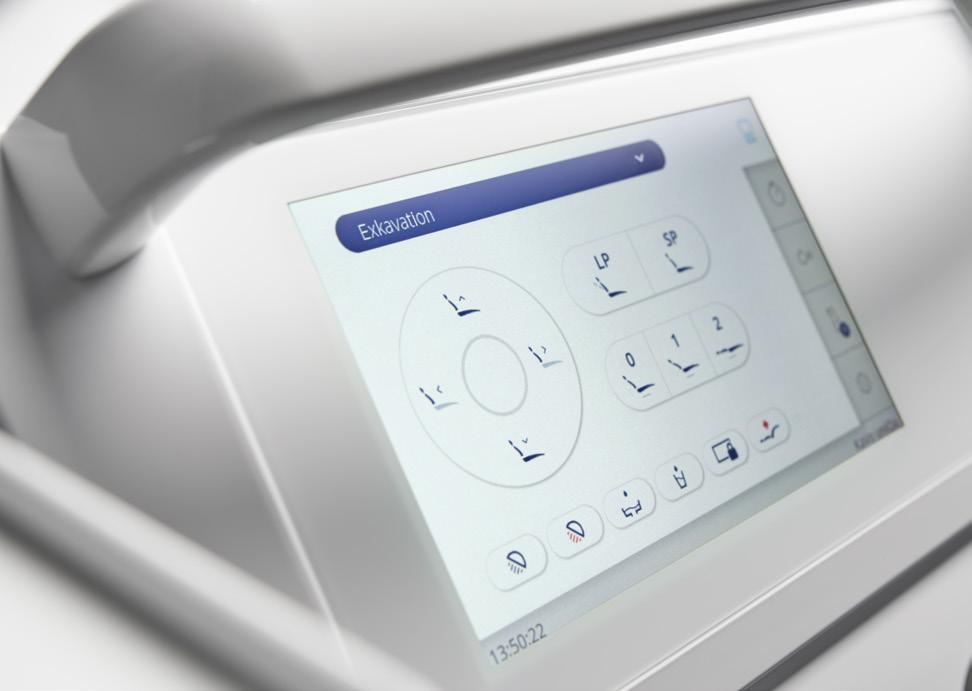
“The reliability we’ve all come to know and love from KaVo, with all the right technological advancements that doctors are demanding these days. It’s clear that KaVo have made intelligent component choices based on their experiences globally, and for the KaVo uniQa, this means they’ve retained and made improvements to what was already a solid base” says Stephen Wilkinson, Senior Service, Technician, Henry Schein Australia
Mark McDonald has been a technician with Henry Schein for almost 10 years and leads the service team in Western Australia. Providing continuous training and working with reliable equipment ensures Mark and his team are delivering a service in WA that Henry Schein customers have come to expect. “For many of our customers here in WA, the nearest town is hundreds of kilometres away, and depending on flight availability, the earliest a technician can get on site for an emergency call out is one to two business days. This means quality and reliability are right at the top of the list when customers are choosing which chair to purchase for their practice. That’s why I love KaVo. Time and time again, KaVo proves to be one of the most reliable treatment units on the market. As part of my training in Germany, I was fortunate enough to see what’s under the hood of the new KaVo uniQa.
I’m happy to say it has all the reliable KaVo DNA that I work with every single day, along with some practical enhancements that our customers will love. Whether you’re purchasing a new chair in a metropolitan or regional area, the new KaVo uniQa needs to be on your short list.” Says Mark McDonald, Senior Service Technician, Henry Schein Australia.
Thomas Schmid, Global Technical Support Manager at KaVo, was leading the team in Germany who were designing the ‘Train the Trainer’ Program. He had this to say on its implementation: “As a global business, it’s important that we adapt to the needs of our customers in all parts of the world. By offering the Train the Trainer Program to our trusted partners at Schein Australia, we can be confident that doctors and practice owners are getting the same level of technical expertise from their local equipment technicians, as we offer here in Biberach, Germany. Australia was the ideal region for KaVo to pilot this program. There is already a very large KaVo footprint in Australia and this comes with significant demand for technical support. The Australian team at Henry Schein were very enthusiastic about partnering with KaVo to deliver this program, and all our expectations have been exceeded which is great news for customers.”
For KaVo, the ‘Train the Trainer’ program has been a big success story for the Australian market. So successful that the team in New Zealand are adopting the same program and KaVo is quickly scaling up this project to offer similar platforms to other regions in Asia, Eastern Europe and South America.
Book in your FREE Handpiece Care & Maintenance Session to learn how to maintain Ultimate Handpiece Performance
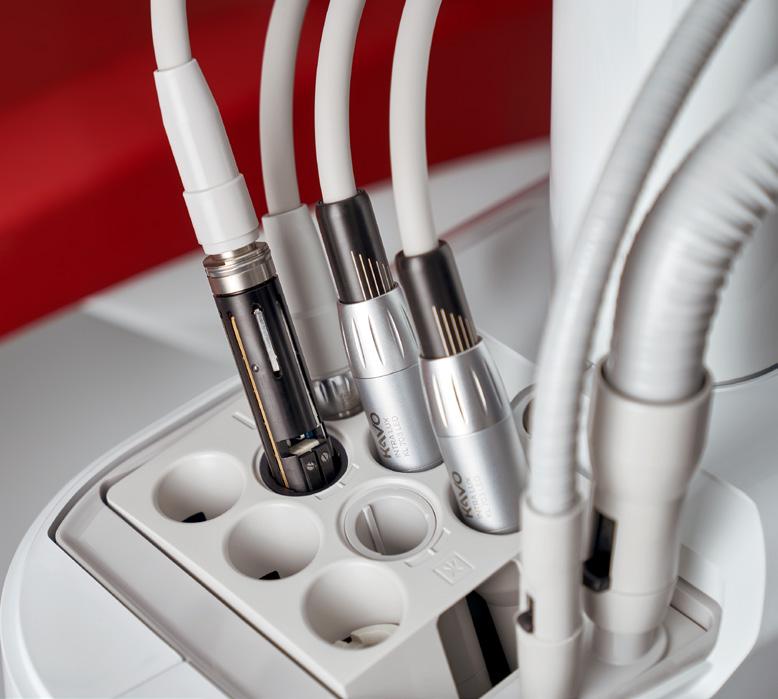
93 henryschein.com.au EQUIPMENT
CLICK HERE
VISTASCAN MINI VIEW 2.0 UNLOCK
THE FULL POTENTIAL OF YOUR PRACTICE
Not only is the design of the new VistaScan Mini View 2.0 futuristic. The technology behind it is just as pioneering. It uses the latest image plate technology and works together with VistaScan IQ image plates to open many new AI-based features.
With Smart Scan Workflow, work becomes even more efficient thanks to the ability to link IQ image plates directly to the patient. Together with the superior image quality of the tried-and-tested PCS technology, this new system will make your dental practice completely fit for the future.
All intraoral formats
You can use all intraoral image plate formats with the VistaScan Mini View 2.0 - from size 0 to size 4. The process is as easy as for analogue film.
Quick and easy scanning
With the Easy Feed concept, you can scan image plates very quickly, one after the other. The interchangeable inserts make it possible to digitize all intraoral image plate formats.
Convenient touchscreen
The color 5“touchscreen display provides a user interface that is very easy to use. It provides excellent image quality.
Excellent image quality
Thanks to PCS technology, VistaScan Mini View 2.0 can reliably highlight incipient caries lesions or make the tiniest bone structures visible.
ScanManager - for even more efficient work
Scanning tasks can be sent simultaneously from different workstations to VistaScan Mini View 2.0. Select the required task on the display, carry out the scan and perform a diagnosis on the PC screen straight away.
Scanning without a PC is possible
Thanks to the standalone mode, you can also work independently of the network. Images are stored temporarily in the internal memory of the device and then transmitted to the database later.
VistaSoft AI automation included
The VistaSoft package gives you access to powerful AI-based features that can automate day-to-day work routines and thus make them noticeably more efficient.
Sustainability built in from the start
All our image plate scanners are manufactured with sustainability in mind, and our goal is to achieve CO² neutral production. Other divisions of Dürr Dental are also committed to using resources in the most responsible way possible. With all our products, it is important for us that we continue to improve energy efficiency and maximize service life by making all our units easy to repair and service. And, of course, finally everything is packaged in a safe and ecofriendly way.
94
EQUIPMENT
Ready for the dental practices of tomorrow
Not only does the new VistaScan Mini Easy feature a pioneering design, but it also boasts state-of-theart technology. It works with the latest image plate technology and enables numerous new AI functions in conjunction with the VistaScan IQ image plate. Combined with the superior image quality of the tried-and-tested PCS technology, it ensures that your practice is well equipped for the future.
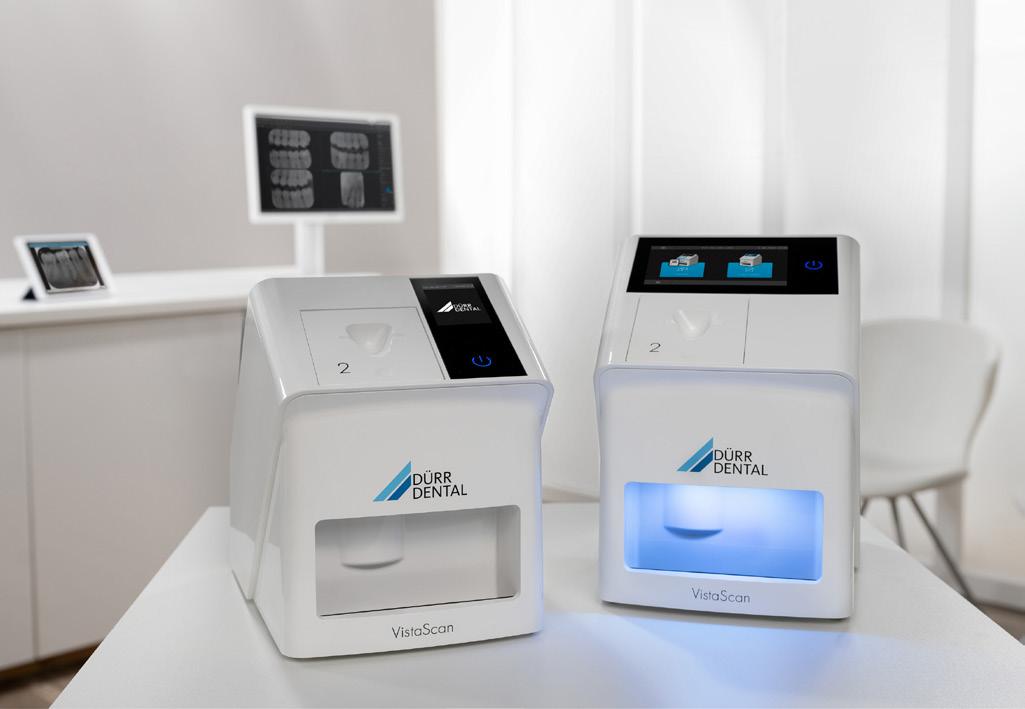
Key features:
• Excellent image quality
• High-resolution glass touchscreen display
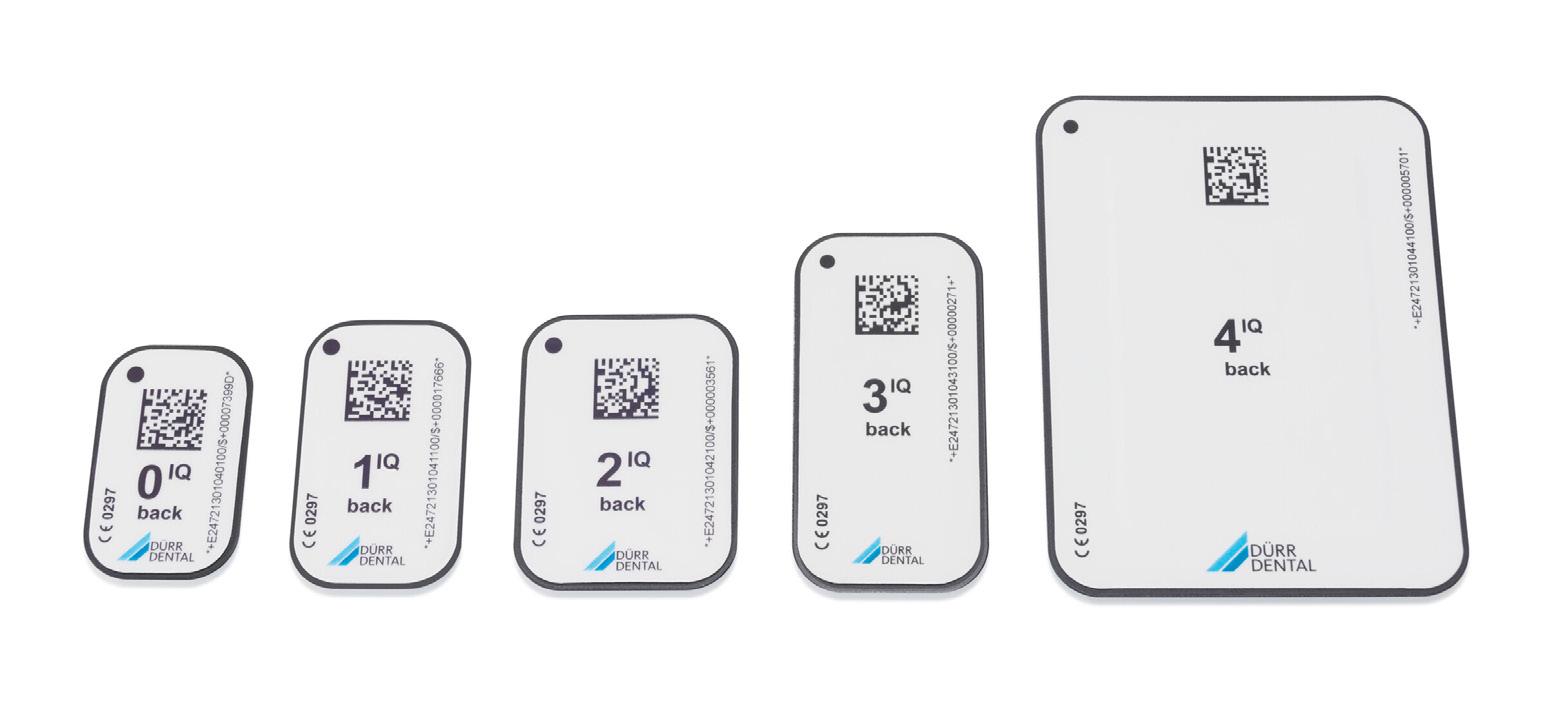
• Ideal chairside appliance
• LAN interface
• Quick and easy scanning
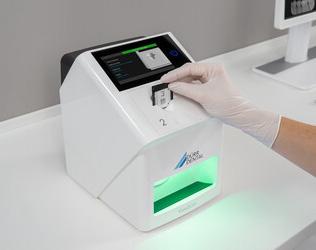
EXCLUSIVE TO HENRY SCHEIN

95 1300 65 88 22 EQUIPMENT
CLICK HERE
Henry Schein Equipment Enquiry Form
VITAPAN EXCELL
EFFICIENCY & BRILLIANCE BASED ON AESTHETIC GUIDELINES
When a smile is revitalized using ceramic restorations, esthetic guidelines are followed and implemented meticulously so that optimal results can be achieved. Smile Design – that’s what everybody is talking about when it comes to fixed ceramics. Attention to detail is also an established practice when fabricating restorations. The anatomy of the hard tooth substance is reproduced threedimensionally during ceramic layering. Dentin and enamel materials form a natural unit. So why should these standards not apply for full dentures too? After all, denture wearers want an esthetic outcome just like any other patient. These days, younger denture wearers in particular want their dentures to look natural rather than artificial. As a dental technician, if you have the opportunity of completely reworking the red-white esthetics, then you should take advantage of the opportunity.
Integrated esthetics
After all, the esthetic guidelines that hold true for all disciplines in dental technology should, of course, also apply for full dentures: the tooth axes, contact surfaces, angle characteristics, cervical dimension, gingival margin and length-width ratio should be designed like natural dentition. The basic requirement in this respect is a denture tooth that meets esthetic guidelines and provides an anatomical structure similar to that of natural dentition. And that’s the challenge: denture teeth generally – for whatever reason – do not meet esthetic guidelines and have a lifeless and monotonous appearance when it comes to layering. The vestibular morphology is a flat surface between two ridges without any texture at all, which is why denture teeth of this kind simply cannot offer a natural appearance. The VITAPAN EXCELL (VITA Zahnfabrik, Bad Säckingen, Germany)
denture tooth meets esthetic guidelines, is layered three-dimensionally using enamel, dentin and cervical material, and is pressed from a single mold and cured. The morphology and texture of real teeth was consistently implemented when creating the mould. The following case report demonstrates the resulting benefits, not just in terms of esthetics but also for setup.
Case study:
A 58-year-old female patient presented in the dental practice, as she was dissatisfied with both the function and the esthetics of her current restoration. When chewing, the partial denture (lower jaw) and the full denture (upper jaw) would slip back and forth and did not provide a secure grip. The denture teeth appeared lifeless and the mucogingival areas were smooth and level with an artificial appearance. Following extractions in the lower jaw, region 31 to 34 did not have any restoration, as the partial denture had not been extended. Only tooth 46 was still present, which the patient insisted she wanted to keep. The molar proved worth retaining and showed no clinical or radiological signs of severe periodontal damage. Once the impact of a partial denture on the only remaining tooth (46) had been explained to the patient, it was decided that the new lower denture should be designed so that in the event of tooth loss, a denture tooth could be added by making minimal changes to the design of the denture. The decision was therefore taken to work around tooth 46 during fabrication of both dentures. The patient wanted a new restoration with a natural appearance that offered her peace of mind with a secure grip when chewing and speaking. After detailed consultation, she decided to have a new full denture made.
96
PROSTHETICS
For this purpose, the VITAPAN EXCELL denture tooth was selected in the appropriate tooth shape to ensure a natural appearance and setup in accordance with esthetic guidelines. In the posterior area, VITAPAN LINGOFORM was used. As an initial basis for the work to be completed, anatomical situation impressions were taken with alginate in order to create custom trays in the laboratory. These were used in a second session to take mucodynamic impressions. The first impression was taken using Heavy Body, and the second, fine impression using Light Body A-silicone. Once the master model had been fabricated, this was used as a basis for fabricating bite registrations with wax rims for determining jaw relation. The spatial arrangement of the jaws in relation to one another could be transferred to the articulator using the intraorally encoded registration data. Following analysis of the model, the appropriate wax setup for the patient was started.
Intuitive setup
Dental technicians have internalized the esthetic guidelines. In addition to their fundamental knowledge of esthetics, they spend every day looking at what works esthetically and what doesn’t. A logical consequence is that they find it easier to set up with anterior teeth that comply with these esthetic rules than, for example, with a set of teeth whose axis and angle characteristics do not harmonize with each other on the dental plate. Even with these kinds of denture teeth, every user will try to find the ideal setup, although they will find it difficult to find the correct tooth position, given the fundamental discrepancies. That’s why VITAPAN EXCELL was designed with tooth axes, contact surfaces, angle characteristics, cervical dimensions, gingival margins and length-width ratios that consistently meet the generally-applicable esthetic guidelines of natural dentition. As a result, setup using this anterior tooth set was intuitive and easy to complete. The wide palatal ridges additionally support optimal shaping of the papilla. For new restorations, it is important to always consider the previous appearance of the patient’s dentition. The basis is the anatomy of the oral cavity on the day treatment started, which is where I begin restoration in accordance with the parameters of esthetics, function and stability. All clinical information must be taken into consideration here to achieve optimal restoration results in the patient’s mouth.
Due to the position and the mesial displacement of tooth 46, space for the lower anterior setup was restricted and was implemented with overlap in order to facilitate physiological molar contact between the denture teeth. The patient was in agreement, as her natural lower anterior teeth had also overlapped and had never been evened out by orthodontic treatment. In the posterior area, efficient setup with precisely defined centricity, but with the necessary freedom for excentric movement, was ensured by VITAPAN LINGOFORM. The multifunctional occlusal surface design based on the cog wheel principle, is universally suited for all conventional tooth-to-tooth or tooth-to-two-tooth setup concepts.
Finishing and try-in
Since the gradient of the gingival garland is not defined by a stepped transition between the tooth and the cervical area, but the transition is natural, the mucogingival structure could be modeled in a patient-friendly way. The alveolar process, palatal ridges and palatal suture, as well as the incisive papilla, were also modeled in wax in order to simulate the final dentures as accurately as possible during clinical try-in. Following careful analysis, the posterior teeth were adjusted to a more distal position in order to achieve a more individual and natural appearance. The single tooth (46) was enclosed in a circular fashion by the base to provide the upper setup with greater occlusal stability and to compensate for distal movement of the tooth. The patient responded well phonetically and functionally, and was delighted with the natural appearance of the denture teeth. Thanks to the three-dimensional anatomical structure in multiple layers, and the harmonious shade gradient from the neck to the incisal area, the VITAPAN EXCELL anterior tooth set had an incredibly lifelike appearance. Its natural morphology and nuanced surface texture facilitated a brilliant play of shade and light in the patient’s mouth, even during try-in. The distinctive incisal characteristics with a white incisal margin and integrated mamelon structure created an organic shade effect, while the balanced light transmission resulted in natural light dynamics.
Completion and finishing
A silicone key was fabricated from the wax setups; the teeth were removed, cleaned and conditioned in the base and cervical areas for acrylic fabrication.
97
henryschein.com.au
PROSTHETICS
Following repositioning of the denture teeth in the silicone key and prior to pouring, the complete denture base was customized with Castdon polymer, and the vestibular labial shield and palate area customized using shades from the Denture Art system (both products from Dreve Dentamid, Unna, Germany). Following repositioning of the master model in the key and autopolymerization, both dentures were finished using a rotating instrument.
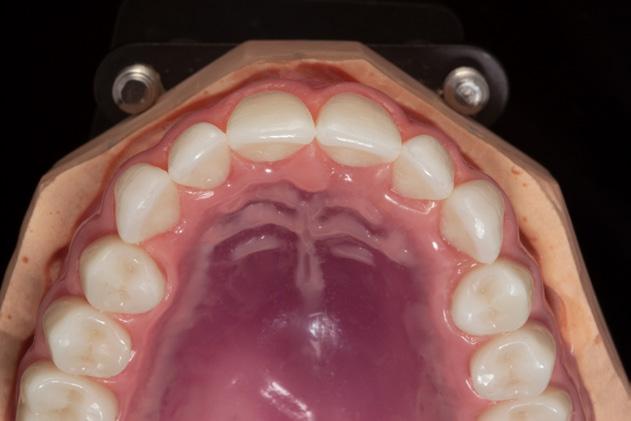
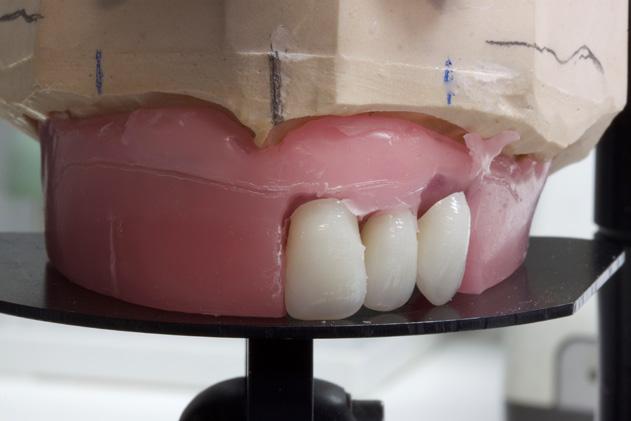
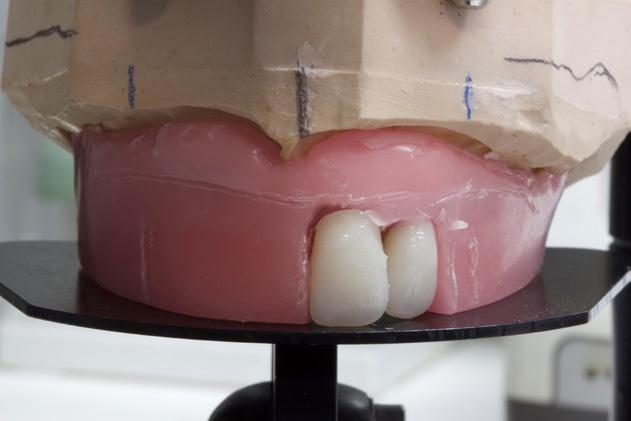
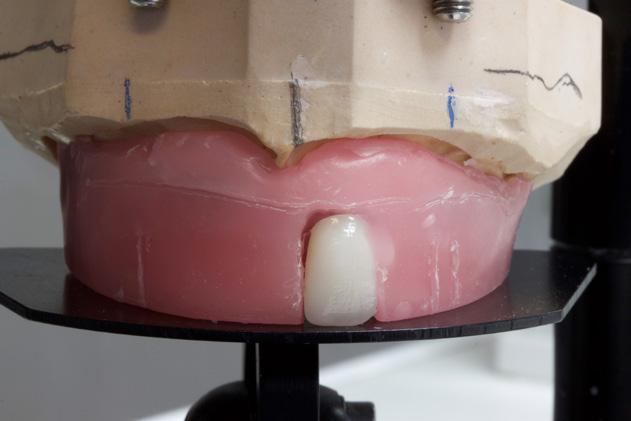
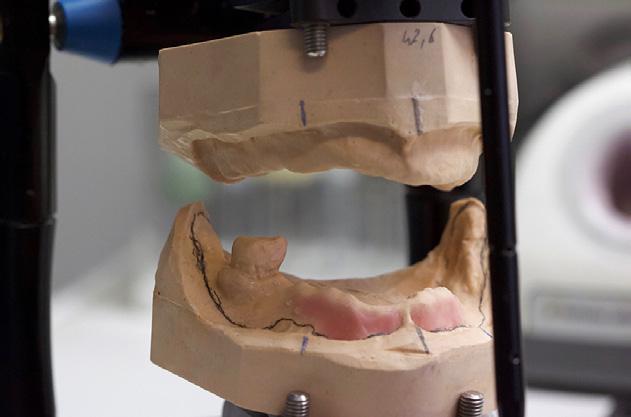
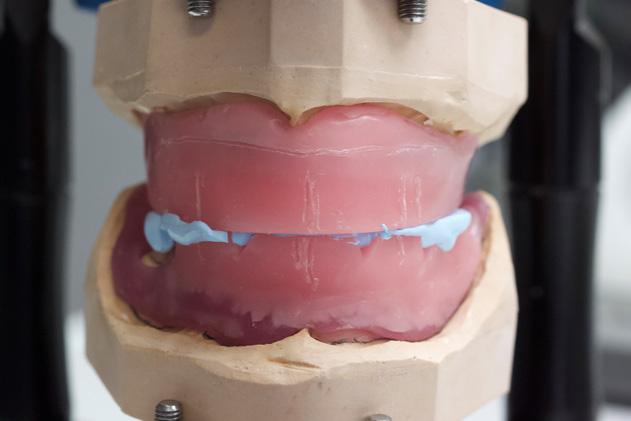

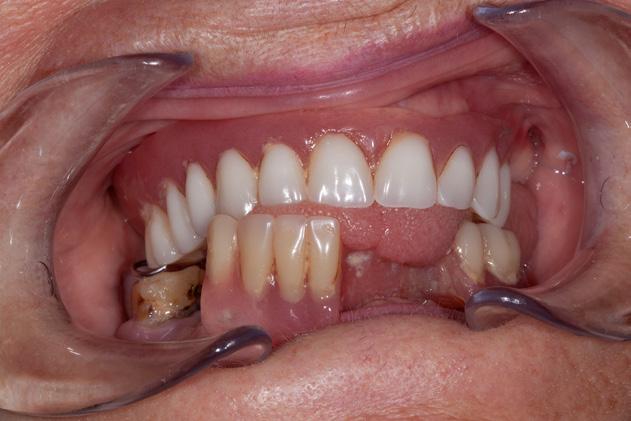
Final polishing was carried out using a pumice stone, polishing paste and a polishing wheel. Depending on the age of the patient, the age of the teeth can be controlled by reducing the surface texture to a greater or lesser degree by quickly polishing. In this case, the surface texture of the teeth were consistently avoided by using a handpiece in order to maintain a more youthful appearance for the denture teeth.

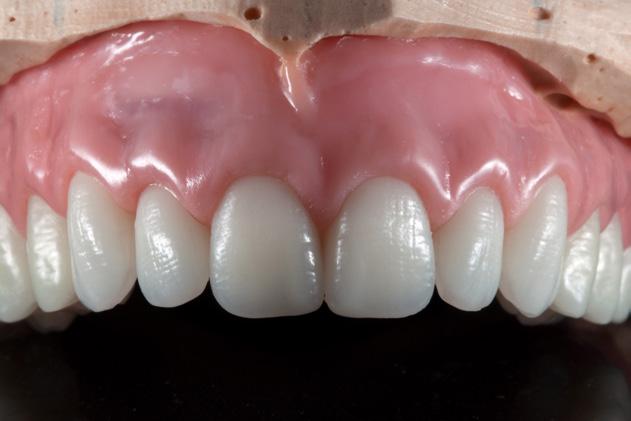
98 PROSTHETICS
Fig. 1: The patient’s insufficient dentures needed to be restored.
Fig. 2: Two-phase mucodynamic impressions were taken of the upper and lower jaw.
Fig. 3: The master models were articulated using jaw relation determination.
Fig. 4: After model analysis, it was possible to begin setup.
Fig. 5: Due to the morphology of VITAPAN EXCELL, setup took place automatically in accordance with esthetic guidelines.
Fig. 6: Tooth 22 was slightly inclined in the palatal direction to facilitate an individual appearance.
Fig. 7: It was possible to complete the anterior setup quickly through integrated esthetics.
Fig. 8: The upper denture with modeling complete and the natural play of light of VITAPAN EXCELL.
Fig. 9: The palatal anatomy was also precisely simulated for try-in.
DANIEL LAVRIN Denturist, London, UK
Highly esthetic full dentures
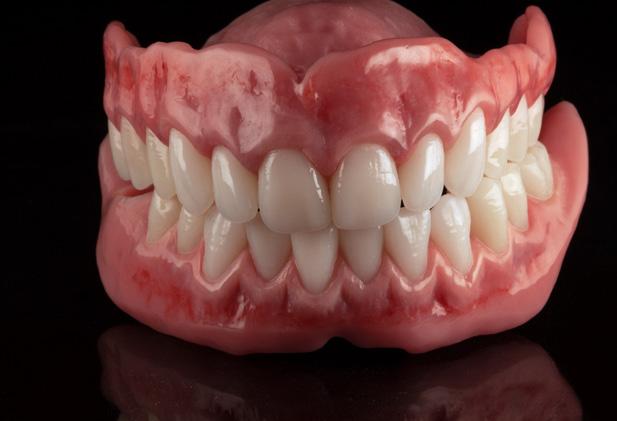
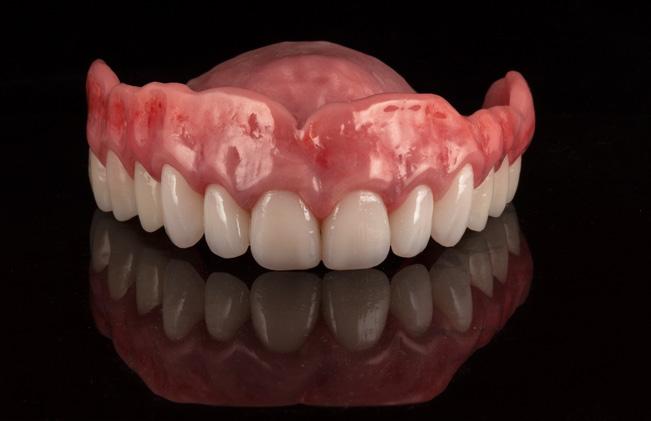
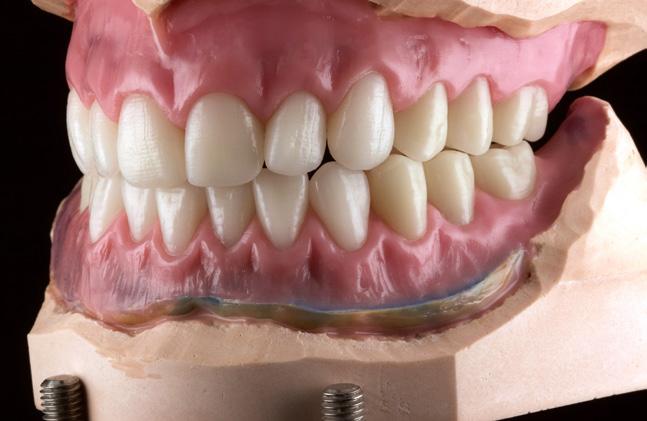
This case shows that by using the right denture teeth in accordance with esthetic guidelines, and by working with a creative dental technician, it is possible to create full denture restorations that compare favorably with complete ceramic jaw
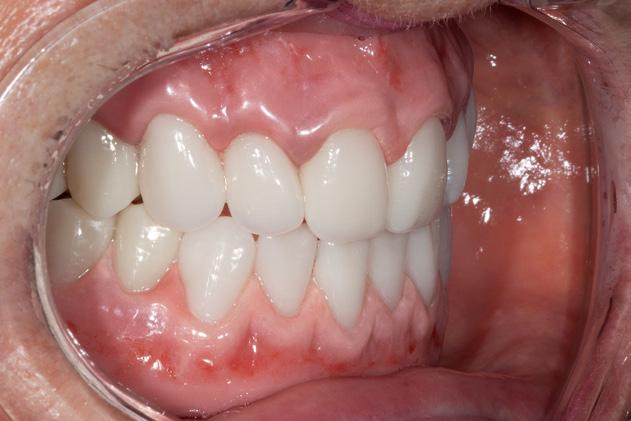
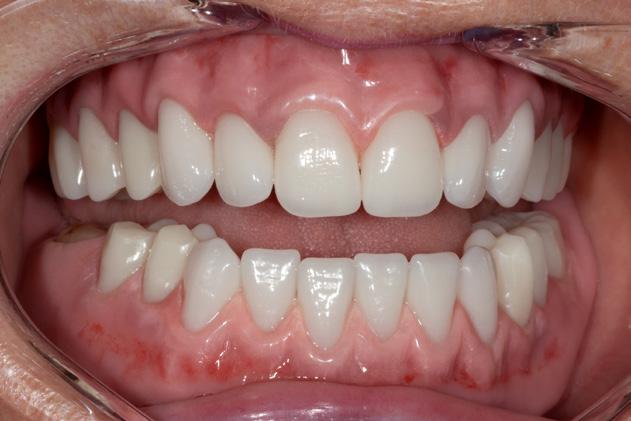

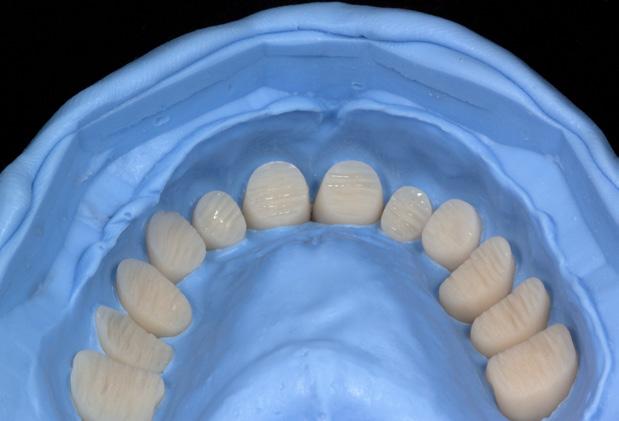
restorations. The patient was delighted with the highly esthetic result and the stable seating of her new dentures, and was already more confident immediately after placement. The denture teeth showed a lifelike play of light and gave the patient an age-appropriate appearance again.
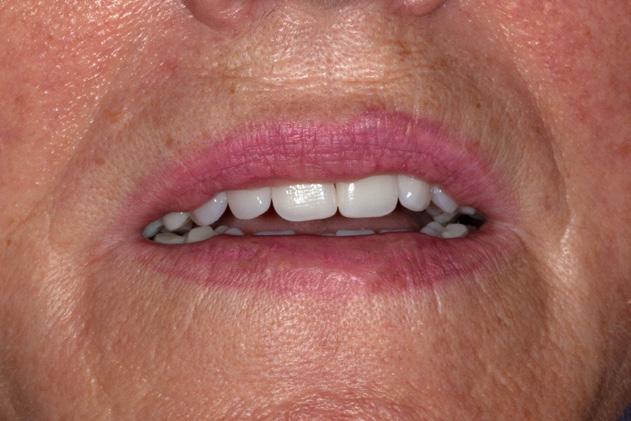
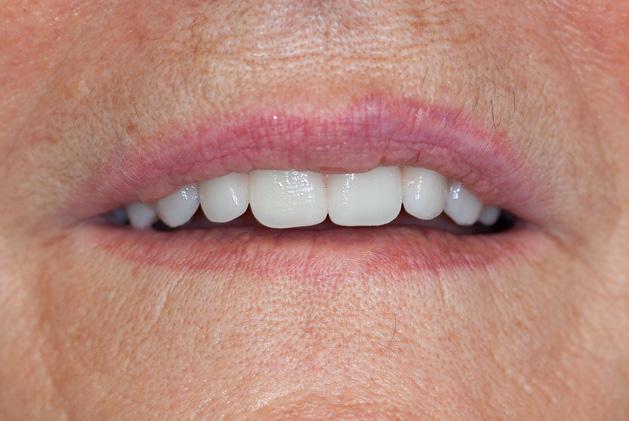
99 1300 65 88 22 PROSTHETICS
Fig. 10: The upper and lower denture with modeling complete in the articulator.
Fig. 11: The patient was already delighted with the esthetic result during try-in.
Fig. 12: The cleaned and conditioned denture teeth repositioned in the silicone key.
Fig. 13: The completed, finished upper denture had a completely natural appearance.
Fig. 14: The slight overlap in the lower anterior area provided an individual appearance.
Fig. 15: The highly esthetic full denture restoration prior to insertion.
Fig. 16: Both dentures could be integrated harmoniously in the oral cavity.
Fig. 17: Denture teeth and mucogingival reproduction formed a natural-looking restoration.
Fig. 18: The patient was completely satisfied with the highly esthetic result.
VITA® and the VITA products mentioned are registered trademarks of VITA Zahnfabrik H. Rauter GmbH & Co. KG, Bad Säckingen, Germany.
THE MATERIAL OF THE FUTURE FOR ALL KIND OF INDICATIONS
RESIN BASED BLOCKS BEYOND YOUR IMAGINATION
Implant prosthetics and dental prosthetics differ considerably, with the absence of periodontal ligament in the implant/ prosthesis complex. This situation causes mechanical problems to the implants, especially to the implant prosthetic material, due the lack of stress absorption resulting from the normal impact during chewing (1) (2).
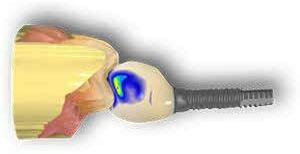
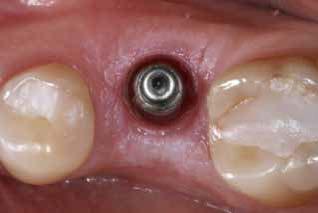
Among the problems we face in daily practice is the unscrewing and fracturing of veneering material of the implant crown and fracturing of implant/abutment components.
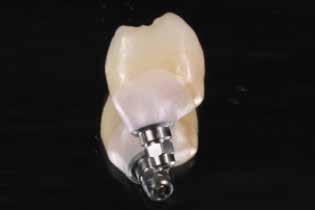
It is very important to consider that resin based blocks give us the missing part from ceramic materials to solve the problem of anterior exposure. It is also necessary to consider the importance of reliable bonding/union between the resin block and the abutment component of the implant, because the right transmission of occlusal load depends on the reliability of this bonding interface.
One of the biggest advantages of BRILLIANT Crios blocks is the combination with ONE COAT 7
CASE 1
UNIVERSAL, the best bonding system for the resin based blocks according to the scientific literature (3) (4) and also tested in my own practice over the last five years of use.
Another very important feature is the size and distribution of ceramic fillers. We have learned from the past that bigger size fillers are better for the strength but, at the same time, are more prone to detach from the surface creating craters initiating the material degradation.
A homogeneous filler size and distribution is much better for the material’s wear, lustre, aesthetics and strength over long term.
During daily practice, it is very common to face situations where the implant has to be placed lingually due to normal resorption (Fig. 1) of the buccal plate after the extraction. But, at the same time, it is not necessary to perform bone grafting procedures. The result of this scenario is to increase the stress on the implant-bone complex when we use rigid materials like conventional ceramics (Fig. 2). For this daily practice situation, the combination of rigid and resilient materials against the antagonist, allows the stress to the implant-bone complex to be reduced (Fig. 3,4). Oblique loads have been reported to increase stress values in peripheral bone and prosthetic components also generating high stress in the crown, implant, abutment, and cortical bone. The Young’s modulus, also known as elastic modulus, is one of the important factors determining a material’s behaviour. (5)
100 PROSTHETICS
Fig 1. Implant placed lingually due to the normal resorption of the buccal plate.
Fig. 2: The design of the crown has to be with a pseudo pontic, increasing the oblique load on the crown.
Fig. 3: Hybrid implant crown made with zirconia mesostructure and BRILLIANT Crios cemented adhesively on top ready to be screwed in mouth.
CASE 2
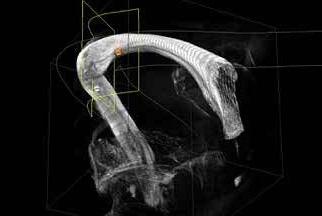
Another common situation is a full mouth restoration over implant. It is well known that the big issue is chipping and delimitation of the ceramics, due to the high forces applied in the patient with dental implants. In regards to this problem, the combination of rigid materials to support the connectors and resilient materials to absorb the shock and, at the same time, allow easy fixation, make the use of resin based blocks the logical choice for this kind of restoration. (Fig. 6,7 and 8)
CASE 3
In this case, a patient presented with extremely atrophic bone in the mandible, with four short implants placed between the dental nerve foramen (Fig, 10a,10b). After some time, patients wearing this kind of restoration with prefabricated teeth, their muscle activity increase considerably, which very often leads to fracture or debonding of the prefabricated teeth (Fig. 12).
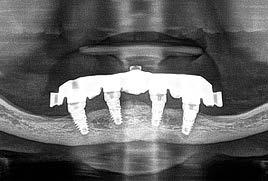
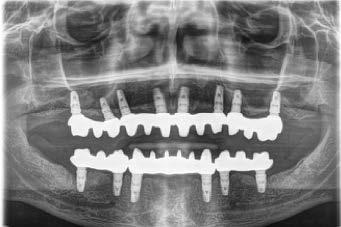
A combination of a rigid metal structure over the telescopic bar and a thimble structure made of PEEK (Fig. 13,14) works as base for the final restorations. These were milled out of a BRILLIANT Crios disc either as single tooth units or bridges and cemented on the thimble structure (Fig. 15-17).
Using BRILLIANT Crios instead of prefabricated teeth, we can increase the strength of the restoration, have good aesthetics and keep the weight low for this kind of prosthesis.
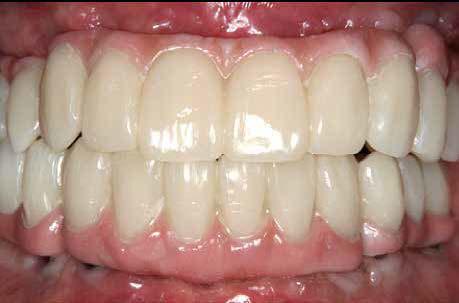
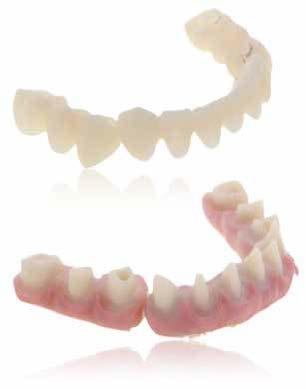
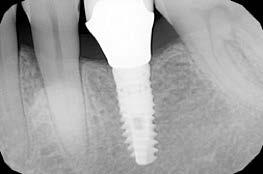
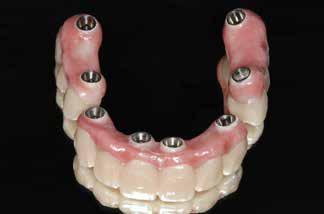
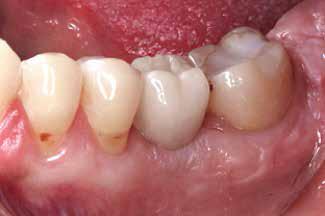
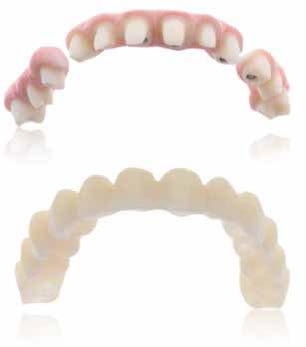
101 1300 65 88 22 PROSTHETICS
Fig. 6b: Zirconia thimble framework and BRILLIANT Crios bridges for extra oral bonding.
Fig. 9: Panoramic view of the finished case.
Fig. 4: Implant crown after one week of placement.
Fig. 7: Zirconia bridges ready to be screwed.
Fig. 10a and 10b: Patient with extremely atrophic bone in the mandible with four short implants placed between the dental nerve foramen
Fig. 5: Implant crown after placement. Fig. 6a: Zirconia thimble framework and BRILLIANT Crios bridges for extra oral bonding.
Fig. 8: Upper and lower bridges in the mouth.
REFERENCES
1. Magne P, Silva M, Oderich E, Boff LL, Enciso R. Damping behavior of implantsupported restorations. Clinical Oral Implants Research. 2013;24(2):143–8.

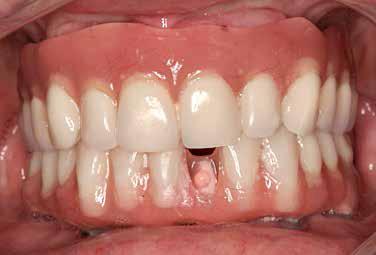
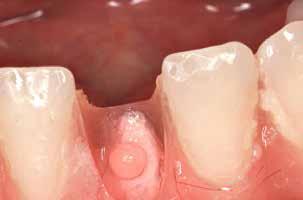
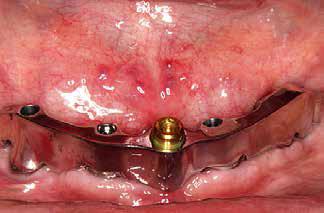
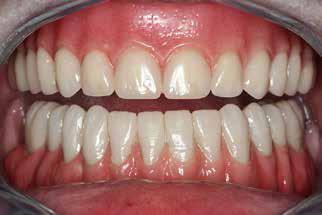
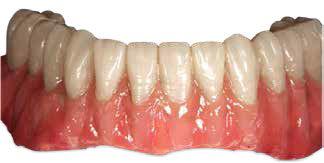
2. Liebig J. Energy Dissipation and Damping Behavior of Commonly Used CAD / CAM Materials. 2018;35392.
3. Reymus M, Roos M, Eichberger M, Edelhoff D, Hickel R, Stawarczyk B. Bonding to new CAD/CAM resin composites: influence of air abrasion and conditioning agents as pretreatment strategy. Clinical Oral Investigations. 2019;23(2):529–38.
4. Emsermann I, Eggmann F, Krastl G, Weiger R, Amato J. Influence of Pretreatment Methods on the Adhesion of Composite and Polymer Infiltrated Ceramic CAD-CAM Blocks. The journal of adhesive dentistry. 2019;21(5):1–11.
5. Kaleli N, Sarac D, Külünk S, Öztürk Ö. Effect of different restorative crown and customized abutment materials on stress distribution in single implants and peripheral bone: A three-dimensional finite element analysis study. Journal of Prosthetic Dentistry [Internet]. 2017;1–9. Available from: http:// dx.doi.org/10.1016/j.prosdent.2017.03.008
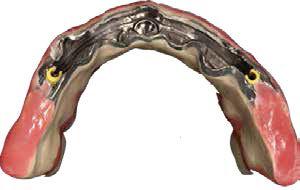
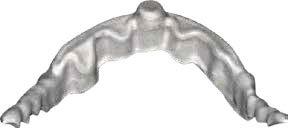
102 PROSTHETICS
Fig. 14: Secondary metal structure
Fig. 17: BRILLIANT Crios restorations used for removable telescopic implant prosthesis.
Fig. 15 and 16: Telescopic prosthesis with BRILLIANT Crios restorations. Occlusal and bottom view.
Fig. 18: Final case in the mouth of the patient. Wearing a complete denture on top and telescopic BRILLIANT Crios on the lower jaw.
Fig. 11: Telescopic bar with retentions for the secondary structure
View products used in this article CLICK HERE
Fig. 12: Debonding of prefabricated tooth is very common on overdentures.
DR. NICOLAS GUTIERREZ Madrid Spain
ACKURETTA DENTIQ
RELIABLE AND INTUITIVE CHAIRSIDE 3D PRINTER FOR DENTAL PROFESSIONALS
The dental world is seeing a drastic change – digital dentistry is raising the standards of what patients are looking for, and what practices are providing. New and emerging technologies are allowing dentists to care for their patients like never before. Creating a mock-up in just a few hours. Producing a crown and inserting it in one session. Delivering a night guard in a fraction of the time, and at a fraction of the cost.
Dentists are increasingly switching from an analog to a digital system, granting them new ways to optimize their practice and improve their patient experience.
3D printing in dentistry has come a long way in the last decade, and there are more new technologies, AI integrations, and resins on the market than ever before. So what happens when you combine dentistry with 3D printing and AI technology? A 3D printing ecosystem that is more efficient, more costs-effective, and produces higher-quality results than ever before. And at Ackuretta, we are leading the way with products that guarantee a user-friendly, validated workflow, right out of the box.
What can 3D Printing do for you?
3D printing in dentistry offers many benefits over traditional practices. Instead of taking a traditional impression of your patient’s mouth, which can take up to 15 minutes and can be extremely uncomfortable, you can use an intraoral scanner and have the same result in under 5 minutes, with a higher level of accuracy, and significantly less discomfort. Many dentists have been promoting the benefits of 3D printing, and what it always comes down to is added time spent with their patients.
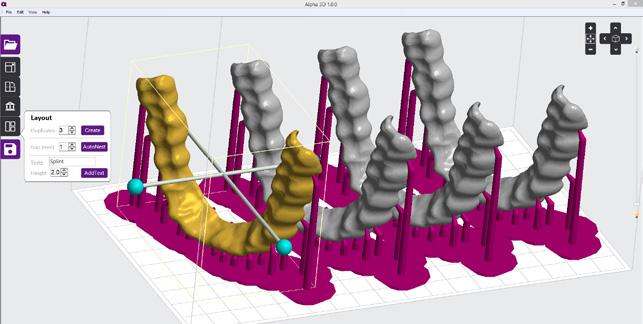
Dr. Russell Schafer – the owner of NOLA Dentures and General Dentistry, based in the United States – has many years of experience with both analog and digital dentistry, and frequently uses Ackuretta’s DENTIQ dental 3D printer. For him, there is no comparison when it comes to time-saving, cost, and quality. More people are able to incorporate dental 3D printing into their practices because it is easy to learn, has unparalleled accuracy, allows you to increase your patient base, and helps you engage more with your current patients.
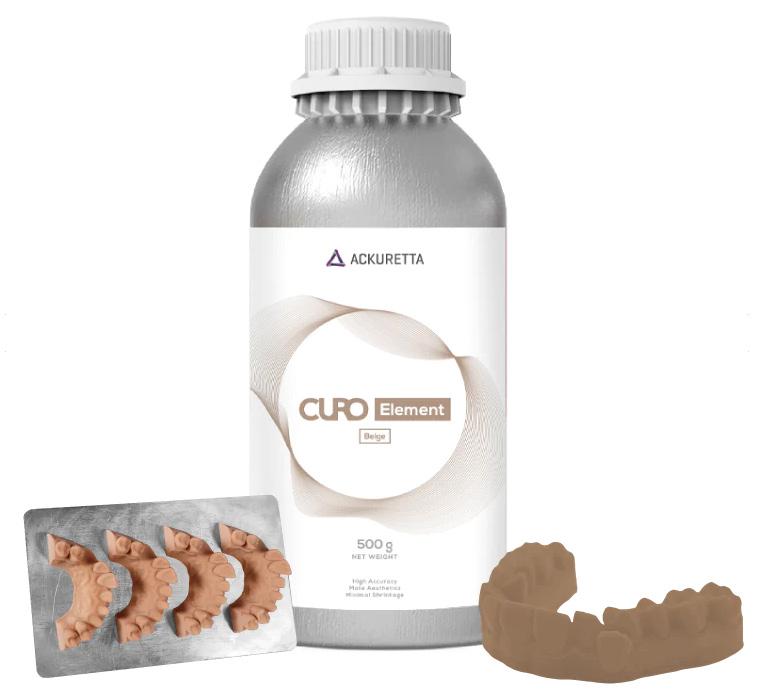
103 henryschein.com.au 3D PRINTING
“One of the biggest advantages of adopting a digital workflow is reducing the time spent on producing a crown, splint, or denture, and maximizing contact with patients.”
Dr. Russell Schafer
In addition to spending more time with patients, 3D printing gives dentists the ability to bring in more revenue and increase their return on investment (ROI). Giving a patient a ‘try-on’ smile, for example, grants them the opportunity to see the smile they could really have with a complete restoration.
A tangible and concrete look – as opposed to a traditional computer-generated image of the potential results of a restoration – can sell a case, and encourage a patient to adopt a treatment.
Starting with the production of night guards and models allows practices to gain a fast return on investment when they purchase a 3D printing ecosystem like Ackuretta’s, before then moving on to more complex applications that require more time to learn and master. Applications that are currently being produced with dental 3D printing include crowns, bridges, splints, night guards, aligners, dentures, surgical guides, models, castables, gingiva masks, IBTs (indirect bonding trays), and impression trays. But the future options are limitless.
The next obvious steps with dental 3D printing are long-term temporary and permanent restorations. Some resins on the market are already TGA-approved for such applications – Saremco CROWNTEC. Ackuretta’s DENTIQ dental 3D printer is completely validated and compatible with all of these resins, so you can take advantage of all the possibilities they have to offer. And Ackuretta’s team is always testing and validating new resins as they become available. This means that as the market continues to expand, your dental 3D printing workstation will evolve with it, ready to produce anything you need.
What do you need to know about 3D Printing?
3D printing has many applications – in manufacturing, engineering, architecture, aeronautics, and beyond –but when it comes to dental applications, there are a few primary considerations. First, your print must be biocompatible – the health and safety of your patient are essential.
Second, it must be extremely accurate and precise. Accuracy refers to how close the actual print is to the design and intended output. Precision refers to the repeatability of consistent results over time. Your printer is very precise, for instance, if when you program a certain application, it can print that application many times over, and there will be no discrepancies in the measurements of the final print, time and time again.
So how do you get accurate and precise prints? It starts with the impression of your patient’s mouth. Traditionally, a dentist uses dental putty which is placed into a tray to take a physical impression of the mouth. With a digital workflow, that same result can be achieved through a 3D intraoral scanner, which creates a digital imprint.
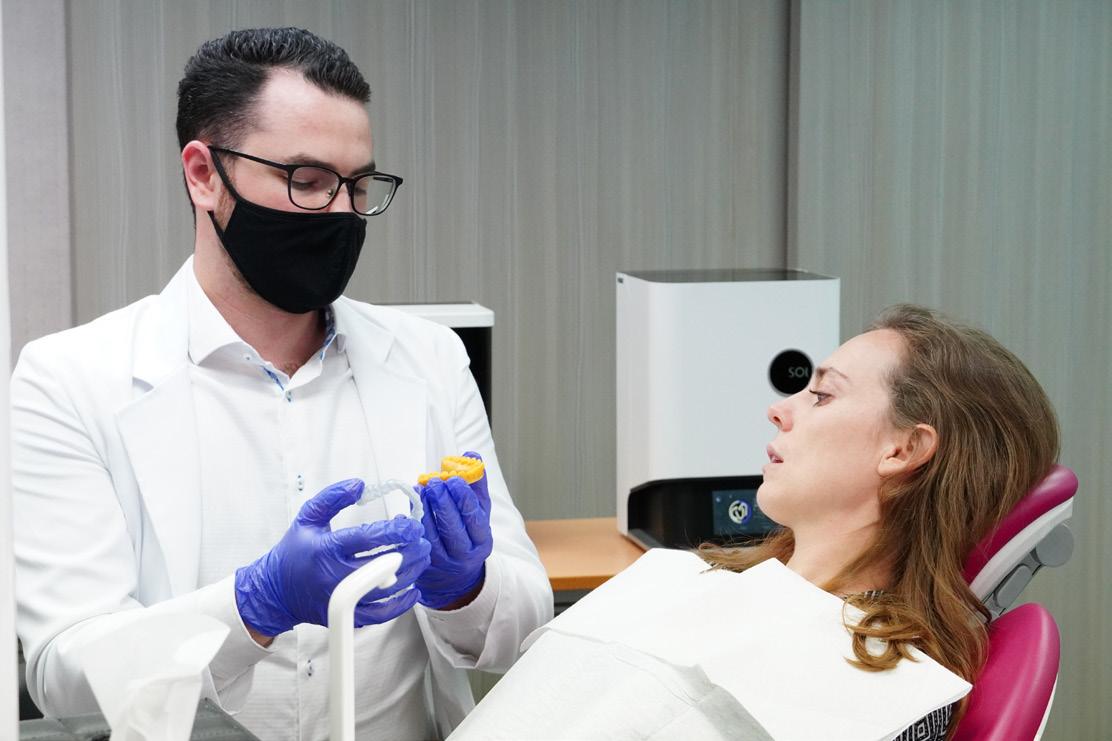
The next step is CAD design, which can be done either inhouse if you have a specialist who can design it for you, or outsourced to either a company or an individual designer. Once your design is complete, you can import your design into CAM slicing software.
A key step in determining the outcome of your print is which printer you will use. This printer determines what CAM software is available, and what resins are compatible.
104 3D PRINTING
With an open system like Ackuretta’s DENTIQ dental 3D printer, you can pick from over 150 pre-validated materials. And with ALPHA 3D and soon-to-be-launched ALPHA AI, special features help you orient your print and create supports so that you have a successful final result.
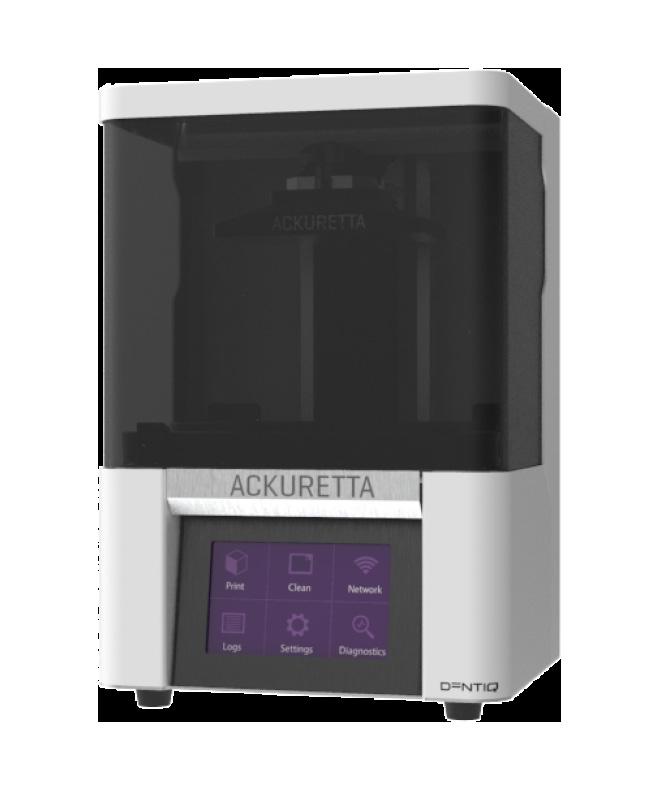
The post-printing phase involves cleaning and curing your final print – you must ensure that you follow the proper instructions. Each step in the process is essential to achieve a final application that is successful and biocompatible.
What is a ‘Validated Workflow’ and why does it matter?
3D printing resins are hazardous in their liquid form. For the final printed result to be biocompatible and safe to insert into your patient’s mouth, you need to make sure that each step in the printing process is done correctly.
The resin is made safe by being cured through a process of polymerization using UV light. This happens in part during the printing process, and then during the final curing stage when the print is placed inside a curing unit for a designated amount of time, using a specific UV wavelength.
UV ovens are designed specifically for dental applications, and ones like the Ackuretta CURIE are designed with 360-degree light distribution, have multiple wavelengths available, and are pre-loaded with a resin library. Having multiple wavelengths available allows the UV light to permeate deeper into the print, ensuring it is fully cured.
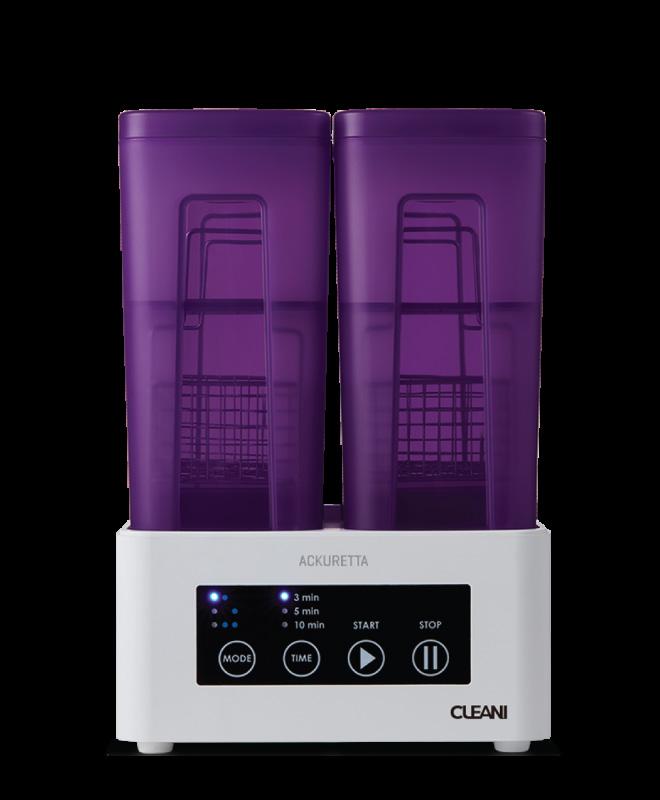
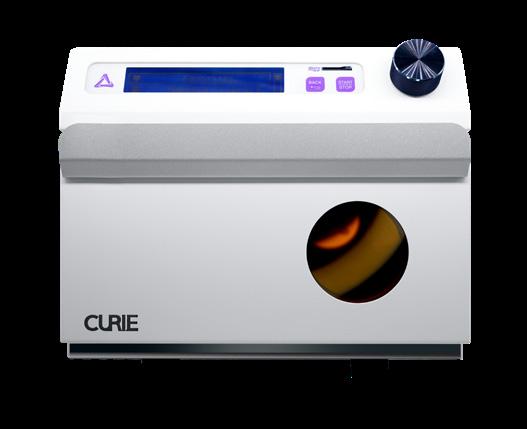
A process is said to be validated when the settings at each step have been optimized to achieve a consistent desired output. The instruments used in the process - the printer and UV chamber – are said to be calibrated. Each step in Ackuretta’s digital dental workflow is validatedthe specifications for each resin are downloaded into the printer and UV oven – so all you need to do is select the resin and press start. Once the time is up, you can be certain that your print is safe for your patient.
For workflows that are not fully validated, getting started is more challenging.
“With some systems, determining the optimal settings for printing success with each unique resin and application takes a lot of trial and error,” shares Dr. Russell Schafer, who has worked with a wide variety of products and workflows, and enjoys the many benefits the Ackuretta 3D printing ecosystem offers him.
Why start 3D printing now?
Dental 3D printing has become wellestablished in the industry. Many practices and labs have adopted a partial or full digital workflow, which has provided many benefits, as well as learning opportunities and room for professional growth. With the constant improvements in the strength and quality of resins on the market – an increasing number of which have been granted FDA approval – as well as the numerous resources and platforms available to learn about and get support for digital dentistry, now is the perfect time to delve into dental 3D printing.
And as Dr. Schafer shared in an interview with Ackuretta, “By adopting a digital workflow and creating more time to focus on faster and improved care, dentists are able to expand their offices. And marketing strategies that promote a more streamlined workflow for patients can add top- and bottom-line revenue for dentists.”
About Ackuretta
Ackuretta is a global manufacturer of high-precision 3D printing solutions for dental professionals. With validated and calibrated workflows and an open system, as well as an industry-leading 2-year warranty and outstanding training and customer support, Ackuretta is a unique, competitive, and accessible player in the industry.
By Ackuretta Editorial Team
105 1300 65 88 22 3D PRINTING
DENTAL PRACTICE MANAGEMENT
TRENDS AND PERFORMANCE NEW STATE OF DENTISTRY REPORT
Dental practices making strides in recovery post pandemic, with over 30% of survey respondents increasing revenue balanced with strong positivity for the future.
Henry Schein One Australia and New Zealand released its first State of Dentistry Report in 2020, during the height of the global pandemic.
The dental industry faced new and unprecedented challenges across Australia and New Zealand in 2020 and 2021 - from strict government regulations and changing social norms to a shifting economic landscape plus more.
Post pandemic, dental practices have continued to adjust to new ways of working and anticipate new challenges to adapt to over the coming 12 months.
While we may have moved through to the other side of unanticipated border and social restrictions, there are new challenges to consider and adapt to.
To understand dental practice recovery and outlook, Henry Schein’s practice management software business Henry Schein One, surveyed just over 400 dental practices across Australia and New Zealand in October 2022.
Dental Practices post pandemic
While practices continue on the path to full recovery from COVID at a higher rate than in 2021 (practices recovered increasing from 28% to 39%), 15% of those practices that had recovered are now being impacted by recent economic influences including increasing cost of living and rising interest rates.
In fantastic news for the industry, the number of practices experiencing a revenue decline of greater than 25% has reduced significantly by 18% compared to last year.
31% of practices have also experienced an increase in revenue over the past 12 months (compared to 26% in 2021).
Two main challenge areas for practices continue to be recall rates and fail-to-attends (FTAs). 28% of practices saw a decrease in their recall rates and just under one third saw an increase in FTAs in the last 12 months.
Future outlook
Dental practices across Australia and New Zealand are increasingly positive about the future with those practices expecting revenue to grow significantly higher than in 2021 (64% compared to 36% in 2021).
Practices continue to actively think about change and improvement with responses highlighting a continued appetite for equipment upgrades, increasing chairs and adopting new technology featuring strongly. There is also a significant increasing shift in interest in cloud dental practice management software.
With dental practices experiencing challenging times during the COVID pandemic, staff shortages, shifts in the economy and changing lifestyle habits in the “new normal” raise a number of new challenges for practices to nagivate in 2023.
Source
The State of Dentistry Report 2022-2023 Australia and New Zealand, Henry Schein One (2022)

106
HENRY SCHEIN ONE
Get your copy of the full report CLICK HERE
1300 65 88 22 henryschein.com.au


