DENTAL SOLUTIONS

MAY / JUNE 2023
02 CONTENTS - CLICK CATEGORY TO VIEW DENTAL EDUCATION HUB NEW PRODUCTS 04 06 COSMETIC & RESTORATIVE PREVENTATIVE 11 40 ENDODONTICS SURGICAL 52 58 PRACTICE GREEN PAIN CONTROL 41 48 INFECTION CONTROL GOVERNMENT INCENTIVES 60 63 HANDPIECES & INSTRUMENTS EQUIPMENT 72 77
In this edition of Dental Solutions, you’ll discover the latest cutting-edge products Henry Schein is bringing to market in collaboration with our global supplier partners plus we’ve curated a collection of clinical articles and product highlights from across our extensive range to keep you up-to-date with the latest advancements in the industry.
Moreover, we urge you not to miss the rapidly approaching deadline for the government tax incentive, and we’re excited to announce the launch of our sustainability initiative here in Australia.
Government Tax Incentives - Temporary Full Expensing
This May-June edition marks the lead up to the end of the Australian Financial Year and with the current economic challenges I wanted to remind you of the government’s Temporary Full Expensing initiative that is there to help your practice but is due to expire on June 30th 2023.
Eligible businesses can claim an immediate tax deduction in their 2022-23 Tax Return for the cost of a new asset in the year the asset is used or installed rather than over its usable life.
With a few key requirements:
• Must be purchased prior to June 30th 2023
• The asset must be Installed and operational prior to June 30
• The individual asset value must be less than $150,000
• Your annual turnover is less the $50 million Maximising the cash flow of your practice can be a daunting task but taking advantage of government tax incentives can be an excellent way to inject funds back

into your business, especially if you’re planning to invest in capital equipment and assets in the near future. To ensure your practice is well-positioned to reap the benefits of this opportunity, it’s vital to plan your purchases well in advance allowing adequate time for installation and to avoid any potential disappointment. So, take advantage of this chance to fuel the growth of your practice and make a smart investment decision today. Read more on page 63 or check out our online calculator to see how much you could save in 2023.
henryscheinequipment.com.au/tax-calculator/
Henry Schein Practice Green
In March, Henry Schein Australia proudly launched Practice Green, our sustainability initiative aimed at enabling healthcare providers to adopt greener practices. Through this program Henry Schein will be growing our sustainable product and service offering as well as making continuous improvements to our supply chain and distribution to significantly reduce our environmental impact.
To read more about our Practice Green initiative both locally and globally HenrySchein.com.au/practice-green
Details in this article must not be taken as financial advice and you should consult your accountant or the ATO before making purchasing decisions.
DID YOU KNOW?
THERE ARE OVER 700 DIFFERENT TYPES OF BACTERIA IN YOUR MOUTH ALONE
 CALUM COOGAN Marketing Communications Digital & CX Manager

03 henryschein.com.au T V
DENTAL SOLUTIONS
UPCOMING CPD COURSES & EVENTS


YOUR FREE GO-TO RESOURCE FOR DENTAL EDUCATION AND CPD


Explore over 270 hours of clinical and business related content all in one place with access to courses, webinars, podcasts and articles. View our upcoming courses and webinars below.

Endodontic diagnosis, communication & treatment
Shalin Desai 7 CPD points - Saturday 17 June


Harry
Endodontics Unpacked

8 CPD points - Saturday 3 June
Lunos
The smart prophylactic system
Christa Napholz

1 CPD point - Tuesday 30 May
Webinar Week Q2
Monday 19 - Thursday 22 June
04 DENTAL EDUCATION HUB
Surgery Setup
Perth Multiple
3
points
10 May
Academy
presenters
CPD
-
View these events at dentaleducationhub.com.au
Dr.
Dr.
Mohan & Dr. Aaron Gascoigne
SURGERY SETUP ACADEMY
WEBINAR WEEK CLICK HERE
PRACTICE MANAGEMENT SOFTWARE
THE CLOUD & WHAT TO ASK WHEN CONSIDERING DIFFERENT SOLUTIONS
In Australia, there are a number of cloud practice management software solutions for dentists to choose from. But what is cloud and what should you be looking for when choosing the best dental software for your practice?
Cloud technology quietly exists in many aspects of our everyday lives. From keeping us connected to family and friends, entertaining us, and enabling us to work remotely and much more.
For dentistry in recent years, we have seen cloud prove to be transformative and it will continue to support dental practitioners as we deal with the ongoing impacts from the COVID-19 pandemic, rising costs of living, staff shortages and more.
Not all cloud software is the same.
There are seven key elements at the heart of cloud practice management software that we recommend you consider, when assessing different cloud practice management software solutions.
1. Does it save you money?
There is no need for expensive hardware and servers. All data is stored securely in the cloud. To keep your practice running smoothly and cost-effectively, there is no need for disruptive and costly downtime!
2. Is it scalable?
As you grow and develop your practice, you need to be sure that your practice management software will run effectively - whether you develop your single site practice or if you are thinking about operating multiple practices sites.

3. Performance
All you need is an internet connection and to run a web browser. It should run on unlimited computers and is compatible with a number of different operating systems.

4. Is it secure?
Are robust policies, technologies and controls in place that strengthen the security of your data and protect against potential threats?
5. Speed
Vast amounts of resources can be provisioned to ensure that speed is never an issue.
6. Productivity
No set up or maintenance required. Compatible with multiple operating systems and works on multiple devices. Automatic back up and daily updates happen without disruption or the need for restarts or downtime, and
7. Reliability
Continuity of service is guaranteed by spreading the way the service is delivered across multiple servers.
Henry Schein One APAC delivers leading dental practice management software, including Dentally, our cloud solution for faster, simpler practice management.
Learn more about Henry Schein One Learn
05 1300 65 88 22
HENRY SCHEIN ONE
more
Dentally CLICK HERE CLICK HERE
about
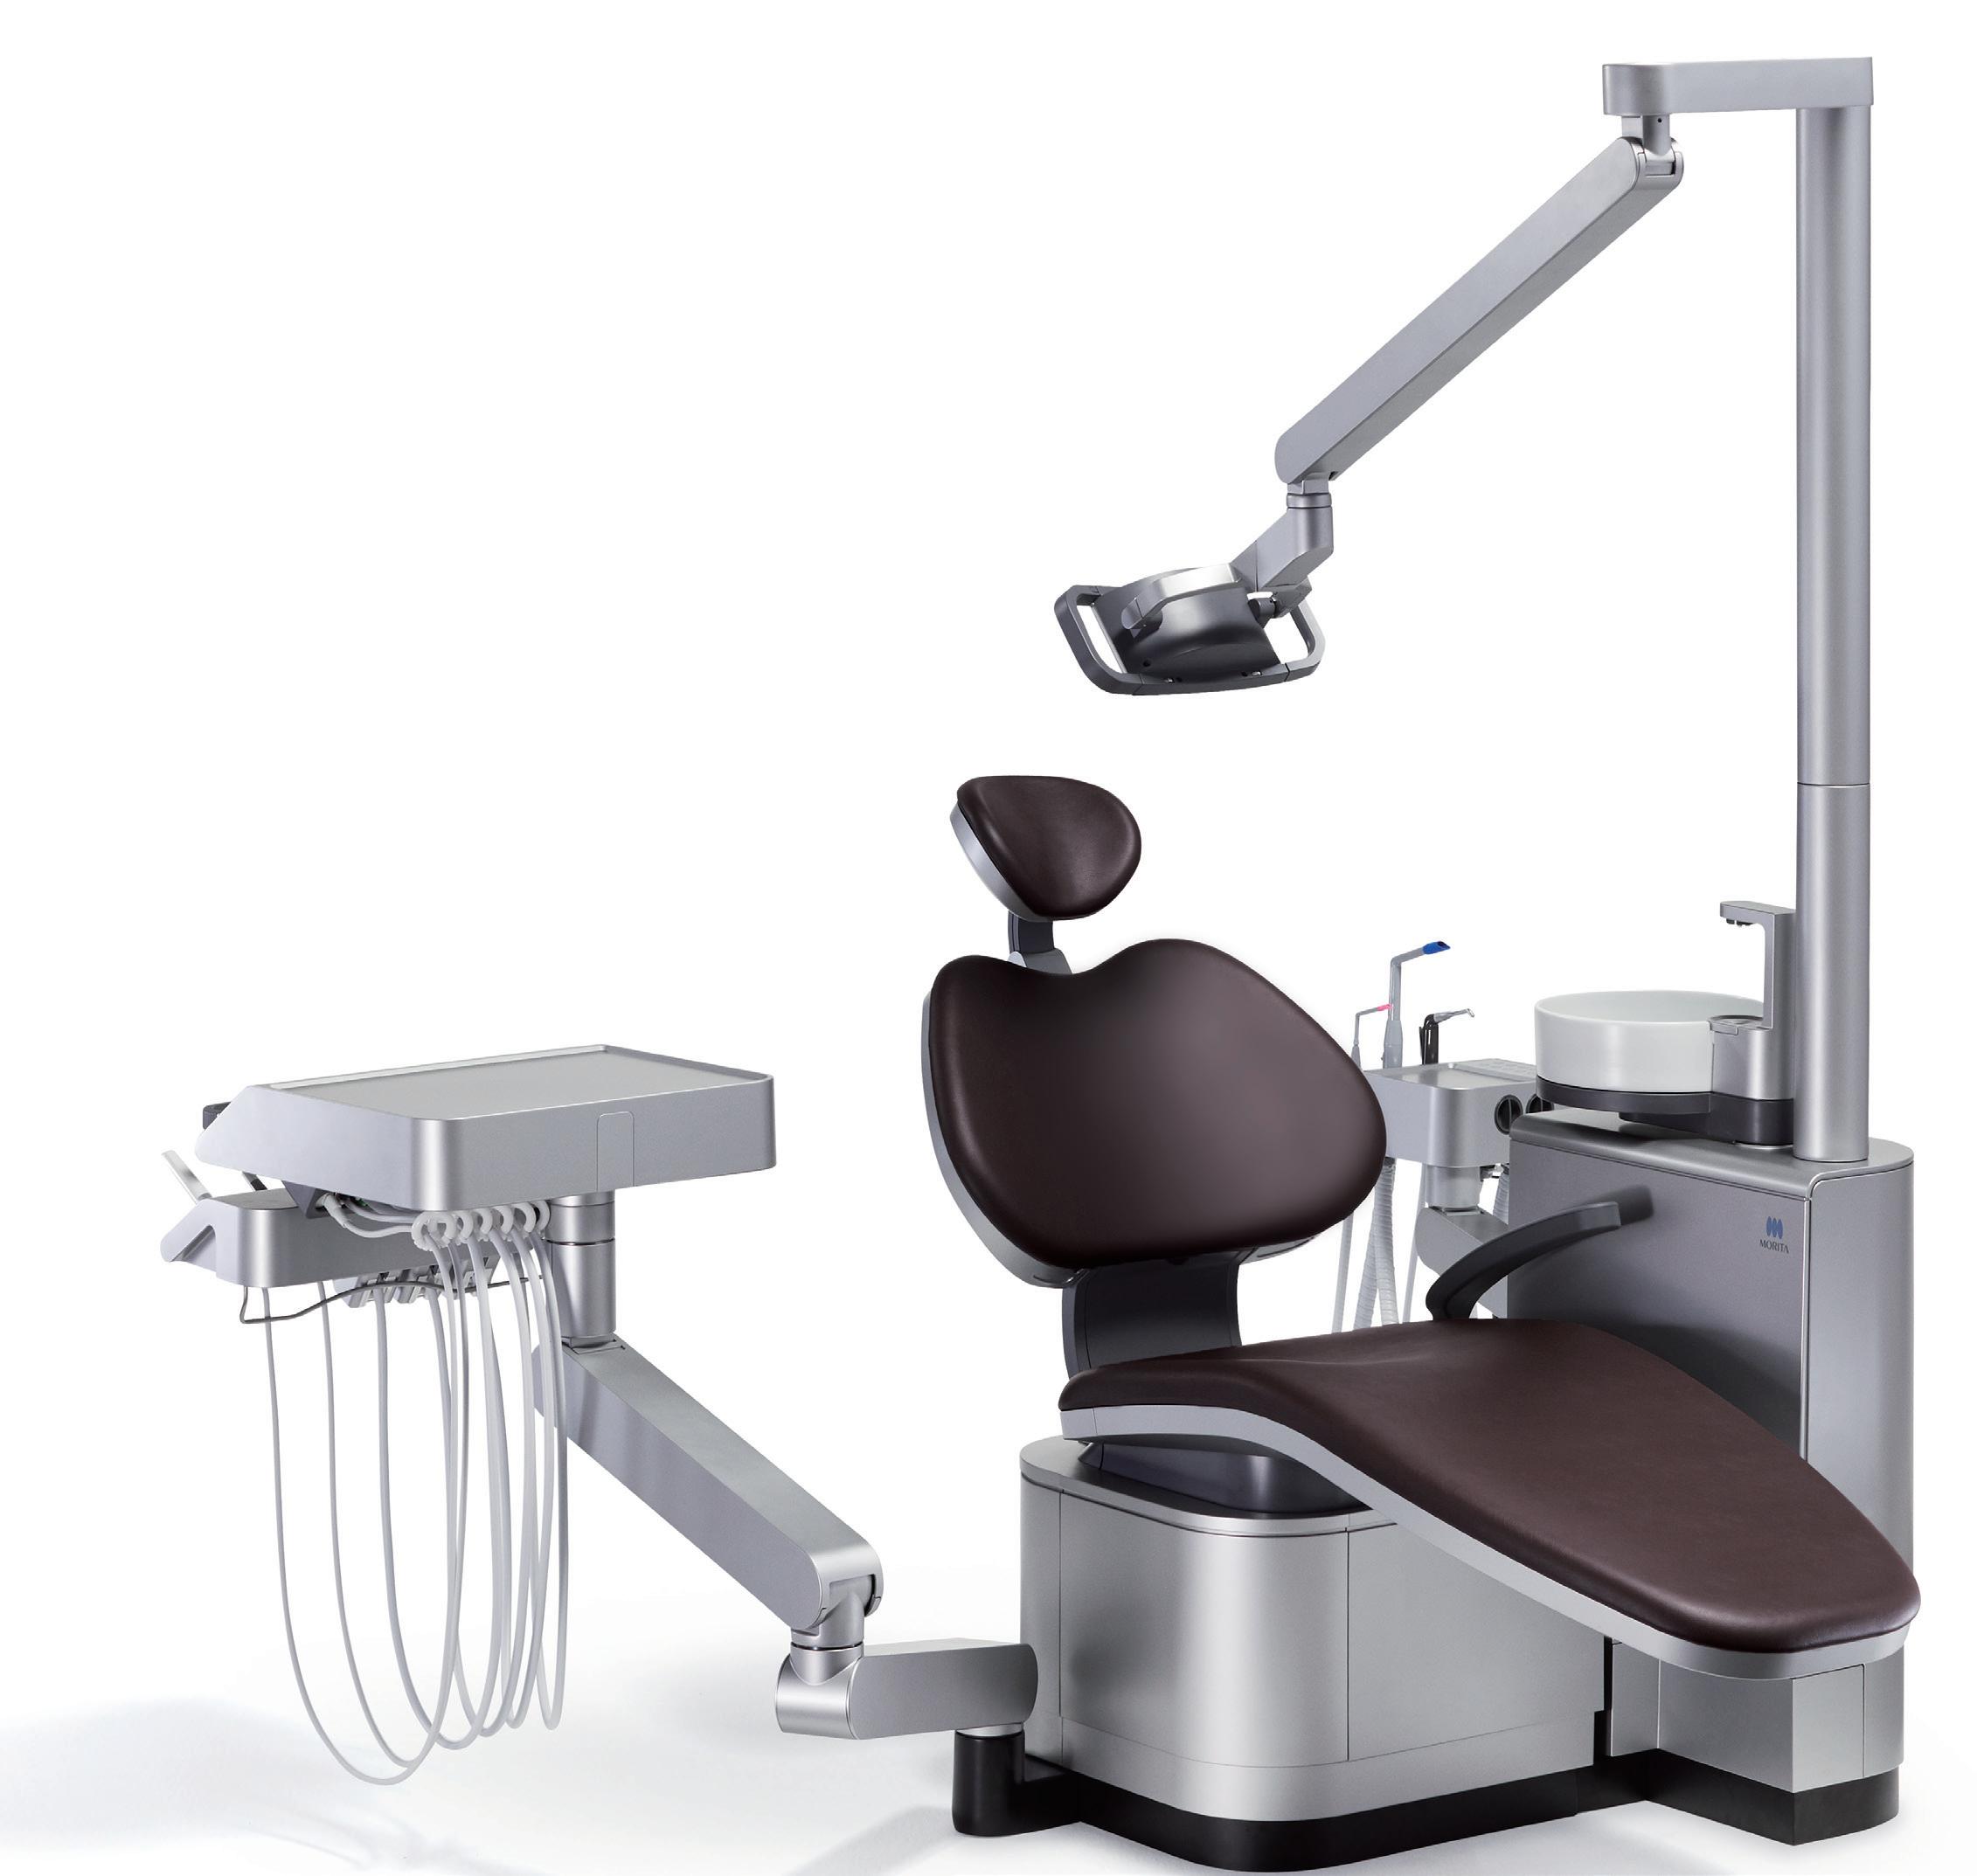
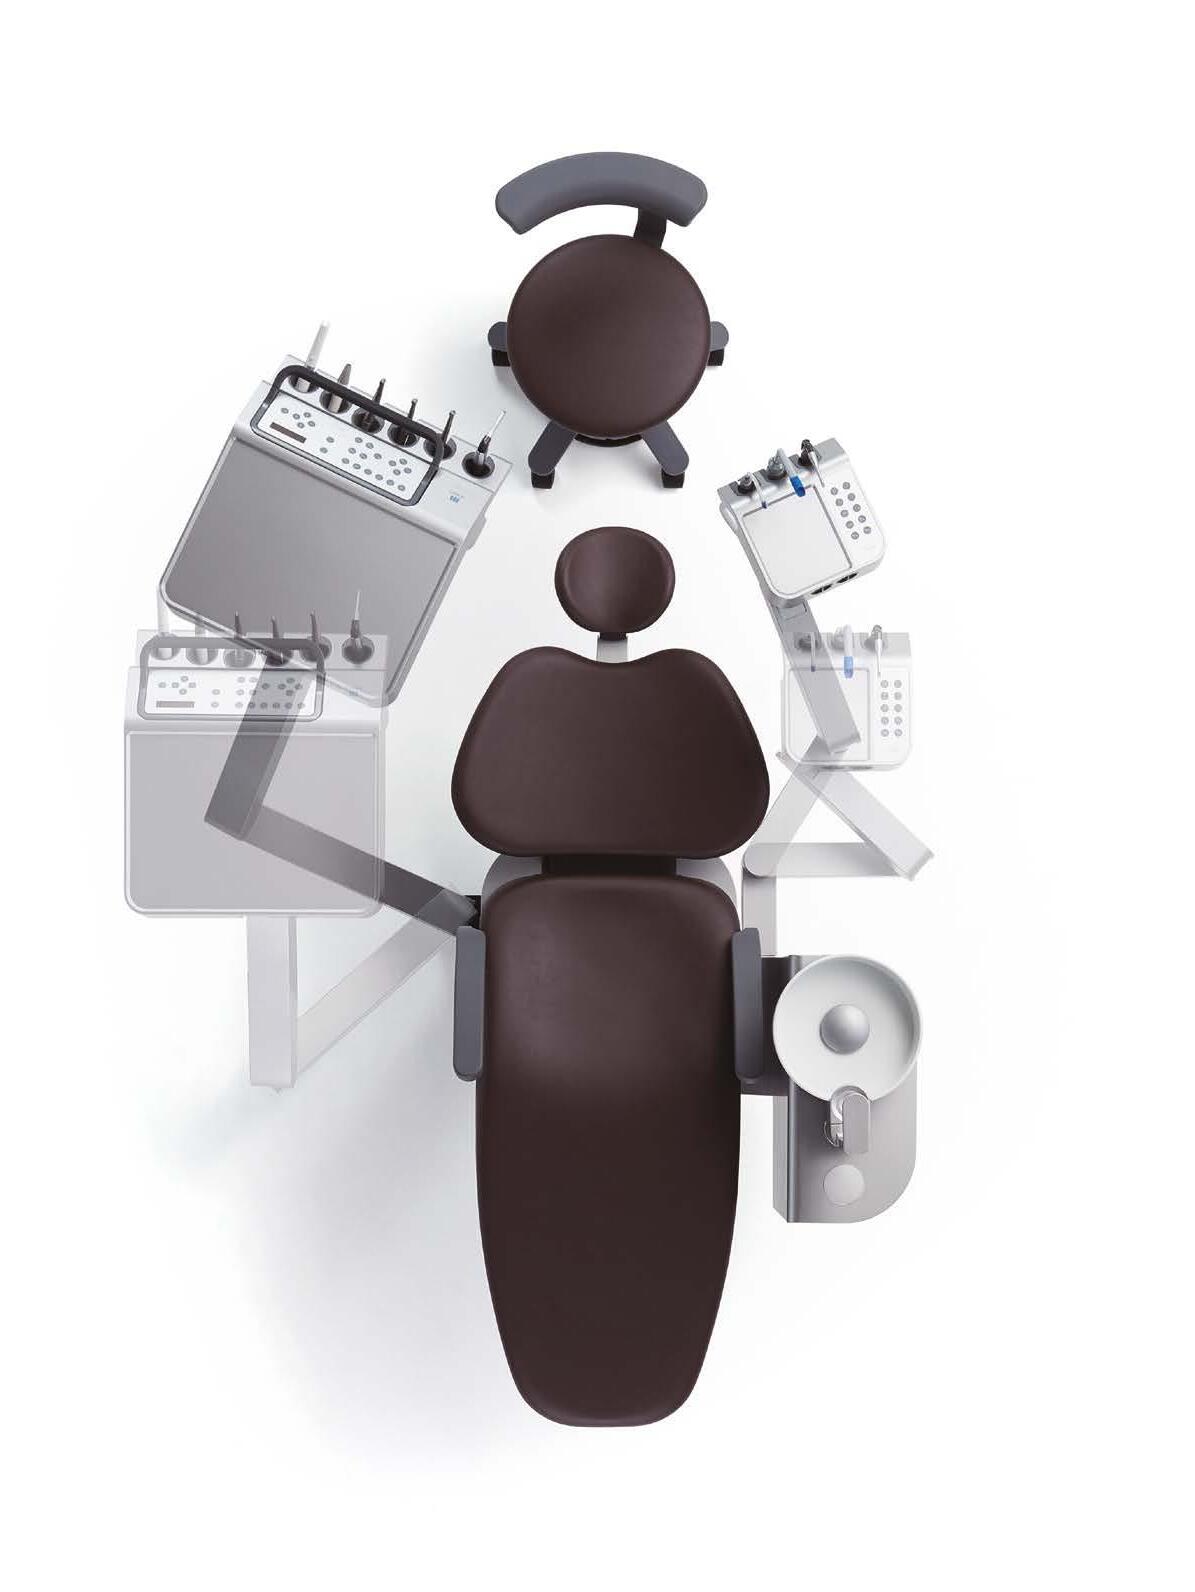
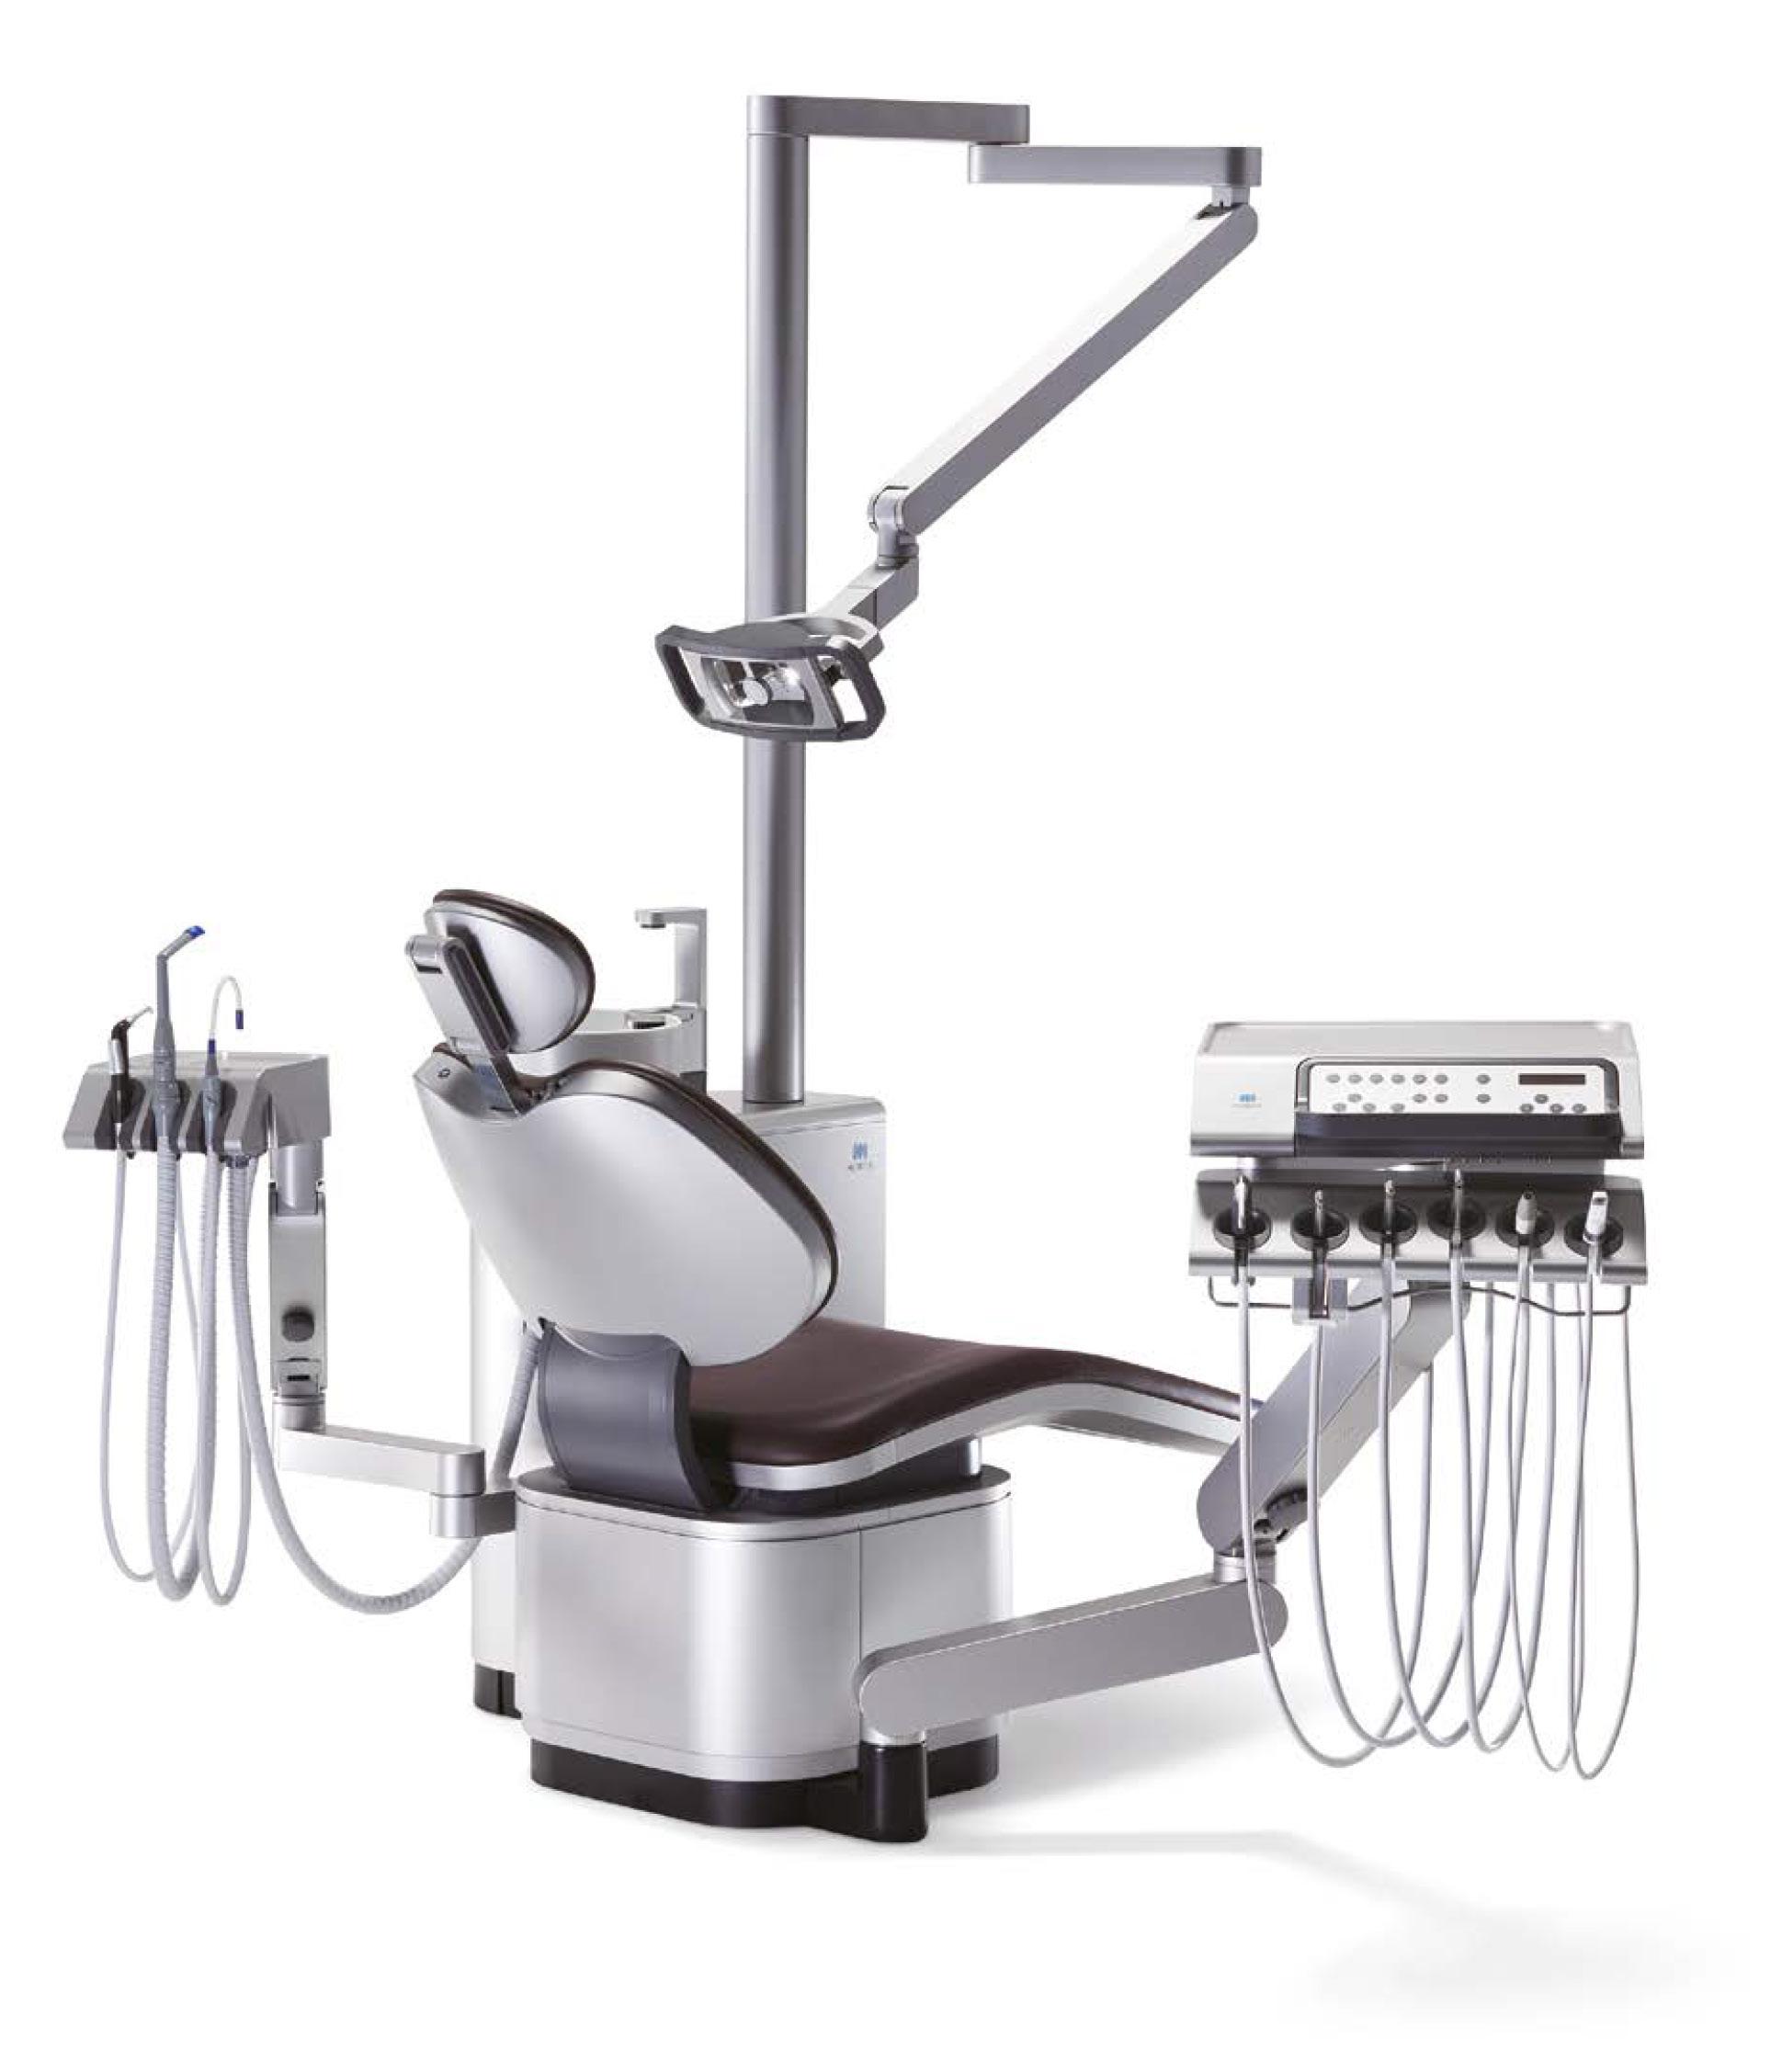
T500 EXCELLENCE FOR EXPERTS
The Morita T500 has been a European success for Morita. Manufactured in Tokyo, the T500 is the successor to the Soaric we know well in Australia. Designed in conjunction with the Studio F.A. Porsche team, its stunning design married with advanced user features is what you’d expect from Morita.
Although new to Australia, the T500 is the latest iteration of the Signo range it’s foundation spans back over 20 years of development of the Signo range.
06
NEW PRODUCTS
Japanese quality engineering, Euro design influence, modern and productive instrumentation, with a choice of delivery styles at a general practice affordable package.
We’re excited to launch the T500 at ADX in Melbourne, to compliment the class leading X800 CBVT unit and Veraview 2D imaging equipment.
Please visit our showrooms and get inspired by the possibilities the T500 brings as a truly affordable premium dental unit.
• Maximum functionality
• Timeless design
• High-end manufacturing quality
• Maximum versatility
• Durability, reliability and value stability
Tailored for efficiency
• First-class comfort
• Benchmark in treatment comfort
• Everything at a glance, everything in control
• Ingenious and low-maintenance
07 henryschein.com.au 5
Register your interest CLICK HERE
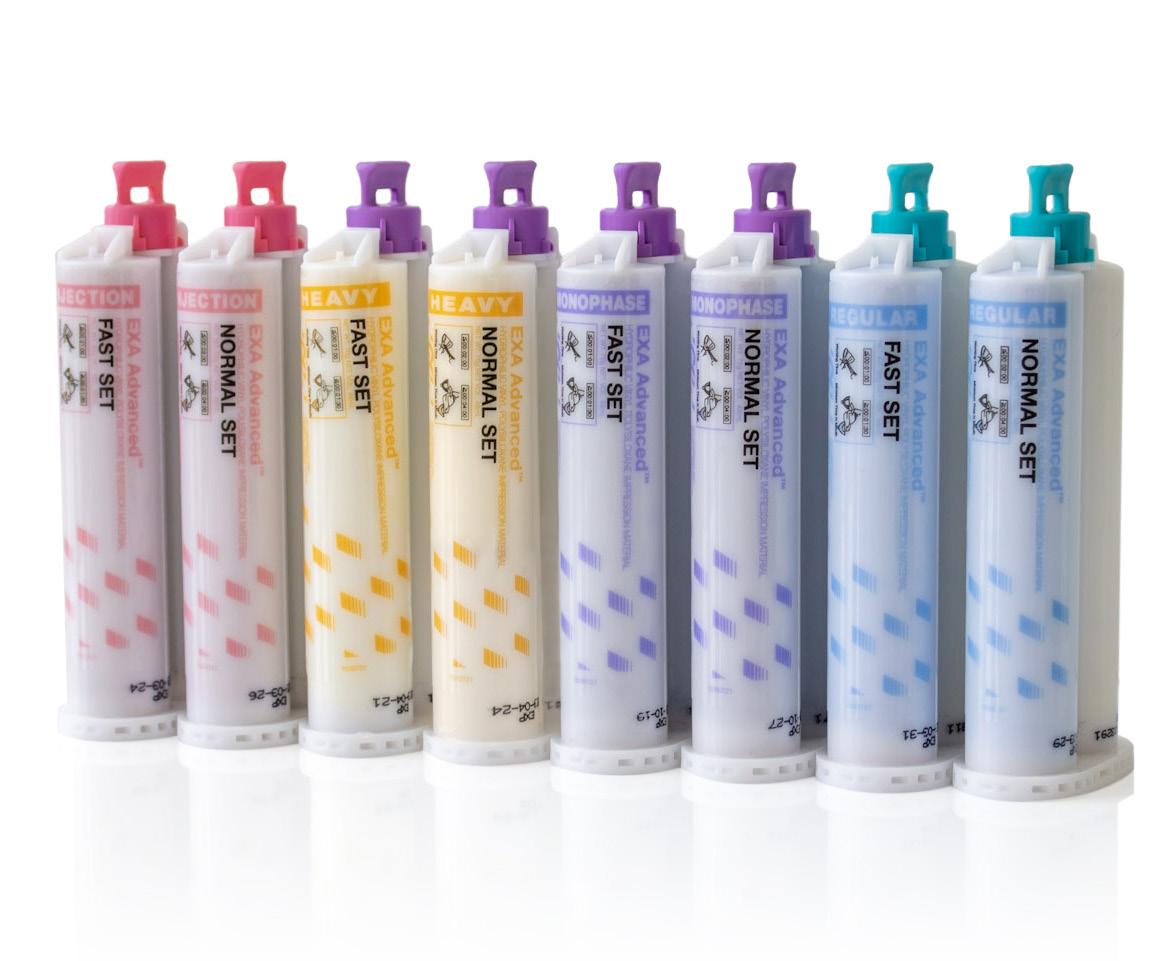
EXA ADVANCED
EXA Advanced is the latest impression material from GC. A successful indirect restoration starts with a good impression. EXA Advanced accurately replicates the smallest details of your preparations. With its high accuracy and increased tear strength, it ensures a predictable fit of your indirect restorations. Resistant to tearing for an accurate reproduction of the finest preparation margins. Hydrophilic to capture all details required for a accurate reproduction.
08
SOON NEW PRODUCTS
COMING
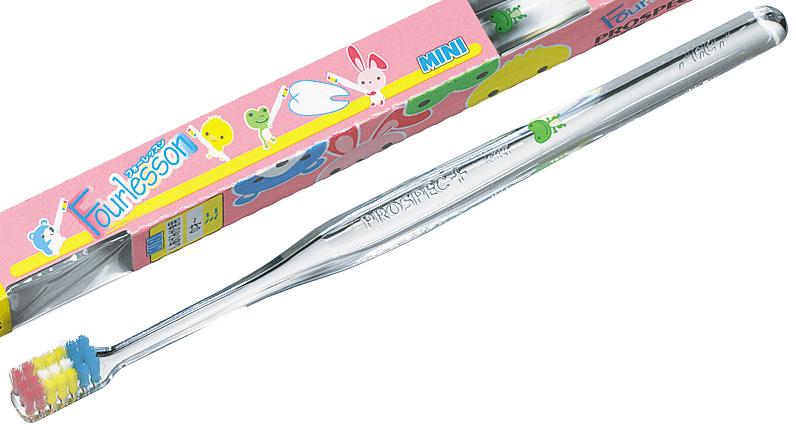
RUSCELLO TOOTHBRUSH RANGE
Ruscello toothbrush range from GC, prescribed by the dental professional according to the patients oral condition and age. Ruscello toothbrushes feature an ergonomically shaped handle that provides a stable, comfortable grip and allows the brush to reach posterior and anterior teeth easily. Also featuring a range of head sizes and bristle orientation for a truly individualised approach.

Ruscello Operation
Dome-like bristle design for brushing post oral surgery
Ruscello Implant
A toothbrush dedicated to the maintenance of dental implants. Hybrid duo-level bristles and in a concave design to adapt to the contoured shape of implants
Ruscello Grappo
Wider brush head and thick handle design for better grip and helps provide 1.8 times better plaque removal


Fourlesson Mini
Color-coded bristles with a clear handle to give better vision and access for parents. All packs include 4 assorted character designs
09 1300 65 88 22
NEW PRODUCTS
View the brochure CLICK HERE
Thanks to its larger 12.5 mm lens and new powerful custom LED chip, the VALO X curing light offers a more complete cure than ever before. This includes improved curing depth, beam collimation, and thermal management.
The VALO X curing light comes equipped with two power modes (Standard Power and Xtra Power) and two diagnostic light modes (black light and white light).
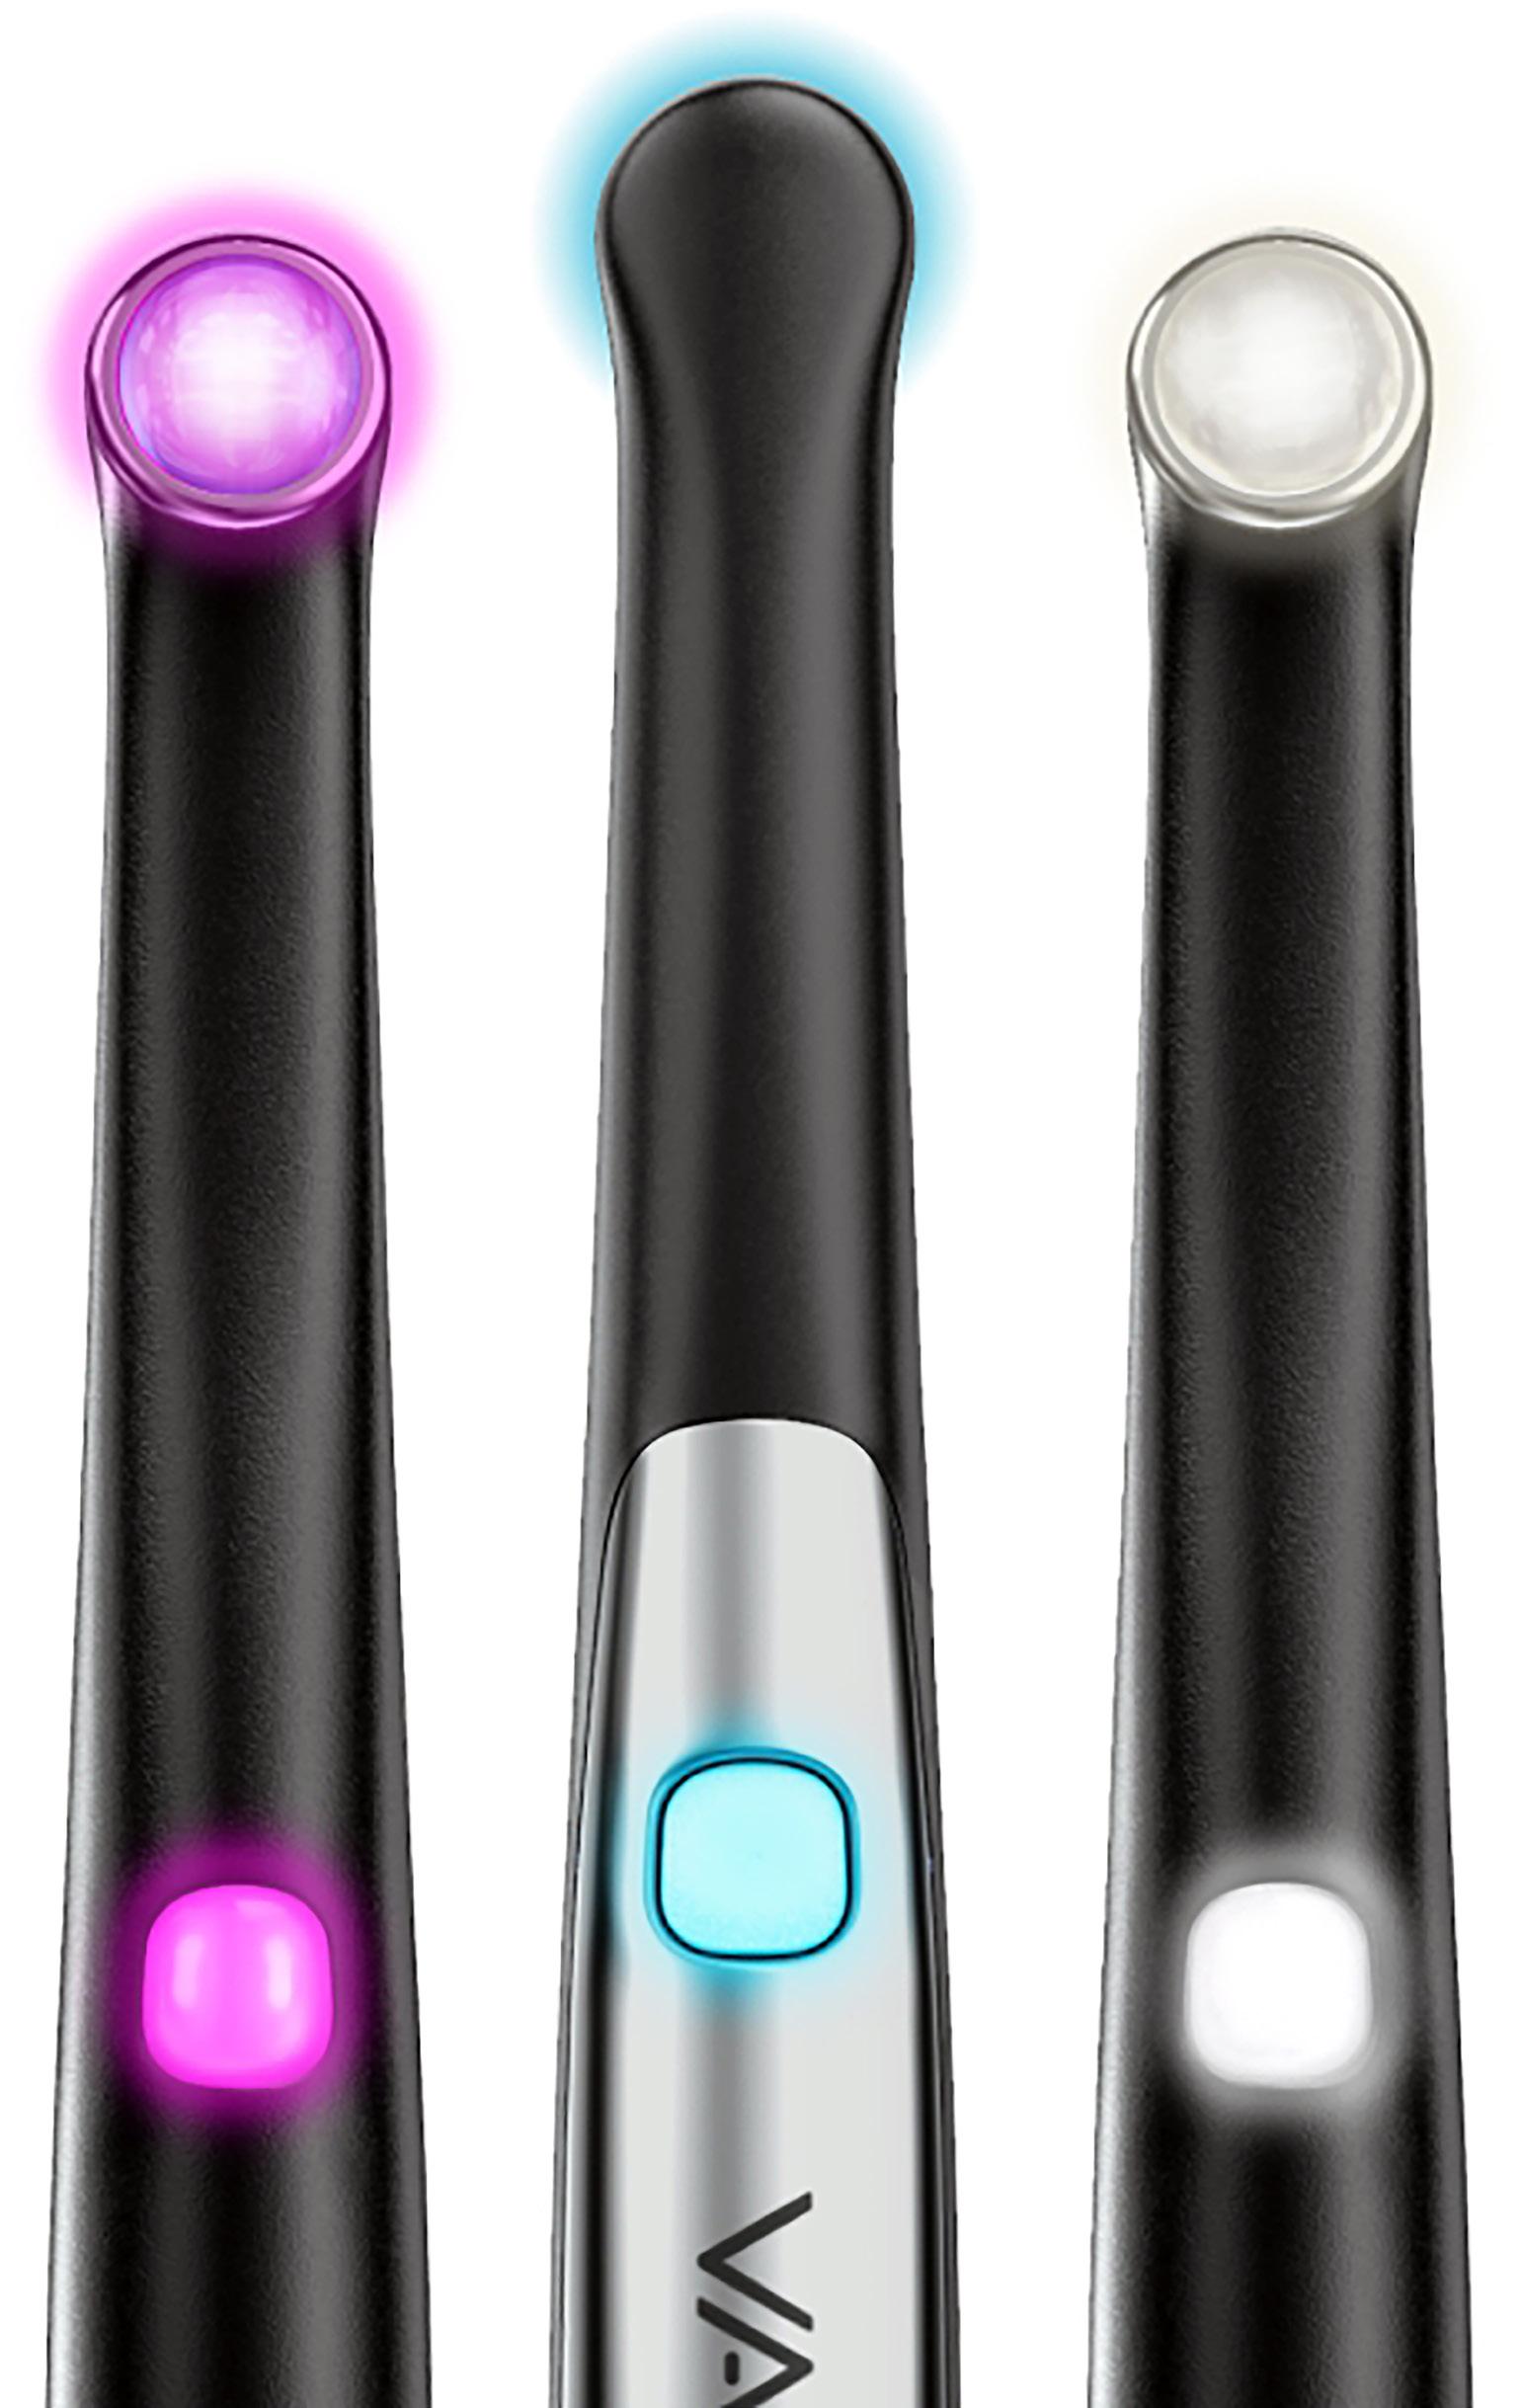
The light’s one-button activation also sports a user interface with an accelerometer, so users can cycle between the light’s power and diagnostic modes with just the wave of the wand, a light drum tap, or the push of a button.
The VALO X light also comes with five accessory lenses, which further enhance its capabilities.
10 NEW PRODUCTS
VALO X
View the brochure CLICK HERE
G-AENIAL UNIVERSAL INJECTABLE
Injection Moulding Technique
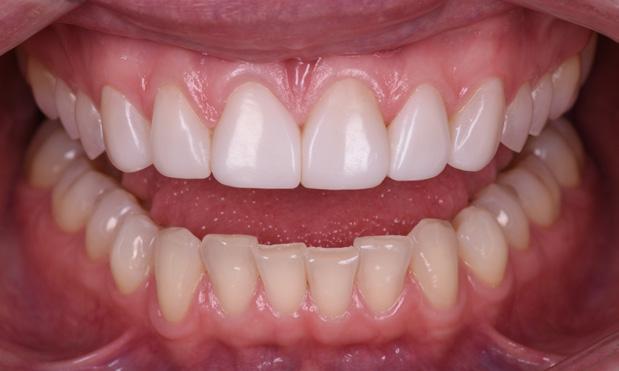
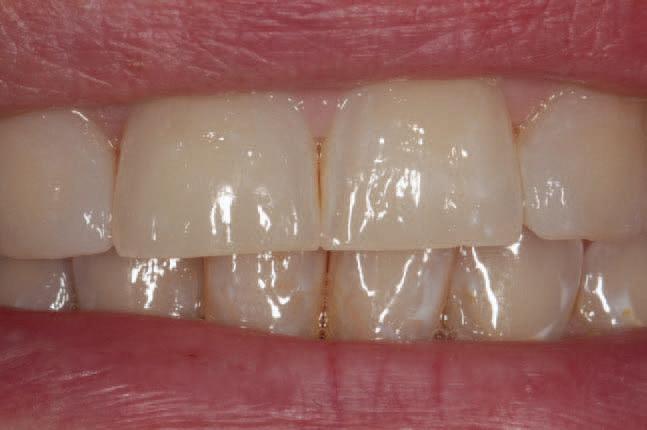
As restorative dentists, the interplay between achieving the desired aesthetics but also conserving tooth structure is very important to consider. This case illuminated the benefit of composite injectables for the Dahl technique as part of one’s armamentarium to conservatively treat localised tooth wear. This case involved addressing the aesthetic concerns whilst also seeking to conservatively manage localised tooth surface loss.
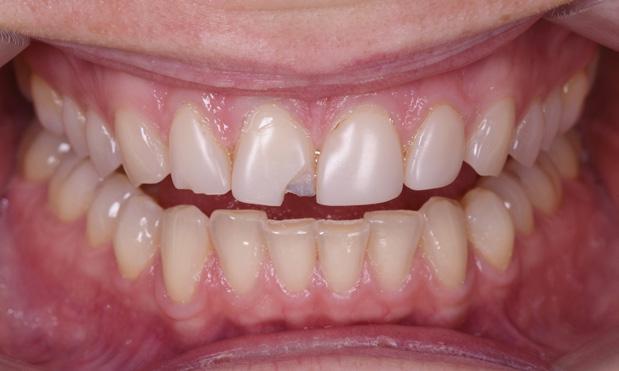
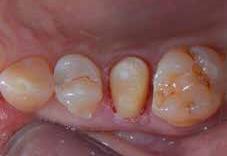
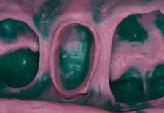
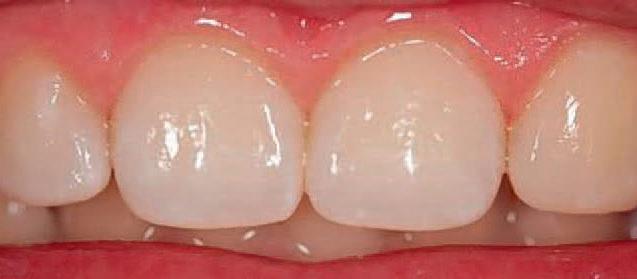
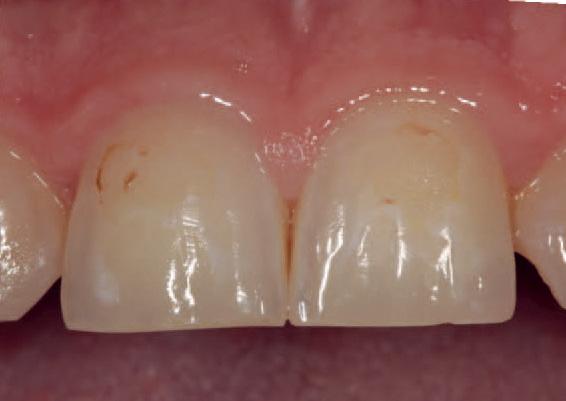
Initial Presentation
The alternate teeth being injected with the first stent had the existing composite resin veneers removed and the tooth surfaces were air abraded with 27 micron.aluminium oxide. Matrix bands were used to protect the adjacent teeth
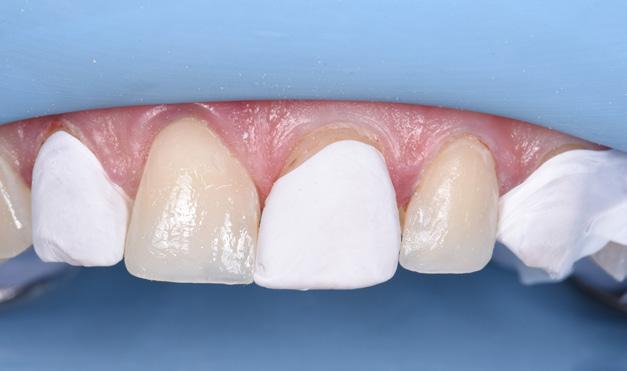
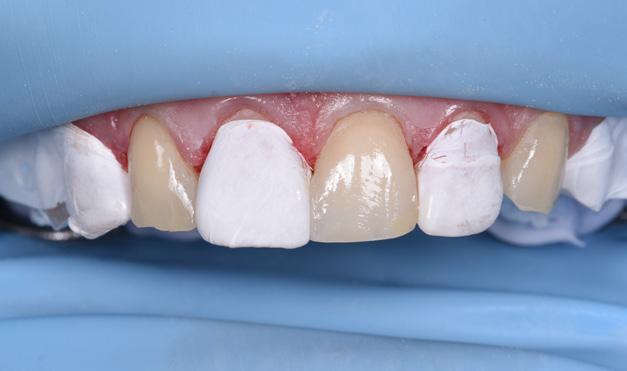
Alternate teeth were wrapped with Teflon tape (12,21,23). The non-PFTE wrapped teeth were then etched with 37% phosphoric acid and thoroughly washed. G-Premio BOND was applied and light cured Using G-aenial Universal Injectable shade B1 alternate teeth were injected through the exaclear stent
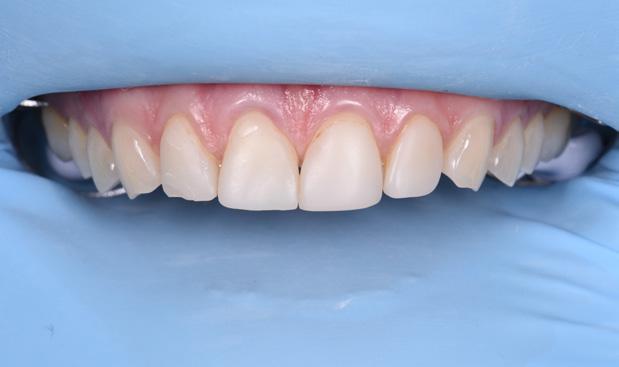
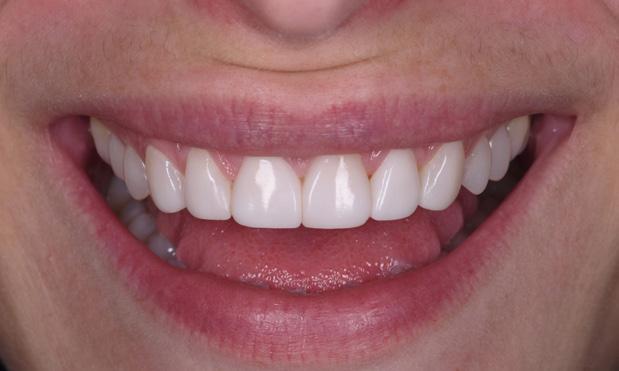
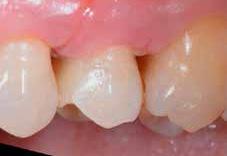
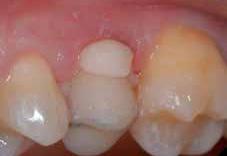
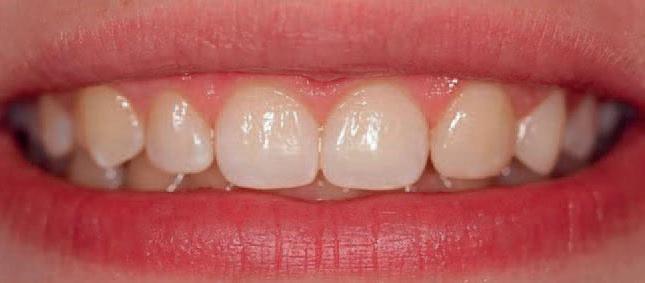
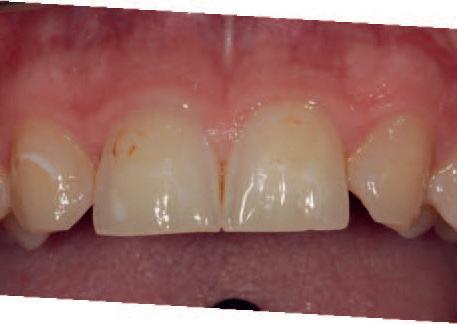
2 month review showcasing seamless integration of the G-aenial Universal Injectable
11 henryschein.com.au
Images courtesy of Dr Selena Liu, Sydney
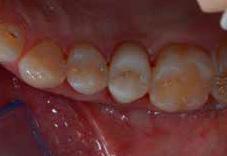
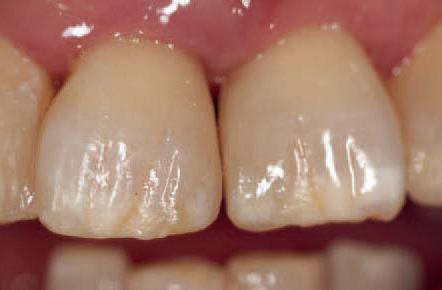
The alternate teeth 12, 21 and 23 were etched and bonded; The second exaclear stent was placed over the teeth and the remaining teeth injected using G-aenial Universal Injectable shade B1
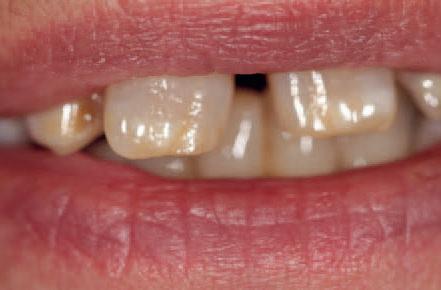
Post Operative view after removal of excess composite resin and finishing and polishing
CLICK
COSMETIC & RESTORATIVE
View the G-aenial Universal Injectable brochure
HERE
CAD-CAM SINGLE TOOTH LITHIUMDISILICATE RESTORATION
THROUGH COMBINED ENDODONTIC, SURGICAL & PROSTHETIC THERAPIES
The restorative treatment of a severely decayed, unvital tooth requires often an interdisciplinary approach, and the aesthetic and the entity of the masticatory loads are often influencing the choice of procedures and materials.
A case of a 45-year- old woman, with an incompletely treated, painful upper premolar is here presented, where the aesthetic needs and functional requirements led the clinician to choose a surgical and prosthetic rehabilitative path, selecting a lithium-disilicate, monolithic block as ideal material for the final restoration.
Introduction
In case of a serious tooth decay, the treatment often requires an inter-disciplinary approach. The dentist can be required to restore aesthetic and function of an upper tooth, where the aesthetic and the entity of the masticatory loads are often influencing the choice of procedures and materials and even the general prognosis of the tooth.
In particular, the factors that had to be considered in this case were the position and size of the cavity, the requirement to complete an endodontic treatment and the size of the final restoration.
Moreover, having planned a prosthetic crown, the authors also considered the requirement of endodontic post, the position of the bone crest in respect to the cavity margins, the length of the root, the status of the adjacent teeth, the overall oral hygiene and the patient’s compliance and, as important consideration, the cost/benefit ratio to explain to patient.
In many cases where the rehabilitation plan of a premolar includes different and complex procedures such as endodontic treatments, posts or extensive restorations, the dentist tends to choose an implantsupported prosthetic rehabilitation, because the costs of the alternative conservative treatments could be similar to those of the implant-supported ones, but the overall prognosis of a tooth- supported prosthesis may result, in the mind of professionals and in a certain part of literature1, lower than that of a crown over implant. In fact, the prognosis of different rehabilitations is strongly affected by many factors, mainly the dentist and his skills, but also the used materials.
However, considering the overall length in terms of months, the rehabilitative treatment of a natural tooth is usually faster and the conservative treatment represents always the best choice biologically, if allowed. In this case the right selection of the prosthetic material could be decisive.
12
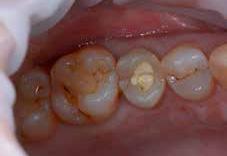
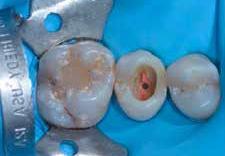
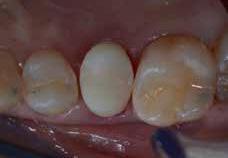
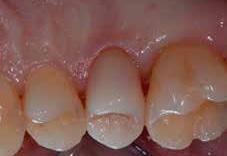
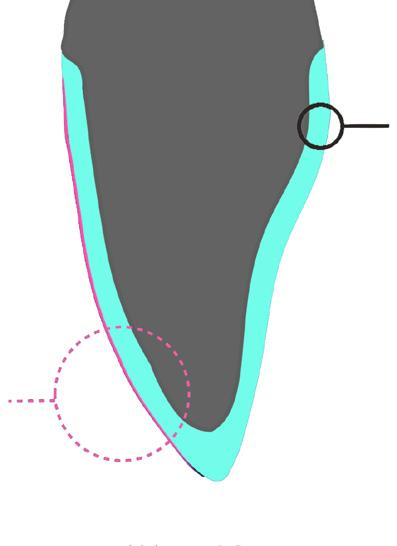
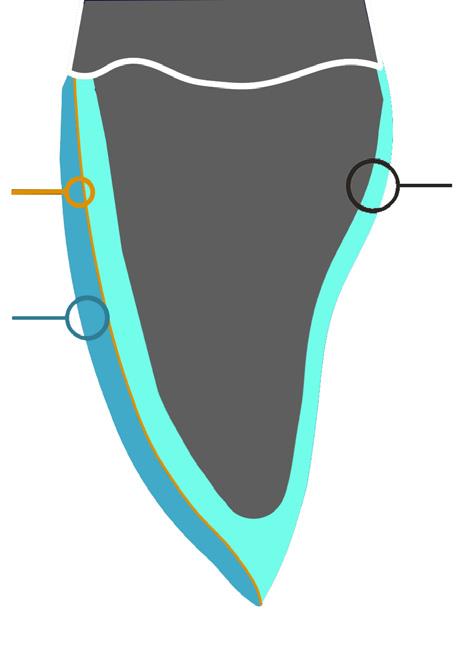
Fig. 1: Initial situation. The patient reported generic pain in the second quadrant, where there was a restoration in temporary material on tooth number 25.
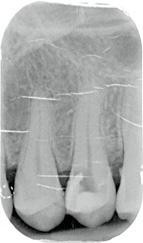
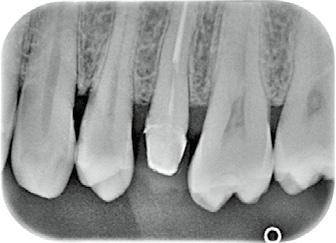
Fig. 2: Initial radiograph showing endodontic dressing that had been present for some months, but the treatment was never completed. Note the depth of the caries lesion and the proximity of the interdental bone ridge, which may represent an obstacle for prosthetic rehabilitation.
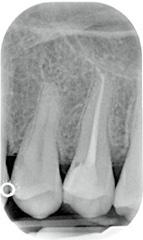
Fig. 3: Root canal therapy completed under proper isolation.
COSMETIC & RESTORATIVE
Clinical case presentation
A 45-year-old female patient, B.S., referring intensive pain in her upper left dental arch, asked for a visit at the dental clinic of the IRCCS Istituto Ortopedico Galeazzi (Milan, Italy). During the anamnesis she told to be in good health status, without being affected by any chronic disease, and no smoking.
During the clinical oral examination, she didn’t exhibit any mucosal lesions, she presented an optimal level of oral hygiene but there were a lot of incongruous restorations and an apparently provisional restoration on tooth #25. This element was not stimulated with the cold test and the radiographic image revealed an incomplete endodontic treatment (Figs. 1-2).
Operational phases
The patient at the first appointment immediately required a quick solution for the pain, consecutive to an incomplete endodontic treatment and a partially removed carious lesion.
So, the first step consisted in the removal of the decayed tissue of the distal face of the tooth 25 in its coronal portion and in the first third of the root. The cervical limit of the decay was exposed; then the wall was restored with a glass hybrid material (EQUIA Forte™, GC) coated with the light- curable EQUIA Forte Coat™ to obtain a more resistant material even in case of occlusal loads 7,8,9 .
A glass hybrid material was chosen because the apical edge of the tooth cavity was under the gingival margin, so it was impossible to obtain a correct isolation for a composite restoration: it’s known that the glass hybrid materials can tolerate acid and humid environments more than composite 7,8,9
The element seemed to present a suitable root length for a conservative restoration, but the apical position of the carious lesion and the proximity of the interdental bone ridge didn’t allow a correct rehabilitation with prosthetic crown, respecting the biological width.2 Considering the patient’s factors (e.g. age, level of oral hygiene, absence of smoking or other risk factors) and status of the tooth (e.g. length of the root, endodontic access, periodontal status), it was communicated to the patient that the treatment plan would include an endodontic-prosthetic restoration through conservative therapies and CAD-CAM restoration in lithium-disilicate 3-6:
The glass hybrid EQUIA Forte was preferred to glass ionomer because better long-term results are reported in literature 7,8,9,10. After that, the tooth was endodontically treated.
The tooth had only one root canal, processed with a hand file K-File and for the shaping and refinement with mechanical file at a working length of 20 mm. The canal was sealed with an apical diameter of 0.30 mm (Figs. 3-4).
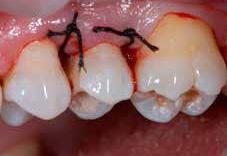
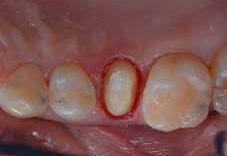
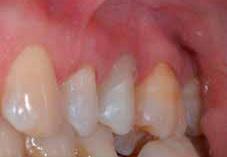
The third step of the treatment consisted of the crown lengthening, necessary to expose an adequate part of the root to obtain, after healing, the correct adhesion of the composite for the pre-prosthetic restoration and the successive prosthetic rehabilitation. After the surgical flap elevation of the tissue and the bone remodelling, the flap was repositioned apically and sutured with a vertical mattress suture anchored in the periosteum (Figs. 5-6). The suture was removed after 7 days (Fig. 7).
13 1300 65 88 22
Fig. 4: Radiography of completed root canal therapy and reconstruction made completely in glass hybrid cement.
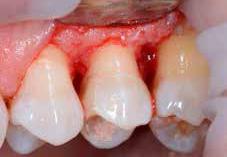
Fig. 7: Suture removal at 7 days. Postsurgical edema is still present.
Fig. 5: Clinical crown lengthening with a minimally invasive technique without mesial and distal discharges. Note the proximity of the reconstruction in glass hybrid material to the mesial bone ridge.
Fig. 8: Recovery 2 weeks after surgery. Note the disappearance of post-surgical edema. The provisional crown was placed after two weeks to allow the formation of an epithelialconnective seal in the area.
Fig. 6: Suture at the end of surgical therapy. It was left in place for 7 days
COSMETIC & RESTORATIVE
Fig. 9: Prosthetic preparation of the dental element with BOPT technique. Note the minimal aggressiveness in the dental groove, recently traumatized by surgery.
During the fourth phase, after waiting a postsurgical healing time of 4 weeks necessary for the correct maturation of the tissues (Fig. 8), the glass hybrid and coronal part of the endodontic material was removed with the Gates Glidden cutters with 01-02-03 size.
A glass fibre post with a medium size truncated cone form, Anatomical Post, was inserted and bonded with a self-adhesive dual-cure cement (G-CEM LinkAce™ translucent, GC).
The permanent composite restoration was completed with G-ænial Posterior™ shade A3 composite (GC) bonded with its respective self-etch adhesive (G-ænial Bond™).
After the restoration, the tooth was prepared with the BOPT technique 5-6 . A provisional PMMA crown, obtained with an optical scan done before the preparation of the element with a AADVA IOS100 scanner (GC), was placed. During this phase the obsolete restorations of the teeth 24 and 26 were replaced. (Figs. 9-12)
After 4 more weeks, the prosthetic abutment was refined and the definitive dental impression was taken with polyvinylsiloxane-ether (Figs. 13-14). The dental impression was sent to the laboratory, where it was optically scanned and a CAD-CAM path was set.
As a consequence of the newly surgically modified prosthetic margin, the appropriate length of the abutment for an adhesive cementation had been obtained, and the high aesthetic requirement and the contemporary need of containing costs with a monolithic crown, led the clinical choice to a lithium-
disilicate crown with high translucency and suitable for the CAD-CAM technology.
The chosen material was the Initial LiSi Block™ (GC), because the ultra- thin structure of the Initial LiSi Block’s has two important advantages: first of all, the block is easy to be milled with the use of chairside milling machine in the lab, and secondly this material doesn’t require other steps in the oven to be sintered or glazed.
In fact, Initial LiSi Block is the first completely crystalized lithium-disilicate block, so the time for its crystallization could be saved and the software for the finishing and glazing would not have to compensate for any material contraction due to the temperature in the crystallizing oven.
In this way, margins remain extremely thin and clear and it’s particularly useful in this case. It’s also possible to reduce costs compared to the use of a highly aesthetic and functional material.
Additionally, the ultra-thin structure of the Initial LiSi Block permits easily polishing of the restoration even after the occlusal adjustments, leaving the area extremely uniform and smooth.
This reduces the finishing times, the brightness lasts longer and the occlusal contacts produce less abrasion of the restoration and of the antagonists (Figs. 15-17).
Regarding the luting phase, the tooth abutment was etched with 37% orthophosphoric acid for 15 seconds (Fig. 18), rinsed and then dried with compressed air.
14
Fig. 10: First relining in acrylic resin of the provisional crown in PMMA obtained by digital scanning of the arches, suitable to condition the tissues after only 4 weeks from the operation, taking advantage of the reparative thrust that follows a periodontal surgery.
Fig. 13: Final preparation of the tooth with the aim of taking the definitive impression. Note the total absence of bleeding despite having extended the preparation margins more apically than the first provisional.
Fig. 11: Provisional crown in PMMA finished and positioned. Composite reconstructions on teeth 24 and 26 have been replaced in order to construct correct contact points with the final crown
Fig. 14: Definitive impression in PVS-E. The impression was scanned by a laboratory scanner and an entire CAD-CAM path was created for milling the final crown.
Fig. 12: Final radiography after positioning of the endodontic post, composite reconstruction and insertion of the provisional crown in PMMA. Note the distance between the edge of the cement used to fix the crown, more radiopaque than PMMA, and the new bone ridge created with periodontal surgery.
&
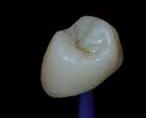
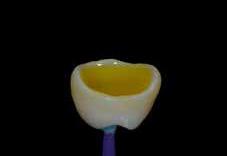
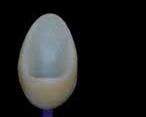
Fig. 15, 16 &17: Views of the monolithic restoration in lithium disilicate, polished and finished.
COSMETIC
RESTORATIVE
The definitive crown was etched with 9% hydrofluoric acid for 20 seconds (Fig. 19), rinsed and dried with compressed air. According to manufacturer’s instruction, it is not recommended to etch Initial LiSi Block for more than 20 seconds, in order to preserve all properties of the material.
Since the acid etching with the hydrofluoric acid may result the formation of crystals of lithium salts on the inner surface of the crown 10, it’s important to put the crown in hot water for 1 minute after the acid removal, to eliminate the crystals and prevent any interference with the adhesive cementation, and then it must be carefully dried.
Before the placement of the adhesive cement, a
specific coupling agent was placed on the internal surface of the crown, in order to obtain a stronger adherence between the ceramic and the luting resin. For this reason, G-Multi Primer (GC) was selected and applied (Fig. 20). The luting phase was finally performed with the G-CEM LinkForce™ (GC), after the placement of the dedicated adhesive system (G-Premio Bond) on the tooth, blowing them with compressed air for 20 seconds, without curing them before the luting phase in order to allow a correct fit of the crown.
Each crown surface was cured for 40 seconds (120” in total in order to correctly cure both adhesive and resin cement even through the ceramic) and the excesses of the luting material were finally removed.


15 henryschein.com.au
Fig. 16
Fig. 17
Fig. 18: Etching of the prosthetic abutment with orthophosphoric acid for 40”
Fig. 19 Fig. 19: Treatment of the internal surface of the restoration with 9% hydrofluoric acid for 20”. Being lithium disilicate, the restoration must be placed in hot water for at least 60” after etching to eliminate some lithium salts that could form on the inner surface and which could weaken the adhesive bonds.
Fig. 20: Application of the silane coupling agent to be left in place for at least 60”
Fig. 21: Adhesive cementation with adhesive composite resin. The absence of bleeding, the respect of the manufacturer’s instructions and the control of the prosthetic margins during the procedures is fundamental for the maintenance and the good outcome of the cementation.
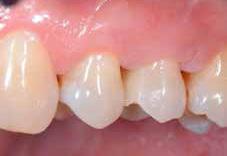
Fig. 22: Final palatal view. Note the excellent integration of the margins also on the palatal side.
Fig. 23: Final occlusal view.
Fig. 24: Final occlusal view at higher magnification.
the full article CLICK HERE
Matteo Basso DDS, PhD, MSc, Maria Giulia Pulcini DDS, Carlo Vitelli Dental student, Arturo Dian DDS, Katherine Radaelli DDS, MSc student Clotilde Austoni DDS, MSc, Milan Italy.
Read
COSMETIC & RESTORATIVE
CHOOSE PANAVIA™ VENEER LC
AND VENEER
CEMENTATION BECOMES A SUCCESS
Prosthodontic treatment concepts have evolved over the past decades. While some time ago, porcelainfused-to-metal crowns and bridges were placed wherever a defect was too large for a direct restoration, the current trend is toward less invasive therapies with highly aesthetic, tooth-coloured materials.

These modern treatment concepts can lead to predictable outcomes when a high-performance resin cement system is used that establishes a durably strong bond to tooth structure on one side and the restoration on the other. The reason is that less invasive often means that restorations have minimal or no retentive elements and extremely thin walls, and a strong chemical bond is a mechanism that holds them in place over time. Depending on the type of restoration and area in the mouth, aesthetic properties of the cementation system are also extremely important, as the typically highly translucent, thin restorations tend to reveal the appearance of the structures underneath to a certain extent.
Universal cements
In the context of striving toward the streamlining of clinical procedures in restorative dentistry, several manufacturers have developed resin cements that work with fewer components and are suitable for a large number of indications. PANAVIA™ SA Cement Universal is a popular example. The self-adhesive, dual-cure resin cement is the only product of its category that works as a standalone solution even on glass ceramics (without the need for a separate primer).

The need for specialists
There are specific clinical situations, however, that require more working time than a dual-cure resin cement can offer. This is the case whenever multiple non-retentive restorations are to be placed simultaneously, a technique that is recommended for veneers. The greatest benefits of placing the thin and highly aesthetic restorations at once lie in the proper positioning of the restorations and in the minimized risk of contamination: When the veneers are placed one after the other, a slightly malpositioned and already fixed veneer might hinder proper positioning of the adjacent restorations and haemorrhage occurring in the context of excess cement removal or finishing of the margin might contaminate the working field. When all veneers are placed simultaneously, repositioning is possible, while excess removal and polishing are accomplished in a moment when blood and debris will no longer endanger the integrity of the restorations, which increases the security during the whole procedure. This task is best fulfilled by a light-curing veneer specialist.
Required properties of veneers cements
Undoubtedly, the key feature of a specialist resin cement system is a long working time sufficient for simultaneous cementation of multiple restorations. In addition, its consistency and handling properties are also important as they can help users overcome the challenge of accurate positioning and reduce the time and effort involved in veneer placement. And finally, the system needs to provide excellent bond strength over time and support long-lasting aesthetics, properties valuable for every kind of resin cement, but the latter being particularly important for thin restorations in the aesthetic zone. Luckily, PANAVIA™ Veneer LC offers all those features.
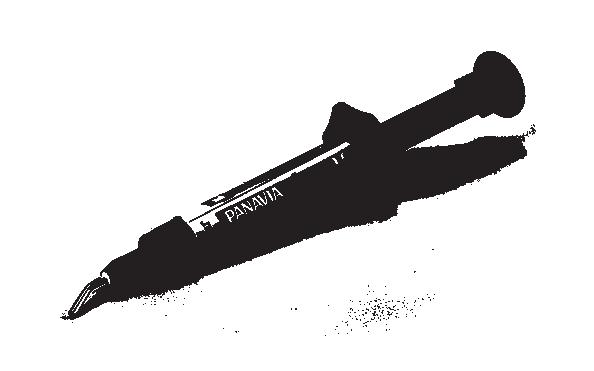
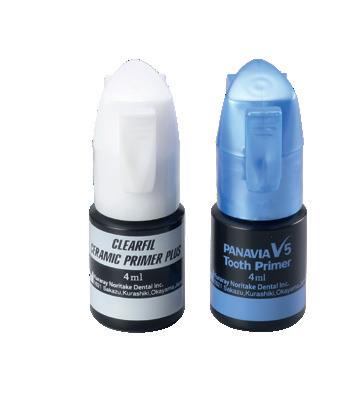
The system consists of PANAVIA™ V5 Tooth Primer that establishes a strong bond to enamel and dentine, PANAVIA™ Veneer LC Paste as the cement and the CLEARFIL™ CERAMIC PRIMER PLUS that has been part of PANAVIA™ V5 cementation system. The latter is responsible for a high bond strength to all types of restorative materials.
Mastering the working time challenge
The light-curing cement paste offers a long working time of 200 seconds* due to its excellent stability under ambient light. As a consequence, dental practitioners may place multiple veneers simultaneously without having to race against setting. Polymerization may be started whenever the user is ready for it. The one-component self-etching tooth primer (PANAVIA™ V5 Tooth Primer) does not contain any photo initiators and does not cure alone. When applied, it etches and penetrates into the tooth surface for 20 seconds and is ready to bond strongly to PANAVIA™ Veneer LC Paste. The integrated touch-cure technology is the key feature safeguarding a high bond strength to tooth structure without shortening the working time.
Providing for precise placement
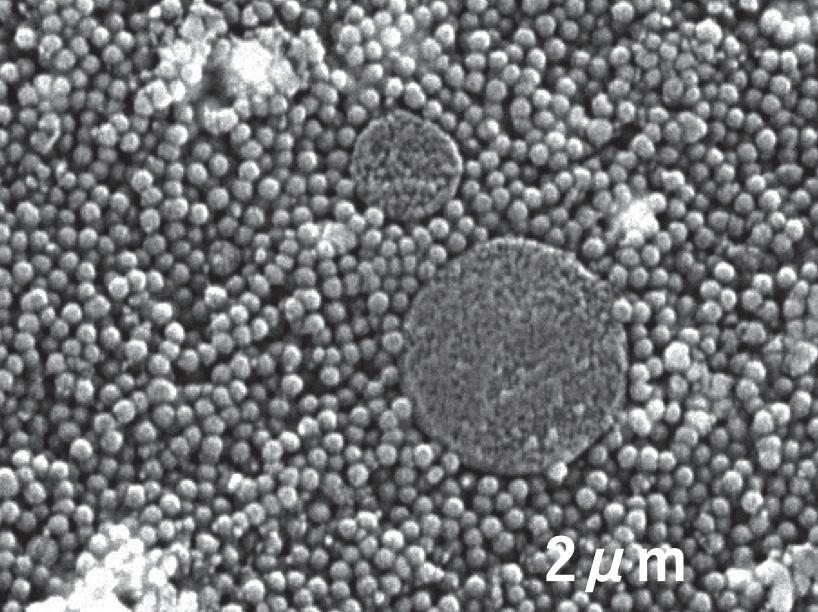
In order to streamline the clinical seating procedure from cement application to polishing, PANAVIA™ Veneer LC has been equipped with a set of well-balanced handling properties. Newly developed spherical silica fillers in the cement provide that it stays put where applied, but flows well when the veneer is seated on the tooth – for easy placement without drifting or sagging.
16
COSMETIC & RESTORATIVE
During application across the intaglio surface, the resin cement does not stick to the application tip, a property achieved by the addition of nanocluster filler technology. The special design of the syringe’s application tip optimises control over the amount of cement applied.
New filler technology
* Not a trademark of KURARAY CO., LTD
Hiding the margins
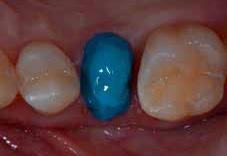
Being extremely thin, highly translucent and mainly used to restore teeth in the exposed anterior region of the maxilla, veneers have to be placed with a cement that is and remains undetectable underneath the restoration and at its margins. PANAVIA™ Veneer LC is available in four highly aesthetic shades with matching try-in pastes, so that a precise shade match with the restoration can be achieved and verified in the patient’s mouth. Additional features contributing to undetectable margins are the resin cement’s flowability and low film thickness: They enable users to easily produce an evenly distributed, thin cement layer for aesthetic outcomes. For those afraid that coffee, tea, acidic drinks or constant tooth brushing might reveal the margins over time, there is good news as well: PANAVIA™ Veneer LC offers a high polish retention and colour stability over time. The wellbalanced formulation and the touch-cure technology are responsible for this resistance to discolouration
Trusted expertise
All these beneficial features make PANAVIA™ Veneer LC worth testing. Additional arguments are the fact that its primers are tried and tested components of the highly popular PANAVIA™ V5 system and that Kuraray Noritake Dental Inc. is a proven expert on adhesive products. Kuraray Noritake Dental developed the original MDP Monomer in 1981 and introduced the first adhesive resin cement containing this monomer in 1983.
And last but not least, excess cement may be easily removed in one piece using an explorer after a onesecond tack-cure, while polishing of the margins is quickly accomplished.
Spherical silica filler

Flow and formability (not runny) combined
Excellent polishability & gloss durability
Nano Cluster Filler
Reduction of stringing (Good handling)
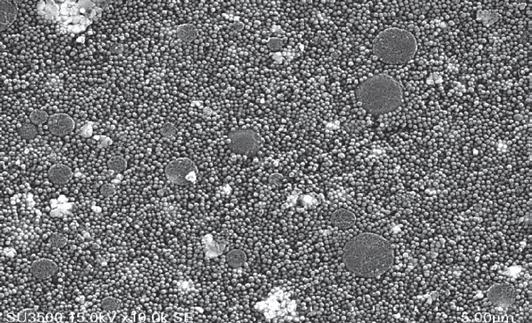
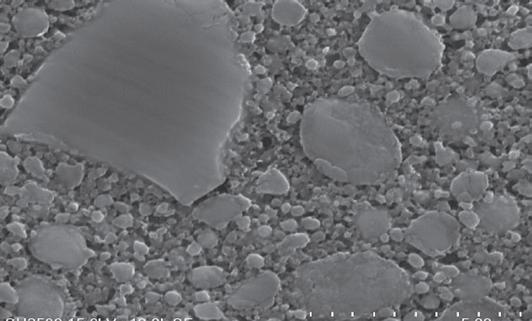
Measured at 15 kV acceleration voltage and 10000 magnification.
Source: Kuraray Noritake Dental Inc.
Since then, the company has improved existing formulations and technologies that ultimately resulted in the current line-up of cementation solutions for every need and indication.
Excellent gloss retention is one of the properties providing for undetectable margins over time.
TEST CONDITIONS: Specimen ø10mm, thickness 2mm. After smoothing the surface with water-resistant abrasive paper of #1000 to #2500, final polishing with lapping film.
• Initial value (measure the gloss level after polishing*)
• Toothbrush wear (measured after 40,000 strokes with 250g load, 30 strokes/minute, 10 wt% toothpaste*)
* Measured with a glossmeter VG 2000 (Nippon Denshoku Kogyo) at an angle of 60°
NOTE: Values may vary depending on measuring conditions.
SOURCE: Kuraray Noritake Dental Inc.
17 1300 65 88 22
COSMETIC & RESTORATIVE
5 μm 5 μm 5 μm
PANAVIA™ Veneer LC Paste RelyX Veneer (3M)*
Valiolink Esthetic LC (Ivoclar)*
10,000 20,000 0 40,000 TOOTHBRUSH
Gloss retention PANAVIA™ Veneer LC (%)
WEAR
SENSE THE DIFFERENCE
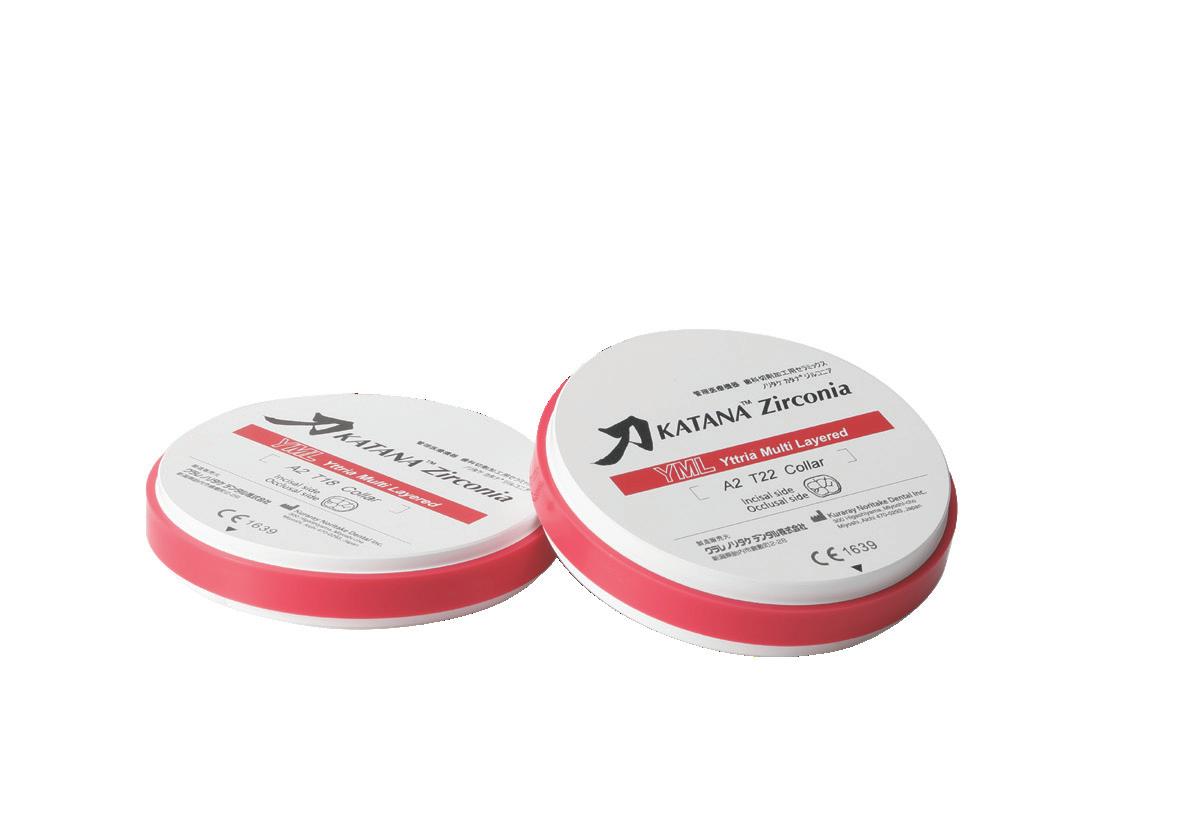
KATANA™ ZIRCONIA YML
In July 2021, Kuraray Noritake Dental Inc. introduced KATANA™ Zirconia YML (yttria multi-layered). With KATANA™ Zirconia UTML, STML, and HTML PLUS already available, it is the fourth multi-layered zirconia in the company’s portfolio – and for dental technicians striving for simplification and standardization, it is the only zirconia they will need.
Its inner structure is different from the other options in that it features the next generation multi-layer technology with not only colour, but also translucency and flexural strength gradation. This makes KATANA™ Zirconia YML a true all-rounder covering every zirconia indication. While translucency and flexural strength gradation is key property differentiating KATANA™ Zirconia YML from other zirconia options within the KATANA™ Zirconia Multi-Layered Series, there are many factors that differentiate it from other materials in the market. One important point is its perfect adjustment to Kuraray Noritake Dental’s specialized products for polishing, staining, glazing and porcelain veneering. In order to learn more about the differentiating factors, we had a conversation with Antonio Corradi, Scientific Marketing Manager at Kuraray Noritake Dental.
Antonio Corradi, who should consider using KATANA™ Zirconia YML?
Offering strength and translucency exactly where needed in the blank, KATANA™ Zirconia YML is suitable for the whole range of indications from crowns to monolithic long-span bridges. With these properties, it is the perfect choice for anyone who would like to use one single zirconia for the production of any kind of ceramic restoration. Instead of playing with different blanks depending on the indication and patient-specific needs, the increasing fan base of KATANA™ Zirconia YML uses the same zirconia every time, and plays with the position of the restoration in the blank to make it particularly strong or translucent.
KATANA™ Zirconia YML: layers and their translucency and flexural strength values.
What are the finishing options available for users of KATANA™ Zirconia YML within the Kuraray Noritake Dental product portfolio?
Kuraray Noritake Dental offers a well-aligned portfolio of feldspathic ceramics for various finishing techniques. Purely natural aesthetics are obtained by full porcelain layering. The framework is milled from KATANA™ Zirconia YML and afterwards, different layers of CERABIEN™ ZR Shade Base Porcelain, Opacious Body, Body and Enamel Porcelain, Internal Stain and Luster Porcelain are applied and fixed in various bakes. For morphological corrections and final polishing, suitable products from Kuraray Noritake Dental like Noritake Meister Finish Point and Pearl Surface Z are available.
18 COSMETIC & RESTORATIVE
Translucent Strength Layer Layer Ratio 49% 750MPa Enamel 35% 47% 1000MPa Transition 15% 45% 1100MPa Transition 15% 45% 1100MPa Dentin 35%
However, a highly aesthetic zirconia like KATANA™ Zirconia YML usually does not require such a complex finishing approach. Instead, a micro cut-back on the vestibular side of the restoration or even a monolithic design with a thin or ultra-thin layer of (liquid) ceramics is sufficient. For the micro-layering approach, we offer a set of CERABIEN™ ZR Internal Stain and Luster Porcelain materials that are usually applied in a two-step procedure. The occlusal and lingual surfaces not covered by porcelain are merely polished e.g. with Pearl Surface Z. For the further simplified ultramicrolayering approach, CERABIEN™ ZR FC Paste Stain is the perfect choice. The liquid ceramic is able to create texture and a 3D effect on the monolithic surface without adding too much volume to call for a reduction of the zirconia.
Which of these finishing approaches do you recommend to users of KATANA™ Zirconia YML?
All three approaches are suitable, and I think that ultra-microlayering is often the best option with a highly aesthetic zirconia, when weighing the time and effort involved against the aesthetics of the outcome. However, a dental technician should always take into account the indication-specific requirements and the needs of the patient (e.g. regarding treatment cost, time available and aesthetic demands), as well as the dentist for the selection of the appropriate material combination and finishing approach. A monolithic design finished with ultra-microlayering is definitely worth a try for those who start working with KATANA™ Zirconia YML!

Are there other materials in the Kuraray NoritakeDental portfolio that perfectly match KATANA™Zirconia YML?
For highly aesthetic zirconia like KATANA™ Zirconia YML, a simplified micro-layering approach is usually sufficient.
There are many additional products that are perfect for use with KATANA™ Zirconia YML. One such material is KATANA™ Cleaner, which removes saliva or blood from (zirconia) restorations and from prepared tooth structures after try-in. With its high cleaning effect, it is the ideal product for everyone striving for an optimized bond quality and streamlined adhesive procedures. For adhesive bonding carried out in the laboratory or in the dental office, different types of resin cements are offered by Kuraray Noritake Dental. As some dental practitioners might ask for recommendations regarding cement selection and restoration pretreatment, it is worth knowing these products and their range of indications. For KATANA™ Zirconia, we recommend using the self-adhesive resin cement PANAVIA™ SA Cement Universal for restorations with a retentive design and an adhesive cementation procedure with PANAVIA™ V5 for all other types of zirconia restorations.
19 henryschein.com.au
An even more simplified approach is ultra-microlayering on monolithic surfaces with liquid ceramics such as CERABIEN™ ZR FC Paste Stain.
COSMETIC & RESTORATIVE SBS OB-B-E Internal Live Stain Internal Live Stain Luster Luster LT1 ZrO2 0,4 mm ZrO2 0,4 mm FC
ZrO2
Purely natural aesthetics are achieved with a complex combination of porcelains.
Paste Stain > 10 microns
0,8 mm
Crown & Bridges
Retentive Preparation
Subgingival
Supragingival OR
Self-Adhesive Techique: PANAVIATM SA Cement Universal
What else differentiates KATANA™ Zirconia YML from similar materials?
Veneers, Inlays, Onlays, Partial Crowns
NOT Retentive Preparation
Adhesive Technique: PANAVIATM V5
BONDING OR LUTING
Kuraray Noritake Dental is a true expert in the processing of dental zirconia. This profound knowledge has been leveraged to align the different layers within KATANA™ Zirconia YML with their varying yttria concentrations , so that shrinkage ratios and CTE values are harmonized, and a smooth transition from one layer to the next is achieved. This adjustment is only possible as an end-to-end in-house production process has been established, which provides full control over every detail. Unlike other companies purchasing readily mixed powder, Kuraray Noritake Dental uses natural ores to produce the required metal oxides and its own proprietary additive combination for powder production. In addition, an extremely meticulous pressing process is used to minimize the risk of contamination by airborne particles, and specific ingredients are added to increase blank stability.
All this leads to high-quality blanks without transition lines and impurities for well-balanced mechanical and optical properties, a high accuracy of fit, a brilliant surface quality and edge stability, and a high design flexibility users will love.
Why do you recommend KATANA™ Zirconia YML to potential users?
To my mind, the new material is definitely worth testing in the own laboratory environment. It offers many properties that have the potential to reduce the inventory and streamline procedures, without compromising the outcomes. Material selection is simplified, sintering may be accelerated, and finishing becomes a lot easier with the proposed techniques and adjusted materials. However, words alone are not enough to reveal the real difference, which can only be sensed when processing the material and creating impressive outcomes.
CORRADI Scientific Marketing Manager
Kuraray Noritake Dental
Kuraray Noritake Dental is a true expert in the processing of dental zirconia
20
ANTONIO
Resin cement recommendations depending on the indication, preparation design and margin position.
COSMETIC &
RESTORATIVE
CLICK HERE
RACEGEL FOR GINGIVAL
MANAGEMENT
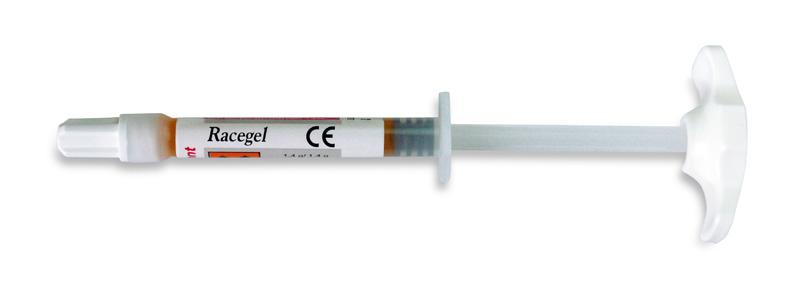
Septodont Racegel is specifically designed to make the gingival preparation procedures easier and more comfortable for patients while ensuring the quality and precision of the final impressions.
Racegel exhibits a thermo-gelifiable effect: the product is liquid at room temperature (T: 20°C) and turns into a firm gel when placed in contact with oral tissues (T: 35°C).
This allows creating a space in the sulcus without applying any pressure, keeping the gingiva passive.
The gel is easy to put in place and won’t run or drip. The orange colour makes the product easy to visualize during placement and rinsing.
As this thermo-gelifiable effect is reversible, Racegel will become fluid again when rinsed by water (T: 20°C), for easier removal. Within minutes the cervical margins are ideally exposed for final impression.
Racegel contains 25% aluminum chloride, clinically proven for its astringent properties.
It allows an optimal control of bleeding and gingival oozing and a contraction of soft tissues, creating ideal conditions for impression taking.
There is no need for additional haemostatic products.
Racegel comes in a thin syringe with pre-bent tips to better control the placement of the gel even in hardto-reach areas. There is no need to acquire dedicated equipment.
The use of a retraction cord is no longer necessary but is still possible if clinically needed. The use of Racegel allows easier insertion of the cord.

21 1300 65 88 22
COSMETIC & RESTORATIVE
For more product information CLICK HERE View this demonstration video on Dental Education Hub CLICK HERE
ANTERIOR CASE WITH CLEARFIL MAJESTY™

ES-2 PREMIUM
Case Background
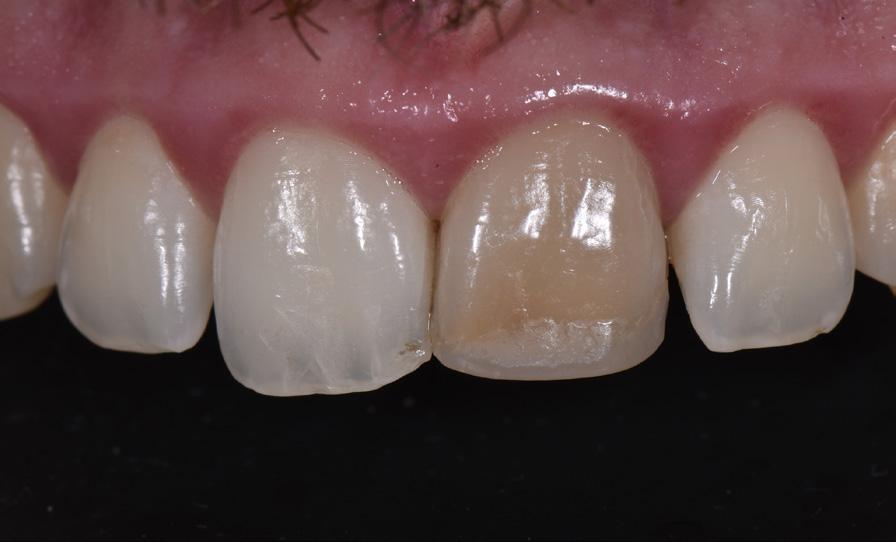
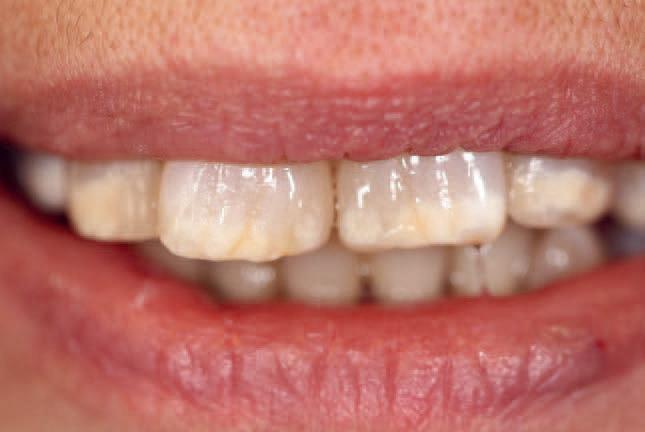
A healthy systemically ASA I classified 30-year-old male presented to my service for esthetic options relative to tooth 2.1. This tooth had been impacted in a bike accident at 16 years of age in South Africa, where the individual high-sided and traumatized the tooth. Since then, it has progressed through specialist endodontist intervention 7 years prior.
Soft tissue clinical examination revealed a band of localized moderate marginal erythema affecting his upper anterior sextant, with no periodontal pockets of significance, with the likely etiology mouth breathing, for which nasal breathing was reinforced. Clinical dental examination revealed tooth 2.1 with significantly lower value than the contralateral teeth with visible margins of the old acid-etched bonded composite restoration on the MIDBP surfaces. There was an oblique crack affecting the distal marginal ridge extending centro-obliquely. A small enamel fracture was noted on the 11MI angle also. Radiographic examination revealed no apical rarefying osteitis and no caries affecting the teeth in view, however the distal marginal ridge incomplete fracture was visible and extended to a cervical level possibly violating the biologic width.
Restorative Procedure
Internal bleaching was discussed with the patient as a structure-conservative first option for lifting the chroma and value especially in the cervical aspect where the enamel volume is the thinnest and can range from less than 0.3-0.5mm (6).
The risks inherent to this procedure involve a 15.1% lifetime risk of External Cervical Resorption (ECR) and with internal bleaching an increased risk to 10.6% of teeth involved. (1)
The patient was anesthetized with 1.5 carpules of 2% Lignocaine with 1:100,000 epinephrine via buccal and lingual infiltration as possible biologic width violation was possible as dissecting out the fracture line to recreate a well-bonded periphery for hermetic enclosure of the walking bleach. Rubber dam isolation was achieved initially but abandoned as the fracture line descended to a significant subgingival level distogingivally and thus required surgical access to be dissected out in its entirety. Following the construction of the distal marginal ridge, the rubber dam was dropped to a crestal level and a small plug of temporary filling placed superficial to this to seal off the obturation.
A slurry of sodium perborate and 16% carbamide peroxide was applied to the access opening and a bonded approach using a contrast shade flowable composite applied to the palatal aspect.
This was removed on a weekly basis for 2 iterations before restoration of the access cavity with a glass ionomer restoration for a 10-day minimum standdown period before any bonded restorative procedures. In actuality a 5-week standdown period eventuated due to scheduling congestion. This period is to allow oxygen leaching from the tooth that can interfere negatively with composite polymerization reactions (5).
Shade selection was completed as the first step of the restorative process especially as dehydration sets in quickly and changes the opacity and value of the tooth if the tooth is not maintained in a hydrated state due to topical and local anesthetic application lag. Composite shade tabs of both CLEARFIL MAJESTY™ ES-2 Premium (Kuraray Noritake Dental Inc.) A1D and A1E were applied, along with the Blue and Clear shades. The shade tabs were polymerized to express any inherent color shift before taking a photograph, although there is virtually no color shift post-curing with CLEARFIL MAJESTY™ ES-2.
Procedurally, the patient was isolated using a split dam rubber dam approach to ensure adequate cervical access on the day of preparation.
No local anesthetic was required, and the old restoration was excavated from the tooth.
22
COSMETIC & RESTORATIVE
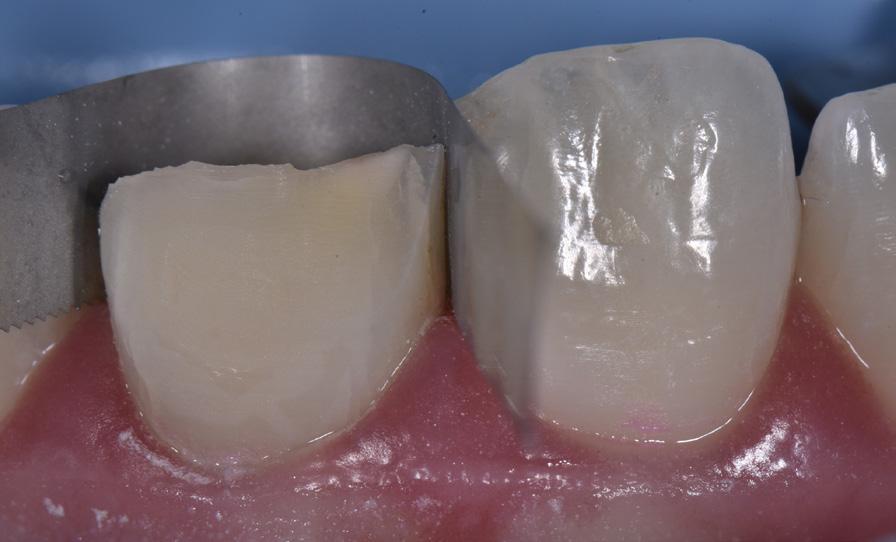
A serrated metal strip was placed surrounding the tooth to protect the adjacent teeth from the effects of the micro air abrasion using 27-micron aluminum oxide. A total etch procedure was staged with a 15 second etch on enamel before a 5-10 second dwell on dentin and the preparation thoroughly rinsed and puff air dried. A 2% chlorhexidine solution was scrubbed into the dentin for 30 seconds before again blot dried to a moist dentin state before application of a single step 10-MDPbased self-etching adhesive, CLEARFIL™ UNIVERSAL BOND Quick.
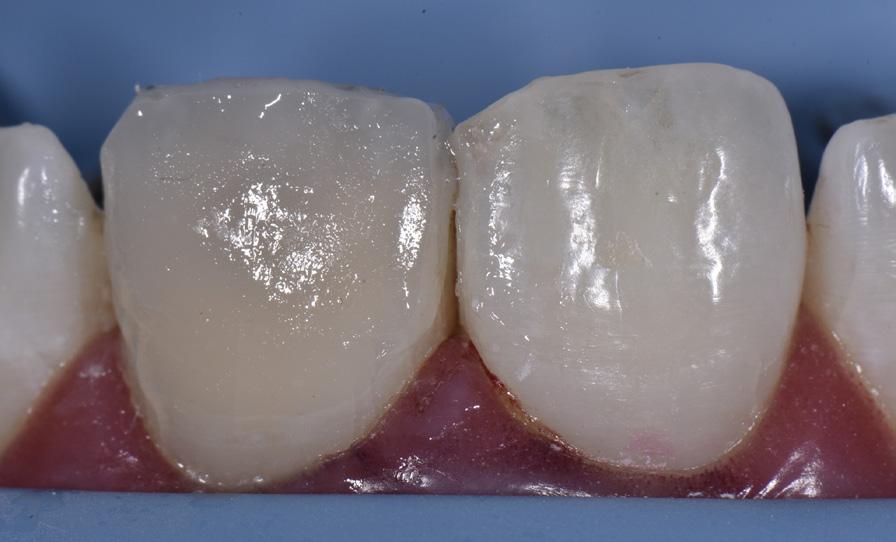
Without waiting time after the application, the bond layer was air thinned and carrier evaporated before curing using a 2000mW/cm2 polywave curing light unit (Pencure 2000, J.Morita Corporation).
A pre-crimped Mylar matrix strip was placed to guide the freehand placement of the lingual shelf, a 0.3mm thick layer composed purely of A1E Enamel (CLEARFIL MAJESTY™ ES-2 Premium). Following this, the join line was occluded using two successive layers of shade of A1D Dentin (CLEARFIL MAJESTY™ ES-2 Premium) and the dentin mamelon incisal details characterized using a dental instrument.
Next, Blue Translucent effects were placed (CLEARFIL MAJESTY™ ES-2 Premium) on the proximoincisal corners to accentuate the opalescence of the enamel and a Trans shade was applied to the mid-incisal area. White tint was used to characterize the tips of the dentin mamelons before a final layer of A1E Enamel was sculpted to final form in preparation for finishing and polishing procedures.
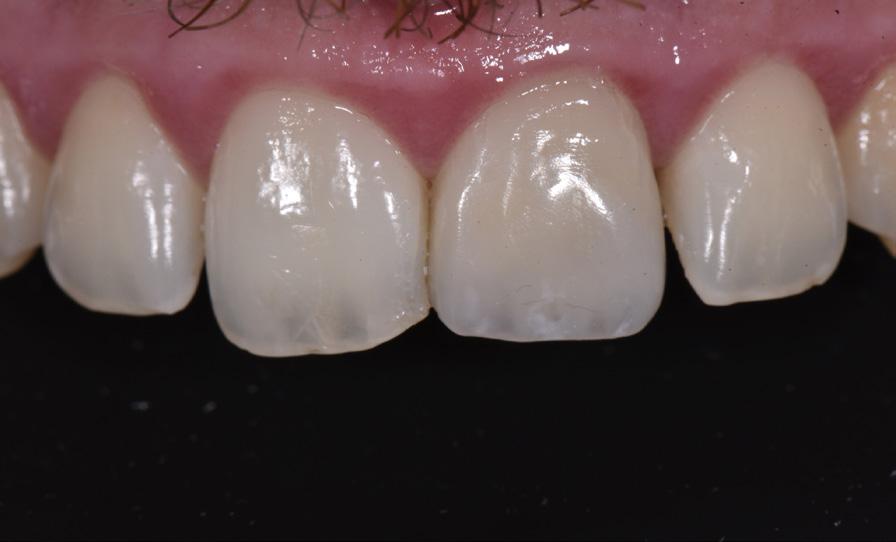
Primary anatomy was completed focusing on incisal embrasures, cervical embrasures and line angles. Secondary anatomy characterized facial anatomy and lobe detail.
Final reassessment of the case shows excellent optical and functional integration of an esthetically complex case that would have been an equa challenge for an indirect approach however with greater reduction of tooth structure.
Rationale for Material Choice
An indirect approach using laminate porcelain restorations would have necessitated the removal of a minimal of 0.3mm of enamel cervically, which often is the maximal volume of the rigid enamel shell in the cervical third of upper anterior teeth (1). This acts to compound negatively with the reduced flexural strength of a tooth that not only has previously been endodontically-treated but features existing palato-oblique fractures. Preservation of a maximal volume of tooth structure is key to preserving a maximal long-term prognosis.
Part of the preservation effort is not only macroscopic, but importantly on a microscopic level. By limiting the phosphoric acid etch’s effect on dentin and especially deep dentin, there is a maximal volume of hydroxyapatite crystal volume remaining, which not only bolsters residual flexural strength but allows both super dentin and super enamel development through use of a 10-MDP-based acidic monomer, which has the ability to nanolayer calcium in pattern
23 henryschein.com.au COSMETIC & RESTORATIVE
1 2 3 4
creating phenotypically a very acid-base-resistant layer, measuring 1000-1200nm in thickness (3, 4). The adhesive selected contains a novel amide monomer, which also increases both hydrophilicity and penetration potential relative to HEMA but is more resistant to hydrolytic degradation. (2)
CLEARFIL MAJESTY™ ES-2 Premium is the only VITA approved shade (VITA Zahnfabrik , Bad Sackingen, Germany) composite system in the world. It features a buttery, no-slump, non-sticky consistency which is a remarkable benefit for universal applications but especially sculpted direct anterior cases. It features an excellent optical refraction index very similar to tooth structure.
Often, the filler to resin matrix in anterior composites leaves the composite sticky, with the subsequent need to use wetting resin (bis-GMA, TEGDMA) to handle the material, which can often dilute the intended chemistry and affect ultimate performance if not used sparingly.
CLEARFIL MAJESTY™ ES-2 Premium features a very unique Light Diffusion Technology (LDT) which allows applications in thinner layers to achieve the same degree of optical refraction as in other composite systems.
This translates to need for less tooth preparation, which is ideal from a responsible esthetics standpoint. With 15 shades in total, it is a slick and tech-smart armamentarium that will be able to tackle any challenge head on in your minimally-invasive daily practice.
References
1. Heithersay GS. Invasive cervical resorption following trauma. Aust Endod J. 1999 Aug;25(2):79-85. doi: 10.1111/j.17474477.1999.tb00094.x. PMID: 11411085.
2. Kuno Y, Hosaka K, Nakajima M, Ikeda M, Klein Junior CA, Foxton RM, Tagami J. Incorporation of a hydrophilic amide monomer into a one-step self-etch adhesive to increase dentin bond strength: Effect of application time. Dent Mater J. 2019 Dec 1;38(6):892-899. doi: 10.4012/dmj.2018-286. Epub 2019 Aug 1. PMID: 31366768.
3. Nikaido T, Takagaki T, Sato T, Burrow MF, Tagami J. The concept of super enamel formation -Relationship between chemical interaction and enamel acid-base resistant zone at the self-etch adhesive/enamel interface. Dent Mater J. 2020 Aug 2;39(4):534-538. doi: 10.4012/dmj.2020-165. Epub 2020 Jul 4. PMID: 32624553.
4. Nikaido, T., Takagaki, T., Sato, T., Burrow, M. F., & Tagami, J. (2021). Fluoride-Releasing Self-Etch Adhesives Create Thick ABRZ at the Interface. BioMed research international, 2021, 9731280. https://doi.org/10.1155/2021/9731280
5. Topcu, F. T., Erdemir, U., Ozel, E., Tiryaki, M., Oktay, E. A., & Yildiz, E. (2017). Influence of Bleaching Regimen and Time Elapsed on Microtensile Bond Strength of Resin Composite to Enamel. Contemporary clinical dentistry, 8(3), 451–458. https://doi.org/10.4103/ccd.ccd_234_17
6. Yu H, Zhao Y, Li J, Luo T, Gao J, Liu H, Liu W, Liu F, Zhao K, Liu F, Ma C, Setz JM, Liang S, Fan L, Gao S, Zhu Z, Shen J, Wang J, Zhu Z, Zhou X. Minimal invasive microscopic tooth preparation in esthetic restoration: a specialist consensus. Int J Oral Sci. 2019 Oct 2;11(3):31. doi: 10.1038/s41368-0190057-y. PMID: 31575850; PMCID: PMC6802612.
Clarence is originally from Toronto, Canada, where she completed her Doctor of Dental Surgery and General Practice Residency at the University of Western Ontario and the University of Toronto, respectively.
Clarence’s practice is limited to cosmetic and restorative dentistry and she is well-published to both the local and international dental press, writing articles, reviewing and developing prototype products and techniques in clinical dentistry. She frequently and continually lectures internationally. Clarence is the Past Chairperson and Director of the New Zealand Academy of Cosmetic Dentistry. She is currently one of two individuals in Australasia to hold Board-Certified Accredited Member Status with the American Academy of Cosmetic Dentistry. Clarence is an Opinion Leader for multinational dental companies Kuraray Noritake Dental Inc., J Morita Corp., Henry Schein NZ, Ivoclar Vivadent, Dentsply Sirona, 3M, Kerr, GC Australasia, SDI and Coltene and is the only Voco Fellow in Australia and New Zealand. She holds Fellowship status with the International Academy for DentoFacial Esthetics and is a passionate and approachable individual, committed to having an interactive approach with patients in all of her cases to maximize predictability.

24 COSMETIC & RESTORATIVE
DR CLARENCE TAM HBSc, DDS, FIADFE, AAACD Auckland, New Zealand
AFFINIS THE CROWNING IN LEVEL OF DETAIL
Has this ever happened to you? The impression looks good, you and the dental technician are satisfied, the restoration fits perfectly on the model and then comes the shock: the patient attends the appointment and the crown does not fit. What could have gone wrong?
When it comes to taking impressions in particular, details are the tricky part. The most common impression indications are single crowns or small bridges, and fast setting impression material is often the first choice here.
However, chemical systems do not cure at the push of a button. Nonetheless, sophisticated formulations allow sufficient processing time and a short oral setting time, as shown by the steep setting curve (AFFINIS snapset) in the illustration. A fast setting characteristic is considered to be patient-friendly and minimises the risk of permanent, often invisible deformities.
However, as soon as the specified processing time is exceeded, the impression material continuously changes from the plastic to the elastic state and reacts sensitively to pressure, which can, for example, be caused when changing hands or by movement of the patient. Therefore, the impression must be kept as steady as possible in situ during the entire oral setting time in order to produce a precise impression.
This complex case by Dr. Kai Zwanzig illustrates impression taking of a very demanding, large-span item of work. In addition to the material used, a clean preparation technique and well-planned sulcus management are crucial for the success of an impression. The choice of impression technique itself also has a major impact on the quality. One of the most precise techniques is the double mix technique, which was applied here.¹
The self-contouring consistencies of AFFINIS wash materials let you achieve outstanding impression results without any bubbles and flashes.
Exceptional quality and precision are required, especially in critical cases. And AFFINIS PRECIOUS gives you just that: a reliable, highly precise material that can be used in any situation, no matter how difficult.
REFERENCES
(1) Luthardt RG, Walter MH, Quaas S, Koch R, Rudolph H. Comparison of the three-dimensional correctness of Impression techniques: a randomized controlled trial. Quintessence Int. 2010 Nov-Dec; 41(10):845-53
View Product on our website CLICK HERE

25 1300 65 88 22
COSMETIC & RESTORATIVE
DIRECT COMPOSITE RESTORATIONS IN ORTHODONTIC INDICATIONS
CONCEPT AND CASE REPORTS
In the past, we used to prepare teeth and sacrifice tooth substance to protect our prosthetic work due to the required minimum wall thickness. Today we protect the teeth with additive, adhesive restorations.
In our daily practice we repeatedly perform restorations based on orthodontic or anatomical indications. There are different aplasias of permanent teeth, which is one of the most common cranio-facial malformations with a prevalence of approximately 1-11%.
Here we encounter agenesis with and without gaps or in the form of altered teeth - such as the so-called conical teeth in region 12 or 22. Often we also find persistent deciduous teeth with agenesis of the permanent dentition.
Apart from mandibular second premolar agenesis, the lateral incisors are the most frequent places where aplasia occurs - apart from the wisdom teeth.
In terms of the development process, this results from the lip-jaw-palate cleft and is the smallest form of this characteristic, which can also occur without the formation of a cleft. However, as this is in the visible and aesthetic region, the patient’s desire for correction is considerable.
In the following cases, different options for restoration using direct composite restoration techniques will be presented. Of course, ceramic restorations are also possible, but considering the young age of the patients, a minimally invasive therapy is advisable. The teeth can still elongate during secondary eruption, which can lead to the preparation margins becoming visible.
Orthodontists choose different therapeutic approaches. In some cases gaps are closed, but the trend tends towards keeping them open. This can have consequences for the entire dental arch and also for aesthetic rehabilitation.
There are different parameters to consider as to whether the gap should be closed or kept open.
On the one hand, a micrognathic maxilla is more likely to speak against a gap closure, as the distal movement of the anterior teeth and mesial movement of the posterior teeth can result in an inverted anterior overjet. A compensatory extraction of the lower premolars could be indicated. However, in the case of a distal bite, compensation by closing the gap can approximate the dental arches.
The profile of the patient should also be taken into consideration. The upper lip tends to revert back when closing gaps, which is more disadvantageous with a concave profile type than with a convex profile type.
If the necessary movement of the teeth is taken into account, a penetration position of the canine near the middle incisors tends to favour closing the gap, a distance position tends to favour keeping the gap open.
Nonetheless, the changed position of the canine teeth often results in a less favourable dental arch or leads to gaps between the canines and the premolars. The transition in the buccal corridor is altered and narrows the visual appearance. This should also correspond to the width of the nose and the shape of the face.
The following cases show that significantly improved results can be achieved by additive restoration with composite, even under unfavourable conditions. In most cases this is also possible without preparation of the tooth structure.
26
COSMETIC & RESTORATIVE
Case Presentations
The timing of the intervention may vary. In the case of reduced conical teeth, it may sometimes prove difficult for the orthodontist to position a bracket at all. It is therefore necessary to build up the teeth prior to orthodontic treatment to be able to move the teeth correctly and thus to set the correct axial direction and position in the arch. This can be achieved quite easily with BRILLIANT COMPONEER or a direct composite build-up with BRILLIANT EverGlow.
In this case (Figs. 1 – 6) there were two differently developed, reduced lateral incisors, which were additively restored prior to orthodontic treatment and subsequently provided with brackets. After building up the incisors, orthodontic treatment could be performed and completed. Due to their impeccable optical appearance, the COMPONEER veneers can remain in the mouth after removing the brackets.
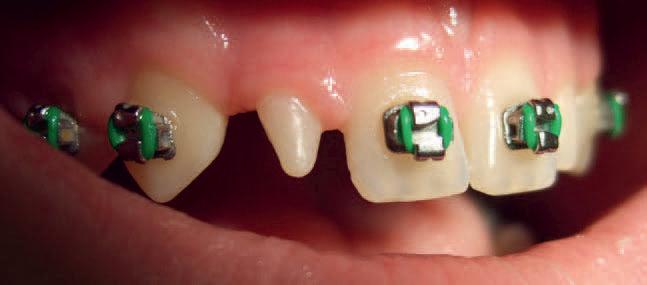
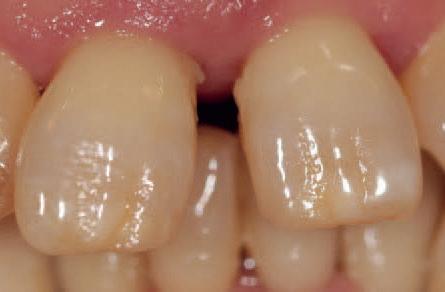
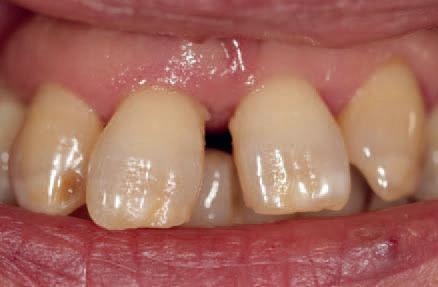
In a second case a 14-year-old female patient presented following recommendation after orthodontic treatment had already been completed (Fig. 7).
The initial situation was a unilateral aplasia of the left lateral incisor, a mesially erupted canine, so that the deciduous canine could be preserved in its position. The gaps were closed, however the patient regarded the interincisal larger retractions and triangular formations in particular as displeasing. The different shade of the more saturated canine was less relevant for her.
We opted for an additive structure of the teeth. Unfortunately, the width of the canine was greater than that of the contralateral lateral incisor, so that small lateral deviations could not be avoided as noninvasive surgery was specified (Fig. 8).
On tooth 12, the incisal edge was lengthened slightly and the edge was straightened.
A stronger mesial light-reflecting ridge was applied with enamel masses to create a larger appearance.
Tooth 23 was also lengthened to an edge incisally, the lateral facets were filled in and the marginal ridges were shaped. To avoid a greyish appearance due to too much enamel, it was necessary to add Universal shade A1/B1 to the BRILLIANT EverGlow Translucent enamel masses.
The deciduous canine was lengthened significantly and built up vestibularly to ensure a transition
into the buccal corridor. Minor gingivectomy was necessary cervically to create an aesthetic garland profile.
We are aware of the paradigm that form is decisive for aesthetics - as opposed to colour. Once the macroscopic shape has been realised, close attention must be paid to the micromorphology, particularly in young patients.
And this is where the special properties of the composite material become relevant. BRILLIANT EverGlow is an extremely supple and easy to shape composite, which can be processed well and delicately with very thin Heidemann spatulas, brushes and pads, yet still remains dimensionally stable.
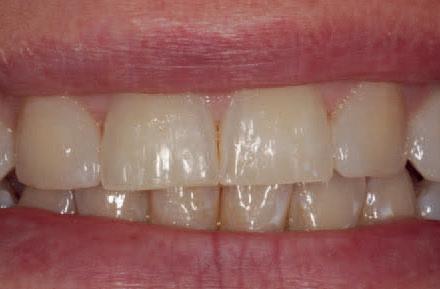
Once we have implemented the micromorphology (Fig. 9), a little polishing is sufficient to achieve a captivating and durable gloss.
This is very important as all the light reflection characteristics otherwise often disappear again due to too much polishing and the tooth appears rather lifeless (Fig. 10).
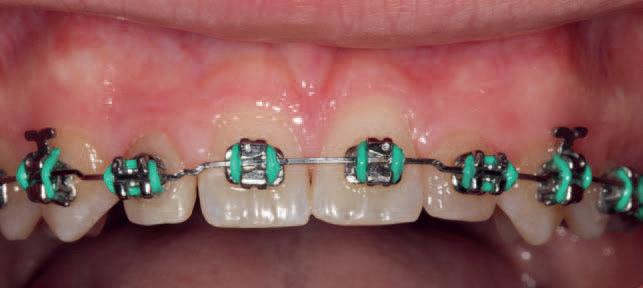
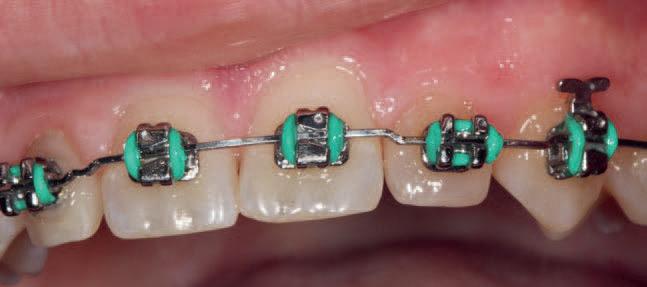
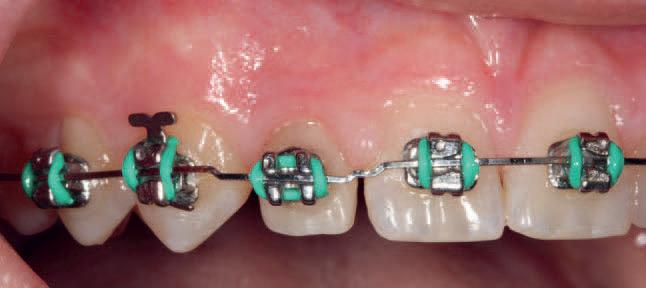
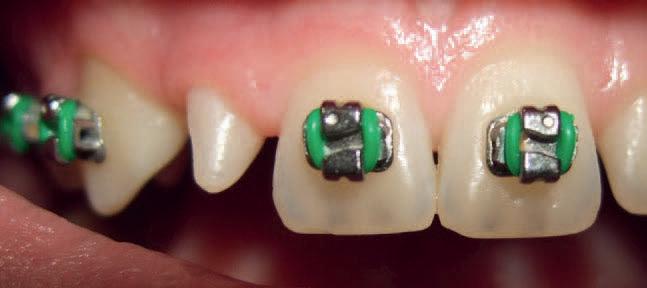
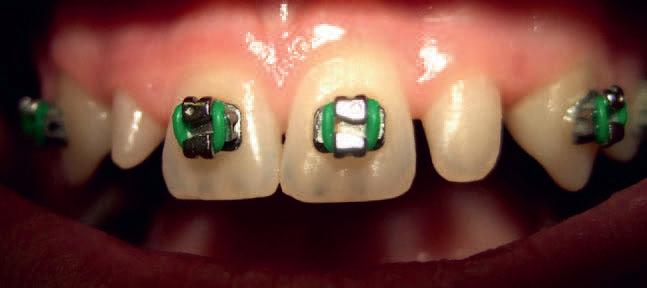
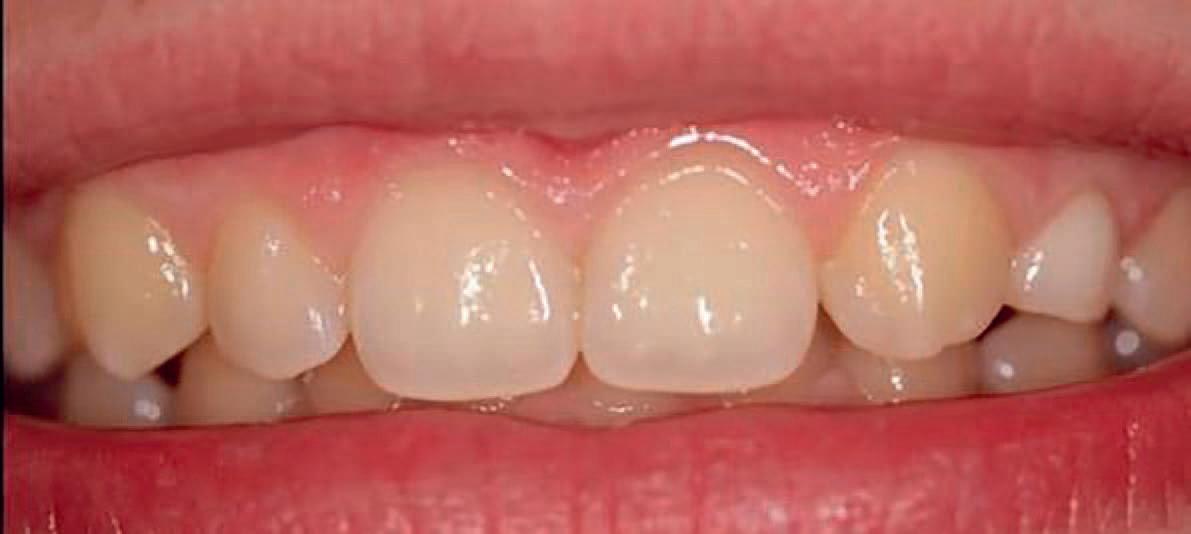
In a further case the canines were pulled to the second position, however these canines were rather delicate and symmetrically placed. The white decalcification present around the brackets on the vestibular surface created an additional problem (Figs. 11 - 12).
27 henryschein.com.au COSMETIC & RESTORATIVE
Fig. 1
Fig. 2
Fig. 3
Fig. 4
Fig. 5
Fig. 6
Here we had to deviate slightly from the non-invasive concept and work from micro-abrasively to minimally invasive. Therapy planning was as follows: The middle incisors were prepared micro-abrasively and restored only with BRILLIANT EverGlow Bleach
Translucent.
The canines were transformed completely vestibularly with BRILLIANT EverGlow A1/B1 and Bleach
Translucent as the patient wished for a whitening effect. The interincisal retraction of the premolars was also minimised in terms of optical appearance.
The mesial marginal ridge was highlighted for light reflection purposes and was converted to more transparent enamel ridges in terms of colourresembling the natural tooth (Figs. 13 - 14).
In cases where the gap is to be kept open early, composite teeth can be included in the gap using brackets at the beginning and then followed by inserting a single-wing Maryland composite bonded bridge. This can also be regarded as a longterm provisional restoration to keep the gap free for a future implant. The implant should not be placed too early as it remains in it position but the jaw continues to grow. This gives it a much too caudal position and the alveolar ridge develops a concavity, which is difficult to remedy with renewed bone augmentation.
Milled, single-wing composite Maryland bridges have the same flexural strength due to a tooth-like modulus of elasticity, which supports prolonged durability. One can still colour the bridge individually with stains or have it milled in cutback design and veneered with individual layers.
Late intervention: Even at an advanced age, we can realise aesthetics in a minimally invasive manner, even if it has not been practised in this case by colleagues before. Thus, this female patient presented in my practice with the notion that no improvement could be achieved without extracting teeth, crowns or implants (Fig. 15).
Several problems were posed at once here:
• Agenesis of the lateral incisors without orthodontic gap closure
• Downward opening diastema
• Teeth very prominent in terms of colour with enamel stains and decalcification as well as brown discolouration.

• Surface-structured teeth with asymmetrical abrasion of the incisal edge.
• Beginning periodontitis with loss of the papillae.
• Deep bite with protrusion
If one wants to close the diastema, one has to consider the biological width so that the papilla has the opportunity to grow up to the contact point. In this case, an elongated contact surface needs to be established in order to reach relatively far to cervical. In addition, the gap must be closed in the form of small wings. These have to be fitted exactly to the gingiva to make it look as if the tooth also has a wider root. If one leaves a slightly larger bar in the rubber dam between the two middle incisors, one can model directly on the rubber dam.
Due to the pronounced micromorphology of these teeth, it is important to extend these into the diastema. The whitish coloured band must also be continued, otherwise the widening of the teeth looks artificial.
Using the Miris2 effect shades White and White Opaque - also by COLTENE – it was possible to imitate the whitish structure. The effect shades are placed under the enamel layer and applied very finely with brushes.
Of course, such cases can also be solved with crowns, partial crowns or veneers, but the more minimally invasive we proceed, the more likely we are to protect the patient’s tooth and, for the benefit of the stability of our restoration, not remove any hard tooth substance.
28 COSMETIC & RESTORATIVE
Fig. 7
Fig. 8
Fig. 9
Fig. 10
Conclusion

Using the BRILLIANT EverGlow composite, it’s very natural shades and the natural layering technique of opaque, universal and translucent shades, we can achieve invisible adhesive direct restorations. Due to their excellent polish-ability and good material properties, they are very durable on the one hand, and on the other hand, the patient can no longer distinguish between a restoration or his/ her own tooth.
29 1300 65 88 22 COSMETIC & RESTORATIVE
Fig. 11
Fig. 12
Fig. 13
Fig. 14
Fig. 15
Fig. 16
Fig. 17
Fig. 18
CLICK HERE
Fig. 19
View these products on our website
DR. SYLVIA RAHM
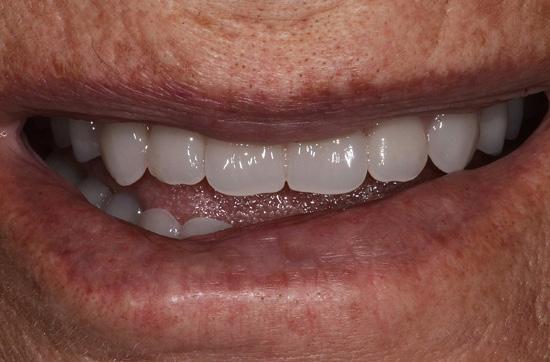
MY UPPER FULL DENTURE PROTOCOL

As a young dentist in my first years after graduation, I was struggling to produce a good functional denture for my patients. The protocol I learned at my university was the one widely used in my country but it wasn’t giving me the same quality results every time.
There was a certain amount of guesswork involved and that is exactly what I wanted to avoid. And for that reason, I decided to travel abroad and take courses with prosthodontists who have a deep practical knowledge of removable prosthodontics and full dentures especially.
Here I have to name Prof. Dr Alexander Gutowski from Germany, Walter F. Turbyfill, DDS, and Joseph Massad, DDS, from the United States and Dr Jiro Abe from Japan. After taking my first courses I started applying the skills in my office and could see a big change in the quality of full dentures produced.

I also was processing dentures in my laboratory, performing every step myself, which also helped me to learn a great deal from a technical point of view. Throughout the years a full denture protocol took shape in my hands that I use on every patient and that works extremely well; the previously mentioned guesswork has been removed.
The protocol is a mixture of what I learned in all those courses and what I practised and developed myself while producing full dentures in my office. The aim is the same as every practitioner’s aim – functional and aesthetic full dentures satisfying my patients’ needs.
30
Fig. 1: Special plastic tray developed by Prof. Dr Alexander Gutowski
Fig. 4: Primary impression in patient’s existing denture – light-bodied silicone Honigum Pro-Light
Fig. 2: Primary impression in patient’s existing denture – silicone stops
Fig. 5: Primary impression in patient’s existing denture – posterior border Aluwax uncut
Fig. 3: Primary impression in patient’s existing denture – Detaseal Function
Fig. 6: Primary impression in patient’s existing denture – posterior border Aluwax cut with scalpel blade
COSMETIC & RESTORATIVE
Taking the primary impression
I always take a primary impression as a functional impression, i.e. a myodynamic one. It is taken with some kind of a mouldable plastic tray or with a special plastic tray developed by Prof. Dr Gutowski (Fig.1) or even with a patient’s existing denture.
A polyvinyl siloxane impression material is used, with a sufficient functional setting time, during which all necessary functional movements can be performed and embedded into the border. At first, silicone stops are applied to the palatal part of the tray, in five or six places, and moulded directly in the patient’s mouth before setting (Fig. 2).
A material such as O-Bite (DMG) is used. These stops prevent the vestibular tissue from pushing against the impression tray, by pulling the vestibulum upwards and creating space for the light-bodied material that will be used later. After that a functional border is produced.
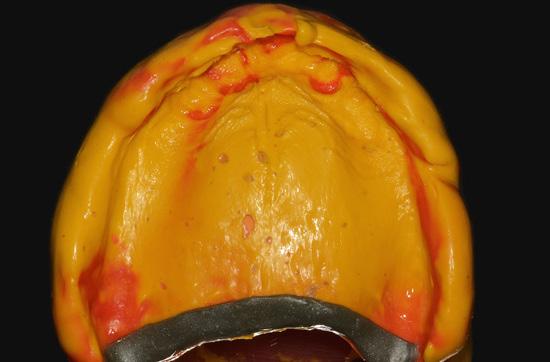
My favourite material for this step is either Honigum Pro Heavy (DMG) or DetaSeal (Detax) (Fig. 3). When the material sets, its edges are cut so that they do not interfere with the next detail impression. This is done with a light-bodied polyvinyl siloxane material.
I use Honigum Pro Light (DMG) for this step (Fig. 4) or, in the case of a primary impression, any kind of a light body type polyvinyl siloxane material that I have in my office.
After setting and cutting overhangs in the impression, the distal border (between A and H lines) is marked in the mouth with a special copying pencil and transferred to the impression and then marked definitively with Aluwax (Aluwax Dental Products Company) (Fig. 5) and (Fig. 6), finishing the primary impression.
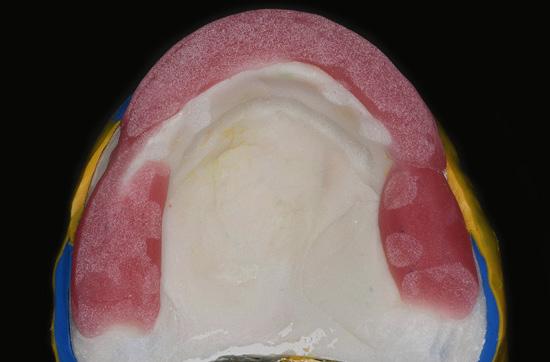
Custom impression tray
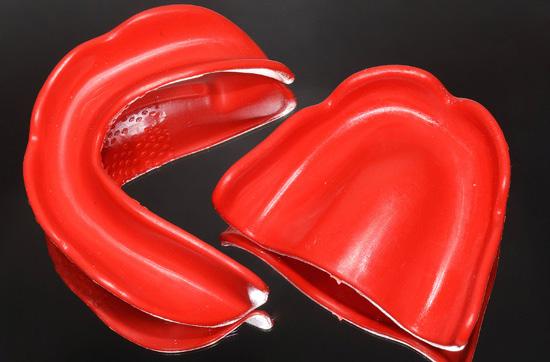
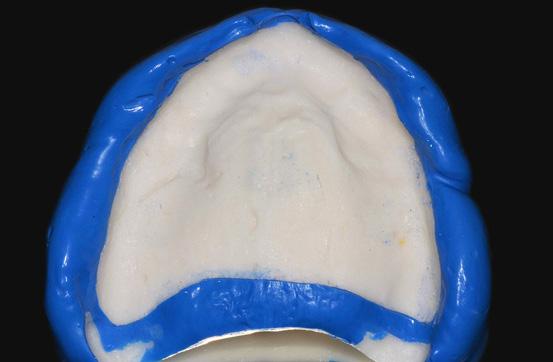
The impression is normally poured with stone and a stone model is produced. If a situation allows a silicone model to be made, this saves time and can be used repeatedly if needed. I make the silicone model from the Zeta Labor material (Zhermack) (Fig. 7, 8, 9).
This is a fast and simple procedure that involves imprinting the primary impression into a silicone material. A custom impression tray from chemically curing resin or from a light-curing resin is prepared afterwards (Fig. 10), containing all the necessary anatomical landmarks imprinted into the silicone material.
Taking the definitive impression
The steps for the definitive impression are the same as those for the primary impression. In this case strict adherence to the proper protocol and material use is needed, especially in the beginning.
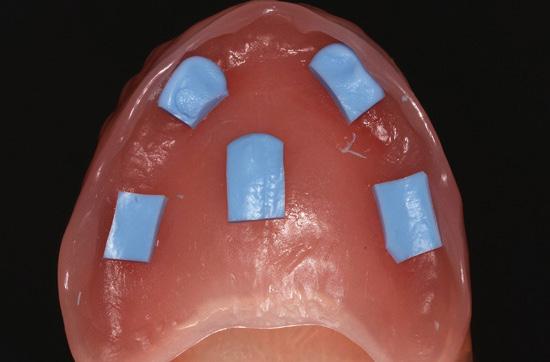
It begins with a try-in in the mouth. The tray should cover the palate where we need it, should be comfortable for the patient and also shouldn’t be overextended. like it when the tray itself is suctioning at this moment, as this shows that my first impression was nearly perfect. Next, we need to produce stops on the palatal side of
the tray (Fig. 11) at this precise moment (I don’t have enough control over silicone materials as they tend to set quite fast in this very important moment).
Use five or six spots and mould them in the mouth so that the stops are approx. 0.5 to 1 mm in height. They are light cured and the tray is checked for stability and possible overextension. An overextension is very rare if you do the primary impression as described, however. Future denture borders are covered with DMG silicone adhesive (Tray-Adhesive for A-silicones). A vestibular retractor is positioned in the mouth.
Honigum Pro Heavy (Honigum Pro Heavy Fast for experienced dentists) is injected onto the border, the impression tray is positioned in the mouth, pushed gently but all the way onto the stops and the retractor is removed.
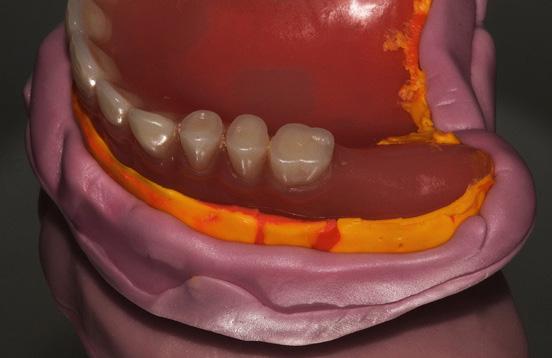
The patient then performs all necessary functional movements – the so called “smile and kiss” protocol for upper denture (Fig. 12). After setting there might be some areas where the tray is showing through – for the purpose of ensuring that there will be no pressure spots in the denture later on I grind them away aggressively, by least 1 mm.
I like Honigum Pro Heavy because this material flows very well yet is thixotropic when in the tray. It can also be moulded very effectively by the patient’s lips and surrounding soft tissues, and the most important thing is that it sets to a very stiff, strong and hard material at the very end that creates a perfect and very stable functional border.
After setting, the material is removed, overhangs are cut away and the future inner surface is polished with a bur (to avoid sharp edges). Palatal stops are removed (Fig. 13). From now on the Honigum Pro Heavy functional border defines the tray and provides the seal. The inside of the tray is now covered with a thin layer of the DMG silicone adhesive.
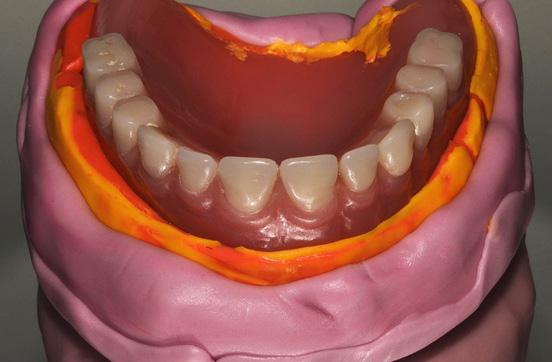
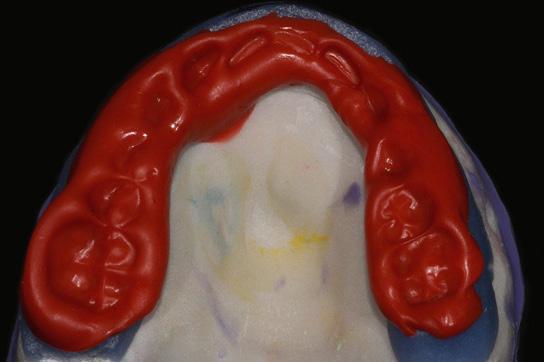
The retractor is positioned back into patient’s mouth, Honigum Pro Light is used to fill the inner part of the tray and the same process that was used with Honigum Pro Heavy is repeated. The tray is gently positioned (the borders will guide you) and then functional movements are perfor- med.
If the light material flows too far back, remove it with a finger. Honigum Pro Light is a highly thixotropic material and will stay on the palate, where I like to put a small amount prior to positioning the impression tray. It also has some very impressive hydrophilic characteristics that help me to create perfect impressions (Fig. 14).
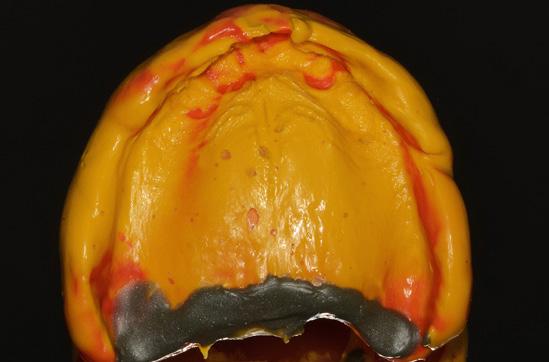
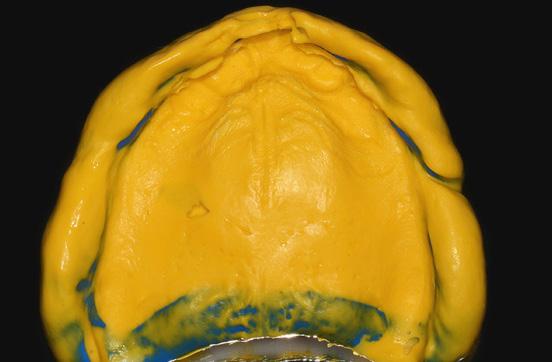
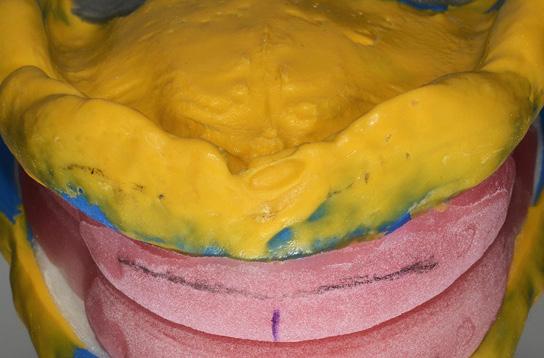
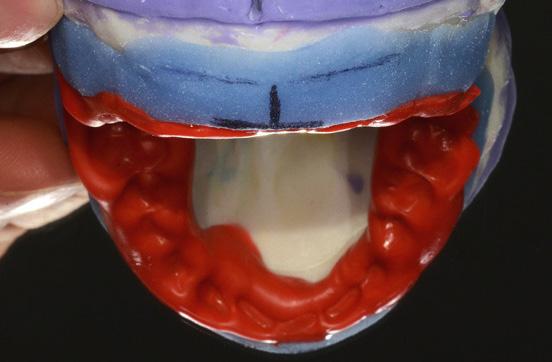
After setting and cutting overhangs in the impression, the distal border (between A and H lines) is marked in mouth with a special copying pencil, transferred to the impression and then marked definitively with Aluwax (Aluwax Dental Products Company) (Fig. 15, 16).
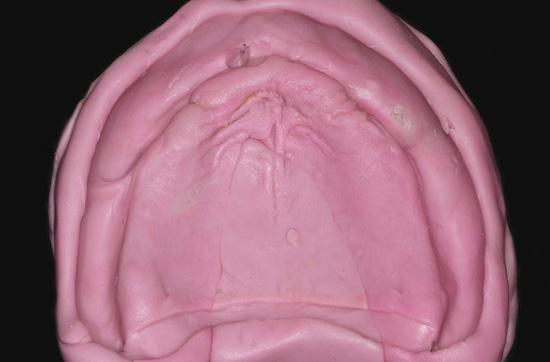
This finishes the definitive impression, finishing the perfect seal all around the denture border and thus producing the correct suction (Fig. 17).
31 henryschein.com.au
COSMETIC & RESTORATIVE

32
Fig. 7: Producing the silicone model –Zhermack Zeta Labor
Fig. 8: Producing the silicone model –Zhermack Zeta Labor
Fig. 9: The silicone model – Zhermack Zeta Labor
Fig. 13: Definitive impression – functional border cut with scalpel blade and pressure spots removed
Fig. 14: Definitive impression – light-bodied silicone Honigum Pro-Light
Fig. 15: Definitive impression – posterior border Aluwax uncut
Fig. 10: The silicone model and the custom impression tray
Fig. 11: Definitive impression – composite stops
Fig. 12: Definitive impression – functional border uncut
Fig. 16: Definitive impression – posterior border Aluwax cut with scalpel blade
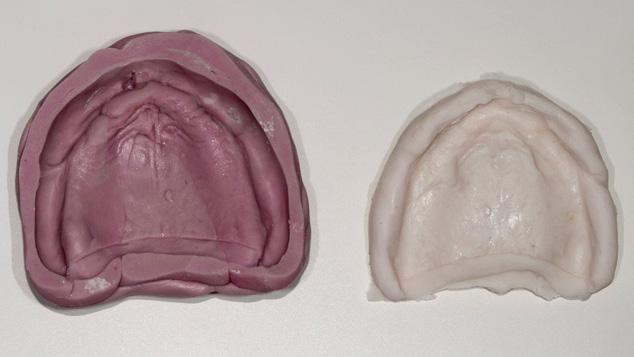
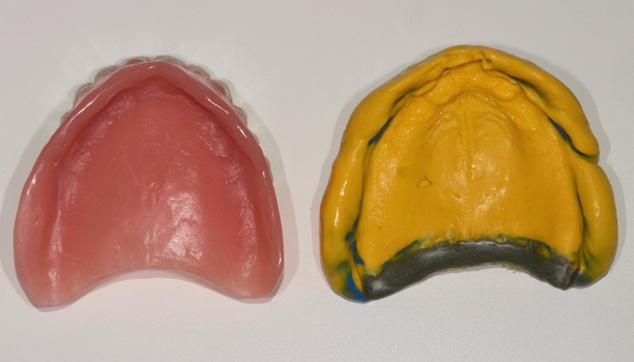
Fig. 17: Comparison of the definitive impression and old non-functional denture
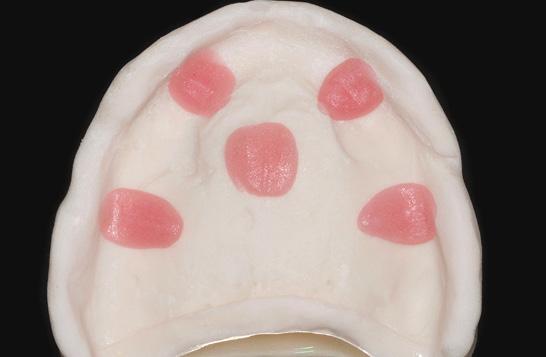
Fig. 18: Bite rim on the definitive impression
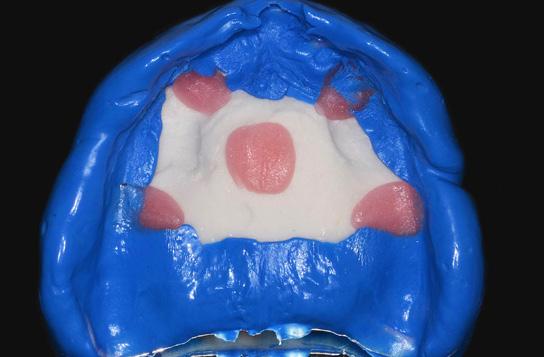
Fig. 22: Teeth set-up on the former custom impression tray/ bite rim
Fig. 23: Final palatal view of the full upper denture
Fig. 24: Smile with a full upper denture
Fig. 19: Bite rim on the definitive impression
Fig. 20: CR registration on a bite rim with GC Bite Compound – another patient
COSMETIC &
Fig. 21: CR registration on a bite rim with GC Bite Compound – another patient
RESTORATIVE
Vertical dimension and CR (centric relation) registration

I prefer to incorporate this step into the same appointment with the definitive impression by simply adjusting the impression tray with a thick layer of light curing resin as a rim (Fig. 18, 19). No wax is used. Quality adhesion with the impression tray is done by using Dry Coat (DMG) and a very thin layer of any type of flowable resin (LuxaFlow by DMG or similar). I make sure the vertical dimension is correct and the front part of the impression tray is positioned where the front teeth need to be. For all this, the Gutowski measuring device helps me immensely. The soft not yet cured Supertec material is applied to the tray and the patient is guided into CR (centric relation) while the lower teeth make shallow imprints into the soft Supertec. This is repeated a couple of times to ensure we achieve a repeatable CR position. The impression is then removed from the mouth and the resin is cured. In the next step, imprints of the lower teeth are ground away, leaving space for the definitive registra- tion material. My favourite material for any type of bite registration is GC Bite Compound (GC) (Fig. 20, 21). It needs to be warmed up and then the patient closes into this material, once again in CR, ideally not biting through and touching the tray.
If a complicated case is being treated, I suggest separating these two steps and preparing a separate maxillary rim. This is made after pouring the master model, using this master model. The base of the impression tray is used, lined with a light body type of polyvinyl siloxane material, like Honigum Pro Light (DMG). I like to use the same type of material as for the impression. The model is dampened in water for a minute or so. The edges and base of the former impression tray are ground thin so that it is easy to put it back on the model and, the tray is cleaned and roughened.
It must be coated with the adhesive from SilagumComfort (DMG) in the next step. Other adhesives won’t work so well! After that, Honigum Pro Light is applied to the model and the base is pushed onto it with a gentle touch. After setting, careful removal is necessary, but the light A-silicone will always make removal possible.
The next steps can be taken from the previous section with the tray adjusted so that the vertical dimension and the position of the front teeth are correct.
It is then checked in the mouth and adjusted in the bite as needed. There should be multiple contacts on both sides of the rim in case the patient bites through during the registration. The rim has to be suctioning and stable. We can then concentrate on the CR registration. This is done with GC Bite Compound (GC) again. A facebow transfer is necessary for precision denture occlusion in this step.
Denture try-in
The master model is poured with stone either before the rim is made or after the impression together with VDO and CR registration are made in one appointment. In the first case the rim already fits the master model perfectly, and the denture teeth try-in is made on the tray base lined with Honigum Pro Light (Fig. 22). In the latter case we now need to pour the master model and use the impression as a base for try-in, or do the same process as described above again – lining with Honigum Pro Light and bonding to the tray with the adhesive from Silagum-Comfort.
Once the patient has accepted the aesthetics and function of our denture, we can then proceed to the lab work. The denture is ideally made on the basis of the injecting resin procedure like the manual system Schütz Unipress (Schütz) or an automated modern device like IvoBase (Ivoclar Vivadent), finalised and polished (Fig. 23). The patient then receives the denture for a moment but at this time we need to remount it for proper occlusion. I like to use the GC Bite Compound again for this remounting. It is then articulated in a quality articulator, in my case a SAM 3.
Then the patient receives final denture with the final occlusion which should bite on both sides simultaneously with a precision of 10 microns (Fig. 24). There should be a protrusive movement path on as many incisors as possible, and I mainly use regular canine guidance with no balancing contacts for my dentures. As I said before, our aim needs to be a patient who is satisfied, both with the aesthetics and the function (Fig. 25). It is important for us to remember that aesthetics is a given necessity, but occlusion is always more important, especially in full dentures!
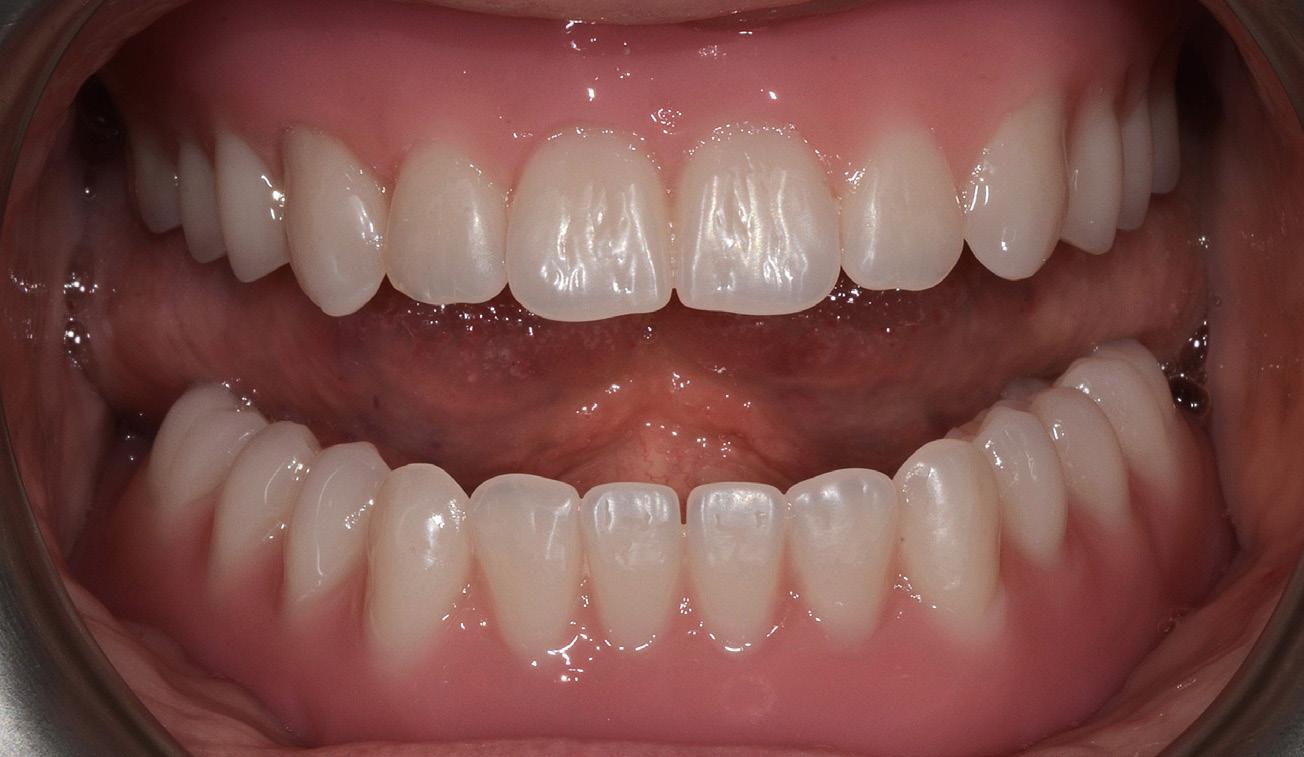
33 1300 65 88 22
Fig. 22: Teeth set-up on the former custom impression tray/ bite rim
COSMETIC & RESTORATIVE
DR JIRI ZVOLANEK Plzeñ, Czech Republic
PRO-MATRIX CASE STUDY
An 87 year old gentleman attended as a new patient and was unconcerned about aesthetics but wanted a functional solution to two teeth which had become fractured and had become symptomatic and were found to be carious. These were LL5 LL6 (lower left second premolar and first molar).
X-rays were recorded, LA delivered and the teeth were isolated with Unodent latex-free rubber dam, Hygienic clamp & Triodent V-ring wedges.The existing amalgam restorations and underlying caries were removed and the cavities were then sandblasted with 50μ aluminium oxide. This was rinsed off, VOCO Vococidacid etchant applied and agitated then rinsed once more.
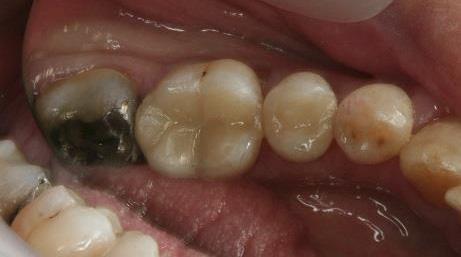
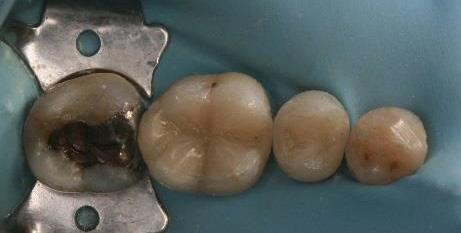
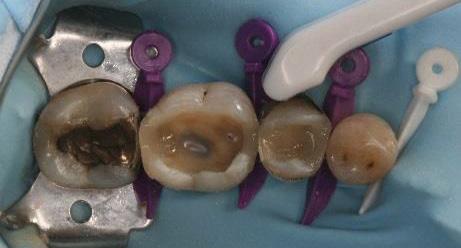
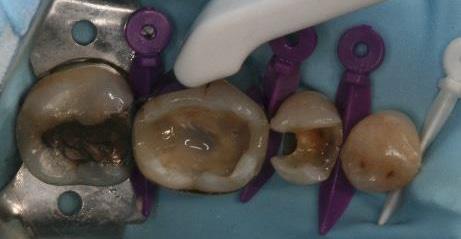
The Pro Matrix was placed on LL6 and the wedges adapted (1). The band was burnished/shaped with an American Eagle teardrop to ensure good tight contacts and the VOCO Futurabond U applied then agitated, air thinned and cured with an Ultradent VALO curing light.
VOCO Grandio SO Flow flowable nanohybrid composite was applied to the box up to the band in a very thin layer then cured. VOCO Grandio SO nanohybrid composite was applied to each proximal contact independently and cured on each occasion, converting the cavity into an occlusal (Black’s Class 1). The band was then removed and the stages were repeated on LL5. (2) The tooth morphology was then restored on a cusp by cusp basis with American Eagle titanium nitride instruments and a VOCO Single Tim microapplicator, gently drawn up towards the cusp tips.
34 COSMETIC & RESTORATIVE
Basic shaping was then performed with an NSK X600L air turbine using fine diamond burs (yellow band) and polished with VOCO Dimanto points run at slow speed with water spray in an NSK Z25L. (3)
The rubber dam was then removed and occlusal checks performed with 40μ Dr Bausch articulating paper and final adjustments made. Contacts were cleared with floss and polished with GC Epitex tapes. (4)
Read the full article CLICK HERE
DR JAMES ROBSON BDS East Lyme, CT , USA
EXTENSIVE RESTORATIVE FRACTURE IN
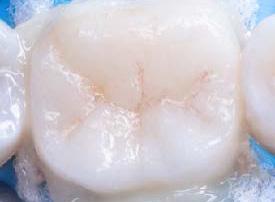
AN ENDODONTICALLY TREATED TOOTH
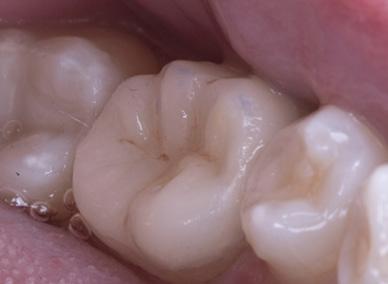
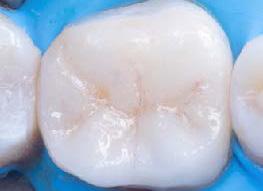
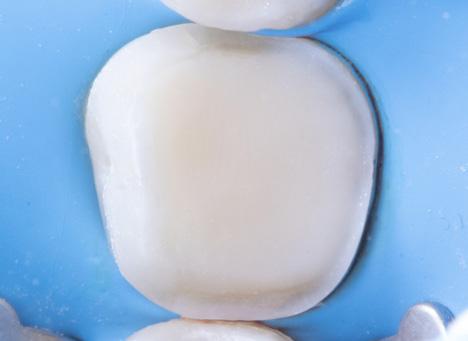
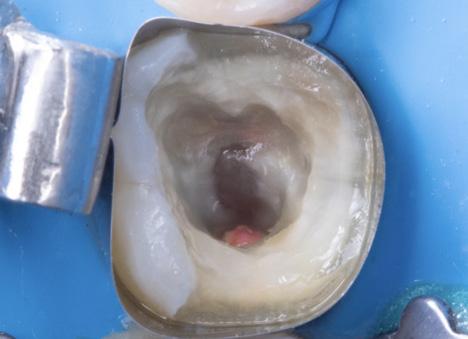
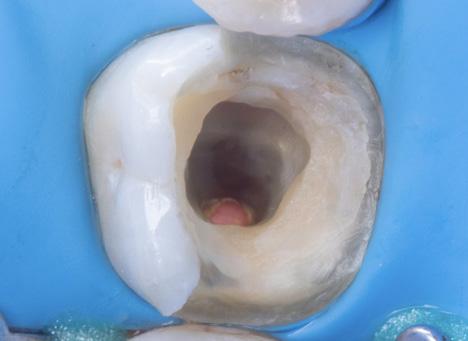
Biomimetic restorative dentistry is part of my area of expertise to restore extensively compromised teeth, with the main objectives of maximizing the adhesive force and mitigating the effects of stress on the polymerization contraction of the tooth-restoration complex.
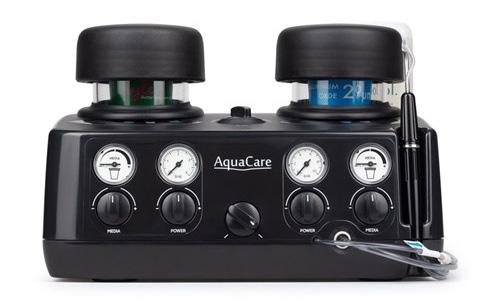
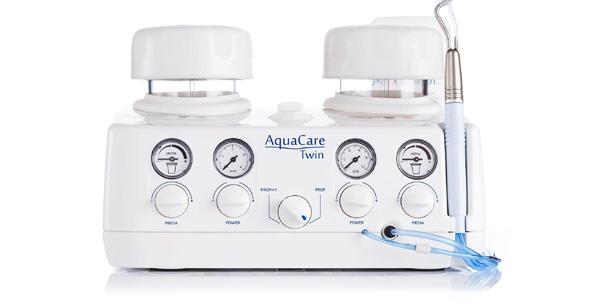
 By Patricio Gutiérrez Pino, Chile.
35 henryschein.com.au COSMETIC & RESTORATIVE
Fig. 1 Initial situation. After removal of the restoration, a large defect is observed in the lingual walls of an endodontically treated tooth.
Fig. 2 Biobase construction: Adhesive interface and margin elevation.
Fig. 3 Biobase finished and sandblasted with alox 53 microns of Aquacare.
Fig. 4 Indirect lithium disilicate restoration cementation, with previously heated resin and under absolute isolation.
Fig. 5 Removal of excesses and polishing of the cervical margins to finalize the cementation.
Fig. 6 Final post-cementation view and occlusion check.
CLOSING DIASTEMA WITH COMPOSITE RESIN
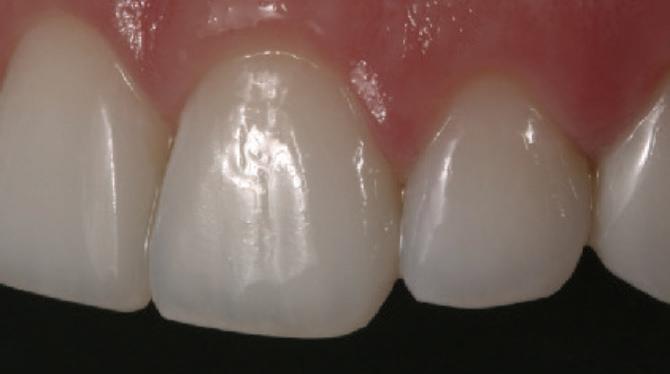
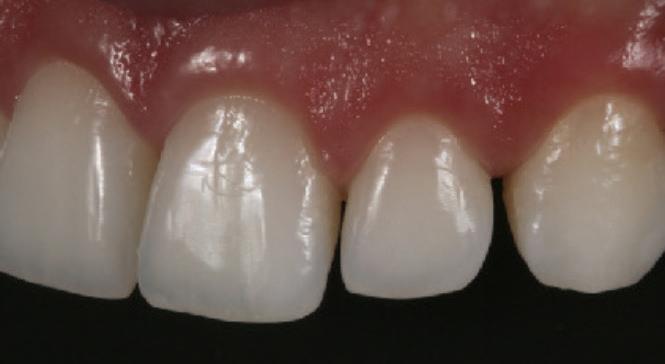
AN EFFECTIVE AESTHETIC AND FUNCTIONAL METHOD
Dental diastemas are openings or spaces between two adjacent teeth in the same dental arch. Many patients dislike the aesthetics of these spaces and search for a dental surgeon to solve this through a clinical solution.
Different techniques can be used to close the diastema, such asorthodontic or restorative treatment using dental ceramics or composite resin. In less extensive cases, such as unitary diastema, the restorative technique with composite resins can be considered a viable option. The current stage of the direct adhesive systems allows an excellent clinical performance as well as presenting great optical properties, being able to not only reproduce the colour but also the translucency, texture and shine of the natural teeth. Therefore knowing the materials is essential. However, the technique must also be practiced to obtain success in treatment. Hence, the objective of this work is to describe, through a clinical case, the technique for direct restorative treatment to close the diastema.
Case Study
A 26-year-old patient, male, sought treatment for the restoration of the front teeth where there were diastema between teeth 21, 22 and 23. Through radiography, it was confirmed that the support and pulp structures were normal. Taking into consideration the possibility of reversibility of the procedure, time and cost, we opted to restore the teeth with a direct adhesive restorative system Aura composite (SDI).
The prophylaxis of the tooth was performed then the shades for the dentin and enamel were selected. The shades DC1 for dentin and E1 for enamel were chosen. The modified isolation of the operation field was carried out through a dental dam.
A tape made of polytetrafluoroethylene was positioned on the lateral incisor to avoid etching the tooth. The enamel surface was etched with phosphoric acid (SDI). After that, the adhesive was applied (Stae SDI) and the light-curing process began according to the manufacturer’s instructions on the buccal and lingual surfaces, with Radii Plus (SDI).
The composite to simulate the shade of the dentin in the cervical line and medium third was condensed. After curing of this element, the contour of the emergence profile is established. One must also check if there is space for the enamel composite in the buccal and lingual surfaces. A layer of the E1 composite for the enamel was applied on the buccal and lingual surfaces and spread with the assistance of a polyester strip and brush. Each increment was cured with an LED device (Radii Plus – SDI) based on the time recommended by the manufacturer, continuously. The same procedures were carried out for the left canine.
After the isolation was removed, the excess was also removed and the incisal adjustment was made. In the following session, the finishing and final polishing were carried out with abrasive discs of sequential granulometry, rubbers and polishing paste, which were all used to promote the final shine. (Pictures 1 and 4).
The final aspect of the composition of the smile can be seen in picture 5.
36
Initial aspect
Final aspect
COSMETIC & RESTORATIVE
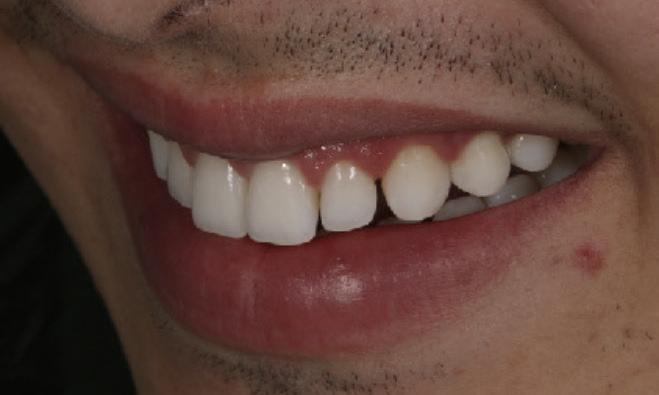
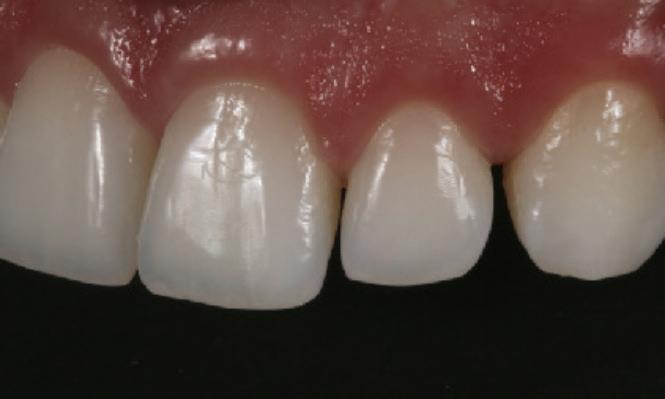
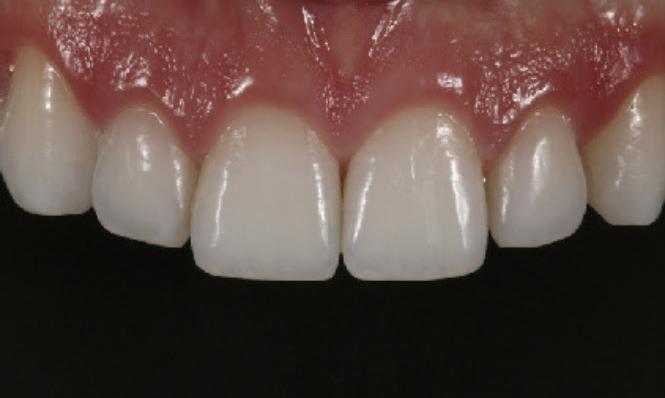
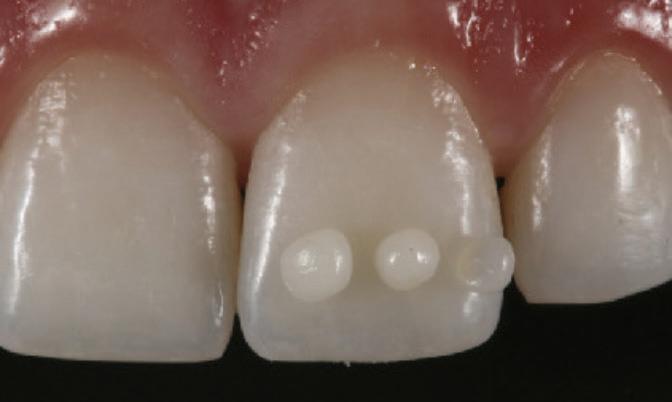
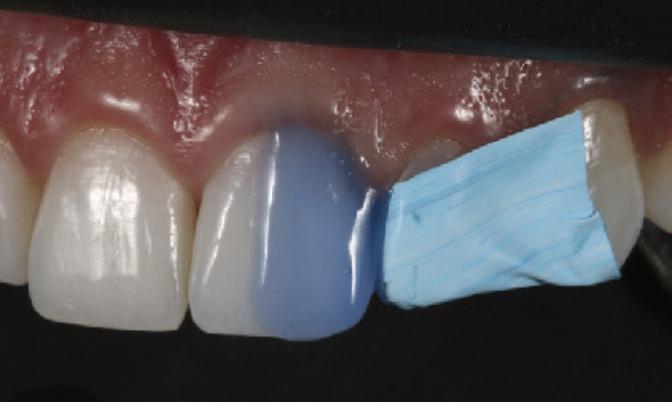
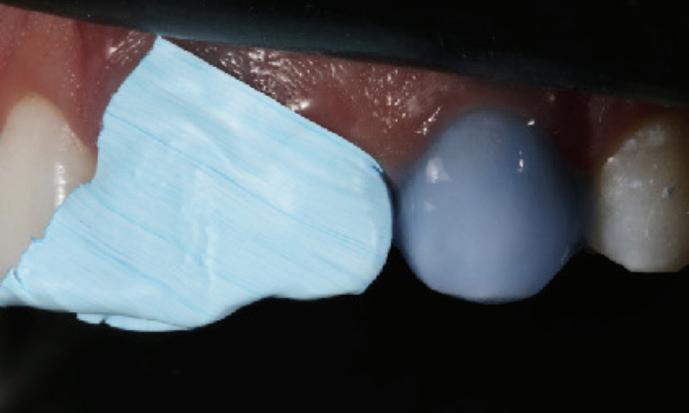
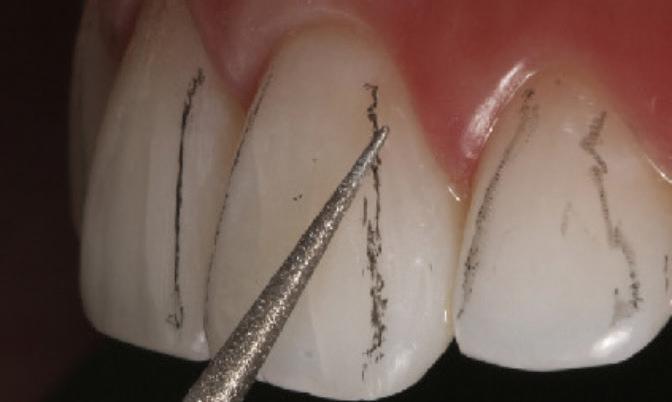
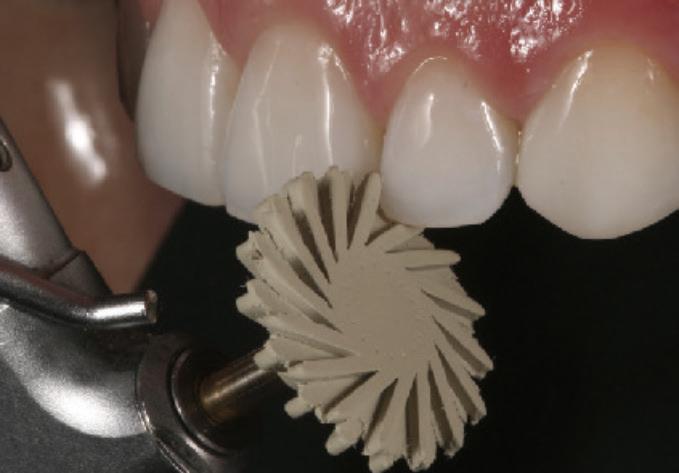

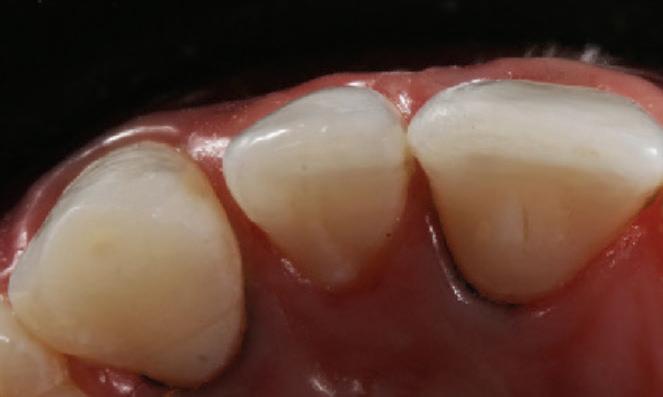
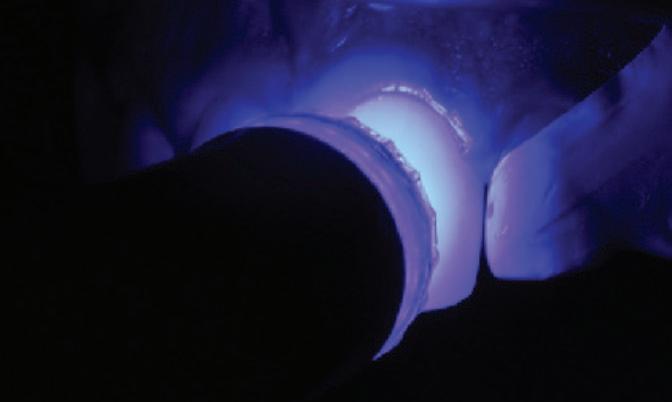
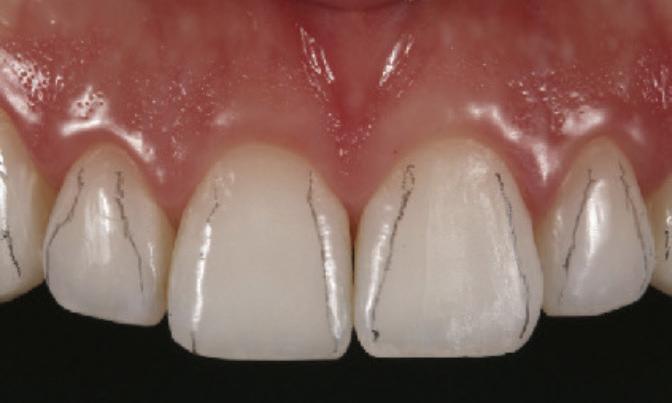


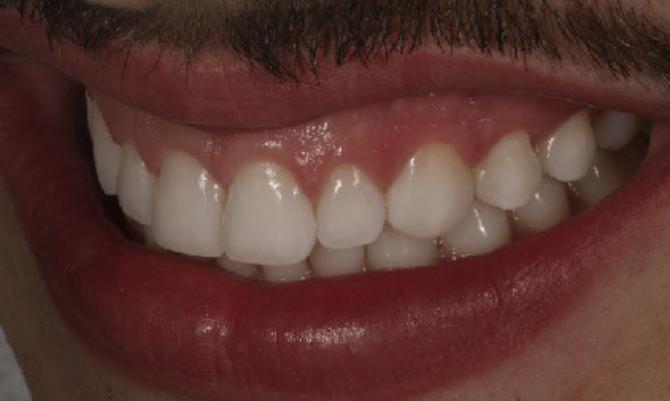
37 1300 65 88 22
Fig 1a Initial aspect of the patient
Fig 1b Initial aspect of the smile
Fig 1c Initial aspect of the patient Front view
Fig 2a Selection of shades through the application of a small amount of composite on the tooth and curing for 5 seconds
Fig 2b Acid conditioning (etching)
Fic 2c Initial patient aspect Frontal vie
Fig 4b Marking the edges with a pencil to start the finishing with a diamond bur and polishing discs
Fig 4c Polishing with rubber disc
Fic 5a Detail of the restorations Lateral and frontal view
Fig 3a Condensation of the dentin composite. Insertion of the DC1 shade to characterize the opacity of the dentin
Fig 3b After protecting the tooth next to it, the etching was performed throughout the entire tooth to avoid the application of resin in non-conditioned areas. Application of the adhesive according to the instruction of the manufacturer and the curing of the adhesive with an LED device.
Fic 4a Marking the edges with a pencil to start the finishing with a diamond bur
DR LEONARDO FERNANDES CUNHA Professor at UnB Sao Paulo, Brazil
DR UBIRACY GAIÃO Prof. Aesthetic Dentistry Parana, Brazil
Fig 5b Detail of the restorations Lateral and frontal view of the restoration
Discussion
COSMETIC & RESTORATIVE
Fig 5c Final aspect of the smile. Notice the harmony between the colour and contour provided by the direct adhesive restorations
Read
& Summary CLICK HERE
HANDLING A SUBGINGIVAL MOD
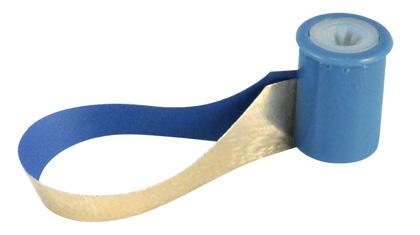
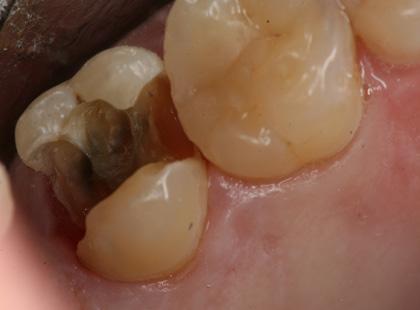 BY USING THE DEEP MARGIN ELEVATION TECHNIQUE FOLLOWED BY THE USE OF A SECTIONAL MATRIX
There are times when, as a practitioner, our desire to do “ideal dentistry” bumps up against the “realities” of a patient’s circumstances. When a patient presents with a posterior tooth that has deep cervical decay, perhaps even approaching the crest of bone, one’s first instinct may be to recommend crown-lengthening periodontal surgery, followed by an indirect (lab-fabricated) restoration such as an onlay or full crown. One or more “realities” however may get in the way. A patient’s finances might not readily allow for such costly treatment. Certain medical conditions may be contraindications for an invasive surgical procedure. Some patients may be fearful or simply be reluctant to undergo what they consider to be an “aggressive” approach, but would be willing to entertain what they perceive to be more conservative measures.
The technique known as Deep Margin Elevation (DME) or cervical margin relocation has been evolving since at least the 1990’s. Numerous authors (Dietschi and Spreafico, 1998 1; Magne and Spreafico, 2012 2) introduced and refined the technique, primarily as a precursor to the placement of an indirect restoration, to improve isolation and reduce contamination at the time of cementation. DME involves the excavation of subgingival caries and then the surrounding of the deep preparation with a band to isolate and shape the placement of a dentin adhesive followed by an initial layer of composite resin, up to a more manageable height at or just above the gingiva. But, as has been pointed out, the technique has also proven useful in the placement of large direct composite restorations. “DME may facilitate the positioning of separating rings and generate improved contours and tight proximal contacts in three, four and five surface direct restorations that are used increasingly for socioeconomic reasons.“ 3
Over the years, it has been well documented that excellent interproximal contact and contours with direct composite resin can be obtained using systems that employ precurved sectional matrix bands with separating rings. A few examples would be the ComposiTight system by Garrison Dental or the Triodent system (also known as Palodent Plus, Dentsply Sirona). Each one may struggle, however, with a preparation that extends well subgingivally.
The convex shape that these systems can produce to create ideal contour at the contact area is less suited in the cervical region, where the root may be flatter or even have concavities. The band may bump into the height of contour of the adjacent tooth, which makes it harder for the cervical portion to adapt to the shape of the root. (Fig. 1a and 1b))
As a result, over the years a number of different matrix band systems have been devised to optimize the technique. In the following case studies, I will highlight the use of the Margin Elevation Band system from Garrison Dental. The band’s reduced height eliminates interference from the neighboring tooth, and allows the band to be drawn more subgingivally and snugger on the tooth to get good adaptation. It is available for use with a traditional Tofflemire matrix holder, or as part of Garrison’s Reel Matrix system (Fig. 2a and 2b). After recreating the cervical portion of the tooth, the remainder of the restoration can be performed with the regular sectional band and ring to obtain ideal results. The use of certain materials and protocols has been recommended to accomplish the best results.4
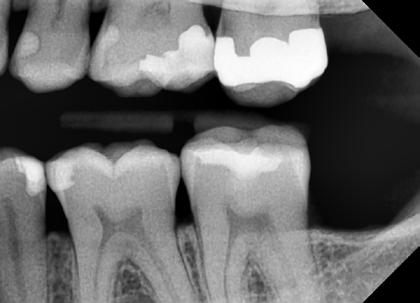
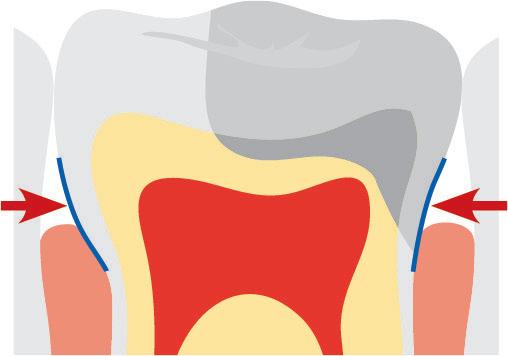
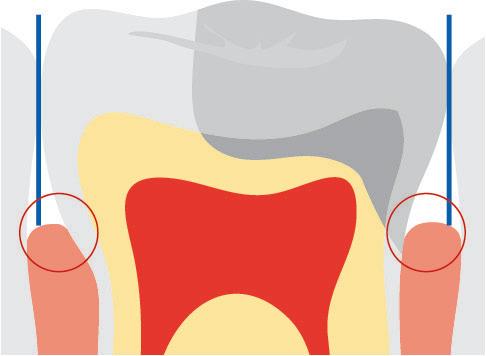
38
Figure 1a
Figure 1b
Figure 2a
Figure 2b
Figure 3
COSMETIC & RESTORATIVE
Figure 4
As a newcomer to this technique, my material choices varied somewhat on my first go around, but the technique still allowed me to obtain results that would otherwise have been difficult or impossible to achieve.
Case Study
A 46 year old male was found, on radiographic examination, to have recurrent decay beneath a large MOD amalgam restoration (fig. 3). It was discussed that, given the size of the restoration, it might ultimately serve as a core for a full coverage indirect restoration in the near future. Removal of the amalgam and excavation revealed that the decay extended quite far subgingivally on both the mesial and distal (fig. 4). It became apparent that, were a crown preparation to be planned, it would be next to impossible to place retraction cord to record a finish line this deep, and at crown delivery it would be impossible to isolate to allow predictable bonding of the crown. Since the crown preparation was not anticipated this day, my goal was to place a direct restoration, with good contact on the mesial to prevent food impaction. Preparation of the crown’s finish line would then end on the newly placed composite, thus “margin elevation”.
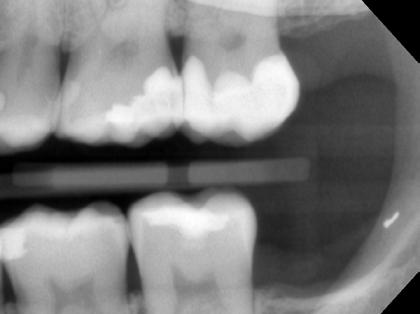
I placed Garrison’s Margin Elevation band around tooth #15. It is suggested that a wedge not be placed, but instead that Teflon tape be used to improve adaptation of the band. Having had too little practice with this band, I placed a wedge (Wedge Wand, Garrison Dental) in the mesial and it worked fine. The adaptation on the distal would have been improved had I used the Teflon tape, or further tightened the band, or both (fig. 5). Employing the selective etch technique, I etched the enamel margins with 37% phosphoric acid (Ultraetch, Ultradent). After placing a self etching primer and adhesive (Clearfil SE Protect, Kuraray) according to manufacturer’s instructions on the rest of the prep, I applied several small increments of a bulk fill flowable material (Surefill SDR Flow, Dentsply Sirona), enough to rise above the gingiva (fig. 6). I then did a freehand layered buildup of the remainder of the restoration, with the exception of the mesial box, using a lightcured core buildup material (Photocore, Kuraray) (fig. 7).
At this point, I removed the Margin Elevation band and placed a sectional matrix band, wedge, and separating ring on the mesial (ComposiTight Fusion, Garrison Dental) and completed the buildup to create good contour and contact until such time that the tooth is prepared for a crown (fig. 8,9 ).
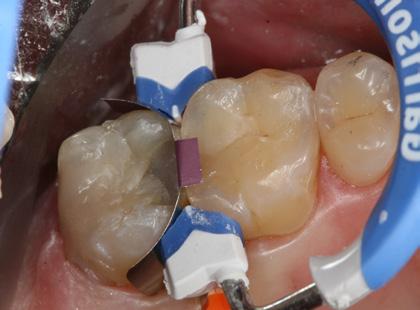

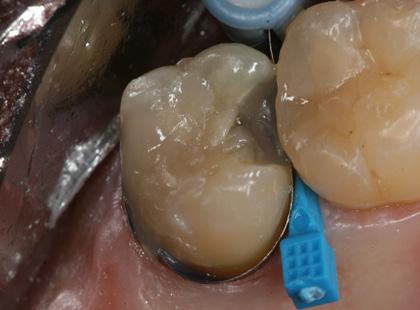
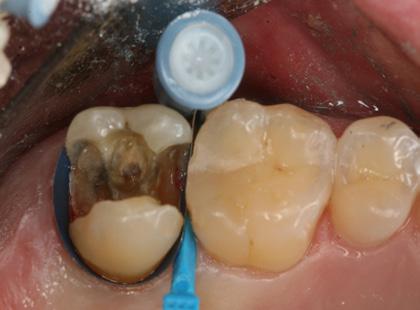
After trimming the slight excess material on the distal with a finishing carbide (ET bur, Brasseler) and adjusting the occlusion, the finished restoration can be seen in fig. 10. The final radiograph shows the dense, well adapted restoration (fig. 11). Ideally, better adaptation of the band would have obviated the need for the subgingival trimming and the resulting buildup would have had the smoothest possible subgingival finish, having been created by the band itself.
The restoration of such deep lesions is a challenge practitioners too often face. Without the necessary armamentarium to achieve quality results, these cases remain a frequent source of frustration. Once the technique is mastered however, it is surprising how often the need to use it is encountered. Instead of provoking anxiety, the practitioner can confidently offer solutions to our patients when these occasions arise.
References
1) Dietschi, D., Spreafico, R. Current clinical concepts for adhesive cementation of tooth-colored posterior restorations, Practical Periodontics and Aesthetic Dentistry. 1998 10: 47-54.
2) Magne, P., Spreafico, R. Deep Margin Elevation: A Paradigm Shift , American Journal of Esthetic Dentistry. 2012; 2:86-96.

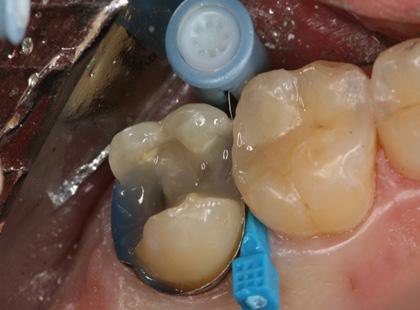
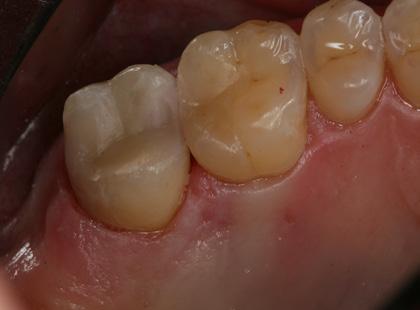
3) Ibid., 95.
4) Margin Elevation Technique Demystified with Dr. Matt Nejad, YouTube, Uploaded by Garrison Dental July 15, 2019, https://youtu.be/xxdHEpgJeLs.
39 henryschein.com.au
Figure 5
Figure 6
Figure 7
Figure 8
Figure 9
Figure 10
Figure 11
ROBERT S ROSENFELD DDS
COSMETIC & RESTORATIVE
View the Deep Margin Elevation Kit and Reel Matrices online CLICK
HERE
SAFE & EFFECTIVE POWDER JET TREATMENT WITH A FEEL-GOOD FACTOR
The MyLunos handpiece is ideal for reprocessing manually and automatically and can be disassembled into its component pieces for placement into an ultrasonic bath and sterilisation unit. The handpiece’s precise balance allows for ergonomic, fatigue-free working, while the convenient exchangeable chamber approach gives much flexibility while saving a tonne of time. The powder container may be easily changed on the handpiece, preventing the inconvenience of having to stop treating the patient to complete a timeconsuming refilling operation.
Powder containers are available in four colours: blue, orange, mint green and red. These different colours can be used to help with the organisation and planning of prophylaxis treatments. For example, the container colours can be assigned to certain treatment rooms or specific powder variants.
Lunos Prophy Powders Gentle Clean and Perio Combi are the latest-generation of low-abrasive prophy powders made mostly of the water-soluble disaccharide trehalose.
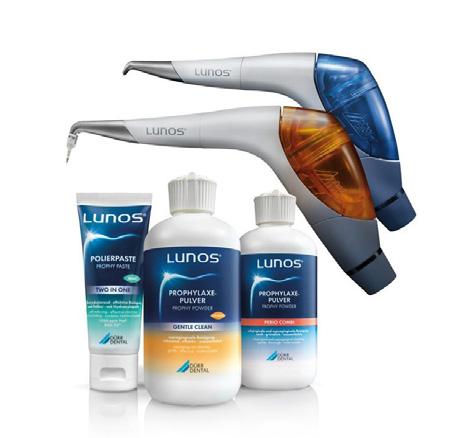
As an abrasive material, Trehalose is gentle on surfaces while still providing effective cleaning, and this leads to more comfort for patients and minimal invasiveness during treatment. Additionally, Trehalose’s excellent solubility protects suction systems and preserves their value.
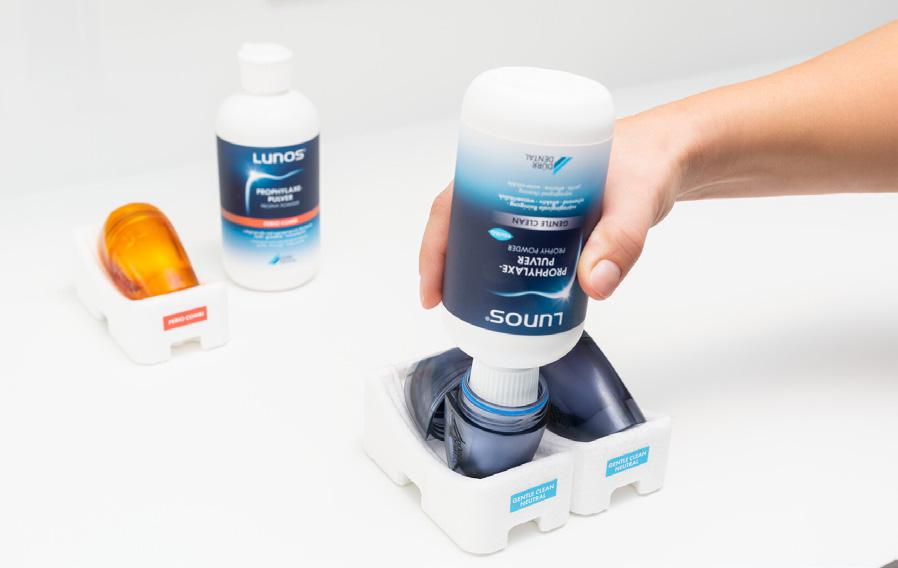
It is ideal to offer different flavours or a neutral option during prophylaxis treatments for patient comfort, accommodating different tastes and preferences while considering those who have allergies.
Lunos Prophy Powder Gentle Clean is available in the flavours Neutral (for patients at risk of allergies), as well as Orange and Spearmint. It is suitable for supragingival cleaning and removing extrinsic discolouration for general hygiene appointments, around orthodontic brackets or before fissure sealants. The 30 μm particle size of Lunos Prophy Powder Perio Combi makes it perfect for recall appointments. It effectively removes biofilm subgingivally, makes it easy to clean around implants, and removes slight discolouration supragingivally. This neutral-tasting powder is ideal for patients who are sensitive to flavours.
40 PREVENTATIVE
CLICK HERE View the Lunos Range on our website
The Lunos prophylaxis system offers a range of products to help with all aspects of the prophylaxis session. The Lunos Prophy Powders Gentle Clean and Perio Combi, as well as the MyLunos powder jet handpiece, ensure that patients receive an air-polishing treatment that is both effective and comfortable.
HUFRIEDY STERILISATION SYSTEM
A GREENER OPTION, NO MORE POUCHES
Hu-Friedy’s Sterilization Containers are a reusable, rigid system used for the packaging of cassettes and instruments during sterilization.
An alternative to the wrap and pouch materials commonly used to package cassettes and instruments.
Sterilization Containers provide significant economic and environmental benefits along with enhanced safety.
• Allows sterilization of enclosed contents and maintains sterility during transport and storage, until opened.
• Provides fully enclosed and locked transit of loose instruments and cassettes.

Points of performance
Two external display windows provide space for a process indicator card and container identification
The filter retention plates audibly click to lock into place providing easy filter changes
Tamper evident seals on latches provide visual evidence of sterility breach
Latches on the lid act as handles for easy, contamination free lid removal
• Offers economic and environmental benefits by providing reusable packaging, low cost of use, a long service life, and minimal use of disposable materials.
• Uniquely sized to fit many Hu-Friedy cassettes, including the Container Cassette that features an integrated handle for easy insertion and removal.
• Includes a full line of Container accessories including filters, indicator cards, and tamper evident seals.
• Suitable for use in pre-vacuum Steam Sterilizers.
A greener option | No more pouches
Lid and bottom are made of anodized aluminum making them lightweight with excellent drying properties. The aluminum alloy with an anodized oxide surface helps resist corrosion. To request a customised appointment please contact your Henry Schein Manager or call Customer Care on

41 1300 65 88 22
222.
1300 658
PRACTICE GREEN
HF-IMDINCO0M IMS Sterilisation Container 312 x 190 x 50mm Holds 1 Cassette HF-IMDINCO1M IMS Sterilisation Container 312 x 190 x 65mm Holds 1 Cassette HF-IMDINCO2M IMS Sterilisation Container 312 x 190 x
Holds 2 Cassettes HF-IMDINCO3M IMS Sterilisation Container 312 x 190 x
Holds 3 Cassettes
100mm
135mm
COLGATE RECYCLABLE TOOTHPASTES TUBES FAQ
How do I recycle the tube?
If your Colgate toothpaste displays the recyclable tube symbol, then it can be recycled either through local council recycling (follow local council guidelines for recycling HDPE #2 plastics) or TerraCycle.
You can find out more about TerraCycle where you are, here: TerraCycle Australia, TerraCycle New Zealand. The tube is not currently recyclable kerbside anywhere in NZ so please use the TerraCycle link to find out where you can recycle your tubes.
When recycling your tube simply squeeze out as much of the toothpaste from the tube as possible and recycle with the cap removed
Are the caps recyclable?
Colgate toothpaste caps are made from polypropylene, which is not generally collected in yellow bins or kerbside recycling. Further, toothpaste tube caps are very small which makes it hard for the recycling stream to manage.
The cap can be recycled with other non-recyclable oral care waste, such as plastic toothbrushes, through Terracycle. You can find out more about TerraCycle in your location, here: TerraCycle Australia & TerraCycle New Zealand.
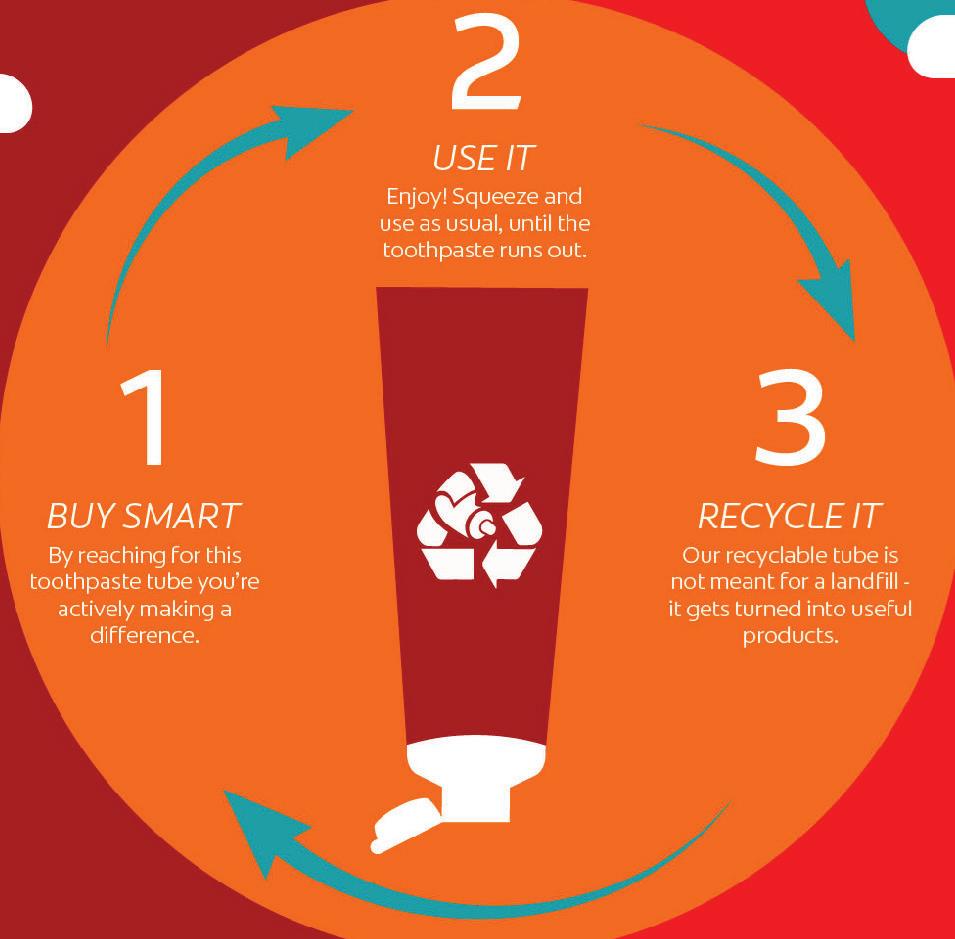
We are continuing with our research to convert all of our caps into a more compatible material within the HDPE stream.
What are you doing to ensure these tubes are accepted by recycling facilities?
A lot, actually. We’re leading industry groups and working with industry partners globally and across Australia & New Zealand on education about recyclability and wider acceptance of recyclable tubes. We’re sharing our knowledge and technology with any other interested company.
We’re also verifying the sortability of tubes through testing in real facilities to make sure there is not too much mis-sorting. The more recyclable tubes are used in the market and as more recyclers are educated about recyclable tubes, the easier it will become for re-processors to recycle tubes coming their way.
Why are some of your toothpastes in the new recyclable tube while others aren’t?
The plan is for all of our toothpaste tubes to be recyclable by the end of 2025. It takes time to make the transition, and during this time some of our toothpastes will be in recyclable tubes while others won’t have transitioned yet.
For now, make sure your tube is marked with the recyclable tube symbol before placing it into a recycling bin. Follow local council guidelines for recycling HDPE #2 plastics or recycle with TerraCycle.
However, for tubes which are still making the transition, we’ve partnered with TerraCycle in Australia and New Zealand to give a second life to
42
PREVENTATIVE
your used oral care packaging. Find out more about our Colgate Oral Care Recycling Program where you are here: TerraCycle Australia & TerraCycle New Zealand, and how you can help prevent eligible oral care packaging from ending up in landfill.
Is this tube biodegradable?
No, this tube (and plastics in general) is not designed to be biodegradable. The #2 HDPE plastic used in our tubes can be re-processed into new products and packaging.
This tube is still made of plastic, how will it help the environment?
Our recyclable tubes are made out of #2 HDPE plastic, which is one of the most recycled plastics. HDPE can be turned into all kinds of new things, from new packaging to fence posts! Switching to recyclable has the potential to keep millions of tubes out of landfills sites across Australia & New Zealand.

What is this tube made of?
The tube is primarily made of HDPE (High Density Polyethylene), #2 plastic. The cap is made of PP (Polypropylene), #5 plastic.
Why do we share our tube technology?
This project isn’t about us, it’s about something bigger. By sharing our technology hopefully, we can initiate a global shift to recyclable toothpaste tubes. Our dream is to have all tubes (not just toothpaste) be recycled in practice and at scale.
What happens after the tubes are recycled?
Once you have placed your recyclable tube into kerbside recycling or sent it to Terracycle, the tube enters the recycling process. It is sent to a Materials Recovery Facility (MRF) where it is sorted with other similar materials and then moves on to a reprocessor who cleans and processes the plastic into little plastic pellets. The pellets can then be turned into new products, packaging and more!
Reference www.colgate.com.au
43 henryschein.com.au View Colgate Practice Green Products here Learn more about TerraCycle New Zealand Learn more about TerraCycle Australia CLICK HERE CLICK HERE CLICK HERE PREVENTATIVE
DENTINAL HYPERSENSITIVITY
TOP TIPS TO MANAGE
Dentinal hypersensitivity: Top tips to manage
As dental professionals one of the greatest dental concerns our patients report when they sit in our chair is experiencing sensitive teeth. Learning how to help our patients manage this condition ultimately helps us improve their dental health, well-being and quality of life. From my own clinical experience, I share my top tips to help you manage dentinal hypersensitivity in your patients.
Dentinal hypersensitivity occurs when the dentine is exposed either through the loss of enamel or exposure of root surfaces by gingival recession. The hydrodynamic theory of dentinal hypersensitivity posits that, any stimulus of the fluid within the dentinal tubules leads to activation of nociceptive (pain) fibres which are interpreted by the brain as sensitivity or pain.1 These stimuli are sourced from temperature changes (hot or cold), certain foods (sweet, sour or spicy), or tactile changes during toothbrushing or touching the exposed area with a finger.
The first risk factor for dentinal hypersensitivity is exposure of the root surface of the tooth caused by gingival recession or periodontal disease. Given the root surfaces of teeth are not covered by protective enamel, these exposed dentinal tubules can become vulnerable to stimuli and therefore sensitivity. The second way dentinal hypersensitivity can be caused is from the loss of the enamel surface that protects the dentine. This can be a consequence of acid erosion, toothbrush abrasion or abfraction of the cervical surface of the tooth.2
Understanding the aetiology and causes of dentinal hypersensitivity is only part of the challenge as the main challenge is managing our patients who all have individual thresholds of pain/sensitivity. Here are some top tips to navigate these clinical challenges:
• Switch the patient to a soft manual toothbrush or electric toothbrush - brushing with too much pressure during toothbrushing combined with the micro-abrasive particles in toothpastes which facilitate mechanical removal of plaque can lead to loss of cervical enamel over time leading to exposed dentinal tubules and sensitivity. Some models of electric toothbrushes come with pressure sensors that flash a red light when brushing with too much force and can be a great tool to prevent further abrasion. If patients are already experiencing some sensitivity, instruct them this will not stop the sensitivity but will prevent further damage from exacerbating the dentine hypersensitivity.3
• Apply a fluoride varnish layer to the sensitive areas in chair - when patients present for a routine hygiene appointment or other dental procedure it can be helpful to apply a fluoride varnish layer to sensitive areas of teeth to provide some short-term relief but also aim to strengthen the existing enamel and dentine surfaces.3
• Apply a desensitising bonding agent layer to sensitive areas in chair - for patients who get persistent or frequent sensitivity to exposed dentinal tubules where there is no obvious defect of tooth surface, a desensitising bonding layer can be applied to the dried surface and cured to provide a barrier which prevents further stimulation of dentinal tubules thus reducing sensitivity.3
44
PREVENTATIVE
• Switch the patient to using a sensitive toothpaste twice daily -some patients benefit from switching to a sensitive toothpaste (e.g. Colgate Sensitive Pro-Relief*) which has been specially formulated to provide a barrier between the dentinal tubules and oral environment, relieving dentinal hypersensitivity.3
• Switch the patient to higher strength fluoridated toothpaste twice daily - patients who experience dentinal hypersensitivity and have a higher risk of dental caries can use a 5000ppm fluoridated toothpaste which aims to strengthen the existing tooth structure by increasing the likelihood of fluorapatite crystals on the enamel surfaces and dentinal tubules making them more acid resistant.3
• Restore the defective tooth surfaces - Some patients have Non-Carious Cervical Lesions (NCCLs) on the cervical surface of teeth or eroded occlusal surfaces of teeth which can lead to frequent dentinal hypersensitivity and can be relieved permanently by restoring the defective surfaces with composite resin, providing a permanent barrier between the dentinal tubules and oral environment.3
• Suggest gingival grafting to cover exposed root surfaces - for patients who have root surfaces of teeth exposed from gingival recession subsequent to periodontal disease or significant NCCLs may qualify in some cases for a gingival graft which covers the exposed surfaces with grafted gum tissue and thus provides soft tissue coverage of dentinal tubules relieving dentinal hypersensitivity. This procedure can be complex and may require treatment by a specialist periodontist.3
• Educate the patient on the long-term management of this condition - this is the most important factor as patients need to be aware that once enamel has been lost it cannot be replaced and so the condition must be managed in the long term. Any of the management tips suggested above do not guarantee complete cessation of dentinal hypersensitivity permanently but will relieve it and thus improve the quality of life for the patient.3
Biography
Dr Kaejenn Tchia is a recent graduate working in a corporate private practice in Darwin, Northern Territory. He is the current Treasurer of the Australian Dental Association NT Branch Inc. In 2020, he was an inaugural member of the Bupa Dental Corporation Clinical Advisory Panel, helping guide strategic direction and providing input towards clinician development within the network of practices. He is passionate about helping and collaborating with fellow dental colleagues, recently embarking on a new journey to help recent graduates eliminate burnout through a 6-step B.E.L.I.E.F System through his motivational coaching platform, The Limitless Dentist. Kaejenn is a member of the Colgate Advocates for Oral Health Editorial Community and hopes to use this platform to raise awareness of the importance of mental health in dentistry and provide mindset tools, which can help his colleagues unlock their next level of growth and success.
References
1. Davari A, Ataei E, Assarzadeh H. Dentin hypersensitivity: etiology, diagnosis and treatment; a literature review. J Dent (Shiraz). 2013;14(3):136-145.
2. Colgate. Treatment options for tooth sensitivity. Published January 18, 2023. Accessed January 26, 2023. https://www.colgate.com.au/oral-health/toothsensitivity/treatment-options-for-tooth-sensitivity
3. Colgate. Sensitive teeth too cold? What you should know. Published January 18, 2023. Accessed January 26, 2023. https://www.colgate.com.au/oralhealth/tooth-sensitivity/sensitive-teeth-to-cold-what-you-should-know
*Colgate Sensitive Pro-Relief Toothpastes
For the relief of sensitive teeth. For instant relief, apply directly to each sensitive tooth with finger tip and gently massage for 1 minute, up to twice daily. For lasting relief, apply to gentle toothbrush, making sure to brush all sensitive areas of teeth. Brush twice daily. Do not use in children 6 years of age or less. Do not swallow.
Colgate-Palmolive Pty Ltd. 420 George St, Sydney NSW 2000, AU.
Phone: 1800 802 307
Colgate-Palmolive Ltd. 45 Knights Rd, Lower Hutt, NZ.
Phone: 0800 441 740
DR KAEJENN TCHIA BDS
Darwin, Australia
45 1300 65 88 22 PREVENTATIVE
View
CLICK HERE
Colgate Advocates for Oral health Articles here
RESIN INFILTRATION OF ICON DMG
POST ORTHODONTIC WHITE SPOT LESIONS
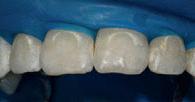

Post-orthodontic decalcifications or white spot lesions are a significant aesthetic challenge.
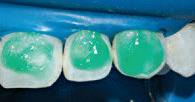
They have been reported at incidencesas high as 73 % - 95 % [1, 2]. The prevalence of white spot lesions is so high due to several factors. Oral hygiene for patients with orthodontic appliances, bands and brackets is a challenge. Besides maneuvering around and cleaning between orthodontic hardware, it provides an increase in surface area for plaque and biofilm to accumulate.
Add to this a teenaged patient, the most common recipient of orthodontic treatment, who may present with a lack of motivation to maintain oral hygiene and a high caries risk scenario ensues. White spot lesions can develop in as little as one month [3, 4, 5].
The lesions are often detected after debonding.
Patients, parents, orthodontists and general dentists all have the same perception; that the appearance of white spot lesions is highly undesirable [6]. Studies show that resin infiltration (Icon DMG) proves to be most effective at masking white spot lesions [7] and more resistant to formation of new white spot lesions when compared to treatment with therapeutic fluoride solutions [8]. Furthermore the colour stability of caries infiltrated teeth is durable [9, 10].
Case studies have been reported with excellent outcomes [11, 12]. In instances in which white spot lesions are treated during active orthodontic therapy, the question of bond strength to treated surfaces must be raised. It has been shown that resin infiltration of demineralized enamel does not affect the bond strength of orthodontic brackets [13].

46 PREVENTATIVE
Fig. 1
Fig. 2
Fig. 3
Fig. 4
Case Study - Post orthodontic white spot lesions treated with resin infiltration (Icon DMG).
Fig. 1: Pre-operative photograph
Fig. 2: Dry field is essential for success. Rubber dam is placed to isolate the field and should be inverted, or ideally ligated, to prevent leakage or saliva contamination.
Fig. 3: Prophylaxis with non-fluoridated pumice is completed; teeth are rinsed, then dried. Icon-Etch (hydrochloric acid) is applied, extrude the Icon-Etch by twisting the syringe. Etch should extend approximately 2 mm around the edges of the lesion and be placed for 2 minutes. Once in place the etch gel should be agitated with an instrument as it will buffer shortly after contact with the surface of the tooth. Etching process was repeated a second time for this case. For long standing white spot lesions the Icon-Etch step may be repeated.
Fig. 4: Rinse for 30 seconds and dry completely with oil free air. Application of Icon-Dry (99% ethanol) to the dried surface. Icon-Dry can indicate the final result after infiltration. Since the result was satisfactory, the ethanol was let on the surface for 30s to promote a thorough desiccation of the enamel, followed by air-drying.
Fig. 5: Application of Icon-Infiltrant by twisting the syringe. At this point remove direct overhead light source to avoid premature curing of the infiltrant. Continue »feeding« infiltrant to lesion for 3 minutes.
Fig. 6: Remove any excess material and light cure. Repeat the infiltration process with a new vestibular tip for 1 minute. Remove excess again and light cure. Final polish with Shofu OneGloss.
Fig. 7: Immediate post-operative photo.
Fig. 8: Recall post-operative photo (two months).
Conclusion
Micro-invasive treatment of post orthodontic white spot lesions can be completed in approximately 15 minutes chair time per tooth without mechanical removal of tooth structure or use of local anaesthetic.

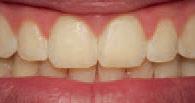
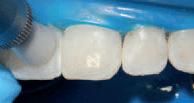

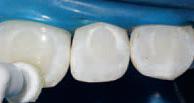
Excellent immediate post-operative results followed by long lasting beauty and stability.
Key Learnings
• Recognize the aetiology and prevalence of post orthodontic decalcification/white spot lesions.
• Understand the success and effectiveness treatment of post orthodontic decalcification/ white spot lesions with resin infiltration.
• Follow the clinical procedure of micro-invasive resin infiltration of smooth surface lesions.
47 henryschein.com.au
Fig. 5
Fig. 6
Fig. 7
Fig. 8
PREVENTATIVE
DR. CARLA COHN Winnipeg, Canada.
IS YOUR DENTAL OFFICE DESIGNED TO BE AN ANXIETY KILLER?
Dental anxiety is thought to affect at least 48% of the UK population to varying degrees.1
For patients, this can lead to treatment avoidance, unchecked disease progression, and adverse oral health outcomes.2
For dentists, according to a recent Septodont survey, it disrupts schedules, costs time and money, and impacts job satisfaction.
Dentists do recognise the importance of tackling anxiety, and there is indeed a plethora of practical strategies to help manage anxiety in the operatory, such as the use of topical anaesthetics before an injection.
However, from the anxious patient’s perspective, these interventions happen late in the treatment journey. Here, we discuss how conscious and considerate office design can help to soothe your patient’s anxiety from the moment they walk through the door.
Supportive design in the dental practice
“Supportive design” is a term coined by renowned behavioural scientist and healthcare architecture researcher, Roger Ulrich, PhD.3 Ulrich describes supportive design as the practice of:
a. Eliminating environmental sources of anxiety and stress in the context of healthcare; and
b. Incorporating characteristics that support the patient’s ability to cope with stress. These supportive characteristics are designed to foster perception of control, social support, and positive distraction, with the latter two shown to be particularly effective in reducing anxiety.4
While much of his research (and the subsequent research it inspired) focuses on the hospital environment, Ulrich’s findings have generated a host of evidence-based design recommendations that can be applied across various healthcare settings, including the dental practice.
Here, we discuss how…
1. Removing environmental sources of anxiety
For an anxious patient, the apprehension of a dental appointment begins the moment they realise they need it. By the time they book an appointment and turn up at your office, they could have already spent weeks or even months nursing a growing sense of dread. When they arrive, they may be especially sensitive to stressful elements in the dental office environment, but you can help to ease their nerves by removing the main offenders.
Odours
The dental office has a distinctive “clinical” smell that some patients may associate with negative experiences and emotions. You can minimise unpleasant scents by using odourless cleaning products where possible, storing heavily scented products away from patient areas, and keeping the office adequately ventilated. Some practices also use essential oil diffusers, which can mask potentially triggering smells and have a calming effect on the patient. Lavender is a popular oil with a wealth of evidence supporting its anti-anxiety effects.5 Roman chamomile, ylang ylang, angelica and sweet orange are also supported,6 while another study found bergamot to reduce anxiety in women in a waiting room at a mental health facility.7
Noise
Noise in a clinical setting can cause psychological and physiological stress, with patients exhibiting anxiety, irritation, increased heart rate and elevated blood pressure.8
In the dental office, the most obvious offender is the dental drill, but there are plenty of other noises that may be jarring to an anxious patient.
48 PAIN CONTROL
Try to minimise the following to create a peaceful environment:
• Put phones on low volume or vibrate mode.
• Soundproof the operatory to minimise equipment and patient noise.
• Use low-noise equipment where possible.
• Add shock absorbers to doors to prevent slamming.
• Use quiet-close drawers and cabinets.
• Provide “quiet rooms” if you have the space.
Lighting
Ulrich cites notable evidence of the negative effects a dark, windowless environment can have on patient wellbeing.3 On the other end of the scale, harsh fluorescent lighting can also be unpleasant. The ideal solution, where possible, is to flood your waiting room with natural light. Sunlight exposure increases levels of serotonin, a neurotransmitter involved in mood and pain regulation. In a study on spinal surgery patients, those exposed to more sunlight reported less pain and stress, and required 22% less analgesic medication.8
Capitalise on this effect by positioning your seating areas next to windows and removing any obstacles to light. If your office is lacking in natural light sources, use soft wall-mounted lighting, rather than harsh overhead light, to create a more calming ambience.
Comfort
Anxiety can cause physiological changes that include raised body temperature and dry mouth, so make sure to provide a water source and keep your office temperature on the cool-but-comfortable side. Depending on your local climate, you might also want to install fans, heaters, dehumidifiers or air purifiers for greater control over temperature and air quality. On the topic of comfort, it’s also important to have comfortable seating. Hard plastic chairs are not pleasant for anyone, but patients who are already experiencing pain, discomfort or anxiety are likely to be even more irritated by uncomfortable seating.
Space
Some of your patients will use wheelchairs or walking frames, and may feel anxious navigating cramped spaces. This can also apply to patients who arrive with children in pushchairs. Make sure that your layout can accommodate them by creating spacious walkways and leaving ample space in the seating areas.
Clutter
Clutter gives the impression of disorganisation and can increase anxiety. Implement a no-clutter policy if you don’t already have one, and provide your team with sufficient waste and storage facilities to maintain a tidy environment.
2. Creating positive distractions
In the busy dental practice, patients often end up waiting longer than anticipated. Nobody enjoys this, but for an anxious patient, it means even more time to worry. Positive distractions have been shown to engage attention and direct it away from stress, pain, discomfort, boredom or agitation.4
Common sources of positive distraction in the waiting room include TVs, music, reading materials and, for our younger patients, toys and games.
Practices are now increasingly adding phone charging ports and making wifi available to their patients, allowing them to entertain themselves on their own terms.
When choosing TV or music, many practice owners will opt for a news channel or local radio. However, we would advise against this; news channels, while engaging, often feature emotionally charged and polarising content. And when it comes to music, one person’s favourite song can be another person’s idea of torture!
Research indicates that when it comes to anxiety and stress relief, there is a much more effective type of content: nature. It has long been known that exposure to nature has a positive effect on physical and emotional health.8 This concept forms the basis of a respected design field called biophilia, which incorporates natural elements to promote a sense of wellbeing.
You can harness the power of nature simply by showing images or videos of natural landscapes on your TV display, or by displaying artwork depicting natural scenes. Research shows that this can provide measurable stress-reducing effects similar to those of actually being out in nature.4
Ulrich notes that looking at nature scenes has been shown to improve mood, lower blood pressure and reduce heart rate in as little as five minutes.3 Simulated nature scenes have also been shown to help reduce perception of pain and promote better post-surgical outcomes.8
When it comes to sound, nature prevails again! It is already known that listening to music has a positive effect on stress and anxiety levels, but researchers conducting a large-scale review on the subject were surprised by one particular finding: listening to the sound of rippling water was significantly more effective at reducing cortisol levels than listening to music.9
It appears the only thing better than natural visuals or sounds is a combination of the two. Various studies show that when people view nature imagery accompanied by sound, the immersive effect — and therefore the ability to alleviate anxiety and discomfort — is even greater.8
Other ways to incorporate biophilia into your office design include plants, fresh flowers, water features, and natural materials like stone and wood. The use of colour can conjure up nature, too; stark white walls create a “clinical” feel, while soft sky blues and sea-foam greens create a more peaceful atmosphere.
49 1300 65 88 22
PAIN CONTROL
3. Facilitating social connection
Social support can be soothing and reassuring during times of anxiety, but the waiting room of a dental office can be a very impersonal place. Ulrich notes that the practice of arranging patient seating side-by-side in rows can inhibit social engagement.3 On the other hand, arranging seating in small, flexible clusters can facilitate interaction, or at least lessen the sense of isolation a patient might feel.
It can also be beneficial for patients to feel connected to the people looking after them. Consider posting smiling staff photos and humanising biographies on the wall, offering your patients a glimpse at the real person behind the scrubs. Other ideas include photos, letters or cards from happy patients (with their consent of course), or photos from outreach events demonstrating your positive relationships with the local community.
4. Improving perception of control
A 2019 editorial in the British Journal of Medical Practitioners highlighted how the loss of control patients experience in a healthcare setting can contribute to anxiety.10 From the moment they seek treatment to the moment they sit in your chair, the patient experiences various threats to their personal autonomy. This might include being forced to take time off work, struggling to schedule an appointment they’d rather not have, or being kept waiting while your previous appointment runs over schedule. The patient can be left on edge, feeling like they have no choice but to surrender to these various challenges if they want to receive treatment.
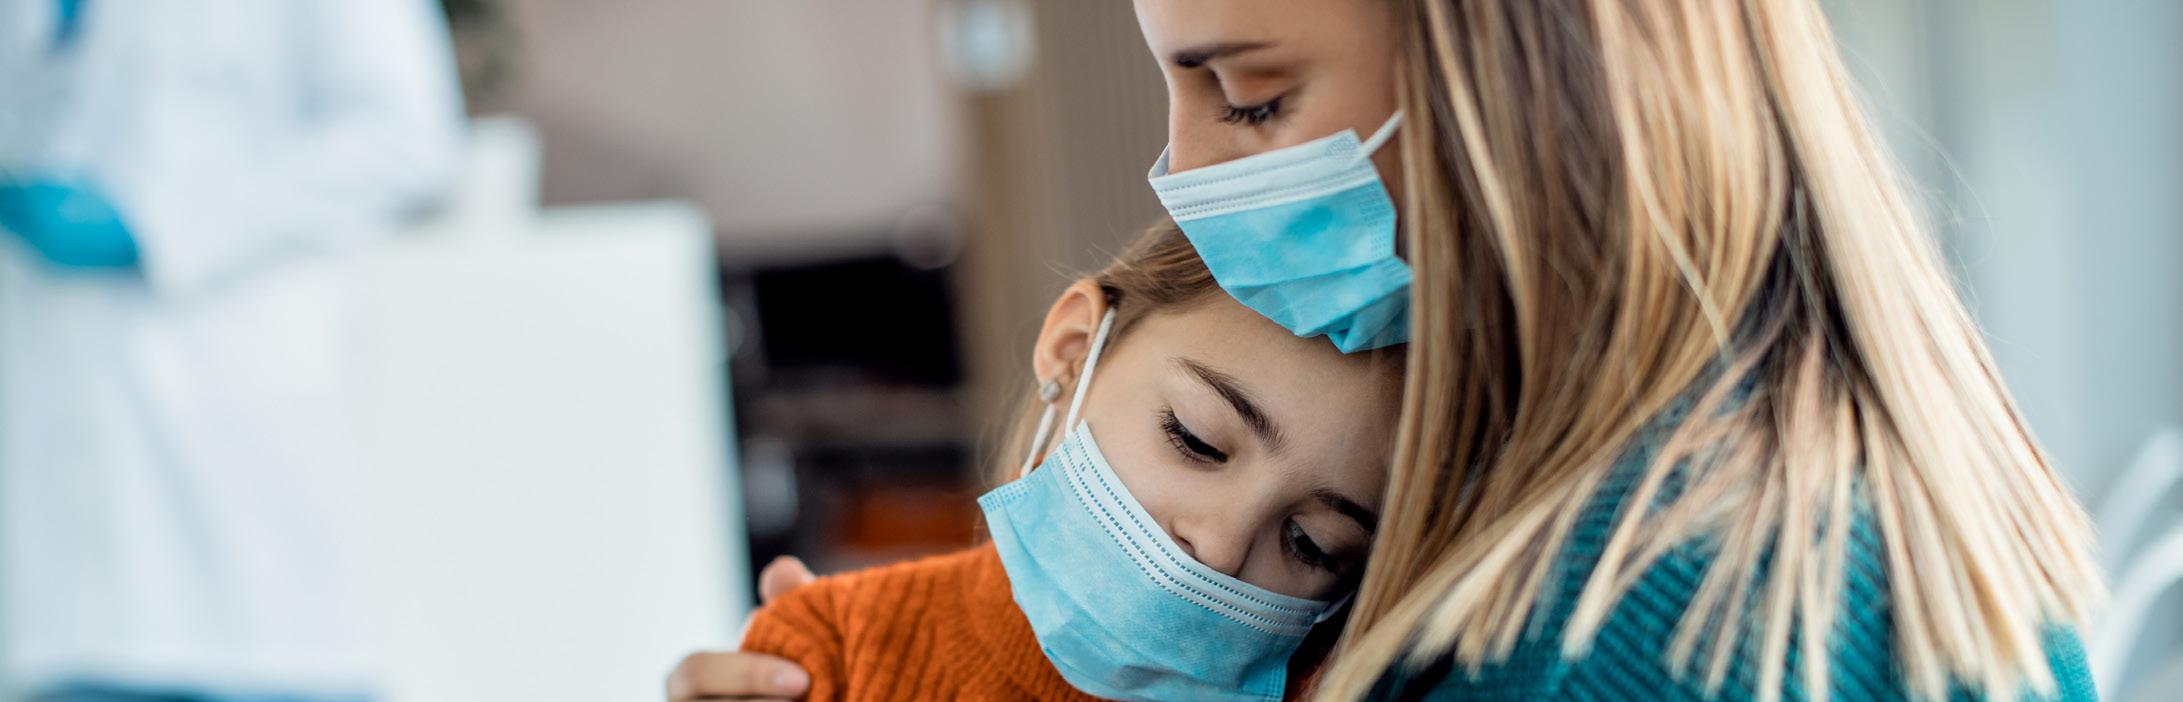
So how can your office interior design help? Well, it won’t solve the problem of busy schedules and long waits, but it can minimise the burden on your patient and give them back some sense of control over their experience.
Potential solutions include clear orientation and signposting. It’s easy to get disoriented in larger offices and buildings, especially if the patient is distracted by pain or anxiety.
Ulrich recommends using clear signage so that your patients can easily find you.3 Within your office, make sure that amenities like bathrooms, water coolers, seating areas, charging ports, and reading materials are clearly signposted in accessible formats, e.g. large print, commonly spoken local languages.
Another important consideration is the patient’s level of control over their sensory surroundings, particularly in patients vulnerable to sensory overload, e.g. those with autistic spectrum conditions or anxiety disorders. Is there a quiet space where the patient can retreat from noise, and is it clearly signposted? Can they control the volume of the music or TV, or are they aware that they can ask your staff?
It does take some effort and investment to turn your office into an anxiety killer, but Ulrich notes that this is often easier and less expensive than practitioners anticipate.3 In the long run, he — along with the many researchers who have built on his theory of supportive design — are in complete agreement that there are great benefits to be gained for both the patient and the practice.
References
1 https://www.karger.com/Article/Pdf/357223
2 https://pubmed.ncbi.nlm.nih.gov/19797921/
3 https://d1wqtxts1xzle7.cloudfront.net/3910295/
4 https://repositorio.iscte-iul.pt/bitstream/10071/8515/5/ JEnvironmPsychol2015.pdf
5 https://www.sciencedirect.com/science/article/pii/ S0944711319303411?via%3Dihub
6 https://www.sciencedirect.com/science/article/pii/ S2221169115001033#bib41
7 https://www.ncbi.nlm.nih.gov/pmc/articles/PMC5434918/
8 https://www.academia.edu/1268609/A_Review_of_the_ Research_Literature_on_Evidence_Based_Healthcare_Design
9 https://www.ncbi.nlm.nih.gov/pmc/articles/PMC3734071/
10 https://www.bjmp.org/content/managing-patient-expectationsthrough-understanding-health-service-experiences
50
PAIN CONTROL
SINGLE TOOTH ANAESTHESIA
STA TESTIMONIAL BY CATHERINE MUNDAY


I’ve been using the WAND system for 7 years, working in a Paediatric Practice I use the WAND from 3-20 years old as that is the age range of our patients that allow LA chairside. The patients are mostly under RA (relative analgesia) and watching a TV screen on the ceiling. I always dry the sulcus with a triple syringe and gently apply topical local anaesthetic which is then washed off to avoid the taste distracting the child.
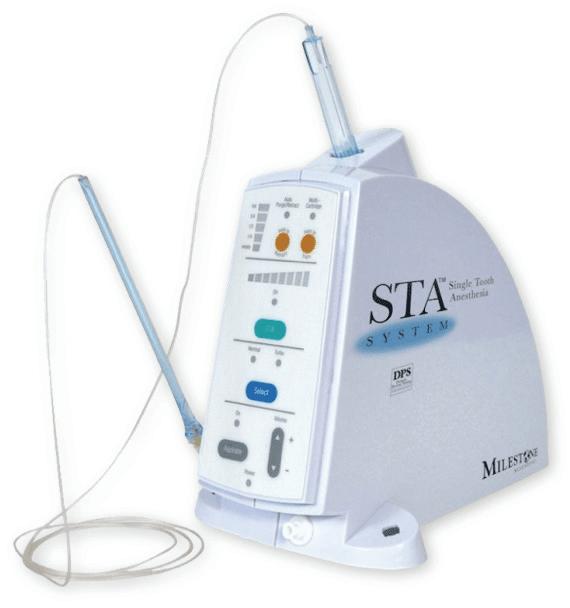
I love the fact I can semi hide the small syringe in the palm of my hand and very slowly insert the tip of the needle into the sulcus. I explain “I’m just rubbing my numbing cream in.” The first 30-60 seconds I’m guided by the machine via the foot pedal, so this is completely painless for the patient.
I slowly insert deeper into the sulcus, to reach the apical region, depending on the tooth involved.
I can see the machine on the bench which indicates the rate of LA given, and I am guided also by the regular audio instructions. When about 2/3 of the carpule is given after about 2 minutes, I then give more LA at right angles through the anaesthetized papilla both mesial and distal.
This allows both hard and soft tissue anaesthesia which is particularly useful for painless rubber dam application, interproximal cavity preparation and matrix band placement.
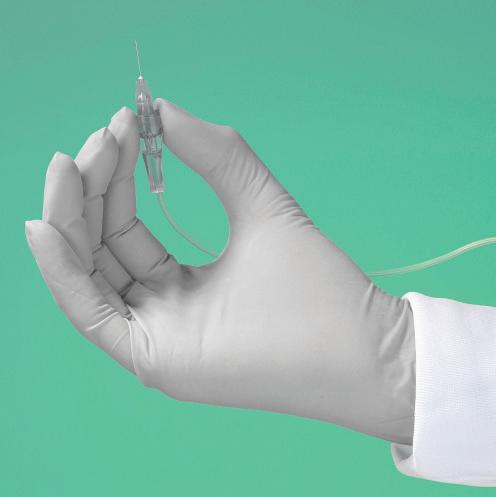
The injection normally takes 2-3 minutes. I’ve never had a patient complain that slow, gentle, and painless LA takes too long!
Most children have no idea that a “needle” is involved as they normally are totally unaware until they feel the numbness. The parents observing often express surprise, “Isn’t it great that you don’t have to use needles anymore” as they too are often unaware. Most patients that we have selected for chairside treatment cope beautifully with the aid of the WAND.
I adore the WAND system because I can give painless LA to young patients. I’ve given LA for 40 years, and still feel the WAND with its automatic pressure sensor system is vastly superior to a metal conventional syringe.
51 henryschein.com.au PAIN CONTROL
Find Out More CLICK HERE CATHERINE MUNDAY
Australia
WA,
APEX
“We’ve always bought and used Morita ZX apex locators and the Dentaport ZX that we are currently using is a number of years old now. Apex locators are manufactured by a lot of different companies and there are many models on the market. I’m sure they’re all good instruments, however, I prefer the Morita apex locators because of their reliability and longstanding track record.”
The History
Prior to the early ’90s, electronic apex locators were notoriously unreliable. They used a single current that would often complete the electronic circuit when the file wasn’t at the apex.
The Morita ZX system eliminates this electronic variability by using two currents of different wave frequencies simultaneously.
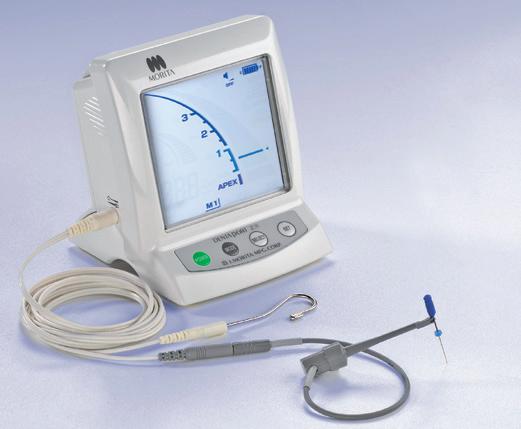
The relationship between these two currents changes as the biologic constriction is approached.
The Research
There’s a plethora of research into this particular instrument. It’s a favourite of endodontic master’s students to investigate and write their thesis.
Most of the research shows that this apex locator is highly accurate to within 0.5 and 1mm of the biologic constriction of the tooth.
The Benefits
It improves efficiency, saves time and reduces patient radiation. The locator gives a very accurate length measurement that is confirmed with an X-ray.

This means you know where you are before taking the X-ray. Without the locator reading, it’s highly likely that a succession of X-rays would be needed to achieve the same result.
Recommendations
There is a degree of technique sensitivity when using this instrument. Care must be taken that short circuits aren’t created by metal restorations. Irrigants used in canals are electrolytic, so if there is any leakage it can also create false readings.
However, any errors are pretty obvious and these can usually be overcome.
52
Dr John Barbat, North Shore Endodontic Services, Chatswood, NSW
DENTAPORT ZX Apex Locator ROOT ZX Mini ENDODONTICS CLICK HERE CLICK HERE
LOCATION AN ENDODONTIST’S PERSPECTIVE
TIPS FOR WARM VERTICAL CONDENSATION
1. You need two devices –one heated plugger and one back fill unit. (e.g. B&L SuperEndo Alpha and Beta) and to take your treatment to the next level we suggest endodontic pluggers such as B&L’s NiTi/SS Kondensors.
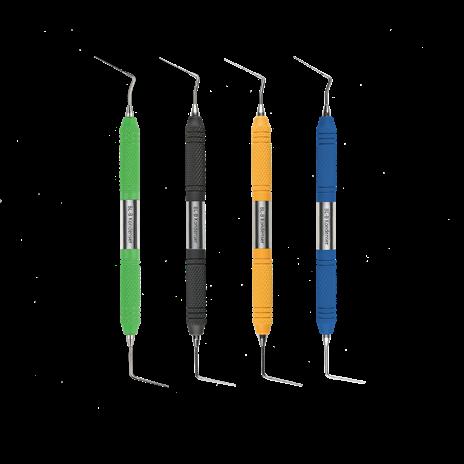
2. Ensure the canals are prepared adequately, disinfected and dried. True warm vertical obturation works consistently with small apical size and larger taper preparation techniques eg. #25 .06.
3. Select your master GP point based on the minimum size of the apical constriction and ensure there is adequate tug back.
4. Select a plugger tip that goes within 4-5mm of your working length. Mark the depth at which it binds to the canal with a rubber stopper.
5. Insert your sealer coated master GP point into the canal and trim off the excess at orifice level using the B&L Alpha heated plugger.
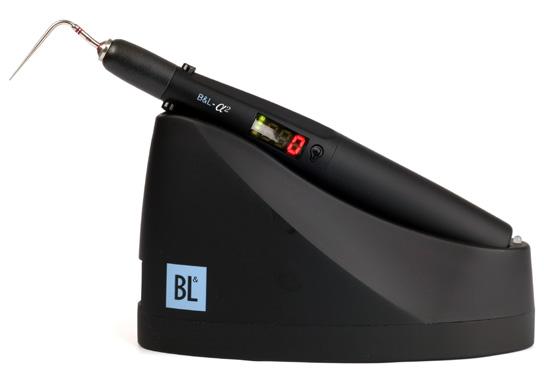
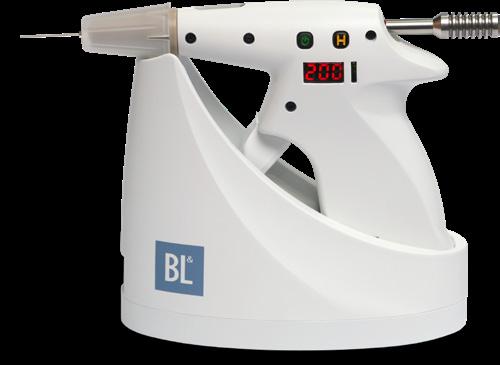
6. Condense your GP at the orifice level using the large SS end of your B&L Kondensor.
7. Activate the heated plugger and Insert into the canal, applying firm pressure. Stop 1mm from the marked stopper.
8. De-activate the heat, whilst still maintaining apical pressure for approximately 8-10 seconds.
9. Activate the plugger again and push 1mm apically and swiftly pull the plugger out along the curvature of the canal. Do this step quickly in 1-2 seconds. This will leave an apical plug.
10. Condense the apical GP with the fine NiTi end of the B&L Kondensor.
11. Place the pre-heated needle of the backfill unit (B&L Beta) into the canal, resting on the apical portion of the GP. Extrude the warmed GP and let the pressure of the extruded GP push the tip out of the canal. Do not pull back as this can create voids!
12. Condense the expressed GP into the canal carefully with an endodontic plugger.
It is recommended that you practice on extracted teeth first to gain confidence.
53 1300 65 88 22 ENDODONTICS
Beta unit
Alpha unit
B&L Kondensors
ENDODONTICS
WHY OTR ?
OPTIMUM TORQUE REVERSE
When instrumenting, endodontic files are always exposed to mechanical forces such as friction resistance and/or clamping force in the root canal, which act on the file as torque during rotary preparation.
This resistance counteracts the drive torque of the endomotor and can cause the file to twist (torsion). Under certain conditions (torsion strength and frequency of repetition) this may cause the file to break.
File Stress
File Stress
54
1. Cyclic Fatique
2. Torsional Fatique 3. Cyclic and Torsional Fatique
1. Cyclic Fatigue 2. Torsional Fatigue 3. Cyclic and Torsional Fatigue
Therefore, the torque acting on the file must be limited. Such a limitation can be realized in different ways:
Controlling the pressure acting on the file manually, i.e. working „with feeling“. This is relatively feasible when the preparation is done by hand. However, when a preparation motor is used, the tactile sensation is basically lost. Cyclically rotate the file backwards (opposite to the cutting direction) in order to relieve the stress.
The most pragmatic application of this method is relieving the file periodically after certain time intervals or rotational angles. This occurs, for example, in reciprocating modes of operation. Periodic motions may not be very original, but they are easy to realise as far as engineering is concerned. One disadvantage is that the individual situation of a root canal isn’t taken into consideration.
The torque acting on the file (impeding) can be measured. Hence, it is possible to automatically relieve the file only when this is really necessary and expedient. In other words, the actual stress acting on the file controls the cycle (torqueprovoked reversal of rotation direction). This function is called Auto Torque Reverse and was realized for the first time in the world in Morita’s TriAuto ZX, later also in the endodontic motors DentaPort ZX and TriAuto mini as well as the treatment unit Soaric. Since this method has proven its worth, endodontic motors made by other manufacturers are increasingly being fitted with Auto Torque Reverse functions.
Nonetheless, there are qualitative differences between the different Auto Torque Reverse functions, which become evident in connection with such criteria as, for example, measuring accuracy and speed of the control circuit.

Also, such quantitative criteria as length of the measuring intervals or reverse rotation of the file affect not only the time needed for the therapy but also the effectiveness and consequently, the safety of the reversal of the direction of rotation.
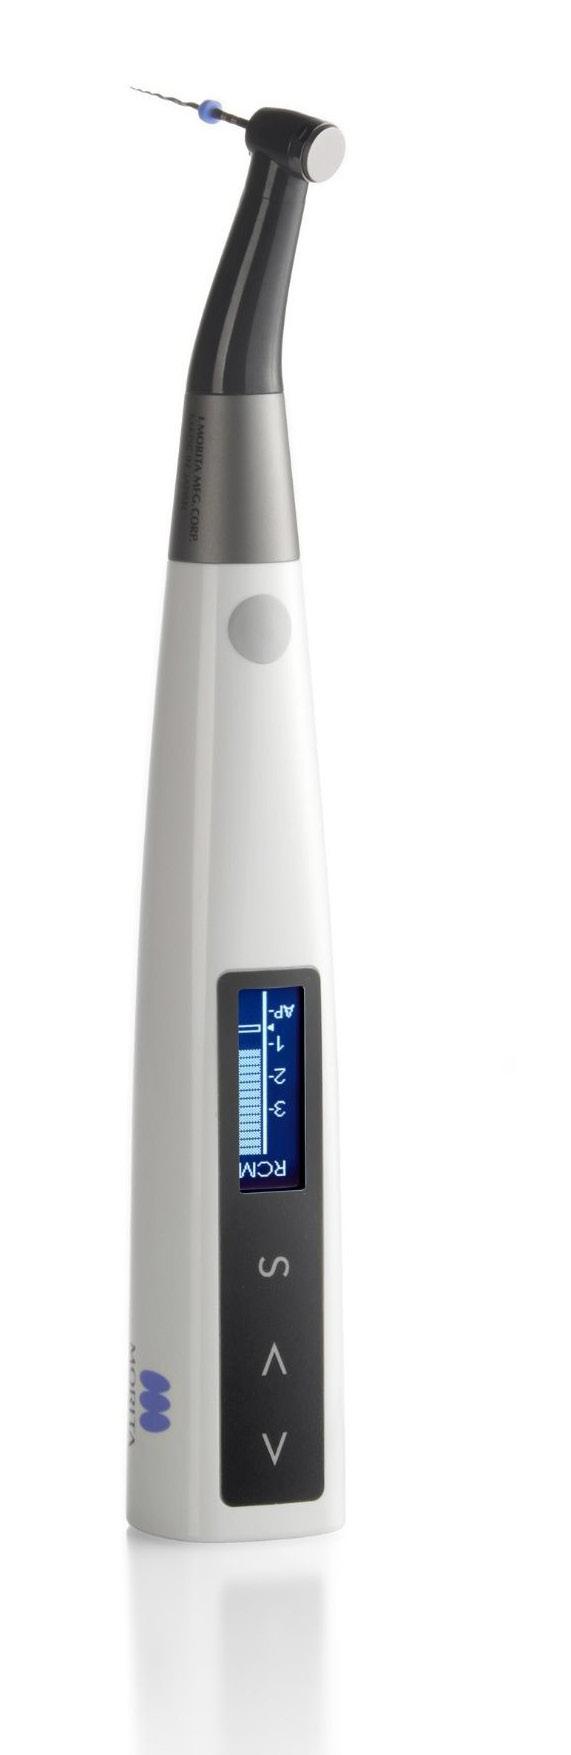
It is in this respect that Morita once again is setting a new standard with Optimum Torque Reverse. Although the OTR function also uses torque-provoked reversal of the direction of rotation, OTR requires only a very small angular rotation of the file to provide safe feedback about its current stress. Accordingly, you can work with optimized rotation angles both when the file is rotating in the direction of cutting and the reverse direction. Material tests have shown that nickel-titanium files can tolerate torsion of half a rotation (180°) in the direction of cutting. In the reverse direction of rotation, a quarter rotation (90°) is needed to release the file. Extensive experiments and tests in dental practices with different file systems and brands have confirmed these values.
Tri Auto ZX2 and DentaPort with OTR continues to be a universal system for almost all file systems.
55 henryschein.com.au
1.
2.
3.
ENDODONTICS
4.
HU-FRIEDY GROUP BASIC ENDO KIT
EVERYTHING YOU NEED FOR ENDODONTIC TREATMENTS IN ONE HANDY KIT
Hu-Friedy’s comprehensive line of endodontic instruments and accessories give you versatile options to meet all of your clinical needs.
Many of our instruments, especially those made for microsurgical applications, were developed in conjunction with leading global Key Opinion Leaders who are on the cutting-edge of clinical research, design and application. If you are looking for exceptional instrument design, quality and reliability, and unmatched customer service, choose Hu-Friedy’s Endodontic Instruments.
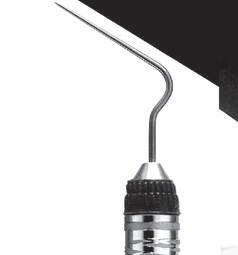
A MH6 MH6 Cone Socket Mirror Handle, Satin Steel Cone Socket Mirror Handle used with Single and Double-Sided Cone Socket Mirrors. The blunt end of the mirror handle is ideal for testing sensitivity to percussion and assessing tooth mobility.
B MIR4 #4 FS CS Mirror, Single Sided, Single Single-sided Cone Socket mirror. 7/8 in. (22mm) diameter
C EPL1 #1 Endo Dressing Pliers (Locking). Locking Endo Pliers have horizontal and vertical grooves for holding points
H RCP5/7X #5/7 DE Root Canal Plugger, Black Line. 5/7 double ended Root Canal Plugger used to compact filling material during vertical condensation
I RCP9/11X #9/11 DE Root Canal Plugger, Black Line. 9/11 double ended Root Canal Plugger used to compact filling material during vertical condensation.
J RCPGL1X #1 DE Glick Plastic Plugger, Black Line. Glick Blade and Root Canal Plugger used to compact filling material during vertical condensation. Combination blade and 1.10 marked plugger.
D EXDG16X #DG16 DE Endodontic Explorer, Black Line. The most popular general endodontic explorer for endodontic applications.
E EXC31LX #31L DE Endodontic Excavator, Black Line The 31L Endo Excavator features and extended length shank for easy access and removal of dentin
F RCSD11NT #D11NT SE Root Canal Spreader Nickel Titanium Root Canal Spreader provides extra flexibility and memory; especially useful for complex treatment sites
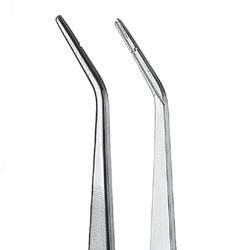
G RCP1/3X #1/3 DE Root Canal Plugger, Black Line. 1/3 double-ended Root Canal Plugger used to compact filling material during vertical condensation
K M5107 10 Inst. Sig Cassette. IMS® cassettes are made of long-lasting, low-maintenance stainless steel. Soft, colored silicone rails securely hold instruments throughout the processing cycle. Available in over 100 different sizes, configurations and color options, and can be specialized to meet your needs.
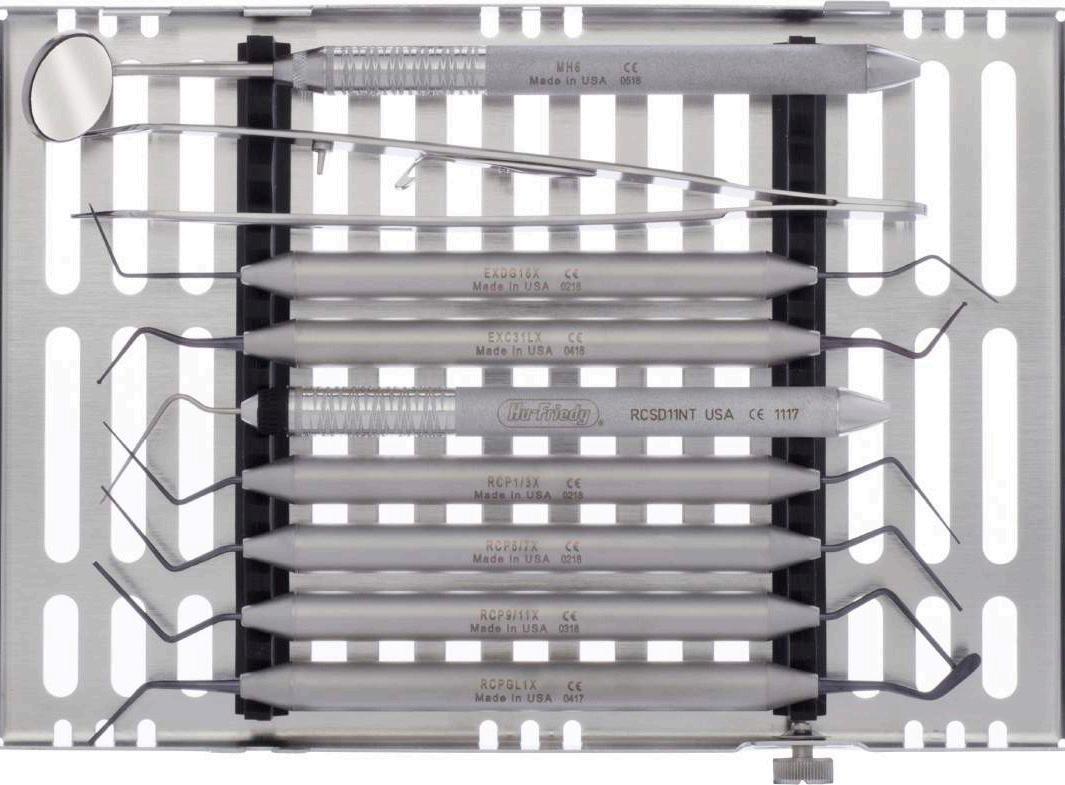

ENDODONTICS
A C D E F G H I J K B
GUTTAFLOW® BIOSEAL
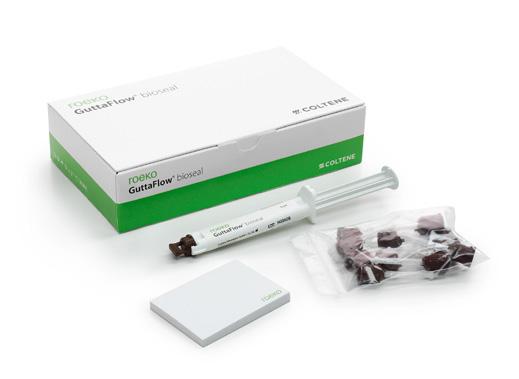
NOT JUST FOR FILLING, ALSO FOR HEALING
GuttaFlow bioseal is a state-of-the-art obturation material used for sealing and filling root canals. Hydroxylapatite crystals are formed on contact with the body’s own fluids. These in turn are natural components of bone and tooth tissue and support the healing process. This helps ENDO experts as well as beginners to create a lasting solution for their patients.
Owing to the slight expansion of GuttaFlow, the canal is sealed tightly. The increase in pH value over several weeks and the formation of the hydroxylapatite crystals support the healing process in the root canal.¹
Where endodontic filling materials remain in the body for many years, it is important that there are no adverse effects. In studies, conventional materials demonstrate toxic characteristics ranging from “marginally toxic”, “moderately toxic” to “severely toxic”, which has an effect on the tissue biocompatibility of the materials. Studies have confirmed that GuttaFlow is extremely biocompatible with tissue.²
Clinical investigations on conventional GuttaFlow are organised within the context of a multi-centre study under the direction of NIOM (Nordic Institute for Dental Material Testing) and conducted in clinics in Germany, Norway and the USA. The closing study report shows excellent healing results. On the basis of the PAI Scoring system, success rates of 0.7 - 0.8 were measured which were documented over a period of one year.³
Obturation under extreme conditions
Every endodontic treatment is different. But when the patient weighs over 150 kg, the canines are 14 cm long and the treating physician has half an hour to work before he risks his life, GuttaFlow literally saves him from the mouth of the lion!
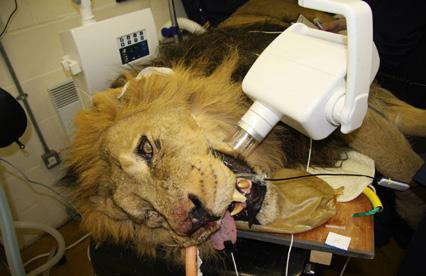
REFERENCES
¹ Study: Maria Giovanna Gandolfi et al. (2016) Properties of a novel polysiloxane- Gutta Percha calcium silicate-bioglasscontaining root canal sealer. Dent Mater. 32(5) p 113-126
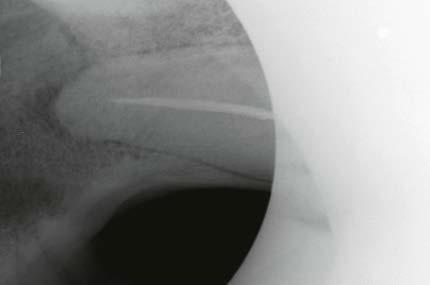
² Study: Mar Collado-Gonzalez et al. (2017) Cytotoxicity of GuttaFlow Bioseal, GuttaFlow2, MTA Fillapex, and AH Plus on Human Periodontal Ligament Stem Cells. J Endod. 43(5) p 816-822
³ Huumonen S, Lenander-Lumikari M, Sigurdsson A, Orstavik D (2003) Healing of apical periodontitis after endodontic treatment: a comparison between a silicone-based and a zinc oxide-eugenol-based sealer. Int Endod J 36, 296-301
57 1300 65 88 22 ENDODONTICS
CLICK HERE View Product on our website
R.T.R.+ BIPHASIC FORMULATIONS
ß-TRICALCIUM PHOSPHATE (ß-TCP) + HYDROXYAPATITE (HA)
CASE STUDY 1 - Post-extraction bone filling before implant placement Dr Bruno Salsou - Toulon
A 55-year-old patient presented with significant mobility in tooth 36. A retro-alveolar radiographic examination showed a level 3 furcation defect preventing the preservation of the tooth.
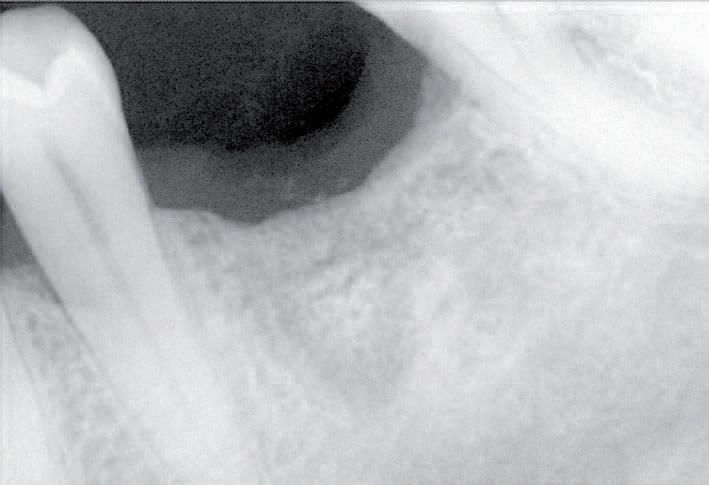
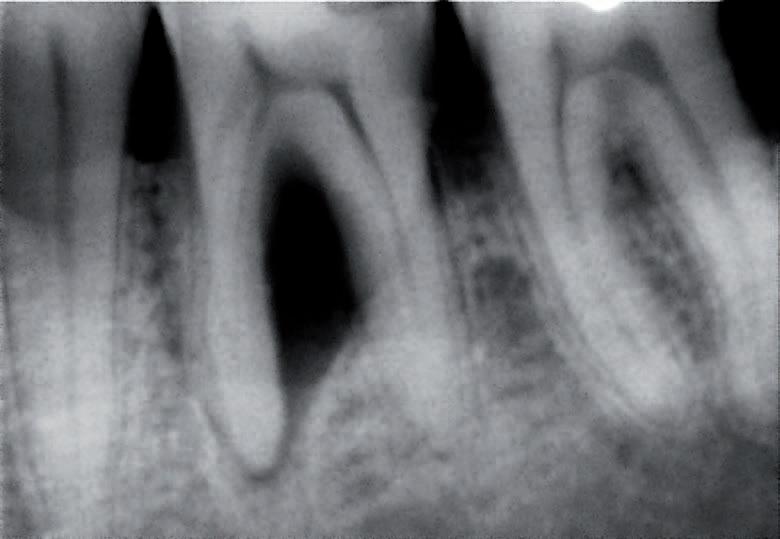
Treatment decision
The decision was made to extract the tooth and perform bone filling so as to permit implant placement.
Conclusion/practitioner’s comments
• The packaging of R.T.R.+/MBCP® Technology in pre-filled syringes facilitates the handling and placement of the material.
• The conglomerate formed with clotted blood helps to ensure the retention of the material within the alveolus, an essential element for good bone healing.
Two formulations
80% ß -TCP
20% Hydroxyapatite
40% ß-TCP
60% Hydroxyapatite
Indications
• Post-extraction socket preservation
• Periodontal defects
• Infrabony defects
• Peri-implant defects
• Sinus lift
• Ridge augmentation
• Cystic cavities
58
Pre-operative examination - Furcation defect in tooth 36.
6-month follow-up: Radiography shows signifcant bone gain. Implant placement can now be considered under optimal conditions.
SURGICAL View the full brochure CLICK HERE
OPERATING PROCEDURE
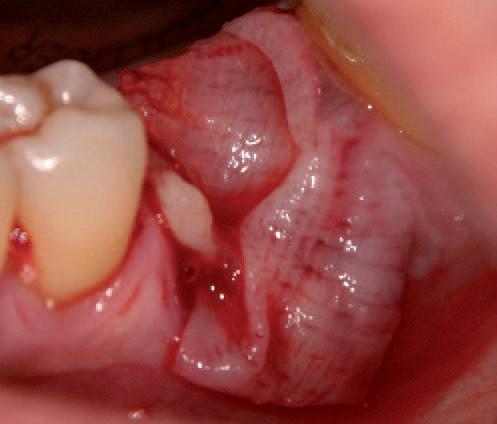
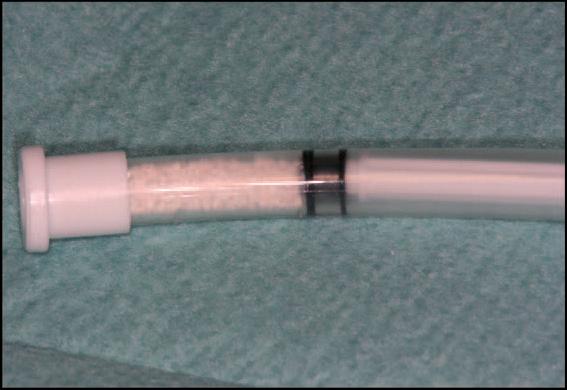
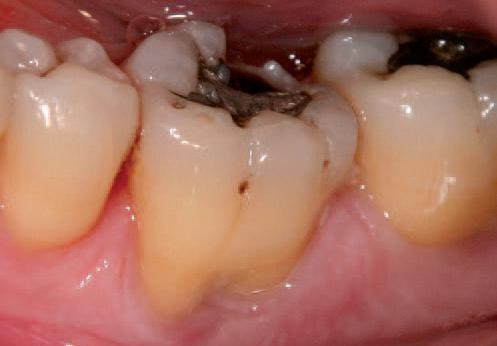
SURGICAL
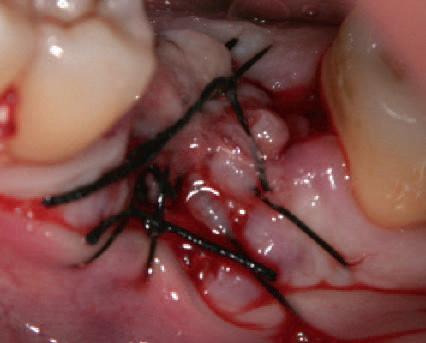
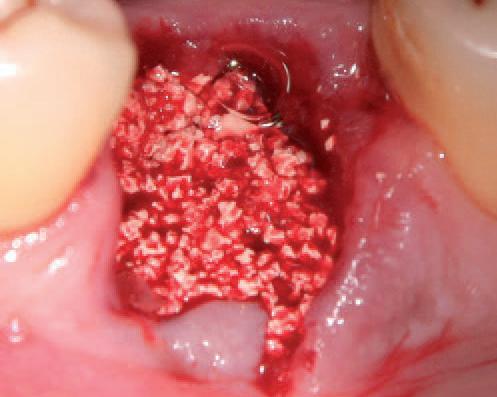
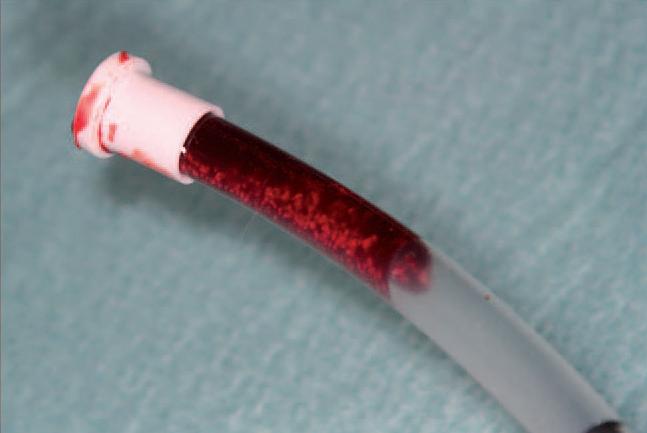
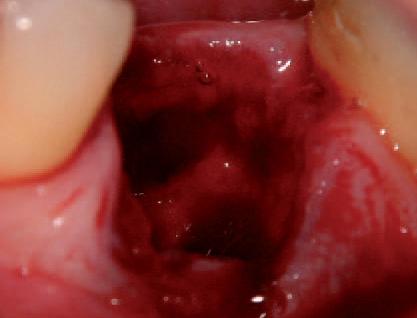
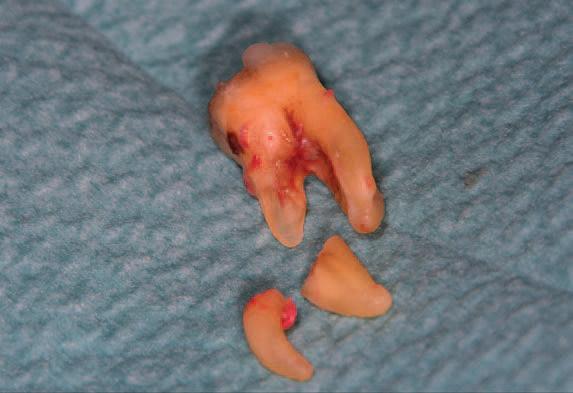
59 henryschein.com.au
Clinical presentation
Fractured tooth extracted
Post extraction alveolus
Syringe with R.T.R.+/MBCP® Technology filling material, 0.5-1mm daimeter grancules
R.T.R.+/MBCP® Technology filling material saturated with blood
Alveolus 36 filled with R.T.R.+/MBCP® Technology
Protection of the graft with PRF membranes
Repositioning of flap and suture with 3-0 silk
UNDERSTANDING THE DIFFERENT TYPES OF STEAM STERILISERS AND THEIR CYCLES
Despite its long history, steam sterilisation continues to be an area where some dental practices struggle to understand the process, the equipment, and how to use it to ensure consistent performance. While virtually all dental practices have steam sterilizers (also known as autoclaves), many staff do not know the differences between the major types.
Sterilisation using saturated steam kills microorganisms by transferring heat onto the items which are being sterilized, as the steam condenses. When steam changes to liquid water, this also moistens the organisms, which increases the kill rate. Statistically, a sterilising cycle is designed so that the opportunity for a micro-organism to survive is less than one in 1 million (This is known as the sterility assurance level, or SAL). At a temperature of 134 degrees Celsius, this time interval is 3.5 minutes.
The three types of cycle and the technology behind them are described in the European Standard EN13060. Not all types of steriliser or cycle are appropriate for all types of load items. EN13060 specifies the general requirements for small steam sterilisers, such as those used in small office dental practice, and the methods used to test their performance, by applying standard test loads.
Displacement autoclaves (also called gravity autoclaves)

These utilize superheated steam to displace air downwards and out of the sterilising chamber. The process that removes air is very gentle, i.e. by the action of steam rising coupled with cold air falling vertically by gravity in the chamber.
This makes these sterilisers unsuitable for hollow items (including dental handpieces) and also for wrapped items. Their cycles are known as “N” cycles, where the N means None hollow and None wrapped (Naked solid items).
• These can be used only for sterilisation of unwrapped solid instruments that are NOT required to be stored in a sterile state.
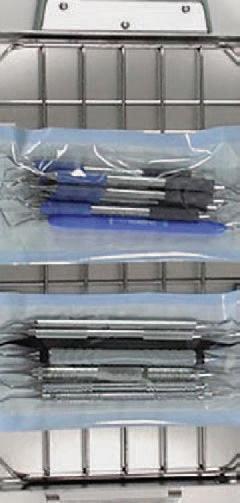
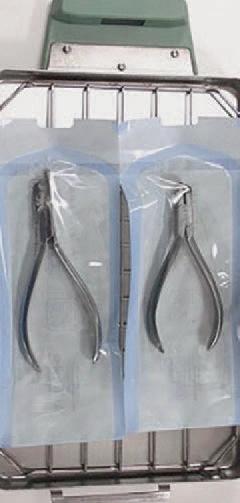
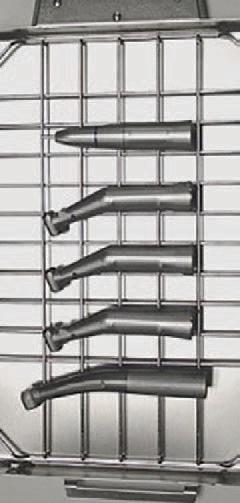
• Sterilized items from N cycles are unwrapped so cannot be kept in a sterile state.
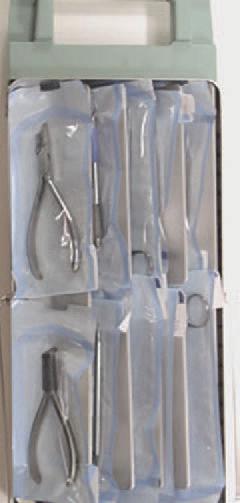
• They are not suitable for sterilization of wrapped items (including those in pouches), porous items, textiles or hollow items.
S (Specified) cycle sterilisers with assisted air removal
Steam sterilisers with S cycles are for Specific products. The manufacturer of the steriliser has determined what a particular cycle of the steriliser can be used for and has specified that information for the user.
60 INFECTION CONTROL
In other words, the steriliser manufacturer provides details of their performance capabilities, which they have established by conducting specific tests with those load types.
A range of bespoke (dedicated) S cycle units have been developed, including units for sterilising dental handpieces and cassette-type compact sterilisers that use on-demand steam generation and positive pressure pulsing for rapid processing (e.g. SciCan STATIM™). It is essential that staff read the instructions for these sterilisers carefully so that loads match those specified as being suitable.
S cycles use various processes for active air removal, overcoming the limitations experienced in N cycles that employ gravity displacement. This is why bespoke sterilisers with S cycles can sterilize restorative dental handpieces.
• These sterilisers may use pulsing of steam from a steam generator to facilitate air removal from the load by an active process, or may use a prevacuum process.
• These sterilisers can process any load type that the manufacturer has specified the load configuration for, including handpieces and wrapped items. See the examples below. Items need to be separated, not piled on top of one another. This applies for loose instruments and dental handpieces, as well as for paper/plastic pouches.
• Unwrapped dental handpieces can be sterilized in an S cycle unit, according to the manufacturer’s instructions. Likewise, wrapped dental handpieces could also be sterilized in an S cycle unit, if that is what the manufacturer stipulates. As an example of the latter, the STATIM has been tested for hollow wrapped items. In each case, refer to the manufacturer’s instructions for what load types are permitted, and follow that advice exactly.
• They should not be used with items that are wrapped in multiple layers.
• They achieve rapid drying by a combination of forced filtered air or pre-vacuum and heat.
• Bespoke (dedicated) S cycle sterilisers that do not use pre-vacuum do NOT require air leak tests or air removal tests
Pre-Vacuum autoclaves sometimes called Class B cycles
“Big” Sterilisers
These use a vacuum pump to pump air from the chamber prior to entry of steam. The removal of air is designed to facilitate the entry and penetration of steam into the load. The air can be pumped out in one continuous phase, or in several separate phases (referred to as multi-pulsed). The latter gives better and faster air removal than a single suction phase, particularly from items with internal pipes.
Monitoring of steam sterilisers
Regular monitoring of performance for ALL types of autoclaves is necessary to prove that sterilization process parameters are adequate. The use of chemical monitors is dictated by the type of autoclave and the relevant standards, such as Table 7.1 of AS/ NZS 4815. Such routine testing ensures that sterilization process parameters are being met on a regular basis and when the results are recorded in a permanent logbook. It verifies that certain staff members have operated the cycle and have checked the contents of the completed load to ensure that they meet expectations. There is little point in recording data from steriliser cycles on memory cards or on hard copy printouts if these records are never scrutinised carefully immediately after the cycle has completed.
Methods for monitoring
Monitoring of autoclaves uses several methods:
• Physical monitors (gauges, displays, print-outs) - from every load.
• Chemical indicators - which change colour when proper sterilising conditions have been achieved (e.g. adhesive inks, tapes, strips)used on and within packs and pouches. These provide a visual assurance that conditions for sterilisation were met (heat, steam).
61 1300 65 88 22
INFECTION CONTROL
• Biological indicators (BI’s, spore tests) - which are used at calibration and validation. Spore tests should be used after installation of a new autoclave, a major redesign or relocation, servicing or major repair, after suspected malfunction, whenever the type of load or packaging system is changed, and during and after training of new staff in autoclave operation.
Pre-vacuum autoclaves are unique in that they require leakage testing for the chamber (to check the door seals and other internal leaks) as well as daily tests for proper air removal (i.e. Bowie-Dick test or helix process challenge device). The Bowie-Dick test assesses penetration of steam into a porous load, while the helix test assesses hollow items.
Steriliser cycle records
The log of autoclave cycle data provides the necessary written documentation of sterilisation and includes parameter information on the batches of items that have been sterilised. An entry into this log should be made for all autoclave cycles, regardless of whether or not they include any packs of critical instruments.

The log book ruled columns would have the following headings:
• Date;
• Time at the commencement of the autoclave cycle;
• Cycle number in that day;
• Cycle temperature and time parameters (which will differ according whether the load contains wrapped items or unwrapped items);
• Nature of the load (numbers of packs, instrument cassettes, etc);
• Batch number(s) of packs included in that load (if any);
• Identification of the loading operator who placed items in the steriliser chamber;
• Result of the autoclave physical read- outs (displays) or printout for that cycle;
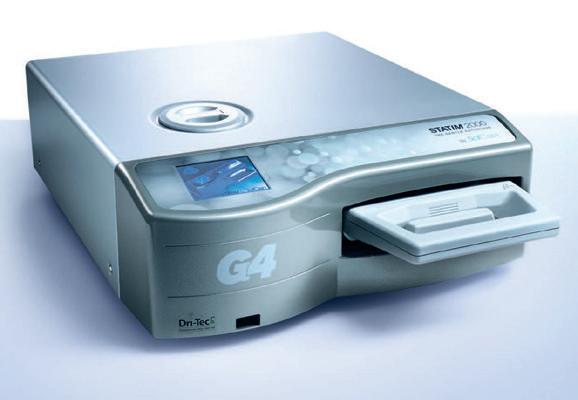
• Result of the particular chemical indicators (Class 1, 4, 5 or 6) used in the cycle. This checking should include all external and all internal chemical indicators;
• Result for checking packages for conformity (e.g. seals are intact, and packages are not damp or wet); and
• Identification (signature or initials) of the unloading operator as the person who has checked the autoclave readouts and chemical indicator result, and who authorizes release of the load for use.
A separate book should be kept for each autoclave, if several autoclaves used in the practice. It is also prudent to compile a list of names, initials and abbreviations of operators of the autoclave, for reference purposes.
About the author
Emeritus Prof. Laurie J. Walsh is based at The University of Queensland School of Dentistry. He serves as the technology editor and infection control of Australasian Dental Practice magazine and is the editor of the ADA Infection Control Guidelines. Prof. Walsh is a noted commentator on and user of new technologies.
62 INFECTION CONTROL
EMERITUS
Click here for more information regarding the SciCan Statim Range CLICK HERE
PROF. LAURIE WALSH
FINAL CALL FOR THE GOVERNMENT INCENTIVES
Henry Schein has on offer a mix of solutions that makes NOW the perfect time to purchase world class equipment. From expert advice, aggressive pricing up to flexible finance options and stock availability, we have tailored special packages with all the resources that you need to purchase dental equipment timely and capitalise on current Government Initiatives. 30th June is the last chance for eligible practice owners to take advantage of the Government Temporary Full Expensing Incentive. This can create additional benefits for your practice including improved cash flow, financial savings & accelerating upgrades. To ensure you are not restricted by the global supply chain shortages & access to available technicians, purchase your equipment today, book your installation ahead of time and enjoy a stress-free experience.
63 henryschein.com.au GOVERNMENT INCENTIVES
CLICK HERE CLICK HERE Enquire here Government Tax Calculator
PURCHASE YOUR EQUIPMENT NOW & AVOID MISSING OUT PRICE Beat the Price Rise & Inflation TAX INCENTIVE Ends 30th June LIMITED SERVICE SLOTS Book your Install now STOCK AVAILABILITY Anticipate your Purchase & avoid Missing out FINANCE Flexible Finance Options
WHY NOW IS THE RIGHT TIME TO BUY
HAND ERGONOMICS IN DENTISTRY
Musculoskeletal disorders (MSDs), including neck and shoulder disorders, hand and wrist disorders, and back disorders1 among dental practitioners is cited as the main reason for early retirement.2
The prevalence of these MSDs among dentist and dental hygienists and can range from 64-93%, with chronic hand and wrist pain prevalence at 40-75 %.3,4,5 MSDs are the result of:1
• static posture
• precise and repetitive motions
• long work hours
• substandard ergonomics during dental practice
Hand/wrist complaints among dentists and especially dental hygienists are highly prevalent. Since fewer dental professionals fully recover from hand pain than they do from neck, shoulder, or elbow pain, it is imperative that hand injury be prevented.3
Although there are numerous pain syndromes of the hand and wrist, Carpal Tunnel Syndrome (CTS) is the most prevalent and can be caused by pressure on the median nerve. The median nerve runs from your forearm through a passageway in your wrist (carpal tunnel) to your hand.
When the median nerve is compressed, numbness, tingling and weakness in the hand and arm may be experienced.
Workplace factors that require working with vibrating tools or performing prolonged and repetitive hand motions and flexing of the wrist can contribute to carpal tunnel syndrome.6
ERGOFORM Certified gloves
Ansell has developed ERGOFORM technology, which aims to enhance workers’ experience and performance by designing hand protection that takes into account the physical strain that repetitive tasks can have on their musculoskeletal health.
A United States (U.S.) Ergonomics certified gloves ensure that “A product that has received certification provides measurable ergonomic benefits to the anticipated users by improving comfort and fit and by minimizing the risk factors that may contribute to the development of ergonomic injuries.”7
By using advanced technologies and measuring the impact of work activities on workers’ hands, Ansell has created examination and surgical gloves that show a reduction in muscle effort and offer superior dexterity, comfort, and fit compared to other gloves or working without gloves.
By lessening muscle effort, you are also reducing the chances of developing injuries, pain and MSDs of the hand and wrist.8
64 INFECTION CONTROL
all Ansell products on our website CLICK HERE
View
Selecting ERGOFORM™ Certified gloves
Ansell dental examination gloves that are currently ERGOFORM™ certified include:
EXAMINATION GLOVES
MICROFLEX® Neogard TOUCH
New ultralight, comfortable neoprene green exam gloves, certified for exceptional wet grip.
MICROFLEX® Ultraform
Blue nitrile exam gloves that offer affordable protection. Half sizes available for a personalised fit.
MICROFLEX® MidKnight TOUCH
Black nitrile exam gloves designed to reduce muscle fatigue.
References
SURGICAL GLOVES
GAMMEX® Non-Latex PI Hybrid
Polyisoprene and neoprene blend delivers exceptional comfort and superior durability.
GAMMEX® Latex
Latex formulation offering comfort, protection and sensitivity.
GAMMEX® Latex Textured
Latex formulation with a micro-textured finish for secure instrument handling.
1. Goodchild J. Musculoskeletal Disorders in Clinical Dentistry: How Technology Can Safeguard Your Dental Team. Dentistry Today. April 2019. https://www.dentistrytoday.com/musculoskeletal-disorders-in-clinical-dentistry-how-technology-can-safeguard-your-dental-team/ Accessed March 3rd, 2023.
2. Gupta A, Bhat M, Bansal N, Gupta G. Ergonomists in Dentistry. Int J Clin Pediatr Dent 2014:1(1):30.
3. Valachi B. Getting the Upper Hand on Pain: Preventing Hand and Wrist Pain Syndromes in Dental Professionals. A Peer-Reviewed Publication. https://silo.tips/download/getting-the-upper-hand-on-pain-preventing-hand-and-wrist-pain-syndromes-in-denta Accessed March 3rd, 2023.
4. Lalumandier JA, McPhee SD. Prevalence and risk factors of hand problems and carpal tunnel syndrome among dental hygienists. J Dent Hyg 2001:75(2):130-134.
5. Attari S. The physical challenges of being a dental hygienist. Dentistry IQ. October 2019. https://www.dentistryiq.com/dental-hygiene/ ergonomics/article/14069153/the-physical-challenges-of-being-a-dental-hygienist Accessed March 3rd, 2023.
6. Mayo Clinic. Carpal Tunnel Syndrome. https://www.mayoclinic.org/diseases-conditions/carpal-tunnel-syndrome/symptoms-causes/syc20355603 Accessed March 3rd, 2023.
7. United States Ergonomics. Product Ergonomics; Product Certification. https://us-ergo.com/product-ergonomics/ergonomics-productcertification/ Accessed March 3rd, 2023.
8. The Importance of Glove Ergonomics to the Medical Profession. Michigan State Medical Society. News and Media. December 2015. https://www.msms.org/About-MSMS/News-Media/The-Importance-of-Glove-Ergonomics-to-the-Medical-Profession Accessed March 3rd, 2023.
65 1300 65 88 22 INFECTION CONTROL
BENEFITS OF IMS CASSETTES

NEW 10 YEAR WARRANTY
Instrument Management can have a big impact on any facility. Keeping instruments organized and managing them properly improves the flow of the facility, which allows the sterilization area to run more efficiently and clinicians to focus on providing the best level of care.

HuFriedy IMS™ Cassettes keep instruments organized and protected throughout the facility, allowing you to go from chairside to cleaning to sterilisation to storage without ever touching contaminated instruments.
This helps to improve efficiency, safety, compliance, organisation, standardization, instrument protection, and more.
Now, with the 10-year warranty of IMS™ Cassettes, you can feel confident in the long-lasting impact on efficiency, safety, organization, and compliance in your facility.
Features of HuFriedy IMS™Cassettes
1. Ergonomic latch with positive locking mechanism is safe and easy-to-use, allows one-handed opening and visual confirmation if the cassette is locked /unlocked.
2. Revolutionary hole pattern design provides more access to instruments during cleaning and sterilization and increases compatibility with today’s cleaning equipment, including automated washers.
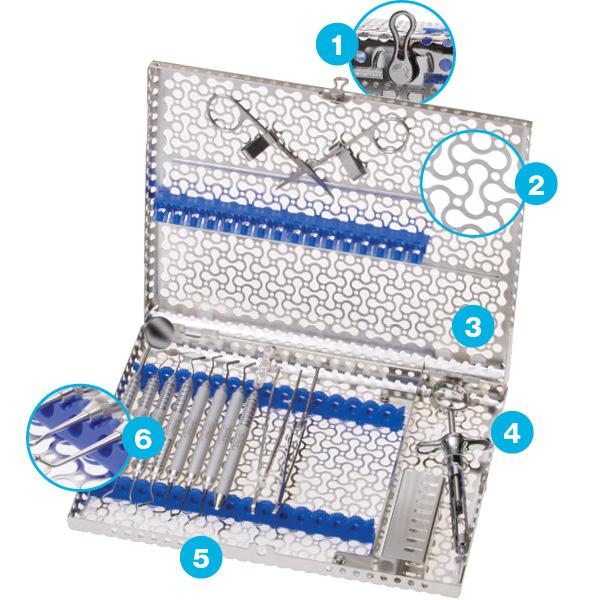

3. High quality, electropolished stainless steel provides more durability than plastic to keep your instruments safe inside while also protecting against corrosion.
4. Smooth round corners and slotted edges increase drainage and reduce drying time.
5. Beveled edge allows for a more ergonomic grasp.
6. Innovative color-coded silicone rail system, available in 11 color options, significantly reduces instrument contact, allowing for more water flow while protecting the instruments during reprocessing.
The benefits of IMS™ Cassettes

Efficiency
IMS™ Cassettes eliminate time-consuming steps to streamline reprocessing, which can save facilities an hour or more each day.
Safety & Compliance

IMS™ Cassettes minimizes how often contaminated instruments are handled, improving compliance during transportation and reprocessing while also reducing the risk of a costly sharps injury.
Organisation
IMS™ Cassettes help facilities better organize their reprocessing flow, freeing up to seven linear feet of counter space, so they can maximize the space in their sterilisation area. When coupled with the use of organizational tubs for procedural disposables, efficiency and organization are greatly improved as procedure needs are easily identified for quick patient set up.
Instrument Protection
IMS™ Cassettes are made of durable, stainless steel to protect the integrity of your instruments. They also keep your instruments held in place and spaced out for an optimal environment for proper reprocessing.
Standardisation
IMS™ Cassettes help facilities create a system for managing their procedural setups. Each setup includes all of the instruments that are needed to help with onboarding and standardizing care throughout a single facility and even across multiple locations
66 INFECTION CONTROL
Return on Investment
IMS™ Cassettes can make an immediate impact on a facility’s bottom line, with the time saved allowing them to see new patients and bring in tens of thousands of dollars in new revenue.
Potential Added Revenue Per Day
Procedures per day
Example: A facility billing $2.000 of revenue a day doing 20 procedures would be able to generate an additional $605.00 per day with the time saved using IMS™
$2,000 ÷ 480 minutes (8 hours) = $6.05 revenue/minute 20 procedures x 5 minutes saved/procedure x $4.17/minute = $650
Contact your Henry Schein Relationship Manager to arrange an IMS consult for your needs
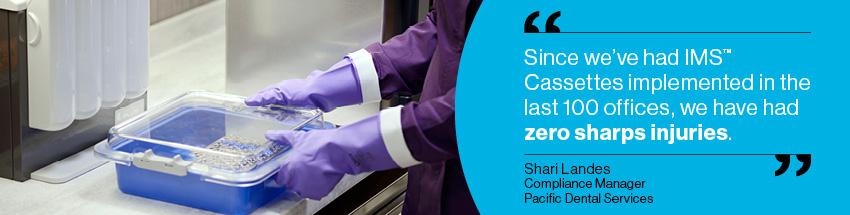
67 henryschein.com.au REVENUE PER DAY $1,000 $2,000 $3,000 $4,000 $5,000 10 $150 $301 $454 $605 $756 20 $302 $605 $907 $1209 $1,511 30 $454 $906 $1360 $1,803 $2,267 40 $605 $1208 $1,813 $2,432 $3,021 50 $755 $1,511 $2,267 $3,021 $3,777 67 INFECTION CONTROL
IMS Improve Safety with Instrument Management WATCH HERE CLICK HERE Ebook Essential Guide to Infection Control CLICK HERE The Journey to Better IMS CLICK HERE
HOW SHOULD I TEST AND MONITOR MY STERILISER
After your leak rate tests (daily or weekly), you must conduct one daily performance test to ensure your steriliser is capable of air removal and steam penetration so that we know we can adequately sterilise our instruments (and other items).
After your leak rate tests (daily or weekly), you must conduct one daily performance test to ensure your steriliser is capable of air removal and steam penetration so that we know we can adequately sterilise our instruments (and other items).
All pre-vacuum steam sterilisers, regardless of their size – whether they’re a small benchtop steriliser in a dental practice or a large steriliser in a hospital sterilising department – operate the same way. And all sterilisers, regardless of their size, are subject to potential faults and as such we must ensure we test our sterilisers to ensure they can meet a standardised set of requirements.
There is sometimes confusion about whether a “Bowie and Dick Test” or a “Helix Test” or a “Daily Air Removal and Steam Penetration Test” must be done in a benchtop steriliser, and which should be done when depending on the items to be sterilised afterwards.
It is important to understand that all of the above tests are the same by definition – a test conducted in an empty chamber to test the performance of the steriliser – i.e. to ensure it is capable of air removal and steam penetration.
Historically, Bowie and Dick Tests (first developed in 1963) were designed to be equivalent in challenge to that of porous loads in large sterilisers. Back in 1963, the most common items to be sterilised were items like fenestrated drapes and simple solid instruments. With the introduction of minimally invasive surgical (MIS) instruments we needed a way to ensure our sterilisers were also capable of sterilising hollow, more complex instruments - because it is far harder to achieve air removal and steam penetration in a hollow instrument (such as hand pieces and burs) than it is for porous items like a stack of fenestrated
drapes or even gauze. This led to the introduction of the “hollow load test” (a.k.a “helix test”) in the standard EN 867-5 (now ISO 11140-6). While EN 867-5 / ISO 11140-6 is for performance testing of small sterilisers, the hollow load test it defined was also added as a test for large steam sterilisers, in accordance with the need to simulate the challenge of hollow items.
We need to understand that “Bowie and Dick Test” is just terminology for the mandatory daily performance test, so whether you choose to call your daily test a “Bowie and Dick Test” or a “Helix Test” or an “air removal and steam penetration test,” it is adequate to use the GKE Orange Process Challenge Device (PCD) (meeting with EN 867-5) for the daily test you do in your steriliser.
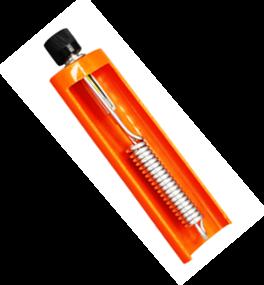
We do not need to use a product defined as a “Bowie and Dick Test” in a small steam steriliser because the standard for small steam sterilisers (EN 13060) refers to the Type Test in EN 867-5.

Don’t worry if your steriliser programs say “Bowie and Dick Test” or “Helix Test” – you can be confident in knowing that if you run the GKE Orange PCD in either program, you are doing the right thing. And you only need to do one of these programs as your daily functionality check.
Because we know that hollow items are harder to sterilise than solid and porous items, if our steriliser can pass the GKE Orange PCD which tests to a hollow level, then we know that the steriliser can also sterilise items like gauze, drapes and cotton rolls. If we look at the standard for small steam sterilisers – EN 13060 – it only asks us to do the Type Test to EN 867-5, not a Bowie and Dick Test in accordance with ISO 11140 Part 4 as well.
68 INFECTION CONTROL
GKE Australia have devices available that are classified as “Bowie and Dick Tests,” but these devices are only sold to facilities with large steam sterilisers (such as hospitals) because that is what the standards require.
The GKE Orange PCD is the right solution for you, your B Type benchtop steriliser and your dental practice, to ensure your steriliser performs according to the relevant standards.
Routine Monitoring
Routine monitoring is something every facility sterilising instruments should consider as part of their risk assessment, regardless of whether their steriliser has an air detector. We must ask ourselves, what happens if we do our daily performance test today and it passes, but we do it again tomorrow and it fails, identifying a fault with the steriliser? It means that every single load we sterilised between those tests no longer has a sterility assurance level and should trigger a risk assessment of whether those instruments have been used on patients. Why take that risk?
Sure, we have our chart printouts that tell us parameters like time and temperature were met. Or we might have our Type 5 or Type 6 package indicators in every pack that will also tell us that time, temperature and steam were achieved at their point of placement. Or perhaps we have an air detector.
But none of these items can tell us whether sufficient air removal and steam penetration occurred for the insides of instruments for each load – only a process challenge device can tell us this.
Routine monitoring is also a mandatory requirement in the ISO Standard 17665-1:2006 where it says in section 10.1 “Routine monitoring and control shall be performed on each operating cycle.”
Impending changes to the Standard for Sterilising Departments in Australia
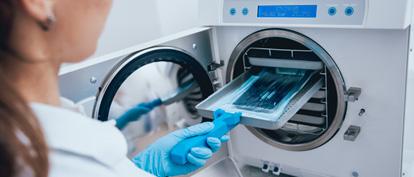
Our Australian Standards for the reprocessing of reusable medical devices in healthcare facilities - AS/ NZS 4187:2014 and AS/NZS 4815:2006 – are soon to be amalgamated into the one standard – AS 5369. This could mean some substantial changes for Dental Facilities who will now come under this standard, instead of the old AS/NZS 4815:2006.
If you have questions about your requirements for monitoring your steriliser in accordance with the standards please contact GKE Australia and we can assist you together with your Henry Schein Representative.
LAUREN KONTUS BSc(EnvSC) Sales and Contracts Manager GKE Australia

69 1300 65 88 22 INFECTION CONTROL
Click here to view GKEl products on our website CLICK HERE
AEROSOL & SPATTER REDUCTION EFFICACY OF

MR.THIRSTY® AND ALTERNATIVE PRODUCTS
Purpose
A pilot study to compare the aerosol and spatter reduction efficacy of various hands-free high-volume evacuation (HVE) systems during an ultrasonic scaling procedure.
Challenge Device
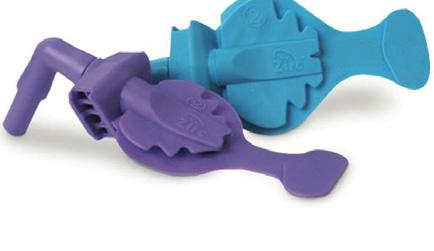
Mr. Thirsty® , an intraoral hands-free high-volume evacuation (HVE) suction device.
Experimental Design
Independent Variables: Use of a standard HVE, Mr. Thirsty® , Isodry® (Zyris), Dry Shield® (DryShield), or Ivory® ReLeaf ™ (Kulzer)
Materials
Mr. Thirsty® (Zirc Dental Products), Isodry® (Zyris), Dry Shield® (Dry Shield), Ivory® ReLeaf ™ (Kulzer), Cavitron ultrasonic scaling unit with Cavitron FSI 10S 30K insert (Dentsply Sirona), HVE with standard suction tips, SAS Super 180 Bioaerosol Sampler, TSA with Lecithin and Poly 90 Contact plates, TSA Settling plates, patient volunteers (A, B, and C), licensed dental hygienist volunteer wearing a face shield, and Level 3 mask.
Methods
Each ultrasonic scaling procedure was completed while the office was closed, and all procedures were completed in one designated operatory. Prior to the first patient, HVE lines were cleaned with an evacuation line cleaner and traps were changed.
An additional saliva ejector line plus two HVE lines were running during the study to simulate a four operatory practice using a dual vacuum pump. The same dental hygienist performed all ultrasonic scaling procedures in this study. The ultrasonic scaler was consistently set to 60Hz and set to the highest water spray level. A control sample of the operatory air was taken for 5 minutes while patient A and the dental hygienist were seated in the room, prior to any aerosol generation. The control air sample was taken using the SAS Super 180 Bioaerosol Sampler with a TSA with Lecithin and Poly 90 Contact Plate (ASP, air sampling plate) placed 18 inches
from the patient’s mouth and a TSA Settling Plate placed on the patient’s chest 8 inches from their mouth (Chest SP).
The positioning of each plate was consistent for all testing for the duration of the study. For each ultrasonic scaling procedure, all quadrants of the mouth were treated, anterior and posterior, buccal and lingual. After 2 minutes, 30 seconds the devices were used on the opposite side of the mouth.
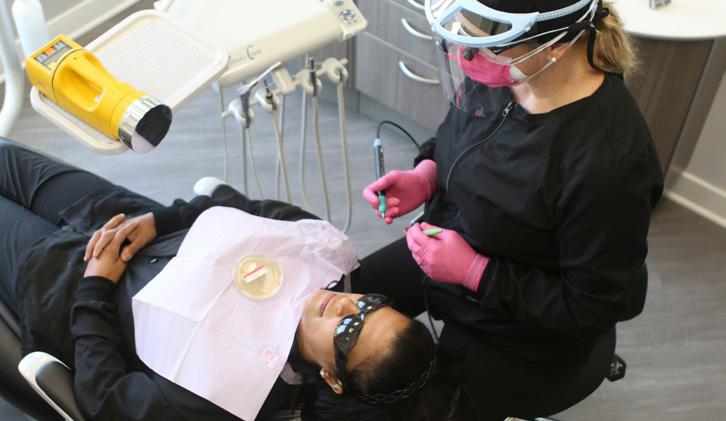
An ASP in the SAS Super 180 Bioaerosol sampler and HS Chest SP were used to routinely collect air quality samples for 5 minutes during each procedure and were replaced between each new condition.
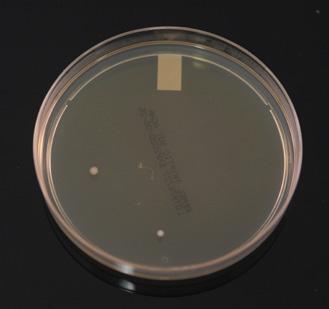
70 CONSUMABLES
Control: ASP (CFU = 94)
Control
Control: Chest (CFU = 2)
Five separate conditions were utilized for comparison purposes on each patient volunteer. The first condition utilized a standard HVE, the second condition utilized Mr. Thirsty® , the third condition utilized Isodry®, the fourth condition utilized Dry Shield® , and the fifth condition utilized Ivory® ReLeaf ™.
There was a 10-minute room turnaround time between each patient, during which appropriate clinical contact surface cleaning and disinfection and other recommended protocols were followed. After each test run, the exposed plates were immediately processed and incubated at 37°C for 48 hours.
Microbial growth was analyzed and recorded for all plates. All testing procedures were repeated on a total of three patient volunteers. Before testing, all volunteers agreed to participate in the study and to having their photos taken.
Results
Air sampling plate (ASP) data and chest settling plate (Chest SP) data is presented below, showing individual data for the three patients.
Discussion
Overall, the data show a trend that the use of Mr. Thirsty® performed most similarly to HVE when considering both ASP and Chest SP results. It should be noted that all HVE devices used in this study reduced air sample bacterial counts when compared to the control air sample.
With respect to the Chest SP, an outlier was observed for Ivory® ReLeaf ™. Among the remaining hands-free devices, more variability was seen across the three patients with IsoDry® than for the other devices. Use of IsoDry® resulted in lower ASP CFU and the greatest variability was found for DryShield® .
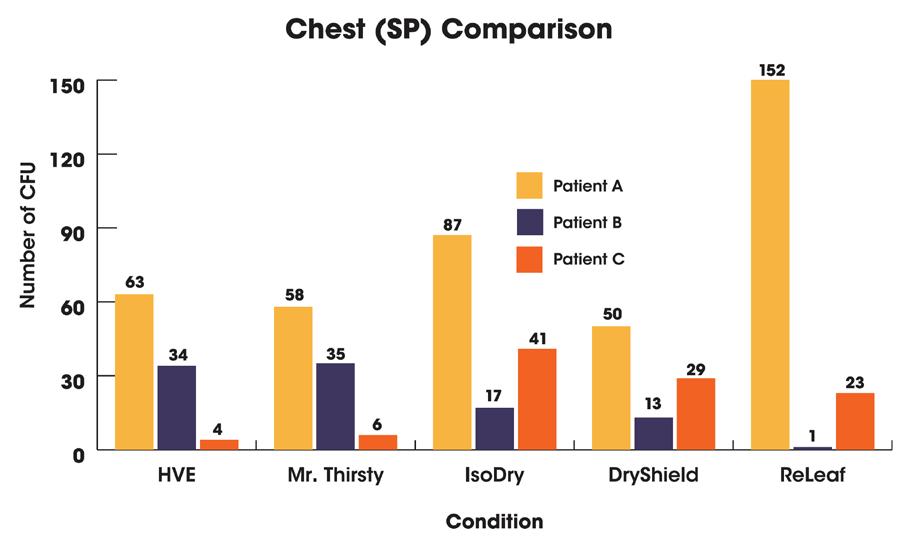
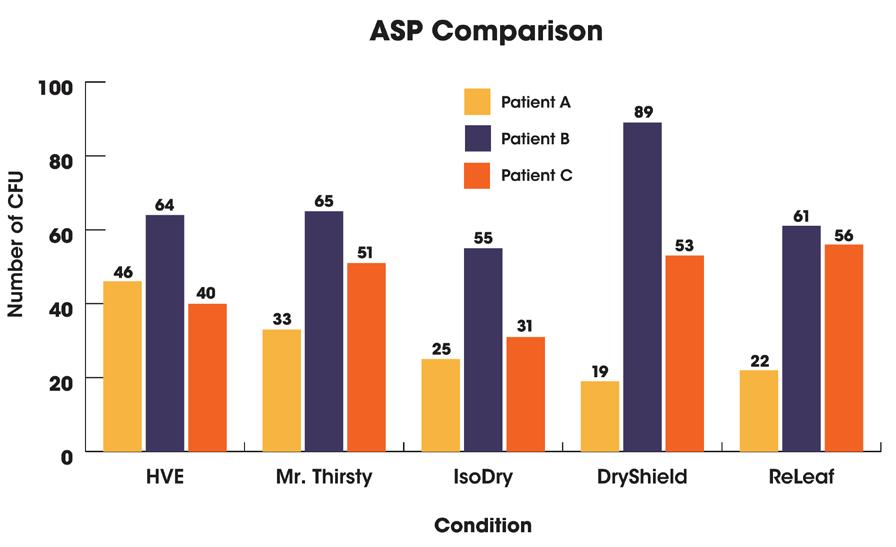
Use of any HVE device holds clinical advantage; hands-free devices seem to be preferred by hygienists. There were some limitations in this study, including the limited number of patients.

A larger sample size could provide a better representation of the population, may reduce variability, and would enable determination of statistical significance. In addition, standardized laboratory testing in conjunction with clinical testing would be useful in future research.
Conclusion
Preliminary data in this pilot study showed Mr. Thirsty® to perform most similarly to a standard HVE in both air sampling and chest spatter plates while also giving the dental professional the advantage of utilizing a hands-free high-volume suction.
71 henryschein.com.au
CONSUMABLES
Read the full article CLICK HERE
DARLENE FINNERTY B.S., RDH USA
RETRACTION & DRAWBACK
KEY DIFFERENCES & SOLUTIONS
Air Driven vs. Electric Motor Handpieces
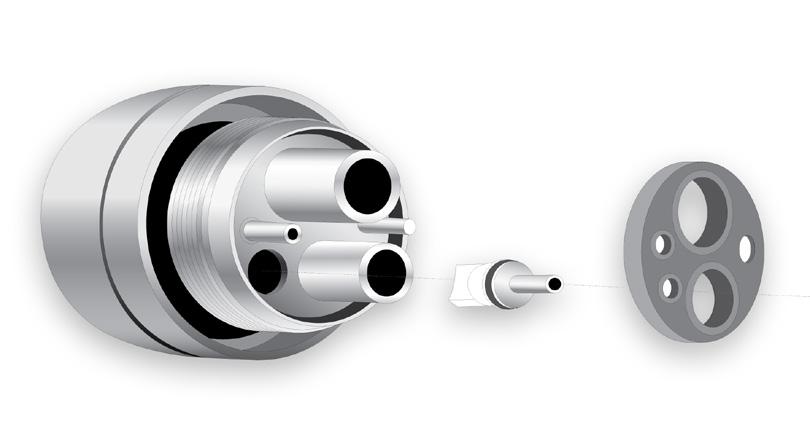
Learn about retraction and drawback (or suck-back) and discover how the right handpiece that can help protect your patients from cross-contamination with solutions like anti-retraction valves and ZeroDrawback technology.
Keep in mind, eliminating aerosols is nearly impossible with the use of air-driven handpieces and electric contra angle motor attachments. In general, contra angle attachments generate fewer aerosols than air-driven handpieces since they do not rely on drive air to run the impeller.
Retraction is essentially related to water being pulled back into the system through the water lines. So, retraction is strictly related to fluids and debris within those fluids.
Many manufacturers, including Morita, have already solved this problem by introducing anti-retraction valves throughout the system.
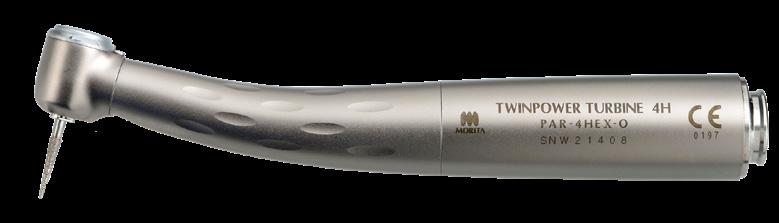
Essentially, these valves use a duckbill shape which blocks any fluids from getting back into the water lines. These can be present in your treatment unit and even in your handpiece itself.
Many practitioners like them for their stable and high torque. This may be a good solution to reduce aerosol generation but the costs of converting to electric motor driven attachments are not trivial. Also, one must consider an increase in weight when compared to air-driven handpieces.
What to look for in Air-Driven Handpieces?
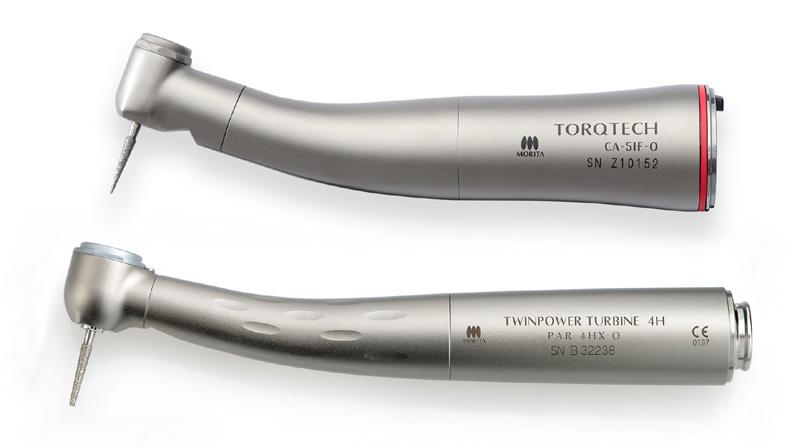
Usually, you will find multiple anti-retraction valves as fail-safes. Most major manufacturers include them within handpieces, couplings, and the treatment unit. This technology has been around for a while and the ISO 7494-2 standard requires your treatment unit to include it.
According to “Transmission routes of 2019-nCoV and controls in dental practice”, “high-speed dental handpieces without anti-retraction valves may aspirate and expel debris and fluids during the dental procedures.
More importantly, the microbes, including bacteria and virus, may further contaminate the air and water tubes within the dental unit, and thus can potentially cause cross-infection.”
Assuming you are not willing to go the electric motor route, choosing the right air-driven handpieces can be challenging. There has been a lot of talk about anti-retraction and anti-suck-back features but little clarification about what they are and how they work.
Should retraction occur, you can still flush and disinfect your waterlines as needed. In summary, we can say that the potential for cross-contamination here is quite low.
72
Retraction, Anti-Retraction Valves and Flushing
HANDPIECES & INSTRUMENTS
Drawback, Quick Stop and Zero-Drawback
Unlike retraction, drawback is related to the air lines. Aerosols, created during dental treatment, are drawn back into the handpiece, your air lines, and eventually into your treatment unit. When the drive air stops, the turbine continues to spin. This creates negative pressure in the system and begins to draw aerosols back into the system, kind of like a vacuum. This is also known as suck-back.
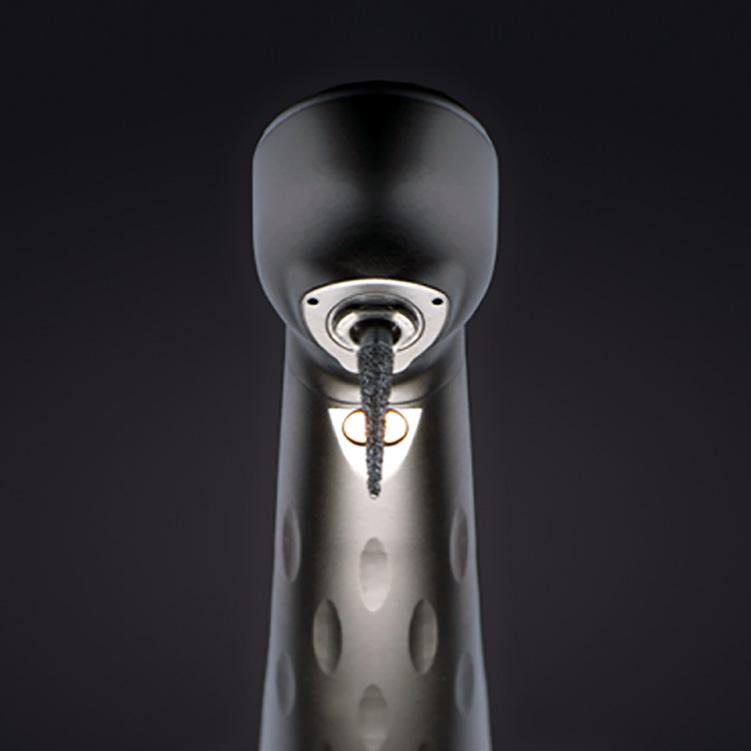
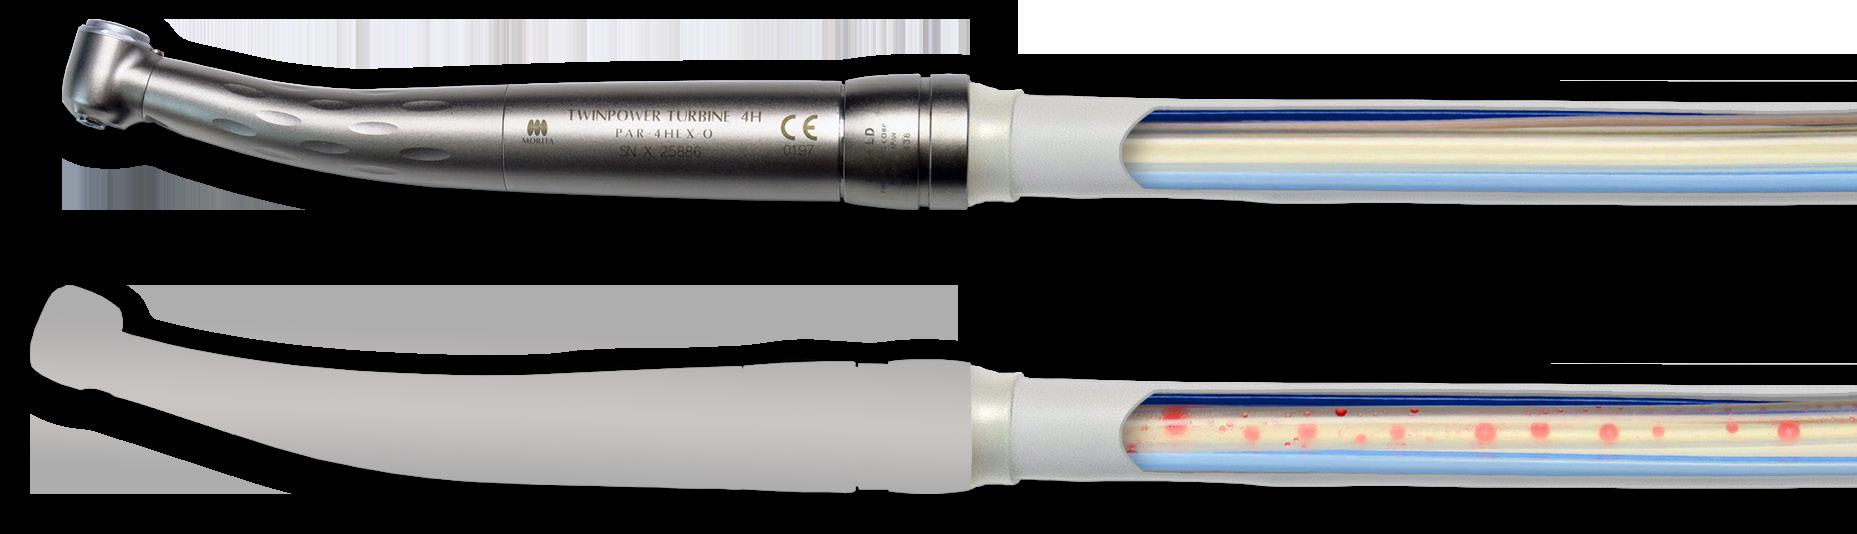
This effect is cumulative. Each time you activate the drive air, the drawback forces any contaminates further into the handpiece, past the coupling, and eventually into your air lines, and your treatment unit. Keep in mind that you cannot disinfect and flush the air lines of your treatment unit. Many manufacturers will include a braking system to reduce the spinning motion of the turbine once the drive air stops. Terminology for these types of braking systems may vary but at Morita, we call it Quick Stop. A Quick Stop braking system can help reduce drawback but not eliminate it. The turbine continues to rotate after the drive air stops and, like any braking system, we cannot force the turbine to stop instantaneously. It takes time and during that time, drawback is a concern. In addition, smaller head sizes create less inertial force which also contributes to reducing stopping times.
Smaller head sizes or quick stop braking mechanisms will help stop the turbine faster and reduce the number of possible contaminants from being drawn back into the system. Reduction is not enough as the effect is cumulative, and even minor drawback can be enough to contaminate your system. According to “In vitro study of anti-suck-back ability by themselves on new highspeed air turbine handpieces”, some manufacturers will introduce a labyrinth system to reduce drawback, but these will not eliminate the drawback effect.
Only the Zero-Drawback system was found to eliminate drawback through this study.
References
Ozawa T, Nakano M, Arai T. In vitro study of anti-suck-back ability by themselves on new high-speed air turbine handpieces. Dent Mater J. 2010;29(6):649-654. doi:10.4012/ dmj.2010-008
Peng, X., Xu, X., Li, Y. et al. Transmission routes of 2019-nCoV and controls in dental practice. Int J Oral Sci 12, 9 (2020). https://doi. org/10.1038/s41368-020-0075-9
Quan, Yingjun & Lim, Joong-Yeon & Kim, Kyoung-Nam & Kim, Yang-Soo. (2015). A testing methodology for suck-back behavior of high-speed air-turbine dental handpiece. Korean Journal of Dental Materials. 42. 10.14815/ kjdm.2015.42.1.29.
If you are interested in learning more about the TwinPower Turbine™ and how Zero-Drawback works, please contact your Henry Schein Relationship Manager - we can provide you with further materials, information about training & support
73 1300 65 88 22
HANDPIECES & INSTRUMENTS View Retraction vs Drawback View Stop Systems Time Test CLICK HERE CLICK HERE
INSTRUMENTATION & PROCEDURAL PRODUCTS
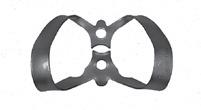
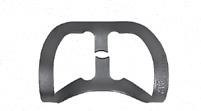

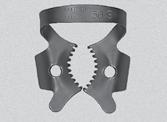
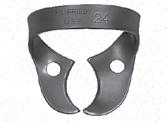
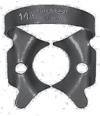

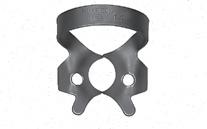


EVERY TOOTH CAN BE ISOLATED WITH THE RIGHT CORRESPONDING CLAMP

74
M OLARS ANTE RIORS MOLAR S PREMOLARS PREMOLARS PREMOLARS PREMOLARS ANTERIORS UPPER LOWER MOLAR S MO LARS Anteriors Uppe rM o lar s Premolars L ower Molars General Molars RDCM0X RDCM2X RDCM27NX RDCM29X RDCM209X RDCM2AX RDCM2ASX RDCMW2X RDCM1X RDCM1AX RDCM4X RDCM3X RDCM7AX RDCM13AX RDCMW3X RDCMW7X RDCM26X RDCM7X RDCM12AX RDCM8AX RDCM14X RDCM25X RDCM14AX RDCM24X RDCM56SX RDCM27X RDCM56X RDCM18X RDCMW14AX RDCM8ADX RDCM11X RDCMW8AX RDCM10X RDCM28X RDCM8X RDCM31X RDCMW4X RDCM26NX RDCM201X RDCM5X RDCM30X RDCM205X RDCM00X RDCM6X RDCM9SX RDCM212X RDCM212SAX RDCM9X Anteriors Contact your Henry Schein Relationship Manager for further support Posteriors Upper Molars Lower Molars General Molars CLICK HERE HANDPIECES & INSTRUMENTS
CHAIRSIDE IMPACT
CRYSTAL HD MOUTH MIRRORS BY ZIRC
Many of us use magnification loupes, bright overhead lights, and are conscious of our patient and operator positions to optimize our visualization, but none of those things matter if one small thing is below standard: our mouth mirror. For many years, I had the unfortunate experience of using mirrors that were badly scratched, cloudy, and dim on the reflective surface with prophy paste and disclosing solution caked around the edges. I always made sure to keep replacement heads close to my working area so that I could change out my mirror when I couldn’t stand the hazy view any longer, but that seemed to happen often. A few months ago, my hygiene mentor gave me some Zirc mirrors, and they have become the exam tool I didn’t know I needed.
Zirc’s Crystal HD mirrors have several characteristics that set them apart from the ordinary. Unlike traditional rhodium-coated mirrors, the Crystal HD mirror is made with multiple layers of metal oxides that provide a much higher reflective value, allowing for a significantly clearer, brighter image. This technology enables the mirror to illuminate your visual field in a way that other mirrors simply cannot.
Now that I’ve experienced the difference, rhodium mirrors remind me of the view I get when I look out my window on a foggy, overcast day, versus the clear, sunny display I get when I use my Crystal HD mirror. The difference is truly astounding.
Another feature I like about the Crystal HD mirror is how easy it is to keep clean while I’m using it intraorally. With most other mirrors, once I notice too much debris or saliva on its reflective face, I have to turn away from my patient, grab a 2x2 gauze, and thoroughly rub it clean before I can continue. In contrast, I’ve noticed that a simple swipe with my gloved thumb removes any accumulation on the Crystal HD mirror without leaving streaks or smudges.
It’s a small time-saver that makes me that much more efficient.
The face of the mirror is also perfectly flush around the
edges, so I never have to worry about debris accumulating with continued use.
The last thing I’d like to spotlight with the Crystal HD mirror is its resin casing. When comparing it to most mirrors with stainless steel components, the resin material provides a few advantages for both patients and clinicians. Aside from its lightweight feel and easy-to-grip handle, I don’t have to worry about patient injury if their teeth happen to contact the resin during examination.
It’s much softer on enamel, and there is no chance of galvanic shock when using around metal restorations. All mouth mirrors are not created equally. I have come to love and expect the quality, clarity, and brilliance of Zirc’s Crystal HD mirror and know that my assessment and instrumentation has improved with enhanced visualization. This product has become something I simply must have when I’m providing clinical care, and I would recommend it to any clinician who is looking for the best tools to have in their hygiene armamentarium. May your mirror—and your future—be clear and bright.
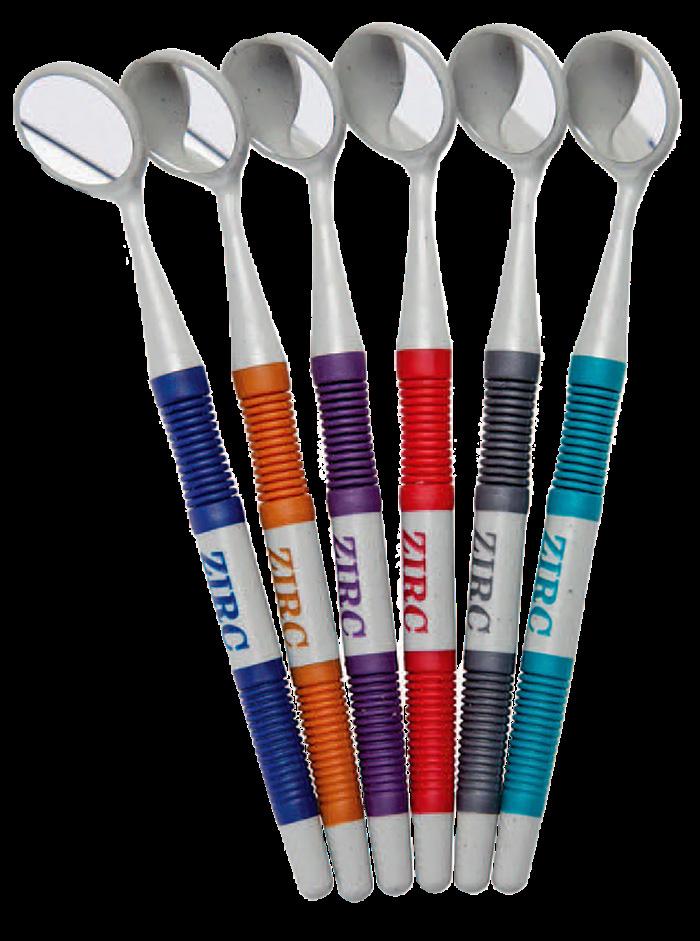
Bethany Montoya, RDH, is a practicing dental hygienist with nearly 10 years of experience. She has advanced knowledge and training in complex cosmetic dentistry, sleep-disordered breathing, TMJ disorders, and implant dentistry. She has achieved success in hygiene diagnosis and acceptance that far exceeds the industry standard. Montoya has devoted her most recent years to focusing on the personal and relationship aspects of dentistry through her latest project, Human RDH. She can be reached at humanrdh@outlook.com.
BETHANY MONTOYA RDH

76
I’m not sure if there’s anything more frustrating than attempting to perform meticulous hygiene instrumentation on a patient while battling an obstructed view.
HANDPIECES & INSTRUMENTS
KAVO UNIQA TICKS ALL THE BOXES
A/Prof. Roy Judge is the owner of ‘Prosthodontics Plus’ in Moonee Ponds Victoria. For over 30 years he has worked in both public and private sectors and has accumulated a vast amount of experience using a variety of equipment. Until now though, he hasn’t had the opportunity to work on a KaVo treatment unit.
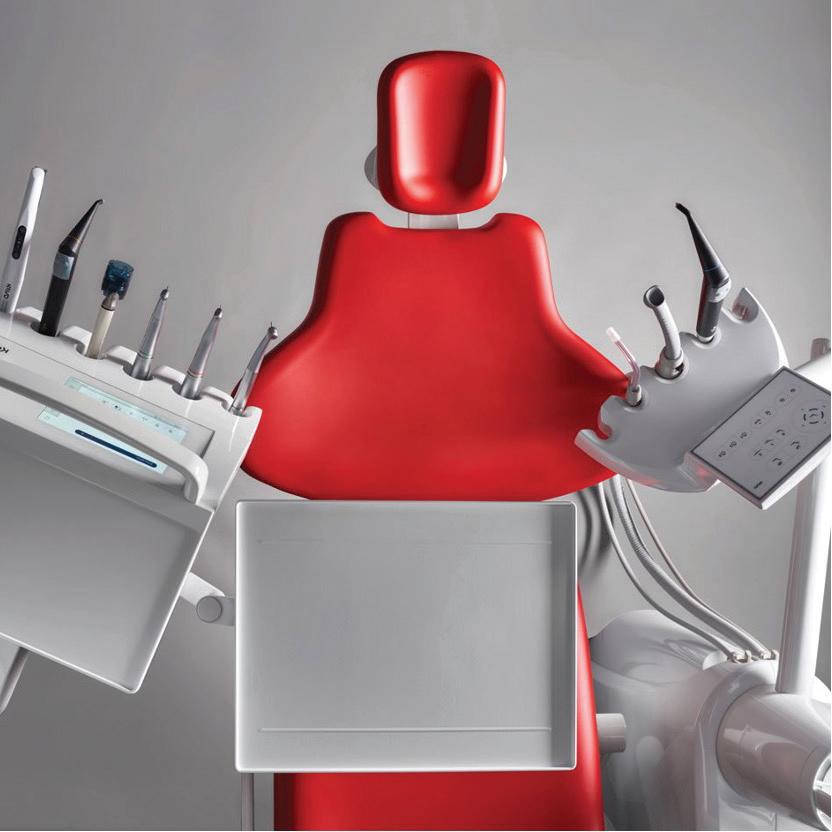
The Moonee Ponds practice he acquired came with two existing treatment units which were ageing and would soon require an upgrade. Being the first time in his career that he would purchase his own treatment unit, A/Prof. Judge started the research process early:
“Prior to the Covid-19 pandemic, I knew there was going to be a time in the future where I would need to invest in my own equipment. After researching treatment units extensively for 4-5 years, KaVo was always going to be high on my wish list when the time came to decide. This was primarily based on the well-known reliability and reputation for quality and engineering that’s synonymous with the KaVo brand.”
When one of the two existing chairs in his clinic ultimately decided to break down, A/Prof Judge needed to get back into the showrooms and make a decision:
KaVo uniQa
A/Prof. Roy Judge of Prosthodontics Plus

“The decision-making process didn’t take very long. When I stepped into the Henry Schein Showroom in Melbourne and saw the new KaVo uniQa, I quickly realised it was going to fulfil all my clinical requirements and be user friendly for my team. Almost immediately, the paperwork was signed, and the installation date confirmed.”
Tuesday 7th February 2023 was installation day, and the technician from Henry Schein, Steve Wilkinson, was on site:
“Steve was fantastic, he was on time and worked throughout the day in a polite, time efficient and neat manner. What really came across in my dealings with Steve were the years of experience he had working with equipment and the level of pride he has in the KaVo product line.”
Fit out was completed that afternoon in preparation for a full clinical day on Wednesday 8th February.
“I was able to perform the full range of clinical procedures during a busy day without a misstep or concern. The overhead lighting on this unit is fantastic, delivering a wide working field with a great and user-friendly resin function. The speed control of the handpieces is robust and straightforward, allowing me access and control for the most difficult preparations. My team were also impressed with the chairs fully integrated hygiene centre. At the end of a busy day one, I was very happy with my decision to purchase a KaVo uniQa.”
77 1300 65 88 22 EQUIPMENT
Find Out More CLICK HERE
A/PROF. ROY JUDGE of Prosthodontics Plus
HANDPIECES & INSTRUMENTS
KAVO EXPERT SERIES

High-tech FG chuck with carbide guide bush for optimum longevity
Low volume (only 57 dB(A)) to eliminate unpleasant noises for patients and treatment personnel

Ceramic ball bearings for excellent quiet and low-vibration operation and high-quality, lowwear materials such as a stainless-steel head
Small head size for easy, efficient access to the preparation area
EXPERTgrip surface for fast cleaning and excellent grip
3-port spray with ultra-fine spray wetting for optimum cooling
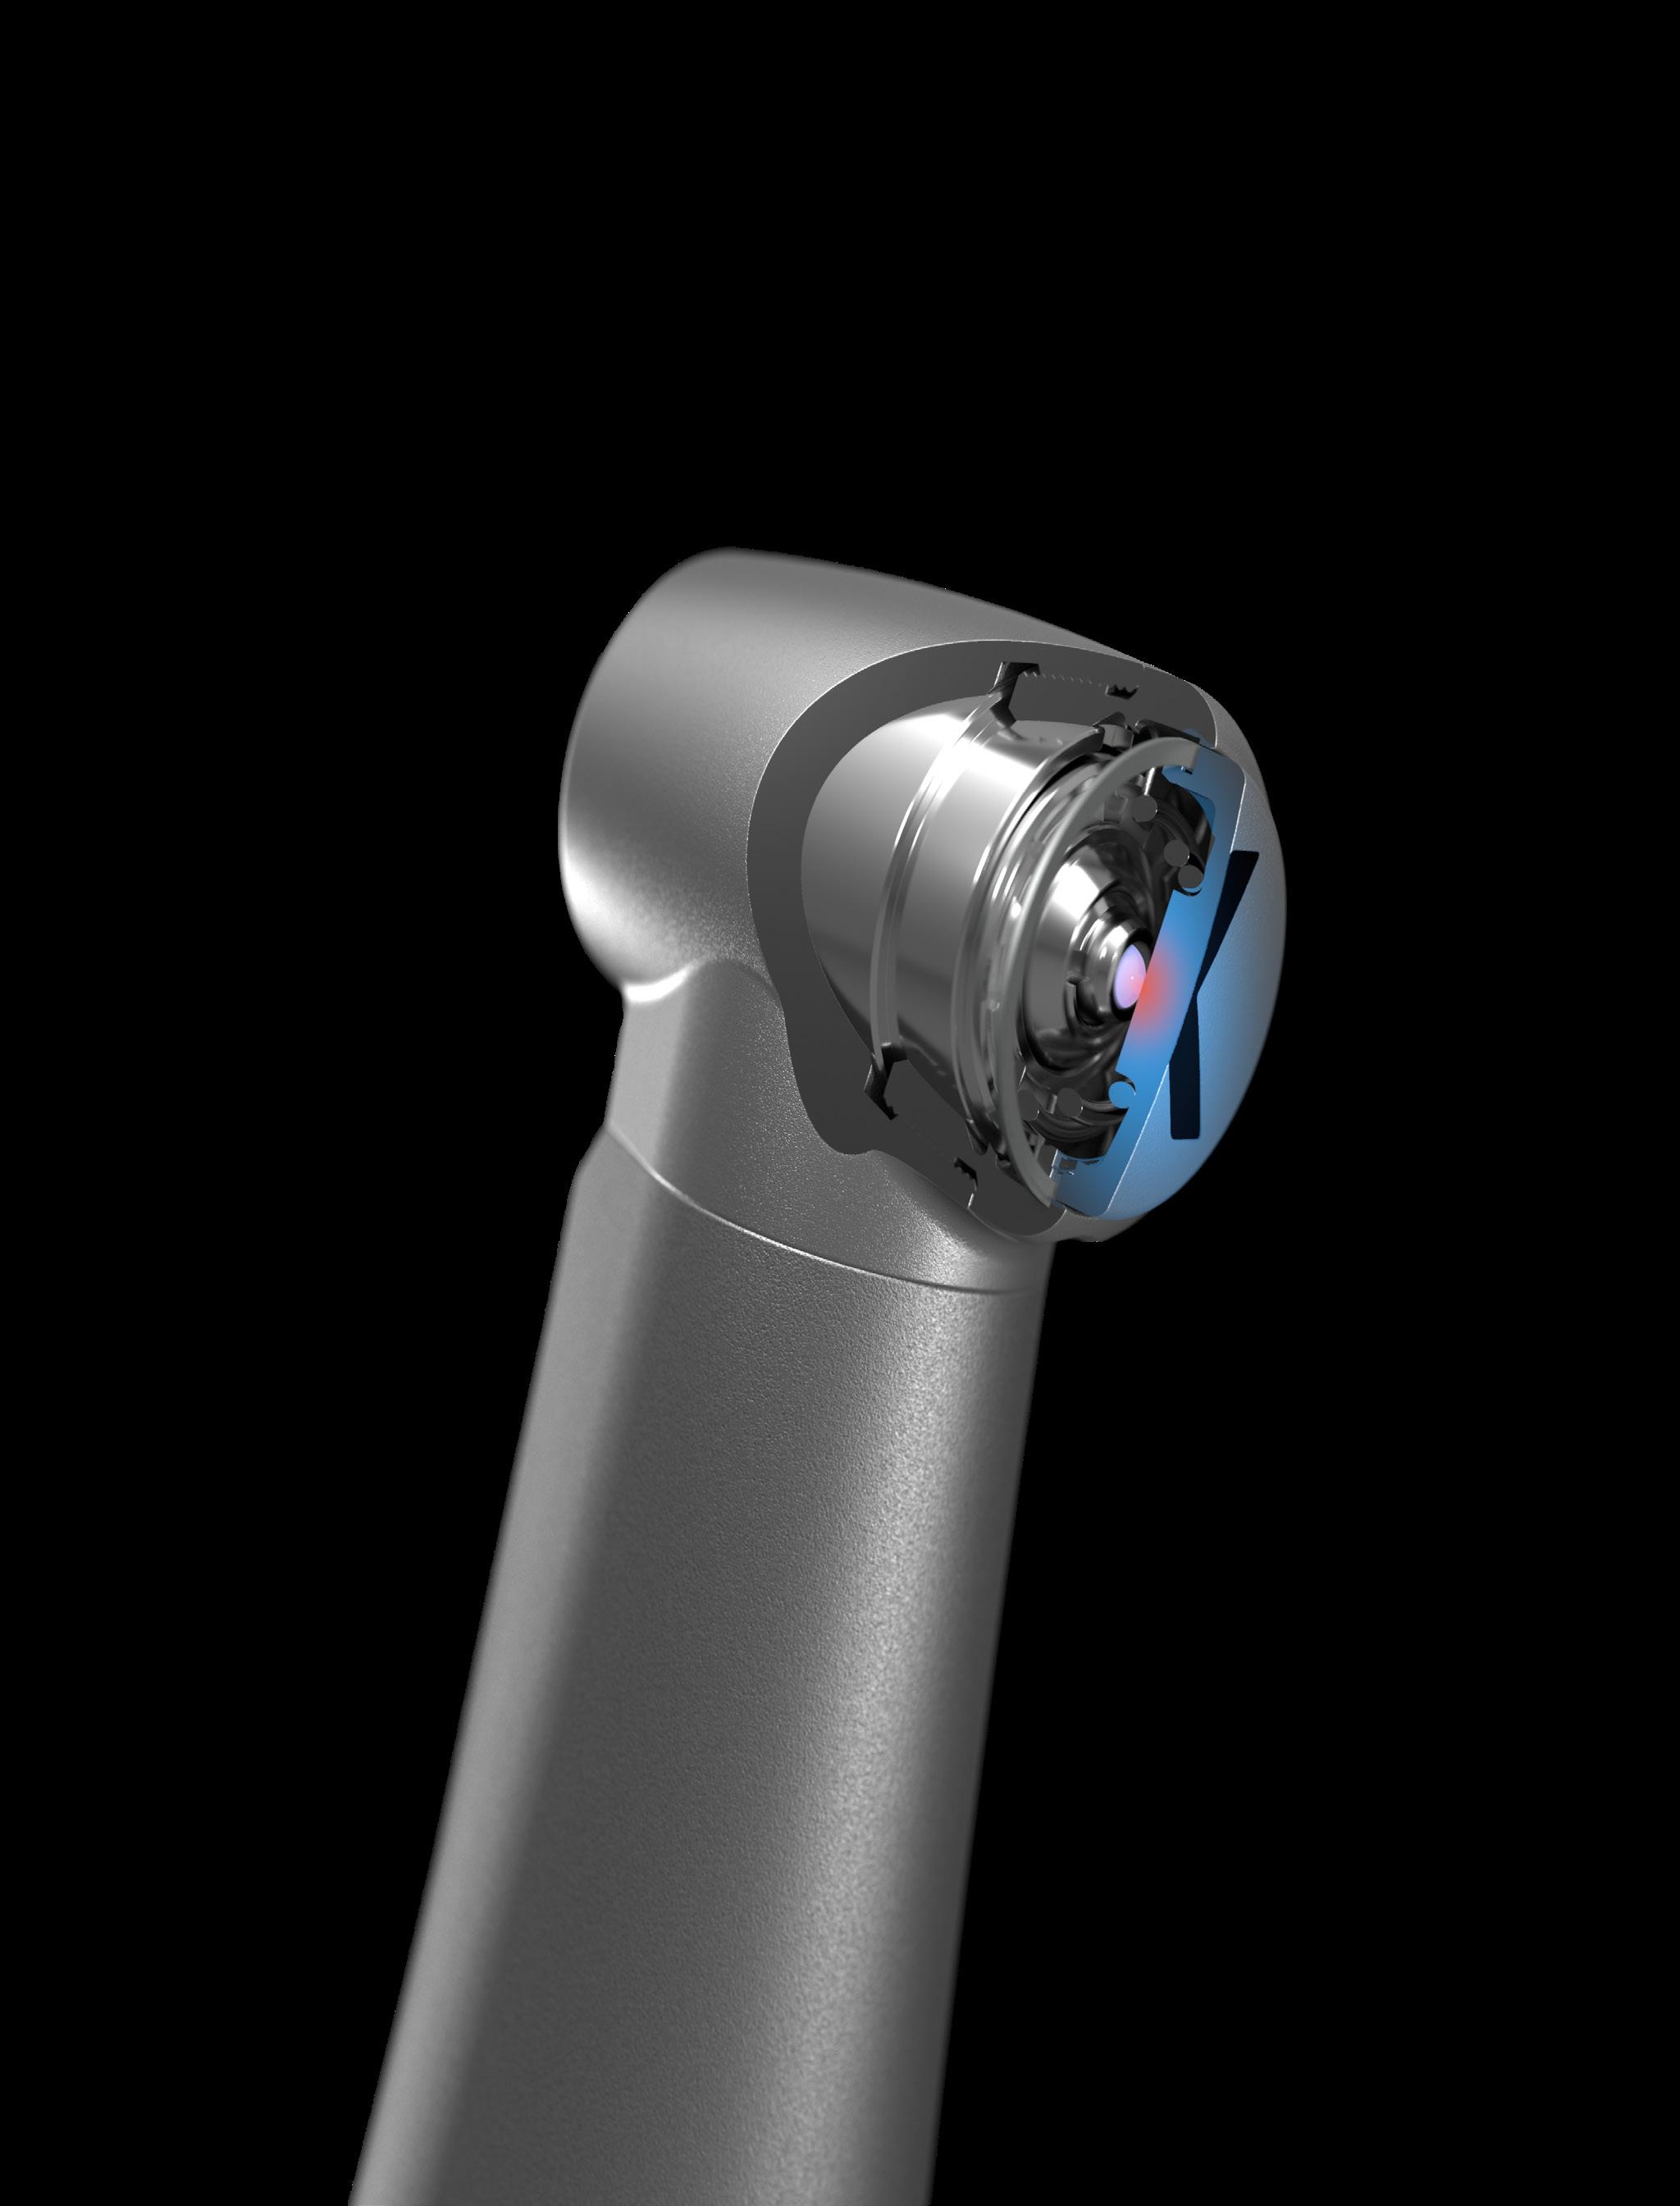
Glass rod light conductor with up to 25,000 lux for reliable detection of the preparation margins
Internally channelled, separate coolant for optimum spray results
Replaceable spray microfilter for effective and trouble-free spray cooling


KaVo INTRAmatic coupling system can be used with any treatment unit
KaVo push-button chuck system with a retention power of up to 30 N for secure retention of the bur
Thermo-disinfectable and sterilisable up to 135 °C
78
MAXIMUM LONGEVITY - EFFICIENT OPERATIONS - RELIABLE FEATURES
EXPERTmatic LUX speed-increasing contra-angle E25L (1:5) Carbide guide bush, glass rod light conductor with up to 25,000 lux, fast, precise work thanks to small head, flexible latch and ceramic ball bearings, internally channelled spray water and spray air, 3-port spray and replaceable spray filter
Mat. no. 1.007.5550
EXPERTmatic handpiece E10C (1:1, without light) 1-port spray, internally channelled spray water and spray air, suitable for both handpiece and contra-angle burs
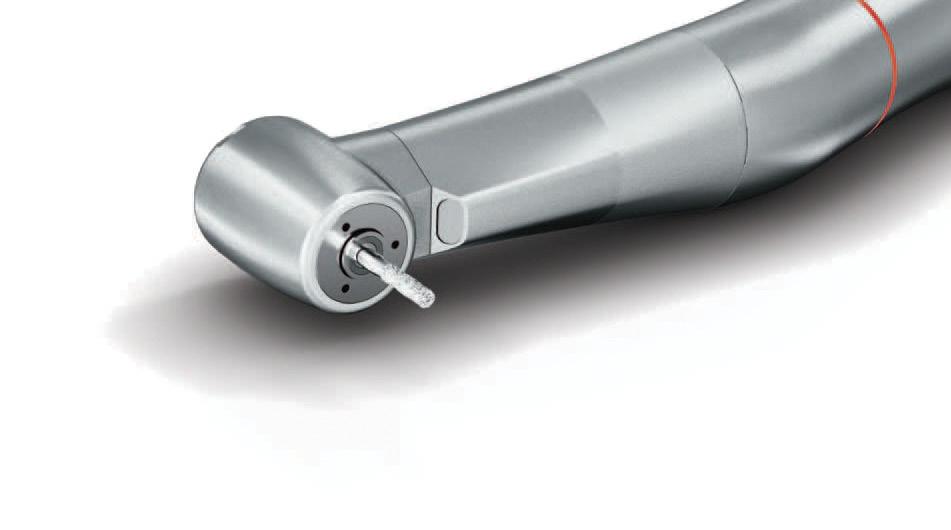
Mat. no. 1.007.5560
EXPERTmatic LUX contra-angle E20L (1:1) Glass rod light conductor with up to 25,000 lux, efficient access thanks to even smaller head, 1-port spray, internally channelled spray water and spray air, easy to handle thanks to flexible latch Mat. no. 1.007.5540
EXPERTmatic LUX reducing contra-angle E15L (5.4:1)
Glass rod light conductor with up to 25,000 lux, efficient access thanks to even smaller head, 1-port spray and internally channelled spray water and spray air, easy to handle thanks to flexible latch
Mat. no. 1.007.5530
EXPERTmatic prophylaxis contraangle E31C (5.4:1, without light) Keeps out polishing paste thanks to multiple seals, with thread and screw-off holder for screw-type and snap-on cups Mat. no. 1.008.4998
EXPERTmatic EVA prophylaxis contraangle E61C (2.7:1, without light)
For the EVA system (files made by Intensiv Co.), for polishing in interdental spaces, for approximal enamel reduction etc., buffered 0.8 mm stroke, precise locking for files thanks to 36 locking positions
Mat. no. 1.008.4999
EXPERTmatic speedincreasing contraangle E25C (1:5, without light)
Carbide guide bush, fast and precise work thanks to even smaller head, flexible latch and ceramic ball bearings, 3-port spray and replaceable spray filter, internally channelled spray water and spray air
Mat. no. 1.007.5551
EXPERTmatic contraangle E20C (1:1, without light)
Efficient access thanks to even smaller head, 1-port spray, internally channelled spray water and spray air, easy to handle Mat. no. 1.007.5541
EXPERTmatic reducing contra-angle E15C (5.4:1, without light)
Efficient access thanks to even smaller head, 1-port spray, internally channelled spray water and spray air, easy to handle

Mat. no. 1.007.5531
79 henryschein.com.au
TURBINES
BENEFITS AT A GLANCE
Optimum access thanks to ergonomic 100°/19° head/knee angle combination
Ceramic ball bearings for excellent quiet and low vibration operation
Low volume (only 62 dB(A)) to eliminate unpleasant noises for patients and treatment personnel
Replaceable spray microfilter for effective and trouble-free spray cooling

Small head size Overall height 13.6 mm (standard version) or 12.2 mm (mini version) for good access and overview
EXPERTgrip surface for fast cleaning and excellent grip
4-port spray with ultra-fine spray wetting for optimum cooling
Glass rod light conductor with up to 25,000 lux for reliable detection of the preparation marginsMaximum power of up to 29 watts for efficient work
KaVo push-button chuck system with a retention power of up to 30 N for secure retention of the bur
Thermodisinfectable and sterilisable up to 135 °C

Maximum power of up to 29 watts for efficient work
High-tech FG chuck with carbide guide bush for optimum longevity
80
HANDPIECES & INSTRUMENTS
EXPERTtorque LUX
E680L
Head height 13.6 mm, up to 29 watts of power*, 4-port spray, glass rod light conductor, up to 62 dB(A)
Mat. no. 1.006.8700
EXPERTtorque Mini
LUX E677L
Small head: head height 12.2 mm, for standard and miniature burs, 27 watts of power*, 3-port spray, glass rod light conductor, up to 65 dB(A)
Mat. no. 1.007.3600
THIRD-PARTY COUPLINGS
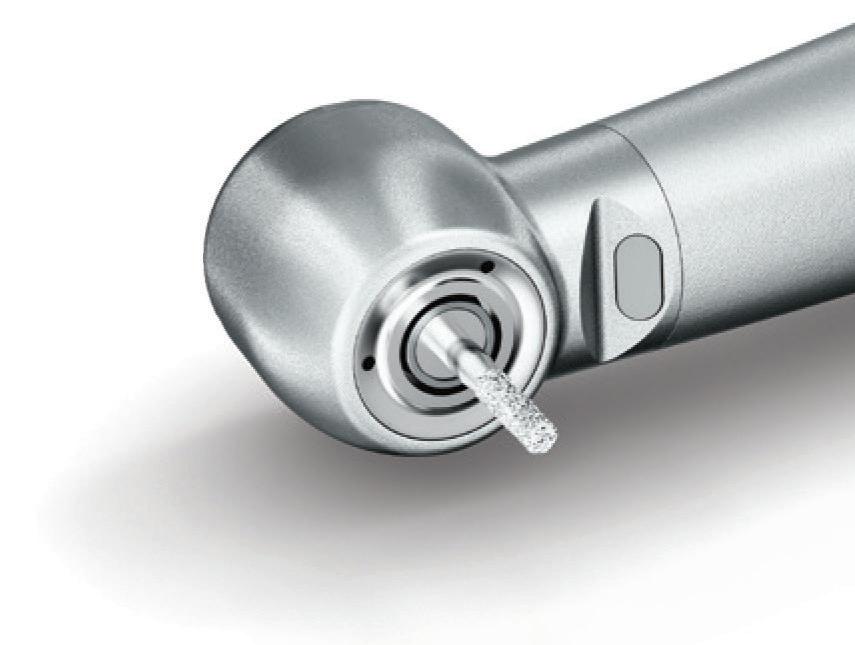
EXPERTtorque E680C
Up to 29 watts of power*, 4-port spray, head height 13.6 mm, up to 62 dB(A)
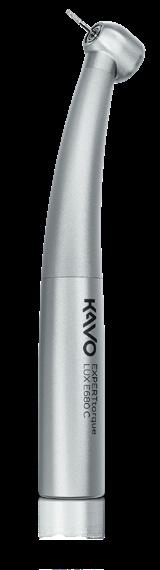
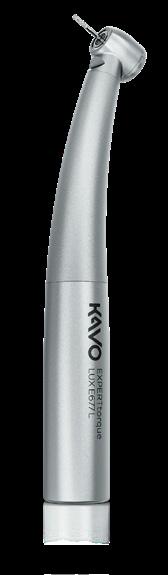
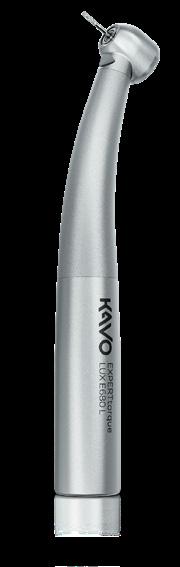
Mat. no. 1.006.9000
EXPERTtorque LUX E680L
Head height 13.6 mm, up to 29 watts of power*, 4-port spray, glass rod light conductor, up to 62 dB(A)
Mat. no. 1.006.8700
EXPERTtorque Mini LUX
Like E677 L, fits NSK FlexiQuik coupling** E677
LN**:
Mat. no. 1.006.0100
* At 3.5 bar. Power depends on drive pressure and other parameters. ** Registered trademark of Sirona or NSK.
81 1300 65 88 22 HIGH POWER SMALL HEAD SIZE WITHOUT LIGHT
Read the full article CLICK HERE
KAVO PRACTICE EQUIPMENT
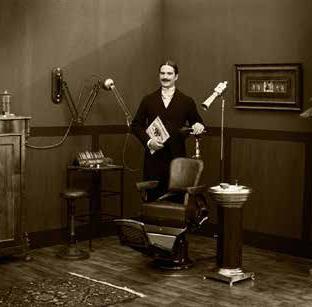
With a large number of patents and utility models, KaVo is constantly keeping its promise of “Dental Excellence”.
1910
1951
KaVo 1010 treatment unit with a built in, automatic spray device for cooling technology.
1930
1950
1964
KaVo 1025 treatment unit. Ergonomic Sensation. For the first time, patients can be treated lying down.
1970
KaVo ESTETICA 1040 Sets new aesthetic and functional standards.
1936
KaVo 1001 - First mass-produced treatment unit.
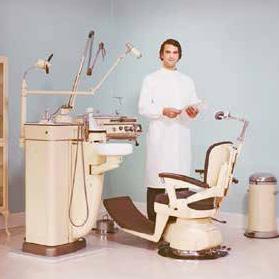
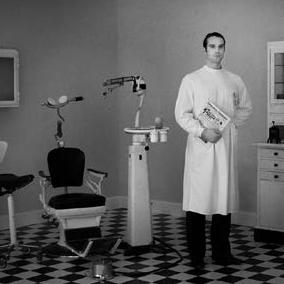
1957
KaVo 1012 - The turbine is integrated into a fully functional treatment unit.
1967
KaVo 1021 - The first treatment unit with free-hanging tubes.
Contact your Henry Schein Equipment RelationshManager for great deals on KaVo Handpieces and Equipment
82 EQUIPMENT
EXCELLENCE FOR OVER 110 YRS
Our innovations have helped us to set new standards and we continue to work on exceeding your expectations.
1970
1983
KaVo Regie 1050 Winner of the design award.
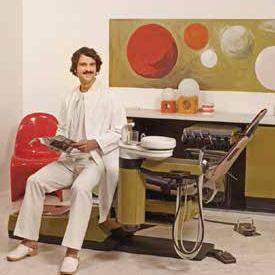
2010
2020
2007
KaVo ESTETICA E80
This suspended chair with outstanding ergonomics won KaVo an award from the “Campaign for Healthier Backs” association (AGR).
1980
KaVoLUX Operating lights with outstanding light quality.
2002
KaVo Primus 1058 becomes a best-seller as an all-round, midrange treatment unit.
2020 Design Edition, Inspired by Japan. New modern designs for your dental practice.
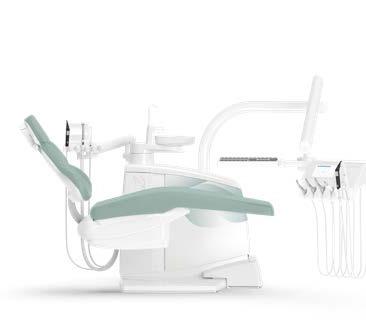
2015 KaVo ESTETICA E70/E80 Vision
The integrated touch display and hygiene centre simplify the daily workflow.
Contact your Henry Schein Equipment RelationshManager for great deals on KaVo Handpieces and Equipment
83 henryschein.com.au EQUIPMENT
1300 65 88 22 henryschein.com.au
