DENTAL SOLUTIONS

AUG / SEPT 2023
02 CONTENTS - CLICK CATEGORY TO VIEW ORAL HEALTH MONTH DENTAL EDUCATION HUB 04 14 NEW PRODUCTS ORTHODONTICS 16 20 ENDODONTICS PAIN CONTROL 50 60 COSMETIC & RESTORATIVE PREVENTATIVE 22 48 INFECTION CONTROL HANDPIECES & INSTRUMENTS 65 72 SURGICAL 3D PRINTING / EQUIPMENT 82 86
WELCOME TO OUR AUGUST EDITION FOCUSED ON ORAL HEALTH MONTH
As dental professionals, you know that oral health is vital to overall health & well-being of your patients, you have the privilege of making a difference & educating your patients on the importance of maintaining healthy teeth and gums and providing them with tools they need to achieve optimal oral health. Henry Schein is proud to be your trusted business partner along this journey. We partner with the world leading brands to provide tailored solutions that meet your practice needs.
In this edition, you will find valuable articles, expert advice, and practical tips to help educate your patients.
The FDI’s Whole Body Health Project supported by Colgate, provides dental professionals with the latest research linking oral health with overall health, and resources to support your conversations with your patients and the community.

Check them out here: www.fdiworlddental.org/whole-body-health
2023 Dental health Week will take place from 7th till 13th of August, learn more: www.teeth.org.au/dental-health-week
With interest rate rises and increased inflation rates it is difficult to predict the effect of the current economic challenges on dental practices. What will be the shortand long-term impact on dental practices and how can practices improve performance and productivity?
With effective systems, strategies, and protocols in place, it is important for practices to adapt to the changing environment, at Henry Schein we have a range of solutions to help you practice.
From our Business Solutions such as Humm patient finance and Cinch Dental marketing through to our market leading product portfolio and our Henry Schein360 loyalty programme, there are a range of solutions available to you and we encourage you to speak to your Relationship Manager for more details.
You and your patients are at the forefront of everything we provide and offer at Henry Schein Australia. Testing times like these encourage us to re-think our purchasing patterns and open opportunities to utilise smart savings.
Henry Schein Brand Products
To support your everyday needs and to help you operate a more efficient practice, we offer you a carefully selected range of high-quality Henry Schein Brand Products, at a competitive price.
Consistency of quality and regulatory compliance are the keystone of Henry Schein Brand Products.
We stand by our products, and we stand by you. Products carrying the Henry Schein Seal of Excellence on the packaging offer an additional assurance. Every item has met high standards to earn the Henry Schein Seal of Excellence which is your 100% satisfaction guarantee. Covering everything from Infection Control, Endodontics, Disposables, Prevention, Instruments and more.
In April, Henry Schein Australia launched the Henry Schein Brand Product website allowing you to easily review the portfolio and fulfill your everyday needs. Rely on us.
To read more about Henry Schein Brand Products visit www.henryschein.com.au/henry-schein-brand
We hope you enjoy this edition, and we look forward to hearing back from you.
If there are any articles that you are interested in or products that you would like to learn more about, please
Mariam Henien Pain Control & Preventive Category Manager Marie Strong Brand Equity Manager, Oceania Brand Manager
henryschein.com.au
03
T V CLICK HERE
DID YOU KNOW? THE AVERAGE AMOUNT OF MONEY LEFT BY THE TOOTH FAIRY IN 1950 WAS 25 CENTS. IN 1988 IT WAS $1.00, THE GOING RATE NOW IS $2.00.
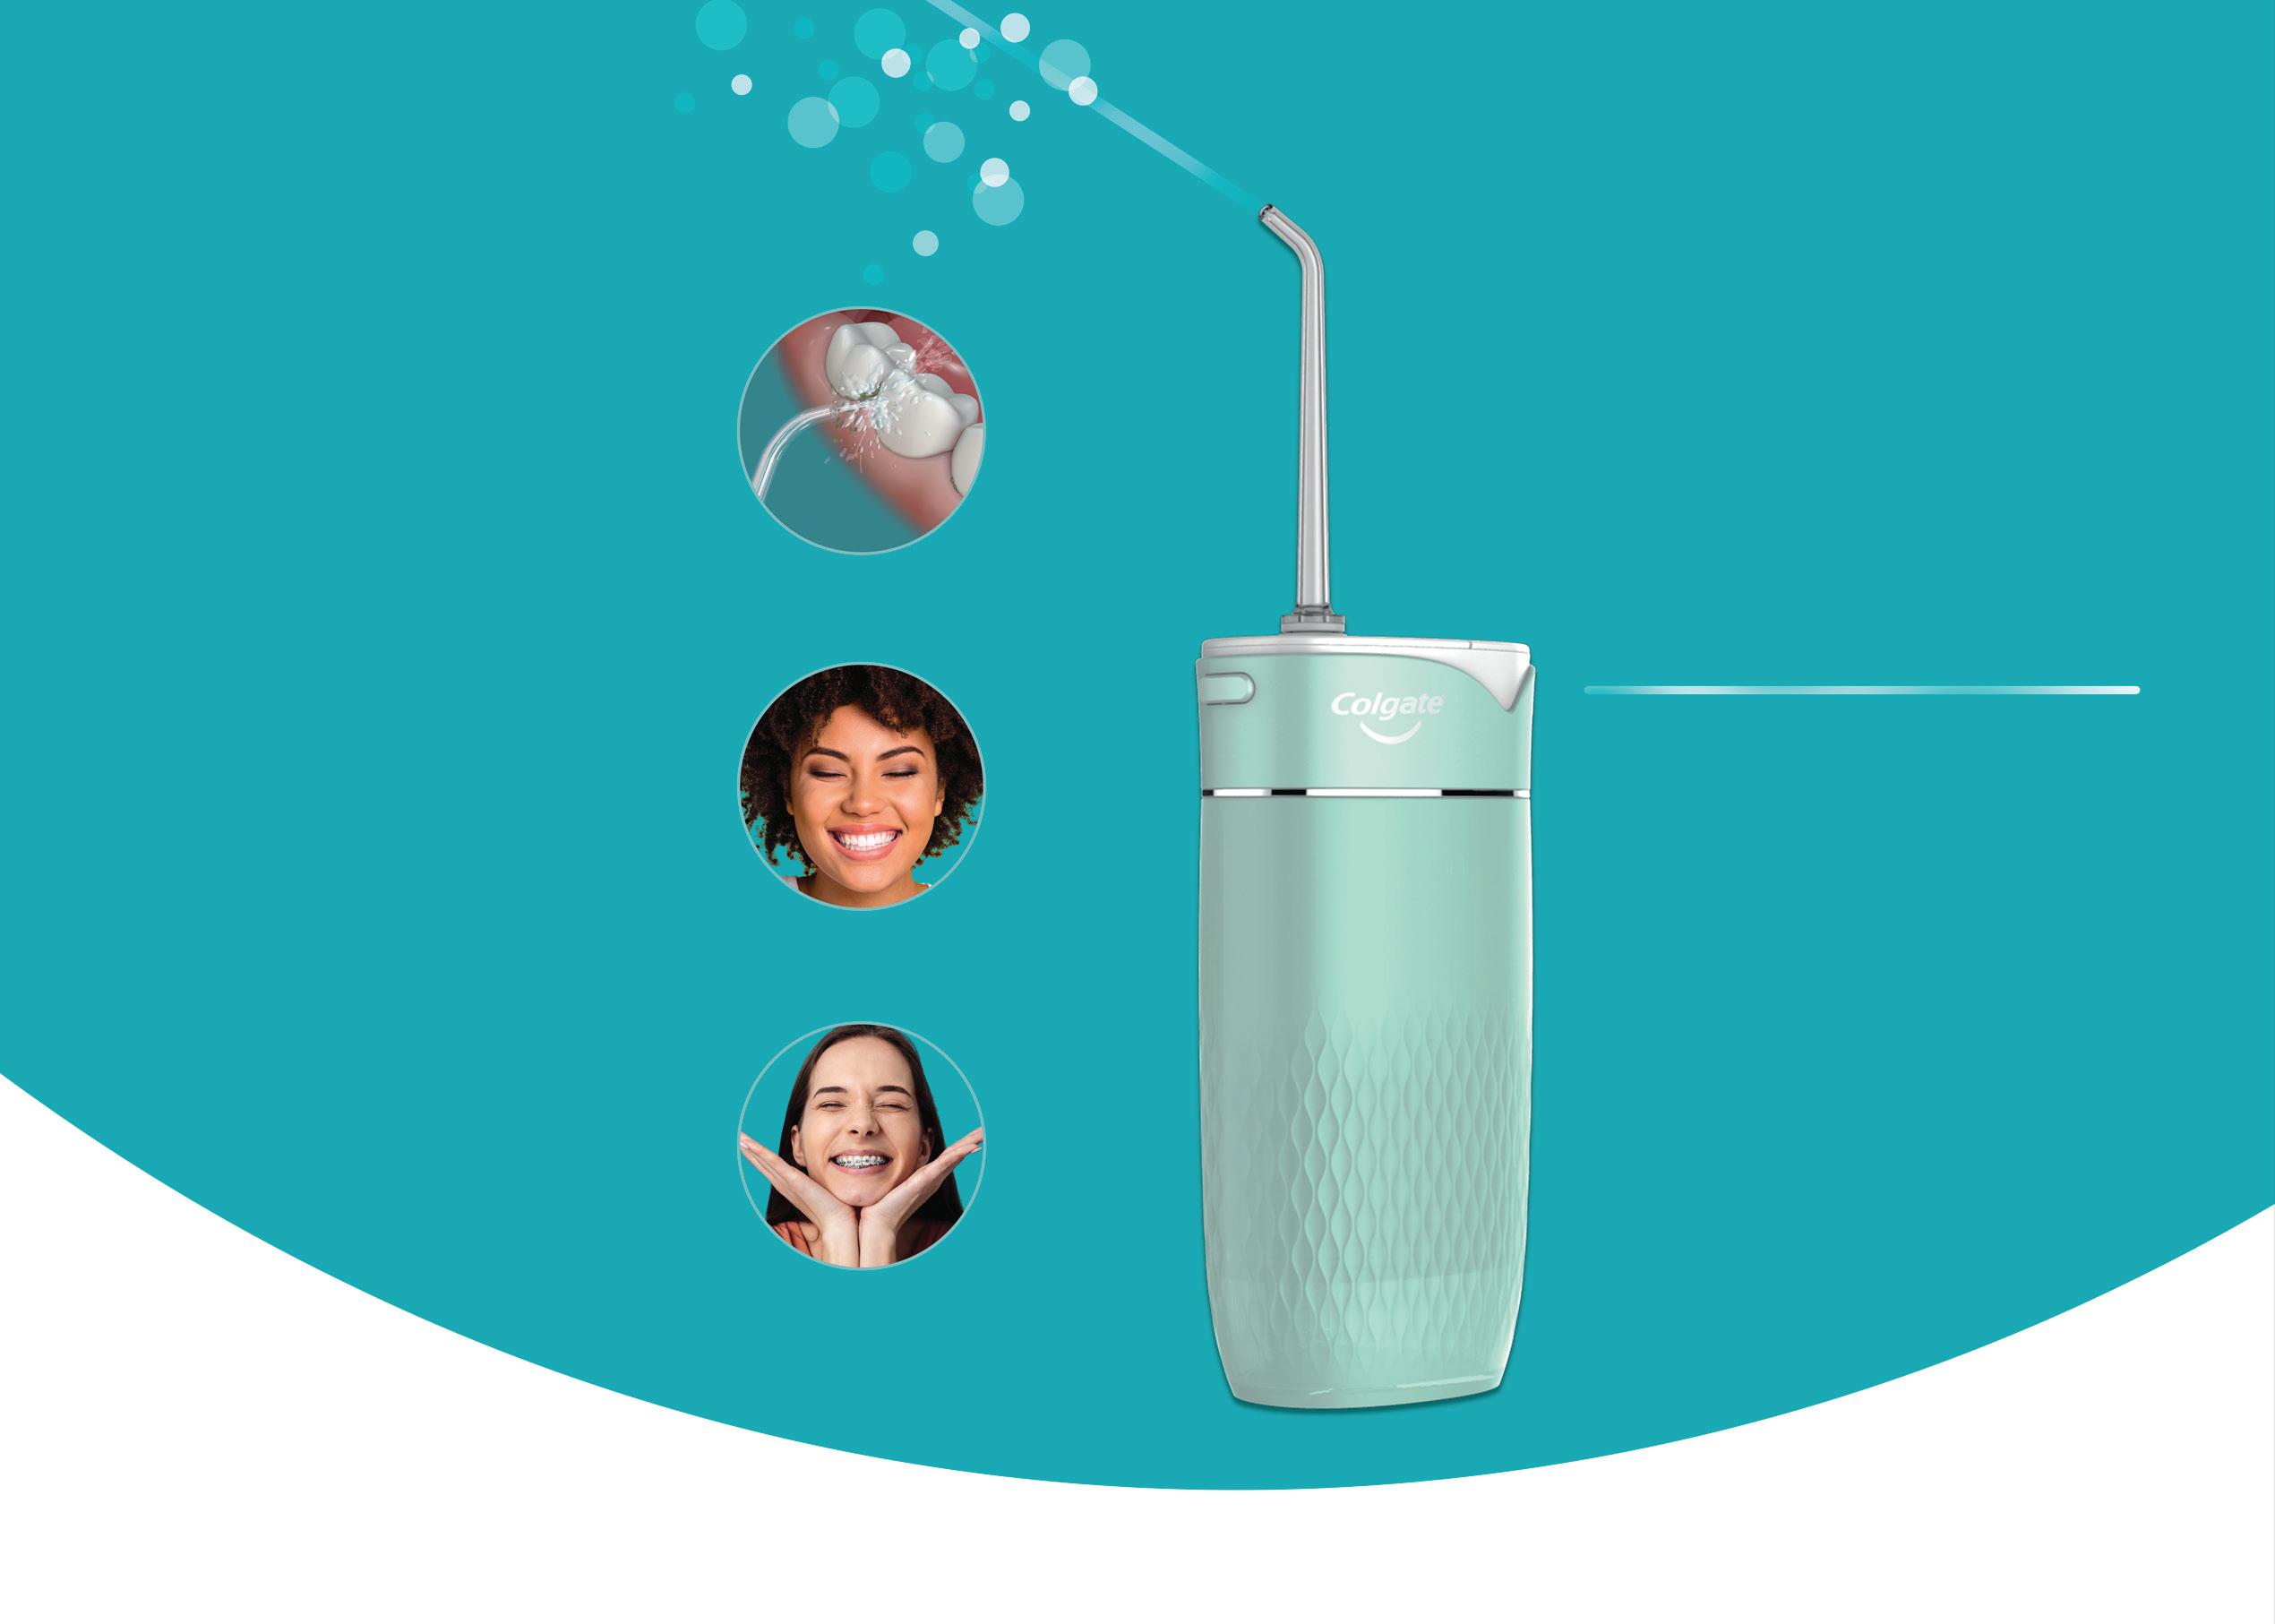
WHAT IS WATER FLOSSING?
Water flossing uses a pressurised stream of pulsating water to clean away food particles, bacteria, and plaque between teeth and under the gumline1. Water flossers (also called oral irrigators) are hand-held devices that are suitable for daily use by patients.
How water flossing works
The combination of pulsations and pressure creates both impact and flushing in a targeted zone of the mouth, working to dislodge and expel debris, plaque and bacteria between teeth, and the gingival sulcus1
Benefits of water flossing
Plaque removal
Good evidence supporting water flossing as up to 29% more effective in overall plaque removal compared to traditional floss2.
Reduced gingival bleeding
Strong evidence supporting water flossing as significantly more effective in reducing gingival bleeding than the use of traditional dental floss3,4
Which patient groups might benefit?
Orthodontic
Reduced bleeding, improved plaque removal One recent study found 26% reduction in bleeding vs traditional floss5.
Reduced gingival bleeding
Periodontal maintenance
Patients undergoing periodontal maintenance therapy have increased risk of future loss of attachment1 and require excellent oral hygiene in hard to reach areas1
Implants
One study found 82% of participants experienced reduced BOP around implants with water flossing compared to 33% with traditional floss6
Diabetes
Patients with diabetes have increased risk of periodontal disease and can benefit from improved periodontal health9
Crowns and bridges
Crowns and bridges can be diffcult to clean. Water flossers require less dexterity and time, preferred by patients7
People not currently flossing or those with limited dexterity
Only 1 in 4 Australian adults floss or clean between their teeth at least once daily8
References
1. https://www.aegisdentalnetwork.com/cced/2012/04/ relevance-of-the-water-flosser-50-years-of- data
2. Goyal CR, Lyle DM, Qaqish JG, Schuller R. Evaluation of the plaque removal efficacy of a water flosser compared to string floss in adults after a single use. JClin Dent. 2013;24(2):37–42.
3. Nanning A. M. Rosema, Nienke L. HennequinHoenderdos, Claire E. Berchier, Dagma E. Slot, Deborah M. Lyle and Godefridus A. van der Weijden, The Effect of Different Interdental Cleaning Devices on Gingival Bleeding. ‘Department of Periodontology, Academic Centre for Dentistry Amsterdam ACTA, University of Amsterdam and VU University Amsterdam, The Netherlands.
4. Barnes CM, Russell CM, Reinhardt RA, Payne JB, Lyle DM. Comparison of irrigation to floss as an adjunct to tooth brushing: Effect on bleeding, gingivitis, and supragingival plaque. J Clin Dent. 2005;16(3):71–77
5. Sharma NC, Lyle DM, Qaqish JG, et al. Effect of a dental water jet with orthodontic tip on plaque and bleeding in adolescent patients with fixed orthodontic appliances. Am J Orthod Dentofacial Orthop. 2008;133(4):565-571.
6. Magnuson B, Harsono M, Stark PC, et al. Comparison of the effect of two interdental cleaning devices around implants on the reduction of bleeding: a30-day randomized clinical trial. Compend Contin Educ Dent. 2013;34(Spec No 8):2–7
7. https://pubmed.ncbi.nlm.nih.gov/19138177/
8. https://www.ada.org.au/News-Media/News-and-Release/Media-Releases/ DHW-The-Mouth- Doesn-t-Lie-02082021
9. Al-Mubarak S, Ciancio S, Aljada A, et al. Comparative evaluation of adjunctive oral irrigation in diabetics. J Clin Periodontal. 2002;29(4):295-300.
Implants Crowns and bridges
Strong evidence supporting water flossing as significantly more e ective in reducing gingival bleeding than the use of traditional dental floss3,4.
ORAL HEALTH MONTH
CONNECTED TOOTHBRUSHES
DO THEY HELP TO CONNECT THE DOTS?
Having the right toothbrush is key to successful oral hygiene. But actually, a toothbrush is only as good as the person using the brush. No matter if patients use electric or manual toothbrushes, dental professionals should help coach their patients in their effective use. A recent development in this sector has been the use of interconnected apps which directly link with electric toothbrushes. This correlates to the global trend of people being more health aware and using connected health technology in their everyday lives to track and improve everything from fitness to sleep.
The connected brush allows people to monitor the frequency, duration, and coverage of brushing. This data can help dental professionals understand how a patient might be able to improve their oral hygiene. The American Dental Association1 recently updated their Tele-dentistry policy to include apps that monitor brushing or other home care.
This study, Connected Health App Improves Oral Health with Real-Time Education IADR Abstract2, compares the benefits of brushing with and without the connected app. It found that people brushing with the connected app had significantly lower levels of plaque overall, and interproximally after 6 weeks.
Using these apps can be a great way to instill good oral hygiene behaviors in your patients. Gamification in healthcare is becoming increasingly popular in helping to improve healthy habits and incentivise good health outcomes for young and old - oral health is no exception and these apps can help make learning how to brush correctly fun!
Colgate have recently launched a new fully connected electric toothbrush range named Pulse which helps the user improve their brushing habits. Most people miss 40% of their tooth surfaces when they brush*. The Pulse Series 2 brush with connected APP can improve this coverage and the time spent brushing with 50% more plaque removal at the gum margin after brushing for 6 weeks compared to a non-connected electric toothbrush.
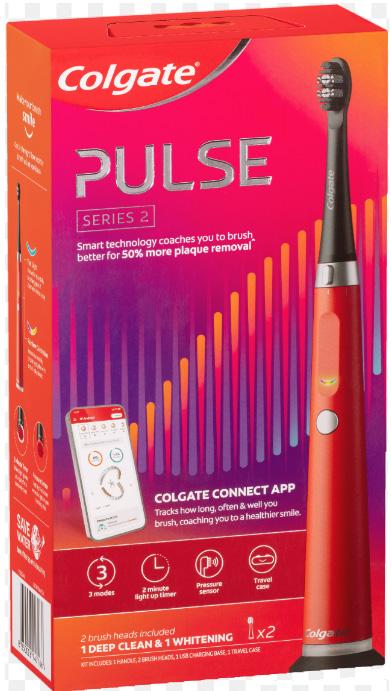
As well as gamification, these toothbrushes can also have reminders set to motivate and nudge your patients into other good oral health habits such as twice daily brushing, visiting the dentist and changing brush heads.
These next generation toothbrushes are a great way to help connect the dots of good at home oral health care.
*Based on tooth surface coverage data collected by the Colgate connect app when brushing with a smart electric toothbrush.

1. https://www.ada.org/en/about/governance/ current-policies/ada-policy-on-teledentistry
2. https://iadr.abstractarchives.com/ abstract/20iags-3323509/connected-health-appimproves-oral-health-with-real-time-education
05 1300 65 88 22
Find out how to use Pulse Series 1 & 2 ETBs View Colgate Pulse CLICK HERE CLICK HERE ORAL HEALTH MONTH
PROTECTING COMPLEX RESTORATIVE DENTAL WORK
A considerable amount of time, effort and money goes into complex restorative work including crowns or bridges. Patients, often after past caries experience, and other risk-related behaviours such as poor oral hygiene or a sugary diet, end up needing a substantial amount of dental work to stabilize their oral health. While many of the risk factors which have caused the dental disease may have been addressed prior to commencing complex restorations, the work doesn’t end there.
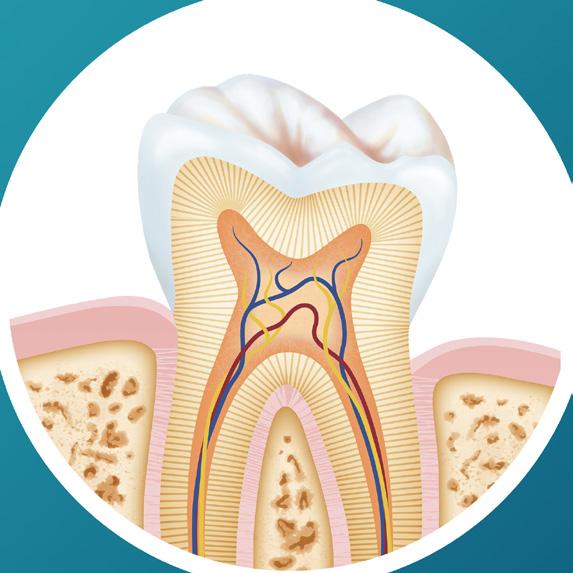
Especially for older patients, as their oral environment changes, maintaining this complex restorative work can be challenging. Difficulties include home care and sub-gingival restorative margins, the risk of root caries associated with exposed roots caused by gingival recession and, for some patients, reduced manual dexterity that negatively impacts their ability to deliver pristine oral hygiene. They also may have never known how best to care for their teeth in the first place! These can all lead to the dreaded secondary caries which can be difficult to treat and can ultimately end in tooth-loss. This is clearly not an outcome that is desired, and your patient has already invested a lot of time and money to improve their oral health.
So how can we help these patients to protect their complex work? The following are suggested and recommended by leading dental authorities1,2,3:
1. Give detailed oral hygiene coaching, including how to maintain oral health around difficult restorative margins, by performing twice-daily brushing and using interdental cleaning aids daily, such as floss or interdental brushes.
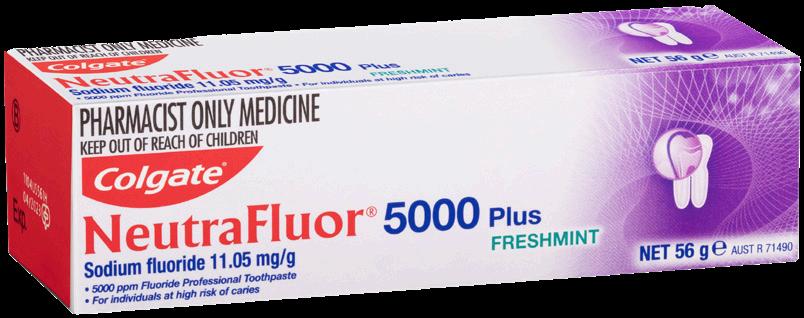
2. Consider recommending a high strength fluoride, for example Neutrafluor 5000 Plus*, which contains 5000 ppm fluoride (1.1% sodium fluoride). High fluoride toothpaste use in patients with an elevated risk of dental caries is recommended in the guidelines from the Australian Dental Association1., the American Dental Association2 and the International Caries Classification and Management System3
3. In addition, consider in-surgery application of 5% sodium fluoride varnish such as Duraphat Varnish^ for those who are at risk of dental caries.
4. The American College of Prosthodontics4 has also published Clinical Practice Guidelines for the Recall and Management of Tooth-borne restorations, which contains guidance and provides recommendations for the different types of complex restorative work your patient may have such as fixed prostheses and removable prostheses.
This guidance is helpful both in terms of oral hygiene and products to recommend, but also the frequency of dental recall to monitor the restorative work both you and your patient have invested in. Register here for Colgate upcoming Live Webinar “Understanding Fluoride Varnish” https://dentaleducationhub.com.au/ understanding-fluoride-varnish-2/
Ensuring the long-term success of complex dental work and protecting the patient’s investment will help to avoid having dissatisfied patients and improve their oral health for the future.
06
ORAL HEALTH MONTH
*Neutrafluor 5000 Plus Toothpaste

Sodium Fluoride 11.05mg/g
Dental caries preventative for individuals at high risk for caries, when used as part of a preventative regimen recommended by a dental professional or doctor. Use daily in place of a regular toothpaste. Apply a thin ribbon of toothpaste to soft small toothbrush. Brush teeth thoroughly for 2 minutes and then spit out. For best results, refrain from eating, drinking, or rinsing for 30 minutes.
Not for use in patients with known allergies or hypersensitivity to any of the ingredients of Neutrafluor 5000. Allergic reactions have been rarely reported with the use of fluoride toothpastes.
^Duraphat Varnish
Sodium Fluoride 50mg/mL
Prevention of caries. Treatment of sensitive teeth. Not for use in patients with hypersensitivity to any ingredients in Duraphat, ulcerative gingivitis, stomatitis, and bronchial asthma. Not for systemic treatment. Do not swallow. 33.8% ethanol content. Avoid use in pregnant or lactating women
Neutrafluor 5000 Plus (Restricted Medicine - NZ). Duraphat Varnish (Prescription Medicine -NZ). Please refer to the full product information before recommending. Available from Colgate-Palmolive upon request. Colgate-Palmolive Pty Ltd. 420 George St, Sydney, NSW AU. Colgate-Palmolive Ltd. 45 Knights Rd, Lower Hutt, NZ

References
1. https://www.adelaide.edu.au/arcpoh/dperu/ fluoride/Guidelines_for_use_of_fluorides_in_ Australia__update_2019.pdf
2. https://www.ada.org/resources/research/ science-and-research-institute/evidence-baseddental-research/caries-management-clinicalpractice-guidelines/evidence-based-clinicalpractice-guideline-on-nhttps://www.iccms-web. com/uploads/asset/59284654c0a6f822230100. pdfonrestorative-treatments-for-caries-lesions
3. https://www.iccms-web.com/uploads/ asset/59284654c0a6f822230100.pdf
4. https://jada.ada.org/article/S00028177(15)01154-X/fulltext
07 henryschein.com.au Register here for Colgate upcoming Live Webinar “Understanding Fluoride Varnish” CLICK HERE
ORAL HEALTH MONTH
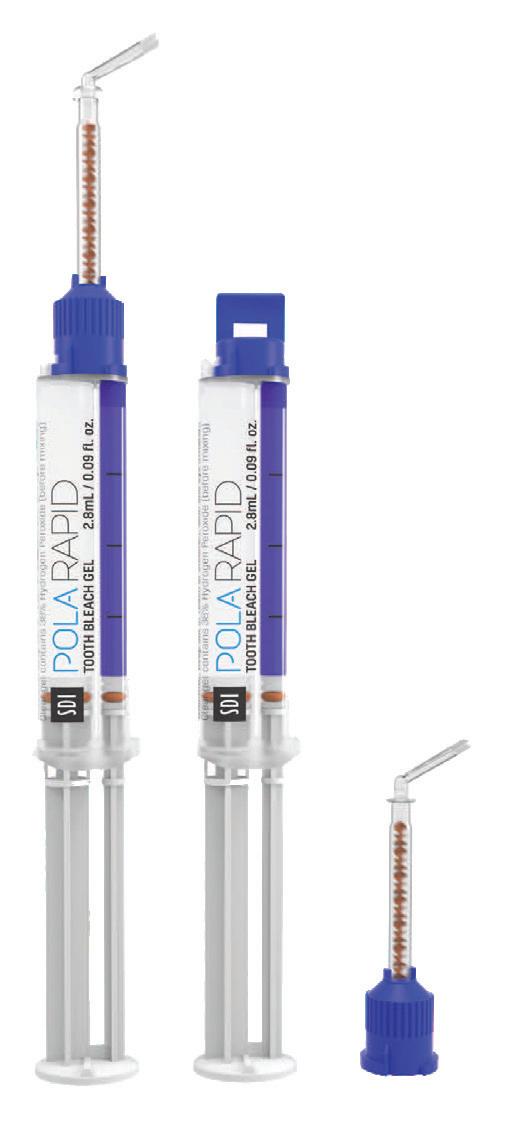
POLA RAPID
ADVANCED TOOTH WHITENING SYSTEM
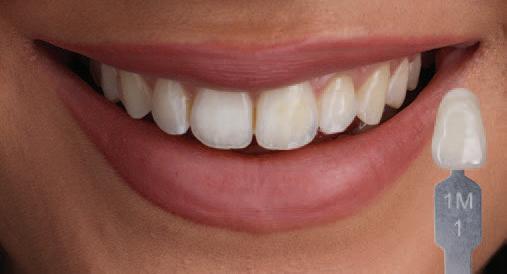
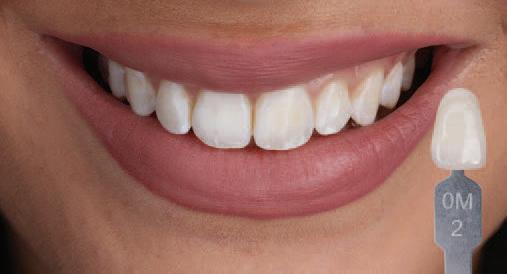

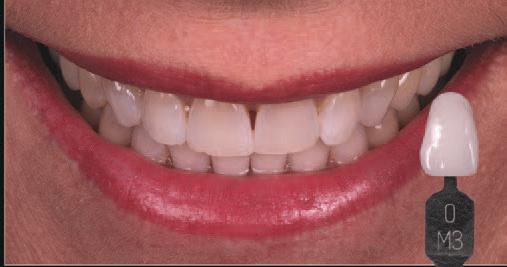
SUPER. FAST. WHITENING. Pola Rapid is the new in office whitening treatment that safely whitens teeth in just 24 minutes.
• 150% Faster Treatment Time
• Enhanced Blue Gel For Faster Application
• Built In Desensitisers
SUPER. FAST. WHITENING.
Clinical Case Studies
“I find Pola Rapid a beautiful, easy-to-use product. It is simple to apply and remove with its non-stick and enhanced blue gel formula.
Pola Rapid is the new in office whitening treatment that safely whitens teeth in just 24 minutes.
150% FASTER TREATMENT TIME

A great product to use by clinicians for in-chair whitening with minimal chair time and patient sensitivity, but reliable and immediate results.”
ENHANCED BLUE GEL FOR FASTER APPLICATION
BUILT IN DESENSITISERS
FLUORIDE RELEASING TO STRENGTHEN TEETH
Pola Rapid 38%
CLINICAL CASE STUDIES
“Pola Rapid has exceptional colour saturation for enhanced visibility during intraoral application. The new non-stick bleaching gel stays where you apply it, and easily wipes away clean with no mess.
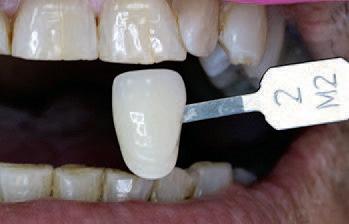
"I find Pola Rapid a beautiful, easy-to-use product. It is simple to apply and remove with its non-stick and enhanced blue gel formula. A great product to use by clinicians for in-chair whitening with minimal chair time and patient sensitivity, but reliable and immediate results.” AFTER BEFORE
I found the new system fast, reliable to use with minimal sensitivity for patients”
DR MILES CONE Fellow American College of Prosthodontists Diplomate Americn Board of Prosthodontics, Nuance Dental Specialist, Portland, Maine USA

saturation for enhanced
intraoral application. The new non-stick bleaching gel stays where you apply it, and easily wipes away clean with no mess. I found the new system fast, reliable to use with
08 ORAL HEALTH MONTH
Sam Koh BDSc Melb (Hons) Melbourne, Australia Pola Rapid 38% “Pola Rapid has
colour
during
exceptional
visibility
DR SAM KOH BDSc Melb (Hons) Melbourne, Australia
Pola Rapid
19 CLINICAL EVALUATORS
TOTAL USES 56
CLINICAL RATING 92%
CLINICAL EVALUATION
Key features: In-office whitening system l 38% Hydrogen Peroxide
Pola Rapid
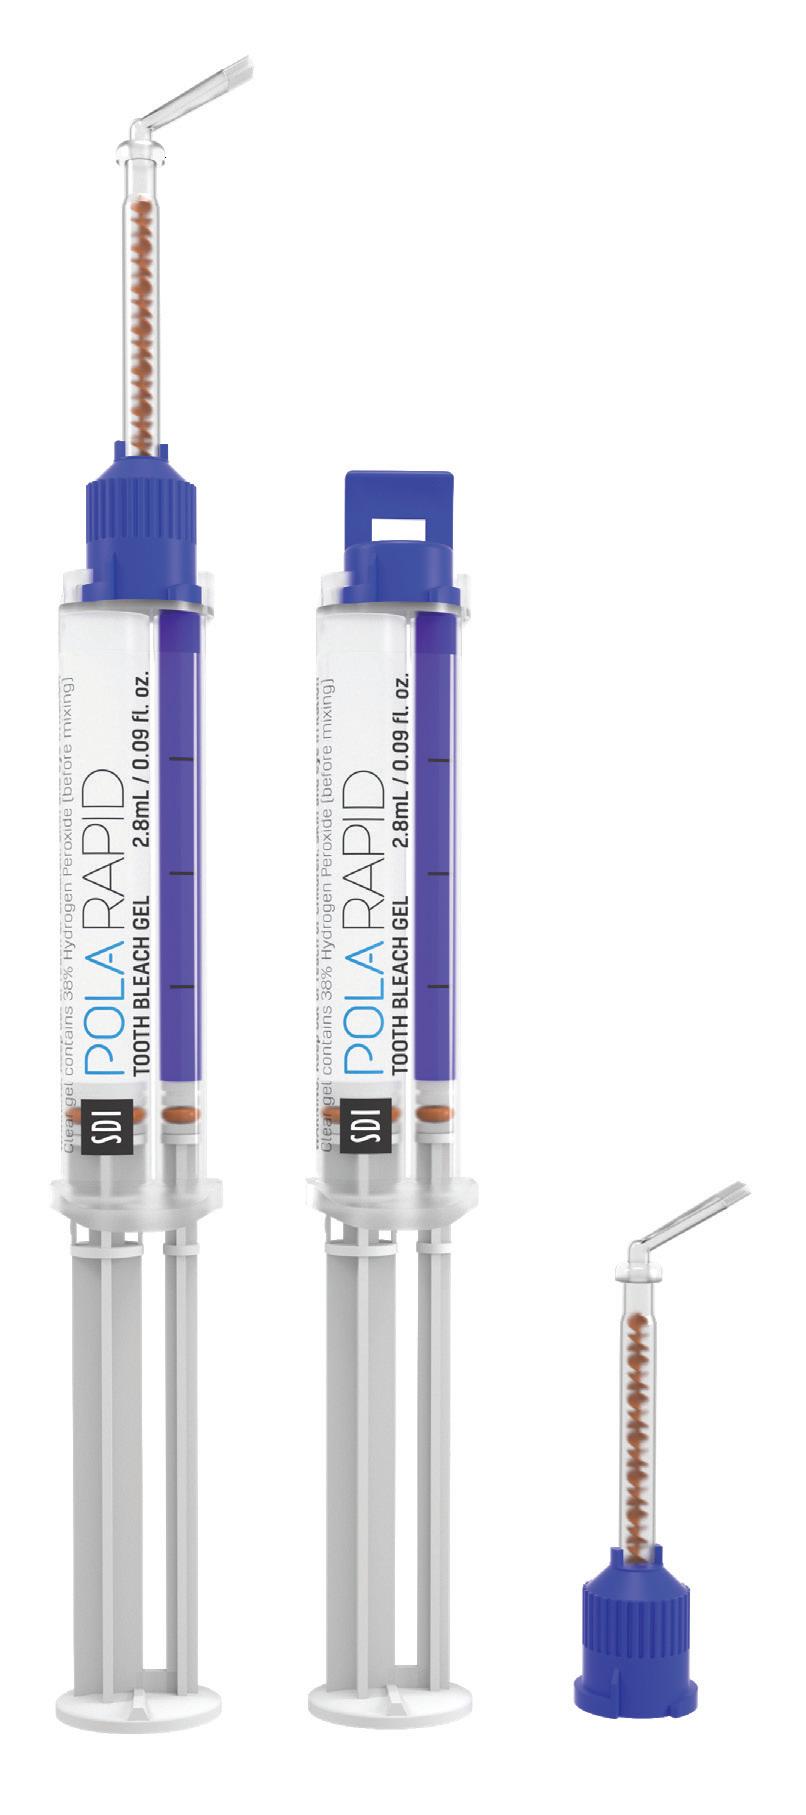
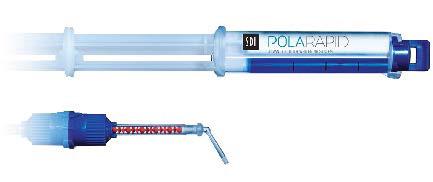
l Dual-barrel syringe dispenser with brush-tip applicato
SDI sdi.com/au/au
Pola Rapid is an advanced in-office tooth whitening system:
Key features
• Whitens teeth with an incredibly fast 24-minute application time.
Clinical Tips
Use a surgical suction to remove the whitening gel between applications for fast and precise removal.


Double check the barrier between each application and make sure there are no areas of leakage.
Clinical Tips
• Features built-in desensitizers and fluoride.
• In-office whitening system 38% Hydrogen Peroxide
• Uses a 38% hydrogen peroxide formulation.
• Simple and precise application.
19 CLINICAL EVALUATORS
• Dual-barrel syringe dispenser with brush-tip appl icator
Indication
TOTAL USES 56
• In-office teeth whitening.
Description
Unique Attributes
CLINICAL RATING 92%
• Blue gel makes for easy application and visibility.
Pola Rapid is an advanced in-office tooth whitening system:
Key features: In-office whitening system
• Faster system - this material only requires 24 minutes of treatment, significantly reducing patient time in the chair.
l Dual-barrel syringe dispenser with brush-tip applicato
• Features built-in desensitisers and fluoride.
• The brush tip allows you to place very easily.
Description
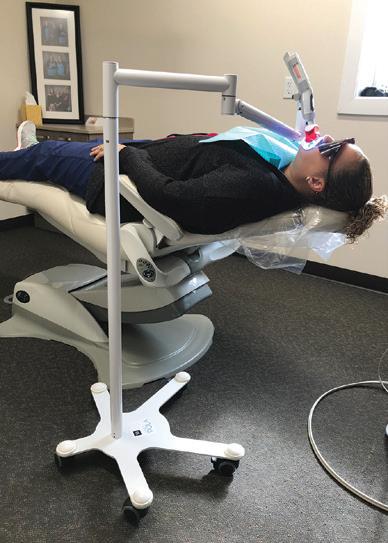
• Light is not necessary; however, the light can be used with the whitening attachment and the Pola Stand.
• Uses a 38% hydrogen peroxide formulation.
• Simple and precise application.
Pola Rapid is an advanced in-office tooth whitening system:
• Whitens teeth with an incredibly fast 24-minute application time.
Indication
• Features built-in desensitizers and fluoride.
• Uses a 38% hydrogen peroxide formulation.
• In-office teeth whitening.
• Simple and precise application.
Indication
Unique Attributes
• Blue gel makes for easy application and visibility.
• In-office teeth whitening.
Unique Attributes
• Blue gel makes for easy application and visibility.
• Faster system - this material only requires 24 minutes of treatment, significantly reducing patient time in the chair.
• Faster system - this material only requires 24 minutes of treatment, significantly reducing patient time in the chair.

• The brush tip allows you to place very easily.
• The brush tip allows you to place very easily.
• Light is not necessary; however, the Radii Xpert light can be used with the whitening attachment and the Pola Stand.
• Light is not necessary; however, the light can be used with the whitening attachment and the Pola Stand.
• Use a surgical suction to remove the whitening gel between applications for fast and precise removal.
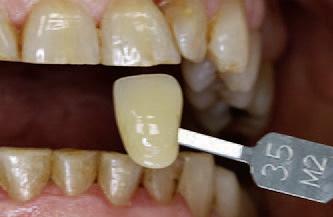
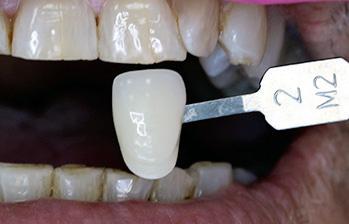
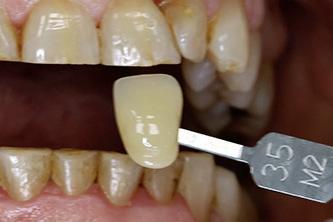
Make the time to take before and after photos. It really shows the patient the difference. Even I did not realize there was such a big difference for a couple of patients until I looked at the photos later.
“GOOD RESULTS, EASY TO USE, AND NO LIGHT NEEDED.”
• Double check the barrier between each application and make sure there are no areas of leakage.
Evaluators’ Comments
“Instructions were easy to follow and time for the procedure was excellent.”
Clinical Tips
“I really liked the brush tip and simplicity of the packaging.”
• Make the time to take before and after photos. It really shows the patient the difference. Even I did not realise there was such a big difference for a couple of patients until I looked at the photos later
Use a surgical suction to remove the whitening gel between applications for fast and precise removal. Double check the barrier between each application and make sure there are no areas of leakage.

“Easy application.”
“The quick chair time is amazing. I had patients who have had other brand name in-office whitening comment they this was so much faster and they got better results.”
Evaluator’s comments
“Color of the gel allowed easy visibility in placing.”
Make the time to take before and after photos. It really shows the patient the difference. Even I did not realize there was such a big difference for a couple of patients until I looked at the photos later.
“I feel that it worked well both with and without the Radii Xpert light.”
“GOOD RESULTS, EASY TO USE, AND NO LIGHT NEEDED.”
“Instructions were easy to follow and time for the procedure was excellent.”
“The brush applicator takes a little getting used to. It makes the applicator tip overall wider than you may be used to.”
“I really liked the brush tip and simplicity of the packaging.”
“Easy application.”
Evaluators’ Comments
“Worked nicely and didn’t drive sensitivity on root exposure patient - able to control application.”
“Instructions were easy to follow and time for the procedure was excellent.”
“The quick chair time is amazing. I had patients who have had other brand name in-office whitening comment they this was so much faster and they got better results.”
“I really liked the brush tip and simplicity of the packaging.”
When dispensing the first amount, it was difficult to get the mixing of material just right - seems like a lot wasted.”
“Color of the gel allowed easy visibility in placing.”
“Easy application.”
Evaluation Summary:
“I feel that it worked well both with and without the Radii Xpert light.”
“The quick chair time is amazing. I had patients who have had other brand name in-office whitening comment they this was so much faster and they got better results.”
Compared to Competitive Products:
“The brush applicator takes a little getting used to. It makes the applicator tip overall wider than you may be used to.”
“Color of the gel allowed easy visibility in placing.”
“I feel that it worked well both with and without the Radii Xpert light.”
“Worked nicely and didn’t drive sensitivity on root exposure patient - able to control application.”
“The brush applicator takes a little getting used to. It makes the applicator tip overall wider than you may be used to.”
“When dispensing the first amount, it was difficult to get the mixing of material just right - seems like a lot wasted.”
Worked nicely and didn’t drive sensitivity on root exposure patient - able to control application.”
“When dispensing the first amount, it was difficult to get the mixing of material just right - seems like a lot wasted.”
Evaluation Summary: Compared to Competitive Products:
09 1300 65 88 22 ORAL HEALTH MONTH CLICK HERE dentaladvisor.com + + + + Good + + + DENTAL ADVISOR 3110 West Liberty, Ann Arbor, Michigan 48103 l (800) 347-1330 l connect@dentaladvisor.com l © 2021 Dental Consultants, Inc.
Consultants who would: 72% Recommend to a colleague Consultants who would want to stock in their office: 33% Yes, instead of current product 28% Yes, in addition to current product 28% I might want to order this product for certain cases AFTER Photos courtesy of Dr. Ona Erdt Pola Stand with Radii Xpert Light Unique application tip Excellent Very Good Good Fair Poor Viscosity of whitening gel Ease o applying whitening gel Color of whitening gel (visibility) Time requirement for procedure Lack of tooth sensitivity during procedure Lack of gingiva irritation dentaladvisor.com RATING SYSTEM: Excellent + + + + + Very Good + + + + Good + + + DENTAL ADVISOR 3110 West Liberty, Ann Arbor, Michigan 48103 l (800) 347-1330 l connect@dentaladvisor.com l © 2021 Dental Consultants, Inc.
SDI sdi.com/au/au CLINICAL
EVALUATION Description
Consultants who would: 72% Recommend to a colleague Consultants who would want to stock in their office: Yes, instead of current product Yes, in addition to current product I might want to order this product BEFORE AFTER Photos courtesy of Dr. Ona Erdt Pola Stand with Radii Xpert Light Unique application tip Excellent Very Good Viscosity of whitening gel applying whitening gel Color of whitening gel (visibility) Time requirement for procedure Lack of tooth sensitivity during procedure Lack of gingival irritation
Before After
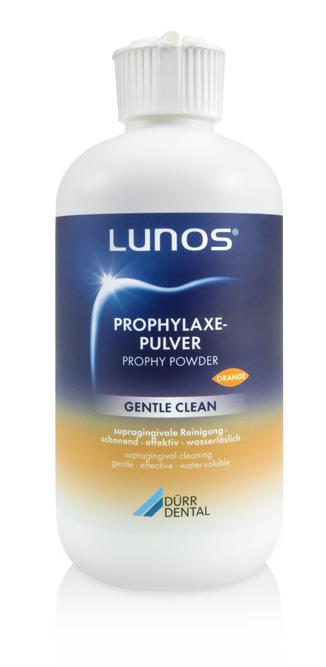
MY LUNOS GENTLE CLEAN POWDER
CASE REPORT
Patient Information
Male, Age 42 | Non-smoker
Initial Situation
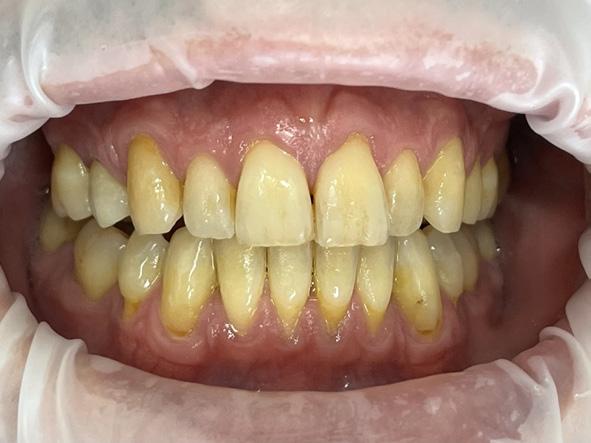
The patient presented with concerns about dental staining due to an upcoming wedding. Periodontal examination revealed all pocket depths to be below 3mm, with minimal BOP. However, the patient experienced generalised cold sensitivity, likely attributable to toothbrush abrasion.

Patient Feedback
Treatment
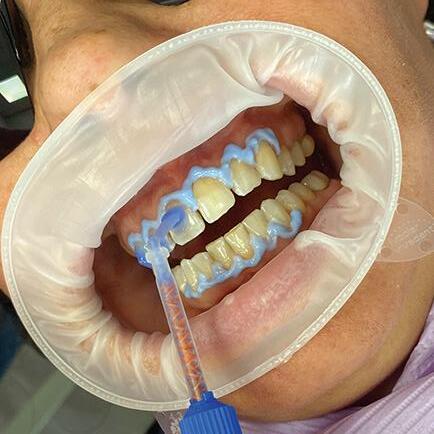
An optragate was used to isolate the teeth, followed by GC Tri-Plaque ID Gel. Oral hygiene instruction was provided, emphasising the use of an oscillating rotating electric toothbrush and interdental brushes.
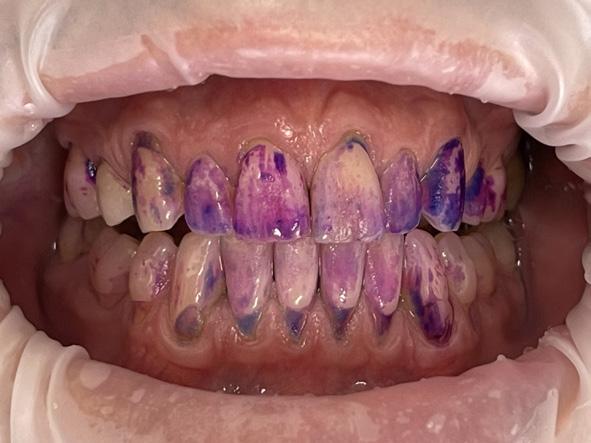
MyLunos Gentle Clean Orange Flavour was utilised for plaque and stain removal, which was subsequently followed by the elimination of calculus via ultrasonic and hand-instrumentation.
“My teeth feel great! I really enjoyed the flavour, and surprisingly had a lot less sensitivity than the usual clean. I’m glad the stains are gone before the wedding.” Charmaine Fernandez, OHT, Hoppers Crossing, VIC
Lunos Free On-Demand Webinar: The Smart Prophylactic System- Effective and Gentle Biofilm Control with Powder Jet Cleaning and Polishing


10
View products online CLICK HERE
CLICK HERE ORAL
MONTH
Presented by Christa Napholz
HEALTH
DENTAL PROPHYLAXIS MADE EASY WITH THE LUNOS SYSTEM
Prophylactic treatment is a crucial aspect of dental care, and as dental professionals know, every patient is unique and requires a tailored approach to treatment.
That’s where the Lunos prophylaxis system from Dürr Dental comes in, offering a range of products that impress with their flexibility and versatility.
Lunos does not prescribe a fixed treatment concept or one that only relates to a specific application area. Instead, practitioners can decide for themselves which form of treatment should be used for each patient.
The Lunos portfolio includes a range of products that can be used for various patient needs, ensuring a comfortable and effective experience for both the practitioner and the patient.

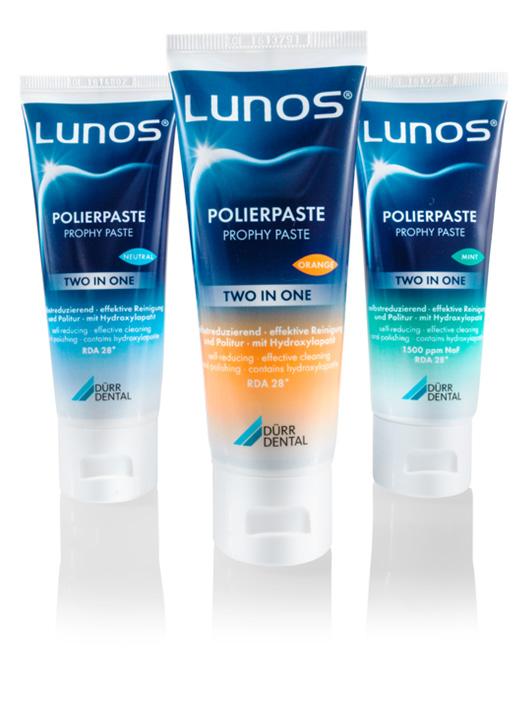
These include a powder jet handpiece, various prophy powders and prophy pastes. The offering is rounded off with consumables that are reusable, like the prophy rings and aerosol cannulas that can be reprocessed, reducing consumer waste.
Lunos offers two different prophy pastes. The 2-in-1 paste offers the versatility of having an abrasive paste break down into a fine paste within 10 seconds of use due to the friction of the prophy cups.
This allows clinicians to confidently remove stains without having to worry about leaving a rough surface area for their patients, which would normally result in an increased uptake of stains between visits.
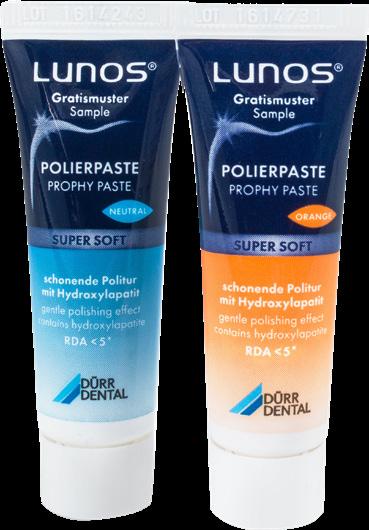
The super soft paste offers options for children and patients with increased sensitivity due to exposed dentine or the presence of prosthetics due to its RDA value <5.
Both pastes offer a variety of flavours, with the neutral and orange ranges offering hydroxyapatite as a remineralisation agent. Sodium fluoride is also available in the mint flavour for the 2-in-1 paste.
The prophylaxis cushion rounds off the Lunos range, offering patients a comfortable experience in the dental chair. Made from viscoelastic foam, the cushion is easily moved due to the velcro fastener while maintaining infection control due to its ability to be disinfected with wipes during the pack down and the ability to remove the cover to wash it. Gone are the days of covering the cushion with plastic bags.
Overall, the Lunos prophylaxis system offers dental professionals a flexible and versatile range of products to cater to each patient’s specific needs. By providing effective and comfortable dental prophylaxis, the Lunos system is a must-have for any dental practice looking to provide top-quality care to their patients.
henryschein.com.au 11
MINA FARAG Durr Dental Product and Hygiene Specialist Australia & New Zealand Oral Health Therapist (BOHSc) View Products online CLICK HERE ORAL HEALTH MONTH
BIOFILM REMOVAL
IN-VITRO STUDY

Objective
Quantify removal of in-vitro dental biofilm using the Philips Sonicare Power Flosser oral irrigator.
Methodology
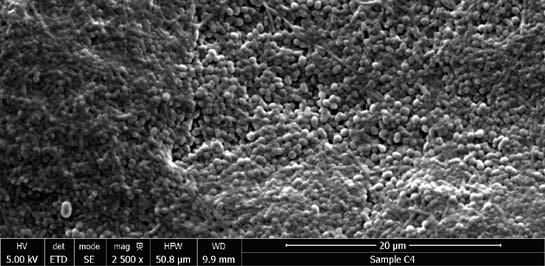
Dental biofilms were grown from pooled human saliva on human enamel disks for 4 days, according to an established academic model*. The biofilms (n=6) were treated with the Philips Sonicare Power Flosser for 3 seconds using the Quad Stream nozzle. To quantify the number of bacteria before treatment, the biofilm volume was measured using optical coherence tomography (OCT) and the bacterial cell density was determined from untreated control samples (n=6) using confocal laser scanning microscopy (CLSM). After treatment the number of remaining bacteria were counted using CLSM. Additionally scanning electron microscope (SEM) images were recorded.
Results
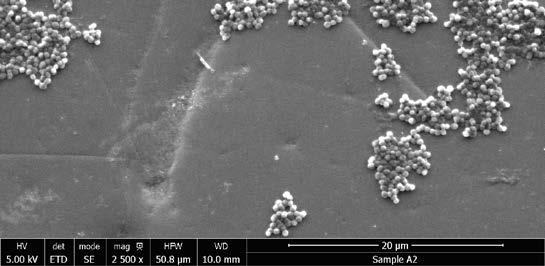
While before treatment 0.2 mm thick dense biofilms were present, after treatment only scattered groups of bacteria remained. Quantitative analysis showed 99.96% removal for the Quad Stream nozzle.


Conclusions
The Philips Sonicare Power Flosser oral irrigator with Quad Stream nozzle removes over 99.9% of the bacteria in this established laboratory model of dental biofilm.

12 CLICK HERE View Product
References B. Gottenbos; W. Suntjens; S. Hötzl Philips Research Europe, 2019 100 µm Before Treatment 100 µm After Treatment OCT cross-sections: no visible biofilm remains after treatment. Before Treatment After Treatment SEM images at 2500x magnification. ORAL HEALTH MONTH
In-vitro biofilm removal from human enamel using a Philips Sonicare Power Flosser
THE DIFFERENCES IN PRACTICE MANAGEMENT SOFTWARE
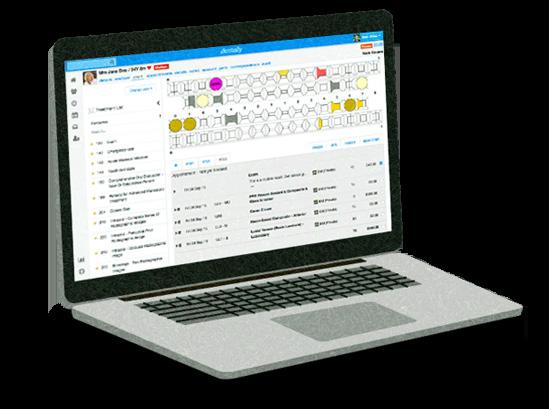
In our day to day lives, we are increasingly bombarded by ‘marketing’ noise and messaging as to the best solutions to benefit our day-to-day routines, and for dentistry how to run our dental practice effectively.
Whether that’s details about the latest chair, PPE, imaging, tools – along with a whole array of software platforms, from finance to marketing to practice management workflows. Today, you can choose from a number of different options, and to help you we are going to explore just some of the differences between traditional on-prem server-based platforms and cloud solutions.
Server based solution
If the solution you are using is ‘on-premise’ then it is software that is installed, hosted and accessed entirely from a physical server or locally based computer in your dental practice.
This is a traditional method of hosting your data, and often this solution is only as secure as the lock on the front door of your practice – because all your sensitive patient data is stored on a server or computer located in your premises – even encrypted, this is a risk.
True cloud software
Cloud software uses a network of multiple remote servers hosted on the internet to store, manage and process data, rather than a local server or computer. True cloud based solutions are all around us. From keeping us connected with friends and family, streaming our entertainment and much more.
For dentistry, cloud software has
been crucial for dental practices, from implementing contactless patient journeys, staying connected and overcoming staff shortages.
A true cloud solution can provide you access whenever you need it via multiple devices, it offers speed and resilience, instantaneous updates and back’s up without any interruption to the user.
For your dental practice, true cloud solutions provide
• Security which is at the heart of cloud
• Shared infrastructure allowing for speed and resilience
• Instant updates and automatic back-ups
• No downtime for maintenance
• Real time views and reporting without delays
• Multiple users and devices
• Interconnectivity with other platforms to leverage the power of cloud technology
When making a decision surrounding the software that you use in your practice, it’s important to keep in mind your needs not only now, but for the future. The best solutions should allow flexibility to grow and scale your practice whilst supporting and optimising your current workflows to deliver the best patient care: be it keeping your team and patients connected or maintaining a full appointment book. Visit dentally.com to learn more.
13 1300 65 88 22
SOFTWARE
UPCOMING CPD COURSES
YOUR FREE GO-TO RESOURCE FOR
Explore over 270 hours of clinical and business related content all in one place with access to
Contemporary endodontic instrumentation for predictable root canal disinfection
Dr. Gaurav Vasudeva
3 CPD points
Tuesday 8 August 2023
READ MORE
The Root to all Success – Current Endodontic Perspectives
Dr. Martin Habibi and Dr. Bobby Patel
7 CPD points
Friday 18 August 2023
READ MORE
Essential endodontic skills in everyday dental practice

Dr. Sass Pakdeethai
7 CPD points
Friday 6 October 2023
READ MORE
Challenges in restorative dentistry in the future: Which materials should we build on?
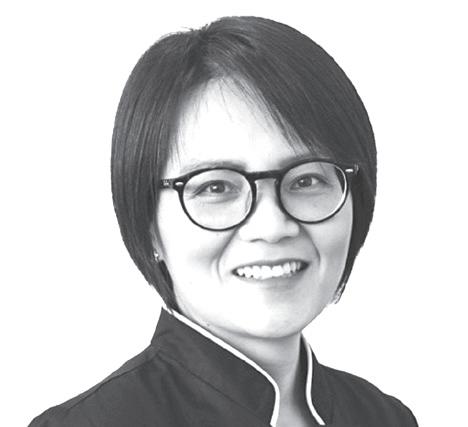
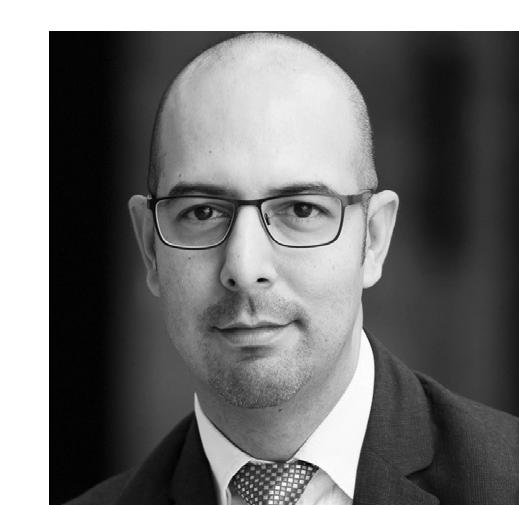
Professor Dr. Falk Schwendicke, MDPH


1 CPD point
Wednesday 11 October 2023
READ MORE
14
DENTAL EDUCATION HUB
COURSES AND EVENTS FOR
DENTAL EDUCATION AND CPD

to courses, webinars, podcasts and articles. View our upcoming courses and webinars below.
Understanding Fluoride Varnish
Cathryn Carboon

1 CPD point
Wednesday 30 August 2023
READ MORE
Reveal Clear Aligners Online Training Course
Dr Joe Alphonse, GP

4 CPD points
Friday 6 October 2023
READ MORE
Shaping Success: Principles and insights to better facilitate root canal preparation
Dr Shalin Desai
1 CPD point
Tuesday 17th October 2023
READ MORE
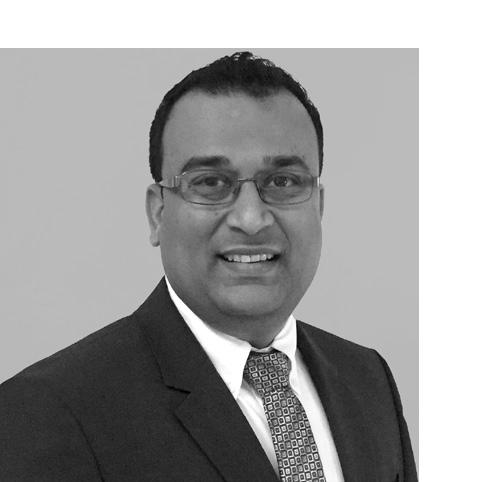
Rotary instrumentation for successful endodontic outcomes
Dr. Gaurav Vasudeva
1 CPD point
Wednesday 1 November 2023
READ MORE
henryschein.com.au 15 DENTAL EDUCATION HUB
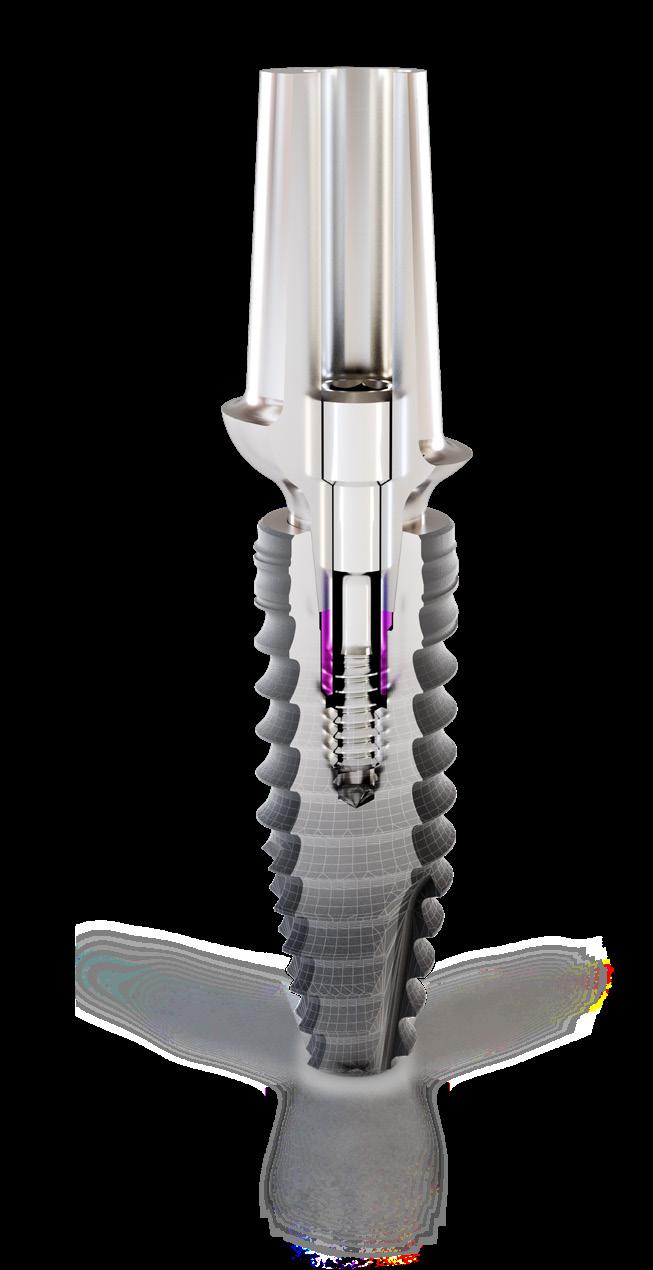
CONELOG® PROGRESSIVE-LINE IMPLANT SYSTEM
CONICAL PERFORMANCE AT BONE LEVEL
Engaging thread design
Improved distribution, advanced primary stability
Deep conical connection
CONELOG® connection benefits
• high precision, 7,5° deep conical connection

• ease of positioning via 3 internal cams
• anti-rotational, self-locking conus
CONELOG® connection benefits:
• long conus for reduced micromovements
• superior positional stability in comparison to other conical systems
• easy positioning with tactile feedback
• integrated platform switching
• "vertical fit feature" designed to minimize vertical discrepancy during workflow
Surgical kit features:
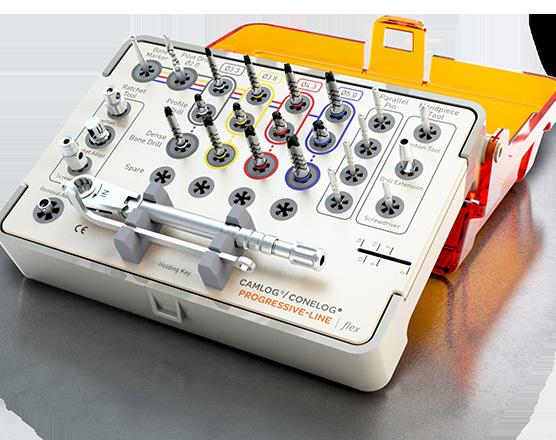
• compact tray design with all the required instruments for soft and dense bone protocols
• efficient color-coded surgical sequence
• validated for automated cleaning, disinfection and sterilization
• empty spare slots allow for customization
Flexible drilling protocol supporting under preparation in soft bone
Compact free-hand surgical kit
Spoonless guided surgical kit
Coronal Anchorage thread improved stability when limited bone height
Promote® surface
• Sandblasted, acid-etched, CP4 titanium.
The CONELOG PROGRESSIVE-LINE Implants make it easier to implement modern treatment concepts such as immediate restorations or immediate loading. The apical conical macro design of the CONELOG PROGRESSIVE-LINE Implant with extended flank height facilitates achieving high primary stability – regardless of bone quality.
The clinical advantages of the Promote® Surface up to the platform and bone level position complement each other and help to preserve crestal bone and achieve esthetic results.
"I simply love the geometry of the BioHorizons Camlog CONELOG PROGRESSIVE-LINE implant and the great primary stability this implant achieves. I think the flutes on the side of the drill profile are fantastic. There are also keyless guides which mean you don’t have to use an accessory handle like some guides, so it is user-friendly.
I like the conical connection. With German precision and a self-locking connection, it enables you to have precise positioning of the abutments."
 Dr Nick Fahey Specialist Prosthodontics
UK

16 NEW PRODUCTS
View our product range CLICK HERE
MAXIMA COMPOSITE POLISHERS
DURABLE POLISHERS FOR DIRECT AND INDIRECT RESTORATIONS
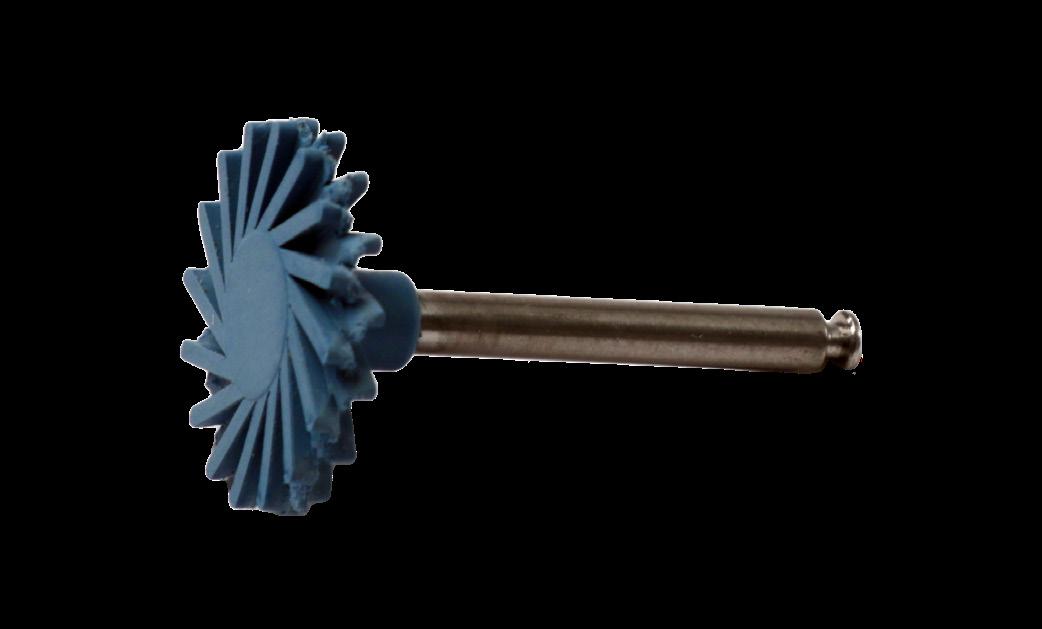
2-step polishing system provides superior high-gloss finishes on composite and hybrid ceramic materials.
Diamond impregnated, flexible spirals allow easy access to all tooth surfaces, including hard to reach interproximal areas.
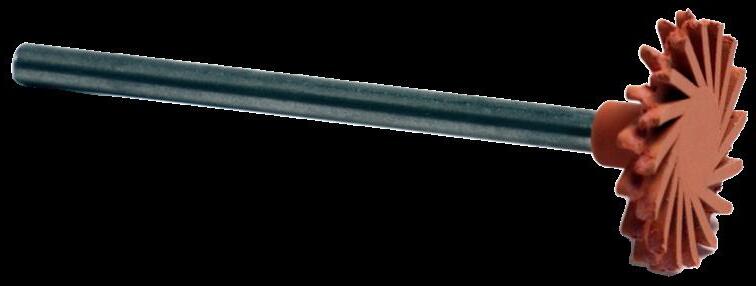
Red Pre-Polisher is designed to remove scratches and create initial shine, while the Blue High-polisher produces a final high-gloss polish.
Available in 2 sizes - Large (14mm) for most general cases and Small (10mm) for more confined or hard-toreach areas with limited access.
Autoclavable.
17 1300 65 88 22 NEW PRODUCTS
Register your interest CLICK HERE
10mm 10mm 14mm 14mm Small Small Large Large Red Pre-Polish Blue High-Polish Red Pre-Polish Blue High-Polish Product Quantity Item Code Contains Starter Set 12 per Set 988-4956 3 of each: Small Pre-polish, Small High-polish, Large Pre-polish, Large High-Polish Refill Set Small Size 6 per Pkg 988-4955 3 of each Small Pre-polish, Small High-Polish Refill Set Large Size 6 per Pkg 988-4954 3 of each Large Pre-polish, Large l High-Polish Trial Set Small Size 2 per Pkg 988-4952 1 of each Small Pre-polish, Small High-Polish Trial Set Large Size 2 per Pkg 988-4953 1 of each Large Pre-polish, Large l High-Polish Individual Size Refills 3 per Pkg 988-4957 Small Pre-Polish Red Individual Size Refills 3 per Pkg 988-4958 Large Pre-Polish Red Individual Size Refills 3 per Pkg 988-4959 Small High-Polish Blue Individual Size Refills 3 per Pkg 988-4960 Large High-Polish Blue
BEST RESULTS WITH EASE
E5 - INNOVATIVE 5-AXIS MILLING MACHINE
vhf camfacture AG has launched a groundbreaking innovation for digital dental technology at the AEEDC in Dubai. The E5 is a dry milling machine for discs which masters even complex indications with the highest precision thanks to its five axes. Despite its versatility, the E5 can be operated with EASE: It does not require any compressed air and is therefore very cost-effective and particularly sustainable. Equally innovative is the low machine weight of the E5. Both aspects reduce the requirements for the installation site, which is particularly helpful in a practice environment. Also in terms of serviceability and handling, the E5 stands out with EASE.
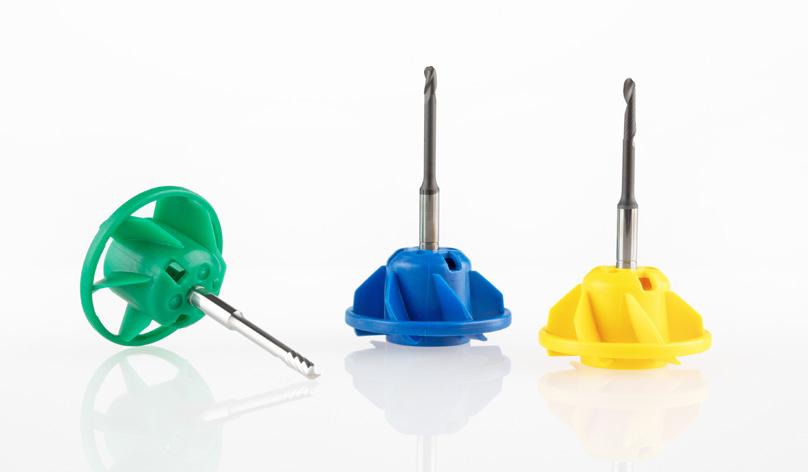
Thanks to vhf’s patent-pending AIRTOOL, the E5 is the first completely compressed air-free 5-axis milling machine on the market. This special tool generates an air flow with its turbine blades, which keeps the workpiece free of chips during milling. This not only gives users maximum freedom in choosing the installation site, but also saves them the cost of running a compressor.
The low weight of the E5 of only 43 kg was achieved by applying the finite element method, which originated in the aerospace industry. The vhf development engineers successfully optimized, for example, the cast body of the E5 so that maximum rigidity and low weight were achieved.
Nevertheless, the E5 is built without compromise from high-quality industrial components. This ensures reliable operation at all times and ensures that almost all materials milled dry can be processed – from plastics to composites, and zirconia to CoCr sintered metals.
The ease of this machine shows in several ways: easy transport thanks to its low weight, an absolutely service-friendly design in which central components can be replaced by the user if needed, and maximum convenience in operation. This convenience of the E5 is evident both in hardware and software: On the one hand, the generously dimensioned working space, despite the compact machine footprint, enables convenient clamping of the workpiece and loading of the tool changer. On the other hand, users can benefit from the DENTALCAM CAM software that comes with the machine.
DENTALCAM’s open interface features intuitive operating logic, fast and sophisticated machining strategies, and an extensive material library.
Lucas Kehl, Head of Product at vhf camfacture AG, explains the central idea in the design of the new machine: “Dental prostheses made easy. With the new vhf E5, the previous requirement for compressed air is history. Thanks to innovative technology, we enable compressed air-free and location-independent production of high-quality dental restorations and thus offer maximum freedom in the choice of the installation site while keeping operating costs low.
18 NEW PRODUCTS
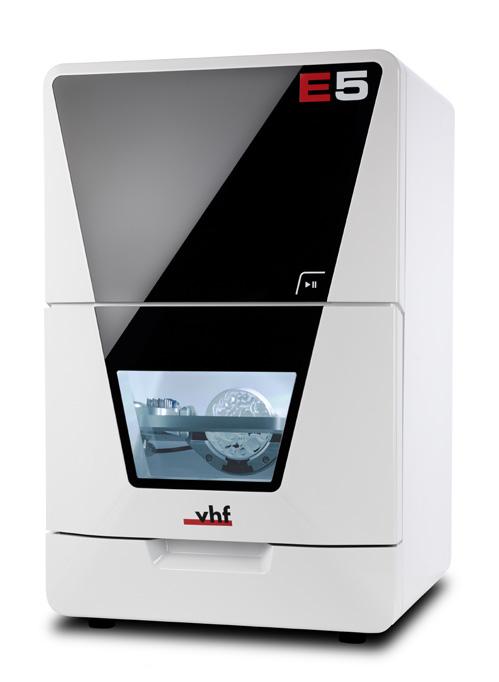
The compressed air-free milling machine for digital dental technology in the practice lab and laboratory.
The vhf E5 is a five-axis dry milling machine that mills both discs and blocks with highest precision. Due to innovative technologies, no compressed air is required.
The operating principle of the patent-pending AIRTOOL: Due to the high speeds of the high-frequency spindle, the turbine blades produce a strong air flow that keeps the workpiece free of chips and dust
The generously dimensioned working space of the E5 allows convenient insertion of workpieces and tools. With a special holder, milling of up to six blocks is also possible.
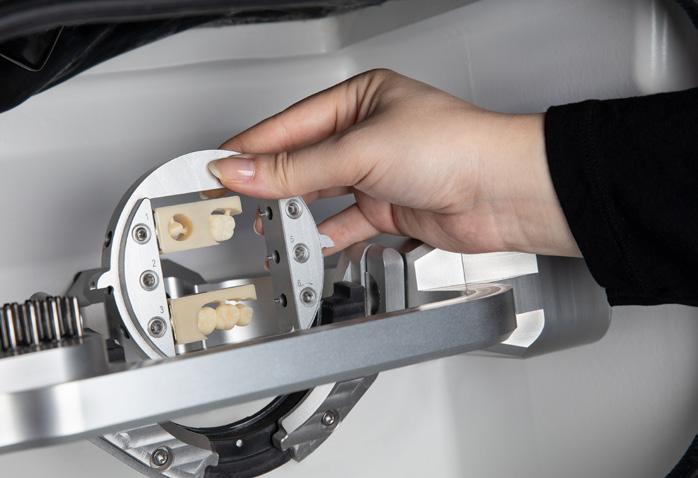
Since the E5 with its open system architecture simplifies the entry into the digital production of dental restorations, it is suitable not only for dental labs, but also for practice labs, and actively supporting digitisation in the practice environment. Plug & Mill is our motto: unpack, connect, and start milling.”
The world premiere of the E5 took place on February 7, 2023 at 9 a.m. CET at the AEEDC trade show in Dubai.
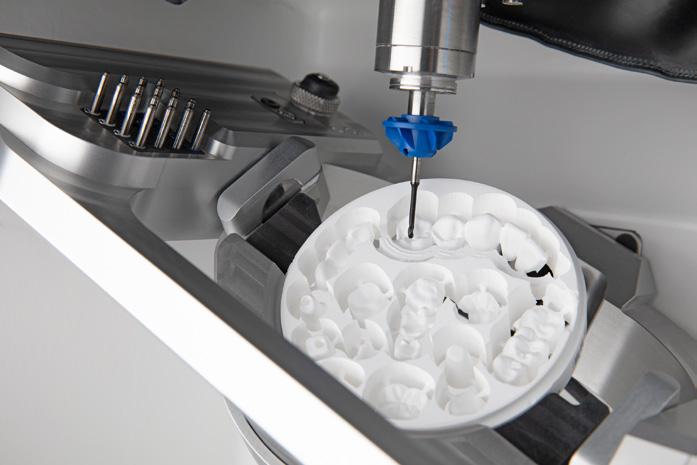
Milling of a zirconia disc with the patent-pending AIRTOOL, which blows away chips from the workpiece. In the background: the tool changer with space for 16 tools and an AIRTOOL.
At the same time, a microsite with lots of additional information went online at ease.vhf.com. vhf will showcase the E5 also at the CDS Midwinter Meeting and LMT Labday in Chicago starting February 23 and at IDS in Cologne starting March 14.
henryschein.com.au 19 NEW PRODUCTS CLICK HERE
A CLEAR ADVANTAGE
THE CLEAR CHOICE FOR A BEAUTIFUL SMILE
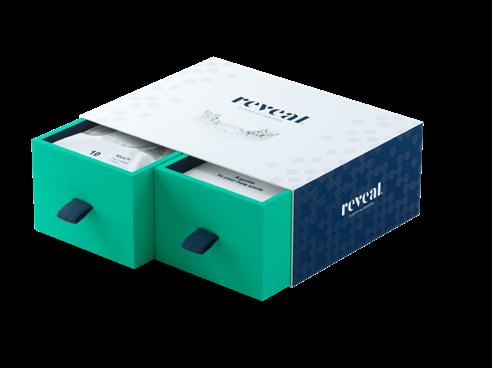
When Dr. David Ostreicher first heard about Reveal Clear Aligners from Henry Schein Orthodontics, he was looking for an alternative to the system he’d been using for years. Patients often complained about the number of attachments needed for their cases, so Reveal’s promise of minimal attachments piqued his interest. And with the aligners coming from a company he trusted, it made sense to give them a try.

He’s glad he did. As one of the first clinicians to implement Reveal aligners about five years ago, Dr. Ostreicher has seen the many benefits they bring his patients—fewer attachments among them. They’re also very comfortable. Reveal appliances are smooth rather than scalloped to help eliminate irritation to the patient’s gums or lips. The aligners are designed to fit precisely and to minimize slipping, offering added comfort and delivering predictable outcomes with minimal attachments and appointments required.
Then there’s the clarity. Reveal aligners, made of proprietary ClearWear material, have a shininess to them that others simply don’t—a feature Dr. Ostreicher’s patients really like. They’re also stain resistant, meaning patients can drink wine and tea, for example, without having to remove the aligners, making it easier to achieve that 22-hour wear time.
“If you have an aligner system that can produce the same results but with fewer attachments, a clearer aligner, and a smooth finish, your patients will be more likely to accept treatment and to comply,” Dr. Ostreicher said. “The main reason you don’t get results is patient cooperation. With other aligners, the thing patients complain the most about is the attachments. These aligners also don’t poke patients because they’re not scalloped. I get better cooperation with Reveal than I do with other products.”
Like Dr. Ostreicher, many dentists are switching to Reveal aligners or turning to them as they integrate clear aligner therapy into their practice for the first time. With plenty of support from Henry Schein, these aligners are easy to add to any office and, as more and more patients seek out this treatment, represent an opportunity for practice growth. Offering comfortable, predictable, and aesthetic appliances gives offices an edge, not to mention that it helps to win over patients who aren’t sure they want to go forward with treatment.
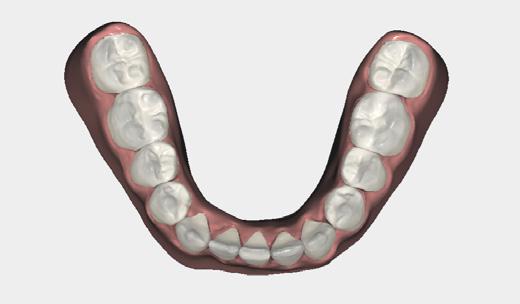
Once you start taking cases, the Studio Pro 4.0 web-based software makes it easy to visualise and modify treatment plans for the full range of mild, moderate, and comprehensive aligner treatments. The software’s features enable superimposition, advanced tooth movements, and arch adjustment, to name a few improvements. And an enhanced user interface enables clinicians to visualise and modify treatment plans no matter their skill level, allowing more dentists to offer this in-demand service.
“I like the slider where I can see at each stage where the patient will be, as well as have the ability to adjust teeth by myself,” Dr. Ostreicher said. “The models look much more realistic, which helps me visualise what the actual patient would look like. I also like that the software is totally internet based. I don’t need to download any software to update it, and I can open it on my computer from anywhere I want.”
The aligner’s manufacturing technology, combined with robust visualisation software, provides clinicians with a complete solution that yields predictable results.
“I get better cooperation with Reveal than I do with other products.”
David Ostreicher, DDS, MS, MPH
20
ORTHODONTICS
From the clear, comfortable aligners to the robust treatment visualisation software, Reveal Clear Aligners from Henry Schein Orthodontics can benefit practice and patients alike.
Case in Point
THE PATIENT
Ronit, a 27-year-old male, had orthodontic treatment as a teenager (lower incisor extraction case).
He presented to Dr. Ostreicher’s office with Class I, deep bite, upper and lower anterior crowding, and a tipped-in posterior segment leading to a narrow smile corridor.
TREATMENT
Reveal aligners with mild interproximal reduction were prescribed.
Treatment was completed in one year, using 22 upper and lower aligners, and resulted in significant bite opening and a broader smile corridor.
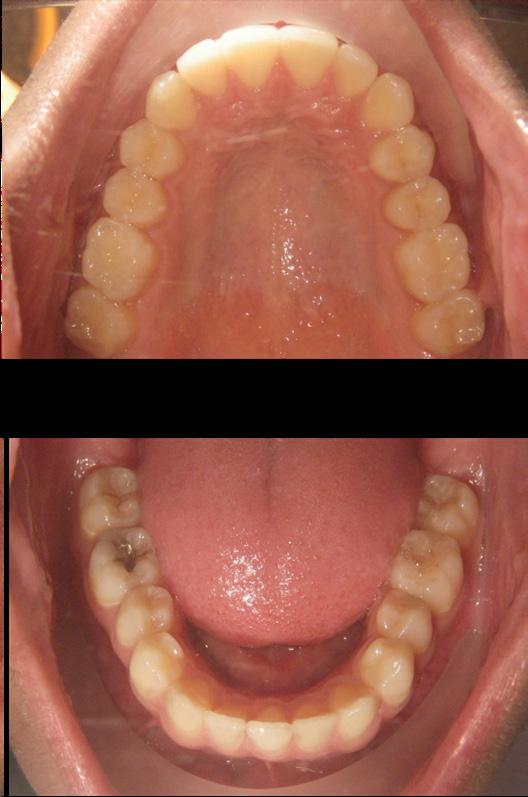
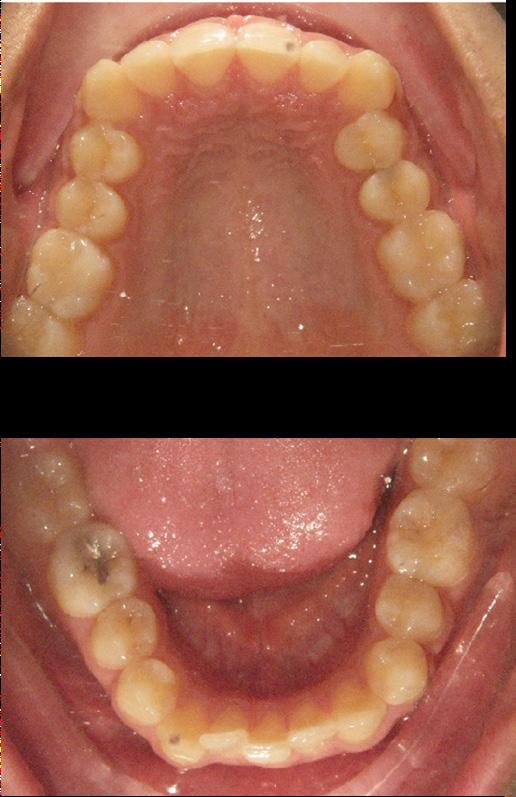
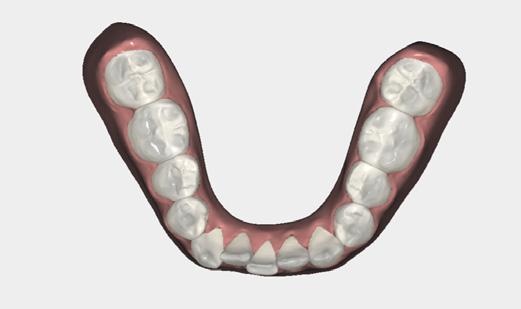


No attachments or refinements were necessary.
DAVID OSTREICHER DDS, MS, MPH Levittown, New York

21 1300 65 88 22 ORTHODONTICS CASE BOOK CLICK HERE
2: Perform IPR before aligner 2 0.2: amount of IPR
AMALGAM
GONE FOR GOOD?
For about a century, dental amalgam has been the standard restorative material for posterior caries lesions. Given the ease of placement, particularly its moisture tolerance, but also its relatively high resistance against masticatory forces and secondary caries, amalgam remains the restorative standard in most statutory or public health insurances until today.
Whilst concerns towards its biocompatibility and wider health effects repeatedly entered the public debate, a number of studies were able to refute such assumptions and to showcase the general safety of amalgam, if properly placed.
Notably, the usage of amalgam will likely cease in many countries in the world over the next years – grounded in the so-called Minamata treaty.
Emanating from the spoilage of mercury used in an industrial process in the city of Minamata in Japan and a series of widespread health effects due to subsequent mercury uptake, the vast majority of nations worldwide have signed the Minamata treaty, binding the signees to reduce and eventually stop the usage of mercury in any industrial process.
In that sense, dentistry is an outlier; only for dentistry, the treaty did not mandate a complete “phase-out” of the material, but a “phase-down”.
Signing nations promised to undertake measures to reduce the usage of dental amalgam, for example via the reinforcement of prevention or the development and adoption of alternative restorative strategies. In many countries in the world, including all countries of the European Union, policy makers have indeed decided to overachieve this promise and phase-out the usage of dental amalgam completely.
For some groups, i.e. pregnant or lactating women, this phase-out has already become reality. Within this reality, dentists are now faced with an important question: Which alternative material to use?
Restorative options in the post-amalgam era
In the course of the last 60 years, a range of amalgam alternative materials have been introduced.
Broadly, they fall into three categories;
1. resin-based composite materials, placed in increments to compensate for polymerization shrinkage and to allow safe polymerization,
2. glass-based materials, i.e. glass ionomers and glass hybrids,
3. materials combining the properties of both material classes (for the latter, terminology is not consistent and the clinical evidence often limited).
Especially resin composites have a long tradition of being used as an alternative to amalgam, in particular for posterior load-bearing restorations extending into the proximal surface.
Micro- and nano-hybrid resin composites have shown excellent physical properties, such as high resistance against abrasion and erosion, high flexural strength, polishability and aesthetics. Moreover, these materials can be placed adhesively and therefore do not rely on macroretentive cavity preparation, allowing for minimally invasive dentistry.
Notably, the placement of resin composites comes with a number of prerequisites like strict moisture control, stepwise preparation and conditioning of the cavities, e.g. involving acidetching and adhesive placement. In recent years the trend towards simplifying these application steps has been one focus of manufacturers, for example by combining the etching and the adhesive steps or by reducing the need for increment placement when using “bulk fill” composites instead.
22
COSMETIC & RESTORATIVE
Nevertheless, the placement of resin composites –especially in equigingival or subgingival situations - is technically demanding. Moreover, the material itself is relatively costly when compared to dental amalgam. Hence, resin composites can safely be regarded as one of the contemporary amalgam alternatives, but nevertheless does not “check all the boxes”.
Glass ionomers and glass hybrids
For several decades, glass ionomers have not been considered a fully fletched amalgam alternative, mainly because of their limited stability against abrasion and erosion and their low flexural strength, which resulted in limited longevity in occlusal-proximal posterior cavities. More recent generations of this material glass have been developed to specifically address the discussed main weaknesses.
A more advanced category of glass-based materials, called glass hybrids, claims to have overcome the most limitations around abrasion and erosion stability, and also to come with significantly improved flexural strength. This has been achieved by alterations in the chemical composition of the material: mainly the introduction of an additional, smaller and highly reactive glass particle and longer acrylic-acid chains. Moreover, the introduction of an additional coating step for the occlusal or other accessible surfaces, with a nano-resin material being placed onto the rougher glass surface protects the porous glass body against acid and abrasion. This coating has also been found to significantly improve the aesthetics of this formerly poorly polishable material. When the coat wears off, the glass hybrid undergoes a unique second maturation, substantially increasing the restoration’s hardness.1
In the range of laboratory studies, it was confirmed that indeed the glass hybrids come with significantly superior properties compared with their predecessors, while retaining the advantages of this material class, namely the option to place it in bulk, the ease of placement and its high bioactivity (especially the known release of fluoride). Notably, laboratory studies are not necessarily perfect surrogates for clinical behaviour.
Only clinical studies can demonstrate the true effects of any material alterations and the potential suitability of a restorative material as an amalgam alternative.
Glass hybrids: Clinical data as hard currency
As with most scientific advances, the development of the glass hybrids was not a revolution but an evolution. A number of studies – some of them even practicebased – investigated the direct predecessors of glass hybrids and confirmed the advances of this material class over the last one and a half decade, refuting the notion of glass-based materials being merely a
temporary material 2-4
The current generation of glass hybrids has been assessed in several studies that are presented in more detail in the subsequent paragraphs. Reassuringly, these studies were not all related to manufacturers and were conducted by a range of groups from all over the world.
Moreover, they dealt with different clinical indications and employed robust clinical designs, such as randomized control trials, to compare the glass hybrid material against an accepted standard of care like a resin composite.
Two main application fields have been explored, i.e. cervical and posterior, load-bearing lesions.
The cervical placement of glass ionomers, especially resin-modified glass ionomers, has a long tradition and is backed by a wealth of clinical studies demonstrating the usefulness of this material for this purpose. Resin-modified glass ionomers have consistently outperformed alternative materials when it comes to survival and success of cervical restorations 5
For glass hybrids, two randomized trials were identified comparing this material against resin composites.
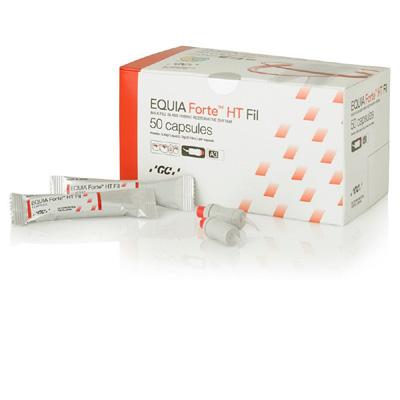
The first study 6 included a small sample of 25 patients with non-carious cervical lesions and bruxism, i.e., a very specific group. In these (overall rather young) patients, a total of 148 lesions were randomly restored (indicating a massive clustering of the lesions per patient) with either a glass hybrid (Equia Forte, GC, Tokyo, Japan) or a resin composite (Ceram.X One Universal, Dentsply, Konstanz, Germany).
After 6, 12 and 24 months follow-up, the restorations were re-evaluated using the modified USPHS criteria. When assessing the 126 remaining restorations (in 22 patients) at the 24-months recall, it was apparent that both materials performed similar.
Only for marginal adaptation, a significant difference was found, with glass hybrids showing slightly reduced adaptation. Secondary caries was not observed on any of the restorations.
Another study 7, with a follow-up of 36 months, assessed the survival, quality and costs of glass hybrid (Equia Forte) and resin composite restorations (Filtek Supreme XTE, 3M, St. Paul, USA) for managing cervical lesions; more specifically, sclerotic noncarious cervical lesions.
In 88 patients (50–70 years) with 175 lesions, restorations were directly placed without any mechanical preparation (which eventually resulted in high annual failure rates for both groups, see below).
Restoration quality was assessed at 1-, 18- and 36 months using FDI-criteria.
henryschein.com.au 23
COSMETIC & RESTORATIVE
Costs were evaluated using a so-called micro-costing approach (accounting for the time used for placing the material) and, during follow-up, fee items of the statutory insurance in Germany. Of the 88 patients, 43 received glass hybrids (83 restorations) and 45 resin composites (92 restorations); cluster randomization had been applied. At 36 months, 17 glass hybrids and 19 resin composites showed total retention loss, 5 glass hybrids were partially lost (no significant difference between materials). FDI ratings were not significantly different for any domain except surface lustre (here, composites were superior to glass hybrids – while it should be noticed that the latest generation of glass hybrids addressed such aesthetic effects specifically) (Fig. 4). Costs were significantly lower for glass hybrids, both initially (glass hybrids: 32.57; SD 16.36 € versus resin composites: 44.25; SD 21.40 €) and over the full observational period (glass hybrids: 41.72; SD 25.08 €, resin composites: 51.60; 26.17 €). In summary, both studies –randomized trials of a robust design – indicate the suitability of glass hybrids for restoring cervical lesions. Moreover, they demonstrate that the material is not only showing similar survival, but also flag the advantageous cost-effectiveness of this material. Notably, and as mentioned above, the fact that glass ionomer materials work well in this indication is not necessarily new. However, aspects around the economic differences between composites and glass hybrids for managing cervical lesions have not been assessed in detail before. The fact that regardless of the used restorative material, a preparation of sclerotic surfaces is likely beneficial, should also be highlighted.
In contrast to cervical lesions, glass ionomers were not considered to restore posterior, load-bearing and proximally extended cavities in the past. As mentioned, their limited flexural strength and abrasion/erosion resistance have often compromised the success and survival of glass ionomer restorations for this indication.

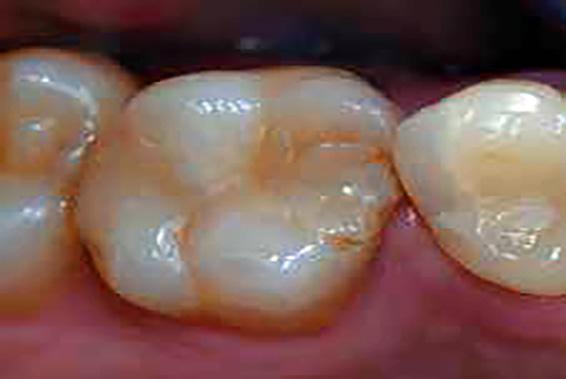
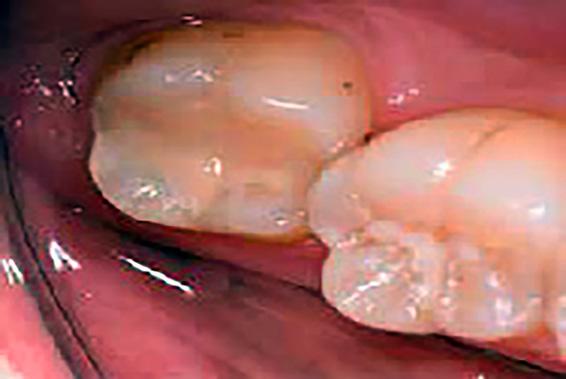
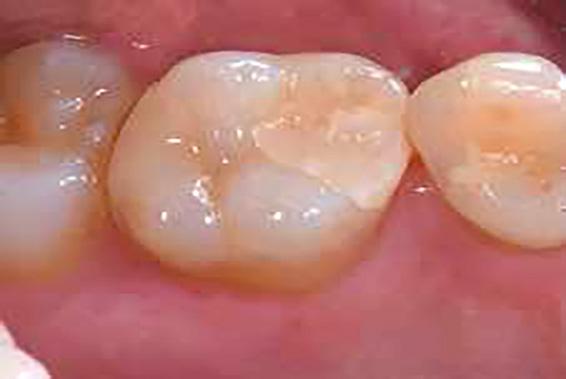
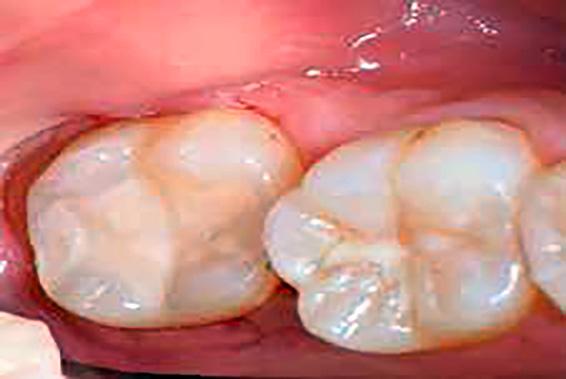
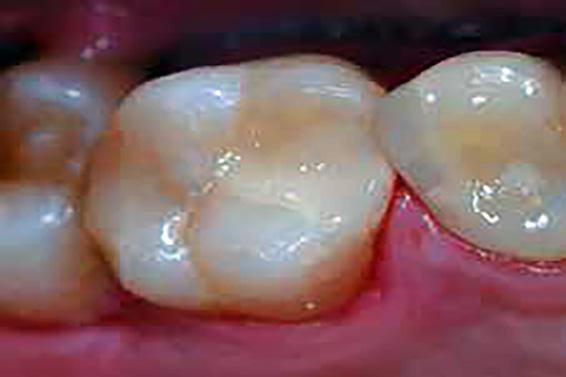
On the contrary, with the glass hybrid materials, a number of clinical studies have now refuted that notion. Two recent randomized trials are particularly noteworthy: In the first trial 8, a glass hybrid (Equia Forte), a bulk-fill composite resin (Filtek Bulk Fill Posterior Restorative, 3M) and a micro-hybrid composite resin placed incrementally (Charisma Smart, Heraeus Kulzer, Hanau, Germany) were compared. 109 teeth in 54 rather young patients (31 female, 23 male, mean age 22 years) with twosurfaced (mesial-occlusal, occlusal-distal) cavities in permanent teeth were randomly restored. The restorations did not extend towards cusps and all cervical margins were placed in sound enamel (i.e. not subgingivally). After caries removal and minimal invasive preparation, the materials were placed. After up to 24 months, 84 restorations were reevaluated using the modified USPHS criteria. Composite restorations showed better anatomic form, contact point, colour match, surface texture and overall survival compared to the glass hybrid restorations.
In contrast, another, multinational randomized controlled split-mouth trial 9, 10 in four university hospital centres in Zagreb (Croatia), Belgrade (Serbia), Milan (Italy) and Izmir (Turkey) compared a glass hybrid (Equia Forte) against a nano-hybrid
24
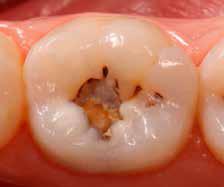
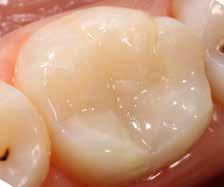
Fig. 3A: Class II restoration on tooth 26 with secondary caries; 3B: Class II glass hybrid restoration with EQUIA Forte on tooth 26, right after treatment; 3C: Class II glass hybrid restoration, 5 years after treatment (Courtesy of Prof. Matteo Basso, Italy).
2A 3A 2B 3B 2C 3C COSMETIC & RESTORATIVE
Occlusal-proximal lesions (Figs. 2 and 3) Fig. 2 A: Class I restoration on tooth 47 with marginal discoloration and recurrent caries, prior to treatment; 2B: Class I glass hybrid restoration with EQUIA Forte, right after placement; 2C: Glass hybrid restoration at follow-up, 3 years after placement (Courtesy of Prof. Matteo Basso, Italy).
composite (TetricEvoCeram, IvoclarVivadent, Schaan, Liechtenstein) for a similar indication. The study included occlusalproximal two-surfaced restorations in the molar region in adults with a permanent dentition; each individual needed to have two similar cavities in vital (positive response to ethyl chloride) molars of the same jaw to allow for the split-mouth design. A total of 360 restorations (in 180 patients) were placed. Per patient, one tooth was randomly selected to be restored with glass hybrid and the other was restored with composite material.
Pre-contoured sectional matrices (Palodent Plus, Dentsply) were employed and cavities conditioned according to manufacturer’s instructions prior to placing the material.
For the composite, a two-step self-etch adhesive (AdheSE, IvoclarVivadent) was employed. Patients were followed up after one week, 1 year, 2 years and 3 years and restorations assessed using FDI-2 criteria (10).
Additionally, the costs of each restoration from the patient’s perspective were calculated in US Dollar (USD), accounting for direct medical costs. To assess cost-effectiveness, incremental cost-effectiveness ratios were used, expressing the cost difference per gained or lost effectiveness.
In that trial, patients in Italy were older than in the other centres, and overall, more patients were female than male. 32 patients dropped out over the 3-years period, and 21 received re-treatments
(on 27 restorations). The mean survival time of the restorations was high across all centres and did not differ significantly between the two materials (Table 1).
In three of the four countries, composite was more expensive both initially (e.g. for its placement) and on the long term (over the 3 years follow-up and accounting for managing complications, too). When assessing the cost-effectiveness (USD and survival in months), composite was usually more costly than glass hybrids in three of the four counties, and overall, composite was more expensive at limited clinical benefit (costing additional 268.5 USD per additional month without complications).
The emerging body of evidence displays that the glass hybrids are also promising for posterior, proximally extended cavities. While there are some inconsistencies around the comparative longevity of glass hybrids versus composites for this purpose between the two described studies, especially the large multinational trial is assuring: In four independent centres, concordant results were generated, confirming that both composites and glass hybrids are suitable materials over the 3-year observational period for load-bearing cavities.
Notably, the cost-effectiveness of glass hybrids was once more confirmed, deeming it a particular amalgam alternative when cost considerations are important, for example in low- and middle-income countries but also in most statutory or social insurance settings in high-income areas.
25 1300 65 88 22
4A 4B
Fig. 4A: Class I cavity prior to treatment; B: Glass hybrid EQUIA Forte HT (GC) restoration (Courtesyof Dr. Zeynep Bilge Kütük, Turkey).
PARAMETER CROATIA ITALY SERBIA TURKEY Age (years) 26.5 (7.4) 44.6 (15.8) 31.7 (11.4) 30.6 (11.2) Gender (female/male) 44/16 16/16 16/12 40/20 Glass hybrids costs (USD) 92.7 (7.4) 146.1 (12.9) 44.0 (3.3) 66.2 (11.9) Composites costs (USD) 126.42 (16.3) 146.2 (19.3) 61.0 (3.5) 128.6 (3.8) Glass hybrids survival (months) 35.1 (3.4) 35.3 (2.3) 34.1 (6.2) 35.0 (3.0) Composites survival (months) 34.3 (5.1) 35.0 (4.0) 34.9 (4.6) 35.8 (1.0) COSMETIC & RESTORATIVE
Table 1: Costs and survival of glass hybrids and composites in different countries (mean, SD)
Using an extrapolation model 11, it was further demonstrated that this cost-effectiveness was likely to be retained on the long term; a recent study found the added effectiveness of composites minimal (tooth retention for a mean (SD) 54.4 (1.7) years) but also more costly (694 (54) Euro) than glass hybrids. In sensitivity analyses, and under certain assumptions, glass hybrids were even more effective and still less costly than composite.
Glass ionomers as essential medicines
Given the advantages of glass ionomers and glass hybrids and the recent advancements, a WHO expert committee, in 2021, declared that “glass ionomer cement has caries-preventive properties due to continued capture and release of fluoride ions, which remineralise carious tooth structures, and have a bacteriostatic effect. Glass ionomer cement results in lower rates of recurring caries compared to composite or amalgam restorations, and also reduces the incidence of new cavities on other teeth. The simplicity of application makes glass ionomer cement suitable for primary health care and field settings, including for “people with special needs”
12. As a result, glass ionomers were, as one of few dental materials, defined as “essential medicines” 13 , i.e. materials needed for a basic healthcare system. Essential medicines are usually the most efficacious, safe and cost-effective materials for a certain condition (in this case dental caries). In 2019, glass hybrids were recognized by the FDI as a class of restorative materials for permanent teeth, suitable for singlesurface restorations and Class II restorations 14, 15
Conclusions
The era of dental amalgam is slowly coming to an end – and it can be expected that in the future, the usage of amalgam will fully cease in most healthcare systems. There is not a single material fulfilling all requirements towards an amalgam replacement; instead, a range of materials with different properties are available and dentists will need to make informed choices which material fits which indication best.
Glass ionomers and glass hybrids are among the potential amalgam replacements, and have shown a considerable evolution over the last two decades. Evidence supports the usage of glass hybrids for both cervical and posterior load-bearing restorations. The cost-effectiveness and applicability of these materials is likely superior to that of other materials, while improvements in further material characteristics (specifically flexural strength) would be welcome to establish this material as truly universal amalgam replacement material. For most healthcare systems worldwide, though, glass ionomers and glass hybrids are already “essential medicines” according to WHO.
References
1. Shimada Y, Hokii Y, Yamamoto K, et al. Evaluation of hardness increase of GIC restorative surface in saliva. Clin Oral Invest (2015) 19:1701–1754.
2. Gurgan S, Kutuk ZB, Ergin E, Oztas SS, Cakir FY. Clinical performance of a glass ionomer restorative system: a 6-year evaluation. Clin Oral Investig. 2017;21(7):2335-43.
3. Klinke T, Daboul A, Turek A, Frankenberger R, Hickel R, Biffar R. Clinical performance during 48 months of two current glass ionomer restorative systems with coatings: a randomized clinical trial in the field. Trials. 2016;17(1):239.
4. Friedl K, Hiller KA, Friedl KH. Clinical performance of a new glass ionomer based restoration system: a retrospective cohort study. Dent Mater. 2011;27(10):1031-7.
5. Schwendicke F, Gostemeyer G, Blunck U, Paris S, Hsu LY, Tu YK. Directly Placed Restorative Materials: Review and Network Metaanalysis. J Dent Res. 2016;95(6):613-22.
6. Koc Vural U, Meral E, Ergin E, Gurgan S. Twenty-four-month clinical performance of a glass hybrid restorative in non-carious cervical lesions of patients with bruxism: a split-mouth, randomized clinical trial. Clin Oral Investig. 2020;24(3):1229-1238.
7. Schwendicke F, Müller A, Seifert T, Jeggle-Engbert LM, Paris S, Göstemeyer G. Glass hybrid versus composite for non-carious cervical lesions: Survival, restoration quality and costs in randomized controlled trial after 3 years. J Dent. 2021; 110:103689.

8. Balkaya H, Arslan S. A Two-year Clinical Comparison of Three Different Restorative Materials in Class II Cavities. Oper Dent. 2020;45(1):e32-e42.
9. Schwendicke F, Rossi JG, Krois J, Basso M, Peric T, Turkun LS, et al. Cost-effectiveness of glass hybrid versus composite in a multicountry randomized trial. J Dent. 2021;107:103614.
10. Mileti I, Baraba A, Basso M, Pulcini MG, Markovi D, Peri T, et al. Clinical Performance of a Glass-Hybrid System Compared with a Resin Composite in the Posterior Region: Results of a 2-year Multicenter Study. J Adhes Dent. 2020;22(3):235-47.
11. Schwendicke F, Basso M, Markovic D, Turkun LS, Mileti I. Longterm costeffectiveness of glass hybrid versus composite in permanent molars. J Dent. 2021;112:103751.
12. Expert Committee on Selection and Use of Essential Medicines. Glass ionomer cement – dental caries https:// cdn.who. int/media/docs/default-source/essentialmedicines/ 2021-eml-expert-committee/expert-reviews/a16_gic_rev1. pdf?sfvrsn=660f8835_82021 (Accessed Sept 16, 2022).
13. WHO. Expert Committee on Selection and Use of Essential Medicines https://HYPERLINK http://www/ www. who.int/groups/ expert-committee-on- selectionand-use-of-essential-medicines (Accessed Sept 16, 2022)
14. FDI World Dental Federation. 2019; Carious Lesions and First Restorative Treatment. https:// HYPERLINK http://www. fdiworlddental.org/ www.fdiworlddental.org/ carious-lesions-andfirst-restorativetreatment. (Accessed Sept 14, 2022).
15. FDI World Dental Federation. Carious lesions and first restorative treatment: Adopted by the General Assembly: September 2019, San Francisco, United States of America. Int Dent J. 2020; 70: 5–6.
26
COSMETIC & RESTORATIVE
PROF. DR FALK SCHWENDICKE Germany
G-ÆNIAL A’CHORD
THE ADVANCED UNIVERSAL COMPOSITE WITH UNISHADE SIMPLICITY
G-ænial A’CHORD is a universal composite that delivers long lasting, invisible restorations. Designed to save time and therefore costs, it brings together superior technology in a straightforward product. Now you can feel truly confident using a material with effortless handling even in challenging cases.
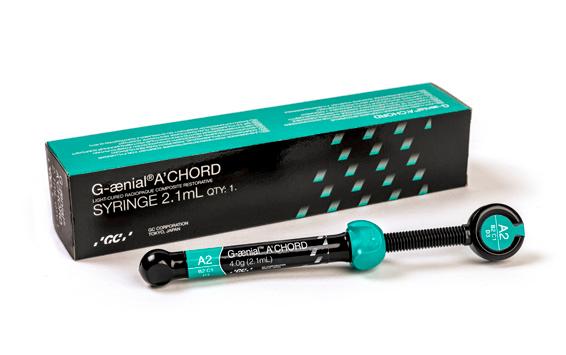
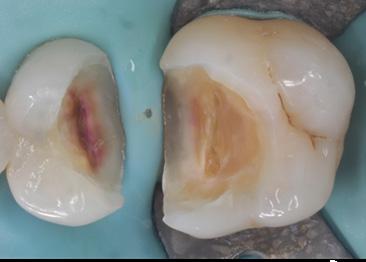
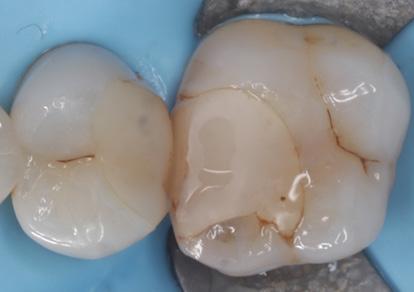
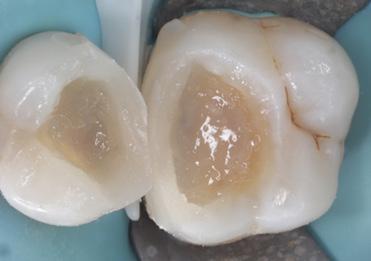
Used in conjunction with a short fibre reinforced composite, everX Flow as a dentine replacement for building a stronger foundation under posterior restorations, offers a biomimetic restorative approach.

henryschein.com.au 27 COSMETIC & RESTORATIVE
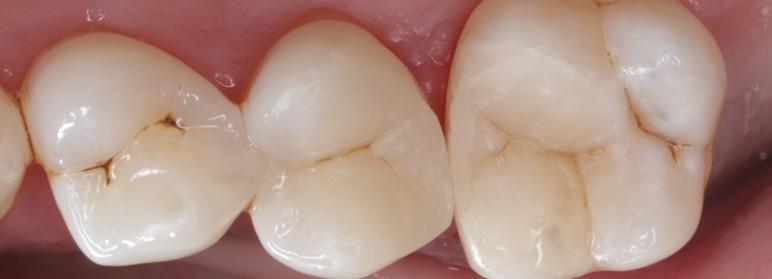
Fig. 1 Initial presentation, two large posterior composite restorations requiring replacement.
Fig. 2 After caries removal process.
Fig. 3 Internal stabilization utilizing short fibre reinforced composite, everX Flow. Marginal ridge build up using G-aenial A’CHORD Shade A2.
Fig. 4 Occlusal anatomy replicated using conventional paste composite resin G-aenial A’CHORD Shade A2.
Fig. 5 Final presentation, immediately post-operative.
CLICK HERE Download Brochure CLICK HERE
Images courtesy of Dr Yo-Han Choi, Sydney
FROM LONG FIBRES TO NANO FIBRES
EVOLUTION OF THE USE OF FIBRES IN DENTISTRY
Could you please shortly introduce yourself?
Professionally, I started as a dental technician and later became a dentist as well. During my undergraduate course, from 1988, I already started with research on the use of several types of fibres to reinforce dentures. In 1994, I completed my doctoral dissertation on this topic. Shortly thereafter, I stayed for almost two years at the Nordic Institute of Dental Materials where I had the chance to do research with Dr I. E. Ruyter, one of the most renowned experts in polymer chemistry for dental applications.
Here, I gained deep knowledge on that topic. Then, I returned to the University of Turku and I was one of the founders of Stick Tech (spin-off of the University of Turku, red.) in 1997. However, I made the personal decision to stay at the university rather than proceeding in the company, where I got governmental funding to continue research on fibre-reinforced composite. Through these many years of research, we had the chance to build a substantial amount of evidence and expertise in fibrereinforced composites. In 2006 I became Professor and Chair of the Department of Biomaterials Science and in 2009, director of the Turku Clinical Biomaterials Centre (TCBC). I’ve been the Dean of the Institute of Dentistry of the University of Turku from 2004 to 2012 and after a short break, returned to that position in 2018.
In your opinion, what are the main advantages of fibres in dentistry?
Fibres are the only way to make large direct restorations with good mechanical properties and durability. Other durable strong materials, such as zirconia and metal can only be made indirectly, outside the mouth. This way we can provide more affordable restorations and allow a larger patient group to be treated. Another advantage is that the mechanical properties of fibre- reinforced composites are very close to those of bone and dentine,
which is not the case with metals or ceramics, which are very rigid. Fibre-reinforced composites are the only synthetic materials which meet the same biomechanical demands as dentine or bone.
What was the purpose of developing everX Flow?
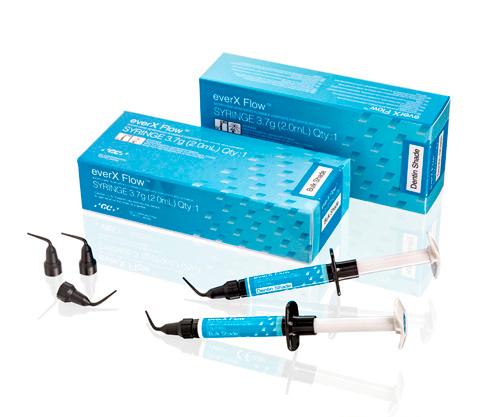
Research started with long fibres, used in the everStick products, which are the most durable ones. However, length is also a matter of designation, and appliances and restorations like splints and bridges that cover a wide span need a different length compared to a single tooth restoration. The main purpose with which we started the development of everX Posterior was to find the optimal fibre length vs. the size of the tooth, so that the fibres would act as reinforcement. This resulted in an average fibre length of 0.7 mm to 1 mm in everX Posterior, which provided excellent mechanical properties, and in particular, increased toughness. However, the adaptation and placement were not always as easy to achieve as we ideally would like to. Meanwhile, the bulk-fill composites emerged onto the dental markets and became popular, not because of their properties but because of their ease of use. Hence, the idea arose to develop a flowable version.
On one hand, we expected that shortening the fibres would decrease the properties. But, from studying the literature, we knew that the fibre length should be proportional to the diameter. Thus we started searching for what is called the ‘Optimal Aspect Ratio’. The fibres in everX Flow are shorter, but also thinner. With these smaller fibres, the viscosity could be changed; the fibres in everX Flow are about 0.1 mm in length but with a much smaller diameter. The amount of fibres could also be increased, maintaining the toughness – which is the main purpose of the fibre reinforcement. Most of the research is focused on the toughness because it has been shown to be the best indicator of longevity of a restoration. 1
28
Interview with Prof. Pekka Vallittu, Finland
COSMETIC & RESTORATIVE
What was your role in the development of this material?
I have initiated and coordinated the development of FRC materials. The key lab research has been mainly executed by Dr. Lippo Lassila who is the principal investigator in this particular project with Adjunct Professor Sufyan Garoushi and our skilled laboratory staff members. Dr. Garoushi wrote a PhD thesis on short fibre-reinforced composites. Further on, I have participated in the clinical test phase and directed the project form the clinical and material science perspectives. The entire project was a cooperation in which TCBC was in charge of the research and development of the research and Stick Tech – now a member of the GC group – transformed the research into an industrial project.
You often refer to fibre- reinforced composites as biomimetic restorations. What exactly do you mean with this term?
When you analyse human tissue, dentine and bone are fibre-reinforced materials, based on collagen fibres and apatite minerals. Even though the chemical composition of fibre- reinforced composites is different, they reproduce a similar structure. Moreover, the biomechanical behaviour of these composites mimics that of dentine.

Are there other differences between everX Posterior & everX Flow? Do they have the same indications?
The indications are very similar, but the main difference is in the handling, because of the viscosity. Basically, they are both base materials to reinforce restored teeth. everX Flow is now also indicated as a core build-up material for metal and ceramic crowns.
There are 2 shades available in everX Flow. What are the differences & when are they indicated?
The ‘Bulk’ shade: is more translucent and can be cured in layers up to 5.5 mm, which widens the indications a bit. The ‘Dentin’ shade is more aesthetic and can be cured up to 2.0 mm.
What is the difference between traditional bulkfill composites and everX Flow?
In indications, they are very close to each other. However, everX Flow is a base material, meant to reinforce the structures underneath and above it. It needs to be covered with a regular composite that can be easily polished. Even though many bulk-fill composites need to be covered as well, in its strict definition, it should mean that you can use one and the same material from the bottom to the surface, in one increment.
How much stronger is everX Flow? What is the impact on performance?
Its toughness, which the most important material property impacting the clinical success1 is twice as much as any other kind of composite on the market, which is also the case for everX Posterior. Its impact on the restoration performance depends on the size and shape of the destructed tooth and the ratio of everX Flow and overlaying composite. The ratio between the short-fibre reinforced base and conventional composite in the restoration should be analogue to the dentine and enamel structure. This means that about 1-1.5 mm of the occlusal surface should be regular composite in order to give the best mechanical strength for the restored tooth as a whole2-3. Less benefit is achieved if the layer of fibrereinforced composite is not sufficiently thick4
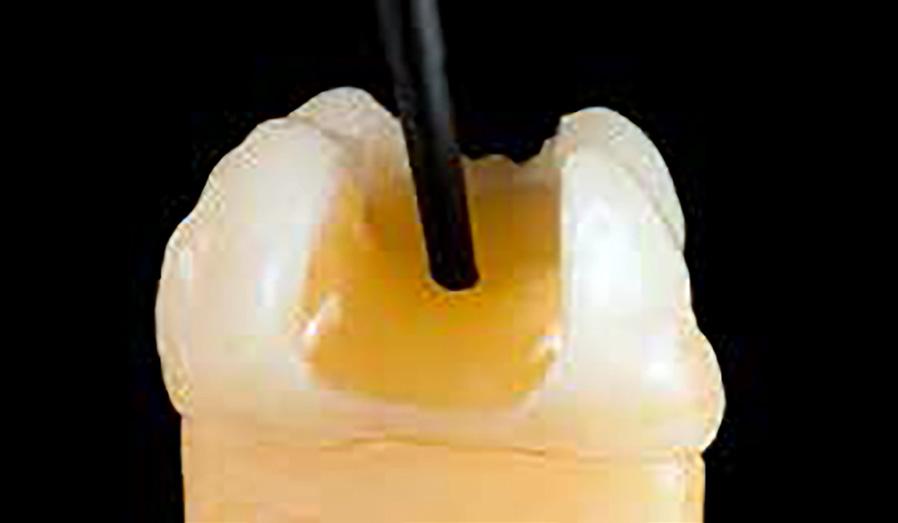
As a rule of thumb, you use everX Flow to replace dentine and regular composite to replace enamel, thus mimicking tooth structure.
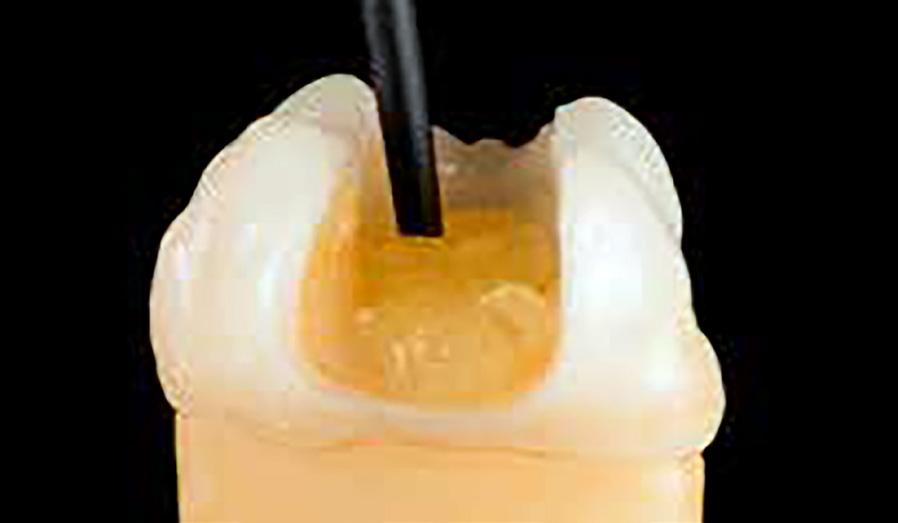
29 1300 65 88 22
COSMETIC & RESTORATIVE
SEM image of the glass fibres in everX Flow. Courtesy of Dr Lippo Lassila, University of Turku
The material keeps its shape during placement (top), but flows when it shear stress or ‘disturbance’ (bottom).
Do you need to cover everX Flow with a last layer of composite, and if yes why?
By structure, everX Flow contains both micro and macrofill particles. Fibres are big particles that make it slightly less polishable even though the wear resistance in vitro is very good. Based on the wear behaviour, it could be exposed in approximal contact points. However, the official instruction remains to cover everX Flow on the proximal surfaces with regular composite as well.
More research is needed to analyse the effect in the long term, but available data are positive.
What does the research say about the performance of the product?
There is already a large number of publications available on everX Flow. On everX Posterior, we have even more evidence available. Almost all studies show superior properties of the material, such as the toughness or other mechanical properties. In vitro, it has been shown that fracture propagation is prevented in a restoration with fibre-reinforced composite. This is also the case at the interface of composite layers5.
In those studies where no considerable reinforcing effect was found, the thickness of the fibre-reinforced layer was usually insufficient. Studies from other research groups have confirmed these superior mechanical properties and there are still many studies ongoing on this topic.
Could everX Flow be used to replace posts? If yes, in which indications?
At the TCBC, we have been looking in this topic a lot, in vitro as well as clinically, and many other research groups are doing so as well. Overall, more research on this topic is still necessary. In molars, it is possible to make a direct endocrown without post by making a base of everX Posterior and this can be extrapolated to everX Flow as well.
This type of endocrown is analogue to lab-made ceramic endocrowns. The restoration only extends about 2-3 mm into the root canals, given that the walls are parallel and diameter is sufficient. The intraradicular part of the restoration should have the same height or be higher than the coronal part.
The thickness of the occlusal veneer of the restoration should be more than 1-2 mm.
In anterior and premolars, studies have been done with very promising, but there is not enough evidence yet for clinical recommendation. However, it is possible to combine the pre-fabricated fibre post and use everX Flow in the coronal part of canal to replace cement and for the core.
This is an improvement in comparison with a regular luting cement.
Of course, results depend a lot on the remaining tooth structure. If there is considerable damage up to the gingival level a thick and well bonded fibre post is still needed for sufficient retention. Evidence might be available within 2-3 years.
What are your future research topics?
Tomorrow I’ll be giving a lecture on the masticatory function of giant pandas and the evolutionary adaptation of the condyles to that function. In the field of fibre-reinforced composites, we strive to an even closer resemblance to natural dentine; among others we are investigating nanofibres, and compositions and structure closer to apatite minerals. We are also cooperating with another research group to extended indications in surgical applications, taking into consideration the biological aspect of bone forming cell lines. This is linked also to the bone regeneration materials used in periodontology and oral surgery.
References
1. Heintze SD, Hickel R, Reis A, Loguercio AS, Rousson V, Dent Mater 2017;33:e101-e114.

2. Omran TA, Garoushi S, Lassila L, Shinya A, Vallittu PK. Bonding interface affects the load-bearing capacity of bilayered composite. Dent Mater J . 2019; 38(6):1002-1011.
3. Garoushi S, Lassila LV, Tezvergil A, Vallittu PK. Load bearing capacity of fibre-reinforced and particulate filler composite resin combination. J Dent 2006; 34:763-769.
4. Rocca GT, Saratti CM, Poncet A, Feilzer AJ, Krejci I. The influence of FRCs reinforcement on marginal adaptation of CAD/CAM composite resin endocrowns after simulated fatigue loading. Odontology 2016; 104:220-232.
5. Tiu J, Belli R, Lohbauer U. Rising R-curves in particulate/ fiber-reinforced resin composite layered systems. J Mech Behav Biomed Mater. 2019;103:103537.
30
COSMETIC & RESTORATIVE
PROF. PEKKA VALLITTU Professor, Institute of Dentistry, DDS, PHD, CDT
RELIABLE ISOLATION
RESULTS IN BETTER CLINICAL OUTCOMES
Henry Schein® Pre-Framed Rubber Dams allow clinicians to achieve isolation. Easier, faster, with patient comfort in mind.
Advantages of Henry Schein Pre-Framed Rubber Dams:
• Single-use, built-in flexible frame designed for convenient placement for better patient comfort
• Eliminates the need for sterilisation or storage of rubber dam
• Available in a convenient size of 165mm x 132mm
• Flexible access to oral cavity for x-ray film or digital x-ray sensors
• Appropriate for a wide range of procedure applications
• Easy to use and saves time
For more product information on Pre-Framed Rubber Dams
HS-5702800 Pre-Framed Rubber Dam Latex x 20
HS-5702801 Pre-Framed Rubber Dam Non Latex Purple x 20
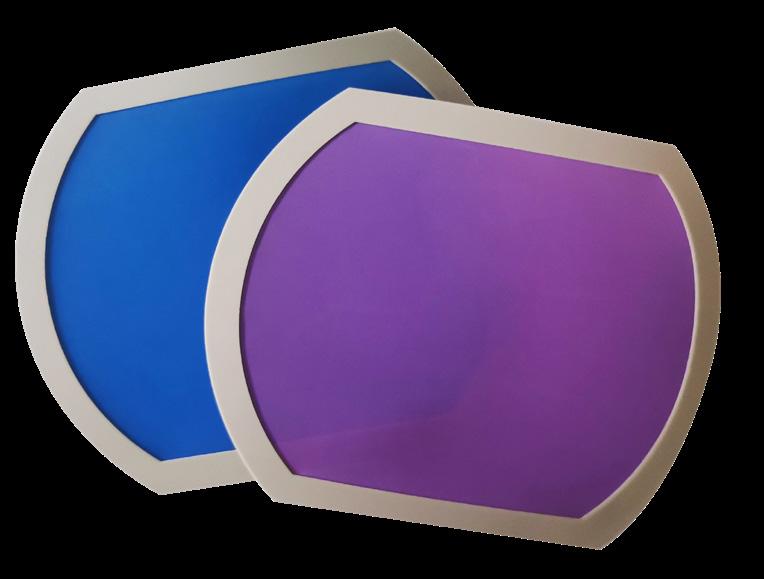
henryschein.com.au 31 COSMETIC & RESTORATIVE
CLICK HERE
STYLESKULPT BEAUTIFUL BIOMIMETIC RESTORATIONS

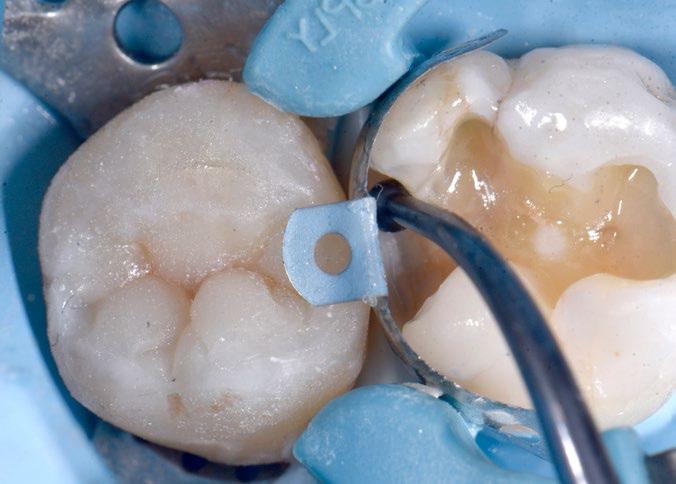
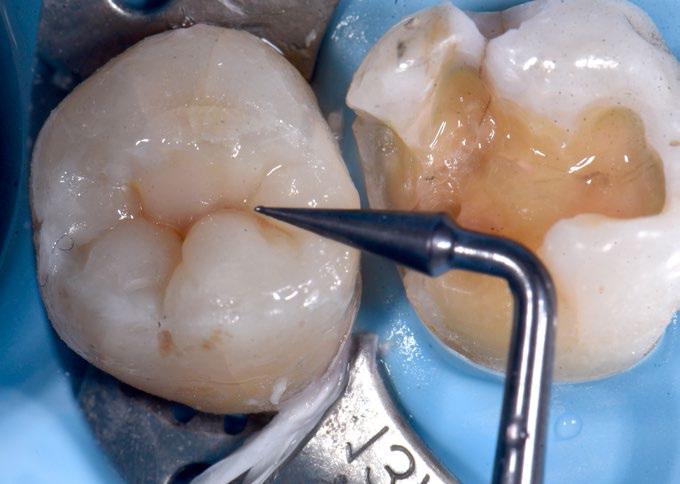
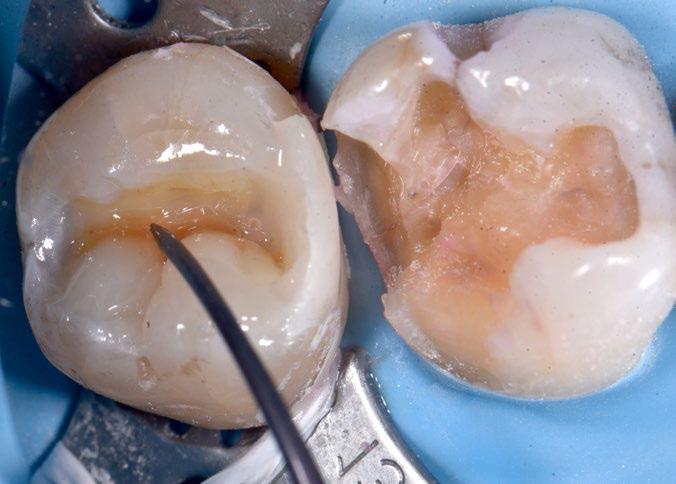
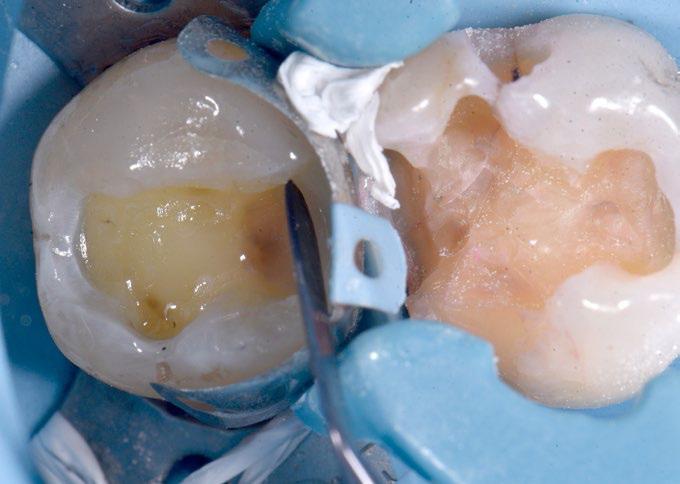
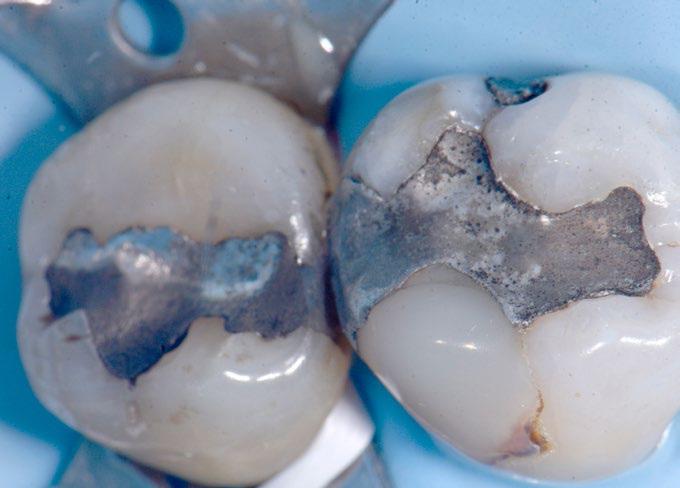
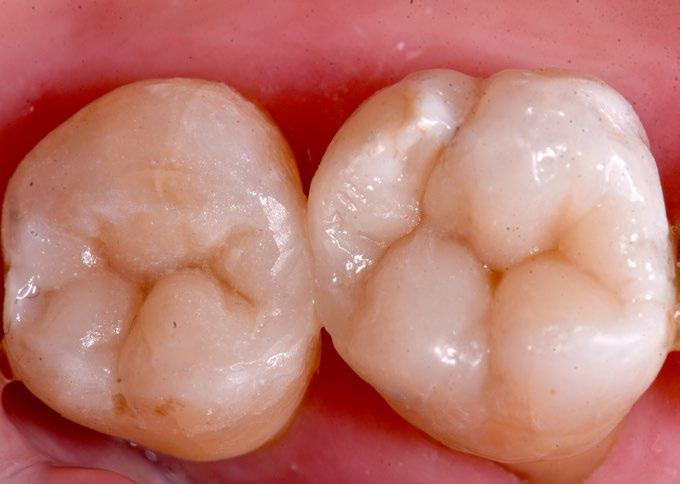
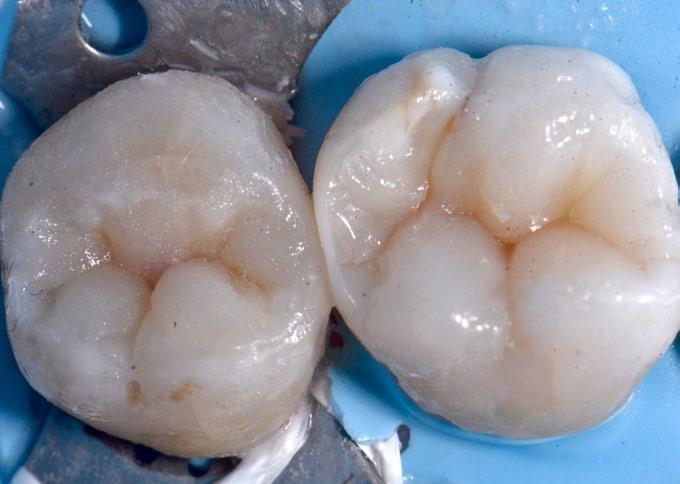
32
FIGURES 7 & 8 - POSTOPERATIVE VIEW - Beautifully and biomimetically-completed restorations.
FIGURE 2 - Amalgams removed and marginal ridgecomposite base layer shaped in the distal prep using TNTAM2.
FIGURE 1 - PREOPERATIVE VIEW Defective amalgam and composite patch restorations which need to be replaced.
FIGURE 3 - Brown tint delicately applied with the ultra-pointed fine end of TNTAM1.
FIGURE 4 - Final layers of composite placed and sculpted with the conical end of TNTAM1.
FIGURE 4 - Access for matrix burnishing and initial layers of packable composite made simple using the extended shank and burnisher end of TNTAM3.
FIGURE 5 - Composite formed and finessed with the thin paddle of TNTAM2. Final layer of composite placed and shaped with TNTAM1.
COSMETIC & RESTORATIVE
TNTAMKIT* STYLESKULPT KIT
DESCRIPTION
PART CODE
Cone Socket Mirror Handle, Satin Steel MH6 #5 HD Mirror MIR5HD
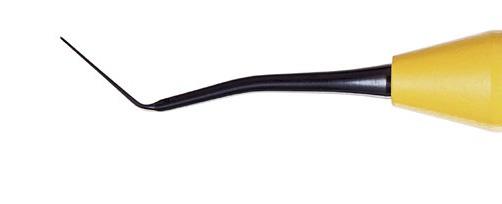
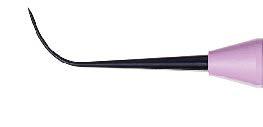
StyleSkulpt 1, Posterior Occlusal Shaper TNTAM1
StyleSkulpt 2, Universal Thin PFI TNTAM2
StyleSkulpt 3, Curved Ball Burnisher TNTAM3
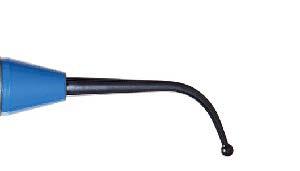
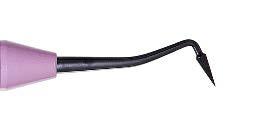
Posterior Sickle Scaler, EverEdge 2.0 S204S9E2

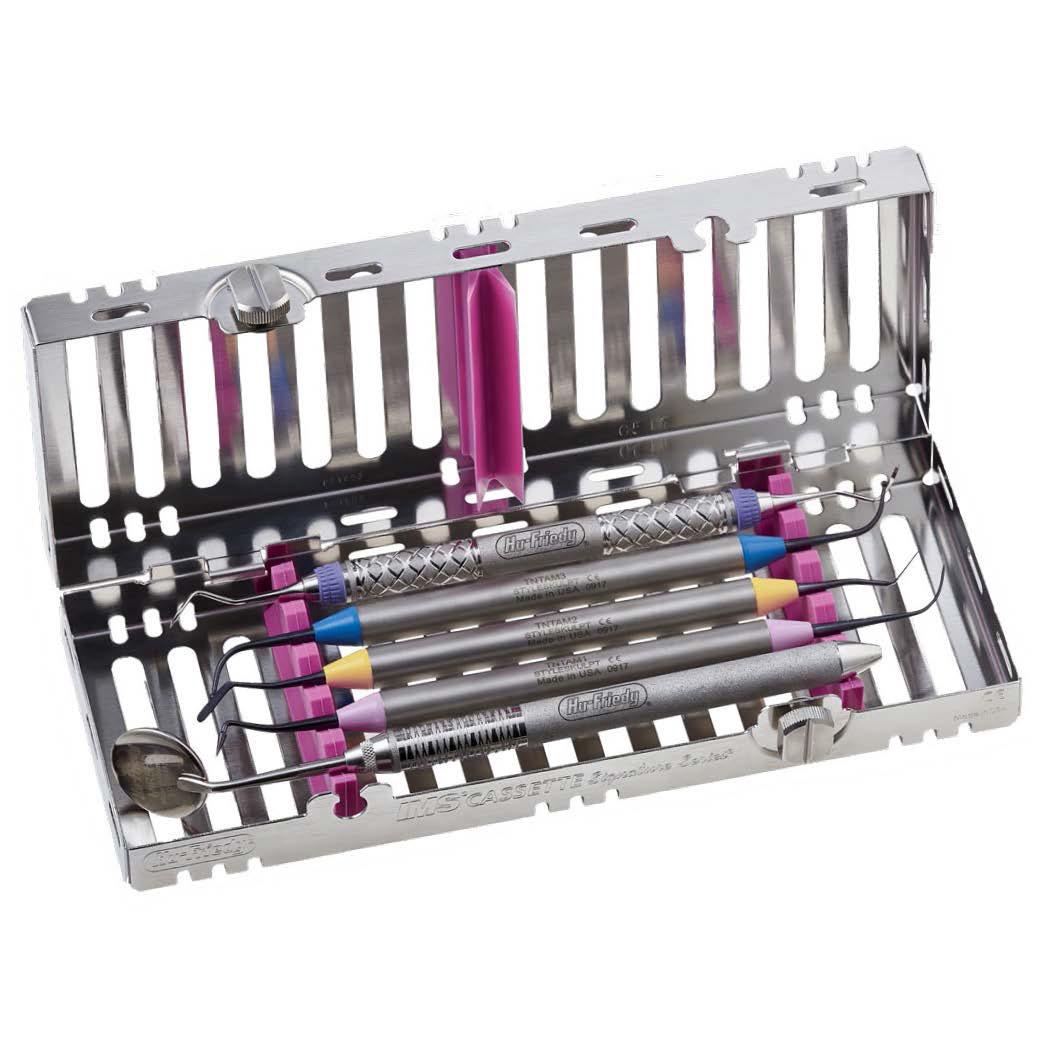
StyleSkulpt Kit TNTAMKIT*
*Kit contains instruments in 5-instrument cassette
Dr. Clarence Tam is originally from Toronto, Canada, where she completed her Doctor of Dental Surgery and General Practice Residency at the University of Western Ontario and the University of Toronto, respectively.
Clarence’s practice is limited to cosmetic and restorative dentistry. She is well-published to both the local and international dental press, writing articles, reviewing and developing prototype products and techniques in clinical dentistry.

She frequently and continually lectures internationally.
Clarence is the Chairperson and Director of the New Zealand Academy of Cosmetic Dentistry. She is currently one of two individuals in Australasia to hold Board-Certified Accredited Member Status with the American Academy of Cosmetic Dentistry.
Clarence is an Opinion Leader for multinational dental companies Kuraray Noritake, J Morita Corp, Henry
Schein NZ, Ivoclar Vivadent, DentsplySirona, 3M ESPE, Kerr, GC Australasia, SDI, Coltene, Triodent and is the only Voco Fellow in Australia and New Zealand. She holds Fellowship status with the International Academy for DentoFacial Esthetics. She is a passionate and approachable individual, and is committed to having an interactive approach with patients in all of her cases to maximize predictability.
DR CLARENCE TAM
HBSc, DDS, FIADFE, AAACD
Auckland, New Zealand
33 1300 65 88 22
StyleSkulpt 1, Universal Thin PFI HF-TNTAM1
StyleSkulpt 3, Curved Ball Burnisher HF-TNTAM3
StyleSkulpt 2, Posterior Occlusal Shaper HF-TNTAM2
COSMETIC & RESTORATIVE
PANAVIA™ 40 YEARS OF SUCCESS IN ADHESIVE LUTING

Did you ever wonder why the products of the PANAVIA™ brand offer an outstanding performance? You probably know that they all contain the original MDP monomer developed in the early 1980s. It has attracted much attention because it is such an excellent adhesive monomer. This phosphate ester monomer forms a very strong bond to tooth structure, zirconia, and dental metals. It has been used in every PANAVIA™ product. In reality, however, other catalytic technologies and ingredients alongside MDP are important technological contributors supporting the performance of our cementation solutions.
Ingredients affecting the polymerisation reaction
One of these decisive additional technologies and ingredients is the polymerization catalyst triggering the curing process. Different from the MDP monomer used in every PANAVIA™ product, the polymerization catalyst has been continuously improved since the introduction of PANAVIA™ EX in 1983. New versions have been developed for PANAVIA™ 21, PANAVIA™ Fluoro Cement and PANAVIA™ V5, for example.
Another important component also affecting the curing process is the Touch Cure Technology used in two of the three major products of the current PANAVIA™ Portfolio: PANAVIA™ V5 and PANAVIA™ Veneer LC. This technology was first used in PANAVIA™ 21, which was launched in 1993. The contact of the chemical polymerization activator contained in the self-etching primer with the resin cement paste accelerates the polymerization of the cement from the adhesive interface, thus providing better adhesion of the resin cement.
In developing PANAVIA™ V5, we reviewed the chemical composition of the existing PANAVIA™ products and updated it substantially. The Touch Cure technology has also been adopted for use in the case of PANAVIA™ V5 Tooth Primer and the concomitantly used PANAVIA™ V5 Paste. When cementing veneers with PANAVIA™ Veneer LC, we also use PANAVIA™ V5 Tooth Primer for conditioning teeth. This also involves the application of Touch Cure technology for achieving an adhesive connection with the tooth without compromising the working time of the cement paste.
Additional adhesive monomers
Even in the field of adhesive monomers, however, our development efforts did not come to a halt: We developed the LCSi monomer, a long carbon chain silane-coupling agent which made possible to integrate the function of a ceramic primer in our universal self-adhesive resin cement PANAVIA™ SA Cement Universal.
With its high level of hydrophobicity, this monomer provides stable, long-term bond strength. Generally speaking, it may be said that the reason bond durability may drop is a hydrolytic reaction damaging the chemical bond between the silica contained in the glass ceramics and the silanecoupling agent.
Three products covering virtually every need
By combining these technologies and ingredients in a smart way, we have succeeded in developing a resin cement portfolio that covers virtually every need. With PANAVIA™ V5, PANAVIA™ SA Cement Universal and PANAVIA™ Veneer LC, it is possible to treat a wide variety of cases. The products allow for the luting of various types of restorations, prosthetic appliances and for the placement of posts and produce great outcomes if used properly according to the instructions for use.
PANAVIA™ V5 is the resin cement that has the widest range of uses among the three cement systems just mentioned. It covers almost all the intended uses of the other two cements.
Therefore, it is possible for the dental practitioner to choose the right cement system for treatment, according to the cases arriving at the clinic and patient needs, from among these three major resin cement products: PANAVIA™ V5, a resin cement with a wide range of applications; PANAVIA™ SA Cement Universal, a simple and easy-handling self-adhesive resin cement; and PANAVIA™ Veneer LC when there is a need to bond laminate veneers.
34
COSMETIC & RESTORATIVE
Exploring new opportunities
The good thing about developing technologies in a company like Kuraray Noritake Dental is that their application is not limited to a certain product or product group. The R&D Department always carries out research on how to leverage the benefits of the technologies in other applications.
Take, for example, KATANA™ Cleaner, which was released in 2019. This cleaning agent can be used to remove saliva, blood, temporary cement, or other contaminants that can adhere to the surfaces of teeth or prosthetic devices during trial fitting and temporary cementation of a prosthetic device. This unique product has been developed by taking advantage of the surfactant function of the MDP monomer.
Conclusion
Hence, it is mainly our long-standing knowledge and experience in the development of dental resin cements and adhesive solutions that provides for the excellence of the current PANAVIA™ Portfolio. We know how to improve existing technologies, never stop developing new ones and continuously look for the best way to combine proven and new components to obtain the best possible outcomes.



In the steps of the product development procedure, clinical tests are conducted and feedback from dental practitioners is gathered to take into account the extreme conditions found in the oral environment. In the past 40 years, this strategy has proven successful, and we are sure it will help us develop many other innovative products that offer ideal support in your striving to improve the oral health of your patients.
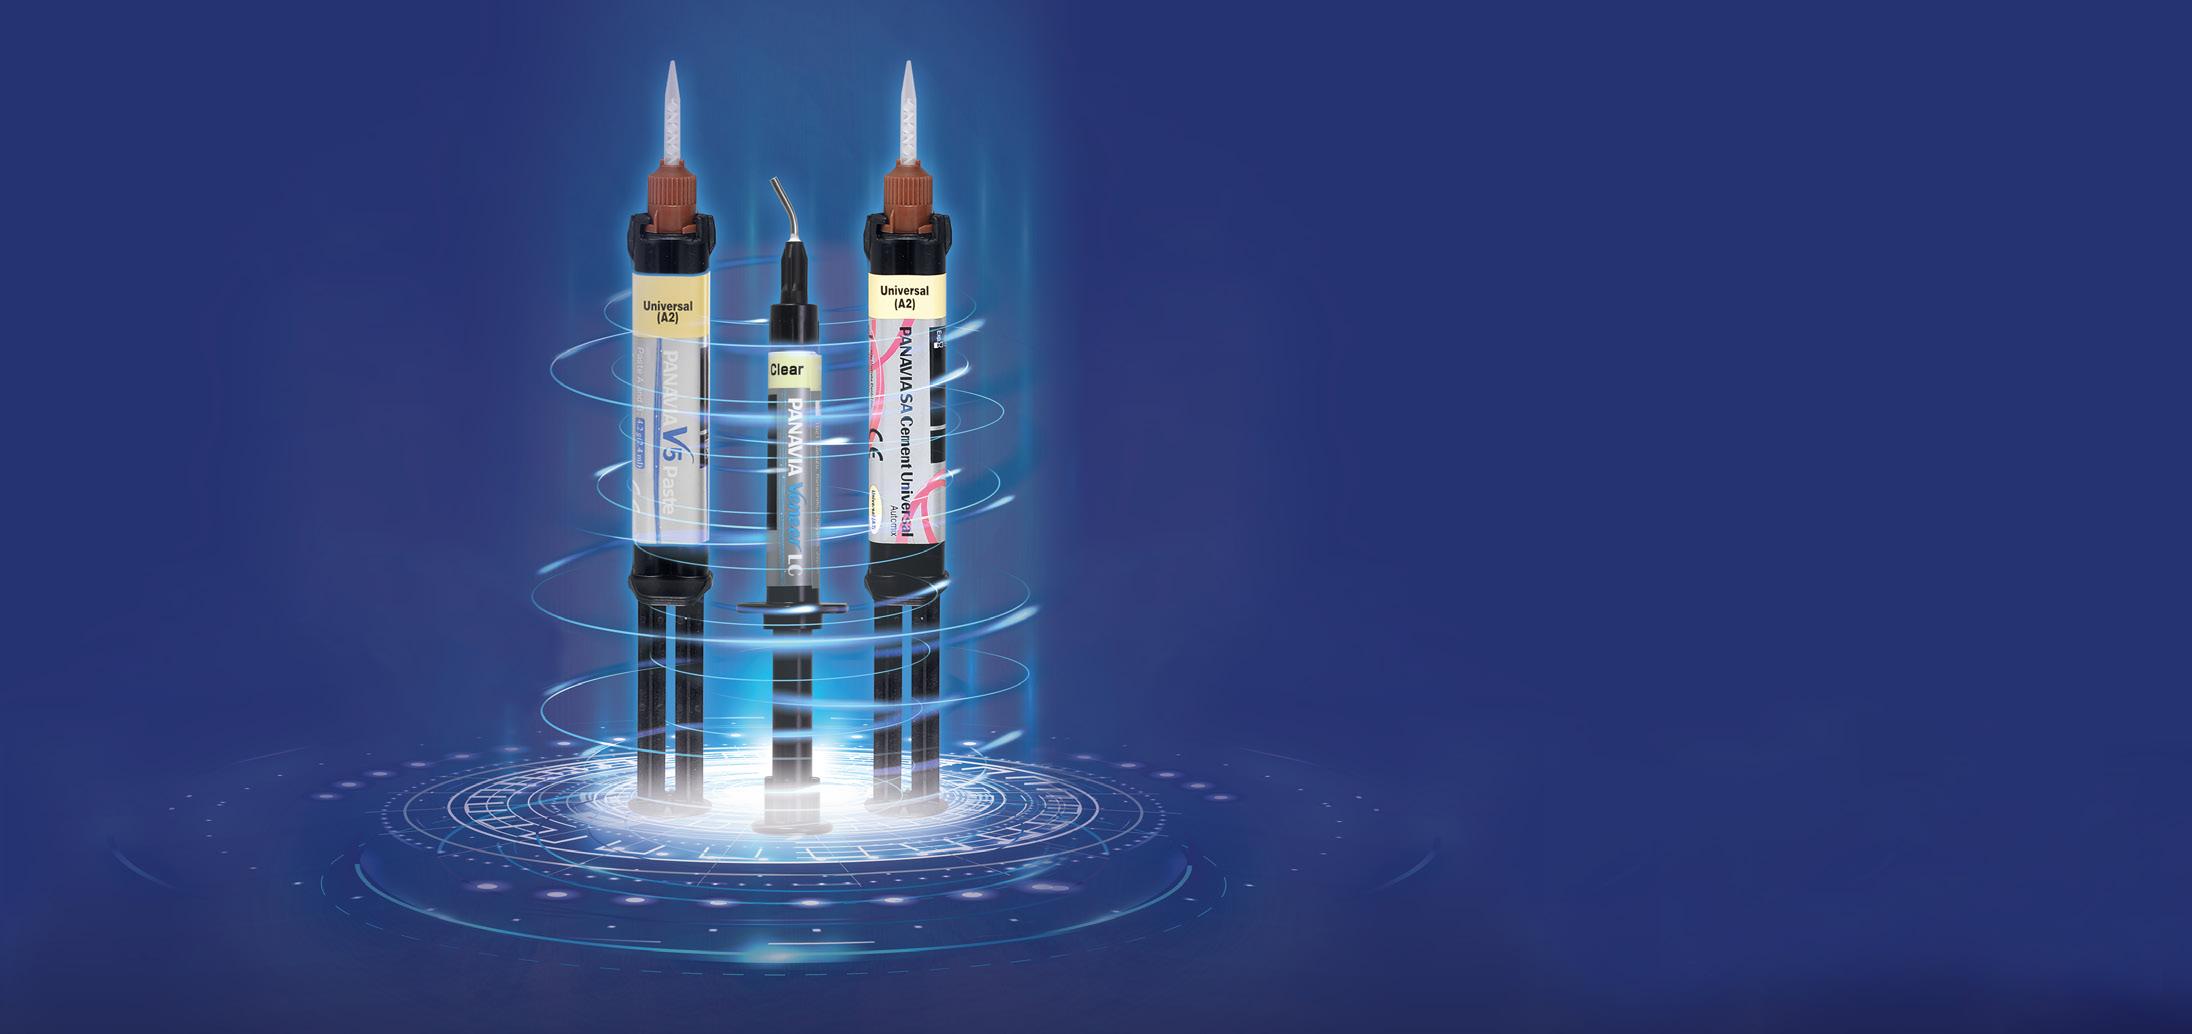
henryschein.com.au 35 COSMETIC & RESTORATIVE
For more product information on PANAVIA V5 For more product information on PANAVIA SA Cement Universal CLICK HERE CLICK HERE CLICK HERE For more product information on PANAVIA Veneer LC One single procedure for your crown cementations-One single procedure regardless of the restorative material. Innovative curing technology Optimised handling High aesthetics www.kuraraynoritake.com The veneer specialist mastering highly aesthetic cementation HIGH AESTHETICS Try-in Paste cement layer contributing to easy seating without interference and highly aesthetic margins. Change in glossiness due to toothbrush abrasion test. Simply create the PANAVIA™ smile!
ADVANCED MATERIAL SCIENCE
DESIGNED TO SIMPLIFY
Despite getting its start in the early 1900s manufacturing synthetic fibres, today, Kuraray Noritake Dental is known to clinicians as a restorative powerhouse - especially to those who have relied on its advanced material science for years to achieve consistently successful restorations. One reason for Kuraray’s success is the company’s introduction of adhesive monomers to dentistry nearly 4 decades ago. Years of careful research ultimately led to the development of the MDP monomer, whose molecular structure yields greater adhesion and a stronger chemical bond to enamel, dentine, metal, and zirconia. It is the foundation of all products in Kuraray’s CLEARFIL and PANAVIA product lines, and likely what has led teams of clinicians to crown several of these materials as DPS Best Products.

CLEARFIL: A Strong Bond and Aesthetic Fill
For restorative dentists, building a strong restoration calls for an artful combination of technique and materials. To satisfy the latter, Donald Jetter, DMD, relies on CLEARFIL adhesives and composites.
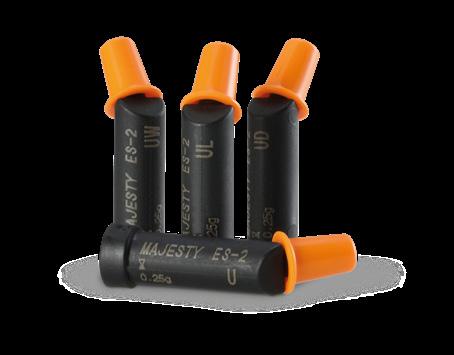
“We have been using Kuraray’s CLEARFIL
After using CLEARFIL MAJESTY ES-2 in the A2 shade for several years with success, Dr. Jetter was excited to try out CLEARFIL
MAJESTY ES-2 Universal, a singleshade composite for posterior restorations. It uses Light Diffusion Technology to mirror the way tooth structure distorts light,resulting in a virtually seamless blend between the restoration and surrounding dentition. Additionally, enamel-like translucency allows for easy polishing to a high gloss.
“The new universal shade seems just a bit lighter than the A2 shade but works well to match adjacent tooth structure,” said Dr. Jetter. “I tried another universal shade product that came out prior to CLEARFIL Universal, but I experienced material failure with it, and it did not handle as well as Kuraray’s material.”
CLEARFIL MAJESTY ES-2 Universal pairs well with CLEARFIL Universal Bond Quick, a singlebottle adhesive that houses both the original MDP monomer and AMIDE-based chemistry, which rapidly permeates dentine and enamel to eliminate waiting time and dramatically reduce water absorption. Together, the two monomers provide a unique Rapid Bond Technology.
Dr. Jetter and his team have been using CLEARFIL Universal Bond Quick since it first came to market, after successfully using its predecessor, CLEARFIL Universal Bond, for many years. “I like these products because they are single-bottle, fluoridereleasing, universal adhesives with low odour that help achieve less postop sensitivity,” he shared.
“I would highly recommend CLEARFIL MAJESTY ES-2 and CLEARFIL Universal Bond Quick to other
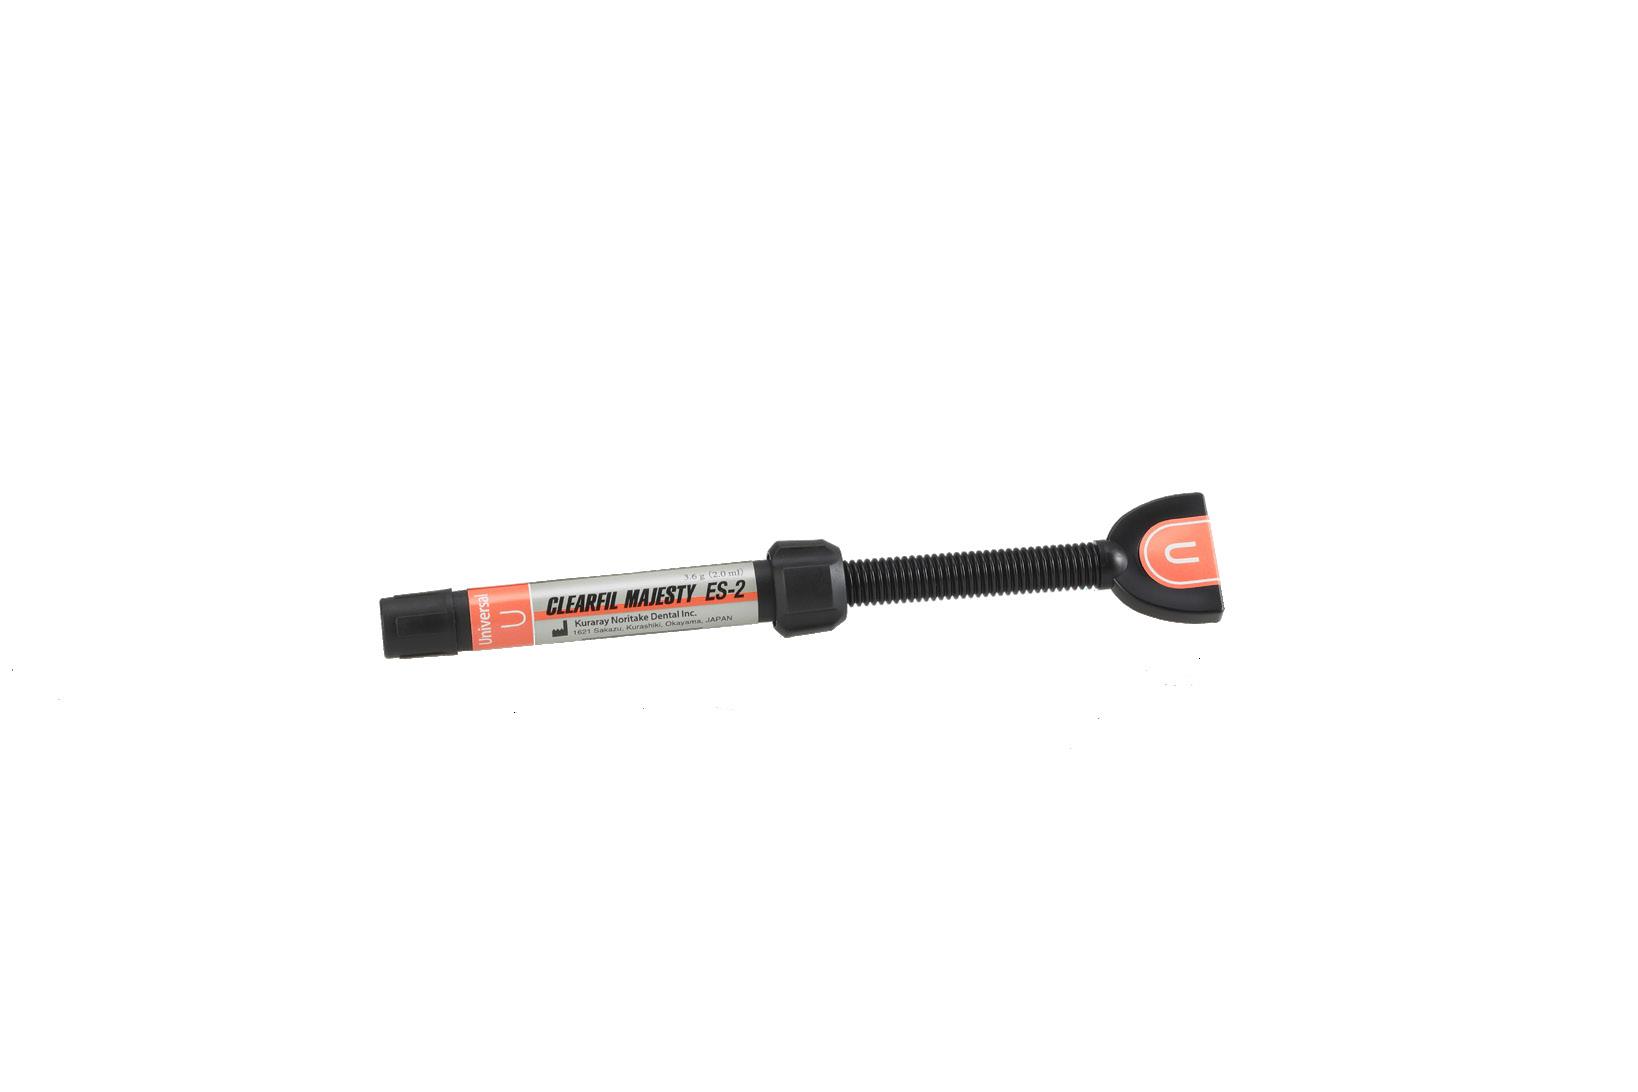
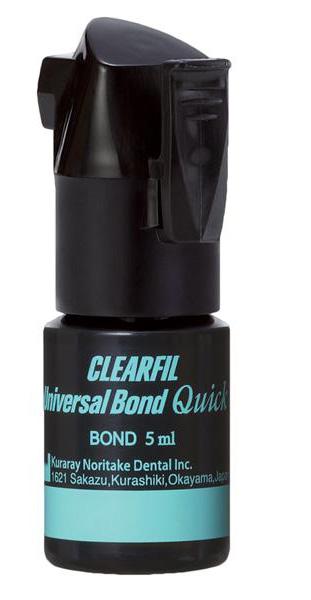
COSMETIC & RESTORATIVE
We shine a light on 4 of Kuraray’s most-loved DPS Best Products and members of its successful CLEARFIL and PANAVIA product lines.
dentists, as they’ve helped me create long-lasting and aesthetic composite restorations with little to no sensitivity for my patients.”
PANAVIA SA Cement Universal: Cementation
Simplified
Designed to remove both primer and silane from the cementation procedure, PANAVIA SA Cement Universal contains not one, but two monomers: the original MDP monomer and the LCSi monomer, which allows for a strong bond to porcelain, lithium disilicate, and composite resin.
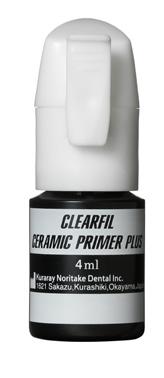
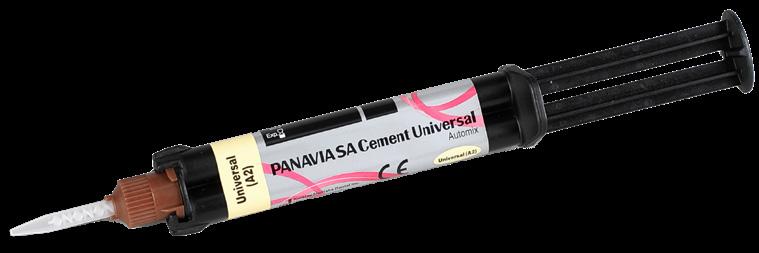
“In my 12 years of clinical practice, I have tried using a variety of different cements and what I find myself gravitating toward is the versatile powerhouse of Kuraray’s PANAVIA, which makes sense since Kuraray revolutionised bonding by introducing the MDP monomer to the world,” said Bilyana Tesic, DDS, who practices in Monterey, CA.
After using earlier generations of PANAVIA cements, which required mixing several bottles together before application, Dr. Tesic was excited when PANAVIA SA Cement Universal changed all that.
“PANAVIA SA Cement Universal simplified this process into a single step delivered via automix dispenser. Voilà! One cement to rule them all.”
Dr. Tesic has been using PANAVIA SA Cement Universal for the past two years, and what she appreciates most about the material is its versatility.
“It is a self adhesive, radiopaque, dual-cure resin cement that bonds to enamel, dentine, composite, semi-precious and precious metal, porcelain, fibre posts, and zirconia. It’s easy to dispense and even easier to clean up. Fast setting time, no need to refrigerate, and no postop sensitivity. That all adds up to no headache. I recommend it to anyone looking to simplify their cementation protocols without losing any bond strength.”
PANAVIA V5: ‘V’ is for Versatility
The strongest dentine bonding cement that Kuraray has ever developed, PANAVIA V5 simplifies cementation of crowns, bridges, inlays, onlays, veneers, and posts and cores. PANAVIA V5’s MDPbased Tooth Primer offers high bond strength in the self-cure mode thanks to unique catalyst technology, while a 1-bottle surface treatment applies to all indirect restorations.
“I loved being able to cement a metal post-and-core and ceramic crown all at the same time with the same product,” said Dr. J. Jerald Boseman, who took part in the DPS product review of PANAVIA V5. He added that the cement was easier to use, had a longer set time, and was less technique-sensitive than similar products.
Available in 5 shades - White, Brown, Universal, Clear and Opaque - with corresponding try-in pastes, PANAVIA V5 offers easy removal of excess cement after light-curing. Just one drop creates a durable bond to hydroxyapatite, metals, composites, and zirconia.
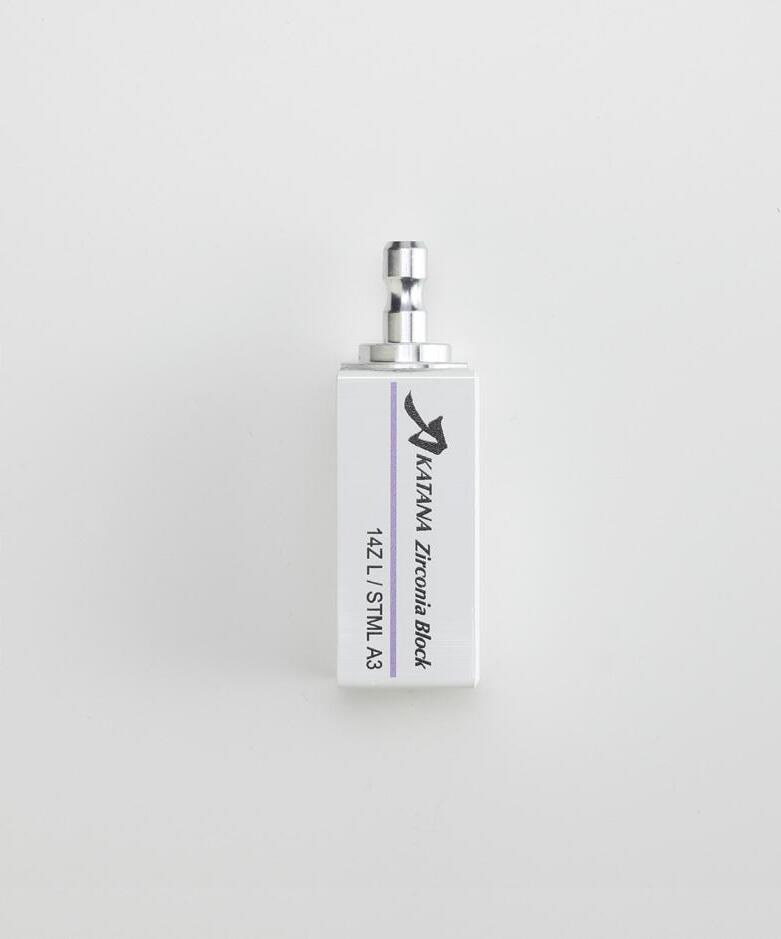


“So far, the retention has been good with excellent handling properties,” shared J. Michael Heider, DDS, who has also used previous generations of PANAVIA products. “I’m glad to see the best characteristics of PANAVIA are being improved further.”
The Crown and Bridge Duo Kuraray offers this pair of products for a simplified, reliable process designed for a range of restorative procedures.
PANAVIA SA Cement Universal
All-in-one bonding solution that can be used without a separate primer because it adheres to virtually all restorative materials. Using a silane coupling agent built into the paste, it delivers a strong, durable chemical reactiveness with zirconia, dentine and enamel.
KATANA Zirconia
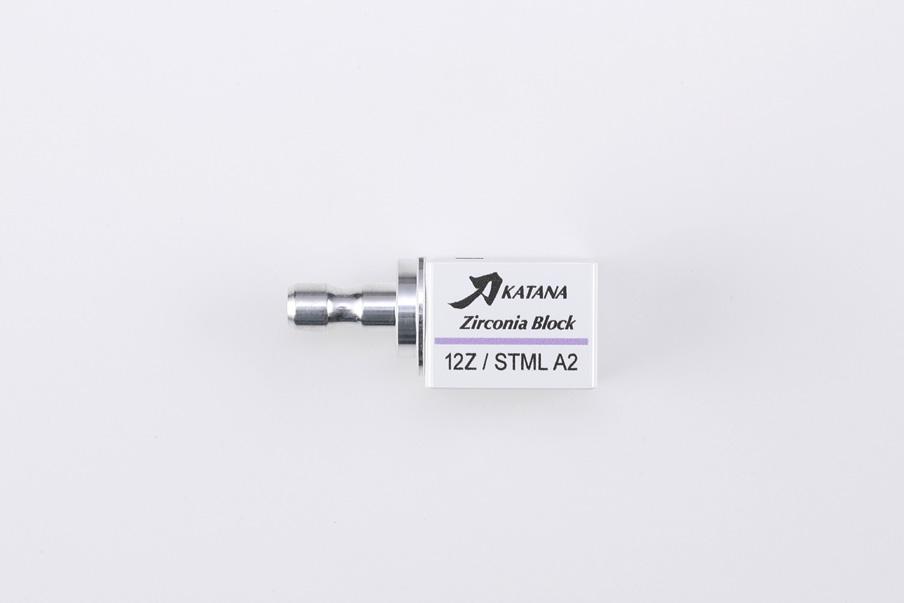
Innovative multilayered block specialised for the fabrication of full-contour zirconia prosthetics at chairside; it reflects natural opacity and comes with natural colour gradients as a dentine-like base for restorations, eliminating timeconsuming challenges in staining a restoration.
DR. DONALD JETTER DMD Article

from
Dental Product Shopper March 2022
37 1300 65 88 22 COSMETIC & RESTORATIVE
SUCCESSFUL USE OF KATANA™ ZIRCONIA BLOCK IN SINGLE-VISIT DENTISTRY
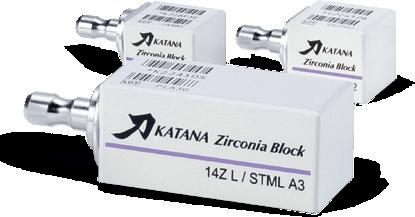

Zirconia is a popular restorative material with highly beneficial mechanical and meanwhile also optical properties. Due to long processing times, especially sintering, the material was initially not suitable for single-visit dentistry. This changed with the availability of zirconia variants with shortened sintering times and special high-speed sintering furnaces.
We discussed with Dr. Karim Nasr, who is senior lecturer at the University of Toulouse in France and head of CAD-CAM postgraduate training, about his actual practice. His passion for CAD-CAM leads him to use CEREC since 2006 (former CEREC trainer) and to found also iAcademy, a training academy about digital dentistry. He shared his experience with us and we talked about his workflow and indicationspecific material preferences as well as specific recommendations regarding the use of KATANA™ Zirconia Block in single-visit dentistry.
Dr. Nasr, which chairside CAD/CAM system do you currently use?
Karim Nasr: I am currently using a chairside CEREC Primescan AC system (Dentsply Sirona) combined with a MCXL milling machine (Dentsply Sirona) in my private practice. In my hospital practice and in the specialised esthetic dentistry consultation that I manage, we use a CEREC Primescan AC system combined with a CEREC Primemill milling machine (Dentsply Sirona).
Why did you opt for those components?
Karim Nasr: The choice of this entire system was guided by several criteria. Working on a proprietary chain certainly locks the possibilities of mixing the equipment, but brings real simplicity and fluidity of use. Moreover, the CEREC Software is certainly the most successful CAD software for a chairside use. It offers personalized and easily modifiable restorations in just a few steps. The simultaneous milling of the top (extrados) and bottom (intrados) surfaces without changing the burs ensures a very short milling time. Finally, a large number of materials are available and can be used with this system.
When did you start working with a chairside CAD/CAM system?
Karim Nasr: I discovered and started working with my first chairside system (CEREC 3) in 2005, shortly after graduating. At that time, everything was new in this field. The intraoral scanner, CAD software, milling unit and ceramic materials had just been introduced. All those components allowed us to deliver aesthetic dental treatments within a single treatment session for the first time.
How did the chairside CAD/CAM systems evolve over time?
Karim Nasr: Of course, with the advances in computer technology, the systems have become more efficient. While it was still necessary to powder the surfaces and possible to record one or two teeth in 2005, powder is no longer required in 2022 and complete arches can be scanned in less than two minutes with an accuracy of less than 20 µm. The design process is highly automated and very well assisted – artificial intelligence is used at all stages, making the work easier.
For what purposes do you use your system today?
Karim Nasr: In more than 15 years, the use of my system has evolved a lot. Nowadays, I reserve it for procedures that can be performed in a single session. This is of the greatest utility for my patients and it allows me to optimize my treatment time. For this reason, not only the milling time, but also the time needed for post-processing is crucial for the decision whether to use my chairside CAD/CAM system or to collaborate with a dental laboratory.
38
COSMETIC & RESTORATIVE
What kinds of materials do you process chairside?
Karim Nasr: I think I have tested all the materials available (at least in France), to be able to select the most suitable ones for daily procedures. Currently, I use different kinds of materials depending on the indications encountered: PMMA for temporary restorations, composites for inlays and onlays, glassceramics for onlays, overlays and crowns, and finally zirconia for crowns and bridges.
How do chairside CAD/CAM and zirconia go together?
Karim Nasr: In fact, quite simply. For me, a chairside equipment must be able to produce restorations in the same treatment session. Otherwise, it is a labside workflow. Thus, to use zirconia in chairside systems, the milling procedure must be fast and efficient, but above all, the post-processing (especially sintering) process must be fast. For short processing times, dry milling is recommended, as well as the use of a fast-sintering furnace (such as the CEREC SpeedFire from Dentsply Sirona).
What are the benefits of zirconia compared to other ceramic materials?
Karim Nasr: There are many of them. From a biomechanical point of view, the high mechanical strength of zirconia allows us to work with reduced wall thicknesses, which enables us to be more conservative in dental tissues or to choose any placement method (cementation or bonding). From a biological point of view, perfectly polished, zirconia is the most tolerant ceramic, as it is kind to antagonistic teeth and incredibly well tolerated by periodontal tissues. I prefer zirconia for my crowns on implants for this reason.
What was your first impression when you heard about KATANA™ Zirconia Block?
Karim Nasr: I caught a first glimpse of the new material during an event in 2018. KATANA™ Zirconia STML already existed in discs for laboratories and was well known for its aesthetic qualities. Its block version was highly anticipated. But the most amazing feature was the short sintering times announced (with the CEREC SpeedFire in particular). Testing it, I was immediately amazed by the quality of the ceramic and impressed that it is possible to obtain such an aesthetic result (translucency and shade gradation) within such a short time. This is aesthetic zirconia for everyone!
For which indications would you employ KATANA™ Zirconia Block?
Karim Nasr: I reserve the use of KATANA™ Zirconia Block for crowns and for 3-unit bridges. In some cases, I also use it to produce cantilever bridges with a single-retainer design to replace missing incisors (as described by M. Kern). I particularly like it in my cases where I employ a Biologically Oriented Preparation Technique (BOPT) or Vertiprep.
Are there any material features which are particularly interesting for you?
Karim Nasr: Its biomechanical qualities (which are those of zirconia, already mentioned above) already allow me to extend the indications of my chairside restorations. But, in my opinion, the most interesting property is the degree of translucency. Although it is translucent, KATANA™ Zirconia Block is slightly more opaque than glass-ceramics in their lowest degree of translucency. This allows me to use it on discoloured substrates with higher confidence and to avoid the gray effect without having to use an opaque resin cement.
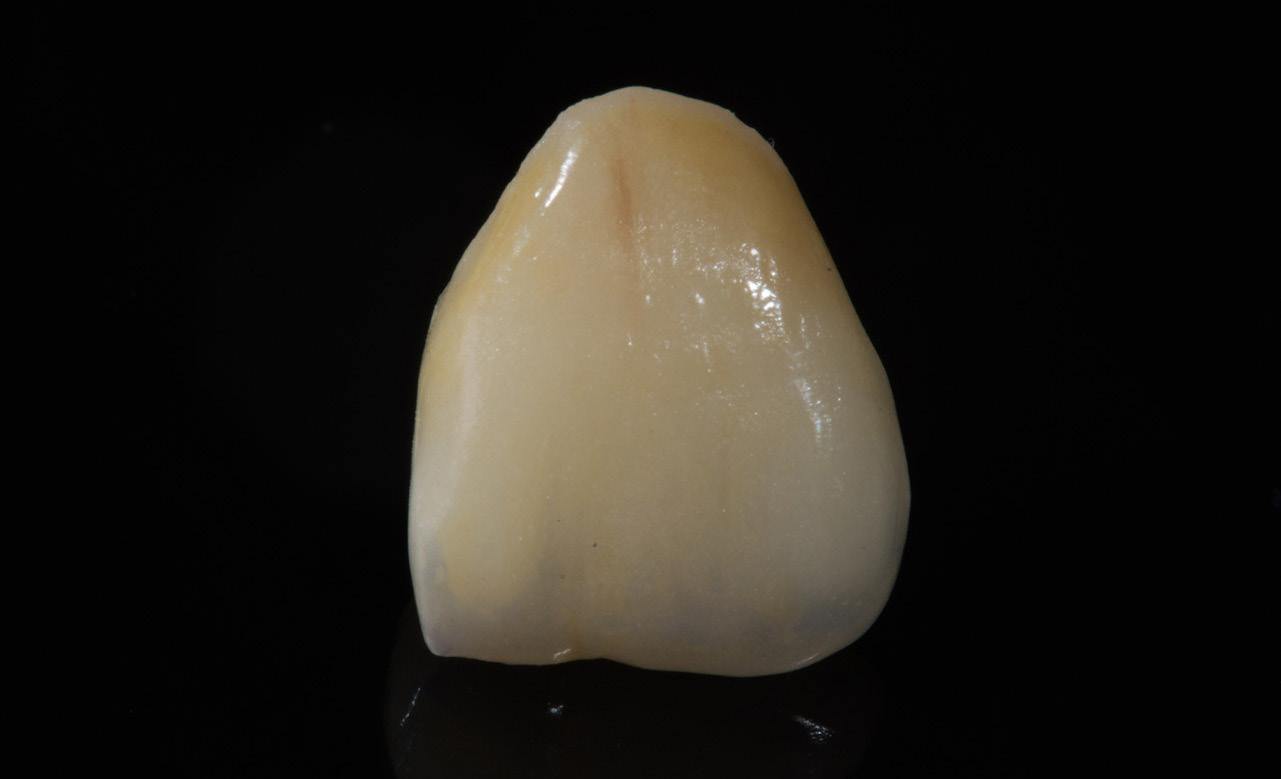
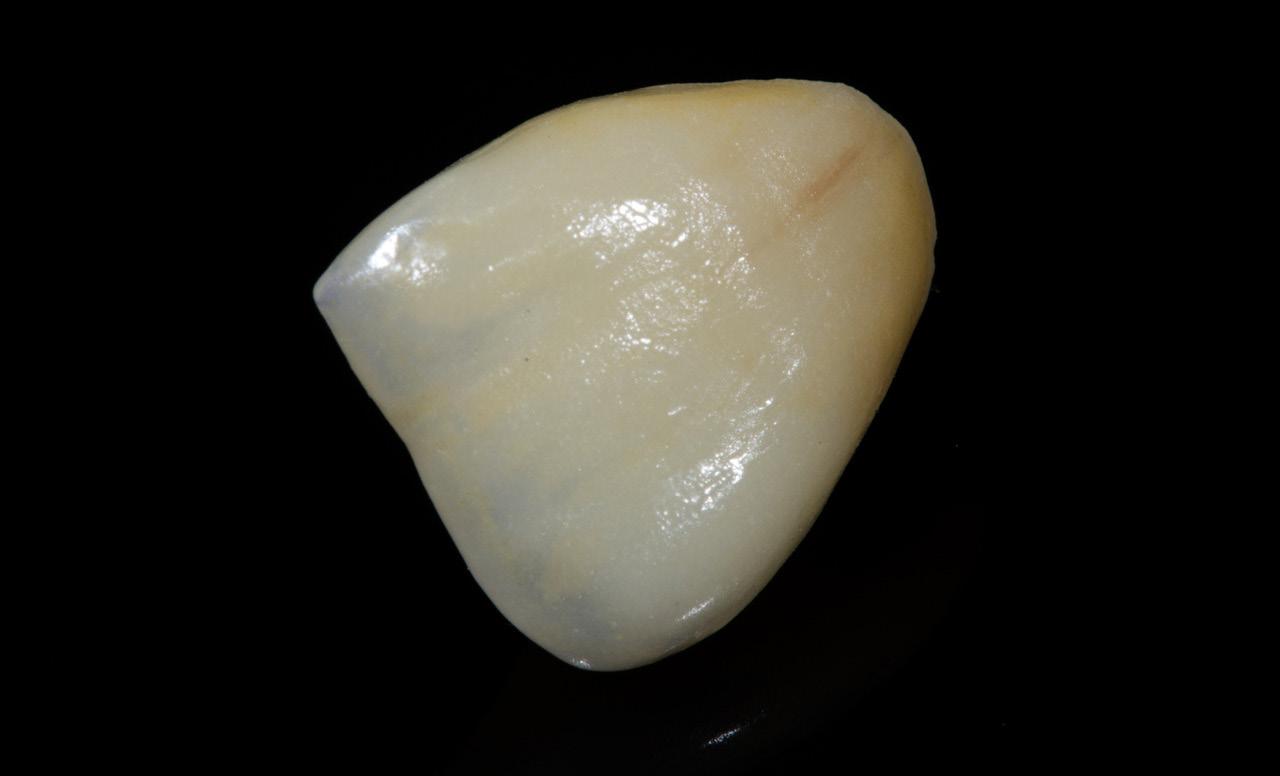
henryschein.com.au 39 COSMETIC & RESTORATIVE
Do you have any recommendations for an ideal processing of KATANA™ Zirconia Block?
Karim Nasr: The use of zirconia in chairside procedures requires certain precautions to be taken in order to achieve the expected results. I have carried out many tests to identify the mistakes not to be made.
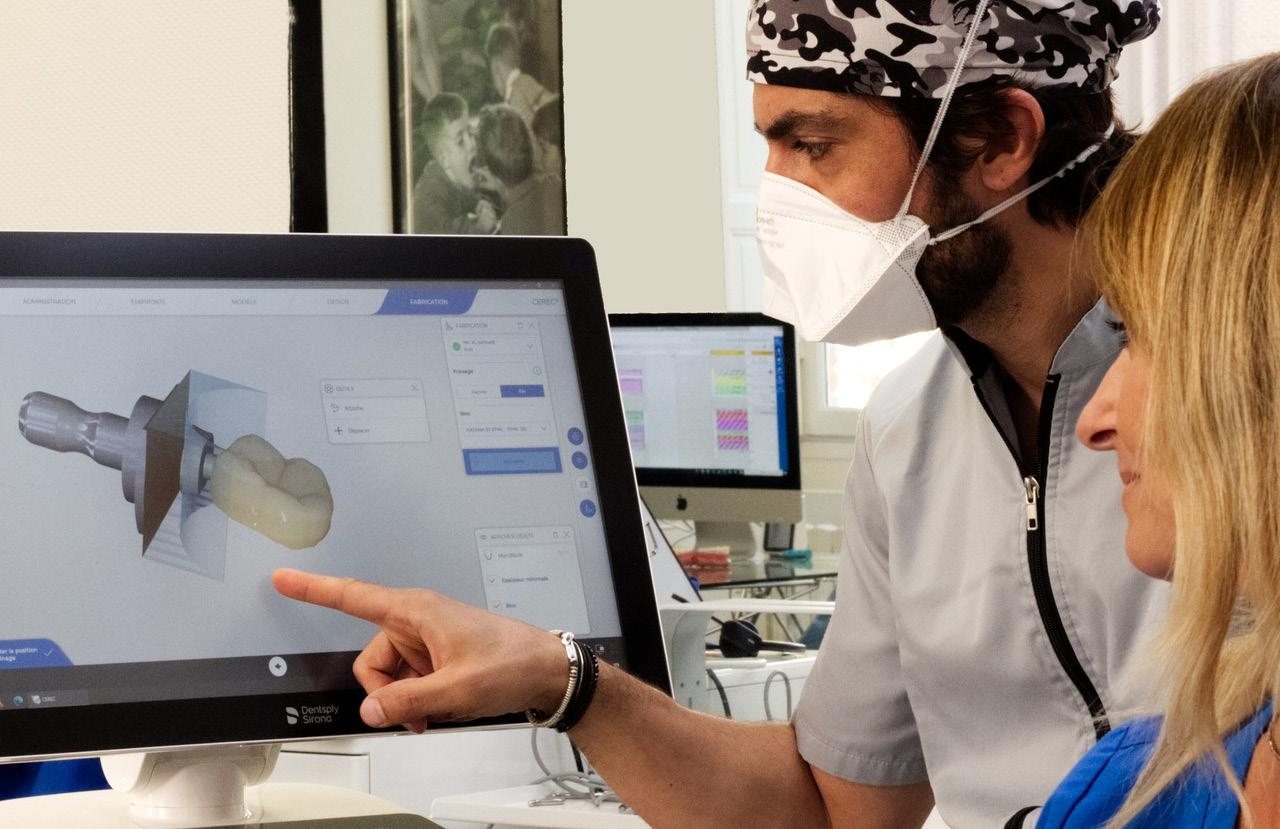
First, dry milling is strongly recommended. Nevertheless, it is quite possible to mill in wet environment. However, in this case, it is fundamental to reserve a tank only for the milling of zirconia, never use any lubricant in water (ideally demineralized water), and to have the filters always clean, which means that they need to be cleaned after each milling procedure. After milling, it is important to remove all the powder of zirconia that may have remained on the surface. After dry milling, the restoration must be sprayed with air. The same is the case after the use of burs or polishers to finish the surface. After wet milling, a demineralized water and ultrasound bath may be indicated but is not mandatory.
Very) fast sintering with CEREC SpeedFire, for example, gives very satisfactory results comparable to conventional slow sintering, which has also been confirmed by scientific literature. Without an appropriate furnace, it is impossible to perform restorations in the same treatment session. However, I do not use CEREC SpeedFire for staining, glazing or micro-layering, but rather a furnace that can be parameterized. Finally, I advise users to finish and glaze only what is necessary (occlusal grooves, vestibular surfaces if visible) and to polish the rest.
Do you have any tips on how to achieve optimal outcomes with KATANA™ Zirconia Block?
Karim Nasr: In anterior cases, I always recommend to perform shading and staining steps in the mouth because there is no better model than the patient himself. Micro-layering in anterior cases makes it possible to improve the aesthetic result with few steps. The 4.4.1. system, which has been specifically developed for KATANA™ Zirconia, makes micro-layering easy to achieve. For polishing, the use of “twist” polishers is recommended. They make it easier to polish all surfaces, especially the occlusal surfaces, both extra-orally and in the mouth. Just like their counterparts for composite, TWIST™ DIA for Zirconia for Zirconia polishers prove to be very effective.
Dr. Nasr, thank you very much.
40
COSMETIC & RESTORATIVE
KATANA™ ZIRCONIA MULIT-LAYERED DISCS WITH
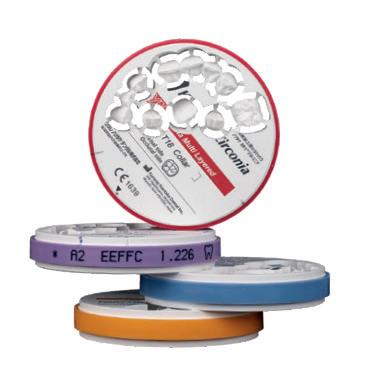
YOSHIHISA YAMADA
KATANA™ Zirconia ML was introduced ten years ago, at the IDS 2013 in Cologne, as the dental industry’s first zirconia product with a multi-layered colour structure. Since that event, KATANA™ Zirconia ML blanks have become very popular. Continued development efforts have led to the current line-up of multi-layered materials, KATANA™ Zirconia UTML, STML and HTML PLUS, and our latest product – KATANA™ Zirconia YML. Our new technology with colour, translucency and strength gradation is found in KATANA™ Zirconia YML.
How important was the invention of the Kuraray Noritake Dental’s original multi-layered technology for the dental market?

Our impression is that the material has had a significant impact on the dental market. Being the first zirconia material with a multi-layered colour structure, KATANA™ Zirconia ML was our first product of its class to offer the properties needed for the efficient production of full-contour zirconia restorations with a natural look. Before its introduction, the “full contour zirconia” concept had not been widely accepted due to the aesthetic properties of the zirconia materials available so far: Many of them lacked the desired level of translucency, while others needed to be treated with dyeing liquids or stains in a complex procedure to obtain a natural shade appearance. With the launch of multi-layered zirconia blanks, which successfully added natural colour gradation to the structure, aesthetic full-contour zirconia restorations started to become popular among dental technicians worldwide. The high potential of the technology was confirmed at the IDS 2013 show, when we saw not only end users, but also engineers from competing companies come to look at this product.
What changes were driven forward by the introduction of KATANA™ Zirconia ML?
After the introduction of KATANA™ Zirconia ML, many companies started developing multi-layered zirconia discs, creating a new dental product category with an added technical and clinical value. We are convinced that the invention of Kuraray Noritake Dental has played a major role in the shift from zirconia exclusively used as a framework material to alternative approaches including full-contour zirconia restorations. If only monochromatic zirconia discs had
been available, we imagine that an increased number of dental technicians would have embraced the concept of using liquid colourants to achieve a natural appearance of full contour crowns and bridges. That would have prevented monolithic zirconia restorations from becoming as popular as they are today.
How did the KATANA™ Zirconia ML technology evolve over the past ten years?
Based on our unique core technology developed for inventing KATANA™ Zirconia ML, we have been continuing making efforts to create even better products. One of Kuraray Noritake Dental’s great strengths is its ability to develop all the raw materials for its zirconia products inhouse. This makes it possible for us to adjust the boundaries between the layers as inconspicuously as possible, even when discs consist of multiple layers. This enabled us to provide multi-layered discs with the required strength and aesthetic qualities, and with a stable, predictable shrinkage rate. In the past ten years, we have focused on adding new materials with different levels of translucency and strength to offer a portfolio that meets the demands of virtually every dental technician, practitioner, and patient.
For example, the advent of KATANA™ Zirconia STML, which has even better aesthetic qualities than KATANA™ Zirconia ML, has made it possible to use it all by itself to create highly aesthetic restorations, with no need to characterise or individualise the restorations. Of course, if you use KATANA™ Zirconia Multi-Layered discs and treat the restorations with a surface staining agent, such as CERABIEN™ ZR FC Paste Stain, you can create even more aesthetic restorations in a shorter time.
41 1300 65 88 22
COSMETIC & RESTORATIVE
What are the benefits of Kuraray Noritake Dental’s multi-layered technology, as compared with other manufacturer’s solutions?
How did you manage to shorten the sintering times so significantly, resulting in your speedy sintering with uniform protocols?
When shorter sintering times became possible, Kuraray Noritake Dental recommended that KATANA™ Zirconia ML be sintered for seven hours. After that, when a new furnace claiming being capable of short-time firing was launched, we used it to fire KATANA™ Zirconia ML on a trial basis. We found, happily, that our zirconia material was uniquely compatible with rapid firing. This was the beginning of our full-fledged study of short-time firing of our zirconia material. You could say that we began investigating short-time firing almost by accident. Then, while developing KATANA™ Zirconia STML and KATANA™ Zirconia UTML, successors of KATANA™ Zirconia ML, we focused on incorporating shorttime firing into their features and made various adjustments, finally achieving the optimal combination of factors for the successful short-time firing of zirconia.
How did you manage to shorten the sintering times so significantly, resulting in your speedy sintering with uniform protocols?
What are the benefits of Kuraray Noritake Dental’s second-generation multi-layered technology, as compared with other manufacturer’s solutions?
One advantage of KATANA™ Zirconia YML is that it can be applied to treat a wider range of cases without complex limitations on position within the disc. The reason: it delivers this high level of aesthetics while still maintaining great strength. This advantage of being appropriate for a wider range of cases also simplifies inventory management. In addition, users benefit from our expertise in developing raw materials and reproducing colour with ceramics. This expertise enabled us to develop a zirconia product in which each layer has a different level of translucency, while great strength and admirable aesthetics are maintained throughout the whole blank.
How did you manage to shorten the sintering times so significantly, resulting in your speedy sintering with uniform protocols?


When shorter sintering times became possible, Kuraray Noritake Dental recommended that KATANA™ Zirconia ML be sintered for seven hours. After that, when a new furnace claiming being capable of short-time firing was launched, we used it to fire KATANA™ Zirconia ML on a trial basis.
KATANA™ Zirconia multi-layered discs offer the advantage of delivering the proper colour even when they are sintered at high speed. There are two reasons for this. First, we developed unique raw materials with suitable characteristics for high-speed firing. This allows the creation of restorations with the same strength, stability, and aesthetics to be achieved after both short- and long-time firing. The second reason is that we possess the technical know-how concerning excellent shading that Noritake Dental Supply, one of Kuraray Noritake Dental’s predecessors, cultivated during its many years spent developing ceramic materials. Noritake Co., Ltd., parent company of Noritake Dental Supply, is a long established ceramic manufacturer that is famous for its tableware and other outstanding products. It is this background that allows us to properly control pigment colouration using our inorganic pigment know-how and to provide unique firing schedules. These two strengths enable us to bring unique advantages to our products. That is, they remain stable and retain appropriate colouration even under rapid firing schedules.
We found, happily, that our zirconia material was uniquely compatible with rapid firing. This was the beginning of our full-fledged study of short-time firing of our zirconia material. You could say that we began investigating short-time firing almost by accident. Then, while developing KATANA™ Zirconia STML and KATANA™ Zirconia UTML, successors of KATANA Zirconia ML, we focused on incorporating shorttime firing into their features and made various adjustments, finally achieving the optimal combination of factors for the successful short-time firing of zirconia.


What are the benefits of Kuraray Noritake Dental’s second-generation multi-layered technology, as compared with other manufacturer’s solutions?


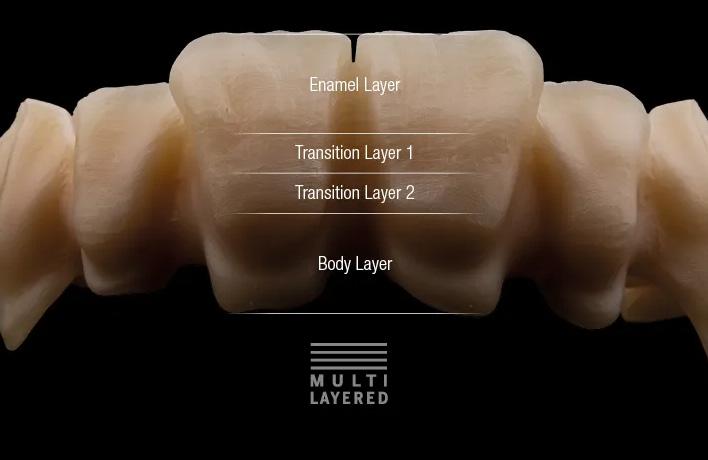
One advantage of KATANA™ Zirconia YML is that it can be applied to treat a wider range of cases without complex limitations on position within the disc. The reason: it delivers this high level of aesthetics while still maintaining great strength. This advantage of being appropriate for a wider range of cases also simplifies inventory management. In addition, users benefit from our expertise in developing raw materials and reproducing colour with ceramics. This expertise enabled us to develop a zirconia product in which each layer has a different level of translucency, while great strength and admirable aesthetics are maintained throughout the whole blank.
When shorter sintering times became possible, Kuraray Noritake Dental recommended that KATANA™ Zirconia ML be sintered for seven hours. After that, when a new furnace claiming being capable of short-time firing was launched, we used it to fire KATANA™ Zirconia ML on a trial basis. We found, happily, that our zirconia material was uniquely compatible with rapid firing. This was the beginning of our full-fledged study of short-time firing of our zirconia material. You could say that we began investigating short-time firing almost by accident. Then, while developing KATANA™ Zirconia STML and KATANA™ Zirconia UTML, successors of KATANA™ Zirconia ML, we focused on incorporating shorttime firing into their features and made various adjustments, finally achieving the optimal combination of factors for the successful short-time firing of zirconia
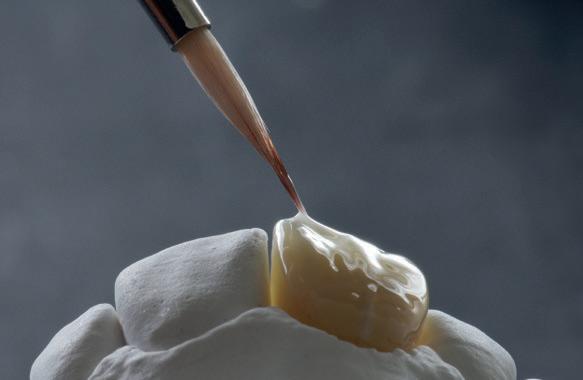
The sintering recommendation is only a guideline; some adjustments may be required depending on each individual furnace. If the furnace cannot be set according to the 54or 90-minute sintering schedule, speed sintering cannot be used.
* The restorations may be removed at 800°C or less depending on the circumstances.
** For the sintering schedule of KATANA
42 COSMETIC & RESTORATIVE
4-layer colour structure of KATANA™ multi-layered discs
CERABIEN™ ZR FC Paste Stain being applied to KATANA™ Zirconia restoration.
Zirconia HT, please refer to the Handy Chart in product packaging.
The sintering recommendation is only a guideline; some adjustments may be required depending on each individual furnace. If the furnace cannot be set according to the 54or 90-minute sintering schedule, speed sintering cannot HOLD 16 min HOLD 20 min 1560OC 800OC 1560OC 1600OC 1600OC 1450OC 1500OC 1400OC +4OC/min 25 min +50OC/min 27.6 min -50OC/min 15.2 min +10 +120OC/min 11.9 min -120OC/min 6.7 min +10OC/min 15 min 20OC Start 20OC 800OC Start 20OC HOLD 120 min 1550OC 1550OC +10OC/min 153 min -10OC/min 153 min Start 7H 90min* 54min* HOLD 16 min HOLD 20 min 1560OC 800OC 1560OC 1600OC 1600OC 1450OC 1500OC 1400OC +4OC/min 25 min +50OC/min 27.6 min -50OC/min 15.2 min +10 6 min +120OC/min 11.9 min -120OC/min 6.7 min +10OC/min 15 min 20OC Start 20OC 800OC Start 20OC HOLD 120 min 1550OC 1550OC +10OC/min 153 min -10OC/min 153 min Start 7H 90min* 54min* HOLD 16 min HOLD 20 min 1560OC 800OC 1560OC 1600OC 1450OC +50OC/min 27.6 min -50OC/min 15.2 min +10 +120OC/min 11.9 min -120OC/min 6.7 min +10OC/min 20OC Start 20OC 800OC Start C +10OC/min 153 min Start 7H 90min* 54min*
The restorations may be removed at 800°C or less depending on the circumstances. ** For the sintering schedule of KATANA Zirconia HT, please refer to the Handy Chart in product packaging. HOLD 16 min HOLD 20 min 1560OC 800OC 1560OC 1600OC 1600 1500OC 1400OC +4OC/min 25 min +50OC/min 27.6 min -50OC/min 15.2 min +10 -120OC/min 6.7 min 20 20OC 800OC Start 20OC HOLD 120 min 1550OC 1550OC +10OC/min 153 min -10OC/min 153 min Start 7H 90min* 54 HOLD 16 min HOLD 20 min 1560OC 800OC 1560OC 1600OC 1600 1500OC 1400OC +4OC/min 25 min +50OC/min 27.6 min -50OC/min 15.2 min +10 6 min -120OC/min 6.7 min 20O 20OC 800OC Start 20OC HOLD 120 min 1550OC 1550OC +10OC/min 153 min -10OC/min 153 min Start 7H 90min* 54min HOLD 16 min HOLD 20 min 1560OC 800OC 1560OC 1600OC 1600OC 1450OC 1500OC 1400OC +4OC/min 25 min +50OC/min 27.6 min -50OC/min 15.2 min +10 6 min +120OC/min 11.9 min -120OC/min 6.7 min +10OC/min 15 min 20OC Start 20OC 800OC Start 20OC HOLD 120 min 1550OC 1550OC +10OC/min 153 min -10OC/min 153 min Start 7H 90min* 54min*
What are the benefits of Kuraray Noritake Dental’s second-generation multi-layered technology, as compared with other manufacturer’s solutions?
One advantage of KATANA™ Zirconia YML is that it can be applied to treat a wider range of cases without complex limitations on position within the disc. The reason: it delivers this high level of aesthetics while still maintaining great strength. This advantage of being appropriate for a wider range of cases also simplifies inventory management. In addition, users benefit from our expertise in developing raw materials and reproducing colour with ceramics. This expertise enabled us to develop a zirconia product in which each layer has a different level of translucency, while great strength and admirable aesthetics are maintained throughout the whole blank.
Is it really possible to address every case using only KATANA™ Zirconia YML?
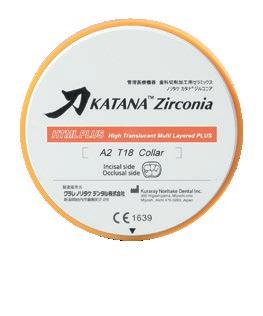
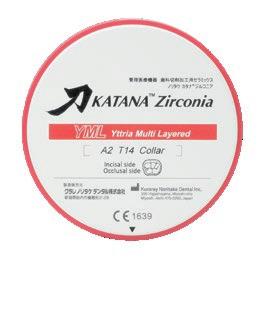
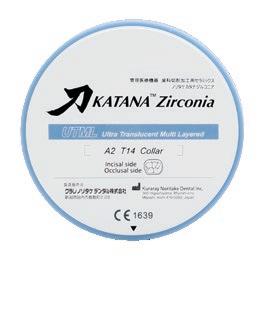
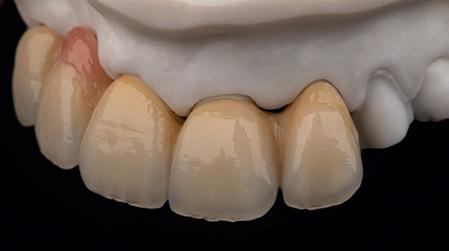
For every case that can be treated either with KATANA™ Zirconia STML, KATANA™ Zirconia UTML, or KATANA™ Zirconia HTML PLUS, KATANA™ Zirconia YML is also an option. Hence, it is possible to use only KATANA™ Zirconia YML for all your zirconia cases – which is probably one of the reasons for its great popularity. It features both great strength and excellent aesthetics, and – being so versatile – it helps simplify inventory management. Of course, Kuraray Noritake Dental’s other multi-layered materials feature outstanding properties as well. Depending on the features you need, it would also be an option to select from these products - KATANA™ Zirconia STML, KATANA™ Zirconia UTML, or KATANA™ Zirconia HTML PLUS – to realise your ideal restorations.
Why is the KATANA™ brand in general so popular among dental technicians around the world?
We think that dental technicians choose KATANA™ because they find that they can create highly aesthetic restorations using simple, straightforward steps.
Is there any further development potential in multilayered technology?
On the basis of our technical know-how, there is always room for improvement. That is why we never stop innovating and listening to the voice of our customers. Developing what supports them in improving their outcomes while providing for more predictable, less stressful procedures is our ultimate goal. Right now, we expect to develop products with even greater strength, increased translucency, and outstanding aesthetics that will have a natural look resembling real teeth, even when the material used is full-contour zirconia.

henryschein.com.au 43 COSMETIC & RESTORATIVE
Kuraray Europe GmbH, BU Medical Products, Philipp-Reis-Str. 4, 65795 Hattersheim am Main, Germany +49 (0)69-30 535 835, dental.eu@kuraray.com, www.kuraraynoritake.eu
KATANA™ Zirconia YML, finished with CERABIEN™ ZR. Photo credits to MDT
Moustakis ™
BORN IN JAPAN
Giuliano
KATANA™ Zirconia YML, finished with CERABIEN™ ZR.
YOSHIHISA YAMADA General Manager, Technology Division of Kuraray Noritake Dental Inc.
BRILLIANT EVERGLOW FLOW
A VERSATILE HYBRID COMPOSITE THAT COMBINES PRECISE DELIVERY, HIGH STABILITY, EXCELLENT FLOWABILITY, AND OPTIMAL ESTHETICS
When it comes to inventory in your dental practice, it’s never too early to think about a bit of spring cleaning. But before you decide which composites to keep and which ones to toss, you might want to consider if the products on your shelves can truly reduce your inventory and simplify your material selection.
In the flowable composite category, Coltene’s BRILLIANT EverGlow Flow simplifies product inventory and selection while offering precise delivery, excellent flowability, high stability, and optimal esthetics.

“I was looking for a versatile flowable resin that could be used in many applications,” noted Roger Urlaub, DDS, who was one of many dentists to test BRILLIANT EverGlow Flow for this DPS evaluation.
“[This material has] multiple uses in dentistry that could reduce the number and types of resins one normally stocks. Plus, fewer shades [are required] as it covered many shades of teeth, especially the A2/B2 shade.”
Placement, Handling, & Stability
With optimal thixotropic characteristics and 2 tip sizes, BRILLIANT EverGlow Flow is easy to apply with precision and reliability. The fine tip allowed Dr. Steven Litwin to “precisely place the material without excess,” and Michael Long, DDS, said, “The composite is easy to place where I want it with no air bubbles.” Noting that it worked much better as a base/liner than his previous flowable composite, Jeffrey Greene, DDS, said, “It stayed in place, allowing for multiple layers to be added” when filling decay on the mesial of a lower incisor.
Using the finer tip, Dr. Urlaub found the material easy to place exactly where he wanted, whether using it for a cuspal incline or a core buildup. He liked the ability to “finesse the resin to the shape I wanted using just a dental explorer tip.” When asked to suggest improvements, Dr. Urlaub said the syringe could be wider and hold more material.
With low viscosity and excellent stability, the flowable is easy to handle and made “restoring
Class Vs expressly easier,” said David Buchina, DMD. “The cohesiveness and viscosity are superb [and it has] exceptional handling attributes,” he added. Dr. Steven LeBeau said BRILLIANT EverGlow Flow is durable with great wetting properties, and Dr. Gregory Chipp said he experienced “no bubbles and easy adaptation.”
Dr. Urlaub shared, “It had excellent marginal adaptation with low film thickness” when using the bonding agent with the flowable, and Raymond Wozny, DDS, remarked, “Its flowability is good for composite base. Slightly less slump would make it ideal.”
Esthetics
Available in 8 shades across 3 translucency levels, BRILLIANT EverGlow Flow features built-in polishability and gloss and an innovative two-in-one Duo Shade system that provides consistent esthetic results. With Duo Shades, fewer overall shades are required, simplifying inventory and selection.
“The shades matched very well and polished nicely,” shared Dr. Greene, and Dr. Buchina said it “was nearly self-polishing; finishing was minimal in most cases.”
Noting that it polished better than any previous flowable, Dr. LeBeau said, “The chameleon shading hides the DEJ line.” Dr. Litwin said BRILLIANT EverGlow Flow “is easy to work with and provides wonderful esthetics, especially its ability to mask discolored areas.”
Explaining that “some flowables have become too translucent and, therefore, unesthetic when cured,” Dr. Urlaub stated, “This one blended well into the dentition,” and Dr. Wozny said it has the “perfect amount of translucence.”
44
COSMETIC & RESTORATIVE
Versatility
“The choice of tips made BRILLIANT EverGlow Flow versatile for filling smaller hard-to-reach areas on roots and for use as a liner/base,” said Dr. Greene.
Dr. Anthony Vocaturo used it for Class V restorations, as a liner for core buildups, and as a filler for voids, and Dr. LeBeau found it “best for Class V abfraction restorations and Class II floors, including the interproximal box.”
After using it for standard cavity preparation, Dr. Chipp said, “Upon getting the patient back for observation, things looked as perfect as when placed.”
“It is very useful as a core material for in-office milled restorations to block out undercuts and amalgam internal dark stains,” said Dr. Urlaub.
“I use it in place of multiple other products [as a] flowable buildup material, different medium flowable resin, and a regular nano-hybrid resin.”
Overall Satisfaction
All of the dentists who participated in this DPS evaluation recommend that other clinicians should give BRILLIANT EverGlow Flow a try.
Describing it as “very simple and straightforward,” Dr. Chipp said, “I would not be hesitant in purchasing and using BRILLIANT EverGlow Flow,” and Dr. LeBeau concluded, “It’s great to evaluate an improved flowable when I didn’t think I could see an improvement.”
Takeaways
• Optimal thixotropic properties and 2 tip sizes make it easy to apply with precision and reliability
• Excellent stability and low viscosity
• Two-in-one Duo Shade system provides consistent esthetic results
• Built-in polishability, long-lasting gloss, and 8 shades across 3 translucency levels
• Fewer shades simplify inventory and selection
45 1300 65 88 22 COSMETIC & RESTORATIVE
View the products online Extracted from Dental Product, Vol 15 No. 1 CLICK HERE
REAL BIOCONSERVATIVE SOLUTIONS

Dentistry has moved towards a minimally invasive pathway over the past years due in part to new technology and techniques allowing the modern dentist to produce the ideal functional and aesthetic result whilst preserving as much tooth structure as possible.
Recently I have been trying to find a harmony between classic time-honoured Shillingburg prosthodontic principles with novel minimal parametric preparations. This constant daily juxtaposition involves very careful treatment planning, occlusal analysis and material selection. What works well in one practitioner’s hand may not be quite as successful for another and vice versa; therefore logically one should develop their skills as best as possible and play to their strengths.
The aim of this article is to show that in many daily scenario’s teeth can be conservatively treated; and where reduction or preparation is needed it must be done as accurately and conscientiously as possible. The use of high magnification, correct bonding protocols, appropriate material selection and micro abrasion allow us to achieve this.
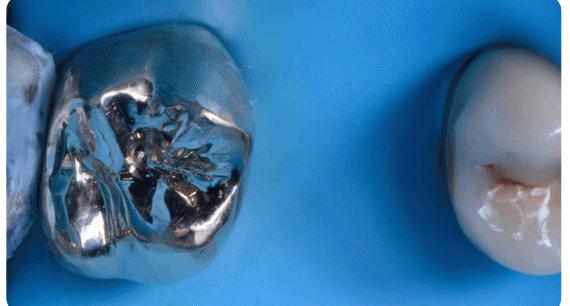

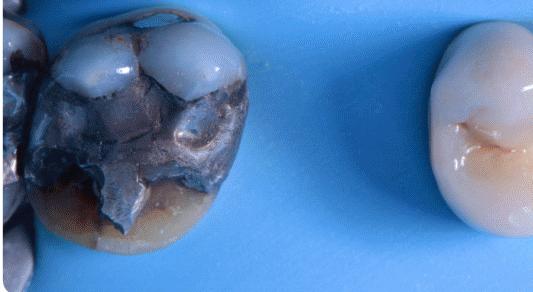
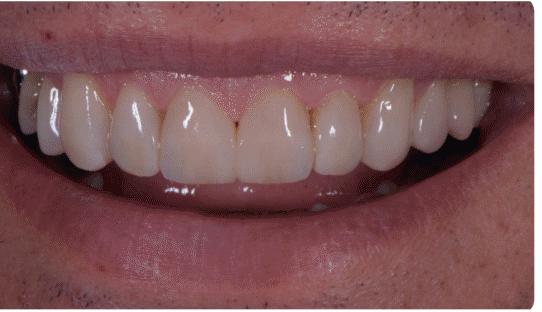

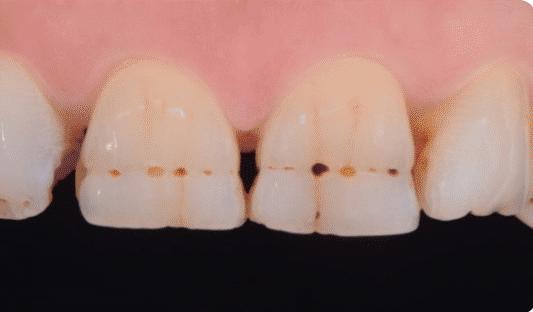
46 COSMETIC & RESTORATIVE
Case 1
Fig. 1 This 54yr old patient wanted little to no tooth preparation done to cover up the developmental pits and discolourations.
Fig. 2 No drilling and with just the use of 29 micron alumina (aquacare) to remove staining and prepare surface for direct bonding.
Fig. 3 Direct composite bonding used to restore and create natural and functional smile.
Case 2
Fig. 1Shows a large fractured amalgam restoration on a first molar.
Fig. 2 After tooth preparation [29μ aluminium oxide and Sylc] and immediate dentine sealing.
Fig. 3Gold onlay placed to allow maximum long-term strength and function.
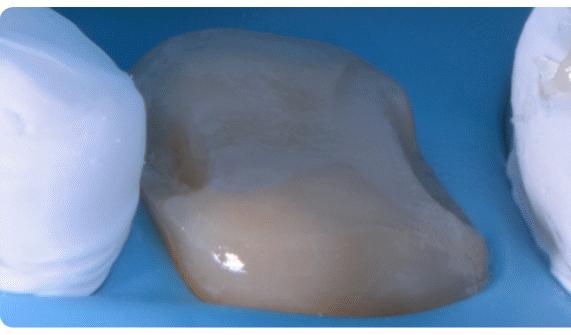
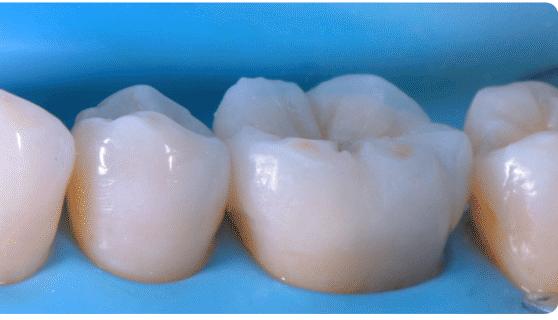
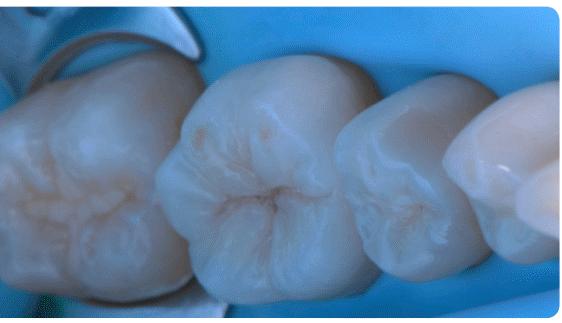

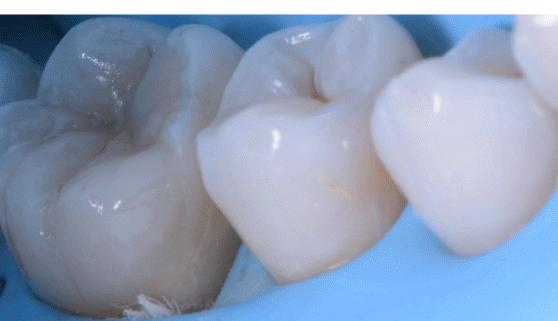
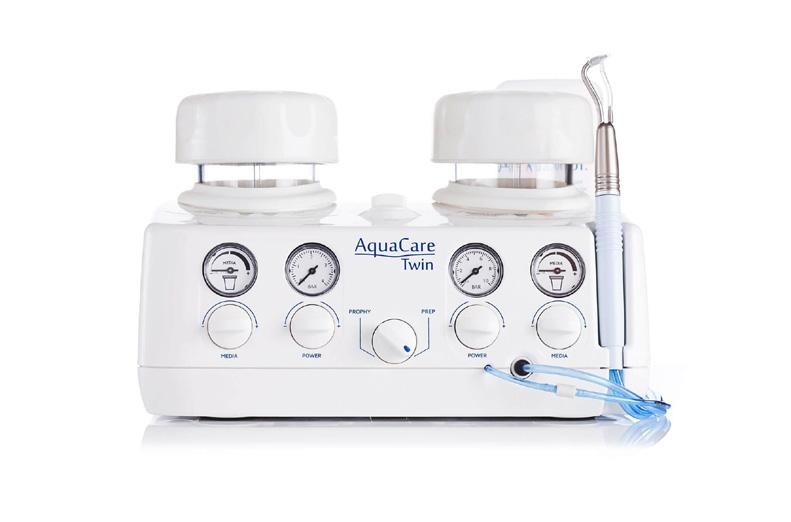

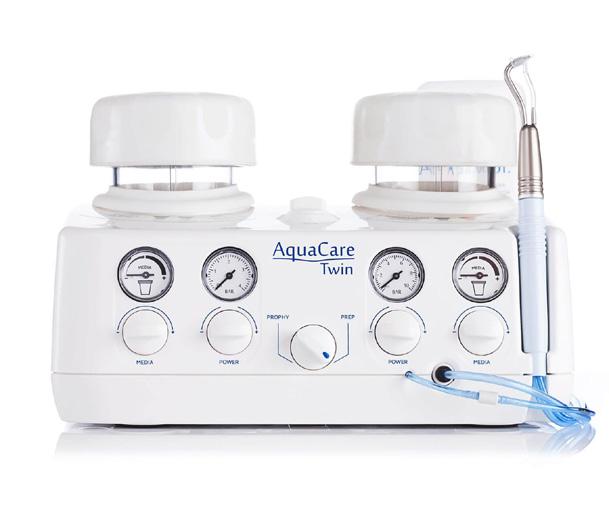

henryschein.com.au 47 COSMETIC & RESTORATIVE
Case 3
Fig. 1 Onlay preparation on lower molar after deep margin elevation [29μ aluminum oxide and Sylc].
Fig. 2 Photograph after immediate cementation of lithium disilicate onlay.
Fig. 3 Occlusal view showing biomimetic integration.
Case 4
Fig. 1 Cavity preparation after abrasion (53μ aluminium oxide) on lower first molar, post root canal therapy.
Fig. 2 Cavity restored provisionally with direct fiber reinforced composite.
THOMAS TAHA, UK
TREATING ENAMEL OPACITIES A NEW CONCEPT
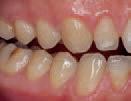

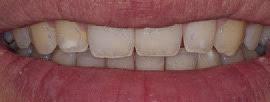
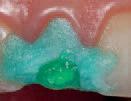
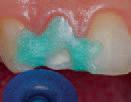
However, this procedure remains a depth-dependent technique [1]. Regarding the fact that the success of the infiltration technique totally depends on the lesion’s topography, a new classification of enamel hypomineralization, based entirely on the lesion’s depth was set forth.
The optical properties of the enamel served as the basis for this classification.
The latter includes a precise, but simple, description of the lesion in daylight conditions as well as under transillumination, to eventually match the clinical data collected to the corresponding lesion topography. This classification regroups three major types of enamel opacities: Superficial, mixed and deep lesions.
Each category has specific clinical features in relation with the topography of the lesion and the proper treatment approach will be then adopted accordingly. While keeping in mind that superficial lesions represent the easiest category to achieve a favorable treatment outcome, the idea behind the treatment concept proposed implies the transformation of mixed and deep lesions into superficial ones using abrasive procedures before proceeding with their infiltration [2].
This clinical case report describes a suggested treatment of a deep lesion affecting a lateral maxillary incisor related to MIH based on transillumination, focalization and lesion transformation to achieve a good aesthetic result.
48
Fig. 1: Initial view of a lesion on the upper right lateral incisor.
Fig. 2
Fig. 3
Fig. 7
Fig. 4
Fig. 5
Fig. 6
PREVENTATIVE
Introducing resin infiltration technique has completely redefined the way we treat enamel hypo mineralization.
Fig. 2: Lateral incisor showing an ivory-white opacity melded in sound enamel tissue located in the incisal third. We may note the presence of the stained opacity affecting the first right lower molar confirming the MIH diagnosis.
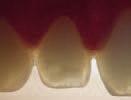
Fig. 3: Under transillumination, the lesion appears opaque with blurry edges showing an indistinct interface between the enamel opacity and sound enamel.
Fig. 4: Lesion focalization using a light-cured resin protective barrier. The aim of this procedure is to be more conservative during abrasive and erosive steps. A mild mutilation of the enamel layer covering the lesion using an abrasive disc. This step was assessed under visual examination and transillumination until the lesion is exposed almost entirely to and superficial features are perceived.
Fig. 5: The exposed hypomineralized enamel was etched during 120 s using Icon-Etch (15 % HCl)
Fig. 6: Aspect of the lesion within the reflection of incident light following abrasive and erosive steps. Note the transformation of the opacity from an ivory-white to an intensely white lesion.
Fig. 7: Aspect of the lesion under transillumination after abrasive and erosive steps. The lesion edges are now well demarcated suggesting the transformation into a rather superficial lesion.
Fig. 8: Dehydration using Icon-Dry.
Key Learnings
Fig. 9: Infiltration is performed using Icon-Infiltrant. The lesion should be infiltrated for at least 3 minutes until complete saturation and the infiltration does not appear to be further possible. A quick control (to avoid light curing) under transillumination is recommended during this step to assess the degree of infiltration.
Fig. 10 and 11: The features of the lesion within light reflection and transillumination following the infiltration procedure show a partial infiltration with an almost complete disappearance of the opacity, which remains only at the margins. In case where the lesion is not completely infiltrated, it is highly recommended to wait for the enamel rehydration in the aim of properly assessing the final aesthetic outcome of the infiltration [3].
Fig. 12: Two weeks later, at the next appointment the appearance of the lesion shows no improvements. Accordingly, the etching, drying and lesion infiltration were all repeated exactly as performed inthe first session.
Fig. 13 and 14: Aspect of the lesion under incident light and transillumination after a second session of resin infiltration procedure showing the complete disappearance of the opacity as well as of the halo effect.
Fig. 15: Final result.
In transillumination and within reflection of incident light, the aspect of the opacity gives topographic information regarding the lesion’s depth. This actually allows to set the treatment steps accordingly.
The newly suggested concept provides a direct visual assistance to the practitioner during the lesion transformation and after infiltration and helps assessing the treatment progress by providing a more controllable and reproducible outcome.
In case of partial infiltration, the re-intervention can be possible to infiltrate the remaining un-infiltrated area.
References
1. Denis, M., Atlan, A., Vennat, E., Tirlet, G., & Attal, J. P. (2013). White defects on enamel: diagnosis and anatomopathology: two essential factors for proper treatment (part 1). International orthodontics, 11(2), 139-165.
2. Marouane, O., & Douki, N. (2016). Traitement focal de l’hypominéralisation traumatique de l’émail. L’information Dentaire, 27(7), 2-7.
3. Attal, J. P., Atlan, A., Denis, M., Vennat, E., & Tirlet, G. (2014). White spots on enamel: treatment protocol by superficial or deep infiltration (part 2). International orthodontics, 12(1), 1-31.

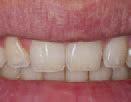
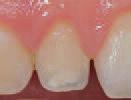
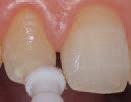
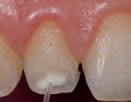
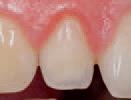
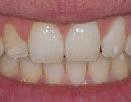
49 1300 65 88 22
Fig. 10
Fig. 11
Fig. 15
Fig. 14
Fig. 12
Fig. 13
Fig. 8
Fig. 9
PREVENTATIVE
EDGEENDO CLINICAL CASE
BY DR SEAN SUNYOTO, DDS

In my experience, many endodontic files are prone to unwinding - that is, with the exception of the EdgeOne Fire. While I previously used files from another leading endodontic manufacturer, switching to EdgeEndo’s NiTi reciprocating files has allowed me to provide safer, more effective endodontic treatment.
The instruments in this advanced 4-file system are flexible and durable, which reduces root canal treatment time, while the Glidepath for EdgeOne Fire, in particular, gives me sufficient access for effective irrigation.
The following case demonstrates how the premium technology built into EdgeEndo files helps me easily navigate canals and achieve successful outcomes.

This case was referred to me by a doctor who was unable to negotiate his patient’s tortuous, ledged, and calcified canals, possibly because he did not have the ideal instruments for the case.

During treatment, I negotiated the patient’s canals to apex using my #8 and #10 files. From there, I used EdgeGlidePath by EdgeEndo, which performs ideally in tight canals.
When it began to bind after 1–2 mm, I paused to irrigate the area, recapitulated with my #10 file, and reentered with the EdgeGlidePath file to length.
Thanks to the flexibility and ease of use offered by EdgeOne Fire files, I completed this root canal rapidly and safely.
Preop and postop images taken 4 months apart display signs of successful healing and an absence of a fistula.
I think these files are great tools that every clinician should have.
50
ENDODONTICS CLICK HERE Learn more about
DR SEAN SUNYOTO DDS
EdgeOne Fire files
PULPOTOMY PROCEDURES USING BIODENTINETM
IN AN IMMATURE PERMANENT TOOTH AND IN A DECIDUOUS TOOTH
Summary
Introduction: Calcium silicate-based cements have demonstrated remarkable clinical outcomes, and, among others, Biodentine may be considered a valid option in the treatment of primary and permanent teeth and a promising material to be applied in different area of endodontics.
Methods: Two cases of vital pulp therapy in a deciduous and an immature permanent tooth have been reported. Pulpotomy procedures were performed using Biodentine as pulp dressing material in both cases. Clinical and radiographical follow-up were performed until 1-year post-treatment.
Discussion: Biodentine demonstrated a 100% success rate in both reported cases showing to be more than suitable as pulpotomy material. Specifically, in case of immature permanent tooth, apexogenesis was appreciated.
Conclusion: Biodentine demonstrated a great induction of new hard tissue formation and may be considered a valid choice in vital pulp therapy.
Introduction
Calcium silicate-based cements have demonstrated remarkable outcomes mainly in endodontics and have resulted in predictable, safe, and successful therapies [1-3]. These cements are considered as unique ceramic compounds capable to react with water forming a solid mass [4]. Among others, Biodentine™ demonstrates a greater resistance to compression and flexion than other tricalcium silicate-based cements as well as sealing properties, bonding strength, and a great release of calcium ions [5-7].
In addition, Biodentine™ shows better results when compared to MTA in terms of handling, reduced setting time, and color stability, caused by the absence of bismuth oxide [8].
Due to these reasons, Biodentine™ can be considered a valid option in the treatment of primary and permanent teeth and a promising material that can be applied in different area of endodontics [9]. Among others, vital pulp therapy provides favourable clinical survival results over time, allowing maintenance of vitality of primary teeth until their natural exfoliation as well as apexogenesis in immature permanent ones [10].

Case report
Case 1: cariously exposed immature permanent tooth
A deep carious lesions involving the mandibular first molar (3.6) was observed in a female patient aged 6 years, as previously reported by Bossù et al [1]. The dental element presented immature root formation and reversible pulpitis.
Vital pulp therapy was carried out to allow apexogenesis. Briefly, after local anesthesia and rubber dam isolation, the caries was removed, and the pulp tissue was exposed. Coronal pulp was amputated by high-speed diamond bur under abundant irrigation. Hemostasis was achieved using sterile cotton pellets moisturized with saline solution within 5 minutes. Then, Biodentine™ was prepared according to the manufacturer’s instructions and placed on radicular pulp stumps with a thickness of 2-4 mm. Definitive restoration with resin composite was performed after 3 days, once the cement hardening was clinically appreciated by a dental probe. Periapical radiographs were obtained immediately after pulpotomy procedures (baseline) (Figure 1a), then the element was clinically and radiographically evaluated after 1 (Figure 1b), 3 (Figure 1c), and 12 months (Figure 1d).
henryschein.com.au 51 ENDODONTICS
Clinical evaluation revealed an absence of pain, discomfort, swelling or inflammation at every time point, reporting a success rate of 100%. The absence of pulp reaction was further confirmed by the radiographic assessment, as demonstrated by the progressive formation of the dental roots, closure of the apical foramina as well as the increase of root walls thickness.
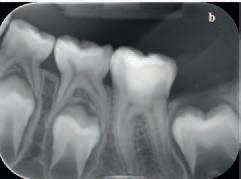
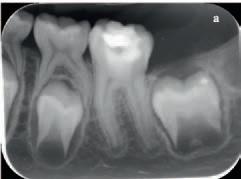
Clinical evaluation revealed absence of pain, discomfort, swelling or inflammation at every time points. Radiographically, absence of periapical reactions was appreciated.
The overall success rate at 12-month follow-up was 100%.
Case 2: cariously exposed deciduous tooth
A deep carious lesions involving the mandibular second deciduous molar (8.5) was observed in a male patient aged 5 years. The dental element presented reversible pulpitis; therefore vital pulp therapy was carried out. Briefly, after local anesthesia and rubber dam isolation, the caries was removed, and the pulp tissue was exposed.
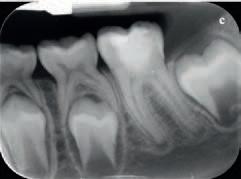
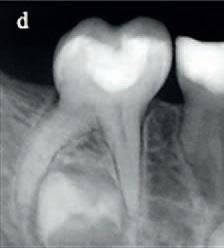
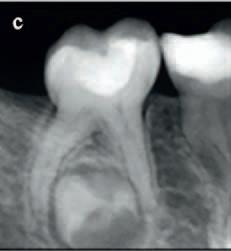
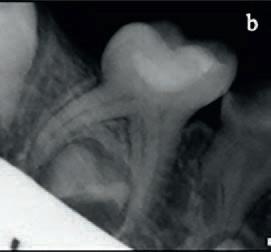
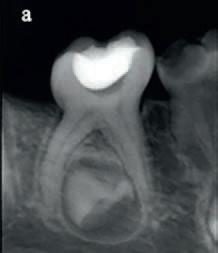
Coronal pulp was amputated by high- speed diamond bur under abundant irrigation. Hemostasis was achieved using sterile cotton pellets moisturized with saline solution within 5 minutes. Then, Biodentine™ was prepared according to the manufacturer’s instructions and placed on radicular pulp stumps with a thickness of 2-4 mm.
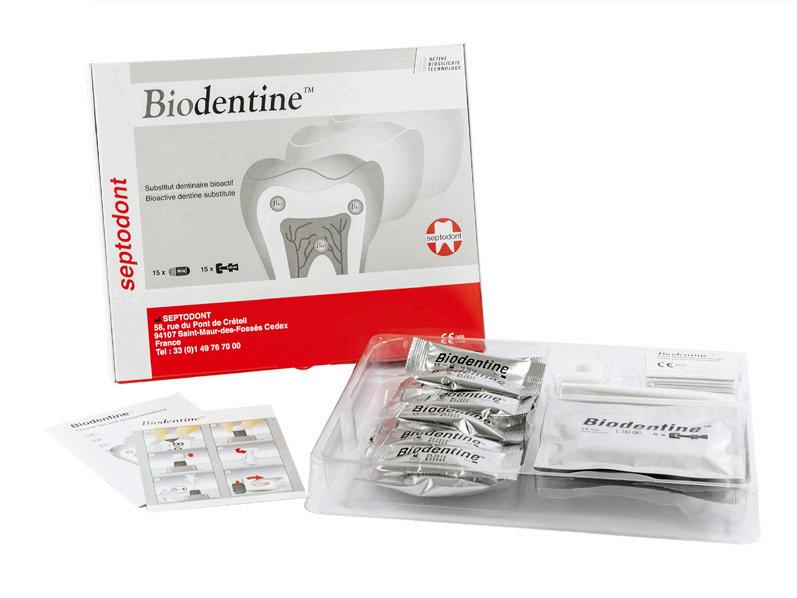
Definitive restoration with resin composite was performed after 3 days, once the cement hardening was clinically appreciated by a dental probe. Periapical radiographs were obtained immediately after pulpotomy procedures (baseline) (Figure 2a), then the element was clinically and radiographically evaluated after 1 (Figure 2b), 6 (Figure 2c), and 12 months (Figure 2d).
52
Fig. 2: Periapical radiographs of the dental element (8.5) treated with Biodentine. a. immediately after vital pulp therapy (Baseline); b. at 1 month; c. at 6 months; d. at 1 year of follow-up. Absence of periapical reactions can be observed at all evaluated time points.
Fig. 1: Periapical radiographs of the dental element (3.6) treated with Biodentine™. a. immediately after vital pulp therapy (Baseline); b. at 1 month; c. at 3 months; d. at 1 year of follow-up. Progressive formation of the dental roots could be observed over time with an absence of periapical reaction.
ENDODONTICS
ENDODONTICS
Discussion
The reported clinical cases showed that Biodentine™ yielded successful clinical and radiographical outcomes when applied in vital pulp therapy of immature permanent tooth and primary tooth, respectively. After 1 year of follow-up, it might be speculated that apexogenesis, as the continued physiologic development and formation of the root’s apex [11] , was obtained.
The present report clinically confirmed the excellent features of Biodentine™ as good biocompatibility and promotion of mineralized dentinal tissue deposition [1]
Conclusion
Biodentine™ demonstrated a great induction of new hard tissue formation and may be considered a valid choice in vital pulp therapy of primary as well as immature permanent teeth.
Author
Maurizio Bossù, DDS, PhD is an Associate Professor of Pediatric Dentistry at the Department of Oral and Maxillofacial Science, “Sapienza” University of Rome, Rome (Italy) and Dentist at the Unit of Pediatric Dentistry of Policlinico Umberto I Hospital in Rome (Italy).
Professor Bossù is Director of Post-graduate Specialization in Pediatric Dentistry and Director of Master in “Odontostomatology in the age of development” at “Sapienza” University of Rome. He took PhD in “Odontostomatological Diseases” in 2005 and the Specialty Board of Oral Surgery in 2007 at “Sapienza” University of Rome. He attended Postgraduate courses in pediatric Dentistry, Restorative Dentistry and Endodontics. Prof. Bossù is a consultant for the Italian Ministry of Health and since 2010 Trainer at ICDAS - “McGill” University of Canada. He is Professor at the School of Dentistry of “Sapienza” University of Rome and Lecturer at several Master and Post-graduate courses mainly in Pediatric Dentistry and Endodontics.
He is a founder of Accademia Internazionale Ricerca in Odontoiatria Pediatrica e di Comunità (AIROPeC), Academic Member of Italian Society of Endodontics (SIE) and accounts auditor of Società Italiana di Odontostomatologia e Maxillo-Facciale (SIOCMF). Prof. Bossù has coauthored more than 50 papers published in national and international peer-reviewed Journals in the field of Preventive Dentistry, Pediatric Dentistry, Endodontics and Dental Materials. He attended more than 100 National and International Congresses as Invited Lecturer.
References
1. Bossù M, Mancini P, Bruni E, Uccelletti D, Preziosi A, Rulli M, Relucenti M, Donfrancesco O, Iaculli F, Di Giorgio G, Matassa R, Salucci A, Polimeni A. Biocompatibility and antibiofilm properties of calcium silicate-based cements: an in vitro evaluation and report of two clinical cases. Biology (Basel) 2021;10:470.
2. Dawood AE, Parashos P, Wong RHK, Reynolds EC, Manton DJ. Calcium silicate-based cements: composition, properties, and clinical applications. J Investig Clin Dent 2017;8(2).
3. Bossù M, Iaculli F, di Giorgio G, Salucci A, Polimeni A, di Carlo S. Different pulp dressing materials for the pulpotomy of primary teeth: A systematic review of the literature. J Clin Med 2020;9, 838.
4. Primus CM, Tay FR, Niu LN. Bioactive tri/dicalcium silicate cements for treatment of pulpal and periapical tissues. Acta Biomater. 2019 Sep 15;96:35-54.
5. Rajasekharan S, Martens LC, Cauwels RGEC, Anthonappa RP, Verbeeck RMH. Biodentine material characteristics and clinical applications: A 3 year literature review and update. Eur Arch Paediatr Dent 2018;19:1–22.
6. Malkondu Ö, Kazandag MK, Kazazoglu, E. A review on Biodentine, a contemporary dentine replacement and repair material. Biomed Res Int 2014;2014:160951.
7. Camilleri J. Investigation of biodentine as dentine replacement material. J Dent 2013;41:600–610.
8. Çelik BN, Mutluay MS, Arıkan V, Sarı . The evaluation of MTA and Biodentine as a pulpotomy materials for carious exposures in primary teeth. Clin Oral Investig 2019;23:661-666.
9. Rajasekharan S, Martens LC, Cauwels RGEC, Anthonappa RP. Biodentine material characteristics and clinical applications: a 3 year literature review and update. Eur Arch Paediatr Dent 2018;19:1-22.
10. Bossù M, Iaculli F, Di Giorgio G, Salucci A, Polimeni A, Di Carlo S. Different Pulp Dressing Materials for the Pulpotomy of Primary Teeth: A Systematic Review of the Literature. J Clin Med 2020;9:838.
11. American Academy of Pediatric Dentistry. Pulp therapy for primary and immature permanent teeth. Pediatr Dent 2017;39:325–333.
MAURIZIO BOSSÙ, DDS, PhD, Associate Professor, Rome ,Italy.

53 1300 65 88 22
Biodentine online CLICK HERE
View
PRESSING ENDODONTIC ISSUES
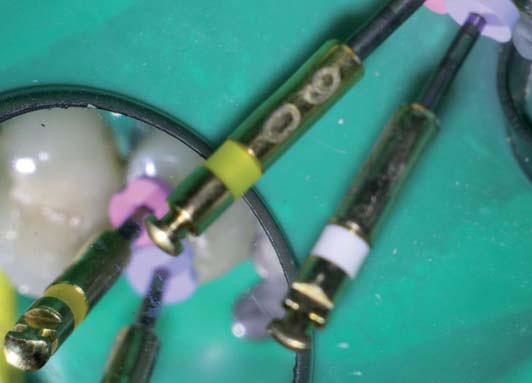
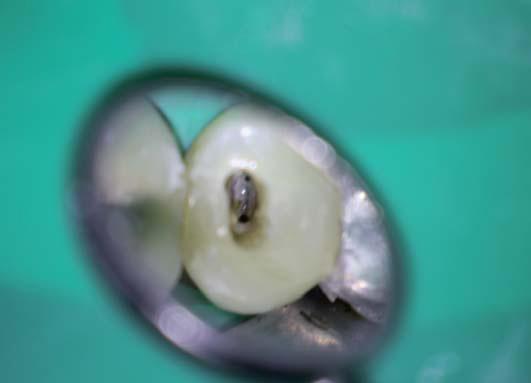
Sealing the root canal system with a durable and bacteria-tight material guarantees a successful endodontic treatment in the long run. Easier said than done, if you consider the complex nature of the given dental anatomy. The following case report demonstrates that a reliable obturation of the root canal system sometimes just needs a little unusual pressure, i.e. negative pressure.
After having shaped and cleaned the canal, the endo specialist seeks to obturate the prepared space effectively. For this purpose, a number of innovative fast flowing filling materials are already available on the market. However, multiple canals, hidden accessory canals or lateral branches make it difficult to create a permanent seal against bacteria and fluids that can just re-enter the root canal system. Irregularities like culs-de-sac or isthmi are not easy to spot, let alone to be filled properly. A new, simple technique using standard instruments can help practitioners to get the job done in no time. All you need is free-flow filling material and a new, special endodontic aspirating tip to create a bit of negative pressure, as my latest endodontic case shows.
Case Report

A 50-year-old male patient was referred to my endodontic practice for evaluation and possible treatment of his left maxillary second premolar. The tooth was percussion painful and a buccal swelling was evident. Endo-Ice cold vitality testing was negative. Radiographic examination, moreover, revealed a periapical lesion associated with a highly curved root (Figs. 1 & 2). The pulp was consequently diagnosed as necrotic and the periapical diagnosis was consistent with Symptomatic Apical Periodontitis (SAP).
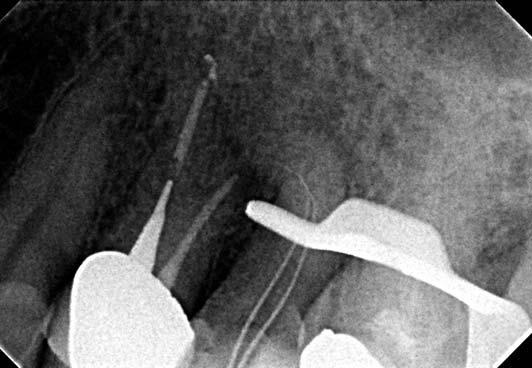
After placing the rubber dam, the pulp chamber was accessed with a diamond DiaDent bur under microscopic visualisation. Two confluent canals were identified and length determination radiograph revealed the highly curved canal anatomy (Fig. 3). Length was verified using the CanalPro Apex Locator. Instrumentation was then achieved with the Hyflex CM rotary files used in a single length protocol. After flaring with 25/0.8, the rotary file sequence followed consisted of 15/0.4, 20/0.4, 25/0.4, 20/0.6 and 30/0.4 to length. After the instrumentation procedure a radiograph confirmed that the original trajectory was maintained (Fig. 4). The angulation of the aforementioned periapical radiograph revealed two lateral lesions suggesting two lateral portals of exit (Fig. 5). The canals were rinsed after each change of instruments according to a strict irrigation protocol. Two corresponding 30/0.4 gutta-percha master cones were then fitted to the canals. The rinsing solution was activated by using dynamic manual agitation with the master gutta-percha cones (holding the cone with tweezers to gently move it up and down).
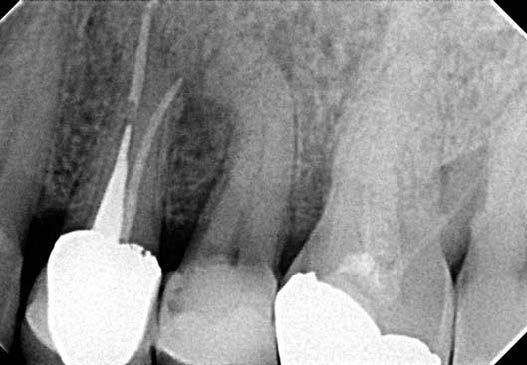
54 ENDODONTICS
Fig. 1 Clinical situation. Fig. 2 Periapical lesion in highly curved root.
Fig. 3 Confluent canals. Fig. 4 Instrumentation with the HyFlex CM rotary files.
During this process, an endodontic aspirator tip was used to dry the root canals. The Swiss dental specialist Coltène/Whaledent recently introduced an aspirating tip specially developed for drying root canals. With an outer diameter corresponding to ISO 60, the Surgitip- endo can be inserted directly into the prepared canal where it removes rinsing solutions and other moisture quickly and effectively at the same time. Thanks to a special fully rotating ball joint, the suction tip is highly flexible and collapsing of the tip is therefore avoided (Fig. 6). You can easily fit it into root canals that are normally hard to reach without having to bend the canal tip. After drying the confluent canals, the Surgitip-endo was fitted to the buccal canal orifice and the irrigation solution was injected in the lingual canal. Simultaneous negative and positive pressure irrigation from different orifices created a continuous current of fresh irrigant washing out all debris.
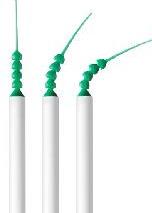
In the next step the preparation for negative pressure filling of the root canal system was taking place.

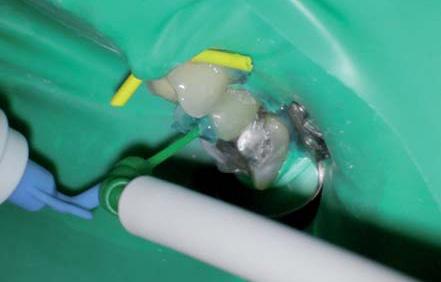
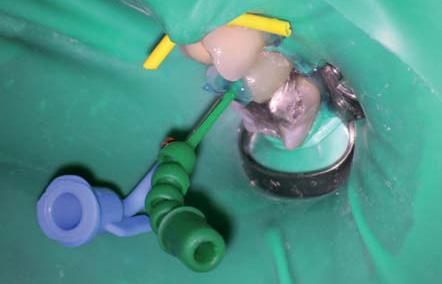
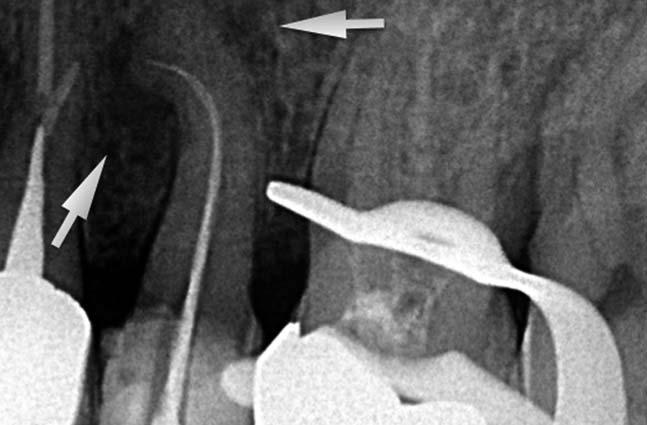
This special filling system was created with the use of the Surgitip-endo and the tight seal material GuttaFlow 2 (Fig. 7). This filling material combines cold free-flow gutta-percha and a sealer creating an easy to handle, fast flowing filling material, which has been proven as a reliable barrier against bacteria and liquids re-entering the root canal. Its working time takes approximately ten to fifteen minutes. Before the actual procedure starts, it is necessary to fix both the Surgitip-endo front part as well as the CanalTip of the GuttaFlow capsules at the entrance of both canals. Both the front part of Surgitipendo and a canal tip are firmly fixed in the different orifices by a sealing material that is polymerised for
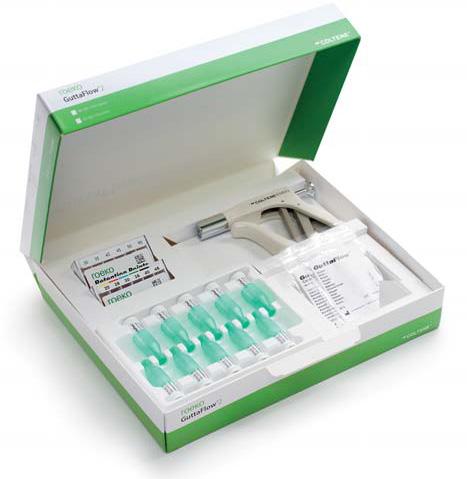
approximately 10 seconds (Fig. 8). The seal at the canal entrance works as a temporary cap to enable the establishment of negative pressure underneath it with the aid of the aspirating tip. With this special trick a negative pressure zone can be created, which allows literally to pull the gutta-percha filling material into smaller lateral canals and ramifications that were hardly detectable in the anamnesis before.
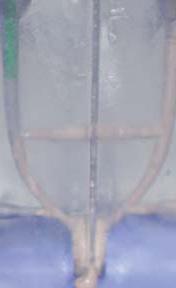
henryschein.com.au 55 ENDODONTICS
Fig. 5 Lateral lesions suggesting two lateral portals of exit.
Fig. 6 Surgitip-endo aspirator tip Fig. 7 Gutta Flow Introkit.
Fig. 8 Fixing both tips in the orifices by sealing material.
Fig. 9 Attaching the Surgitip-endo and GuttaFlow 2 FAST capsule.
Fig. 10 Visualisation of the technique in a plastic training block.
Fig. 11 Classic backfill after removal of temporary seal.
Fig. 12 Seating of pre-fitted master cones.
Now a GuttaFlow 2 FAST capsule was attached to the CanalTip as well as the Surgitip-endo to its front part (Fig. 9). While the air was sucked off with the Surgitip-endo above the filling, the guttapercha material was released into the canal system simultaneously and quickly spread into the prepared root canal system. In general, the innovative design of the suction tip ensures unrestricted high suction performance at all angles, therefore the gutta-percha was evenly distributed and filled the confluent canals within seconds. Complete control of the material extrusion was consequently achieved (Fig. 10). After the injected GuttaFlow 2 had reached the Surgitipendo, the temporary sealing material could be removed. The rest of the GuttaFlow 2 capsule was used for a classic backfill and the pre-fitted master cones were very slowly seated in place (Figs. 11–13). The tooth was restored with a fiber post, a composite built up and a PFM crown. In the final radiographic image of the tooth right after the RCT, the lateral ports of exit could be visualised (Fig. 14). One year after the treatment, the follow-up radiograph revealed complete healing. The nonabsorbable GuttaFlow 2 could be detected unaltered in the lateral portals of exit (Fig. 15). The buccal and occlusal clinical view of the tooth and soft tissues can be seen in Figures 16 and 17.

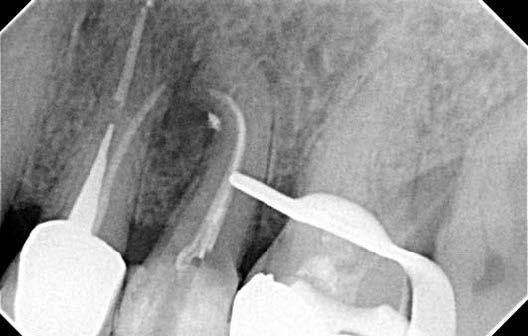
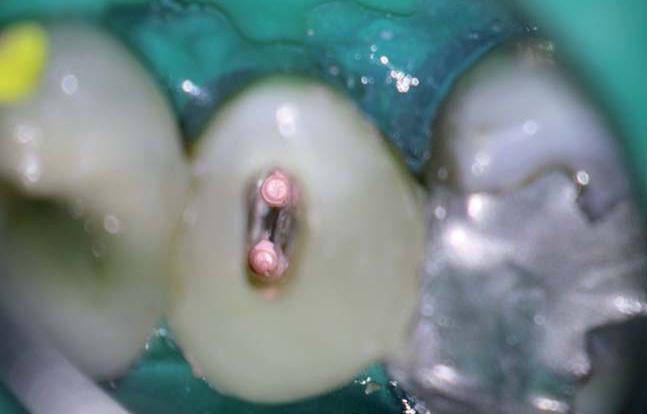
Conclusion
Innovative filling systems nowadays come with excellent flow properties. They are easy to handle and help to speed up treatment sessions, even more so if dentists make good use of their endodontic instruments. Creating a negative pressure zone with a special endodontic aspiratory tip is easy to learn, but saves additional time in the process. No extra material or instruments are needed. The guttapercha is easily distributed to the root canal system, even in areas that are hardly detectable beforehand and often impossible to fill. The combination of modern equipment and individual craftsmanship thus guarantees a tight seal of the root canal for an optimum protection against re-infection. Negative pressure obturation with GuttaFlow 2 provides absolute material control and a fluid tight seal of the main root canal system and its lateral components.


Reference
(2014) ROOTS ‘Industry Report _ Innovative Filling Systems’, Volume 3, Pgs 14-17.

56
Fig. 13 Position of the master cones.
Fig. 14 Visualisation of lateral ports of exit.
Fig. 15 Radiograph one year after treatment with non resorbable GuttaFlow 2.
Fig. 16 Occlusal clinical view.
Fig. 17 Buccal clinical view.
CLICK HERE
View the products online
ENDODONTICS
DR ANTONIS CHANIOTIS, GREECE
THE WAY TO SAFE ENDODONTICS
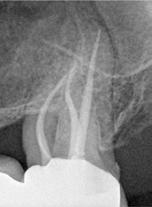
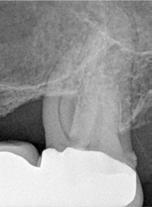
Innovation meets experience Komet from Lemgo, Germany, have been providing the dental world with groundbreaking innovations for 100 years now. Their FQ system proves yet again that experience is the best foundation for innovative products. This range continues the success story of the well-loved F360 and F6.
Concise system. Clearly laid out basic system containing a small number of wellmatched instruments to save time during root canal treatments.
The name FQ stands for flexibility and the physical symbol for heat: The instruments are made of heat-treated nickel-titanium alloy leading to more flexibility and cyclic fatigue resistance. The variably tapered file core of the taper .06 instruments is a patented innovation granting more flexibility and better cutting performance. The instruments do not clog and ensure an optimum preparation time.
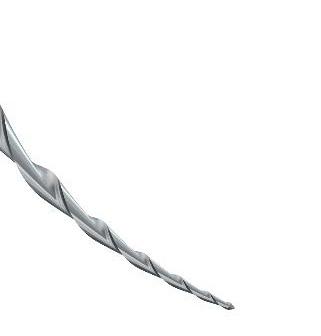
[ 01 ] Exposure of the canal entrance with the FQ Opener.
[ 02 ] Probing with manual files and mechanical creation of a glide path with the FQ Glider.
The development of the FQ-range was based on the dentists’ needs and demands. The material and the double-S cross section make the file more flexible and the treatment more efficient because substance is removed faster – and the risk of file fracture is reduced to a minimum.
“FQ allows general practitioners to proceed with a great deal more security and confidence, whereas the high versatility of the instruments enables specialists to respond individually to complicated canal anatomies, as shown in the patient case.”
Dr. Rafael Michiels Specialist for endodontics Hasselt / Belgium


However, the comprehensive, portfolio also allows individually adapted the requirements

[ 03 ] Preparation of the canal with the FQ Shaping files.
The well-planned system of the instruments grants, safe, reliable, and time-efficient treatment – even in difficult cases. Users confirm that operating the FQ-system makes them feel in control and at ease. This makes FQ-series the best choice for everyone wishing for a comfortable endo-treatment.
O ptional: Finishing up to the desired preparation size with the FQ Finishing files.
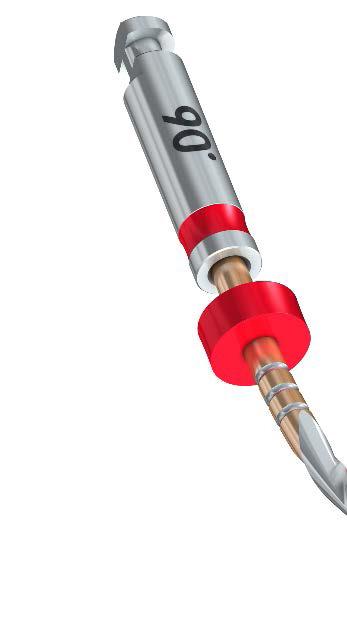
57 1300 65 88 22
FQ
1
020
Clinical case Treatment by
Initial situation Root filling FQ . Step-by-Step. Access Clinical case Treatment by
Initial situation Root Filing ENDODONTICS
Rafaël Michiels – Hasselt (Belgium)
Rafael Michiels
STEP-BY-STEP
Step-by-Step.
Concise system

Clearly laid out basic system containing a small number of well-matched instruments to save time during root canal treatments.


Concise system. Clearly laid out basic system containing a small number of wellmatched instruments to save time during root canal treatments.


However, the comprehensive, versatile portfolio also allows the compilation of individually adapted file sequences to suit the requirements of the canal anatomy.
However, the comprehensive, versatile portfolio also allows the compilation of individually adapted file sequences to suit the requirements of the canal anatomy.
[ 01 ] Exposure of the canal entrance with the FQ Opener.
[ 02 ] Probing with manual files and mechanical creation of a glide path with the FQ Glider.


[ 03 ] Preparation of the canal with the FQ Shaping files.
O ptional: Finishing up to the desired preparation size with the FQ Finishing files.

020 1 2

58
FQ
4 | FQ
Initial situation Root filling
Clinical case Treatment by Rafaël Michiels – Hasselt (Belgium)
FQ .
Access reaming FQ Opener Glide path FQ Glider ENDODONTICS
“I like working with FQ. For me, the system provides the complete solution for a safe endo. At the same time, a clear basic sequence helps to save time during preparation and provides a fast-learning curve for every user.”


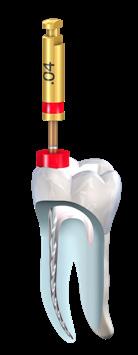

for more complex situations
for most clinical cases


henryschein.com.au 59 FQ | 5 020 Taper .04 Taper .06 020 030 030 035 045 055 3 3
Basic sequence Shaping Shaping optional Finishi n g optional
Dr. David Christofzik Specialist for endodontics and traumatology, Kiel / Germany
Initial situation Root Filing ENDODONTICS
Clinical case Treatment by Dr. David Christofzik
NEW STA SINGLE TOOTH ANESTHESIA
INTRALIGAMENTARY INJECTION VS. THE OLD PDL
There are major differences that should be considered between the traditional PDL injection delivered with the dental syringe and the STA (Single Tooth Anesthesia) (Fig.1) administered Intraligamentary Injection (STA-II); some of them are noted here:
• The PDL is usually the injection of last resort, when the mandibular block fails; The STA-II should be the primary injection for any maxillary or mandibular tooth and can replace mandibular blocks and supraperiosteal infiltrations, which cause collateral numbness to the patient’s lip, face and tongue.
• With the PDL, a small amount of anesthetic is injected under excessive pressure, which produces a short duration of anesthesia; The STA-II delivers a larger volume of anesthetic under minimal pressure resulting in longer duration (approximately 60 min).
• The PDL is difficult to administer, and the flow rate depends on manual pressure; The STA-II is easy to administer, and the flow rate is computer-controlled, consistent, and below the patient’s pain threshold.
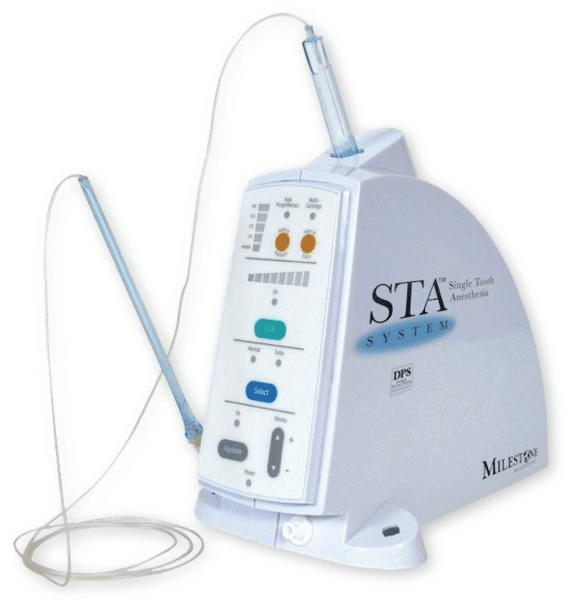
• The PDL is painful on delivery, results in tissue damage and bone resorption, and can cause postoperative discomfort; The STA-II is a comfortable injection, and a clinical study shows it causes no tissue damage or bone resorption and little or no post-op discomfort.

The STA, using Dynamic Pressure Sensing, allows you to know when you have arrived at the correct site (the top of the periodontal ligament space) for a successful intraligamentary injection; it also indicates if you have left the site and if the needle has been blocked by obstruction or pressure.
Check out the simple injection technique for the STA-II below and more on the STA-II on the milestonescientific.com web site.
It’s easy to do. Try it, you’ll like it! And so will your patients.
60
PAIN CONTROL
STA Intraligamentary Injection on a Typodont CLICK HERE
1. Keep the STA System on the STA mode.
2. It is recommended that you break the handpiece short to get better access to the injection site on lower teeth. (Fig 2)
3. Locate the injection site. For the maxillary teeth use the Distal-buccal line angle then the Mesial buccal line angle. For mandibular teeth use the Distal-lingual line angle then the Mesial-lingual line angle. The four lower incisors only require one site, Distal-lingual.
It is very important to always start on the distal and then proceed to the mesial.
4. Orient the needle with the bevel towards the tooth and the needle at about a 45degree angle to the vertical. Place the needle into the sulcus as if it were a periodontal probe, advance the needle with a gentle and light hand-force until resistance is felt. The needle tip will penetrate the attachment at the base of the sulcus and makes contact to the entrance of the PDL space. (Fig 3)
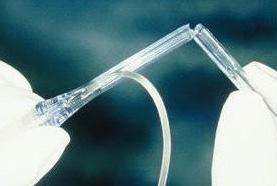
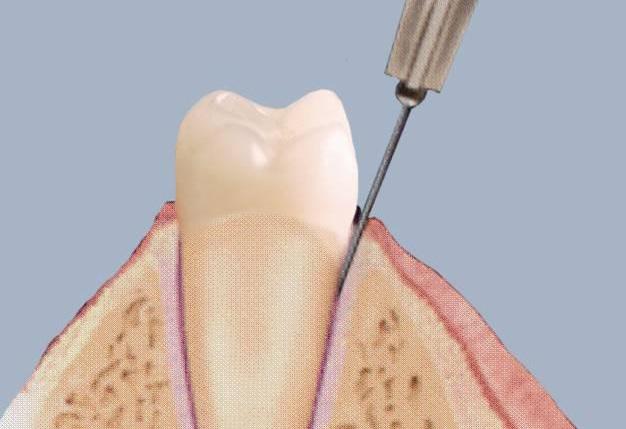
5. While setting the system on cruise control and continuing to administer the anesthetic at the ControlFlo rate (one drop each two seconds), hold the Wand handpiece in place for up to 15 seconds and listen for the DPS
(Fig 4) audible ascending tones and watch the lights (going from red to yellow to green) to make sure the needle is in the correct site. Hold the needle in place without moving the needle or placing force or pressure on the needle throughout the injection.
6. If the DPS lights and sounds do not come on after 15 seconds, tip or move the needle very slightly (without placing excessive force/pressure on the needle), then wait for the lights/sounds to appear.
7. The lights should at least be in the high red or yellow zone. The lights do not need to reach the green zone in order to achieve anesthesia.
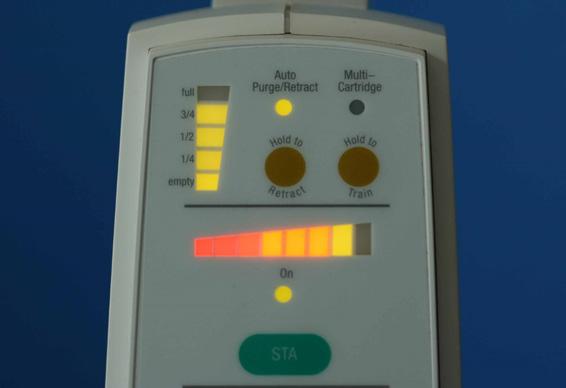
8. Once you have reached the injection site administer ½ cartridge per injection site (2% Lidocaine 1:100,000) or ¼ cartridge (4% Septocaine 1:200,000). On Primary teeth, the dosages are ½ these recommended volumes.
9. Once you have administered the desired amount of anesthetic and to eliminate anesthetic going into the patient’s mouth:
a. Hit and release the foot pedal to enter the Aspiration cycle.
b. Quickly remove the needle from the sulcus after the third beep during the aspiration cycle; then direct the needle towards the patient’s bib or bracket table.
c. If after the aspiration a steady stream of anesthetic flows out of the needle, that amount of anesthetic did not go into the bone due to excessive force/pressure on the needle. If after aspiration, only one or two drops come out of the needle, all the anesthetic entered the bone and gingival tissue.
d. If the DPS lights go to the green zone and then the STA’s voice says “Overpressure” or “Relocate”, excessive force was placed on the needle. Restart the injection procedure.
10. Make sure to use minimal force/pressure on the needle to allow the anesthetic to flow into the bone and gingival tissue for successful and profound anesthesia. (Fig 5)
The scope of anesthesia is pulpal, buccal, and lingual on the tooth anesthetized.

The STA versus the traditional syringe requires more time to perform some injections, however, the onset of the anesthesia is much faster than with the traditional syringe so the total time to achieve anesthesia is the same or shorter.
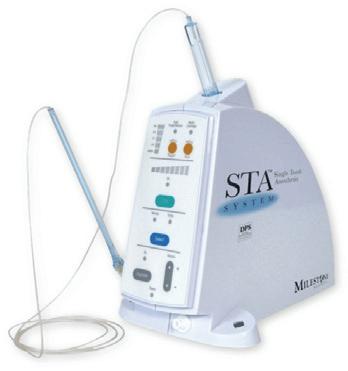
61 1300 65 88 22
EUGENE R. CASAGRANDE DDS, FACD, FICD Arizona, United States
Fig. 1
Fig. 2
Fig. 3
Fig. 4
Fig. 5
STA-Intraligamentary Injection Technique Tips
PAIN CONTROL
*This injection can take the place of an Infiltration or a Mandibular Block injection.
UNDERSTANDING AND MANAGING THE INQUISITIVE PATIENT
According to a recent survey by Septodont, one of the more challenging day-to-day experiences for a dentist is the inquisitive patient. Too long spent answering questions means that appointments run over, other patients are kept waiting, and schedules are thrown into chaos. During the pandemic, with schedules – and budgets – stretched to breaking point, this presents even more of a challenge. When every minute counts, we discuss how dentists can keep their inquisitive patients satisfied and their schedules running smoothly.
When does curiosity become a problem?
Asking questions is not necessarily a problem in itself. In fact, as a dentist, you know that questions give you the opportunity to:
• Involve the patient in their care.
• Help them to understand their treatment.
• Establish informed consent.
• Manage their expectations.
• Improve patient satisfaction and retention. However, there are some patients whose curiosity you just can’t seem to satisfy. You sense that they’re looking for an answer that you can’t give them. Or that they’re asking one question but they really want to ask another. Or that they simply don’t know what to ask to get the information they need. Sometimes, it may even seem as if the patient is challenging you. That’s when curiosity can become a problem.
Your time with the patient is limited. You want your patient to feel comfortable enough to raise questions, but not to the extent that it dominates or disrupts their treatment. In order to deliver a high standard of care – not just to them, but also the patients after them – how can you strike the ideal balance?
Understanding the inquisitive patient
Patients ask excessive questions for a variety of reasons. Some simply haven’t been given enough information about their treatment, or don’t understand the information they’ve been given. Others are motivated by fear or uncertainty, and they usually fall into one of three categories.
The anxious inquirer
This patient asks questions due to anxiety about dental treatment. 36% of people in the UK are believed to suffer from dental fear or anxiety, and a further 12% have a dental phobia, so you may run into this patient often. Asking questions can be a way for them to understand the unknown, mentally prepare for a treatment, or even stall for time.
Look out for questions relating to pain, duration of treatment, and recovery time in particular, as these can all be major sources of anxiety. Another hallmark is that the patient may not seem to be reassured by your answers. You might notice that each answer prompts another question, or that the patient circles back to a topic of concern that you’ve previously addressed.
The control seeker
In a previous article, we discussed an interesting piece of research about the loss of personal control many patients feel in dental and other healthcare settings. This can happen at various touchpoints throughout the patient journey, such as scheduling an appointment around other commitments, or having to wait a long time for treatment. At each point, the patient is doing something they’d prefer not to do, but perceives that they have no choice if they want to be treated. That’s nobody’s fault, of course, but it can still take an emotional toll on the patient.
By the time the patient reaches you, they may have accumulated any number of these “micro-threats” to their personal autonomy.
62 PAIN CONTROL
Now, facing the biggest threat yet – a potentially uncomfortable or even painful treatment – some patients react by becoming inquisitive or even challenging. They may ask questions as a way to boost their confidence, re-assert their control, or gain a sense that they’re having treatment on “their own terms”.
The overinformed patient
In the digital age, our patients can find an abundance of information about oral health and dental care with just a few clicks. Many do just that, but it can create problems in the chair.
When a patient looks for information online, the best-case scenario is that they read accurate -- but unnuanced -- information intended to give patients a broad, simplified overview. The worst-case scenario is that they’re exposed to misinformation, ranging from innocent mistakes to deliberate fear campaigns.
In either case, this can lead some patients to reach incorrect conclusions or form unrealistic expectations around their dental care. When your assessment, diagnosis or treatment plan doesn’t align with their beliefs or expectations, you might face a barrage of questions as they try to understand why.
Managing the inquisitive patient
1. Pre-educate your patients
If you don’t already, provide every patient with detailed information prior to an appointment.
For each treatment, create a standard template with a description of the procedure, why it’s necessary, what outcomes should be expected, and what will happen on the day. You can also include a list of relevant FAQs and point your patient to additional learning resources like articles or videos. When a patient is scheduled, they can be given all the information they need quickly and easily.
For anxious and control-seeking patients, knowing exactly what to expect can help to ease their concerns and give them back a sense of control. Meanwhile, overinformed patients can be directed to accurate and reliable sources of information, reducing potential conflict in the chair.
2. “Pre-assure” your patients
This pre-education stage is also a golden opportunity to reassure the patient before anxiety has chance to take root. In our article Why topical anaesthetics go hand-in-hand with patient (and professional) satisfaction, we discuss how pain is the number-one driver of anxiety in dental patients. It’s not just the experience of pain; research shows us that the mere anticipation of pain can be just as traumatic as the pain itself, and it can make the actual pain feel more intense.
The first step to addressing this is to implement a comprehensive pain management system, focused on keeping your patients as comfortable as possible at every stage of treatment. Septodont can help you to achieve this with our portfolio of world-leading dental pain management products, including the highest-quality pre-injection topicals, injectable anaesthetics and lower-deflection needles.
The second step is to tell your patients all about it at the earliest opportunity! As soon as they schedule an appointment, let them know all the steps you’ll be taking to keep them comfortable, e.g. topical anaesthetic to make injections pain-free. By “preassuring” your patient, you’ll stop anxieties in their tracks and gain a reputation as a dentist who truly goes the extra mile.
3. Give your patients a nudge
Don’t be tempted to drop your resources and pain management plans in an email or hand over a brochure and simply hope your patients read them! Plenty won’t, so offer a gentle nudge. For example, have your reception staff say:
“I’ve scheduled your appointment and I’m going to send you an email to confirm. I’m also including some important details about your treatment and some questions other patients often ask about it.
Will you read through that information and let me know if you have any questions that haven’t been answered?”
The question is key. Believe it or not, soliciting that one little “yes” is a tried-and-tested trick that marketers have been using for decades. People are more likely to read the information simply because they’ve made a verbal commitment to do so.
If the material doesn’t answer their questions, you can delegate any further questions to a member of the dental team prior to the appointment. And for those who still don’t read it…
4. Make use of waiting room time
Give the patient a copy of your FAQs to review while they wait and ask them to write down any additional questions they want to ask during the appointment.
This has a number of time-saving benefits:
• As they bring their questions to mind, they may find the material has answered many of them.
• You can get down to any unanswered questions quickly and efficiently.
• The patient is more likely to stick to a pre-written list, instead of going off on tangents.
• The patient is less likely to interrupt the treatment with questions they forgot to ask.
henryschein.com.au 63 PAIN CONTROL
5. Define question time
At the very beginning of the appointment, set clear expectations and boundaries around question time. For example:
“I’m going to start by talking you through what we’ll be doing today, and then we’ll have about x minutes to go over any questions you might have. Then we’ll start the treatment, and you’ll have the chance to ask some more questions afterwards. Does that sound ok to you?”
Again, solicit the yes, and reiterate the agreed time when you hand over to your patient for questions. If your patient is still asking towards the end, remind them of the time limit and give them the chance to prioritise their most pressing questions:
“We’re coming up to the end of our x minutes and we’ll have to move onto the treatment shortly. What’s the most important thing you need to know before we get started?”
6. Answer questions transparently
During question time, be as open and forthcoming as possible with your answers. Research shows that if a patient perceives you to be shutting them down, avoiding their questions, or answering inadequately, they can double down on their efforts to assert control, i.e. ask even more questions. And if your patient is already sceptical or suspicious of the profession, this will only reinforce their fears and encourage them to keep challenging you.
Try to acknowledge any concerns your patient is showing, even if they’re based on misinformation. The fear or uncertainty is still very real to them, so empathise with the underlying concern, offer them reassurance, and answer their questions transparently. (And whatever you do, never dismiss them or try to pull rank!)
By investing a little time to make your patient feel heard, respected and understood, you can show them that there’s no need to assert control or dominate the appointment.
7. Know when (and how) to draw the line
What do you do when this isn’t enough? When an anxious patient keeps on circling, or an overinformed patient keeps on challenging? If you feel you’ve answered the best you can but the questions keep coming, it’s time to put the ball in their court – compassionately, of course.
For an anxious patient, this may look like:
“I can see how worried you are about the treatment. It’s very safe, but I understand that it can still be scary. Would you like to give it a try, or would you like to leave this for another time?”
For an overinformed patient, it may look like:
“It’s important to me that you’re comfortable with the treatment plan but it seems you’re feeling conflicted. Would you like to go ahead, or do you need to go away and think about it some more?”
Most patients don’t want to be in the chair, but they also don’t want to go away without having their problem solved. This is a simple way to give them back a sense of personal control, while subtly letting them know that question time must come to an end. When faced with this call to action, the majority of patients resolve to move forward.
8. Delegate the debrief
Without a thorough debrief, the inquisitive patient will often call back with their questions later on. Rather than pushing the problem down the road, think about who else in your office is qualified to carry out this task.
Consider delegating the debrief to your assistant or another member of the dental team. They will be able to explain the findings, talk the patient through paperwork and home care instructions, and answer any further questions they may have. Meanwhile, you can move on to the next patient and keep your schedule running smoothly.

64 PAIN CONTROL
USING THE GKE ORANGE PROCESS CHALLENGE DEVICE (PCD) IN YOUR STERILISER

What is the device?
The GKE Orange Process Challenge Device is innovatively designed to perform as a Helix Test.
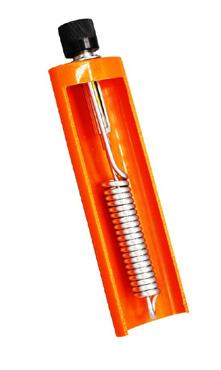
The device contains a patented stainless-steel coiled helix, encapsulated by an orange hard plastic outer covering. The device is unlike any other “Helix Test” on the market, in that the coil is made from stainless steel, simulating or mimicking our instruments inside the steriliser.
We insert a 4-bar chemical indicator inside the device and together this makes a Type 2 Monitoring System in accordance with International Standards for sterilising.
The most environmentally sustainable option on the market:
The stainless-steel helix makes the device “permanently reusable” for at least 10,000 cycles –which could be the life of your practice. Competitive products made of plastic, must be replaced every 250 cycles, which is a lot of waste to landfill. If the plastic devices are not replaced, they could lead to falsepositive results.
How do we use the GKE device?
We use the device for our daily air removal and steam penetration test (aka Helix or Bowie Dick Test) every day in an empty chamber at start-up, which checks the steriliser’s ability to remove air and inject steam inside the chamber, but more importantly inside our packs and instruments.
We also use the GKE PCD for routine monitoring of all loads to provide certainty of air removal and steam penetration inside our hollow instruments (i.e. handpieces).
Key Benefits of the GKE Device:
• Only need the 1 device for all your monitoring requirements.
• Using the device in all loads provides more information than just chemical indicators alonegives us information about our hollow instruments and proof that the internal surfaces have a sterility assurance level.
• Routine use of the PCD could pick up on potential faults with the steriliser prior to the next day’s daily air removal test, e.g. an issue with the vacuum seal, or non-condensable gases entrained within steam – saving time and potential risk to patients.

• Indicators have adhesive backings so can easily be adhered to documentation for record keeping.
• Most environmentally sustainable device on the market.
• Clear colour change from yellow to black in a successful process.

Sufficient temperature, time and steam penetration
Insufficient air removal and steam penetration
Temperature achieved, but no air removal and no stream penetration
Insufficient temperature, no air removal and no steam penetration
Helix Test or Bowie Dick Test?
You only need to do one functionality test of your steriliser each day, and this should simulate the most challenging items you sterilise, so in the case of a dental facility, that’s our hand pieces. If we can prove air removal and steam penetration inside a helix device, then this is sufficient.
65 1300 65 88 22 INFECTION CONTROL
LAUREN KONTUS BSc(EnvSC)
and Contracts Manager GKE Australia CLICK HERE View Product
Sales
UNDERSTANDING LATEX ALLERGY IN DENTAL PRACTICE
For dental practitioners and the patients they care for, latex exposure can cause allergic reactions ranging from contact dermatitis to life threatening anaphylaxis.

An unprecedented rise of latex allergy in dental and medical health care providers (HCPs) and individuals with specific health problems followed the adoption of measures to prevent the spread of infections (HIV, Hepatitis) and bloodborne pathogens. It is estimated that more than 13 million people worldwide have latex allergy. 1
Data (2016) indicates that the average prevalence of latex allergy worldwide remains 9.7%, 7.2%, and 4.3% among healthcare providers, susceptible patients, and general population, respectively.1 Investigations have shown that up to 17% of HCPs are sensitised to the allergenic proteins in latex and those at the highest risk of sensitisation include dental assistants, operating room personnel, hospital housekeeping and emergency medical technicians.2,3
WHAT CAUSES LATEX ALLERGIES 1,4,5
Latex allergy occurs when a person’s immune system reacts to certain proteins found in NRL. Of some 250 proteins in NRL, 15 have been identified as allergenic proteins that can elicit a hypersensitive immune response. Prolonged and repeated exposure to latex allergenic proteins increases the risk and sensitisation to NRL (presence of latex-specific IgE antibodies) is a prerequisite to latex allergy. Latex sensitive individuals are asymptomatic and generally unaware of their antibody status. Latex allergy occurs following latex exposure and is a systemic reaction leading to a range of reactions, as outlined in the infographic below
Exposure to NRL allergenic proteins occurs via mucous membranes, the vascular system, direct skin contact and inhalation. Inhalation occurs when the cornstarch inside powdered latex gloves binds to latex allergens and becomes airborne during the donning and doffing of gloves.
Population at risk of latex allergy5
• HCPs such as dentists, dental assistants, physicians, nurses, laboratory clinicians, medical technicians
• Individuals with specific health problems including atopy (history of allergy)
• Spina bifida
• Myelodysplasia
• Urogenital abnormalities
• Multiple surgical interventions
• Food allergies (bananas, kiwi, avocado, and chestnuts).
66 INFECTION CONTROL
View Ansell products online CLICK HERE
Prevalence off latex allergy among dental practitioners and patients
Healthcare workers including dentists and dental hygienists are the most affected occupational group for latex allergy due to their frequent donning and removal of latex gloves.1 Data shows that up to 17% of healthcare workers are sensitised to latex.2 Due to their frequent repeat exposure, all dental professionals who use latex gloves should be considered high risk for allergic reaction.5 Even as many dental practices transition away from latex gloves, latex allergy remains a highly prevalent occupational health hazard among practitioners.
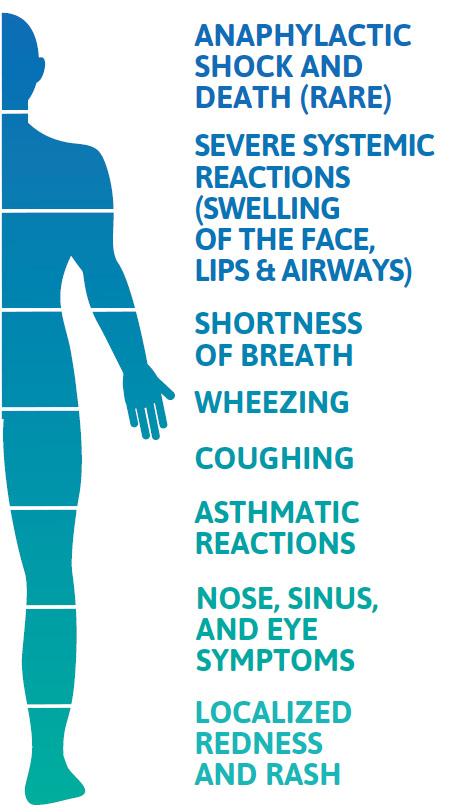
That is, in part, because latex is present not only in gloves but also in common dental products such as dental dams, bite blocks, mixing bowls, syringes, suction tips, oxygen masks, adhesive bandages and more. The frequency with which dental practitioners make contact with additional latex products may not be as high as the exposure to allergens from a latex glove.
References
1. Wu M, McIntosh J, Liu J. Current prevalence rate of latex allergy: Why it remains a problem? J Occup Health. 58(2):138-144. March 2016
2. Dermata A, Arhakis A. Latex Allergy in Dental Care. Balk J Dent Med. Vol 18, 2014.
3. Burkhart C, Schloemer J, Zirwas M. Differentiation of Latex Allergy from Contact Dermatitis. Contact Dermatitis. Vol. 96, December 2015.
4. Pien L. Latex Allergy. Cleveland Clinic Center for Continuing Education. Disease Management. Published 2010. Reviewed 2017. http://www. clevelandclinicmeded.com/medicalpubs/ diseasemanagement/allergy/latex-allergy/
Management of latex allergy
Avoidance of latex is critical to managing latex allergy. Research shows that when measures were taken to minimise latex exposure during dental treatment, 81% of latex allergic patients did not suffer adverse reactions.6 Additionally, management protocols for latex allergy are recommended, including steps to evaluate both staff and patients for their risk of latex allergy, guidelines to create a latex-safe environment, education about latex allergy and emergency preparedness for adverse patient or staff reactions, should they occur.7
Latex glove alternatives
Due to recent advancements in technology, nitrile gloves have significantly improved, making them a popular alternative to latex gloves in dental clinics. These gloves are now more comfortable to wear, offer better grip, and have increased puncture and chemical resistance. As a result, dental clinics may opt for nitrile gloves to provide better protection to their staff and patients.
5. Katelaris C. Latex Allergy Diagnosis and Management. World Allergy Management. September 2016
6. Kean T, McNally M. Latex hypersensitivity: a closer look at considerations for dentistry. Journal of the Canadian Dental Association 2009
7. Hamann C, Rodgers P, Sullivan M. Prevalence of Type I Natural Rubber Latex Allergy Among Dental Hygienists. Journal of Dental Hygiene, Vol.79, No. 2, Spring 2005.
PATRICIA TAYLOR RN, BA Medical Device - Clinical Consultant

henryschein.com.au 67 INFECTION CONTROL
ARE YOU RUNNING A SAFE S CYCLE STERILISER?
5 ANSWERS ABOUT USING INDICATORS AND MONITORING YOUR STATIM
If you’re using a STATIM cassette steriliser, things are a little simpler. Since it’s an S Cycle steriliser using steam flush pressure pulses, you will only need to follow two simple steps: First, check cycle data to confirm that the unit is functioning correctly. Second, make sure the external Class 1 chemical indicators show a pass result. This will validate that your load has been exposed to the sterilisation temperature of the cycle you selected (either 121oC or 134oC, as per the instrument manufacturer’s instructions). It’s generally straightforward, but of course, the questions are in the details. Let’s start with physical monitoring.
If STATIM has sensors and software that precisely control each cycle, why do I need to check the cycle record?
This is a requirement because some offices still use steam sterilisers that have gauges and don’t operate automatically. Of course, if you’re using one of these, the record keeping can be onerous because you’ll have to write down the unit’s temperature and pressure every 10 seconds as it runs a cycle.
Meanwhile, most modern autoclaves now have software using multiple sensors to govern every process. That means every parameter of temperature and pressure – from conditioning, to sterilising to drying – is tracked and recorded. In fact, if anything is even a bit off at any stage, the unit will stop the cycle to declare a faulty condition.

It can simply be that a door seal is leaking but whatever the cause, it’s important to note that if you have a modern steriliser like a STATIM, physical monitoring is done by the machine. In fact, on STATIMs, G4 technology stores the records to the unit, to a USB (if inserted) as well as to the MyColtene cloud service (if your unit is registered).
Every dental office must maintain a sterilisation cycle logbook that states who checked the cycle parameters, unloaded the STATIM, and determined that the sterilised load was suitable for use. The process of checking and recording a steriliser’s cycle parameters to validate sterility before releasing the instruments for use is known as parametric release.
Which class of CI should I use?
You need a Class 1 chemical indicator (CI) on the outer surface of every individual pack of wrapped or pouched instruments or inside every unwrapped load. Class 1 CIs will change colour when they are exposed to the required sterilisation temperature. These can be found integrated on sterilisation pouches or applied to wrapped loads in the form of sterilisation tape. For unwrapped loads, you can use a Class 1 CI strip.
Why would I need any of the other classes of CIs?
With a STATIM, you may also find yourself needing to use Class 4, 5 or 6 CIs, all of which are used to measure not only temperature but also time of exposure at that temperature. Class 5 and 6 CIs also detect the presence of steam. Each has a different level of precision when it comes to measuring temperature and exposure time, with Class 6 being the most accurate. Unlike Class 1 CIs that are placed on the outer area of wrapped packs, Class 4, 5 and 6 CIs must either be placed inside wrapped packs along with the instruments being sterilised or be loose in the chamber for unwrapped loads.
These last three chemical indicator types are important because you may need them in certain circumstances.
68 INFECTION CONTROL
Thousands of dental offices and dozens of jurisdictions means each dental team will have a variation on the process it follows to sterilise instruments in accordance with AS/NZS 4815. What they all have in common is a need to verify the process is working.
For example, you may have a new unit, or a loaner and your technician hasn’t yet completed the full qualification process using biological indicators. If that’s the case, you can still run loads in the steriliser if you use a Class 4 or higher indicator in each pack (or a single test on the rack if running an unwrapped load). When changing to new packaging materials, you’ll also need to verify your steriliser, but here again you can use a Class 4 or higher with every load until a technician completes a qualification process using the new packaging materials.
How often do I need to use the Helix test that came with my STATIM?
In accordance with the 2006 European dental hygiene guideline changes, STATIMs sold in Australia, New-Zealand, Europe and other regions come equipped with Helix PCD tests along with compatible Class 6 chemical indicators. This test checks the ability of your STATIM to penetrate hollow spaces. Though Helix PCD tests are not required for S Cycle sterilisers like STATIM, we recommend you check your local guidelines regarding the use of Helix tests if you sterilise hollow instruments in your STATIM.

STATIM doesn’t use a vacuum to reach the inside of handpieces. Instead, it achieves similar steam penetration using steam flush pressure pulses (SFPP) where the air is actively removed from the cassette through pressurisations and flushes with steam. Using a Helix PCD test periodically can provide peace of mind that hollow instruments, such as handpieces, are being sterilised internally and externally.
What should I know about using biological indicators?
Biological indicators – those tiny vials in which bacterial spores are suspended in a growth medium – are not dangerous. They use a type of heat-resistant spore that is difficult to kill and not harmful to humans, two qualities that make it ideal for testing sterilisers. Used spore tests (including any that show growth) should be discarded with the sharps waste.
Once a year, after your technician has completed the annual maintenance and calibration, they must perform a validation of cycle parameters. For a STATIM, this involves placing three BI vials in a pouch, arranging them one on each end and one in the middle, then running a cycle. This is done two more times so that the technician finishes with 9 BIs. The 9 processed vials are incubated along with one control vial and checked for growth. A correctly calibrated and functioning STATIM will inactivate each of the 9 BIs that were processed so that there is no indication of spore germination.
Sterility assurance is easy with a steriliser that does all the monitoring for you. With the proper packaging, the appropriate chemical indicators, and the right office procedures, it’s easy to remain compliant and efficient. For superior record-keeping security, sign up to MyColtene.com to automatically back up all your STATIM’s cycle data, access product training videos and register your warranty. And to learn more about SciCan ENSURE products for your practice, contact your Henry Schein Sales Representative.
REFERENCES
Australian Dental Association, 2021, Guidelines for Infection Prevention and Control Fourth Edition, accessed 29 May 2023, { https://www.ada. org.au/Dental-Professionals/Publications/Infection-Control/Guidelinesfor-Infection-Control/Guidelines-for-Infection-Control-V4.aspx }
69 1300 65 88 22 INFECTION CONTROL View the products online CLICK HERE
UPTAKE OF THERMAL WASHER DISINFECTORS CONTINUES TO GROW
BY JOSEPH ALLBEURY
The uptake of automated instrument cleaning using thermal washer disinfector units continues to increase as dental practices update their infection control workflows and equipment.
The trend is as much driven by the need to comply with a Standards-driven push to move away from manual instrument cleaning as it is to increase efficiency and make better use of valuable human resources. We spoke to Jim Owen from MOCOM Australia about this growing trend in infection control solutions and why installing a washer disinfector is a good idea.

Q Thank you for your time, Jim. So why are washer disinfector units becoming the new normal in dental sterilisation rooms?
A I think the big driver for installing washer disinfectors in 2023 will continue to be as a way of future proofing your practice.
There are also myriad benefits to using a washer disinfector over manual cleaning. It’s a validated process so you know its cleaning effectively. It allows for better use of staff time. There is significantly less risk of sharps injuries due to reduced handling. Many practices are on an efficiency drive so for a staff member to be able to load the washer disinfector and then move on to other duties while the instruments are automatically cleaned has a multitude of benefits.
Q Is a washer disinfector an alternative to an ultrasonic bath?
A It’s a better alternative. A lot of practices do use ultrasonic baths to assist in instrument cleaning but the fact remains that you still need to manually handle the instruments. You still need to rinse the instruments afterwards and you still need to dry the instruments before sterilisation. And you need to drain the chemicals out of the bath. If you’re short on space, we have a bench top washer disinfector (Mocom H10 Tethys) that completely automates that process and for larger clinics, the under-bench models offer even greater productivity. You load the dirty instruments and the unit does the rest.
Q Can you clean handpieces in washer disinfectors?
A The short answer is yes you can. In our underbench units, there’s an accessory for this. The handpieces fit into a silicon holder that allows water and chemicals to be “pushed” through the handpiece mechanism to remove any bioburden. It’s one size fits all handpieces.
Our bench top unit, the Tethys H10, is also now able to process handpieces using an accessory. Up until recently, you couldn’t process handpieces in the H10 because it uses ultrasonics during the washing phase. And as we know, you can’t put rotary instruments in an ultrasonic bath. With the new firmware update, however, it enables the ultrasonic function to be turned off and with the addition of the handpiece accessory, you can now process up to six handpieces at a time.
In both cases, once removed, the handpieces should be lubricated prior to sterilisation.
It is of course important for practices to clean their handpieces internally as well as lubricating them and we often see this first step overlooked.
Q What about instrument cassettes?
A Instrument cassettes are actually perfect for use in our washer disinfectors and mitigate the risks of sharps injury even further. Instruments can remain in the cassettes during cleaning and drying in the washer disinfector and once completed, wrapped or bagged for sterilisation. If practices are utilising instrument cassettes, like Hu-Friedy’s IMS, MOCOM has two accessory racks that allow up to 12 of the very large cassettes to be processed at a time in our full size under-bench washer disinfector.
70 INFECTION CONTROL
Using cassettes have also been shown to save time and increase efficiency. Instruments are loaded into the cassette chairside after use and closed up for transport to the sterilization area. The entire cassette is placed in the washer disinfector unopened. The instruments inside are cleaned and disinfected and dried at the end of the cycle. The still unopened cassette is then bagged or wrapped and placed into an autoclave for steam sterilization. The instruments in the cassette are then ready for patient use. Only when the cassette is chairside again is it opened. So the instruments inside are never misplaced, dropped or damaged and risks of a sharps injury is negligible. So whereas using a washer disinfector alone increases your efficiency considerably, when used in conjunction with a cassette system, the gains are even greater.
Q Do the instrument cassettes fit in the sterilisers?
A We have multiple chamber racks available for the sterilisers as well. As cassette systems have become larger and more popular, having sterilisers that can accommodate these is obviously important. And sometimes you find with different brands of sterilisers that the standard chamber rack doesn’t accommodate cassettes very well. At MOCOM we have a couple of options that basically utilise the width of the round chamber better so you can get those bigger cassettes in. We also have what we call a modular tray rack where the shelves can be adjusted to the different heights of the cassettes. And we also have three chamber sizes available with the 28 litre model being fairly unique for bench top dental sterilisers. Its larger diameter obviously allows you to fit more in but also accommodates larger instrument cassettes with ease.
Q How long does the washer disinfector take to process a load?
A A full cycle with our largest D60 under-bench model utilising three-phase power - which includes pre-rinse, wash, thermal disinfecting and dryingtakes around 90 minutes. There are also shorter cycles. The D60 has 16 cycles to select from and some of the shorter cycles don’t include the prerinse. We tend to recommend using the full cycle because the Standard says that if you’re using a washer disinfector, you should be using a cycle with a pre-rinse.
Q When you say a validated process, what does that mean?
A It means that you’re getting the same cleaning result every time because a technician has validated that the process is successful. It means the unit has been tested to ensure it is cleaning thoroughly, time after time.
Soil tests and process challenge devices should also be used at regular intervals per guidelines.
Q How are the chemicals dispensed?
A Part of the validated process is the automated dispensing of chemicals to ensure the correct amounts are used. There is a chemical cleaner and an acid neutralizer. There are two 5-litre bottles that sit side-by-side next to the machine, normally inside a cupboard.
Q Do washer disinfectors record cycle data?
A The units do record cycle data - disinfection level and how long it’s disinfected for and at what temperature. The unit can send cycle data to a computer and then this can be read with the software provided. There’s also an option for an external printer to print cycle data. Like sterilisers, you’re meant to record this information with thermal disinfectors as well.
Q MOCOM are based in Perth- what’s the support network like?
A Service and support is critical when selling sterilisers and washer disinfectors so we have a large national service network in place. We have multiple service technicians in each state so there is a choice of service providers. Technicians attend regular training sessions at our HQ and technical office in Perth to ensure they are up-to-date with product updates. Spare parts are also available for overnight shipping nationwide, so any downtime is minimised.
Q Any final words of advice?
A There’s been a lot of talk about the use of washers disinfectors becoming mandatory. It’s already recommended in the Standard that you should always be using a washer disinfector where possible, unless the instruments cannot withstand the rigors of the cleaning process.
So installing a washer disinfector the next time you update your sterilisation area is future proofing your practice against any changes that may occur. It will also deliver a range of other benefits to your practice that will pay for itself time and again.
Thank you for your time.
© 2023. Originally published in Australasian Dental Practice Vol. 34 No 1. January/February 2023. Reprinted with permission.
henryschein.com.au 71 INFECTION CONTROL
View Product on our website CLICK HERE
BENEFITS OF TORQTECH HANDDPIECES
Easy access
The compact head improves visibility, while the comfort grip makes it easy to position. The angle is designed to help avoid contact with opposing teeth, allowing you to focus on treatment, rather than access.
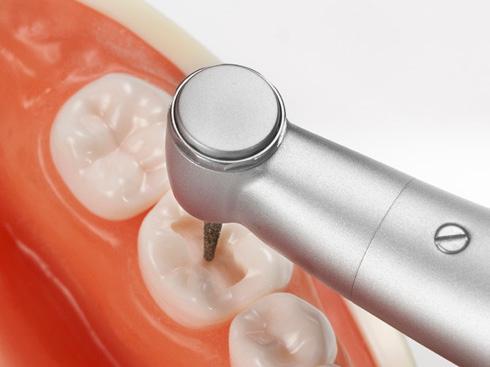

Unique, multi-point chuck
MORITA's unique chuck design grips the bur firmly and doesn't lose its strength even after years of use. Experience the stability TORQTECH provides when performing work that requires great precision.
Highly durable involute gears
A unique combination of internal and involute gears provide superior durability by reducing wear and resistance.
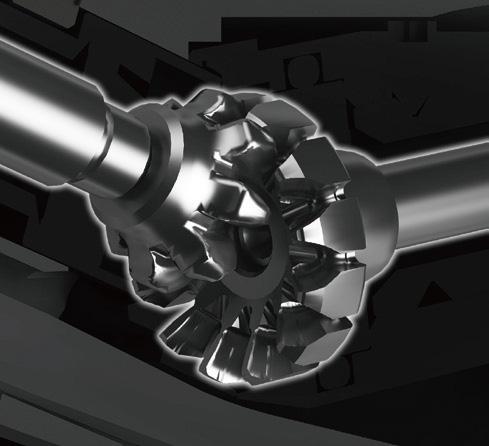

Improved access
TOROTECH Ultra mini Contraangle is ideal for treating patients with limited Jaw mobility or children with small oral cavities. Use any standard friction bur up to 21mm, in a smaller profile.
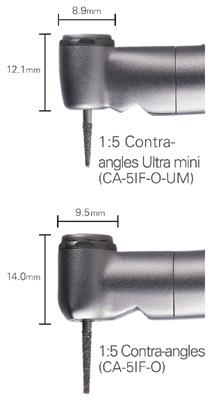
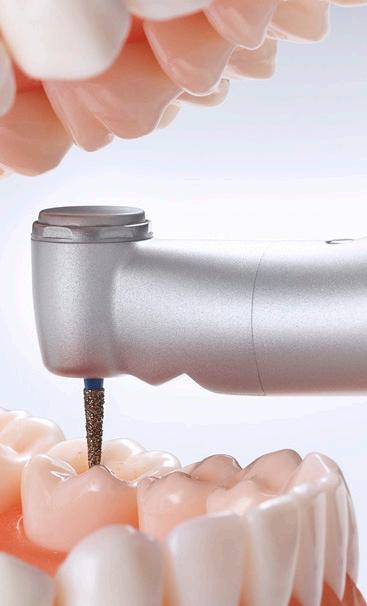
See what you’ve been missing
The ultra mini head allows you to reach narrow treatment areas with ease and provides excellent visibility for fine, precise work.
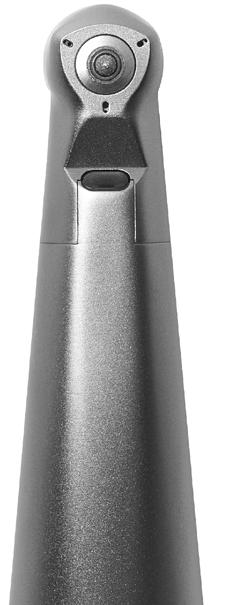
Wide, one-point spray
Newly designed spray mechanism provides a wide spray ensuring adequate cooling in even the most challenging treatment areas.
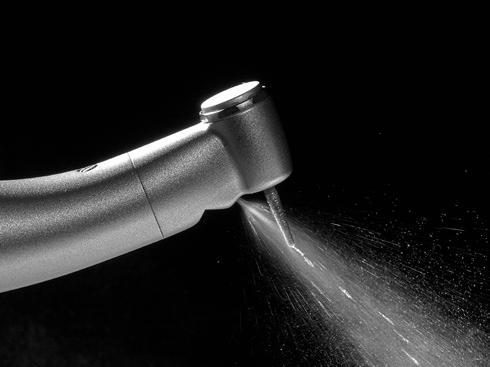
72
1:5 Contra-angles - Robust and durable with easy access
HANDPIECES & INSTRUMENTS
Morita 1:5 Contra-angle Ultra Mini - For maximum access and visibility
Reduced
The ultra mini head provides excellent access and its rounded shape is more comfortable for patients. In addition, the head is sealed to prevent prophy paste from getting inside the attachment which helps improve its durability and extend its working life.

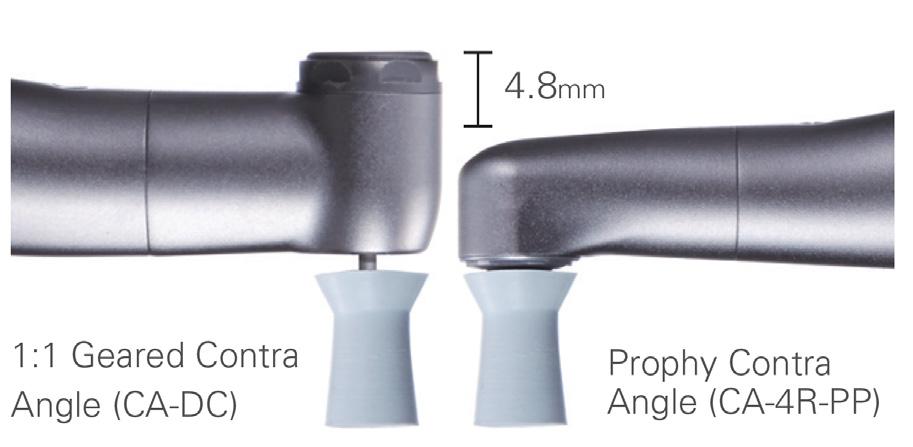
• Superb access
• Sealed head helps prevent contamination and extends working life
• Thrust bearings for improved durability
lnterproximal Stripping Made Easy
• Finely controlled with up to 10,500 oscillations per minute
• Quickly remove enamel with high power and torque
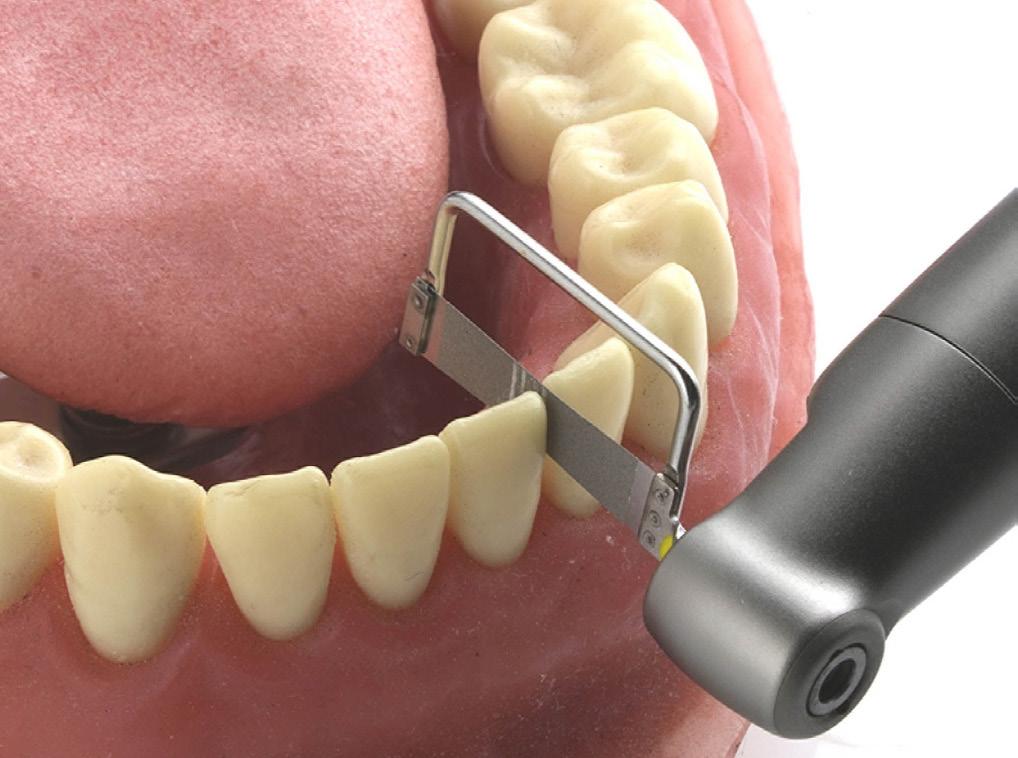
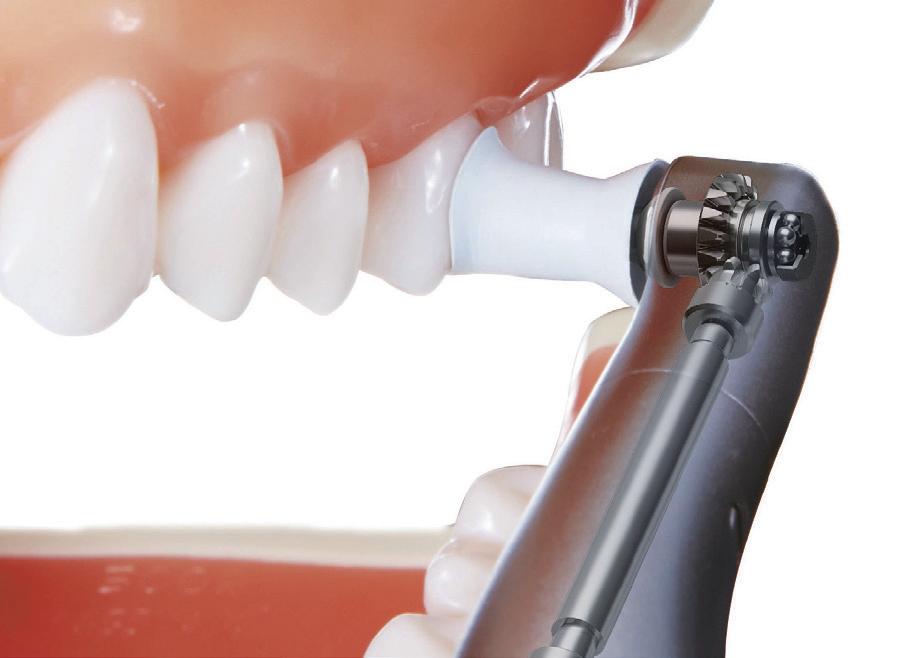
• May be used for contouring and polishing enamel


• Superior control for improved patient safety

73 1300 65 88 22
Speed, Improved Performance - Enables Cleaning at a Whole New Level
HANDPIECES & INSTRUMENTS


74 Optic ※ 2 Non-Optic Non-Optic Optic ※ 2 Non-Optic Name TORQTECH Model CA-10RC-O CA-10RC CA-4R-PP CA-4R-O-PF CA-10RC-ENDO ※4 Gear ratio 10:1 (slow down) 4:1 (slow down) 4:1 (slow down) (up and down movements) 10:1 (slow down) Maximum Rotation Speed ( rpm ) 40,000 10,000 20,000 20,000 Head Diameter ( ㎜ ) Φ 8.0 Φ 8.0 Φ 7.8 Φ 9.0 Head Height ( ㎜ ) 13.0 8.5 9.1 13.5 Total Length ( ㎜ ) 94 94 94 94 Weight ( g ) 69 67 67 55 Glass Rod Light Guide ○ - - ○Surface Treatment Ion plating Spray Holes 1 - 1Spray Filter ○ - - ○Bur Insertion/Removal Method Push button Screw Frictiongrip Push button Usable Burs ※ 3 Shaft Type 1 ( CA ) Screw (No.1-72UNF) EVA Tips※1 Lamineer Tips※1 Shaft Type 1 ( CA ) Usable Motor Motor conforming to JIS T5912 / ISO14457 7 Optic ※ 2 Non-Optic Optic ※ 2 Optic ※ 2 Non-Optic Non-Optic Name TORQTECH Model CA-5IF-O CA-5IF CA-5IF-O-UM CA-DC-O CA-DC ST-DH Gear ratio 1:5 (speed-up) 1:5 (speed-up) 1:1 1:1 Maximum Rotation Speed ( rpm ) 40,000 40,000 40,000 40,000 Head Diameter ( ㎜ ) Φ 9.5 Φ 8.9 Φ 9.5Head Height ( ㎜ ) 14.0 12.1 13.3Total Length ( ㎜ ) 94 93 94 83 Weight ( g ) 68 66 67 73 Glass Rod Light Guide ○ - ○ ○ -Surface Treatment Ion plating Spray Holes 3 1 (wide one-point spray) 1 1 Spray Filter ○ - ○ ○ -Bur Insertion/Removal Method Push button Mechanical locking Usable Burs ※ 3 Shaft Type 3 ( FG ) Shaft Type 3 ( FG ) Standard shortshank Shaft Type 1 ( CA ) Shaft Type 2 ( HP ) Usable Motor Motor conforming to JIS T5912 / ISO14457
TORQTECH SPECIFICATIONS
AUTOMATED HANDPIECE LUBRICATION
FOR OPTIMAL PERFORMANCE OF HANDPIECES
Dental handpieces are a costly investment and every dental practice could benefit from having a simplified protocol to ensure the proper care and maintenance of their handpiece inventory.
Poorly maintained dental handpieces can compromise the quality of performance, lead to potential health and safety risks and can cause costly and time-consuming repairs.
It is important to follow the maintenance recommendations of the handpiece manufacturer but almost universally they recommend handpieces are lubricated, purged and chuck maintenance performed on both highspeed and speed increasing red band contra angle handpieces.
Automating handpiece maintenance provides precise and consistent lubrication and purging of handpieces which ensures optimal performance and longevity, increases efficiency as multiple handpieces can be lubricated in one cycle and can significantly reduce the amount of lubricant required.
Morita’s Lubrina 2, with programmable maintenance modes, can effectively and efficiently perform purging and lubrication of 4 handpieces (highspeed or contra angle), automatically.
The new Clean Air-Blow function with double-conduit design, ensures residual water is removed from the handpiece prior to oiling, maximising lubrication results. The Clean Air-Blow also effectively removes any surplus oil prior to bagging and autoclaving your handpiece.
The Lubrina 2 is the cornerstone of a standardised, efficient and effective handpiece maintenance protocol for dental practices, minimising maintenance costs and maximising handpiece longevity.
• NEW Clean Air-Blow System
• Dedicated built-in, one touch, Chuck Maintenance port
• NEW Oil mist suction removal
• 20 second high speed handpiece maintenance
• Programmable maintenance modes for different handpiece types
• Maintains up to 4 handpieces in one cycle
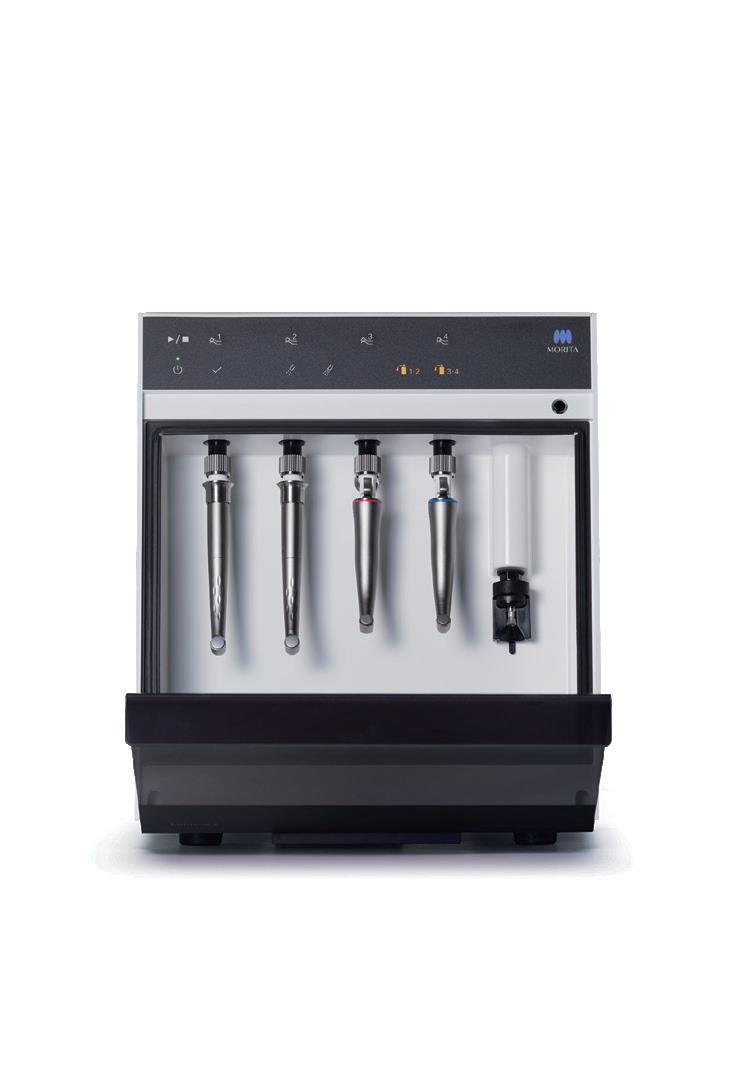
• Multiple handpiece coupling options available
• Compatible for use with other manufacturer’s lubricant
• Quiet operation
• Simple unit maintenance
henryschein.com.au 75
Watch
2 Video CLICK HERE HANDPIECES & INSTRUMENTS
the Lubrina
1985 • Gerald M. Kramer and Myron Nevins • Kramer-Nevins Periosteal
The Kramer-Nevins periodontal surgical kit was created in 1967 and is still popular today. In the 1980’s, the surgical knives included in the kit were manufactured with a carbon surgical steel that had been introduced by Hu-Friedy.
Hu-Friedy also took the lead on the manufacturing and sales of Kramer-Nevins instruments.

The Periosteal Retractor has many advantages during surgical procedures due to its size and design. It allows for the delicate separation of thin gingival biotype over bone exostosis without perforations. It can be applied immediately after initial incisions when a full thickness flap is planned. The retractor is also effective in separating the Schneiderian membrane from the floor of the maxillary sinus during a sinus lift procedure. This instrument can also be used by the dental assistant to consolidate grafting material to place into a bone defect. The grafting material can then be mixed with patient blood, sterile water or growth factors when available.
A second elevator is used to reflect the surgical flap and gain visibility. This then allows for the carrying of grafting material to the defect or the sinus with the periosteal retractor.
Active part-code: HF-PKN152X
76
HISTORY OF KEY OPINION A TRADITION OF COLLABORATION
Key Opinion Leaders have a long history of supporting the development of our instrument product portfolio. More than
HANDPIECES & INSTRUMENTS
OPINION LEADERS
COLLABORATION
than 60% of our products have been developed in partnership with dental professionals, institutions, or universities.

1986 • University of North Carolina • UNC Probe

Periodontal probes have undergone extensive changes since their introduction by G.V. Black. Since then, these instruments have evolved from a unidimensional, first-generation manual probe into more sophisticated computerized devices. In an effort to increase accuracy and reproducibility of readings and to improve efficiency, the Michigan “O” probe was created by Sigurd P. Ramfjord, followed by other types of calibrated periodontal probes like Williams, Marquis, WHO, Goldman-Fox, Narber’s Furcation, Novatech and more. Periodontal probes are used to assess the health of the periodontium for screening purposes or to evaluate periodontal changes throughout a treatment process. The WHO (World Health Organization) probe that was designed in 1978, may be the correct instrument to use for screening patients in a general practice, but would be less useful when evaluating changes in the periodontal status during active periodontal therapy. Each probe has features that make it unique, and in some cases, specific and limited in use. For probing depth measurements, recessions and clinical attachment levels using a probe with precise millimeter markings increases accuracy and support calibration. This design originates from the University of North Carolina and was initially requested for research purposes. Today, HuFriedy®’s PCP-UNC15 is the most sold instrument in Europe and the Middle East.
Active part-code: HF-PCPUNC156

77 1300 65 88 22
View HuFriedy range here CLICK HERE HANDPIECES & INSTRUMENTS
KAVO MASTER SERIES
HANDPIECES AND CONTRA-ANGLES BENEFITS AT A GLANCE
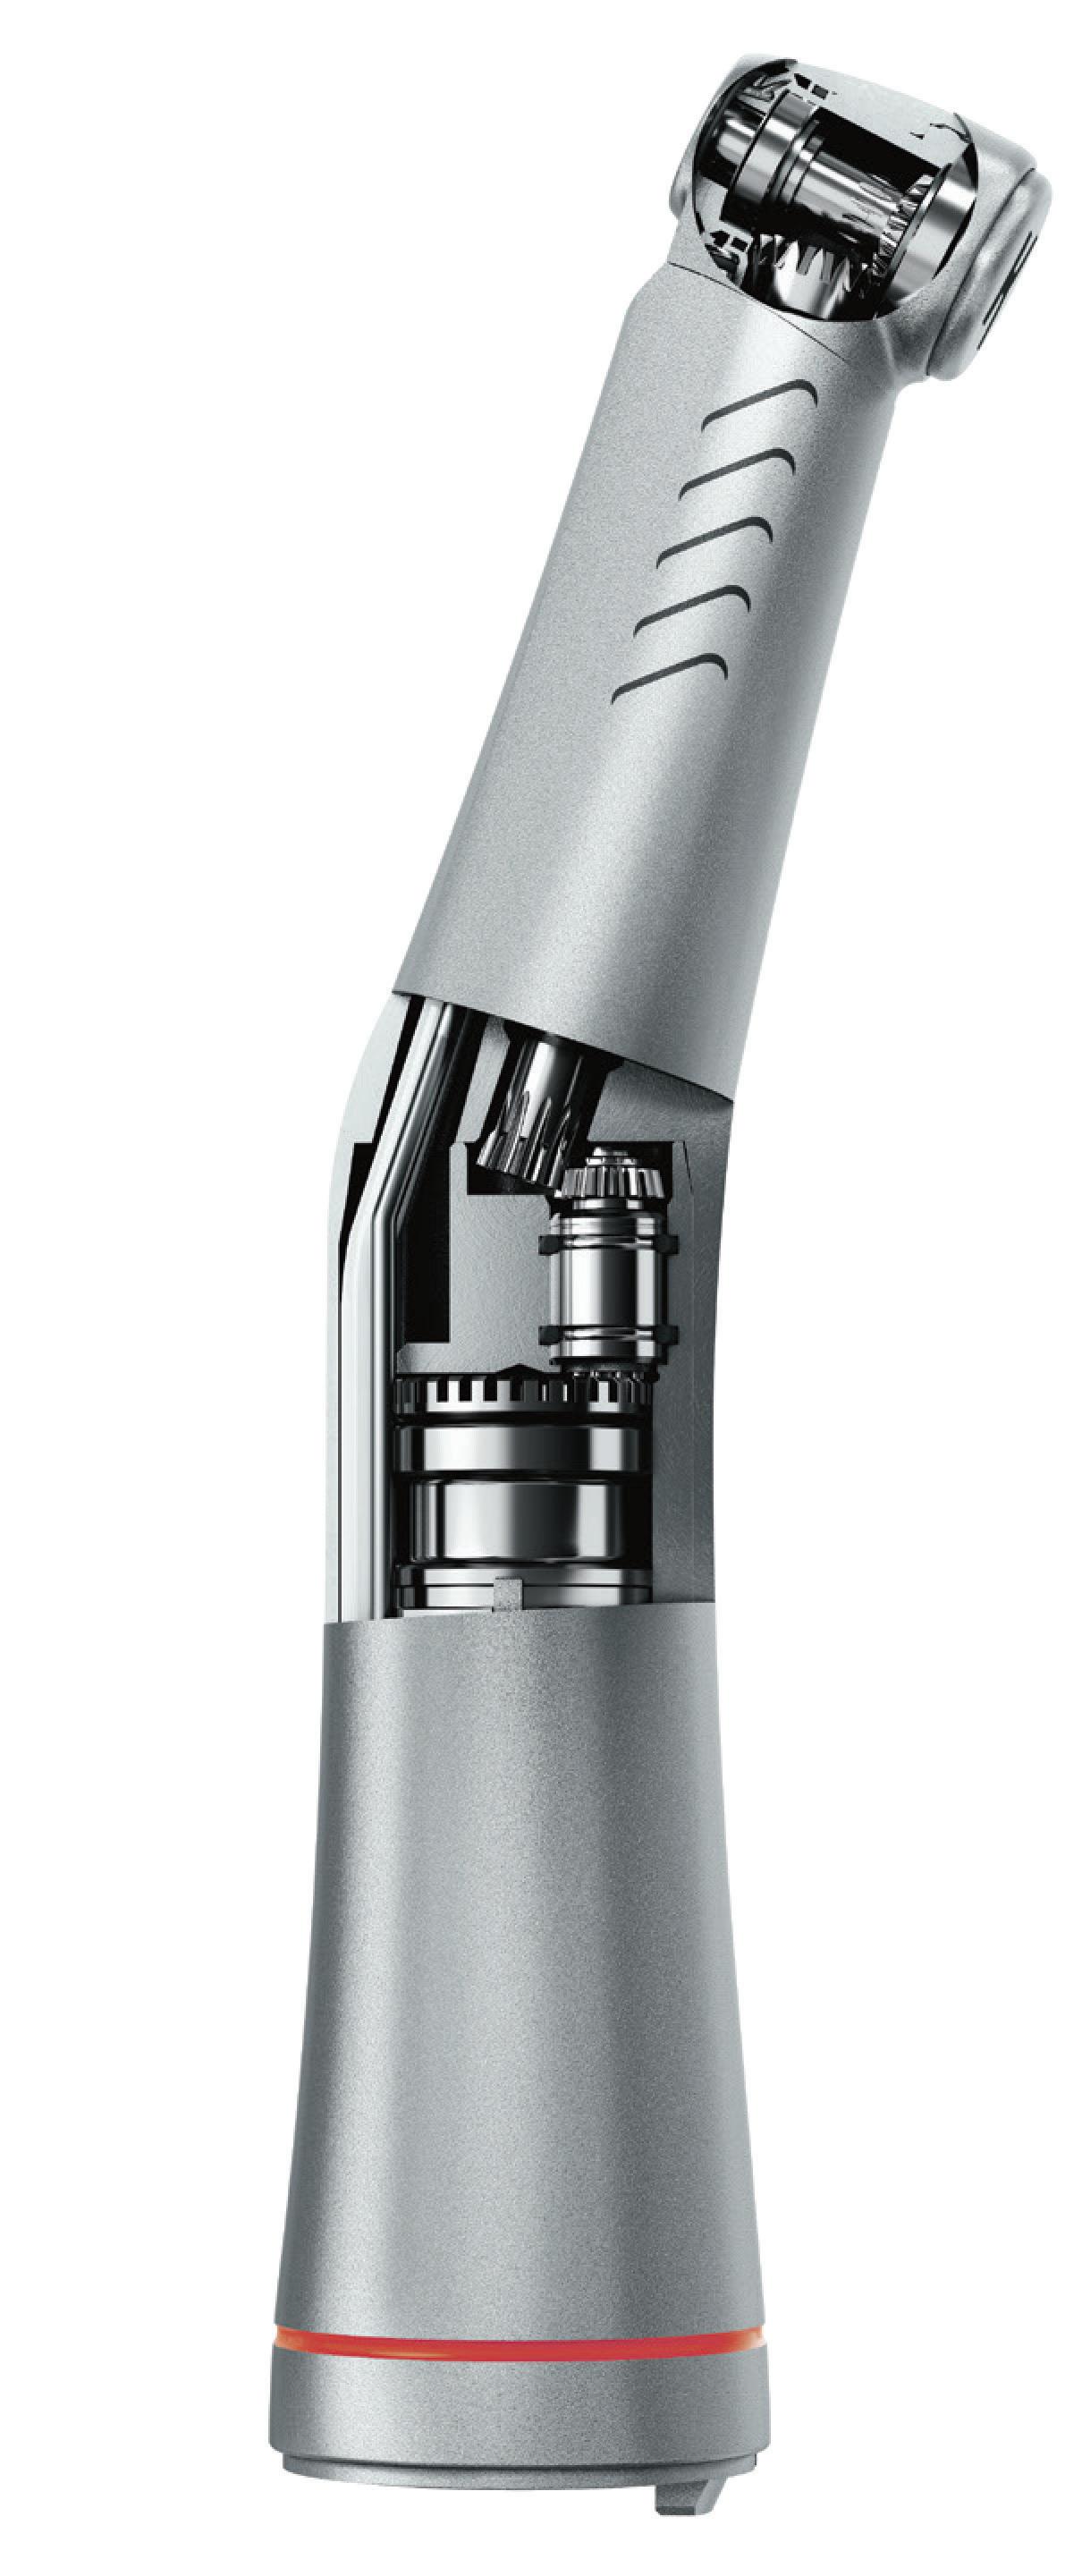
Optimum access thanks to the ergonomic 100°/19° head/knee angle combination

Triple-gear technology for ultra-smooth operation with minimal vibration
High-tech FG chuck with carbide guide bush for optimum longevity EXPERTgrip surface for fast cleaning and excellent grip
Flexibility thanks to exchangeable heads for complete versatility and optimum cost effectiveness


Ceramic ball bearings for excellent quiet and low-vibration operation


Small head size for easy, efficient access to the preparation area
Plasmatec coating for a perfect grip and excellent hygiene
3-port spray with ultra-fine spray wetting for optimum cooling

Glass rod light conductor with up to 25,000 lux for reliable detection of the preparation margins
Low volume (only 55 dB(A)) to eliminate unpleasant noises for patients and treatment personnel
Internally channelled, separate coolant for optimum spray results
Replaceable spray microfilter for effective and trouble-free spray cooling

KaVo INTRAmatic coupling system can be used with any treatment unit

KaVo push-button chuck system with a retention power of up to 30 N for secure retention of the bur
Thermo-disinfectable and sterilisable up to 135 °C

78
BEST TREATMENT QUALITY - MAXIMUM TREATMENT COMFORT - HIGHEST PATIENT SATISFACTION HANDPIECES & INSTRUMENTS
MASTERmatic LUX speed-increasing contra-angle M25 L (1:5)
Our best high-speed contra-angle thanks to a reduced head size (H: 13.5 mm; diameter 10.3 mm), ergonomic head/ knee angle combination, carbide guide bush, triple-gear technology and replaceable spray filter, 3-port spray, push-button chuck, ceramic ball bearings, low volume (55 dB(A)) Mat. no. 1.009.3630
MASTERmatic LUX speed-increasing contra-angle M05 L (1:5) Mini head (H: 12.6 mm, diameter 9 mm) for shortshaft burs, triple-gear technology and replaceable spray filter, 1-port spray, with push-button chuck, ceramic ball bearings, head 43% smaller than for GENTLEpower 25 LP, perfect for hard to reach areas and ideal for treating children and the elderly, low volume (55 dB(A)) Mat. no. 1.009.3640
MASTERmatic LUX shank M20 L (1:1)
For cavity and crown preparation, finishing, caries excavation and endodontic treatments using KaVo treatment units, glass rod light conductor with up to 25,000 lux, replaceable spray filter, maximum treatment flexibility with 14 exchangeable heads Mat. no. 1.009.3620
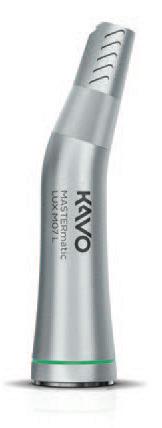
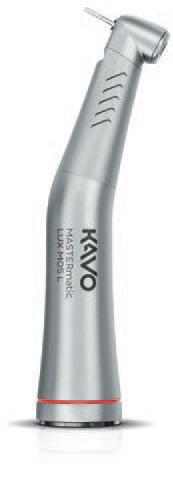


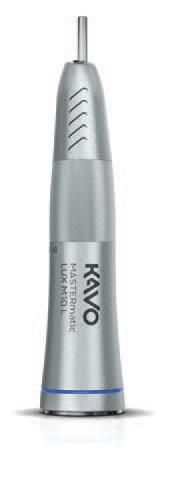
MASTERmatic LUX reducing shank M29 L (7.4:1)
For endodontic applications, glass rod light conductor with up to 25,000 lux, replaceable spray filter, maximum treatment flexibility with 14 exchangeable heads Mat. no. 1.009.3580
MASTERmatic LUX reducing shank M07 L (2.7:1)
For caries excavation and prophylaxis applications, glass rod light conductor with up to 25,000 lux, replaceable spray filter, maximum treatment flexibility with 14 exchangeable heads Mat. no. 1.009.3610
MASTERmatic LUX handpiece M10 L (1:1)
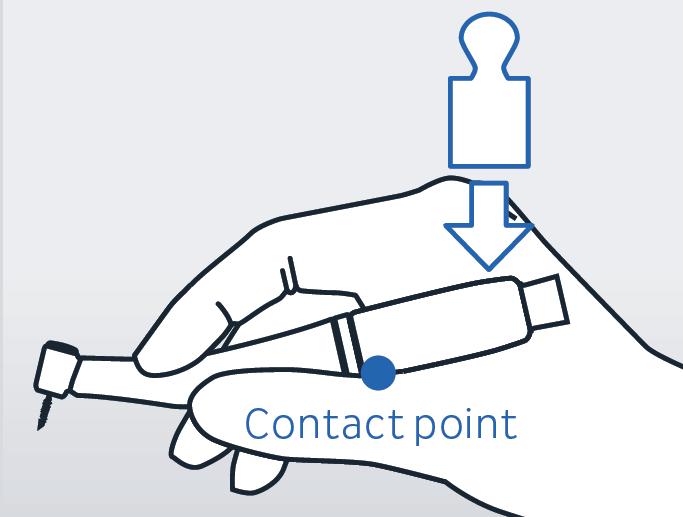
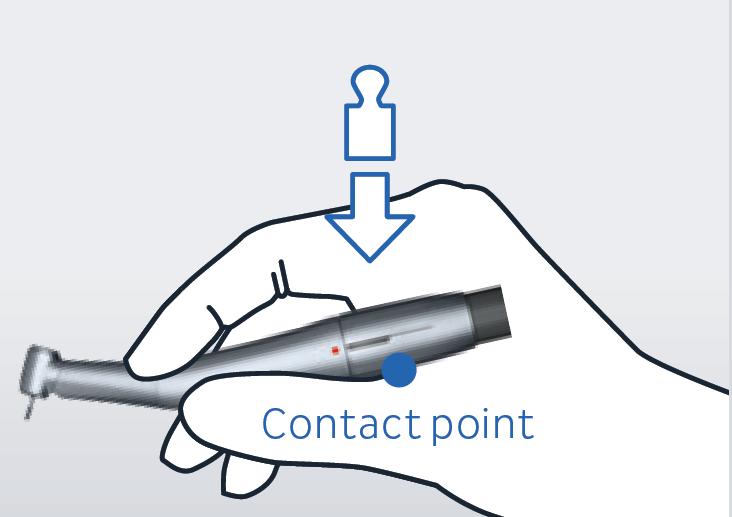
For straightforward extraoral work, suitable for handpiece and contra-angle burs, no replaceable spray filter Mat. no. 1.009.3570
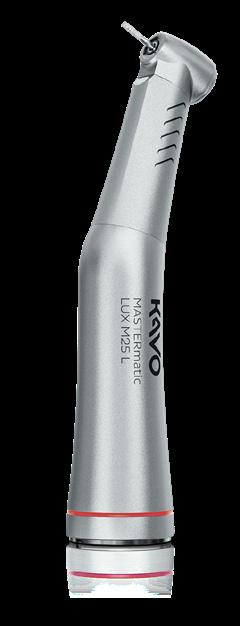
henryschein.com.au 79
KaVo 25 LP - 1.48 cm3 KaVo M25 L - 0.925 cm3 –20% –43% KaVo M05 L - 0.66 cm3
COMPARISON OF HEAD VOLUMES Standard instrument HANDPIECES & INSTRUMENTS
KaVo COMFORTdrive 200 XD
Comparison with KaVo GENTLEpower 25 LP, the world’s favourite high-speed instrument
HANDPIECES & INSTRUMENTS
KOMET DIAO
KOMET CELEBRATES 100 YEARS WITH DIAMONDS & PEARLS
A new generation of diamonds for preparations of unmatched quality. Concentrated power for exceptional durability - Optimum Control - Rose gold colour for easy recognition in the practice
For 100 years, Komet has been known as a provider of rotary instruments of the highest quality as well as an innovator focused on bringing more safety and efficiency into dentists’ practices.


Now, Komet introduces a new generation of instruments. DIAO is the innovation for demanding clinicians who want to experience a more efficient and reliable daily routine in their practice. DIAO features a totally new, innovative coating combining diamonds with ceramic pearls.
ern, radiant rose gold.
10010825v001_BRO_EN_DIAO.indd 4 22.03.21 07:21


with an unmistakable color: a classy, mod-
workflow in everyday use, DIAO is provided
For optimum recognition facilitating the
ble to guide for perfect control.
That’s not all: DIAO is easy and comforta-


staying sharp over an extremely long time.
its coating. You can rely on the instrument
This combination, developed and patented by Komet, is a world premiere that provides precise cutting performance for optimum control.
significantly prolonging the sharpness of


As an innovation for crown- and bridge-preparation, Komet’s DIAO has impressed users worldwide with its outstanding and long-lasting sharpness and its users also confirm DIAO’s excellent control during preparation. The application which requires only light pressure of the instrument, makes treatments not only more time-efficient but also less tiring.
powerful innovation amazing durability.
ing the instrument amazing durability and
be applied with the utmost precision, giv-
tion creates concentrated power that can
"Diao provides smooth and precise performance while also giving the doctor an amazing amount of control. The idea behind Diao is combining the diamond cutting particles with ceramic pearls that help filter away enamel and dentine dust during preparation. The result is a bur that cuts like nothing on the market"

grains and ceramic pearls. This combina-

diamond coating that combines diamond
counts among the core practice. A routine that Concentration, time and there a way of making better at the same its innovative combines diamond pearls. This combinaconcentrated power that can utmost precision, givamazing durability and
workflow at the practice.
storage. This contributes to a smooth
when placing the instruments back into
stand out wherever they are, during the
instrument management. The instruments
gold color, DIAO greatly facilitates the


at the practice. With its distinctive rose
DIAO supports the entire team every day
time? The answer: DIAO, with its innovative
work thanks to the rose gold color
treatment.
these jobs easier and better at the same
▯ Easy recognition during everyday
physical effort. Isn’t there a way of making
demands a lot: Concentration, time and
jobs at the dental practice. A routine that
John Fluke DDS in Lee's Summit MO
Crown preparation counts among the core
treatment, during reprocessing process or

▯ Concentrated power for exceptional durability

ease, thus increasing the safety during the
the DIAO can be guided smoothly and with
Thanks to its innovative diamond coating,
The rose-gold colour makes the instruments easily recognizable when preparing for the next procedure and allows for easier reprocessing and reorders. In short: The practice processes become easier.

DIAO is an innovation from Komet, focused on making the dental procedures more efficient for the most demanding of dentists, and enabling them to provide the highest standard of care to their patients.

▯ Optimum control
time and time again.
The combination of diamond grains and ceramic pearls leads to an unprecedented concentration of power that ensures an incredibly long service life. The optimal density of the coating guarantees that the instrument stays sharp for an exceptionally long time – a sharpness you can rely on
"Diao was able to not only efficiently cut and grind through all materials but left a surprisingly smooth and polished surface in its aftermath. There must really be something to this 'diamonds and pearls' thing after all"
long time –a sharpness you can rely on

instrument stays sharp for an exceptionally
density of the coating guarantees that the


incredibly long service life. The optimal
concentration of power that ensures an
Timothy Bizga

ceramic pearls leads to an unprecedented
The combination of diamond grains and
Average service life/(percent)
for exceptional durability
▯ Concentrated power
DDS, FAGD in Cleveland, OH
with amazing durability. standard diamond S6881 S-diamond KP6881 DIAO
80
0 20 40 60 80 100 120
standard diamond S6881 S-diamond KP6881 DIAO Average service life/(percent) 0 20 40 60 80 100 120
A powerful innovation Comparison of durability
27% greater initial sharpness compared to traditional instruments*


*Source: Test lab Komet Dental, mechanical cutting test 2020
*Source: Test lab Komet Dental, mechanical cutting test 2020


Efficiency, created from diamonds and pearls
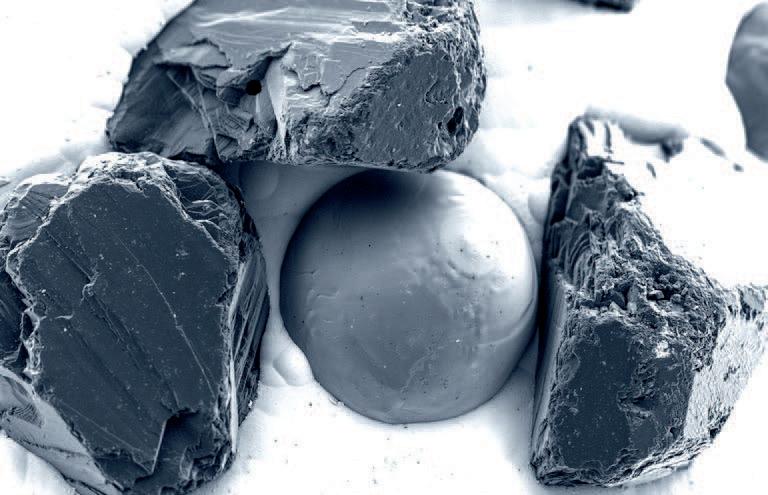

Efficiency, created from diamonds and pearls.
The innovative diamond coating of the DIAO burs is interspersed with ceramic pearls to increase the distance between the diamond grains. Like this, any pressure exerted is concentrated on the tips of the diamond grains which greatly increases the efficiency of the instrument.
The innovative diamond coating of the DIAO burs is interspersed with ceramic pearls to increase the distance between the diamond grains. Like this, any pressure exerted is concentrated on the tips of the diamond grains which greatly increases the efficiency of the instrument.
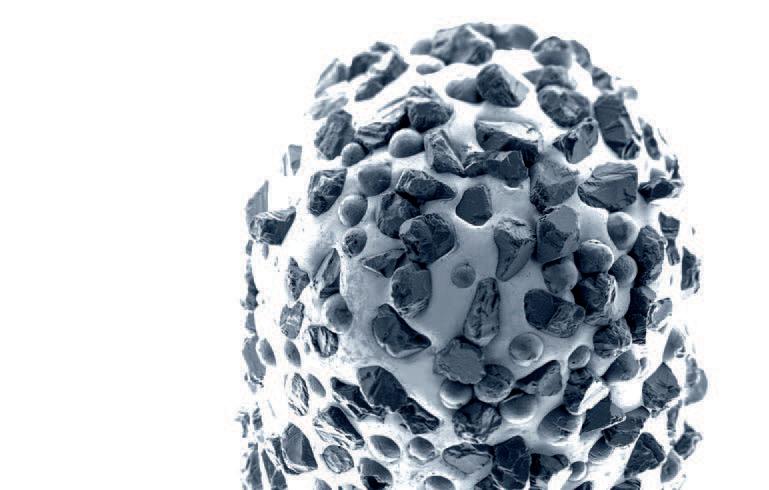
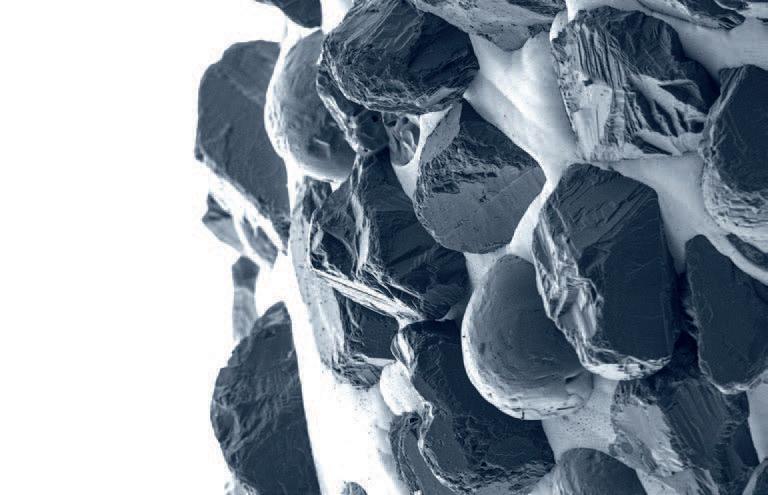


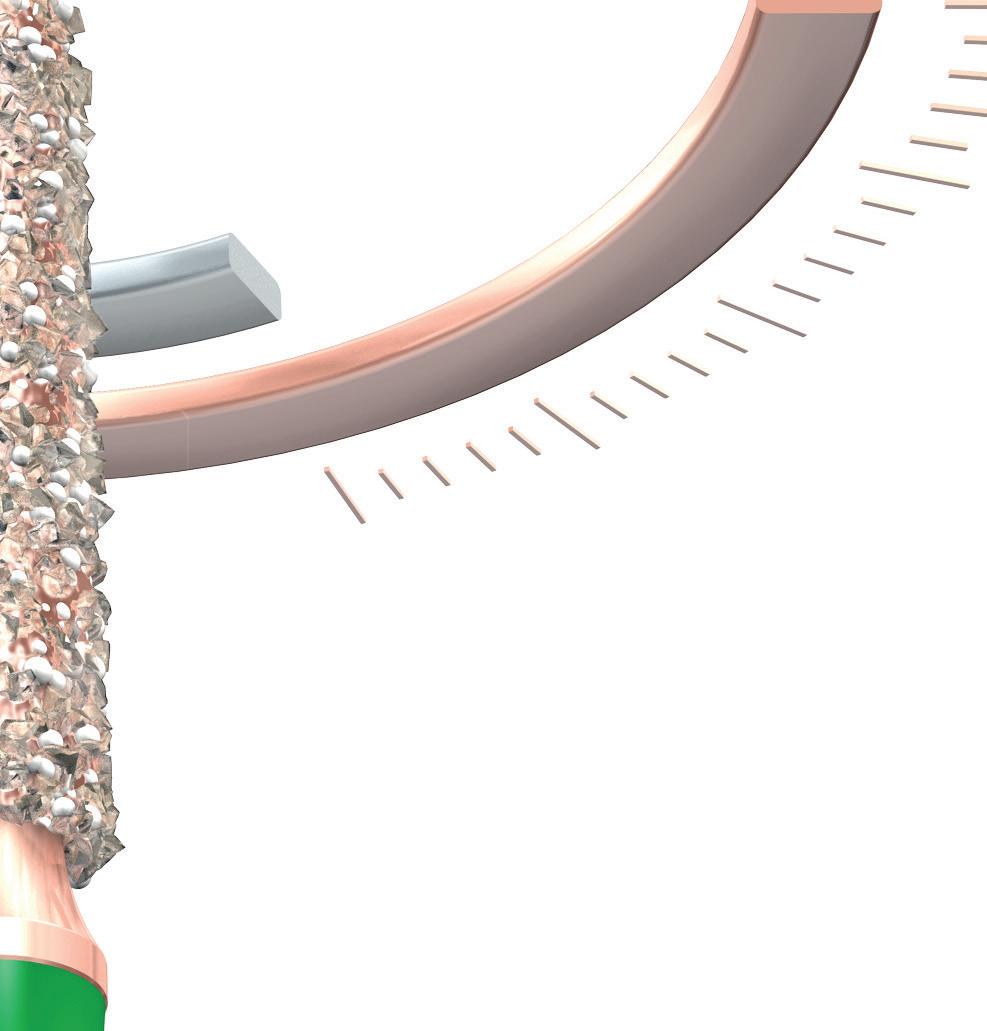

81 1300 65 88 22
DIAO | 5
On average, 64 % longer service life compared to traditional instruments*
View Komet DIAO Catalogue View Komet DIAO online CLICK HERE DIAO. Efficiency, created from diamonds and pearls. HANDPIECES & INSTRUMENTS
THE WONDERFUL WORLD OF PIEZOELECTRIC SURGERY
Piezo-powered surgery is a technique of cutting bone for osteotomy and osteoplasty in implantology, periodontology, endodontics and oral surgery applications.
Piezosurgery, or the use of piezoelectric devices, is a new and rapidly flourishing development in oral and maxillofacial surgery. The main advantages of this technique are precise and selective cuttings, the avoidance of thermal damage, and the preservation of soft-tissue structures.
Piezoelectric surgery is superior to other methods relying on mechanical instruments as it provides for precise, minimally-invasive and highly impeccable handling of delicate or compromised hard- and softtissue conditions, with less risk for the patient and greater ease for the surgeon. Through piezoelectric surgery, implant-site preparation, bone grafting, sinus-floor elevation, edentulous ridge splitting, or the lateralisation of the inferior alveolar nerve becomes technically very feasible.
What are the main features of piezoelectric surgery?
• Micrometric cutting maximum surgical precision and intra-operative sensibility
• Selective cutting is specific for mineralised tissue i.e. bone, and inactive when in contact with soft tissue
• Cavitation effect this lowers the temperature of the cut and increases the intra-operative visibility (bloodless field)
NSK VarioSurg3: cutting-edge technology
VarioSurg3, the latest advance in NSK’s VarioSurg range, maintains the lightweight and slim handpiece design of its predecessor and the same excellent balance and grip, but has 50% more power than the previous model – making it immeasurably more precise and shortens treatment time significantly. This gives the practitioner extraordinary accessibility and visibility during procedures.
Its ergonomic shape and fine balance are designed to minimise hand and finger fatigue, even during extensive usage. The advanced feedback and auto-tuning functions, combined with the finest engineered tips on the market, a triumph of NSK’s meticulous manufacturing using three-dimensional toothing (working) of the sharp edge, make this a refined and elegant tool of surgical excellence.
VarioSurg3 also features the world’s first dynamic link feature, which enables you to operate both VarioSurg3 and SurgicPro via a single foot control. Intuitive controls and a large and clear backlit LCD screen makes VarioSurg3 really easy to operate and takes the strain out of delicate procedures.
Variosurg3 and Handpiece: The NSK VarioSurg3 can be used for the following applications:

• Sinus lift
• Bone graft harvesting
• Ridge expansion
• Mandibular nerve transposition
• Peri-implant osteoplasty
• Implant site preparation
• Cystectomy
• Tooth extraction
• Endodontic surgery
82
SURGICAL
What are the main advantages of using the NSK VarioSurg3?
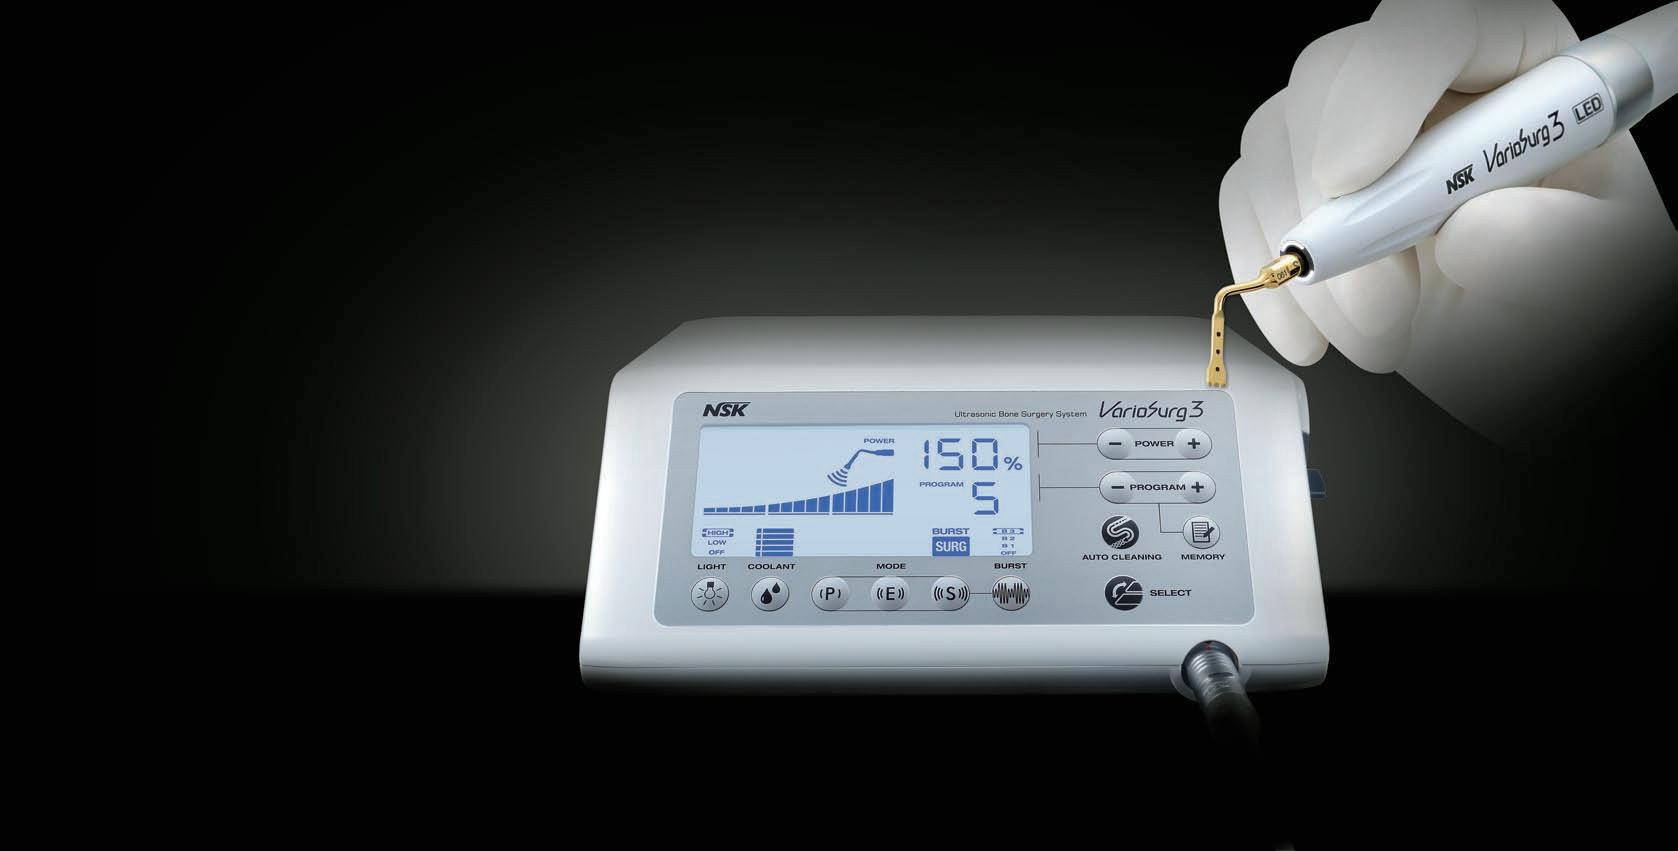
• Precision – zero rotational motions completely change the game in both accuracy and surgical impact
• Reduced bleeding through the superbly engineered irrigation and cavitation design


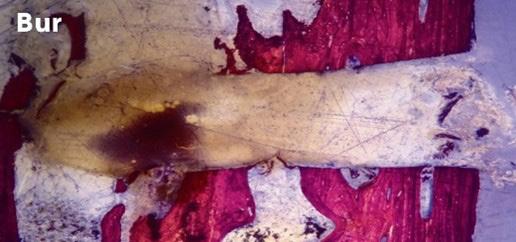
• Completely safe on soft tissue
• Fast operation – reducing patient stress and surgical fatigue
• Up to three times more powerful than a dental
In the accompanying images you will see a comparison of bone cutting using a bur, saw and piezo. This series illustrates beautifully why piezosurgery is at the leading edge of surgical innovation, and the precision and safety of using piezo.
henryschein.com.au 83
View NSK Range CLICK HERE VS3_p00-12_D764E_1308.idd 1-2 13.8.28 11:31:12 AM SURGICAL
R.T.R.+ BIPHASIC FORMULATIONS

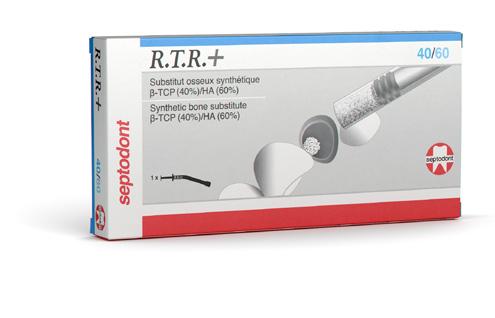
ß-TRICALCIUM PHOSPHATE (ß-TCP) + HYDROXYAPATITE (HA)
CASE STUDY 2 - Sinus filling for implant placement Dr Bruno Salsou - Toulon
As a result of caries problems, a 25-year-old patient lost teeth 15 and 16. A retro-alveolar radiographic examination showed large sinus volume, which in such condition would prevent the placement of implants to replace the missing teeth.
Treatment decision
The decision was therefore made to perform a sinus lift.
Conclusion/practitioner’s comments
• The highly granular consistency of the material permits easier placement and prevents the dispersion of the R.T.R.+ /MBCP® Technology granules.
• The stability of the material also optimizes bone healing.
Indications
• Post-extraction socket preservation
Pre-operative examination
Radiographic examination showing large sinus volume.

• Periodontal defects
• Infrabony defects
• Peri-implant defects
• Sinus lift
• Ridge augmentation
• Cystic cavities
Two formulations
80% ß -TCP 20% Hydroxyapatite
40% ß-TCP 60% Hydroxyapatite
84
SURGICAL View the full brochure CLICK HERE
Immediate post-operative check:
OPERATING PROCEDURE
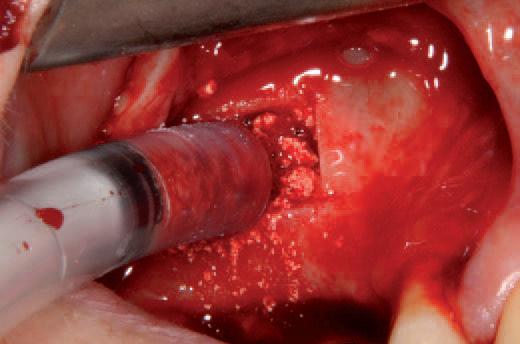
SURGICAL
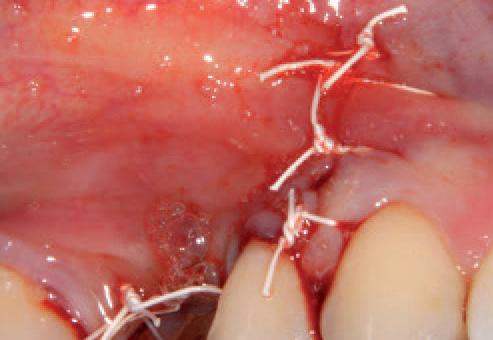
radiographic
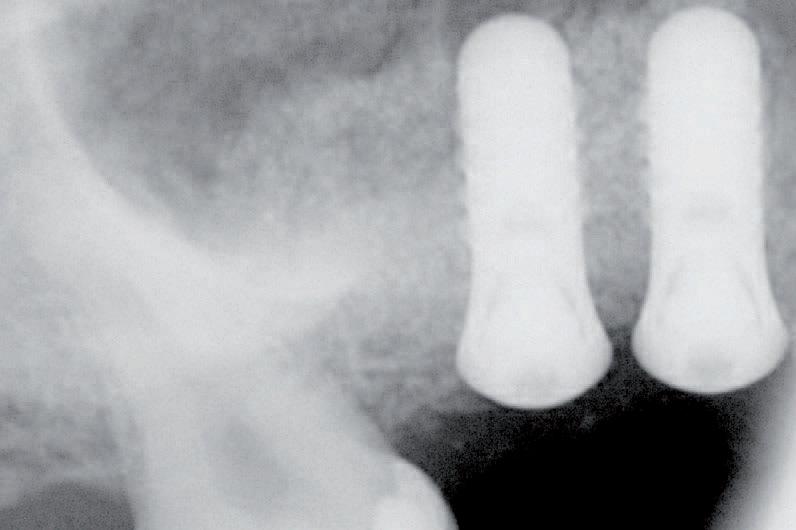
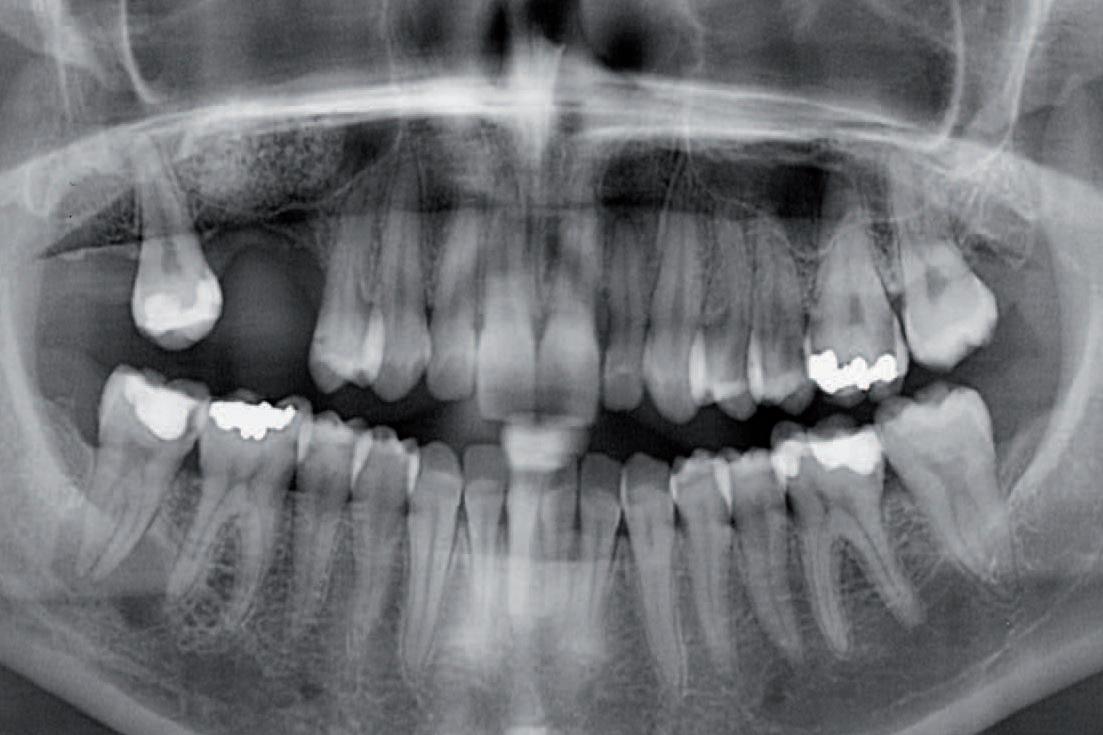
6 month follow-up: Placement implants,

diameter
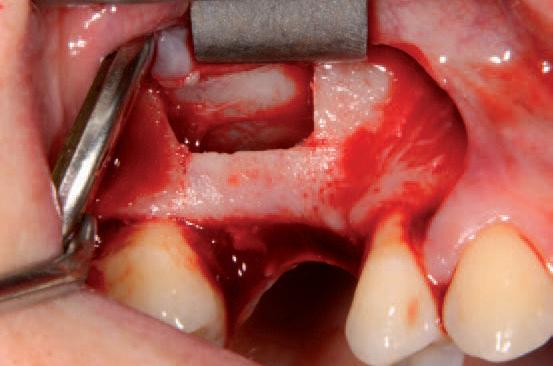
85 1300 65 88 22
Opening of bone flap with piezosurgery.
Placement of 1-2 mm diameter granules of R.T.R. /MBCP® Technology flling material using the delivery syringe.
Sinus flling completed.
Repositioning the flap to close off the site tightly. Suturing the area. End of operation.
Panoramic
examination showing the bone gain obtained following the sinus-lift in sector 1.
4.1mm in
and 10mm in length.
RAPID SUCCESS WITH THE PATIENT

HOW DENTAL 3D PRINTING IS CHANGING LIVES
Case Study Summary: Dr. Schafer was able to create and print a lower denture in one week, which fit almost perfectly when he went to deliver it. The patient was very happy with the final product, and the remarkable results demonstrate how beneficial 3D printing can be for a dental practice.
The Problem
One of Dr. Schafer’s patients, Beverly, came to his office and presented with a common problem – a top denture she loved, and a lower denture she hated. However, unlike the normal loose lower denture, the mandibular denture was set improperly. The vertical dimension of occlusion (VDO) was too high and made it extremely uncomfortable to wear on a regular basis.
The patient had been without a mandibular denture for more than a decade and was unsure if she’d ever be able to tolerate one. Unfortunately, so many patients suffer with poor oral health not knowing whether they will be able to feel comfortable with their smile, as they have had negative experiences with dental professionals in the past. To assess whether Beverly would be able to tolerate a lower prosthetic, Dr. Schafer decided to make her an interim denture to see if this could be a functional and positive solution for her.
The Solution
Dr. Schafer decided to cut back the vestibule on the patient’s current mandibular CD until he got an acceptable VDO and relined it with light body PVS. He then scanned the mandibular denture with the reline, the maxillary CD, and the bite with the two dentures which were articulated with blue bite intraorally.
From here, Dr. Schafer was able to articulate the mandible to Beverly’s upper denture and set the mandibular teeth in Maximum Intercuspal Position (MIP) and form a denture
base around them. The denture base was printed on the DENTIQ with CURO Light Pink Denture Resin, and the teeth were printed on the SOL with CURO Crown A2 Resin.
Dr. Schafer invested in multiple printers in the office. With the Ackuretta DENTIQ, which is a smaller but reliable printer, he often prints his denture bases. The SOL, which prints faster and has a variety of build platforms, prints denture teeth within 45 minutes for a layer thickness of 100 microns.
As a long-time user of 3D printers, Dr. Schafer makes these three recommendations to everyone:
1. It is always useful to have two printers. If one of the printers is out of commission, which occasionally happens, you always have a back-up.
2. With two printers, a dental office can print a denture base and denture teeth at the same time, making for an efficient denture workflow.
3. Always keep one resin per vat and store them in a storage space that doesn’t allow UV light to penetrate. The new SOL vats are now all sent with a stackable vat box, which will make your life a lot easier. With this technique, you will avoid pouring resin in and out of vats on a regular basis, which will save you time, money, and a mess to clean up.
The most important step in 3D printing is not actually the printing itself, but rather the washing and curing protocols which determine the biocompatibility of the print.
86 3D PRINTING
Following the resin manufacturer’s recommended wash and curing steps is easy with the CLEANI and CURIE units.The Ackuretta CURIE comes with pre-programmed curing parameters for almost 200 resins. The user selects the resin used and clicks “Start”. It’s foolproof.
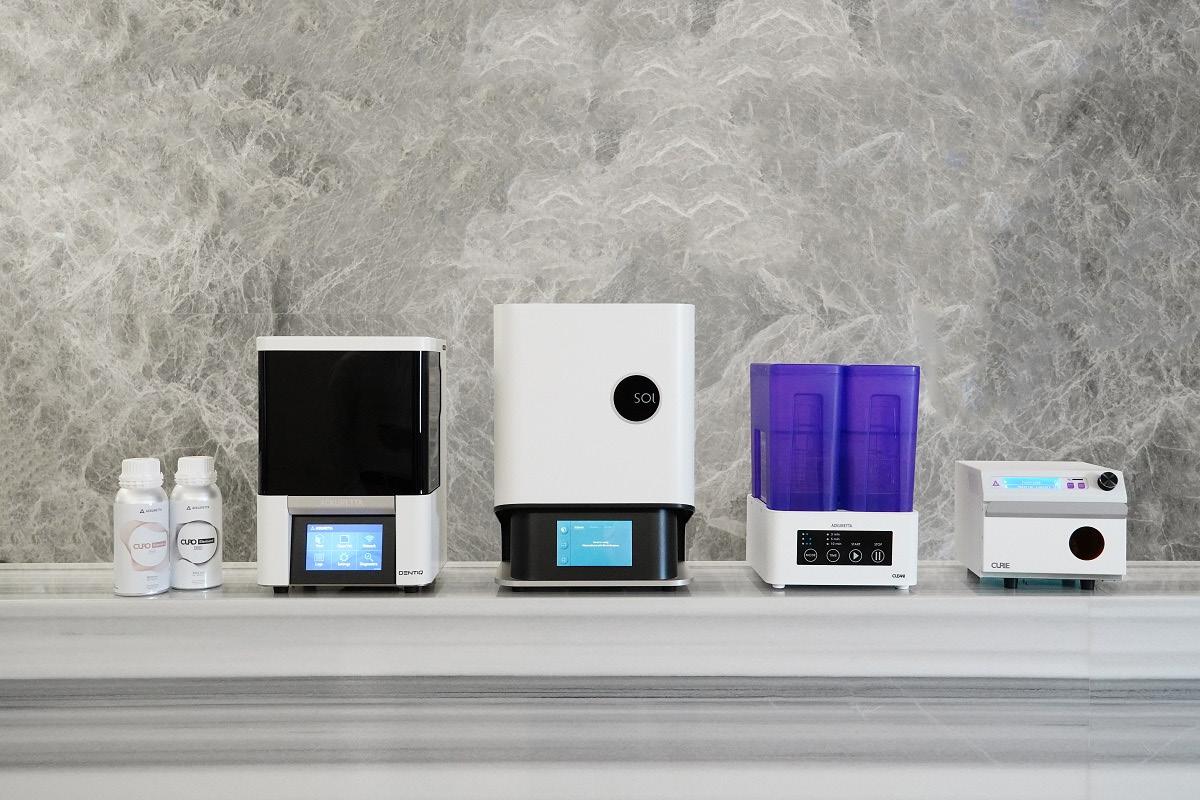
After cleaning, processing, and curing, the denture was placed in the patient’s mouth.
The Results
The patient was able to adapt quickly to the denture. Dr. Schafer had to adjust the lingual flange slightly as it was overextended. With this very minor adjustment, Beverly was able to speak just a few minutes after wearing the lower denture! At her one-week follow-up appointment, she was speaking normally, pleased with the overall result.
The Power of 3D Printing
The power of creating an application – or more importantly a solution – using 3D printing technology is undeniable. Dr. Schafer was able to present a quick and low-cost denture solution for the patient. The team went from initial meeting and impressions to delivering the final results one week later with minimal adjustments.
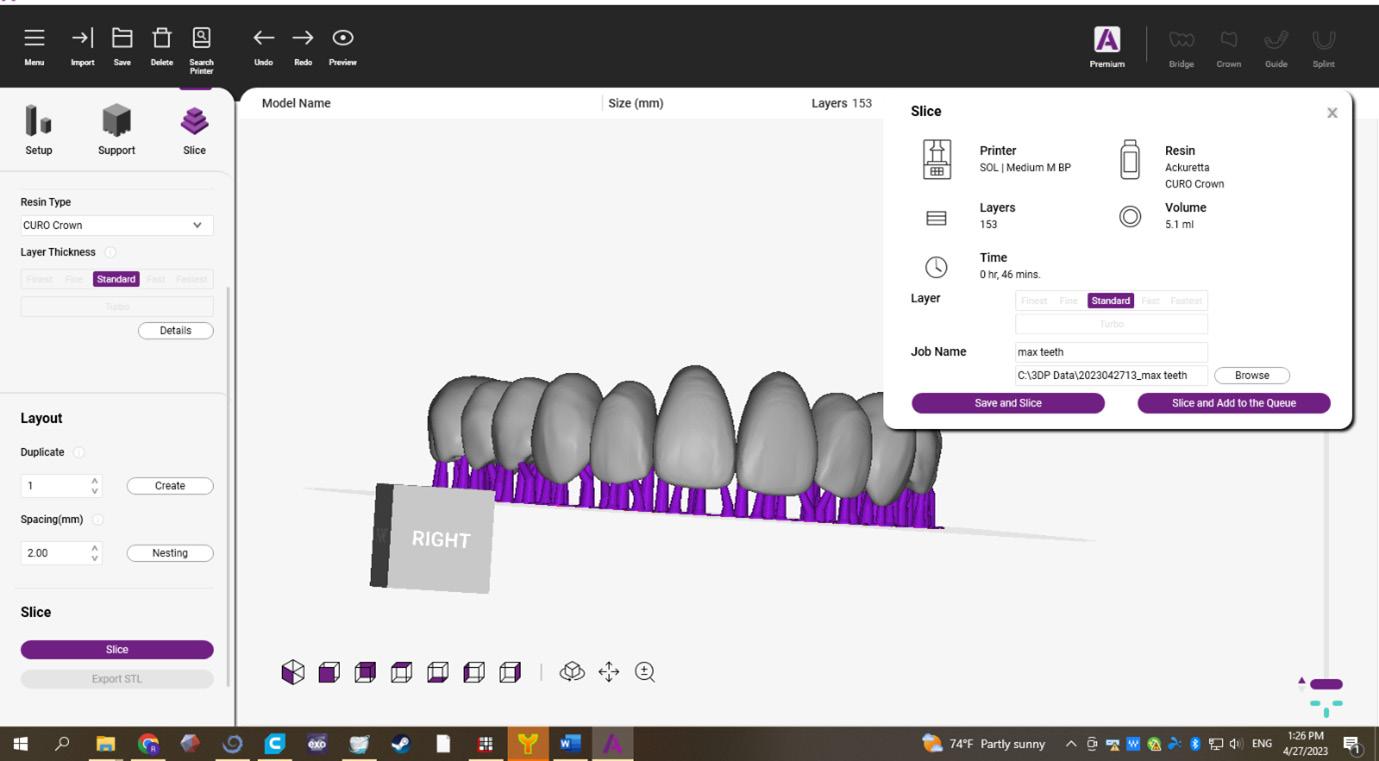
3D printing has the power to change dentistry, and the lives of each and every patient. This is just one of many successful stories. 3D printing is providing dental professionals with access to innovative solutions, bringing affordable and high-quality solutions to patients around the world. We look forward to helping on your journey to print each patient’s perfect smile.
DR RUSSELL SCHAFER

henryschein.com.au 87 3D PRINTING
A GAME CHANGER FOR CHAIRSIDE SPLINT PRODUCTION
Introduction
From their inception, porcelain laminate veneers have become a staple in modern cosmetic practice. Their indications include the corrections of tooth shape and position, closing of diastemas and masking tooth discoloration. In terms of aesthetics and tooth conservation, these restorations have been proven to be incredibly successful1,2
When enhancing or rejuvenating a smile, the key is to achieve minimal tooth reduction. The conservative nature of veneer preparation allows for ultra-thin veneers that can be relatively fragile. With advances in material sciences, we now have numerous porcelains with improved aesthetics, bond strength and fracture toughness3. These materials allow the dentist to conservatively design smiles and favorably direct functional forces. However, when nonfunctional forces are applied, as in the case in bruxism, long-term success can be affected.
Bruxism can complicate porcelain veneer prognosis, hence in some clinical situations, porcelain veneers may be contraindicated4,5. According to the American Academy of Orofacial Pain, bruxism is a diurnal or nocturnal parafunctional activity which includes clenching, bracing, gnashing and grinding of the teeth6
It is defined as a forcible clenching or grinding of the teeth, or a combination of both in non-functional movement of the jaw.
Magne et al. reported that failure rates increased in the presence of uncontrolled bruxism. Managing bruxism in the form of a nocturnal and/or diurnal splint is recommended as a preventative measure to reduce the risk of failure7,8. Occlusal splints allow the mandible to continue the nonfunctional excursive movements whilst balancing the force distribution across the arch, thus protecting the veneers.
Case Study
A 34-year-old female presented with aesthetic concerns. She found her smile to be unflattering and wanted to improve her overall aesthetics and self-esteem. She wanted slightly sharper “feline” upper canines and a whiter smile.
Treatment Plan
After thorough co-diagnostic digital smile design and planning, the patient decided on 10 porcelain veneers and 2 resin veneers. The increased length of her upper canines presented a potential risk for increased lateral forces in excursive movements. In addition, the patient reported a history of bruxism.

88 3D PRINTING
Occlusal Splint Design & Material
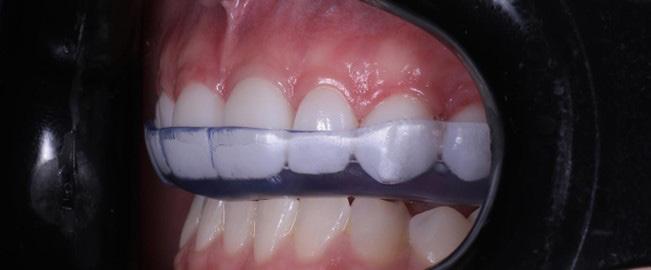
Flat plane occlusal splint was decided as ideal and the scans were sent for Ai Design via 3Shape Design Services. This is a 15-minute design service enabling same day productions.
Material: Keyprint KeySplint Soft
3D Printer
Asiga Max UV with UltraGLOSS™ material tray and Composer software. See Figure 1
Occlusal Splint Fit
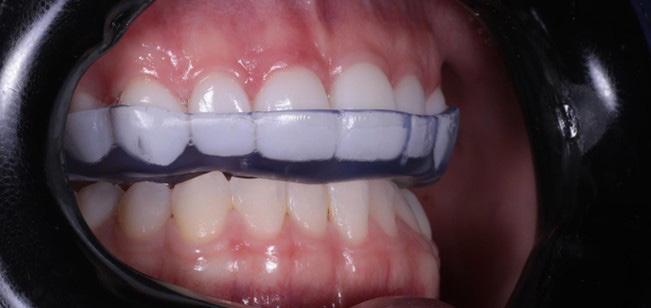

The printed occlusal splint had an incredibly accurate fit with little discomfort or noticeable pressure on the anterior teeth. Due to the digital design process and digital bite registration, only minor occlusal adjustment was required. See Figure 2
Benefits of the Asiga UltraGLOSS™ material tray
The post processing time had been all but eliminated. Apart from the standard washing and post curing requirements, trimming off the sprues at the distal saddle of the splint was the only manual labor required. This allowed us the flexibility of manufacturing and delivering a perfect occlusal splint within a day.
KeySplint soft has always had a high patient compliance due to the fit and nature of the material. Now with the release of the UltraGLOSS™ material tray, chairside fabrication has become effortless and time efficient without compromise.
Conclusions
Longevity of restorations (in the absence of debonding or fracture) is quintessential in successful clinical practice. Patients with bruxism exhibit a three times higher probability of debonding and eight times higher probability of porcelain fractures compared to their nonbruxing counterparts.
89 1300 65 88 22 3D PRINTING
Figure 1
Figure 2
As such, the use of occlusal splints reduces the failure rate of porcelain laminate veneers in patients with bruxism. Having the ability to provide a same day design and production service with nominal manual labour has now become my gold standard treatment. In addition, the KeySplint material and the accuracy of 3Shape Design service consistently produces exceptionally comfortable occlusal splints which increase patient compliance and in turn increase the longevity of dental restorations. See Figure 3
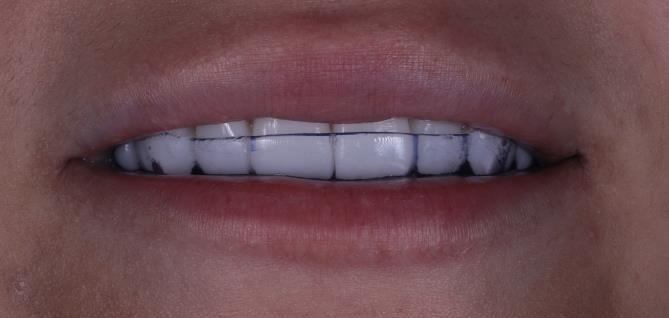
Tips and Tricks for Printing
1. Thoroughly mix your KeySplint resin prior to pouring into the UltraGLOSS™ material tray
2. If you already have KeySplint resin in the UltraGLOSS™ material tray, it may be good practice to always clean your build tray according to the Asiga Protocol by exposing the tray to 30 seconds of UV light. Then peel off the cured resin for the base prior to mixing the resin in the tray.
3. When designing your splint, add an extra 3mm of solid form to the distal portion on the splint. This will establish a stable anchor for the splint when mounting it on the build platform. For consistent results, place the splint at a 9-degree angle as shown in Figure 1.
4. Double check that you are using the UltraGLOSS™ material tray profile in Asiga Composer and print at the receommended layer thickness of 50-microns.
5. After printing, use 2 baths with fresh 99% IPA solution. The first bath is to remove the bulk of uncured resin and the second bath is for a thorough wash for 5 mins.
6. After washing and air drying, place the splint in an oxygen free environment and cure for the recommended curing times (times are specific to curing chamber manufacturer).
7. Once cured, remove the distal extension portion with an acrylic bur and lightly buff the area. You are now ready to issue the high gloss splint.
References
1. Chen W, Raigrodski AJ. A conservative approach for treating young adult patients with porcelain laminate veneers. J Esthet Restor Dent. 2008;20:223-238.
2. Fons-Font A, Solá-Ruiz MF, Granell-Ruiz M, Labaig-Rueda C, Martínez-González A. A choice of ceramic for use in treatments with porcelain laminate veneers. Med Oral Patol Oral Cir Bucal. 2006;11:e297-302.
3. Freire A, Archegas LR. Porcelain laminate veneer on a highly discoloured tooth: a case report. J Can Dent Assoc. 2010;76:a126.
4. Walls AWG. The use of adhesively retained all-porcelain veneers during the management of fractured and worn anterior teeth: Part 2. Clinical result after five years follow-up. Br Dent J. 1995;178:337- 340.
5. Peumans M, Van Meerbeeck B, Yoshida Y, Lambrechts P, Van- herle G. Five-year clinical performance of porcelain veneers. Quin- tessence Int. 1998;29:211-221.
6. American Academy of Orofacial Pain. Okeson JP, ed. Orofacial Pain. Guidelines for assessment, diagnosis, and management. Chi- cago: Quintessence Publish Co; 1996. p. 49-73.
7. Magne P, Perroud R, Hodges JS, Belser UC. Clinical performance of novel-design porcelain veneers for the recovery of coronal volume and length. Int J Periodontics Restorative Dent. 2000;20:440-57.
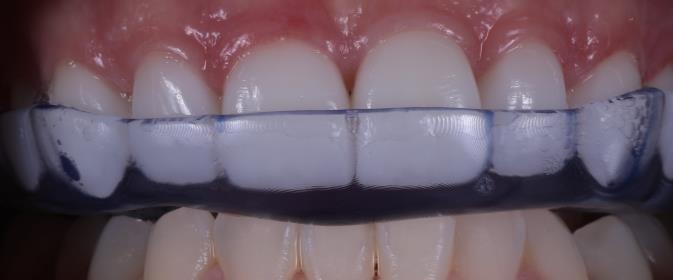
8. Christensen GJ, Christensen RP. Clinical observations of porcelain veneers: a three-year report. J Esthet Dent. 1991;3:174-9.
About Dr Kasen Somana

BSc Hons (Melb) BDS Hons (Syd) MSc (Lond) MFGDP (UK)
Dr Kasen Somana has been in private practice in Melbourne, Australia for almost 20 years and is the principal dentist of Signature Dentistry in Toorak. His practice has a special interest in conservative digital aesthetic fixed prosthodontics and occlusal rehabilitation. Determined to provide the highest level of care to his patients, he often participates and lectures at digital dental conferences locally and internationally. He is a key opinion leader for 3Shape and Asiga.
About Asiga
Asiga, a 3D printer manufacturer located in Sydney, Australia manufacture 3D printers for direct additive manufacturing in industries including dentistry, hearing, medical modelling, jewellery and more. Having the ability to output predictable and accurate 3D printed parts is essential for these industries, ensuring production continuity. Asiga 3D printers offer an open material architecture providing compatibility with more than 500 materials from many industry leading 3D printing polymer manufacturers.
90
Figure 3
DR KASEN SOMANA
Principal Dentist
3D PRINTING
Signature Dentistry Toorak
ERGONOMICS IN YOUR PRACTICE
EVERYTHING YOU NEED FOR A HEALTHY POSTURE
More than 100 years of KaVo – ergonomics right from the start.
KaVo has always blazed the trail in ergonomics and comfort. KaVo products were developed from an ergonomic point of view as far back as the early 20th century. In 1965 came the ergonomic revolution: a patient chair with a completely new lying position helps dentists maintain a healthy, strain-free posture for the first time.
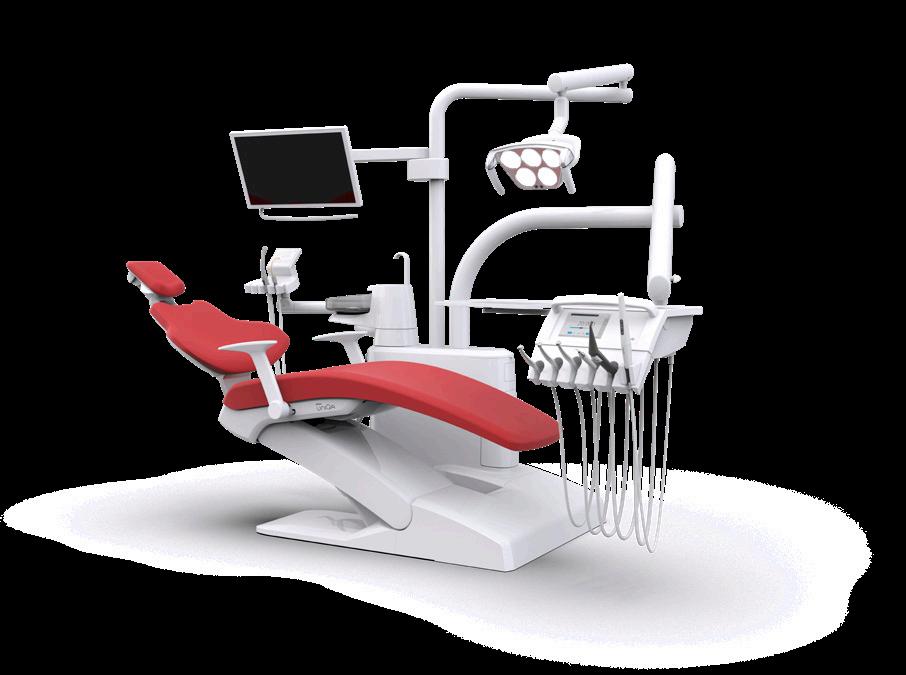
Patients experienced comfortable treatment that was previously unknown. Free-hanging instrument tubes offer additional ergonomics, minimising the amount of reach required.
KaVo symbolises the highest standards of ergonomics and smooth treatment processes.
Every KaVo product is specifically tailored to the needs of dentists and patients – for excellent ergonomics and maximum comfort.
A dentist carries out around 80,000 treatments during their career. No wonder that many of them suffer from back and neck pain.
Each KaVo product is specifically tailored to your needs so that you can work in a relaxed manner.
1 Source: www.the-dentist.co.uk/content/news/back-for-the-future (Retrieval date: 6.11.2020)
2 Source: https://www.agr-ev.de/en/back-friendly-products/ back-friendly-products/2833-dental-surgery-furniture (Retrieval date: 6.11.2020)
henryschein.com.au 91
The great innovation of 1965: with the treatment unit 1025, patients are treated ergonomically while lying down.
80% OF DENTISTS SUFFER FROM BACK PAIN AT LEAST ONCE IN THEIR PROFESSIONAL CAREER 1
EQUIPMENT
40% OF DENTISTS EXPERIENCE HEADACHES DUE TO POOR POSTURE 2
Suspension Chair concept
The unique suspension chair concept is our answer to neck and back pain: the free space under the KaVo ESTETICA E70/E80 Vision patient chair enables you and your assistant to maintain healthy, relaxed leg and body positions while being close enough to the patient.
Relaxation from head to toe
The KaVo foot control – optionally as flexible positioned wireless foot control – is operated with simple left to right movements. Without strenuous up and down movements, your leg muscles are freed of tension, even during long sitting or standing treatments.
Consistent field of work
Excellent for Ergonomics
KaVo ESTETICA E70/E80 Vision treatment units and the PHYSIO Evo dentist’s chair have been awarded the ergonomic seal of approval from the "Campaign for Healthier Backs" association (AGR). This is the first time, and to date, the only time that the coveted title has been awarded to dental practice equipment.
With the horizontal shift of the KaVo ESTETICA E80 Vision, the practitioner can change treatment positions, maintaining the position of the patient’s head without increasing the range of reach.

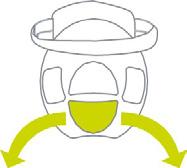
Ergonomics regardless of height
The extremely low position of 350 mm enables natural posture for patients in a sitting or lying position – even for short practitioners. The maximum position of 900 mm (KaVo ESTETICA E70/E80 Vision) or 830 mm (KaVo Primus 1058 Life, KaVo ESTETICA E50 Life) also enables dentists who are taller than 1.80 metres to work in an ergonomic position.


Closer, closer – The Progress Backrest


Small differences in design often make a big difference in daily treatments. The best example of this is the particularly narrow Progress backrest, which is available for all treatment units and, thanks to its narrow shape, offers a back-friendly working posture possibility, providing optimal access to the patient.
Double duty ergonomics
: for you and your assistant
All doctor and assistant elements can be swivelled and adjusted in height and can be positioned to ergonomic perfection – regardless of whether treatment is performed while standing or sitting.

92
EVERYTHING YOU NEED FOR D E F G A C EQUIPMENT
ERGONOMICS IN
YOUR PRACTICE FOR A
The optional swing arm version with a low table height of 45 cm and balanced swing arms offers optimum ergonomics. The instrument tubes with an extension length of 90 cm allow maximum freedom of movement.
J Raised seat for comfortable lying over long periods of time
With the KaVo ESTETICA E80 Vision’s motorised seat lift, patients of different sizes, children and even patients with health restrictions such as hunched back or hollow back are always in the best possible position
Trendelburg means : Treating in total relaxation
In order to achieve the Trendelenburg patient position, the footrest tilts and lifts automatically to matchthe tilt of the backrest. The lying position remains ergonomic, preventing the patient’s back from being compressed or stretched when the backrest is positioned. In addition, your patients stay relaxed and you can treat them for longer in total comfort.

Ergonomics at its best, with additional features and unimpeded access
Some KaVo treatment units are available as righthanded or left-handed versions. In addition, many have an integrated endo and surgery function as standard or optional, saving you additional avenues and invest- ments.


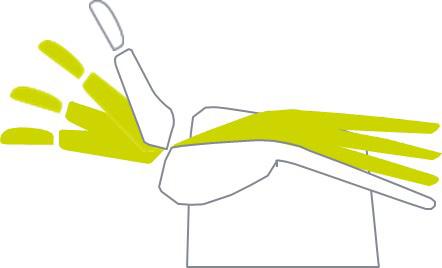
Ergonomics with heads and shoulders above

With the infinitely adjustable head tilt angle, you can adjust the headrest and thus the position of the head and the mouth. Your patients will feel relaxed on the comfortable and easy-to-position comfort headrest and you will constant optimal access to the work area
Obviously ergonomic
The natural white light of the KaVoLUX 540 LED enables optimum visibility. The COMPOsave mode, which prevents fillings from hardening prematurely, keeps the dentist from being rushed. The KaVoLUX 540 LED is automatically switched on and off in accordance with the automatic positions of the treatment centre. The user can also control the most important functions such as dimming and switching on and off without contact.
93 1300 65 88 22
HEALTHY
H J K I L Find out more CLICK HERE EQUIPMENT
POSTURE
1300 65 88 22 henryschein.com.au


 Dr Nick Fahey Specialist Prosthodontics


