

DENTAL SOLUTIONS
DENTAL HEALTH WEEK 2024
BEYOND THE SMILE – WHY PERIODONTAL HEALTH MATTERS MORE THAN YOU THINK
The first week in August marks Dental Health Week in Australia, a crucial time to bring attention to an often overlooked yet critical aspect of oral health: periodontal disease. This event aims to promote oral health awareness and encourage preventive care practices and is a great opportunity for you to connect with your patients. While cavities and tooth decay are familiar ‘enemies’, the silent yet significant impact of periodontal disease is less widely known.
A Hidden Epidemic?
Periodontal disease, involving everything from mild gingivitis to severe periodontitis, is alarmingly prevalent among Australians. Recent studies reveal that the prevalence of moderate or severe periodontitis in Australian adults soared to 30.1% in 2017-2018, a dramatic increase from 20.5% in 2004-2006 1 This upward trend highlights a growing public health crisis that demands immediate attention and action.
A Closer Look at Age and Regional Differences
The burden of periodontal disease is not uniformly distributed across the population. Older Australians, particularly those aged 60 and over, have experienced a 17% increase in periodontitis prevalence between 1991-1992 and 2013-2014.1 Regional variations are equally stark: nearly twice as many adults in Queensland (37%) suffer from periodontal disease compared to South Australia (21%).2 These disparities call for targeted interventions.
Gingivitis: The Gateway to Serious Dental Issues
Gingivitis, a milder form of gum disease, affects 29% of Australian adults.3 While less severe than periodontitis, untreated gingivitis can progress, leading to more serious dental problems. We cannot emphasise enough the importance of regular dental check-ups and effective oral hygiene practices for prevention.
Why Should We Care?
These numbers paint a concerning picture of periodontal disease's growing impact on Australians' health. As we celebrate Dental Health Week, let's use the opportunity to educate ourselves and our communities about the importance of gum health. By promoting better oral hygiene practices and regular dental visits, we can work towards reducing the prevalence of periodontal disease and improving overall health outcomes for all Australians.
Join the Movement
Dental Health Week 2024 serves as a vital reminder that oral health is a crucial component of overall well-being. By focusing on periodontal disease and gum health, we can address a significant public health issue that affects millions of Australians. Let’s use this week to spread awareness, encourage preventive care, and ultimately improve the oral health of our nation.
For more information and resources on periodontal disease and oral health, visit Australian Dental Association www.ada.org.au or Australian Institute of Health and Welfare www.aihw.gov.au/reports/dental-oral-health
References
1. https://www.ncbi.nlm.nih.gov/pmc/articles/PMC9786236/
2. https://www.aihw.gov.au/reports/dental-oral-health/oral-healthand-dental-care-in-australia/contents/healthy-mouths
3. https://www.health.gov.au/topics/dental-health
AGOTA BERCES Head of Strategic Partnerships ANZ, Henry Schein

HENRY SCHEIN PLANTS FOR A GREENER FUTURE

On June 4, 2024, a dedicated team of 12 Henry Schein employees partnered with Greater Sydney Landcare’s Creating Canopies team for a corporate volunteering event at Renown Park in Oatley, located within the Georges River Local Government Area.
A Commitment to the Environment
Under sunny skies, the Henry Schein volunteers dug holes in the soft, moist soil and successfully planted 600 native trees and shrubs. These plants, which will grow to over three meters, aim to create new canopy cover that will provide much-needed shade and help reduce urban heat in the future.
Community Benefits
The new plants were strategically placed by the oval in Renown Park, offering future shade for sports players, spectators, dog walkers, and park visitors. This initiative complements a previous planting by Creating Canopies in July 2022, allowing volunteers to witness the growth and impact of their efforts over time.
Team Building in Nature
The day provided an excellent opportunity for team building and creating lasting memories. Henry Schein employees enjoyed working outdoors, swapping their laptops for shovels and experiencing the benefits of physical activity and fresh air.
Acknowledgements and Future Efforts
Creating Canopies Project Manager Danielle Packer and Project Officer Alicia Harb-Akins praised the Henry Schein team for their hard work and enthusiasm.
A special thanks goes to the Georges River Council for supporting this initiative and to the Henry Schein volunteers for their dedication, which has left a lasting positive impact on the environment and the local community. As the trees and shrubs grow, they will stand as a testament to the power of collective action for a common cause.
Get Involved
If you’re interested in contributing to environmental efforts in the Georges River area, consider becoming a Bushcare volunteer to help regenerate bushland. No experience is necessary as training is provided.
For information on how to get free trees planted on your land or to join upcoming events, visit Greater Sydney Landcare’s Eventbrite page. Corporate Volunteering
About Creating Canopies
Landcare NSW and Greater Sydney Landcare are on a mission to plant 200,000 trees as part of the Greening our City program, proudly funded by the NSW Government, to help reduce urban heat in Greater Sydney.

Front Row L to R - Ariane Aeschimann-Forbes, Conor Hillis, Leanne Bricknell, Analise Vadala, Jodie Finn, Michelle Scanlon, Calum Coogan Back Row L to R - Andrew Youell, Mike Covey, Michael Earl, Sean Toms, and Steve Longley
CPD COURSES AND EVENTS
YOUR GO-TO RESOURCES FOR DENTAL EDUCATION AND CPD.
Explore Dental Education Hub: your ultimate destination for comprehensive dental educational content. Access over 500 live and on demand webinars, 150 courses annually, 29 publications, and podcasts.

WEBINAR WEEK

Webinar Week Q3 Watch it On Demand www.dentaleducationhub.com.au
Register for this on-demand webinars and earn 4 CPD points, with each session offering 1 point. Topics include: Streamlined posterior aesthetics, Fluoride Varnish, Ecosite elements and Sustainability in medical manufacturing.
VITA Discovery Symposium 2025
Bad Säckingen, Germany
31 March – 4 April 2025
Join us for a 4-days immersive educational program conducted by Vita’s leading KOL’s and dental professionals from around the globe, at the VITA Zahnfabrik facility in Bad Säckingen, Germany.

Endodontics Refreshed Demystifying Endo
Dr. Harry Mohan 8 CPD point - Saturday 23 November
This one-day course teaches and refreshes your knowledge with a logical, predictable, and reproducible approach to endodontics. Countless clinical tips and skills will equip you to walk away armed to perform high-quality endodontic treatments in general practice.

ENDODONTICS | IMPLANTOLOGY | CONE BEAM | IOS SCANNING
3D PRINTING | ALIGNERS | BUSINESS SOLUTIONS

ALL TOGETHER, ONE VENUE 16th – 17th May 2025
PEPPERS NOOSA RESORT, SUNSHINE COAST
7TH AUSTRALASIAN HENRY SCHEIN
DENTAL SYMPOSIUM
ALL DENTAL, ALL SOLUTIONS
"This years symposium is an exciting multidisciplinary "All Play" event. It showcases THE perfect blend of traditional and digital dentistry. Delegates will explore and experience the latest innovations in CBCT imaging, 3D printing, endodontic and management software - all aimed to enhancing patient care and optimising practice efficiency and thereby - profitability.
Join us on an exclusive platform that covers all aspects of modern dentistry and learn about the latest advancements in the field, network with peers, and join our hands-on breakout sessions for the latest in cuttingedge technologies and techniques.
Why Attend?
•Gain insights from leading experts in the field.
•Discover the latest technological advancements and practical applications.
•Enhance your skills with hands-on workshops.
•Network with peers and industry leaders.
•Elevate your practice’s efficiency and profitability.
Don’t miss this opportunity to foster innovation and digitisation across various facets of modern dentistry. An unmissable event designed to keep dental professionals at the forefront of advancements in clinical techniques and practice management.
Platinum Sponsor:
Gold Sponsors:
ORAL HEALTH CARE FOR THE ELDERLY AND MODIFYING APPROACHES

Oral health not only refers to the absence of dental diseases but its contribution to general well-being and quality of life (QoL), which is more difficult to achieve with advancing age (Lamster and Northridge, 2008). Learning about the characteristics of this population can give helpful insights into oral health care for the elderly and how to modify approaches to suit individual needs.
Demography of Aging: Australia and New Zealand
Due to medical advances, socioeconomic development and improved public health measures, the average lifespan has improved and mortality/ fertility rates have reduced. In New Zealand (NZ) the number of people aged 65+ doubled between 1991 and 2020, to reach 790,000. This number is projected to double again by 2056 with a significant increase in the 85+ age group, which will be approximately 320,000 in 2048 (Stats NZ, 2021). In Australia, from 1999 to 2019, the population of those aged 65+, increased from 12.3% to 15.9%, with a 2.5% increase in the age group 85+ in the same period (Australian Bureau of Statistics, 2019).
The New Zealand 2018 census results show that the changing demography consists of a more diverse cultural makeup (Statistics NZ, 2021). Furthermore, poor oral health statistics are represented disproportionally in both countries by the indigenous population and minority groups. Collectively, these statistics highlight the burden on oral health services because more people are living longer and are more likely to retain natural teeth. However, the elderly population is made up of distinct groups and this can affect the way a treatment plan is formulated. Below are the estimated age groups and their different characteristics:
• 65-74 are considered as young elderly who are relatively healthy and active.
• 75-84 are mid-elderly who could vary from being healthy and active to being dependent with chronic diseases.
• 85+ are the frail group with one or more medical conditions. (Razak, Jose Richard, Thankachan, Abdul Hafiz, Nanda Kumar, Sameer, 2014).
Senior Living Spectrum
All elderly are not subject to the same living circumstances. We must appreciate the wide spectrum of senior living and levels of senior care (National Caregivers Library, 2019). At one end of the spectrum are individuals who are more independent, perhaps requiring some form of home assistance, but who are able to carry out dental homecare themselves. Even so, there may be opportunities for oral health practitioners to make suggestions for an improved homecare routine with a focus on preventative strategies. On the other end of the spectrum individuals may live in aged-care facilities in which healthcare assistants and/or nurses provide the necessary care. Moreover, in institutionalised facilities care resistant behaviours may be more common and add further complications. Evidence reveals that institutionalised individuals are at greater risk of developing dental diseases than the non-institutionalised, as reported in a study of several rest homes in Adelaide in 2005 (Lamster and Northridge, 2008).
Determinants of Oral Health in Elderly
Treating the elderly population poses many challenges for oral health professionals especially when implementing preventative strategies. Clinicians have to consider deterioration of physical and mental health, medical condition(s) and polypharmacy when managing this cohort. The elderly population is a unique group of vulnerable individuals who become the main consumers of primary health care services and are more likely to access multiple services such as medical clinics, outpatient hospital services, pharmacies, dental care and supportive care (Lamster and Northridge, 2008). Oral health practitioners in collaboration with allied health services can achieve better oral health outcomes and continuation of care.
With individuals keeping their natural teeth further into life there is a greater need for support, preventative dental treatment, and restorative work. The oral-health concerns during ageing can include one or more of the following:
• Reduced chewing efficiency
• Poor nutritional status
• Denture-related issues - such as ill fitting, damaged/cracked dentures
• Edentulism or tooth loss
• Reduced sensitivity to pain
• Tooth Sensitivity
• Reduced salivary function or xerostomia
• Changes in teeth such as erosion, attrition, and recession
• Changes in oral mucosa - less regenerative capacity
• Coronal Dental caries - higher rate
• Root caries - higher rate
• Periodontal disease - more prevalent
• Oral cancer
• Complications by comorbid conditions such as hypertension, heart disease, cancer, and diabetes mellitus
• Age-related physiologic changes (Razak et al., 2014; Gil-Montoya, Ferreira de Melli, Barrios, GonzalezMoles, Bravo, 2015) Other factors that can affect oral health in the elderly are barriers to accessing dental care resulting in irregular dental visits due to cultural views, ethnic background, inability to travel, fear and anxiety, and financial strain.
Recommendations for oral health interventions and other suggestions:
• Diet and nutrition counselling should be considered as an integral part of the oral health assessment. Refer to GP, nutritionist, or dietician if necessary.
• Toothbrushing: Use an electric toothbrush with an ergonomic handle. This makes it easier to grip and move around. Alternatively, the way you hold a toothbrush can be changed (refer to resource below) as well as the shape and size of the handle to suit individual needs. Soft or extra soft bristled toothbrushes with bass or modified bass brushing technique using light pressure are best.
• Mouth rinses: either fluoride rinses or chlorhexidine rinses can help control plaque and prevent decay - important for those with physical or mental disability. A small bottle spray can help if the individual is unable to swish around the liquid.
• Adaptive dental aids: special handles for floss, toothbrush or interdental aids.
• Water flossing - not a replacement to flossing but helps those with reduced dexterity.
• Use high fluoride toothpaste.
• Apply fluoride varnish regularly.
• Communicate: Keep oral health instructions simple, use easy to understand language and visual aids. Speak at a volume they can hear clearly but not raising your voice.
• Counsel and educate caregivers or families to support with homecare.
• Provide denture care instructions.
• Use tell-show-do method.
• Employ preventative counselling.
• Make referrals to other health care professionals as required.
• Work with allied health professionals. (Razak et al., 2014; Lamster and Northridge, 2008).
Resources
1. Modifying toothbrush: https://www.mytoothbetold.com/modifytoothbrush-arthritis/
2. Better oral health in residential care - A toolkit: https:// www.sahealth.sa.gov.au/wps/wcm/connect/77fd7a004b332 3958834ade79043faf0 BOHRC_Professional_Portfolio_Full_ Version%5B1%5D.pdf?MOD=AJPERES&CACHEID=ROOTW ORKSPACE-77fd7a004b3323958834ade79043faf0-nKKIuxl

References
Australian Bureau of Statistics. (2019). Australian Demographic Statistics: Twenty years of population change. Retrieved September, 2021, from https://www.abs.gov.au/ausstats/abs@. nsf/0/1cd2b1952afc5e7aca257298000f2e76.
Gil-Montoya, J. A., Ferreira de Melli, A. L., Barrios, R., GonzalezMoles, M. A., & Bravo, M. (2015). Oral health in the elderly patient and its impact on general well-being: A nonsystematic review. Clinical Interventions in Aging,10, 461–467.
Lamster, I. B., & Northridge, M. E. (2008). Improving oral health for the elderly: An interdisciplinary approach. Springer Science + Business Media.
Lauritano, D., Moreo, G., Della Vella, F., Stasio, D., Carinci, F., Lucchese, A., & Petruzzi, M. (2019) Oral Health status and need for oral care in an aging population: A systematic review. International Journal of Environmental Research and Public Health, 16(22), 4558. https:// doi.org/10.3390/ijerph16224558
National Caregivers Library. (2019).The long-term care spectrum. Retrieved September, 2021, from http://www.caregiverslibrary. org/Caregivers-Resources/GRP-Care-Facilities/The-LongTerm-Care-Spectrum-Article Razak, P. A., Jose Richard, K. M., Thankachan, R. P., Abdul Hafiz, K. A., Nanda Kumar, K., Sameer, K. M. (2014). Geriatric oral health: A review article. Journal of International Oral Health, 6(6),110-116.
Stats NZ (2021). National population projections: 2020(base)–2073. Retrieved September, 2021, from https://www.stats. govt.nz/information-releases/national-population-projections2020base2073
Author:
Christine Murthi is an Oral Health Therapist based in New Zealand. She is currently studying for a Masters in Health Science at Auckland University of Technology. Prior to this she had secondary teaching/tutoring experience spanning more than ten years. Through this teaching experience combined with her diverse cultural background she has developed a passion for promoting diversity in clinical practice, overcoming communication barriers, and connecting with the community. As a member of the Colgate Advocates for Oral Health: Content Community, her contributions to the dental community aim to promote good oral health for all and keeping a healthy smile for life.

LEARN MORE
CHRISTINE MURTHI New Zealand
CARIES MANAGEMENT TOOLS
Assisting our patients to manage their caries risk is a core task for dental practitioners. It is important that we understand each patient’s risk factors and help them to manage these so that they can enjoy good oral health.
Colgate has created a suite of evidence-based caries management tools, based on the International Caries Classification and Management System (ICCMSTM).
These tools have been developed to assist dental professionals implement a personalised caries risk management plan for their patients.
These are the tools available for you:
1. Patient Questionnaire
2. Chairside Risk Assessment
3. Fluoride Management Plan
https://www.colgateprofessional.com.au/dentist-resources/ caries/caries-management-tool


POLA RAPID
ADVANCED TOOTH WHITENING SYSTEM
SUPER. FAST. WHITENING. Pola Rapid is the new in office whitening treatment that safely whitens teeth in just 24 minutes.
• 150% Faster Treatment Time
• Enhanced Blue Gel For Faster Application
• Built In Desensitisers
SUPER. FAST. WHITENING.
Clinical Case Studies


“I find Pola Rapid a beautiful, easy-to-use product. It is simple to apply and remove with its non-stick and enhanced blue gel formula.
Pola Rapid is the new in office whitening treatment that safely whitens teeth in just 24 minutes.
A great product to use by clinicians for in-chair whitening with minimal chair time and patient sensitivity, but reliable and immediate results.”
150% FASTER TREATMENT TIME
ENHANCED BLUE GEL FOR FASTER APPLICATION
BUILT IN DESENSITISERS
FLUORIDE RELEASING TO STRENGTHEN TEETH
Pola Rapid 38%


CLINICAL CASE STUDIES
“Pola Rapid has exceptional colour saturation for enhanced visibility during intraoral application. The new non-stick bleaching gel stays where you apply it, and easily wipes away clean with no mess.
I found the new system fast, reliable to use with minimal sensitivity for patients”
DR MILES CONE Fellow American College of Prosthodontists
"I find Pola Rapid a beautiful, easy-to-use product. It is simple to apply and remove with its non-stick and enhanced blue gel formula. A great product to use by clinicians for in-chair whitening with minimal chair time and patient sensitivity, but reliable and immediate results.” AFTER BEFORE
Diplomate Americn Board of Prosthodontics, Nuance Dental Specialist, Portland, Maine USA


Pola Rapid 38%
“Pola Rapid has exceptional colour saturation for enhanced visibility during intraoral application. The new non-stick bleaching gel stays where you apply it, and easily wipes away clean with no mess. I found the new system fast, reliable to use with
DR SAM KOH BDSc Melb (Hons) Melbourne, Australia
19 CLINICAL EVALUATORS
TOTAL USES 56
CLINICAL RATING 92%
CLINICAL EVALUATION
Pola Rapid SDI
Key features: In-office whitening system l 38% Hydrogen Peroxide l Dual-barrel syringe dispenser with brush-tip applicato
Description
Pola Rapid is an advanced in-office tooth whitening system:
Key features
• Whitens teeth with an incredibly fast 24-minute application time.
• Features built-in desensitizers and fluoride.
• In-office whitening system 38% Hydrogen Peroxide
• Uses a 38% hydrogen peroxide formulation.
• Simple and precise application.
Indication
19 CLINICAL EVALUATORS
• Dual-barrel syringe dispenser with brush-tip appl icator
TOTAL USES 56
• In-office teeth whitening.
Description
Unique Attributes
CLINICAL RATING 92%
• Blue gel makes for easy application and visibility.
Pola Rapid is an advanced in-office tooth whitening system:
Key features: In-office whitening system
• Faster system - this material only requires 24 minutes of treatment, significantly reducing patient time in the chair.

Clinical Tips
Use a surgical suction to remove the whitening gel between applications for fast and precise removal.
Double check the barrier between each application and make sure there are no areas of leakage.
Clinical Tips
l Dual-barrel syringe dispenser with brush-tip applicato
• Features built-in desensitisers and fluoride.
• The brush tip allows you to place very easily.
Description
• Light is not necessary; however, the light can be used with the whitening attachment and the Pola Stand.
• Uses a 38% hydrogen peroxide formulation.

• Simple and precise application.
Pola Rapid is an advanced in-office tooth whitening system:
Indication
Make the time to take before and after photos. It really shows the patient the difference. Even I did not realize there was such a big difference for a couple of patients until I looked at the photos later.
• Use a surgical suction to remove the whitening gel between applications for fast and precise removal.
“GOOD RESULTS, EASY TO USE, AND NO LIGHT NEEDED.”
• Double check the barrier between each application and make sure there are no areas of leakage.
Evaluators’ Comments
“Instructions were easy to follow and time for the procedure was excellent.”
Clinical Tips
“I really liked the brush tip and simplicity of the packaging.”
• Make the time to take before and after photos. It really shows the patient the difference. Even I did not realise there was such a big difference for a couple of patients until I looked at the photos later
Use a surgical suction to remove the whitening gel between applications for fast and precise removal.
“Easy application.”
Double check the barrier between each application and make sure there are no areas of leakage.
• Whitens teeth with an incredibly fast 24-minute application time.
• Features built-in desensitizers and fluoride.
• In-office teeth whitening.
• Uses a 38% hydrogen peroxide formulation.
• Simple and precise application.

Indication
Unique Attributes
• In-office teeth whitening.
Unique Attributes
• Blue gel makes for easy application and visibility.

• Blue gel makes for easy application and visibility.
• Faster system - this material only requires 24 minutes of treatment, significantly reducing patient time in the chair.
• Faster system - this material only requires 24 minutes of treatment, significantly reducing patient time in the chair.

• The brush tip allows you to place very easily.
• The brush tip allows you to place very easily.
• Light is not necessary; however, the light can be used with the whitening attachment and the Pola Stand.
• Light is not necessary; however, the Radii Xpert light can be used with the whitening attachment and the Pola Stand.
Consultants who would:
Recommend to a colleague Consultants

“The quick chair time is amazing. I had patients who have had other brand name in-office whitening comment they this was so much faster and they got better results.”
Evaluator’s comments
“Color of the gel allowed easy visibility in placing.”
Make the time to take before and after photos. It really shows the patient the difference. Even I did not realize there was such a big difference for a couple of patients until I looked at the photos later.
“I feel that it worked well both with and without the Radii Xpert light.”

“Instructions were easy to follow and time for the procedure was excellent.”
“I really liked the brush tip and simplicity of the packaging.”
“Easy application.”
Evaluators’ Comments
“Worked nicely and didn’t drive sensitivity on root exposure patient - able to control application.”
“Instructions were easy to follow and time for the procedure was excellent.”
“The brush applicator takes a little getting used to. It makes the applicator tip overall wider than you may be used to.”
“The quick chair time is amazing. I had patients who have had other brand name in-office whitening comment they this was so much faster and they got better results.”
“I really liked the brush tip and simplicity of the packaging.”
When dispensing the first amount, it was difficult to get the mixing of material just right - seems like a lot wasted.”
“Easy application.”
“Color of the gel allowed easy visibility in placing.”
“The quick chair time is amazing. I had patients who have had other brand name in-office whitening comment they this was so much faster and they got better results.”
“GOOD RESULTS, EASY TO USE, AND NO LIGHT NEEDED.” Consultants
“I feel that it worked well both with and without the Radii Xpert light.”
“The brush applicator takes a little getting used to. It makes the applicator tip overall wider than you may be used to.”
“Color of the gel allowed easy visibility in placing.”
“I feel that it worked well both with and without the Radii Xpert light.”
“Worked nicely and didn’t drive sensitivity on root exposure patient - able to control application.”
“The brush applicator takes a little getting used to. It makes the applicator tip overall wider than you may be used to.”
“When dispensing the first amount, it was difficult to get the mixing of material just right - seems like a lot wasted.”
Worked nicely and didn’t drive sensitivity on root exposure patient - able to control application.”
“When dispensing the first amount, it was difficult to get the mixing of material just right - seems like a lot wasted.”
Evaluation Summary: Compared to Competitive Products:
Before After
INTERDENTAL CLEANING:
A KEY TO ORAL AND GENERAL HEALTH

Dental professionals play a crucial role in educating and motivating their patients to adopt and maintain interdental cleaning habits. In this brief guide, Michaela von Geijer, Doctor of Dental Surgery and private practicing dentist, addresses how to promote interdental cleaning among patients.
Why interdental cleaning is important for oral and general health
Interdental cleaning is essential to oral hygiene, as it removes plaque and debris from the interproximal areas that are inaccessible to a toothbrush. Interdental cleaning can prevent or reduce the risk of dental caries, periodontal disease, halitosis, and other oral health problems. Interdental cleaning can also improve the appearance of the teeth and gums and enhance the effectiveness of fluoride and other preventive agents. Moreover, interdental cleaning can contribute to the patients' overall health, as oral health is linked to systemic health and well-being. We know that periodontal treatment and a healthy mouth result in systemic health by reducing systemic inflammation and improving cardiometabolic risk.1
How to assess and advise patients on interdental cleaning
As dental professionals, it is our responsibility to assess and advise our patients on their interdental cleaning habits and needs. How the patient accomplishes the daily cleaning at home will make the difference, not the professional cleaning we perform at the clinic. We should also share our knowledge and inspire the patient to maintain a healthy mouth, we can do this by:
• Asking them about their current interdental cleaning routine, frequency, and which tools they use.
• Examining their interdental spaces, plaque levels, gingival health and periodontal health.
• Demonstrating the correct technique, practicing with the patient and recommending the most suitable tool for their interdental spaces, based on their anatomy, preferences, and abilities.
• Emphasizing the benefits of interdental cleaning for their oral and general health and addressing any barriers or misconceptions they may have.
• Providing them with written or visual instructions and samples of interdental cleaning tools to bring home.
• Monitoring their progress and reinforcing their motivation at every visit.
What are the best interdental cleaning tools, and how do you use them?
There is no one-size-fits-all solution for interdental cleaning, as different tools may suit different patients and situations. However, some general guidelines are:
• Dental floss is effective for removing plaque from tight interdental spaces, but it requires good manual dexterity and technique. Patients should use a gentle sawing motion to slide the floss between the teeth, and then curve it around each tooth and move it up and down, cleaning the sides of the teeth and the gum line.
• Many studies have confirmed the superiority of interdental brushes. They are the tools to recommend for patients with gingivitis and/or spaces.2,3 Interdental brushes are ideal also for cleaning around implants, bridges (abutments) and orthodontic appliances. The brush should fit snugly but comfortably between the teeth. Gently insert it into the interdental space, moving it back and forth a few times. The interdental brush should be used only with water, never toothpaste.
Oral hygiene essentials: the tools your patients need
Dr Michaela von Geijer is also an employee of TePe, a Swedish oral hygiene company with a multinational presence, where she works as a Clinical and Education Advisor. TePe has been producing interdental cleaning products since 1965. Let’s hear more about what to look for when it comes to interdental cleaning and what TePe offers.
Why is an interdental brush more efficient than floss for cleaning proximal spaces?
The proximal spaces between premolars and molars are irregular and concave. That is why a brush is superior for cleaning these spaces. We should recommend an interdental brush for those with interdental spaces and/or bleeding gums. If the teeth are healthy and there are no spaces, floss is the tool to be used.
Which features are important to consider when recommending an interdental brush?
I look at safety, efficacy and high quality and TePe interdental brushes fulfil all my wishes. The bristles of TePe’s interdental brushes cover the entire plasticcoated wire for safe, comfort and gentle cleaning. The user-friendly handle offers a stable grip which enables cleaning with controlled movements.
Looking at quality, the interdental brushes are continuously tested and evaluated to comply with the international standard for manual interdental brushes, ISO 16409. An advantage with TePe’s Interdental Brush Original is that the small brush sizes (0-3) have a flexible neck for increased durability and access. The larger sizes have a thicker, bendable wire.
It is also important not to forget the environmental aspect. All handles of TePe brushes are made with materials from renewable mass balanced material certified according to the international and Carbon Certification (ISCC PLUS).


TePe has all nine ISO sizes (0-8). How do you know which size to recommend?
Having a practice box chair with all brushes is very convenient. With experience, you can guess fairly well which size to use. As you know, the proximal space will vary over time, so at every appointment, check periodontal health, reinstruct the usage of oral hygiene devices, and encourage the patient to have a healthy mouth.

When uncertain about the brush size, I often use the pocket probe. If the probe can pass through, then I know a blue brush will fit. If there is a lot of space around the probe, I size up, and if it can’t enter or scratch the proximal surfaces, I size down.
Some patients find the gums and teeth very sensitive after periodontal treatment, when cleaning proximal sites. Any thoughts about that?
Well, in that case I would recommend TePe Interdental Brush Extra Soft which comes in six sizes (size 1-6).

Something else you would like to add when it comes to the daily cleaning for a healthy mouth?
There are many specialty brushes that might be good to be aware of. Some patients need a specialty brush every day, others now and then.
Which one do you most often recommend?
For sure, that must be TePe Compact Tuft™. The specialty brush has a small, dense, rounded tuft that can be used for all ages and many situations, such as erupting tooth, occlusal surfaces, along the gumline in mucositis cases, around brackets, removing stains, and much more.


TePe Universal Care™ with the unique angled neck. How can this brush be used?
I recommend TePe Universal Care for all patients with implants, cleaning lingually along the gumline. It is a perfect daily complement for patients with implants. TePe Universal Care is also ideal for cleaning the last tooth, retroclined teeth, or other difficult-to-reach areas. At www.tepe.com/au you can read more about our products.


Conclusion
Interdental cleaning is a vital part of oral hygiene, as it prevents the development of oral diseases and protects the body's overall health. Dental professionals have a key role in educating and motivating their patients to adopt and maintain interdental cleaning habits, by assessing their needs, advising them on the best tools and techniques, and providing support and feedback. By doing so, we can help our patients achieve and maintain optimal oral and general health.
References
1. Orlandi M et al. Impact of treatment of periodontitis on systemic health and quality of life: A systematic review. J Clin Periodontol. 2023 Jun:49 Suppl 24:314-327.
2. Sälzer S et al. Efficacy of inter-dental mechanical plaque control in managing gingivitis - a meta-review. J Clin Periodontol. 2015 Apr;42 Suppl 16:S92-105.
3. Chapple IL et al. Primary prevention of periodontitis: managing gingivitis. J Clin Periodontol. 2015 Apr;42 Suppl 16:S71-6.
About Michaela von Geijer, Doctor of Dental Surgery
Dr von Geijer works part-time at a private dental office in Sweden and TePe HQ in Malmö, Sweden. She has long clinical experience and is particularly interested in prevention and oral health. She has always placed a high value on working with preventive care.
Dr von Geijer has held temporary preclinical positions as amanuensis at the University of Lund, including basic research and assistance with education/training at the medical and dental schools. She also has experience lecturing to professionals when employed by pharmaceutical companies and companies within the dental industry.
Since 2015 Dr von Geijer has been employed by TePe and been a lecturer at universities worldwide.


A TRULY UNIVERSAL APPLICATION
G-AENIAL® UNIVERSAL INJECTABLE

G-ænial® Universal Injectable is a beautiful, high-strength1,2,3,4 universal composite, applied with the irresistible convenience of direct injection delivery. GC’s ingenious composite technology heralds a new era in composite placement.
G-ænial® Universal Injectable is suitable for the entire range of cavity classifications and more. Highly aesthetic restorations can be achieved using a single shade or multi-shade layering technique.

presentation, worn dentition

Restoring with G-ænial® Universal Injectable
CLICK HERE
CLICK HERE TO VIEW THE PRODUCTS ONLINE
DR ANTHONY MAK
BDS (USyd), Grad Dip Clin Dent (Oral Implants) (USyd) AUSTRALIA

After removal of existing restorations

Immediately post operative

Application of G-Premio BOND™ and light cure

6. Final restorative outcome using G-ænial® Universal Injectable and following application of Optigalze Color
1. Carrabba et al (2019). Injectable Resin Composite, Preliminary Clinical Report: 1 Year Follow-Up. J Dent Res Vol 98 (Spec Iss B): 0604. https://iadr.abstractarchives.com/abstract/19iags-3183775/injectable-resincomposite-preliminary-clinical-report-1-year-follow-up
2. Corsentino G, Ferrari M. (2020). Clinical Report of Class II Restorations Made Using an Injectable Resin Composite. J Dent Res J Dent Res Vol 99 (Spec Iss A): 1383. https://iadr.abstractarchives.com/ abstract/20iags-3322298/clinical-report-of-class-ii-restorations-made-using-an-injectable-resin-composite

3. Echevarria et al. (2020). Adhesive Interface and Chemical Composition of Nanoparticulate Composite
Universal Injectable. J Dent Res J Dent Res Vol 99 (Spec Iss A): 0746. https://iadr.abstractarchives.com/ abstract/20iags-3307659/adhesive-interface-and-chemical-composition-of-nanoparticulate-compositeuniversal-injectable
4. Echevarria et al. (2020). Adhesive Interface and Chemical Composition of Nanoparticulate Composite
Universal Injectable. J Dent Res J Dent Res Vol 99 (Spec Iss A):
1.Initial
5.
3.
2.
4.
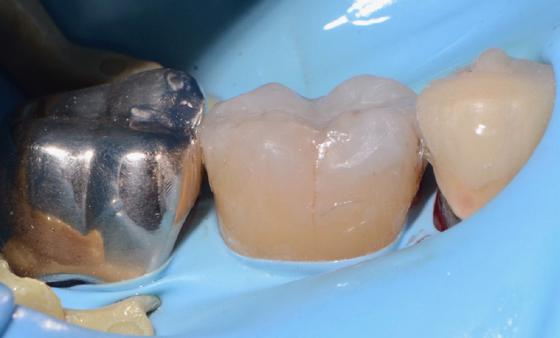
DIRECT RESTORATION OF THE COMPROMISED TOOTH


Direct posterior restorations utilising G-ænial® A’CHORD. G-ænial® A’CHORD is a universal composite restorative with a simplified unishade system and simplified handling that offers the ideal balance of simplicity, aesthetics and advanced technology in one product. G-ænial® A’CHORD provides excellent handling, whether sculpting with a hand instrument or using a brush. G-ænial® A’CHORD is a simplified solution that can truly impress your patients.

1. Pre-operative view shows a fractured amalgam restoration with loss of both lingual cusps. Isolation has been applied. The patient has opted for a direct restoration, understanding that an indirect restoration of tooth 46 would be optimal.

A dentin replacement material, everX Flow in Dentin shade, was placed in the cavity, following the anatomy of the missing dentin, with thicker application in the area of ML and DL cusp replacement.


2. The existing restoration has been removed, and air abrasion has been completed. The thickness of remaining cusps is evaluated. Cusp coverage is required in this case.


3. The matrix was applied. Selective etching approach was employed and G2-BOND Universal was utilised. G-ænial® Universal Injectable A2 was applied as a resin coat.
Shade integration is shown, G-ænial® A’CHORD shade A2 blended well with the remaining tooth structure.

HERE
HERE TO VIEW THE PRODUCTS ONLINE
BDentSc,
Dip Clin Dent (ARD) AUSTRALIA
4.
7. Occlusion checked and adjusted.
6.
5. Cusp by cusp build up was placed using G-ænial® A’CHORD shade A2.
8. Final restoration.
DR AMY CALVIN
LEGO PREP
WITH THE AQUACARE AIR ABRASION UNIT


aid location.


Fig.1 The preparation ready for cementation with composite bump to
Fig.2 Lithium disilicate emax onlay surface being prepared for bonding.
Fig.3 Immediate buccal view post cementation.
Fig.4 Occlusal view showing fantastic bio mimetic integration.
Fig.5 Post operative X-ray shows clean join lines. A raised margin allows for easier cement clean up and less excess remaining.
Fig.6 An incongruous defective amalgam filling.

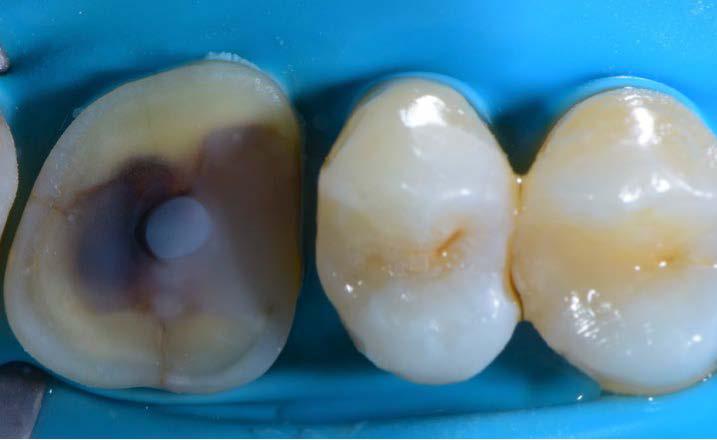
Fig.9 Occlusal view immediate post operative shows very natural result well integrated, occlusal bump (Lego onlay prep) after cleaning with AquaCare.


Fig.10 Immediate after onlay cementation.
Fig.11 X-ray showing deep margin elevation and onlay placed over to protect tooth.
Fig.12 Comparison prior to emax onlay replacing stained old composite restoration.
Fig.7 Preparation after IDS and being prepared for cementation.
Fig.8 Supra gingival margin allowing for simplified excess cement removal.
THOMAS TAHA UK
PANAVIA™ 40 YEARS OF SUCCESS IN ADHESIVE LUTING
Did you ever wonder why the products of the PANAVIA™ brand offer such outstanding performance? You probably know that they all contain the original MDP monomer developed in the early 1980s. It has attracted much attention because it is such an excellent adhesive monomer. This phosphate ester monomer forms a very strong bond to tooth structure, zirconia, and dental metals. It has been used in every PANAVIA™ product. In reality, however, other catalytic technologies and ingredients alongside MDP are important technological contributors supporting the performance of our cementation solutions.
Ingredients affecting the polymerization reaction
One of these decisive additional technologies and ingredients is the polymerization catalyst triggering the curing process. Different from the MDP monomer used in every PANAVIA™ product, the polymerization catalyst has been continuously improved since the introduction of PANAVIA™ EX in 1983. New versions have been developed for PANAVIA ™ 21, PANAVIA ™ Fluoro Cement and PANAVIA ™ V5, for example. Another important component also affecting the curing process is the Touch Cure Technology used in two of the three major products of the current portfolio of PANAVIA™: PANAVIA™ V5 and PANAVIA™ Veneer LC. This technology was first used in PANAVIA™ 21, which was launched in 1993.

The contact of the chemical polymerization activator contained in the self-etching primer with the resin cement paste accelerates the polymerization of the cement from the adhesive interface, thus providing better adhesion of the resin cement. In developing PANAVIA™ V5, we reviewed the chemical composition of the existing PANAVIA™ products and updated it substantially. The Touch Cure technology has also been adopted for use in the case of PANAVIA™ V5 Tooth Primer and the concomitantly used PANAVIA™ V5 Paste. When cementing veneers with PANAVIA™ Veneer LC, we also use PANAVIA™ V5 Tooth Primer for conditioning teeth. This also involves the application of Touch Cure technology for achieving an adhesive connection with the tooth without compromising the working time of the cement paste.


Additional adhesive monomers
Even in the field of adhesive monomers, we did not stand still: we developed the LCSi monomer, a long carbon chain silane-coupling agent which made it possible to integrate the function of a ceramic primer in our universal self-adhesive resin cement PANAVIA™ SA Cement Universal. With its high level of hydrophobicity, this monomer provides stable, long-term bond strength. Generally speaking, it may be said that the reason bond durability may drop is a hydrolytic reaction damaging the chemical bond between the silica contained in the glass ceramics and the silane-coupling agent.
Three products covering virtually every need
By combining these technologies and ingredients smartly, we have succeeded in developing a resin cement portfolio that covers virtually every need. With PANAVIA and PANAVIA wide variety of cases. The products allow for the luting of various types of restorations, prosthetic appliances and for the placement of posts, and produce great outcomes if used properly according to the instructions for use.
PANAVIA
widest range of uses among the three cement systems just mentioned. It covers almost all the intended uses of the other two cements. Therefore, it is possible for the dental practitioner to choose the right cement system for treatment, according to the cases arriving at the clinic and patient needs, from among these three major resin cement products: PANAVIA™ V5, a resin cement with a wide range of applications; PANAVIA™ SA Cement Universal, a simple and easy-handling self-adhesive resin cement; and PANAVIA™ Veneer LC when there is a need to bond laminate veneers.

Exploring new opportunities
The good thing about developing technologies in a company like Kuraray Noritake Dental is that their application is not limited to a certain product or product group. The R&D Department always carries out research on how to leverage the benefits of the technologies in other applications. Take, for example, KATANA™ Cleaner, which was released in 2019. This cleaning agent can be used to remove saliva, blood, temporary cement, or other contaminants that can adhere to the surfaces of teeth or prosthetic devices during trial fitting and temporary cementation of a prosthetic device. This unique product has been developed by taking advantage of the surfactant function of the MDP monomer.
Hence, it is mainly our long-standing knowledge and experience in the development of dental resin cements and adhesive solutions that provides for the excellence of the current PANAVIA™ portfolio. We know how to improve on existing technologies, to never stop developing new ones and to continuously look for the best way to combine proven and new components to obtain the best possible outcomes. In the steps of our product development procedure clinical evaluations are conducted and feedback from dental practitioners is gathered in order to take into account the extreme conditions found in the oral environment. In the past 40 years, this strategy has proven successful, and we are sure it will help us to develop many other innovative products that offer ideal support in striving to improve the oral health of patients.
HOW TO CEMENT RESTORATIONS MADE OF HIGH TRANSLUCENCY ZIRCONIA


KATANA™ Zirconia STML is a highly popular material used in many dental laboratories around the world.
Compared to traditional zirconia framework materials with a mainly tetragonal polycrystalline structure, the material has a higher yttria content, leading to a different material structure with an impact on the optical and physical properties (the translucency is increased, the flexural strength reduced). As a consequence, the indication range is limited to single-tooth restorations and two- to three-unit bridges in the anterior and posterior regions. The greatest benefit lies in a much higher aesthetic potential, which is responsible for the fact that the material is predominantly used for the production of monolithic restorations or those with a micro cut-back individualized with a micro-layer of porcelain.
While the indications and technical procedure are well-known, there seem to be some obscurities regarding the handling in the dental office. Is conventional cementation possible and recommended or is an adhesive luting procedure preferable? Is the surface pre-treatment the same as for tetragonal zirconia or is a different procedure required? And what may be expected regarding the long-term behaviour of KATANA™ Zirconia STML restorations? A close look into the available scientific literature provides some guidance.
Definitive placement of restorations made of KATANA™ Zirconia STML
Conventional cementation or adhesive luting? In principle, both procedures are possible when the restoration to be placed has a retentive design. It is generally accepted that a full coverage crown provides sufficient retention for conventional cementation when the abutment tooth is at least 4 mm high and the convergence angle of the axial walls ranges between 6 and 12 or maximally 15 degrees1,2
The reason is that the flexural strength of the material is higher than 350 MPa3, the critical value for conventional cementation. As conventional cements are opaque and available in a single shade, however, the use of a (self-) adhesive resin cement may be preferable with all high-translucency restorative materials for aesthetic reasons. Anyway, these products are mandatory whenever a macroretentive preparation design is not feasible or desired. To sum up, the use of a self-adhesive or adhesive resin cement is preferable in many situations. An argument in favour of self-adhesive resin cements is the lesser effort involved in their use.
But what about the pre-treatment of the zirconia? No matter what type of dental zirconia is used, etching with hydrofluoric acid is ineffective due to the lack of glass matrix in the material. However, it is clear that surface modification is necessary to establish a strong and durable bond to any resin cement system4,5
The method generally recommended for highstrength zirconia is sandblasting with aluminium oxide particles or tribochemical silica coating4. The particle size should be small (≤ 50 µm) and the pressure low (about 1 bar) to avoid a weakening of the material’s mechanical properties3,4. For lowerstrength material variants, this risk of weakening the material seems to be higher5, so that it becomes even more important to work with a low pressure and particle size5-8. In the case of KATANA™ Zirconia, however, it was reported that “alumina-sandblasting significantly increased the biaxial flexural strength of KATANA™ STML.”9 This means that proper sandblasting of restorations made of KATANA™ Zirconia STML did not affect the flexural strength of the material, which was even increased because of the specific properties of zirconia from Kuraray Noritake Dental.
Based on these findings, the following procedures are recommended for high-translucency zirconia:
Option 1
Aluminium oxide air-abrasion followed by the use of a self-adhesive resin cement containing 10-MDP6
Option 2
Tribochemical silica coating followed by silanization of the bonding surface6
As the dual-cure self-adhesive resin cement PANAVIA™ SA Cement Universal contains the Original MDP monomer and the long carbon-chain silane coupling agent (LCSi monomer), it is suited for both procedures.
PANAVIA™ SA Cement Universal is available in an automix syringe and a handmix system, which consist of a paste-paste formulation. One paste contains the Original MDP monomer in a hydrophilic monomer environment and the other contains the inactive LCSi monomer in an environment of hydrophobic monomers. When extruding the pastes, they are mixed in the syringe’s mixing tip (automix) or dispensed on a mixing pad and mixed by hand (handmix). Afterwards, the material is simply applied to the intaglio of the restoration and the restoration is placed. Cleanup of excess cement is easiest after tack-curing (2 to 5 seconds).
Does this work well in the clinical environment?
The best way to check whether the described procedure is successful in the clinical environment is by conducting a clinical study. This is exactly what a group of researchers from the University Complutense of Madrid, Spain, has done with the material combination KATANA™ Zirconia STML and PANAVIA™ SA Cement Universal10. Within the framework of the prospective clinical trial, 30 posterior crowns made of KATANA™ Zirconia STML were placed in 24 individuals requiring posterior tooth restorations. The teeth were prepared as recommended for all-ceramic restorations, allowing for a wall thickness of approximately 1 mm (recommended minimum wall thickness of KATANA™ Zirconia STML for crowns in the posterior region: 1.0 mm). The restorations were sintered, characterized and glazed as recommended by the material manufacturer and subsequently tried in. Prior to cementation, the intaglio of the restorations was pretreated with aluminium oxide particles (50 µm, 1 bar pressure) followed by ultrasonic cleaning. The use of PANAVIA™ SA Cement Universal also was in line with the manufacturer’s recommendations.
A clinical evaluation of the crowns was performed after 6, 12 and 24 months using the California Dental Association (CDA) quality evaluation system. The parameters evaluated in this system are the surface and colour of the restorations,
their anatomical form and the marginal integrity of the crowns. After 24 months, the success and survival rates were 100 percent. Regarding all three parameters, the crowns received a “satisfactory” (Score 3 or 4) rating. Marginal integrity (the key parameter to judge the performance of the resin cement) received an “excellent (the highest possible Score 4) in all 30 cases.
Conclusion
The researchers concluded that “the excellent results obtained in this study suggest that the third-generation tooth-supported monolithic zirconia crowns in posterior regions seem to be a good alternative to metal-ceramic crowns, secondgeneration monolithic zirconia crowns, and veneered zirconia crowns. A long-term study is necessary to confirm this short-period study.” Hence, it seems that KATANA™ Zirconia STML and PANAVIA™ SA Cement Universal are a promising team, and that adhering to the recommended above-mentioned protocols is likely to produce excellent results that remain stable over many years.

References
1. Edelhoff D, Özcan M. To what extent does the longevity of fixed dental prostheses depend on the function of the cement? Working Group 4 materials: cementation. Clin Oral Implants Res. 2007;18 Suppl 3:193-204.
2. Güth JF, Stawarczyk B, Edelhoff D, Liebermann A. Zirconia and its novel compositions: What do clinicians need to know? Quintessence Int. 2019;50(7):512-20.
3. Kern M, Beuer F, Frankenberger R, Kohal RJ, Kunzelmann KH, Mehl A, Pospiech P, Reis B. All-ceramics at a glance. An introduction to the indications, material selection, preparation and insertion techniques for all-ceramic restorations. Arbeitsgemeinschaft für Keramik in der Zahnheilkunde. 3rd English edition, January 2017.
4. Comino-Garayoa R, Peláez J, Tobar C, Rodríguez V, Suárez MJ. Adhesion to Zirconia: A Systematic Review of Surface Pretreatments and Resin Cements. Materials (Basel). 2021 May 22;14(11):2751.
5. Mehari K, Parke AS, Gallardo FF, Vandewalle KS. Assessing the Effects of Air Abrasion with Aluminum Oxide or Glass Beads to Zirconia on the Bond Strength of Cement. J Contemp Dent Pract. 2020 Jul 1;21(7):713-717.
6. Chen B, Yan Y, Xie H, Meng H, Zhang H, Chen C. Effects of Tribochemical Silica Coating and Alumina-Particle Air Abrasion on 3Y-TZP and 5Y-TZP: Evaluation of Surface Hardness, Roughness, Bonding, and Phase Transformation. J Adhes Dent. 2020;22(4):373-382.
7. Alammar A, Blatz MB. The resin bond to high-translucent zirconia-A systematic review. J Esthet Restor Dent. 2022 Jan;34(1):117-135.
8. Soto-Montero J, Missiato AV, dos Santos Dias CT, Giannini M. Effect of airborne particle abrasion and primer application on the surface wettability and bond strength of resin cements to translucent zirconia. J Adhes Sci Technol, Online publication May 2022.
9. Inokoshi M, Shimizubata M, Nozaki K, Takagaki T, Yoshihara K, Minakuchi S, Vleugels J, Van Meerbeek B, Zhang F. Impact of sandblasting on the flexural strength of highly translucent zirconia. J Mech Behav Biomed Mater. 2021 Mar;115:104268.
10. Gseibat M, Sevilla P, Lopez-Suarez C, Rodríguez V, Peláez J, Suárez MJ. Prospective Clinical Evaluation of Posterior Third-Generation Monolithic Zirconia Crowns Fabricated with Complete Digital Workflow: Two-Year Follow-Up. Materials (Basel). 2022 Jan 17;15(2):672. (https://pubmed.ncbi.nlm.nih.gov/35057389/)
OPTIMIZING FUNCTIONAL AND ESTHETIC PARAMETERS IN VENEER CEMENTATION
The use of both porcelain veneers to improve and restore the shape, shade and visual position of anterior teeth is a common technique in esthetic dentistry. The biomimetic aim in the restoration of teeth is not only the cosmetic domain, but also functional considerations. It is critical to note that the intact enamel shell of the palatal and facial walls with respect to anterior teeth are responsible for its innate flexural resistance. When dental structure has been violated by endodontic access, caries and/or trauma, every effort must be made to preserve the residual structure and strive to restore or exceed the baseline performance levels of a virgin tooth.
Background
A 55 year old ASA II female with a medical history significant only for controlled hypertension presented to the practice for teeth whitening. It was foreseen that dental bleaching would not have an effect on the shade of a pre-existing porcelain veneer on tooth 1.2, and that this would need to be retreated following the procedure especially if the shade value changes were significant. The patient started with a baseline shade of VITA* 1M1:2M1; 50:50 ratio in the upper anterior region and 1M1 in the lower anterior region. Following a nightguard bleaching protocol with 10% carbamide peroxide worn overnight for 3-4 weeks, the patient succeeded in achieving a VITA* 0M3 shade in both upper and lower arches.
As a result, there was a significant value discrepancy between the veneered tooth 1.2 and the adjacent teeth, and also increased chroma noted on the contralateral tooth 2.2 due to a facially-involved Class III composite restoration. This latter tooth also did not match the contralateral tooth in dimension and thus the decision was made to treat both lateral incisors with bonded lithium disilicate laminate veneers. The canine adjacent (2.3) featured localized mild to moderate cusp tip attrition, but the patient did not want to address this until following the currently-discussed veneers were placed.
The goal of smile design at this stage is to ultimately establish bilateral harmony with the view to placing an additional indirect restoration restoring the facial volume and cusp tip deficiency of tooth 2.3 in the near future.
Procedure
A digital smile design protocol was not required for the initial intention, which was individual treatment of the lateral incisors, as slight variation is permitted in this tooth type, being a personality and gender marker of the smile. Prior to anesthesia, the target shade was selected using retracted photos featuring both polarized and unpolarized selections. The photographs were prepared for digital shade calibration by taking reference views with an 18% neutral gray white balance card (Fig. 1).
The basic body shade was VITA* 0M2 with an ingot shade of BL2. The patient was anesthetized using 1.5 carpules of a 2% Lignocaine solution with 1:100,000 epinephrine before affixing a rubber dam in a split dam orientation. The veneer on tooth 1.2 was sectioned and removed from tooth 1.2 and a minimally-invasive veneer preparation completed on tooth 2.2 (Fig. 2). Partial replacement of the old composite resin restoration was completed on the mesioincisobuccopalatal aspect of tooth 12 with the intact segment maintained.
Adhesion to old composite was achieved using both micro particle abrasion and a silane coupling agent (CLEARFIL™ CERAMIC PRIMER PLUS, Kuraray Noritake Dental Inc.). Margins were refined and retraction cords were placed. Preparation stump shades were recorded. Final impressions were taken using both light and heavy body polyvinylsiloxane in a metal tray. The patient was provisionalized and sent away with instructions to verify the shade at the laboratory at the bisque bake stage. The models prepared by the laboratory verify the minimallyinvasive nature of the case.
On receipt of the case, the patient was anesthetized and the provisionals removed. The preparations were debrided and prepared for bonding by abrading the surfaces using a 27 micron aluminum oxide powder at 30-40 psi. The veneers were assessed using a clear glycerin try-in paste (PANAVIA™ V5 Try-in Paste (Clear), Kuraray Noritake Dental Inc.). Retraction cords were packed and the intaglio surface of the restorations treated using a 5% hydrofluoric acid for 20 seconds prior to application of a 10-MDP-containing silane coupling agent (CLEARFIL™ CERAMIC PRIMER PLUS, Kuraray Noritake Dental Inc.) (Fig. 3). The tooth surface was etched using 33% orthophosphoric acid for 20 seconds and rinsed. A 10-MDP-containing primer was applied to the tooth (PANAVIA™ V5 Tooth Primer, Kuraray Noritake Dental Inc.) (Fig. 4) and air dried as per manufacturer’s instructions.


Fig. 1. Reference photograph taken with a 18% neutral gray card.
Fig. 2. Veneer preparation tooth 1.2, 2.2
Fig. 4. PANAVIA™ V5 Tooth Primer application to etched tooth surfaces.
Fig. 3. CLEARFIL™ CERAMIC PRIMER PLUS applied to intaglio surfaces of veneers.
Veneer cement was loaded (PANAVIA™ Veneer LC Paste (Clear), Kuraray Noritake Dental Inc.) (Fig. 5) and the veneer seated. The excess cement featured a non-slumpy character and maintained the veneer well in place during all margin verification exercises prior to a 1 second tack cure (Fig. 6).


The cement was rendered into a gel state, which facilitated “clump” or en masse removal of cement with minimal cleanup required (Fig. 7). The margins were coated using a clear glycerin gel prior to final curing to eliminate the oxygen inhibition layer (Fig. 8).


The margins were finished and polished to high shine and the occlusion of the restorations verified as conformative. The post-operative views show excellent esthetic marginal integration (Fig. 9).


On polarized photograph reassessment, the restorations are well-integrated into the new smile esthetically and functionally (Fig. 10), now awaiting esthetic augmentation of tooth 2.3 to match the contralateral canine.

Fig. 6. PANAVIA™ Veneer LC Paste immediately after seating. Note the viscous, non-slumpy nature of the cement, which allows for ease of removal under both wet and gel-phase options.
Fig. 9. Post-operative esthetic integration of veneers on 1.2 and 2.2.
Fig. 7. Excess cement removal after tack curing for 1 second.
Fig. 8. Final curing of veneers from both palatal and facial aspects simultaneously.
Fig. 5. PANAVIA™ Veneer LC Paste (Clear) shade loaded onto prepared intaglio surfaces of veneers.
Fig. 10. Final result with polarized photography on reassessment.
Rationale for Material Selection
Porcelain is often the material of choice for prosthetic dental veneers due to its innate stiffness in thin cross section, ability to modify and transmit light for optimal internal refraction and its bondability by way of adhesive protocols to composite resin. This trifecta allows for a maximal preservation of residual tooth structure whilst bolstering its physical function relative to flexural performance1. The elastic modulus of a tooth can be restored to 96% of its control virgin value if the facial enamel is replaced with a bonded porcelain laminate veneer2. The elastic modulus of lithium disilicate is 94 GPa whereas that of intact enamel is 84 GPa. The elastic modulus of dentin has been found to range from 10-25 GPa, whereas that of the hybrid layer can vary widely, indeed from 7.5 GPa to 13.5 GPa in a study by Pongprueska et al3. This low flexural resistance range reflects that of deep dentin and not that of superficial dentin, which does not reflect an ideal situation where a laminate veneer is bonded in as much enamel as possible, or in the worst case to superficial dentin. Maximal flexural strength of the hybrid layer is invaluable from a biomimetic standpoint.
PANAVIA™ V5 Tooth Primer (Kuraray Noritake Dental Inc.) incorporates the use of the original 10-methacryloyloxydecyl dihydrogen phosphate (10-MDP) monomer, which elicits a pattern of stable calcium-phosphate nanolayering known as Superdentin, an acid-base resistant zone that is about 600x more insoluble than the monomer 4-MET, which is found in many other adhesives. Indeed, PANAVIA™ V5 Tooth Primer is used solely in conjunction with Kuraray Noritake Dental Inc. PANAVIA™ V5 Paste and PANAVIA™ Veneer LC Paste which both allow the primer to act as a bond without the need to cure the layer prior to cementation of the indirect restoration due to its dual cure potential when married together. If a bonding agent is preferred, CLEARFIL™ Universal Bond Quick (Kuraray Noritake Dental Inc.), a multimodal adhesive that also contains the essential amide monomer and 10-MDP components created by Kuraray Noritake Dental Inc., can be used. Of note, CLEARFIL™ Universal Bond Quick features exceptional flexural strength due to the accentuated cross-linking during polymerization afforded by the amide monomers, on the order of 120 MPa by itself4
PANAVIA ™ Veneer LC is a cement system that features cutting edge technology that provides excellent aesthetics and adhesive stability of your indirect restorations, whilst allowing a stress-free workflow. It is a cement system that is a game changer; one that allows you to restore confidence in the patient, strength in the tooth-restoration interface, and bolsters your clinical confidence in the delivery of biomimetic excellence.
References
1. Magne P, Douglas WH. Rationalization of esthetic restorative dentistry based on biomimetics. J Esthet Dent. 1999;11(1):5-15. doi: 10.1111/j.1708-8240.1999.tb00371.x. PMID: 10337285.
2. Magne P, Douglas WH. Porcelain veneers: dentin bonding optimization and biomimetic recovery of the crown. Int J Prosthodont. 1999 Mar-Apr;12(2):111-21. PMID: 10371912.
3. Pongprueksa P, Kuphasuk W, Senawongse P. The elastic moduli across various types of resin/dentin interfaces. Dent Mater. 2008 Aug;24(8):1102-6. doi: 10.1016/j.dental.2007.12.008. Epub 2008 Mar 4 PMID: 18304626.
4. Source: Kuraray Noritake Dental Inc. Samples (beam shape; 25 x 2 x 2 mm): The solvents of each material were removed by blowing mild air prior to the test.

DR CLARENCE TAM, HBSc, DDS, AAACD, FIADFE
KATANA™ ZIRCONIA RESTORATIONS
PRE-TREATMENT FOR ADHESIVE LUTING
The prerequisite for adhesive luting is a reliable bond between the tooth and the restorative material. The quality of the bond depends on the resin cement and its correct application. The state of the bonding surface also plays a decisive role. The surfaces of the tooth and restoration must be conditioned and clean. We spoke with Dr. Adham Elsayed.
All-ceramic restorations require adhesive luting. Is this true for all restorative materials (zirconia, lithium disilicate, hybrid ceramics, etc.)?
Yes and no, several factors must be taken into account. The first important factor is the material's properties, especially the flexural strength. Fortunately, clear guidelines based on scientific studies are available. As a guideline, all materials with a flexural strength of less than 350 MPa should be placed with an adhesively luted. Correct adhesive luting stabilizes the restoration and tooth structure. Restorative materials of higher strength (e.g. reinforced glassceramics, lithium disilicate ceramics, zirconia, etc.) can be cemented with conventional methods. However, some studies indicate that adhesive luting can improve the overall stability, whereas others show no significant difference.
Another factor guiding the decision for or against adhesive luting is the preparation design. For crowns and bridges, the decisive factor is whether the operator has been able to adhere to the preparation guidelines (minimum abutment height of 4 mm and maximum convergence of 15 degrees)1-5 in order to create the required retention and resistance form for conventional cementation. Minimally invasive restorations, such as resin-bonded fixed dental prothesis (FDPs), veneers and inlay FDPs, are based on a non-retentive preparation design. In such cases, only adhesive luting can ensure adequate retention.
Aesthetics is another important factor. Besides the restorative material, the luting material also has a major impact on the optical outcome. For highly translucent ceramics in particular, it is recommended to resort to adhesive luting.
While conventional cements are usually only available as opaque materials, resin composites come in different colours with higher colour stability (PANAVIA™ V5 or PANAVIA™ SA Cement Universal).
How should the surface be pre-treated or conditioned for adhesive luting?
Pre-treatment of the surface depends on the structure or microstructure of the ceramic. Silicate ceramics (e.g. glass ceramics) have a glass phase and can be etched. Etching increases the surface area, thus preparing it for adhesive luting. In contrast, oxide ceramics like zirconia as well as composites have no or neglectable amount of glass phase. They cannot be etched. Their surface is conditioned by air-abrasion (with aluminium oxide). This is the only current method which is scientifically proven to achieve a dependable bond with these materials.
How important is correct cleaning of the tooth and restoration surface for the quality of the bond?
The restoration surface must be decontaminated immediately prior to luting. Contamination must be removed thoroughly. Rinsing with water or alcohol has been shown to be insufficient. Therefore, cleaning solutions such as KATANA™ Cleaner have been developed.
Rub it in, rinse and dry—that's all—for optimal bonding procedures. Unlike other cleaning products, which have to be rubbed in for longer and are only suitable for extraoral use due to their high pH value, KATANA™ Cleaner is applied within 10 seconds and is suitable for both intraoral and extraoral use.
Any contamination is detrimental for the adhesive bond. At try-in of the restoration, for example, its surface becomes contaminated. Saliva, possibly blood, etc. accumulate and the proteins contained act to isolate all subsequently applied components (e.g. the primer). Any contamination must therefore be thoroughly removed prior to the bonding procedure. This is also the case for direct adhesive restorations. KATANA™ Cleaner offers a simple and quick way to accomplish this task.
What makes KATANA™ Cleaner so interesting for the user?
The special features of KATANA™ Cleaner are its integrated MDP salt and mild pH-value. Let's look at the function of the MDP salt. Rubbed in (for 10 seconds), the cleaner causes the contaminant particles (e.g. remnants from the work process, proteins from saliva, blood, etc.) to adhere to the MDP salt, like a magnet. The contamination is flushed out of the surface by rinsing with water. This ability is attributable to the MDP salt and makes KATANA™ Cleaner interesting and easy to use. In addition, the pH-value allows us to use the cleaning solution both intra- and extra-orally, which is another special feature. We generally recommend the use of KATANA™ Cleaner for both - direct and indirect restorations.
Measurement conditions: Substrate surface: After #1000 sanding, alumina sandblasting. Coverage area ø 5mm, measured at 37°C, underwater storage for 1 day. Cement: PANAVIA™ V5 Paste. Data source: Kuraray Noritake Dental Inc. *Numerical values vary depending on measurement conditions.
Thanks to the universal applicability of the cleaning solution, only one material is needed, while the time required is extremely low. Even for bonding abutments on a titanium base, cleaning with KATANA™ Cleaner is recommendable as it provides for an ideal basis (before applying the primer). In this case, contamination (e.g. finger grease, residues of the air abrasive) could also act as an insulator and impair the quality of the bond.
References
1. Ladha K, Verma M. Conventional and contemporary luting cements: an overview. J Indian Prosthodont Soc. 2010;10(2):79-88.
2. Edelhoff D, Özcan M. To what extent does the longevity of fixed dental prostheses depend on the function of the cement? Working Group 4 materials: cementation. Clin Oral Implants Res. 2007;18 Suppl 3:193-204.
3. Güth JF, Stawarczyk B, Edelhoff D, Liebermann A. Zirconia and its novel compositions: What do clinicians need to know? Quintessence Int. 2019;50(7):512-20.
4. Smith CT, Gary JJ, Conkin JE, Franks HL. Effective taper criterion for the full veneer crown preparation in preclinical prosthodontics. J Prosthodont. 1999;8(3):196-200.
5. Uy JN, Neo JC, Chan SH. The effect of tooth and foundation restoration heights on the load fatigue performance of cast crowns. J Prosthet Dent. 2010;104(5):318-24.

MY UPPER FULL DENTURE PROTOCOL

As a young dentist in my first years after graduation, I was struggling to produce a good functional denture for my patients. The protocol I learned at my university was the one widely used in my country but it wasn’t giving me the same quality results every time.
There was a certain amount of guesswork involved and that is exactly what I wanted to avoid. And for that reason, I decided to travel abroad and take courses with prosthodontists who have a deep practical knowledge of removable prosthodontics and full dentures especially.
Here I have to name Prof. Dr Alexander Gutowski from Germany, Walter F. Turbyfill, DDS, and Joseph Massad, DDS, from the United States and Dr Jiro Abe from Japan. After taking my first courses I started applying the skills in my office and could see a big change in the quality of full dentures produced.


I also was processing dentures in my laboratory, performing every step myself, which also helped me to learn a great deal from a technical point of view.
Throughout the years a full denture protocol took shape in my hands that I use on every patient and that works extremely well; the previously mentioned guesswork has been removed.
The protocol is a mixture of what I learned in all those courses and what I practised and developed myself while producing full dentures in my office. The aim is the same as every practitioner’s aim – functional and aesthetic full dentures satisfying my patients’ needs.


Fig. 1: Special plastic tray developed by Prof. Dr Alexander Gutowski
Fig. 4: Primary impression in patient’s existing denture – light-bodied silicone Honigum Pro-Light
Fig. 2: Primary impression in patient’s existing denture – silicone stops
Fig. 5: Primary impression in patient’s existing denture – posterior border Aluwax uncut
Fig. 3: Primary impression in patient’s existing denture – Detaseal Function
Fig. 6: Primary impression in patient’s existing denture – posterior border Aluwax cut with scalpel blade
Taking the primary impression
I always take a primary impression as a functional impression, i.e. a myodynamic one. It is taken with some kind of a mouldable plastic tray or with a special plastic tray developed by Prof. Dr Gutowski (Fig.1) or even with a patient’s existing denture.
A polyvinyl siloxane impression material is used, with a sufficient functional setting time, during which all necessary functional movements can be performed and embedded into the border. At first, silicone stops are applied to the palatal part of the tray, in five or six places, and moulded directly in the patient’s mouth before setting (Fig. 2).
A material such as O-Bite (DMG) is used. These stops prevent the vestibular tissue from pushing against the impression tray, by pulling the vestibulum upwards and creating space for the light-bodied material that will be used later. After that a functional border is produced.
My favourite material for this step is either Honigum Pro Heavy (DMG) or DetaSeal (Detax) (Fig. 3). When the material sets, its edges are cut so that they do not interfere with the next detail impression. This is done with a light-bodied polyvinyl siloxane material.
I use Honigum Pro Light (DMG) for this step (Fig. 4) or, in the case of a primary impression, any kind of a light body type polyvinyl siloxane material that I have in my office.
After setting and cutting overhangs in the impression, the distal border (between A and H lines) is marked in the mouth with a special copying pencil and transferred to the impression and then marked definitively with Aluwax (Aluwax Dental Products Company) (Fig. 5) and (Fig. 6), finishing the primary impression.
Custom impression tray
The impression is normally poured with stone and a stone model is produced. If a situation allows a silicone model to be made, this saves time and can be used repeatedly if needed. I make the silicone model from the Zeta Labor material (Zhermack) (Fig. 7, 8, 9).
This is a fast and simple procedure that involves imprinting the primary impression into a silicone material. A custom impression tray from chemically curing resin or from a light-curing resin is prepared afterwards (Fig. 10), containing all the necessary anatomical landmarks imprinted into the silicone material.
Taking the definitive impression
The steps for the definitive impression are the same as those for the primary impression. In this case strict adherence to the proper protocol and material use is needed, especially in the beginning.
It begins with a try-in in the mouth. The tray should cover the palate where we need it, should be comfortable for the patient and also shouldn’t be overextended. like it when the tray itself is suctioning at this moment, as this shows that my first impression was nearly perfect. Next, we need to produce stops on the palatal side of
the tray (Fig. 11) at this precise moment (I don’t have enough control over silicone materials as they tend to set quite fast in this very important moment).
Use five or six spots and mould them in the mouth so that the stops are approx. 0.5 to 1 mm in height. They are light cured and the tray is checked for stability and possible overextension. An overextension is very rare if you do the primary impression as described, however. Future denture borders are covered with DMG silicone adhesive (Tray-Adhesive for A-silicones). A vestibular retractor is positioned in the mouth.
Honigum Pro Heavy (Honigum Pro Heavy Fast for experienced dentists) is injected onto the border, the impression tray is positioned in the mouth, pushed gently but all the way onto the stops and the retractor is removed.
The patient then performs all necessary functional movements – the so called “smile and kiss” protocol for upper denture (Fig. 12). After setting there might be some areas where the tray is showing through – for the purpose of ensuring that there will be no pressure spots in the denture later on I grind them away aggressively, by least 1 mm.
I like Honigum Pro Heavy because this material flows very well yet is thixotropic when in the tray. It can also be moulded very effectively by the patient’s lips and surrounding soft tissues, and the most important thing is that it sets to a very stiff, strong and hard material at the very end that creates a perfect and very stable functional border.
After setting, the material is removed, overhangs are cut away and the future inner surface is polished with a bur (to avoid sharp edges). Palatal stops are removed (Fig. 13). From now on the Honigum Pro Heavy functional border defines the tray and provides the seal. The inside of the tray is now covered with a thin layer of the DMG silicone adhesive.
The retractor is positioned back into patient’s mouth, Honigum Pro Light is used to fill the inner part of the tray and the same process that was used with Honigum Pro Heavy is repeated. The tray is gently positioned (the borders will guide you) and then functional movements are perfor- med.
If the light material flows too far back, remove it with a finger. Honigum Pro Light is a highly thixotropic material and will stay on the palate, where I like to put a small amount prior to positioning the impression tray. It also has some very impressive hydrophilic characteristics that help me to create perfect impressions (Fig. 14).
After setting and cutting overhangs in the impression, the distal border (between A and H lines) is marked in mouth with a special copying pencil, transferred to the impression and then marked definitively with Aluwax (Aluwax Dental Products Company) (Fig. 15, 16).
This finishes the definitive impression, finishing the perfect seal all around the denture border and thus producing the correct suction (Fig. 17).


Fig. 7: Producing the silicone model –Zhermack Zeta Labor
Fig. 8: Producing the silicone model –Zhermack Zeta Labor
Fig. 9: The silicone model – Zhermack Zeta Labor
Fig. 13: Definitive impression – functional border cut with scalpel blade and pressure spots removed
Fig. 14: Definitive impression – light-bodied silicone Honigum Pro-Light
Fig. 15: Definitive impression – posterior border Aluwax uncut
Fig. 10: The silicone model and the custom impression tray
Fig. 11: Definitive impression – composite stops
Fig. 12: Definitive impression – functional border uncut
Fig. 16: Definitive impression – posterior border Aluwax cut with scalpel blade
Fig. 17: Comparison of the definitive impression and old non-functional denture
Fig. 18: Bite rim on the definitive impression
Fig. 22: Teeth set-up on the former custom impression tray/ bite rim
Fig. 23: Final palatal view of the full upper denture
Fig. 24: Smile with a full upper denture
Fig. 19: Bite rim on the definitive impression
Fig. 20: CR registration on a bite rim with GC Bite Compound – another patient
Fig. 21: CR registration on a bite rim with GC Bite Compound – another patient
Vertical dimension and CR (centric relation) registration
I prefer to incorporate this step into the same appointment with the definitive impression by simply adjusting the impression tray with a thick layer of light curing resin as a rim (Fig. 18, 19). No wax is used. Quality adhesion with the impression tray is done by using Dry Coat (DMG) and a very thin layer of any type of flowable resin (LuxaFlow by DMG or similar). I make sure the vertical dimension is correct and the front part of the impression tray is positioned where the front teeth need to be. For all this, the Gutowski measuring device helps me immensely. The soft not yet cured Supertec material is applied to the tray and the patient is guided into CR (centric relation) while the lower teeth make shallow imprints into the soft Supertec. This is repeated a couple of times to ensure we achieve a repeatable CR position. The impression is then removed from the mouth and the resin is cured. In the next step, imprints of the lower teeth are ground away, leaving space for the definitive registra- tion material. My favourite material for any type of bite registration is GC Bite Compound (GC) (Fig. 20, 21). It needs to be warmed up and then the patient closes into this material, once again in CR, ideally not biting through and touching the tray.
If a complicated case is being treated, I suggest separating these two steps and preparing a separate maxillary rim. This is made after pouring the master model, using this master model. The base of the impression tray is used, lined with a light body type of polyvinyl siloxane material, like Honigum Pro Light (DMG). I like to use the same type of material as for the impression. The model is dampened in water for a minute or so. The edges and base of the former impression tray are ground thin so that it is easy to put it back on the model and, the tray is cleaned and roughened.
It must be coated with the adhesive from SilagumComfort (DMG) in the next step. Other adhesives won’t work so well! After that, Honigum Pro Light is applied to the model and the base is pushed onto it with a gentle touch. After setting, careful removal is necessary, but the light A-silicone will always make removal possible.

The next steps can be taken from the previous section with the tray adjusted so that the vertical dimension and the position of the front teeth are correct.
It is then checked in the mouth and adjusted in the bite as needed. There should be multiple contacts on both sides of the rim in case the patient bites through during the registration. The rim has to be suctioning and stable. We can then concentrate on the CR registration. This is done with GC Bite Compound (GC) again. A facebow transfer is necessary for precision denture occlusion in this step.
Denture try-in
The master model is poured with stone either before the rim is made or after the impression together with VDO and CR registration are made in one appointment. In the first case the rim already fits the master model perfectly, and the denture teeth try-in is made on the tray base lined with Honigum Pro Light (Fig. 22). In the latter case we now need to pour the master model and use the impression as a base for try-in, or do the same process as described above again – lining with Honigum Pro Light and bonding to the tray with the adhesive from Silagum-Comfort.
Once the patient has accepted the aesthetics and function of our denture, we can then proceed to the lab work. The denture is ideally made on the basis of the injecting resin procedure like the manual system Schütz Unipress (Schütz) or an automated modern device like IvoBase (Ivoclar Vivadent), finalised and polished (Fig. 23). The patient then receives the denture for a moment but at this time we need to remount it for proper occlusion. I like to use the GC Bite Compound again for this remounting. It is then articulated in a quality articulator, in my case a SAM 3.
Then the patient receives final denture with the final occlusion which should bite on both sides simultaneously with a precision of 10 microns (Fig. 24). There should be a protrusive movement path on as many incisors as possible, and I mainly use regular canine guidance with no balancing contacts for my dentures. As I said before, our aim needs to be a patient who is satisfied, both with the aesthetics and the function (Fig. 25). It is important for us to remember that aesthetics is a given necessity, but occlusion is always more important, especially in full dentures!
DR JIRI ZVOLANEK Plzeñ, Czech Republic

Fig. 22: Teeth set-up on the former custom impression tray/ bite rim
VITAL PULP THERAPY, A HIGHLY
EFFECTIVE TREATMENT
TESTIMONIAL & CASE REPORT BY
JENNER ARGUETA D.D.S. - M.SC.

A high percentage of the population decides to visit the dentist when their teeth are considerably affected by caries. In many cases, the patients opt for early extraction of teeth due to the costs of root canal therapy and posterior restoration process (1, 2). The importance of keeping the pulp-dentin complex vital, the search for alternatives to root canal therapy and the clinical application of minimally invasive dentistry have led to the increased popularity of conservative approach to pulp damage. The high success rate reported for vital pulp therapy (VPT) procedures nowadays has been a key factor in bringing a higher frequency of application of this type of therapy (3, 4). The good prognosis of these procedures has been partly achieved thanks to current treatment protocols, an understanding of the biological processes involved and the materials available for use in cases of reversible pulp disease.
A good diagnosis is the most important and complex factor when taking decisions and establishing a course of treatment. Determining the exact degree of pulp inflammation is not an easy task, given the limitations of current diagnostic tests, subjective factors inherent to the patient and the correct interpretation of the clinical information by the operator (5-7). It is well-known that, for a VPT procedure to work, the pulp inflammation should be in a reversible stage (reversible pulpitis). It is important to bear in mind that current pulp sensitivity tests are not 100% reliable (6, 8)
In the clinical case below, we describe the recommended technique for performing direct pulp capping in cases of frank pulp exposure with a diagnosis of reversible pulpitis. This clinical case was selected because it is the one that occurs most frequently.
The patient attended reporting short-term pain in tooth no. 19 (Fig. 1). Through radiography, a clinical assessment and an analysis of the patient’s clinical history, an extensive carious lesion was diagnosed (Fig. 2) as the cause of the pain, due to a process of reversible pulpitis.
Complete sealing was achieved using rubber dam, a stainless-steel Clamp and a light-curing Flowable dam located around the clamp to prevent bacterial
contamination of the area to be treated. The caries was removed circumferentially from the coronal towards the cervical margin to limit the movement of bacteria to the pulp tissue space (9)
An exploration of the cavity preparation floor showed a pulp exposure (Figs 3 & 4). It is always advisable to explore the cavity preparation floor with an endo explorer, because smaller carious-exposed pulps may be overlooked.
In cases where there is haemorrhaging in the exposed pulp region, it is necessary to apply sustained pressure for 40–60 seconds with a cotton swab dampened with sterile saline solution (10) , followed by the disinfection of the cavity with 0.5% sodium hypochlorite. After this, Biodentine bioactive material was placed to directly cap the pulp (Figs. 5 & 6), the material was placed in bulk increments as a dentinal replacement, as the material sets in 12 minutes, it was possible just to wait the indicated time and the restoration could be done in the same session (11). The definitive restoration was done afterwards, using composite resin with the oblique layer technique (Figs. 7) with the aim of minimizing the contraction of the material (12)
The quality of the definitive restoration and its close adaptation to the dentine structure to prevent leaks are key factors in the long-term success of the procedure. Correct marginal adaptation and the continuity of the restoration with the dental tissue can be seen in the final radiograph of the procedure
Direct pulp capping. Clinical technique


(Fig. 8). An assessment was made seven days after treatment to ensure that the patient was completely asymptomatic and responded to sensitivity tests in a normal manner. A normal tissue response was obtained in all the tests.
One of the main characteristics of Biodentine is that it is easy to manipulate, it can be used as a dentine substitute due to its high compression strength and offers good adhesion to the tooth structure. Its characteristics mean that it is easy to place it in the region to be treated and can be used as a base for the definitive adhesive coronal restoration. The Fig. 9 shows the vital pulp therapy procedure. In radiographic form, on follow-up after two years, it is possible to observe mesial pulp horn retraction. One of the most appreciated advantages of Biodentine is that it does not pigment the tooth structure, making it an ideal material for performing pulp capping in the anterior sector.


Fig. 1. Tooth no. 19 with deep caries. Total isolation prior to the removal of caries.
Fig. 3. & Fig. 4. Pulp exposure at the level of the cavity preparation floor, with minimum haemorrhaging that was easy to control.
Fig. 2. Bite radiograph shows evidence of a carious lesion of tooth 19. Undermineralized tissue is found close to the mesial pulp horn.
Fig. 5. & Fig. 6. Placing of Biodentine in bulk increments by the help of an endodontic compactor.
Fig. 7. Definitive adhesive restoration in tooth no. 19.
Fig. 8. Final radiograph of the vital pulp therapy procedure. The different layers of materials used, and the correct marginal adaptation can be seen.
Fig. 9. Vital pulp therapy at tooth no. 19 . At follow-up after 2 years the retraction of the mesial pulp horn can be seen

Materials used in Vital Pulp Therapy
Among the materials described to carry out pulp therapy procedures, calcium hydroxide-based cements and bioceramics (10) have been mentioned. The latter are biocompatible materials that are divided into three basic groups:
1.- High-resistance bioinert cements
2.- Bioactive cements that create chemical bonds with mineralized tissue, and 3.- Biodegradable materials that actively participate in metabolic processes of the organism (13)
There are many materials that can be used for vital pulp therapy procedures, the best-known being MTA and latest-generation calcium silicatebased cements such as EndoSecuence BC RRM, Biodentine and CeraPutty, among others. All the materials mentioned above belong to the bioactive cements group.
Biodentine is a dentin substitute that helps to promote dentinogenesis and shows next biological properties: alkaline pH, biocompatibility, antibacterial capacity, release of calcium and hydroxyl ions, good margin sealing properties, and insoluble when coming into contact with oral fluids. Its radiopacity is also similar to that of dentin, the setting time is approximately 12 minutes, and it does not cause pigmentation in the dental structure (14-18) This last property makes it one of the materials of choice when it is necessary to perform treatments that involve the coronal and cervical zone, especially in anterior teeth.
Prognosis
Obtaining the right diagnosis is essential for the success of VPT. An ideal case is one diganosed with reversible pulpitis without a history of spontaneous dental pain or long duration (6). It is
generally accepted that a history of spontaneous pain or nocturnal pain are associated with the existence of a process of irreversible pulp inflammation (19, 20). In such cases, the success of direct pulp capping could be questioned (21) , although some studies indicate that VPT can even be successful in this kind of situation. (1, 22-24)
As for long-term success in VPT procedures, it is extremely important to give the tooth a definitive restoration that guarantees suitable margin sealing, because this factor, together with the absence of bacterial contamination during the procedure, are among the most important aspects to be taken into account to avoid later pulp inflammation (25, 26). The reported success rate for vital pulp therapy using bioactive cements and follow-up of up to 10 years is higher than 85% (3, 27), quite a high percentage for a dental procedure over that length of time.
Conclusions
From a completely optimistic standpoint, the ultimate aim of any dentist when carrying out a restorative and/or endodontic procedure should be to maintain pulp vitality and functionality of the tooth with an absence of symptoms (28)
Based on the results reported in a number of clinical research studies (1-5, 17, 18, 25, 29-31), we can conclude that VPT on teeth withy reversible pulpitis is a highly effective treatment option to maintain pulp vitality.

DR. JENNER ARGUETA Guatemala
Author Jenner Argueta D.D.S. – M.Sc. jennerargueta@gmail.com 1ª. Av. 13-29 zona 10. Edificio Dubai Center 5to. Nivel, Oficina 501. Guatemala, Guatemala C.A.
Dr. Jenner Argueta holds a dentistry and endodontics master’s degree in endodontics from San Carlos de Guatemala University, where he achieved multiple awards as an outstanding student.
He Is the former president of the Guatemalan Endodontics Academy (2016–2020) and is a certified researcher at the Guatemalan National Council for Science and Technology. International Speaker, Faculty endodontics professor at Mariano Galvez de Guatemala University. His clinical practice is focused on micro-endodontics and microrestorative dentistry.
Co-author
Ana Lucía Orellana D.D.S. Private Practice.
Argueta-Orellana microscopic dental offices. Clinical Coordinator.
References
1. Asgary S, Eghbal MJ, Fazlyab M, Baghban AA, Ghoddusi J. Five-year results of vital pulp therapy in permanent molars with irreversible pulpitis: a non-inferiority multicenter randomized clinical trial. Clin Oral Investig. 2015;19(2):335-41.
2. Asgary S, Eghbal MJ. Treatment outcomes of pulpotomy in permanent molars with irreversible pulpitis using biomaterials: a multi-center randomized controlled trial. Acta Odontol Scand. 2013;71(1):130-6.
3. Mente J, Hufnagel S, Leo M, Michel A, Gehrig H, Panagidis D, et al. Treatment outcome of mineral trioxide aggregate or calcium hydroxide direct pulp capping: long-term results. J Endod. 2014;40(11):1746-51.
4. Holan G, Eidelman E, Fuks AB. Long-term evaluation of pulpotomy in primary molars using mineral trioxide aggregate or formocresol. Pediatric Dentistry. 2005;27(2):129-36.
5. Fuks AB, Nuni E. Pulp therapy for the young permanent dentition. Pediatric Dentistry: Elsevier; 2019. p. 482-96.
6. Camp J. Diagnosis dilemmas in vital pulp therapy: treatment of the toothache is changing, Especially in young, immature teeth. Journal of Endodontics. 2008;34(7S):S6.
7. Taha NA, Albashaireh ZS, Alfied RG. Endodontic decision making for asymptomatic root-filled teeth with apical periodontitis - A radiographic survey. Aust Endod J. 2018.
8. Taha N, Khazali M. Partial Pulpotomy in Mature Permanent Teeth with Clinical Signs Indicative of Irreversible Pulpitis: A Randomized Clinical Trial. Journal of endodontics. 2017;43(9).
9. Schwendicke F, Dörfer CE, Paris S. Incomplete Caries Removal:A Systematic Review and Meta-analysis. Journal of Dental Research. 2013;92(4):306-14.
10. Hilton TJ. Keys to clinical success with pulp capping: a review of the literature. Operative dentistry. 2009;34(5):615-25.
11. Magne P, Spreafico R. Deep Margin Elevation: A Paradigm Shift. the American Journal of Stetic Dentistry. 2012(2).
12. Chandrasekhar V, Rudrapati L, Badami V, Tummala M. Incremental techniques in direct composite restoration. Journal of Conservative Dentistry. 2017;20(6):386-91.
13. Koch K, Brave D. Endosequence: melding endodontics with restorative dentistry, part 3. Dentistry today. 2009;28(3).
14. Bekhtiar H, Hossein M, Aminishakib P, Abedi F. Human Pulp Responses to Partial Pulpotomy Treatment with TheraCal as Compared with Biodentine and ProRoot MTA: A Clinical Trial. Journal of Endodontics. 2017; Article In Press.
15. Malkondu O, Karapinar Kazandag M, Kazazoglu E. A review on biodentine, a contemporary dentine replacement and repair material. Biomed Res Int. 2014;2014:160951.
16. Miller AA, Takimoto K, Wealleans J, Diogenes A. Effect of 3 Bioceramic Materials on Stem Cells of the Apical Papilla Proliferation and Differentiation Using a Dentin Disk Model. J Endod. 2018.
17. Nowicka A, Lipski M, Parafiniuk M. response of human dental pulp capped with biodentine and mineral trioxide aggregate. Journal of Endodontics. 2013;39(6).
18. Villat C, Grosgogeat B, Seux D, Farge P. Conservative approach of a symptomatic carious immature permanent tooth using a tricalcium silicate cement (Biodentine): a case report. Restor Dent Endod. 2013;38(4):258-62.
19. Endodontics aAo. Endodontic Diagnosis. Collages for Excellence. 2013(Fall 2013).
20. Mejare IA, Axelsson S, Davidson T, Frisk F, Hakeberg M, Kvist T, et al. Diagnosis of the condition of the dental pulp: a systematic review. International endodontic journal. 2012;45(7):597-613.
21. Barrieshi-Nusair KM, Qudeimat MA. A prospective clinical study of mineral trioxide aggregate for partial pulpotomy in cariously exposed permanent teeth. J Endod. 2006;32(8):731-5.
22. Matsuo T, Nakanishi T, Shimizu H, Ebisu S. A clinical study of direct pulp capping applied to carious-exposed pulps. J Endod. 1996;22(10):551-6.
23. Mejare I, Cvek M. Partial pulpotomy in young permanent teeth with deep carious lesions. Endodontics & dental traumatology. 1993;9(6):238-42.
24. Caliskan MK. Pulpotomy of carious vital teeth with periapical involvement. International endodontic journal. 1995;28(3):172-6.
25. Edwards J, Swift J, Trope M, Ritter V. Vital pulp therapy for the mature tooth – can it work? Endodontic Topics. 2003(5).
26. Rechenberg D-K, Zehnder M. Molecular diagnostics in endodontics. Endodontic Topics. 2014;30(1):51-65.
27. Daniele L. Mineral Trioxide Aggregate (MTA) direct pulp capping: 10 years clinical results. Giornale Italiano di Endodonzia. 2017;31(1):48-57.
28. Zanini M, Meyer E, Simon S. Pulp Inflammation Diagnosis from Clinical to Inflammatory Mediators: A Systematic Review. J Endod. 2017.
29. Asgary S, Eghbal MJ, Ghoddusi J, Yazdani S. One-year results of vital pulp therapy in permanent molars with irreversible pulpitis: an ongoing multicenter, randomized, non-inferiority clinical trial. Clin Oral Investig. 2013;17(2):431-9.
30. Aguilar P, Linsuwuanont P. Vital pulp therapy in vital permanent teeth with cariously exposed pulp: A systematic review. Journal of Endodontics. 2012;37(5).
31. Maroto M, Barberia E, Planells P, Garcia Godoy F. Dentin bridge formation after mineral trioxide aggregate (MTA) pulpotomies in primary teeth. American journal of dentistry. 2005;18(3):151-4.

ANA LUCIA ORELLANA Guatemala
PREVENTING PATIENT TOOTH LOSS:
WHY IT MATTERS AND HOW TO ACHIEVE IT
As a dentist, saving teeth features highly among your goals. When well informed about their options, most patients want to keep their natural teeth for better quality of life. In fact, tooth loss has serious repercussions on patients not only physically, but also psychologically. Not only is tooth loss prevention essential for patients’ health, it also wards off future complicated procedures, avoiding patient pain and anxiety. You can prevent tooth loss by implementing strong patient education and preventative care treatments.
Why tooth loss happens
While old age accelerates tooth loss, patients can prematurely lose teeth for a number of other reasons, the biggest factors being poor oral health, disease and trauma.
Poor oral health can lead to caries, pulp infection, tooth decay and a possible removal. One study done in Kuwait on patients who’d suffered tooth loss showed a strong statistical link to infrequent or nonexistent dental visits and poor oral health habits, proving the importance of regular check-ups.1
Periodontal (gum) disease is the highest predictor of tooth loss in adults, estimated to affect about 2050% of the population around the globe, including 10% with severe gum disease that can lead to tooth loss.2,3 Heavy smoking also damages oral health, so smokers often feature among patients treated for gum disease.4
Furthermore, medical research has established a strong link between tooth loss and some diseases such as Type-2 diabetes (higher blood sugar leading to more tooth decay), while other diseases may show a possible correlation, such as rheumatoid arthritis and hypertension.5,6 Physical injury or trauma can also cause tooth loss, including accidents like falls or sports-related injuries, and harmful behaviors that put unwanted pressure on teeth.
Does genetics play a role in tooth loss?
According to scientific research, “no gene to date has been identified that has as large an impact on periodontal disease as do environmental influences, such as smoking or diabetes”7 and “heritable bacteria are not associated with dental caries.”8 Nevertheless, up to 30% of the population may be
genetically predisposed to gum disease, especially those diagnosed with diabetes - so ask your patients about their family history.9 While some genetic factors may influence the degree to which patients are susceptible to tooth decay, they cannot alone predict tooth loss; this is rather the result of complex gene-environment interactions.10 As a dentist, you can use these factors to establish at-risk profiles for patients, for instance those with weak enamel, crowded teeth and acidic saliva.
Why is it important to prevent tooth loss?
Good oral health is a strong basis for high quality of life and good self-confidence.11 Conversely, tooth loss can affect patients’ overall quality of life, both physically and psychologically.12 When patients lose teeth, many physical symptoms will disrupt their daily life, in both basic and complex ways. They can feel pain and discomfort, and experience difficulty eating or chewing that can incur diet changes, compounding a lower quality of life.13 For instance, patients may opt for more soft and processed foods, which are poorer in nutrition.
Furthermore, tooth loss affects psychological health because it changes patients’ appearance, which can lead to lower self-confidence. Tooth loss causes disorder in daily life, making simple communications and social activities more difficult, which may lead some patients to self-isolate or feel alienated from their community, thereby creating conditions for anxiety and depression.
Psychological and physical impacts are often linked, as physical discomfort can lead to impaired social interactions, which then leads to poor mental health. This is especially true for older patients who are more susceptible to losing teeth with serious effects on their daily life.14 What’s more, a metaanalysis of
existing studies show that more teeth lost result in stronger negative impacts, especially if they are anterior teeth.15
Prevention for easier procedures and patient satisfaction
When interviewed, dentists report that they strongly enjoy saving teeth as part of their practice, and what drives them the most is patient satisfaction.16,17 Saving natural teeth naturally generates goodwill in patients, enabling you to run a smooth practice with lower stress levels for everyone. This is because tooth loss prevention will help avoid complex and time-consuming procedures, such as endodontics, tooth extractions, root canal treatments, tooth replacements and prosthetics, which are much more challenging and stressful for dentists.18 These procedures can also induce more anxiety in patients due to the higher risk of pain and be a cause for patient dissatisfaction. So by focusing on tooth loss prevention, not only are you supporting patients’ health, you’re setting the basis for a more peaceful practice.
How to prevent tooth loss
Focus on patient education and preventive care to launch a virtuous cycle in your practice. You’re probably familiar with most of these, but here’s a reminder of actions you can take to minimize tooth loss for your patients.
One of dentists’ favorite tasks in the course of their practice is patient education.19 What’s more, patients truly appreciate it when you make time for them. You can help prevent tooth decay and tooth loss by working with your patients to establish a regular dental care routine. First, establish your patient profile and evaluate their cavity risks. Are they high-risk due to their age or other health conditions? Educate patients on home care measures to establish healthy habits like effective brushing, flossing and fluoride intake. Advise them on the best tools and latest products for oral health. Warn them about which traps to avoid (dietary and drinking choices, smoking, etc.). And of course, get your patients on board with preventive care: encourage them to schedule regular sessions for cleanings and check-ups, every year or more frequently depending on profile types.
Preventive care treatments can take on many forms in your practice: from oral exams, teeth cleaning, and x-rays, to the use of dental sealants. While often routine, check-ups and cleanings must not be overlooked. A thorough oral exam may uncover symptoms of periodontal diseases or other serious medical conditions. Diagnostic x-rays are crucial to prevent tooth loss, as they are often necessary to detect pathologies such as bone loss, decay, cysts and tumors. Restorations must also be checked regularly for defects and wear.
If your patients’ teeth are at risk of decay, you can use fluoride treatments to fortify teeth through remineralization and repair weakened enamel. A more permanent treatment is to use dental sealants, which are especially useful on molars and hard-toreach teeth. In fact, according to the ADA, sealants on permanent molars reduce the risk of cavities by 80%, which in turn can prevent tooth loss.20 And when prevention fails, you can rely on bioactive treatments such as Biodentine to protect teeth from further decay. Biodentine is a dentin substitute used to preserve pulp vitality with bioactive properties that prevent bacteria proliferation thanks to high pH (12).
References
1. Hitti, M. 9 Risk Factors for Tooth Loss. webmd.com. Nov 11, 2005. Accessed June 22, 2021. <https://www.webmd.com/oralhealth/news/20051111/9-risk-factors-for-tooth-loss>
2. Oral Health. who.int. March 25, 2020. Accessed June 22, 2021. <https://www.who.int/news-room/fact-sheets/detail/oral-health>
3. Nazir, M A. “Prevalence of periodontal disease, its association with systemic diseases and prevention.” International journal of health sciences vol. 11,2 (2017): 72-80. <https://www.ncbi.nlm. nih.gov/pmc/articles/PMC5426403/ >
4. Stuart, A. Are You at Risk for Tooth Loss? webmd.com. October 12, 2010. Accessed June 22, 2021. <https://www.webmd.com/ oral-health/features/tooth-loss-risks#1>
5. Hitti, M. 9 Risk Factors for Tooth Loss. Ibid.
6. Stuart, A. Are You at Risk for Tooth Loss? Ibid.
7. Oral Health Topics: Genetics and Oral Health. ada.org. Last Updated: July 13, 2021. Accessed June 22, 2021. <https://www. ada.org/en/member-center/oral-health-topics/genetics-and-oralhealth>
8. Gomez, A et al. Host Genetic Control of the Oral Microbiome in Health and Disease. Cell Host & Microbe. Volume 22, Issue 3, 13 September 2017, Pages 269-278.e3. https://doi.org/10.1016/j. chom.2017.08.013 <https://www.sciencedirect.com/science/ article/pii/S1931312817303463>
9. Casanova L, Hughes FJ, Preshaw PM. Diabetes and periodontal disease: A two-way relationship. Br Dent J. 2014;217:433–7.
10. University of Melbourne. Your genetic make-up has little impact on your dental health, new study finds. ScienceDaily. 30 April 2019. <www.sciencedaily.com/releases/2019/04/190430091838. htm>
11. Werner CW. Odontologia Geriátrica. Rev FOL UNIMEP 1998; 11: 62–70.
12. Gerritsen, Anneloes E et al. Tooth loss and oral healthrelated quality of life: a systematic review and meta-analysis. Health and quality of life outcomes, vol. 8 126. 5 Nov. 2010, doi:10.1186/1477-7525-8-126 <https://www.ncbi.nlm.nih.gov/ pmc/articles/PMC2992503/>
13. Brennan, D. S. et al. Tooth loss, chewing ability and quality of life. Quality of Life Research: An International Journal of Quality of Life Aspects of Treatment, Care & Rehabilitation, 17(2), 227–235. 2008. https://doi.org/10.1007/s11136-007-9293-2 <https:// psycnet.apa.org/record/2008-05056-005>
14. Saintrain, M. V., & de Souza, E. H. (2012). Impact of tooth loss on the quality of life. Gerodontology, 29(2), e632–e636. https://doi. org/10.1111/j.1741-2358.2011.00535.x <https://pubmed.ncbi. nlm.nih.gov/21883422/>
15. Gerritsen, Anneloes E et al. Tooth loss and oral healthrelated quality of life: a systematic review and meta-analysis. Health and quality of life outcomes vol. 8 126. 5 Nov. 2010, doi:10.1186/1477-7525-8-126 https://www.ncbi.nlm.nih.gov/ pmc/articles/PMC2992503/
16. Healthcare Market Research Worldwide. Dentistry Needs. 2019
17. Suazio Consulting commissioned by Septodont. Dental Professionals - Insights. 2014
18. Dentistry Needs. Ibid.
19. Healthcare Market Research Worldwide. Dentistry Needs. 2019
20. Wright, John T et al. Sealants for Preventing and Arresting Pitand-fissure Occlusal Caries in Primary and Permanent Molars. The Journal of the American Dental Association, vol. 147, issue 8, P631-645.E18, August 01, 2016 https://doi.org/10.1016/j. adaj.2016.06.003
PERIODONTAL PATIENTS
THE BALANCE BETWEEN REFERRAL AND IN-HOUSE TREATMENT

Integrating periodontal care in the general dental practice
General dental practitioners are often the first to diagnose patients with periodontal disease and outline the appropriate course of care (1). The typical “periodontal patient journey” develops as follows:
1. Screening
2. Periodontal assessment – including a complete periodontal chart, radiographs and photos, and risk assessment
3. Non-surgical periodontal treatment
4. Re-assessment (4-6weeks later) – including an updated periodontal chart to ascertain the effectiveness of the treatment
5. Regular supportive periodontal therapy (3-6 monthly, based on the risk level)
Today most general practitioners effectively screen for periodontal disease (2,3) and there is a growing trend of retaining more periodontal treatment within the practice (3). In this shifting landscape, general dentists, hygienists and oral health therapists have the opportunity to significantly contribute towards the best care of periodontal patients.
In-house periodontal treatment: advantages
The latest National Oral Health Plan 2015-2024 performance monitoring report shows an unfavourable increase in the prevalence of moderate and severe periodontitis in Australia, affecting almost one third of the adult population (4). With only 270 specialist periodontists in Australia, it is clear that they cannot fully service the current needs. (5)
Additionally, the majority of the dental workforce resides in metropolitan areas, forcing people in regional and remote areas to endure either long drives or extensive waiting times to be able to see a specialist (6). Building the confidence of general practitioners could create more accessible and timely care for the millions of Australians affected.
In the dental environment, the highest efficiency and satisfaction can be obtained when every team member is utilised at the best of their abilities. If general practitioners contribute to the management of periodontal patients, specialists can dedicate themselves to the more complex cases and procedures. This approach is also effectively true when OHTs and hygienists are employed and empowered in the general practice (3,7) Interestingly, a recent U.S.-based survey revealed employing hygienists results in more patients referred to a periodontist. This is likely because hygienists and OHTs are very well trained and focused on periodontal health, increasing the awareness and education, enhancing screening and diagnosis, and benefiting both the patients and the practice. (8).
Finally, non-clinical factors, such as fear and financial constraints, can significantly delay pursuing a referral (9). Due to the increasing cost of living, private specialist care can become prohibitive. In such cases providing solid treatment as a general practitioner is better than no treatment at all.
Additionally, patients often choose us for a reason. An established relationship means we are familiar with the patient, their personality, their needs and anxieties. Being able to provide treatment is great not only for their continuity of care, but also for the business’ patient retention.
When to retain and when to refer
In Australia, there are no set rules dictating when a general practitioner must refer a patient to a periodontist. Practitioners are trained to assess patients and based on their scope of practice and clinical skills, make a decision. Interestingly, guidelines from the British Society of Periodontology (10) suggest that even complex cases may be cared for in a general dental practice, based on the clinician’s experience, and patient’s risk factors and desires. Most practitioners would agree that a referral is advised for advanced disease (Stages III-IV) medically compromised or frail patients, particularly young patients, and those with peri-implantitis. Local complexities such as furcation involvement and vertical bony defects also warrant consideration. Patients who are difficult to motivate toward good oral hygiene are also good candidates for specialist treatment (11)
Non-clinical factors are equally important: is the patient willing and financially able to get specialist care? Do they live far from the nearest periodontist, and can they travel? Is the waiting period excessively long? Are they anxious about seeing a new practitioner? Do you feel confident stepping slightly outside your comfort zone and take on a case? Regardless of the reason, it is your obligation to offer the patient a specialist referral for a second opinion or full management, and this conversation should be documented in the patient’s file. Referral to a periodontist is also strongly recommended when, despite initial non-surgical treatment, the disease progresses or relapses. Even with good overall healing and perfect compliance, stubborn residual bleeding pockets might persist, which may require advanced periodontal care or surgery.
Finally, when in doubt, ask your periodontist. A quick phone call or email often provide the clarity needed to make the appropriate decision.
Cultivate the relationship with your specialists
General practitioners should carefully consider which specialist they will trust with their patients’ care. How do they work? What’s their philosophy and does it align with yours? How do they unsure good results? How do they communicate with you? Do not be afraid to initiate and grow communication with your periodontist. Specialist can help your clinic develop a mutually beneficial protocol and referral pathway, detailing which type of patients to refer, the necessary examinations, records to send and any treatment to commence. By clearly communicating what you are comfortable managing, specialists will know when they can confidently refer the patient back to your care. Moreover, specialists often provide great resources for patients and are willing to share their knowledge and assist with cases.
The importance of education
An evident discrepancy still exists between clinicians’ confidence in diagnosing periodontal disease and their confidence and willingness to undertake the active treatment (2). This lack of confidence seems to mainly come from the level of training the clinician has received and their perceived experience. (2,11) Therefore, the first step to is to undertake further training. The availability of periodontal-focused continuous education courses is on the rise, with periodontists themselves offering a share of their incredible knowledge to empower general practitioners and foster strong, fruitful collaborations. An excellent starting point is the EMS Swiss Dental Academy, where webinars, in-person courses and in-house training from local and international GBT® experts can help build a high standard of periodontal care in your practice.
Periodontal patients retention – Revenue
Given the prevalence of periodontal disease, retaining periodontal treatment in-house can significantly contribute to both business revenue and clinician’s financial reward. Even if a referral is necessary early in the patient’s journey, there are still valuable steps you can take. A thorough and complete assessment before referral is not only advised but also greatly appreciated by specialists, allowing them better to know the patient. This includes periodontal charting, radiographs, photos and sometimes even initial supragingival debridement and oral hygiene instructions, all of which are within the scope of any general practitioner. Completing the initial assessment not only enhances your clinical records, but also reassures the patient that you are actively involved in their care, rather than simply passing them on to someone else.
Based on the average revenue as per ADA Dental fees survey of 2022, the initial comprehensive assessment of a periodontal patient including an OPG could earn the practice $400+, with an additional $120 if the initial supragingival debridement is provided.
If the active treatment is performed in house, it can generate between $571 and $992, plus around $113 for the reassessment. Finally, maintenance therapy becomes a regular and reliable source of work and income for the practice.
How Guided Biofilm Therapy® can help
Consistent clinical results rely on established protocols. Guided Biofilm Therapy - GBT® is an emerging and successful approach designed to address a wide range of patients and clinical needs, from the everyday preventative check-ups and clean to the treatment of periodontal disease, providing several advantages.
Improved communication with the patient
GBT® prioritizes patient engagement and motivation before any debridement begins. Fear of failing to communicate with periodontal patients can hinder practitioners’ confidence (2) and getting patients on board is one of the biggest hurdles when the “simple clean” they thought they needed turns into a more demanding course of treatment. Using a plaque disclosing agent is a great way to initiate conversation, and check and maintain motivation along the way.
Effective and comfortable debridement
Let’s be honest: long and repetitive sessions of scaling and root planing (SRP) uncomfortable for both the patient and the clinician, and the post-operative sensitivity can deter many patients. Unlike old-style SRP which primarily focuses on calculus removal and “smoothening” of the root surface, GBT® shifts the attention to biofilm, the living cause of periodontal disease, and aims to be minimally invasive on any surface. The first step of GBT® involves complete biofilm removal through Airflowing, a gentle stream of air, water and erythritol powder. The Airflow MAX® handpiece is ideal for supra-gingival areas and sulci up to 4mm of depth, while the Perioflow® handpiece is used in pockets up to 10mm of depth. Once all biofilm is removed, the long and thin Piezon PS® ultrasonic tip gently removes all the calculus and debrides the root surface. GBT® demonstrated excelled treatment outcomes, particularly in reducing deep pockets (PPD≥5.5mm) (12) and positively shifting in the pocket microbiome (13) .
However, the main advantage of GBT® is the increased patient comfort. The reduced use of ultrasonic and manual instruments provides a better overall patient experience, which is fundamental for maintaining their willingness to continue treatment and causes less fatigue to the clinician (14)
Easy maintenance
Maintenance therapy for periodontal patients is a life-long commitment. However repeated SRP may lead to removal of root cementum and dentinal hypersensitivity, potentially reducing long-term patient compliance (15)
The GBT® excels in maintenance care. As all the stubborn calculus was eliminated during active treatment, biofilm is once again the main target, and Airflow MAX® and Perioflow® are the instruments of choice. This gentler approach ensures long-term success (16)
Time saved
GBT® typically requires less treatment time than conventional SRP, both during the initial treatment (14) and the maintenance phase (15). The increased time-efficiency contributes to the overall financial advantage of adopting GBT® in the practice.
Overall, while referral to specialists remains essential in certain cases, in-house treatment can be a valuable option. By leveraging in-house treatment capabilities and cultivating strong relationships with specialists, dental practices can deliver comprehensive periodontal care while maximizing business success and patient outcomes.

Dr Annamaria Sordillo (DDS)
Dr Annamaria Sordillo grew up in Italy, were she obtained her combined Bachelor and Masters degree in Dentistry with Honours. She moved to Sydney in 2017 to be with her Australian husband and she now lives and works in general practice in the Hunter region of New South Wales.
For the last 7 years she has been collaborating with a research group in Periodontology led by Prof Magda Mensi at the University of Brescia (Italy), and she has co-written several international research papers. Dr Annamaria Sordillo has an interest in periodontology, preventative and restorative dentistry.


REFERENCES
1. Brown LM, Bowman P, O'Rourke VJ, Mercado F, Marshall R, Parsons S. Periodontal Referral Patterns in Australia: 2000 Versus 2015. J Periodontol. 2017 Sep;88(9):869-875. doi: 10.1902/jop.2017.160774. Epub 2017 May 18. PMID: 28517973
2. Darby IB, Angkasa F, Duong C, Ho D, Legudi S, Pham K, Welsh A. Factors influencing the diagnosis and treatment of periodontal disease by dental practitioners in Victoria. Aust Dent J. 2005 Mar;50(1):37-41. doi: 10.1111/j.1834-7819.2005.tb00083.x. PMID: 15881304
3. Kraatz J, Hoang H, Ivanovski S, Ware RS, Crocombe LA. Periodontal diagnosis, treatment, and referral patterns of general dental practitioners. J Investig Clin Dent. 2019 Aug;10(3):e12411. doi: 10.1111/jicd.12411. Epub 2019 Apr 21. PMID: 31006957
4. National Oral Health Plan 2015–2024: performance monitoring report - https://www.aihw.gov.au/reports/dental-oral-health/ national-oral-health-plan-2015-2024/contents/our-oral-health-anational-perspective/periodontitis-prevalence#
5. Dental Board of Australia – Registrant Data, Reporting period: 01 January 2024 to 31 March 2024. https://www.dentalboard.gov. au/about-the-board/statistics.aspx
6. Dentists, specialists and allied practitioners in Australia: Dental Labour Force Collection, 2006 - https://www.aihw.gov.au/ getmedia/0b50f218-a1a4-4dd3-8a4b-d09d2645feef/11915.pdf? v=20230605171922&inline=true
7. Hopcraft M, McNally C, Ng C, Pek L, Pham TA, Phoon WL, Poursoltan P, Yu W. Attitudes of the Victorian oral health workforce to the employment and scope of practice of dental hygienists. Aust Dent J. 2008 Mar;53(1):67-73. doi: 10.1111/j.1834-7819.2007.00012.x. PMID: 18304244.
8. Zemanovich MR, Bogacki RE, Abbott DM, Maynard JG Jr, Lanning SK. Demographic variables affecting patient referrals from general practice dentists to periodontists. J Periodontol. 2006 Mar;77(3):341-9. doi: 10.1902/jop.2006.050125. PMID: 16512747.
9. Dockter KM, Williams KB, Bray KS, Cobb CM. Relationship between prereferral periodontal care and periodontal status at time of referral. J Periodontol. 2006 Oct;77(10):1708-16. doi: 10.1902/jop.2006.060063. PMID: 17032114
10. https://www.bsperio.org.uk/assets/downloads/BSP_Guidelines_ for_Patient_Referral_2020.pdf
11. Sum J, O'Rourke VJ. Factors affecting periodontal disease referral and the adherence to guidelines among general dentists. Aust Dent J. 2018 Dec;63(4):394-401. doi: 10.1111/adj.12641. Epub 2018 Jul 25. PMID: 29947419
12. Divnic-Resnik T, Pradhan H, Spahr A. The efficacy of the adjunct use of subgingival air-polishing therapy with erythritol powder compared to conventional debridement alone during initial non-surgical periodontal therapy. J Clin Periodontol. 2022 Jun;49(6):547-555. doi: 10.1111/jcpe.13623. Epub 2022 Apr 22. PMID: 35373340; PMCID: PMC9321595
13. Mensi M, Caselli E, D'Accolti M, Soffritti I, Farina R, Scotti E, Guarnelli ME, Fabbri C, Garzetti G, Marchetti S, Sordillo A, Trombelli L. Efficacy of the additional use of subgingival air-polishing with erythritol powder in the treatment of periodontitis patients: a randomized controlled clinical trial. Part II: effect on sub-gingival microbiome. Clin Oral Investig. 2023 Jun;27(6):2547-2563. doi: 10.1007/s00784-022-04811-4. Epub 2022 Dec 20. PMID: 36538094; PMCID: PMC10264538.
14. Vouros I, Antonoglou GN, Anoixiadou S, Kalfas S. A novel biofilm removal approach (Guided Biofilm Therapy) utilizing erythritol air-polishing and ultrasonic piezo instrumentation: A randomized controlled trial. Int J Dent Hyg. 2022 May;20(2):381-390. doi: 10.1111/idh.12533. Epub 2021 Jul 19. PMID: 34218516
15. Zappa U, Smith B, Simona C, Graf H, Case D, Kim W. Root substance removal by scaling and root planing. J Periodontol. 1991;62(12):750–4.
16. Tan SL, Grewal GK, Mohamed Nazari NS, Mohd-Dom TN, Baharuddin NA. Efficacy of air polishing in comparison with hand instruments and/or power-driven instruments in supportive periodontal therapy and implant maintenance: a systematic review and meta-analysis. BMC Oral Health. 2022 Mar 23;22(1):85. doi: 10.1186/s12903-022-02120-6. PMID: 35321688; PMCID: PMC8944123
MASKING OF DIFFUSE OPACITIES BY RESIN INFILTRATION
GABRIELA CALDEIRA ANDRADE AMERICANO VERA MENDES SOVIERO

Abstract
Aesthetic problems due to Fluorosis can occur in children and adolescentes. The aim was to describe a case report about the use of infiltrant resin to mask diffuse opacities. A male patient aged 12 years attended the Paediatric Dentistry clinic of the Rio de Janeiro State University, Rio de Janeiro, Brazil. Through a clinical exam, it was diagnosed that incisors had fluorosis. The teeth 12, 11, 21 and 22 were treated with infiltrant resin (Icon, DMG, Hamburg, Germany). All procedures were done in accordance with manufacturer instruc-tions. Furthermore, Icon-Etch and Icon-Dry were applied three times in order to enhance the masking of the defects. The immediate result as well as 1 week and 4 months after the treatment were satisfactory. The use of infiltrant resin (Icon) can mask diffuse opacities improving the esthetics without a significant loss of tooth tissue.
Key-words: Esthetics, Dental. Fluorosis, dental. Icon infiltrant.
Introduction
Aesthetic problems due to enamel developmental defects can occur in children and ado-lescentes. Fluorosis is a defect of enamel mineralization, characterized by porosity of the enamel subsurface 1. Clinically, fluorosis can be seen as slight accentuation of the periky-mata, difusse opacities with a opaque white appearance or chalky white enamel with some yellow to brown staining and pitting 2. There are several treatment options for aesthetic problems due to fluorosis, such as bleaching, microabrasion and restorative techniques. Bleaching therapy has been reported by being able to mask the blemishes and providing a more uniform appearance 3,4. Microabrasion works well for shallow defects, but it can result in some reduction
of enamel 5,6. Treatment with resin composites can correct or improve enamel imperfections 7, however this procedure also ends up in a loss of tooth tissue. Infiltrant resin has masked white spot lesions 8,9, because this resin has a refractive index similar to apatite crystals. Thereby, light refraction and, consequently, the color difference of enamel are reduced 10. As the fluorotic enamel is porous 11 same as the white spot lesions, the resin infiltration can be a good alternative to mask the opacities. Thus, this paper aimed to describe a case report about the use of infiltrant resin (Icon, DMG, Hamburg, Germany) to mask diffuse opacities in permanent anterior teeth.
Case Report
The patient L.P.M., male, 12 years old, has been assisted at the Paediatric Dentistry clinic of the Rio de Janeiro State University, Rio de Janeiro, Brazil. Through a clinical exam, it was diagnosed that all of permanent anterior teeth, which were erupted, had fluorosis. However, the teeth 11 and 21 were more severely affected according to Thylstrup and Fejerskov index 12(Figure 1). Before the treatment with Icon, the teeth 12, 11, 21 and 22 were cleaned and a rubber dam was placed. Icon-Etch was applied on the buccal surfaces of the upper incisors for 2 minutes (Figures 2 and 3). Once the teeth were rinsed for 30 seconds and air-dried, Icon-Dry was used for 30 seconds. After the first acid-etching, part of the white diffuse opacities seemed masked when Icon-Dry was applied, but not the yellowish ones (Figure 4). A second application of Icon-Etch was done for 2 minutes, followed by dry air and Icon-Dry. However, the yellowish opacities were still visible (Figure 5). Hence, a third application of IconEtch was done for 2 minutes. This time a gentle friction was done using Icon-Etch applicator on the yellowish areas. Finally, the yellowish opacities

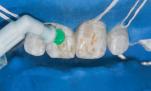


see-med masked when they were wetted by IconDry (Figure 6). All the surfaces were dried again, and Icon-Infiltrant was applied (Figure 7). First the infiltrant set for 3 minutes and before light-curing each tooth for 40 seconds(Figure 8), the excess material was removed with gauzes. According to manufacturer instructions, the application of IconInfiltrant was repeated for 1 minute. To finalize the treatment, the tooth surfaces were polished with composite resin polishing discs (Figure 9). The result immediately after the use of Icon s shown in figure 10, before removing the rubber dam. Figure 11 shows the follow-up of 4 months. The guardians signed an informed consent form regarding all the procedures.
Discussion
Whenever an aesthetic procedure is recommended, it should be based on patient’s de-mand. Aesthetic perception is very much subjective and individual. An enamel defect can be an aesthetic problem for dentists, but not for patients. Furthermore, it can be argued that girls may be more concerned with their appearance than boys 6. In the present case, the patient was a boy and felt really upset about the appearance of his teeth. Thus, the decision to treat the upper incisors aesthetically came from the patient’s wish of having teeth not discolored. Thereby, as the infiltrant resin has masked white spot lesions 8,9, it was decided to use the Icon to mask the diffuse opacities. The color difference of enamel between white spot lesions and sound enamel occurs because the refractive indices of enamel, water and air are different 9. If lesion pores are filled
with water or air, in other words, if lesions are wet or dried, they will appear opaque, because the refractive indices of water and air are smaller than the enamel refractive index. When pores are filled with infiltrant resin, lesions are masked because the refractive indices of sound enamel and infiltrant are similar 9,13. As fluorotic enamel has a porous subsurface in the enamel below a well-mineralized surface 11 similar to white spot lesions, the infiltrant can behave in the same way as in white spot lesions.
Diffuse opacities were well masked by the infiltrant in this clinical case. The application of Icon-Etch for three times was necessary to achieve a complete erosion of the surface layer allowing the infiltrant to penetrate as it happens in caries lesions 8,14
Compliance with manufacturer instructions on how to use the material may have contributed for the treatment success, for instance, the polishing of tooth surfaces. The polishing of treated areas enhances the color stability of the masking probably due to reduction in surface porosity. Clinical conditions, such as type of opacity and infiltration depth, complete or incomplete infiltration, polymerization shrinkage as well as resin color, can also interfere in the final result 10. In this case, the rubber dam hampered Icon to set in the gingival margin. Nonetheless, even with slight blemishes in the gingival margin of the upper incisors, the patient was very satisfied with the treatment. Icon infiltrant has a lot advantages over other treatment techniques. The infiltrant can mask deeper lesions 9 without a significant loss of tooth tissue, which the microabrasion 5,6 and restorations with resin
Fig 1. Initial appearance of the permanent anterior teeth. The teeth 12/22 and 11/21 are classified as scores 4 and 6 according to Thylstrup and Fejerskov index, respectively.
Fig 2. Application of the Icon-Etch.
Fig 3. Application of the Icon-Etch.
Fig. 4. Application of the Icon-Dry by the first time.
Fig 5. Application of the Icon-Dry by the second time.
Fig 6. Application of the Icon-Dry by the third time.


10. Appearance of the upper incisors immediately after the treatment with Icon (DMG), before removing the rubber dam.
composites are not able to do. Moreover, a resin layer is not necessary, once the material penetrates into the enamel 9. The removal of the excess material with gauzes also retains the surface shape 15. In contrast to the bleaching therapy, which can reduce the microhardness of demineralized enamel surfaces 16, the infiltrant resin can strengthen the enamel structure mechanically 17. Other positive points of the infiltrant are the possibilities to perform the treatment in a single session and to have the result immediately 18
Conclusion
The use of Icon infiltrant can mask diffuse opacities improving the esthetics without a sig-nificant loss of tooth tissue.
References
1. Fejerskov O, Johnson NW, Silverstone LM. The ultrastructure of fluorosed human dental enamel. Scand J Dent Res. 1974; 82:357-72.
2. Møller IJ. Fluorides and dental fluorosis. Int Dent J. 1982;32(2):135-47.
3. Wright JT. The etch-bleach-seal technique for managing stained enamel defects in young permanent incisors. Pediatr Dent 2002; 24:249-52.
4. Bussadori SK, do Rego MA, da Silva PE, Pinto MM, Pinto AC. Esthetic alternative for fluorosis blemishes with the usage of a dual bleaching system based on hydrogen peroxide at 35%. J Clin Pediatr Dent 2004; 28:143-6.
5. Dalzell DP, Howes RI, Hubler PM. Microabrasion: effect of time, number of applica-tions, and pressure on enamel loss. Pediatr Dent 1995; 17:207-11.

PROF. DRA. VERA SOVIERO State University Rio de Janeiro – Brazil


6. Wong FS, Winter GB. Effectiveness of microabrasion technique for improvement of dental aesthetics. Br Dent J 2002; 193:55-8.
7. Dietschi D. Optimizing smile composition and esthetics with resin composites and other conservative esthetic procedures. Eur J Esthet Dent 2008; 3:14-29.
8. Paris S, Meyer-Lueckel H. Masking of labial enamel white spot lesions by resin infil-tration – a clinical report. Quintessence Int 2009; 40:713-8.
9. Kim S, Kim EY, Jeong TS, Kim JW. The evaluation of resin infiltration for masking labial enamel white spot lesions. Int J Paediatr Dent 2011; 21:241-8.
10. Paris S, Schwendicke F, Keltsch J, Dörfer C, Meyer-Lueckel H. Masking of white spot lesions by resin infiltration in vitro. J Dent 2013; 41:28-34.
11. Newbrun E, Brudevold F. Studies on the physical properties of fluorosed enamel I. Microradiographic studies. Arch Oral Biol 1960; 2:15-20.
12. Thylstrup A, Fejerskov O. Clinical appearance of dental fluorosis in permanent teeth in relation to histological changes. Community Dent Oral Epidemiol. 1978;6:329-37.
13. Hosey MT, Deery C, Waterhouse PJ. Paediatric Cariology. London: Quintessence Essentials 2004.
14. Knösel M, Eckstein A, Helms HJ. Durability of esthetic improvement following Icon resin infiltration of multibracketinduced White spot lesions compared with no therapy over 6 months: A single-center, split-mouth, randomized clinical trial. Am J Orthod Dentofacial Orthop 2013; 144:86-96.
15. Mueller J, Meyer-Lueckel H, Paris S, Hopfenmuller W, Kielbassa AM. Inhibition of lesion progression by the penetration of resins in vitro: influence of the application procedure. Oper Dent 2006; 31:338-45.
16. Basting RT, Rodrigues Júnior AL, Serra MC. The effect of 10% carbamide peroxide bleaching material on microhardness of sound and demineralized enamel and den-tin in situ. Oper Dent 2001; 26:531-9.
17. Robinson C, Brookes SJ, Kirkham J, Wood SR, Shore RC. In vitro studies of the pene-tration of adhesive resins into artificial caries-like lesions. Caries Res 2001; 35:136-41.
18. Meyer-Lueckel H, Paris S. Improved resin infiltration of natural caries lesions. J Dent Res 2008; 87:1112-6.
Fig 7. Application of the Icon-Infiltrant.
Fig 8. Light-curing of the infiltrant resin. Fig 9. Polishing of the tooth surfaces.
Fig
Fig 11. Follow-up of 4 months.
OPTIZYME ULTRA D
AN ADVANCED TOOL FOR DENTISTRY
Novapharm has been a research leader in the use of enzyme detergent medical instrument reprocessing for 3 decades. The last 15 years has seen an almost total replacement of the old style alkaline detergents by near neutral enzyme detergent formulations which have proven to be safer, more efficacious, more cost effective and more instrument compatible.
Recently it became clear that the challenges in reprocessing dental instruments are somewhat different from medical requirements and therefore a research project focussed on developing an enzymatic cleaner specifically to meet this dental challenge was undertaken five years ago.
The result is Optizyme Ultra D - an aqueous, multi-enzyme detergent concentrate developed specifically for dental instrument reprocessing. This formulation has proven to offer superior cleaning efficacy and is applicable to all dental instruments and cleaning modalities i.e. sinks, ultrasound baths and automated washers.
The unique features of the product focussed on satisfying the currently unmet dental requirements are:
• Clear, low foaming solution, fully compatible with manual washing, ultrasound baths and automated washers
• The ability to clean both organic and inorganic soils (bone, pulp, amalgam, ionomer as well as all human secretions).
• Digests and removes biofilm
• Contains rust and corrosion inhibitor
• The inclusion of a disinfecting system which ensures that the cleaning sink or ultrasound bath does not become a source of crossinfection after being in continuous use with a multiplicity of soiled instruments for many hours. (N.B. the product is not an instrument disinfectant)
Optizyme Ultra D is easily used in exactly the same way as other currently available instrument cleaners. It is simply added to the bath water or automated washer at the rate stated on the label.

STEVE KRITZLER Technical Director Novapharm Research (Australia) Pty Ltd

PRE-CLEANING: THE FOUNDATION FOR EFFECTIVE INSTRUMENT REPROCESSING

Precleaning is the beginning of the journey of reprocessing, and arguably the part that attracts the least attention, despite its importance. Appropriate precleaning steps that are undertaken at the chair side can dramatically reduce the amount of adherent material (including blood, salivary proteins, cements and bonding agents) on instrument surfaces. The 2024 Australian Dental Association Infection Prevention and Control Guidelines highlight the importance of precleaning steps, from those that occur during treatment and at the chair side, through to those that are undertaken prior to mechanical cleaning, once items have left the area where patient treatment is being undertaken.
Precleaning using a multi-enzyme approach has been a part of the protocol for reprocessing rotary nickel-titanium endodontic files for over 20 years. As a result, many dental practices have become more familiar with the use of multienzyme products for the pre-treatment of instruments before the cleaning process is commenced.
Cleaning solutions with multiple enzymes are specifically designed to handle a variety of organic and inorganic substances that stick to dental instruments. These solutions usually contain a mix of enzymes, such as proteases, lipases, amylases, and other types of carbohydrases. Proteases will break down proteins present in blood and saliva, while lipases focus on fats and lipids, and carbohydrases break down carbohydrates and organic substrates such as those in dental cements and bonding agents. This multi-enzyme strategy guarantees a thorough disintegration of bioburden, thereby enhancing the efficiency and effectiveness of the cleaning procedures that follow.
There are several advantages of employing a multienzyme treatment for dental instruments. They enhance the efficacy of the cleaning process by decomposing organic substances at a molecular level.
This aids in preventing the creation of biofilms during the time the instruments are soaking. Biofilms are difficult to eliminate and can harbor harmful pathogens. An effective cleaning solution can also extend the lifespan of instruments by preventing corrosion using corrosion inhibitors.
Several factors play a crucial role in determining the activity and effectiveness of multi-enzyme solutions. Firstly, temperature is a significant factor, since enzymes are sensitive to temperature changes. Most multi-enzyme solutions are designed to function at room temperature, which is typically 20-25°C. However, increasing the temperature to 40°C can considerably enhance enzyme activity, and accelerate the breakdown of contaminants. It is important to stay within the recommended temperature range, as excessively high temperatures will denature the enzymes, making them ineffective. Secondly, the duration of exposure to the multi-enzyme solution is critical. A soaking time of 10-20 minutes can be sufficient for the enzymes to act on the bioburden. Extended soaking can enhance cleaning efficiency, but it is essential to adhere to the manufacturer's guidelines to prevent potential damage to the instruments. Thirdly, some multi-enzyme products are designed to be used during ultrasonic cleaning. The agitation effects gained from cavitation significantly boost the effectiveness of the agent, since ultrasound waves create jet streams on the rigid surface of items when the microscopic bubbles created by cavitation collapse. This aids in dislodging debris, giving more effective cleaning, and reducing the time needed.
Fourthly, mild agitation, either manually or through mechanical means, can increase the extent of contact between the enzymes in solution and contaminants on instrument surfaces, thereby improving the breakdown process. Agitation helps distribute the enzymes evenly through the solution and across the instrument surfaces, ensuring comprehensive cleaning.
The concentration of the enzyme solution is another critical factor. Manufacturers provide specific dilution instructions to achieve the optimal concentration for effective cleaning. Using the solution at the correct concentration ensures that there is sufficient enzyme activity to break down bioburden efficiently. In addition to these factors, the pH of the solution, the hardness of the water used, and the presence of inhibitors or activators can also influence the effectiveness of multi-enzyme solutions. The influence of these variables was seen in a comprehensive analysis that we undertook of commercially available cleaning solutions for dental instruments, when we evaluated the various parameters that influenced their efficiency.

Figure 1. Effective cleaning of STF Browne Load Check® Indicators by ultrasonic cleaning over a period of 30-min with various commercial detergents at their manufacturer-designated concentrations at a temperature of 40°C. Row C is Optizyme Ultra D 6 ml/L, which shows the fastest removal of soil at 10 mins.


Therefore, it is important to optimise all these factors when using multi-enzyme cleaning solutions for cleaning dental instruments.
Based on the foregoing results it can be concluded that multi-enzyme cleaners are highly effective in removing biofilms, blood residues, and microbial contaminants from dental instruments. Multi-enzyme cleaners that include disinfectants also reduce the overgrowth of bacteria that otherwise occurs during a prolonged holding period when items are submerged, and thereby enhances environmental hygiene in the reprocessing area. Their actions are superior to simply leaving instruments immersed in tap water, or in tap water to which ordinary detergents or chlorine compounds have been added.
DR. JAYA SENEVIRATNE
Director Higher Degree Research Senior Lecturer in Periodontology School of Dentistry
The University of Queensland
EMERITUS PROFESSOR LAURENCE J. WALSH AO
BDSc(Hons), PhD, DDSc, GCEd, FRACDS, FFOMP(RCPA), FDFTEd(RCS Edin), FICD, FADI, FPFA, FIADFE School of Dentistry
The University of Queensland
SADAF KHAN
Associate Research Assistant
The University of Queensland
Figure 4. Comparative analysis of enzyme-based and non-enzyme-based detergents
Figure 3. Efficacy of Optizyme Ultra D.
Figure 2. Cleaning of artificially soiled dental instruments by ultrasonic cleaning, analyzed using PROReveal for efficacy evaluation in short wash cycle (10-min cycle) with various commercial detergents at designated concentrations
OCCUPATIONAL HAND DISORDERS IN DENTISTRY
Work-related musculoskeletal disorders (WMSDs) and discomfort are common among dental healthcare providers. Among 70% of all dental healthcare providers report musculoskeletal disorders, most commonly from the neck and the upper extremity.1 Dental hygienists and therapists seem to have higher prevalence rates for WMSDs in wrists and hands as compared to dentists. Hand problems are an important area to address, and to adopt preventative strategies to maintain a sustainable work life. In this ebook, we will provide an overview of WMSDs and discomfort in the hand relevant to the dental healthcare provider, treatment options for these, and effective prevention strategies.
Hand Fatigue
Hand fatigue is defined as the hand muscles failing to produce the force required, and multiple biological mechanisms contribute to the symptoms. Hand fatigue leads to more performed errors, impaired steadiness and dexterity, and overall impaired function of the hand when trying to perform a specific task.2 Hand fatigue is a symptom often caused by repetitive tasks at low loads. Both hand fatigue and carpal tunnel syndrome may hence be caused by the same occupational risk factors, both conditions affecting hand performance, and symptoms may be similar.

Carpal Tunnel Syndrome
Carpal Tunnel Syndrome (CTS) is the most common peripheral nerve entrapment syndrome in the upper extremity, with a prevalence of 3-4% in the general population.3 CTS occurs when the median nerve is compressed when passing through the tight carpal tunnel in the wrist. It is more common among women, and risk factors include advancing age, diabetes, rheumatoid arthritis, obesity, hypothyroidism, and occupational factors.
In many countries, CTS is recognized as an occupational health disorder. Work-related risk factors for developing CTS include vibrating hand-held tools, repetitive movement, static postures, and use of excessive force.4 CTS causes numbness, tingling, impaired dexterity, and pain in all fingers except the little finger. In advanced cases, there might be a wasting of the muscles innervated by the affected nerve. Among dental practitioners, symptoms of CTS are reported among 30%.5, 6 CTS treatment options include night splints, to keep the wrist in a neutral position, cortisone injections, and surgical release of the carpal tunnel ligament. Surgical treatment usually provides good and lasting resolution of the symptoms,7 but symptoms might take up to a year to completely resolve. Following surgery, there is an incision with sutures that are removed after two weeks, and sick leave is often required up to six weeks after the procedure, depending on the workload. For a working person, a diagnosis of CTS leads to a threefold increase in sick leave/disability pension days.8

Carpal Tunnel Syndrome causes numbness, tingling, impaired dexterity, and pain in all fingers except the little finger.
Hand Arm Vibration Syndrome
Hand Arm Vibration Syndrome (HAVS) is a cluster of symptoms and disability caused by vibration damage to various tissues. Vibration exposure might cause damage to blood vessels, leading to “white finger disease”, where the blood circulation to the fingers is impaired, causing pain and cold sensitivity.9 It might also cause damage to the nerves in the hand, causing neuropathy, which leads to impaired sensation of the hand, and increasing the risk of nerve entrapments, such as CTS.10 Vibrations may also cause damage to the muscle cells, causing weakness, and vibration exposure increases the risk of finger contracture (Dupuytren’s disease).11, 12


Other Conditions
There is some evidence that work tasks that involve pinch grip might increase the risk of future osteoarthritis in the hand.13
Impact on Daily Practice
WMSDs have both direct costs, in terms of seeking medical attention and compensation, and indirect costs, in the form of decreased productivity, lost wages, and reduced quality of life.
More recent data has shown ‘Musculoskeletal disorders account for $1 of every $3 spent on workers’ compensation for a total of more than $15 billion to $20 billion in workers’ compensation costs.14 Dental hygienists reported a reduction in number of days worked, decreased speed and quality of work, and increased sick leave, and 18% to 30% of practitioners cited WMSDs as determining factors for quitting the profession.15
Prevention Strategies
There are several strategies that the workplace can adopt to work proactively to prevent hand problems and disease among employees. Firstly, planning the workday and a smart design of the workflow, with reasonable work hours and patient load, as well as allowing for breaks between patients, are important strategies.16 It is also important that the equipment used allows sustainable working conditions, as well as providing education on ergonomics and avoiding awkward postures.15 Ergonomically designed instruments might help prevent hand and wrist disorders, and wide-diameter silicone handles may reduce hand and wrist pathology including hand fatigue.17, 18 Stabilizing and supporting the hand when working in the mouth is also important to decrease the force needed in the pinch grip thereby reducing muscle fatigue.19 A simple chairside stretching program, performed before starting a procedure, preferably developed together with a physiotherapist or occupational therapist, can also be effective in reducing hand fatigue.20 The usage of loupes when appropriate is also important in preventing WMSDs.17, 18
Dental handpieces, high-speed turbines, and ultrasonic scalers expose the users’ hands to high-frequency vibrations. Excessive vibrations from improperly maintained dental handpieces could result in the development of Hand-Arm Vibration Syndrome among dental practitioners. Dental handpieces that are not properly maintained throughout their lifetime are quite likely to develop a higher-than-normal rate of vibration. Used instruments are more hazardous as compared to newer ones. Rotating instruments such as high-speed turbines and handpieces must be replaced periodically, sufficient to switch between two operations, especially after every handpiece usage.21, 22
Clinical evaluations have demonstrated that cleaning and lubrication are the most critical factors in determining performance, durability, and longevity.23
Supportive workplace policies that facilitate return to work for the employee help minimize sick leave and time away from work. 24 Someone who is newly operated for CTS might be able to return to work faster if there can be an adjustment of work tasks, for example, by shifting from clinical to administrative work during the first recovery period after surgery (once the sutures are removed).
For the individual, having optimal treatment and control of eventual medical diseases, such as diabetes and obesity, is of importance, as they might further increase the risk of MSDs such as CTS. Diabetes is a common condition that increases the risk of CTS, and optimal blood glucose control helps reduce the risk of developing CTS. Physical exercise is also effective, in preventing other medical comorbidities, as well as WMSDs.
When blood vessels and nerves are affected, “white finger disease” may occur, and may be red and painful when blood circulation returns.
Glove Selection
For gloved tasks, glove selection impacts symptoms of hand fatigue, and may also impact the pressure inside the carpal tunnel. Too small gloves and incorrectly fitted double gloves (which sometimes are needed when performing surgery where there is a risk of glove perforation) increase the pressure inside the carpal tunnel more than a single glove of the right size.25 For longer gloved tasks, it might be beneficial to choose fitted gloves. These gloves are molded for a left and a right hand, whereas ambidextrous gloves have a fit for either the right or the left hand. Ambidextrous gloves stretch more and exert greater force when worn. This could lead to impaired blood flow, nerve compression, muscle fatigue, and hand pain.26 Glove thickness also impacts hand function, where a thicker glove decreases tactile sensitivity.27 For invasive tasks when double gloving is warranted, a thick outer glove reduces the tactile sensitivity without increased protection in the event of a sharps injury. A dedicated colored underglove for perforation detection with a standard thickness (or micro-thin) top glove is recommended.28
Hence, it is important to choose gloves of the right size, as thin as possible, and fitted gloves are probably better for tasks where the gloves have to be worn for a longer period. There are ergonomically certified gloves available with the intention to reduce muscle effort during daily wear and reduce hand fatigue.
Quality Requirements, Evaluations, and Purchase
When choosing gloves, it may be valuable to know that gloves intended to be used in medical/dental procedures, must fulfill Medical Devices Regulations. These strict rules are intended to ensure that all patients, staff, and others involved are guaranteed care will be provided with the best possible quality and the greatest possible safety, at a reasonable cost and with as few risks and side effects as possible. Environmental aspects and sustainability should also be considered when choosing gloves for one’s practice.
Medical Devices Regulations have the following specifications:
• EU: MDR 2017/745;
• Australia: MDR 2002;
• Brazil: RDC 16 2013;
• Canada SOR 98-282;
• Japan: Japanese Medical Device QMS;
• USA: 21 CFR 803, 21 CFR 806, 21 CFR 807, 21 CFR 820, 21 CFR 821.
This includes a Declaration of Conformity (DoC), a legally binding document where the producer certifies the fulfillment of current requirements in international standards.

• EU 2016/425 Personal Protective Equipment;
• EN-ISO 21420:2020 Protective gloves - General requirements and test methods
• EN-ISO 374-1 Protective gloves against dangerous chemicals and micro-organisms
• EN-ISO 374-5 Penetration resistance, microorganisms - bacteria, virus, and fungus
• EN 16532:2015 Determination of material resistance to permeation by chemicals - Part 1: Permeation by potentially hazardous liquid chemicals under conditions of continuous contact. Breakthrough time.
• EN 421:2010 Protective gloves against ionizing radiation and radioactive contamination
All these regulations serve the sole purpose of ensuring that all medical devices are produced in a safe process and are safe for everyone: staff, patients, technicians, and others.
In continuation, all these requirements must not only be met by manufacturers but must be maintained: validated, verified, and process-controlled by users and technicians throughout the whole lifetime (cycle) of the medical device (product). By international standard ISO 13485:2016 - Medical Devices, Quality management systems - manufacturers are obliged to implement Post Market Surveillance concerning their medical devices. Including not only the abovementioned quality aspects and standards but also identified, suspected, and/or previously unknown risks and side effects such as the correlation between medical/dental gloves and work-related musculoskeletal disorders.
In conclusion, awareness needs to be raised for WMSDs of the hand in dentistry, and there are today already effective prevention strategies that can be applied. Further research needs to be done to further improve the work environment, equipment, and gloves to allow all practitioners a long and healthy career.
References
1. Chenna D, Pentapati KC, Kumar M, Madi M, Siddiq H. Prevalence of musculoskeletal disorders among dental healthcare providers: A systematic review and meta-analysis. F1000Res. 2022;11:1062.
2. Forman GN, Sonne MW, Kociolek AM, Gabriel DA, Holmes MWR. Influence of muscle fatigue on motor task performance of the hand and wrist: A systematic review. Hum Mov Sci. 2022;81:102912.
3. Atroshi I. Incidence of physician-diagnosed carpal tunnel syndrome in the general population. Archives of internal medicine (1960). 2011;171(10):943-4.
4. van Rijn RM, Huisstede BM, Koes BW, Burdorf A. Associations between work-related factors and the carpal tunnel syndrome--a systematic review. Scandinavian journal of work, environment & health. 2009;35(1):19-36.
5. Alhusain FA, Almohrij M, Althukeir F, Alshater A, Alghamdi B, Masuadi E, et al. Prevalence of carpal tunnel syndrome symptoms among dentists working in Riyadh. Ann Saudi Med. 2019;39(2):104-11.
6. Hamann C, Werner RA, Franzblau A, Rodgers PA, Siew C, Gruninger S. Prevalence of carpal tunnel syndrome and median mononeuropathy among dentists. J Am Dent Assoc. 2001;132(2):163-224.
7. Scholten RJ, Mink van der Molen A, Uitdehaag BM, Bouter LM, de Vet HC. Surgical treatment options for carpal tunnel syndrome. Cochrane Database Syst Rev. 2007;2007(4):CD003905. Published 2007 Oct 17.
8. Lallukka T, Shiri R, Alexanderson K, Ervasti J, Mittendorfer-Rutz E, Virtanen M. Sickness absence and disability pension after carpal tunnel syndrome diagnosis: A register-based study of patients and matched references in Sweden. Scand J Public Health. 2022;50(4):471-81.
9. Aarhus L, Stranden E, Nordby KC, Einarsdottir E, Olsen R, Ruud B, et al. Vascular component of hand-arm vibration syndrome: a 22-year follow-up study. Occup Med (Lond). 2018;68(6):384-90.
10. Lundborg G, Dahlin LB, Hansson HA, Kanje M, Necking LE. Vibration exposure and peripheral nerve fiber damage. J Hand Surg Am. 1990;15(2):346-51.
11. Mathieu S, Naughton G, Descatha A, Soubrier M, Dutheil F. Dupuytren’s Disease and exposure to vibration: Systematic review and Meta-analysis. Joint Bone Spine. 2020;87(3):203-7.
12. Necking LE, Lundborg G, Lundström R, Thornell LE, Fridén J. Hand muscle pathology after long-term vibration exposure. J Hand Surg Br. 2004;29(5):431-7.
13. Hammer PE, Shiri R, Kryger AI, Kirkeskov L, Bonde JP. Associations of work activities requiring pinch or hand grip or exposure to hand-arm vibration with finger and wrist osteoarthritis: a meta-analysis. Scandinavian journal of work, environment & health. 2014;40(2):133-45.
14. United States Department of Labor: Occupational Safety and Health Administration. Ergonomics: The Study of Work. Washington, DC; 2000:1-14.
15. Mulimani P, Hoe VC, Hayes MJ, Idiculla JJ, Abas AB, Karanth L. Ergonomic interventions for preventing musculoskeletal disorders in dental care practitioners. Cochrane Database Syst Rev. 2018;10(10):Cd011261. Published 2018 Oct 15.
16. Pejcic N, Petrovic V, Markovic D, Milicic B, Dimitrijevic, II, Perunovic N, et al. Assessment of risk factors and preventive measures and their relations to work-related musculoskeletal pain among dentists. Work. 2017;57(4):573-93.
17. 1Wu J, McCullough M, Panisset MG, Galea MP. Prevention of work-related musculoskeletal disorders among dental professionals: A scoping review. Work. 2022;72(1):91-108.
18. Roll SC, Tung KD, Chang H, Sehremelis TA, Fukumura YE, Randolph S, et al. Prevention and rehabilitation of musculoskeletal disorders in oral health care professionals: A systematic review. J Am Dent Assoc. 2019;150(6):489-502.
19. Dong H, Barr A, Loomer P, Rempel D. The effects of finger rest positions on hand muscle load and pinch force in simulated dental hygiene work. J Dent Educ. 2005;69(4):453-60.
20. Padhye NM, Padhye AM, Gupta HS. Effect of Pre-Procedural Chair-Side Finger Stretches on Pinch Strength amongst Dental Cohort- A Biomechanical Study. Journal of clinical and diagnostic research : JCDR. 2017;11(4):ZC82ZC85.
21. Banga HK, Goel P, Kumar R, Kumar V, Kalra P, Singh S, et al. Vibration Exposure and Transmissibility on Dentist’s Anatomy: A Study of Micro Motors and Air-Turbines. Int J Environ Res Public Health. 2021;18(8).
22. Turcot A, Hamel D, Tessier M. Hand-Arm Vibration Syndrome in Dentistry: A Questionnaire Survey among Dentists and Review of Literature. Proceedings. 2023;86(1):17.
23. Schalli M, Kogler B, Miorini T, Gehrer M, Reinthaler FF. High-Speed Dental Instruments: An Investigation of Protein-Contaminated Dental Handpieces with the Bicinchoninic Acid Assay in Dental Offices in Styria, Austria. Int J Environ Res Public Health. 2023;20(3).
24. Peters S, Johnston V, Hines S, Ross M, Coppieters M. Prognostic factors for return-to-work following surgery for carpal tunnel syndrome: a systematic review. JBI database of systematic reviews and implementation reports. 2016;14(9):135-216.
25. Jernigan EW, 3rd, Smetana BS, Rummings WA, Dineen HA, Patterson JMM, Draeger RW. The Effect of Intraoperative Glove Choice on Carpal Tunnel Pressure. J Hand Microsurg. 2020;12(1):3-7.
26. Powell BJ, Winkley GP, Brown JO, Etersque S. Evaluating the fit of ambidextrous and fitted gloves: implications for hand discomfort. J Am Dent Assoc. 1994;125(9):1235-42.
27. Basak T, Sahin G, Demirtas A. Comparison of surgical gloves: perforation, satisfaction and manual dexterity. Int J Occup Saf Ergon. 2022;28(2):1160-6.
28. Han CD, Kim J, Moon SH, Lee BH, Kwon HM, Park KK. A randomized prospective study of glove perforation in orthopaedic surgery: is a thick glove more effective? J Arthroplasty. 2013;28(10):1878-81.
Dr. Mikael Zimmerman has been working in private enterprise since 2000 with a focus on hygiene and infection control, quality assurance, and development in dentistry. He is an Associate Professor in Clinical Oral Diagnosis at Karolinska Institute, Stockholm, Sweden. Previously, he served on the Dental Faculty, responsible for a special clinic for patients with immunodeficiencies (mainly HIV/AIDS), and the need for special attention when receiving dental care. He also serves as an International Advisor in infection control issues in both the dental and medical field in public, private, health institutions, and regulatory affairs groups.
DR. MIKAEL ZIMMERMAN DDS, PhD, Associate Professor

Dr. Malin Zimmerman is an Orthopedic Surgeon at Helsingborg Hospital in Sweden. Her clinical practice is focused on orthopedic trauma and hand surgery. She serves as an Associate Professor in orthopedic research at Lund University in Sweden, mainly focused on peripheral nerves, diabetes complications in the upper limb and the effect of socioeconomic factors on upper extremity conditions.
DR. MALIN ZIMMERMAN MD, PhD, Associate Professor

DIRECT COMPOSITE RESTORATIONS
IN ORTHODONTIC INDICATIONS - CONCEPT & CASE REPORT
In the past, we used to prepare teeth and sacrifice tooth substance to protect our prosthetic work due to the required minimum wall thickness. Today we protect the teeth with additive, adhesive restorations! In our daily practice we repeatedly perform restorations based on orthodontic or anatomical indications. There are different aplasia of permanent teeth, which is one of the most common cranio-facial malformations with a prevalence of approximately 1-11%.
Here we encounter agenesis with and without gaps or in the form of altered teeth - such as the so-called conical teeth in region 12 or 22. Often we also find persistent deciduous teeth with agenesis of the permanent dentition. Apart from mandibular second premolar agenesis, the lateral incisors are the most frequent places where aplasia occurs - apart from the wisdom teeth.
In terms of the development process, this results from the lip-jaw-palate cleft and is the smallest form of this characteristic, which can also occur without the formation of a cleft. However, as this is in the visible and aesthetic region, the patient's desire for correction is considerable.
In the following cases, different options for restoration using direct composite restoration techniques will be presented. Of course, ceramic restorations are also possible, but considering the young age of the patients, a minimally invasive therapy is advisable. The teeth can still elongate during secondary eruption, which can lead to the preparation margins becoming visible.
Orthodontists choose different therapeutic approaches. In some cases gaps are closed, but the trend tends towards keeping them open. This can have consequences for the entire dental arch and also for aesthetic rehabilitation.


to speak against a gap closure, as the distal movement of the anterior teeth and mesial movement of the posterior teeth can result in an inverted anterior overjet. A compensatory extraction of the lower premolars could be indicated. However, in the case of a distal bite, compensation by closing the gap can approximate the dental arches.
The profile of the patient should also be taken into consideration. The upper lip tends to revert back when closing gaps, which is more disadvantageous with a concave profile type than with a convex profile type. If the necessary movement of the teeth is taken into account, a penetration position of the canine near the middle incisors tends to favour closing the gap, a distance position tends to favour keeping the gap open. The colour and shape of the canines are only of limited importance, as both can be changed minimally invasively. Visually more challenging is the gingival profile, which can be positively influenced by orthodontic intrusion or extrusion. Nonetheless, the changed position of the canine teeth often results in a less favourable dental arch or leads to gaps between the canines and the premolars. The transition in the buccal corridor is altered and narrows the visual appearance. This should also correspond to the width of the nose and the shape of the face.
The following cases show that significantly improved results can be achieved by additive restoration with composite, even under unfavourable conditions. In most cases this is also possible without preparation of the tooth structure.
Case
presentations
The timing of the intervention may vary. In the case of reduced conical teeth, it may sometimes prove difficult for the orthodontist to position a bracket at all. It is therefore necessary to build up the teeth prior to orthodontic treatment to be able to move the teeth correctly and thus to set the correct axial direction and position in the arch. This can be achieved quite easily with BRILLIANT COMPONEER or a direct composite

User Report – BRILLIANT COMPONEER / BRILLIANT EverGlow
BRILLIANT COMPONEER EverGlow
Case 1: In this case (Figs. 1 – 6;) there were two differently developed, reduced lateral incisors, which were additively restored prior to orthodontic treatment and subsequently provided with brackets. After building up the incisors, orthodontic treatment could be performed and completed. Due to their impeccable optical appearance, the COMPONEER veneers can remain in the mouth after removing the brackets


a 14-year-old femaledation after orthodontic treatment had already been completed (Fig. 7).
In a second case a 14-year-old female patient presented following recommendation after orthodontic treatment had already been completed (Fig. 7).

a 14-year-old female patient presented following recommendation after orthodontic treatment had
The initial situation was a unilateral aplasia of the left lateral incisor, a mesially erupted canine, so that the deciduous canine could be preserved in its position. The gaps were closed, however the patient regarded the interincisal larger retractions and triangular formations in particular as displeasing. The different shade of the more saturated canine was less relevant for her.
The initial situation was a unilateral aplasia of the left lateral incisor, a mesially erupted canine, so that the deciduous canine could be preserved in its position. The gaps were closed, however the patient regarded the interincisal larger retractions and triangular formations in particular as displeasing. The different shade of the more saturated canine was less relevant for her.
On tooth 12, the incisal edge was lengthened slightly and the edge was
A stronger mesial light-reflecting ridge was applied with enamel masses to create a larger appearance.
On tooth 12, the incisal edge was lengthened slightly and the edge was straightened.
On tooth 12, the incisal edge was lengthened slightly and the edge was straightened.
In a second case a 14-year-old female patient presented following recommendation after orthodontic treatment had already been completed (Fig. 7).
A stronger mesial light-reflecting ridge was applied with enamel masses to create a larger appearance.
Tooth 23 was also lengthened to an edge incisally, the lateral facets were filled in and the marginal ridges were shaped. To avoid a greyish appearance due to too much enamel, it was necessary to add Universal shade A1/B1 to the BRILLIANT Ever Glow Translucent enamel masses.
A stronger mesial light-reflecting ridge was applied with enamel masses to create a larger appearance.
cromorphology (Fig. 9), a little polishing is sufficient to achieve a captivating and durable gloss.
This is very important as all the light reflection characteristics otherwise often disappear again due to too much polishing and the tooth appears rather lifeless (Fig. 10).
Once we have implemented the micromorphology (Fig. 9), a little polishing is sufficient to achieve a captivating and durable gloss.
Once we have implemented the micromorphology (Fig. 9), a little polishing is sufficient to achieve a captivating and durable gloss.
The initial situation was a unilateral aplasia of the left lateral incisor, a mesially erupted canine, so that the deciduous canine could be preserved in its position. The gaps were closed, however the patient regarded the interincisal larger retractions and triangular formations in particular as displeasing. The different shade of the more saturated canine was less relevant for her.
Tooth 23 was also lengthened to an edge incisally, the lateral facets were filled in and the marginal ridges were shaped. To avoid a greyish appearance due to too much enamel, it was necessary to add Universal shade A1/B1 to the BRILLIANT Ever Glow Translucent enamel masses.
The deciduous canine was lengthened significantly and built up vestibularly to ensure a transition into the buccal corridor. Minor gingivectomy was necessary cervically to create an aesthetic garland profile.
Tooth 23 was also lengthened to an edge incisally, the lateral facets were filled in and the marginal ridges were shaped.
To avoid a greyish appearance due to too much enamel, it was necessary to add Universal shade A1/B1 to the BRILLIANT Ever Glow Translucent enamel masses.
The initial situation was a unilateral aplasia of the left lateral incisor, a mesially erupted canine, so that the deciduous canine could be preserved in its position. The gaps were closed, however the patient regarded the interincisal larger retractions and triangular formations in particular as displeasing. The different shade of the more saturated canine was less relevant for her.
We opted for an additive structure of the teeth. Unfortunately, the width of the canine was greater than that of the contralateral lateral incisor, so that small lateral deviations could not be avoided as non-invasive surgery was specified (Fig. 8).
We opted for an additive structure of the teeth. Unfortunately, the width of the canine was greater than that of the contralateral lateral incisor, so that small lateral deviations could not be avoided as non-invasive surgery was specified (Fig. 8).
We opted for an additive structure of the teeth. Unfortunately, the width of the canine was greater than that of the contralateral lateral incisor, so that small lateral deviations could not be avoided as non-invasive surgery was specified (Fig. 8).
We opted for an additive structure of the teeth. Unfortunately, the width of the canine was greater than that of the contralateral lateral incisor, so that small lateral deviations could not be avoided as non-invasive surgery was specified

The deciduous canine was lengthened significantly and built up vestibularly to ensure a transition into the buccal corridor. Minor gingivectomy was necessary cervically to create an aesthetic garland profile.
The deciduous canine was lengthened significantly and built up vestibularly to ensure a transition into the buccal corridor. Minor gingivectomy was necessary cervically to create an aesthetic garland profile.
This is very important as all the light reflection characteristics otherwise often disappear again due to too much polishing and the tooth appears rather lifeless (Fig. 10).
On tooth 12, the incisal edge was lengthened slightly and the edge was straightened. A stronger mesial light-reflecting ridge was applied with enamel masses to create a larger appearance. Tooth 23 was also lengthened to an edge incisal, the lateral facets were filled in and the marginal ridges were shaped. To avoid a greyish appearance due to too much enamel, it was necessary to add Universal shade A1/B1 to the BRILLIANT EverGlow Translucent enamel masses.

This is very important as all the light reflection characteristics otherwise often disappear again due to too much polishing and the tooth appears rather
The deciduous canine was lengthened significantly and built up vestibular to ensure a transition into the buccal corridor. Minor gingivectomy was necessary cervically to create an aesthetic garland profile.
We are aware of the paradigm that form is decisive for aesthetics - as opposed to colour. Once the macroscopic shape has been realised, close attention must be paid to the micromorphology, particularly in young patients.
We are aware of the paradigm that form is decisive for aesthetics - as opposed to colour. Once the macroscopic shape has been realised, close attention must be paid to the micromorphology, particularly in young patients.
We are aware of the paradigm that form is decisive for aesthetics - as opposed to colour. Once the macroscopic shape has been realised, close attention must be paid to the micromorphology, particularly in young patients.
And this is where the special properties of the composite material become relevant. BRILLIANT EverGlow is an extremely supple and easy to shape composite, which can be processed well and delicately with very thin Heidemann spatulas, brushes and pads, yet still remains dimensionally stable.

And this is where the special properties of the composite material become relevant. BRILLIANT EverGlow is an extremely supple and easy to shape composite, which can be processed well and delicately with very thin Heidemann spatulas, brushes and pads, yet still remains dimensionally stable.
And this is where the special properties of the composite material become relevant. BRILLIANT EverGlow is an extremely supple and easy to shape composite, which can be processed well and delicately with very thin Heidemann spatulas, brushes and pads, yet still remains dimensionally stable.
10
Fig. 7
Fig. 4
Fig. 5
Fig. 6
Fig.
Fig. 7
Fig. 1
Fig. 4
Fig. 2
Fig. 5
Fig. 3
Fig. 6
Fig. 9
Fig. 10
edge was the edge was
light-reflecting enamel masses appearance. lengthened to an facets were filled ridges were shaped. appearance due to too necessary to add the BRILLIANT enamel masses. canine was lengthbuilt up vestibuinto the buccal gingivectomy was necesan aesthetic paradigm that aesthetics - as opthe macroscopic close attention micromorphology, patients. special propermaterial become EverGlow is an exto shape comprocessed well thin Heidemann pads, yet still stable.
Once we have implemented the micromorphology (Fig. 9), a little polishing is sufficient to achieve a captivating and durable gloss. This is very important as all the light reflection characteristics otherwise often disappear again due to too much polishing and the tooth appears rather lifeless (Fig. 10) Fig. 6
Once we have implemented the micromorphology (Fig. 9), a little polishing is sufficient to achieve a captivating and durable gloss. This is very important as all the light reflection characteristics otherwise often disappear again due to too much polishing and the tooth appears rather lifeless (Fig. 10).
In a further case the canines were pulled to the second position, however these canines were rather delicate and symmetrically placed. The white decalcification present around the brackets on the vestibular surface created an additional problem (Figs. 11 - 12).

The mesial marginal ridge was highlighted for light reflection purposes and was converted to more transparent enamel ridges in terms of colour - resembling the natural tooth (Figs. 13 - 14).
vestibularly with BRILLIANT EverGlow A1/B1 and Bleach Translucent as the patient wished for a whitening effect. The interincisal retraction of the premolars was also minimised in terms of optical appearance. The mesial marginal ridge was highlighted for light reflection purposes and was converted to more transparent enamel ridges in terms of colour - resembling the natural tooth (Figs. 13 - 14).

User Report – BRILLIANT COMPONEER / BRILLIANT EverGlow
Late intervention: Even at vanced age, we can realise aesthetics in a minimally invasive manner, if it has not been practised case by colleagues before. Thus, female patient presented in my tice with the notion that no improvement could be achieved without ing teeth, crowns or implants (Fig.


In a further case the canines were pulled to the second position, however these canines were rather delicate and symmetrically placed. The white decalcifi cation present around the brackets on the vestibular surface created an additional problem (Figs. 11 - 12).
In a further case the canines were pulled to the second position, however these canines were rather delicate and symmetrically placed. The white decalcification present around the brackets on the vestibular surface created an additional problem (Figs. 11-12).

In cases where the gap is to be kept open early, composite teeth can be included in the gap using brackets at the beginning and then followed by inserting a single-wing Maryland composite bonded bridge. This can also be regarded as a longterm provisional restoration to keep the gap free for a future implant. The implant should not be placed too early as it remains in it position but the jaw continues to grow. This gives it a much too caudal position and the alveolar ridge develops a concavity, which is difficult to remedy with renewed bone augmentation.
In cases where the gap is to be kept open early, composite teeth can be included in the gap using brackets at the beginning and then followed by inserting a single-wing Maryland composite bonded bridge. This can also be regarded as a longterm provisional restoration to keep the gap free for a future implant. The implant should not be placed too early as it remains in it position but the jaw continues to grow. This gives it a much too caudal position and the alveolar ridge develops a concavity, which is difficult to remedy with renewed bone augmentation.


Here we had to deviate slightly from the non-invasive concept and work from micro-abrasively to minimally invasive. Therapy planning was as follows: The middle incisors were prepared micro-abrasively and restored only with BRILLIANT EverGlow Bleach Translucent. The canines were transformed completely vestibularly with BRILLIANT EverGlow
User Report – BRILLIANT COMPONEER / BRILLIANT EverGlow
In cases where the gap is to be kept open early, composite teeth can be included in the gap using brackets at the beginning and then followed by inserting a single-wing Maryland composite bonded bridge. This can also be regarded as a longterm provisional restoration to keep the gap free for a future implant. The implant should not be placed too early as it remains in it position but the jaw continues to grow. This gives it a much too caudal position and the alveolar ridge develops a concavity, which is difficult to remedy with renewed bone augmentation.
Milled, single-wing composite Maryland bridges have the same flexural strength due to a tooth-like modulus of elasticity, which supports prolonged durability. One can still colour the bridge individually with stains or have it milled in cutback design and veneered with individual layers.
Milled, single-wing composite Maryland bridges have the same flexural strength due to a tooth-like modulus of elasticity, which supports prolonged durability. One can still colour the bridge individually with stains or have it milled in cutback design and veneered with individual layers.

Here we had to deviate slightly from the non-invasive concept and work from micro-abrasively to minimally invasive. Therapy planning was as follows:
In a further case the canines were pulled to the second position, however these canines were rather delicate and symmetrically placed. The white decalcification present around the brackets on the vestibular surface created an additional problem (Figs. 11 - 12).
Here we had to deviate slightly from the non-invasive concept and work from micro-abrasively to minimally invasive. Therapy planning was as follows: The middle incisors were prepared micro-abrasively and restored only with BRILLIANT EverGlow Bleach Translucent. The canines were transformed completely vestibularly with BRILLIANT EverGlow A1/B1 and Bleach Translucent as the patient wished for a whitening effect. interincisal retraction of the premolars also minimised in terms of
A1/B1 and Bleach Translucent as the patient wished for a whitening effect. The was lighted for light reflection purposes and ridges in terms of colour - resembling the
The middle incisors were prepared micro-abrasively and restored only with BRILLIANT EverGlow Bleach Translucent. The canines were transformed completely vestibularly with BRILLIANT EverGlow A1/B1 and Bleach Translucent as the patient wished for a whitening effect. The interincisal retraction of the premolars was also minimised in terms of optical appearance.
Milled, single-wing composite Maryland bridges have the same flexural strength due to a tooth-like modulus of elasticity, which supports prolonged durability. One can still colour the bridge individually with stains or have it milled in cutback design and veneered with individual layers.
Late intervention: Even at an advanced age, we can realise aesthetics in a minimally invasive manner, even if it has not been practised in this case by colleagues before. Thus, this female patient presented in my practice with the notion that no improvement could be achieved without extracting teeth, crowns or implants (Fig. 15).

The mesial marginal ridge was high lighted for light reflection purposes and was converted to more transparent enamridges in terms of colour - resembling the
In cases where the gap is to be kept open early, composite teeth can be included in the gap using brackets at the beginning and then followed by inserting a
case by colleagues before. Thus, this female patient presented in my prac-
Late intervention: Even at an advanced age, we can realise aesthetics in a minimally invasive manner, even if it has not been practised in this case by colleagues before. Thus, this
Several problems were posed here:
Agenesis of the lateral incisors without orthodontic gap closure
Downward opening diasthema
Several problems were posed at once
Teeth very prominent in terms colour with enamel stains and decalcification as well as brown discolouration.
Surface-structured teeth with metrical abrasion of the incisal
Agenesis of the lateral incisors without orthodontic gap closure Downward opening diasthema
Beginning periodontitis with the papillae.
Fig. 9
Fig. 10
Fig. 12
Fig. 11
Fig. 15
Fig. 16
Fig. 18
Fig. 17
User Report – BRILLIANT COMPONEER / BRILLIANT
Fig. 13
Fig. 14
Fig. 12
Fig. 11
Fig. 15
Fig. 16
Fig. 18
Fig. 17
Fig. 19
Fig. 14
Fig. 15
Fig. 16
gap is to be kept teeth can be inclubrackets at the befollowed by inserting a composite bonded regarded as a longto keep the gap The implant should as it remains in it continues to grow. This position and the concavity, which renewed bone
composite Maryland flexural strength due elasticity, which durability. One can still individually with stains cutback design and layers.
Even at an adrealise aesthetics manner, even practised in this before. Thus, this presented in my practhat no improvewithout extractimplants (Fig. 15).
If one leaves a slightly larger bar in the rubber dam between the two middle incisors, one can model directly on the rubber dam.
Due to the pronounced micromorphology of these teeth, it is important to extend these into the diasthema. The whitish coloured band must also be continued, otherwise the widening of the teeth looks artificial.
Using the Miris2 effect shades White and White Opaque - also by COLTENE - it was possible to imitate the whitish structure. The effect shades are placed under the enamel layer and applied very finely with brushes. Of course, such cases can also be solved with crowns, partial crowns or veneers, but the more minimally invasive we proceed, the more likely we are to protect the patient's tooth and, for the benefit of the stability of our restoration, not remove any hard tooth substance.
Conclusion
Using the BRILLIANT EverGlow composite, its very natural shades and the natural layering technique of opaque, universal and translucent shades, we can achieve invisible adhesive direct restorations. Due to their excellent polish ability and good material properties, they are very durable on the one hand, and on the other hand, the patient can no longer distinguish between a restoration or his/ her own tooth
Several problems were posed at once here:
Several problems were posed at once here:
• Agenesis of the lateral incisors without orthodontic gap closure
• Downward opening diasthema
Agenesis of the lateral incisors without orthodontic gap closure
Downward opening diasthema
• Teeth very prominent in terms of colour with enamel stains and decalcification as well as brown discolouration.
Teeth very prominent in terms of colour with enamel stains and decalcification as well as brown discolouration.
• Surface-structured teeth with asymmetrical abrasion of the incisal edge.
Surface-structured teeth with asymmetrical abrasion of the incisal edge.
• Beginning periodontitis with loss of the papillae.
• Deep bite with protrusion
Beginning periodontitis with loss of the papillae.
Deep bite with protrusion
If one wants to close the diasthema, one has to consider the biological width so that the papilla has the opportunity to grow up to the contact point.
In this case, an elongated contact surface needs to be established in order to reach relatively far to cervical. In addition, the gap must be closed in the form of small wings. These have to be fitted exactly to the gingiva to make it look as if the tooth also has a wider root.

Fig. 15
Fig. 16
Fig. 18
Fig. 17
Fig. 19
DR SYLVIA RAHM Coltene, Switzerland
BENEFITS OF TORQTECH HANDDPIECES


Easy
access
The compact head improves visibility, while the comfort grip makes it easy to position. The angle is designed to help avoid contact with opposing teeth, allowing you to focus on treatment, rather than access.

Unique, multi-point chuck MORITA's unique chuck design grips the bur firmly and doesn't lose its strength even after years of use. Experience the stability TORQTECH provides when performing work that requires great precision.

Highly durable involute gears
A unique combination of internal and involute gears provide superior durability by reducing wear and resistance.
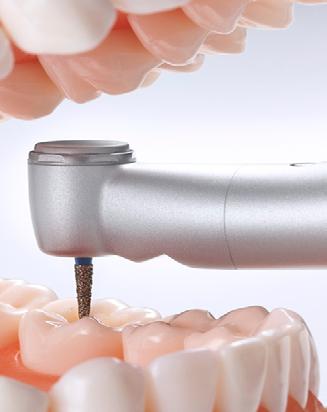
Improved access

TOROTECH Ultra mini Contraangle is ideal for treating patients with limited Jaw mobility or children with small oral cavities. Use any standard friction bur up to 21mm, in a smaller profile.

See what you’ve been missing
The ultra mini head allows you to reach narrow treatment areas with ease and provides excellent visibility for fine, precise work.

Wide, one-point spray
Newly designed spray mechanism provides a wide spray ensuring adequate cooling in even the most challenging treatment areas.
1:5 Contra-angles - Robust and durable with easy access
Morita 1:5 Contra-angle Ultra Mini - For maximum access and visibility


Reduced Speed, Improved Performance - Enables Cleaning at a Whole New Level

The ultra mini head provides excellent access and its rounded shape is more comfortable for patients.
In addition, the head is sealed to prevent prophy paste from getting inside the attachment which helps improve its durability and extend its working life.

• Superb access
• Sealed head helps prevent contamination and extends working life
• Thrust bearings for improved durability
lnterproximal Stripping Made Easy
• Finely controlled with up to 10,500 oscillations per minute
• Quickly remove enamel with high power and torque
• May be used for contouring and polishing enamel
• Superior control for improved patient safety

A HANDPIECE THAT’S A MASTER OF ITS DOMAIN
One clinician shares why she’s relied on the mastertorque lux for years, and why she won’t use any other handpiece.

With her KaVo MASTERtorque LUX M9000L highspeed airdriven handpiece always at the ready, Dr. Siti Lowery says she has one less thing to worry about during her workday. She’s relied on the handpiece in her Cary, NC, practice for years, and said it’s the only one she’s purchased since opening her office and buying her own equipment.
The high-performing handpiece offers a host of benefits, including 31 watts of power, 57 dB for quiet operation and a more pleasant treatment experience, and Direct Stop Technology (DST) for increased patient safety and reduced risk of crosscontamination. One of the most notable benefits the handpiece offers, though, is reliability.
“KaVo has been my gold standard. I knew when I invested in a handpiece, it was going to be from KaVo,”
Dr. Lowery said, noting the M9000L was the “hot” handpiece being recommended at the time.
“And this handpiece has been reliable; I know I can depend on it no matter what.”
The Perfect Fit
Dr. Lowery enjoys the Goldilocks effect of the handpiece, which she says fits perfectly into her hand—unlike other brands she’s tried. It also provides smooth operation; she doesn’t feel it
vibrate as she works in a patient’s mouth, which improves comfort during the procedure.
“I have small, petite hands, and it’s just the right weight and shape to fit into them comfortably,” she said.
“It’s not too skinny and it’s not too fat. It’s just right!”
Predictable Performance
Dr. Lowery uses the MASTERtorque LUX M9000L handpiece primarily to prep for crowns and composite restorations, but regardless of the procedure at hand, it works well. In fact, she describes its performance as better than any other handpiece she’s ever used.
“It’s predictable, and as dentists, we like predictable,” she said.
“If your hand is steady, you’re going to get smooth cuts.”
High-Quality Construction
The team at KaVo manufactures every part that goes into their handpieces, which means that each instrument employs the high quality that comes with German engineering. Dr. Lowery appreciates the durability that this superior construction gives the M9000L.
“It holds up,” she said. “And it still looks good, even after years of use.”

“It’s predictable, and as dentists, we like predictable. If your hand is steady, you’re going to get smooth cuts.”
A Better Experience
There’s no question the powerful MASTERtorque LUX M9000L is Dr. Lowry’s go-to handpiece; she doesn’t have any interest in using anything else. And if she does happen to pick up what she describes as one of the practice’s “imposter” handpieces, she can tell the difference right away. It doesn’t feel the same and it certainly doesn’t perform as well. The handpiece’s high-quality construction and the enhanced experience it provides are simply unmatched.
“It’s my preferred handpiece, by far,” she said. “It’s my workhorse. That’s what I call it.”
Any dentist looking for a durable, high-performing handpiece can’t go wrong investing in the MASTERtorque LUX M9000L.
“It’s seamless and predictable,” Dr. Lowery said. “It takes the question out of your days.”
The DST advantage – KaVo’s Direct Stop Technology stops the bur in less than 1 second on average when the foot control is released. This not only increases efficiencies, but it also reduces the likelihood of soft tissue damage. This feature also prevents aerosols and debris drawback, lengthening turbine life. The MASTERtorque LUX M9000L also features:
• 31 Watts of Peak Power
• 20% more torque than previous generations
• Industry leading noise level of 57 db

WATCH THE VIDEO
SKOOLTOOLZ BEAUTIFUL
BIOMIMETIC RESTORATIONS


FIGURE 1 - PREOPERATIVE VIEW Defective amalgam and composite patch restorations which need to be replaced.

4 - Final layers of composite placed and sculpted with the conical end of TNTAM1.


FIGURE 2 - Amalgams removed and marginal ridgecomposite base layer shaped in the distal prep using TNTAM2.

5 - Access for matrix burnishing and initial layers of packable composite made simple using the extended shank and burnisher end of TNTAM3.

FIGURES 7 & 8 - POSTOPERATIVE VIEW - Beautifully and biomimetically-completed restorations.

FIGURE 3 - Brown tint delicately applied with the ultra-pointed fine end of TNTAM1.

6 - Composite formed and finessed with the thin paddle of TNTAM2. Final layer of composite placed and shaped with TNTAM1.
FIGURE
FIGURE
FIGURE
SKOOLTOOLZ KIT
TNTAMKIT
DESCRIPTION
Cone Socket Mirror Handle, Satin Steel
#5 HD Mirror
SkoolToolz 1, Posterior Occlusal Shaper
SkoolToolz 2, Universal Thin PFI
SkoolToolz 3, Curved Ball Burnisher
Posterior Sickle Scaler, EverEdge 2.0
SkoolToolz Kit
*Kit contains instruments in 5-instrument cassette

PART CODE
MH6
MIR5HD
TNTAM1
TNTAM2
TNTAM3
S204S9E2
TNTAMKIT*


Dr. Clarence Tam is originally from Toronto, Canada, where she completed her Doctor of Dental Surgery and General Practice Residency at the University of Western Ontario and the University of Toronto, respectively.
Clarence’s practice is limited to cosmetic and restorative dentistry. She is well-published to both the local and international dental press, writing articles, reviewing and developing prototype products and techniques in clinical dentistry.
She frequently and continually lectures internationally. Clarence is the Chairperson and Director of the New Zealand Academy of Cosmetic Dentistry. She is currently one of two individuals in Australasia to hold Board-Certified Accredited Member Status with the American Academy of Cosmetic Dentistry.
Clarence is an Opinion Leader for multinational dental companies Kuraray Noritake, J Morita Corp, Henry Schein NZ, Ivoclar Vivadent, DentsplySirona, 3M ESPE, Kerr, GC Australasia, SDI, Coltene, Triodent and is the only Voco Fellow in Australia and New Zealand.
She holds Fellowship status with the International Academy for DentoFacial Esthetics. She is a passionate and approachable individual, and is committed to having an interactive approach with patients in all of her cases to maximize predictability.
DR CLARENCE TAM
HBSc, DDS, FIADFE, AAACD Auckland, New Zealand

TNTAM1
TNTAM3
TNTAM2
CERAMIC VENEERS
THE MINIMALLY INVASIVE ALTERNATIVE TO FULL CROWNS

All-ceramic front tooth restorations. Perfect Veneer Preparations.
The traditional preparation:
Up to now, traditional (veneer) crowns used to be standard practice when it came to restoring large front tooth defects. Komet have Specially developed instruments, ensuring Safe Preparations.
The restoration of extensive defects in anterior dentition used to require full crowns, usually porcelain fused to metal crowns. The development of new, high-strength tooth-coloured dental ceramics (monolithic lithium disilicate and other suitable ceramics), in combination with adhesive fixation methods, opens the way to new, minimally invasive types of restorations. These are all called “veneers”, but they differ in terms of shape and size to suit the defect to be restored.
*) Scientific note issued by the Deutschen Gesellschaft für zahnärztliche Prothetik und Werkstoffkunde (DGZPW): Klinische Indikation von Kronen und Teilkronen (der geschädigte Zahn) (Clinical indication of crowns and partial crowns (the damaged tooth))
**) Act to improve the rights of patients, Federal Law Gazette, year of issue 2013, Part I, no. 9, issued in Bonn on 25 February 2013
***) Gürel G, Sesma N, Calamita MA, Coachman C, Morimoto S. Influence of enamel preservation on failure rates of porcelain laminate veneers. Int J Periodontics Restorative Dent. 2013;33(1):31-9.
What they all have in common is that the required preparations cause fewer traumas during grinding and incorporation, thus reducing the risk of pulpitis. This is particularly important from a clinical aspect because pulpitis is one of the main risks associated with treatments involving full crowns.
In response to the high risk of pulpitis, the DGPro negotiated and issued a statement as early as 2004, recommending that in view of the risk of pulpitis, alternatives should be checked prior to crowning*.
According to the German Patientenrechtegesetz** BGB §630e (1), patients have to be informed about the risks and alternatives.
Depending on the extent of the preparation, we distinguish between:
• Purely labial veneers (“short-wrap design”)
• Veneers extending in an interproximal direction, preserving the contact point (“medium wrap design”)
DR. M. OLIVER AHLERS Specialist for function diagnostic and therapy Director of the CMD Centrum Hamburg-Eppendorf

PROF. DR. DANIEL EDELHOFF Specialist for dental prosthetics Director of the Poliklinik für Zahnärztliche Prothetik LMU München

• Extended veneers comprising the interproximal regions and the incisal edges (“long-wrap design”)
• 360° veneers that extend across the entire dental surface but are limited to the dental enamel (“fullwrap design”)
• Palato/incisal functional veneers, usually applied to canines.
A decisive factor for the durability of these restorations is that the preparation is carried out in the enamel***.
This is difficult to achieve with traditional preparation instruments.
Indications
We have developed new abrasive instruments with special geometries to facilitate the procedure and to increase the safety, for:
• treating carious teeth
• restoring front teeth damaged by tooth wear
• stabilizing teeth after endodontic treatments
• masking severely discoloured anteriors


Pre-preparation depth marking
The durability of veneers largely depends on keeping the preparation within the dental enamel. It is, therefore, of decisive importance to limit the penetration depth accordingly. To this end, we have developed special depth markers with guide pin. Thanks to their geometry, these depth markers reliably limit the penetration depth[ 1 ] – even if the instrument is inadvertently applied at too steep an angle [ 2 ].
The suggestion* to highlight the bottom of the preparation groove with a felt or marker pen proved useful [ 3 ]. Like this, the maximum permissible


removal depth is clearly recognizable during the shaping preparation at a later point.
Shaping preparation
Shaping [ 3 ] and finishing [ 4 ] are done with a tapered diamond abrasive. The tip of this instrument is rounded to an ellipsoid shape. The diameter of the instrument used depends on the size of the prepared tooth.
*) Kern M, Ahlers MO. Controlling the depth of ceramic veneer preparations by using a color marker in the depth grooves. J Prosthet Dent. 2015;114(6):862-4.
Traditional labial veneers (short wrap design)
The preparation prior to placing veneers is sophisticated precision work. To ensure durability of the ceramic veneer, this should ideally be 0.6 mm thick, but certainly no less than 0.3–0.4 mm. The enamel of maxillary incisors and canines is thinned down to a thickness of merely 0.4 mm in the cervical region, which is why the preparation prior to placing traditional labial veneers should be limited to this value. The observance of the required thickness is facilitated by the depth marker 868BP.314.020 and the special labial abrasive with guide pin 856P.314.018 as well as the finisher 8856P.314.018 with matching shape [ 5 ].
Thin
veneers
The enamel in the cervical region of incisors – both in the upper and lower jaw – is even thinner, which is why the preparation depth has to be limited to just 0.3 mm. The depth marker 868BP.314.018 makes sure that this is observed. The instrument is followed by a tapered diamond abrasive 868.314.012 with matching shape and an ellipsoid tip as well as a congruent diamond finisher 8868.314.012. These instruments are particularly suitable for “small” anteriors and for the preparations prior to placing purely labial veneers as well as veneers extending in an interproximal and/or incisal direction.
These are special instruments and techniques for extending a preparation in maxillary central incisors and all canines in an interproximal and labial direction. these are described on the following page.
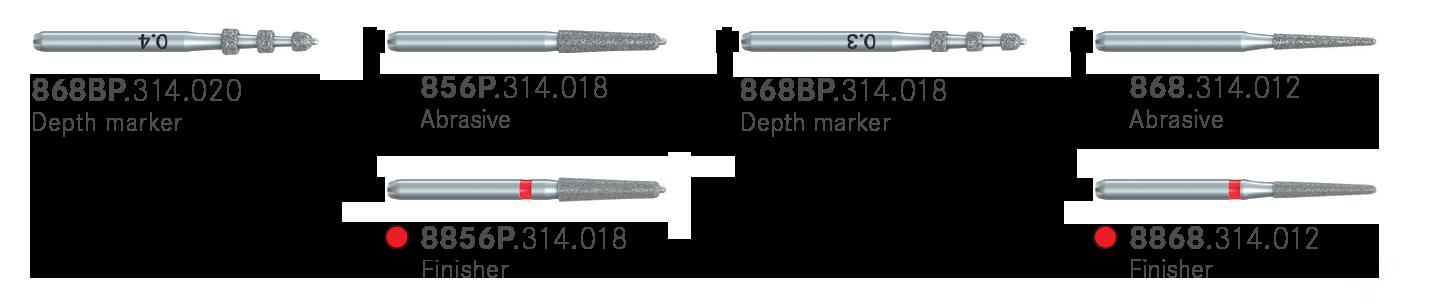


Extended veneers (medium/long wrap design) Discolorations, diastemata, enamel defects and previous root canal treatments all require the placement of extended veneers that extend from interproximal to incisal. The extension is done with a tapered diamond abrasive 868.314.016 rounded to an ellipsoidal shape and a diamond finisher 8868.314.016 of identical shape. The aesthetic appearance and the durability of the restoration profit from this, but the interproximal preparation is particularly challenging due to the close vicinity to the adjacent tooth [ see 6 ].
In response to this, special sonic tips are available that perfectly complement the Perfect Veneer Preparations set. Their shape corresponds to that of the diamond abrasives, but they are bisected lengthwise [ 7 ] and coated on one side only to safely prevent injury to the neighbouring tooth [ 8 ] and to guarantee ideal interproximal geometries [ 9 ].
TIP: If your practice has the necessary facilities, you can smooth the interproximal surfaces with the matching sonic tips coated on one side – without matrix!


Palato-incisal functional veneers
Another condition for durable ceramic veneers is the absence of dysfunctional loads. If the canine guidance is lost due to tooth wear caused by erosion, attrition or abrasion, it might be necessary to rebuild the canine guidance. Instead of invasive crowns, palato-incisal functional veneers have now become a well-established*, scientifically recognized option**. The preparation prior to placing these veneers is done in two steps with two instruments: In a first step, the preparation takes place using an egg-shaped diamond abrasive 379.314.023 [ 10 ], followed by finishing with a diamond finisher 8379.314.023 of identical shape. During finishing, it has proved useful to create a preparation groove with the tip of the abrasive instrument in the thickest part of the enamel.


* Sieweke M, Salomon-Sieweke U, Zofel P, Stachniss V.: Longevity of oroincisal ceramic veneers on canines - a retrospective study. J Adhes Dent 2: 229-34 (2000)
** Joint statement of the Deutschen Gesellschaft für Zahnerhaltung (DGZ) und der Deutschen Gesellschaft für Zahn-, Mund- und Kieferheilkunde (DGZMK) Autoren: M. Federlin, W. Geurtsen, B. Haller, G. Schmalz): “Zahnfarbene Restaurationen aus Keramik: Inlays, Teilkronen und Veneers”. (“Tooth-colored ceramic restorations: inlays, partial crowns and veneers”) DZZ 62 (09) 2007
BUY NOW
PRO SURGICAL SYSTEM
GUIDED OR FREEHAND? IT'S YOUR CHOICE!

Keyless guided and freehand workflows in a single kit, for a new level of flexibility and predictability.
The Pro surgical kit from BioHorizons offers predictability and flexibility in a single system. Guided implant placement can be performed with control and precision following a keyless drilling protocol. The same set of length specific drills can also be used for freehand placement, offering flexibility for treatment planning and for surgery.
Features
• Supports guided and freehand surgical protocols
• Keyless guided surgery solution
• Color-coded instruments for easy recognition of compatibility


Freehand protocol uses standard width-increasing drill protocol for traditional
Keyless Guided Workflow
Fully guided implant placement provides control over the final implant position with the ease of keyless guided drilling.
Freehand Workflow
placement.
GC INITIAL® LISI BLOCK
New & Revised Milling Parameters
GC Initial® LiSi Block is a fully crystallized lithium disilicate block, offering optimal physical and aesthetic properties without the need for firing. 1-6 The processing time is significantly reduced as it comes fully crystallized eliminating the firing step.9 Just mill, polish, and place!
GC’s proprietary HDM technology optimizes crystal size and glass matrix stiffness, ensuring good machinability, precise margins, excellent polishability, high wear resistance and aesthetic durable restorations are produced with or without firing.7,8 This makes it an ideal time saving solution for single visit chairside treatments.
The introduction of the revised preparation guidelines for Initial LiSi Block is aimed at enhancing efficiency and maintaining workflow consistency. Take a look at the updated milling parameters for Initial LiSi Block provided below.
INLAYS/ONLAYS

• Cavity wall angle 6o with long axis
• Shoulder preparation
CROWNS

• Wall angle 6 ~ 10o taper
• Deep chamfer or round chamfer preparation

New milling parameters require CEREC Software Version 5.2.8 on your milling machine.
References:
1. Hoshino T, Matsudate Y, Sasaki K (2020). Wear resistance of CAD/ CAM glass ceramic blocks. J Dent Res 99 (Spec Iss A):1823, (https://iadr.abstractarchives.com/abstract/20iags-3294486/wearresistance-of-cadcam-glass-ceramic-blocks).
2. Kato K et al. (2020). Edge Chipping Resistance of Glass Ceramic Block for CAD/CAM. J Dent Res 99 (Spec Iss A):0083, (https://iadr.abstractarchives.com/abstract/20iags-3315704/edgechipping-resistance-of-glass-ceramic-block-for-cadcam).
3. Kariya S, Azuma T, Fusejima F (2020). Wear Resistance of Novel Machinable Glass Ceramics. J Dent Res 99 (Spec Iss B):1 (https://iadr.abstractarchives.com/abstract/jadr2020-3000018/ wear-resistance-of-novel-machinable-glass-ceramics)
4. Hoshino T, Matsudate Y, Sasaki K (2019). Chemical durability of CAD/CAM glass-ceramic blocks. J Dent Res 98 (Spec Iss A):0100, (https://iadr.abstractarchives.com/abstract/19iags-3168964/ chemical-durability-of-cadcam-glass-ceramic-blocks).
5. Kojima K et al. (2019). Wear properties of lithium silicate glass ceramic block for CAD/CAM. J Dent Res 98 (Spec Iss A): 1259, (https://iadr.abstractarchives.com/abstract/19iags-3178759/wearproperties-of-lithium-silicate-glass-ceramic-block-for-cadcam).
6. Akiyama S et al. (2019). Edge-Stability of the Novel Lithium Disilicate Glass-Ceramic Block for CAD/CAM. J Dent Res 98 (Spec Iss A): 0097, (https://iadr.abstractarchives.com/abstract/cediadr2019-3223282/edge-stability-of-the-novel-lithium-disilicateglass-ceramic-block-for-cadcam).
7. Cagidiaco EF, Sorrentino R, Pontoriero D, Ferrari M (2020). A randomized controlled clinical trial on two types of lithium disilicate partial crowns. Am J Dent. 33(6):291-295. https://pubmed.ncbi. nlm.nih.gov/33439557/
8. GC R&D, Japan, Data on file [marginal gap was quantified by μ-X ray CT system] available from info.australasia@gc.dental
9. GC R&D, Japan, Data on file [in-house test] available from info. australasia@gc.dental. Under testing conditions based on IFU.

3D-PRINTED DENTURE MATERIAL SHOWCASES STRENGTH & ESTHETICS

Trusana from Myerson Tooth features powerful flexural strength not seen in other materials.
Achieving a natural esthetic for 3D-printed teeth while maintaining flexural strength and wear resistance is not possible using ordinary material. That is where Trusana comes in, according to Steven Sadowsky, DDS, FACP, professor at the Arthur A. Dugoni School of Dentistry at the University of the Pacific in San Francisco, California, and dental implant expert. Trusana is a 3D printing resin that uses a photopolymer liquid to create denture teeth with fracture toughness, wear resistance, and esthetic translucency.
The Need for an Innovative Material
Created by Myerson Tooth, Trusana was formulated to fill the need left by materials that were prone to breakdown, a problem Dr Sadowsky noticed in his prosthodontic practice.
“We were seeing a lot of mechanical complications with the ‘All-on-4®’design, especially with the provisional prosthesis that’s used to provide immediate function and stabilize the implants during the integration during the first phase of treatment,” Dr Sadowsky says.
“Even after we finished the definitive restoration, there was often wholesale wear on the teeth. So that within 5 years, we needed to completely retread that prosthesis, and someone who’s paying quite a bit for this type of definitive work was obviously going to be discouraged after a fairly short time of service.”

Dr Sadowsky cites several studies.
“One investigation concluded that patients were 50 times more likely to need posterior tooth replacement at 5 years or less than at 2 years of service.1 A longitudinal study addressing prosthetic complications over 29 years found what was quite inflammatory for our work. After about 10 years, only about 10% of our prostheses were without mechanical problems. ”2 Equally troubling have been the higher fracture rates of up to 60% using the all-acrylic prosthesis that is delivered at the time of implant placement.3 These mechanical problems could jeopardize the integration of the implants. This led Dr Sadowsky and his colleague and notable polymer scientist, Jeff Stansbury, PhD, to additive materials using a urethane dimethacrylate formulation with robust physical properties. After researching and patenting a highly durable denture tooth material, Dr Stansbury and Dr Sadowsky discovered Trusana for additive manufacturing.
Strength Through Data
Trusana stood out to Dr Sadowsky because of its unique composition among other 3D printing materials. “Trusana has really formidable properties,” he says. Dr Sadowsky says that Trusana’s flexural strength is where it shines. “What we see from Trusana is that the flexural strength is 50% higher than present market materials. In comparison with methyl methacry- late, which was the conventional material most used in analogue processing, it is more than 100% better in terms of flexural strength.”4 Trusana’s flexural strength is 160 MPa

when dry and 171 MPa after being stored in water for 14 days. One of the pitfalls of additive and other denture material can be water uptake. Because water uptake degenerates the physical properties of the denture tooth, it can cause breakdown and staining over time. Trusana has the added benefit of being hydrophobic, meaning its water uptake is just around 0.3% and it is impervious to the aging seen with other materials. The denture material not only displays high strength as well as tough- ness with an exceptionally good elastic modulus, but its esthetics are a big draw too. Dr Sadowsky says patient feedback to Trusana has been very positive. “The patient that was first to benefit from a Trusana implant prosthesis was very complimentary, and she felt like she could smile for the first time without being sensitive to her appearance,” he says. “She also felt like she had a lot of confidence in terms of the stability of the prosthesis.”
REFERENCES
1. Purcell BA, Mc.lumphy 3A, 4olloway JA, Bec9 :M. Prosthetic complications in mandibular metal- resin implant-fixed complete dental prostheses: a 5- to 9-year analysis. lnt JOral Maxillofac lmplants. 2008;23(5):847-857.
2. Dhima M, Paulusova V, Lohse C, Salinas TJ, Carr AB. Practicebased evidence from 29-year outcome analysis of management of the edentulous jaw using osseointe- grated dental implants. J Prosthodont. 2014;23(3);173-181. doi:10.1111/jopr.12084
3. Lopes A, Mal6 P, de Araujo Nobre M, Sanchez-:Ernandez 3, .ravito _. The Nobel.uide All-on-4 treat- ment concept for rehabilitation of edentulous jaws: a retrospective report on the 7-years clinical and 5-years radiographic outcomes. Clin lmplant Dent Relat Res. 2016;19(2):233-244. doi:10.1111/cid.12456
4.aesemann C, Spies BC, Sterzenbach ., et al. Polymers for conventional, subtractive, and additive manufactur- ing of occlusal devices differ in hardness and flexural properties but not in wear resistance. Dent Mater. 2021;37(3):432-442. doi:10.1016/j. dental.2020.11.020

Trusana Premium 3D Printing Resin, a photopolymer liquid indicated for dentures, is durable and offers the enhanced esthetics that patients desire. Trusana Premium 3D Printing Resin has a lower percentage of water uptake than many resins on the market and is available in 6 shades-A1, A2, A3, B1, C1, and 51 (bleached)-for esthetic flexibility.
LEARN MORE
STEVEN SADOWSKY
OCCLUSAL FREEDOM WITH VITA VIONIC DENT DISC MULTICOLOUR

Introduction
I had the opportunity to challenge myself, as well as the digital technology. An implant-supported full class 1 denture in the upper jaw was to be manufactured using the most recent 3shape software (3shape A/S, Copenhagen, Denmark) and polychromatic composite disk VITA VIONIC DENT DISC multiColor (VITA Zahnfabrik, Bad Säckingen, Germany), which has recently arrived on the market, for the subtractive manufacturing of denture teeth.
The interaction of traditional experience with new technology inspired me to once again break new ground, and to challenge the status quo and my own professional complacency when treating complex implant cases.
Case study
The patient came to the practice because he needed a new restoration in the edentulous upper jaw. Since the patient did not like the fit, the foreign body sensation or the functionality of a conventional denture, implant insertion had been suggested in advance, to which the patient consented. The new full denture was to be stabilized on top of four implants with Novaloc abutments (Straumann, Freiburg, Germany). In the treatment plan, we decided to manufacture the full denture using the digital workflow. The goal was to show whether the digital denture could be manufactured more easily, and whether a similar or even better fit could be achieved after integration, compared with conventional full dentures. Of particular interest here was the integration itself, as well as whether the abutments had to be integrated into the denture base in the treatment chair or in the laboratory.


The treatment phase included the following steps:
1. The palate portion was to be freely designed.
2. The base from the VITA VIONIC BASE DISC HI should not be additionally reinforced.
Fig. 1: The upper jaw after the insertion of the four implants
Fig. 2: The virtual model during the analysis and block out phase.
Fig. 3: The virtual setup with the selection of tooth shapes.
3. The angulation of the implants should not be corrected. This decision was made because of the flexible angulation compensation with the different Novaloc Locators. They make it possible to compensate for the leverage provided by the extended free end. At the same time, the the strain on the implants was reduced despite the unfavorable positioning while chewing. A prosthetic correction of the angulation would only increase and strengthen the leverage effect. A trouble-free, occlusal freedom in centric was also essential in order to provide even more compensation for the load stress.
4. The focus was on making the occlusal morphology of the teeth functional within the patient's chewing cycles, while at the same time transferring the freedom of movement concept to the VITAPAN LINGOFORM posterior teeth. The VITA VIONIC DIGITAL VIGO denture tooth library, available in the 3shape software, is based on the design of the VITA VIONIC VIGO prefabricated teeth, which are in turn based on the design of the VITAPAN EXCELL anterior teeth and the VITAPAN LINGOFORM posterior teeth. Their basic functional principle was automatically transferred to the patient's occlusion. Note: The VITA VIONIC DENT DISC multiColor is made from the same VITA MRP (Microfiller Reinforced Polymermatrix) composite formulation as the premium teeth VITAPAN EXCELL and VITAPAN LINGOFORM.
5. Treatment continued with intraoral scans of the lower dental arch and the alveolar ridge in the upper jaw. Note: The updated version of 3shape software (3Shape Dental System 2022) includes an option for the prosthetic implant components used in this treatment. Once the scans and registration were uploaded, the design of the denture began. VITA VIONIC VIGO O45 and 22L were the teeth selected. The posterior contacts were adjusted and confirmed in order to implement freedom in centric.
6. The dental arch and denture base were manufactured subtractively and fixed using VITA VIONIC BOND.
7. Due to the virtual integration of the Novaloc Locators in the software and the high milling precision, the matrices clicked into the denture base after subtractive manufacturing. To ensure a secure bond, the matrices were also integrated into the denture base using DTK adhesive (Bredent, Senden, Bavaria).
Background information
Freedom in centric: Freedom in centric is defined as a “flat area” in the central fossa in which the antagonist cusps have 0.5 to 1 mm of eccentric freedom of movement upon contact, unaffected by tooth inclination. All natural teeth work according to this concept, but very few denture teeth have it integrated.
Why is freedom in centric important? This concept is important because denture teeth are not innervated. This means that a patient cannot feel when the teeth are in occlusion or if they are almost in occlusion. It is important to note that there is food between the teeth during chewing and it is not possible to create perfect centric contact with each individual chewing cycle, as is possible in the articulator during the manufacture of dentures. And then there is also the fact that full dentures are supported by mucous membranes. When considering these two aspects, it is actually inconceivable that a patient with full dentures can always return precisely to centricity. For the same reason, the natural dentition – even if we can feel our teeth during the chewing process - cannot achieve precise centricity after each chewing cycle. This is also the main cause of instability and tension within the denture.
Why was freedom in centric important for the success of this treatment? Due to the distribution of the implant abutments, a free occlusal concept without interference was important for preventing a leverage effect. A prefabricated tooth with a locked centric would not allow this compensation to achieve a good denture fit and the desired function. This applies in the present case, especially with regard to the pronounced free end distal from the area of the implant support. For this reason, the patient needs a flexible and adjustable occlusal design.

Matrix
As already described, special attention was paid to the locators because the matrices were integrated into the denture base in the laboratory and not at the patient's chair. As a result, we had to check whether the dimensional transfer of the implant position into the software, in conjunction with the precise subtractive manufacturing, would make it unnecessary to integrate the matrices on the patient chairside. Bonding in the laboratory can reduce chair time by 1.5 to 2 hours.
Fig. 4: Checking the occlusal contacts and the freedom in centric.
Fig. 5: The STL file of the dental arch for the denture.
That is much more comfortable for the patient because less work needs to be performed inside the mouth. However, the matrices can also be fixed in the laboratory with an accurate model and a careful, precise conventional procedure. Subtractive manufacturing of the base and bonding of the matrices in the laboratory was effective and accurate in this case. Due to the complex implant distribution, a precise relationship between implant head and matrix was a must, especially in this clinical situation.
In this case, the matrices fit into the patrixes of the implant abutments without any complications, and demonstrated reliable retention. During the occlusion check, no adjustments were necessary at all. The patient has been wearing the CAD/ CAM-supported prosthesis to date without any discomfort. He is satisfied with its appearance and trouble-free function.


Summary
• Analog or digitally manufactured denture teeth that are designed with occlusal freedom provide stability, flexibility and adaptability to the patient's chewing cycle. The occlusal design can be modified in the production of tooth material with the VITA VIONIC DENT DISC multiColor to obtain the desired reliability and function.
• Hitting and sliding on the main cusps is the main cause of these well-known denture problems.
• This treatment plan demonstrates the challenges of dealing with one's own professional complacency, and the digital workflow for the production of implant-supported dentures.
• The VITA VIONIC DENT DISC multiColor enabled an easy-to-implement and time-saving workflow that created a high-quality denture.

Summary
As denture professionals, we have to create this form of care specifically for each patient and not expect them to simply adapt to their new dentures. In order to achieve this, denture teeth that are adaptable must be used. On the other hand, selfreflection is important to prevent complacency and to allow an adaptation of the skills needed for the specific requirements of the patient case.
Freedom in centric is the possibility of moving within the centric contact and therefore not to be blocked in a bite. This concept allows for flexible occlusal adjustment to the patient's needs, but has only been integrated into a few prosthetic tooth designs available to us. In this case, the successful treatment can be attributed to precisely this freedom, which is contained in the VITA tooth library and in the subtractively manufactured dental arch from the VITA VIONIC DENT DISC multiColor.
If we want to be superheroes for our patients, we need to think outside the box when it comes to complete dentures. Digital workflow manufacturing is another viable “tool in your arsenal” to provide your patients with consistent, high-quality removable dentures. It matters what type of teeth you use for traditional or digital manufacturing.
Find out about the freedom in centric of the VITAPAN LINGOFORM posterior tooth set and the VITA VIONIC DIGITAL VIGO denture tooth library with the VITA VIONIC DENT DISC multiColor. Freedom is great!
The author is grateful to his patients, VITA Zahnfabrik, Aurum Lab Calgary and, especially, Jason Atwood.
MARC WAGENSEIL DD, RDT
VITA International Speaker Heritage Denture Centre and Dental Lab Edmonton AB, Canada

Fig. 6: VITA VIONIC BASE DISC HI and VITA VIONIC DENT DISC multiColor.
Fig. 7: The completed digital denture.
Figure 8: Basal view of the denture with the integrated matrices.
Fig. 9: The upper denture in situ.
OCCLUSAL FREEDOM WITH VITA VIONIC DENT DISC MULTICOLOUR
Introduction
I had the opportunity to challenge myself, as well as the digital technology. An implant-supported full class 1 denture in the upper jaw was to be manufactured using the most recent 3shape software (3shape A/S, Copenhagen, Denmark) and polychromatic composite disk VITA VIONIC DENT DISC multiColor (VITA Zahnfabrik, Bad Säckingen, Germany), which has recently arrived on the market, for the subtractive manufacturing of denture teeth.
The interaction of traditional experience with new technology inspired me to once again break new ground, and to challenge the status quo and my own professional complacency when treating complex implant cases.
Case study
The patient came to the practice because he needed a new restoration in the edentulous upper jaw. Since the patient did not like the fit, the foreign body sensation or the functionality of a conventional denture, implant insertion had been suggested in advance, to which the patient consented. The new full denture was to be stabilized on top of four implants with Novaloc abutments (Straumann, Freiburg, Germany). In the treatment plan, we decided to manufacture the full denture using the digital workflow. The goal was to show whether the digital denture could be manufactured more easily, and whether a similar or even better fit could be achieved after integration, compared with conventional full dentures. Of particular interest here was the integration itself, as well as whether the abutments had to be integrated into the denture base in the treatment chair or in the laboratory.
The treatment phase included the following steps:
1. The palate portion was to be freely designed.
2. The base from the VITA VIONIC BASE DISC HI should not be additionally reinforced.
Fig. 1: The upper jaw after the insertion of the four implants
Fig. 2: The virtual model during the analysis and block out phase.
Fig. 3: The virtual setup with the selection of tooth shapes.
3. The angulation of the implants should not be corrected. This decision was made because of the flexible angulation compensation with the different Novaloc Locators. They make it possible to compensate for the leverage provided by the extended free end. At the same time, the the strain on the implants was reduced despite the unfavorable positioning while chewing. A prosthetic correction of the angulation would only increase and strengthen the leverage effect. A trouble-free, occlusal freedom in centric was also essential in order to provide even more compensation for the load stress.
4. The focus was on making the occlusal morphology of the teeth functional within the patient's chewing cycles, while at the same time transferring the freedom of movement concept to the VITAPAN LINGOFORM posterior teeth. The VITA VIONIC DIGITAL VIGO denture tooth library, available in the 3shape software, is based on the design of the VITA VIONIC VIGO prefabricated teeth, which are in turn based on the design of the VITAPAN EXCELL anterior teeth and the VITAPAN LINGOFORM posterior teeth. Their basic functional principle was automatically transferred to the patient's occlusion. Note: The VITA VIONIC DENT DISC multiColor is made from the same VITA MRP (Microfiller Reinforced Polymermatrix) composite formulation as the premium teeth VITAPAN EXCELL and VITAPAN LINGOFORM.
5. Treatment continued with intraoral scans of the lower dental arch and the alveolar ridge in the upper jaw. Note: The updated version of 3shape software (3Shape Dental System 2022) includes an option for the prosthetic implant components used in this treatment. Once the scans and registration were uploaded, the design of the denture began. VITA VIONIC VIGO O45 and 22L were the teeth selected. The posterior contacts were adjusted and confirmed in order to implement freedom in centric.
6. The dental arch and denture base were manufactured subtractively and fixed using VITA VIONIC BOND.
7. Due to the virtual integration of the Novaloc Locators in the software and the high milling precision, the matrices clicked into the denture base after subtractive manufacturing. To ensure a secure bond, the matrices were also integrated into the denture base using DTK adhesive (Bredent, Senden, Bavaria).
Background information
Freedom in centric: Freedom in centric is defined as a “flat area” in the central fossa in which the antagonist cusps have 0.5 to 1 mm of eccentric freedom of movement upon contact, unaffected by tooth inclination. All natural teeth work according to this concept, but very few denture teeth have it integrated.
Why is freedom in centric important? This concept is important because denture teeth are not innervated. This means that a patient cannot feel when the teeth are in occlusion or if they are almost in occlusion. It is important to note that there is food between the teeth during chewing and it is not possible to create perfect centric contact with each individual chewing cycle, as is possible in the articulator during the manufacture of dentures. And then there is also the fact that full dentures are supported by mucous membranes. When considering these two aspects, it is actually inconceivable that a patient with full dentures can always return precisely to centricity. For the same reason, the natural dentition – even if we can feel our teeth during the chewing process - cannot achieve precise centricity after each chewing cycle. This is also the main cause of instability and tension within the denture.
Why was freedom in centric important for the success of this treatment? Due to the distribution of the implant abutments, a free occlusal concept without interference was important for preventing a leverage effect. A prefabricated tooth with a locked centric would not allow this compensation to achieve a good denture fit and the desired function. This applies in the present case, especially with regard to the pronounced free end distal from the area of the implant support. For this reason, the patient needs a flexible and adjustable occlusal design.
Matrix
As already described, special attention was paid to the locators because the matrices were integrated into the denture base in the laboratory and not at the patient's chair. As a result, we had to check whether the dimensional transfer of the implant position into the software, in conjunction with the precise subtractive manufacturing, would make it unnecessary to integrate the matrices on the patient chairside. Bonding in the laboratory can reduce chair time by 1.5 to 2 hours.
Fig. 4: Checking the occlusal contacts and the freedom in centric.
Fig. 5: The STL file of the dental arch for the denture.
That is much more comfortable for the patient because less work needs to be performed inside the mouth. However, the matrices can also be fixed in the laboratory with an accurate model and a careful, precise conventional procedure.
Subtractive manufacturing of the base and bonding of the matrices in the laboratory was effective and accurate in this case. Due to the complex implant distribution, a precise relationship between implant head and matrix was a must, especially in this clinical situation.
In this case, the matrices fit into the patrixes of the implant abutments without any complications, and demonstrated reliable retention. During the occlusion check, no adjustments were necessary at all. The patient has been wearing the CAD/ CAM-supported prosthesis to date without any discomfort. He is satisfied with its appearance and trouble-free function.
Summary
• Analog or digitally manufactured denture teeth that are designed with occlusal freedom provide stability, flexibility and adaptability to the patient's chewing cycle. The occlusal design can be modified in the production of tooth material with the VITA VIONIC DENT DISC multiColor to obtain the desired reliability and function.
• Hitting and sliding on the main cusps is the main cause of these well-known denture problems.
• This treatment plan demonstrates the challenges of dealing with one's own professional complacency, and the digital workflow for the production of implant-supported dentures.
• The VITA VIONIC DENT DISC multiColor enabled an easy-to-implement and time-saving workflow that created a high-quality denture.
Summary
As denture professionals, we have to create this form of care specifically for each patient and not expect them to simply adapt to their new dentures. In order to achieve this, denture teeth that are adaptable must be used. On the other hand, selfreflection is important to prevent complacency and to allow an adaptation of the skills needed for the specific requirements of the patient case.
Freedom in centric is the possibility of moving within the centric contact and therefore not to be blocked in a bite. This concept allows for flexible occlusal adjustment to the patient's needs, but has only been integrated into a few prosthetic tooth designs available to us. In this case, the successful treatment can be attributed to precisely this freedom, which is contained in the VITA tooth library and in the subtractively manufactured dental arch from the VITA VIONIC DENT DISC multiColor.
If we want to be superheroes for our patients, we need to think outside the box when it comes to complete dentures. Digital workflow manufacturing is another viable “tool in your arsenal” to provide your patients with consistent, high-quality removable dentures. It matters what type of teeth you use for traditional or digital manufacturing.
Find out about the freedom in centric of the VITAPAN LINGOFORM posterior tooth set and the VITA VIONIC DIGITAL VIGO denture tooth library with the VITA VIONIC DENT DISC multiColor. Freedom is great!
The author is grateful to his patients, VITA Zahnfabrik, Aurum Lab Calgary and, especially, Jason Atwood.
MARC WAGENSEIL DD, RDT
VITA International Speaker Heritage Denture Centre and Dental Lab Edmonton AB, Canada
Fig. 6: VITA VIONIC BASE DISC HI and VITA VIONIC DENT DISC multiColor.
Fig. 7: The completed digital denture.
Figure 8: Basal view of the denture with the integrated matrices.
Fig. 9: The upper denture in situ.
INTERVIEW WITH DPT VICTOR CERDÁ
ON HIS ADVANCES WITH VITA VIONIC VIGO

Víctor Cerdá is a dental prosthodontist and owner of the laboratory of the same name in Castalla, Alicante, Spain
How did you first get involved with digital prosthesis?
Víctor Cerdá: I became involved with digital prostheses relatively recently, conducting tests with VITA and their VIONIC VIGO system, which is the first system I have found to be effective. I was never fully convinced by what I was seeing with fully printed and milled prostheses.
Why did you select VITA materials for the digital production of full prostheses?
Víctor Cerdá: With VITA VIONIC VIGO, I saw a tooth that looked natural. What caught my attention was the ability to have a tooth that is similar to a high-end splint tooth, and not like a milled monoblock tooth or a printed tooth. I had not seen this commercially available from any company until I encountered VITA VIONIC VIGO.
What was especially important for you about teeth for digital prostheses?
Víctor Cerdá: The most important thing with VITA VIONIC VIGO was that it was unique; I had never seen anything like it before, particularly its natural appearance (textures, translucency, etc.) and resistance to abrasion.
What is the benefit of digital prostheses?
Víctor Cerdá: I am currently investing more time in the learning process because these are the first digital prostheses I have used, and I am aware of the learning curve involved in anything digital. Now I am working
better to understand the software and create protocols similar to those I have for conventional prostheses. I know that as soon as I have mastered some of these steps, it will be a big change for the better.
What is the main advantage of VITA VIONIC VIGO?
Víctor Cerdá: Placing a high-end tooth in a digitally produced prosthesis is the main advantage. It is the closest thing I have found so far to conventional prostheses.
What has changed with the digital workflow?
Víctor Cerdá: I now see big advantages, such as making new prostheses for a patient who brings in their old ones, for example.
When we have their prostheses, we have the patient’s esthetics and vertical dimension, so we just need to functionalize their prostheses to obtain a good adaptation of the bases to the mucosa. We scan these prostheses, which have already been functionalized in the clinic, send in the .stl file and return the prostheses to the patient.
From there, we can create the digital prosthesis in the laboratory instantly, with great savings in terms of both time and money.
What differences do you see between digitally produced prostheses and analog ones?
Víctor Cerdá: For now, the biggest difference is in the time and cost of the materials.


Have you found that you are saving time in the production of digital prostheses as compared to those produced using conventional means? If so, how much time would you estimate you save?
Víctor Cerdá: We still need to study the material costs and time and evaluate whether the bases should be milled or printed. We need to be clear about all the costs in order for the clinic to accept them. We need to know whether a printed base gives us the same level of reliability and adaptation in the mouth as a milled base. The ideal thing would be to obtain the same results with the printed version as the milled one. If the digital version is comparable to the conventional one as far as price is concerned, the clinic would readily accept it, but if there is a big difference in price, that would be challenging.
Can the SEMCD technique be used with digital prostheses from VITA VIONIC VIGO?
Víctor Cerdá: Well, it has been difficult for us to find the point of feasibility (which was scanning the functional

impressions and from there, working on and finishing the complete prosthesis). The problem is that the software programs are not yet designed to work with an impression, but with a physical model. For now, we have searched for ways to, let’s say, “trick” the software and invert the impressions, converting them into models and then being able to work with them. This step has taken many hours, but we have finally achieved it.
• We scan the functionalized base plates in the mouth.
• From there, we gradually clean the mesh.
• We generate the master models and the complete one.
At this point, we now have our protocol, but it has involved a lot of trial and error. , We can now adapt it to the SEMCD technique to create esthetic and static digital prostheses.
VÍCTOR CERDÁ Castalla, Alicante, Spain

WHY IS HENRY SCHEIN
A GREAT CHOICE FOR YOUR EQUIPMENT PARTNERSHIP
DID YOU KNOW HENRY SCHEIN IS THE WORLD’S LARGEST SUPPLIER TO DENTISTS IN OFFICE-BASED PRACTICE?
We are a Fortune 500 company currently ranked about 333 and one of the NAZDAQ indices company. In USD we have revenues of over $12 Billion and have over 25,000 Team Schein Members in 190 countries/regions dedicated to office-based practice.
Big is one thing, it’s the way we do business is important: for 18 years we’ve been on the ‘Fortune Worlds Most Admired Company’s listing’. Furthermore, 8 Years on Ethisphere World’s Most Ethical Companies List to name two of many awards. As one of our 1 million global customers, you are sharing and benefiting in business growth and success. Importantly our core values include commitment to constant improvement, CPD Education, actions in philanthropy through Schein Cares as well as charitable acts in times of crisis, these few examples mark and defines the character of our business and team.
Whilst thinking global we act local; it’s our Australian team, over 350 employees strong working in 8 Australian and New Zealand entities. Greater than 70 of them in equipment are dedicated to your practice technical needs in areas of specialist reps, the largest service team in Australia, administrators and logistics.

Our staff are local to your office (in all Australian state and territories) ready to help, committed to be your trusted business partner for mutual success. In equipment we know we can’t be everywhere at once. The Henry Schein internal support network is augmented by a large cohort of small technical service businesses. We’re pleased to support those family businesses that have been the backbone of dental service and repair. These third-party repairers are working hand in glove with our field service teams and are focused to support your practice.
Supporting your practice. As your practice forms part of Henry Schein’s success, you’ll benefit as we are always seeking ways to do more for you. Through Schein 360 we can assist with Practice Analysis, providing the keys to building your practice, better inventory and freight through Inventory Solutions. Software support via Henry Schein One. Convenient professional development via our Education team and Schein TV.

We also through Schein 360 have links to businesses with focus in key areas to help you and your practice such as Henry Schein One, myDental Marketing and Apollo Films to develop your marketing reach. With the changing infection control needs, parallel to our experienced staff we work closely with Prime Practice to assist in IC compliance.
TOP SHELF
SUPPLIERS,
TERRIFIC TEAM
MEMBERS
READY TO SERVE WITH A FOCUS ON YOUR NEEDS.
HOW CAN WE HELP YOU TODAY?
WELCOME TO HENRY SCHEIN AUSTRALIA.
Supported By:


GETTING SMARTER ALL THE TIME

Assisted intelligence is the key ingredient fuelling many of the advancements in the dental practice—from cutting-edge digital imaging to all-in-one software solutions like DTX Studio™ Clinic from DEXIS. Although it will never replace clinical experience and expertise, intelligent technologies are creating opportunities to assist with diagnosis, treatment planning, and more.
In recent years, artificial intelligence, or AI, has become so ingrained in our daily lives that we often don’t even realise it’s there, working in the background. So, what exactly is AI? Simply put, it’s intelligence demonstrated by machines. AI is built to mimic the human mind, combining computer science and robust datasets to enable problem solving and decision making. AI is fuelled by algorithms, which are essentially the rules for problem solving. Today, AI is not only automating machinery; it’s the technology behind your search engine results, the product recommendations you receive while scrolling through social media, and the speech recognition systems you use every day.

features that improve both practice efficiencies and patient outcomes, it’s imaging software like DTX Studio Clinic that brings it all together. Every image, whether 2D, 3D, clinical photography, or intraoral scans, is housed in this solution. Any technology you buy comes with its own software, but it can be cumbersome to switch back and forth to get what you need from each one.
This solution ties everything together, making it accessible via a single, intuitive software.
DTX Studio Clinic makes it easy to integrate digital diagnostic and treatment planning processes into the workflow, from image collection and image capturing to treatment planning and delivery
It’s clear AI has a huge impact on our daily lives, so it’s no surprise it’s starting to play a major role in dentistry as well. The AI algorithms can direct software to point out if information is missing on a scan, for example, or digitally select the appropriate tooth shade for a case. Of course, no matter the application, human input is still required; AI will never replace clinicians and their teams. For this reason, AI can be considered “assisted intelligence” technology, helping you arrive at informed decisions so you can better diagnose and treatment plan.
While dental equipment is evolving to include smart
Improving Communication
Dentists can use the software to boost patient education and ultimately case acceptance. Presentations become more robust, with patients able to see all the relevant images on the screen in front of them as you go over the treatment plan. They leave with a much better understanding of their condition and why you’re recommending treatment, making them more likely to move forward.
The intuitive software also enhances communication between dentists and their team members. For example, it’s easy to sync data across rooms or practices with 40 installations per licence; all team members have quick, easy access to the same information.


An Enhanced Workflow
With DTX Studio Clinic, AI is present throughout the workflow and serves as a digital assistant. The DTX Studio Clinic Smart features were designed together with dentists around the world to improve the way you diagnose and communicate with your patients. Through MagicSort™, for example™, the software automatically recognises tooth numbers and orders intraoral images. Images are then correctly orientated and placed into the relevant position in your selected radiographic mounts, eliminating a task once handled manually. SmartFocus™ instantly brings up the entire 2D and 3D imaging history of whichever tooth you choose to click on the screen. SmartFusion™ combines surface models from intraoral and desktop scanners with any CBCT scan via proprietary voxel-based algorithms, providing clinicians with an accurate 3D view of surface details and the underlying anatomy. The software also automatically tracks mandibular nerve canals and identifies airways, removing manual labour and uncertainty for the clinician. 2D dental findings allows you to instantly detect and diagnose six potential pathologies in 2D intraoral x-rays.
Simplified Image Acquisition
Direct acquire from your imaging devices through DTX Studio Clinic on Windows® PC and Mac®. This includes CBCTs, Pans, Cephs, intraoral optical scanners, intraoral X-rays, intraoral cameras, diagnostic cameras and importing clinical photos. Easily import industry standard file formats, such as DICOM, STL, PLY, bmp, jpg, png, from your 2D and 3D devices or open DTX Studio Clinic from your Practice Management System and never have to enter patient data twice.
GoShare™ - Encrypted Data Sharing
DTX Studio Go is an online data transfer portal to facilitate secure external collaboration. Share your patient’s data with a connected lab, specialist, referral dentists or other colleague for smooth case collaboration. DTX Studio GoShare offers monthly data transfer allowance from 3-30GB so you can efficiently request design and production services and effortlessly share the needed imaging data directly from your patient library. With an open output path, you can also export files for in-house printing and production.
Putting It All Together
Clinicians must collect a great deal of data for each patient to make an accurate diagnosis and create a treatment plan. Because everything lives in one place with DTX Studio Clinic, the information is both easier to find and to digest, enabling better clinical decision making. All DEXIS imaging products, such as the OP 3D™ CBCT range, PSP Systems and digital sensors come with DTX Studio Clinic at no extra cost.
About DEXIS
DEXIS is a global leading brand in digital radiography for 70+ years. Today, DEXIS has brought together the most trusted brands in 3D imaging, intraoral scanning solutions, and diagnostic software to provide a complete digital diagnostic solution. DEXIS innovative award-winning technology enhances the way you diagnose, accelerates your workflow, and delivers simpler treatment paths with better patient outcomes. From the groundbreaking iCAT™, ORTHOPANTOMOGRAPH™ OP 3D and latest OP 3D LX, built on pioneering cone beam and 3D advancements to award-winning intraoral X-ray solutions including digital sensors and reliable Phosphor Plate Systems, DEXIS imaging has a solution for every practice.
DTX Studio Clinic:
Operated by humans, powered by AI
DTX Studio Clinic AI Features Overview

AI 2D Dental Findings:
Instantly detect and diagnose six pathological findings with embedded AI in newly captured and existing 2D intraoral X-rays.
MagicSort™
Recognize and sort all your 2D X-ray images into one template so you don’t have to do it manually.

Mandibular Nerve Tracing
Map your patients’ mandibular nerve canal in your CBCT scan with AI-tracing of the nerve canal in your CBCT scan for better treatment planning.

SmartFusion
Fuse together your CBCT scan with your intraoral scan data for a 3D view of underlying anatomy providing deeper visibility to diagnose and treat.

SmartFocus™
View images related to the selected tooth number(s).

MORITA MOMENTS
WITH LINDFIELD DENTAL CARE
Enduring Quality in Morita DNA
Morita Moments with Lindfield Dental Care captures the essence of a successful practice’s transition to a new era of dental care innovation. After the remarkable achievement of nearly five decades of exceptional service, thousands of scans and precise diagnoses, the practice has updated the 49-year-old Morita Panex-E OPG unit and embraced the cutting-edge technology and image quality of the Morita X800 CBCT.
Here’s to the next half-century of continuing to provide top-quality patient care supported by the Morita legacy of quality and advancement.


Learn more about Morita X800 CBCT
LEARN MORE
ADVANCED INTRAORAL DIAGNOSTICS
ONE SOLUTION FOR ALL NEEDS
DEXIS Scan eXam imaging plate system - the perfect One to cover a wide range of your intraoral diagnostic needs.
Highlights & Advantages:
• Easy to operate
• Superb results in an instant
• Chairside or shared use
• Attractive design with five colours
DEXIS Scan eXam One continues the intraoral imaging revolution started almost three decades ago, incorporating the innovative spirit present in all DEXIS imaging products. Known for its long-lasting quality, proven reliability and easy-to-use, intuitive design; the DEXIS Scan eXam One is perfect for any dental office that demands a top-quality digital intraoral imaging solution for their everyday operation.
Excellent image quality
Advanced digital image processing provides consistent images time after time. Excellent image quality can already be achieved using factory configurations that can still be adjusted easily according to the dentist’s diagnostic preferences. Clear and sharp intraoral images reproduce greylevels accurately to show required diagnostic information, even in the smallest details. The DEXIS Scan eXam One automatically compensates for over- and under-exposures.


Safe workflow
Check the quality of your imaging plates with the unique iDOT™ marking system. iDOT™ marking can be seen on each image taken, making it possible to identify plates where quality is declining. Damaged plates can be replaced immediately.
The next generation of DEXIS software now included with Scan eXam One
DTX Studio Clinic brings all your 2D, 3D, intraoral scans and photography into one award-winning platform powered by assisted intelligence. AI helps do the work so you can focus on delivering better patient care. With ‘AI 2D Dental Findings’ instantly detect and diagnose six potential pathologies (caries, periapical, root canal, margin, bone loss, calculus) in your newly captured and existing 2D intraoral X-rays. The ‘MagicSort™’ feature automatically recognises tooth numbers and orders intraoral images. Images are then correctly orientated and placed into the relevant position in your selected radiographic mounts, eliminating a task once handled manually. SmartFocus™ instantly brings up the entire 2D and 3D imaging history of whichever tooth you choose to click on the screen.
Fast and easy clinical workflow
Simply feed the imaging plate in, the magnet grips the plate and the Scan eXam One takes care of the rest. The processing time does not depend on the resolution setting. The entire process from reading the image to display on screen takes only seconds. The system can be operated in a normal daylight environment, no chemicals needed.


Matching all your needs
Multiple imaging plate sizes available for DEXIS Scan eXam One can be used in all bitewing, periapical and occlusal X-rays. The plates are as easy and flexible as film and particularly suitable for paediatric patients.

Size 0
22 x 31 mm
734 x 1034 Pixels
1.08 MB
Size 1
24 x 40 mm
800 x 1334 Pixels
1.53 MB

Size 2
31 x 41 mm
1034 x 1368 Pixels
2.03 MB
Size 3
27 x 54 mm
900 x 1800 Pixels
2.32 MB
PREVENTATIVE MAINTENANCE
THE BEST WAY TO PREVENT COSTLY DOWNTIME

As a medical device manufacturer, we are obliged to stipulate maintenance activities, technical safety inspections and integrated unit tests. This approach serves two purposes: it ensures functional safety and prevents damage, health hazards and legal risks. Regular maintenance also prevents expensive downtimes and helps you to preserve the value of your unit.
KaVo recommends the annual maintenance service for your treatment units to ensure continuous operational readiness, safety and value preservation of the KaVo product. The annual maintenance service also helps to comply with the specifications, standards and laws in your country.
The international standard IEC (DIN EN) 62353 is used to ensure electrical functional safety. It also demands that the functional safety of all technical application and safety-relevant functions are checked and repaired, if required.
Dental practice operators are responsible for:
• Conducting the safety check in accordance with IEC 62353
• Complying with hygiene standards
These requirements can be met during the scope of maintenance carried out by KaVo or the certified specialised dealers.
The following individuals are authorised to carry out repairs and maintenance:
• Technicians from the KaVo branch who have received appropriate product training
• Technicians from KaVo authorised dealers who have been specially trained by KaVo All certified service technicians are also obliged to only use original KaVo spare parts.
35,000 treatments and
20,000 operating hours will be performed in a treatment unit over an average of
12 years.
During this time, approx.
100,000 litres of water are used.
Source: KaVo empirical values

Costs time and money: Waiting for service
Maintenance components
Benefits for the dental practice (Functional safety and Safety of the dentists and dental practice team and patients)
• Testing of all important functions, e.g. hygiene functions, safety switch, etc.
• Cleaning the suction system, Aquamat and selection unit | Replacing wearing parts
• Replacing worn parts in the water block | Inspecting for leaks
• Inspecting the O-rings on the doctor’s and assistant’s element, hoses and pressures | Replacing worn parts
• Safety inspection in accordance with IEC (DIN EN) 62353

Saving you time and money: Planned, periodic maintenance
The best way to prevent costly downtime:
The KaVo maintenance kit for your operational safety.
The certified technician and the KaVo maintenance kit are an unbeatable team when it comes to ensuring the operational safety of your treatment unit.
The kit supports:
• Safety: Replacement of necessary parts with KaVo original parts
• Efficiency: Systematic workflow of maintenance activities
Learn More About KaVo Dental Chairs
LEARN MORE