6 minute read
3ds Max Making of Dungeon

from may2008_mag
by Hiba Dweib

by Alejandro Ruano - DrakeXXI, Spain Email: drakexxi@gmail.com Web: www.3dx-design.com

Advertisement
In this my first “Making Of”, I’m gonna try to explain the creating process of my image “Dungeon”. I used mainly 3dsmax, with VRay renderer. I also used Adobe Photoshop for the textures and small retouches, and Fusion for the final post-production.
Inspiration
First of all, I must say that I faced the project as a challenge to my own capabilities. Usually, there are several techniques we don’t know, nor try, due to lack of time or interest, or just because we don’t need them for the daily job. So I took it as an experiment, to try to learn and get used to those techniques and tools, which are very useful.
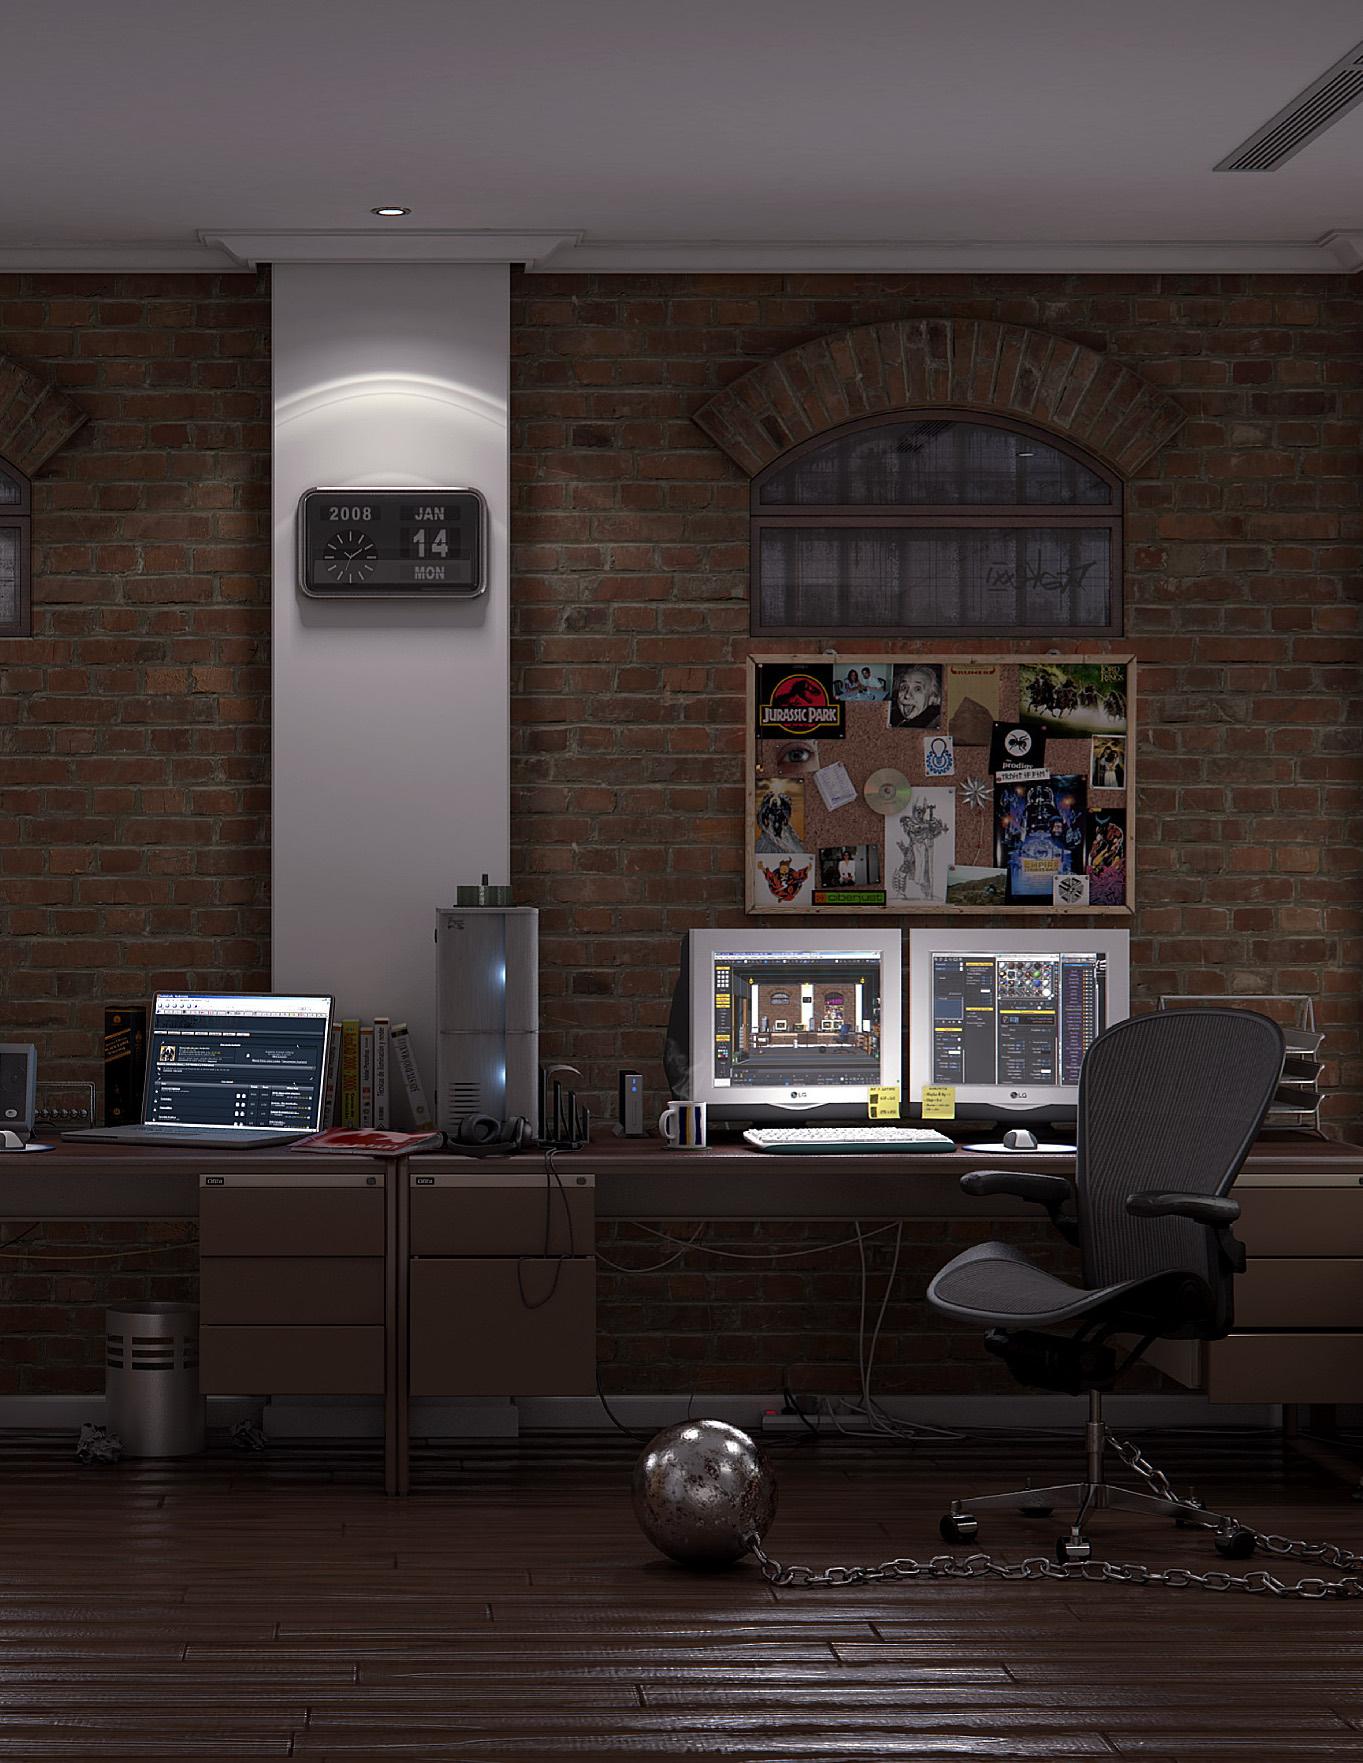
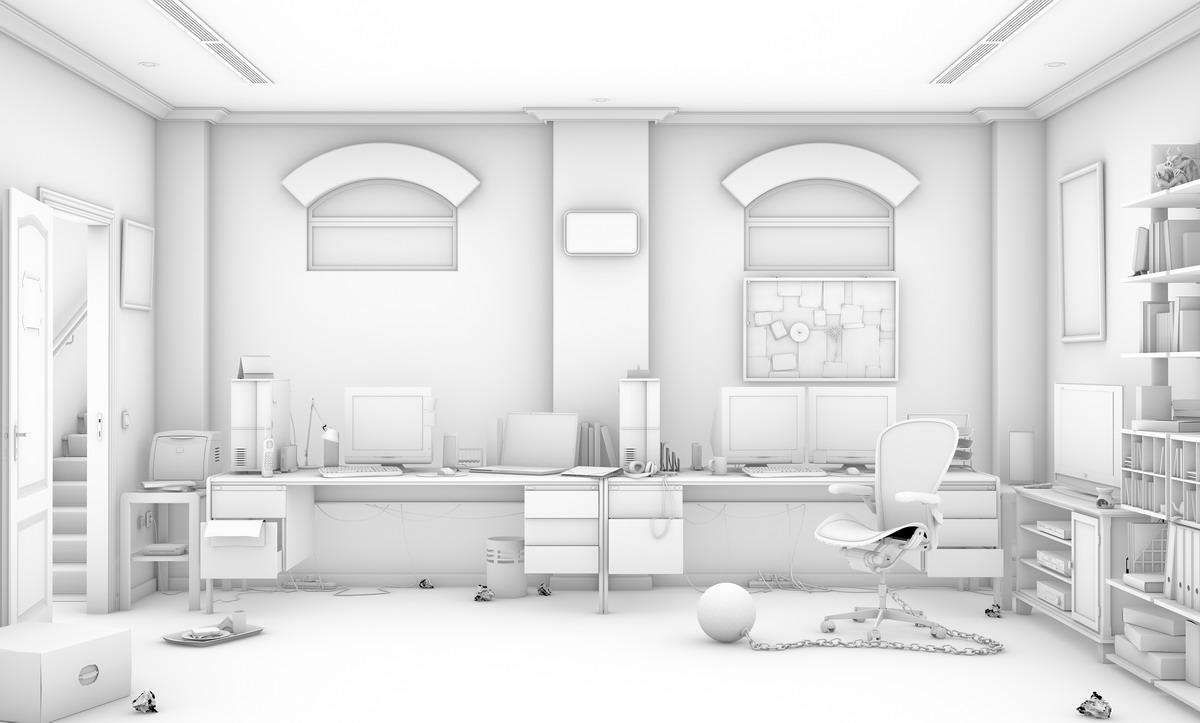
The story of the image starts like this: as a freelance, I work at home. And my family and friends call my office “The Cave” or “The Dungeon”. So the idea came from that. So I tried to mix both concepts: a cool office with some details of a dungeon or a jail. No matter how cool our office is, or how much do we love our work: all of us feel chained to it, sometimes. All of us have our own prisoner ball (mine are some ugly buildings & 3d sections I have to do at work).
References
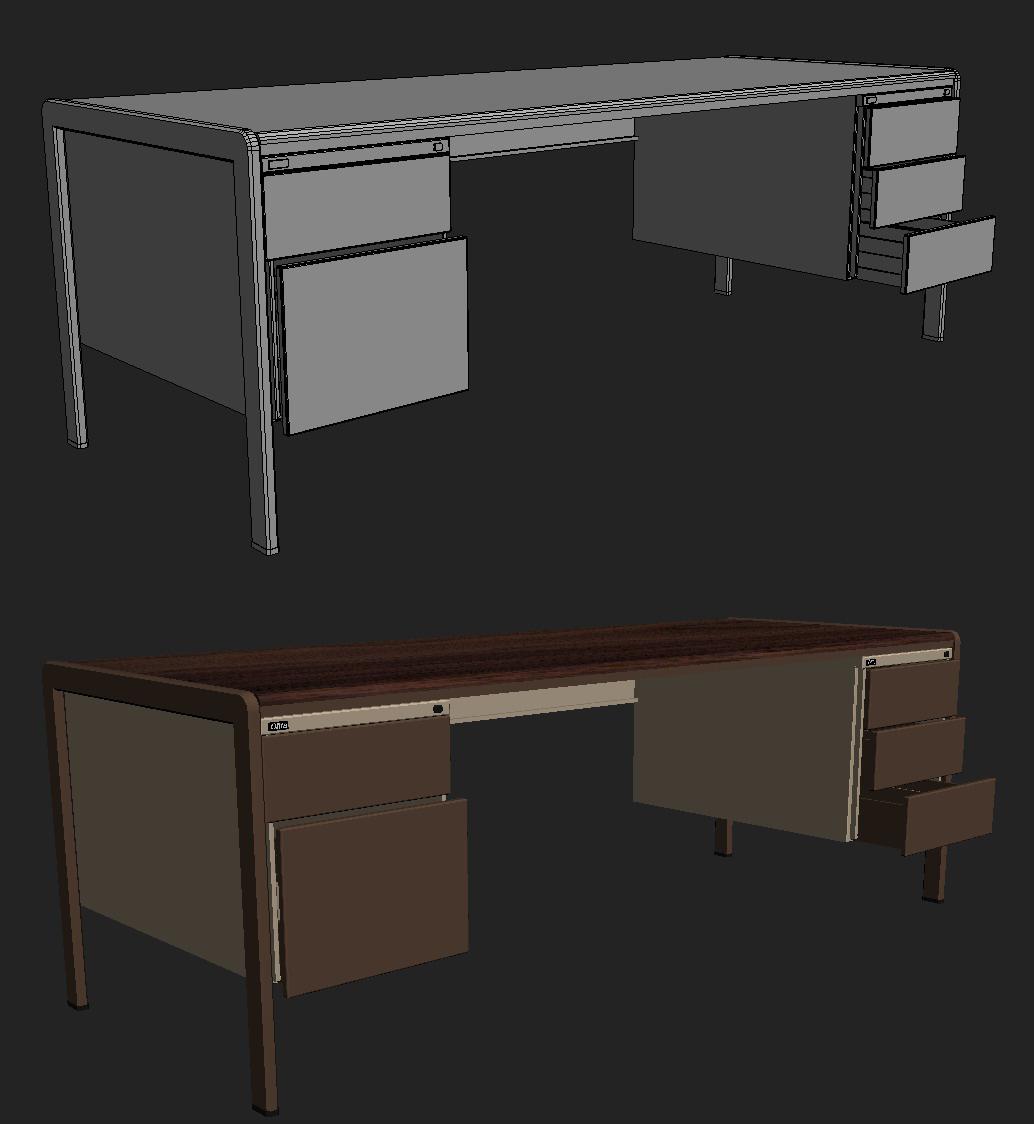
I started taking some pictures of my real office furniture, and some other objects I do have (computer case, books, maga-
zines, cork panel, electronic stuff…etc). I also put several details or “cameos” on the scene (private jokes or messages to my friends (they know who they are)). This is something I always like to do (when possible).

The room itself was totally made up in my head, halfly inspired on the typical US residential basement, and halfly on a render by Aaron Coon, which I really liked:
http://aaron-cds.cgsociety.org/gallery/

Modeling
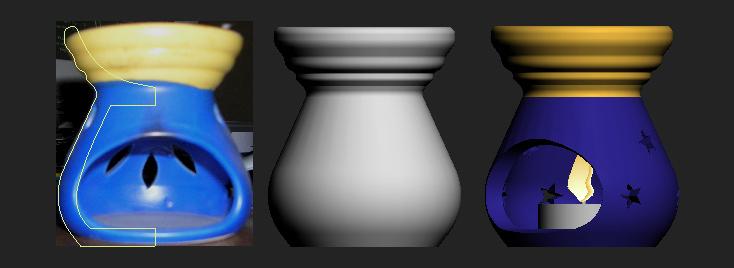
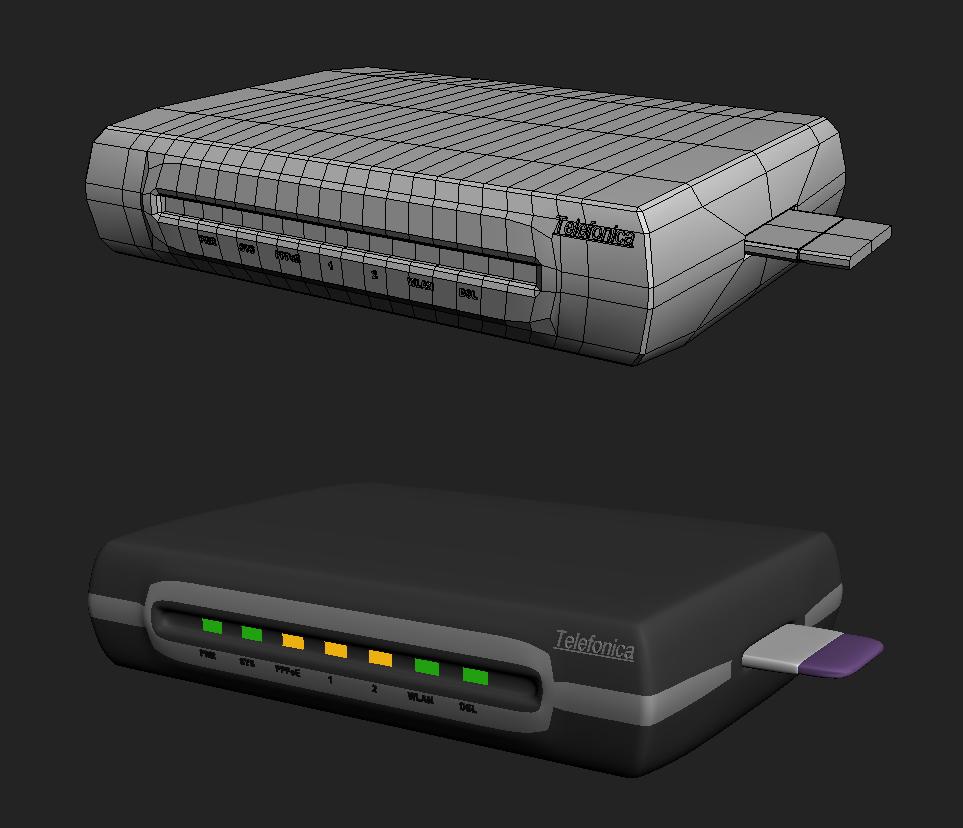
Most part of the scene was not difficult at all to model, since there are a lot of quite easy objects (boxes converted to Edit Poly and then manipulated splines with thickness or extruded…etc. This is clearly visible on the “essence burner” (don’t know it’s exactly name in English). As you can see, it’s just a lathed spline, and then, I used boolean operations to make the star-shaped holes. There are also several objects I modeled with not much detail, (like the router) trying to save polygons, since I knew they were not going to be too visible on the final render.

The Thermaltake Tsunami case was modeled with the help of my friend Jorge Amigo “Joalamber”, and the same with the laptop, modeled entirely by Alejandro Martín “R|P”.
The chain was made from a modified torus, and then instancing and rotating the chain links, to follow the path that I liked. Before that, I tried with the Path Deform modifier, but I was not satisfied with the result, so I finally did it by hand.
The papers on the floor are simple spheres, with noise modifier and several seeds to make them slightly different, and FFDBox, to flatten them at the bottom, where they are in contact with the floor.


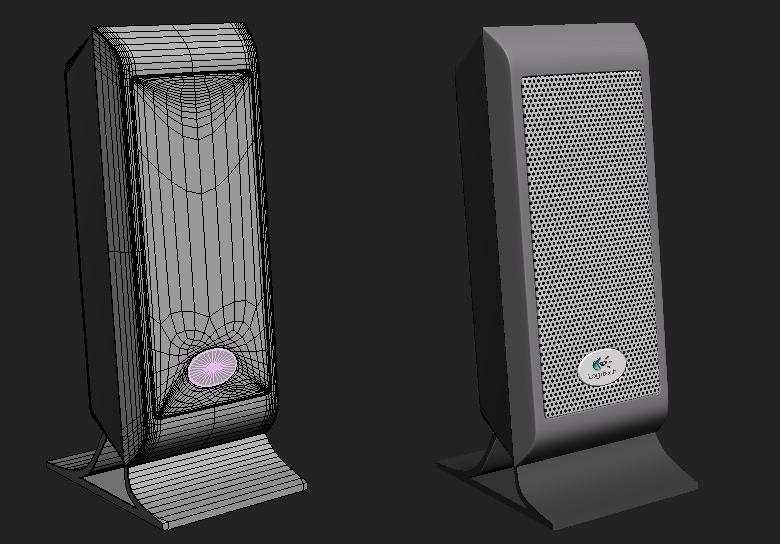
Some other objects were indeed a small challenge to my skills, since I’m not used to do any kind of organic modeling. One of those is the phone, or the speakers, that I modeled following some videotutorials I found on Evermotion.
There are some other additional objects that came from libraries, even though I tried to use them as few as possible.
Texturing
So we finally come to the hardest (to me) part of the process. As I’ve said, when I started this project, there were some techniques that I hadn’t used before. Unwrapping was one of them. So I practiced unwrapping 20 different books, magazines, PC components boxes, and other elements. Nothing difficult (just some modified boxes), but they were very useful for me to learn and practice, which was the main purpose of the project.

I used Vray materials for every object on the scene, lots of them with their bump and specular. For example, here you have the wooden floor. In this case I used also the ColorCorrect plugin, in order to have more control on the color, brightness & contrast of the texture, without externally modifying the bitmap itself:

Another example is the prisoner ball, which is a Blend material, between a clean glossy metal, a corroded metal, and a mask to mix them:

Lighting
Lighting the dungeon was kind of complex. I used 22 lights (some of them, instanced). For the outside, since it’s a night scene, I used a dark blue for the environment, and a light blue direct light for the moonlight (I’ve seed it’s a common mistake to think there’s no light at all at night). And in order to see a silhouette of somebody walking on the outside, I placed a streetlamp with a spot light and volumetrics on (with vrayshadows off, because they are not compatible).

On the inside, main light comes from the halogens on the ceilings, which are photometric lights, using the well-known IES file “1589835-nice”. Some other lights are: another photometric light on the stairs, with a warm orange tint, a huge vraylight coming from behind the camera, both lamps (the Tolomeo on the left and the right hand corner one). And the rest of the lights on the scene are the ones that come from the screen of the monitors and the leds of the Tsunami cases (vraylights most of them).

Render
Something important: I used a VRay Physical Camera. So take care of this, because all the light multipliers shown above depend on this special camera. Here you have the camera and VRay render settings:


In this occasion, in addition to the render, I got an Ambient Occlusion pass (AO). To do so, I used a VRayLightMaterial, with a mix map (black and white), and VRayDirt as the mask. You have a nice tutorial of this, from the great master (and friend) Juan Siquier, on his blog:

Post - Production
I used Eyeon Fusion for postproduction. I’m quite new at using it, but the more I use it, the more I like it. It’s highly intuitive and you have a great control on every filter through the tree-node. So I imported both passes (diffuse & AO), merged them, played a little with the opacity, and added some color correction, brightness & contrast, a slight chromatic aberration and vignetting.
Well, that’s all. I want to thank everybody that has somehow helped me throughout the process (specially Alejandro Suárez “Jan”, Javier Núñez “Ja3D”, Jorge Amigo “Joalamber”, David Bastidas “Kh0rne”, Juan Siquier, Alejandro Martín “R|P”, and everyone at #3DInfografica on IRC Hispano). And of course, thank you all for reading this Making Of. I hope you’ve enjoyed and found it helpful. Best regards.

Alejandro Ruano - DraKeXXI
www.3dx-design.com drakexxi@gmail.com


