![](https://assets.isu.pub/document-structure/211012101204-55093c9408eedbd6f94d5e83e595b2af/v1/bdc8ca22b60afa0ed00a0cbec5109c9e.jpeg?width=720&quality=85%2C50)
5 minute read
Softimage XSI Making of The Legends Jeep Willys MB
from may2008_mag
by Hiba Dweib
Introduction
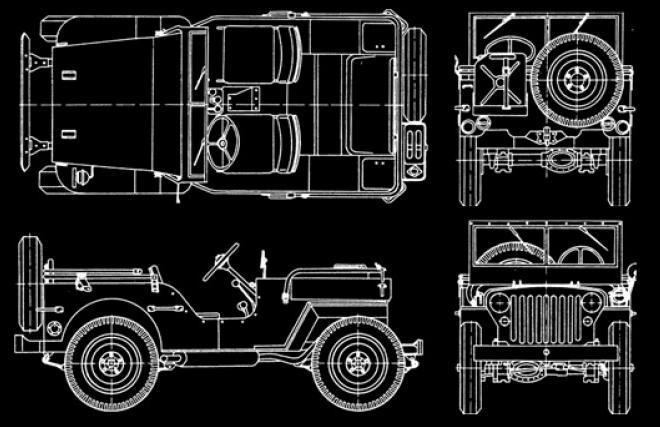
Hi, my name is Mhd. Rasyid Ridha also known as XtremeTm. I want to share with you the making of Jeep Willys MB. Every time before starting any project, I collect as much as references as I needed for the project including blueprints. Everything you will see in my work is self thought, may be what I explained here is not the best technique to do that thing but works for me and hopefully for you too. I used XSI for basic compositing and all the models, Maxon Bodypaint used for unwrap and texturing and the last one I used Adobe Photoshop for post-production including the final composite, some painting and other tweaking.
Advertisement
Modeling
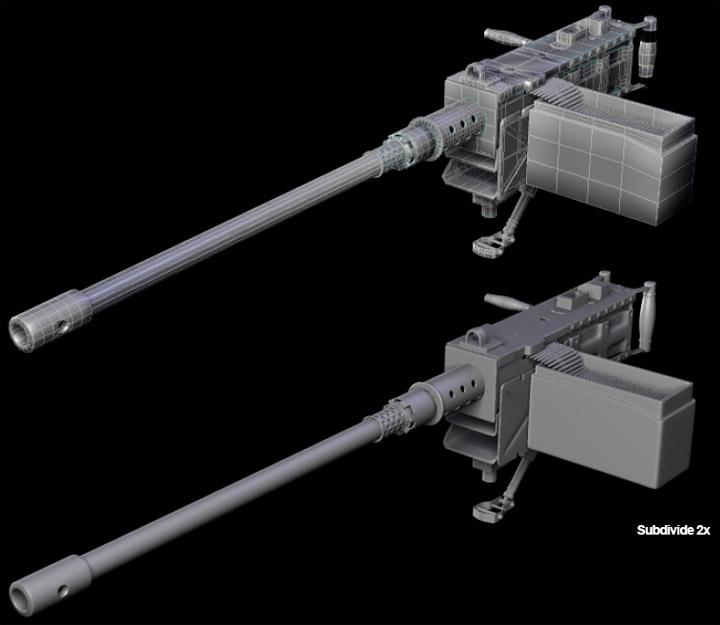
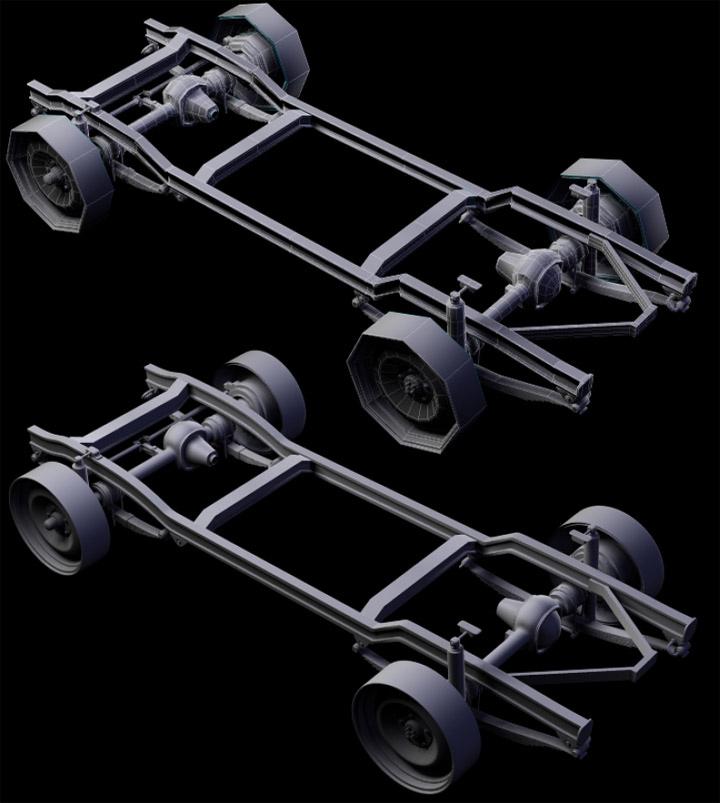
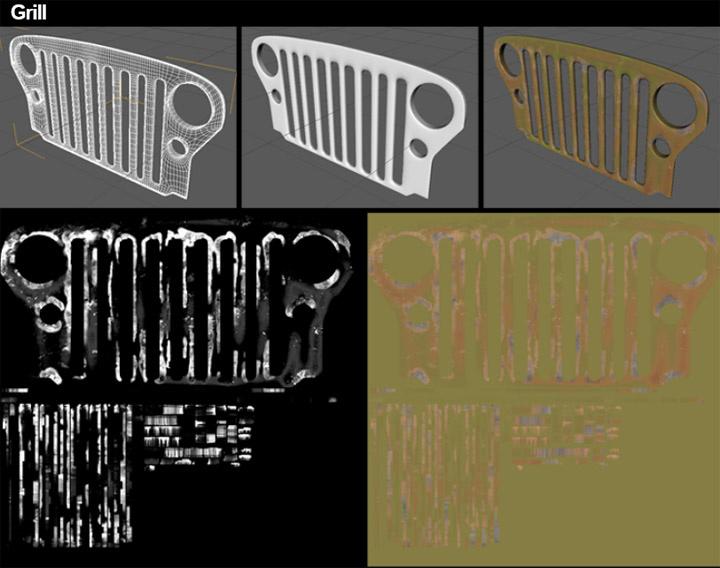
In my opinion looking at the pictures, references or real objects is very important for modeling because you can really see the scale, proportion, dimension and other aspects including how they related to each other. Most of my models usually start from simple form, I am using primitive polymesh grid, extruding (duplicate) the edge and keep adding details until I thought the basic form was enough and ready to go to create other related model. Here are the basic form (wires) and subdivide version.
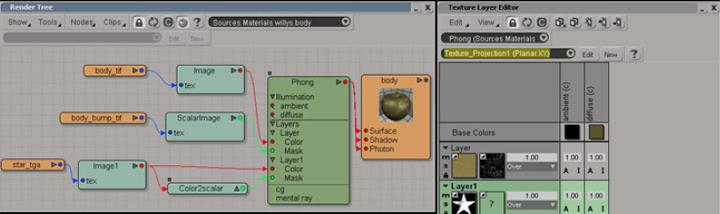
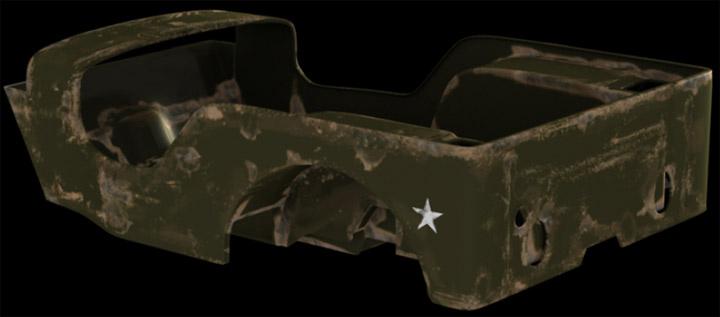
![](https://assets.isu.pub/document-structure/211012101204-55093c9408eedbd6f94d5e83e595b2af/v1/86f7915baa1c7e0867e0dd66406a7458.jpeg?width=720&quality=85%2C50)
![](https://assets.isu.pub/document-structure/211012101204-55093c9408eedbd6f94d5e83e595b2af/v1/1059e707e6d8d47bacbf189a6931564f.jpeg?width=720&quality=85%2C50)
![](https://assets.isu.pub/document-structure/211012101204-55093c9408eedbd6f94d5e83e595b2af/v1/b3329f264ea15bc7a031cca88b8ea78d.jpeg?width=720&quality=85%2C50)
![](https://assets.isu.pub/document-structure/211012101204-55093c9408eedbd6f94d5e83e595b2af/v1/73d47de48770dff043e88db747e6eaa1.jpeg?width=720&quality=85%2C50)
![](https://assets.isu.pub/document-structure/211012101204-55093c9408eedbd6f94d5e83e595b2af/v1/11a10b4f87bbd63bf5f1517d20d70140.jpeg?width=720&quality=85%2C50)
![](https://assets.isu.pub/document-structure/211012101204-55093c9408eedbd6f94d5e83e595b2af/v1/e7210bb845464f6e6218574350d2a55c.jpeg?width=720&quality=85%2C50)
![](https://assets.isu.pub/document-structure/211012101204-55093c9408eedbd6f94d5e83e595b2af/v1/ec757b87b58589250e979d23f5ad8077.jpeg?width=720&quality=85%2C50)
![](https://assets.isu.pub/document-structure/211012101204-55093c9408eedbd6f94d5e83e595b2af/v1/33d1aeea8eda19166442fd3f94eea4dd.jpeg?width=720&quality=85%2C50)
![](https://assets.isu.pub/document-structure/211012101204-55093c9408eedbd6f94d5e83e595b2af/v1/b14b67b5d490b5c8c23f04a649ba24ed.jpeg?width=720&quality=85%2C50)
Texturing
Before continuing with texturing I usually go back again to see the reference photos. In this part all models are complete and ready to go for texturing, some of the models (especially willys) already been subdivide and exported into *.obj file type. I subdivide the models first to reduce the stretching when I do a paintwork in Body Paint. Actually there are other techniques to reduce those things, but I choose this way. There are over 70 textures that I created including bump and mask/alpha maps. As for the Jeep itself I use 1500* - 2000* pixels and for the scene including environments, I used only 800* - 1500* pixels maps. I did unwrap in BodyPaint, well it’s little a bit easy and faster for me to do it in BodyPaint. Some of the textures are taken from 3DTotal CD and default texture from BodyPaint as well, I just mixed them together to get better look.
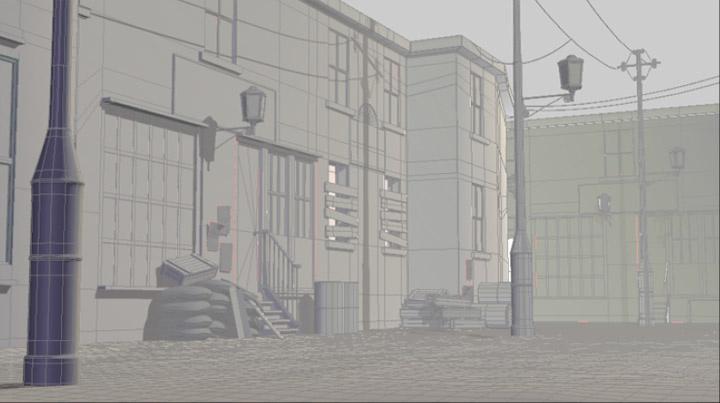
![](https://assets.isu.pub/document-structure/211012101204-55093c9408eedbd6f94d5e83e595b2af/v1/5977a5a2523e82613f553469b4049123.jpeg?width=720&quality=85%2C50)
![](https://assets.isu.pub/document-structure/211012101204-55093c9408eedbd6f94d5e83e595b2af/v1/a9f21543fe20828ca0b8ad34fe9f551b.jpeg?width=720&quality=85%2C50)
![](https://assets.isu.pub/document-structure/211012101204-55093c9408eedbd6f94d5e83e595b2af/v1/19641d60692e1344c5a13ce192000a5c.jpeg?width=720&quality=85%2C50)
![](https://assets.isu.pub/document-structure/211012101204-55093c9408eedbd6f94d5e83e595b2af/v1/0cf135be4291b4f8ca3d85f9d1ccef08.jpeg?width=720&quality=85%2C50)
![](https://assets.isu.pub/document-structure/211012101204-55093c9408eedbd6f94d5e83e595b2af/v1/b21761e55c328b4d2ac9d18d7a4b98c8.jpeg?width=720&quality=85%2C50)
Scene
![](https://assets.isu.pub/document-structure/211012101204-55093c9408eedbd6f94d5e83e595b2af/v1/5bf07ddfd1490e77f28aea3e3e6b5ec6.jpeg?width=720&quality=85%2C50)
![](https://assets.isu.pub/document-structure/211012101204-55093c9408eedbd6f94d5e83e595b2af/v1/c3288eaaa1e9440a99d1aab4539cb96d.jpeg?width=720&quality=85%2C50)
![](https://assets.isu.pub/document-structure/211012101204-55093c9408eedbd6f94d5e83e595b2af/v1/3d9adb56fe3abef3f1bda9817d666a34.jpeg?width=720&quality=85%2C50)
![](https://assets.isu.pub/document-structure/211012101204-55093c9408eedbd6f94d5e83e595b2af/v1/6d584da328e93bd33f31f623bd5ea5c3.jpeg?width=720&quality=85%2C50)
![](https://assets.isu.pub/document-structure/211012101204-55093c9408eedbd6f94d5e83e595b2af/v1/54a2ac95ffe7582f3113b5cb27cc2174.jpeg?width=720&quality=85%2C50)
![](https://assets.isu.pub/document-structure/211012101204-55093c9408eedbd6f94d5e83e595b2af/v1/0ea29d4c3568ea3cd9d3b1557387ea88.jpeg?width=720&quality=85%2C50)
![](https://assets.isu.pub/document-structure/211012101204-55093c9408eedbd6f94d5e83e595b2af/v1/2acb5bb4509d9e9a3cc2f8acc64e37f4.jpeg?width=720&quality=85%2C50)
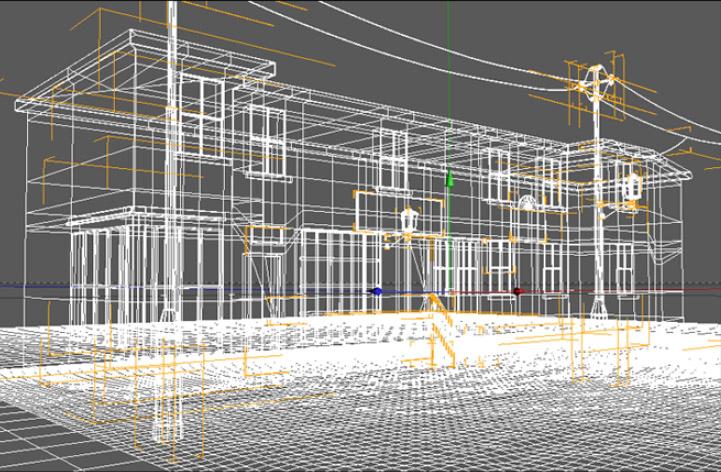
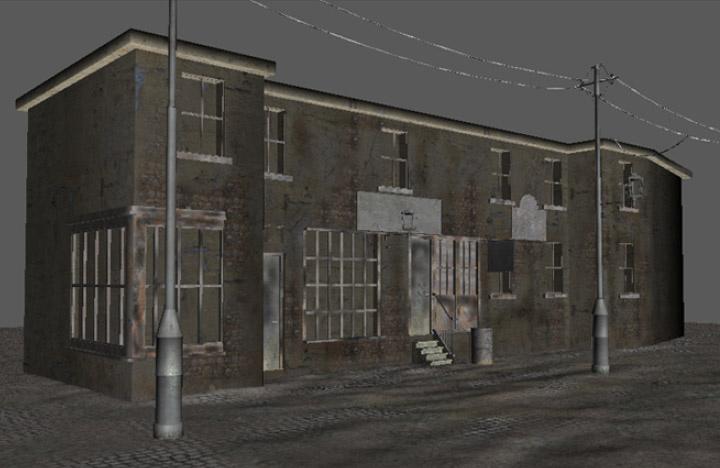
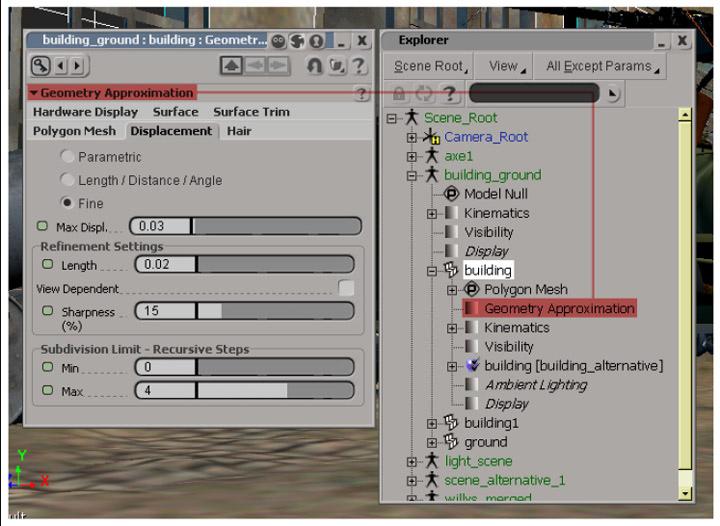
Rendering and Lighting
In this part I will show you the render and lighting. I used 3 lights in the scene in which 2 are point lights and 1 is infinite light. One point light as light source, one point and infinite light I used as fill light. Fill lights are not casting any shadows. And for the render, I used Mental Ray. I created 4 render passes, its color with shadow, specular pass, ambient occlusion pass and mask/alpha pass. As for reflection around the glasses material I used an HDRI image, I used them only for the glass reflection. I don’t use any FG or GI, my computer cannot handle them.
After finished the render, now I ready to composite the renders in XSI. In this session I only used 3 render pass, they are color pass (with shadow), ambient occlusion pass and specular pass. The Alpha pass I used it later in Photoshop for color correction and other tweaking.
![](https://assets.isu.pub/document-structure/211012101204-55093c9408eedbd6f94d5e83e595b2af/v1/671e2d61ea011611bcd0b80a3b7706f7.jpeg?width=720&quality=85%2C50)
![](https://assets.isu.pub/document-structure/211012101204-55093c9408eedbd6f94d5e83e595b2af/v1/2e998405f0d75ac72855c6aa12aadc83.jpeg?width=720&quality=85%2C50)
Final Compositing and Paint work
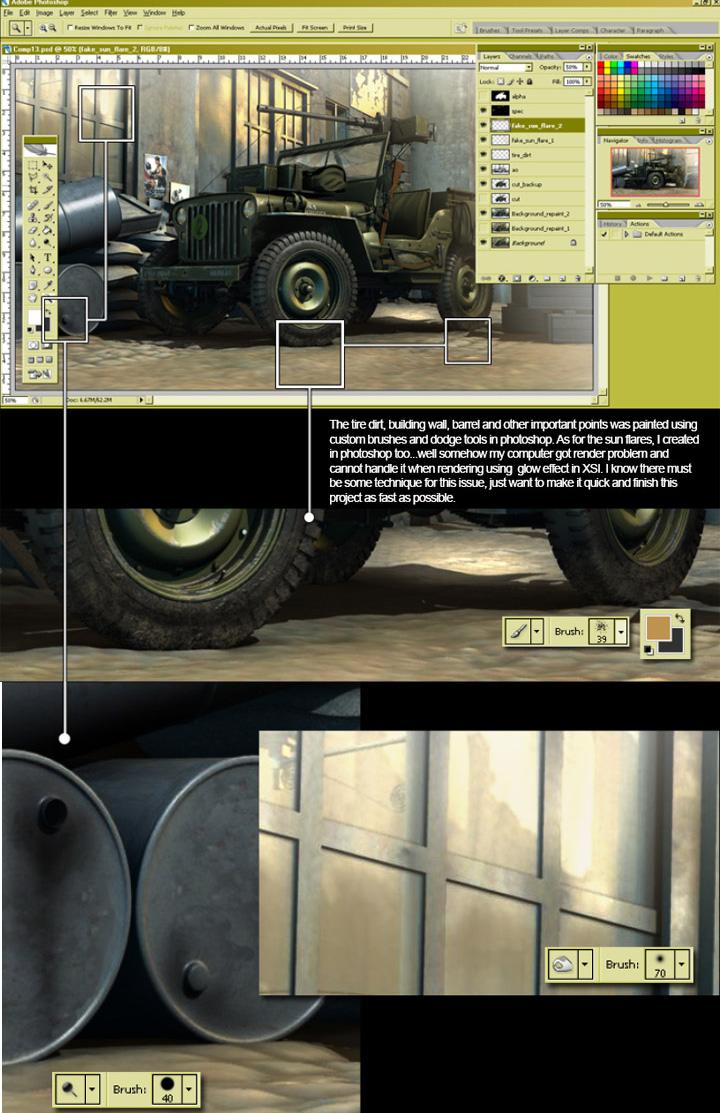
In this part I used Photoshop, for compositing, paint work and other tweaks. I’ll show you the pictures as much as possible to show the process done in Photoshop.
![](https://assets.isu.pub/document-structure/211012101204-55093c9408eedbd6f94d5e83e595b2af/v1/b1022a5eeb165d9bb8a99baa7cb992d8.jpeg?width=720&quality=85%2C50)
The tire dirt, building wall, barrel and other important points was painted using custom brushes and dodge tools in Photoshop. As for the sun flares, I created in Photoshop too… well somehow my computer got render problem and cannot handle it when rendering using Glow effect in XSI. I know there must be same technique for this issue, just want to make it quick and finish this project as fast as possible.
![](https://assets.isu.pub/document-structure/211012101204-55093c9408eedbd6f94d5e83e595b2af/v1/73777e4d6f829771c53f870b412acfaa.jpeg?width=720&quality=85%2C50)
I used dodge and burn too to get better effect where I cannot reach or created in XSI or BodyPaint. Some texture stretch, I fix them too in Photoshop. The last thing that I done was after finishing this scene is cropping the image (to get better composition and point of interest), adding ash/dust on the ground to add some extra life for the scene. Then tweaking all the color of the overall image. Finally I am done. Hope this walkthrough gives you some inspiration and interesting read.
![](https://assets.isu.pub/document-structure/211012101204-55093c9408eedbd6f94d5e83e595b2af/v1/e0de79b3be525310241dff677d575af3.jpeg?width=720&quality=85%2C50)
Rasyid Ridha
rasyidxtreme@gmail.com http://rasyidxtreme.wordpress.com