3 minute read
Photoshop When Cloning goes wrong

from sep2008
by Hiba Dweib

When Cloning goes Wrong

Advertisement
Have you ever wished you could have a clone of yourself to do homework while you hit the skate park or went out with your friends? Cloning is the creation of an organism that is an exact genetic copy of another. This means that every single bit of DNA is the same between the two! And if by mistake anything done wrong then results can be dangerous or hilarious. And mistakes are quite possible, we are humans after all. So, in this tutorial I will explain how I created a hilarious animal cloning effect using Photoshop.
The steps I used in this tutorial is very simple, no different or special technique used just the difficult part is to find the perfect pictures for the cloning otherwise if you have a photography skills then you can shoot yourself in your nearest zoo. Just try to match the positioning of the heads of the animals.
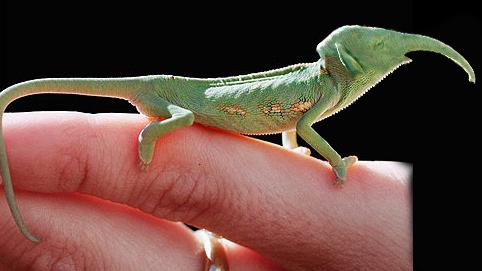
I searched the Google (my best friend even when I am feeling lonely then I Googled myself) for the pictures and find the following Chameleon and Elephant pictures. Chameleon picture is quite small but works for me.
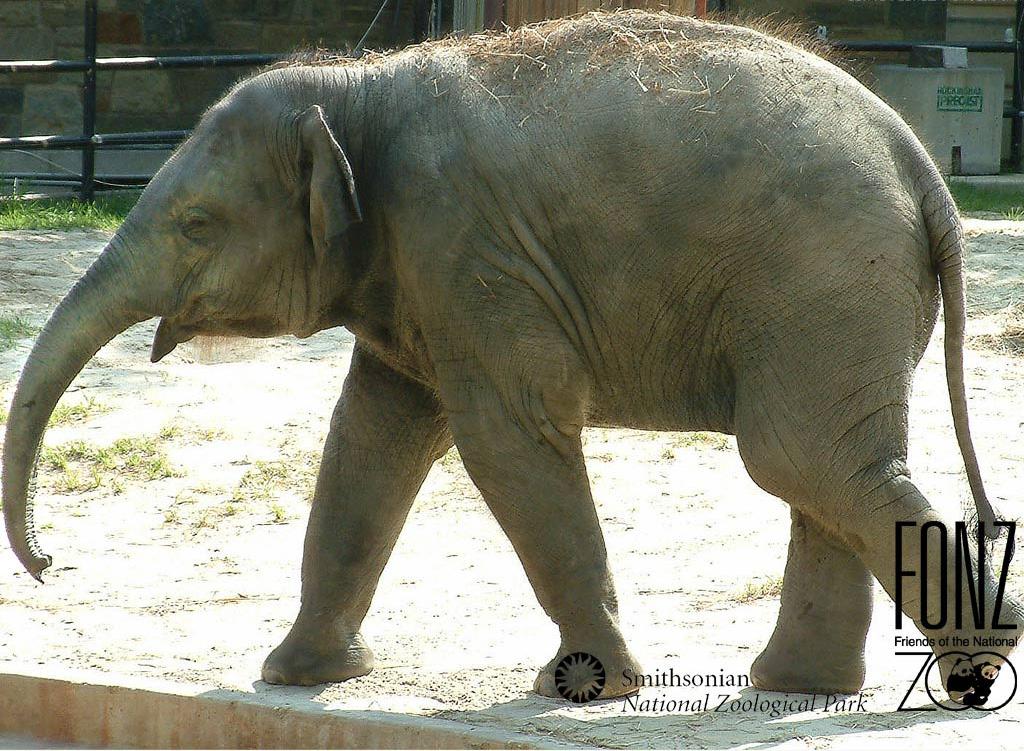

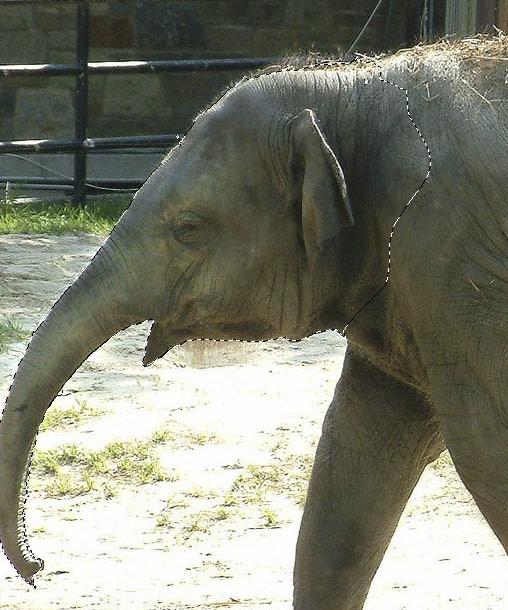
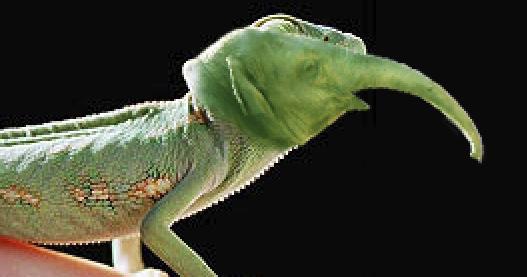
Step 1: Open both the pictures in Photoshop and think about replacing a chameleon’s head with the elephant’s head. For doing this I start creating a selection around elephant head and cut the head and placed in the chameleon’s image.
Step 2: Now I have to resize and position the elephant’s head according to the scene requirement but before doing this I converted the elephant layer into Smart object, so when I resize then overall quality of the image don’t go down. (Layer > Smart Objects > Convert to Smart Objects)
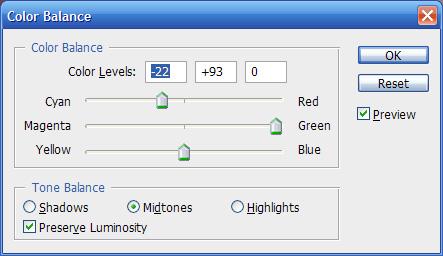
Step 3: After resizing and positioning, I rasterizing the elephant layer and try to match the color with the chameleon’s image. For this I choose Image > Adjustment s > Color Balance and try to match the colors as much as possible.
Step 4: As you can see the chameleon is overlit, so I pressed the Ctrl + L for Levels and brighten the elephant head, so matched with the other image lighting.
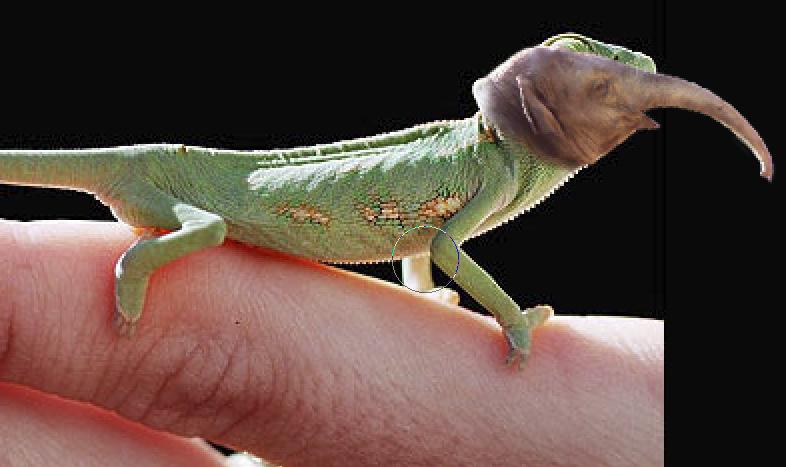
Step 5: Now the only part left is blending, so I created a layer mask on the elephant image and choose a soft brush and start removing fixing the areas. I removed the chameleon’s face which is showing outside the elephant head.

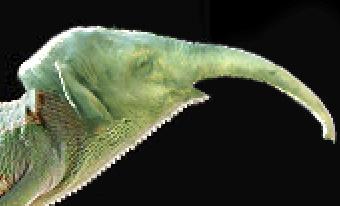
Step 6: Then create a new layer and choose a Clone Stamp Tool, in the settings I checked the “Align” and choose Sample “All Layers”. This is necessary to select if you are taking source of cloning from the below layers. I cloned various areas and blend the skin texture.
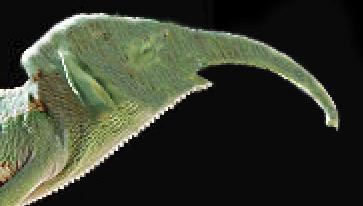
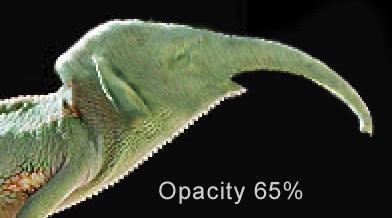
Step 7: Now everything start looking perfect except the difference in the skin, so I create a another layer, choose Clone stamp tool and start painting the skin scales on the elephant head, later I reduced the opacity of that layer to 65%, so everything start blending and my final image is ready.
Now you can create unlimited combinations like this, just need to choose the right images and little bit playing with the normal tools. Thanks for reading, hope you have enjoyed this explanation of the technique.
Andy Halls, USA
andyhalls123@yahoo.com