
5 minute read
Simple berms


APPROACH
Always adjust your speed before entering the turn, so that you can roll through it rather than having to pedal or brake.
CUT WIDE
To make full use of the berm, cut wide to enter the turn as the berm starts. Keep your head up and look ahead round the turn.
AT TAC K STA N C E
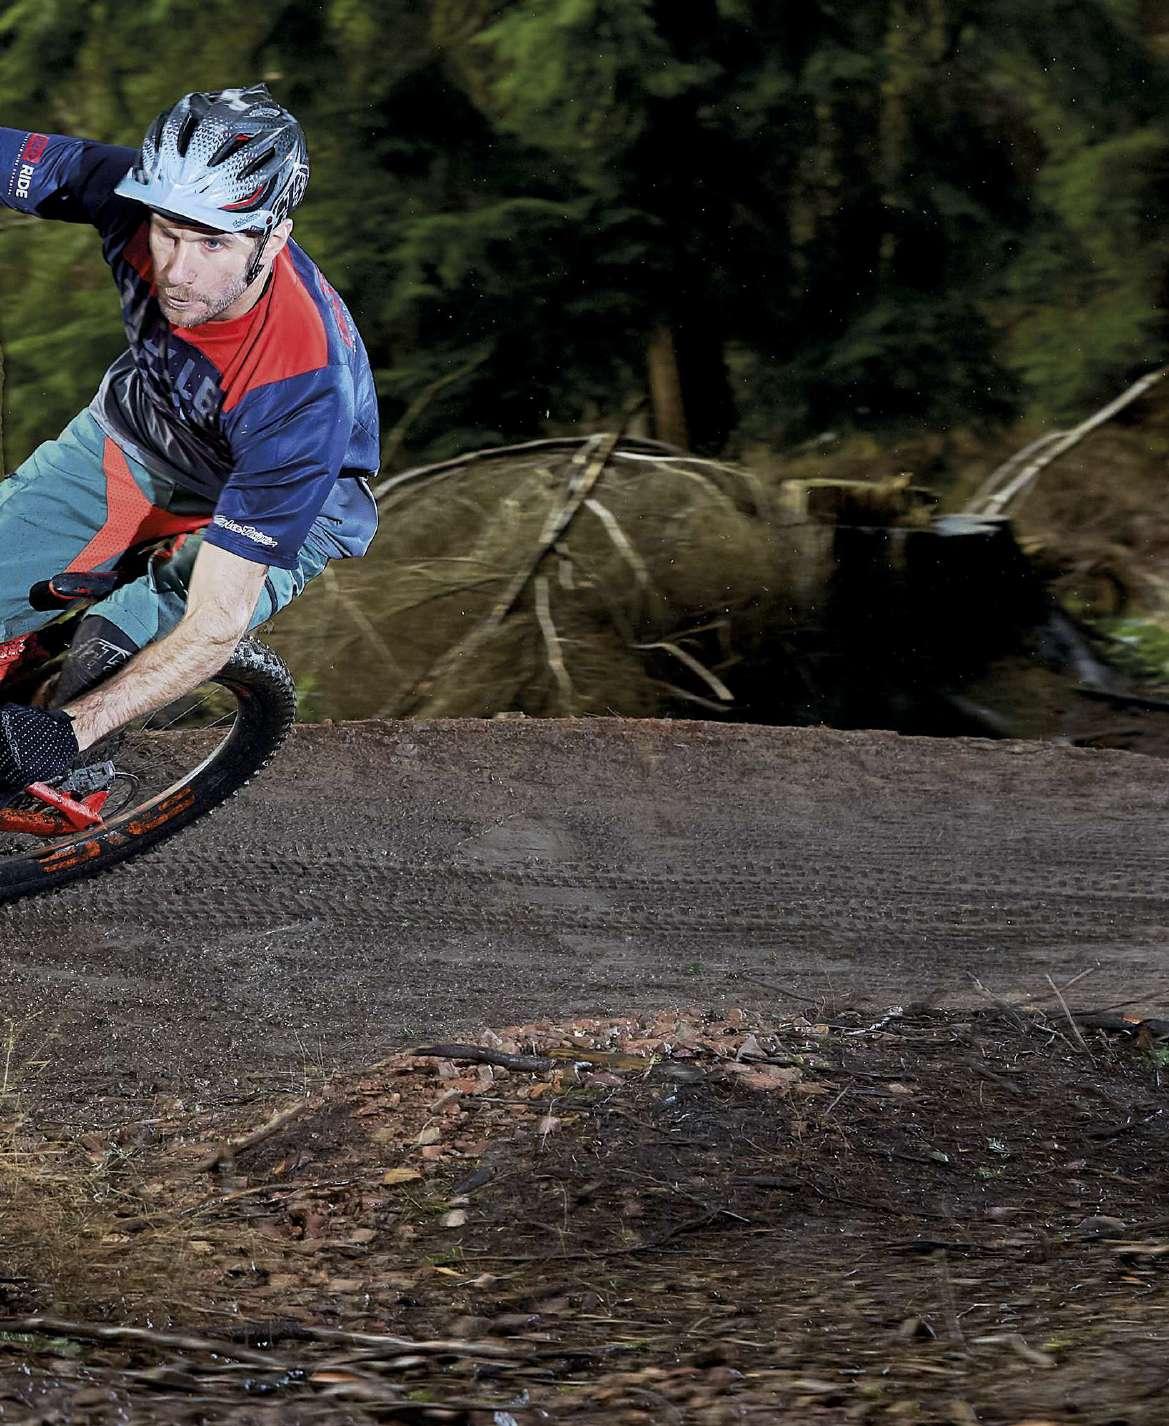
Maintain a typical trail riding position – elbows out, heels dropped and preferred foot forwards. Keep your bodyweight driven through your feet and stay central over the bike.
BERMS
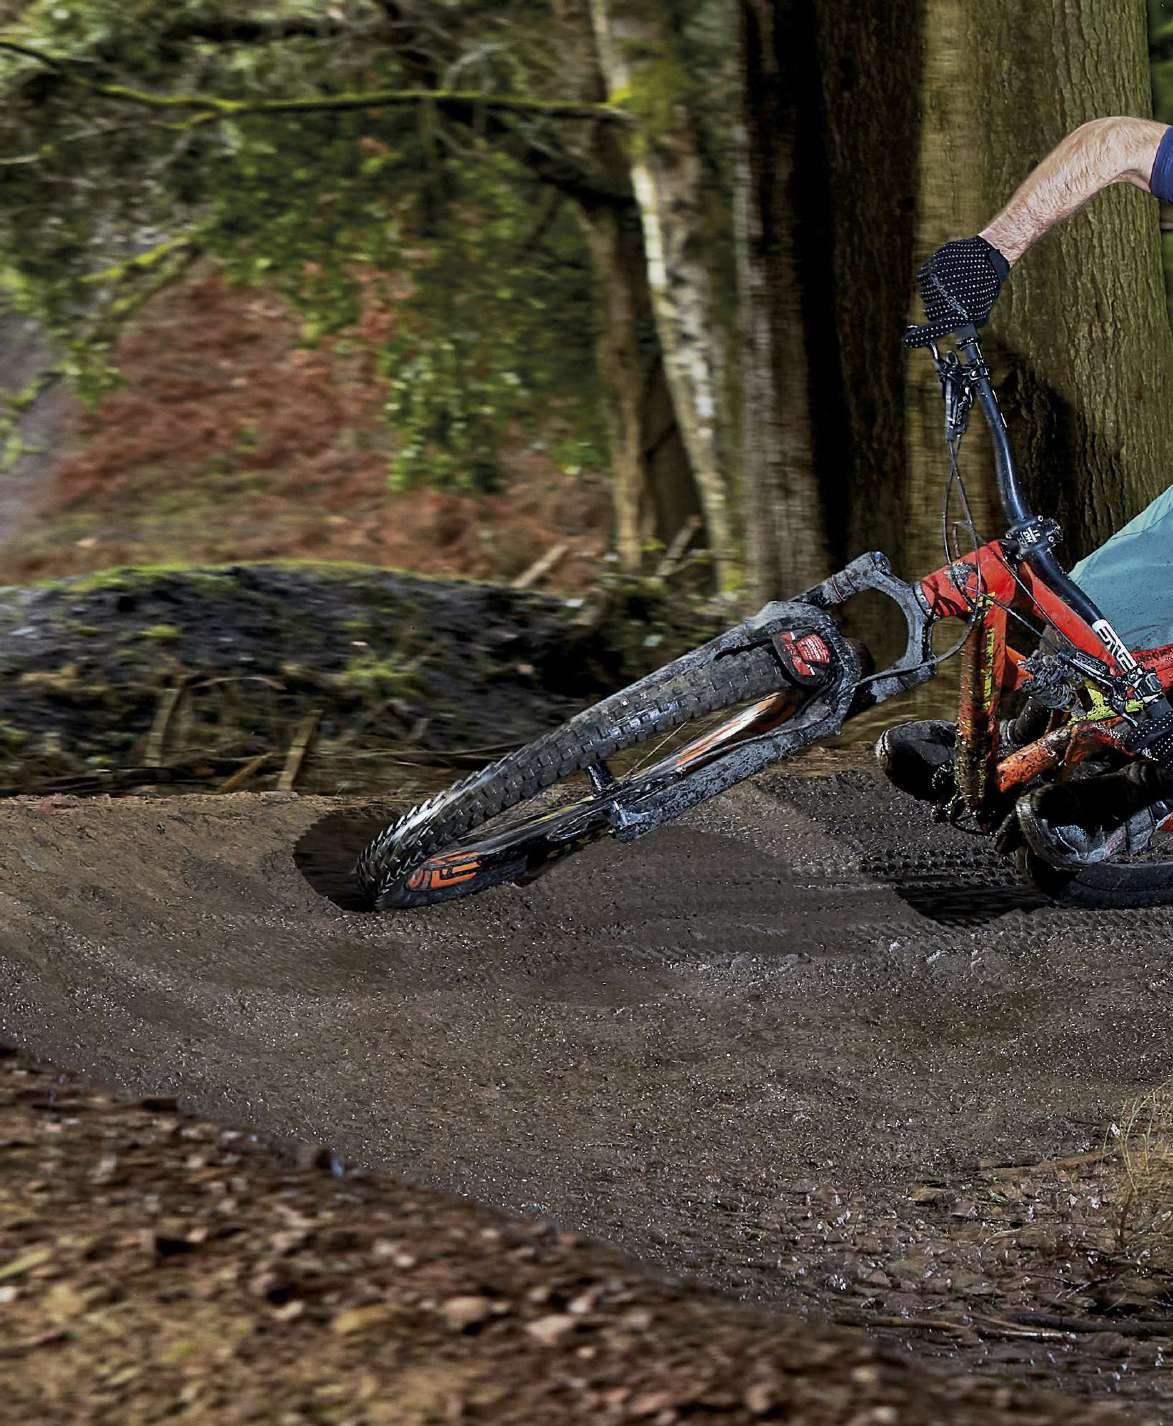
The berm, or banked turn, is a common trail feature used to help the rider keep their flow and maintain grip in the turns. In a conventional flat turn you need to lower your outside pedal in order to help you get your body in the right position, weight the tyres correctly and improve ground clearance as the bike leans over. But in a berm the bike remains upright in relation to the surface beneath its tyres, so there’s no need to lower a pedal or adjust your riding position drastically – good technique here is more about the approach and line choice.
LOOK AHEAD
As you’re turning you should be looking at least two or three bike lengths in front of you, to give yourself enough time to react to any hazards.
COMPLETE THE TURN
Aim to use the full length of the berm, which will push you out into the right place on the trail. Stay off the brakes until you’re off the berm.
OPTIMUM LINE The bermed line gives maximum grip because the tyres are weighted directly from above. It’s the fastest and safest way to corner, and is also clear of the loose dirt and rocks on the inside of the turn.

INSIDE LINE Because this turn is much tighter, you’re forced to slow right down and need to weight your outside pedal when you’re in the turn to help the tyres grip. You’ll also exit the turn wider – and could even go over the edge of the berm.
FIX CORNERING MISTAKES
When you hit a corner well, you know it – the bike just grips, you exit with speed and the whole process feels effortless. But what if you find that you’re losing all your speed in turns, sliding out or, even worse, crashing? The key to learning to corner confidently and smoothly is to avoid some common mistakes and build consistency. Here are four things that a lot of riders get wrong – and how to fix them.
T U R N I N G T H E B A R N O T L E A N I N G THE BIKE
A lot of riders don’t lean the bike properly in corners. A bike turns from leaning, not from turning the handlebar. Practise giving the bike freedom of movement under you. One key technique that helps this freedom is dynamic elbow movement.
S T A R I N G A T T H E FRONT WHEEL
Looking at your front wheel can mean you make small, pointless adjustments to the steering. This unbalances the bike. Mid-corner adjustments should be made using feedback through the bike, when you feel something happening, not based on what you see in front of your wheel. When you get to the main leaning point of the corner, look for a specific point further down the trail where you need to be heading – a tree or something off to the side. This will help stop you staring at the front wheel.
B R A K I N G I N T H E C O R N E R , NOT BEFORE IT
This one sounds obvious, but we all brake in the middle of corners too often. A good way to overcome this is to find a turn to practise on and use a marker to work out your braking point. Put the marker on the straight leading into the corner, a good distance back from it. Ride the corner. If you hit it confidently, move the marker closer to the turn and try again. If not, either try again or move the marker back a bit.
P E D A L L I N G O U T OF THE CORNER
We’re sure you’ve been there, chasing your mate who’s a little bit faster than you. You start to pedal out of the corners to keep up, but he/she keeps pulling away. That’s because pedalling out of the corners unbalances the bike, reducing grip, and therefore speed. The best way to gain speed from a corner is to ride it correctly. Then you can add pedalling.
advanced tips
We’re huge believers in experimentation during skills practice and training. Here are three things you can play with to help you with your cornering
1.RIDE HEIGHT Practise hitting the same turn repeatedly while adjusting how low you get your chest relative to the handlebar. Try really low (by bending your arms a lot), try really high and experiment until you find the optimum position. Generally, a lower riding position should give you more front-end control, but find the right balance for you – and the corner you’re riding.
2.PEDAL POSITION People often argue over whether you should have your outside pedal down or not when cornering. The answer is that it depends on the turn. Practise riding a variety of corners where you keep your cranks flat and outside foot down. You can also try adjusting how far down you have your outside foot. Figure out what gives you the most grip and stability.
3.PUMPING Try ‘pumping’ – extending your legs to push the bike into the corner – at different stages in the turn. After a bit of practice, you’ll start to find the ‘sweet spot’ and begin bouncing out of the corner. This is a more advanced skill, so build up to it slowly.


