
6 minute read
Riding rollers


WHOOPS / ROLLERS
Whoops are smooth bumps in the trail that are great fun to ride and can even help you gain speed if you pump through them. At slow speeds they’re rarely a problem because the impact forces aren’t great enough to affect you. But at speed, if you stay sat down or get your timing wrong, they’ll kick you all over the place. The main focus when riding whoops is to stay smooth and keep your bodyweight flowing forwards by absorbing the upslope and extending on the downslope. Try to stay relaxed and let the bike pivot and move underneath you by relaxing your arms.
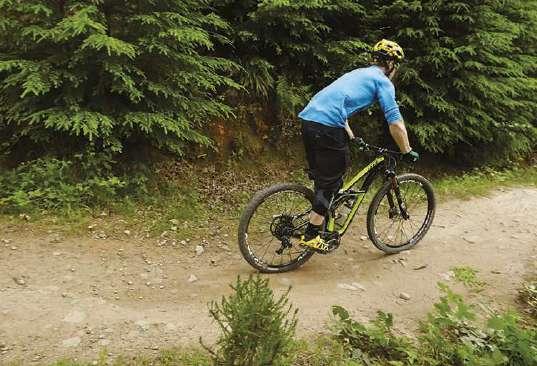
APPROACH Stand in your neutral position. For bigger whoops stand slightly taller than normal to create more room between you and the bike to absorb the bump. You’ve already seen the first whoop and you know what to expect, so look towards the next feature. 1

ABSORB As the bike hits the upslope allow your legs and arms to bend so the bike comes up underneath you. To time this you have to feel it rather than use a visual reference. As you feel the bike go, load into the upslope – that’s when you absorb. The bump will push the bike up underneath you so there’s no need to try to pick it up. 2
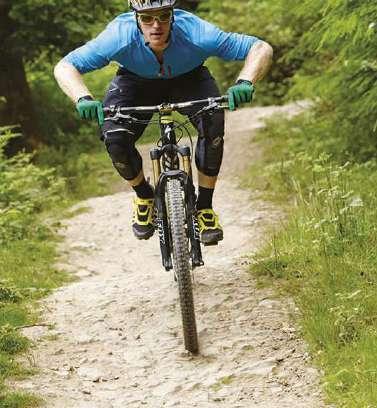
RESET You won’t have long between most whoops so focus on extending your legs and arms into a neutral position so you’re ready to repeat the sequence of absorb and extend again. 4
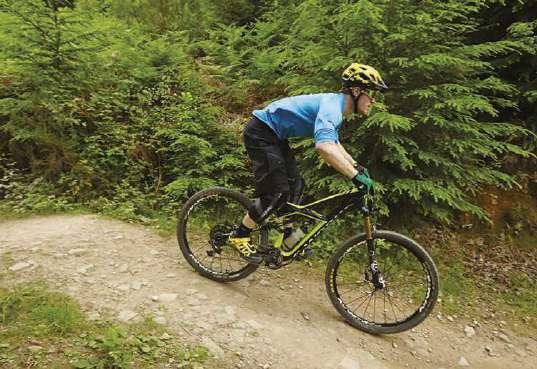
EXTEND When your bike is over the top of the whoop, push it into the downslope using your legs as much as possible. Before trying to gain speed from pumping, your main focus is to stay smooth and in control for the next whoop. If you’ve timed it correctly you’ll have picked up speed and you’ll be feeling smooth. 3
Pump it
If you can stay smooth through whoops then you can gain extra speed without pedalling by pumping them. Try to be as
light as possible over the speedsapping upslope, then push hard with your legs to generate forward speed on the downslope.
HOLD THE HIGH LINE
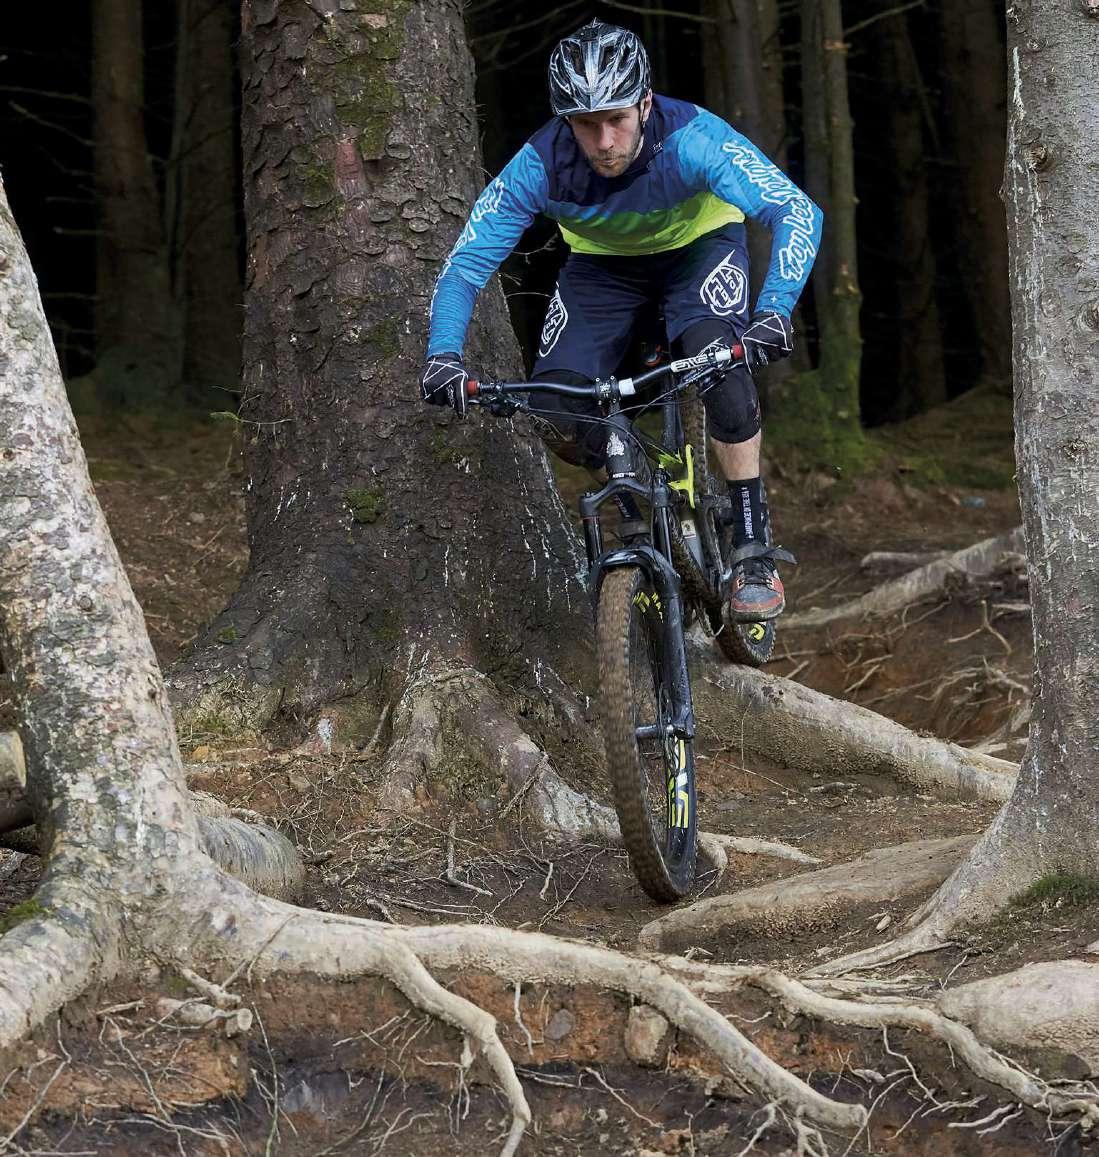
When you’re looking for ways through a trail section, the high line is often the quickest, straightest and/or smoothest option, although rarely the easiest. Like with a lot of techniques, the key to holding high lines is in the set-up – you need good balance and stability to get you through. The most common mistake on high lines is riders entering them too fast. You need to control your entry speed and then build it up as you go through the line.
BRAKING Hit the brakes early so that the bike isn’t sliding when it’s on the high line. We’d advise over-braking instead of hitting the line with full speed. Your aim should be to accelerate through the line, not slow down once you’re on it. One of the most common mistakes on a high line is coming into it too quickly. You’re then forced to brake, which causes you to stall. 1
TURNING Get into the best position to make it through the line (ie. do most of your turning) before you enter it. This is especially important if the line is technical, because it’ll be tough to make your turn once you’re in there. After you’ve slowed down, make a significant movement to get your bike at the correct angle so that you can fully commit to the line. 2
MID LINE No braking, minimal turning and stable body position – these are the key things to remember once you’re on the line. As the bike is accelerating, avoid making any drastic steering movements. Stability comes from your footwork and your arms so, where you can, keep your cranks flat and a bend in your elbows. Then just allow the bike to move freely underneath you. 3
EXIT The number one rule is to look at the exit. As soon as you’ve completed the turn to set you up for the high line, stay focused on exactly where you want to end up, and your bike will follow. You’ve already seen the line, so you don’t need to look down at it. Any reactions you make should be based not on what you can see but on the feedback the bike is giving you. 4
FIND GRIP IN FLAT TURNS
Have you ever noticed that most bike parks bring berm after berm, all the way down the trail? That’s because flat corners can be a flow killer – they’re harder to find grip on, commit to and carry speed through. With the correct technique though, you can rail these turns just like any other. Follow our tips to find as much grip as possible and keep your speed.
GET CENTRED
Approach flat corners in a centred position on the bike – with your weight over the bottom bracket – as this is where you’ll have the most balance, and the best manoeuvrability.
SPOT THE EXIT
Fix your vision looking around the corner, towards the exit of the turn, by keeping your head up. You ride where you look.
LEAN THE BIKE
Drop your inside hand towards the centre of the turn to lean your bike over, and let your hand unweight as it moves further away from your body. This will increase the pressure on your outside hand, and help you maintain front tyre grip. Keep the outside elbow high to maintain a strong position.
USE YOUR BODY
Turn your body in the same direction as your line of vision (this isn’t the same as leaning in) – this will help to steer the bike where you want it to go.
S TAY U P R I G H T

Lower your outside pedal and heel, to shift your weight over the outside of your bike. Make sure you don’t lean in with your body, because keeping yourself more upright than the bike is how you’ll get pressure over the tyres to find traction.
turning tips
More pointers for lawless lat corner technique
BRAKE FIRST Get any braking done before the turn. Braking negatively affects a bike’s handling and grip, by making it stand more upright and potentially skid out. With flat corners, it’s better to go slow in and fast out, and build up slowly until you’re hitting them quicker and quicker.
PICK YOUR LINE Spot a smooth line to follow – bumps will make it harder for your tyres to maintain contact with the ground – and try to set up wide to help straighten out the corner.
TRUST YOUR TYRES Leaning the bike over on its side means you’ll be engaging the side knobs on your tyres. Trust them – they’re surprisingly grippy.
STAY SMOOTH Avoid quick movements up/down or left/right, because they’ll disrupt your balance and lessen the pressure on the trail, losing you valuable traction.
STAY CENTRED Don’t lean forward onto the bar too heavily. This will impede your ability to lean the bike sideways and move it underneath you (a bike that’s too long will also have this effect).


