
15 minute read
Attack the steeps


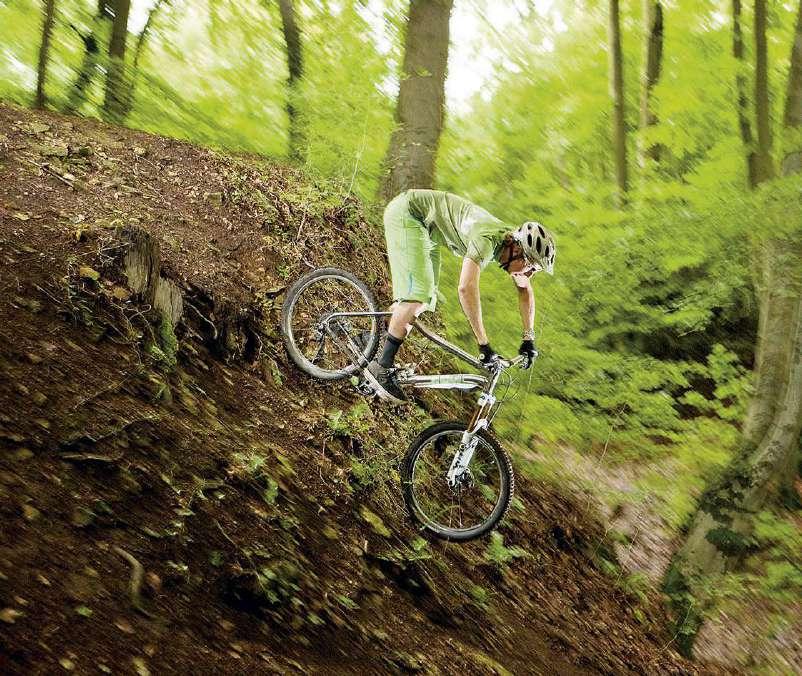
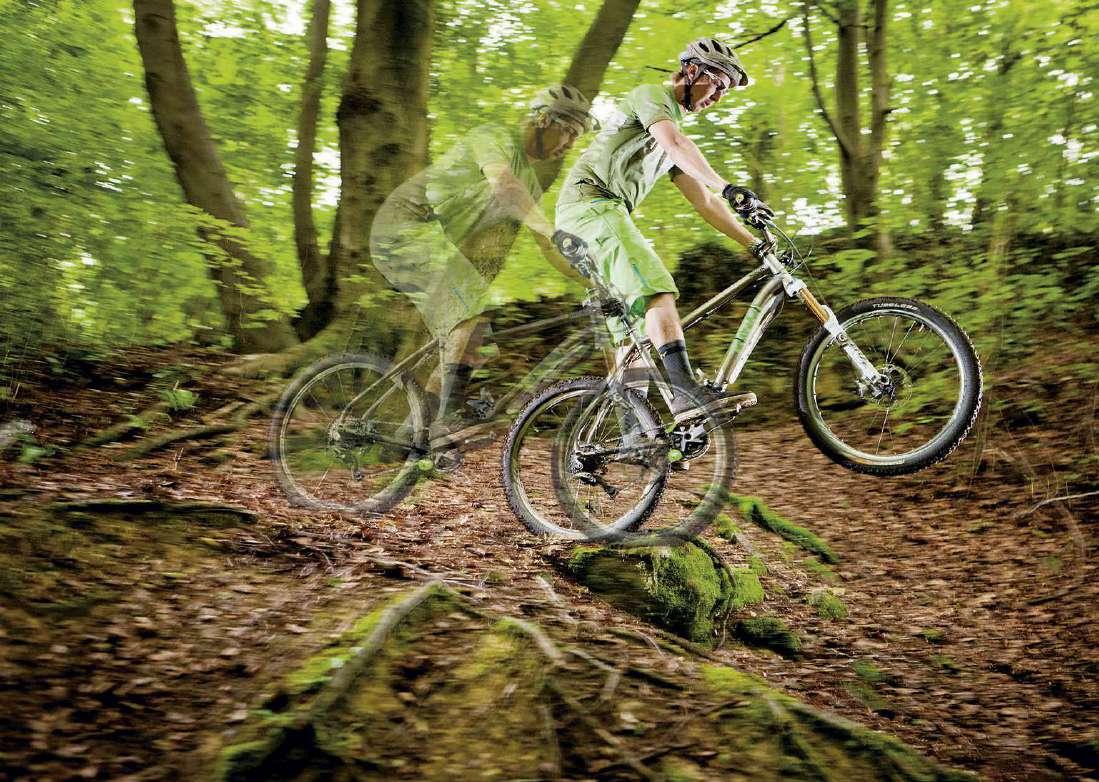
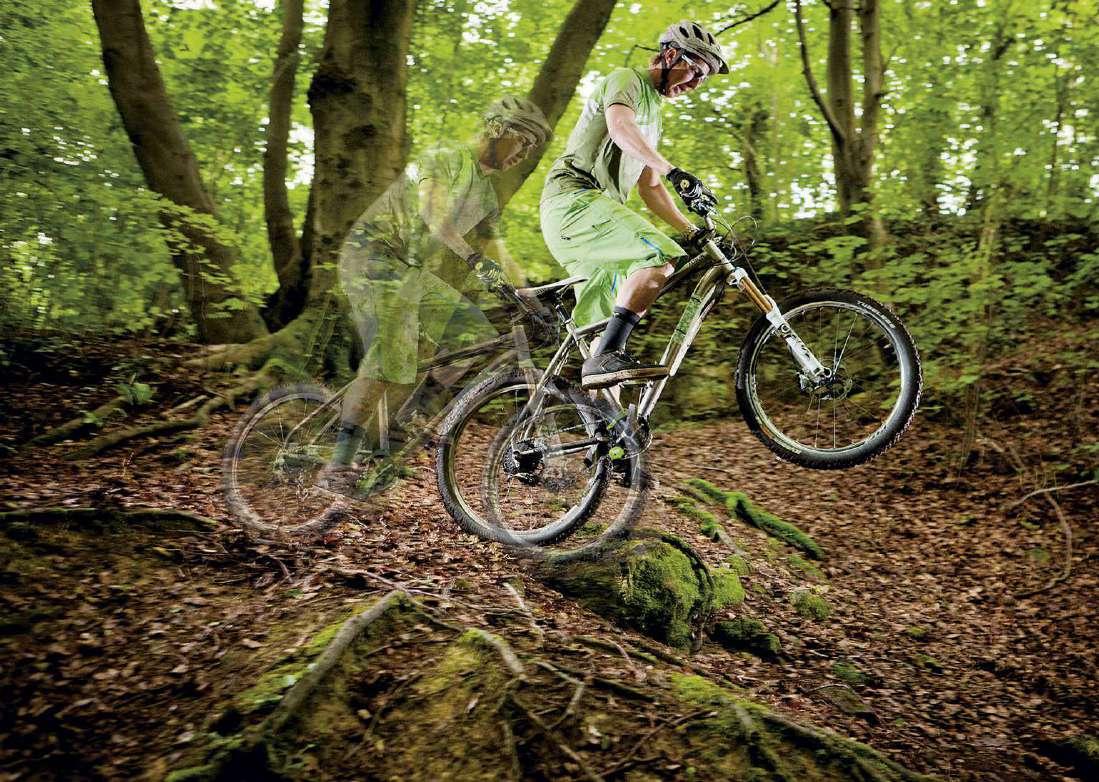
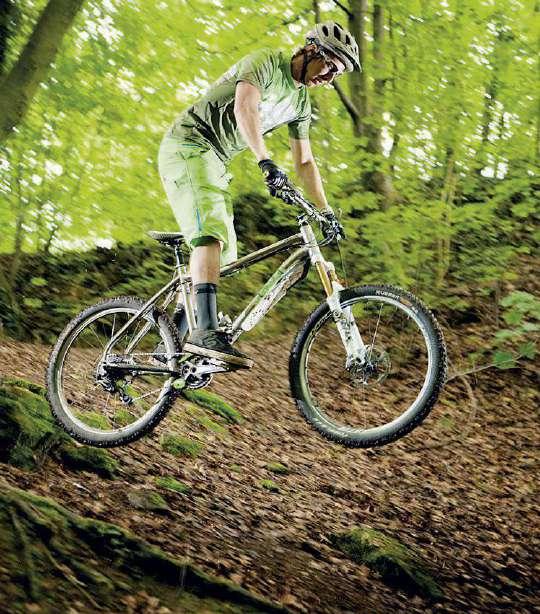
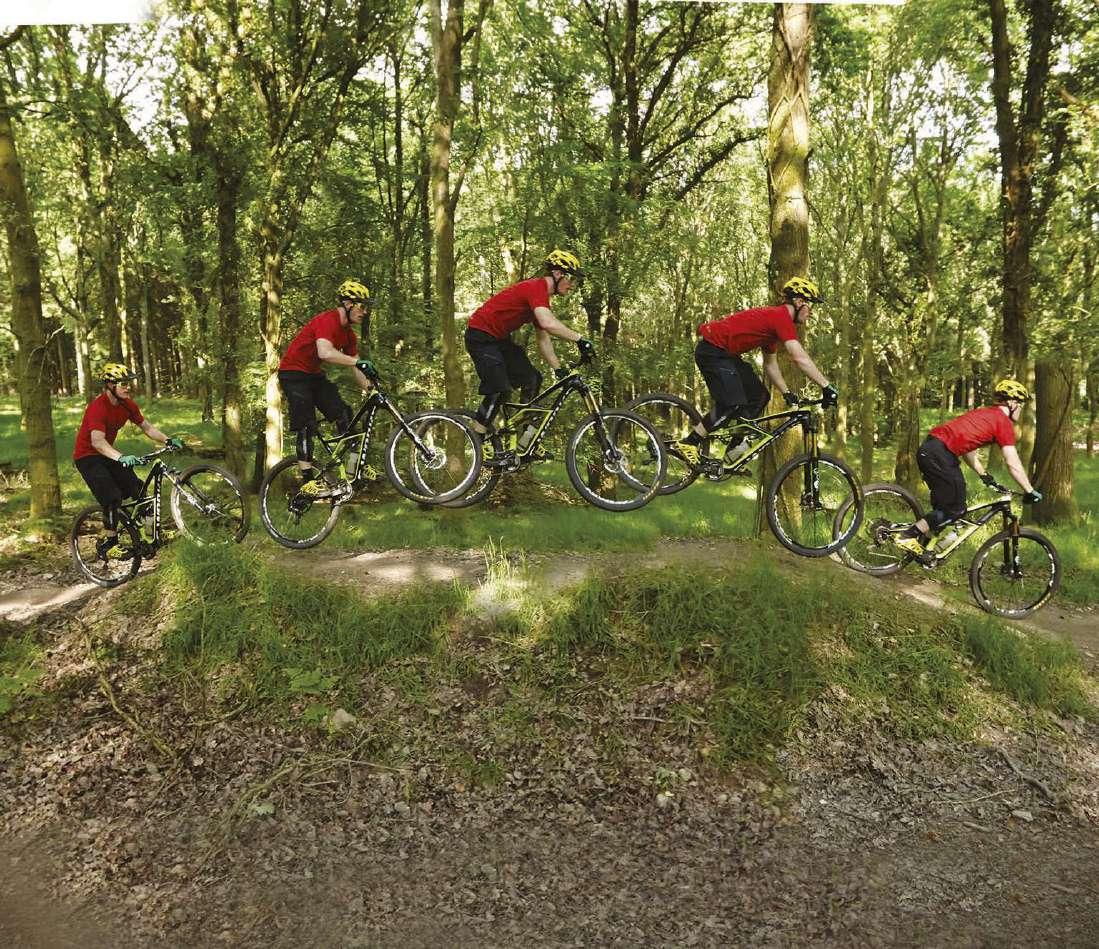
STEEP ROLL-INS
Riding down steep slopes is fun but can be really intimidating if you haven’t tried it before. With the right line in and out though, it’s possible to tackle any slope. And no matter how steep they are they don’t actually get any harder – just a little scarier! The skill involved in riding sharp banks can be applied in other trail situations too. In this example we’ve used a steep and short roll-in that’s fairly common. As always, start small before rolling off something you wouldn’t walk away from if you were to get it wrong...
OVER THE EDGE STAGE 1
PREPARE POSITION
Have your best foot forwards, and be out of the saddle, looking at the edge of the slope.
Speed tips
KEEP IT SLOW Don’t ride off too fast – if you do, you risk taking off and flat landing.
STAY CONTROLLED Keep your speed controlled – aim for a slow walking pace.
BRAKE Slow right down, maintain a steady line, and drag the brakes as the front wheel goes over the edge.
WEIGHT BACK
Slide off the back of the saddle to keep your weight back.
LET IT ROLL
Let the bars move away from you, allowing your bike to pivot underneath you.
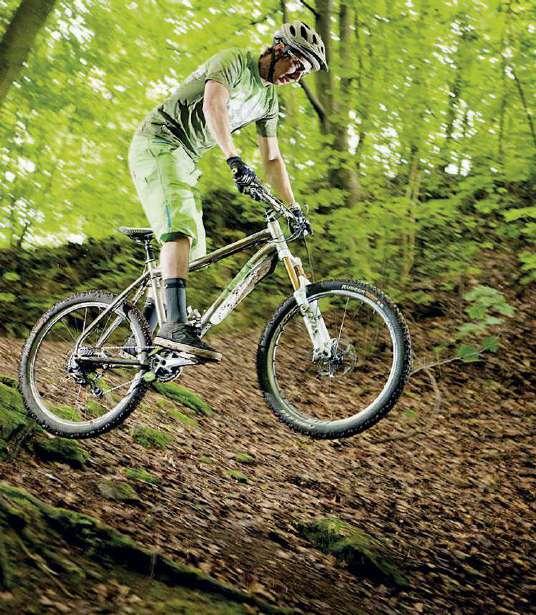
speed & line
BRAKING ON A HIGH SLOPE If you’re riding a longer, steeper or higher slope, you may want to control your speed on the way down. There’s no weight on the rear wheel, so you’ll need to use the front brake. Without locking it, you’ll be surprised by how much power you can put through it. Try on a smaller slope first, rolling as slowly as you can – if you get squirrelly, release the brakes and you’ll straighten up.
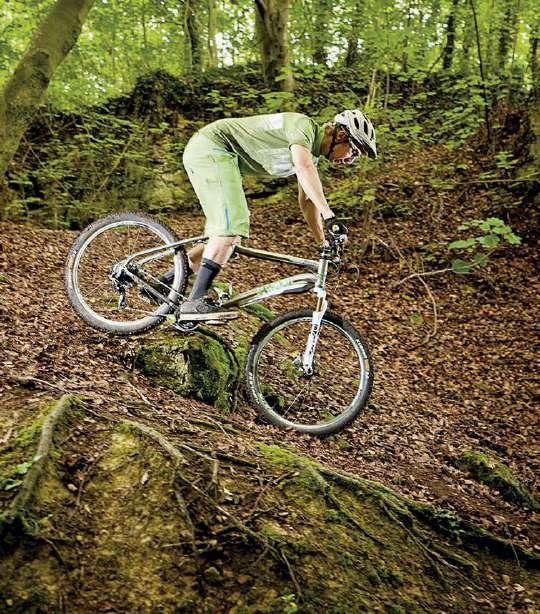
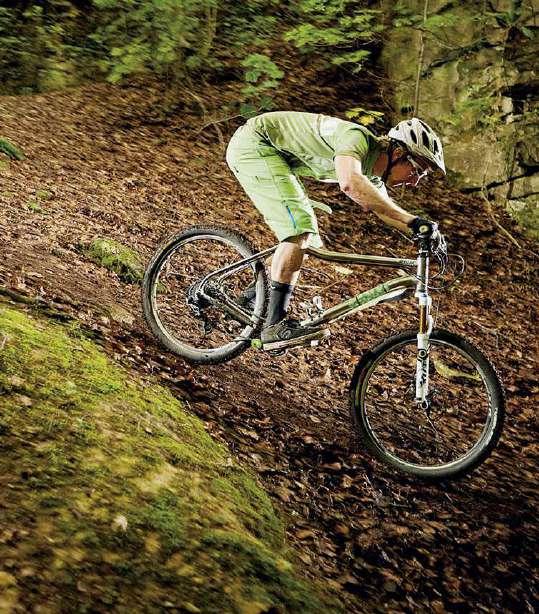
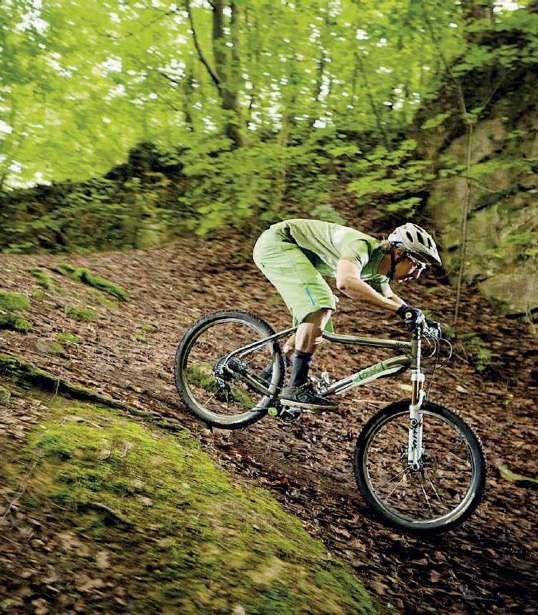
FREEFALL STAGE 2
BALANCE YOUR WEIGHT
Your bodyweight should stay behind the saddle, but allow your elbows to bend rather than keeping your arms pushed out in front of you.
GOUT BRAKING If you need to lose speed fast after a steep slope, do your braking on the G-out. The bike and your weight will be compressing into the ground, giving your tyres maximum grip. Make the most of it by braking on the exact moment you hit the G-out – grab a handful of brake while also stiffening your arms and legs.
LINEUP AND RUNOUT One intimidating thing about rolling over a steep slope is not being able to see what you’re riding on until you’re on it. Stand at the edge of the drop and look at your line. Then line it up on the run-out with a tree or rock that you can see from your run-in. Use this point as a reference and trust your memory of the line down the slope.
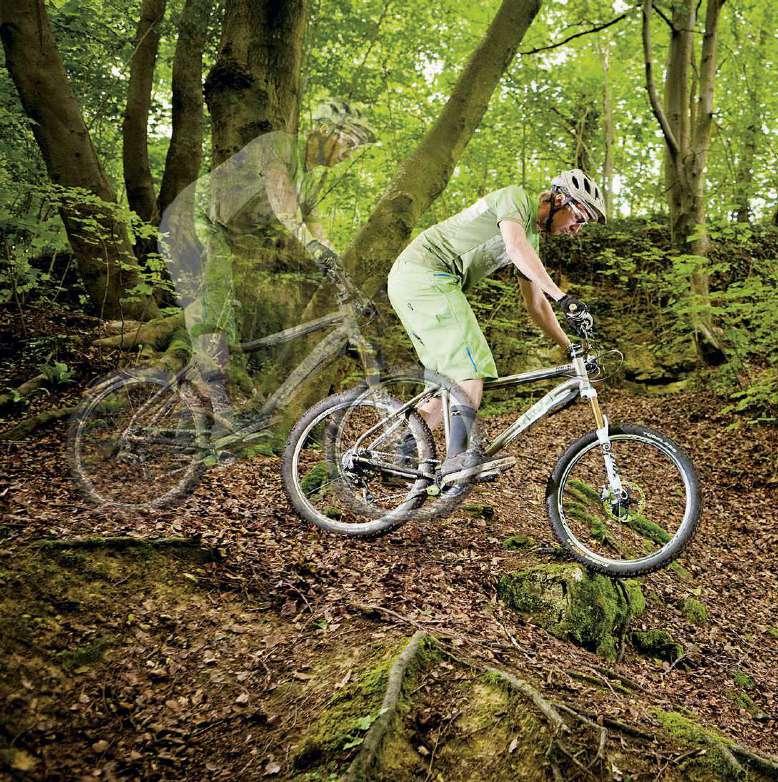
THE G-OUT STAGE 3
REACT
As the transition from the slope runs out to flat, your weight will pull you into the bike. This is known as a ‘G-out’, and you need to be ready for it.
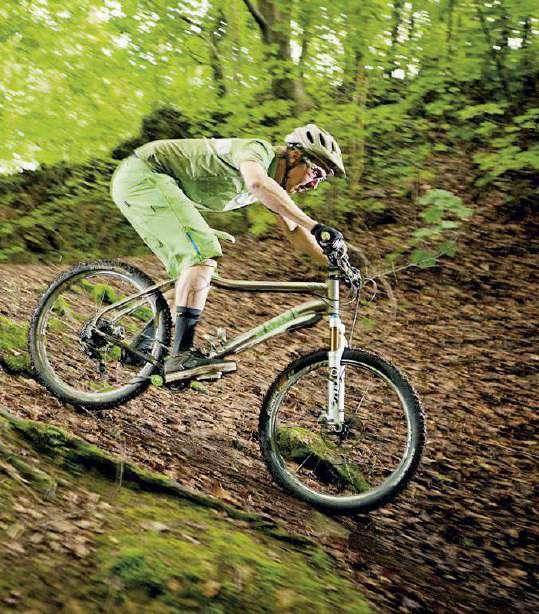
HEAD POSITION
Keep your head up.
LOOK
Keep your eyes on the runout area.
LET GO
Come off the brakes completely.
BEND JOINTS

Keep your arms and legs tense but allow them to move rather than lock them solid. As you G-out, the bike will speed up.
ROLLING A DROP-OFF
If the drop-off is higher than your wheel then it’s unlikely that you’ll be able to roll off it without sending yourself over the handlebars, so exercise caution and have a good look the first time you try it.
bike & brakes
SLAM YOUR SEAT Make sure your saddle is low and out of the way. This will ensure that you don’t get caught off-guard and will help you get your bodyweight back off the bike .
CLEARANCE Be cautious of your chainring knocking the edge of the drop-off – if it’s mud it’s nothing to worry about, but chainrings can stick in logs. Your fork will compress on impact, bringing your chainring closer to the edge. If it strikes, keep rolling – don’t grab the brakes.
BRAKE CHECK Go as slow as possible, while still having enough motion to maintain balance. A slow walking pace is perfect.
APPROACH STAGE 1

WARNING Make sure your chainring won’t foul the edge of the drop – your bike could stop dead and throw you over the bars. Argh!
LANDING STAGE 2
N O BRAKES
Don’t touch the front brake!
OVER THE EDGE
Let the front wheel roll over the edge.
EXTEND ARMS
Allow your arms to extend as you lean back, and let the bike .
RUN OUT STAGE 3
SMOOTH IT OUT
Use your body weight to absorb the impact as best as possible and ride away.
DISTRIBUTE WEIGHT
If the drop is this could pitch you over the bars, so keep your weight as far back as possible.
IMPACT
As your front wheel hits the floor, your fork will compress, steepening your head angle.
PREPARE FOR IMPACT
As your rear wheel comes down, the impact may be high.
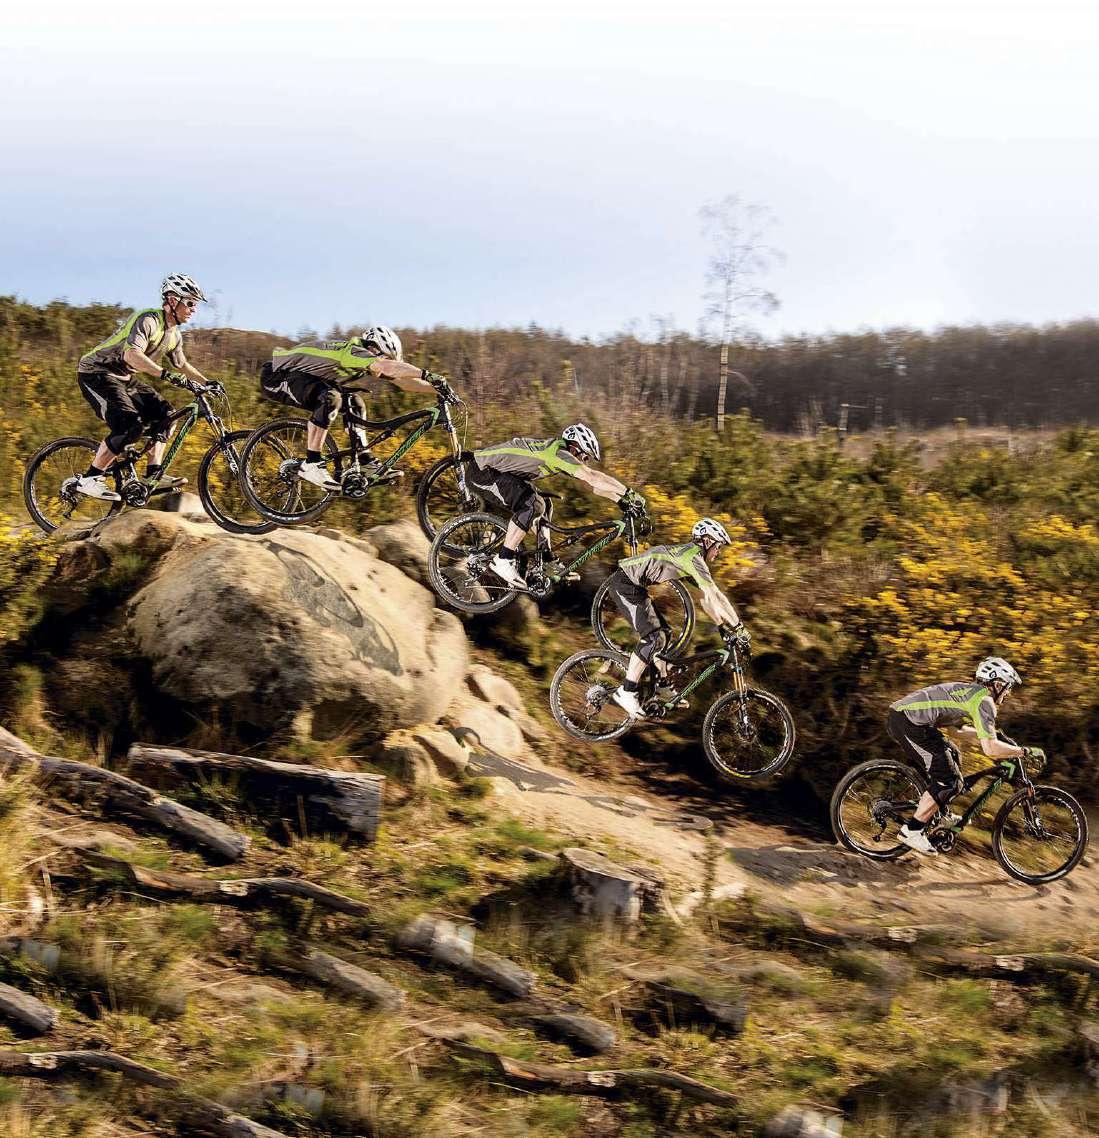
DROPPING A DROP-OFF
When dropping a drop-off, there’s less chance of crashing. It uses the manual technique to get the front wheel off the ground. Keep good rolling speed on entry and a good line and you can land drop-offs from a fair height.
APPROACH STAGE 1
THE DROP STAGE 2
STA N D TA L L
ABSORB STAGE 3
As the rear wheel leaves the drop-off, stand tall on the bike to get a balanced position when in the air. This helps level the bike for landing both wheels at the same time.
PULL BACK
Pull back on the bars and lean back while driving your feet forwards. This will pivot the bike on the rear wheel and get the front end up. You don’t want it to cometoo high, just enough so you don’t land front wheel first.
PREPARE
If the run-out is good enough, more speed will help with stability. It’ll mean you can meet with the ground too, as opposed to dropping straight down on to it. Make sure you’re rolling with your preferred foot forwards, and have your eyes on the take-off area and run-out.
ABSORB IMPACT
Keep your arms and legs straight and use their natural suspension travel and your whole body to absorb the landing. Head up, looking down the trail.
PEDAL OFF A DROP-OFF
When you come to a drop-off with low speed, and it looks dodgy, it’s safer to get the front wheel up and land both wheels together (or rear wheel first). By pedalling and pulling up, you can lift the front wheel easily. A higher drop will allow a full pedal rotation, starting – and ending – with best foot forwards. For smaller dropoffs, you’ll only get a half crank in – landing with your weaker leg forwards. At first this will feel odd, but practice on a kerb.
APPROACH STAGE 1
SET UP
In a fairly low gear, set yourself up with your best foot forwards.
THE DROP STAGE 2
PULL UP
Pull up and back on the bars, and pedal hard. This will lift the front end.
PEDAL
Depending on your timing, you’ll have time for a half crank, or full rotation, before your rear wheel leaves the ground. Ideally get a full rotation in, but allow enough time to prepare for landing.
LAND ON TWO WHEELS
Ideally you want to land on both wheels together, but you’ll inevitably land on the rear wheel sometimes, because pedalling will pull the rear wheel towards the ground. Absorb as much impact as you can before riding away.
LANDING STAGE 3
STEADY SPEED
As the rear wheel leaves the drop-off, stop pedalling and prepare for landing .
FLAT OUT DROP-OFFS
There’s nothing better than hitting drops flat out with confidence and not having to slow down. Although they’re not entirely the same techniques, you’ll need to have practised small drops before speeding up to gain confidence and balance. Faster means further, so spot your landing and get ready for some airtime.
LOOK AHEAD


Approach in the stand strong position, slightly lower than normal. Keep your head up, spot your landing then look ahead.
PRESSURE RELEASE
Release the pressure under your feet before the rear wheel leaves the edge so your bodyweight is already dropping.
DROP & EXTEND
Drop your hips back and down quickly as your front wheel reaches the edge, extending your arms to allow yourself to get back and really low.
DROP TIPS Make the distance your bodyweight drops as small as possible – lower your centre of gravity on the top of the drop and extend the bike towards the landing in the air.
WEIGHT SHIFT
Relax in the air and aim to get your weight back over your bottom bracket by extending your legs and arms ready for touchdown.
STA N D ST R O N G LAND STRONG
Aim to land both wheels together, absorb, stand strong and be ready for the next feature.
S T A N D STRONG
Keep your pedals level and support as much of your bodyweight as you can with your legs to deal with the g-forces. Don’t be afraid to lean with the bike and really push your feet into the berm for extra grip.
AGGRESSIVE BERMS
On most trail centre corners you’ll find a berm. The banking is there to help you lean more, allowing you to corner faster and carry more speed down the trail. ‘Aggressive berms’ are short berms with plenty of support that you can hit hard and even gain speed on. As with all corners, if you want to ride them fast you have to lean more. If you want to ride them really fast, you need to focus on maintaining a strong body position so you can deal with the cornering forces, and have pinpoint precision and timing to keep your wheels in the berm.
O F F T H E BRAKES
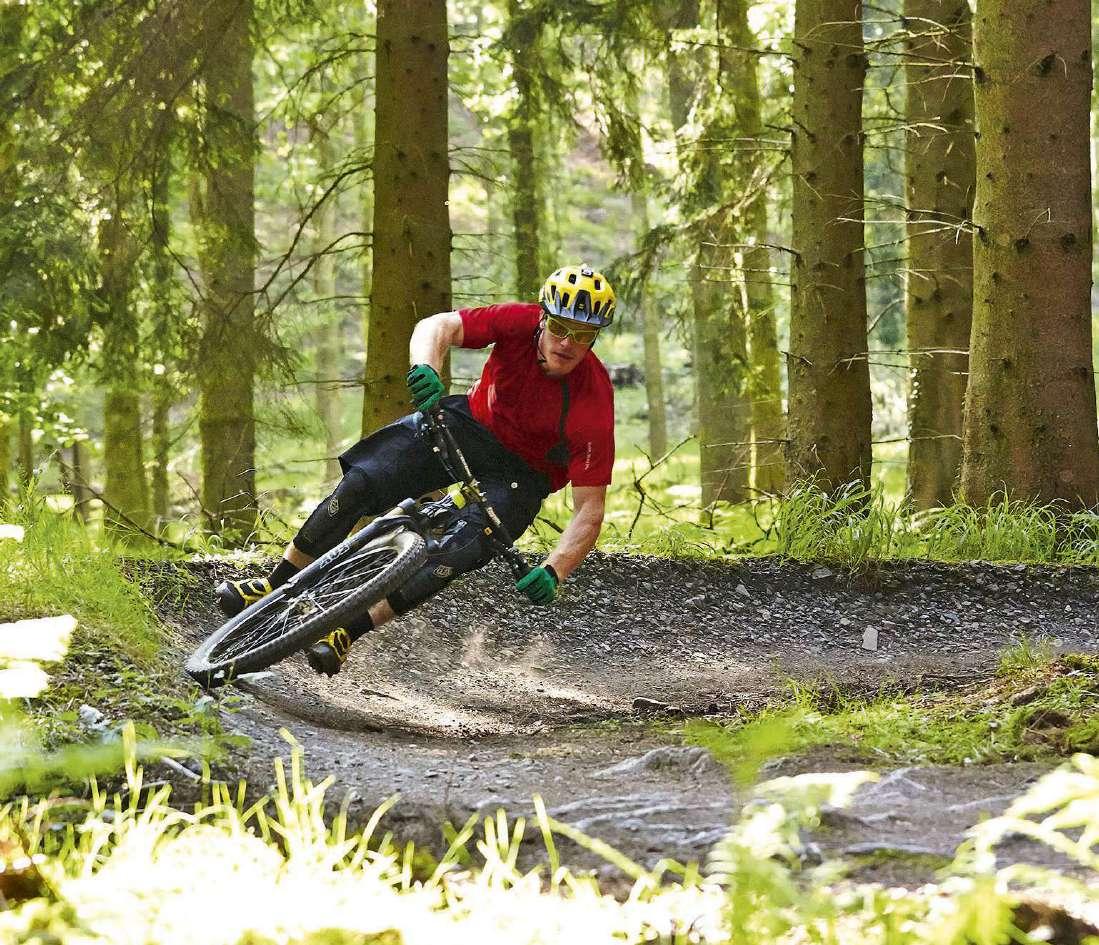
Stay off the brakes when you’re in the berm because they’ll bring you out of the lean, making you more likely to overshoot the turn.
L O O K T O THE EXIT
There’s no point staring down at the berm once you’re in it. Looking up and towards the exit will help to keep you balanced and bring you out of the lean.
GET LOW
As you’re about to lean into the corner, drop your chest and hips but keep your elbows high. This will make it easier to lean the bike, as well as lowering your centre of gravity.
LINE You want to hit the centre of the berm. Too low and you’ll be on the flat, which means you’ll lose grip and slide up the berm. Too high and you’ll end up going too wide on the exit. 1
LOW AND LEAN As you enter the berm make sure you get low and lean. If the berm has plenty of support then you can lean with the bike. If it doesn’t, lean the bike more than your body. 2
PUSH Resist the g-forces by pushing with your legs in the centre of the turn to generate speed and transfer weight to your back wheel. You may find you manual out of short berms. 3
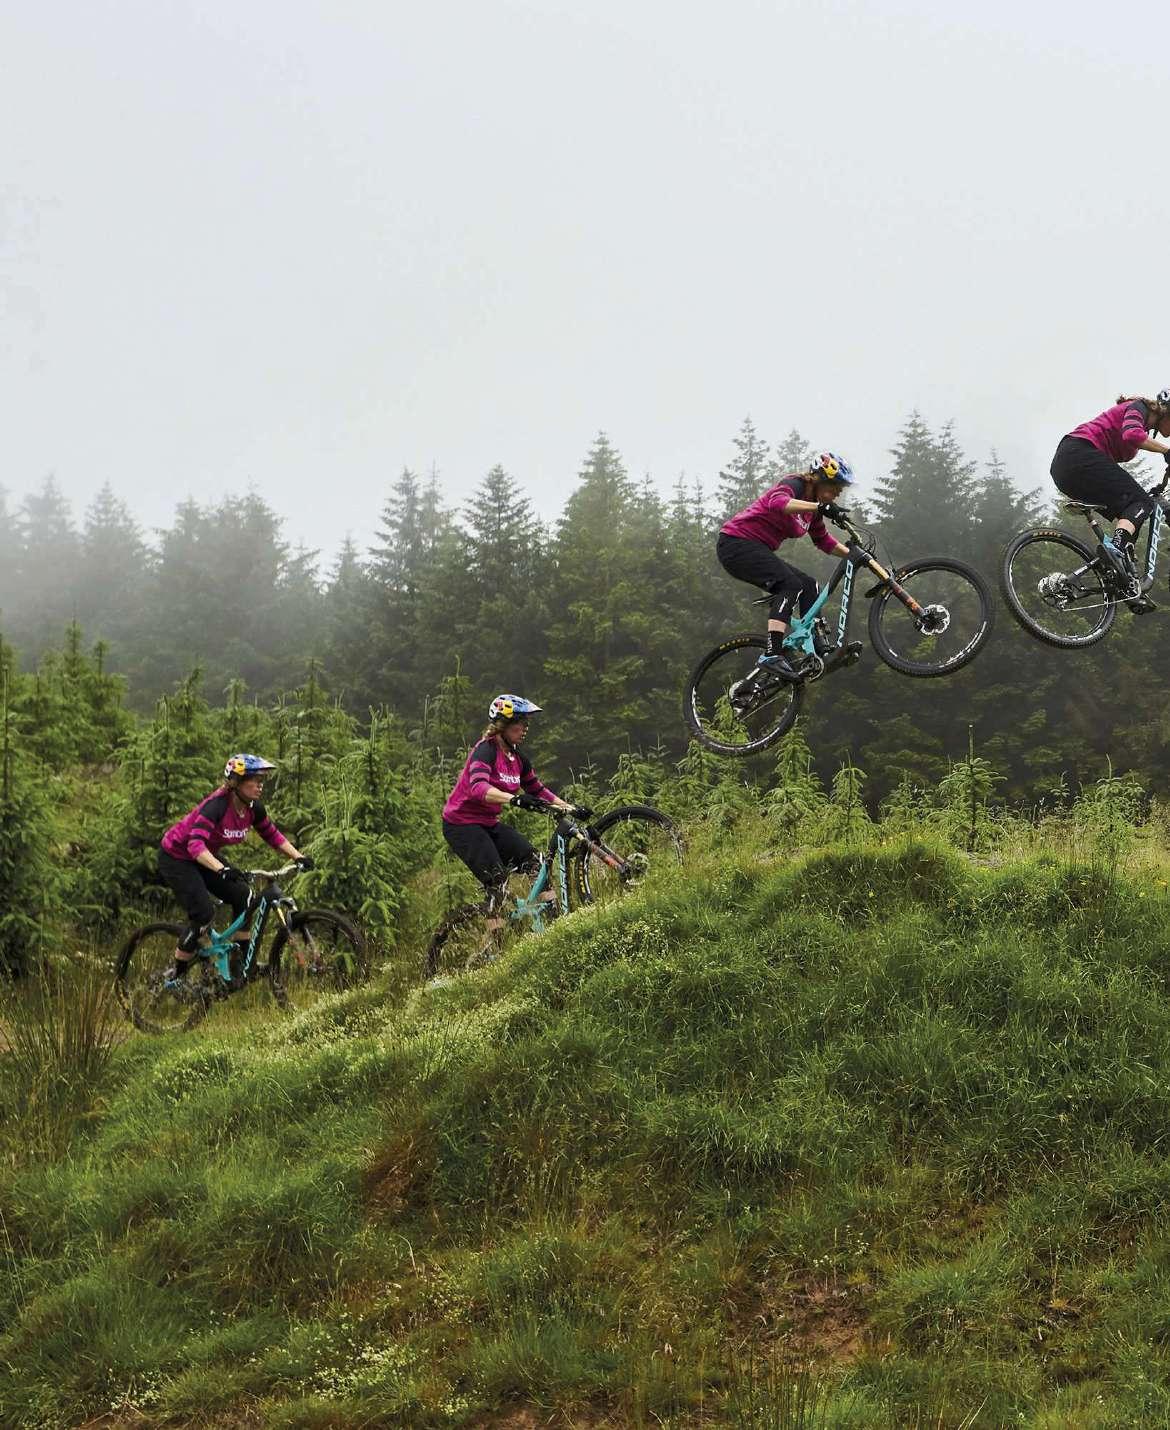
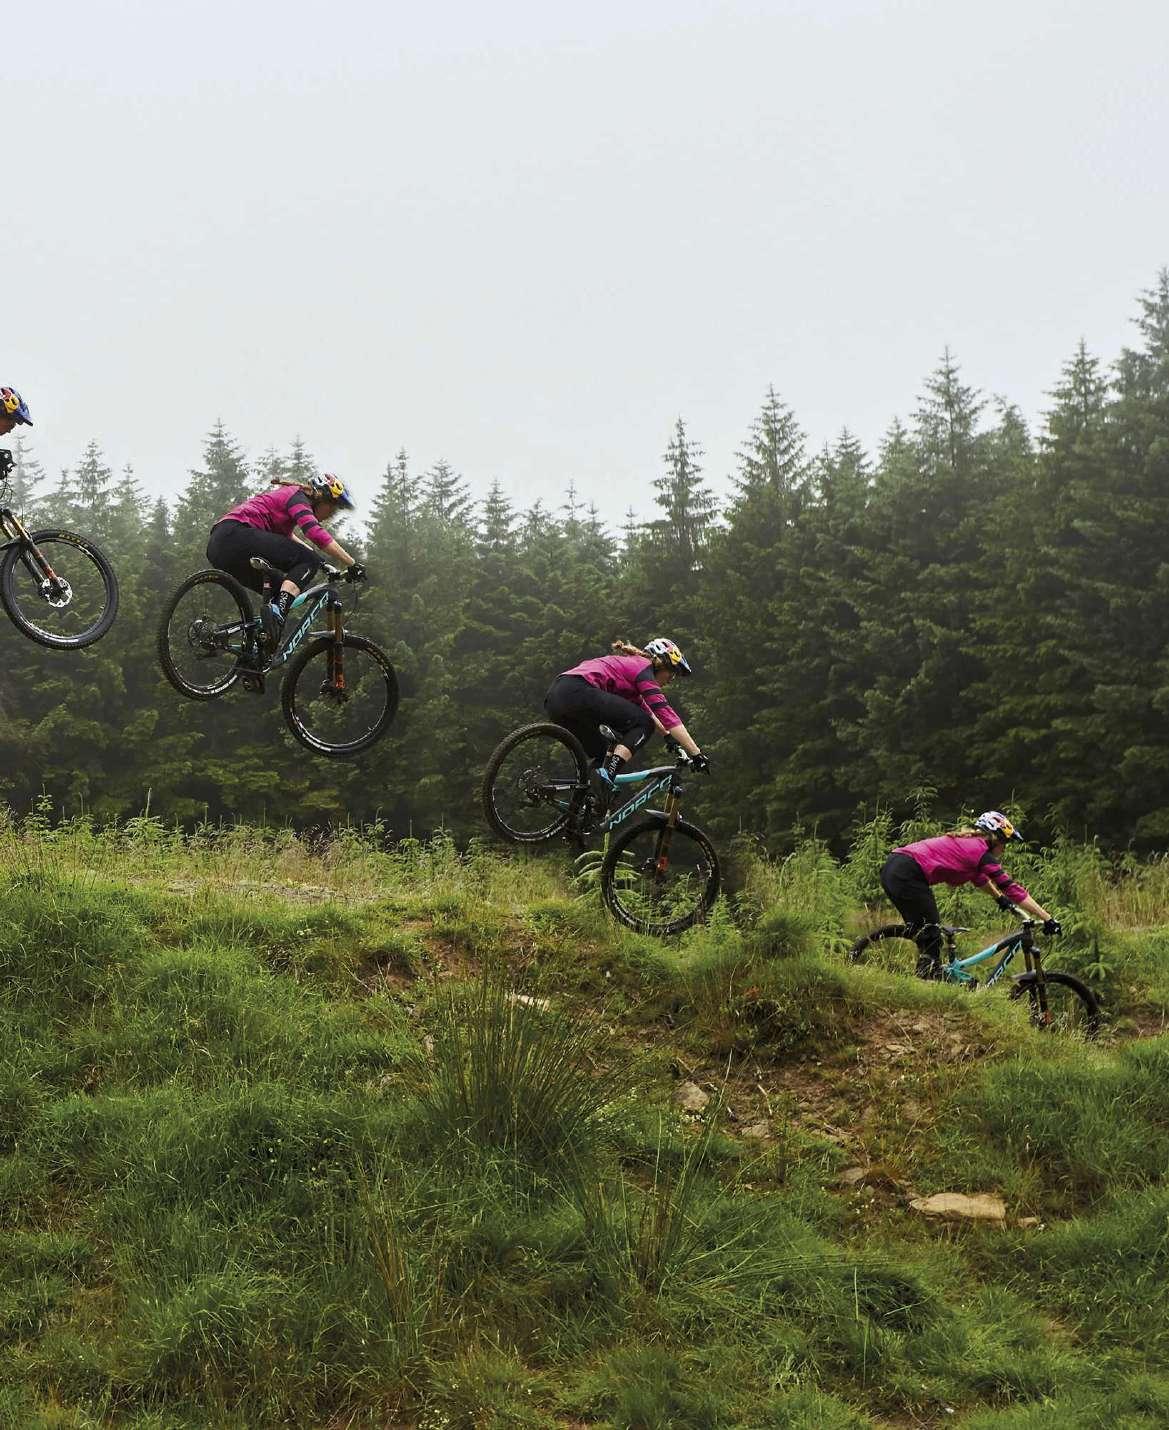
TABLETOP JUMPS
The great thing about tabletop jumps is that you can roll them before trying to jump them. We recommend doing this first because it gives you a good feel for the lip and an idea of what to expect from the jump. The aim is to land on the downslope – that way the landing will be smooth and will also give you speed. But the best technique will vary depending on your speed and the size of the jump. For example, if you’re going slow, you’ll need to ‘pop’ off the lip to make the landing. If you’re riding fast, you may be better ‘squashing’ it so you don’t overshoot the landing. In this case we’re doing a basic jump to reach the landing.
1.COMPRESS
As you approach the lip, get low on your bike so you’re in a position ready to extend. Try to keep as much weight as you can through your feet, with your hands light, so the bike can rotate towards you and you stay in balance.
Troubleshooting
Basic jumping on a simple tabletop is a straightforward technique, but it’s easy to get wrong. Most errors are due to the rider’s body position and balance before take-off. If there’s a problem, it’ll be exposed when the wheels leave the ground. Work on your position if you’re finding it impossible to jump.
YOU CAN’T GET AIR A weak body position means you’ll always collapse and soak up the lip. Find a strong position on your bike. Heavy feet, light hands!
BACK WHEEL GETS KICKED UP Shying away from the lip and leaning back will cause your back wheel to get kicked up. Bend your arms and allow the bar to come towards you up the lip, don’t get pushed backwards.
DEAD SAILOR If you end up shooting off to the side every time you jump, it’s probably because you’re stiffening up on the take-off. To jump you have to be relaxed and dynamic, like a goalkeeper. Bounce and get loose!
NO HEIGHT AND HEAVY LANDINGS You’re probably trying to pull the bike up and over the jump, which means you’ll land in a compressed position – bang!
5 . L A N D S M O O T H LY
Aim to land softly, just as you would if you were going to land from a height on your feet. Absorb the landing with your legs and return to your neutral position as soon as possible so you’re ready for the next feature.
2.EXTEND
Push against the lip by extending your legs to get your body moving upwards. The harder you push, the higher you’ll go. Timing is vital – many extend too early, meaning they travel up the lip out of shape and with straight legs.
3.LEVEL OUT
Relax your arms and legs so the bike can come up underneath you. Keep looking forwards and focus on staying relaxed and in balance. If the front wheel is high, push the bar away from you to level the bike out.
4.NOSE IN
Push the front end of the bike down towards the landing, but keep your head up and aim to take the majority of the impact with your legs. If you’re going to land on top, there’s no need to push the front wheel down.
GETTING AIR

Jumping is a skill that’ll serve you well and make riding more fun, whether it’s to clear a gap or simply hop over a root. The move basically starts with good timing of a bunnyhop and progresses from there the faster you go. Start small and work your way up – sound fundamentals are key.
APPROACH
Jumping is all about gauging your speed, timing and getting set before the lip. Get your feet level, in a neutral position, and look up where you want to go. The compression at the base of the jump will give you an explosive linear movement to pop (jump) from.
TA K E O F F
As you go up the face of the jump your weight will transfer from your arms to your feet, which will give you the force to preload with your legs, and make your front wheel light as you hit the top of the lip. Your heels should be slightly down through the take-off till you’re airborne.
AIRTIME
In the air, think about readjusting your balance and spotting the landing. Because the angle of your bike is changing (like you’re riding a rainbow), your weight needs to shift slightly forward to level it. To do this, shift your hips forward and raise your heels a little.
NOSE DOWN

As the bike starts to go down, your arms will pull you forward slightly. Angle your toes down to bring the bike into your body and shift your weight over the front a touch to get the nose pointing down and make both wheels match the slope of the landing.
LANDING
You need to continually adjust your body position to match the natural arc of a jump. When you land with both wheels at the same time, your body acts like secondary suspension to absorb the impact equally through your arms and legs. Be strong in your core, eyes up, and ride out of there like a champ!
advanced airtime
FLAT PEDAL SKILLS Start on flat pedals and a hardtail if possible. Skills days at jump parks will develop good timing and control, and are fun. Try building little kickers and see how far you can go, getting faster and going further each time, learning how to pop and absorb the flat landing. The key is to start small and build up.
GO SLOW See how slow you can go and still clear a jump. BMX tracks are a good place to practise this, as the jumps are mellow and safe. Try starting closer to the jump or come in from a turn – it’s a fun challenge. You’ll be surprised with what is possible, and learn how to boost, rather than only using speed to clear jumps.
BACK BRAKE TAP This is a good trick to know if you ever get in trouble with the front end too high on a jump. Pulling the rear brake in the air creates a force that brings the front end back down. Moto riders do it all the time. We’ve had to use this on steeper jumps when things go out of shape and we felt like we might loop out on the landing.


