International Research Journal of Engineering and Technology (IRJET) e-ISSN: 2395-0056
Volume: 11 Issue: 09 | Sep 2024 www.irjet.net p-ISSN: 2395-0072


International Research Journal of Engineering and Technology (IRJET) e-ISSN: 2395-0056
Volume: 11 Issue: 09 | Sep 2024 www.irjet.net p-ISSN: 2395-0072
Ravi Kumar P1 , Kuldeep Kora2
1M-Tech Tool Engineering Scholar, Government Tool Room and Training Centre (GTTC), Mysuru 2Tool Design Engineer, Government Tool Room and Training Centre (GTTC), Mysuru
Abstract - Injection Molding is a very old and advanced manufacturing technique in which heated molten polymer is forced into mold opening under huge pressure. The heated plastic in the mold then cools down, solidifies to form desired shaped part. Top cover bearing is a part used to accommodate in automobile suspension systems. Material selected is Nylon 6 with 30% glass filled (black). The grade of the material is SGR 30 and the shrinkage factor of 0.6%. The component and tool designs are done with the help of Unigraphics (NX 11.0). Mold flow analysis is carried out using the software Easy flow advance NX 11.0. Finally, manufacturing, tool trials and corrections were performed.
Keywords: Injection Molding, Top cover bearing, Nylon 6, Shrinkage factor, Easy flow advance
1. INTRODUCTION
One well-liked and effective method for making plastic objectsistheuseofinjectionmolding.Typically,thismethod usesmoltenpolymerthermoplasticsasthesubstrate.Thatis the order in which they originated and cooled. Infusion molding plastics are used in nearly every functional produced item in today's society, from food containers to vehicles.
Topcoverbearingisusedinthesuspensionassemblyofthe automobiles. Investigating the Nylon-6 substance that is usedinthepieceof equipmentisthefirststep.Theinitial stage involves a thorough analysis of the substance specs and part dimensions (from 3D CAD). Choice of separating lines,drawing,shrinkageexpense,optimalgateplacements, runnerlayout,extractionofcoresandcavities,ejectedunits, andventilationsystemsareallincludedindesign.
Studyofthecomponentanddesign
ToolDesignCalculations
Investigationofmoldflow
Solidcomponentofthetool
3. METHODOLOGY

4. COMPONENT STUDY AND 3D MODELLING
Thepartiscalledatopcoverbearing.Nylon-6makesupthe componentsubstance,whichhas30%glasspackedinit.The part has a black color and a SGR 30 rating. The part has a volumeof298.35cm³.Thetotalmassofthecomponentsis 406.23 grams. The part has a density of 1.35 grams/cubic centimeter andanapproximate volume reduction of 0.6%. Themeltingpointis285°C.Partthatisproducedisutilizedin cars/automobiles.

-2:Topcoverbearing3Dmodel

International Research Journal of Engineering and Technology (IRJET) e-ISSN: 2395-0056
Volume: 11 Issue: 09 | Sep 2024 www.irjet.net p-ISSN: 2395-0072
This section outlines a methodical approach to obtaining theoreticalvaluesforspecificmoldproperties.Pointingout that the real values is much greater and takes into safe consideration,becausethegainedpropertiesarenotdirectly usedinthemold.
Shot weight (Sw)
Weightofcomponent(w)=MaterialdensityxVolume
w=1.35x298.35
w=402.77g
Incorporatethemoldmassintotheformulaandmultiplyby themultiplicationfactor(M.F),therefore,
Shotweightofcomponent(Sw)=WeightofcomponentxM.F
Sw=402.77x1.05=422.90g
Sw = 423g
5.2 Clamping force/clamping tonnage
Clampingforce=ProjectedareawithfeedsystemxInjection pressure
Projectedareawithfeedsystemis256cm2 .
ForprocessingNylon6with30%glassfilledtoproducean engineering part, the injection pressure required is 1650 kg/cm2 .
Thecavitypressureiscalculatedtobe1/2oftheinjection pressurebecauseNylon6with30%glassfillhasgoodflow abilityandisalsotheleastviscousmaterial.
Cf=Projectedareawithfeedsystemx1/2Injectionpressure =256x[1/2x1650]=211200kgf
Cf = 220 T
Shot Capacity
Shotcapacity=SweptvolumexMaterialdensityxConstant
Where, Constant = correction factor for percent volume expansion of the plastic at the molding temperature for Nylon=0.35(semi-crystallinematerials).
Thescrew-typeisnormallyratedintermsofsweptvolume oftheinjectioncylinder=900cm³.Densityofthematerialis 1.35g/cm³.
Shotcapacity(g)=900x1.35x0.35=425.25g
Shot capacity of the machine = 425 g
Calculatingthequantityofcavitiesfrommachinecapacity
Ns = Shot capacity of the machine / Shot weight of the component
Shot/MachinecapacityofthemachineforNylon-630%glass filled is 425 grams. Shot weight of the component is 423 grams.
Ns=425/423=1.005
Ns=1Cavity
Depending on shot capacity, a single cavity mold can be accepted.
Diameterofsprue=10mm
Diameterofrunner=6mm
DiameteroftheTunnelgate=1.547mm
No.ofgatesused=4numbers

5.6 Determination of working length of finger cam
L=[Ms/Sinθ]+[2c/Sin2θ]
Where,Ms=splitsmovementtoejectthecomponent positively=32.5mm
θ=angleoffingercam=25°
c=clearancebetweenholeandthefingercaminthe splits=0.5mm
L=[32.5/Sin25]+[(2x0.5)/Sin2(25)]
L = 78.2 mm

International Research Journal of Engineering and Technology (IRJET) e-ISSN: 2395-0056
Volume: 11 Issue: 09 | Sep 2024 www.irjet.net p-ISSN: 2395-0072
5.7 Length of side core (Ls)
Lengthofsidecore=Fittinglength+Workinglength+radius offingercam
Where,
Fitting length = (Diameter of finger cam x 2) + Factor of
Safety=(22x2)+10=54mm
Working length = [Slider stroke (Undercut + 5mm)] / Sin (Fingercamangle)=[42+10]/Sin25=123.04mm
Radiusofthefingercam=11mm
Therefore,
Lengthofsidecore=54+123.04+11=188.04mm
Hencelengthofsidecore(Ls)is188.04mm
5.8 Injection time (Ti)
Theinjectiontimetakenafterthecalculationis6.25s(value fromtheanalysisreport).
5.9 Cooling calculations
ThesolidifyingtimetakenaftercalculationisTs=40s(value fromthemoldflowreport).
5.10 Cycle time estimation
InjectionTime,Ti=6.25s
SolidifyingTime,Ts=40s
Moldopeningandclosingtime,Toc=2Td=2x5=10s
Where,Td=machinecycletime=assumedas5s
EjectionTime(Te)=2sapproximately
MoldlubricationtimeTL =3+(ns+nc)+(nc-1)
Numberofsidecores(ns)=2
Numberofcavities(nc)=1
TL=3+(2+1)+(1-1)=6s
Therefore,totalcycletime=Ti+Ts+Toc+Te+TL =6.25+40+10+2+6=64.25s
Totalcycletime=65s
Fromtheabovecalculationsthecycletimeis65seconds.
5.11 Determination of number of shots/hr.
Numberofshot/hr.=Totaltime/Totalcycletime =3600/65 =55shots/hr.
Hence,numberofshots/hr.is55.
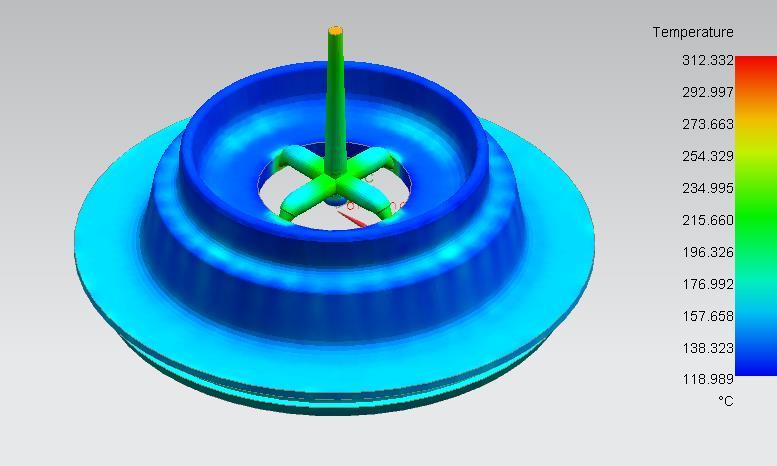
It focuses on the flow characteristics of plastics. After the holeisfilledbymoltenplastic,theflowcharacteristicsare measured.PlasterflowestimationisdoneinNXSimpleFill BasicandMoldedFlowConsultant.
TheapplicationMouldex3DcontrolsNXEasy-FillPlus.Early inthegoodsinnovationperiod,designersmaytestthemold abilityofplasticpiecedesignsthankstothisincludedmold simulatortool.Inordertooptimizegatenumber/locations, choosingmaterials,componentdesign,operationalcriteria, orproductchoice,programmersmayadditionallyperform adjustmentsinadvance.Autodesk'sMoldedFlowAdviseris asmall,inexpensivedevicethatsimulatesdesignthroughout elementmanufacture.Thankstotheelectronicsamplesthat are produced, time to market and costs can be drastically decreased.TheadvisermakesiteasiertoaddCADdatafrom severalwidelyusedprograms,suchasSolidWorks®,andit speedsupitemtraining.
6.1 Reports from the Flow Analysis


International Research Journal of Engineering and Technology (IRJET) e-ISSN: 2395-0056
Volume: 11 Issue: 09 | Sep 2024 www.irjet.net p-ISSN: 2395-0072


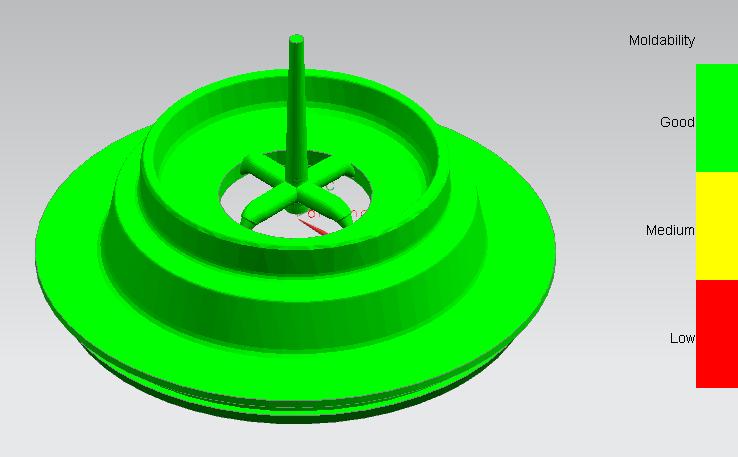
The part with less weld marks and a workable design is depicted in the image. Raise the liquid warmth or the container'sheattopreventweldstreaks.Loadingtimeought tobeshortened.Increasetherateofinjection.

Fig -10:Airtrap
Thesiteswherewindtrapmayoccurareindicatedbytheair captureresult.Thepresenceofair-trapsisindicatedbythe component's blue color. Escapes should be arranged in a circular pattern to prevent air trapping. The baking time oughttobeincreased.Movetheentrywaytoanewlocation. Reduce the speed at which you inject. Modify the valves locationorsize.
Afillingmoldisadevicemadeupofmultiplecomponents thatareusedtomold&coolhotmaterialintoacertainpart configuration. The tool's components as they appear in belowfigure.

Fig -11:Explodedviewof2-platemold

International Research Journal of Engineering and Technology (IRJET) e-ISSN: 2395-0056
Volume: 11 Issue: 09 | Sep 2024 www.irjet.net

8.1 Fabrication of tool
Partdesignswithanadequatedimensionalrangearecreated for everysingle elementafterthefinal layoutiscomplete. Uponreceiptofthedrawings,themakingdepartmentmust determine whether to buy or manufacture them. Conventionalpartssuchasbolts&nutsareobtainedfrom marketplaces, while pieces that cannot be constructed internally are contracted. Other components that can be manufacturedinternallyutilizingthe existingfacilitiesare retained. After deciding which pieces need to be made internally,themanufacturingbranchstartsdevelopment.


-14:Machiningoperations&machineuse
8.2 Assembly of the tool
Theconstructionworkperformedbythetoolmakerisquite skilled.Agoodtoolrequirestheabilityofthetoolmakerto maneuvereachpartintoitsdesignatedspotinaccordance with the layout. The two most crucial factors to take into account when assembling are attention and hygiene. The pieces will be destroyed if they are not handled carefully, whichwillresultinwastedtimeandincreasethepriceofthe mold.
Followingconstructionandassembly,thetoolverifiedthat theshapeandsizesofthecomponentweremanufacturedin accordancewiththecustomer'sspecifications.Try-outisthe process of subjecting a production tool to real-world operationalrequirementsonaninjectionmoldingmachine.
Themoldhasbeenclearedofoilanddirt.Oncethemold's halves are closed, the product flows by force via the equipment'snozzleandintothesupplyline.Thematerialis transportedtothemold'scavitiesby thefeedmechanism. Thesubstanceiskeptunderstressuntilthepartisdried.The partcanthenbeejectedafterthetoolhasbeenexposedand themechanismthatreleasesitassemblyisactivated.
The item is immediately examined after the test runs and thenforwardedtothemoldingqualitycontroldivisionfor theinitialtrialobservationreport,wheregradeassurance commentsareprovidedandthecomponentsisevaluatedin

all parameters. All the components are submitted for assemblyandinspectionifeachsizeisacceptable.
For the first several shots, less force is used to inject the substance.Duetotherecentdie,itisessentialtocheckfor substanceleaksandensurethatboththecore&cavityare suitable for the hot operating circumstances. Both the engagementpressure&theappliedflowarebeingsteadily maintained.Onthefirstattempt,defectivecomponentsthat werenotfilledweremade.
It is frequently difficult to identify the root reason behind molding errors due to the multitude of elements that influence injection formed item manufacture. Multiple reasons can lead to a single error. The reasons may have startedwiththepropertiesofthestuff,thecircumstanceof theprocess,themoldingmachine,oranothermold.Before tryingtofixanyerrors,it'scrucialtothoroughlyunderstand thedifferentkindsoferrorsandtheirrootcausesandfixes forthem.
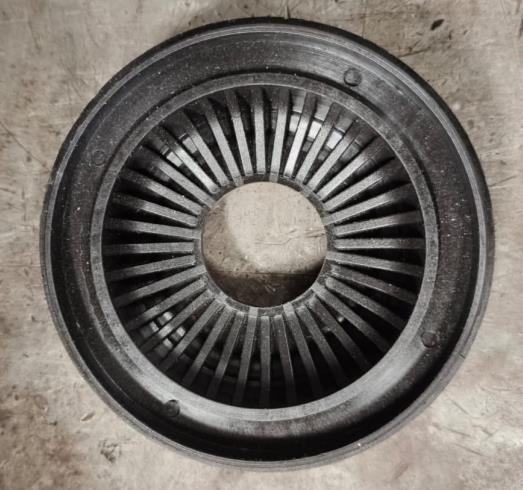
The component has the following defects that have been observed:
Weldlines
Air-traps&Airbubbles
Flowlines
Cracks
Flash
Ejectorpinmarks
Table -1: Inspectionreport


Inthiscovertwork,itisdescribedthelayoutofapolymer injection molding usedtocreatethetopbearingcover, an itemfoundincars Anexaminationoftheelementmaterial isconductedinordertoascertainitsphysical,chemical,and electrical characteristics as well as its mold ability. The machinethatismostsuitedtooperatethemoldprocessis selected through estimates. The NX Easy Fill Plus & Flow Advisorprogramwasusedtodothestudy.Beforetryingto fixatoolthatdoesn'tfunctionwellonthefirsttry,it'scrucial tothoroughlyunderstandthemanykindsoferrorsandthe rootcausefixesforthem.Then,thetoolisconstructedafter goingthroughthestagesofproduction.

International Research Journal of Engineering and Technology (IRJET) e-ISSN: 2395-0056
Volume: 11 Issue: 09 | Sep 2024 www.irjet.net p-ISSN: 2395-0072
If there are multiple kinds of bearing parts manufacturing The core & cavity frames can be changedtoreusethesamemoldbaseintheevent thatanotherpieceisdelivered.
Theoutcomesofthemoldflowstudycanbeutilized toenhancethemolddesign.Furtherresearchcanbe donetooptimizethesettingsandboostthemold's productivity.
FiniteElementAnalysisprogramcanbeutilizedto predicttoollongevityandperformstresstestand endurance analyses on the mold's component elements.
[1] Injectionmoulddesign,R.G.WPye,4thEdition,Affiliated East-WestPressPvtLtd
[2] Practicalguidetoinjectionmoulding,ArburgVannessa Good-ship,2ndEdition,SmithersGroupCompany.
[3] Mouldtheory,Handbook,GTTC-Mysore.
[4] Understanding injection mould design, Herbert Rees, HanserPublishers2001.
[5] Polymerscience&technology,JoelRFried,Universityof Cincinnati.
[6] Selectinginjectionmoulds,HerbertReesBruceCatoen, HanserGardnerPublications,Cincinnati.
[7] ASMhandbook,Failure,Causes&Analysis,Volume-15.
[8] Srinivasa G, L.G. Sannamani, Dr. S. N. Ravi Shankar, Influence of Gating System for Electrical Panel Part ComponentbySimulationFlowAnalysisusingNX-Easy FillAdvancedSoftware,ISSN2582-7421,Vol3,no9,pp 2148-2154,September2022.
[9] Abhilash V, L.G. Sannamani, Dr. S.N. Ravi Shankar, Design and Analysis of an Injection Mould Tool for PowerBoardHousingUsedinWashingMachine,ISSN 2582-7421,Vol(2)Issue(8)(2021)Page1423-1428.
[10] VinayakS.Patil,L.G.Sannamani,Dr.S.N.RaviShankar, DesignandSimulationStudyofMixerJarLidComponent usingNX-11.0andAutodeskMoldflowAdviserSoftware, ISSN2582-7421,Vol(2)Issue(8)(2021).
[11] Hongbo Fu, Hong Xu, Ying Liu, Zhaogang Yang, S. Kormakov, Daming Wu and Jingyao Sun, Overview of InjectionMoldingTechnologyforProcessingPolymers andtheirComposites,ESMater.Manuf.,20May2020.
[12] PrekshithY.P,Dr.S.N.RaviShankar,L.G.Sannamani, Flow Analysis for an Injection Mould Tool for the Component ION Base Plate, ISSN 2582-7421, Vol (2) Issue(8)(2021).
[13] TechnicalDirectoryonDesignandToolingforPlastics, CentralInstituteofPlasticsEngineeringandTechnology.
[14] E-Profit-Servo-201908.pdf - Electronica Plastic Machinesmanual.
[15] G.T.T.Cmoulddesignmanual.
[16] DMEstandardmanual.