
5 minute read
TECHNIQUE TASTERS

I Refuse to Become What You Call Normal

Jackie Ludlage, Elk Point, Alberta
SUPPLIES: Ranger Simon Hurley Create cardstock, Picket Fence Studios die, stamp and Life Changing Blender Brushes, Ranger non-stick craft mat, Dina Wakley Media acrylic paint, Dylusions stamps, Tim Holtz Distress ink and Distress Splatter Brush, Tonic Studios Nuvo Crystal Drops and Tim Holtz Mini Snips, Sookwang double-sided adhesive.

Scraps of Info
EVERYONE needs to play with this Tree die from Picket Fence Studios. It is absolutely gorgeous!
Welcome to Technique Tasters.
In each issue of Creative Scrapbooker Magazine we will share with you a number of different techniques to inspire your next crafty project. Want MORE Technique Tasters? Visit our video library for technique-rich shows that are fun and easy!
CreativeScrapbooker.ca/Videos

ADHERING INTRICATE DIES CATHIE ALLAN STYLE
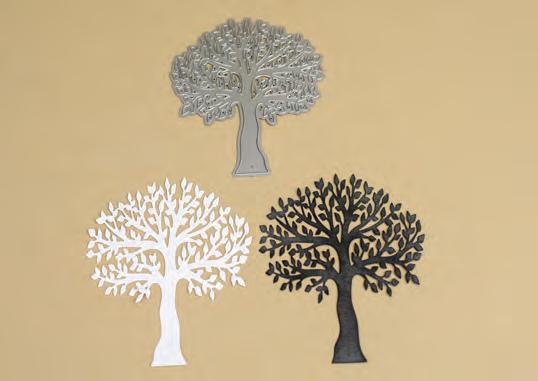
1. Using the Picket Fence Studios’ A Tree die, cut out two trees from Creative Scrapbooker Super Stock. Colour one of the trees, using Ranger Tim Holtz Distress ink.

2. Adhere the two trees together, using Therm O Web iCraft Mixed Media Adhesive, while offsetting them so white peeks out on one side.

3. Adhere a strip of Sookwang double-sided tape to a non-stick craft mat.
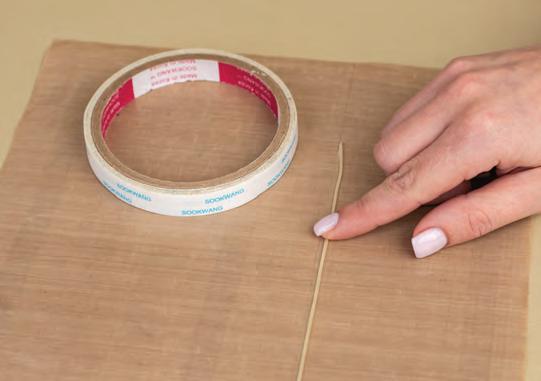
4. Remove the backing, and roll the tape into a log.

5. Adhere the adhesive log onto the back of the tree created in Step 2. You will be able to manipulate the log to go in and around all the intricate parts of the die.
Scraps of Info
This technique was discovered by our very own Cathie Allan. It has become a staple in our adhering bag of tricks. Thank you, Cathie!


Game On
Noreen Smith, Calgary, Alberta
SUPPLIES: All supplies by Creative Memories including the new Circle Cutter.
Scraps of Info
Trust Creative Memories to create a new tool that can cut AND draw circles in any size from 3” to over 11”! See how Noreen used it to cut the circle and outline it in the layout shown.

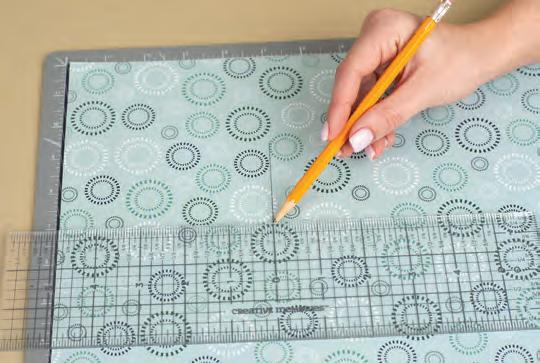
1. Place your paper onto the 13″ × 13″ Custom Cutting System Mat. Use a pencil and the zero-centering ruler to mark the centre of your circle with intersecting lines on your paper. These lines will help you position the Circle Cutter.

3. Place the dial/guide on top of the intersecting lines, lining up the two black guidelines on either side of the dial with the vertical pencil marks. Ensure that the horizontal pencil marks are in the centre of the window as you look down from above.
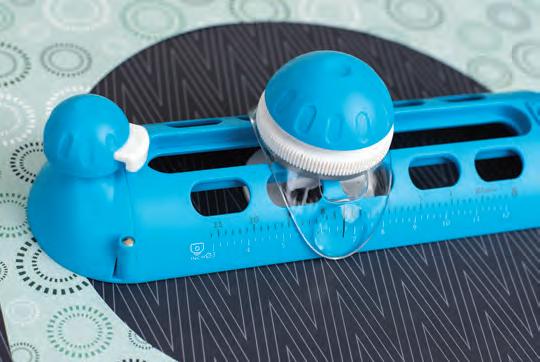
5. When drawing circles with the Circle Cutter, use the black markings that run from 11.25″ to 3″. Unscrew the white dial and slide the guide along the cutter until the black line matches the desired circle size. Tighten white dial. In this example, an 8.5″ circle will be drawn.

2. When cutting circles with the Circle Cutter, use the white markings that run from 3″ to 12″. (Note that the white markings for cutting on the opposite side are shown in cm.) Unscrew the white dial and slide the guide along the cutter until the black line matches with the desired circle size. Tighten white dial. In this example, an 8″ circle will be cut.

4. To cut the circle, press down on the blue dome on top of the dial/guide to secure the cutter to the paper. Press in the white button on the blade housing to engage the blade, and rotate the blade around, just as you would rotate a protractor. When finished, release the white blade button and lift the cutter up.
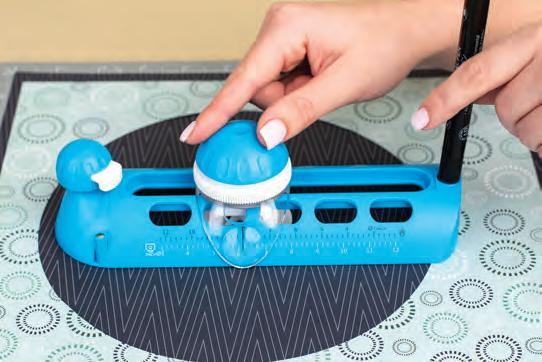
6. To draw the circle, place the dial/guide in the centre of the circle. (Note that you may want to measure to find the centre.) Press down on the blue dome on top of the dial/guide to secure the cutter to the paper. Place the Fine Tip end of a Creative Memories Dual-Tip Pen into the pen receptacle on the end opposite from the blade housing, and rotate the pen around, just as you would rotate a protractor.


Dog Days of Summer
Nicole Wright, Calgary, Alberta
SUPPLIES: Wild Whisper NWD patterned paper and stencil, Ranger Dina Wakley Media Gloss Spray and white Gesso, Sizzix dies, Sakura Gelly Roll pen, coffee filters, Scrapbook Adhesives by 3L E-Z Runner Grand and 3D Foam Tape.
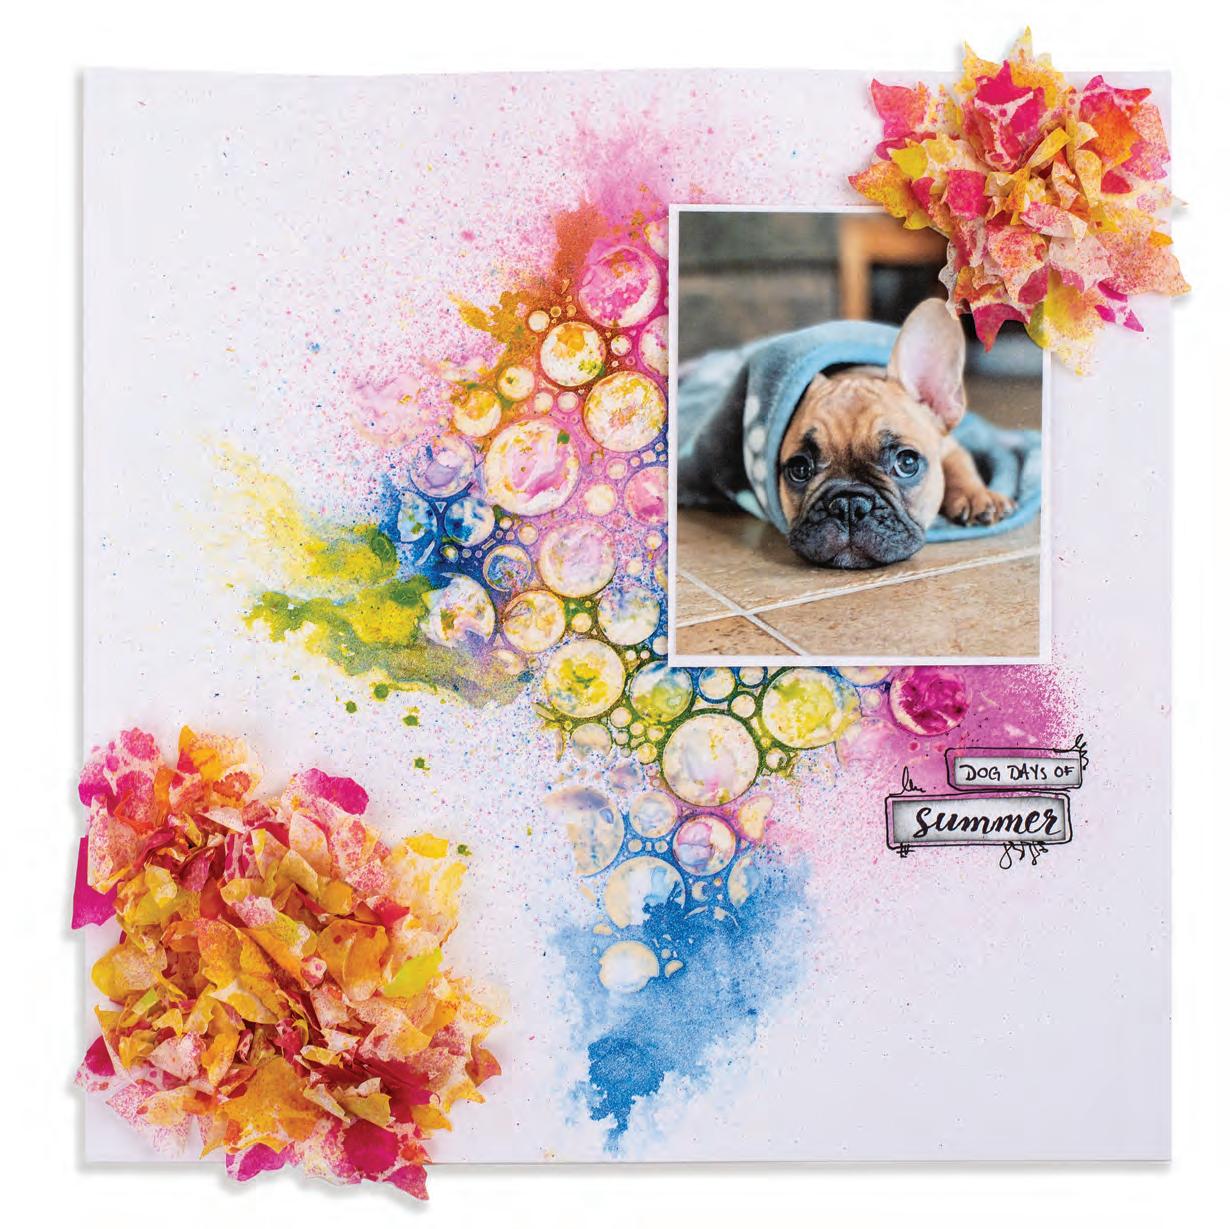
COFFEE FILTER FLORALS
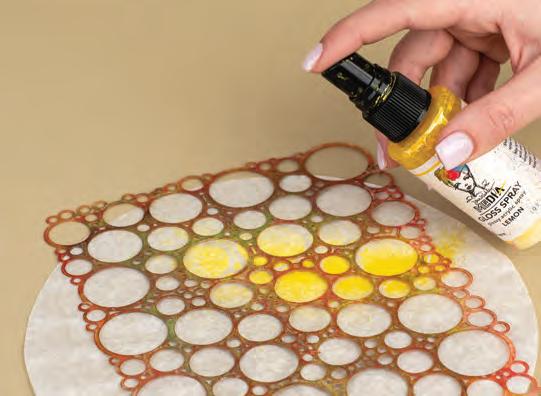
1. Lay your NWD stencil on a coffee filter, and add a few random sprays with Ranger Dina Wakley Gloss Spray. Remember to protect your work station when using sprays.
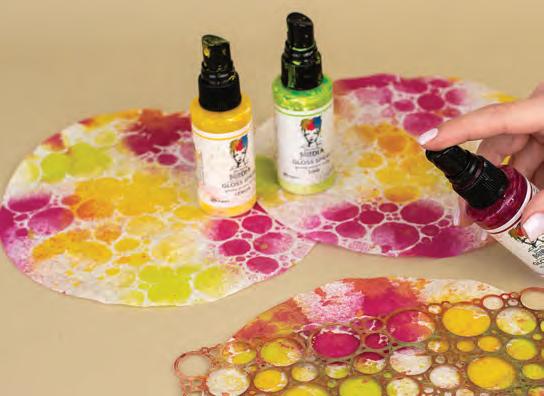
3. Create at least three patterned coffee filters. This is such a fun process, I know you will create more.
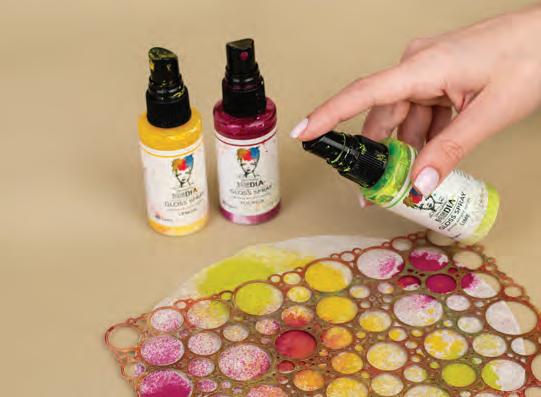
2. Repeat Step 1 with two complementary colours of the Ranger Dina Wakley Gloss Spray. I spray each colour three times in a triangular pattern to achieve even coverage.

4. Select your favourite floral die cut, and start cutting out your flowers. Then start building and adhering as many layers together as you like to create beautiful paper flowers for your next project.
Scraps of Info
I have found that I am able to cut six coffee filters at once with my die cut machine. However, separating the cut petals can be tricky. Much like opening a produce bag at the grocery store. It helps to have a paper pick on hand to separate the die cut petals.


