
3 minute read
OFF THE PAGE
offthe page

By Els Van de Burgt
Paper Flower Craft Caddy

SUPPLIES USED
Elizabeth Craft Designs • Florals 5 Die Set • Florals 6 Die Set • Florals 7 Die Set • Florals 8 Die Set • Florals 9 Die Set • Leaves & Branches Die Set • 240 g/90 lb white soft finish cardstock • Kids Choice Glue • Fine-pointed Tweezers
Other • craft caddy • floral stamens • die cutting machine • Ranger Archival Ink Pad colours of choice • blending tools • shaping tools

1.


3.
5. 2.
4.
1.
Die cut Florals 5, Florals 6, Florals 7, Florals 8, Florals 9, and Leaves and Branches from white soft finish cardstock.
Using a blending tool, colour the die cuts with choice of colour. First, lightly dab the colour onto the cardstock. Starting at the edge of the cardstock, use a circular motion to blend the colour.
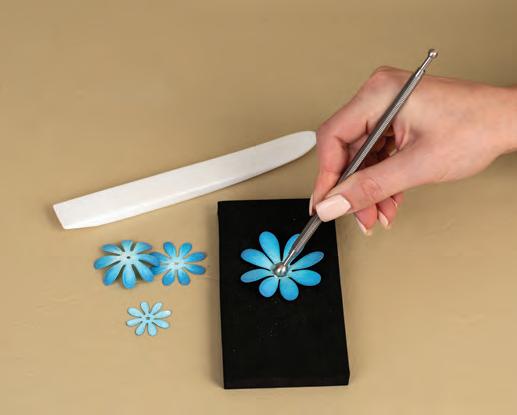
Shape the florals on a moulding pad to give them dimension. Use shaping tools of choice.
Assemble the paper flowers with Kids Choice Glue. Use the Fine-pointed Tweezers to handle the small die cuts. Add stamens or centres to the assembled flowers with Kids Choice Glue.
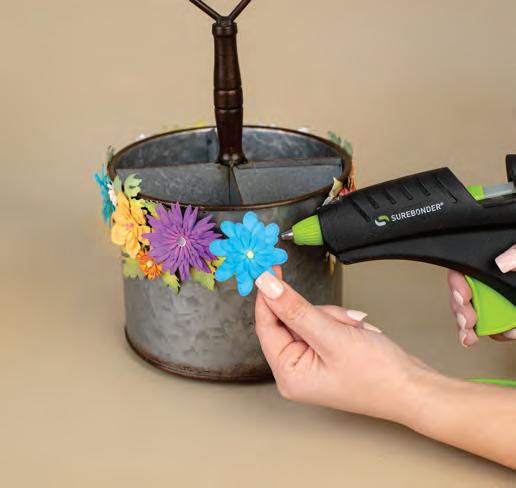
Using a hot glue gun, adhere the flowers to the craft caddy.
2.
3.
4.
5.
Swing into Summer


SWINGING BIRTHDAY CARD Cathie Allan, Stony Plain, Alberta

SUPPLIES: Creative Scrapbooker Super Stock, Impression Obsession stamps and dies, Embossable Window Plastic, Glitter Ritz glitter, StazOn and Tsukineko ink, Tombow markers, Scrapbook Adhesives by 3L, unknown ribbon.
By Cathie Allan



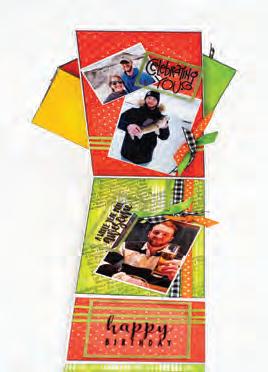
SUPPLIES: Creative Scrapbooker Super Stock, Impression Obsession stamps and dies, Embossable Window Plastic, Glitter Ritz glitter, StazOn and Tsukineko ink, Tombow markers, Scrapbook Adhesives by 3L, unknown ribbon.
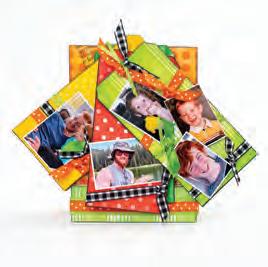
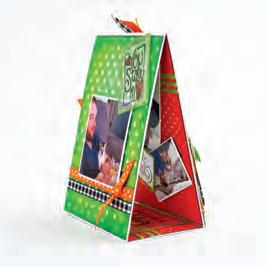
Summer is here and because of my spring-cleaning ritual I will be cruising into summer with some GREAT new ideas. Spring cleaning in my craft space is actually like a treasure hunt. I never know what I will find, and a couple weeks ago I struck gold. As I was sorting through a few of my boxes of old projects, cards, scrapbook pages, and altered cardstock, I came upon something that I had not done for a long time. I used to call them swing cards. A swing card has an element that “swings away” to reveal something underneath it. The moment my eyes laid on one of those old projects, I needed to play again. I decided to take the idea to a whole new level. I love it when an idea leads to another idea. I applied this new evolution of the swing card to a birthday card for my grand-handsome son, Liam. We now have the “stacked swing card,” in which I stacked four tags, each revealing a new photo of Liam. The only issue was that the front panel was heavy. So, I designed a special tent card format that supports the weight of this very special front panel. This is how new card formats evolve. This wrap-around tent card base actually has a section that comes forward and tucks underneath the bottom tag, thus locking the tent card base in place so it stays erect. The swing card/tag idea is a great element to add to your scrapbook page. Check out the matching scrapbook page I created, using similar techniques that I used to create the card.

If you are looking for something extra special to create for your loved one or a cool embellishment for your scrapbook page that reveals a hidden message, journaling, or just another photo, this Cathie Choice idea just may be what you are looking for. Happy summer, everyone … may it be your swingiest!


