12 minute read
From analogue mono to digital magic


Technique
KIT LIST
Advertisement
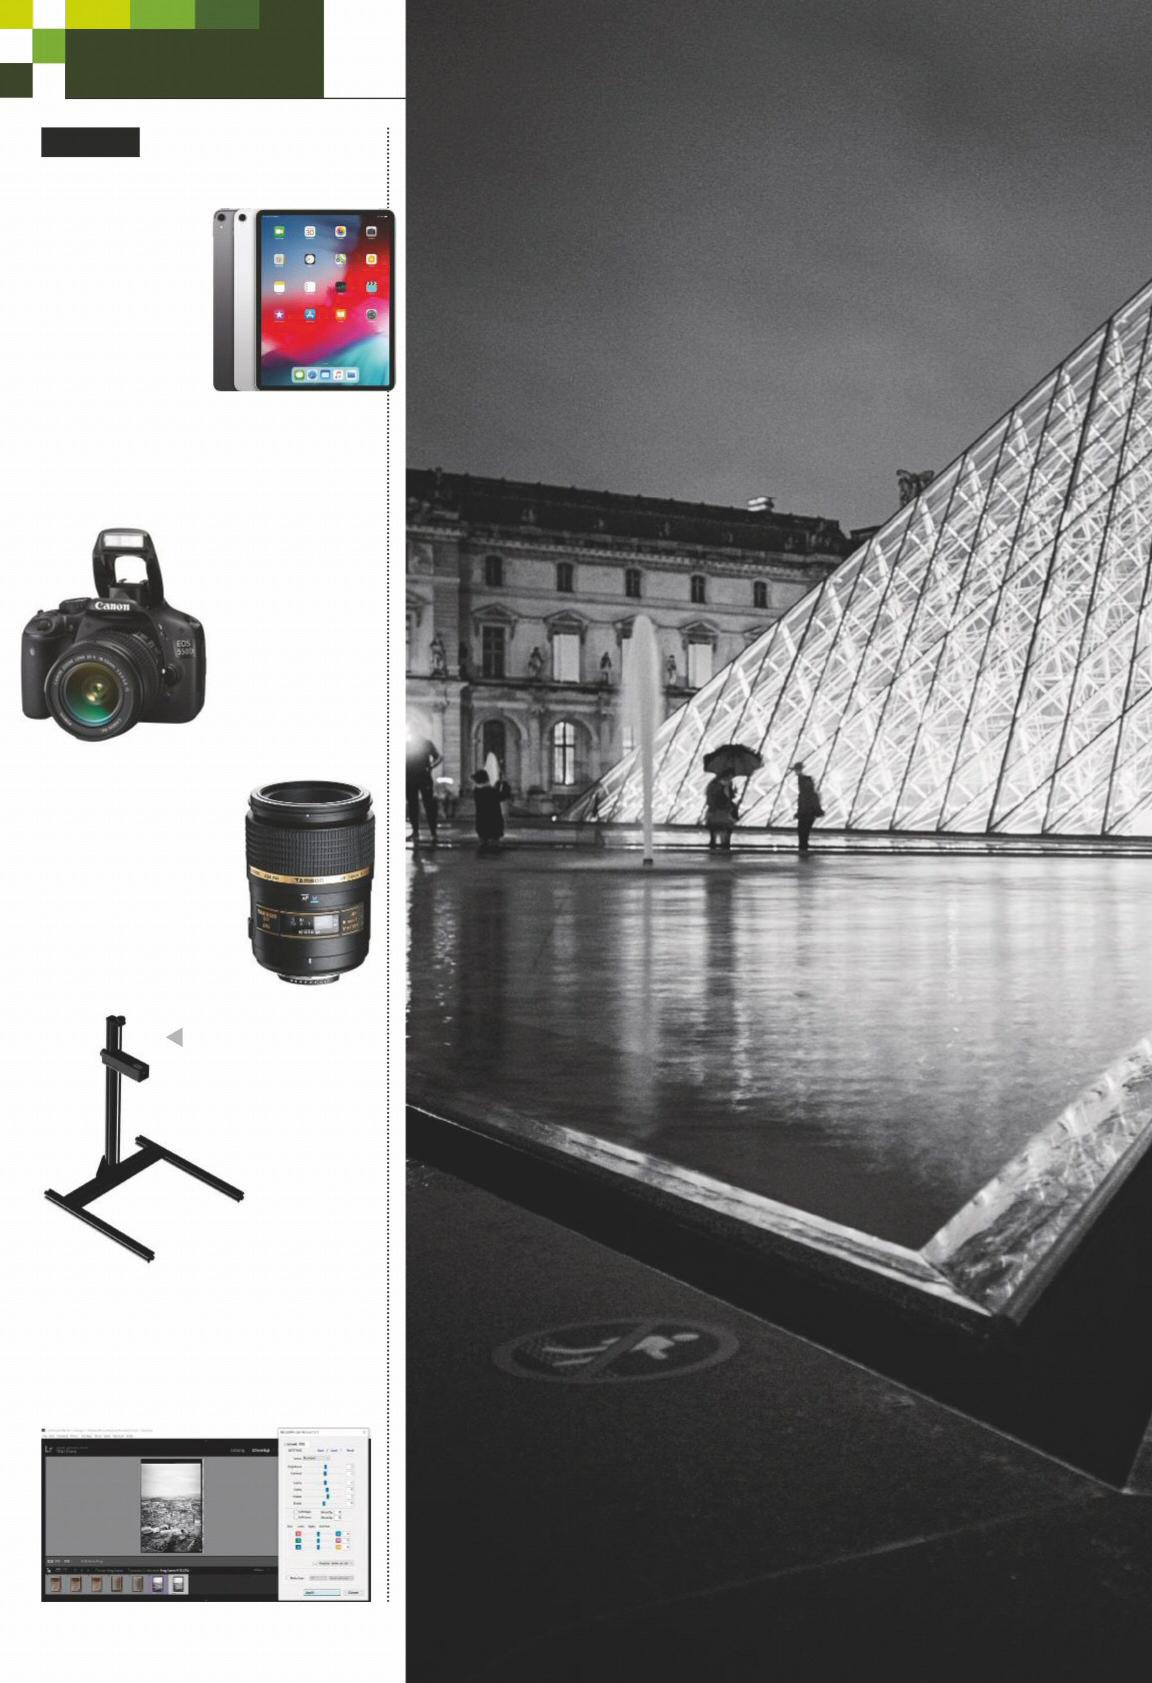
▲ ▲ Light source A light source is required to illuminate the negatives. This should be evenly lit, diffused and bright enough not to slow shutter speed. It could be as simple as an iPad / tablet that is set to a white screen, an LED panel light or even a standard light box. Or you may have some other kind of lighting in your kit collection.
▲ Digital camera Most modern digital cameras with interchangeable lenses will do a great job. If you don’t own one and will only use it for scanning, look for a cheap second-hand Canon model like the 550D as it has native macro lenses and tethering capabilities.
Macro lens A macro lens that can achieve 1:1 magnification ratio is essential for optimal scanning results as focus needs to be close enough for the negative to fill the entire frame without cropping in post-production. Don’t try to get away with a cheap zoom lens.
Copy stand The camera needs to be kept fixed and stable. It is possible to use a tripod but a dedicated copy stand is a much better option. Negative Supply’s ‘Pro Riser’ is an excellent choice. If you already own an enlarger you could also adapt this.
▲ Soft ware To convert your scanned negative into a positive, there are numerous options available. A great option for Lightroom users is Negative Lab Pro, a plug-in for inverting and editing scanned negs. You can get a free trial of 12 scans to see if it is right for you.
ALL PICTURES © MATT PARRY
This scanned image was shot on Ilford XP2 Super, using an Olympus XA3 film camera
From analog to digital m
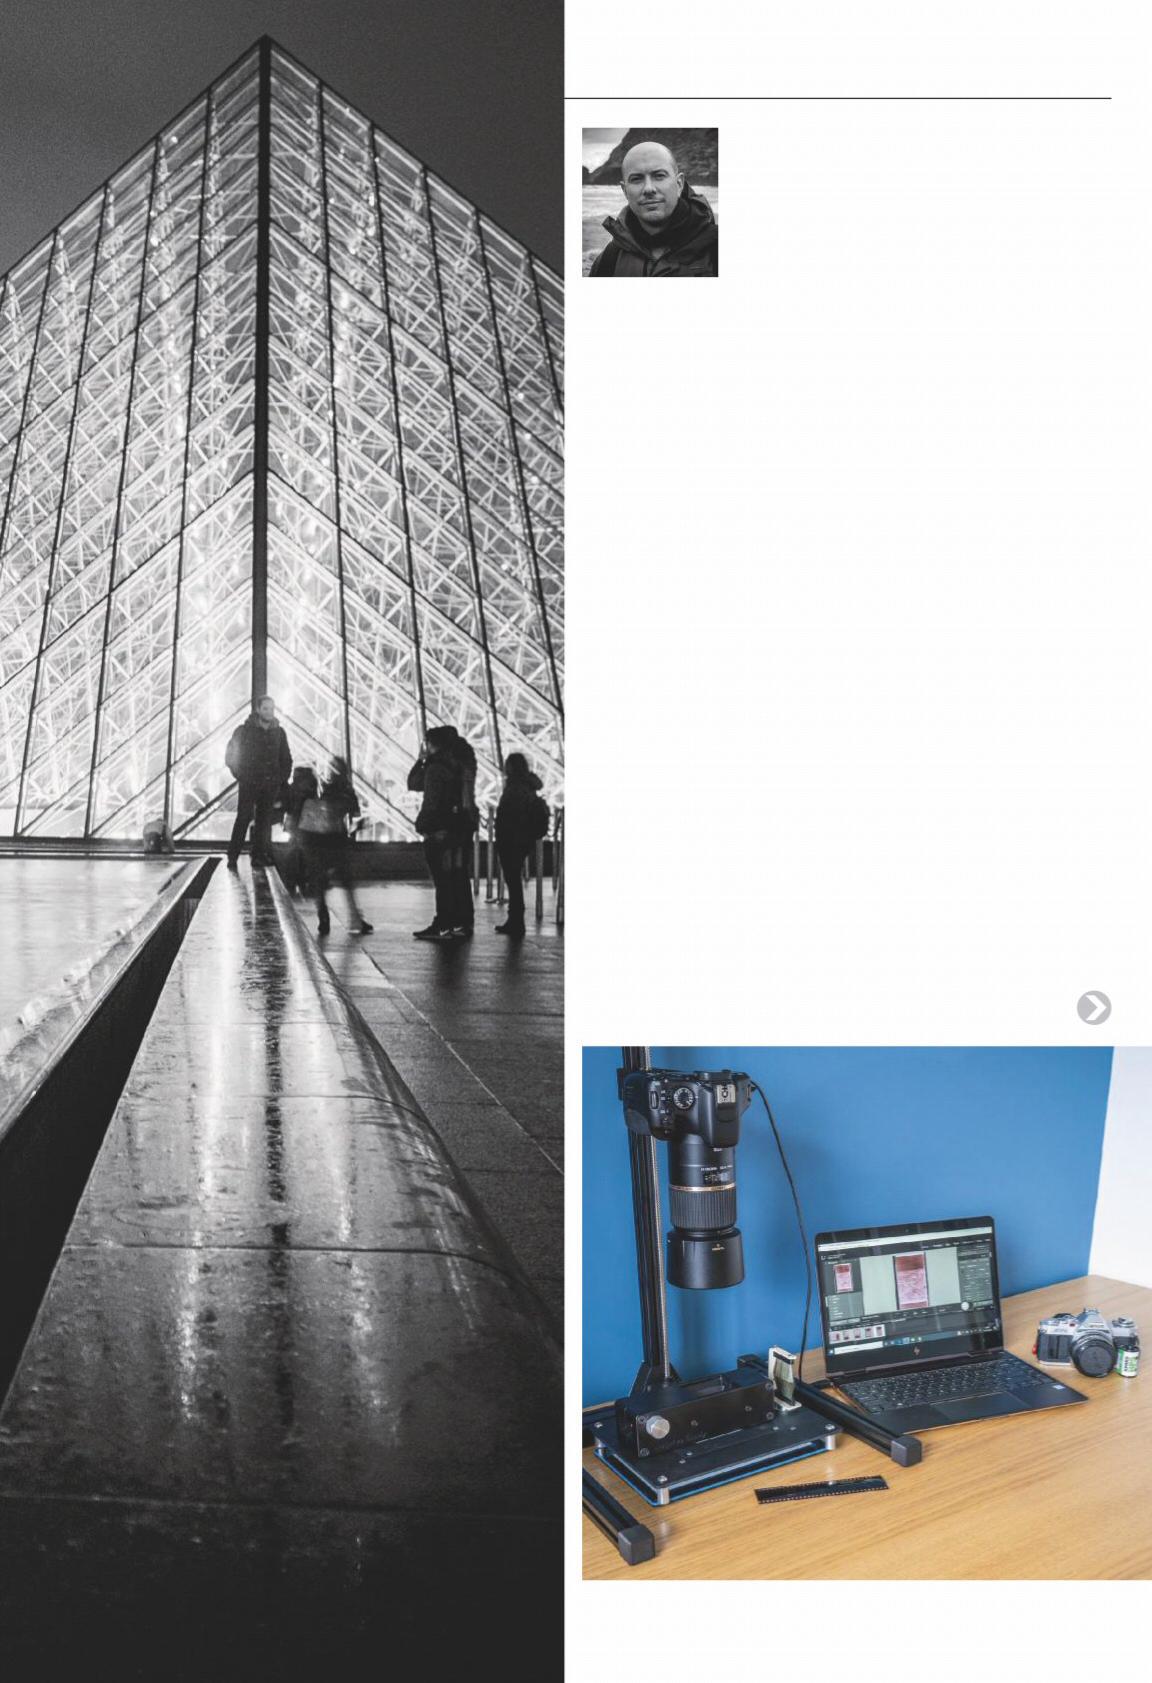
Matt Parry Matt Parry is an award-winning travel photographer and regular contributor to magazines and blogs. He is also the marketing manager for Ilford Photo, a role that reignited his love for film photography. His images can be seen at mattparryphoto.com or on Instagram @mattparryphotofilm .
Whatever your reasons for wanting to digitise your film archive, Matt Parry has lots of jargon-free insights and advice to make it a stress-free job
There are plenty of compelling reasons to use film. But with most images now shared or consumed online, many analogue photographers are also looking for the best ways to digitise their negatives. The principle of digitising negatives is nothing new but there are new tools to add to the tried and tested methods.
Lab scans offer convenience, particularly if you are outsourcing the processing at the same time. However, what if you process your own film or want a greater degree of control over the output? Maybe you have an archive of negatives you want to digitise, making lab costs prohibitive. If so, then home scanning could be the perfect solution to what you are looking for.
Film Scanners There is a lot of choice when it comes to dedicated film scanning hardware but not all the options are good. The unfortunate reality is you get what you pay for so striking a balance between value, affordability and quality is key.
Basic models may, at best, provide low-res scans from strips of 35mm negatives so if you are serious about digitising your negatives, or shoot multiple formats, it is advisable to stretch for a medium to higher-end flatbed scanner such as one of the Epson Perfection V series.
While not always fast, high-end flatbeds will offer superior resolution, higher Dmax (image density/greater shadow detail) and better sharpness versus their
ue mono magic
Keeping your negatives fl at
Flatbed scanners come with holders for most fi lm formats but keeping your negatives fl at when scanning with a digital camera is a challenge. Thankfully, there are a couple of innovative solutions around which smashed their Kickstarter targets.
Pixl-latr ● pixl-latr.com
Surprisingly simple yet understatedly clever in its concept, Pixl-latr holds the negative fl at using a series of gates which are adjusted to the type of negative (135, 120 up to 4x5in). It all rests on a translucent base plate which diffuses the light. Add in the fact it is very affordable and this becomes a great entry-level option for scanning with a digital camera.
Negative Supply ● www.negative.supply
Not cheap, but the 135 and 120 fi lm carriers do an excellent job of holding the fi lm fl at while ensuring the fi lm travels smoothly and in alignment. This can make the scanning process very quick with an un-cut 36-exposure 35mm fi lm taking less than 5 minutes.
Their Pro Mount adds levelling feet, raises the holder above the light source for better dispersion and adds the clever touch of an anti-static brush for removing dust particles. Accessories include their Pro Riser copy stand, slide fi lm and 4x5in holder accessories.
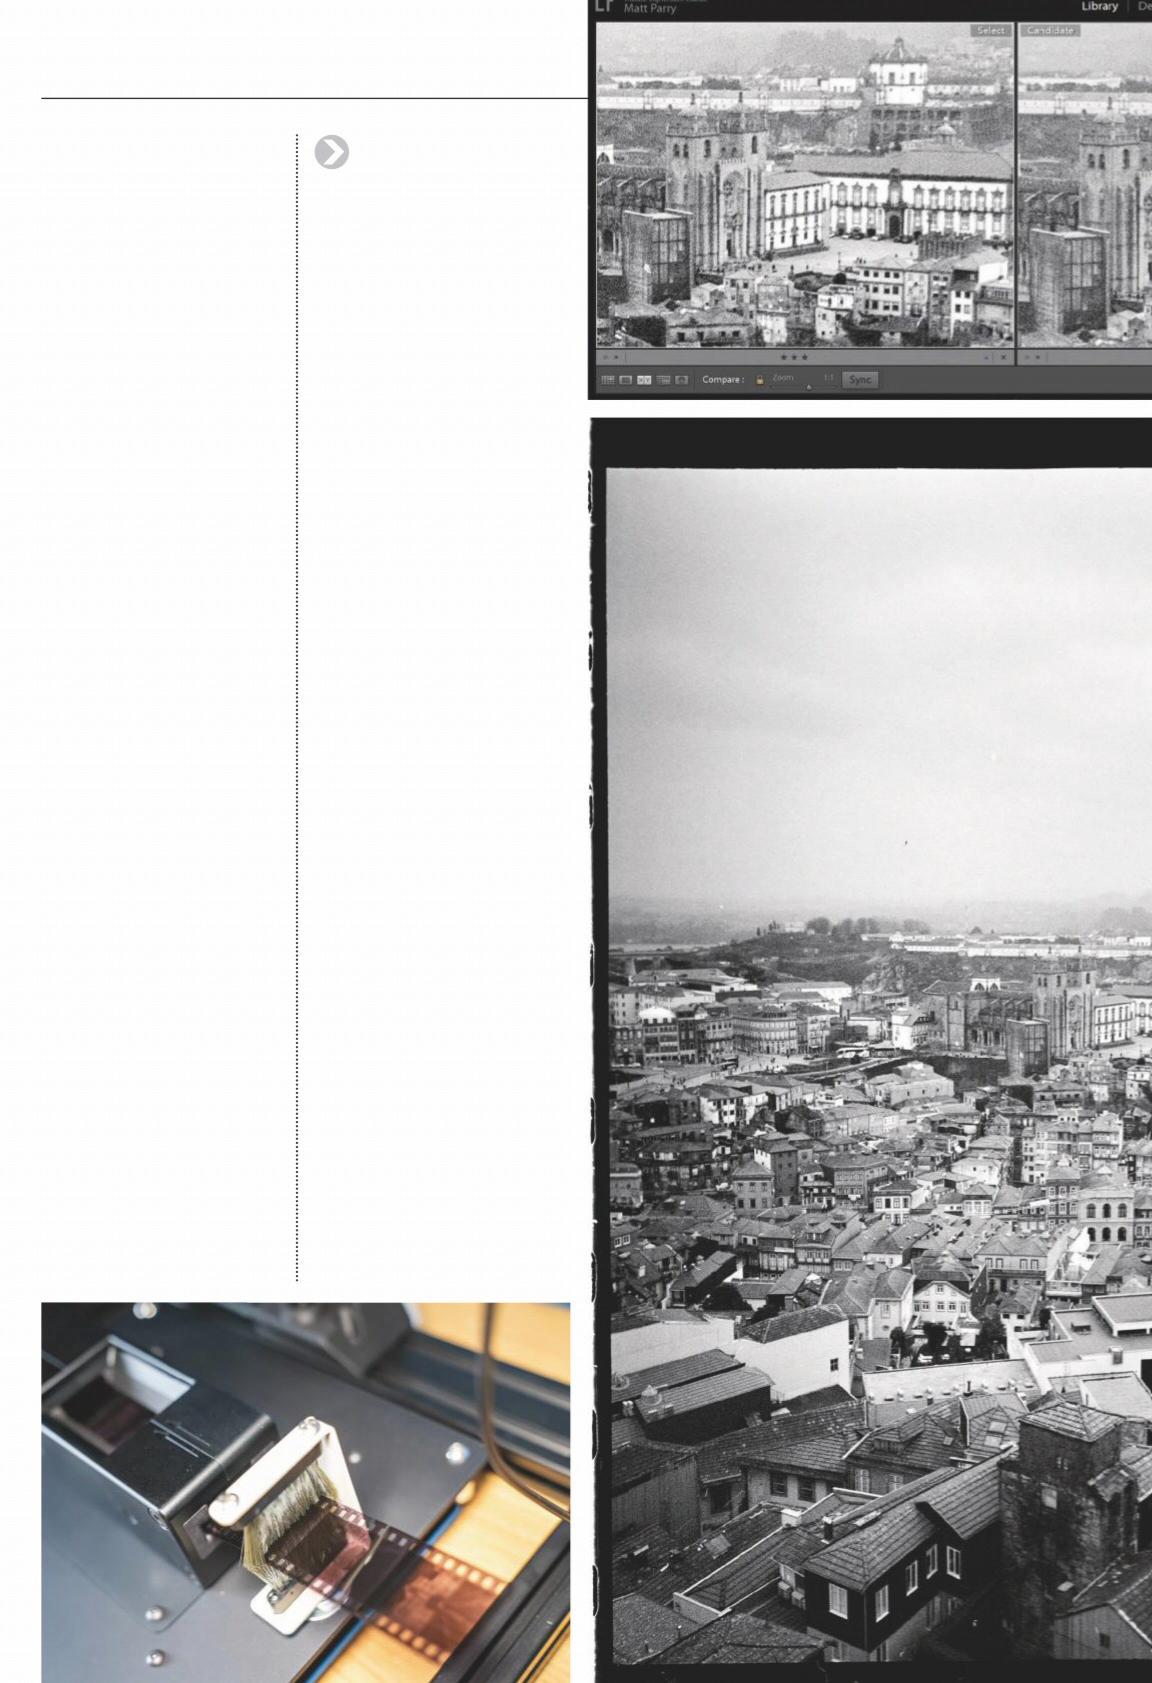
A Negative Supply 35mm film carrier along with anti static brush
cheaper counterparts. This will ultimately give you better-quality fi les with more scope for editing. Additionally, they will typically come packaged with software and a variety of holders for diff erent formats of negatives.
When buying or using any scanner it is worth bearing in mind that there is a law of diminishing returns when it comes to scan resolution so don’t be misled by the numbers. The sweet spot for resolution is rarely the maximum the scanner will off er and going above this may only generate marginal gains or even deteriorate the quality of the scan.
The scanner manufacturers will typically quote an optical resolution and an interpolated resolution, with the former being the key number to pay attention to. The manufacturer may also recommend an optimum resolution (dpi) setting and while this can be a good starting point, always run your own tests. When setting dpi remember: the higher it is, the longer the scan will take and the larger the fi nal fi le size – sometimes without a comparable jump in image quality.
Which digital camera? As the technology in fi lm scanners has stagnated, the technology and sensors in digital cameras have gone from strength to strength. It should therefore come as no surprise that using a DSLR or mirrorless camera for fi lm scanning is now an increasingly popular and practical option, aided by the fact that many fi lm photographers already own a digital camera.
Above left: Zoom-in on scan using Canon 550D and Tamron 90mm lens using Negative Supply Film Carrier and Negative Lab Pro. Above right: Zoom of scan with Fujifilm Frontier. No edits on either
Main image: Ilford XP2 Super film from an Olympus XA3 camera, scanned with Canon EOS 550D DSLR and Tamron 90mm lens, converted with Negative Lab Pro (the unedited zoom-in comparison above is based on this image)
DIGITISING BLACK & WHITE FILM Technique
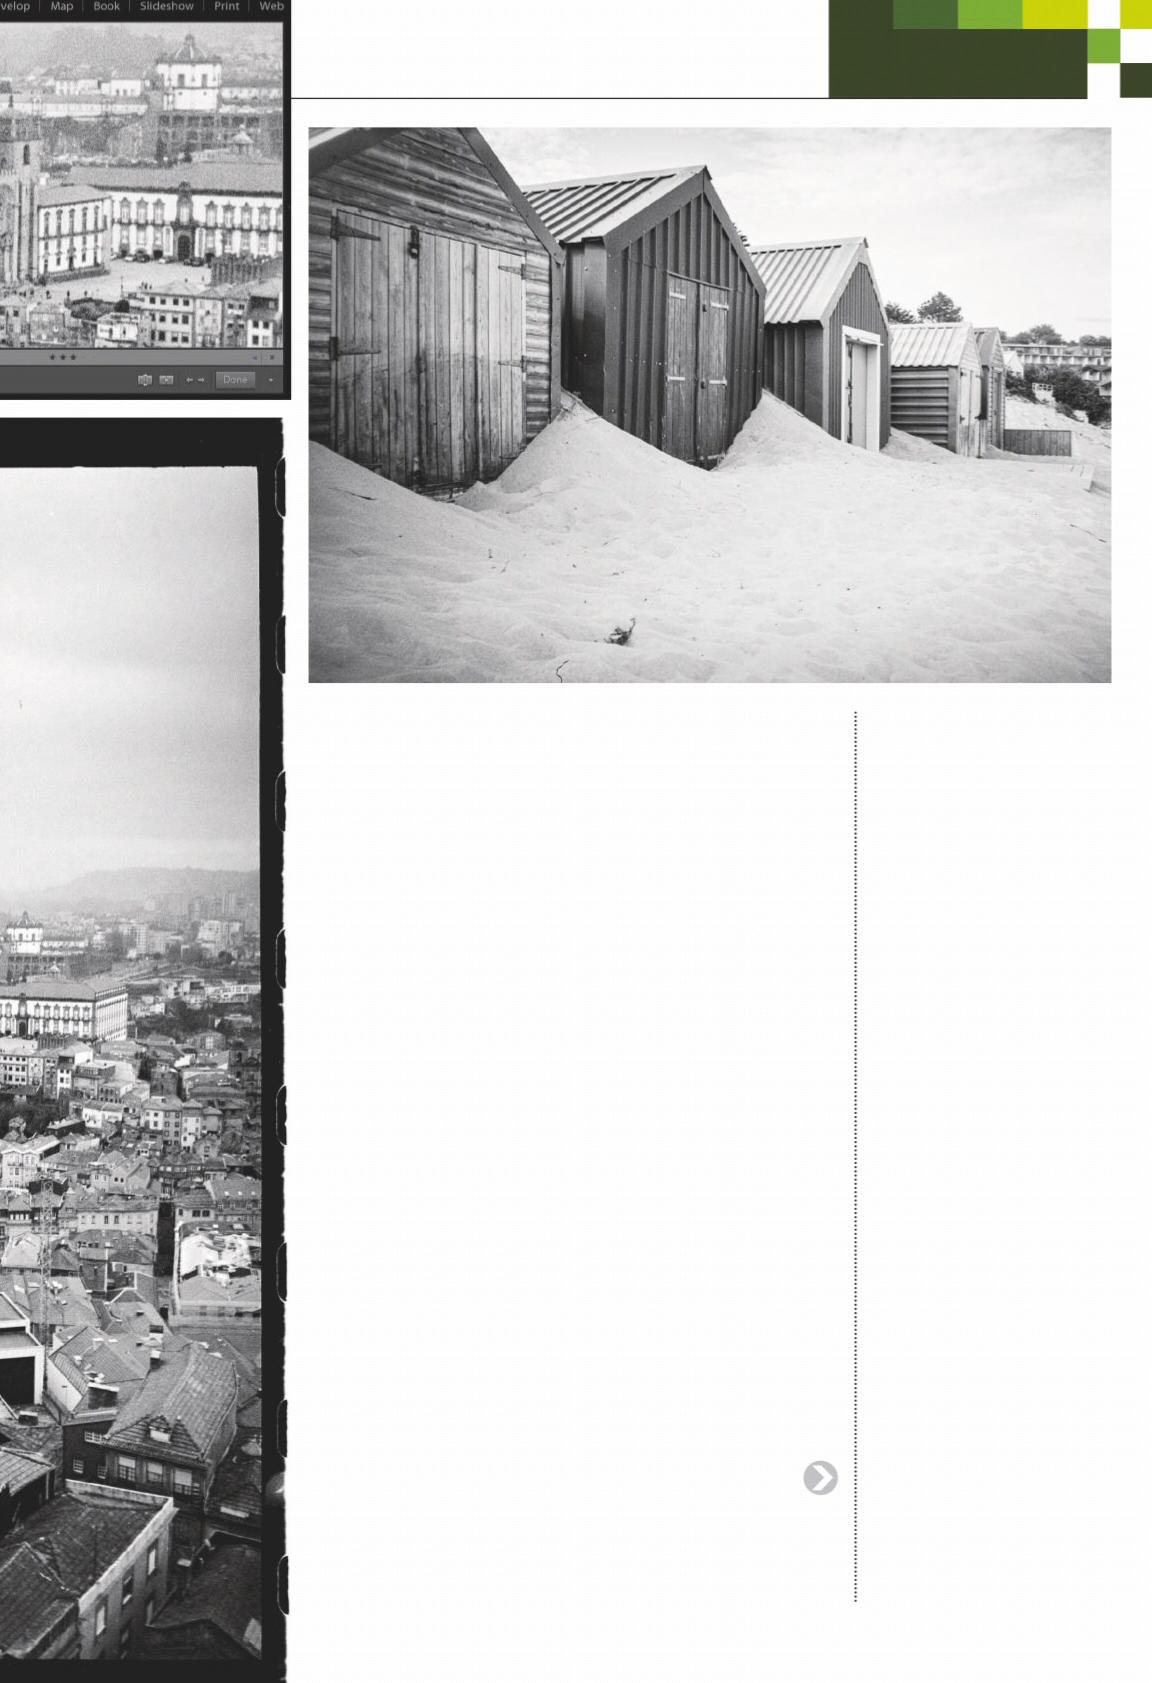
Beach huts shot using Ilford XP2 Super film inside an Olympus XA3
The principle of how they scan is essentially the same. The negative is illuminated from below with a light source while captured from above by a digital imaging sensor. The key diff erence is that the process of capturing it with a camera can be signifi cantly quicker than most dedicated scanners and creates comparable, if not superior, fi les.
While you may need some additional items for this process (see Kit List), it is important to realise that you don’t necessarily need the latest and greatest camera to scan negatives. In fact, any DSLR or mirrorless camera, whether crop sensor or full frame, released in the past decade should be capable of doing the job well.
The latest full-frame cameras will of course provide you with a raw fi le containing better resolution, more data and detail or even provide the option to utilise Pixel Shift type technology to combine multiple images of the same negative. Despite this, the lens choice is more important and best results will be achieved from using a macro lens or
macro extension tubes off ering 1:1 image magnifi cation.
Which soft ware? The software you use for scanning plays the vital role of inverting the negative and creating the base image to edit. Before you start scanning in earnest, it is advisable to take some time to test diff erent combinations of software and scan parameters to achieve a level of output you are happy with.
The software and drivers that come with fi lm scanners can be limited and are often not updated in line with computer operating systems. Thankfully, there are many third-party options with broader scanner compatibility. SilverFast and VueScan are well established and reasonably well-regarded while newcomers include Lightroom plug-in Negative Lab Pro. Also keep an eye out for Develop & Fix which has just launched a desktop version of its mobile scanning app.
Workfl ow wisdom Before you start any type of home processing it is worth establishing a
Digital ICE and black & white scans WHY DO your black & white scans show more blemishes than your colour ones?
There are a couple of very good reasons for this. The fi rst is because common marks such as dust and scratches will typically be more obvious appearing as very small areas of white contrasting against the grey background on an inverted black & white scan. The second reason is due to Digital ICE technology (Infrared cleaning).
Mini-lab and fl atbed scanners often include the option to apply Digital ICE (Image Correction & Enhancement) technology which automatically fi nds and removes dust and scratches.
While this works well on colour fi lm, it unfortunately doesn’t work on conventional black & white fi lms because the silver halide grains in a black & white negative confuse the infrared light scan that detects surface defects such as dust and scratches.
The exception to this rule is Ilford XP2 Super. This is a chromogenic black & white fi lm meaning it can use C-41 processing and scans like a colour fi lm thanks to its use of dyes rather than silver.
Technique
DIGITISING BLACK & WHITE FILM
workfl ow that makes the process as quick and effi cient as possible. Begin by using an air blower to remove the dust from your negatives before mounting into a holder. If using a fl atbed, check the glass is also clean from smears and dust. Dust and marks can often be cloned out in the edit but clean negatives could save you considerable effort.
If using a camera, tweak your aperture and shutter speed to match your setup. A good starting point is the camera’s lowest base ISO and shoot in aperture or manual mode and either auto or manual focus. Focus peaking in mirrorless cameras is a great help when using manual mode. Try a starting aperture somewhere around f/5.6 to give an optimum balance of depth of fi eld and brightness while
A long exposure pre-sunrise shot.
Ilford HP5 Plus, Rolleiflex f/2.8 F
Ilford Delta 100, Olympus XA3, scanned with Canon 550D, Tamron 90mm prior to white balance adjustment
Ilford Delta 100, Olympus XA3, scanned with Canon 550D, Tamron 90mm after white balance adjustment
aiming for a fast shutter speed to avoid any camera shake.
The ability to tether the camera and capture direct to your computer will also help your workfl ow and if shooting large format consider taking multiple images across the negative and use stitching software to piece it together for maximum resolution.
Finally, don’t forget to include storage and naming conventions for your newly scanned fi les. If your images end up in Lightroom it is also worth spending some time to add keywords such as fi lm stock, camera used, location, dates and even push/pull and development information.

Editing your black & white scans The digitisation of any negative will alter its look and is determined by the hardware, software or both. This may be more prevalent in colour fi lm but it still impacts black & white negatives, particularly contrast, sharpness and tone.
Editing your scans simply ensures you are determining the fi nal look, not the scanner. Despite this an ongoing debate rages over editing fi lm and the degree with which it is acceptable. Personally, I like to remain as faithful as possible to the characteristics of the fi lm stock so keep editing to a minimum. The benefi t of this is a relatively quick and simple workfl ow.
I limit edits to spot removing dust and scratches, straightening / cropping as well as tweaking exposure, contrast, highlights and shadows. I might add a light touch of clarity / dehaze if needed but I avoid sharpening and noise reduction tools as I fi nd these tend to impact the grain more than the structure of the image, particularly in 35mm scans where grain is already more pronounced. After all, even digitised, I still prefer my grain to look like grain, not pixels.
Why not just shoot digital? If the end-goal of shooting fi lm is only to scan and share online then why not just shoot digital in the fi rst place? This is a good question that many ask.
Even without darkroom printing, the process of shooting fi lm is still a different experience to digital. The limitations of frames, the aesthetics, the choice of formats, the opportunity to process fi lm, the tangible output of a negative, the delay and anticipation of seeing your images, the necessity to think in black & white or the particular colour palette of your chosen fi lm stock, the need to understand the latitude of that fi lm, the way it slows you down and can make you more considered in your choice of shots and so on...
All are compelling reasons to work with fi lm which is why so many of us still choose to shoot it. Film is still hugely rewarding.
So good, we got it... ... again!
Wex Photo Video is a Which? Recommended Provider. Source: Which? members’ annual survey June-July 2018 and 2019.
Get more camera for your money
Choose from a range of used photographic and video equipment
All stock is quality checked and graded accordingly 30-day returns policy †
All used items come with a 12-month warranty*
Visit www.wex.co.uk/used or call us on 01603 486413 Monday - Friday
CELEBRATING THE YEAR’S BEST PRODUCTS
GLOBAL AWARDS 2019-20 visit www.eisa.eu for the winners

EISA is the unique collaboration of 62 member magazines and websites from 29 countries, specialising in all aspects of consumer electronics from mobile devices, home theatre display and audio products, photography, hi-fi and in-car entertainment. Now truly international with members in Australia, India, Canada, the Far East and USA, and still growing, the EISA Awards and official logo are your guide to the best in global consumer technology!

