

Pasta Roja RED BODY
PASTA ROJA RED BODY


ALFARO BRILLO
7,5 x 15 · 3" x 6"


ALFARO
Blanco Brillo
7,5 x 15 cm (R26)

Moldura
Blanco Brillo 4 x 15 cm (M03)
Torelo
Blanco Brillo 2 x 15 cm (M11)

ALFARO
Gris Brillo
7,5 x 15 cm (R26)

Moldura ALFARO
Gris Brillo
4 x 15 cm (M03)
Torelo ALFARO
Gris Brillo
2 x 15 cm (M11)

ALFARO
Grafito Brillo
7,5 x 15 cm (R26)

Moldura ALFARO
Grafito Brillo
4 x 15 cm (M03)
Torelo ALFARO
Grafito Brillo
2 x 15 cm (M11)

ALFARO
7,5 x 15 cm (C25)

ALFARO
Brillo 7,5 x 15 cm (C25)

ALFARO
Negro Brillo
7,5 x 15 cm (R26)

Moldura
Negro Brillo
4 x 15 cm (M03)
Torelo
Negro Brillo
2 x 15 cm (M11)

ALFARO
Bone Brillo
7,5 x 15 cm (R26)

Moldura ALFARO
Bone Brillo 4 x 15 cm (M03)
Torelo ALFARO
Bone Brillo 2 x 15 cm (M11)

ALFARO
Brillo
7,5 x 15 cm (C25)

ALFARO
Sage Brillo
7,5 x 15 cm (R26)

Moldura
ALFARO
Sage Brillo
4 x 15 cm (M03)
Torelo ALFARO
Sage Brillo
2 x 15 cm (M11)

ALFARO BRILLO
7,5 x 15 · 3" x 6"
ALFARO MATE
7,5 x 15 · 3" x 6"

ALFARO MATE


ALFARO
Blanco Mate
7,5 x 15 cm (R26)

Moldura Blanco Mate
4 x 15 cm (M03)
Torelo Blanco Mate
2 x 15 cm (M11)

ALFARO Copper Mate
7,5 x 15 cm (C25)

x 15 cm (M03)
Torelo ALFARO Gris Mate 2 x 15 cm (M11) ALFARO Gris Mate 7,5 x 15 cm (R26)

ALFARO Gold Mate
7,5 x 15 cm (C25)
x 15 cm (R26)


Grafito Mate
x 15 cm (M03)
Torelo ALFARO Grafito
x 15 cm (M11) ALFARO Grafito Mate

ALFARO Silver Mate 7,5 x 15 cm (C25)


BISELADO Y LISTELO


* También disponible en pasta blanca. Ver series PARIS y NEW YORK Also available in white body. See ranges PARIS & NEW YORK

BISELADO
Blanco Brillo
7,5 x 15 cm (R22)

BISELADO Negro Brillo 7,5 x 15 cm (R32)

BISELADO
Blanco Mate 7,5 x 15 cm (R22)
Listelo PIRÁMIDE
Blanco Brillo
2,5 x 15 cm (C27)
Listelo PIRÁMIDE Negro Brillo 2,5 x 15 cm (C27)
Listelo PIRÁMIDE
Blanco Mate 2,5 x 15 cm (C27)
Listelo PIRÁMIDE
Negro Mate
2,5 x 15 cm (C27)

BISELADO Marfil Brillo 7,5 x 15 cm (R25)


7,5 x 15

(R31)
x 15

x 15


GLAMOUR


x
·
x
Cenefa BAIKAL
7,5x15 (C27)
Cenefa GARDA
7,5x15 (C27)
GLAMOUR Neutro 7,5x15 (R22)
Moldura CHIC Neutro 4x15 (M14)
Torelo CHIC Neutro 2x15 (M09)
GLAMOUR Beige 7,5x15 (R22)
Moldura CHIC Beige 4x15 (M14)
Torelo CHIC Beige 2x15 (M09)
GLAMOUR Bone 7,5x15 (R22)
Moldura CHIC Bone 4x15 (M14)
Torelo CHIC Bone 2x15 (M09)
GLAMOUR
7,5 x 15 · 3" x 6"


GLAMOUR Gris
7,5x15 (R22)

Moldura CHIC
Gris 4x15 (M14)
Torelo CHIC
Gris 2x15 (M09)


GLAMOUR Carmín
7,5x15 (R29)

Moldura CHIC
Carmín 4x15 (M14)
Torelo CHIC
Carmín 2x15 (M09)

GLAMOUR Burdeos
7,5x15 (R29)

Moldura CHIC
Burdeos 4x15 (M14)
Torelo CHIC
Burdeos 2x15 (M09)


Bondi
7,5x15 (R29)

Moldura CHIC
Bondi 4x15 (M14)
Torelo CHIC
Bondi 2x15 (M09)


Marino
7,5x15 (R29)

Moldura CHIC
Marino 4x15 (M14)
CHIC
Marino 2x15 (M09)


Cenefa BAIKAL
7,5x15 (C27)
Cenefa GARDA 7,5x15 (C27)
GLAMOUR
GLAMOUR
Torelo
GLAMOUR Verde
7,5x15 (R29)
Moldura CHIC Verde 4x15 (M14)
Torelo CHIC Verde 2x15 (M09)
Cenefa NESS
7,5x15 (C27)
GLAMOUR

x 15 · 3" x 6"
GLAMOUR


7,5 x 30 · 3" x 12"

ARTISTIC BRILLO


ARTISTIC Blanco Brillo
x 30 cm (R37)
ARTISTIC Copper Brillo 7,5 x 30 cm (C32)
ARTISTIC Bone Brillo 7,5 x 30 cm (R37)
ARTISTIC Gold Brillo 7,5 x 30 cm (C32)
ARTISTIC Grafito Brillo
Brillo
ARTISTIC Silver Brillo 7,5 x 30 cm (C32)
ARTISTIC Sage Brillo 7,5 x 30 cm (R37)
ARTISTIC Gris Brillo 7,5 x 30 cm (R37)
ARTISTIC MATE
7,5


x 30 · 3" x 12"
ARTISTIC Blanco Mate 7,5 x 30 cm
ARTISTIC Copper Mate 7,5 x
(C32)
ARTISTIC Sage Mate
ARTISTIC Negro Mate 7,5 x
ARTISTIC Gris Mate 7,5 x 30 cm (R37) ARTISTIC Grafito Mate 7,5 x 30 cm (R37)
ARTISTIC Bone Mate
7,5 x 30 cm (R37)
ARTISTIC Blanco Mate
7,5 x 30 cm (R37)

BISELADO Y LISTELO


BISELADO Y LISTELO
10 x 20 · 4" x 8"


CHIC Bone 15x15 (R22)


CHIC Bone 4x15 (M14) Torelo CHIC Bone 2x15 (M09)


CHIC Beige 15x15 (R22)


CHIC Beige 4x15 (M14) Torelo CHIC Beige 2x15 (M09)


Cenefa BAIKAL
7,5x15 (C27)
Cenefa GARDA
7,5x15 (C27)
CHIC Beige 15x15 (R03)
Decorado
Moldura
CHIC Bone 15x15 (R03)
Decorado
Moldura


CHIC
15 x 15 · 6" x 6"


Cenefa GARDA
7,5x15 (C27)
Cenefa NESS 7,5x15 (C27)
Cenefa BAIKAL
7,5x15 (C27)
Cenefa GARDA 7,5x15 (C27)
CHIC Burdeos 15x15 (R13)
Decorado CHIC Burdeos 15x15 (R22)
Moldura CHIC Burdeos 4x15 (M14) Torelo CHIC Burdeos 2x15 (M09)
CHIC Carmín 15x15 (R13)
Decorado CHIC Carmín 15x15 (R22)
Moldura CHIC Carmín 4x15 (M14) Torelo CHIC Carmín 2x15 (M09)
CHIC Verde 15x15 (R13)
Decorado CHIC Verde 15x15 (R22)
Moldura CHIC Verde 4x15 (M14) Torelo CHIC Verde 2x15 (M09)
CHIC Neutro 15x15 (R03)
Decorado CHIC Neutro 15x15 (R22)
Moldura CHIC Neutro 4x15 (M14) Torelo CHIC Neutro 2x15 (M09)


CHIC
15 x 15 · 6" x 6"


Cenefa GARDA
7,5x15 (C27)
Cenefa GARDA
7,5x15 (C27)
Cenefa NESS
7,5x15 (C27)
Cenefa NESS
7,5x15 (C27)
CHIC Marino 15x15 (R13)
Decorado CHIC Marino 15x15 (R22)
Moldura CHIC Marino 4x15 (M14) Torelo CHIC Marino 2x15 (M09)
CHIC Bondi 15x15 (R13)
Decorado CHIC Bondi 15x15 (R22)
Moldura CHIC Bondi 4x15 (M14) Torelo CHIC Bondi 2x15 (M09)
CHIC Gris 15x15 (R03)
Decorado CHIC Gris 15x15 (R22)
Moldura CHIC Gris 4x15 (M14) Torelo CHIC Gris 2x15 (M09)

15 x 15 · 6" x 6"


PATINÉ Blanco 15 x 15 cm (R15)

Moldura
Blanco Brillo 4 x 15 cm (M03)
Torelo Blanco Brillo 2 x 15 cm (M11)

PATINÉ Gris 15 x 15 cm (R05)


* Combina con: Matches with: serie RACINE 15 x 15


PATINÉ Beige
x 15 cm (R05)

PATINÉ Ocre 15 x 15 cm (R05)

(R05)


Moldura PATINÉ Gris 4 x 15 cm (M03) Moldura
Torelo PATINÉ Gris 2 x 15 cm (M11)
Moldura PATINÉ Beige 4 x 15 cm (M03) Moldura PATINÉ Ocre 4 x 15 cm (M03)
Brillo 4 x 15 cm (M03)
Torelo PATINÉ Beige
x 15 cm (M11)
Torelo PATINÉ Ocre
(M11)

PATINÉ Blanco
PATINÉ Turquesa
PATINÉ
15 x 15 · 6" x 6"


PATINÉ Melado
15 x 15 cm (R05)

PATINÉ Turquesa
15 x 15 cm (R05)

Moldura
PATINÉ Melado
4 x 15 cm (M03)

Moldura
PATINÉ Turquesa 4 x 15 cm (M03)
Torelo PATINÉ Melado
2 x 15 cm (M11)
Torelo PATINÉ Turquesa
2 x 15 cm (M11)

Ángulo Mold. PATINÉ
Todos los colores
4 x 2 cm (M01)


PATINÉ Verde 15 x 15 cm (R05)
PATINÉ Lavanda 15 x 15 cm (R05)
PATINÉ Marino 15 x 15 cm (R05)

Moldura PATINÉ Verde 4 x 15 cm (M03)

Moldura PATINÉ Lavanda 4 x 15 cm (M03)

Moldura PATINÉ Marino 4 x 15 cm (M03)


Torelo PATINÉ Verde 2 x 15 cm (M11)
Torelo PATINÉ Lavanda 2 x 15 cm (M11)
Torelo PATINÉ Marino 2 x 15 cm (M11)
Decor PATINÉ Frío 15 x 15 cm (R32) * 11 diseños diferentes. 11 different patterns.
Decor PATINÉ Cálido 15 x 15 cm (R32) * 11 diseños diferentes. 11 different patterns.
Ángulo Torelo PATINÉ Todos los colores
2 x 2 cm (M01)
PATINÉ
15 x 15 · 6" x 6"


Decor PATINÉ Gris 15 x 15 cm (R32) * 11 diseños diferentes. 11 different patterns.


15 x 15 · 6" x 6"


* COMBINA con Matches with: serie PATINÉ 15 x 15


RACINE Decor 15x15 cm (R32)


* 12 diseños diferentes. 12 different patterns.

RACINE Blanco 15x15 cm (R03)
* 12 diseños diferentes. 12 different patterns.


Embalaje Packing · 15 x 15 6" x 6"

ACRÓPOLIS
20 x 20 · 8" x 8"


x 20 cm (P02)


Grey
x 20 cm (P02)


PASTA ROJA RED BODY
DELFOS Grey
CRONOS
HYDRA Green
OLYMPIA Grey
OLYMPIA Grey 20 x 20 cm
DELFOS Mix
ACRÓPOLIS
20 x 20 · 8" x 8"

ACRÓPOLIS
20 x 20 · 8" x 8"

ACRÓPOLIS

20 x 20 · 8" x 8"
OLYMPIA
ACRÓPOLIS
20 x 20 · 8" x 8"

ACRÓPOLIS
20 x 20 · 8" x 8"

ACRÓPOLIS
20 x 20 · 8" x 8"


ASTURIAS

15 diseños distintos mezclados en la caja 15 different designs mixed in the box


Embalaje Packing
ASTURIAS Cotto

ATLAS


Embalaje Packing
ATLAS


Torelo COSTA Beige


Marrón


Cendra


Decor
Decor COSTA Cendra


Blanco 20 x 20 cm (R15)

REFLET Blanco 5 x 20 cm (M06)
REFLET Blanco 2 x 20 cm (M04)

20 x 20 cm (R06)

REFLET Gris 5 x 20 cm (M06)
REFLET Gris 2 x 20 cm (M04)


Arena 20 x 20 cm (R06)

REFLET Arena 5 x 20 cm (M06)
REFLET Arena 2 x 20 cm (M04)


Moldura
Torelo
Moldura REFLET Taupe 5 x 20 cm (M06)
Torelo REFLET Taupe 2 x 20 cm (M04)
STUCCO Taupe 20 x 20 cm (R06)
Moldura
Torelo
STUCCO
STUCCO
Torelo
Moldura


STUCCO
20 x 20 · 8" x 8"


NÚMERO DE DISEÑOS NUMBER OF DESIGNS


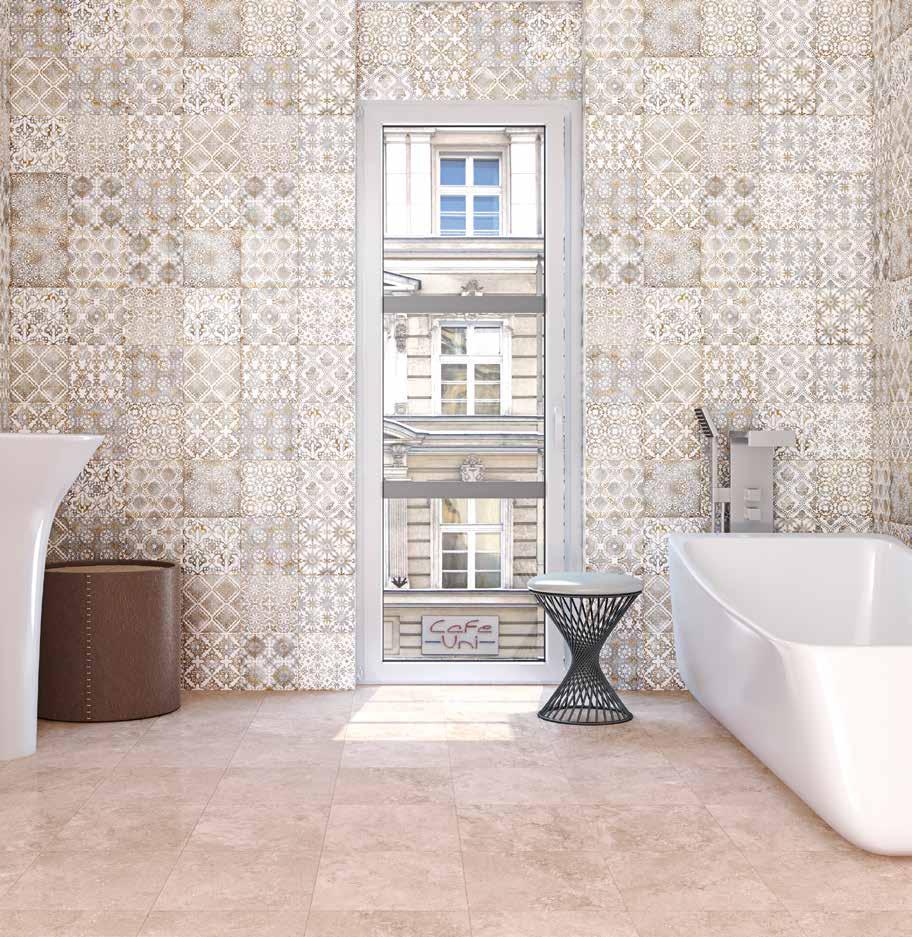
Decor STUCCO Beige 20 x 20 cm
Decor STUCCO Beige 20 x 20 cm (R32)
* 17 decorados distintos. Mix of 17 decors
Decor STUCCO Gris 20 x 20 cm (R32)
* 17 decorados distintos. Mix of 17 decors
Decor STUCCO Azul 20 x 20 cm (R32)
* 17 decorados distintos. Mix of 17 decors


BALKAN Arena 20x60 (R02)
BALKAN Marrón 20x60 (R28)
BALKAN Taupe 20x60 (R28)
Mural BALKAN Día 20x60 (R22)
Mural BALKAN Arena 20x60 (R22)
Mural BALKAN Marrón 20x60 (R22)
Mural BALKAN Taupe 20x60 (R22)
BALKAN
20 x 60 · 8" x 24"


BALKAN Cendra 20 x 60 cm
BALKAN Grafito 20 x 60 cm
Mural BALKAN Gris 20 x 60 cm
BALKAN Cendra 31,6 x 31,6 cm
BALKAN Grafito 31,6 x 31,6 cm
BALKAN Cendra 20x60 (R02)
BALKAN Grafito 20x60 (R28)
BALKAN Gris 20x60 (R28)
Mural BALKAN Noche 20x60 (R22)
Mural BALKAN Cendra 20x60 (R22)
Mural BALKAN Grafito 20x60 (R22)
Mural BALKAN Gris 20x60 (R22)

BALKAN
31,6


31,6 x
· 12" x 12"
PASTA ROJA
BALKAN Arena
31,6x31,6 (P02)
BALKAN Marrón
31,6x31,6 (P02)
BALKAN Cendra
31,6x31,6 (P02)
BALKAN Grafito
31,6x31,6 (P02)

FRESCO
20 x 60 · 8" x 24"


FRESCO Beige 20 x 60 cm (R02) FRESCO Gris 20 x 60 cm (R02)
VENEZIA FRESCO Gris 20 x 60 cm (R22)
VENEZIA FRESCO Beige 20 x 60 cm (R22)
FRESCO Beige 31,6 x 31,6 cm (P02)
FRESCO Gris
x 31,6 cm (P02)
FRESCO
20 x 60 · 8" x 24"


20 x 60 · 8" x 24"


18 diseños distintos mezclados en la caja 18 different designs mixed in the box



KALMA Blanco Brillo 20x60 (R02)
Duna KALMA Blanco Brillo 20x60 (R22)
KALMA Blanco 31,6x31,6 (P02)

20 x 60 · 8" x 24"


18 diseños distintos mezclados en la caja
18 different designs mixed in the box


KALMA Arena 31,6x31,6 (P02)
KALMA Arena 20x60 (R02)
Duna KALMA Arena 20x60 (R22)

20 x 60 · 8" x 24"


Embalaje Packing · 20 x
KINTAY Beige 20 x 60 cm (R22)
KINTAY Gris 20 x 60 cm (R22)
* COMBINA con Tribeca y Petra. Matches with Tribeca and Petra

20 x 60 · 8" x 24"


KORE BRILLO


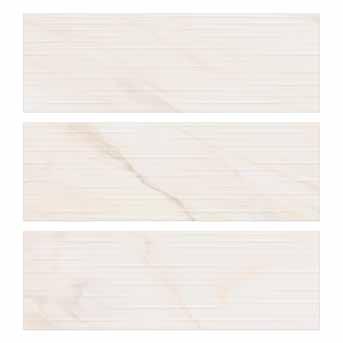


KORE MATE


KORE
KORE Blanco
Duna KORE Arena Mate
Duna KORE Blanco
(R22)

20 x 60 · 8" x 24"

20 x 60 · 8" x 24"

20 x 60 · 8" x 24"


LOFT



20 x 60 · 8" x 24"
LOFT
RACE

20 x 60 · 8" x 24"


DUNA
VENEZIA PETRA Beige 20 x 60 cm (R22)
VENEZIA PETRA Arena
PETRA

20 x 60 · 8" x 24"
PETRA
20 x 60 · 8" x 24"


PETRA Cendra 20 x 60 cm
DUNA PETRA Cendra 20 x 60 cm
PETRA Cendra 31,6 x 31,6 cm
PETRA Cendra 20 x 60 cm (R02) PETRA Gris 20 x 60 cm (R02)
DUNA PETRA Gris 20 x 60 cm (R22)
DUNA PETRA Cendra 20 x 60 cm (R22)
VENEZIA PETRA Gris 20 x 60 cm (R22)
VENEZIA PETRA Cendra 20 x 60 cm (R22)
PETRA Cendra
31,6 x 31,6 cm (P02)
PETRA Gris 31,6 x 31,6 cm (P02)


Embalaje Packing
QUANTUM Blanco 20x60 (R28)
QUANTUM Cendra 20x60 (R28)
QUANTUM Gris 20x60 (R28)
Decorado QUANTUM Cendra 20x60 (R22)
QUANTUM
20 x 60 · 8" x 24"

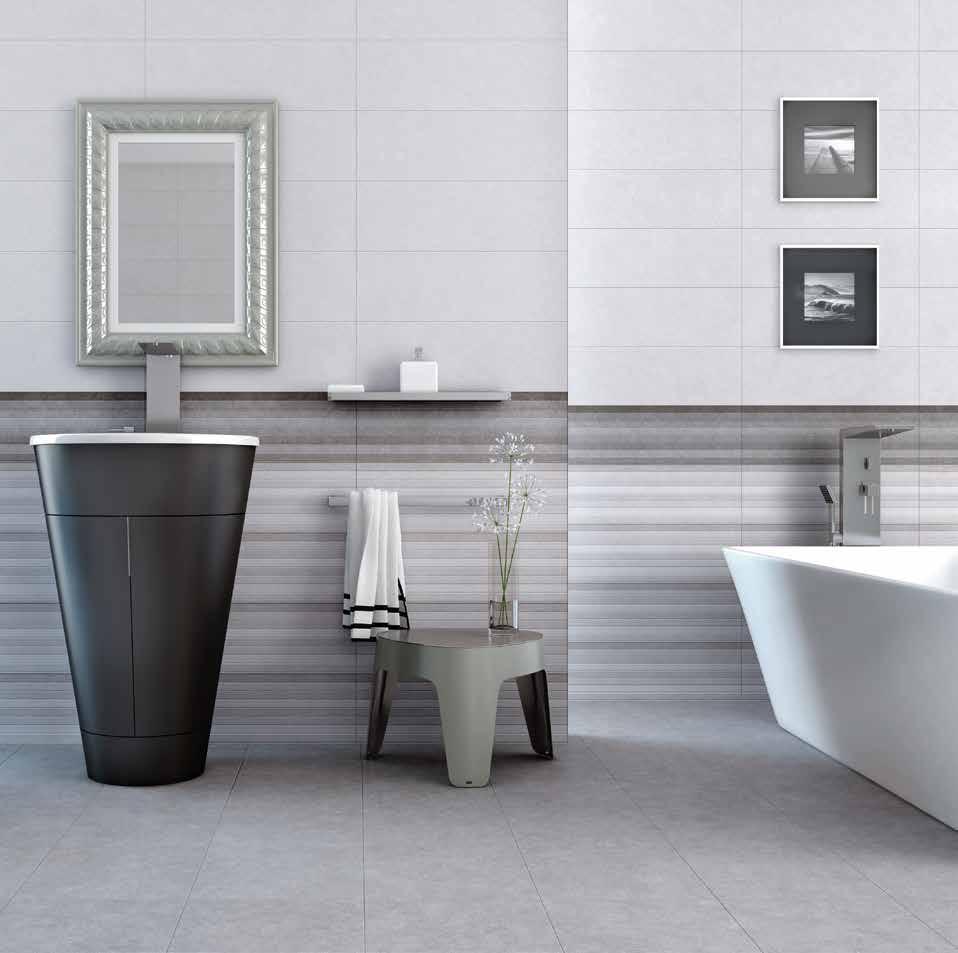
TRIBECA
20 x 60 · 8" x 24"


COMBINA con: Matches with: serie KINTAY 20 x 60


*
TRIBECA Cendra
TRIBECA Cendra 20 x 60 cm (R02)
DUNA TRIBECA Cendra 20 x 60 cm (R22)
TRIBECA Gris 20 x 60 cm (R28)
DUNA TRIBECA Gris 20 x 60 cm (R22)
VENEZIA TRIBECA Gris 20 x 60 cm (R22)
VENEZIA TRIBECA Cendra 20 x 60 cm (R22)
TRIBECA

20 x 60 · 8" x 24"
TRIBECA
20 x 60 · 8" x 24"


TRIBECA Arena 20 x 60 cm
VENEZIA TRIBECA Arena 20 x 60 cm
TRIBECA Arena 31,6 x 31,6 cm
* COMBINA con: Matches with: serie KINTAY 20 x 60
TRIBECA Arena
31,6 x 31,6 cm (P02)
TRIBECA Beige 31,6 x 31,6 cm (P02)
TRIBECA Arena 20 x 60 cm (R02)
DUNA TRIBECA Arena 20 x 60 cm (R22)
TRIBECA Beige 20 x 60 cm (R28)
DUNA TRIBECA Beige 20 x 60 cm (R22)
VENEZIA TRIBECA Beige 20 x 60 cm (R22)
VENEZIA TRIBECA Arena 20 x 60 cm (R22)

PAVIMENTOS
FLOOR TILES
31,6 x 31,6 · 12" x 12"
BALKAN


FRESCO


BALKAN Arena
31,6 x 31,6 cm (P02)
BALKAN Marrón
31,6 x 31,6 cm (P02)
BALKAN Cendra 31,6 x 31,6 cm (P02)
BALKAN Grafito 31,6 x 31,6 cm (P02)
PASTA ROJA
FRESCO Gris
31,6 x 31,6 cm (P02)
FRESCO Beige
31,6 x 31,6 cm (P02)
PAVIMENTOS
FLOOR TILES
31,6 x 31,6 · 12" x 12"
GALICIA


* Gran destonificación. V4 shade variation.


PETRA


LOFT


TRIBECA


PAVIMENTOS
FLOOR TILES
31,6 x 31,6 · 12" x 12"


KALMA Blanco
Arena
x 31,6 cm (P02)
KALMA
BRILLO GLOSSY
KORE Blanco
x 31,6 cm (P02)
Arena
x 31,6 cm (P02)
CARACTERÍSTICAS TÉCNICAS
TECHNICAL DATA
Baldosas cerámicas prensadas en seco, con absorción de agua >10%, para paredes interiores.
Dry pressed ceramic tiles with water absorption >10%, for internal walls.
Carreaux pressés à sec avec une absorption d’eau >10%, pour murs intérieurs.
NORMA EN 14411:2016 Anexo L Grupo BIII GL
Baldosas cerámicas prensadas en seco, con absorción de agua entre 3 y 6%, para suelos y paredes interiores.
Dry pressed ceramic tiles, with water absorption between 3 and 6%, for internal floors and walls.
Carreaux pressés à sec, avec une absorption d’eau entre 3 et 6% pour sols et murs intérieurs.
NORMA EN 14411:2016 Anexo J Grupo BIIa GL
CONSEJOS DE COLOCACION
SOME ADVICE ON THE INSTALLATION
Una vez elegidos los pavimentos y revestimientos de EL BARCO con los cuales vamos a decorar nuestra vivienda, debemos calcular la cantidad de material que nos va a hacer falta. Es importante tomar las medidas correctamente. Desde EL BARCO, recomendamos, medir las paredes completas, incluyendo puertas y ventanas, para así poder calcular la cantidad de revestimiento que necesitamos. Para el pavimento, calcularemos la superficie y la cantidad que resulte la incrementaremos en un 10% para compensar por las piezas que vamos a tener que cortar en las esquinas, remates, etc…
Once you have chosen the wall and floor tiles from EL BARCO to be used to decorate your house, you must determine how many tiles you will need. It is important to make sure you have accurate measurements. From EL BARCO, we recommend measuring the whole walls, including doors and windows, so as to know the exact amount of wall tiles that are going to be needed. As for the floor tiles, order 10% more tiles than you need to allow for the cut tiles in the corners and edges.
/ Caractéristiques
Absorción de agua / Water absorption / Absorption d´eau
Carga de rotura, en N (espesor >=7.5mm) / Breaking load, in N (thickness >=7.5mm) / Charge de rupture en N (épaisseur >=7.5mm)
Resistencia a la flexión en N / Bending strength in N / Résistance à la flexion en N
Resistencia al cuarteo / Crazing resistance / Résistance au tressaillage
a las manchas / Resistance to staining / Résistance aux taches.
Resistencia a productos domésticos y sales para piscinas: baldosas esmaltadas Resistance to cleaning products and salts for swimming pool: glazed tiles Résistance aux produits de nettoyage et sel pour les piscines: carreaux émaillés.
La colocación la debe realizar personal cualificado y experimentado.Las superficies que vamos a revestir o pavimentar, deben estar perfectamente niveladas y limpias. La elección del adhesivo para la fijación de la cerámica, debe ir en función del grupo al que pertenezcan los revestimientos o pavimentos. La separación entre piezas (junta) debe ser de un mínimo de 2 mm en colocación a escuadra o cartabón si unimos totalmente los lados, y de 5 mm en colocación a espiga. Se recomienda la colocación en capa fina, ya que es la técnica más evolucionada y adaptada a los soportes existentes. No recomendamos la colocación que se realiza aplicando material en varios puntos de la pieza, ya que esto va a provocar que queden algunos huecos entre el soporte y la misma que pueden llevar a la rotura de las piezas por golpes simples. Para obtener una buena y duradera colocación con mezcla adhesiva, estas se han de utilizar extendiéndolas con llana dentada, macizando la pieza y utililizando el doble encolado cuando sea necesario. Evitar el falso doble encolado, que consiste en peinar la mezcla adhesiva en el soporte y a toques en la cerámica. De esta forma no se consigue macizar las piezas, ocasionando desprendimientos y además un excesivo consumo de mezcla adhesiva. Comprobar que el soporte sea consistente, esté limpio y seco, haya efectuado todas las retacciones propias del mortero y haya estabilizado las posibles fisuras. Los residuos sueltos, tales como polvo, yeso, mortero mal adherido, disminuyen la adherencia de los materiales de agarre. Los aceites y las grasas deben ser eliminados con disolventes especiales. Para nivelar: se utiliza una capa de mortero, o bien la misma mezcla adhesiva, cuando el desnivel no supere los 5 mm. La nivelación debe hacerse al menos 48 horas antes de la colocación de las cerámicas. Colocar agua limpia en el balde, luego agregar mezcla adhesiva y mezclar hasta obtener una pasta homogénea, con brillo y consistencia. Extender sobre el soporte en paños de 1 m² aprox., y peinar con una llana dentada para regularizar el espesor. Colocar las piezas y presionarlas, hasta conseguir el aplastamiento de los surcos. Comprobar periódicamente la pegajosidad de la pasta levantando el revestimiento recién colocado.
The installation must be carried out by experienced and qualified tile fixers. For wall tiles. The surfaces to be tiled must be smooth and solid, and free from dust and grease. The wall tile adhesive, must be suitable for the type of surface you are tiling onto. When working out where your tiles will start and finish, try to avoid ending with small cut tiles in the corners and edges. Using a spirit level, draw lines around the room to be tiled. Fix battens onto these level lines. Apply a thin layer of adhesive with a notched trowel to the area to be tiled - no more than a 2 square metre area. Fix tiles onto the battens or level area with a minimum space of 2mm. between tiles. If fixing in a brick-tiles formation, a 5mm. gap is recommended. For floor tiling. Make sure the area is clean and free from any loose pieces. Any levelling must be carried out 48 hours before tiling. Choose the correct tile adhesive for both the surface you are fixing onto and the composition of the tile you are fixing. Apply the adhesive with a notched trowel to the floor area, no more than 2 square metres. Then apply the adhesive with the notched trowel to all of the back of the tile. Press the tile firmly and evenly onto the floor. Match the next tiles in the same manner, making sure they are all evenly fixed as you progress. Leave a 5mm. gap between tiles. Wipe off lightly, any excess adhesive or marks on the tiles.
Una vez terminada la colocación, llega el momento de aplicar un producto cubrejuntas, blanco o de algún color suave. Hay que esperar aproximadamente un día a que seque la cola. Se aplica con una pequeña espátula o una llana de goma (para que encaje a presión en la junta) y cuando empieza a secarse se retira el sobrante con movimientos circulares de una esponja o un trapo húmedos. Hay que limpiar de nuevo para un mejor acabado. En las zonas muy húmedas, como los bordes de duchas, bañeras o lavabos, conviene aplicar una junta de silicona fungicida para aislar el alicatado y que no se pudran las uniones. Un trabajo de mantenimiento muy sencillo es sustituir las juntas cuando se ensucian o envejecen. Basta pasar un rascador para retirar la pasta vieja y aplicar la nueva de la misma forma que en el paso anterior.
Once you have finished the installation, allow at least a day for the adhesive to fully dry out. The grout should be applied into all the tile joints using a rubber float. Remove any excess grout. Lightly wipe the joints with a damp sponge in a circular motion until all the joints are uniform and the tiles are clean. When the grout has dried, lightly buff off with a dry towel type cloth any dry grout dust. On very wet areas, such as showers, baths and sinks, it is advisable to apply a fungicide silicone joint to avoid the joints from rotting. A good maintenance task is to replace the joints when they get dirty or too old. Just use a grout remover to remove the old grout and then apply the new grout, following the same steps described in the procedure above.
COLOCACIÓN | Installation
ELECCIÓN DE LA CERÁMICA Y MEDIDAS Choosing the tile & the measurements
EL REJUNTADO Grouting


