Amazon S3 for Magento 2

Magento 2 Amazon S3 Extension by MageComp helps upload and sync your Magento 2 store’s downloadable products, images, and catalog to the Amazon S3 AWS servers.
Table of Content
1. Create an Amazon S3 Bucket and AWS Access Key ID and Secret Access Key
2. Configuration
3. Uploading Media Files to Amazon S3 server
4. Upload Downloadable Products on Amazon S3
5. Add URL in the Back-end Product Edit Page
1. Create an Amazon S3 Bucket and AWS Access Key ID and Secret Access Key
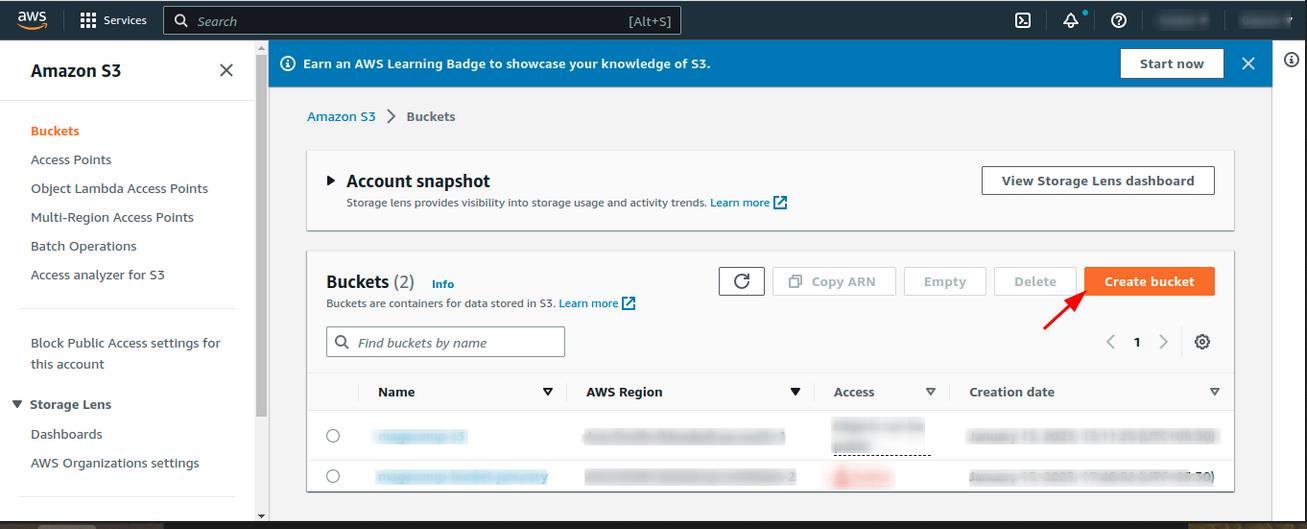
Step 1:- First, log in to the Amazon s3 Server using the below URL. https://aws.amazon.com/console/
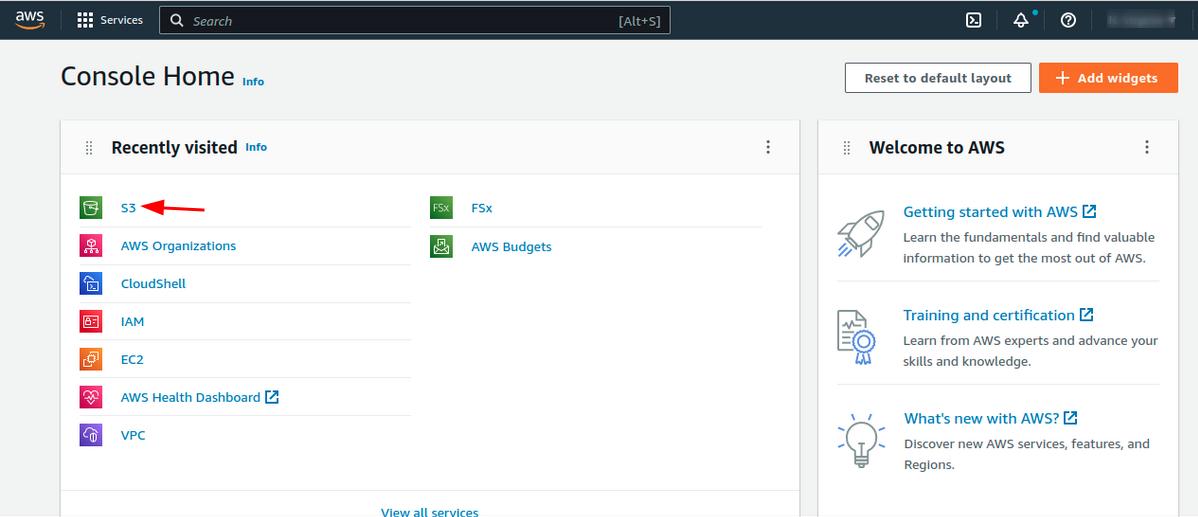
Step 2:- Click on the S3 option.
Step 3:- Now click on the "Create bucket" option.
Step 4:- Enter the Bucket name & select AWS Region

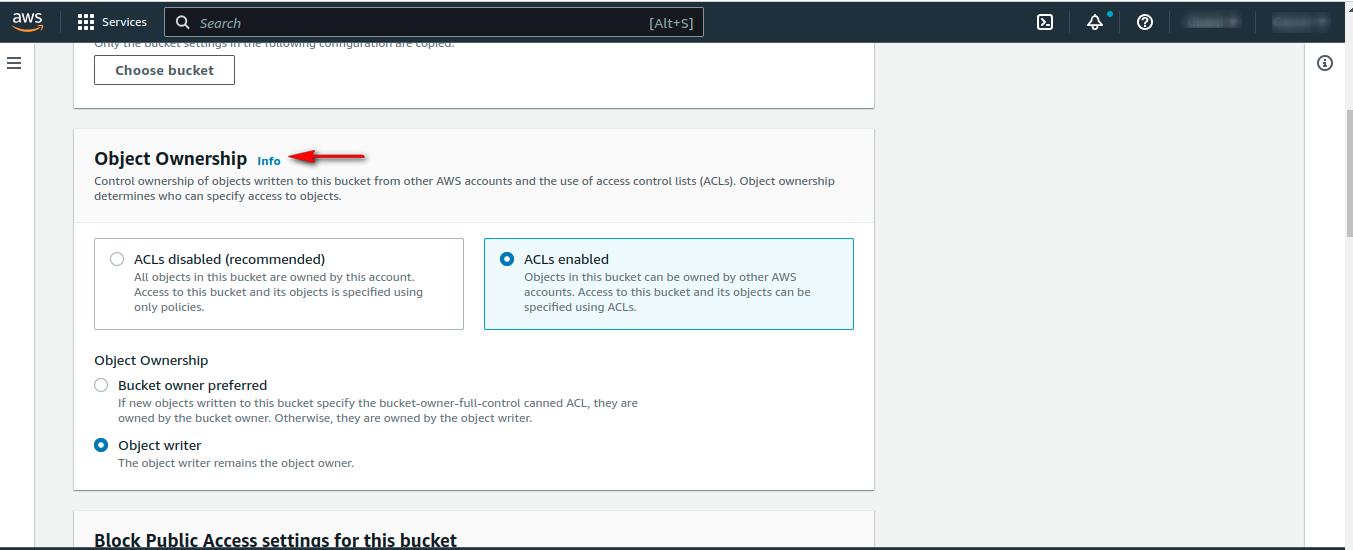 Step 5:- Object ownership select as below Screenshot.
Step 6:- Block Public Access Setting for this bucket select as below Screenshot.

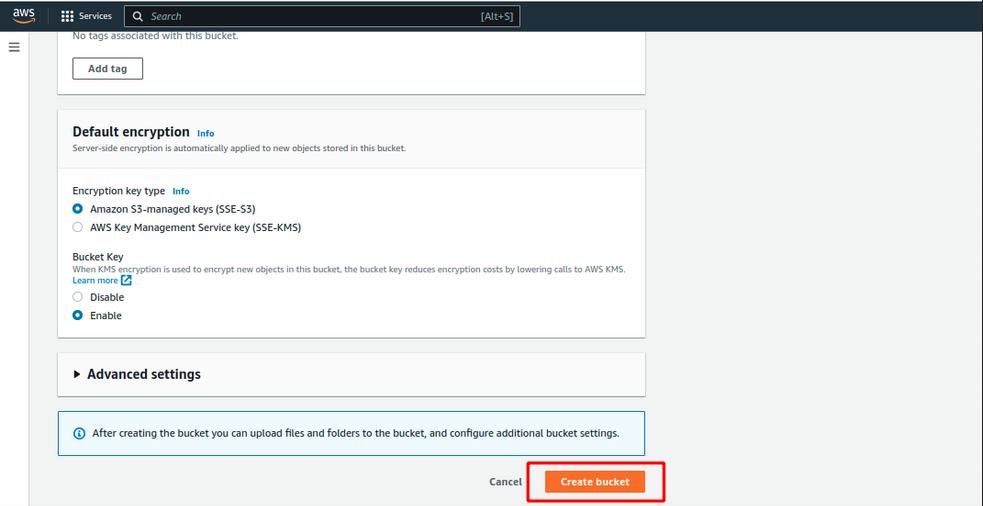 Step 7:- Now click on the "Create bucket" button.
Step 8:- Now your Bucket is created Successfully

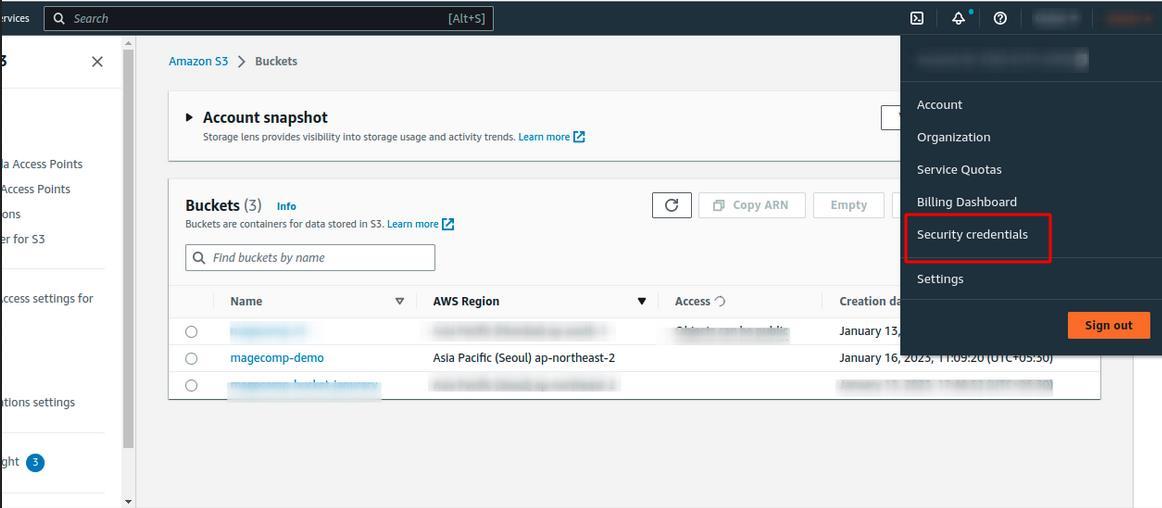
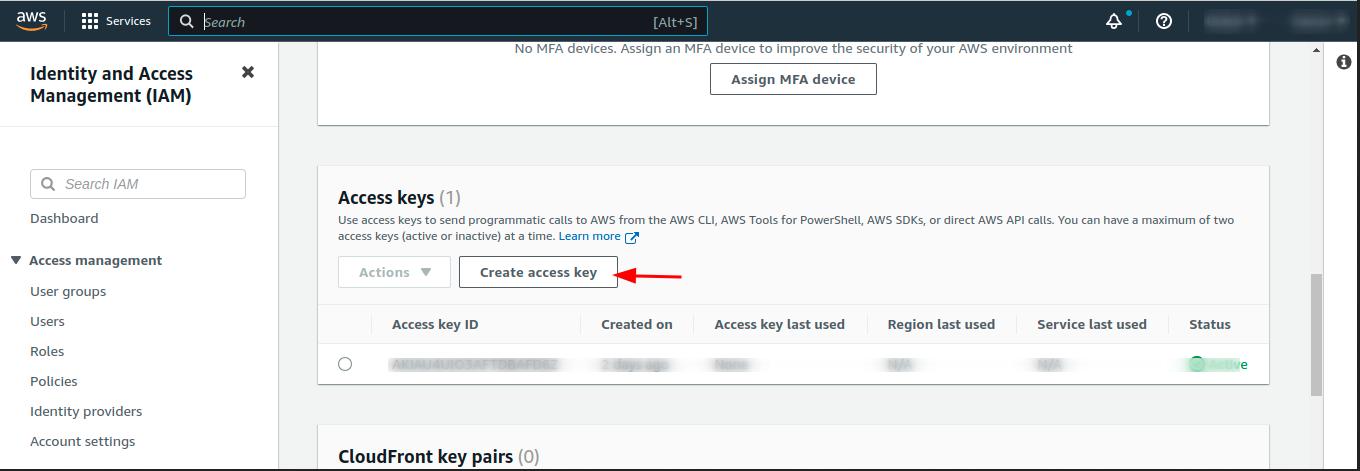
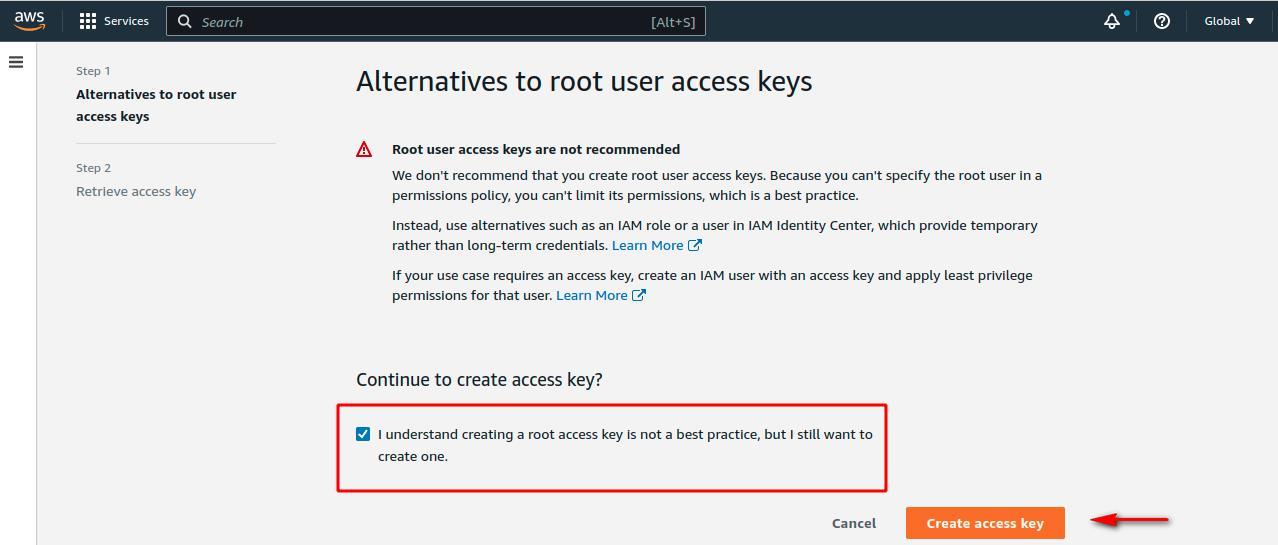
 Step 3: Select the checkbox and click on the "Create access key" button.
Step 4:- Your access key & secret key is generated
Change ACL Permission of your Bucket
Step 1:- Click on your bucket.
Step 2:- Click on the Permissions option.
Step 3:- Now you click on Edit in "Access Control List (ACL)"


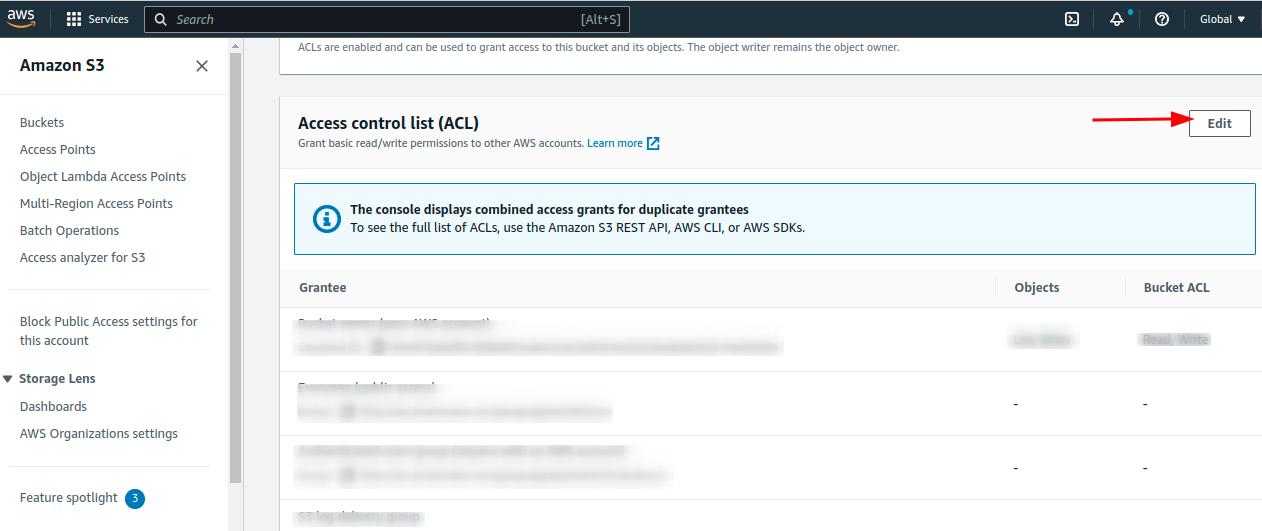
 Step 4:- Select Read Checkbox as shown below and click on the "Save changes" Button.
Step 5:- Now your Bucket is Public and you can use it.
2. Configuration
Once you have successfully installed the extension, go to Stores > Configuration to configure the extension for use.
Note – In order to use this extension, the bucket in your AWS Server must be Public.
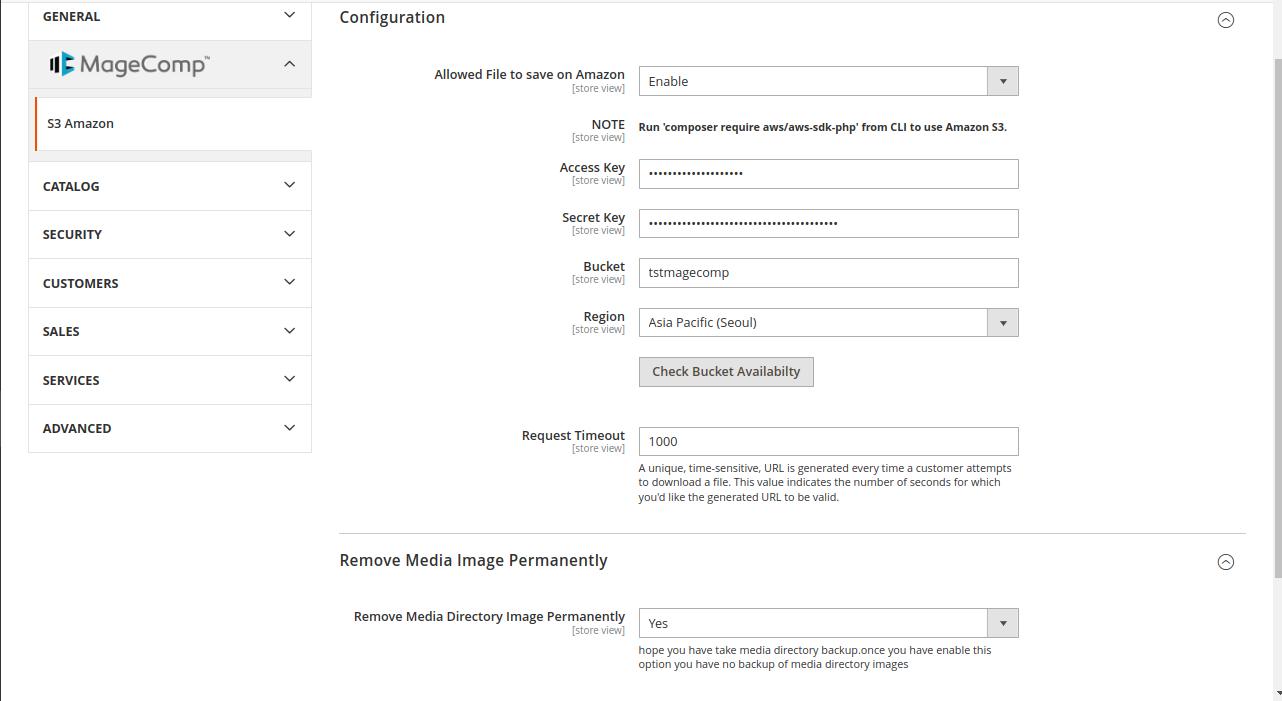

Configuration
● Allowed file to save on Amazon: Enable or disable extension from here.
● Access key: Enter your Amazon S3 access key here.
● Secret key: Enter your Amazon S3 secret key here.
● Bucket: Enter the name of your Amazon bucket here.
● Region: Enter the name of a specific region here to check the availability of the bucket.
● Request timeout: Set the timeout period for request here.
Remove Media Image Permanently
● Remove Media Directory Image Permanently – Set this field to Yes to remove all the media images from the local server.
Note – Once the media files are removed, you cannot recover them. Make sure you take a backup of the media files before exporting them to the Amazon Server.
3. Uploading Media Files to Amazon S3 server
To Install Amazon Library, run this command composer require aws/aws-sdk-php
To sync all your product image media files, category image media files, CMS page media files, and CMS block media files to the Amazon S3 server you must have to follow the below steps.
Note: Before using Amazon S3 cloud storage, take a backup of all the media files.
1. First, enable the extension from the back end and set up your Amazon S3 credential details. Run all the commands to your Magento Root Path.
2. Run the below command to upload your existing media files, such as images, catalog, products, etc., to the Amazon server.
php bin/magento amazons3:export
Note – Before running the export command, make sure you have a backup of all the media files. If the “Remove Media Directory Image Permanently” field is set to “Yes” in the backend configuration and you run the export command, then all the media files will be removed from the local server and exported to the Amazon server. Afterward, there is no option to recover media files on the local server.
First thing you need to do is to run export command before you run enable command to sync all existing media to S3. To use the export command, first, it would verify that you haven’t run enable command.
If you have already run enable command first, then you should run disable command first before running export command
3. To enable S3 integration run below command
php bin/magento amazons3:enable
Once you run enable command than and only than you will be able to use our amazon S3 extension functionality, and using this command you need to set base media URL in system configuration (System->Configuration->General->Web-> Base URLs / Base URLs (Secure)) to access all the S3 media in system as per shown in below screenshot.
If you do not see any URL in base media field after running enable command, then you need to set that URL manually as per below screenshot.
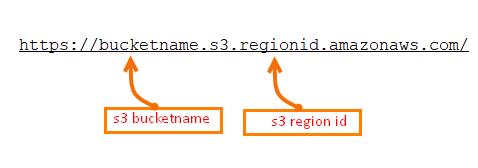
Now if you create a new product it will be saved on local as well as S3 server by default. If you want to save new product only on S3 server run below command
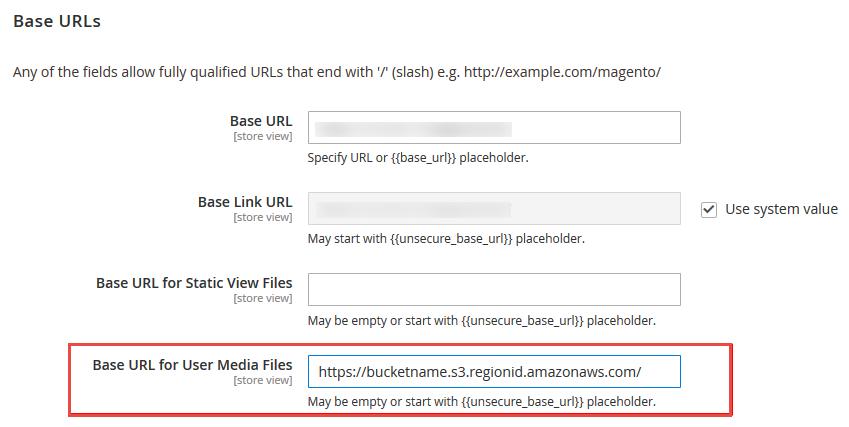
sudo php bin/magento setup:config:set –remote-storage-driver=”aws-s3″ –remote-storagebucket=”<Your Bucket name>” –remote-storage-region=”<Your Bucket Region name>” –remote-storage-key=<Your Bucket Access key> –remote-storage-secret=<Your Bucket Secret key>
If you again want the new product to be saved on local server, run below command
sudo php bin/magento setup:config:set –remote-storage-driver=”file”
4. To disable S3 integration run below command
php bin/magento amazons3:disable
If you do not want to use S3 media anymore, than you can run disable command. Using this command, S3 base media URL will be removed from system configuration. You can also remove the base media URL manually.
Once the upload is completed, you will be able to see all the product images in the Amazon S3 server as shown below.

You can also, see the before and after URL of images uploaded on the Amazon S3 server.
4. Upload Downloadable Products on Amazon S3

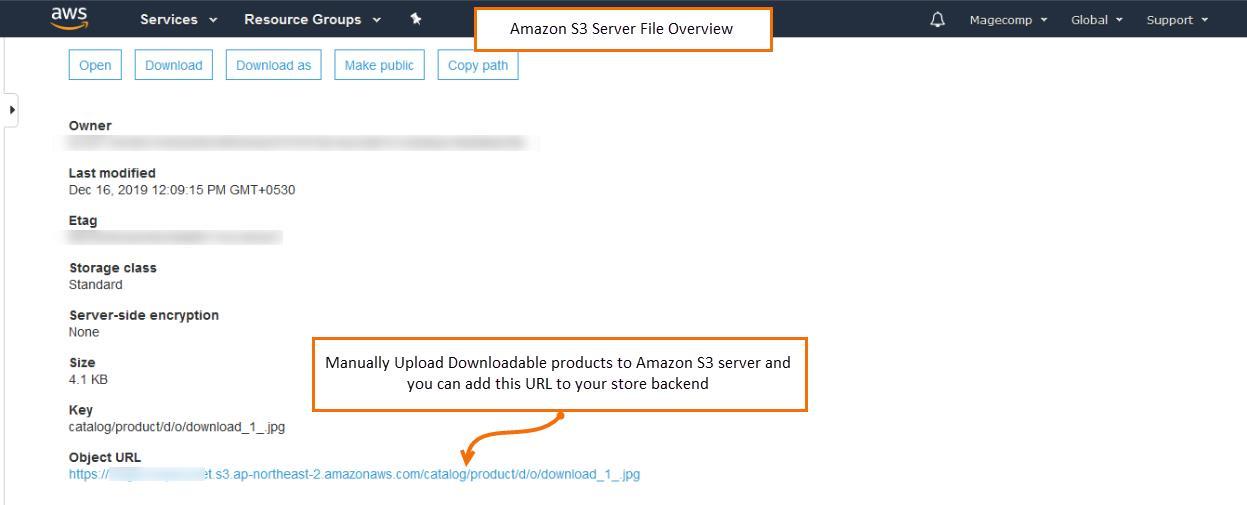
You can manually upload the downloadable product on the Amazon S3 server. To do that go to your Amazon AWS account and upload file in your bucket. You will get the URL of the downloadable product from the Amazon S3 servers as shown below.
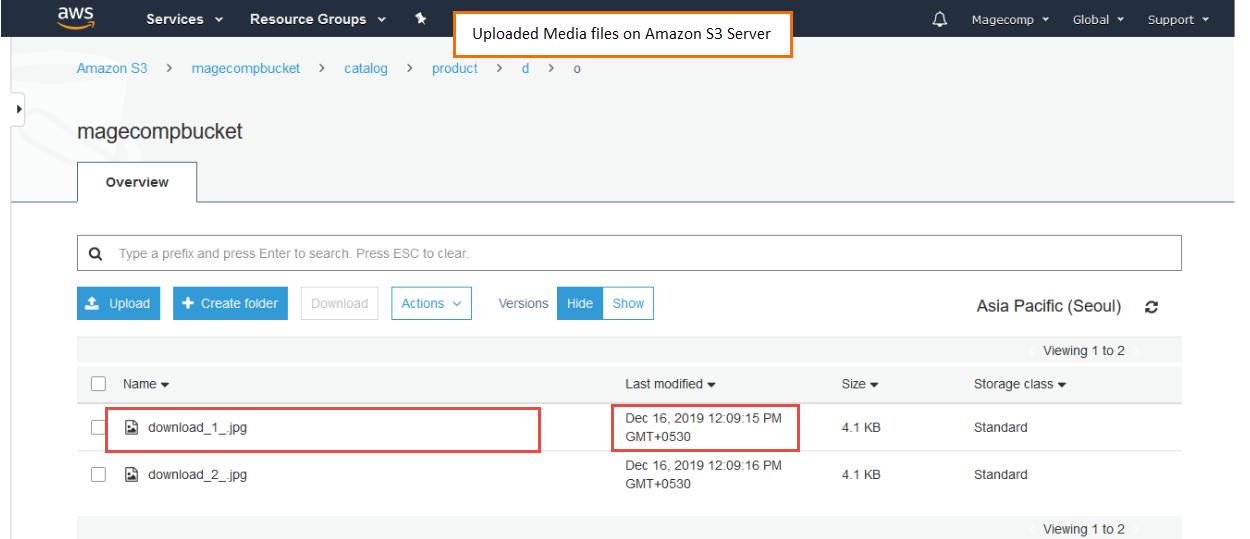
Once the downloadable product is uploaded copy the URL and paste it to your Magento store downloadable product’s file URL.

If anything goes wrong, please contact us at support@magecomp.com
 5. Add URL in the Back-end Product Edit Page
