Introduction to your veterinary professional Anifusion® IV Pump

1
FLUID THERAPY CONNECTED TO YOUR WORLD

Introduction to your veterinary professional Anifusion® IV Pump
For all queries or technical support regarding the Anifusion® IV Pump, please contact the technical department at Millpledge Veterinary on one of the numbers below. Please have your model number and serial number to hand and details of when and where the product was purchased
United Kingdom: 08000 11 22 88 — sales@millpledge.com
USA: (888) 715-9909 — nasales@millpledge.com
Canada: (888) 715-9909 — casales@millpledge.com
Europe:
+32 (0) 51 70 30 21— eusales@millpledge.com
Germany: +32 800 26 726 — desales@millpledge.com
Australia: +61 1800 950 585— ausales@millpledge.com
Alternatively, please contact us in writing:
Millpledge Ltd Whinleys Estate Clarborough, Retford Notts DN22 9NA UK
Millpledge North America Inc 828 Mitchell Road Thousand Oaks CA 91320 USA
Millpledge Veterinary Canada 6 - 73 Galaxy Blvd Toronto, Ontario M9W 5T4 Canada
Millpledge Veterinary Europe Verrekijker 38 8750 Wingene Belgium
Thank you for purchasing the Anifusion® IV Pump. This small, compact and lightweight infusion pump has lots of exciting features and is very simple to use.

The Anifusion IV Pump® is designed to be used with 15, 20 and 60 drop IV Sets.
For warranty coverages, please see the separate warranty document available online at anifusion.millpledge.com or request a copy from your Millpledge customer service representative.
• Small and light and easy to carry.
• Rechargeable internal battery.
• Easy to use setting keys.
• Touch screen.
• mls/hr modes.
• Animal mode (Constant and Variable).
• CRI mode.
• Vet Bolus mode
• Sequence mode.
• Easy calibration of 15 lines.
• Multi-level occlusion sensitivity.
• Ultrasonic sensor for air detection.
• Multiple alarms.
• Prime / bolus function.
• KVO function.
• Can be used to deliver whole blood products.
• Internal battery that recharges with AC use.
• At-a-glance information for all deliveries.
• Can deliver both macro and micro volumes.
• Integrated mount to attach to an IV pole / stand.
• Additional hook to attach to a kennel or cage.
• Comes with sophisticated software designed for animal patients.
PLEASE READ CAREFULLY BEFORE USE
• The Anifusion® IV Pump is intended for use in a Veterinary environment only.
• The Anifusion® IV Pump should be used by trained or qualified personnel only. All users should make themselves aware of all information in this manual prior to use.
• All patients should be monitored closely whilst receiving infusions from this pump, as it is a mechanical device and cannot be guaranteed against failure.
• The Anifusion® IV Pump can be used to deliver crystalloids, colloids and whole blood products.
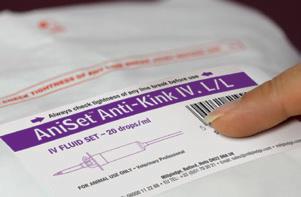
• The Anifusion® IV Pump is calibrated to deliver infusions via a Millpledge Aniset™ 20 drop per ml IV line, Aniset™ 15 drop per ml IV line and Millpledge Aniset™ 60 drop IV line. Other makes of IV lines can be used but must be calibrated prior to use.
• It is recommended to change the IV line after a period of 8 hours of insertion into the Anifusion® IV Pump. Only use one IV line per patient.
• The Anifusion® pump will perform a series of selftests each and every time the pump is initially powered on . It is therefore imperative, that an IV line not be present during these self-tests, as the sensors will not be able to be checked and an error will occur.
• You must always insert the IV line after the pump has been powered on.
• Use a damp cloth to clean the outside of the pump. Do not immerse in water. Do not place in a steam or gas steriliser.
• As with all electrical equipment, caution should be taken when used in the presence of inflammable chemicals including anaesthetics.
• Do not use in the presence of Magnetic Resonance Imaging (MRI)
• Do not use in the presence of cautery equipment or similar.
• When using for the first time, use an electrical source rather than battery power as the battery will need to be fully charged prior to sole usage.
• Ensure your electrical current is at the same rate at your premises as it is shown on the infusion pump. AC Adaptor port External 100 – 240v 50/60Hz AC power supply.
If not the same, the Anifusion® IV Pump should not be used.
recommend using
• Intended Use & Advisory Notes
•
•
•
•
•
•
•
•
We recommend you read the manual prior to use to familiarise yourself with all the features the Anifusion® IV Pump has to offer and the instructions as to how it all works.
We do realise, however, that you may wish to simply get started as quickly as possible in order to deliver an infusion to a critical care patient. We have therefore written this quick start guide for use with the mls/hr mode, in order to allow the user to deliver an infusion as quickly as possible.
You must use electrical power for its first use and allow the battery to fully charge before using battery power. You can only use a pre set Aniset™ line: to use a different line that is not calibrated for use will lead to inaccurate fluid delivery.
1 Plug the Anifusion® IV Pump into an electrical supply.
2 Press and hold the power button located at the bottom left hand corner of the pump.
3 On Main menu, select modes.
4 Select ml / hr mode. Select VTBI (volume to be infused) and using keypad, enter the amount of fluid required.
Press when complete.
5 Select Rate. Using the keyboard enter the mls/ hr rate you wish to use Press when complete.
Time will adjust itself based on amount of fluid and infusion rate you have entered.
6 Select volume. The Anifusion® IV Pump will ask if you wish to reset total volume. Press
7 (Pump calibrated tubing) Open the door to the infusion pump and insert the primed line running from top to bottom.
Close the door ensuring it clicks shut.
8 The Anifusion® IV Pump will ask you to select which line you would like to use and will show you your options.
Confirm your selection
9 Press the start / stop button located on bottom right hand side of the pump to start the infusion.
Start/Stop Button
SHOWN WITH DOOR CLOSED and CARRY HANDLE RAISED
A Power Button
B Indicator Lights
C Menu Button
D Bolus/Purge Button
E Start/Stop Button
F Alarm Indicator (LED)
G LCD Touch Screen (activated)
H Carry Handle (shown raised)
I Door Release
Press and hold the power button to switch the infusion pump on. You will first see the main menu which will allow you to select each area you need to access. Select mode, and then choose from the modes available to get started immediately! (See page 10).
Press and long hold to switch the Anifusion® IV Pump on.
After operation, press again to bring you to the standby screen where you can either power off the machine, place the machine in standby or cancel. If nothing is pressed the machine will automatically go in standby mode.
To switch off the Anifusion® IV Pump, press the button to bring up the main menu. You then select ‘switch off’.
Nb: the pump has to be switched on prior to an IV line being inserted. Similarly, the IV line has to be removed prior to the infusion pump being switched off. The pump will alert you to this in each circumstance if performed incorrectly.
B Indicator Lights
Top = mains power.
Bottom = battery.
The top indicator light glows constant green when the pump is connected to an mains power supply.
If the top light is illuminated and the bottom indicator light is flashing green, this indicates that the battery is charging.
If the bottom indicator light is flashing without the top one illuminated: the pump is functioning on battery power alone.
This will allow you to access the system menu.
By pressing this, it will allow you to purge the line before an infusion starts or run a bolus during infusion. Please see page 49 for more details on this function.
Press this button to either start or stop your infusion as appropriate.
This will illuminate with different colours and frequency to indicate an error in operation.
Enables you to navigate through the Anifusion® IV Pump functions easily.
H Carry Handle (shown raised)
Easy to move the Anifusion® IV Pump around. It can be folded back when not in use.
Lift from the right-hand side to open the door.
SHOWN WITH DOOR OPEN and CARRY HANDLE LOWERED
I Door Release
J LCD Touch Screen (Showing warning screen)
K Infusion Line Channel
L Sensor Array
M Anti-Flow Clamp
When the door is open the Anifusion® IV Pump will show the above screen, warning you to ensure that you install the IV set correctly.
Make sure that the IV line rests within the channel and through the sensor then close the door.
In the event of your IV line not being installed correctly, the pump will show the screen on the right informing you that the line needs attention.
REAR WITH CARRY HANDLE RAISED
A Carry Handle (shown raised)
B Fixing hole for cage and pole clamps (Alan key supplied)

C Upgrade / Service interface D Power socket
E Serial plate

1 Plug the Anifusion® IV Pump into a mains electrical supply.
2 Switch on by pressing and holding power button (A)
3 Menu screen will appear
4 Select Mode from the menu.
5 Select ml/hr mode.
6 Select VTBI (Volume To Be Infused).
7 Enter the VTBI using the keypad provided and then press when completed.
8 Select Rate.
9 Enter the ml / hr rate you require by using the keypad provided and when completed press
10 The Anifusion® IV Pump will automatically adjust the time needed for your infusion.
11 Select volume.
12 The Anifusion® IV Pump will ask if you wish to reset total volume. Press
13 Volume will reset to Zero (volume automatically returns to zero at the start of a new infusion after power off / power on cycle).
14 Open the door to the Anifusion® IV Pump by opening the blue latch and pulling the door open.
15 Insert your primed infusion line, ensuring it runs vertically through all the sensors and is clamped by the blue anti-flow clamp at the bottom.
16 Close the door firmly by pushing hard until it clicks, and the blue latch flush with casing.
17 Please ensure you use the correct IV line for accurate fluid delivery.
To confirm, press
18 Press start when ready and the Anifusion® IV Pump will run your infusion.
Start/Stop Button
Animal Mode can be used to calculate the deficit and maintenance fluid volumes your patient needs, based on your clinical evaluation and patient profile. There are two Animal modes to choose from within Anifusion®.
Animal mode Constant program adds together the deficit volume and the maintenance volume and calculates a total fluid volume which is delivered at a constant rate over a 24 hour period.
Animal mode Variable is calculated at a higher rate of infusion to return the patients fluid deficit, the deficit volume is delivered over a 6 hour time period.
Once the deficit volume has been infused, Anifusion automatically transitions to the maintenance infusion rate.
1 Plug the Anifusion® IV Pump into an electrical supply.
2 Switch on by pressing and holding power button
5 Select Animal Mode Constant (Fig 1).
3 Menu screen will appear
4 Select Modes from the menu.
6 Select patient type (Fig 2): Cat will appear as the default species, but by selecting Patient type, this allows you to select the species of your choice (over 2 pages).
Once the species has been selected, the menu will revert back to the previous screen.
7 Select level of patient dehydration (Fig 3): 5% appears as the default setting, but by selecting this area, you can select the % of dehydration required for your patient.
Once selected, the menu will revert back to the previous screen.
8 Select patient weight (Fig 4): Using the keypad provided enter the patient’s weight. Please note that all weights are in kgs.
Please note that for each patient type there is a weight range displayed. If a body weight is added out of weight range for this patient type a warning will be displayed.
Acknowledge this warning by selecting the and the pump will revert back to the previous screen whereby the correct body weight can be inserted. (If your patients weight range is out of range, please refer to the table on page 20 and select a more appropriate range for the calculation).
The pump will now calculate the amount of fluids required for both maintenance requirements and deficit amounts.
In constant animal mode, Anifusion® will now add these amounts together and prepare to infuse them over a 24 hour period at a constant rate of infusion.
9 Example:
A 20kg medium sized dog requires a maintenance rate of 50ml x kg per 24hours.
50ml x 20kg = 1000mls over 24 hours to cover maintenance fluids.
At 5% dehydrated he will require 20kg x 5% x 10= 1000mls deficit fluids
Together he requires 2000mls VTBI.
When choosing to infuse the deficit and maintenance volumes at a constant rate, Anifusion® will calculate the rate as follows:
2000mls / 24 hours – 83.33mls per hour for 24 hours.
Press start to begin the infusion
The method of setting up the pump for the Animal Mode Variable is exactly the same as it is for Animal mode Constant.
Animal Mode Variable program adds together the deficit volume and the maintenance volume and calculates a total fluid volume which is delivered at two different rates of infusion.
The first rate is calculated at a higher rate of infusion to return the patients fluid deficit, the deficit volume is delivered over a 6 hour time period.
The second rate, a lower rate of infusion, is calculated to deliver the maintenance fluid volume over an 18 hour period. Once the deficit volume has been infused, Anifusion® automatically transitions to the maintenance infusion rate.
A 20kg medium sized dog requires a maintenance rate of 50ml x kg x 24hours. 50ml x 20kg = 1000mls over 24 hours to cover maintenance fluids.
At 5% dehydrated he will require 20kg x 5% x 10= 1000mls deficit fluids
Together he requires 2000mls VTBI.
For animal Mode Variable this will then be calculated at Deficit 1000mls / 6 hours = 166.67 mls per hour for 6 hours
Maintenance 1000mls / 18 hours = 55.56 mls per hour for 18 hours.
In Animal Mode Variable, because the fluid deficit amount is given in a short period of time (6 hours) this can sometime mean that the delivery rate of fluid required, is higher than the pump capability of 2000mls per hour.
There are therefore the following maximum rates using the Animal Mode Variable.
Max rates on 10% dehydration is 120kg body weight.
Max rates on 12% dehydration is 100kg body weight.
Max rates on 15% dehydration is 80kg body weight.
Press start to begin the infusion.
Start/Stop Button

See page 72 for information on how to calculate CRI
1 Plug the Anifusion® IV Pump into an electrical supply.
2 Switch on by pressing and holding power button (A)
3 Menu screen will appear
4 Select Mode from the menu.
5 Select CRI (Constant Rate Infusion) mode.
6 Select ‘Weight’. (Weight units are in kilo’s. See page 76 for a conversion chart)
7 Enter the patient’s weight in kg and then press
8 Select ‘Drug Info’ followed by ‘Conc. unit’ Drug conc. Drug Volume Fluid Bag
Drug conc. (mg/ml)
Drug conc.
Drug Volume
Fluid Bag
9 Conc. unit: enter the way in which your drug is expressed eg. ‘mg/ml’ – press when completed.
10 Select Drug conc. mg/ml: Enter the drug concentration and press when done.
11
Once you have entered the concentration of your drug, the screen reverts to the previous menu.
12 Select Drug Volume and using the keyboard add the volume, in mls of the drug you wish to add to your fluid bag.
Press when completed.
13 Select Fluid Bag and again, using the keyboard screen, add in mls, the volume of your fluid bag eg. 500mls or 1000mls.
Press when completed and the screen will revert back to the previous menu.
When all sections are completed press to bring you back to the CRI screen as described on the next page.
continued…
14 Select Dose Rate
15 Select dose unit and choose from the options as to how you want to calculate your dose. When completed, press
16 Select Dose rate: using the keyboard enter the dosage rate of your drug. When completed, press
18 Select Total VTBI and add the total amount of fluid to be infused (including drug, eg. 500mls or 1000mls). Use the keyboard to enter the amount of drug in ml’s you are adding to the fluid bag. When complete, press
Once start has been pressed, the Anifusion® IV Pump will start to run. The running screen will tell you how much of your DRUG has been infused in mg, how much VOLUME has been infused in ml and how much TOTAL VOLUME is left to be infused (drug and fluid combined). It will also tell you how much time is left for the total infusion to finish at the current rate.
19 Open the door to the Anifusion® IV Pump by opening the blue latch and pulling the door open.
20 Insert your primed infusion line, ensuring it runs vertically through all the sensors and is clamped by the blue anti-flow clamp at the bottom.
21 Close the door firmly by pushing hard until it clicks, and the blue latch is back in place.
22 The Anifusion® IV Pump will ask you which line you wish to use. Select the line of your choice out of the list of commonly used lines shown. The infusion pump will ask you to confirm your line of choice.
To confirm, press
23 Press start when ready and the Anifusion® IV Pump will run your infusion.
1 Plug the Anifusion® IV Pump into an electrical supply.
2 Switch on by pressing and holding power button (A)
3 Menu screen will appear
4 Select Mode from the menu.
5 Select Vet Bolus mode.
6 Select RATE 1.
7 Enter the rate of your first infusion using the keypad provided and then press
8 Select VTBI1.
9
10
11
Enter the VTBI you wish your first infusion to run over, using the keypad provided and when complete press
Repeat these steps for each sequence you require.
The VTBI on the very last screen will show you the total amount of fluid you have asked the pump to deliver over the 5 sequences.
The volume will automatically be switched back to zero each time the infusion pump has been switched off. If the infusion is paused / stopped during an infusion and then started again, you will be prompted to confirm if you want to resume and continue or restart. Restart will reset VI to zero.
If after 30 seconds, no option has been chosen, the infusion pump will automatically continue from where it left off.
1 Plug the Anifusion® IV Pump into an electrical supply.
2 Switch on by pressing and holding power button (A)
3 Menu screen will appear 4 Select Mode from the menu.
5 Select sequence mode. 6 Select RATE 1.
7 Enter the rate of your first infusion using the keypad provided and then press
8 Select Time.
9 Enter the time you wish your first infusion to run over, using the keypad provided and when complete press
10
Repeat these steps for each sequence you require. You can enter up to 5 different sequences.
11 The VTBI on the very last screen will show you the total amount of fluid you have asked the pump to deliver over the 5 sequences.
The volume will automatically be switched back to zero each time the infusion pump has been switched off. If the infusion is paused / stopped during an infusion and then started again, you will be prompted to confirm if you want to resume and continue or restart. Restart will reset VI to zero.
If after 30 seconds, no option has been chosen, the infusion pump will automatically continue from where it left off.
We strongly advise, that all patients are blood typed and cross matched before administering whole blood.
Please refer to the guide section starting on page 62. This guide gives general advice on how to carry out a blood transfusion and each patient must be under the direct responsibility of the attending Veterinary surgeon.
The Anifusion® IV Pump is capable of delivering whole blood and blood products. Unlike other infusion pumps on the market, the Anifusion® IV Pump will not damage the blood cells as they travel through the sensors in the pump. A blood transfusion line is imperative to prevent infusing blood clots, and the use of an in-line filter is fully recommended as well.
Enter the primed line into the anifusion pump in the same way as previously described. Use the ml/hr mode to deliver the blood, starting with a low infusion rate initially and increasing gradually as required, if no adverse effects are seen in your patient. As whole blood and blood products are thicker than saline and other crystalloids, you may need to decrease the pressure tolerance of the pump, as described in the setting section under occlusion pressure (page 32).
Delivery of whole blood / blood products should not exceed 400mls / hr
Meets blood and Component Blood Quality Requirements
GB18469-2012
USE A BLOOD TRANSFUSION LINE
If at any point the infusion needs to be paused, for example, if you take your patient out for a toilet break, press the start / stop button, and the infusion screen will pause and remain on this screen. Once your patient has been reconnected, simply press the start / stop button again to resume the infusion from where you left off.
If you require the infusion to be paused in order for another screen to be accessed, eg turning the sound down, press stop / start button to pause the infusion.
Press the menu button to bring up main menu which will allow you to access the other functions of the pump.
Start/Stop Button Menu Button
Once completed, press the menu button again to revert back to your infusion, and press stop / start to resume your infusion from where you left off.
If you wish all the data to be completely cleared to start again, you can either input all the new data into the fields and reset your volume to Zero or switching the pump off and on again will automatically clear all fields*.
Start/Stop Button
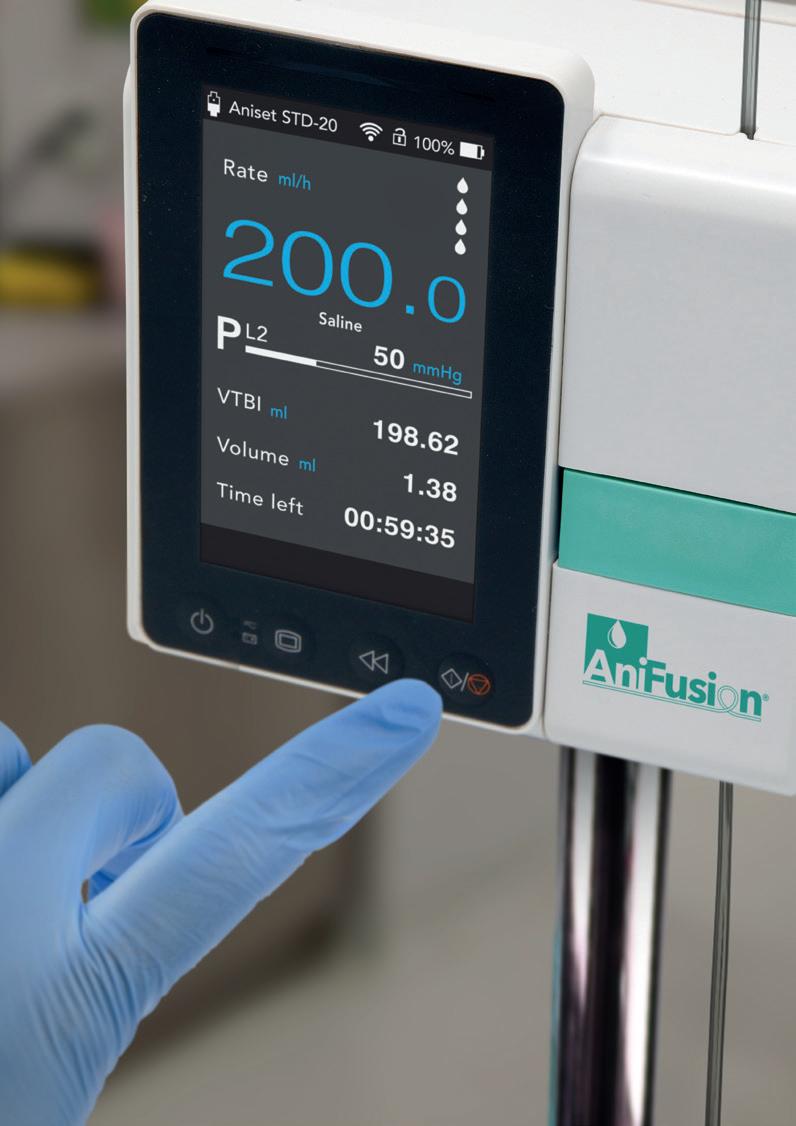
A IV SET INDICATOR
Shows you which IV line has been selected to deliver the infusion. If the pump is running from battery power, the wording will alternate between this and ‘no power supply’.
B BATTERY POWER LEVEL
Will advise the user how much battery power is left expressed in a percentage.
C MODE FUNCTION
Advises you by which mode the infusion is being delivered.
D DROP SYMBOLS
These animated droplets indicate that the IV Pump is running.
E NUMERICAL DISPLAY
Shows the rate at which the infusion is running. Select rate to quickly alter the rate.
F FLUID CURRENTLY BEING INFUSED
The name of the fluid is displayed here informing you of the fluid that is being infused.
G PRESSURE BAR
Shows the amount of pressure in the line and the unit of measure.
H VTBI – THE VOLUME TO BE INFUSED
This decreases as the machine operates in order to show the user at all times the remaining volume to be infused.
I VOLUME
This increases as the machine operates in order to show the user at all times the amount that has been infused during the current infusion.
J TIME LEFT
This decreases as the machine operates in order to show the user at all times the amount of time that is remaining for the infusion to complete.
There are six different options available to configure the Anifusion® IV Pump to how you wish to operate it. These are all described in detail on the following pages.
There are 5 different modes of operation which you can select for your patient. These are:
ml/hr mode
Animal mode (constant and variable)
CRI mode
Sequence Mode
The Anifusion® IV Pump will arrive with this setting as the default and it is this setting that is generally used in practice. The method for setting up the Anifusion® IV Pump has been described previously in the ‘Set up guide’ (starting on page 10). Select each option and use the keypad to enter the amounts needed.
Press to confirm each entry. Alternatively, by entering the VTBI and the time you wish the infusion to be completed, the Anifusion® IV Pump will then calculate the ml/hr rate automatically for you.
In both versions of Animal mode, the user is required to enter details such as species, body weight in kg, and % of dehydration of the patient. Based on this, the pump will then be able to calculate the amount of fluid that is required to cover both fluid deficits and fluid maintenance amounts for that patient, over a 24 hour period. The rate at which this fluid is delivered, is determined by the two different versions of this mode.
Animal mode constant: by selecting this version , the deficit and maintenance amount of fluids required, will be added together and a rate of infusion will be calculated by the pump for delivery in mls per hour over a 24 hour period. Animal mode variable: In this version, the pump will calculate the rate for the deficit amount to be infused over a 6 hour period initially, followed immediately and automatically by the remaining maintenance amounts to be delivered over the remaining 18 hours.
In this mode, it is possible to programme the Anifusion® IV Pump to run a Constant Rate Infusion. (CRI) Tap on each section to select and enter the relevant information. The machine is programmed to have the weight in Kg. Full details as to how to program this mode are on page 18. We have also included a ‘how to’ guide, at the back of the manual as to how you calculate the drugs needed for a CRI.
NB This is generally set as mg/kg/hr but can be altered if required.
Once set, your pump will work out the hourly rate and will keep a running total of the amount of drug being infused.
In this mode the user has the ability to program a bolus amount of fluid to be infused at a chosen rate. This can be used for any amount of fluid and at any rate of infusion but is primarily designed to enable the patient to receive a bolus of fluid as quickly as possible when needed. A second amount of fluid can be programmed in at a chosen rate, so that once the bolus has been infused, the second more long term rate can be run automatically without the need for re programming the infusion pump.
In this Mode, the Anifusion® IV Pump will allow the user to set up to 5 different sequences for administration. So, for example, you may wish to have your patient on 4 x maintenance for the first hour, then reduce that to twice maintenance for three hours, and then on maintenance only for the following 18 hours. The Anifusion® IV Pump will allow you to set each sequence so that the patient will receive up to 5 sequence rates consecutively and automatically without the user having to remember to manually turn the fluids up or down. Once set, press start and the infusion pump will start running. The display screen will advise you what rate is currently running, what the next rate in the sequence will be, and then how long until this is due to start. The volume displayed is the volume infused thus far. The TV (Total Volume) time left is the total time for all programmed sequences to run.
NB, The Anifusion® IV Pump will show you on the last screen the total volume that has been programmed into the anifusion pump, taking into account all sequences involved. Please ensure that the bag of fluids to be infused is large enough to cover all sequences.
In this section it is possible to alter the default settings that the Anifusion® IV Pump will arrive with. In this way, you can tailor the settings to suit the individual needs of the user and the hospital environment they are in.
Once the programmed infusion has ended, the alarm will sound and the Anifusion® IV Pump will automatically revert to the KVO (Keep Vein Open) setting.
Press to stop the alarm. Press it again at any point to stop the KVO.
By delivering this amount, it ensures that the infusion is still patent, and that the patient’s vein will remain open until such time that the patient is either removed from the infusion pump or a new infusion started. The Anifusion® IV Pump will arrive with the default setting of 1.0ml per hr. This can be altered to as low as 0.01ml or as high as 5ml per hr. It is not possible to switch this function off. However, entering a figure of 0.00ml will ensure that the KVO function will not operate.
The Anifusion® IV Pump arrives with the bolus rate set at 1000mls /hr. This amount can be set to as little 1.0ml/hr and as high as 2000mls per hr. The same figures will be used if the infusion pump is to be used to purge the line. Once programmed here, the bolus / purge function is accessed on the front panel of the infusion pump (see page 49). Max bolus/ purge vol = 50ml.
The Anifusion® IV Pump is able to detect any pressure in the line and will sound an alarm to alert you that there is an occlusion / blockage. The pump is set with the default of 2 but can be altered here between levels 1 (most sensitive) and 4 (least sensitive). Once set, the pump will detect pressure in the line, whether this be an upper occlusion above the pump (eg roller clamp in closed position or a lower occlusion below the pump (eg. a blocked IV cannula). The units in which the pressure is expressed can be altered further in the settings (see below).
NB. If blood products or colloids are used, a less sensitive setting may be needed as these fluids are thicker than saline and will naturally cause more pressure in the line during infusion.
Warning: Level 1 will allow flow rates of 100mls/hr or below, only. If a higher setting is used, the anifusion pump will automatically change the occlusion level to level 2
The Anifusion® IV Pump is able to detect air bubbles within the line as it passes through the sensors in the infusion pump. The default is set at 2/ 50ul but can be set at one of the 5 levels available. Our suggestion would be to have the setting as low as possible to ensure maximum risk detection. Use the slide gauge to alter this setting.
The Anifusion® IV Pump is set to prevent an accumulative amount of air passing through the IV line within a 15 minute time period. When the bubble size is smaller than what has been set, the air bubble will be allowed to pass through undetected; however, the anifusion pump will sound an alarm if there are several of these smaller sized bubbles, as this will be detrimental to the patient’s health. Use the keypad to alter this setting.
Once an infusion is running and the screen is touched, the Anifusion® IV Pump will prompt you if you wish to unlock the pump. Select the tick to confirm and then you will be able to adjust your infusion as needed. Chose between 15s up to 30min for the screen lock to be implemented or switch off altogether.
The Anifusion® IV Pump will sound an alarm at a pre-programmed time interval to warn the user that their infusion is nearing the end. This can be set here at 2,5,10,15,20 or 30-minute intervals or can be switched off altogether.
The alarm will sound if the pump is idle, but only when an IV line is inserted.
The pump is designed to use patient weight in Kg. Currently this setting cannot be changed. See page 77 for conversions.
This allows you to alter how the occlusion pressure is to be expressed in units. This can be mm/Hg, kPa, Bar, psi.
Select to switch on or off. With the Micro mode in the ‘on’ position, it will only allow a maximum amount of fluid to be infused per hour.
NB:Default is set as 100mls/hr, but this can be altered in the maintenance section.
Select to switch on or off depending if a drop sensor will be in use.
Adjust the level accordingly to how quickly you wish to be alerted that there are no drops present. Default setting is at 2.
In this section you can select up to 5 commonly used IV sets to be available for your infusion. Once selected, when the Anifusion® IV Pump is initially started and a new infusion programmed, please confirm your chosen IV set, and this is where your 5 choices will appear. The Anifusion® IV Pump will arrive with pre-loaded IV lines calibrated for use as default, and these will appear here along with any other lines you have subsequently calibrated. Your 5 choices can be selected and de selected as many times as you wish.
This will sound once pressure is becoming too high. The default setting is off but it is our recommendation to have this switched on.
YYYY/MM/DD
Adjust the levels of the alarm from the lowest setting 1 (10%) to the highest setting 10 (100%)
Select ‘Date’ and then ‘Time’ and enter the details in the order requested on screen. Once done you can select the way you wish the date to be displayed, and to choose whether you wish the time to be displayed in 12-hour or 24hour format.
It is possible to have a screen lock on your Anifusion® IV Pump if you so desire. This is to prevent any inadvertent changes by mistake. Choose how long before the screen lock option comes into effect after an infusion has started. This can be from 15 seconds up to 30 minutes. The default time is 1 minute.
You can also select ‘OFF’ to disable this operation. The Anifusion® IV Pump will come with ‘OFF’ as default.
adjust the levels of screen brightness from 1 up to 10
With this mode in operation the Anifusion® IV Pump will reduce the brightness of the screen at the designated time. You can choose the level of brightness and also at what time you wish this mode to start and end.
Night Mode can be implemented anytime between 17:00 (5pm) and 09:00 (9am).
NB please ensure the time is set correctly on your Anifusion® IV Pump in order for this mode to operate correctly.
In this section of the pump you can enter the following patient details:
• Location
• (Patient) Name
• Patient Number
• Gender
• Species
• Age
• Weight
• Condition
NB: Running mode and IV line must be setup before patient details!
Select condition which can be found on page 2 of the patient mode. This will display a 3 page menu of different conditions to chose from. Select the condition of your choice to bring up further pages to allow you to chose which drug / fluids you wish to infuse.
Once you have selected your fluid of choice, this will display further information about the drug you have chosen.
Pressing and then to go back to the main menu.
Once you have set up your infusion, the fluid you have chosen will be displayed on the running screen.
The Anifusion® IV Pump will keep a log of every occurrence the pump has made. It will record when the pump was switched on or off, when an infusion has been started or stopped or if any errors have occurred such as an occlusion etc. Very important if you wish to track the fluid therapy of a patient, particularly if a problem has been encountered. Please ensure the date and time are entered correctly on your pump in order for these records to be accurate.
The Anifusion® IV Pump can record up to twenty infusions. When it has recorded more than twenty it will write over the previous infusion recordings, starting with the earliest. Again, very helpful for tracking patients’ treatments, or you can simply select one of these therapies to start a new infusion at the same rate. Simply Select the desired rate, and the pump will revert back to the initial set up screen whereby you can simply press start.
NB: do not forget to reset the volume infused total!
Access denied, core system settings, contact Millpledge
It is highly recommended that great care is taken when accessing this section of the pump. Alterations to some categories of this section will invalidate any warranty and technical support from Millpledge.
Select ‘Language’ and then choose from the options which language you wish to use. English is set as default. Press return once completed to bring you back to the system menu.
This is the serial number of your pump. This is required whenever you contact Millpledge for technical support or issues relating to the purchase. Press return to go back to the system menu.
The SN can also be found on the serial plate on the back of the pump.
This area gives you details as to what version, build and software you are using. This information may be required if contacting Millpledge for technical support or contractual issues.
Access to this area is denied and can only be done by an authorised member of staff who has the required permission and password from Millpledge.
Once the password has been issued, Select Maintenance. The message will come up saying access denied but then press and you will be able to input the password.
Press once done. This will take you to the maintenance menu.
This is the section you would use to maintain your IV lines and calibrate new lines as described on the next page.
It is our recommendation that this section not be accessed, as once the data is reset or deleted it cannot be retrieved again.
In each section it will ask you if you wish to proceed. By pressing the tick button, all data will be deleted. You may be asked for the password and once this has been entered and the tick selected, the data will be cleared.
This provides you with information relating to the sensors within the infusion pump. Changing the settings on here will cause the pump to stop working correctly and will immediately invalidate any warranty you may have in place. If these settings are altered in any way, Millpledge reserves the right to withdraw any technical advice and the pump may require a service.
Changing the settings here will cause the pump to stop working correctly and will immediately invalidate any warranty you may have in place. If these settings are altered in any way, Millpledge reserves the right to withdraw any technical advice. The pump may require a service to restore factory defaults.
This provides information to the amount of memory used by the pump and what is available to use. You may be asked to access this information when reporting a technical issue.
The default setting for this is 100ml/hr. It can be increased here to a maximum of 200mls per hour. For safety reasons when using the infusion pump with this setting on, the user will not be able to programme any more fluid rates than the maximum set here.
‘Clear all records’ : This will remove all history of all infusions this pump has carried out.
‘Clearing user data’: This will remove all personalisation of the pump that your practice has carried out. Eg if you have set the sound to 60% it will reset to Factory settings. If you have switched off the KVO function it will switch it back on again etc.
‘Reset all settings’: By inputting a password and clicking on the tick, this will remove all records and all data as detailed above. It will also remove all iv lines you have calibrated for use. The anifusion will revert back completely to the factory settings it arrived with. The password required for this area will only be issued to you by a technical advisor.
Clear all records
Clearing user data
Reset all settings
The Anifusion® IV Pump will arrive with either Millpledge Aniset 15/20/60 drop pre-calibrated IV sets ready to use. A further 13 additional lines can be calibrated to use with the Anifusion® IV Pump. Once calibrated, up to five of these lines can be selected as the most commonly used lines and these will show on the initial set-up screen when you use your pump.
When the infusion pump is initially switched on and you insert your IV line, the Anifusion® IV Pump will immediately ask you to select which line is required for use, out of the list of commonly used lines.
Select the one required.
These commonly used lines can be selected or de-selected from the total amount calibrated as described on page 42.
The Anifusion® IV Pump will operate successfully using lines that will deliver
10 drops per/ml (USA and Canada)
15 drops per/ml (USA, Canada and China)
20 drops/ml (UK/EU and Australia)
60 drops per/ml (UK, EU, USA, Canada, Australia and China).
It is of course imperative that the correct line is selected to ensure the correct volume of fluid is delivered.
Once selected, this IV line name will appear in the left-hand corner of the screen at all times. If the Anifusion® IV Pump is running on battery power, the name of the IV line will alternate between this and the words ‘batt power’.
If you wish to choose an alternative brand, switch the pump off and back on and select again.
The Anifusion® IV Pump can be calibrated to store up to 15 different brands of IV line.
By default, the Anifusion® IV Pump will arrive with the following lines set up as favourites*.
1. Millpledge Aniset 20 drop
2. Millpledge Aniset 60 dro
Presets may alter depending on market.
It is very easy to re-program the Anifusion® IV Pump to show the five favourite brands of your choice, as follows…
From the main menu screen select ‘Settings’ and navigate through to the second page then select Commonly used IV set. This will bring you the list of IV sets available. The ones programmed as favourites will have a tick by them. Up to 5 can be selected.
Once the maximum of 5 is reached you must deselect one entry and select another to replace it.
* NB. The default for USA Canada is as follows:
Aniset (A) - 15
Aniset (A) - 60
Aniset (B) - 15
Aniset (B) - 60
The Anifusion® IV Pump can be programmed to hold up to 15 different lines at one time.
It is possible to add a new brand to the list (if less than 15 are already held), or to replace an existing entry with a new one. You cannot delete the pre-programmed IV lines. New lines will need to be calibrated.
You will need to do the following before calibration:
• Prime the IV line you wish to be calibrated, in the usual way.
• Insert the IV line into the Anifusion® IV Pump as previously shown.
• Attach an 18g IV cannula to the distal end.
• Weigh a small plastic container on digital scales (0.000g) Up to 20mL fluid volume container, capable of measuring very small volumes of fluid accurately.
• Record the weight of the empty container (A)
On the infusion pump perform the following steps:
• On the Main Menu screen, select ‘System’
• Then select ‘Maintenance’
• A warning will pop-up informing you that access to core systems is denied.
Press
• You will need to enter your password*.
Press when done.
• Select ‘Brand Maintenance’
• ‘Add new brand’ (if less than 15 brands already programmed).
• Select ‘Brand’
• Name your new IV set. Press ‘tick’ when finished.
*Your system password is issued when you purchase your pump
• Select ‘Precision calibration’
• Select ‘Size’ and change the drop value to that of your new IV set. Press Typical drop rates /ml =
• With the IV Cannula attached, place the distal end into your empty container.
• Press ‘Start calibrate’ on the touch screen. Do not press the Stop/Start button!
• The Anifusion® IV Pump will then deliver a volume of fluid into the empty container over a 3 minute time period.
• The Anifusion® IV Pump will alert you when the calibration has completed.
• Remove the container with the fluid and place on the digital scales.
• Record this weight (B)
• Take the weight ‘A’ (that of your empty container) away from weight B.
• This is the amount in mls the pump has delivered.
• Select ‘volume’ on the touch screen and enter this new amount, using the keypad. Press tick.
• This brand of IV line is now calibrated.
• Go to the main menu -> settings-> page 2-> Commonly Used IV Set -> select your new brand so it will appear in your favourites.
• Discard the used IV line and switch off the pump.
• When you switch the infusion pump on again for use, the new line will now be available for selection when setting up for a new infusion.
It is imperative that the line used for calibration be discarded immediately and NOT used for a patient infusion due to the crushing of the line during the calibration procedure.
To delete a line follow the steps above but instead of selecting ‘Add new brand’ choose the delete option and then select from all the previously calibrated lines, which one you wish to delete and replace.
The infusion will ask you to confirm that you wish to delete the line you have selected.
The Aniset Anti-Kink® IV lines are pre-programmed and cannot be deleted.
Press to confirm and deletion of the selected brand.
Do you want to delete this brand: Alt Brand?
This function is accessed by pressing the hard button on the front panel of the infusion pump.
This is used when an IV line has been inserted into the Anifusion® IV Pump and has not yet been attached to a patient. The purge button will force fluid through the IV line, by-passing the air bubble sensors in the pump. It will allow you to purge the IV line of all air bubbles that may be present, until only fluid remains in your IV line.
It is imperative that this is never performed when a patient is attached to the line, as the air bubbles will be pushed into the patient’s vein.
NB: We do not recommend that you use this function to prime your IV line.
This function is accessed by the same button on the front panel. It is to be used when the infusion is running and the patient is attached to the IV line. It is designed to give a volume of fluid rapidly, usually in large quantities and in a very small space of time. The rate is pre-set to a maximum of 2000mls/hr but can be altered as shown on page 28.
Press the Bolus button once.
You can now manually input the amount of fluid you wish to be infused up to a maximum of 50mls.
Press ‘start’ on the touch screen. The pump will deliver the fluid at the pre-set rate.
Alternatively, you can simply press and hold the Bolus button and the pump will deliver the bolus until either you release the button or the maximum amount has been reached.

Switching the Anifusion® IV Pump off and back on again will clear all previous data such as infusion rates recently used, and patient details recently entered. It is imperative that this be done between patients, as any error history and alerts will also be cleared from the memory. The IV line should be changed every 8 hours and one line should not be used between multiple patients.
The Anifusion® IV Pump will neither switch on nor off if an IV line is still inserted within the pump.
As users are most likely to be wearing gloves, the touchscreen on the Anifusion IV pump is resistive rather than capacitive. This means, it requires a manual touch, involving some pressure, in much the same way as an ATM screen. It is not capacitive like a smartphone, which is programmed to use the human fingerprint or specialised device for input, with no pressure required.
You can re-calibrate the touchscreen should this be needed by following these steps
Press once the “on / off button” to display the standby screen (where you have the choice to power off, standby or cancel) Then, simultaneously, press the “stop /start button” and the “bolus / purge” button.
Press in turn the crosses that will now appear on the screen Once completed, press cancel, and the touchscreen calibration has completed.
ALARM TYPE
Reminder Alarm
This alarm will sound after the designated time delay, if the pump is on with an IV line inserted, but has been left idle for a period of time.
SOLUTION
NOTES
ALARM TYPE
CAUSE CAUSE
SOLUTION
NOTES
ALARM TYPE
CAUSE
SOLUTION
Select to stop the alarm. The infusion pump will then repeat the alarm until an instruction is given or an infusion is started, or it is switched off entirely.
The Alarm Indicator will flash orange and the screen will be amber. NB : Choose from 2 minutes to 30 minutes of no activity before alarm sounds. Can also be switched off. Alarm only sounds if an IV line has been installed. See settings.
No IV
The alarm will sound immediately once the start button is pressed, if the door has been left open and is unable to detect an IV line or if there is no IV installed.
Select to switch alarm off and install an IV line. Close the pump door.
The Alarm Indicator will flash orange and the screen will be red.
VTBI near end
This alarm will sound when the infusion pump has a programmed time until its VTBI is nearing its completion. It will continue to sound until the tick is pressed or until the infusion is complete.
Select to acknowledge.
NOTES
ALARM TYPE
CAUSE
SOLUTION
The Alarm Indicator will flash orange and the screen will be yellow. Choose from 2 minutes to 30 minutes before completion. You also have the option to turn this option to off.
Door open
The door open alarm will sound if the door to the infusion pump has been opened whilst running an infusion. To correct, close the door, Select the tick and press start to continue. Nb,If the anifusion pump is connected to the anifusion portal, opening the door during infusion may terminate the data transfer. To resume, you will need to re enter the data on patient / condition, and all the information will be picked up and resent to the central monitoring system.
Shut the door.
ALARM TYPE
Air bubble
If an air bubble is detected, the alarm will immediately sound, and the infusion will stop.
SOLUTION
NOTES
The infusion will automatically stop when this alarm sounds. Select to acknowledge the alarm and stop it sounding. Rectify the problem by closing the roller clamp and quick release clamp and remove the iv line from the infusion pump. Eliminate all air bubbles from your i/v line and re insert it into the pump. Ensure that the clamps are in the on / open position. Change the IV line. Press start to restart the infusion pump.
The Alarm Indicator will flash Red and the screen will be Red.
NB it is possible to change the tolerance of the presence of air bubbles.
Go to settings.
ALARM TYPE
Cummulated air
The Anifusion IV pump will detect if smaller air bubbles, than the bubble size set, are being let through and if combined, will therefore create a larger air bubble.
SOLUTION
NOTES
ALARM TYPE
CAUSE CAUSE CAUSE
SOLUTION
NOTES
The infusion will automatically stop when this alarm sounds. Select to acknowledge the alarm and stop it sounding. Rectify the problem by closing the roller clamp and quick release clamp and remove the iv line from the infusion pump. Eliminate all air bubbles from your i/v line and re insert it into the pump. Ensure that the clamps are in the on / open position. Change the IV line. Press start to restart the infusion pump.
The Alarm Indicator will flash Red and the screen will be Red. NB it is possible to change the tolerance of the presence of air bubbles. Go to settings.
VTBI infused
This alarm will sound to inform you that the infusion has reached its conclusion.
Select to acknowledge the end of infusion and switch off the alarm.
Flashing orange indicator and red screen. The infusion will automatically switch over to KVO until the tick is clicked. NB: the KVO option can either be switched off or amended. Go to settings.
ALARM TYPE
Pressure high
SOLUTION
NOTES
ALARM TYPE CAUSE CAUSE
SOLUTION
NOTES
The alarm will sound to indicate an occlusion has occurred preventing the infusion working.
The infusion pump will automatically stop working.
Press to acknowledge the alarm. Check your IV line for kinks / blockages, ensuring the clamps on the IV line are in the off / closed position.
Check the patient’s IV cannula for any blockages and that it is inserted correctly. Once rectified, replace the IV line into the infusion pump. Place clamps to on / open position and restart the pump.
Flashing orange and screen will turn red. If the infusion pump is being used for fluids other than crystalloids, the viscosity of the fluid may require that the tolerance of the occlusion level be altered. Go to settings to higher the pressure tolerance required.
Low battery / battery empty
NB: it is possible to change the levels of pressure tolerated before the alarm will sound. See settings. This alarm will sound to warn the operator that the stored battery power is either coming or is at an end.
Press to acknowledge and switched to an electrical supply as soon as possible.
Indicator light will flash orange and screen will turn red.
The battery will recharge all the while the Anifusion® IV Pump is connected to a mains electrical supply. (If an infusion is running, it will take longer to recharge.) Please ensure the battery is fully charged to 100%, before using battery power for the first time. The pump will alert the user that there is low battery power when there is 18% remaining.
At 10%, whilst the Anifusion® IV Pump remains on and allows the user to access all menus, it will decide that there is not enough power to run an infusion completely and correctly. Therefore your infusion will not run until you re connect to a mains electrical supply. For full Anifusion operation do not run the pump with less than 10% battery power remaining.
At 5% the infusion pump will shut off in order to preserve system settings.
We recommend that for optimal battery usage, the pump is fully charged at least once a month. It may also be advisable to change the batteries yearly, especially if battery power is used regularly.
ALARM TYPE
No power supply
Alarm will sound if the pump becomes unplugged or the electrical supply is switched off whilst the infusion pump is switched on. The pump will continue to run using the battery power.
SOLUTION
NOTES
ALARM TYPE
Press to acknowledge and to switch the sound of the alarm off. The infusion pump will continue to run as normal, but the orange indicator light will remain on and the wording in the top left corner of the screen will alternate between no power supply and the name of the drip line being used. The pump will continue to show this until an electrical supply is plugged in.
Flashing orange and the screen will turn yellow when the initial electrical supply is disconnected or if the pump is switched on without an electrical supply. NB: The indicator light will remain solid orange all the time battery power is in use.
Drop sensor connection
No Sensor in use.
The Anifusion® IV Pump can be used in conjunction with a drop sensor. This mode needs to be activated in the settings menu.
SOLUTION
You will be alerted if this function is switched on but with no sensor in place. If no sensor is being used, simply switch this function off to rectify the problem.
ALARM TYPE
CAUSE CAUSE CAUSE
SOLUTION
Standby time expired
If the Anifusion® IV Pump is left in standby mode, this will end after 24 hours and the alarm will sound. The screen will display a countdown to when this 24 hour period is due to end.
Press to cancel the alarm.

A blood transfusion may be needed as a result of a lack of red blood cells (anaemia) in the circulatory system. This could be as a result of a disease process or condition such as haemolytic anaemia or as a result of blood loss following surgery or trauma.
Normal circulatory volume in dogs is 80 – 90 ml/kg
Normal circulatory volume in cats is 50 – 70 ml /kg
TO CALCULATE BLOOD LOSS FOLLOWING SURGERY
Know the weight of a dry swab and multiply this by the number of swabs used . This equals the total weight of the dry swabs.
Weigh the number of blood-soaked swabs used. Deduct the weight of the dry swabs from the weight of the soaked swabs.
The remaining weight will be the weight of the blood. 1g = 1ml of blood
If suction has been used, deduct the amount of the blood in the suction machine from any lavage that has been used and add this figure to the blood loss collected by the swabs.
If the blood loss is 10% of the total blood volume, use crystalloids such as Hartman’s Solution (Lactated Ringers USA/Canada) to replace lost volume x 4.
If blood loss is 10 to 15% use colloids such as Haemocoel at 5ml / kg rate and 1.5 x volume lost in a bolus and then continue with crystalloids at 4 x volume lost.
If blood loss is 20% plus, your patient requires a blood transfusion.
• A blood sample should be taken from your donor patient and recipient.
• The donor patient should have a PCV taken and temperature taken.
• Perform cross matching and blood typing and an agglutination test to check for suitability.
In the circumstances of a condition, a blood transfusion will be given to replace the red bloods cells in the circulatory system to give the patient the best chance of recovery. In the situation of actual blood loss, you can calculate blood loss and replace what has been lost.
• A maximum of 16ml per kg can be taken from the canine patients.
• A maximum of 10ml per kg be taken from feline patients up to a maximum of 50mls in total.
CALCULATING THE AMOUNT OF BLOOD REQUIRED FROM THE DONOR PATIENT
As a general guide , 2mls of whole blood per kg body weight will raise the recipients PCV by 1%.
So for example, if the recipient patient weighs 40kg , 80mls of whole blood will raise the PCV by 1%.
To raise the PCV by 5% would mean that 400mls of whole blood will be required (80 x 5 = 400mls)
To be a bit more accurate you can calculate the amount of blood required by using the following formula:
Volume of donor blood required in ml =
DOGS – 80 x bodyweight (bw) in kg x desired PCV increase ÷ PCV of donor blood.
CATS – 60 x bodyweight (bw) in kg x desired PCV increase ÷ PCV of donor blood.
So for example if a 40kg dog needs to have his PCV raised by 5% and the donor blood has a PCV of 47%:
80 x 40kg bw x 5% ÷ 47% = 340mls of whole blood needed.
BLOOD TYPING
Dogs and cats have a number of blood groups.
Blood typing determines the presence or absence of speciesspecific inherited antigens which are present on the surface of the RBC’s.
These antigens are responsible for inciting devasting transfusion reactions.
In 98% of the population, these antigens are not present.
The first mismatched transfusion will only result in sensitisation of the immune system to the antigen leading to the development of the development of antibodies over the course of 4-5 days.
Cats should always be blood typed as they have natural occurring antibodies to the antigens occurred with other blood types.
In dogs, there are very low levels of naturally occurring antibodies, but these can occur as a result of a transfusion making a potential reaction to a subsequent transfusion quite high.
BLOOD TYPES IN DOGS
Canine blood typing kits are testing for the presence of DEA 1 antigen. It will determine if the patient is DEA 1 negative or positive.
DEA 1 negative dogs are viewed as being universal donors as they can be used successfully as donors for both DEA 1 negative and Positive dogs.
DEA 1 Positive dogs can only be used with another positive dog.
BLOOD TYPING IN CATS
Blood typing for cats uses the AB system. Testing kits will determine if they are A, B, or AB. They can only be matched with a cat with the same blood type.
If no other donor is available, an A cat can be used in an emergency for an AB cat but this is not really recommended.
Cross matching is performed to determine the compatibility of blood between donor or recipient. Cross matching is recommended even if blood typing has been done.
Cross matching should always be done
• if the recipient has already received a blood transfusion
• has had a previous transfusion reaction
• has an unknown previous history
• has been pregnant in the past
Cross matching can be done in house using a test kit or can be performed by the Pet Blood Bank who will test the blood with the recipient’s sample prior to sending out the best match.
If there is a reaction between the recipient and the donor the blood should not be transfused.
A cross match should ALWAYS be done for every subsequent transfusion even if the same donor blood is used.
• Dogs need to be above 25kg in weight and cats need to be above 4kg in body weight.
• Both dogs and cats need to be between 1 to 8 years of age.
• Both dogs and cats need to be vaccinated but more than 2 weeks ago.
• Worming needs to be current but more than 2 weeks ago.
• Ideally cats should be indoors only if possible.
• General health needs to be good with a biochemistry and haematology blood screen being performed.
• No more than 3 to 4 donations per year per donor dog.
• No more than 4 to 5 times per year per donor cat.
• Sedation in dogs best avoided.
• Sedation in cats is recommended with a suitable protocol.
• IVFT should be done for 1 hour for dogs if sedation has been used.
• IVFT should always be used for cats.
• Food and water to be offered to the donor.
• Gentle exercise for dogs for 72 hours and cats to be kept indoors for 24 hours to 48 hours.
• Record baseline PCV and TPR.
• Take patient outside to urinate and defaecate.
• Place a fresh dedicated iv cannula.
• Only use SALINE to flush. DO NOT use Hartman’s or colloids at all.
• Do not give any other medications via the cannula used for blood transfusions.
• Collect blood using commercially available collection sets, containing a suitable anticoagulant.
• Gently tip the bag from side to side to encourage the anticoagulant to thoroughly mix. Do not shake or agitate.
• Use collected blood as soon as possible to maintain the heat. Must be used within 4 to 6 hours.
• Whole blood should ideally not be warmed and given at room temperature.
• Over warming will cause clotting and haemolysis and can also encourage any bacterial activity.
• If warming the blood is needed, use a water bath and always protect the blood bag with a zip lock bag to prevent contamination of the ports.
• Never heat blood or fluids in a microwave.
• Use a commercially filtered blood administration line.
• Check the delivery rate of your transfusion line as some
deliver at 15 drops per ml (Aniset US) rather than 20 drops per ml (Aniset UK).
• Alternatively, use an in-line blood filter 170um to 200um to filter blood clots (suitable for transfusions of 250mls or less).
• Few infusion pumps and syringe drivers can be used but do check with manufacturers first.
• The Anifusion® IV Pump has certificated blood infusion capability.
• Connect the blood product to the transfusion line in the same aseptic way you would connect any other fluids to a giving set.
• Prime the transfusion line with the donor blood, eliminated any air bubbles.
• 0.25ml / kg/ hr for 15minutes to check tolerance.
• 1ml per kg per hour for 15 minutes.
• Increase to 2ml per kg per hour for a further 15 minutes.
• TPR should be monitored carefully every 10 minutes until completion.
• If no adverse effects, can increase to 5 to 10ml per kg per hour for the duration
• The Transfusion should not exceed 4 hours due to risk of bacterial activity.
• This 4 hour time frame starts at the point the unit of blood is breached with the transfusion line.
• If the Anifusion® IV Pump is being used to deliver the whole blood, the delivery rate must not exceed 400mls/ hour.
• A new transfusion set should be used for each unit of blood given
• A TPR and baseline PCV should be taken prior to blood transfusion.
• TPR, CRT, MM and blood pressure should be taken throughout.
• The transfusion should not be stopped unless a reaction occurred, or a MRCVS has requested this.
• Offer water throughout but no food.
• Take a TPR and PCV upon completion of the transfusion.
• Consider an indwelling urinary catheter to monitor for haematuria.

Reactions are rare if blood typing and cross matching have been done (recommended).
A reaction occurs if the blood becomes haemolysed.
Haemolysis can occur as the cells react to each other in mis-matched blood hence the reason for typing and cross matching prior to collection / administering.
Haemolysis can also occur as a result of result of incorrect physical collection, handling and delivery of the of the blood transfusion hence the importance for using the correct equipment.
TPR Monitoring: call the vet if the patient becomes tachycardic, dyspnoeic, tachypnoeic, abnormal heart or pulse rhythm, elevated temperature.
General demeanour: call the vet if the patient becomes weak, ataxic, depressed, vomiting, hypersalivation, vocalising, muscle tremors or convulsions.
Appearance: Urticaria, facial oedema, jaundice.
Urination: Haematuria.
If changes are subtle it can be hard to determine if the changes are due to the blood transfusion or as a result of the original condition. The blood transfusion can be slowed to 0.5ml per kg per hour. Care should be taken if considering the use of steroids or antihistamines as you may be masking a reaction, which would lead to a delay in stopping a transfusion that is causing harm. All drugs should therefore be considered with caution and only under the direction of the attending Veterinary surgeon.
• The details of the donor have to be recorded.
• The date the blood was collected.
• The blood type.
• The PCV at the time of collection and temperature at time of collection.
• The name of the clinician.
• How much blood was collected.
• Complete paperwork for your recipient patient detailing exactly how the blood was administered.
A constant Rate Infusion (CRI) is often used in conjunction with Fluid therapy. If medication is given in the usual way, by injection, at regular intervals throughout the day, the patient will experience highs, when the medication takes effect and lows when the medication wears off.
By giving the patient a constant rate of infusion (CRI) the patient will receive a constant administration of the medication, eliminating the high and low effects of the drug. This is especially important if analgesia or sedation is being used.
In order to calculate a CRI, you require the following information.
• The patient’s body weight
• The Length of time your fluid bag will last the patient at its current rate of infusion.
• The concentration of the drug in the bottle.
• The dose rate of the drug to be given.
A) The patient’s body weight from the example is 20kg
B) The patient is currently on 40mls per hour and the bag is 500mls.
500mls / 40mls per hour = 12.5 hours. Therefore, your fluid bag will last 12.5 hours.
C) From the example, the concentration of the drug is 10mg / ml
D) From the example, the dose rate of the drug is 0.1mg/ kg/hr
EXAMPLE
A 20kg dog requires a CRI of Morphine (10mg/ml)
The dose rate is 0.1mg /kg/hr
Drip rate is 40mls per hour
A 500mls bag is being used
0.1mg dose rate x 20kg body weight = 2mg per hour.
2mg per hour x 12.5hours = 25mg needed in total
25mg needed in total / 10mg (per ml in bottle) = 2.5mls needed in total
Important: remove 2.5mls from the fluid bag BEFORE adding the 2.5mls of the drug needed
When using the Anifusion® IV Pump, the screens using these examples will look like the example shown. Once set, your CRI infusion should say it will last 12.5 hours
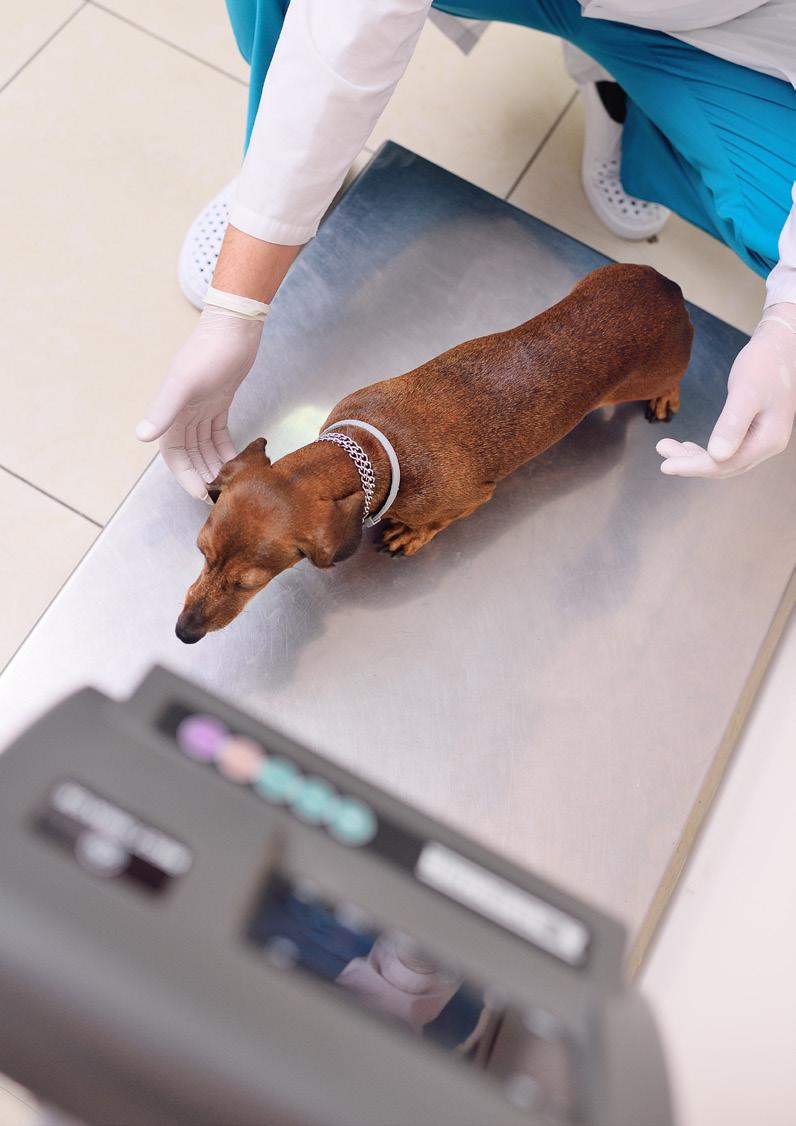
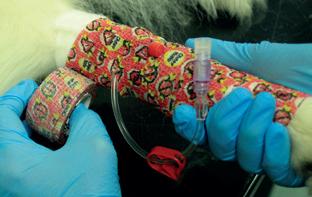
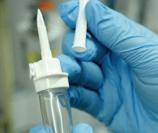
Ideally, an aseptic technique using sterile gloves should be adopted, but in reality this isn’t always possible. If you are not using surgical gloves then your hands should be washed thoroughly and normal examination gloves should be used instead.
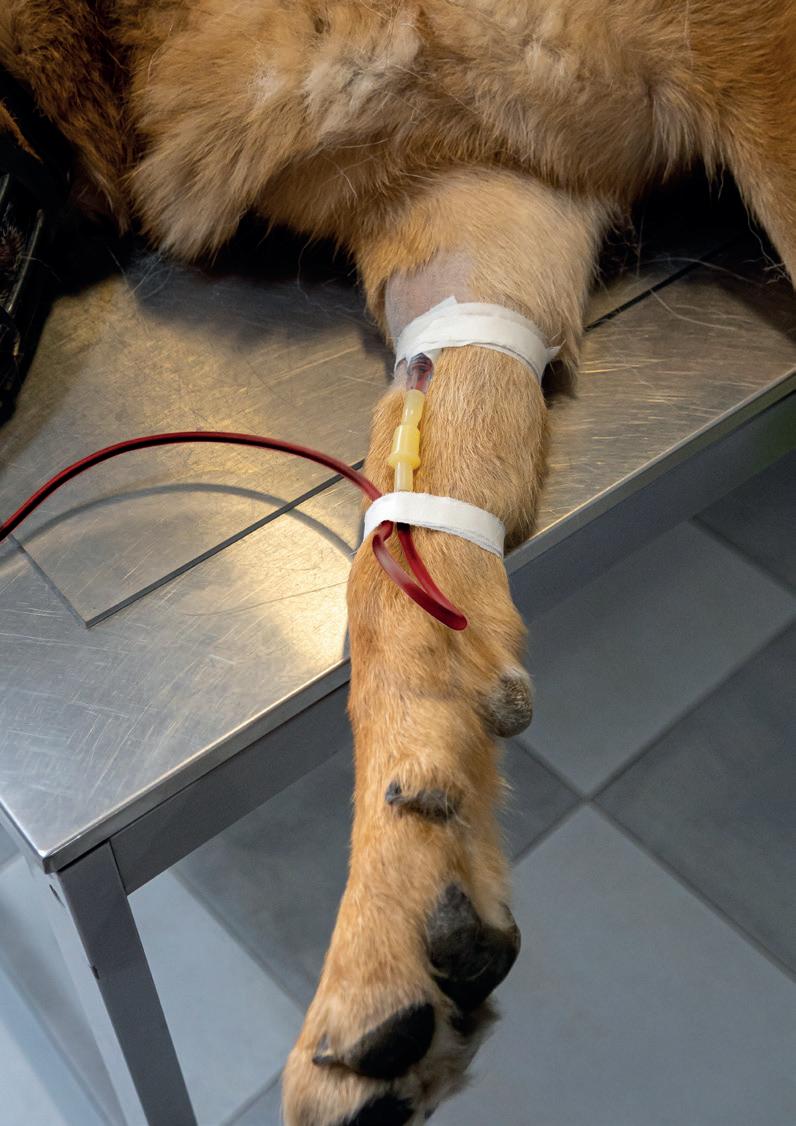
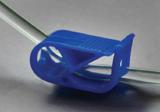
Ensure that an IV cannula/catheter has been placed and is patent. Attach Aniset™ T-connector to the patient if one is not already present.
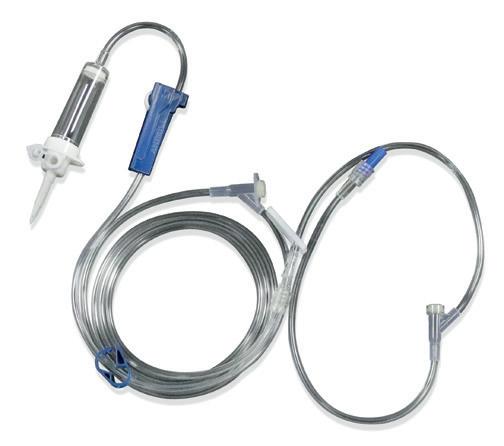
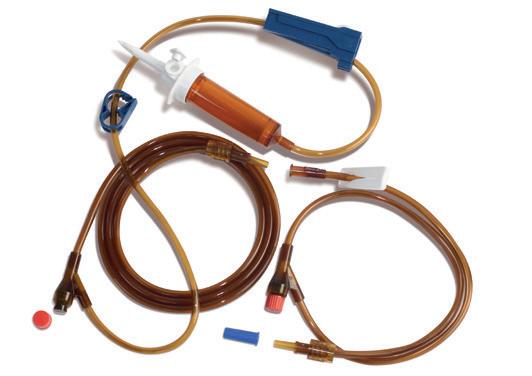
Check the packaging of the giving set to ensure that it is not damaged and / or out of date. Also check that the fluids are in date, are not discoloured or have any sediment present.
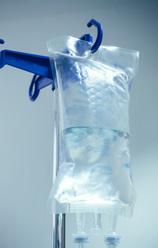
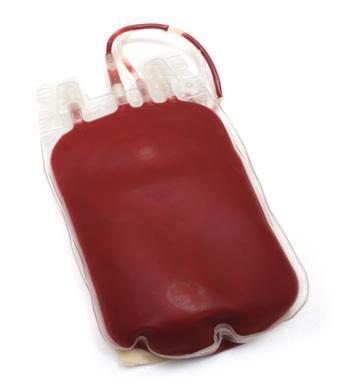
Remove the outer cover from your fluid bag and using the loop provided on top of the fluid bag, hang on a drip stand or similar device.
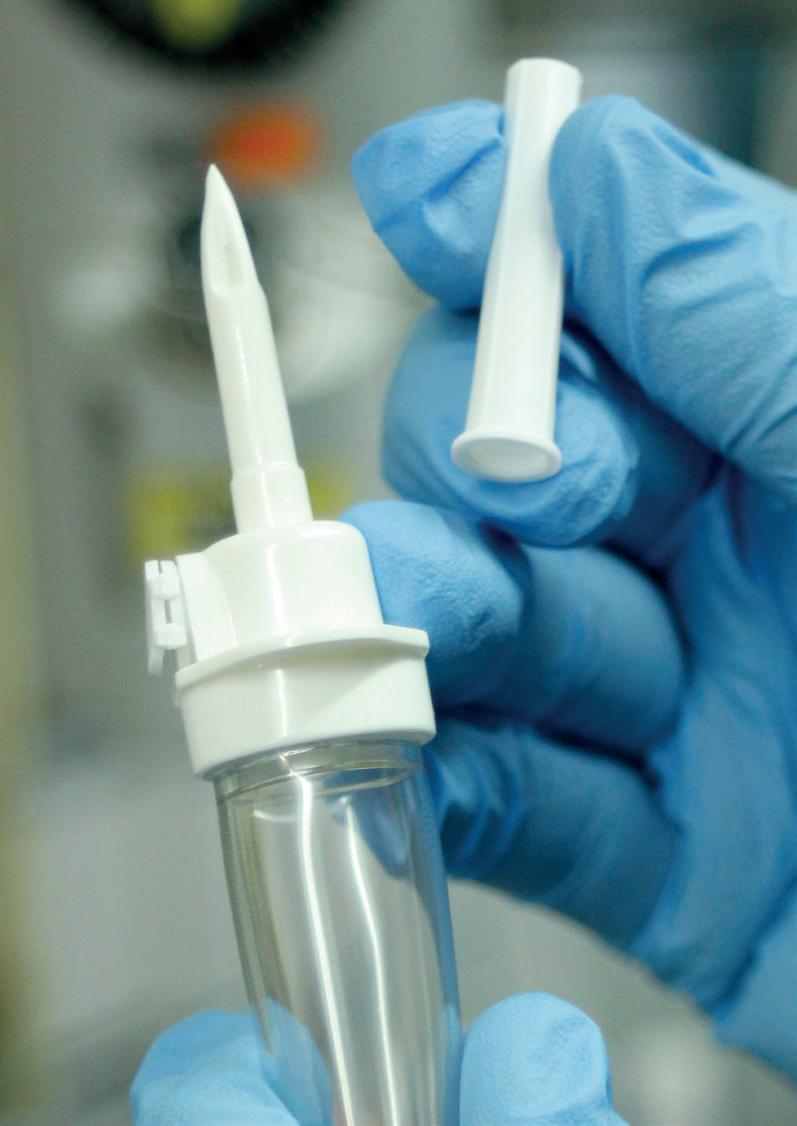
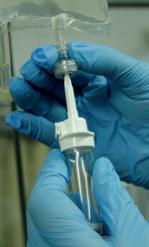
Remove the IV Set from the package and close the flow regulating clamp.
Remove the cap from the spike on the IV Set and push it into the port of the fluid bag. Keep your hands clear of the spike and ensure you insert it straight to prevent piercing of the tubing.
Half fill the drip chamber by squeezing it.
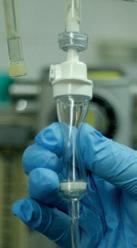
1. Open the flow regulating clamp slowly to allow the fluid to flow through the IV Set until it is full, this is known as ‘priming’.
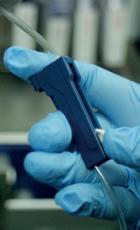
2. Fully close the flow regulator.
3. Check that there are no air bubbles in the line.
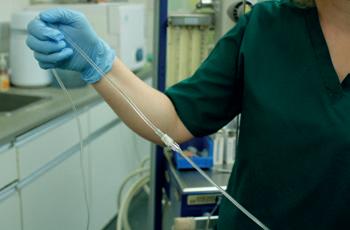
4. Suspend the fluid bag from a drip stand.
5. Connect the end of the IV Set to the T-connector, open the clamp on the Aniset™ t-connector.
6. Open the flow regulator so the fluid is delivered at the correct infusion rate.
Further information and advice is available in our Fluid Therapy Book – the essential guide for Veterinary Professionals.
It has details on many aspects of fluid therapy including the reasons for fluid therapy, assessing dehydration along with guides on how to calculate drip rates and fluid requirements.
Contact Millpledge for your copy.